

Page 1
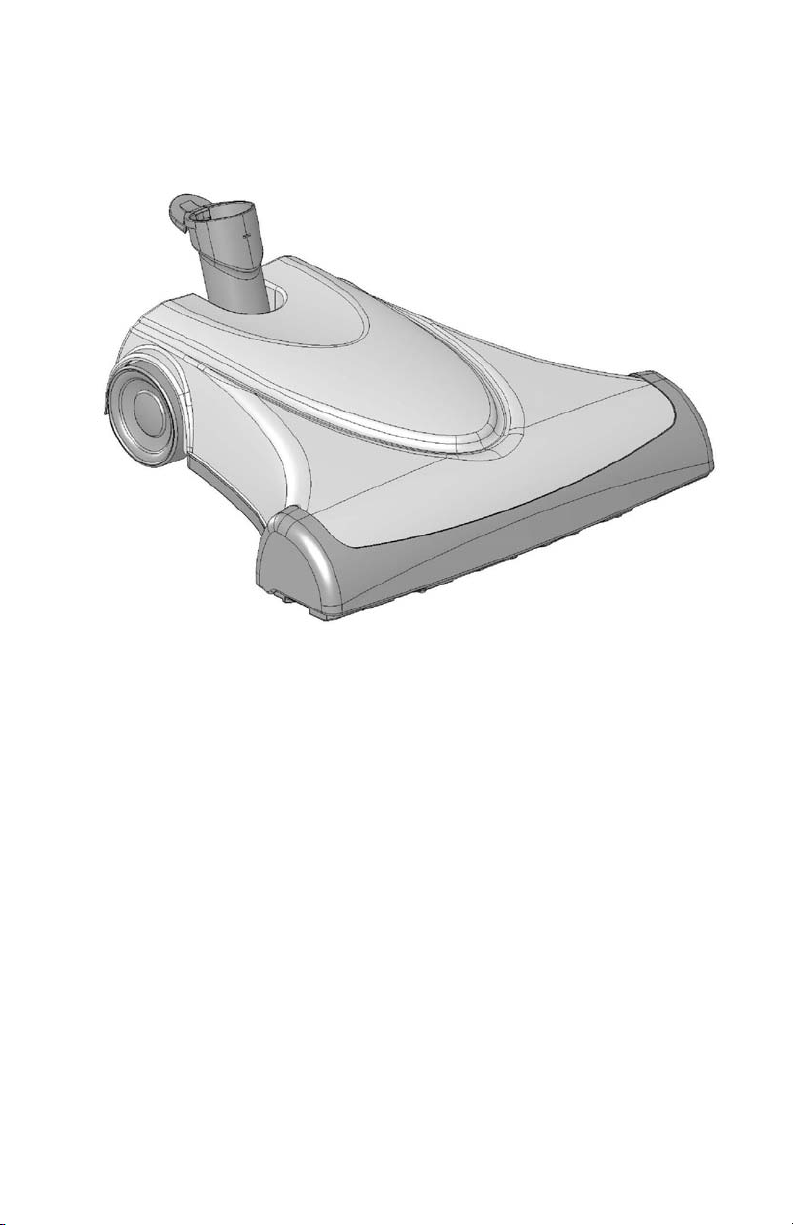
Turbine Powerhead
Operating Instructions
This Turbine Powerhead has been engineered for higher performance, quieter
operation and superior cleaning ability. It has been carefully designed and
manufactured for long life, reliable performance and convenient cleaning. It
requires no electricity because it runs off the airflow of your central vacuum
system. The Turbine Powerhead moves easily and does not require downward
pressure for thorough cleaning.
Please read and save these Operating Instructions.
SAFETY PRECAUTIONS
As with any tool with moving parts, caution must be exercised while using this
Turbine Powerhead.
1. Keep hair, hands and feet away from rotating brush while the Turbine
Powerhead is running.
2. Remember that Turbine Powerheads operate whenever they are connected
to a running vacuum. If children are present, make sure to turn vacuum
system off when leaving Powerhead unit unattended.
3. Do not attempt to service or unclog Turbine Powerhead while unit is running.
Page 1
p/n 8429 1/06
Page 2
Use & Care of Your Turbine Powerhead
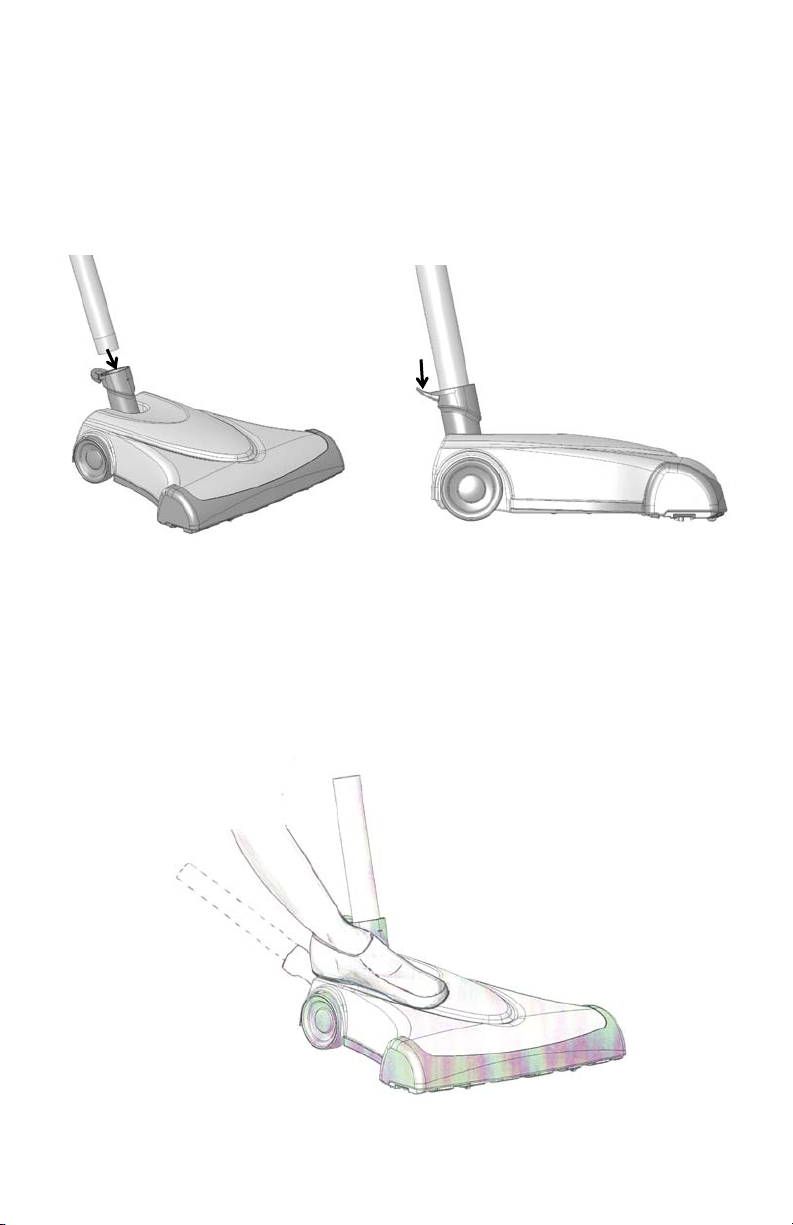
(A) ATTACHING THE TURBINE POWERHEAD
To attach your metal wand, simply insert wand into Powerhead neck until it fits
snugly. The built-in, locking mechanism will prevent the wand from coming
loose. To detach wand, depress wand release tab on back of neck with foot or
hand and twist wand free.
Inserting the Wand
Push
here to
Release
Wand
The wand can be locked in an upright position by pushing it forward until the
lock is engaged. This locked position is convenient for storage and lifting the
Powerhead. To release wand from the vertical locked position, gently place foot
on Powerhead, grasp wand and pull back.
Page 2
Page 3
Use & Care of Your Turbine Powerhead
(B) OPERATING PROCEDURES
Your Turbine Powerhead runs off the airflow of your vacuum system. It has no
on/off switch. Whenever it is attached to an operating vacuum system, it will be
running. No adjustments to the powerhead are necessary for different types of
carpeting.
To ensure maximum efficiency of the Turbine Powerhead, make sure that any
filters, bags and cleaning hoses in your vacuum system are clean and free of
blockage.
Avoid picking up water or spilled liquid with your Turbine Powerhead. The
vacuum system is designed for dry pick up only.
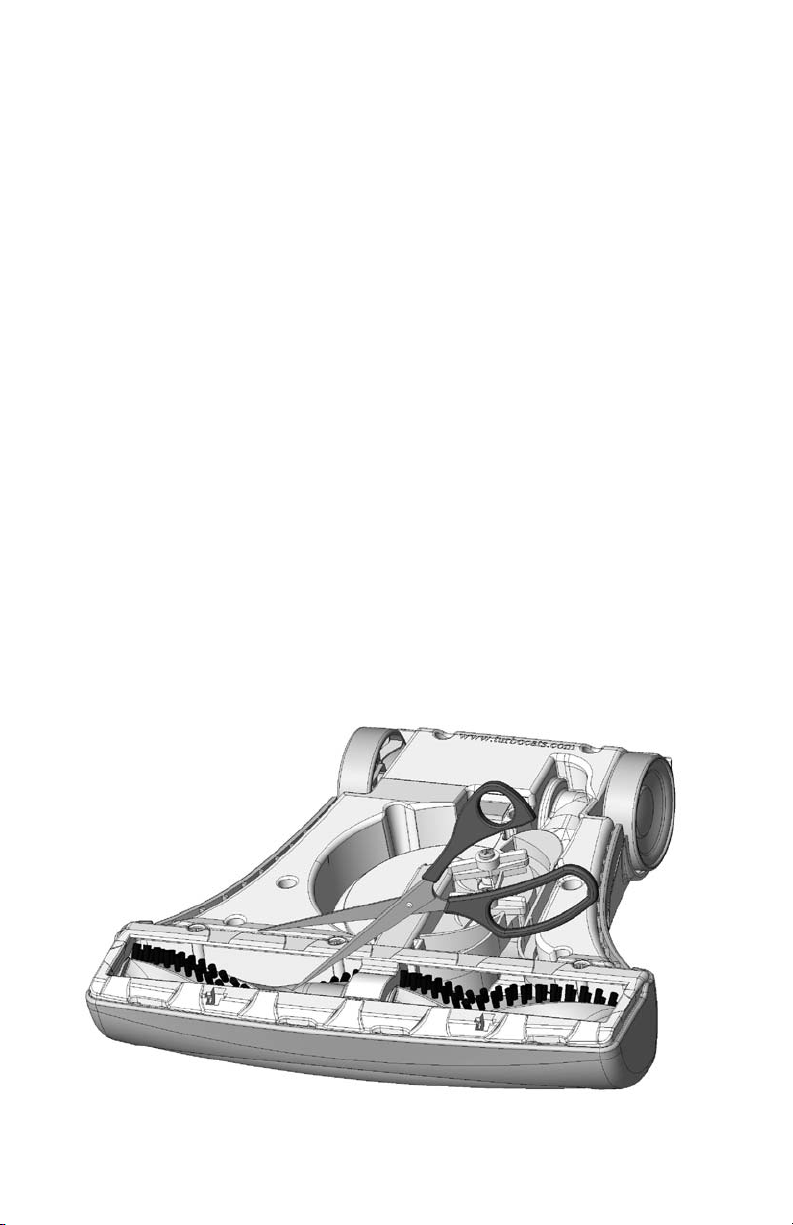
(C) CLEANING ROLLER BRUSH
Turn off vacuum system and disconnect Powerhead. Threads, string, carpet
fiber, fuzz and similar items may become wound around the beater brush.
These should be removed by unwinding them by hand or carefully cutting with
scissors. Keeping the beater brush clean will maintain efficiency.
Page 3
Page 4

Use & Care of Your Turbine Powerhead
(D) REMOVING CLOGS
Follow these steps if the turbine becomes obstructed:
1. Turn off vacuum system and disconnect the Powerhead.
2. Remove the clear belt cover by turning the Powerhead over and rotating the
two latches until they align with the openings in the belt cover. Remove the
belt cover.
3. Remove debris from the intake or turbine. Rotate brush to ensure the
system is clear. Ensure the orange seal on the belt cover and mating
surfaces are clean before reinstalling the belt cover.
4. To reinstall the belt cover, simply insert the front of the belt cover under the
baseplate edge and lower into its original position.
5. Secure the belt cover in place by turning the two latches to the locked
position.
Turn latches
to remove
Belt Cover
Remove
Belt Cover
Like This
Page 4
Remove
clog
here.
Baseplate
Edge
Page 5

Use & Care of Your Turbine Powerhead
(E) REPLACING THE DRIVE BELT
It is recommended that the drive belt be replaced by a Qualified Service
Technician.
1. Turn off vacuum system and disconnect powerhead.
2. Remove belt cover as described on page 4.
3. Remove the 3 screws securing the baseplate.
4. Remove the baseplate.
5. IMPORTANT: Please note correct brush and belt orientation. They must be
reinstalled correctly for proper function.
6. Lift the brush, belt and support assembly out of the housing.
7. Remove the old belt.
8. Place the new belt over one end, onto the brush roller, between the two
center flanges.
9. Loop belt around shaft. Twist belt as shown.
10. Slide the brush/belt assembly back into the housing recesses so the
supports seat properly into the housing. The assembly is designed to fit
only one way into housing. NOTE: The brush will rotate in the wrong
direction if the belt is twisted incorrectly.
11. Replace belt cover.
Baseplate
Shaft
Lift Rollerbrush
and Belt straight
up to remove
Position Belt
between these
two Flanges
Proper Belt
Orientation
Page 5
Page 6

TROUBLESHOOTING THE TURBINE POWERHEAD
CAUTION: Moving parts—disconnect from vacuum system before servicing unit.
Use the chart below to troubleshoot common problems you may experience with
your turbine powerhead. If you cannot solve the problem using the solutions
below, please contact your distributor or dealer for service.
Check for clog at air intake.
Clean central vac power unit guard
Turbine
Runs
Slow
z
z
Brush
Bounces
in Use
Brush
Hard to
Push
screen/filter.
Check for clog in hose.
Check for clog in tube line
Ensure belt orientation is correct.
Change direction you are vacuuming.
z
z
z
z
OTHER REPAIRS
For repairs or service beyond those described in this manual, please contact
your servicing distributor or dealer. Visit www.turbocats.com for servicing dealer
contact information.
LIMITED WARRANTY
H-P PRODUCTS, INC. warrants that the turbine powerhead when used for household
purposes, pursuant to Seller’s instructions, will be free from defects in materials and
workmanship for a period of three(3) years from the date of the initial consumer
purchase. H-P PRODUCTS, INC. warrants that the turbine powerhead, when used in a
commercial application pursuant to Seller’s instructions, will be free from defects in
materials and workmanship for a period of ninety (90) days from the date of the initial
consumer purchase. This warranty is limited to the replacement of defective parts and
any costs of shipping shall be incurred by the purchaser. THIS WARRANTY IS
EXCLUSIVE AND IS IN LIEU OF ALL OTHER WARRANTIES, EXPRESS, IMPLIED, OR
STATUTORY, AND H-P PRODUCTS, INC. SPECIFICALLY DISCLAIMS
RESPONSIBILITY FOR CONSEQUENTIAL AND INCIDENTAL DAMAGES, AND
LIMITS THE IMPLIED WARRANTY OF MERCHANTABILITY TO THE PERIOD OF
EFFECTIVENESS OF THIS EXPRESS WARRANTY.
H-P PRODUCTS, INC.
Louisville, Ohio 44641
U.S.A.
(330) 875-5556
Page 6
Page 7

REPLACEMENT PARTS
# Description Part #
1 Lower Housing 8412*
2 Wheel Assembly (2) 8425*
3 Turbine Assembly 8558
4 Belt Cover 8413
5 Base Plate 8414*
6 Compression Spring 8557
7 Washer, Spring 5974
8 Washer, Neck 5971
9 Neck Assembly 8423
10 Spring, Neck Lock 7218
11 Top Housing 8411*
12 Seal, Small 7223
13 Roller Brush Assembly 8457
# Description Part #
14 T-Latch (2) 7226
15 Belt 8439
16 Screw, Housing (12) 7228
17 Screw, T-Latch (2) 7230
18 Bearing, Idler Assembly 8556
19 Bushing, Wheel (2) 7231
20 Shaft Support Assembly, Left 8428
21 Shaft Support, Right, with
washer
22 Ballast (2) 7238
23 Foam Pad (4) 7239
24 Shaft, Roller Wheel (2) 8416
25 Roller Wheel (2) 8417
26 Bearing Isolator (2) 8427
27 Retaining Ring (2) 8458
28 Seal, Belt Guard, Large 7224
* Please specify color when ordering.
8561
Page 7
p/n 8429
 Loading...