

Page 1

RP Series Software
Setup Guide
Instructions for installing and setting up
X-EditTM, USB Drivers and Cubase® LE 4
Page 2

1. COMPUTER MINIMUM REQUIREMENTS
Windows
®
Vista, XP Home, or XP Professional
1GHz Processor
1GB of memory
Windows XP (SP 2 installed)
Available USB port
Mac® OS
PPC G4 1.5GHz / G5 1.8GHz or higher, IntelTM Core 2.0GHz or higher
1GB of memory
OS X Version 10.4 or later
Available USB port
2. DOWNLOADING FILES
Download the Driver installer (Windows only), X-EditTM installer, and the NetUpdater
applications for your device to your desktop.
A. INSTALL DRIVER (WINDOWS)
Double-click the driver installation icon on your desktop and follow the on-screen
instructions to install the driver for your device.
B. INSTALL X-EDIT
TM
(WINDOWS)
Double-click the X-Edit installation icon on your desktop and follow the on-screen
instructions to install the driver for your device. Windows XP users may be prompted
to install dotnet fx. Proceed with this installation as it is required to use X-Edit. The XEdit installation will continue when the dotnet fx installation has completed.
C. INSTALL X-EDIT
TM
(MAC)
Double-click the X-Edit .dmg icon on your desktop. A new window will open with the
installer icon. Double-click the installer and follow the on-screen instructions to install
the driver for your device.
ATTENTION: If your product requires a firmware update, backup your presets at this
time using X-Edit before running the NetUpdater application. Updating your device will
erase all user presets permanently.
D UPDATE YOUR FIRMWARE USING NETUPDATER
Using the NetUpdater application requires that you be connected to the internet. If
you are not connected, please connect at this time.
Turn on your device and connect it to an available USB port on your computer with
a USB cable.
•
•
•
•
•
•
•
•
1.
Page 3

1
Double-click the NetUpdater application icon on your desktop to start the appli-
cation.
On the Welcome screen click Next>. The NetUpdater will begin scanning for
connected devices. When your device is listed in the Found Devices screen, click
Next>.
On the Version Filtering screen, leave the default check box “Only show the
latest version...” selected and click Next>.
If there are updates available for your device, they will be displayed in the Select new
version menu. When this appears, click Next>.
On the next screen you will be asked to confirm and start the update procedure.
ATTENTION: Updating your product will erase all user presets permanently. If
you wish to keep your presets, please use X-Edit to backup your presets before
proceeding.
Place a tick in the check box and Click Next> to start the update procedure.
Once the update is complete, your device will perform a factory reset. If your device
has an expression pedal, you will be required to calibrate it per your manual’s instructions.
E. INSTALL CUBASE® LE 4 (for products that include Cubase LE 4)
For products that include Cubase LE4, follow these installation instructions:
WINDOWS INSTALLATION
Insert the DVD into your DVD drive. A new window will open.
Double-click the Cubase LE 4 for Windows folder. Double-click the Setup.
exe icon inside this folder to begin installation. Follow the on screen instructions to continue with the installation.
Cubase LE4 requires the installation of Syncrosoft eLicense software. When
prompted to install this, accept the license agreement and follow the on screen
instructions to complete Syncrosoft installation.
Vista Users: When prompted, select Install this driver software anyway to
allow Syncrosoft software installation to continue.
For XP users, the Windows Media Format 9.5 Runtime Setup will launch
next. Accept the license agreement and continue with running the setup until
complete.
For XP users, Steinberg’s Halion One Soft Synth installer will run next.
Accept the license agreement and continue with running the setup until complete. This will complete the Cubase LE 4 installation for Windows.
2.
3.
4.
5.
6.
7.
1.
2.
3.
4.
5.
Page 4

2
MAC INSTALLATION
Insert the DVD into your DVD drive. A new window will open.
Double-click the Cubase LE 4 for Mac OSX icon. A new windows will open.
Double-click the Cubase LE 4.mpkg icon and follow the on screen instructions to install Cubase LE 4.
3. CUBASE SETUP
A. SET UP WINDOWS® AUDIO AND MIDI (OPTIONAL)
When the USB Audio and MIDI drivers were installed, Windows may have automatically
selected them as your default audio and MIDI outputs. This means that your Windows
sounds will be sent to the RPxxx rather than your computer’s sound card. We need to
check if these have been changed and return the settings to what they were before.
Select Start>Control Panel>Sounds and Audio Devices (XP) or
Hardware and Sound (Vista).
Select the Audio tab (XP) or Manage Audio Devices (Vista).
Under Sound Playback>Default device (XP), or Playback (Vista), make
sure your computer’s sound card is selected as the default device.
Under Sound Recording>Default device (XP), or Recording (Vista), make
sure your computer’s sound card is selected as the default device.
Under MIDI Music Playback>Default device, open the pull-down menu and
make sure Microsoft GS Wavetable Synth is selected as the default device (XP
only).
B. CUBASE® LE 4 DEVICE SETUP FOR WINDOWS
®
After the RPxxx is connected to your computer and powered on, open Cubase
LE 4, and go to Devices>Device Setup as shown below.
1.
2.
3.
1.
2.
3.
4.
5.
1.
Page 5

3
Under Devices, click on VST Audio System and select RPxxx ASIO from
the ASIO Driver pull-down menu if it is not already selected.
Click on Switch to switch the driver and click OK. You are now ready to
begin recording using your RPxxx and Cubase LE 4.
B. CUBASE® LE 4 DEVICE SETUP FOR MAC
After your RPxxx is connected to your computer and powered on, open
Cubase LE 4, and go to Devices>Device Setup as shown below.
2.
3.
1.
Page 6

4
Click VST Audio System and select DigiTech RPxxx In/Out (2) as the
ASIO Driver (as shown below). DO NOT select DigiTech RPxxx In/Out (1).
Cubase® LE 4 will now ask you if you would like to switch the driver. Select
Switch then OK.
Mac PPC users: After selecting RPxxx In/Out (2) in the Device Setup panel, you may
need to verify that your device inputs are active. To do this, follow these steps:
Select Device>VST Connections from the menu bar.
When the VST Connections panel appears, click the Inputs tab.
The box under the Audio Device column may say “Not Connected.” If it
does, click in this box and select DigiTech RPxxx In/Out (2) to enable the
device inputs.
You are now ready to start recording with Cubase LE 4.
2.
3.
1.
2.
3.
Page 7

5
2. RECORDING WITH CUBASE® LE 4 (WINDOWS®
AND MAC®)
A. CREATING A NEW PROJECT
Open Cubase
®
LE 4..
Click File and select New Project.
Select default and click OK.
1.
2.
1.
Page 8

6
Select a location to store the project (or use the default location) and click OK. You
may want to create a new folder for each new project
5. (XP users only)
If you ever see the warning message shown below when opening a new or existing
project, you must reset the driver in the Device Setup dialog. To reset the driver, click
Devices > Device Setup, and click the Reset button.
1.
Page 9

7
B. SETTING THE INPUT OF THE TRACK TO RECORD
Click the Project menu and select Add Track > Audio. When the Add Audio Track
dialog appears, make sure the Configuration is set to Stereo and click OK.
Make sure the Show Inspector button located in the upper left corner of the
screen is lit.
1.
2.
Page 10

8
In the Audio 01 window, make sure the Record Enable button is lit.
In the Audio 01 window, make sure the Input Monitoring button is not lit.
3.
4.
Page 11
9
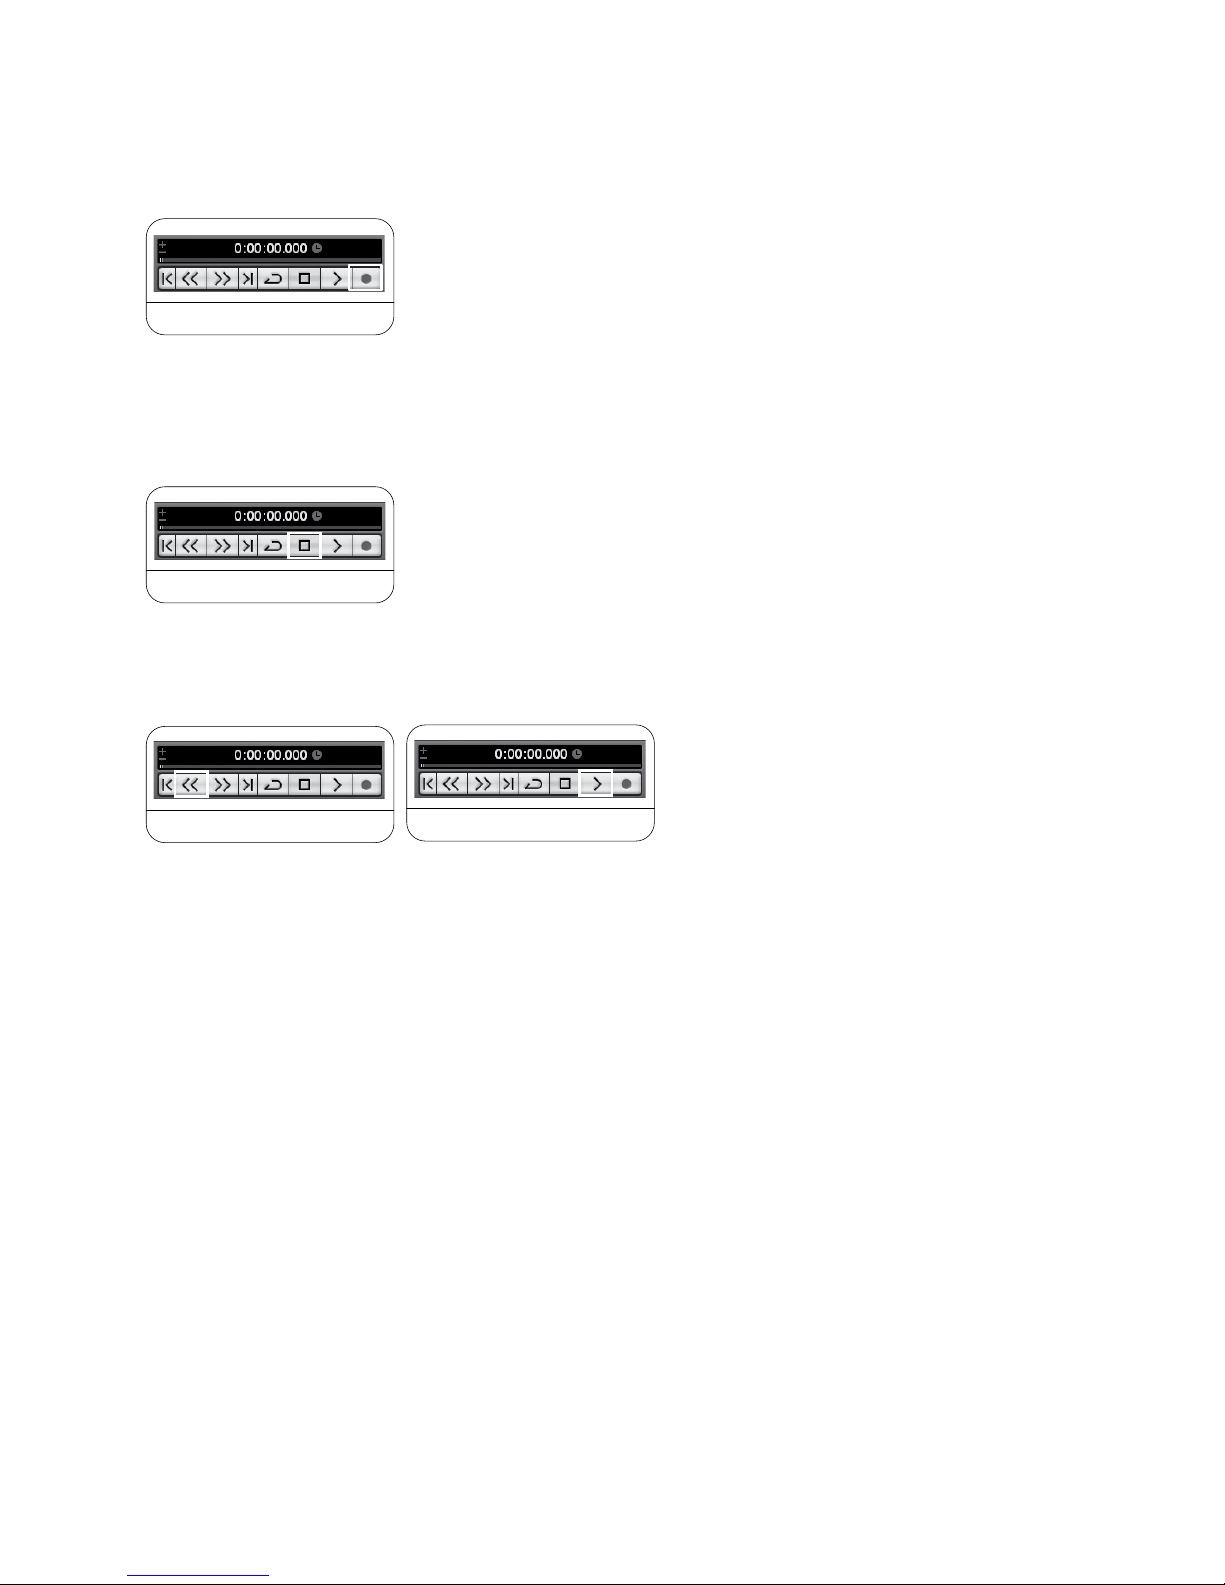
C. TO START RECORDING
Click the Record button on Cubase® LE 4’s Transport control.
Record Button
Play your guitar.
When you are finished recording press the Stop button.
Stop Button
Press Rewind and press the Play button to listen to the track you have just recorded.
Rewind Button
Play Button
1.
2.
3.
4.
Page 12

8760 South Sandy Parkway
Sandy, UT 84070
Tel: (801) 566-8800
Fax: (801) 566-7005
http://www.digitech.com
 Loading...