

Page 1

3 Input HDMI Switcher
Us
er manual
Page 2

1
I. Introduction
This is a high performance 3 HDMI input and 1 HDMI o utput sw itc h. It s upports HDCP repeater
functions and fast switching between a ny of the HDMI input ports. The system supports all 3D
TV formats in addition to a ll HDTV formats up to 4Kx2K. F ur thermore, the r emo te contr ol
gives uses complete control over the selection of sources and makes the device incredibly user
friendly. Low consumption, doe s not require an externa l power s upply f o r no r mal fu nc t io ns .
II. Features
Compliant with HDMI 1.4a, C TS 1.4a, DVI 1.0 standards.
HDMI 1.4 support: 3D TV support.
Support 3D Video & 4Kx2K, 8, 10, 12 & 16 bits per color depth.
Audio support:
Dolby TrueHD
DTS-HD Master Audio 7.1CH
Page 3

2
III. Package
3 x 1 HDM I 1.4 Switcher
Remote control
IR Receive Extend cable
Operatio n Ma nua l
IV. Specifications
Freque nc y B a nd w id th 2.97Gbps
Input Ports 3 HDMI Sockets, IR Receiver socket
Output port 1 HDMI Socket
HDMI Audio Output PCM2, 5.1, 7.1CH, Dolby 5.1, DTS5.1, D-TrueHD, DTS-HD
ESD Protection Human Body Model: ± 8kV (air-gap discharge)
± 4kV (contact discharge)
Di mensio ns (mm) 87(D) x59.5 (W) x 19(H)
Page 4
3
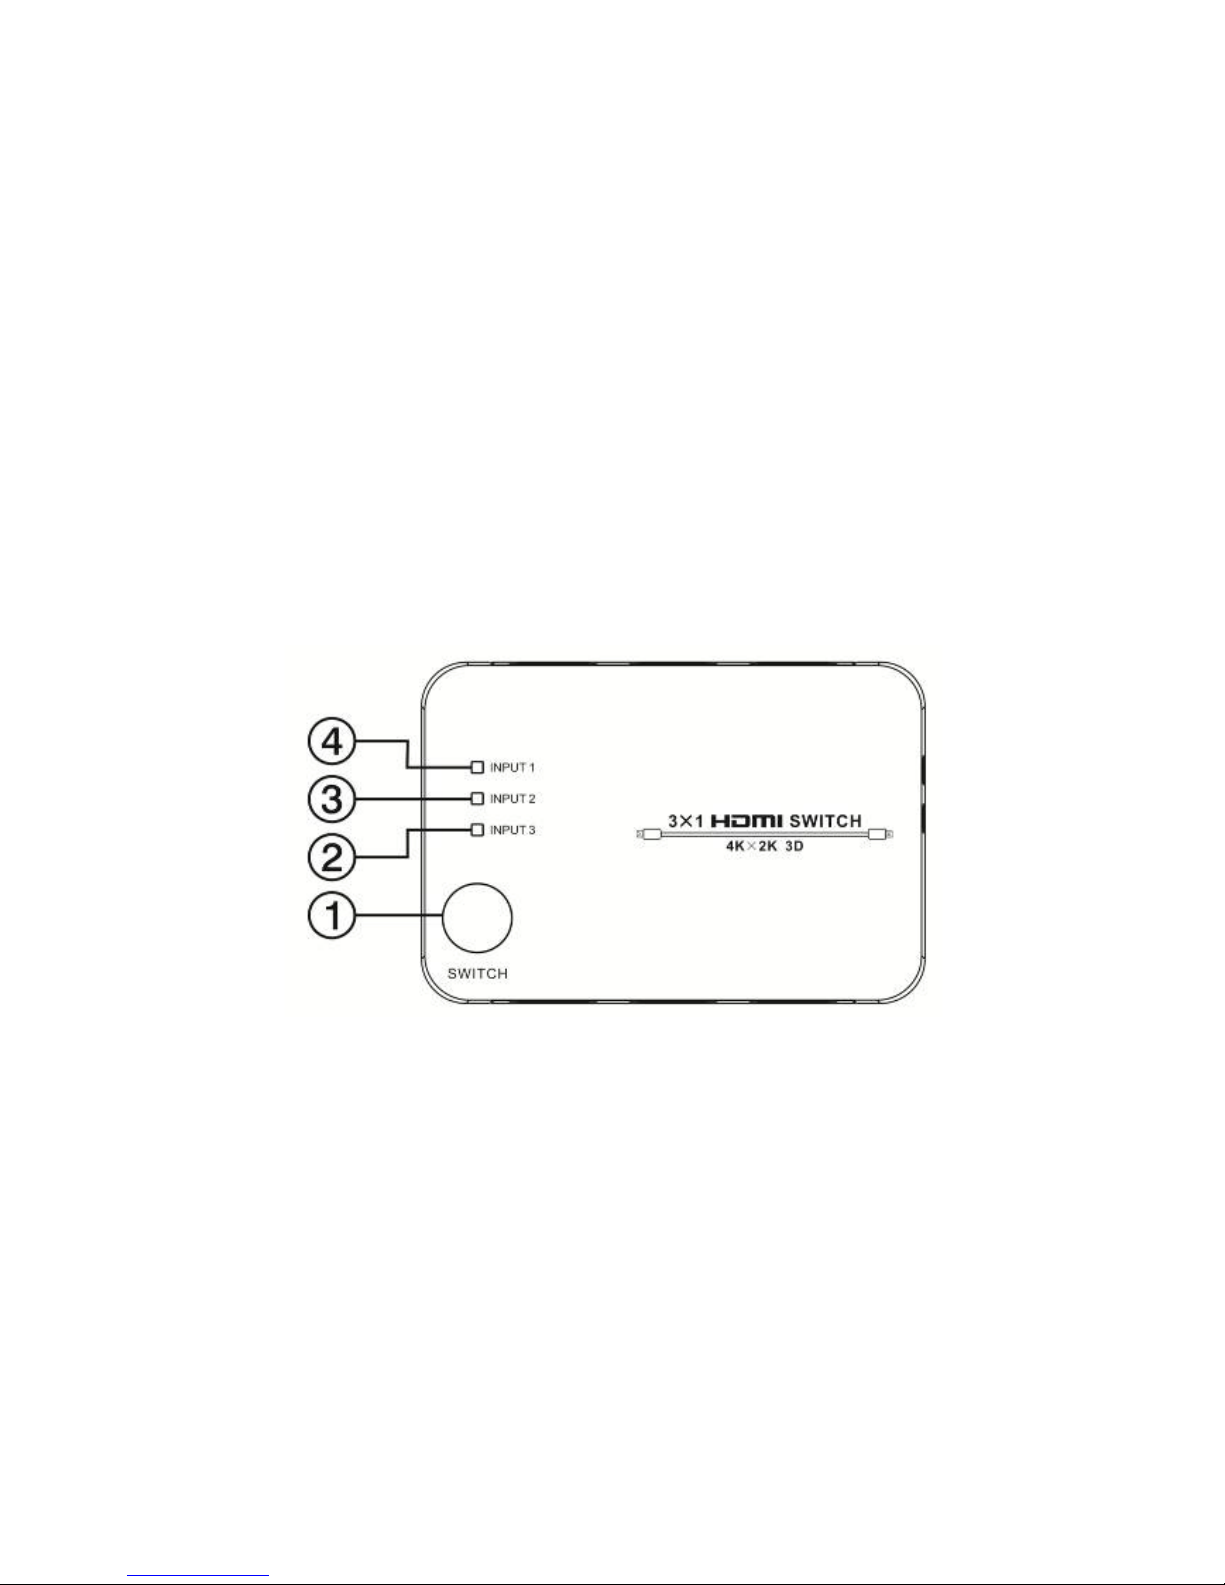
V. 3×1 Switch Operation controls and Functions
Top Panel: ① Switc h button; Press this button to select any sources, i.e. Blu-r ay, Game
Console, Set Top Box, etc, which is connected to the input and indicated by the number of the
input, i.e. ②③④
Page 5
4
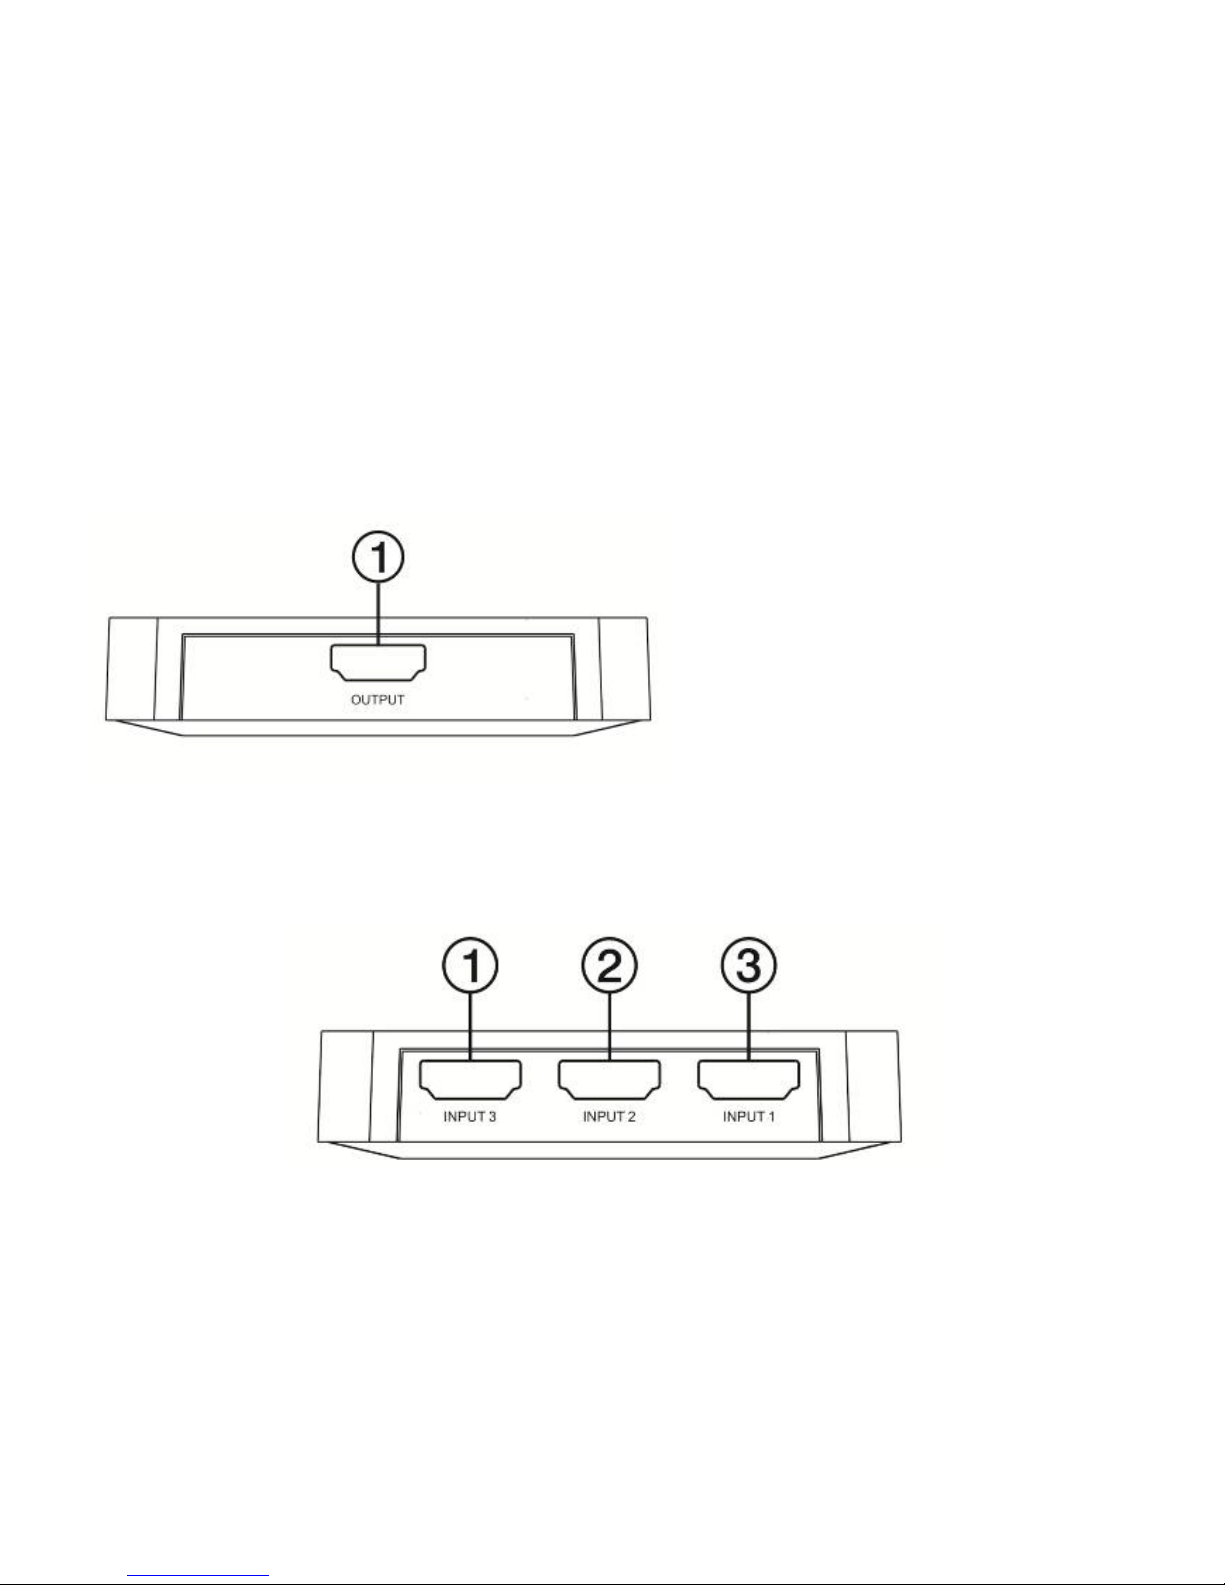
Front Panel:Connect the output of the switcher to a monitor or HDTV that is equipped wit h a
HDMI socket. The s elected source will be displayed from this output.
Rear Panel:3 HDMI i np u ts located on the rear of the device. Connect a HDMI source to an y of
these inputs.
Page 6

5
Right Panel:
①DC 5V input port; this switcher does not require power to switch between the 3 available
sources. The power input is available in cases where one or all HDMI leads is or exceeds 5
metres in len g t h.
②IR receiver port: connect the suppl ied IR receiver cable to receive a remote signal.
Page 7
6
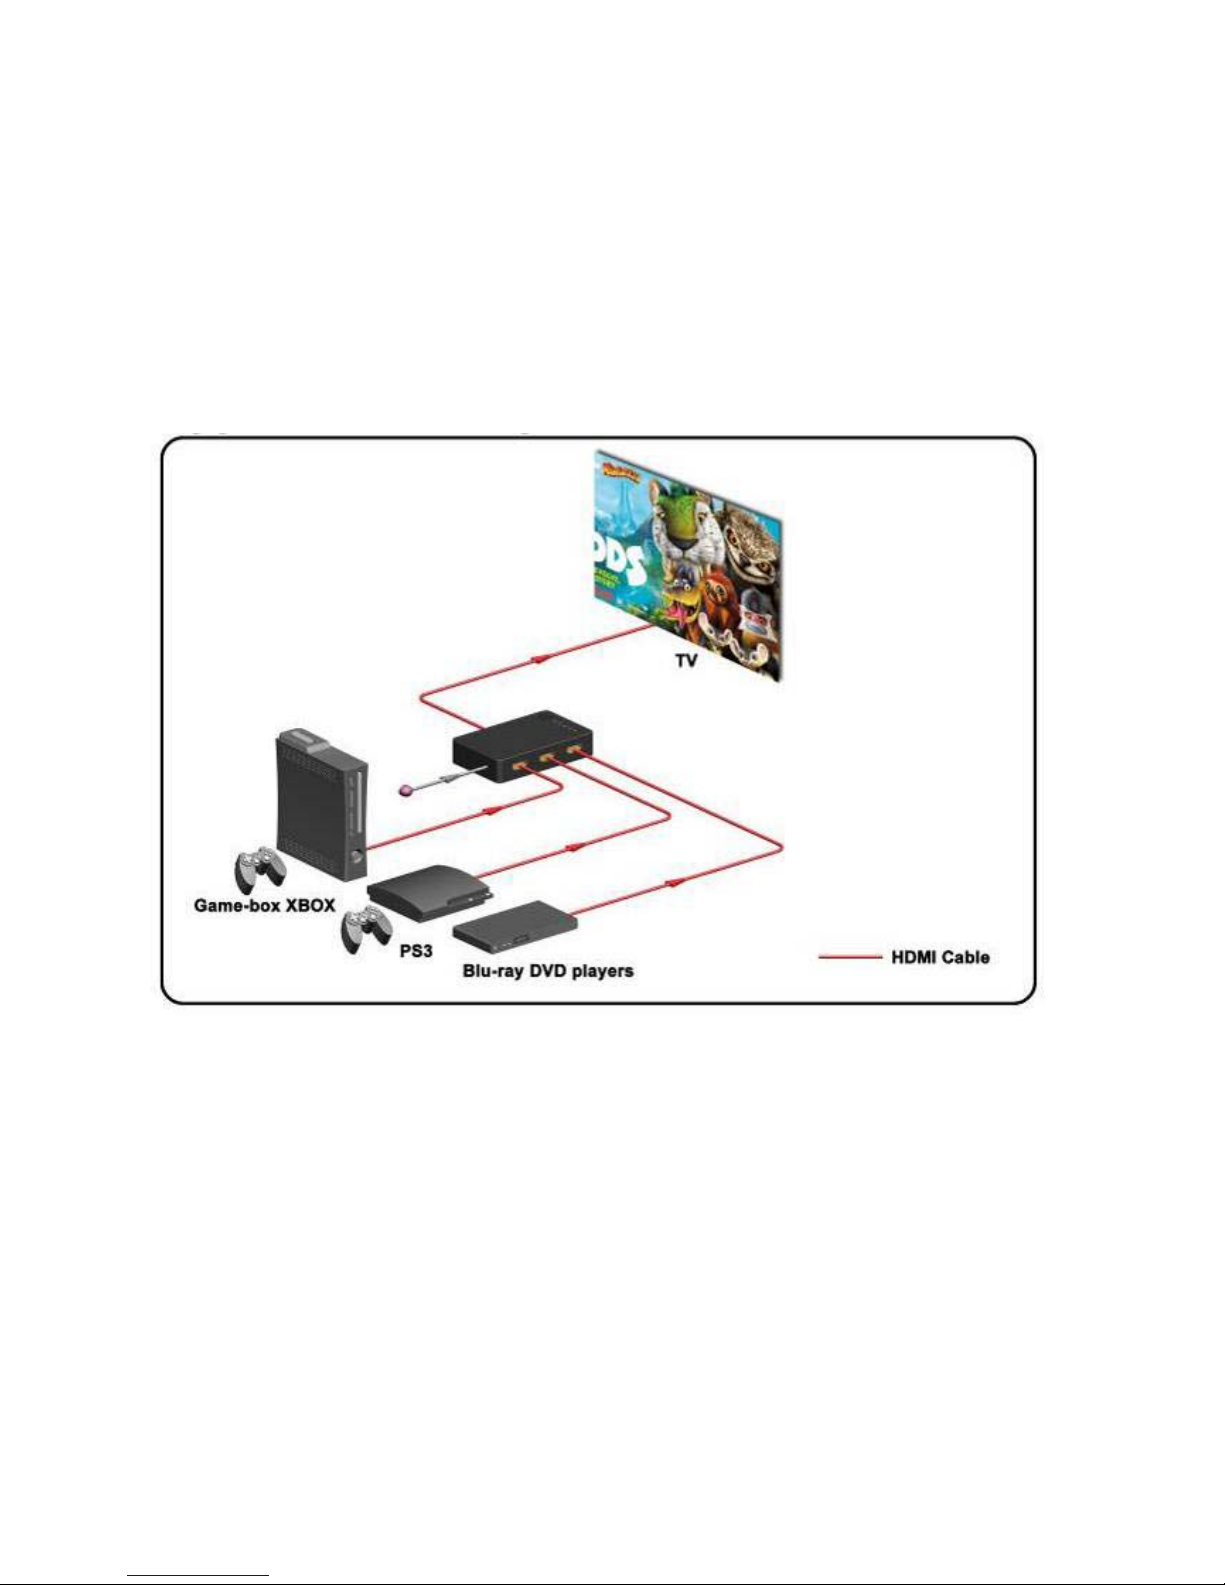
VI. Application Example(3×1 Sw itch)
Page 8

7
VII. Remote control
IN1、IN2、IN3:Press any of the “I N”put numbered buttons and the
LED will indicate the corresponding selected input source.
:Press this button to cycle thr ough the availab le input source
and the LED will indicate the corresponding input source.
 Loading...