

Page 1
2009/7/28 V01
e
h
g
AVR-1910/1610/1620/790/590 Firmware Update Instruction (Common for AVC-1620)
Nr. Contents Tools Remarks
Follow this instruction and the operating instructions for servic
parts kit = "00DSPK-581 WRITING UNIT" which to be used wit
1 Writer Starter = "m3a0806v020046exe.zip"
File size : 345,864 bytes (0.32 Mbytes)
"FlashSta.exe"
Please download the Writer Starter software "Flash
Programmer M16C Flash Starter M3A-0806 Software
Ver.2.0.0.46 Up
http://america.renesas.com/fmwk.jsp?cnt=/downloadsearchresults.jsp&fp=/support/downloads/downloadresults&layerId=1216
2 Program File = "AVR1910_1610_Main Ver00.85.mot" Available in SDI.
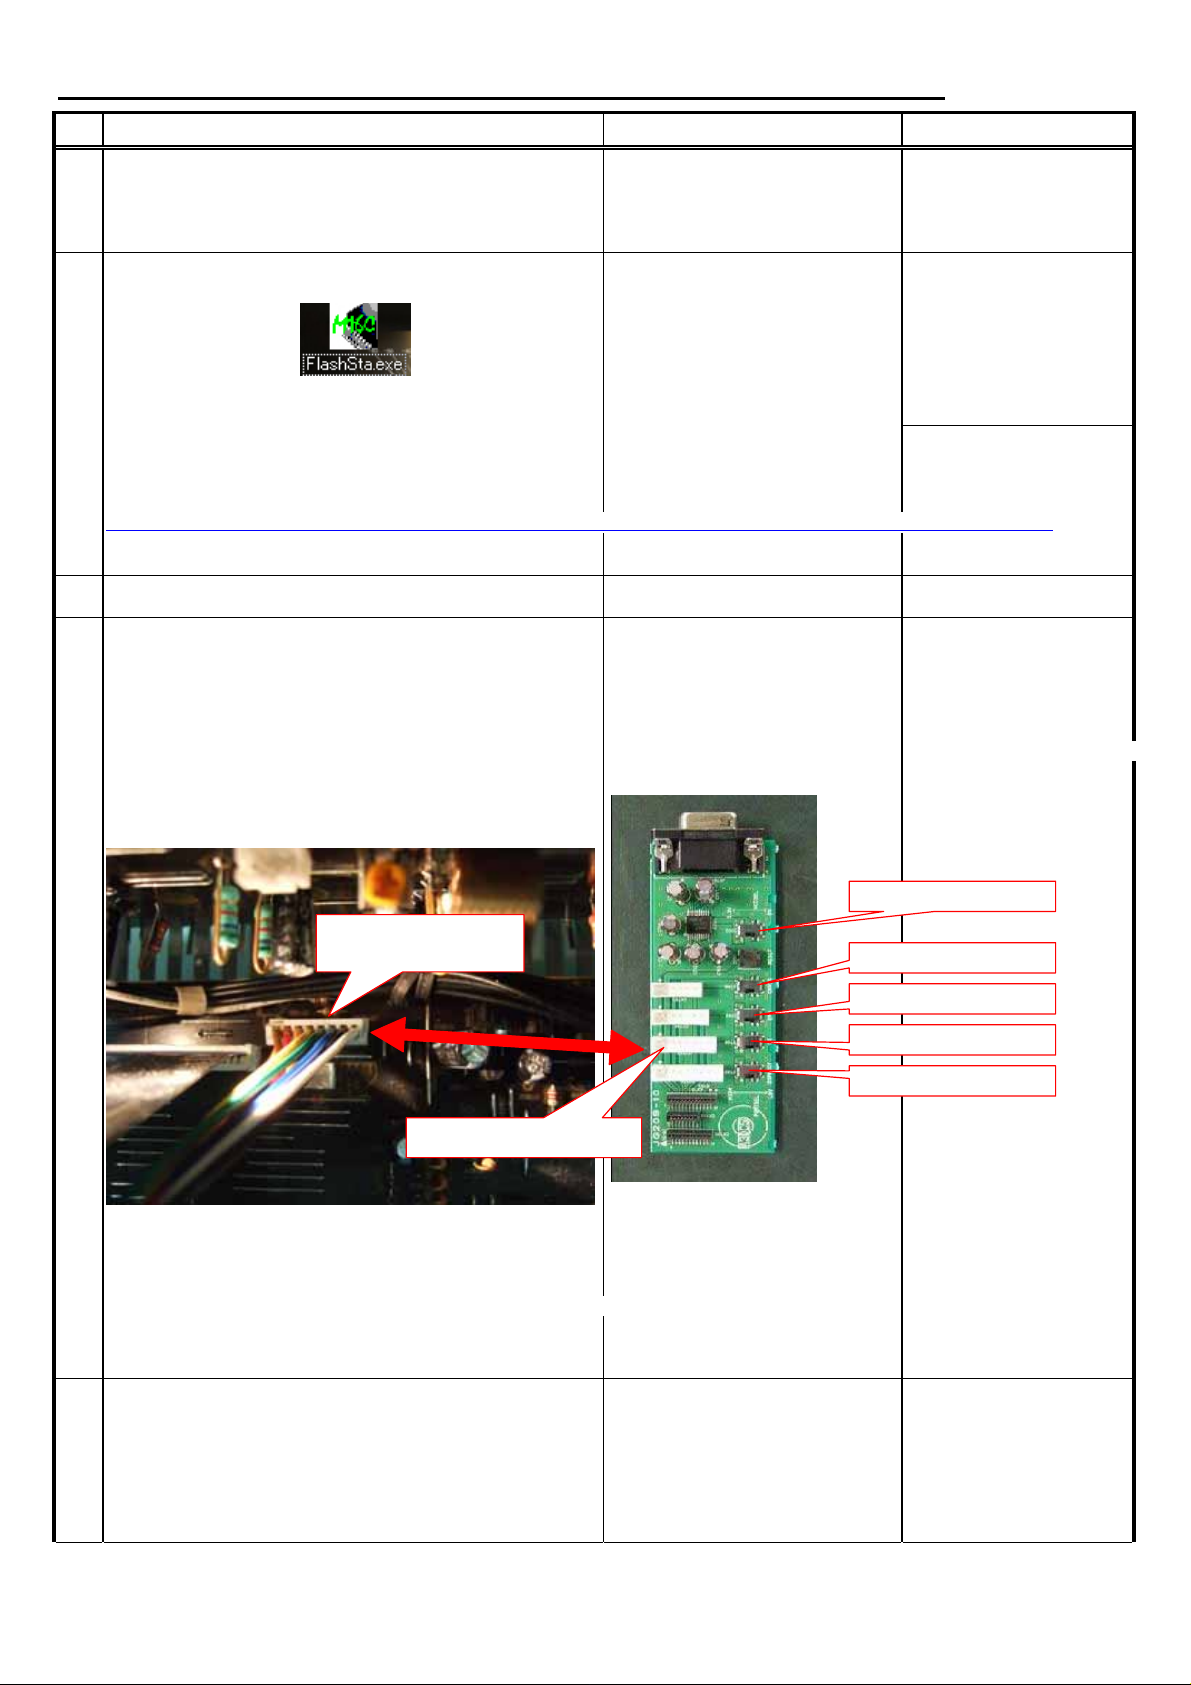
3 Jig setting and the connection between jig and main unit.
Connect CP1015 on MAIN PWB and
CX707 on JG209-10 with 8P connector cable.
Set all the slide switch into the position as follows.
S702 VCSEL : 5V Service parts kit: Avaiable for service
S706 CNVSS : H 00DSPK-581 WRITING UNIT 8P connection cable included
S707 EPM : L
S708 CE : H
S709 DSPBOOT : H
rade" from SDI or below URL.
(1) PC with RS-232C terminal Commercially avaiable
(2) RS-232C cable(9P, D-sub, StraighCommercially avaiable
Available in SDI or web.
CP1015 on
MAIN B'd
CX707 on JG209-10.
Caution!
Do not turn on the power of A/V amplifier, when A/V amplifier
connects the "00DSPK-581 WRITING UNIT" with 8p connector cable.
Because the customer's setting of A/V amplifier will be lost.
4 How to set main unit into firmware update mode.
Put POWER ON/OFF switch on while pressing
"Surround <" + "MENU" (for all models)
buttons on front panel of main unit.
No LED and FL display should be lit (firmware update mode.)
S702 VCSEL : 5V
S706 CNVSS : H
S707 EPM : L
S708 CE : H
S709 DSPBOOT :
1/6
Page 2
5 Operation with writer software.
Procedure of writing software.
1) Start up "Flash Starter M3A-0806 Ver2.0.0.46" on PC.
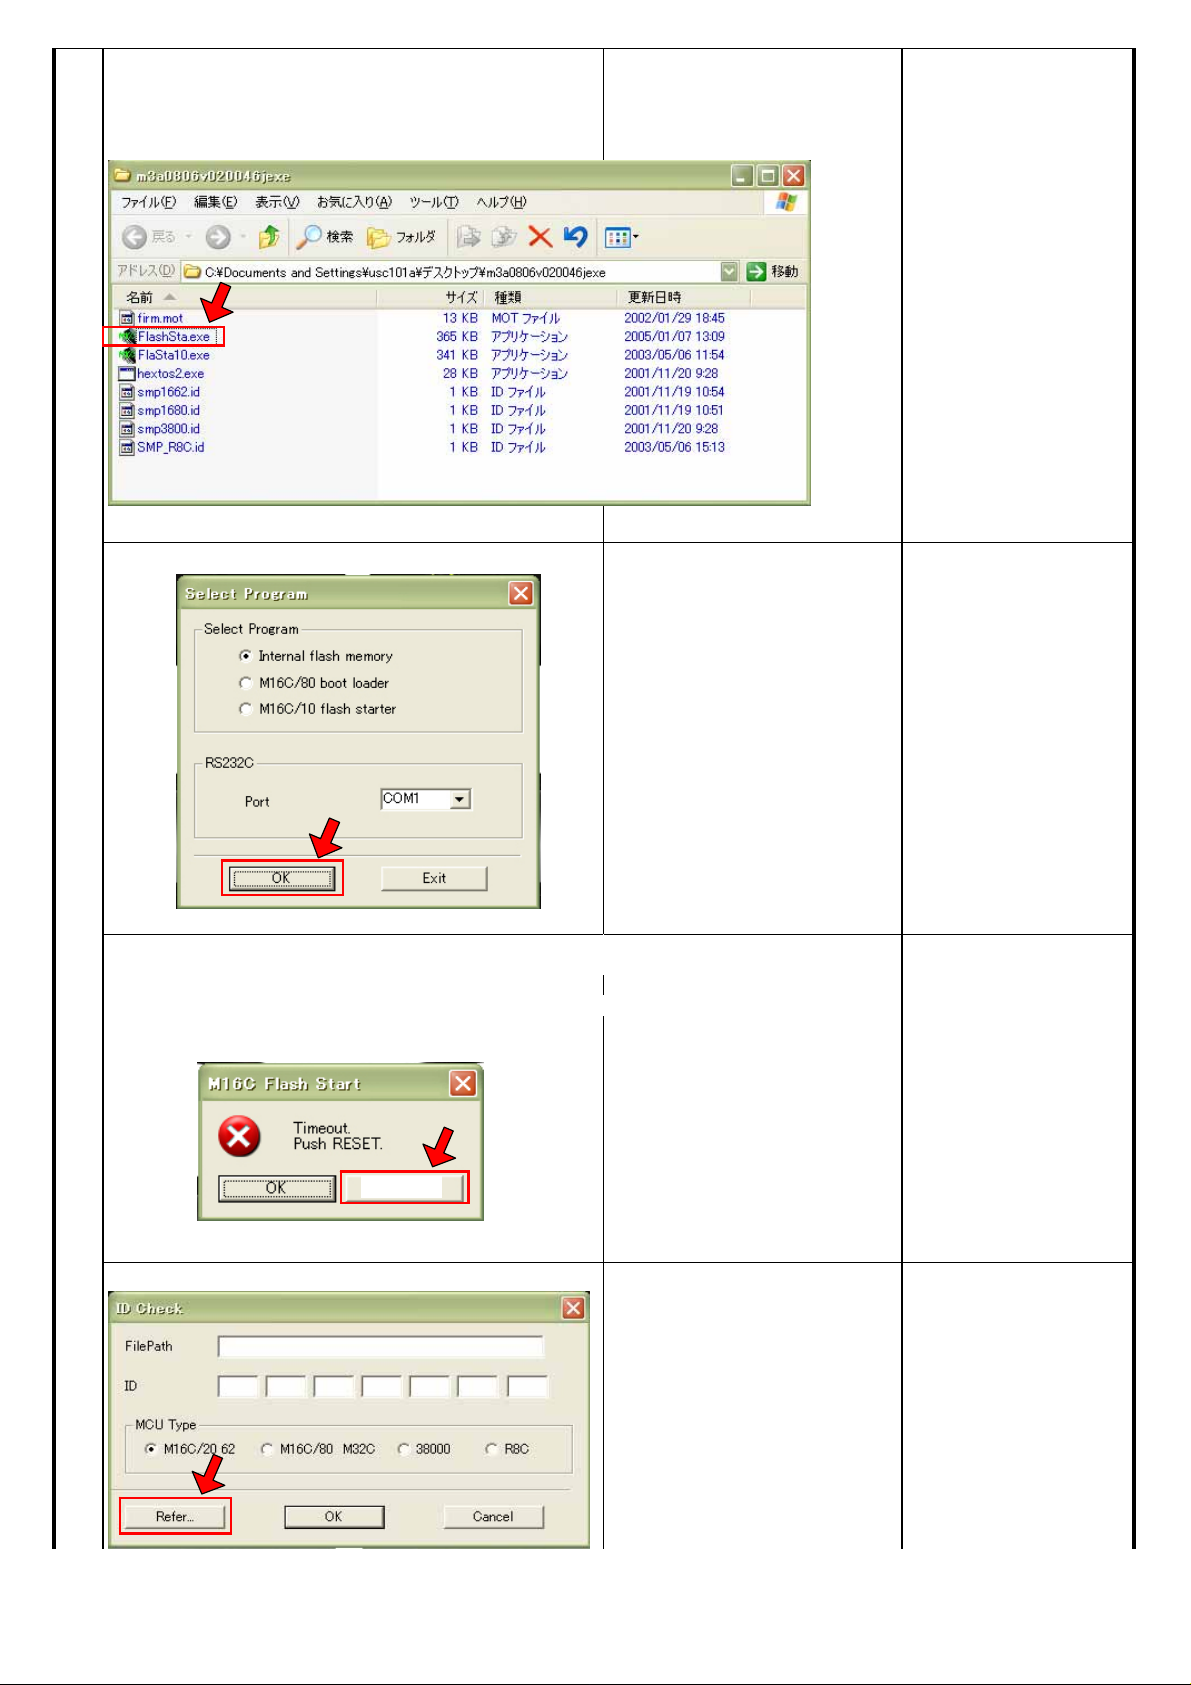
2) Window of "FlashSta.exe"
3) Double click the file name of the "FlashSta.exe".
3) Click the "OK" button.
4) If A/V amplifer does not connect to "00DSPK-581 WRITING UNIT"
(or PC) properly or Setting of the "00DSPK-581 WRITING UNIT"
is not correct, the following indication is displayed.
Please click the "Cancel" button, and confirm all connection and
setting, and goes to item-3.
Cancel
5) Click the "Refer…" button.
2/6
Page 3

6) Select file "AVR1910_1610_Main Ver00.85.mot" file in PC.
A
)
Click the "Open" button.
VR1910_1610_Main
Cancel(C
7) Click the "OK" button.
8) Please input the "FF" to 7 spaces by keyboard.
and click the "OK" button.
9) Click the " Setting…" button.
3/6
Page 4

10) Select the "57600" in Baud rate (bps)
and click the "OK" button.
11) Click the "E. P. R" button.
4/6
Page 5

12) Click the "OK" button.
13) Updating is starting.
5/6
Page 6

14) Click the "OK" button.
6 While holding the "<" and ">" buttons (SURROUND MODE)
down simultaneously, turn the "Power switch" on.
The FL Display indicates all digits at interval a second.
7 Finished.
* How to confirm the firmware version.
Put POWER ON/OFF switch on while pressing
"DIMMER" and "STATUS" buttons
on the front panel of main unit.
Press "DIMMER" to catch the product model name,
Main (CPU) and DSP firmware version.
6/6
 Loading...