

Page 1

WET & DRY VACUUM
CLEANER
Dear customer,
Congratulations and thank you for choosing our
company.
Class A introduces a new-generation, High Efficiency
motor, guaranteeing exceptional performance: maximum power and maximum suction with minimum consumption, reducing the time required for cleaning.
Important information
• Read the instruction booklet carefully
• Before using, check that the mains voltage corresponds to the
voltage indicated on the specifications label under the handle.
• Connect your cleaner only to power outlets with a minimum
of 10 amps and make sure the outlet is earthed. For
machines with double insulation (see the symbol on the
specifications label), earthing is not necessary.
• Always disconnect the appliance from mains outlet
when not in use or before any maintenance or care
operation.
• Do not clean the appliance with benzine or other solvents.
Use soapy water only.
• Do not tug on the power cord, or the machine itself, to
disconnect the appliance from mains outlet.
• Do not leave the appliance unattended while it is running.
Keep it away from the reach of children and persons unfit to
use it.
• Do not run the appliance over the power cord as this may
damage the insulating sheath.
• Do not use to pick up flammable or corrosive liquids and
liquids in general.
• Do not use to pick up matches, hot ash, or burning cigarette
ends.
• Do not attempt to use the appliance if it appears to be faulty.
• To repair or if the power cable is damaged and requires
replacement, contact the dealer or authorised service centre
in order to avoid compromising the efficiency of your
appliance and guarantee the validity of the guarantee. For
the same reasons, you are always recommended to use
original spare parts.
• During operation a significant quantity of air is blown out
from the air exhaust grill, which may be an annoyance if
directed towards the person, especially the face
8
xp GB 8/11 26-11-2002 11:20 Pagina 8
Page 2
9
Descrizione
1) Handle
2) ON/OFF switch
3) Lid
4) Air outlet with micro-filter
5) Power cable
6) Motor unit housing
7) Catch
8) Suction port + suction hose coupling
9) Tank
10) Attachment trolley
11) Castors
12) Polyurethane foam filter
13) Motor-protection paper bag
14) Flexible hose
15) Extension tube
16) Crevice tool
17) Multi-purpose nozzle
18) Paper dustbag
19) “Explora” carpet/floor brush
20) Accessory for delicate floors of the “Explora” brush (according to the model)
21) Wet cleaning brush
22) Frame with rubber section
Preparing for use
Remove the motor unit by pulling the catches
outwards to release.
(Fig. 1).
Lift off motor unit by the easy-grip handle, remove tools out of the tank
(Fig. 2).
Turn the appliance over and fit with the wheels
provided, pushing them into the slots on the
base of the tank
(Fig. 3).
Vacuuming liquids: Make sure that the
polyurethane foam filter required for extraction cleaning and wet vacuuming is fitted over
the motor housing (fig. 4).
Dry vacuum function: Make sure that the
motor-protection paper bag is fitted over the
motor housing. Secure the filter with the special elastic ring (where provided) or an ordinary elastic band (fig.5).
Position the dustbag inside the tank by fitting
the cardboard collar onto the suction inlet port
and pressing firmly in place (fig. 6).
Fit the telescopic tube K onto the hose grip,
pushing it fully into place.
The handgrip on the hose is fitted with a
mechanical suction power control, allowing the
power to be varied quickly and practically by
simply moving the slide.
Plug in the appliance and switch it on by
depressing the ON/OFF button on the cover.
Wet vacuum function
This function will help you to cope with those
little emergencies such as:
- unclogging a drain or a blocked sinks, minor
floods (washing machines, dishwashers), spilt
liquids, defrosting refrigerators and freezers,
etc.
Make sure that the polyurethane foam filter is
fitted on the motor housing fig.4.
Fit the cleaning attachment most suited to the
type of operation to be performed onto either
the extension tube or directly onto the handgrip.
Use the crevice nozzle, multi-purpose nozzle
and the or the wet cleaning brush with the frame
with rubber section.
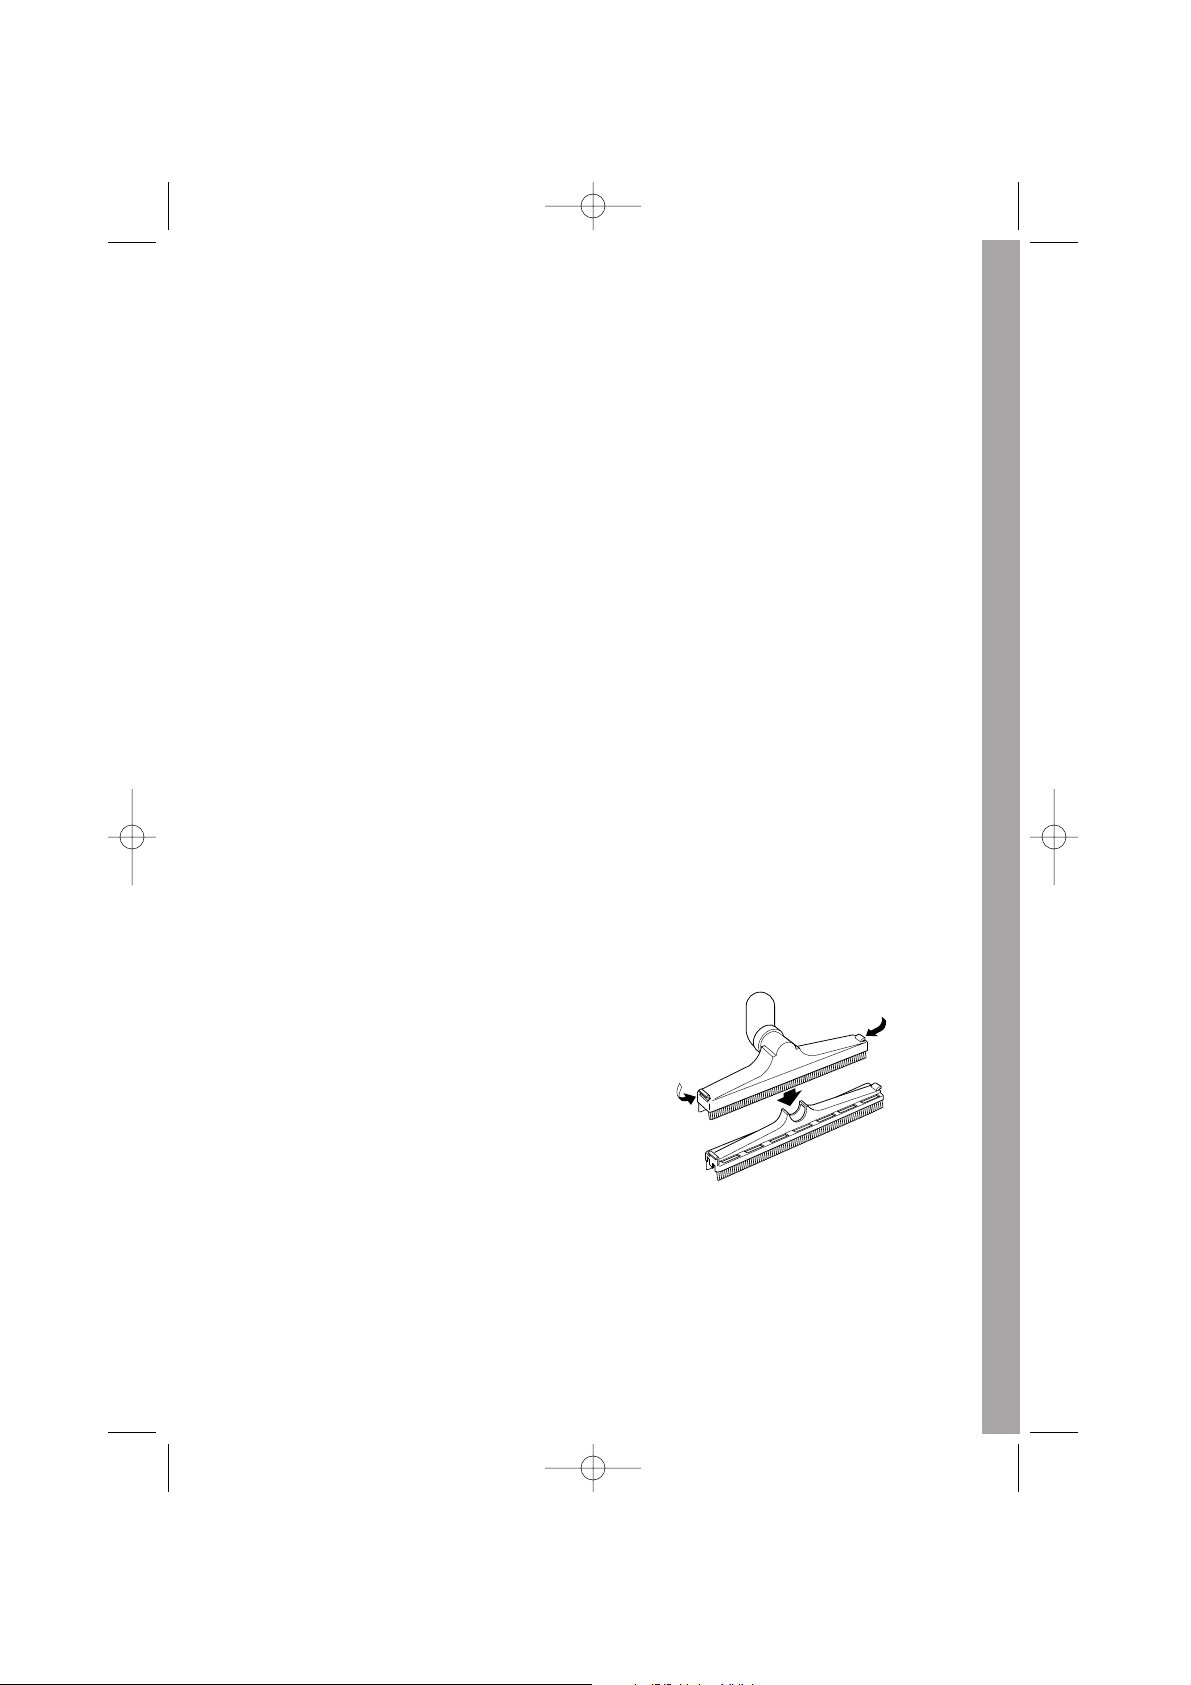
Ideal for vacuuming liquids, the brush has a
removable frame with a rubber section to
facilitate wet vacuuming. To replace the
removable frame, press the two small levers on
the sides of the frame downwards.
Dry vacuum function
Make sure that the motor-protection paper bag
(13) or cloth bag (where provided) is fitted over
the motor housing. Secure the filter with the
special elastic ring (where provided) or an
ordinary elastic band (fig.6).
ENGLISH
xp GB 8/11 26-11-2002 11:20 Pagina 9
Page 3

10
“Explora” carpet/floor brush: Cleans dust
efficiently from both hard floors or mats and
carpet.
Thanks to the articulated fins,
this model is particularly
suited to cleaning right up
close to furniture and into
corners.
For cleaning wider areas,
simply rotate the brush to use
the total width.
Accessory for delicate floors of the
“Explora” brush (some models only) The
accessory features felt strips for using the brush
on delicate surfaces such as parquetry and
treated marble.
To fit the accessory to
the base of the
“EXPLORA” brush, line
up the two pins on the
accessory with the two
holes on the bottom of
the brush and press
until it clicks into place.
Crevice tool
Ideal for collecting crumbs, dust and small
deposits and in all hard-to-get-to places.
Multi-function nozzle
Used for cleaning sofas, upholstery, car
interiors, drapes, etc.
When cleaning drapes, if required, decrease the
suction power by sliding the control on the
handgrip of the appliance, so that the hole is
fully or partially open.
Using the large-siwe paper
dust bag (if provided)
Position the dustbag inside the tank by fitting
the cardboard collar onto the suction inlet port
and pressing firmly in place.
Replace the bag lwhen it is full (Fig. 7).
Cleaning and
maintaining the
appliance
CAUTION: before starting cleaning or
maintenance operations, ensure that the
appliance is unplugged from the mains.
Once you have finished using the appliance as
a wet vacuum cleaner you are advised to rinse
the attachments by sucking in a few litres of
clean water. This will clean the attachments and
the inside of the hose.
Remember to empty the dirty water collection
tank after every cleaning operation.o (fig. 8).
After emptying and rising the tank, the
polyurethane motor filter must be removed,
washed under running water and dried.
The filter must be kept dry to prevent
deterioration.
Maintenance of the paper or
cloth filters
To use the appliance as a dry vacuum cleaner,
the motor protection bag must be replaced
periodically. The cloth filter (if provided) can be
washed periodically with water and soap;
remember to dry it before re-using.
When cleaning very fine dust such as dust from
cement, talcum, or rubble, the paper or cloth
filter may appear to be clean but is actually filled
with small particles blocking normal suction and
reducing the cleaning power of the machine.
In such cases the paper filter should be
replaced and the cloth filter washed.
Periodically replace the air filter behind the
doors on the motor unit (fig. 8).
Periodically check that the float inside the motor
unit cage is free to move in its housing (fig. 9)
by lifting motor unit and shaking it.
Before putting the appliance away, place the
attachments inside the dust container of the
attachment trolley (fig. 10).
xp GB 8/11 26-11-2002 11:20 Pagina 10
Page 4

11
The manufacturer reserves the right to change the specifications of the appliance and/or accessories without prior
notice.
Use only original spare parts and accessories so as to maintain the appliance in good working order and NOT
invalidate the warranty.
ELECTRICAL CONNECTION (U.K. ONLY)
A) If your appliance comes fitted with a plug, it will incorporate a 13 Amp fuse. If it does not fit your
socket, the plug should be cut off from the mains lead, and an appropriate plug fitted, as below.
WARNING: Very carefully dispose of the cut off plug after removing the fuse: do not insert in a 13
Amp socket elsewhere in the house as this could cause a shock hazard. With alternative plugs
not incorporating a fuse, the circuit must be protected by a 15 Amp fuse. If the plug is a moulded-on type, the fuse cover must be re-fitted when changing the fuse using a 13 Amp Asta approved fuse to BS 1362. In the event of losing the fuse cover, the plug must NOT be used until a
replacement fuse cover can be obtained from your nearest electrical dealer.
The colour of the correct replacement fuse cover is that as marked on the base of the plug.
B) If your appliance is not fitted with a plug, please follow the instructions provided below:
IMPORTANT
The wires in the mains lead are coloured in accordance with the following code:
Blue: Neutral
Brown: Live
As the colours of the wires in the mains lead of this appliance may not correspond with the coloured
markings identifying the terminals in your plug, proceed as follows:
The wire which is coloured blue must be connected to the terminal which is marked with the letter N or
coloured black.
The wire which is coloured brown must be connected to the terminal which is marked with the letter L or
coloured red.
xp GB 8/11 26-11-2002 11:20 Pagina 11
 Loading...