

Page 1

16
Dear customer,
Congratulations and thank you for choosing our company.
All our products are the result of meticulous design and technical testing.
We have produced this manual to enable you to get the best from your appliance and appreciate its
quality to the full.
If you follow our tips, we are sure the appliance will give you complete satisfaction and long and
faithful service.
This appliance exploits the power of steam to facilitate everyday cleaning in the home.
By exploiting the power of steam, it helps reduce air pollution caused by the dispersion of chemical
detergents.
It has been designed to improve the hygiene of household surfaces and upholstery.
ENGLISH
Tools supplied
(vary according to
model)
Dry vacuuming
27. Multipurpose brush
28. Dusting brush
29. Crevice tool
Steam and extraction washing
27. Multipurpose brush
30. Small triangular nozzle
31. Squeegee
32. Multipurpose nozzle with steam insert and brush
33. Crevice tool
34. Bristles in line" brush
35. Brush
Description
1. Front cover
2. Removable liquids/solids collection
drum
3. Air/water conveyor
4. Polyurethane filter
5. Drum cover
6. Drum handle
7. Air filter
8. Float valve
9. Handle
10. Front cover release catch
11. Water tank
12. Hose socket
13. Safety hatch
14. Power ON/OFF button
15. Steam generator ON/OFF button
16. Power on light
17. Steam generator on light
18. Steam ready light
19. Steam regulation knob (certain models
only)
20. Suction regulation button
21. Suction ON/OFF button
22. Steam button
23. Hose connector
24. Bayonet coupling
25. Complete hose
26. Rigid extension tubes
Page 2

17
Warnings
1) Read the instructions carefully
2) The appliance contains pressurised steam. Incorrect or improper use could be dangerous.
The appliance is designed for household use only as described in the manual.
The manufacturer declines all liability for damage deriving from improper use of the product.
3) After use and before cleaning the appliance or maintenance, always unplug from the
mains.
4) Before use, make sure the mains voltage corresponds to the voltage indicated on the rating
plate on the bottom of the appliance.
5) Plug the appliance into an efficiently earthed socket with a minimum rating of 10 A.
6) Never direct the steam jet towards power sockets or appliances containing electrical components such as those inside ovens. They could be damaged.
7) Never direct the steam jet towards the appliance.
8) Never unplug the appliance by pulling the power cable or appliance itself.
9) To avoid damaging the insulation, do not run the appliance over the power cable.
10) To add water, always remove the tank from the appliance. Never place it under the tap.
11) Avoid the steam coming into contact with the skin. The high temperature could cause serious
burns. Never direct the steam jet towards persons or animals or towards surfaces or objects
which could be damaged by high temperatures.
12) Do not touch the plug with wet hands.
13) When in operation, hold the appliance by the handgrip. As it incorporates a steam generator, surfaces become hot during use. Persons affected by particular pathologies causing abnormal sensitivity to heat should take special care when using this appliance.
14) Always keep the appliance in a horizontal position when in use.
15) Do not add detergent to the steam generator. Use cold water only.
16) Never wash the appliance with triethylene or other solvents. Use water with normal liquid
detergents only.
17) Avoid closing the door on the cable or rubbing it over sharp edges. Keep it away from hot
surfaces.
18) Do not vacuum up inflammable liquids.
19) Avoid vacuuming up hard or sharp objects as they could damage the appliance.
20) Before starting the appliance, make sure the filters are in position.
21) Never use the appliance without the polyurethane filter in place on the float valve housing.
22) Always fill the drum with water before using the appliance as a dry vacuum cleaner.
23) Take particular care when using the appliance on stairs.
24) Keep the appliance out of reach of children or persons not capable of using it without supervision.
25) Do not use the appliance if it appears to be faulty. Contact your local dealer or an authorised service centre.
26) If the temperature safety switch trips, the appliance shuts down. To reuse the appliance, contact an authorised technical service centre.
27) Protect the appliance from atmospheric agents (rain, frost, sun, etc).
28) Heating up and cooling down of the steam generator could cause noises associated with
Page 3
18
normal expansion of the stainless steel it is made from.
29) For repairs contact your local dealer or an authorised service centre in order to avoid compromising the efficiency of your appliance and to maintain the validity of the guarantee.
For the same reasons, you are always recommended to use original spare parts.
30) The power cable must always be replaced by an authorised service centre only.
KEEP THESE INSTRUCTIONS CAREFULLY
The manufacturer reserves the right to modify appliances and tools without warning.
This appliance conforms to current electrical safety and electromagnetic compatibility legislation.
A) If your appliance comes fitted with a plug, it will incorpora-
te a 13 Amp fuse. If it does not fit your socket, the plug
should be cut off from the mains lead, and an appropriate
plug fitted, as below.
WARNING: Very carefully dispose of the cut off plug after
removing the fuse: do not insert in a 13 Amp socket elsewhere in the house as this could cause a shock hazard.
With alternative plugs not incorporating a fuse, the circuit
must be protected by a 15 Amp fuse.
If the plug is a moulded-on type, the fuse cover must be refitted when changing the fuse using a 13 Amp Asta approved fuse to BS 1362. In the event of losing the fuse cover,
the plug must NOT be used until a replacement fuse cover
can be obtained from your nearest electrical dealer. The
colour of the correct replacement fuse cover is that as
marked on the base of the plug.
B) If your appliance is not fitted with a plug, please follow
the instructions provided below:
WARNING - THIS APPLIANCE MUST BE EARTHED
IMPORTANT
The wires in the mains lead are coloured in accordance with
the following code:
Green and yellow: Earth
Blue: Neutral
Brown: Live
As the colours of the wires in the mains lead may not correspond with the coloured markings identifying the terminals in
your plug, proceed as follows:
The green and yellow wire must be connected to the terminal in
the plug marked with the letter E or the earth symbol or
coloured green or green and yellow.
The blue wire must be connected to the terminal marked with
the letter N or coloured black.
The brown wire must be connected to the terminal marked with
the letter L or coloured red.
N
E
L
ELECTRICAL CONNECTION (UK ONLY)
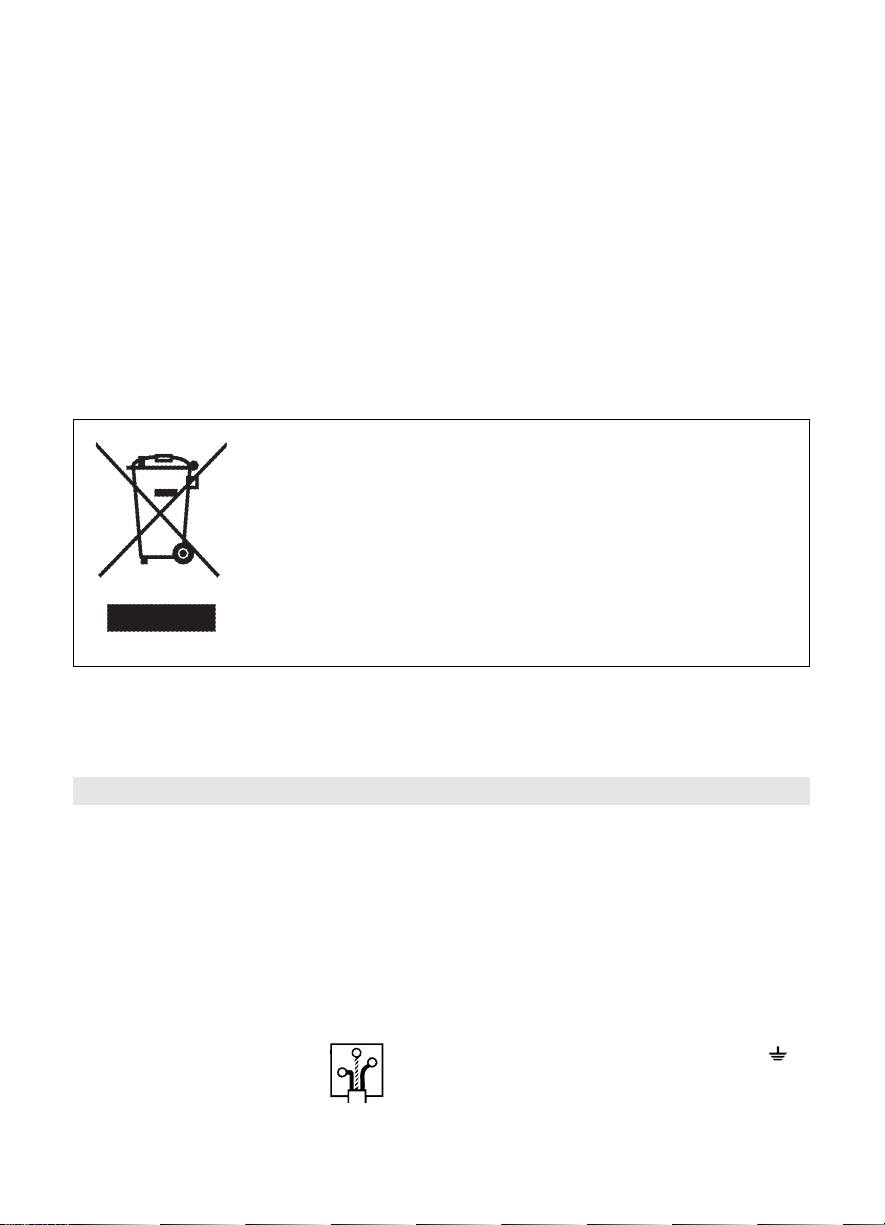
Important information for correct disposal of the product in accordance with EC
Directive 2002/96/EC.
At the end of its working life, the product must not be disposed of as urban waste.
It must be taken to a special local authority differentiated waste collection centre or to
a dealer providing this service.
Disposing of a household appliance separately avoids possible negative consequences for the environment and health deriving from inappropriate disposal and
enables the constituent materials to be recovered to obtain significant savings in
energy and resources.As a reminder of the need to dispose of household appliances separately, the product is marked with a crossed-out wheeled dustbin.
Page 4
19
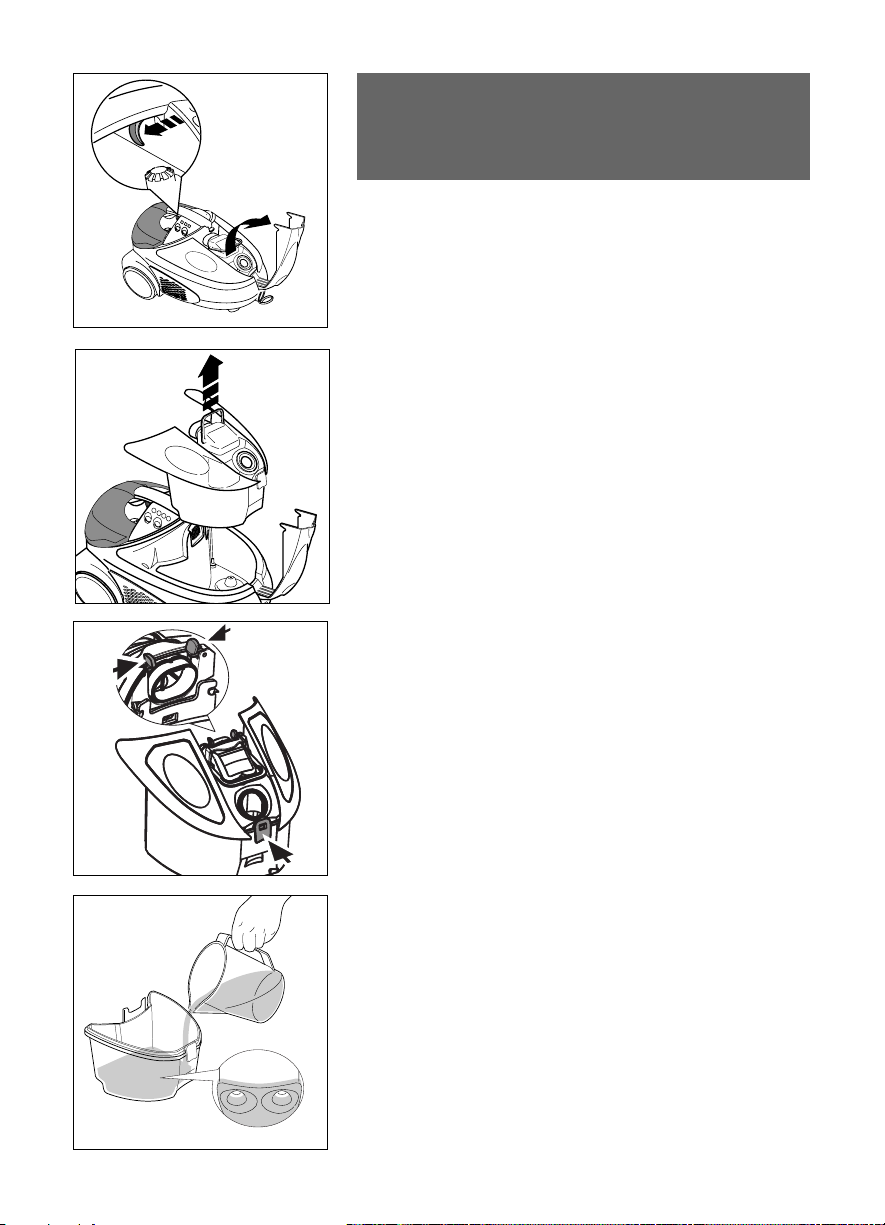
Preparing the appliance for dry or
liquid vacuuming.
Release the catch (10) under the handle of the appliance
and open the front cover.
Remove the liquids/solids collection drum by pressing the
catch and lifting the tank by the handle (6).
Remove the drum cover with float valve system.
To remove the cover correctly, press the release levers
marked with the letter A and at the same time press lever B
at the bottom of the cover to release it.
Hold levers A down, lift the lid and empty the drum.
Lift the cover and empty the drum.
Remove the air/water conveyor (3) and pour the water into the
drum until it covers the two projections on the bottom of the
tank (about 800 cc).
Replace the conveyor, insert the drum cover and press down as
far as it will go until it hooks into place, then holding the catch
(10) down, replace the drum.
Close the front cover.
NB: To use the appliance as a wet vacuum cleaner, you do
not need to fill the drum with water.
B
A
A
Page 5

Fit the hose (25) onto the appliance. Insert the bayonet coupling (24) into the socket on the cover (1), press down and
rotate clockwise as far as it will go.
Open the safety hatch (13) and insert the plug (23) into the
socket (12) on the bottom of the appliance, making sure the
arrow points upwards. Push down until it locks into place.
To remove, press the locking fins at the side and pull.
Insert the extension tube (26) onto the hose handgrip,
making sure the handgrip coupling is perfectly connected to
the extension tube coupling by pushing firmly together. Lock
in place by rotating the locking ring (A).
To make sure it is fitted correctly, attempt to remove the
extension tube.
To insert the second extension tube or brush, proceed as
described above.
Plug into the mains socket and press the ON/OFF button
(14). Light (16) comes on. Power to the appliance is now
on.
20
A
24
23
Page 6

To turn the vacuum function on, press the suction ON/OFF
button (21) on the hose handgrip. The appliance will be at
maximum suction power.
To turn suction off, press the suction ON/OFF button (20)
again.
To reduce or increase the suction force of the motor, hold
button (20) down until the required power is reached.
NB: Do not press button (15) to turn power to the steam
generator on when the appliance is being used as a vacuum cleaner only.
Impor
tant: while vacuuming up liquids, when the drum (2)
is full of water, a device shuts off suction and motor revolutions increase.
You must turn the appliance off by pressing the ON/OFF
button (14).
Unplug from the mains socket and empty the drum.
This device may also trip when the filters (7) and (4) are
exhausted. In this case, remove and clean them (see chapter “cleaning and maintenance”).
The suction shut-off device may also trip when the appliance is knocked violently.
In this case, turn off the motor and wait a few seconds
before turning the appliance back on.
21
Page 7

22
Vacuuming tools
(the exact tools supplied vary according to model)
Multipurpose brush (27)
Use this brush to vacuum up liquids and dust.
Dusting brush (28)
Jointed to facilitate cleaning. Particularly suitable for
eliminating dust from upholstery, furniture, books, curtains,
frames and clothes.
Crevice tool (29)
Can be used to collect crumbs, dust and small debris. Perfect
for hard-to-reach corners.
Page 8

23
Preparing the appliance for steam
cleaning
Extraction steam cleaner
Make sure the cable is unplugged from the mains socket.
Take the tank out, remove the cap and fill with water.
Fit the hose (25), extension tubes (26) and brush (27)
following the instructions for assembling the tubes and
brush given in chapter 2.
Plug into the mains socket. Press the power ON/OFF button
(14) and steam generator ON/OFF button (15).
At this point, the power on (16) and steam generator on
(17) lights will come on. When the steam ready light (18)
goes off, the appliance is ready for use.
To deliver steam, hold the button (22) on the bottom of the
hose handgrip down. Release it to stop delivery.
Activate suction by pressing the ON/OFF button (21). The
appliance will then wash and vacuum at the same time.
In the case of persistent marks, you are recommended to
steam first, then vacuum. (See paragraph "Extraction
washing technique" on page 24).
NB: When used for the first time, the appliance may give
out smoke and an odour for several minutes. This is caused
by heating and subsequent drying of the sealers used in
assembling the steam generator.
Page 9

24
Topping up the water in the tank
When the water in the tank reaches 2 cm from the bottom,
you should top up. Proceed as follows:
- Turn off the steam generator by pressing the steam gene-
rator ON/OFF and power ON/OFF buttons.
- Unplug from the mains.
- Take the tank out, remove the cap and fill with cold wa-
ter. Replace the cap.
- Replace the tank on the appliance, making sure it is cor-
rectly positioned.
IMPORTANT: during operation, the appliance fills the steam
generator with water from the tank (continuous fill).
It is normal to hear the noise caused by filling at regular intervals to maintain constant steam pressure. You can thus
steam clean constantly, maintaining the same efficiency and
performance.
Extraction washing technique
Steam regulation knob (19)
(certain models only)
Regulates the quantity of steam delivered.
When turning on, you are recommended to rotate the knob
to the maximum steam delivery position.
If the water in the tank runs out completely, there is still
enough steam left for about 10 minutes operation, depending on the quantity being used.
If you do not fill the tank, the pump vibrates and no more
steam is given off.
When the water in the tank has been topped up, the appliance operates as if it were turned on for the first time.
Steam will therefore be ready in three minutes, during
which time the pump fills the steam generator with water.
When the water in the tank has run out, you should not
continue steam cleaning, leaving the pump vibrating.
If continued over time, this practice could irreparably
damage internal components.
IMPORTANT: there may be water on the shelf under the
appliance. This is caused by the pressure relief valve.
To avoid water spilling out of the tank when moving the
appliance, always close the tank with the cap.
Page 10

For extraction washing, proceed as follows:
- Aim the steam jet at the surface to be treated using the
steam button (22) and at the same time activate suction
using the ON/OFF button (21).
- Retract the brush bristles by pressing the pedal, then pass
a number of times over the surface to be treated using
suction only. The treated surfaces will be almost
completely dry and the dirt will be removed.
NB: Suction power must be at maximum.
Steam cleaning without extraction
To use the appliance as a steam cleaner only, proceed as
above, but without activating the vacuum system, in other
words, without pressing the vacuum button (21).
Extraction and steam cleaning tools
(the exact tools supplied vary according to model)
Multipurpose brush (27)
To use the steam extraction washing brush on hard floors
turn the pedal until the bristles are protruding.
This obtains a combined steam+brush action for more
efficient cleaning.
Recommendation: not recommended for treated cotto
floors, wax polished floors and parquet.
Triangular nozzles (30)
Insert the extension tube either directly onto the handgrip,
making sure the coupling is perfectly connected to the
handgrip coupling or to the extension tube, pushing firmly
together and then locking by rotating the locking ring.
Use the small triangular nozzle to wash and wet vacuum
upholstery, sofas, furniture and hanging fabrics.
To avoid damaging colours and delicate fabrics, you should
first test on a concealed part of the carpet or upholstery to
be cleaned.
25
Page 11

Squeegee tool (31)
The squeegee tool is extremely useful for cleaning glazed
surfaces.
Insert the extension tube either directly onto the handgrip,
making sure the coupling is perfectly connected to the
handgrip coupling or to the extension tube, pushing firmly
together and then locking by rotating the locking ring.
Aim the jet at the surface to be washed. To dry, slope the
tool in such a way that the squeegee adheres perfectly to
the surface to be dried.
Recommendation: in low temperatures, you are
recommended to warm the windows first with a weak jet of
steam to avoid the risk of breakage due to sudden
temperature changes.
Nozzle with steam insert and brush (32)
Insert the extension tube either directly onto the handgrip,
making sure the coupling is perfectly connected to the
handgrip coupling or to the extension tube, pushing firmly
together and then locking by rotating the locking ring.
Combined with steam, the brush facilitates removal of the
dirt from joints between tiles, radiators, bathroom fittings
and all difficult to reach points.
Crevice tool (33) and brushes (round 35 and "in-line" 34)
After fitting the crevice tool, attach one of the brushes
provided.
The brushes are different colours, so you can reserve each
one for a specific purpose (eg. red for the oven, yellow for
sanitary fittings, etc).
The "bristles in line" brush is particularly suitable for
cleaning cracks.
Important: After fitting the required tool, follow the instructions in the manual to operate the appliance.
26
Page 12

27
Cleaning and maintenance
Important: Before cleaning or maintenance, always
unplug from the mains socket.
After using the appliance, to improve hygiene you should
rinse the tools by sucking up clean water.
This will clean the tools and the inside of the hose.
You should empty the liquid collection drum each time you
use the appliance.
If not used for long periods, you are recommended to
empty the tank before putting the appliance away.
After emptying and rinsing the drum, remove the
polyurethane filter for liquids, wash under running water
and leave to dry.
To improve the working life of the filter, keep it dry.
The exhaust air is filtered through a high efficiency filter (A)
able to retain particles larger than 3 microns. This filter
must be replaced when dirty.
When dirty, filters B and 7 can be washed, dried and
replaced.
Efficient filters are important to keep the appliance working
effectively.
Filters can be obtained from authorised service centres.
Check the float valve in the motor housing regularly to
make sure it is free to move. Also check that the
polyurethane filter (4) and air filter (7) are always present
and inserted correctly.
7
B
A
 Loading...