

Delonghi PACS 120HP Instructions Manual

19
ENGLISH
Warnings
• This appliance is designed for home air conditioning and must not be used for other purposes.
• It is dangerous to modify or alter the characteristics of the appliance in any way.
• The appliance must be installed in conformity with legislation in force in the country concerned.
• If the appliance requires repair, contact a Service Centre authorised by the manufacturer only.
Repairs carried out by unauthorised personnel may be dangerous.
• This air conditioning unit must be used by adults only. Never allow children to play with the
appliance.
• The appliance must be connected to an efficient earth system. Have your electrical circuit
checked by a qualified electrician.
• The appliance must not be used by young children or unfit persons without adequate supervision.
• If the supply cord is damaged, it must be replaced by the manufacturer, its service agent or
similarly qualified persons in order to avoid a hazard.
• Do not use extension cables.
• Before cleaning or maintenance operations, always unplug the appliance from the mains
socket.
• Do not move the appliance by pulling the power cable.
• Do not install the appliance in rooms containing gas, oil or sulphur. Do not install near sources
of heat.
• Do not rest heavy or hot objects on top of the appliance.
• Clean the dust filter at least once a week.
•Avoid using heating appliances near the air conditioning unit.
• Always transport the appliance upright or resting on one side, with short movements only. Before moving the appliance, empty the condensate pan in the indoor unit and the base of the
outdoor unit.
After moving the appliance, wait at least 1 hour before starting it.
• The materials used for packaging can be recycled. You are therefore recommended to dispose of them in special differentiated waste collection containers.
• The refrigerant gas R410A conforms to EC regulations on the environment.
Avoid perforating the refrigerant circuit of the appliance. At the end of its working life, consign the appliance to a special collection centre.
IMPORTANT INFORMATION FOR CORRECT DISPOSAL OF THE PRODUCT IN ACCORDANCE WITH EC DIRECTIVE 2002/96/EC.
At the end of its working life, the product must not be disposed of as urban waste.
It must be taken to a special local authority differentiated waste collection centre or to a dealer providing
this service.
Disposing of a household appliance separately avoids possible negative consequences for the environment and health deriving from inappropriate disposal and enables the constituent materials to be
recovered to obtain significant savings in energy and resources.As a reminder of the need to dispose of household appliances separately, the product is marked with a crossed-out wheeled dustbin.

20
D
uring the summer, you feel comfortable at a temperature of between 24 and 27°C with a
relative humidity of about 50%.
An air conditioning unit removes excess moisture and heat from the room where it is located.
Compared with installed models, portable air conditioning units have the advantage that they
can be moved from one room to another in the home or be transported from one building to
another.
Hot air from the room is passed through a coil cooled by refrigerant gas. Excess heat and moisture are removed before the air is re-emitted into the room.
In packaged models, a small part of this air is used to cool the refrigerant gas and then, when hot
and damp, is discharged outside.
In split models, the circuit is cooled using air from the outside.
All air conditioners can also be used in fan-only mode.
DESCRIPTION OF THE APPLIANCE
1 Indoor unit
2 Indoor unit handle
3 Cold air outlet grille
4 Operating status indicator LED
5 Filter
6 Air intake grille
7 Power cable
8 Button for emptying the pan
9 Connection sheath
10 Castor wheels
11 Outdoor unit
12 Outdoor unit handles
13 Air outlet grille
14 Red light (Heating/dehumidifying function)
15 Yellow light (fan function)
16 Green light (air-conditioning/dehumidifying function)
17 Manual operation button
18 Remote control receiver
19 Condensate drenage connection
20 Suckers
21 Castor locks
22 Protection cover
23 Wall fixing brackets
24 Supplementary extension for quick-fit couplings
What is the Pinguino ?

ENGLISH
21
Preparing for use
NOTE: The appliance must be positioned at
least 20/30cm from any walls.
POSITIONING THE INDOOR UNIT
Install the appliance inside the room being airconditioned. In general, near a window or
door. In any case, near a perimeter wall. The
indoor unit must be positioned on an even surface, where possible on a table, or other piece
of furniture (see Figures 1 and 2). There must
be no obstructions to the air intake (rear grilles
)and outlet (top outlet grille ) on the
indoor unit.
3
6
POSITIONING THE CONNECTION SHEATH
The sheath connecting the outdoor and
indoor units can be passed through the gap in a
window or door left ajar; use the suckers to
prevent them from opening further. In addition
to the methods described above, the sheath
connecting the external and internal units can
also pass through a hole with a diameter of
about 9 cm in an external wall.
The internal unit can be mounted permanently
using the bracket accessory
(see mounting
instructions provided with the bracket kit).
23
20
9
fig. 1
fig. 2
Before passing the sheath through the hole
in the wall, you should protect the ends of
the quick-fit coupling using the caps provided or with paper tape.
The external unit can also be mounted permanently by purchasing the wall bracket kit from a
De'Longhi service centre or dealer.
DISCONNECTING THE TWO UNITS
To disconnect the internal and external units,
proceed as follows:
1) Undo the two screws on the cover protecting the external unit couplings. (Fig. 3)
2) Remove the protection from the electrical
connections on the external unit by
undoing the screw. (Fig. 4)
This should always be done with the
appliance unplugged from the mains.
3) Disconnect the condensate coupling by
pushing on the sleeve A and pulling the
tube out. (Fig. 5)
fig. 5
fig. 3
fig. 4
A
2
1
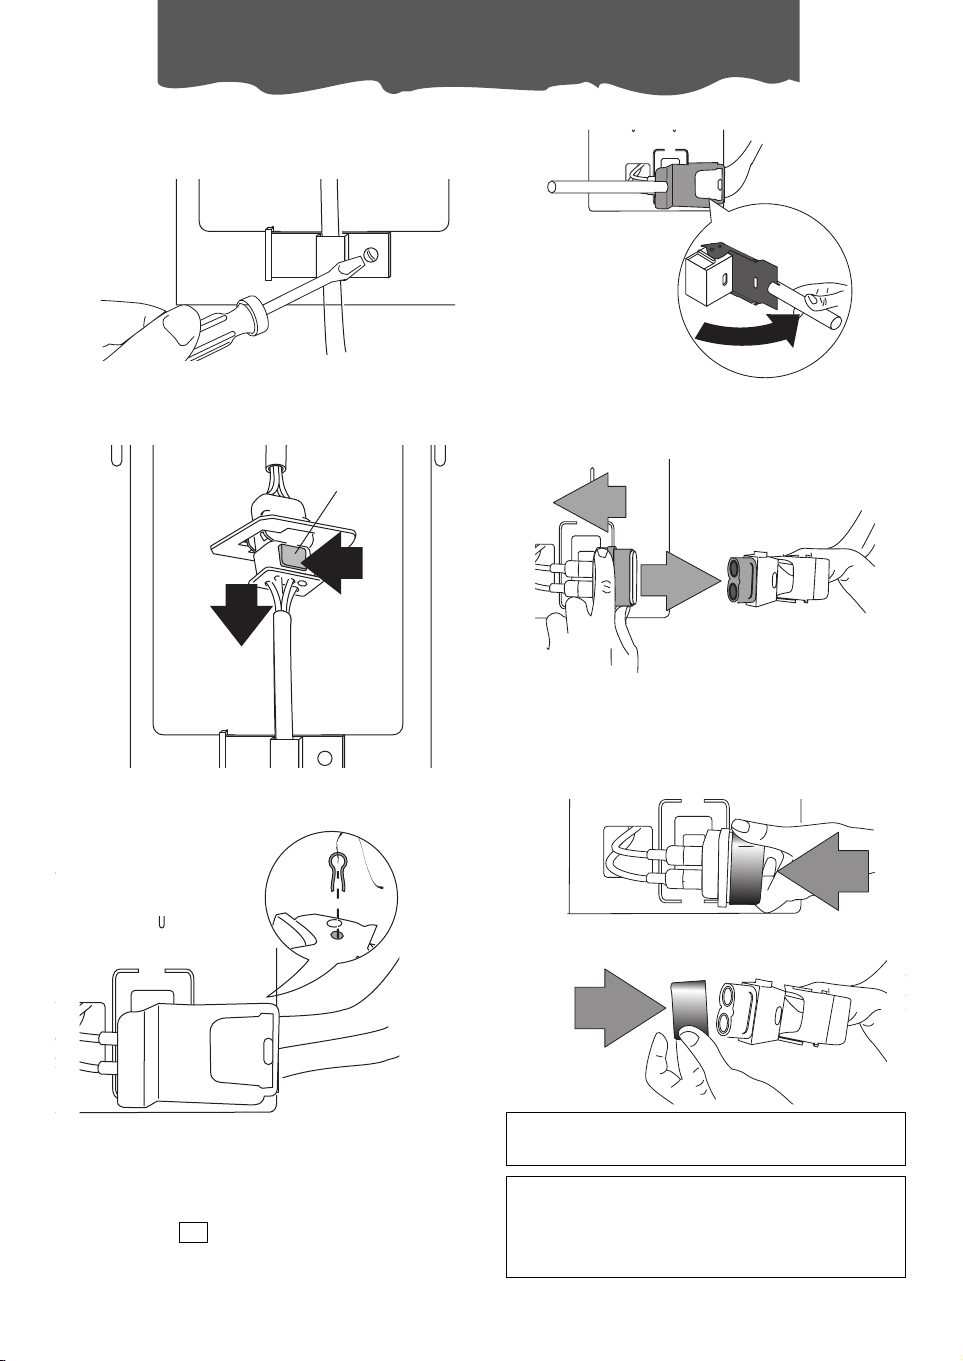
4) Undo the right hand screw on the cable
clip. (Fig. 6)
5) Disconnect the electrical connector by
pushing the tabs B, then pulling out the
connector (fig. 7)
6) Remove the safety plug (fig. 8).
7) Open the locking lever on the quick-fit
coupling. To facilitate closing, use the
extension , fitting it onto the lever and
turning until fully open (see figure 9).
24
8) Disconnect the male and female couplings by pushing the sleeve backwards
and pulling (Fig. 10).
To avoid damage to the couplings, before
passing the sheath through the hole in the
wall, you should protect the ends of the
quick-fit coupling using the caps provided or
with paper tape (Fig. 11).
22
Make sure the connecting sheath is free of
kinks.
Important
Always disconnect or connect the quick-fit
couplings in the open air or adequately ventilated rooms.
Preparing for use
fig. 8
fig. 6
fig. 7
fig. 9
fig. 10
fig. 11
B
1
2
1
2
23
ENGLISH
Always lock the 2 outer wheels using the
castor locks supplied.
The manufacturer is not liable for any damage to people or things caused by the positioning of the unit in a manner not compliant
with the basic standards of safety.
Preparing for use
HOW TO CONNECT THE SHEATH
To connect the sheath, follow the above procedure in reverse. When connecting the
water drain hose, make sure it is pushed in as
far as it will go.
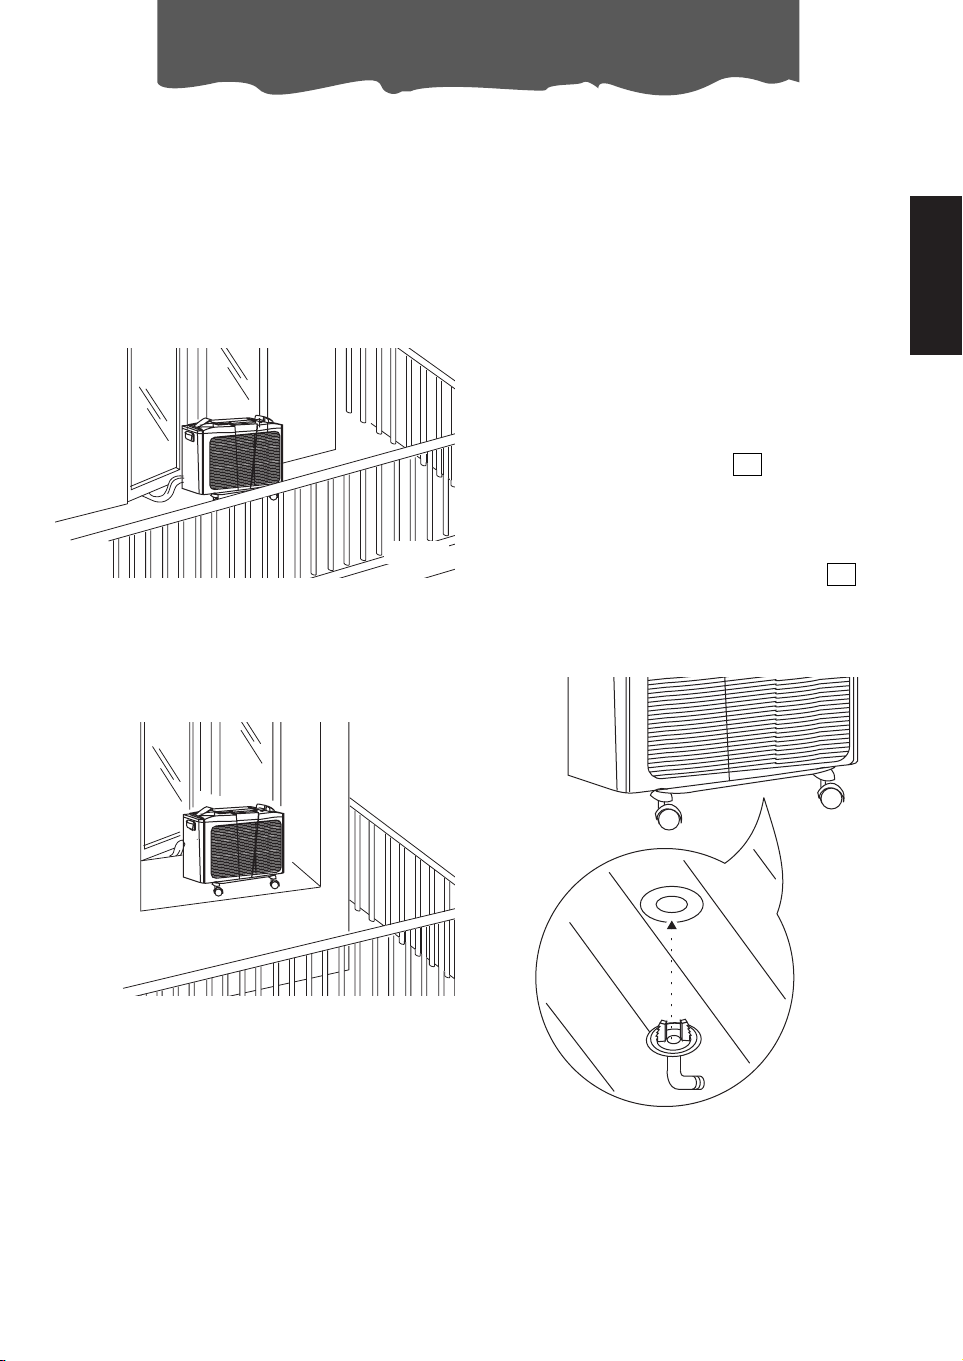
POSITIONING THE OUTDOOR UNIT
The outdoor unit can be placed on a terrace
or balcony (Fig. 12).
The outdoor unit can also be installed on a
window sill, if this faces onto a balcony (Fig.
13)
fig. 12
fig. 13
fig. 14
The outdoor unit may be installed above or at
the same level as the indoor unit, provided
that the difference in level is not greater than
1.5m. The air intake and outlet of the outdoor
unit must be kept clear of obstacles. Leave at
least 6cm between the wall and the rear of
the appliance.
The condensate forming during operation in
air-conditioning mode (in summer) is almost
totally eliminated via evaporation from the
outdoor unit.
In particular cases, if there is excessive humidity, the condensate is drained through a
hole in the base.
To drain the water that forms, use the condensate drain connector supplied, which
must be fitted on the base of the outdoor unit
(see Figure 14). This can then be connected
to a rubber hose
Note: If appropriate, the external unit can be
protected with the protective cover
fixing
it with the screw provided.
The outdoor unit
should be protected from the sun, rain, snow
and drips from the roof.
22
19
 Loading...