

Delonghi MAK 346Y Instructions Manual
26
HOW TO GET THE BEST RESULTS FROM YOUR OVEN
What power should I
choose?
What do I want to do?
• Defrost
• Melt butter and soften
cheese
• Heat pastry goods
• Cook meat
• Cook fruit
• Cook vegetables
• Cook fish
• Cook rice, pasta
• Heat up all types of ready
cooked or frozen food
• Keep food warm
38
39
36
38
39
43
38
41
38
43
42
41
43
39
Function
(or Defrost)
Power level
Power level 4
Power level 1
GB
Use Instr.
page
Amt. &
time chart
page
37
40
43
41
Pre-memorized
Automatic functions
• To make popcorn
• To heat frozen pre-baked
pizza, to reheat frozen precooked food
• To cook potatoes
• To heat drinks and liquids
• To heat chilled ready
meals.
45
45
45
45
45
45
45
45
45
45
42
41
43
40
• Defrost, reheat, cook on
two levels at the same
time
Microwave only with (SPACER
LEVEL) (Not with all models)
34 35
23 lt 17 lt
135w 120w
auto auto
270w
450w
240w
400w
675w 600w
900w 800w
Power level 5
2
3
Pop Corn
Pizza
Jacket Potatoes
Beverages
Ready Meals
GB 18-01-2001 16:32 Pagina 26
27
Before beginning to use this oven, read this important information to
obtain the best possible result.
1) This oven has been designed to thaw, heat up and cook foods at home. It must not be used for
other purposes and must not be altered or tampered with in any way.
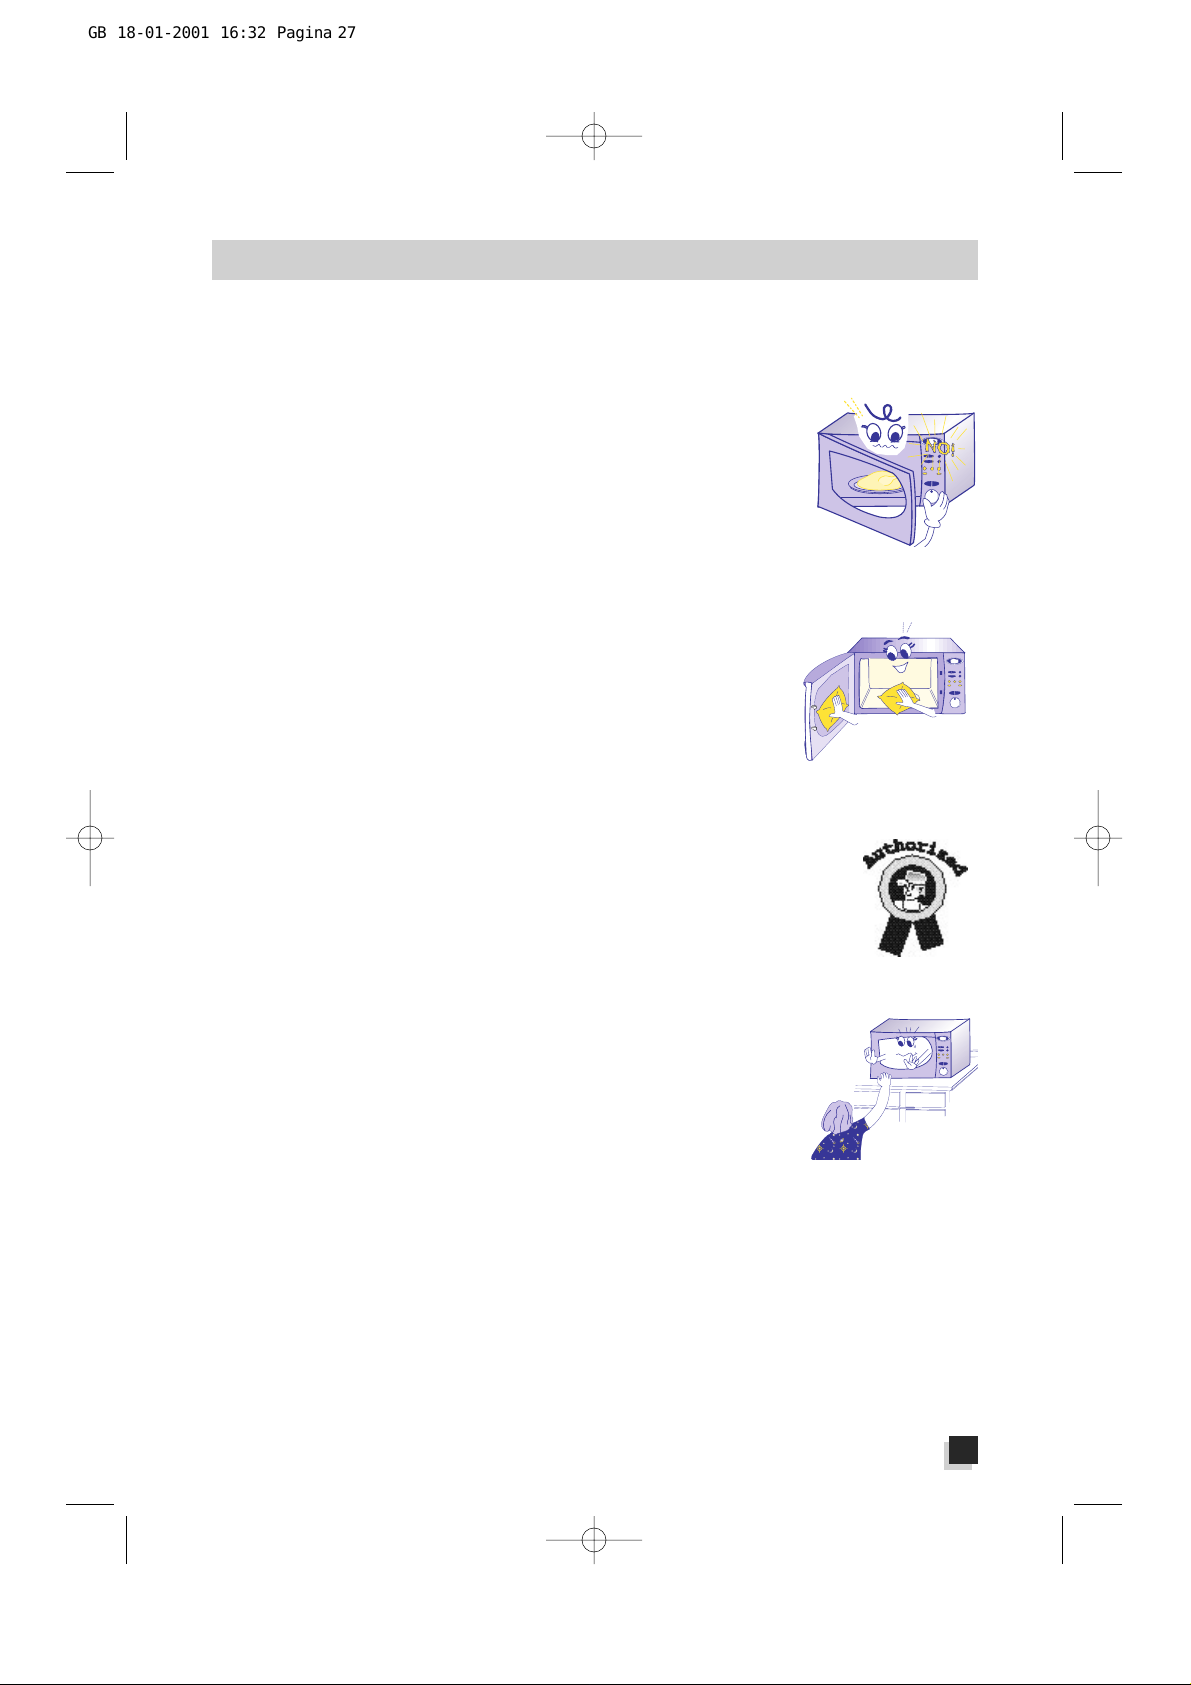
2) Before connecting this oven to your electrical system, check to be certain
that the door closes tightly. Also check to see that the metal frame is not
warped and that the hinges and hooks have not loosened. In the event
that these parts have been damaged, the microwave oven cannot be
used until a qualified technician (trained by the manufacturer or by its
Customer Service) has made the necessar y repairs.
3) Do not try to make the oven operate while the door is open by tampering with the safety devices.
4) Do not operate this oven if objects of any type whatsoever get caught
between the front of the oven and the oven door. Also keep the inside of
the door (C) completely clean by using a damp cloth and non-abrasive
detergent. Do not let dirt or food residue build up between the front of
the oven and the oven door.
5) Do not operate the oven if its electrical feed cable or plug are damaged
(because there is the danger of electric shocks).
6) Adjustments, repairs and replacement of the electrical feed cable must be performed only by
qualified technicians trained by the manufacturer. Repairs made by personnel
who are not qualified may become a source of danger.
7) If you should see smoke coming out of the oven, DO NOT OPEN THE OVEN
DOOR. Instead, immediately turn the oven off or pull the plug from its electric
socket.
8) This oven must be used only by adults. Never let small children come near the oven when it is
operating (because they might get burned).
9) You must absolutely not pre-heat the oven (i.e., in the absence of
foodstuffs) and you must not let it run in idle (in the absence of
foodstuffs), because by doing so you might cause hazardous sparks.
10)Before using this oven, check to be certain that the utensils and containers
chosen are suitable for microwave oven use (see the section on “Glassware
and Similar Items”).
11)Before using this oven, check to be certain that the utensils and containers chosen are suitable for
microwave oven use (see the section on “Glassware and Similar Items”).
12) Look at the oven from time to time when food is heated or cooked in disposable containers of
plastic, paper or other combustible material. Also, small portion of food may become combustible
if over heated.
13) Do not use recycled kitchen paper as it way contain metal particles that could cause it to ignite.
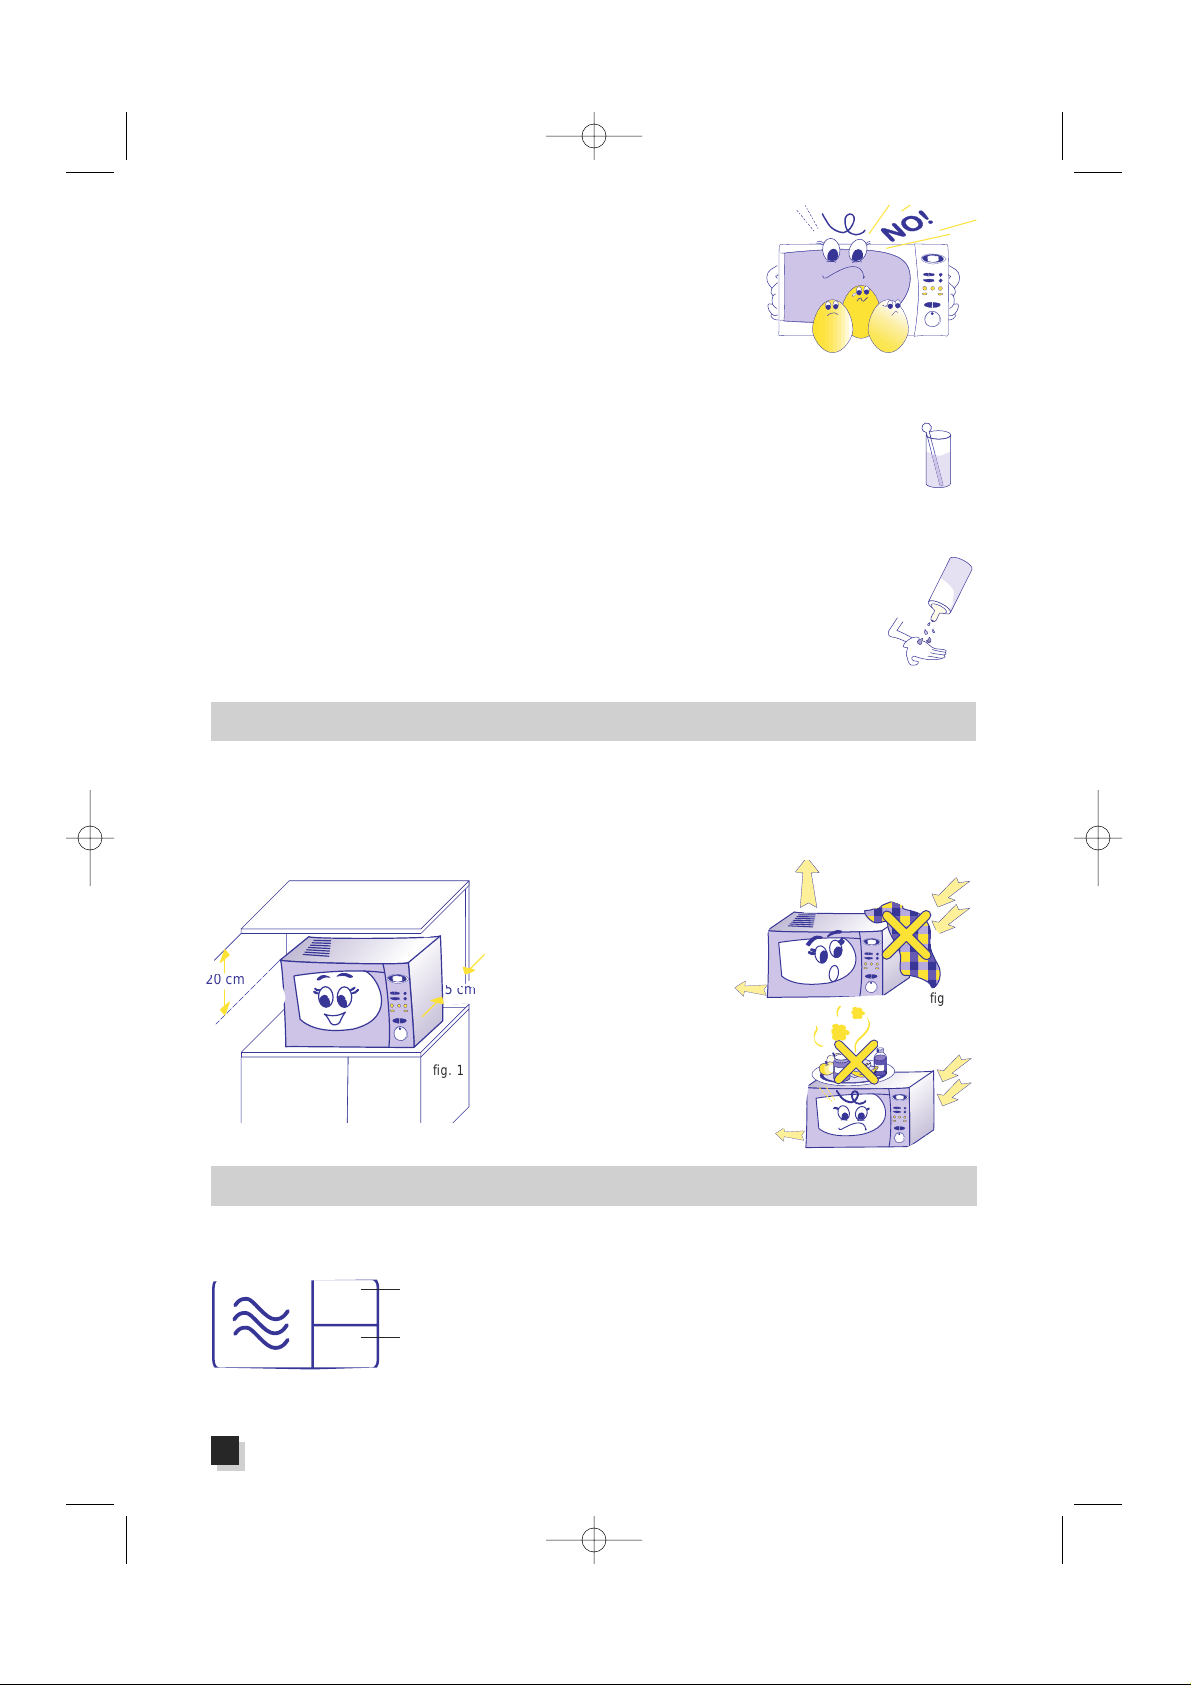
14)Do not cook eggs still in their shell. The pressure which might form inside the shell would make
IMPORTANT SAFEGUARDS
GB 18-01-2001 16:32 Pagina 27
28
the egg itself explode (even after it has already been cooked).
Never heat up eggs that have already been cooked (unless such
eggs are scrambled).
15)Always pierce sealed container or loosen the lid before heating or
cooking food. Otherwise the pressure inside those containers might
build up and cause an explosion, even after the food itself has been
cooked.
16)When heating liquids (water, coffee, milk, etc.), you may find that, because of delayed
boiling, the liquid in question may suddenly boil up and spill out when removing the
container scalding to your hand in the process. To prevent such a situation, you must
place a heat-resistant plastic spoon or a glass stirrer in the container before starting to
heat that liquid.
17)Do not heat up liquor having a high alcohol content or large amounts of oil (because overheating
could cause such substances to burst into flame).
18) Refer to the charts in this instruction manual for the correct heating and cooking
times.
19)ALWAYS check the temperature of heated infant food before serving it so as to prevent
burning. Always mix or shake the food to distribute the heat.When using commercially
available bottle sterilisers, before turning the oven on, ALWAYS make sure the container
INSTALLATION
1) After having removed the oven from its box, check to make certain that the turntable spindle (B) is correctly fitted into its housing. Place the turntable support (E) in the middle of the cooking chamber and
set the turntable (D) on top of it. The spindle (B) must be inserted in the related turntable housing.
2) Check to make certain that this equipment has not been damaged in transport and check especially to see if the door opens and closes correctly.
3) Place this oven on a surface so
that there remains a space of
about 5 cm. between the
oven’s surface portions and
the walls to the side and the
back, and a free space of at
least 20 cm. above the
oven (see Fig. 1).
4) Never block up or otherwise obstruct
the air outlet holes. In particular, never
place anything on the oven and check to
be certain that the air and steam outlet
slots (located atop the oven) are
ALWAYS FREE (see Figs. 2 and 3).
20 cm
5 cm
fig. 1
fig. 2
fig. 3
air outlet
air
intake
air outlet
air
intake
air outlet
OUTPUT POWER
ONLY FOR SOME MODELS: The microwave output power is also indicated
inside this simbol, placed on the oven door.
(ONLY FOR U.K.) The letter indicates the heating category to which your oven
belongs: some pre-cooked food packages (frozen or chilled) give heating instructions
corresponding to the various categories. Follow those instructions related to the category indicated for your oven.
The microwave output power is written on the rating plate placed on the rear side of the appliance (see
“MICRO OUTPUT”). When you consult the tables, always look up your oven’s output power. It will be
useful also when you are consulting cookbooks intended for use with microwave ovens.
The levels of intermediate power available are shown on page 24. This information will be useful for you to consult
the prescription pads for microwaves currently on sale.
GB 18-01-2001 16:32 Pagina 28

29
MODEL WITH A 23-LITRE CAVITY
Outer measurements (LxDxH) 520x305x400
Inner measurements (LxDxH) 322x218x331
Approximate weight 17 kg.
Turntable diameter 31 cm
Oven light 25 W
MODEL WITH A 17-LITRE CAVITY
Outer measurements (LxDxH) 480x272x360
Inner measurements (LxDxH) 285x197x290
Approximate weight 16 kg.
Turntable diameter 27,5 cm
Oven light 25 W
TECHNICAL DATA
BOTH MODELS
For additional data, consult the serial plate glued to the back of the equipment.
This equipment is in compliance with EEC Directives 89/336 and 92/31 related to Electromagnetic Compatibility.
Connect this equipment only to electrical outlets
having a capacity of at least 10A. Before using
this oven, check to make certain that the electrical network is the same as that indicated on the
equipment’s data plate and that the electrical
outlet is connected to an efficient grounding
(earth) terminal. The manufacturer shall not be
responsible in any manner whatsoever for
harm or damage caused by failure to observe
this norm.
ELECTRICAL CONNECTIONS
You can make use of all types of containers
made of glass (preferably Pyrex), ceramics,
porcelain and glazed pottery as long as they do
not have decorations or metal parts (gilded
borders, handles, feet). You can also use
containers made of heat-resistant plastic. For
short heating periods, you may use paper
napkins, cardboard trays and plastic
“throwaway” plates as a base.
As far as shape and size are concerned, it is
absolutely essential that containers be such as to
allow the turntable to rotate.
In order to use large-size rectangular containers
(which may not be able to rotate inside the
cooking cavity), you can remove the spindle (B)
from its housing to prevent the turntable (D)
moving. Bear in mind that to be assured of good
results when carrying this out you must stir the
food and turn the container around several
times during the cooking process. Containers
made of metal, wood, recycled kitchen paper,
cane and plate glass are not suitable for use in
microwave ovens. The metal rack supplied with
your microwave have been fully tested for safe
use. You should remember, too, that since
microwaves heat the food and not the
glassware, earthenware or similar containers
for that food, it is possible to cook such foods in
the serving dish and thereby avoid the problem
of having to clean pans later.
GLASSWARE AND SIMILAR ITEMS
Plastic for
microwaves
YES
YES
YES
Paper
cups*
YES
YES
NO
Paper
plates*
YES
YES
NO
Parch-
ment
paper*
YES
YES
NO
Cardboard
YES
YES
NO
Metal
contain-
ers
NO
NO
NO
Glass-
ware with
metal
parts
NO
NO
NO
Special
roasting
paper
YES
YES
YES
Defrosting
Heating
Cooking
Clay
plates
YES
YES
YES
Porce-
lain
YES
YES
YES
Cera-
mics
YES
YES
YES
Glass
YES
YES
YES
* If the cooking time required is too long, there is a possibility of fire.
• Electrical Connection for UK only . . . . .see page 46
GB 18-01-2001 16:32 Pagina 29
30
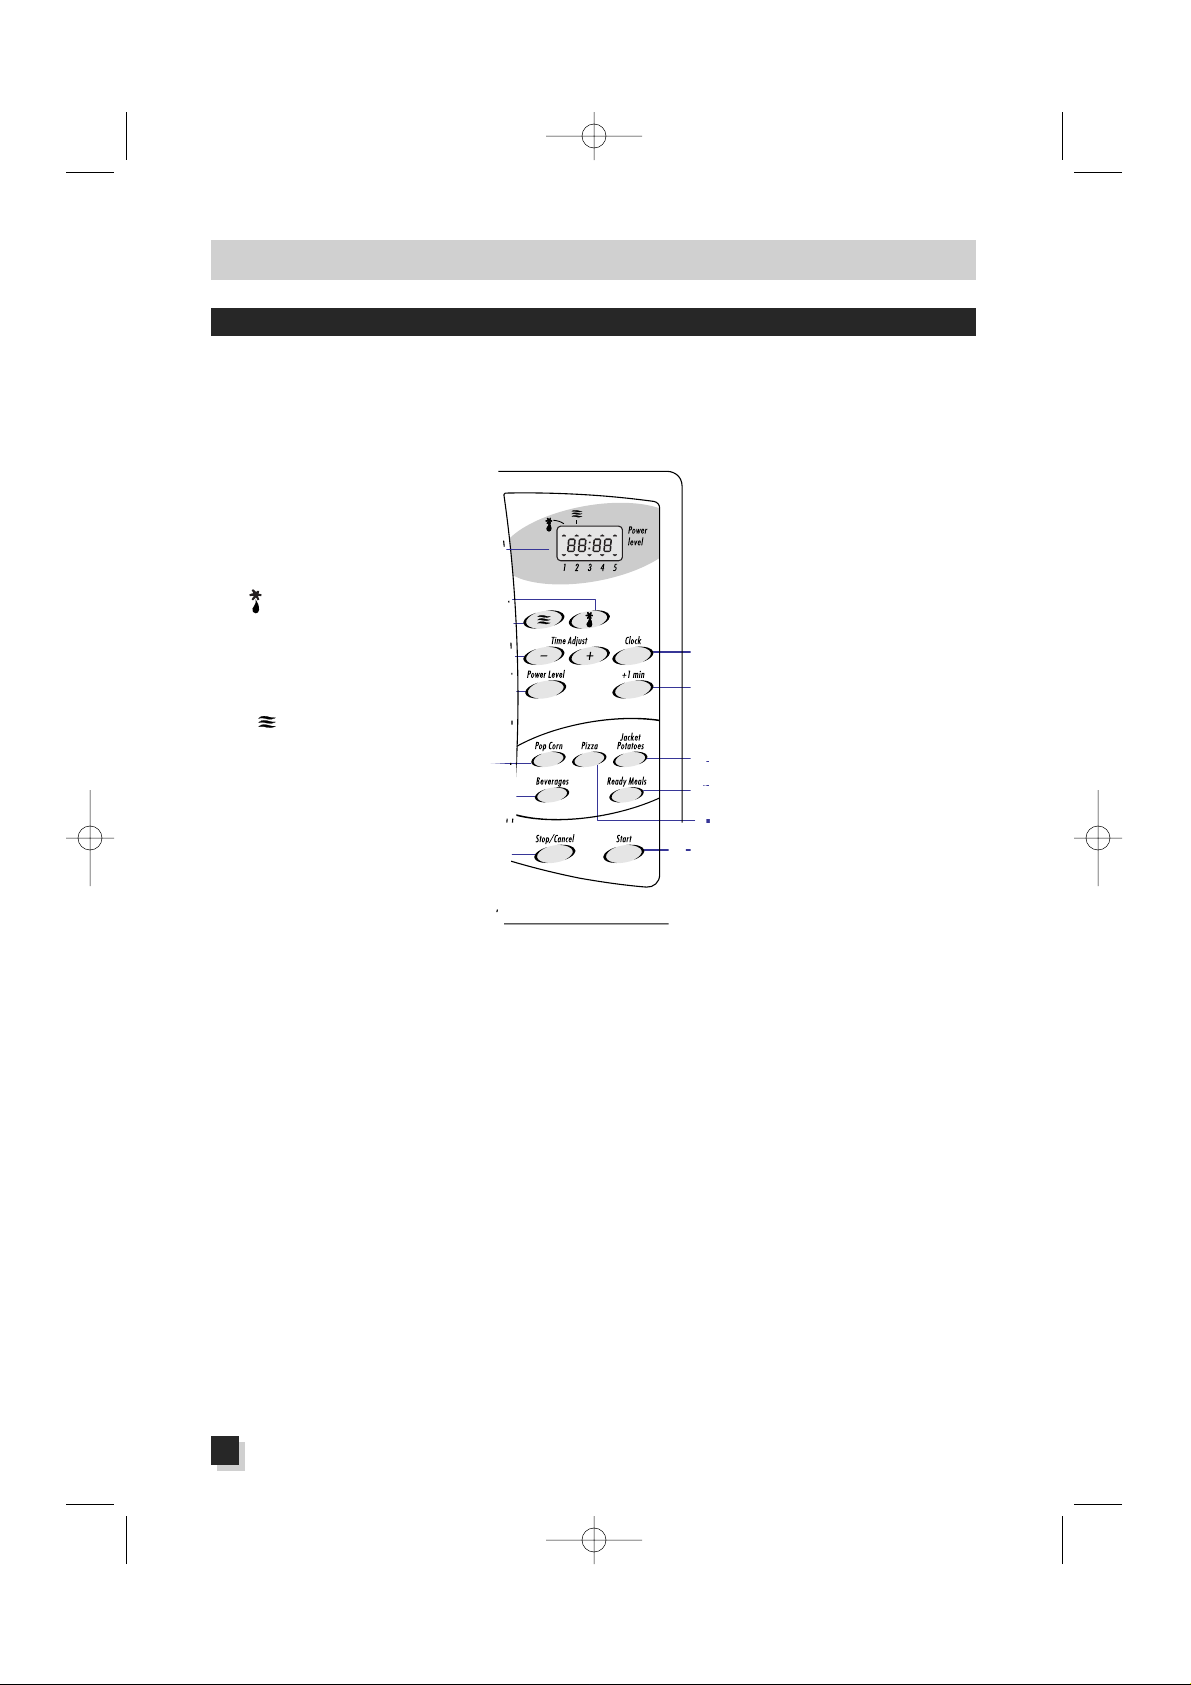
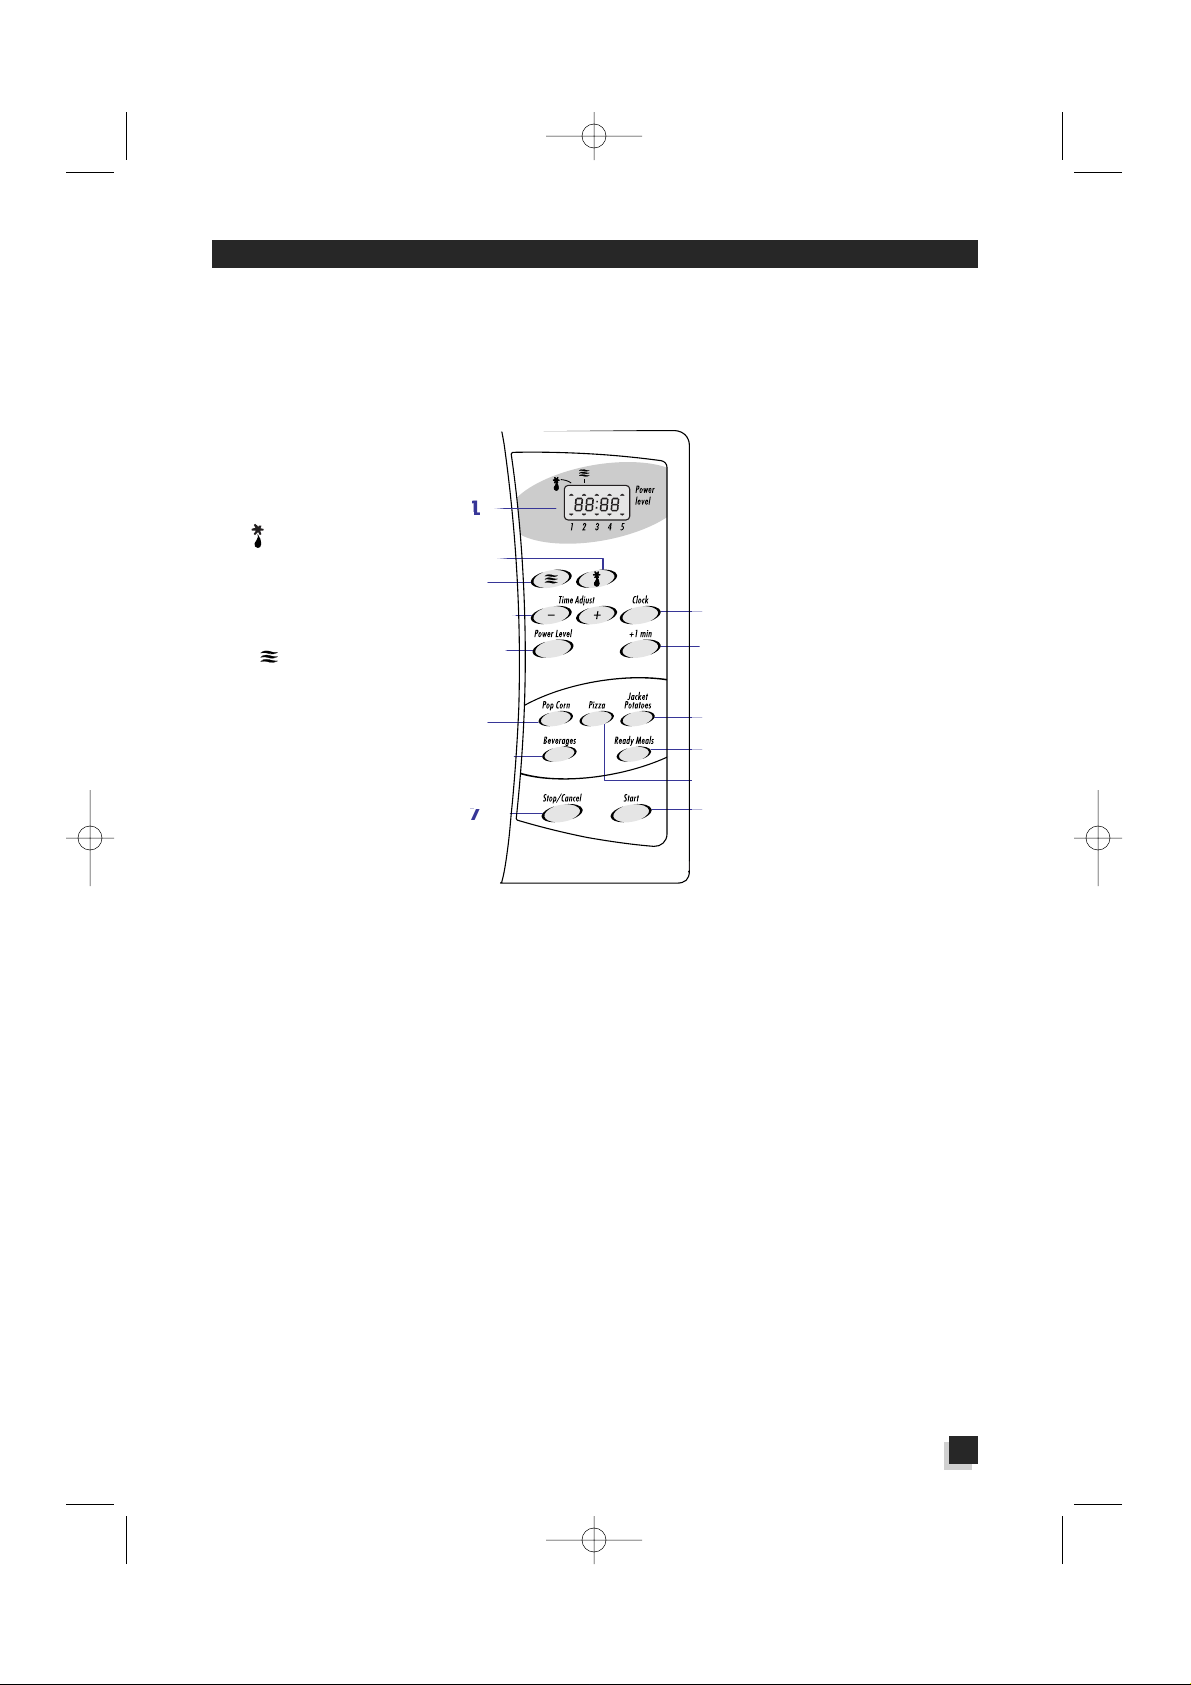
DESCRIPTION OF CONTROLS
1. Display
The control panel shows a
24-hour clock, the pre-set
cooking times, the functions chosen (upper indicators) and the microwave
level selected (lower indicators).
2. (or Defrost) button:
automatic thawing
Push this button to thaw
foodstuffs.
3. (or Micro) button:
microwave cooking
Push this button to cook or
heat foodstuffs.
4.
Power Level
button:
Microwave power level
Push this button to select
the microwave power level
required.
5 - 6 - 11 - 12 - 13:
"Quick Menu" button
Push one of these buttons
to make popcorn, baked
potatoes, warm beverages,
ready-to-serve dishes,
frozen pizza and pre-cooked
frozen food
.
7.
Stop/Cancel
button:
Cancelling a function
Push this button to stop
the cooking or to cancel
the pre-set cooking times.
8.
Time Adjust
knob:
Cooking times
Use this knob to set the
cooking time or the time
of day.
9.
Clock
button:
Clock adjustment
Push this button to set the
correct time of day and to
get a view of the clock
while the oven is working.
10.
+1 min
button
Press this button to set
exactly one minute of
microwaving at max
power level. Each additional touch of this button
will increase the set time
by 30 seconds, up to a
maximum of 6 minutes.
14.
Start
button
Press this button to turn
the oven on, but only
after you selected the
function and the cooking
times.
MODEL WITH A 23-litre CAVITY
9
10
11
12
14
13
1
3
8
2
4
5
6
7
GB 18-01-2001 16:32 Pagina 30
31
1. Display
The control panel shows a
24-hour clock, the pre-set
cooking times, the functions chosen (upper indicators) and the microwave
level selected (lower indicators).
2. (or Defrost) button:
automatic thawing
Push this button to thaw
foodstuffs.
3. or (Micro) button:
microwave cooking
Push this button to cook or
heat foodstuffs.
4.
Power Level
button:
Microwave power level
Push this button to select
the microwave power level
required.
5 - 6 - 11 - 12 - 13:
"Quick Menu" button
Push one of these buttons
to make popcorn, baked
potatoes, warm beverages,
ready-to-serve dishes,
frozen pizza and pre-cooked
frozen food
.
7.
Stop/Cancel
button:
Cancelling a function
Push this button to stop
the cooking or to cancel
the pre-set cooking times.
8.
Time Adjust
buttons
Cooking times
Push these buttons to set
cooking times or the time
of day.
9.
Clock
button:
Clock adjustment
Push this button to set the
correct time of day and to
get a view of the clock
while the oven is working.
10.
+1 min
button
Press this button to set
exactly one minute of
microwaving at max
power level. Each additional touch of this button
will increase the set time
by 30 seconds, up to a
maximum of 6 minutes
14.
Start
button
Press this button to turn
the oven on, but only
after you selected the
function and the cooking
times.
MODEL WITH A 17-litre CAVITY
9
10
11
12
14
13
1
3
8
2
4
5
6
7
GB 18-01-2001 16:32 Pagina 31
32
1) In order to set cooking times correctly , remember (in referring to the charts on the following pages)
that when you increase the amount of foodstuffs the cooking time must likewise be proportionately
increased and vice-versa. It is important to respect the “standing” times: standing time means that
period during which the food must be left to “rest” after being cooked so as to allow an even
greater spreading of the temperature within. The temperature of meat, for example, will rise about
5°-8° C. (approx. 9°-15° F.) during the standing time. Standing times may be observed either
inside or outside the oven.
2) One of the main things you must do is stir the food where appropriate several times while it is
being cooked. This helps distribute the heat more uniformly and thus shortens the cooking
time.
3) It is also advisable to turn the foodstuff over where appropriate during its cooking
process: this applies especially for meat, whether it is in large pieces (roasts,
whole chickens, etc.) or small (chicken breasts, etc.).
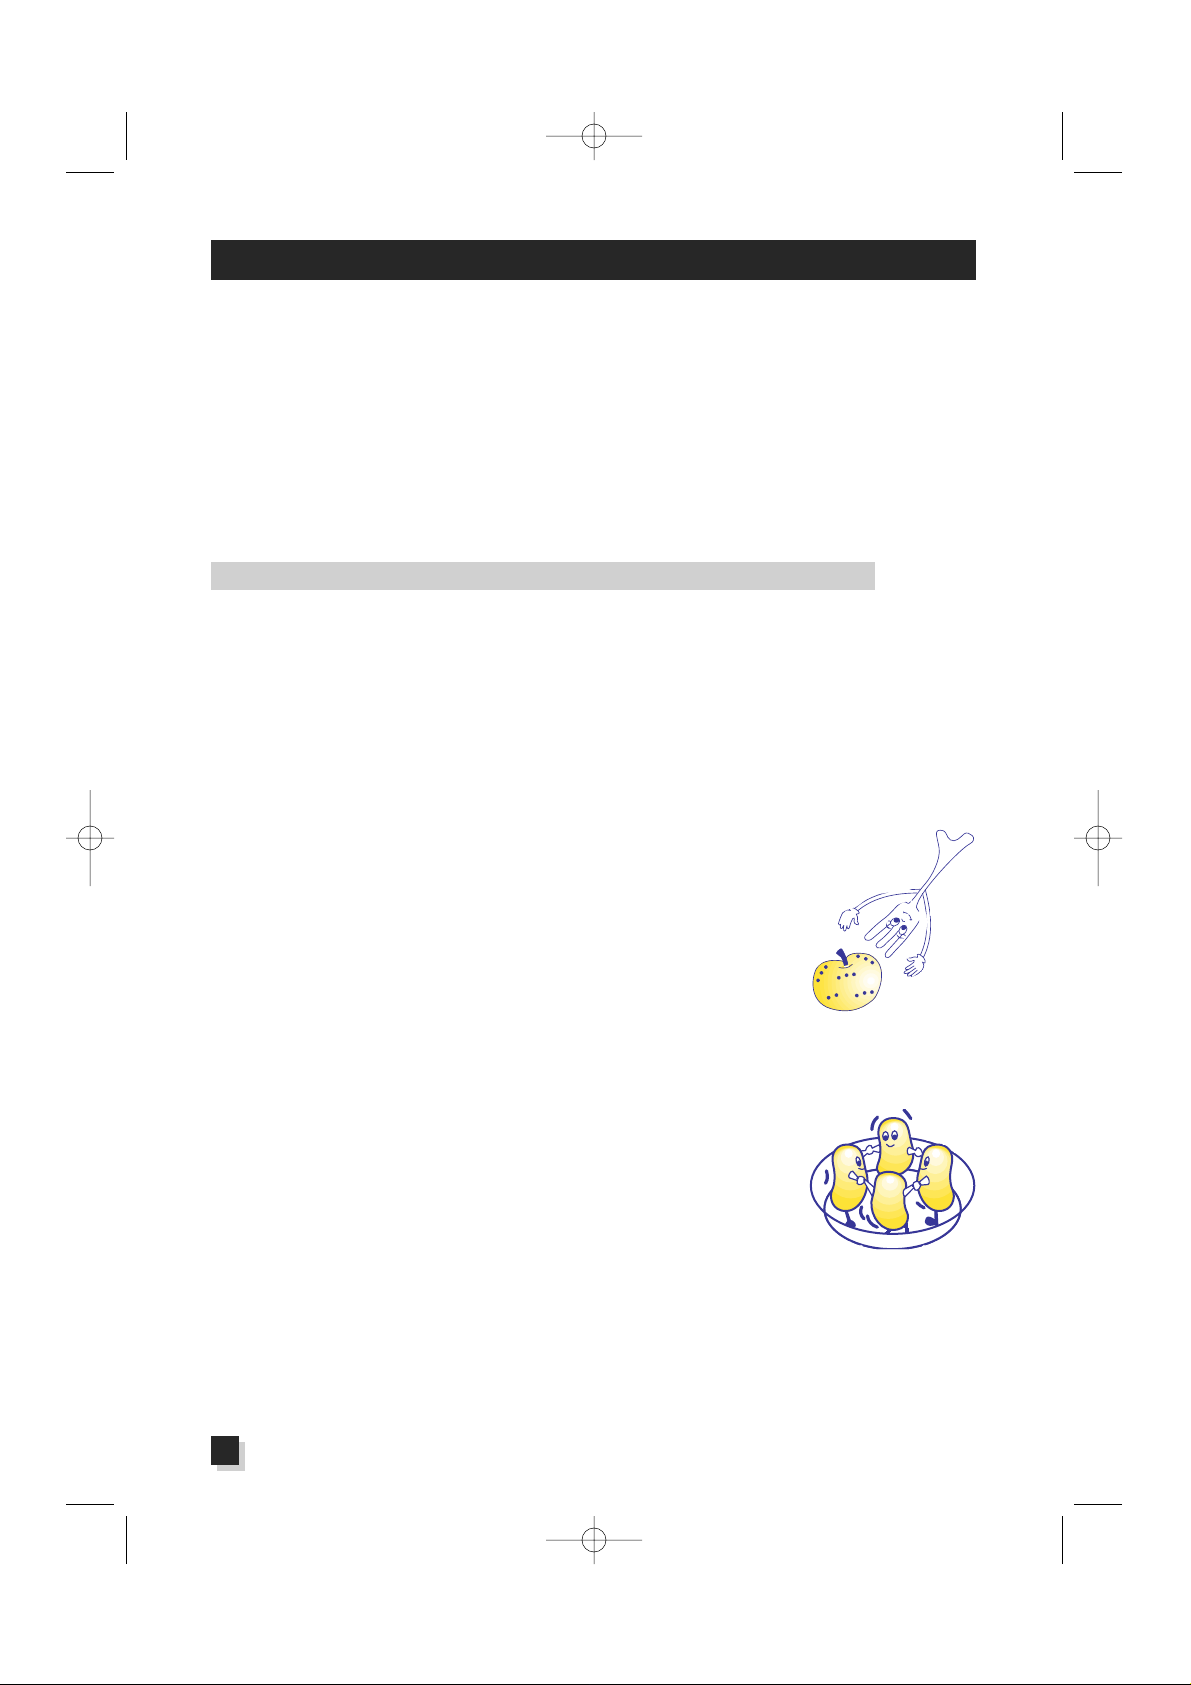
4) Foods with a skin, shell or peel (e.g., apples, potatoes, tomatoes, frank-
furters, fish) must be pierced with a fork or sharp knife in several points
so as to allow steam to escape and prevent exploding.
5) If you are preparing a large number of portions of the same food item (e.g., boiled potatoes),
place them in a large dish to allow uniform cooking.
6) The lower the temperature at which a foodstuff is placed in a microwave oven, the longer the
cooking time required. Food having a room temperature will cook more
quickly than food having a refrigerator temperature.
7) Always cook by placing the food container in the centre of the turntable.
8) It is perfectly normal for condensation to form inside the oven and near the
air outlet. To reduce such condensation, cover the foodstuffs with clear-film,
wax paper , a glass lid or simply an overturned plate.Foods having a water
content (e.g., greens and vegetables) cook better when covered. The covering of food also helps keep the oven clean on the inside. Make sure when using clear films that they
are suitable for microwave use.
ADVICE ON USING YOUR OVEN CORRECTLY
Basic rules for correct cooking with a microwave oven
Microwaves consist of electromagnetic radiation
found in nature under the form of light waves
(e.g., sunlight). Inside the oven, these waves
penetrate food from all directions and heat up the
water, fatty and sugar molecules.
Heat is produced very quickly only in the food
itself, whereas the container being used warms
up indirectly by means of heat given off by the
heated food. This prevents food from sticking to
its container , so you can use very little fatty sub-
stance or , in some cases, no fat at all during the
cooking process.
Therefore cooking in a microwave oven is considered to be healthy and good for one’s diet.
And in contrast to traditional methods, cooking
in a microwave foodstuffs are less dehydrated,
lose less of their nutritional value, and retain
more of their original flavour.
Fig. 4
Fig. 5
GB 18-01-2001 16:32 Pagina 32
33
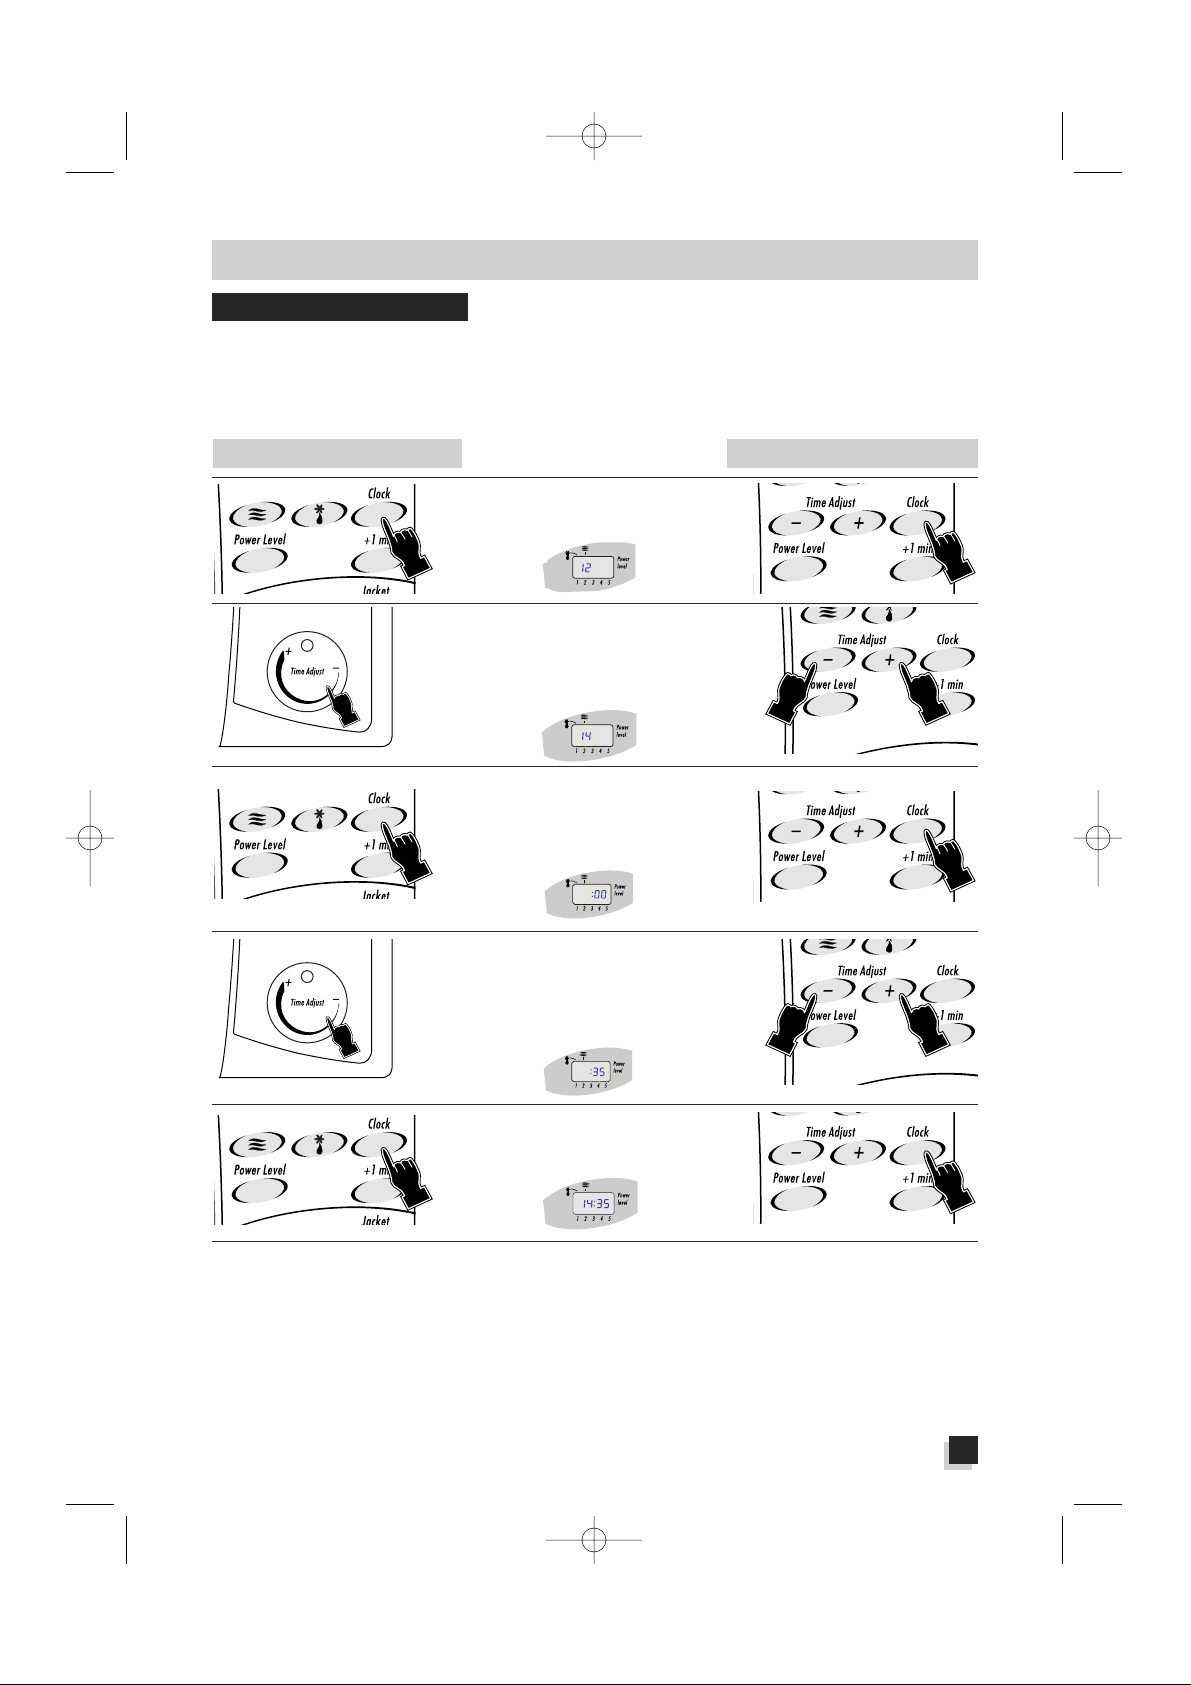
HOW TO PROGRAMME THE OVEN
HOW TO ADJUST THE CLOCK
MODEL WITH A 23-litre CAVITY MODEL WITH A 17-litre CAVITY
2. Set the time you want by turning the
Time Adjust knob (8) or by pushing
the Time Adjust buttons (8).
(The
hour will begin blinking on the display.)
4. Set the minutes you want by turning
the Time Adjust knob (8) or by
pushing the Time Adjust buttons
(8).
(The minutes will begin blinking on
the display.)
• To change the time of the control panel once it has been set, push the Clock button (9) and then
proceed to a setting of the time as indicated above.
• You can obtain a showing of the time of day even after the oven has started operating simply by
pushing the Clock button (9). (The time will be shown for 3 seconds.)
• When this appliance is first plugged in, or after there has been a power failure, the figure 12:00
will start blinking on the display.
To set the time of day, proceed as follows:
1. Push the Clock button (9).
(The hour 12 will begin blinking on the
display.)
3. Push the Clock button (9) once
again.
(The hour will disappear from
the display, and the minutes will begi
blinking.)
5. Push the Clock button one more time.
(The time selected will appear on the
display.)
GB 18-01-2001 16:32 Pagina 33
 Loading...