

Dell S560 User Manual

Dell Interactive Projector
S560P/S560T
&
Dell Advanced Projector
S560
User’s Guide

Notes, Cautions, and Warnings
NOTE: A NOTE indicates important information that helps you make
better use of your projector
CAUTION: A CAUTION indicates potential damage to hardware or
loss of data if instructions are not followed.
WARNING: A WARNING indicates a potential for property damage,
personal injury, or death.
____________________
Information in this document is subject to change without notice.
© 2016 Dell Inc. All rights reserved.
Reproduction of these materials in any manner whatsoever without the written
permission of Dell Inc. is strictly forbidden.
Trademarks used in this text: Dell and the DELL logo are trademarks of Dell Inc.; DLP
and DLP logo are trademarks of T
Windows are either trademarks or registered trademarks of Microsoft Corporation in
the United States and/or other countries.
Other trademarks and trade names may be used in this document to refer to either
the entities claiming the marks and names or their products. Dell Inc. disclaims any
proprietary interest in trademarks and trade names other than its own.
Model: Dell Projector S560/ S560P/ S560T
August 2016 Rev. A01
EXAS INSTRUMENTS INCORPORATED; Microsoft and

Contents
1 About Your Dell Projector . . . . . . . . . . . . . . . . . 5
Projector Box Contents . . . . . . . . . . . . . . . . . . . . 5
Projector Top and Bottom View
Projector Connections
Adjusting Image Size
Remote Control
. . . . . . . . . . . . . . . . . . . . . 8
. . . . . . . . . . . . . . . . . . . . . 10
. . . . . . . . . . . . . . . . . . . . . . . . 12
2 Using Interactive Pen (Only for S560P) . . . . . 16
System Requirements. . . . . . . . . . . . . . . . . . . . . 16
About Your Interactive Pen
Replacing the Interactive Pen Tips
Replacing the Interactive Pen Batteries
Using Interactive Pen with S560P
Touch Area Setting
Pen Calibration
. . . . . . . . . . . . . . . . . . . . . . . 21
. . . . . . . . . . . . . . . . . . . . . . . . . 23
3 Using Interactive Touch (Only for S560T) . . . 24
System Requirements. . . . . . . . . . . . . . . . . . . . . 24
Setting Up Interactive Touch
Using Interactive Touch with S560T
Touch Area Setting
Interactive Touch Calibration
Using S560T and Dry Erase Whiteboard
. . . . . . . . . . . . . . . . . . . . . . . 27
. . . . . . . . . . . . . . . 7
. . . . . . . . . . . . . . . . . 17
. . . . . . . . . . . . 18
. . . . . . . . . 19
. . . . . . . . . . . . . 20
. . . . . . . . . . . . . . . . 25
. . . . . . . . . . . 25
. . . . . . . . . . . . . . . . 29
. . . . . . . . . 30
4 Connecting Wireless Display Adapter . . . . . . 31
Installing Wireless Display Adapter . . . . . . . . . . . . 31
Setting up the Wireless Display Adapter
. . . . . . . . . 32
5 Troubleshooting. . . . . . . . . . . . . . . . . . . . . . . . 33
Troubleshooting Tips . . . . . . . . . . . . . . . . . . . . . 33
Guiding Signals
. . . . . . . . . . . . . . . . . . . . . . . . . 37
6 Maintenance. . . . . . . . . . . . . . . . . . . . . . . . . . . 38
Changing the Lamp . . . . . . . . . . . . . . . . . . . . . . 38
Replacing Remote Control Batteries
. . . . . . . . . . . 40
Contents | 3

7 Specifications . . . . . . . . . . . . . . . . . . . . . . . . . . 41
8 Additional Information . . . . . . . . . . . . . . . . . . 45
9 Contacting Dell . . . . . . . . . . . . . . . . . . . . . . . . 46
4 | Contents
About Your Dell Projector
Calibrate
Touch
VGA
Freeze
Blank
Screen
Video
Mode
Info
HDMI
AAA
AAA
1
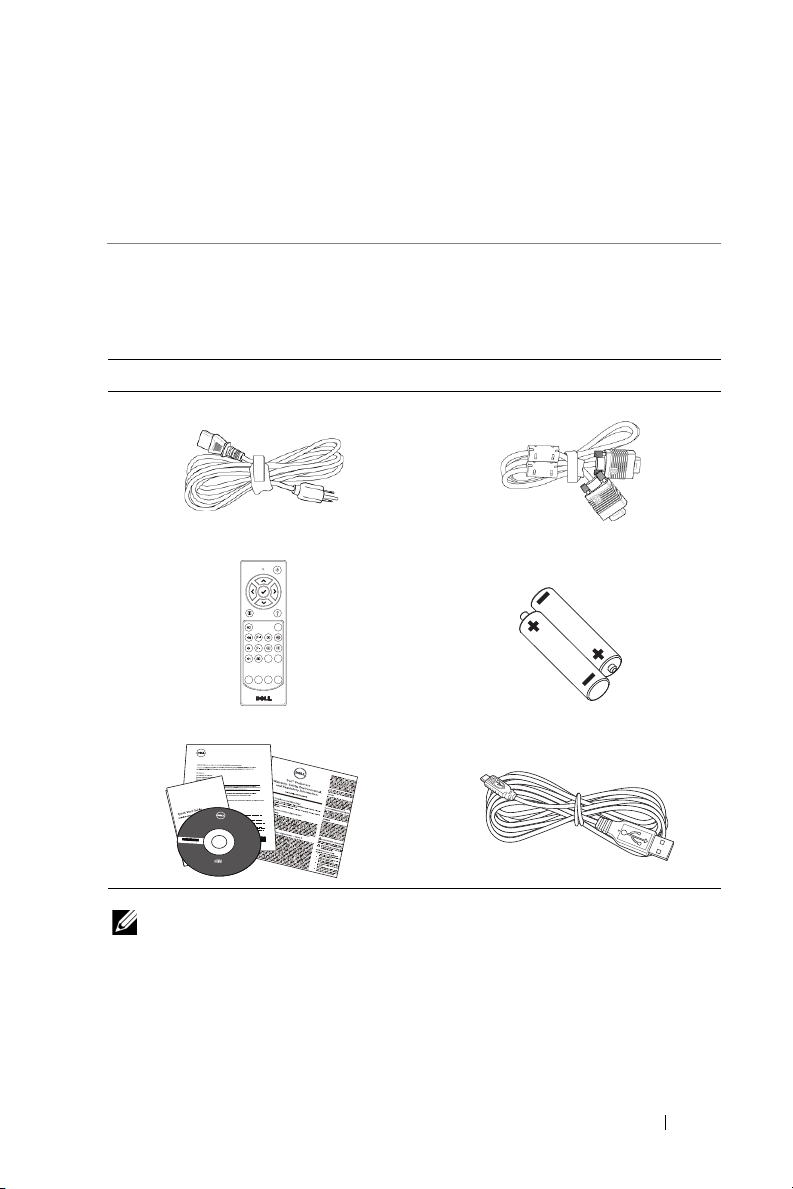
Your projector comes with all the items shown below. Ensure that you have
all the items, and contact Dell if anything is missing.
Projector Box Contents
Package Contents
Power cable 5 m VGA cable (VGA to VGA)
Remote control AAA Batteries (2 for S560/ S560T; 6
for S560P)
CD, User’s Guide, and Documentation
Informacion Importante
Dell Interactive Projector
S560/ S560P/ S560T
D
ocument
at
ion
Dell Interactive Projector S560P/ S560T
Dell Advanced Projector S560
C
ont
e
n
ts
:
•
Use
r
'
s
G
018TWNA01
ui
d
e
(S560/ S560P/ S560T)
• Setup Utility
(S560P/ S560T)
• Touch Setup Guide
(S560T)
.
d
e
v
r
e
s
e
r
s
t
h
g
i
r
l
l
A
P/
.
N 18TWN
c
Rev. A01
n
I
l
l
P/N 36.76G04G001
e
D
6
1
0
August 2016
2
©
Mad
e
in
C
h
ina
5 m Mini cable (USB-A to Mini B)
NOTE: 5 m Mini cable is only for S560P/ S560T.
About Your Dell Projector 5

Package Contents (S560P only)
Interactive pen (2 pcs)/
Pen tip cap (4 pcs)
Package Contents (S560T only)
Touch Unit 2 m DC to DC power cable (for
Passive Pen (2 pcs)/ Pen Nib(2 pcs) Touch unit Base Plate kit
Wrist strap (2pcs)
Touc h u nit)
6 About Your Dell Projector

Projector Top and Bottom View
1
4
2
3 5
6
Top View Bottom View
1 Infrared (IR) receivers
2 Power button
3 Camera
4 Lens
5 Lamp cover
6 Mounting holes for wall mount
A : Dell S560 series wall mount
B : Universal wall mount
NOTE:
•
Wall mount screw hole M4 X 4. Recommended torque < 15 kgf-cm.
•
Camera is only for S560P/ S560T.
About Your Dell Projector 7

Projector Connections
1 2 3 4 5 6 7 8 910
11
12131415
1 Mini USB (Mini Type B) 9 Microphone connector
2 VGA Out connector (monitor
loop through)
3 VGA In connector 11 Power cord connector
4 Composite Video connector 12 USB A connector
5 HDMI 2 connector 13 RJ 45 connector
6 HDMI 1 connector 14 RS232 connector
7 Audio Input connector 15 Touch Unit power
8 Audio RCA connector
CAUTION: Before you begin any of the procedures in this section,
follow the Safety Instructions as described on page 9.
NOTE: Touch Unit power jack is only for S560P/ S560T.
10 Audio Output connector
8 About Your Dell Projector

CAUTION: Safety Instructions
1
Do not use the projector near appliances that generate a lot of heat.
2
Do not use the projector in areas where there is an excessive amount of
dust. The dust may cause the system to fail and the projector will
automatically shutdown.
3
Ensure that the projector is mounted in a well-ventilated area.
4
Do not block the ventilation slots and openings on the projector.
5
Ensure the projector operates between ambient temperatures (5 °C to 40
°C).
6
Do not try to touch the ventilation outlet as it can become very hot after
the projector has been turned on or immediately after it is turned off.
7
Do not look into the lens while the projector is on as it may cause injury to
your eyes.
8
Do not place any objects near or in front of the projector or cover its lens
while the projector is on as the heat may cause the object to melt or burn.
9
Do not use alcohol to wipe the lens.
NOTE:
•
Do not attempt to wall mount the projector by yourself. It should be
installed by a qualified technician.
•
Recommended Projector Wall Mount Kit. For more information, see
the Dell Support website at
•
For more information, see the Safety Information that shipped with
dell.com/support
.
your projector.
•
The S560P/ S560T projector can only be used indoors.
About Your Dell Projector 9

Adjusting Image Size
0.66' (20cm)
0.73' (22.2 cm)
0.82' (25cm)
0.805' (24.5 cm)
0.913' (27.7 cm)
1.004' (30.6cm)
81" (205.7 cm)
85" (215.9 cm)
90" (228.6 cm)
95" (241.3cm)
89.1" (226.3 cm)
100" (254 cm)
Projector to screen distance
10 About Your Dell Projector

Adjusting Image Shape
H1
H2
L1
L2
Screen Size
Diagonal Width Height wide wide
inch mm inch mm inch mm inch mm inch mm inch mm inch mm
81 2057 71 1793 40 1009 6 145 45 1153 8 200 18 452
85 2159 74 1882 42 1059 6 154 48 1212 9 222 19 474
89.1 2263 78 1972 44 1110 6 163 50 1273 10 245 20 497
90 2286 78 1992 44 1121 7 165 51 1286 10 250 20 502
95 2413 83 2103 47 1183 7 177 54 1360 11 278 21 530
100 2540 87 2214 49 1245 7 188 56 1434 12 306 22 558
H1 H2
L1 L2
About Your Dell Projector 11

Remote Control
1
15
2
316
4
17
18
19
20
21
22
23
24
25
26
Calibrate
Touc h
Freeze
Blank
Info
Screen
Video
HDMI
VGA
Mode
5
6
7
8
9
10
11
12
13
14
1 Power Turns the projector on or off.
2 Up Press to navigate through the On-Screen
Display (OSD) Menu items.
3 Right Press to navigate through the On-Screen
Display (OSD) Menu items.
4 Down Press to navigate through the On-Screen
Display (OSD) Menu items.
12 About Your Dell Projector

5 Laser Point the remote control at the screen, press
and hold the laser button to activate the laser
light.
WARNING: Do not look at the laser
point when it is active. Avoid directing
the laser light on your eyes.
6 Freeze Press to pause the screen image, then press
"Freeze" again to unfreeze the image.
7 Brightness + Press to increase the brightness.
8 Keystone adjustment + Press to adjust image distortion caused by
tilting the projector (+/-40 degrees).
9 Brightness - Press to decrease the brightness.
10 Keystone adjustment -Press to adjust image distortion caused by
tilting the projector (+/-40 degrees).
11 Blank screen Press to toggle among displaying blank white
and black screens and return to presentation.
12 Info Press to display the projector information.
13 Video mode The projector has preset configurations that
are optimized for displaying data
(presentation slides) or video (movies, games,
etc.).
Press the Video Mode button to toggle
between Presentation mode, Bright mode,
Movie mode, sRGB, or Custom mode.
Pressing the Video Mode button once will
show the current display mode. Pressing the
Video Mode button again will switch
between modes.
14 HDMI Press to choose HDMI source.
15 Enter Press to confirm the selection.
16 Left Press to navigate through the On-Screen
Display (OSD) Menu items.
17 Menu Press to activate the OSD.
18 Source Press to switch between VGA, Composite,
HDMI-1, and HDMI-2 source.
About Your Dell Projector 13

19 Volume up Press to increase the volume.
20 Zoom + Press to increase the image.
21 Volume down Press to decrease the volume.
22 Zoom - Press to decrease the image.
23 Mute Press to mute or un-mute the projector
speaker.
24 Auto Adjust Press to auto adjust the displayed image.
25 Calibrate Touch Press to calibrate touch to adjust for better
accuracy.
NOTE:
•
Setup Utility is required.
•
Calibrate Touch is only for S560P/
S560T.
26 VGA Press to choose VGA source.
14 About Your Dell Projector
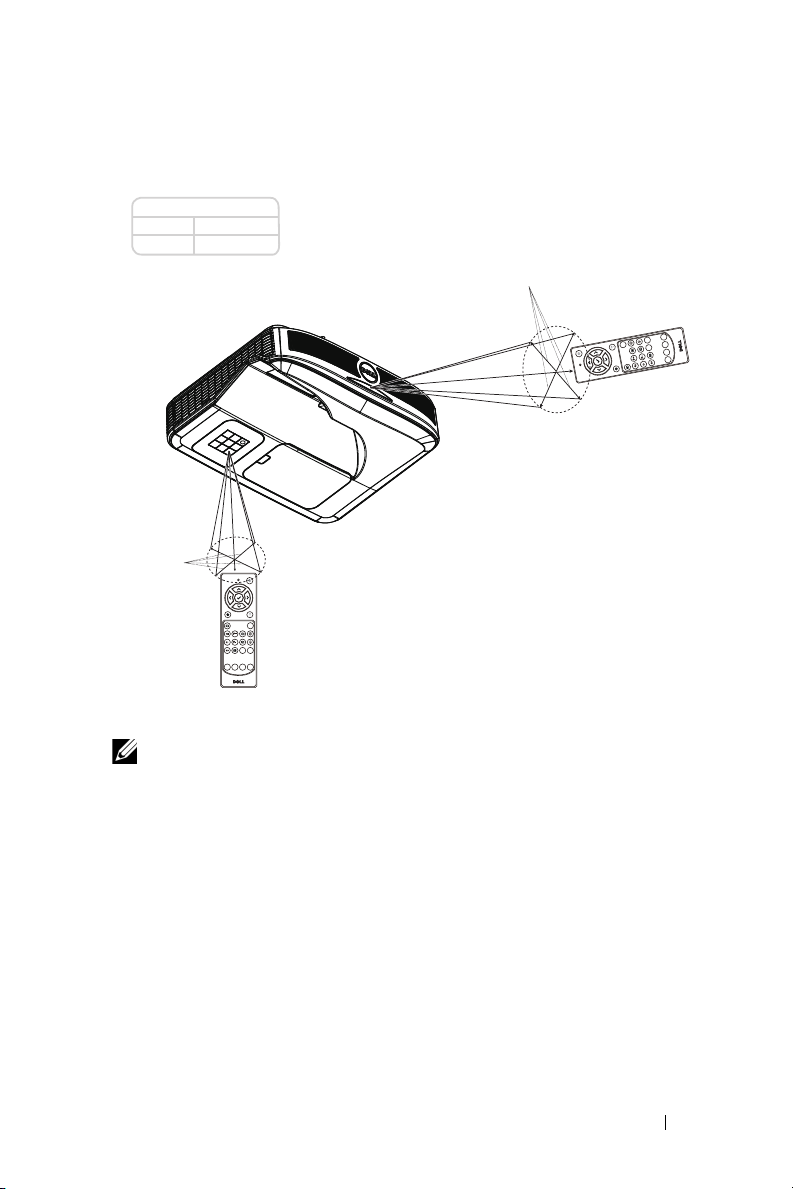
Remote Control Operating Range
Angle
Distance
Angle
Distance
Calibrate
Touch
VGA
Freeze
Blank
Screen
Video
Mode
Info
HDMI
Calibrate
Touch
VGA
Freeze
Blank
Screen
Video
Mode
Info
HDMI
Operating range
Angle
±30°
Distance
7 m/22.97 feet
NOTE: Actual operating range may slightly differ from the diagram.
Weak batteries will also prevent the remote control from properly
operating the projector.
About Your Dell Projector 15
 Loading...