How it Works
Log In / Sign Up
Buy Points
How it Works
FAQ
Contact Us
Questions and Suggestions
Users
Dell
Loading...
P
PP29L
PP30L
2
PP30LA
3
PP31L
29
PP32LA
PP32LB
PP33L
26
PP35L
PP36L
3
PP36S
2
PP36X
2
PP39L
55
PP40L
PP40S
PP41L
3
PP521
PPX
PR01X
13
PR09S
3
Precision
2
Precision 15 3551
3
Precision 15 7510
2
Precision 17 7710
PRECISION 210
Precision 220
2
Precision 3240
2
Precision 3240 Compact
Precision 330
3
Precision 340
21
Precision 3420
2
Precision 3430 Small Form Factor
158
Precision 3431
61
Precision 3431 SFF
Precision 3440
Precision 3440 SFF
Precision 350
19
Precision 3510
48
Precision 3520
56
Precision 3530
96
Precision 3540
65
Precision 3550
49
Precision 3551
50
Precision 3560
2
Precision 360
13
Precision 3620
Precision 3630
29
Precision 3630 MT
Precision 3630 Tower
88
Precision 3640 Tower
2
Precision 370
16
Precision 380
16
Precision 390
16
Precision 3930 Rack
95
PRECISION 400
Precision 410
2
Precision 420
3
Precision 450
3
Precision 470
14
Precision 490
15
PRECISION 530
3
Precision 5510
30
Precision 5520
50
Precision 5520-6270
Precision 5530
61
Precision 5540
5
Precision 5720
Precision 5720 AIO
41
Precision 5750
3
Precision 5810-0224
Precision 5810-4544
Precision 5820 Tower
81
Precision 610
Precision 620
21
PRECISION 650
16
Precision 670
24
Precision 690
13
Precision 7520
44
Precision 7520-8024
Precision 7550
5
Precision 7710
44
Precision 7720
44
Precision 7740
63
Precision 7750
7
Precision 7820 Tower
79
Precision 7920 Rack
94
Precision 7920 Tower
98
Precision DCD0
Precision M20
15
Precision M2300
36
Precision M2400
64
Precision M2800
30
Precision M3800
31
Precision M40
4
Precision M4300
20
Precision M4400
7
Precision M4500
68
Precision M4600
54
Precision M4700
58
Precision M4800
62
PRECISION M50
Loading...
Loading...
Nothing found
Precision 380
User Manual [ja]
137 pgs
4.72 Mb
0
User Manual [fr]
153 pgs
3.95 Mb
0
User Manual [en, es, fr]
186 pgs
10.45 Mb
0
User Manual [de]
152 pgs
4.13 Mb
0
User Manual [po]
151 pgs
4.36 Mb
0
User Manual [zh]
145 pgs
5.07 Mb
0
User Manual [in]
150 pgs
4.01 Mb
0
User Manual [pt]
150 pgs
4.06 Mb
0
User Manual [es]
154 pgs
4.06 Mb
0
User Manual [ko]
147 pgs
4.59 Mb
0
User Manual [en, ru, pl]
372 pgs
22.69 Mb
0
User Manual [en, de, es, fr, it]
230 pgs
13.1 Mb
0
User Manual
46 pgs
17.43 Mb
0
User Manual [zh]
138 pgs
17.87 Mb
0
User Manual [zh]
136 pgs
9.1 Mb
0
User Manual [zh]
146 pgs
5.24 Mb
0
Table of contents
Loading...
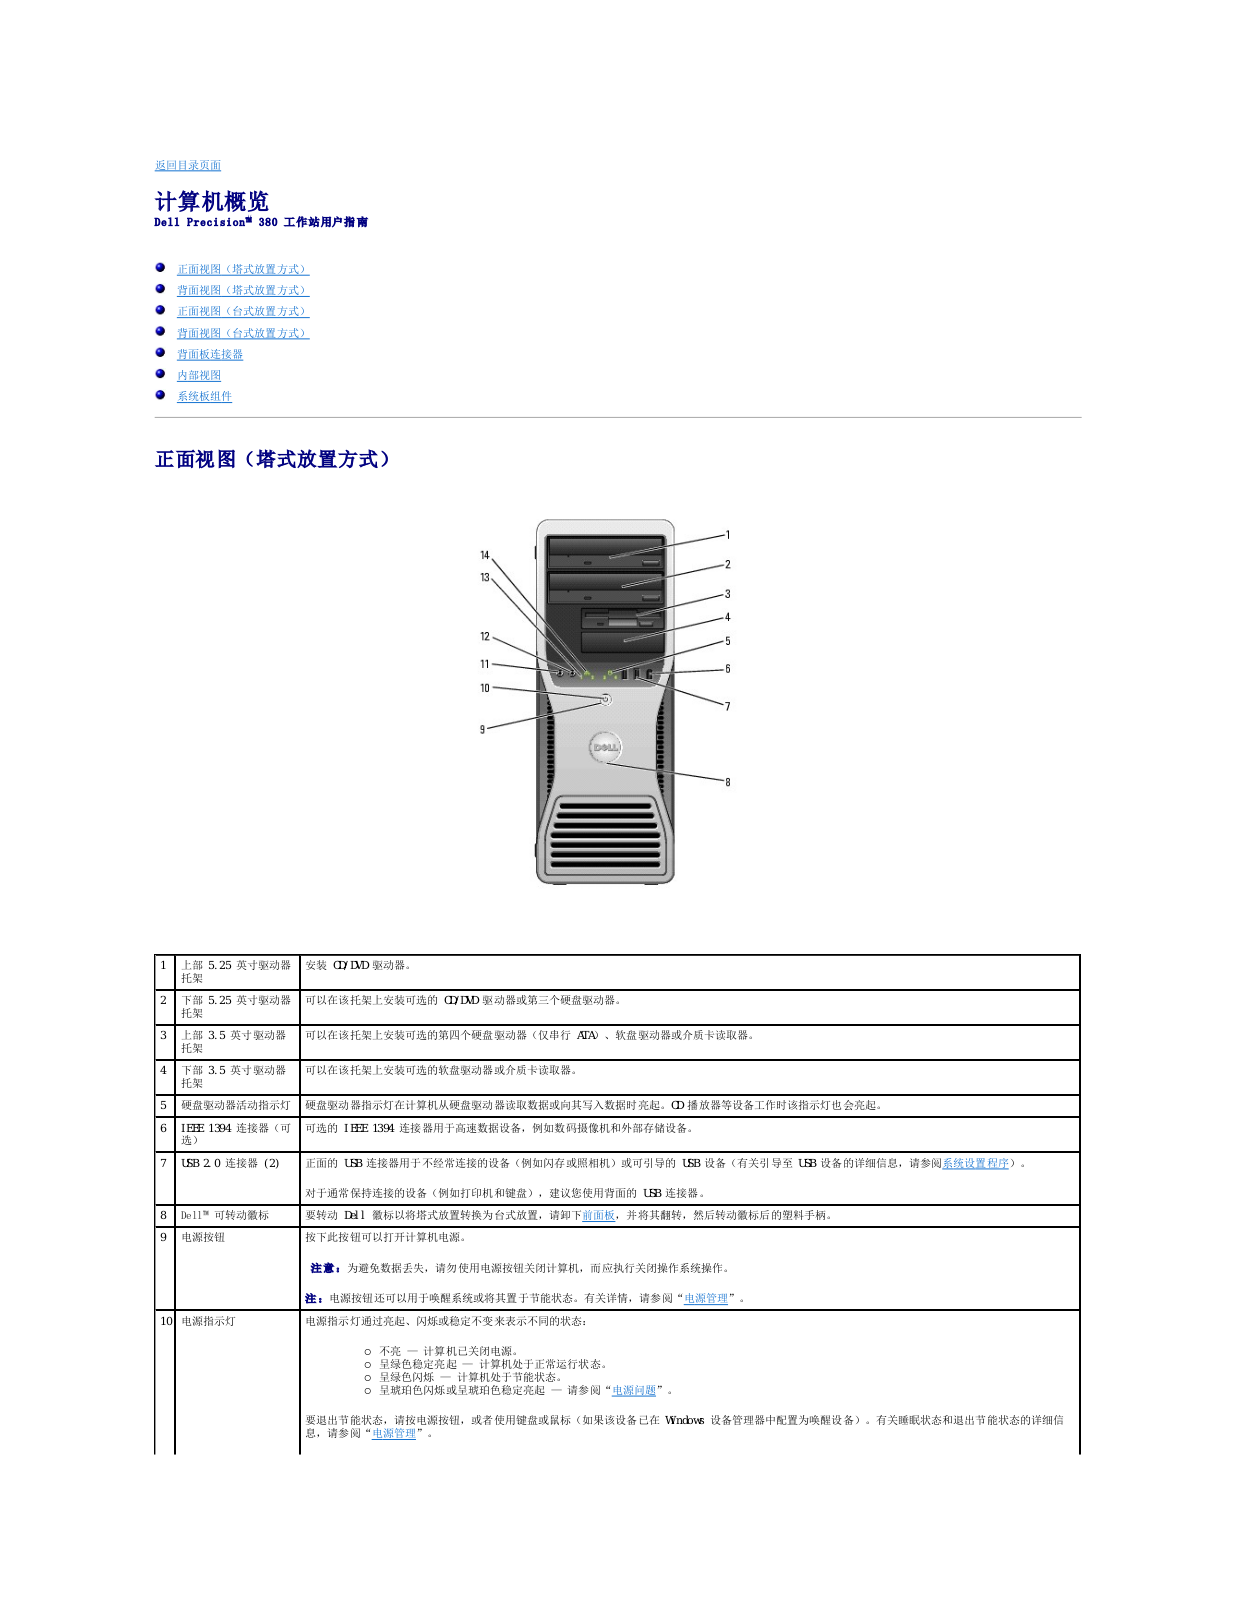
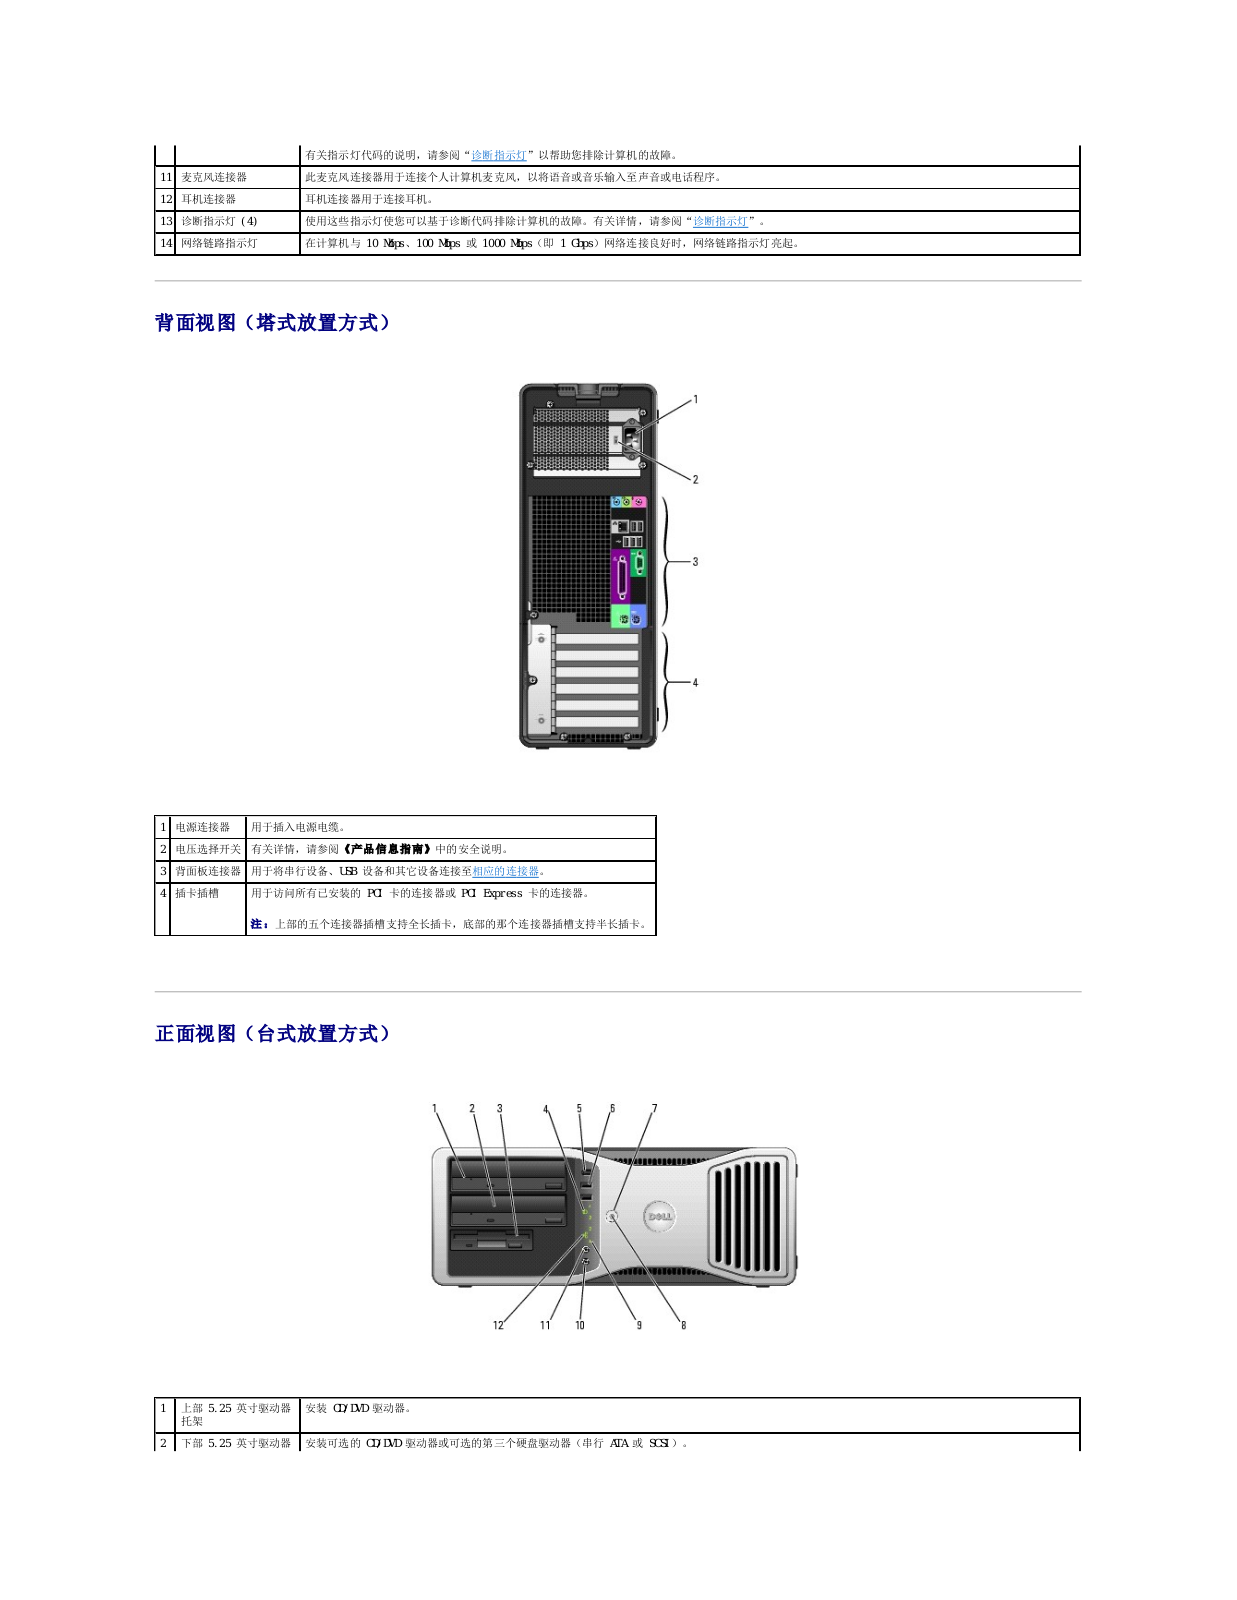
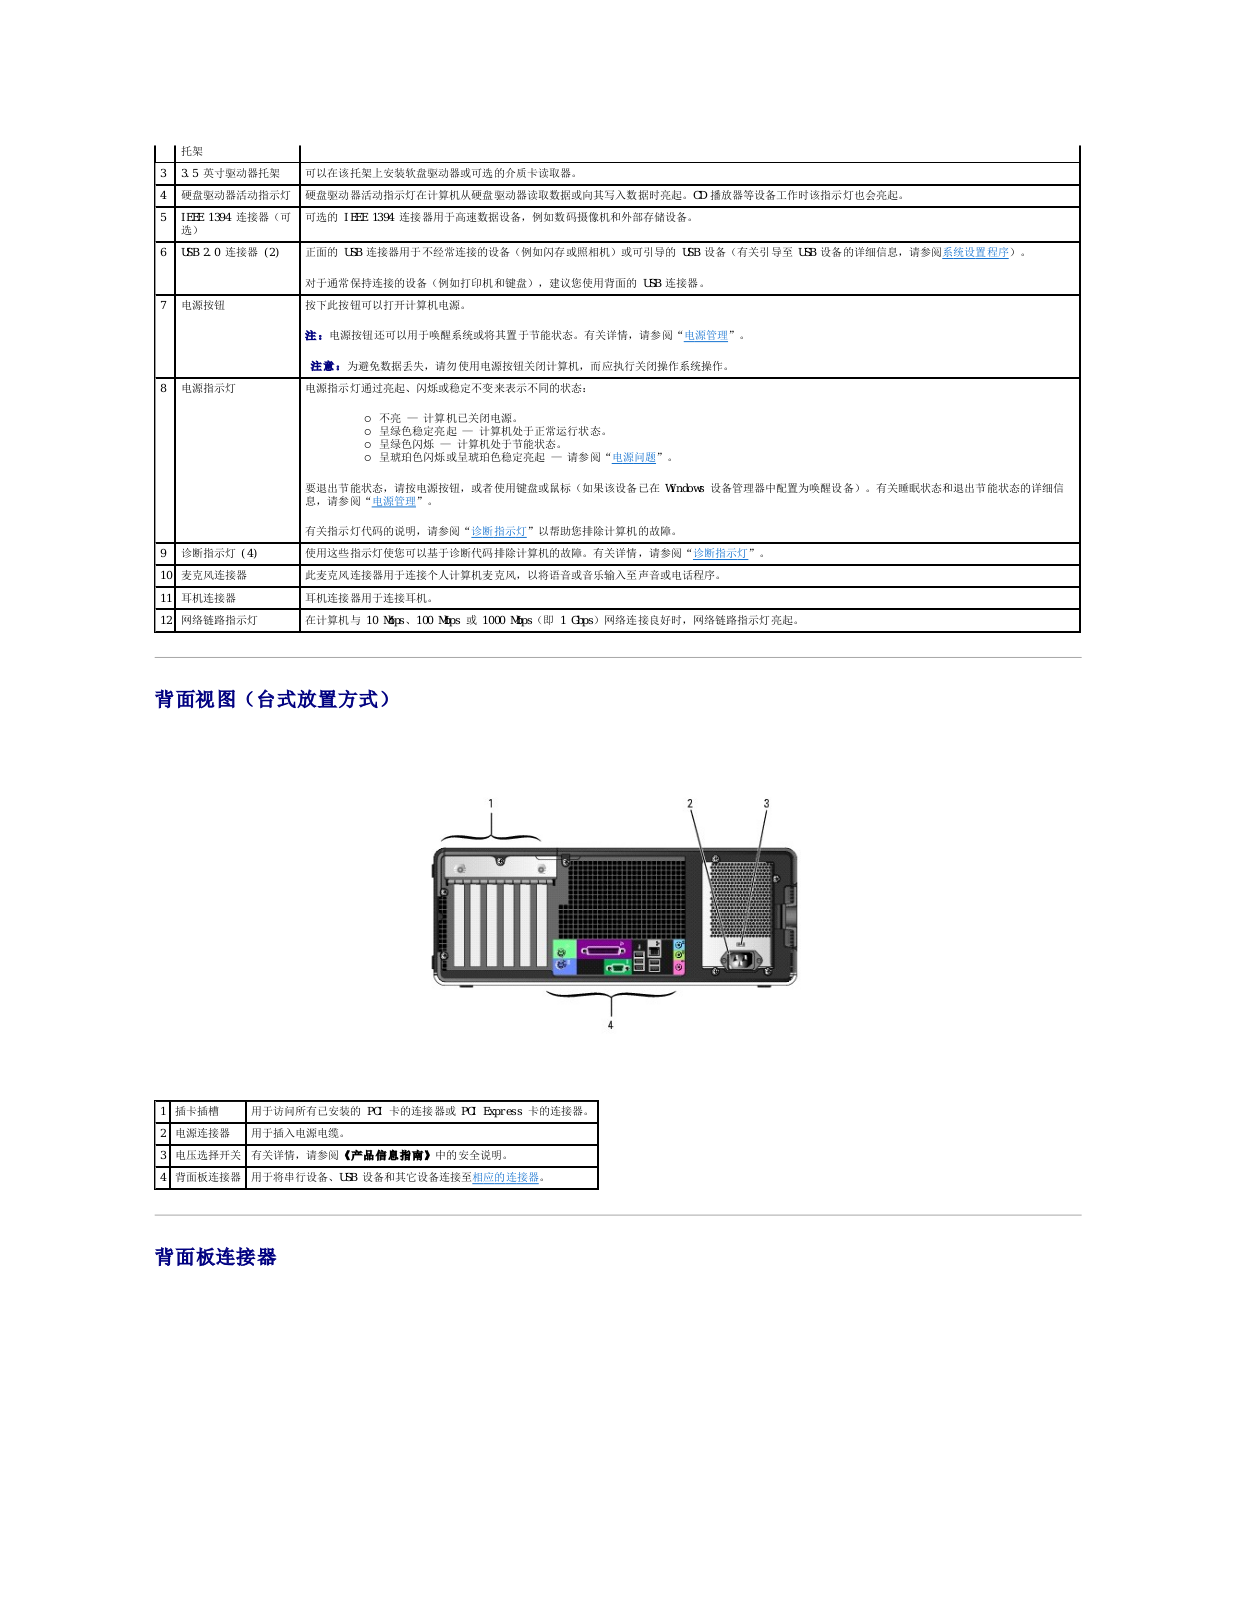
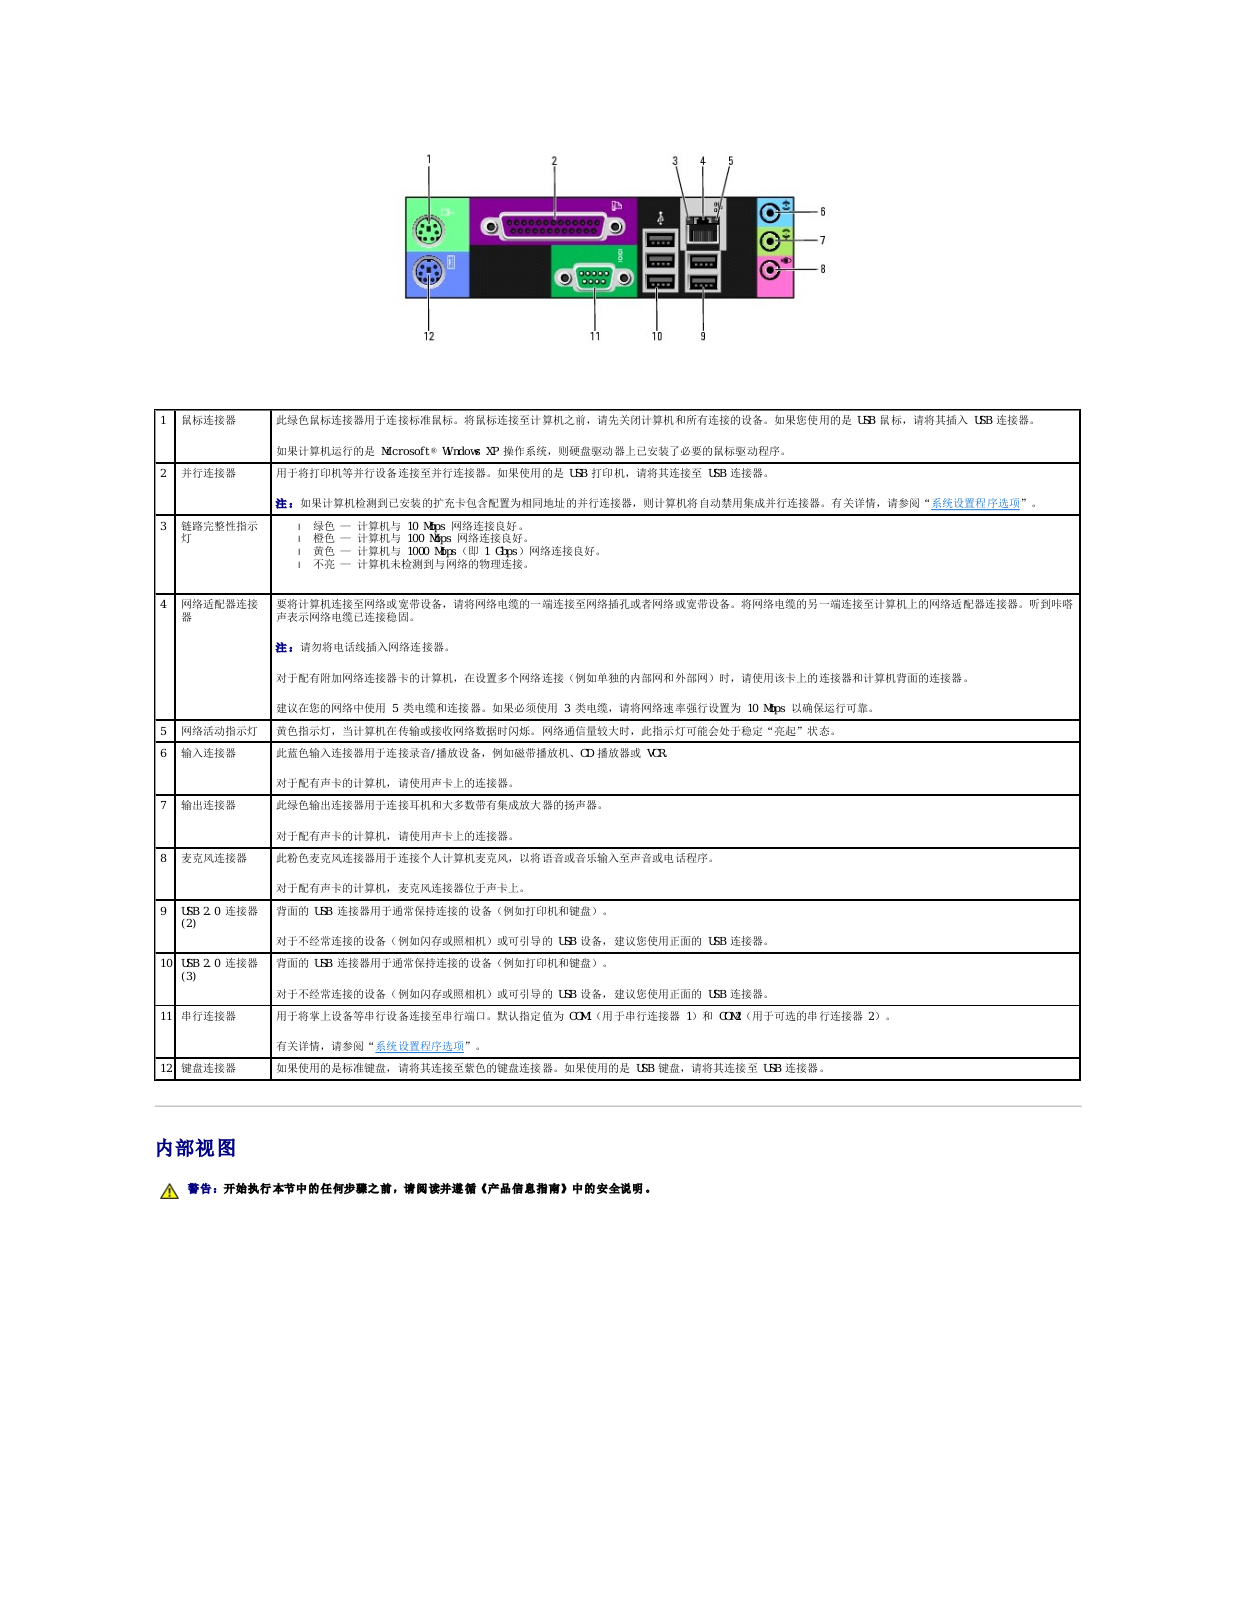
Dell Precision 380 User Manual [zh]
...
Dell User Manual [zh]
Download
Specifications and Main Features
Frequently Asked Questions
User Manual
Download
Loading...
+
115
hidden pages
Unhide
You need points to download manuals.
1 point = 1 manual.
You can buy points or you can get point for every manual you upload.
Buy points
Upload your manuals
 Loading...