

Page 1
53-1001803-01
Table: 1-1
Column ID
27
28
29
30
31
Rail to Rail
depth (inches)
27-27.5
27.5-28.5
28.5-29.5
29.5-30.5
30.5-31
*53-1001803-01*
January 31, 2010
Installing the DCX-4S Shipping Brackets
Use the following instructions to install the DCX-4S shipping brackets. These brackets ar e required when DCX-4S is installed with
the intent to s hip preinstalled in a cabinet .
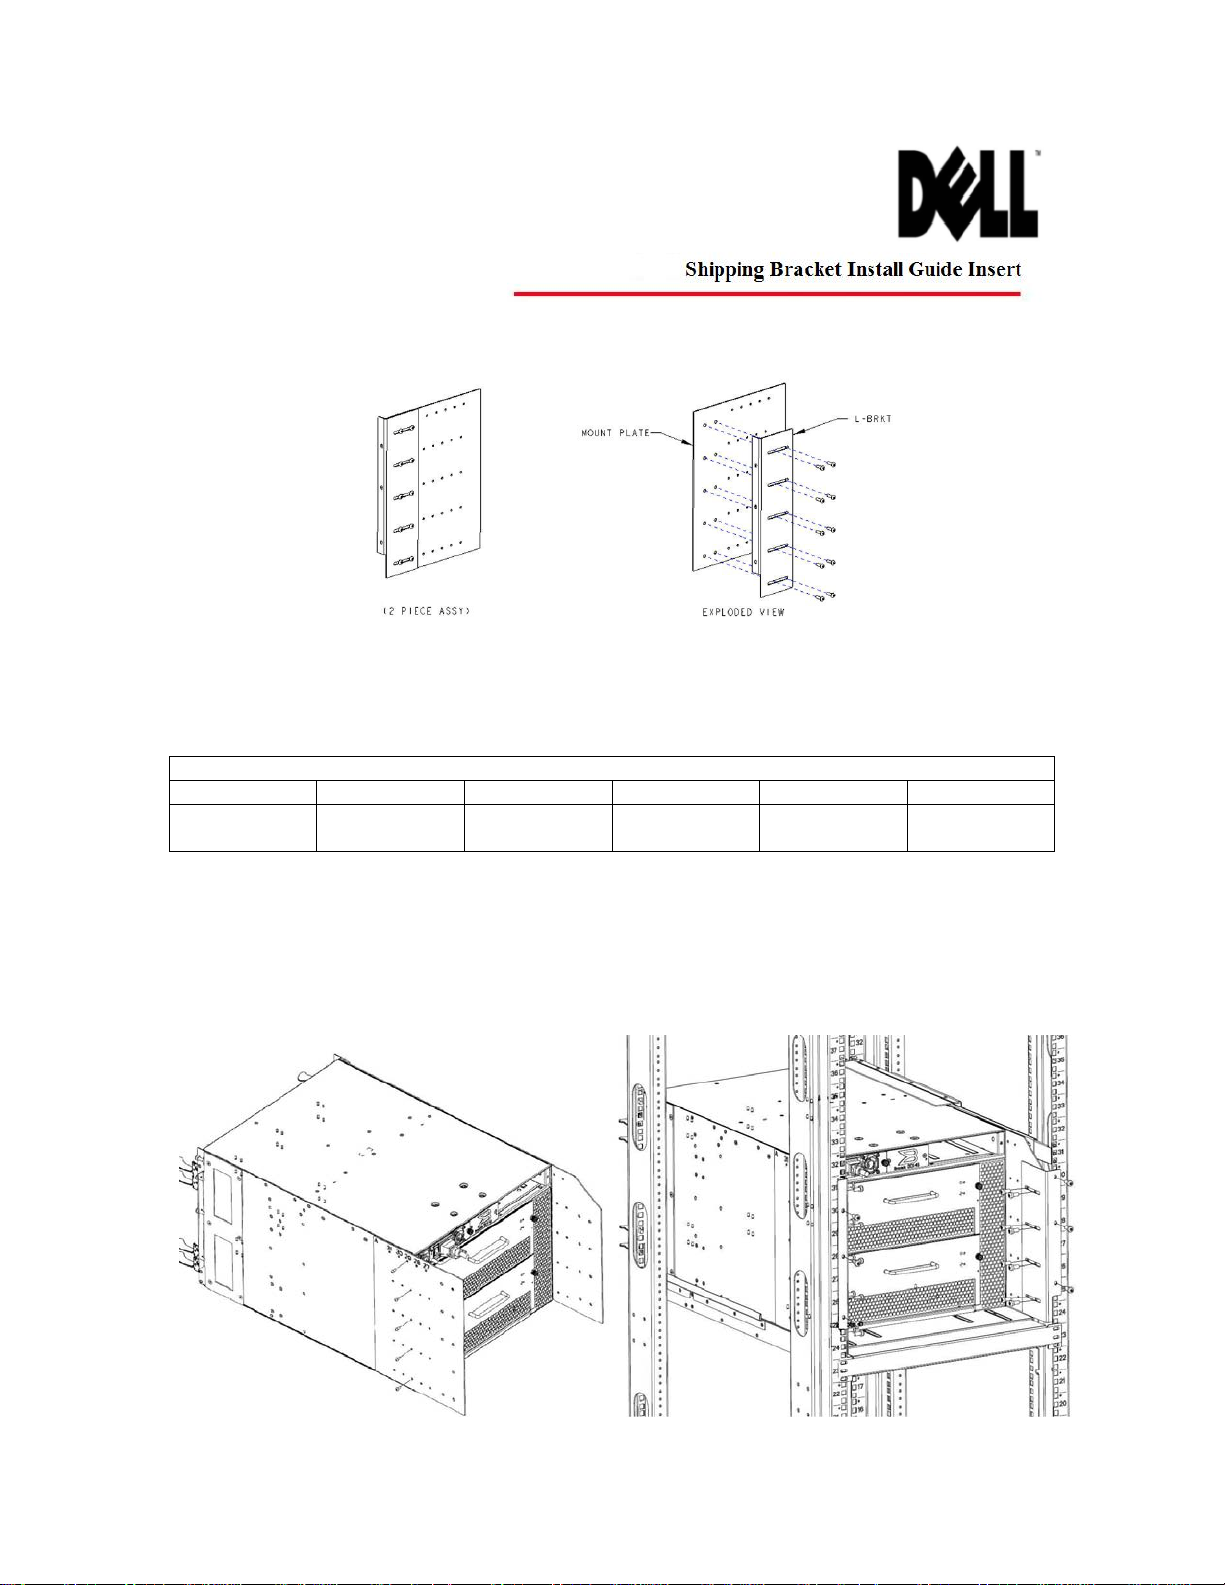
1. Prior to installing the chassis into the cabinet, remove the 10 flat head 6-32 fan bay attach screws located on both the left
and right side chassis panels. (see Fig ure 1-1)
2. Install both s ide plates using the 10 pan head 6-32 screws supplied with the kit, making sure to note that the left and right
side plates are different. The left side and right side plates are part marked with “A” and “B” respec tively. (see F igure 1-1)
NOTE: The side plates have 5 sets of discrete holes, part marked 27 through 31. Use the holes that correspond with the
cabinet’s rail to rail depth (see Table: 1-1). Torque the screws to 10 in/lbs.
3. Install the chassis to the cabinet based on the instructions outlined in the Port Side Exhaust Kit Inst allation Procedure
document number 53-1001181-XX.
4. Install the clip nuts or nut retainers. NOTE: The clip nuts are used with cabinets that utilized square holes, and nut retainers
are used with cabinets that utilize round holes. The locations of the clip nuts or nu t retainers match the location for the port
side rack brackets outlined in 53-1001181-XX.
5. Secure the L-brackets to the cabinet rails using the 6 10-32 pan head screws with square cone washers supplied with the
kit, making sure to notice the left and right side brackets are different. The left side and righ t side L-brackets are part
marked with “A” and “B” respectively. (see Figure 1-2) Torque the screws to 32 in/lbs.
6. Once the L-brackets are mounted to the rails they can be secured to the side plates using the 18 10-32 pan head screws with
square cone washers supplied with the kit. (see Fig ure 1-2) Torque the screws to 32 in/lbs.
Figure 1-0: Shipping brackets stand alo ne (left side only)
Figure 1-1 Figure 1-2
PowerConnect B-DCX-4S Shipping Bracket Install Guide Insert
DELL
 Loading...