

Page 1

Dell™ Latitude™ D631
Quick Reference Guide
Model PP18L
www.dell.com | support.dell.com
Page 2

Notes, Notices, and Cautions
NOTE: A NOTE indicates important information that helps you make better use of your computer.
NOTICE: A NOTICE indicates either potential damage to hardware or loss of data and tells you how to avoid the problem.
CAUTION: A CAUTION indicates a potential for property damage, personal injury, or death.
Abbreviations and Acronyms
For a complete list of abbreviations and acronyms, see the Glossary in your
If you purchased a Dell™ n Series computer, any references in this document to Microsoft
User’s Guide
.
®
Windows®
operating systems are not applicable.
NOTE: Some features or media may be optional and may not ship with your computer. Some features or media may not
be available in certain countries.
___________________
Information in this document is subject to change without notice.
© 2007 Dell Inc. All rights reserved.
Reproduction in any manner whatsoever without the written permission of Dell Inc. is strictly forbidden.
Trademarks used in this text: Dell, the DELL logo, Latitude, Wi-Fi Catcher, ExpressCharge are trademarks of Dell Inc.; AMD and combinations
thereof are trademarks of Advanced Micro Devices, Inc; Windows Vista is a trademark and Microsoft Outlook and Windows are registered
trademarks of Microsoft Corporation.
Other trademarks and trade names may be used in this document to refer to either the entities claiming the marks and names or their products.
Dell Inc. disclaims any proprietary interest in trademarks and trade names other than its own.
PP18L
Model
March 2007 P/N UY447 Rev. A00
Page 3

Contents
Finding Information . . . . . . . . . . . . . . . . . . . . . . . . . . . . . . . . 5
Setting Up Your Computer
About Your Computer
Using a Battery
Troubleshooting
. . . . . . . . . . . . . . . . . . . . . . . . . . . . . . . . 9
. . . . . . . . . . . . . . . . . . . . . . . . . . . . . . . . . . 12
. . . . . . . . . . . . . . . . . . . . . . . . . . . . . . . . . 15
. . . . . . . . . . . . . . . . . . . . . . . . . . . . . 8
Contents 3
Page 4

4 Contents
Page 5
Finding Information
NOTE: Some features or media may be optional and may not ship with your computer. Some features or media may
not be available in certain countries.
NOTE: Additional information may ship with your computer.
What Are You Looking For? Find It Here
• A diagnostic program for my computer
• Drivers for my computer
• My device documentation
• Notebook System Software (NSS)
• Warranty information
• Terms and Conditions (U.S. only)
• Safety instructions
• Regulatory information
• Ergonomics information
• End User License Agreement
Drivers and Utilities Media
NOTE: The Drivers and Utilities media may be optional
and may not ship with your computer.
Documentation and drivers are already installed on
your computer. You can use the media to reinstall
drivers and to run the Dell Diagnostics (see "Dell
Diagnostics" on page 17).
Readme files may be
included on your media
to provide last-minute
updates about technical
changes to your
computer or advanced
technical-reference
material for technicians
or experienced users.
NOTE: Drivers and documentation updates can be
found at support.dell.com.
NOTE: The Drivers and Utilities media may be optional
and may not ship with your computer.
Dell™ Product Information Guide
•How to remove and replace parts
• Specifications
• How to configure system settings
• How to troubleshoot and solve problems
User’s Guide
Microsoft Windows Help and Support Center
1
Click
Start
or
→
Help and Support→ Dell
User and System Guides
2
Click the
User’s Guide
→
System Guides
for your computer.
Quick Reference Guide 5
.
Page 6
What Are You Looking For? Find It Here
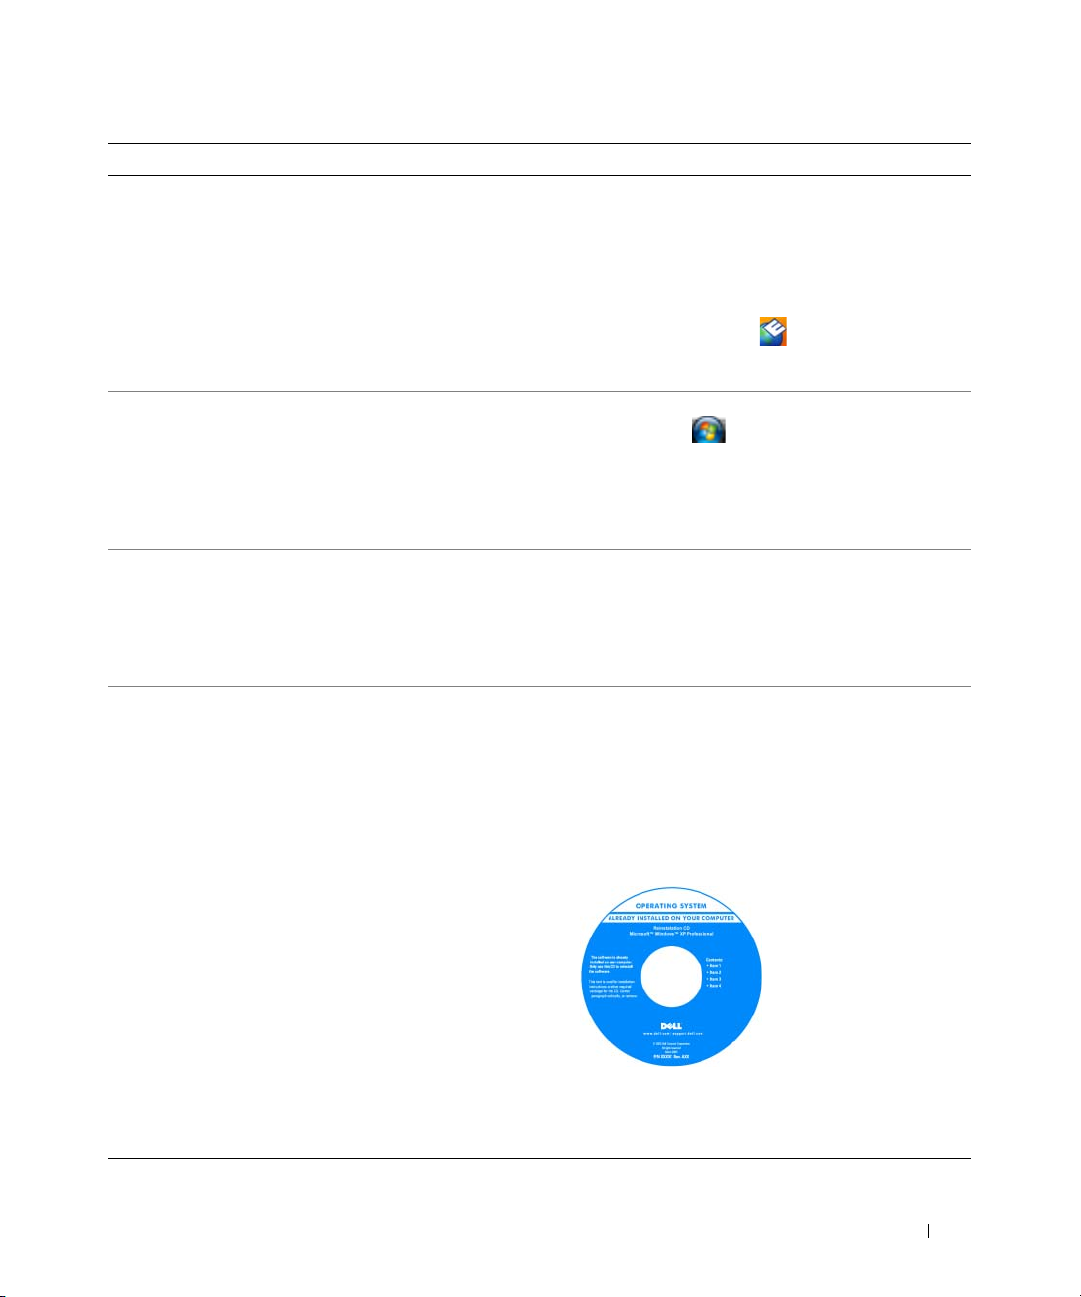
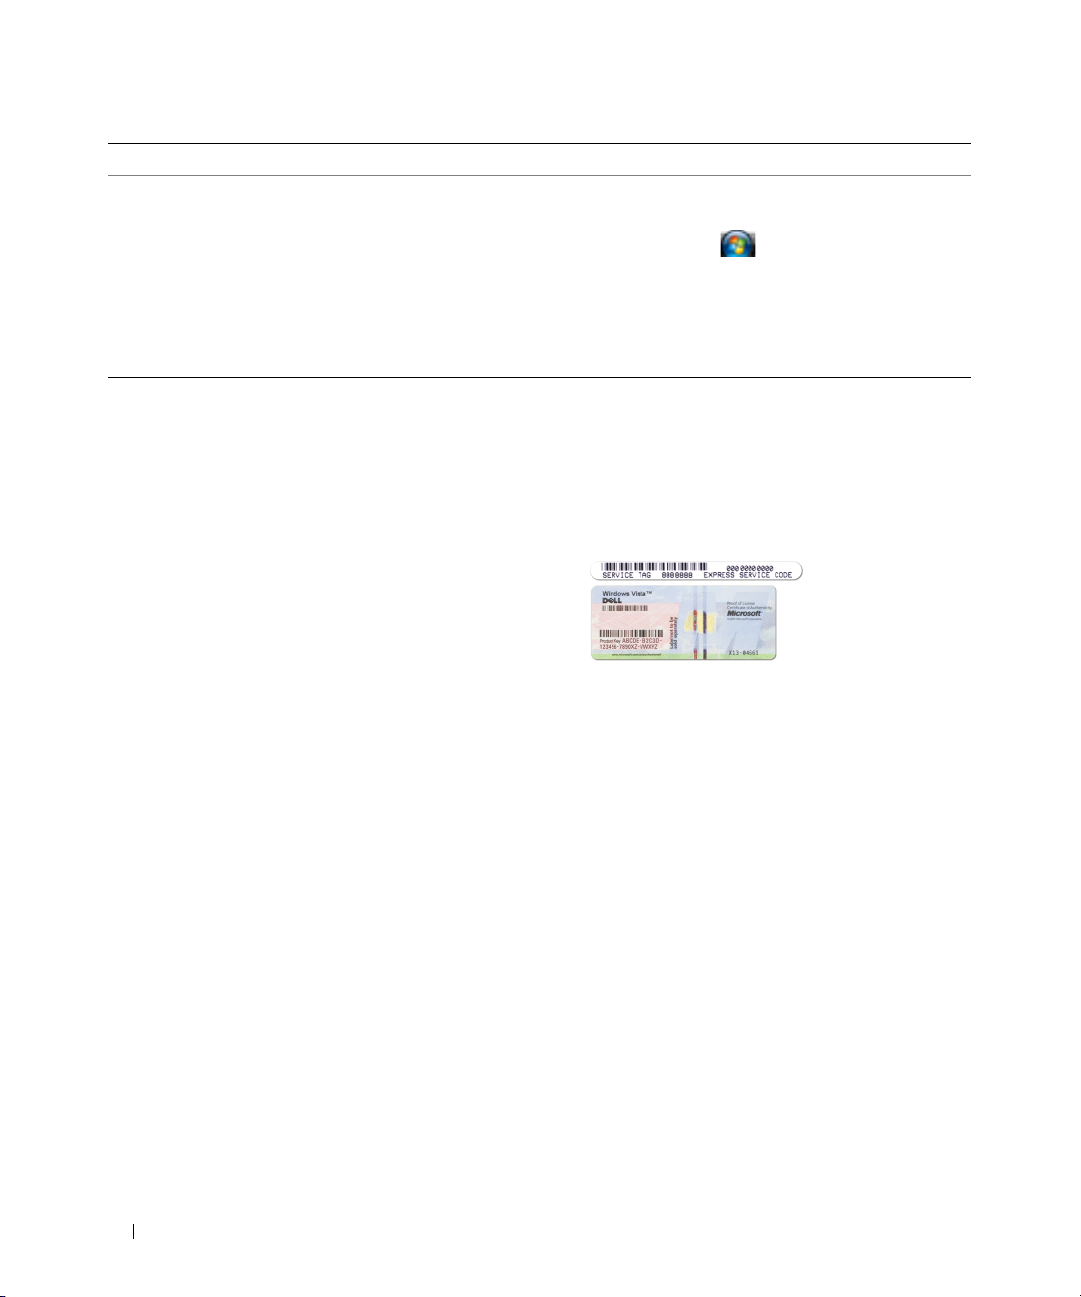
• Service Tag and Express Service Code
• Microsoft Windows License Label
Service Tag and Microsoft® Windows® License
These labels are located on your computer.
• Use the Service Tag to identify your computer when
you use
• Enter the Express Service Code to direct your call
when contacting support.
NOTE: The Microsoft Windows License label has been
redesigned with a hole, or "security portal," as an
increased security measure.
• Solutions — Troubleshooting hints and tips, articles from
technicians, online courses, and frequently asked questions
• Community — Online discussion with other
Dell customers
• Upgrades — Upgrade information for components, such as
memory, the hard drive, and the operating system
• Customer Care — Contact information, service call and
order status, warranty, and repair information
• Service and support — Service call status and support
history, service contract, online discussions with technical
support
• Reference — Computer documentation, details on my
computer configuration, product specifications, and
white papers
• Downloads — Certified drivers, patches, and
software updates
• Notebook System Software (NSS)— If you reinstall the
operating system for your computer, you should also
reinstall the NSS utility. NSS provides critical updates for
your operating system and support for Dell™ 3.5-inch USB
floppy drives, AMD™ processors, optical drives, and USB
devices. NSS is necessary for correct operation of your Dell
computer. The software automatically detects your
computer and operating system and installs the updates
appropriate for your configuration.
Dell Support Website — support.dell.com
NOTE: Select your region or business segment to view
the appropriate support site.
To download Notebook System Software:
1
Go to
support.dell.com
business segment, and enter your Service Tag.
2
Select
3
Click your operating system and search for the
keyword
NOTE: The support.dell.com user interface may vary
depending on your selections.
support.dell.com
Drivers & Downloads
Notebook System Software
or contact support.
, select your region or
and click Go.
.
6 Quick Reference Guide
Page 7
What Are You Looking For? Find It Here
• Software upgrades and troubleshooting hints — Frequently
asked questions, hot topics, and general health of your
computing environment
Dell Support Utility
The Dell Support Utility is an automated upgrade
and notification system installed on your computer.
This support provides real-time health scans of your
computing environment, software updates, and
relevant self-support information. Access the Dell
Support Utility from the
more information, see "Dell Support Utility" in your
User’s Guide
• How to use Windows operating systems
• How to work with programs and files
• How to personalize my desktop
Windows Help and Support Center
1
Click
Start
2
Type a word or phrase that describes your problem
and click the arrow icon.
3
Click the topic that describes your problem.
4
Follow the instructions on the screen.
• Information on network activity, the Power Management
Wizard, hotkeys, and other items controlled by
Dell QuickSet.
Dell QuickSet Help
To view
Dell QuickSet Help, right-click the QuickSet
icon in the Microsoft
For more information on Dell QuickSet,
see "Dell™ QuickSet" in your User’s Guide.
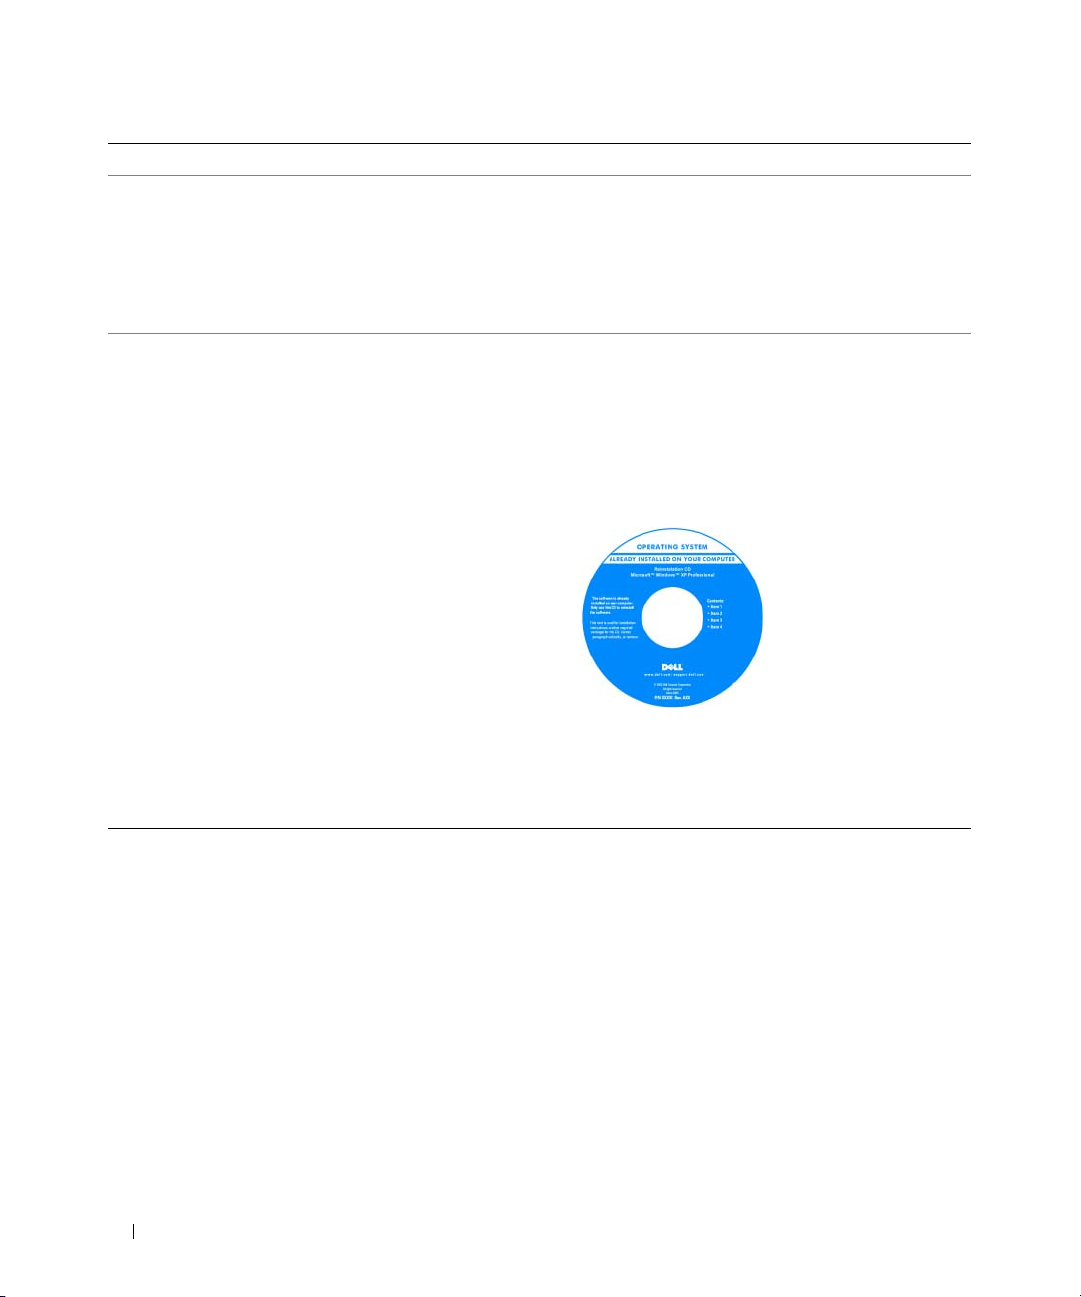
• How to reinstall my operating system
Operating System CD
NOTE: The Operating System CD may be optional and
may not ship with your computer.
The operating system is already installed on your
computer. To reinstall your operating system, use the
Operating System CD. See "Reinstalling Microsoft
Windows
icon in the taskbar. For
.
or
→
Help and Support.
®
Windows® taskbar.
®
XP" in your User’s Guide.
After you reinstall your
operating system, use
the optional Drivers and
Utilities media to
reinstall drivers for the
devices that came with
your computer.
Your operating system
product key label is
located on your computer.
®
NOTE: The color of your CD varies based on the
operating system you ordered.
Quick Reference Guide 7
Page 8
Setting Up Your Computer
CAUTION: Before you begin any of the procedures in this section, follow the safety instructions in the
Product Information Guide
1
Unpack the accessories box.
2
Set aside the contents of the accessories box, which you will need to complete the setup of your computer.
The accessories box also contains user documentation and any software or additional hardware (such
as PC Cards, drives, or batteries) that you have ordered.
3
Connect the AC adapter to the AC adapter connector on the computer and to the electrical outlet.
.
4
Open the computer display and press the power button to turn on the computer (see "Front View" on
page 9).
NOTE: It is recommended that you turn on and shut down your computer at least once before you install any cards
or connect the computer to a docking device or other external device, such as a printer.
8 Quick Reference Guide
Page 9
About Your Computer
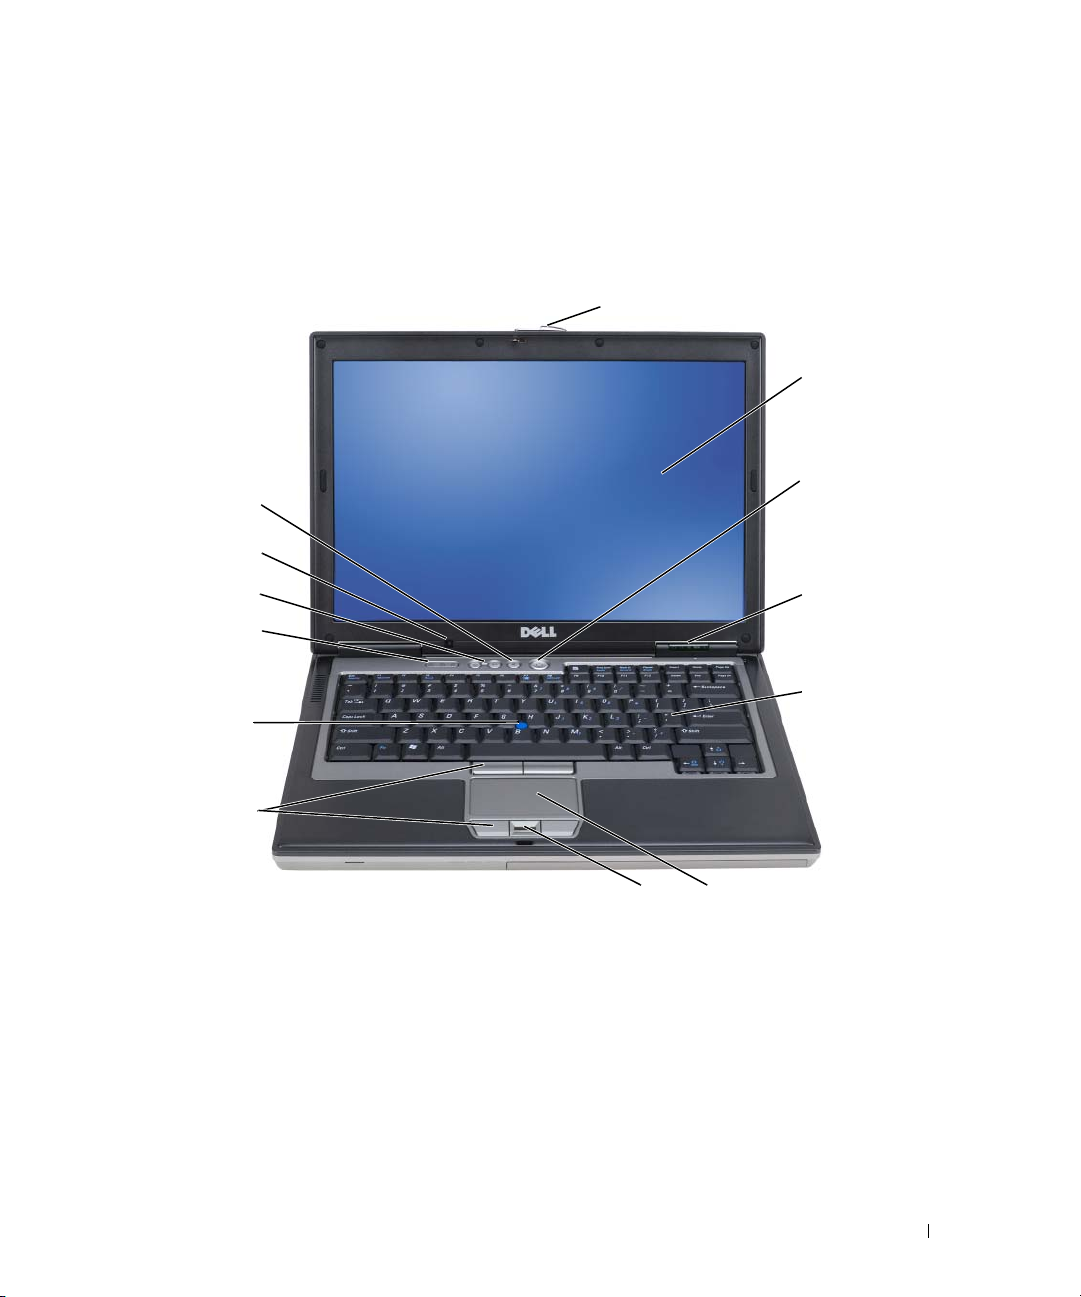
Front View
13
12
1
2
3
11
10
9
8
7
1 display latch 2 display 3 power button
4 device status lights 5 keyboard 6 touch pad
7 fingerprint reader (optional) 8 touch-pad/track-stick buttons 9 track stick
10 keyboard status lights 11 volume control buttons 12 ambient light sensor
13 mute button
6
4
5
Quick Reference Guide 9
Page 10
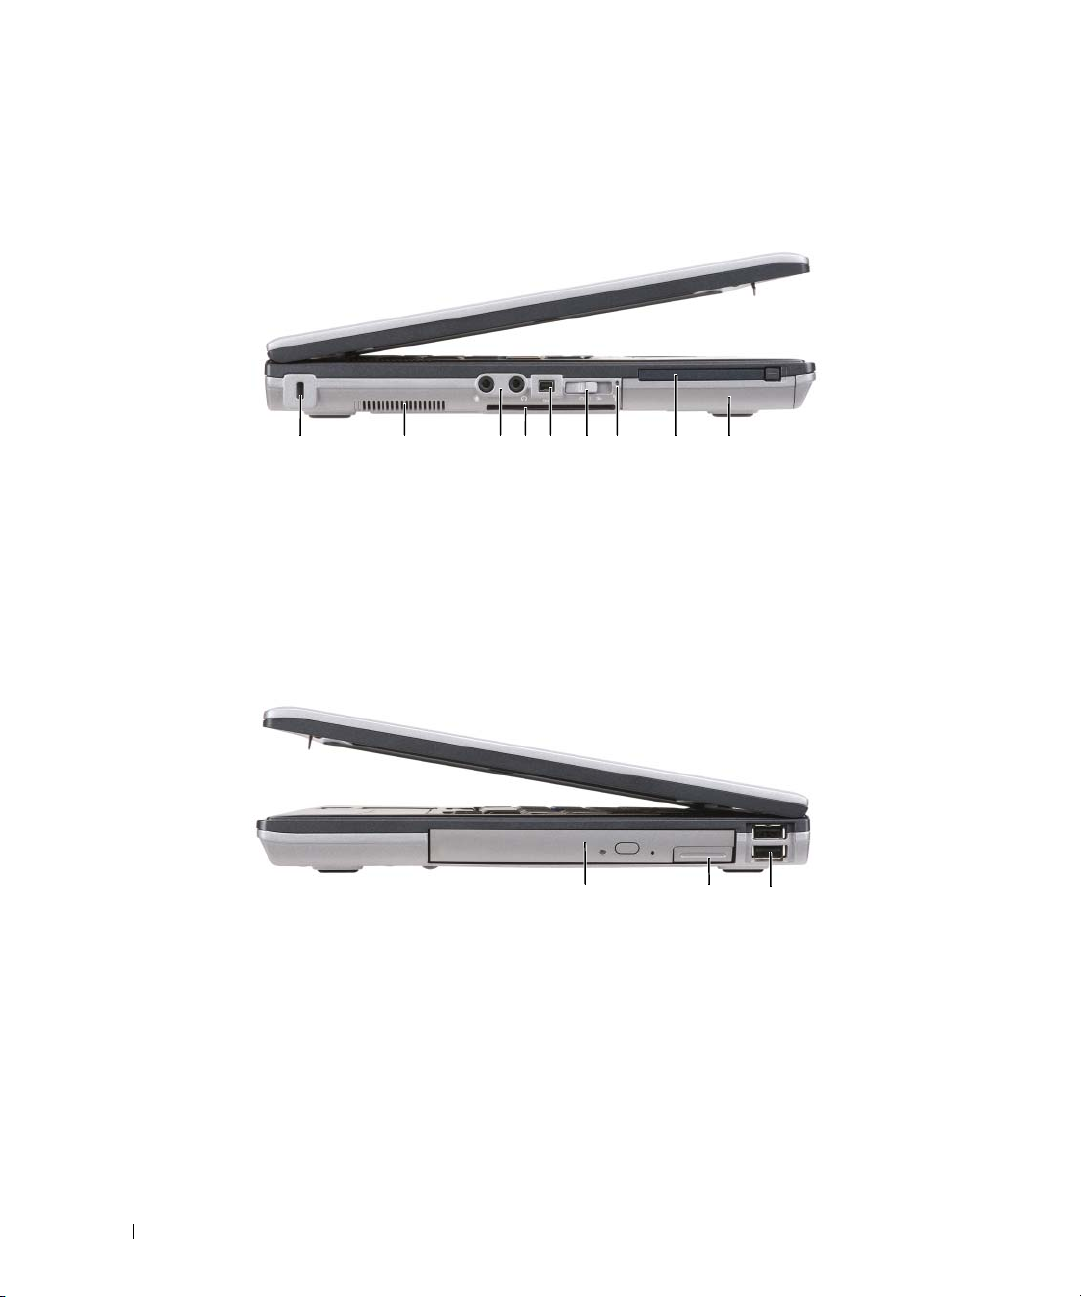
Left Side View
1 2 3 65 7 84 9
1 security cable slot 2 air vent 3 audio connectors (2)
4 smart card slot (with blank) 5 1394 connector 6 wireless switch
7 Wi-Fi Catcher™ light 8 PC Card slot 9 hard drive
Right Side View
1 optical drive in media bay 2 media-bay device latch release 3 USB connectors (2)
10 Quick Reference Guide
1
2
3
Page 11
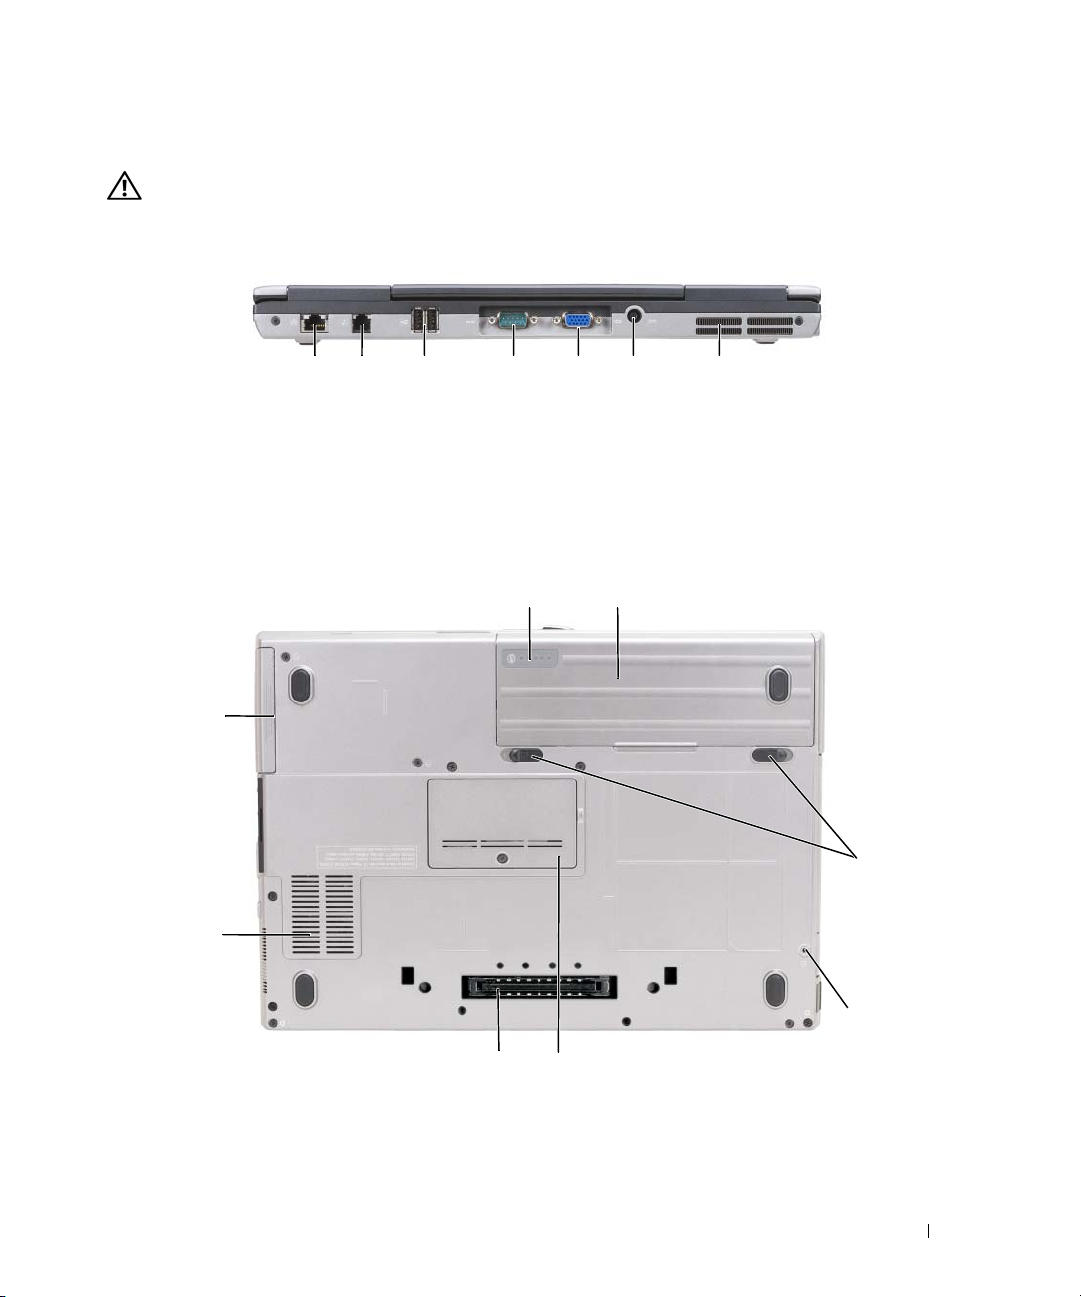
Back View
CAUTION: Do not block, push objects into, or allow dust to accumulate in the air vents. Do not store your
computer in a low-airflow environment, such as a closed briefcase, while it is running. Restricting the airflow
can damage the computer or cause a fire.
1 2 63 4 75
1 network connector (RJ-45) 2 modem connector (RJ-11) 3 USB connectors (2)
4 serial connector 5 video connector 6 AC adapter connector
7 air vents
Bottom View
1
8
7
6
1 battery charge gauge/health gauge 2 battery 3 battery-bay latch release(2)
4 device locking screw (if present) 5 memory module cover 6 docking-device connector
7 air vent 8 hard drive
2
3
4
5
Quick Reference Guide 11
Page 12
Using a Battery
Battery Performance
NOTE: For information about the Dell warranty for your computer, see the Product Information Guide or separate
paper warranty document that shipped with your computer.
For optimal computer performance and to help preserve BIOS settings, operate your Dell™ portable
computer with the main battery installed at all times. One battery is supplied as standard equipment in
the battery bay.
NOTE: Because the battery may not be fully charged, use the AC adapter to connect your new computer to an
electrical outlet the first time you use the computer. For best results, operate the computer with the AC adapter
until the battery is fully charged. To view battery charge status, click Start→ Settings→ Control Panel→
Power Options→ Power Meter.
NOTE: Battery operating time (the time the battery can hold a charge) decreases over time. Depending on how
often the battery is used and the conditions under which it is used, you may need to purchase a new battery during
the life of your computer.
Battery operating time varies depending on operating conditions. You can install an optional second
battery in the media bay to significantly increase operating time.
Operating time is significantly reduced when you perform operations including, but not limited to,
the following:
•Using optical drives
• Using wireless communications devices, PC Cards, ExpressCards, media memory cards, or USB devices
• Using high-brightness display settings, 3D screen savers, or other power-intensive programs such as
complex 3D graphics applications
• Running the computer in maximum performance mode (see "Configuring Power Management
Settings" in your
User’s Guide
).
NOTE: It is recommended that you connect your computer to an electrical outlet when writing to a CD or DVD.
You can check the battery charge before you insert the battery into the computer (see "Checking the
Battery Charge" on page 13). You can also set power management options to alert you when the battery
charge is low
CAUTION: Using an incompatible battery may increase the risk of fire or explosion. Replace the battery only
with a compatible battery purchased from Dell. The lithium-ion battery is designed to work with your Dell
computer. Do not use a battery from other computers with your computer.
CAUTION: Do not dispose of batteries with household waste. When your battery no longer holds a charge, call
your local waste disposal or environmental agency for advice on disposing of a lithium-ion battery. See "Battery
Disposal" in the
CAUTION: Misuse of the battery may increase the risk of fire or chemical burn. Do not puncture, incinerate,
disassemble, or expose the battery to temperatures above 60°C (140°F). Keep the battery away from children.
Handle damaged or leaking batteries with extreme care. Damaged batteries may leak and cause personal injury
or equipment damage.
(see "Configuring Power Management Settings" in your
Product Information Guide
.
User’s Guide
).
12 Quick Reference Guide
Page 13
Checking the Battery Charge
The Dell QuickSet Battery Meter, the Microsoft Windows Power Meter window and icon, the battery
charge gauge and health gauge, and the low-battery warning provide information on the battery charge.
Dell™ QuickSet Battery Meter
If Dell QuickSet is installed, press <Fn><F3> to display the QuickSet Battery Meter. The Battery Meter
displays status, battery health, charge level, and charge completion time for the battery in your computer.
For more information about QuickSet, right-click the QuickSet icon in the taskbar, and click Help.
Microsoft® Windows® Power Meter
The Windows Power Meter indicates the remaining battery charge. To check the Power Meter,
double-click the icon on the taskbar.
If the computer is connected to an electrical outlet, a icon appears.
Charge Gauge
By either pressing once or pressing and holding the status button on the charge gauge on the battery,
you can check:
• Battery charge (check by pressing and
• Battery health (check by pressing and
The battery operating time is largely determined by the number of times it is charged. After hundreds of
charge and discharge cycles, batteries lose some charge capacity—or battery health. That is, a battery can
show a status of "charged" but maintain a reduced charge capacity (health).
releasing
holding
the status button)
the status button)
Check the Battery Charge
To check the battery charge, press and release the status button on the battery charge gauge to illuminate
the charge-level lights. Each light represents approximately 20 percent of the total battery charge.
For example, if the battery has 80 percent of its charge remaining, four of the lights are on. If no lights
appear, the battery has no charge.
Check the Battery Health
NOTE: You can check battery health in one of two ways: by using the charge gauge on the battery as described
below and by using the Battery Meter in Dell QuickSet. For information about QuickSet, right-click the QuickSet
icon in the taskbar, and click Help.
To check the battery health using the charge gauge, press and hold the status button on the battery
charge gauge for at least 3 seconds. If no lights appear, the battery is in good condition, and more than
80 percent of its original charge capacity remains. Each light represents incremental degradation. If five
lights appear, less than 60 percent of the charge capacity remains, and you should consider replacing the
battery. See "Specifications" in your User’s Guide for more information about the battery operating time.
Quick Reference Guide 13
Page 14
Low-Battery Warning
NOTICE: To avoid losing or corrupting data, save your work immediately after a low-battery warning.
Then connect the computer to an electrical outlet. If the battery runs completely out of power, hibernate mode
begins automatically.
By default, a pop-up window warns you when the battery charge is approximately 90 percent depleted.
You can change the settings for the battery alarms in QuickSet or the Power Options Properties window.
See
"Configuring Power Management Settings" in your
User’s Guide
for information about accessing
QuickSet or the Power Options Properties window.
Charging the Battery
NOTE: With Dell™ ExpressCharge™, when the computer is turned off, the AC adapter charges a completely
discharged battery to 80 percent in about 1 hour and to 100 percent in approximately 2 hours. Charge time is longer
with the computer turned on. You can leave the battery in the computer for as long as you like. The battery’s internal
circuitry prevents the battery from overcharging.
When you connect the computer to an electrical outlet or install a battery while the computer is
connected to an electrical outlet, the computer checks the battery charge and temperature. If necessary,
the AC adapter then charges the battery and maintains the battery charge.
If the battery is hot from being used in your computer or being in a hot environment, the battery may
not charge when you connect the computer to an electrical outlet.
The battery is too hot to start charging if the light flashes alternately green and orange. Disconnect
the computer from the electrical outlet and allow the computer and the battery to cool to room
temperature. Then connect the computer to an electrical outlet to continue charging the battery.
For more information about resolving problems with a battery, see "Power Problems" in your User’s Guide.
Removing the Battery
CAUTION: Before performing these procedures, turn off the computer, disconnect the AC adapter from the
electrical outlet and the computer, disconnect the modem from the wall connector and computer, and remove any
other external cables from the computer.
CAUTION: Using an incompatible battery may increase the risk of fire or explosion. Replace the battery only
with a compatible battery purchased from Dell. The battery is designed to work with your Dell™ computer. Do not
use a battery from other computers with your computer.
NOTICE: You must remove all external cables from the computer to avoid possible connector damage.
For information about replacing the second battery, which is located in the media bay, see "Using Multimedia" in
your User’s Guide.
To remove the battery:
If the computer is connected to a docking device (docked), undock it. See the documentation that
1
came with your docking device for instructions.
2
Ensure that the computer is turned off.
3
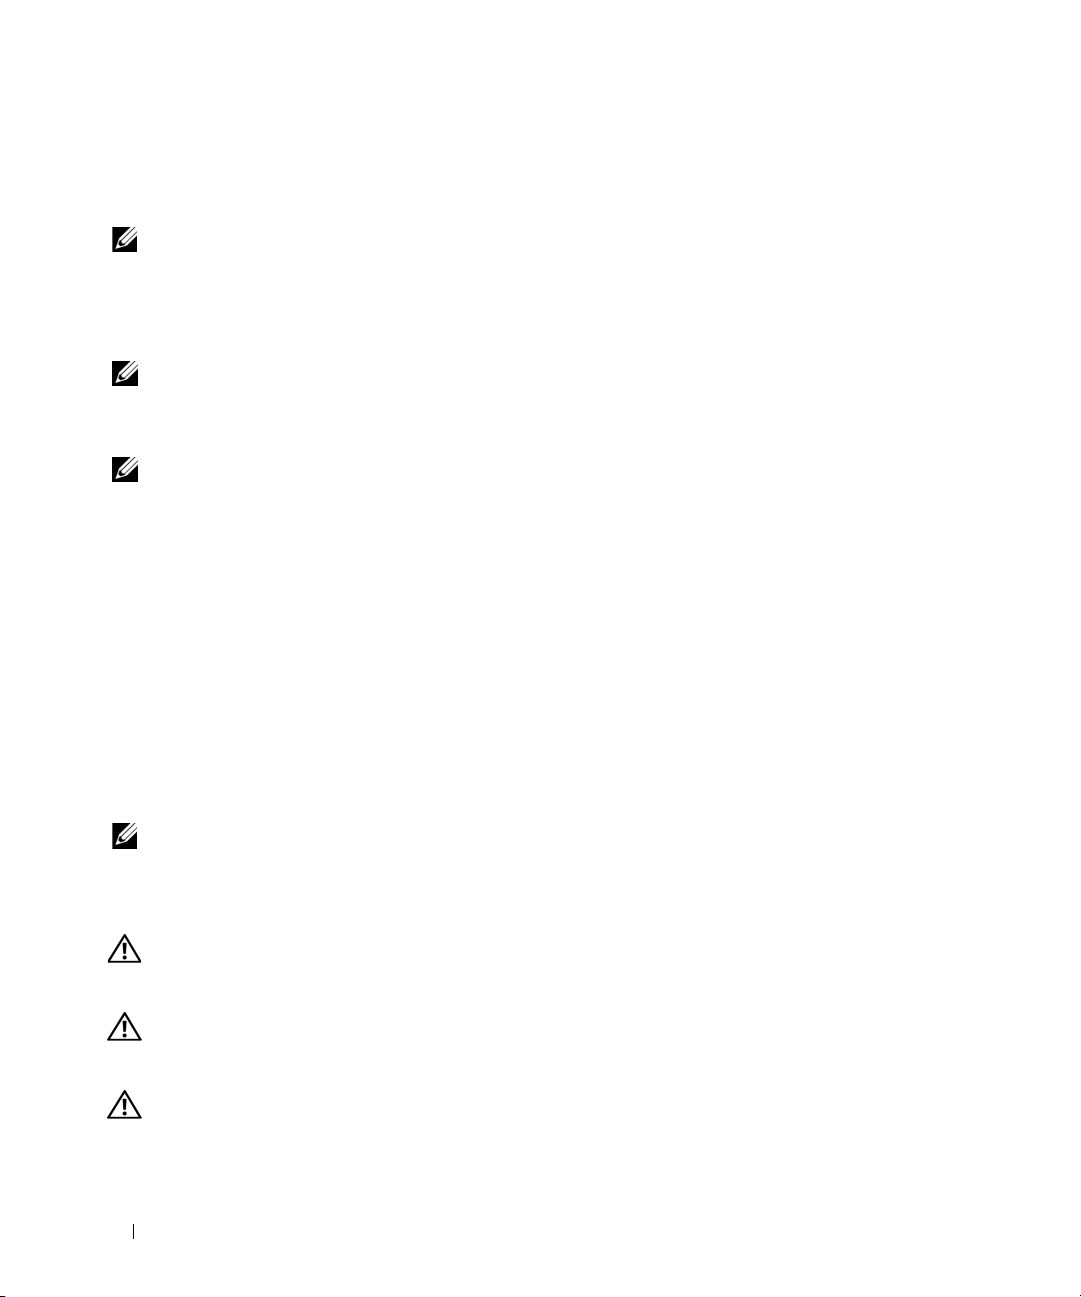
Slide and lift the battery out of the battery bay.
14 Quick Reference Guide
Page 15
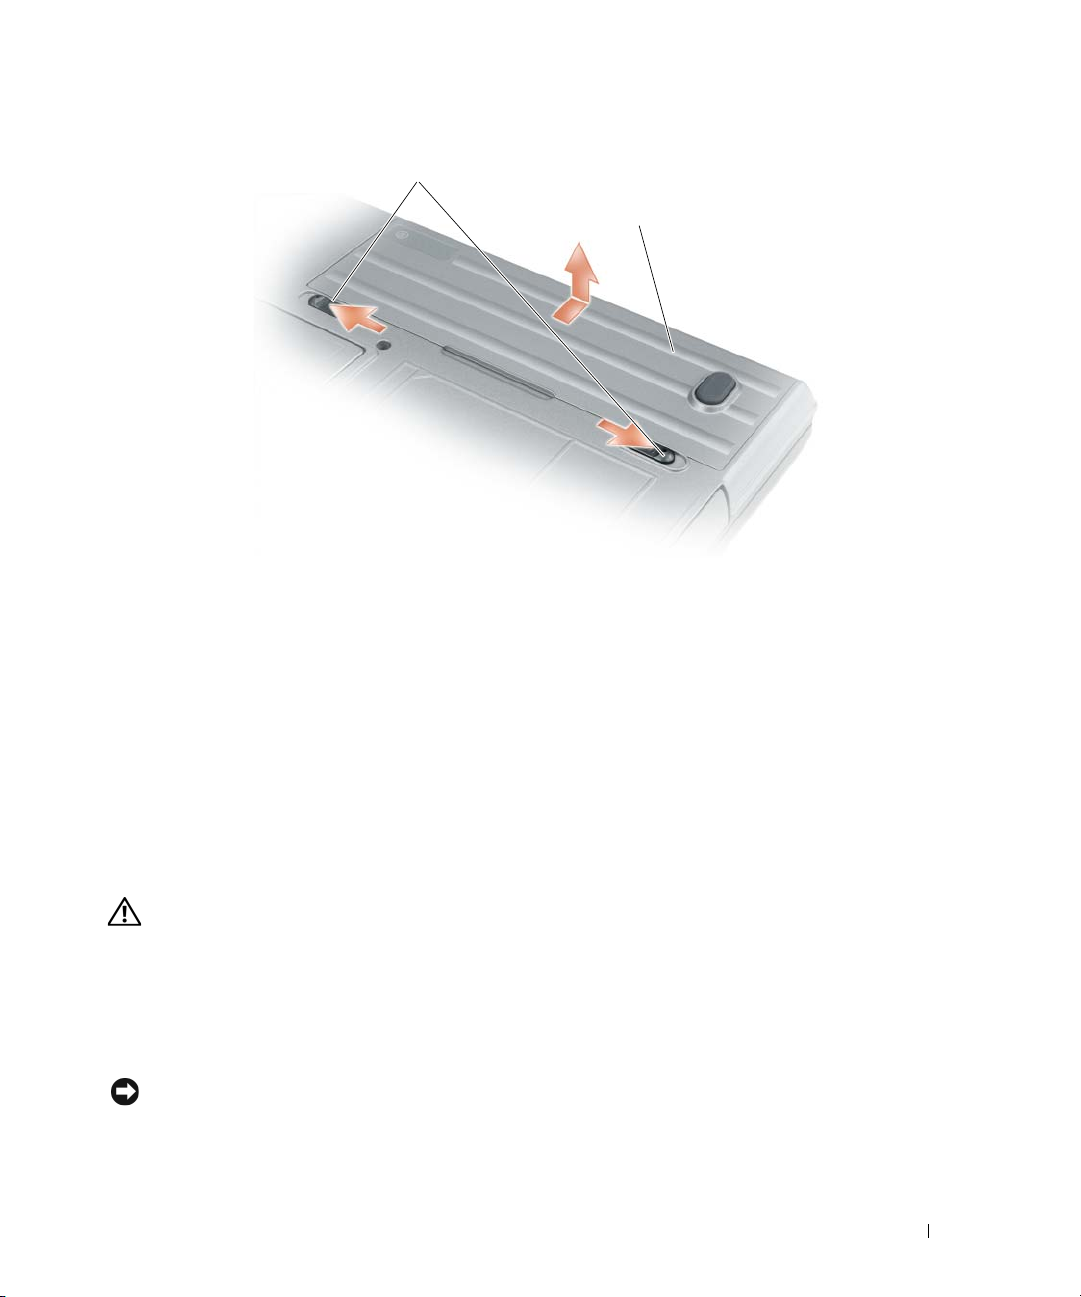
1
2
1 battery-bay latch release 2 battery
To replace the battery, place the battery in the bay and press down until the battery-bay latch release clicks.
Storing a Battery
Remove the battery when you store your computer for an extended period of time. A battery discharges
during prolonged storage. After a long storage period, recharge the battery fully before you use it (see
"Charging the Battery" on page 14).
Troubleshooting
Lockups and Software Problems
CAUTION: Before you begin any of the procedures in this section, follow the safety instructions in the
Product Information Guide
The computer does not start up
ENSURE THAT THE AC ADAPTER IS FIRMLY CONNECTED TO THE COMPUTER AND TO THE ELECTRICAL OUTLET.
The computer stops responding
NOTICE: You might lose data if you are unable to perform an operating system shutdown.
T
URN THE COMPUTER OFF — If you are unable to get a response by pressing a key on your keyboard or
moving your mouse, press and hold the power button for at least 8 to 10 seconds until the computer
turns off. Then restart your computer.
.
Quick Reference Guide 15
Page 16

A program stops responding or crashes repeatedly
NOTE: Software usually includes installation instructions in its documentation or on a floppy disk or CD.
ND THE PROGRAM —
E
1
Press <Ctrl><Shift><Esc> simultaneously.
2
Click
Tas k Ma n a g e r
3
Click the program that is no longer responding.
4
Click
End Task
CHECK THE SOFTWARE DOCUMENTATION — If necessary, uninstall and then reinstall the program.
A program is designed for an earlier Microsoft® Windows® operating system
RUN THE PROGRAM COMPATIBILITY WIZARD — The Program Compatibility Wizard configures a program
.
.
so that it runs in an environment similar to non-Windows XP operating system environments.
1
Click
Start→
2
Follow the instructions on the screen.
A solid blue screen appears
TURN THE COMPUTER OFF — If you are unable to get a response by pressing a key on your keyboard or
All Programs→ Accessories→
Program Compatibility Wizard→ Next
.
moving your mouse, press and hold the power button for at least 8 to 10 seconds until the computer
turns off. Then restart your computer.
Other software problems
CHECK THE SOFTWARE DOCUMENTATION OR CONTACT THE SOFTWARE MANUFACTURER FOR TROUBLESHOOTING
INFORMATION —
• Ensure that the program is compatible with the operating system installed on your computer.
• Ensure that your computer meets the minimum hardware requirements needed to run the software.
See the software documentation for information.
• Ensure that the program is installed and configured properly.
• Verify that the device drivers do not conflict with the program.
• If necessary, uninstall and then reinstall the program.
BACK UP YOUR FILES IMMEDIATELY.
SE A VIRUS-SCANNING PROGRAM TO CHECK THE HARD DRIVE, FLOPPY DISKS, OR CDS.
U
S
AVE AND CLOSE ANY OPEN FILES OR PROGRAMS AND SHUT DOWN YOUR COMPUTER THROUGH THE Start MENU.
16 Quick Reference Guide
Page 17

SCAN THE COMPUTER FOR SPYWARE —If you are experiencing slow computer performance, you
frequently receive pop-up advertisements, or you are having problems connecting to the Internet, your
computer might be infected with spyware. Use an anti-virus program that includes anti-spyware
protection (your program may require an upgrade) to scan the computer and remove spyware. For more
information, go to support.dell.com and search for the keyword spyware.
RUN THE DELL DIAGNOSTICS — See "Dell Diagnostics" on page 17. If all tests run successfully, the error
condition is related to a software problem.
Dell Diagnostics
CAUTION: Before you begin any of the procedures in this section, follow the safety instructions in the
Product Information Guide
When to Use the Dell Diagnostics
If you experience a problem with your computer, perform the checks in "Lockups and Software Problems"
on page 15 and run the Dell Diagnostics before you contact Dell for technical assistance.
It is recommended that you print these procedures before you begin.
NOTICE: The Dell Diagnostics works only on Dell™ computers.
NOTE: The Drivers and Utilities media is optional and may not ship with your computer.
Enter system setup (see "System Setup Program" in your User’s Guide), review your computer’s
configuration information, and ensure that the device you want to test displays in system setup and is active.
Start the Dell Diagnostics from either your hard drive or from the Drivers and Utilities media.
.
Starting the Dell Diagnostics From Your Hard Drive
The Dell Diagnostics is located on a hidden diagnostic utility partition on your hard drive.
NOTE: If your computer cannot display a screen image, contact Dell (see "Contacting Dell" in your User’s Guide).
1
Shut down the computer. Turn on (or restart) your computer.
2
If the computer is connected to a docking device (docked), undock it. See the documentation that
came with your docking device for instructions.
3
Connect the computer to an electrical outlet.
4
Diagnostics can be invoked in one of two ways:
a
Turn on the computer. When the DELL™ logo appears, press <F12> immediately. Select
Diagnostics from the boot menu and press <Enter>.
NOTE: If you wait too long and the operating system logo appears, continue to wait until you see the
Microsoft
Press and hold the <Fn> key while powering the computer on.
b
NOTE: If you see a message stating that no diagnostics utility partition has been found, run the Dell
Diagnostics from the Drivers and Utilities media.
®
Windows® desktop. Then shut down your computer and try again.
Quick Reference Guide 17
Page 18

The computer runs the Pre-boot System Assessment, a series of initial tests of your system board,
keyboard, hard drive, and display.
• During the assessment, answer any questions that appear.
• If a failure is detected, the computer stops and beeps. To stop the assessment and restart the
computer, press <Esc>; to continue to the next test, press <y>; to retest the component that
failed, press <r>.
• If failures are detected during the Pre-boot System Assessment, write down the error code(s) and
contact Dell (see "Contacting Dell" in your
If the Pre-boot System Assessment completes successfully, you receive the message
Diagnostic Utility Partition. Press any key to continue
5
Press any key to start the Dell Diagnostics from the diagnostics utility partition on your hard drive.
Starting the Dell Diagnostics From the Drivers and Utilities Media
1
Insert the
2
Shut down and restart the computer.
Drivers and Utilities
media.
User’s Guide
).
Booting Dell
.
When the DELL logo appears, press <F12> immediately.
If you wait too long and the Windows logo appears, continue to wait until you see the Windows
desktop. Then shut down your computer and try again.
NOTE: The next steps change the boot sequence for one time only. On the next start-up, the computer boots
according to the devices specified in the system setup program.
3
When the boot device list appears, highlight
IDE CD-ROM DeviceCD/DVD/CD-RW Drive
press <Enter>.
4
Select the
5
Ty p e 1 to start the
6
Select
Boot from CD-ROM
ResourceCD
option from the menu that appears and press <Enter>.
menu and press <Enter> to proceed.
Run the 32 Bit Dell Diagnostics
from the numbered list. If multiple versions are listed, select
the version appropriate for your computer.
7
When the Dell Diagnostics
Main Menu
appears, select the test you want to run.
and
18 Quick Reference Guide
Page 19
Dell Diagnostics Main Menu
1
After the Dell Diagnostics loads and the
Main Menu
screen appears, click the button for the option
you want.
Option Function
Express Test Performs a quick test of devices. This test typically takes 10 to 20 minutes and
requires no interaction on your part. Run Express Test first to increase the
possibility of tracing the problem quickly.
Extended Test Performs a thorough check of devices. This test typically takes 1 hour or more and
requires you to answer questions periodically.
Custom Test Tests a specific device. You can customize the tests you want to run.
Symptom Tree Lists the most common symptoms encountered and allows you to select a test
based on the symptom of the problem you are having.
2
If a problem is encountered during a test, a message appears with an error code and a description of the
problem. Write down the error code and problem description, and follow the instructions on the screen.
If you cannot resolve the error condition, contact Dell (see "Contacting Dell" in your
NOTE: The Service Tag for your computer is located at the top of each test screen. If you contact Dell, the
technical support representative will ask you for your Service Tag.
3
If you run a test from the
Custom Test
or
Symptom Tree
option, click the applicable tab described in
User’s Guide
the following table for more information.
).
Tab Function
Results Displays the results of the test and any error conditions encountered.
Errors Displays error conditions encountered, error codes, and the problem description.
Help Describes the test and may indicate requirements for running the test.
Configuration Displays your hardware configuration for the selected device.
The Dell Diagnostics obtains configuration information for all devices from the
system setup program, memory, and various internal tests, and it displays the
information in the device list in the left pane of the screen. The device list may not
display the names of all the components installed on your computer or all devices
attached to your computer.
Parameters Allows you to customize the test by changing the test settings.
4
When the tests are completed, if you are running the Dell Diagnostics from the
Drivers and Utilities
media, remove the media.
5
When the tests are complete, close the test screen to return to the
Diagnostics and restart the computer, close the
Main Menu
screen.
Main Menu
screen. To exit the Dell
Quick Reference Guide 19
Page 20

20 Quick Reference Guide
Page 21

Index
A
anti-virus software, 16
B
battery
charge gauge, 13
charging, 14
checking the charge, 13
performance, 12
power meter, 13
removing, 14
storing, 15
C
CDs
operating system, 7
computer
crashes, 15-16
slow performance, 17
stops responding, 15
D
Dell Diagnostics
about, 17
starting from the Drivers and
Utilities media, 18
starting from the hard
drive, 17
using, 17
Dell support site, 6
diagnostics
Dell, 17
documentation
End User License
Agreement, 5
ergonomics, 5
online, 6
Product Information Guide, 5
regulatory, 5
safety, 5
User’s Guide, 5
warranty, 5
E
End User License
Agreement, 5
ergonomics information, 5
H
hardware
Dell Diagnostics, 17
Help and Support Center, 7
help file
Windows Help and Support
Center, 7
L
labels
Microsoft Windows, 6
Service Tag, 6
M
Media
Drivers and Utilities, 5
O
operating system
CD, 7
reinstalling, 7
P
problems
blue screen, 16
computer crashes, 15-16
computer does not start up, 15
computer stops responding, 15
Dell Diagnostics, 17
lockups, 15
program crashes, 16
program stops responding, 16
programs and Windows
compatibility, 16
slow computer
performance, 17
software, 15-16
spyware, 17
Product Information Guide, 5
Q
QuickSet Help, 7
Index 21
Page 22

R
W
regulatory information, 5
ResourceCD
Dell Diagnostics, 17
S
safety instructions, 5
Service Tag, 6
software
problems, 16
spyware, 17
support website, 6
system views
back, 11
bottom, 11
front, 9
left side, 10
right side, 10
T
warranty information, 5
Windows XP
Help and Support Center, 7
Program Compatibility
Wizard, 16
reinstalling, 7
wizards
Program Compatibility
Wizard, 16
troubleshooting
Dell Diagnostics, 17
Help and Support Center, 7
lockups and software
problems, 15
U
User’s Guide, 5
22 Index
Page 23

Dell™ Latitude™ D631
Lynreferenceguide
Model PP18L
www.dell.com | support.dell.com
Page 24

Bemærkninger, meddelelser og advarsler
BEMÆRK: En BEMÆRKNING angiver vigtige oplysninger, som du kan bruge for at udnytte computeren optimalt.
MEDDELELSE: En MEDDELELSE angiver enten en mulig beskadigelse af hardware eller tab af data og oplyser dig om,
hvordan du kan undgå dette problem.
FORSIGTIG: En ADVARSEL angiver mulig tingskade, legemsbeskadigelse eller død.
Forkortelser og akronymer
En fuldstændig liste over forkortelser og akronymer finder du i ordlisten i
Hvis du har købt en Dell™ n Series computer, gælder eventuelle henvisninger i dette dokument til
Microsoft
®
Windows®-operativsystemer ikke.
BEMÆRK: Visse funktioner eller medier kan være valgfrie og følger muligvis ikke med computeren. Visse funktioner
eller medier vil muligvis ikke være tilgængelige i visse lande.
Brugervejledningen
.
___________________
Oplysningerne i dette dokument kan ændres uden varsel.
© 2007 Dell Inc. Alle rettigheder forbeholdes.
Enhver form for gengivelse uden skriftlig tilladelse fra Dell Inc. er strengt forbudt.
Anvendte varemærker i denne tekst: Dell, DELL-logoet, Latitude, Wi-Fi Catcher, ExpressCharge er varemærker, der tilhører Dell Inc.; AMD
og kombinationer deraf er varemærker, der tilhører Advanced Micro Devices, Inc; Windows Vista er et varemærke og Microsoft Outlook og
Windows er registrerede varemærker, der tilhører Microsoft Corporation.
Andre varemærker og firmanavne kan være brugt i dette dokument til at henvise til de fysiske eller juridiske personer, som ejer mærkerne og
navnene eller deres produkter. Dell Inc. fraskriver sig alle krav på ejendomsret til alle andre varemærker og handelsnavne end Dells egne.
PP18L
Model
Marts 2007 P/N UY447 Rev. A00
Page 25

Indhold
Sådan finder du oplysninger. . . . . . . . . . . . . . . . . . . . . . . . . . . 27
Opsætning af computeren
Om computeren
Anvendelse af et batteri
Fejlfinding
. . . . . . . . . . . . . . . . . . . . . . . . . . . . . . . . . 32
. . . . . . . . . . . . . . . . . . . . . . . . . . . . . . . . . . . . 39
. . . . . . . . . . . . . . . . . . . . . . . . . . . . 31
. . . . . . . . . . . . . . . . . . . . . . . . . . . . . 35
Indhold 25
Page 26

26 Indhold
Page 27

Sådan finder du oplysninger
BEMÆRK: Visse funktioner eller medier kan være valgfrie og følger muligvis ikke med computeren. Visse
funktioner eller medier vil muligvis ikke være tilgængelige i visse lande.
BEMÆRK: Der kan blive leveret yderligere oplysninger sammen med computeren.
Hvad søger du efter? Find det her
• Et diagnosticeringsprogram til computeren
• Drivere til computeren
• Dokumentationen til enheden
• Notebook System Software (NSS)
•Garantioplysninger
• Vilkår og betingelser (kun USA)
• Sikkerhedsinstruktioner
• Oplysninger om regler
• Oplysninger om ergonomi
• Slutbrugerlicensaftale
Drivers and Utilities-medie
BEMÆRK: Drivers and Utilities-mediet kan være
valgfrit og følger muligvis ikke med computeren.
Dokumentationen og driverne er allerede installeret
på computeren. Du kan bruge mediet til at
geninstallere drivere og til at køre Dell Diagnostics
(se "Dell Diagnostics" på side 40).
Mediet kan indeholde
vigtigt-filer med sidste
øjebliks-opdateringer
om tekniske ændringer
af computeren eller
avanceret teknisk
referencemateriale for
teknikere eller erfarne
brugere.
BEMÆRK: Opdatering af drivere og dokumentation
kan findes på support.dell.com.
BEMÆRK: Drivers and Utilities-mediet kan være
valgfrit og følger muligvis ikke med computeren.
Dell™ Produktinformationsvejledning
Lynreferenceguide 27
Page 28
Hvad søger du efter? Find det her
• Afmontering og udskiftning af dele
• Specifikationer
• Konfiguration af systemindstillinger
• Fejlfinding og løsning af problemer
• Servicekode og kode for ekspresservice
• Microsoft Windows licensmærkat
Brugerhåndbog
Microsoft Windows Hjælp og support
1
Klik på
User and System Guides (
systemvejledninger)
(Systemvejledninger).
2
Klik på
computer.
Servicekode og Microsoft® Windows®-licens
Disse mærkater er placeret på computeren.
• Brug servicekoden til at identificere computeren,
når du bruger
teknisk support.
• Indtast koden for ekspresservice, når du kontakter
teknisk support.
BEMÆRK: Microsoft Windows-licensmærkaten er
blevet nydesignet med et hul (en "sikkerhedsportal")
som en ekstra sikkerhedsforanstaltning.
Start
eller
User’s Guide
support.dell.com
→
Hjælp og support→ Dell
Dell Bruger- og
→
System Guides
(Brugervejledning) for din
eller kontakter
28 Lynreferenceguide
Page 29
Hvad søger du efter? Find det her
• Løsninger – Fejlfindingsoplysninger og tip, artikler fra
teknikere, onlinekurser og ofte stillede spørgsmål
• Forum – Online-diskussioner med andre Dell-kunder
• Opgraderinger – Opgraderingsoplysninger for komponenter
som f.eks. hukommelse, harddisk og operativsystem
• Kundeservice – Kontaktoplysninger, serviceopkald og
ordrestatus, garanti- og reparationsoplysninger
• Service og support – Status for serviceopkald og
supporthistorie, servicekontrakt, online-diskussioner med
teknisk support
• Reference – Computerdokumentation, oplysninger om
computerkonfigurationen, produktspecifikationer og
Dell supportwebsted – support.dell.com
BEMÆRK: Vælg dit område eller dit virksomhedssegment
for at få vist det relevante supportwebsted.
Sådan downloader du Notebook System Software:
1
Gå til
support.dell.com
virksomhedssegment, og indtast din servicekode.
2
Væ lg
Drivers & Downloads
3
Klik på dit operativsystem, og søg efter nøgleordet
Notebook System Software
BEMÆRK: Brugergrænsefladen på support.dell.com
kan variere alt afhængigt af dine valg.
white papers
• Downloads – Certificerede drivere, programrettelser
og softwareopdateringer
• Notebook System Software (NSS) – Hvis du geninstallerer
computerens operativsystem, skal du også geninstallere
hjælpeprogrammet NSS. NSS sørger for vigtige
opdateringer til operativsystemet og understøttelse af
Dell™ 3,5-" USB-diskettedrev, AMD™-processorer, optiske
drev og USB-enheder. NSS er en forudsætning for, at din
Dell-computer fungerer korrekt. Softwaren detekterer
automatisk din computer og dit operativsystem og
installerer de opdateringer, der passer til din konfiguration.
• Softwareopgraderinger og fejlfindingstip – Ofte stillede
spørgsmål, populære emner og generelle oplysninger om dit
computermiljøs helbred
Dell Support Utility
Dell Support Utility er et automatisk opgraderings- og
underretningssystem, som er installeret på computeren.
Dette supporthjælpeprogram giver dig
realtidssundhedsskanninger af dit computermiljø,
softwareopdateringer og relevante selvhjælpsoplysninger.
Du får adgang til Dell Support Utility via ikonet
proceslinjen. Yderligere oplysninger finder du under "Dell
Support Utility" i
• Hvordan du bruger Windows-operativsystemer
• Sådan arbejder du med programmer og filer
• Sådan tilpasser du skrivebordet
Windows Hjælp og support
1
Klik på
2
Skriv et ord eller en sætning, der beskriver
problemet, og klik på pileikonet.
3
Klik på det emne, der beskriver problemet.
4
Følg instruktionerne på skærmen.
Brugervejledningen
Start
eller
, vælg dit område eller dit
, og klik på
Go
(Gå).
.
.
→
Hjælp og support
.
på
Lynreferenceguide 29
Page 30
Hvad søger du efter? Find det her
• Oplysninger om netværksaktivitet, guiden Strømstyring,
genvejstaster og andre elementer, der styres af Dell QuickSet
Dell QuickSet Hjælp
Hvis du vil have vist
højreklikke på Quickset- ikonet på proceslinjen
i Microsoft
Yderligere oplysninger om Dell QuickSet finder du
under "Dell™ QuickSet" i Brugervejledningen.
• Geninstallation af operativsystemet
Operating System CD
BEMÆRK: Operating System CD kan være valgfri og
følger muligvis ikke med computeren.
Operativsystemet er allerede installeret på computeren.
Hvis du vil geninstallere operativsystemet, skal du bruge
Operating System CD. Se "Geninstallation af
Microsoft
operativsystemet er placeret på computeren.
Dell QuickSet Hjælp, skal du
®
Windows®.
®
Windows® XP" i Brugervejledningen.
Når du har installeret
operativsystemet igen,
skal du bruge Drivers and
Utilities-mediet
(ekstraudstyr) til at
geninstallere driverne til
de enheder, der fulgte
med computeren.
Mærkaten med
produktnøglen til
30 Lynreferenceguide
BEMÆRK: Farven på din cd kan variere alt afhængigt
af det operativsystem, du har bestilt.
Page 31

Opsætning af computeren
FORSIGTIG: Inden du påbegynder nogen af fremgangsmåderne i dette afsnit, skal du følge sikkerhedsinstruktionerne
i
Produktinformationsvejledningen
1
Åbn kassen med tilbehør.
2
Tag de dele fra, som du skal bruge til opsætning af din computer.
Kassen med tilbehør indeholder også brugerdokumentation, programmer og ekstra hardware (f.eks. PC
Cards, drev eller batterier), som du har bestilt.
3
Tilslut AC-adapteren til AC-adapterstikket på computeren og til stikkontakten.
.
4
Åbn computerskærmen, og tryk på tænd/sluk-knappen for at tænde computeren (se "Set forfra" på
side 32).
BEMÆRK: Det anbefales, at du tænder og slukker computeren mindst én gang, inden du installerer nogen kort
eller tilslutter computeren til en dockingenhed eller en anden ekstern enhed som f.eks. en printer.
Lynreferenceguide 31
Page 32

Om computeren
Set forfra
13
12
1
2
3
11
10
9
8
7
1 skærmsmæklås 2 skærm 3 tænd/sluk-knap
4 enhedsstatuslamper 5 tastatur 6 pegeplade
7 fingeraftrykslæser (ekstraudstyr) 8 knapper til pegeplade/pegepind 9 pegepind
10 tastaturstatuslamper 11 lydstyrkeknapper 12 omgivelseslyssensor
13 lydløs-knappen
6
4
5
32 Lynreferenceguide
Page 33

Set fra venstre
1 2 3 65 7 84 9
1 stik til sikkerhedskabel 2 ventilationshuller 3 lydstik (2)
4 chipkortslot (med dummy) 5 1394-stik 6 kontakt for trådløse forbindelser
7 Wi-Fi Catcher™-lampe 8 PC Card-slot 9 harddisk
Set fra højre
1
1 optisk drev i mediebås 2 frigørelsesknap til mediebåsenhed 3 USB-stik (2)
2
3
Set bagfra
FORSIGTIG: Undgå at blokere lufthullerne, og undgå at skubbe genstande ind i dem eller at lade støv samle sig
i dem. Opbevar ikke computeren et sted med lav luftgennemstrømning når den er tændt, f.eks. i en lukket mappe
eller i en taske. Dette kan beskadige computeren eller forårsage brand.
Lynreferenceguide 33
Page 34

1 2 63 4 75
1 netværksstik (RJ-45) 2 modemstik (RJ-11) 3 USB-stik (2)
4 seriel port 5 skærmstik 6 AC-adapterstik
7 lufthuller
Set nedefra
1
8
7
6
1 batteriladningsmåler/sundhedsmåler 2 batteri 3 frigørelseshåndtag til
4 enhedssikringsskrue (hvis den er
installeret)
7 ventilationshuller 8 harddisk
5 dæksel til
hukommelsesmodul
2
3
4
5
batteribåssmæklås (2)
6 dockingenhedsstik
34 Lynreferenceguide
Page 35

Anvendelse af et batteri
Batteriydelse
BEMÆRK: Oplysninger om Dell-garantien for computeren finder du i Produktinformationsvejledningen eller i det
separate trykte garantidokument, der fulgte med computeren.
For at sikre en optimal computerydelse og for at bidrage til at bevare BIOS-indstillingerne bør du altid
anvende din bærbare Dell™-computer med batteriet installeret. Der medfølger ét batteri som
standardudstyr i batterirummet.
BEMÆRK: Da batteriet muligvis ikke er fuldt opladet, skal du bruge AC-adapteren til at tilslutte din nye computer
til en stikkontakt, første gang du bruger computeren. Du får det bedste resultat ved at bruge computeren med ACadapteren, indtil batteriet er helt opladet. Hvis du vil have vist batteriets opladningsstatus, skal du klikke på Start→
Indstillinger→ Kontrolpanel→ Strømstyring→ Batterimåler.
BEMÆRK: Batterilevetiden (den tid som et batteri kan fungere på en opladning) falder med tiden. Alt afhængigt af,
hvor ofte batteriet bruges, og af de betingelser, det bruges under, kan du få brug for at købe et nyt batteri i løbet af
computerens levetid.
Batteridriftstiden varierer alt afhængigt af anvendelsesbetingelserne. Du kan installere et valgfrit ekstra
batteri i mediebåsen og på den måde øge driftstiden betydeligt.
Driftstiden reduceres væsentligt, hvis du foretager nogen af de følgende handlinger (listen er ikke udtømmende):
• Bruger optiske drev
• Bruger trådløse kommunikationsenheder, PC Cards, ExpressCards, mediehukommelseskort eller
USB-enheder
• Bruger en skærmindstilling med høj lysstyrke, 3D-pauseskærme eller andre strømkrævende
programmer som f.eks. komplekse 3D-grafikprogrammer.
• Brug af computeren i maksimalydelsestilstand (se "Konfiguration af strømstyringsindstillinger"
i
Brugervejledningen
).
BEMÆRK: Det anbefales at tilslutte computeren til en stikkontakt, når du skriver til en cd eller en dvd.
Du kan kontrollere batteriladningen, før du indsætter batteriet i computeren (se "Kontrol af
batteriopladningen" på side 36). Du kan også indstille strømstyringsindstillingerne sådan, at du bliver
advaret, når batteriladningen er lav
FORSIGTIG: Brug af et inkompatibelt batteri kan øge risikoen for brand eller eksplosion. Udskift kun batteriet
med et kompatibelt batteri, der er købt hos Dell. Lithium-ion-batteriet er beregnet til at fungere sammen med din
Dell-computer. Brug ikke et batteri fra andre computere sammen med computeren.
FORSIGTIG: Batterier bør ikke bortskaffes sammen med husholdningsaffald. Når batteriet ikke længere kan
opbevare en ladning, skal du kontakte de lokale renovations- eller miljømyndigheder for at få råd vedrørende
bortskaffelse af litium-ion batterier. Se "Bortskaffelse af batterier" i
FORSIGTIG: Misbrug af batteriet kan øge risikoen for brand eller kemisk forbrænding. Undgå at punktere eller
brænde batteriet, og skil det ikke ad eller udsæt det for temperaturer over 60°C. Opbevar batteriet utilgængeligt
for børn. Håndter beskadigede eller lækkende batterier med stor forsigtighed. Beskadigede batterier kan lække
og medføre personskade eller skade på udstyr.
(se "Konfiguration af strømstyringsindstillinger" i
Produktinformationsvejledningen
Lynreferenceguide 35
Brugervejledningen
.
).
Page 36

Kontrol af batteriopladningen
Dell QuickSet Battery Meter (batterimåler), vinduet og ikonet Microsoft Windows Batterimåler ,
batteriladningsmåleren og sundhedsmåleren samt advarslen om lav batteriladning giver oplysninger om
batteriladningen.
Dell™ QuickSet Battery Meter
Hvis Dell QuickSet er installeret, skal du trykke på <Fn><F3> for at få vist QuickSet Battery Meter
(QuickSet Batteriemåler). Batterimåleren viser status, batterisundhed, opladningsniveau og
opladningsforløbet for batteriet i computeren.
Yderligere oplysninger om QuickSet finder du ved at højreklikke på QuickSet-ikonet på proceslinjen og
klikke på Help (Hjælp).
Microsoft® Windows® Batterimåler
Windows Batterimåler viser den resterende batteriladning. Hvis du vil kontrollere Batterimåler, skal du
dobbeltklikke på ikonet på proceslinjen.
Hvis computeren er tilsluttet en stikkontakt, vises ikonet .
Opladningsmåler
Ved at trykke én gang eller ved at trykke og holde statusknappen på batteriladningsmåleren på batteriet
kan du kontrollere følgende:
• Batteriladningen (kontrolleres ved at trykke på og
• Batterisundheden (kontrolleres ved at trykke på og
Batteriets funktionstid bestemmes i vidt omfang af det antal gange, det oplades. Efter flere hundrede
opladnings- og afladningscyklusser mister batteriet noget af dets opladningskapacitet – dets batterisundhed.
Det betyder, at et batteri kan vise status "opladet", men have en reduceret opladningskapacitet (sundhed).
slippe
statusknappen)
holde
statusknappen inde)
Kontrol af batteriladningen
Hvis du vil kontrollere batteriladningen, skal du trykke på og slippe statusknappen på batteriladningsmåleren
for at få ladningsniveaulamperne til at lyse. Hver lampe repræsenterer ca. 20% af den samlede batteriladning.
Hvis batteriet f.eks. har 80% af dets ladning tilbage, vil fire lamper være tændt. Hvis ingen af lamperne lyser,
har batteriet ingen ladning.
Kontrol af batteriets sundhed
BEMÆRK: Du kan kontrollere batteriets sundhedstilstand på to måder: ved at bruge ladningsmåleren på batteriet
som beskrevet nedenfor og ved at bruge Battery Meter (Batterimåler) i Dell QuickSet. Oplysninger om QuickSet
finder du ved at højreklikke på QuickSet-ikonet på proceslinjen og klikke på Help (Hjælp).
Hvis du vil kontrollere batteriets sundhedstilstand ved hjælp af ladningsmåleren, skal du trykke på og
holde statusknappen på batteriladningsmåleren i mindst 3 sekunder. Hvis ingen lamper lyser, er batteriet
i god stand og det har mere end 80 % af dets oprindelige opladningskapacitet tilbage. Hver lampe
36 Lynreferenceguide
Page 37

repræsenterer en trinvis forringelse. Hvis fem lamper lyser, er der mindre end 60% af ladningskapaciteten
tilbage, og du bør overveje at udskifte batteriet. Yderligere oplysninger om batteridriftstiden finder du
under ”Specifikationer” iBrugervejledningen.
Advarsel om lav batteriladning
MEDDELELSE: For at undgå at miste eller beskadige data bør du gemme dit arbejde med det samme, hvis du får
en advarsel om lav batteriladning. Tilslut derefter computeren til en stikkontakt. Hvis batteriet løber helt tør for
strøm, skiftes der automatisk til dvaletilstand.
Som standard advarer et pop-up-vindue dig, når batteriladningen er brugt ca. 90 procent op. Du kan
ændre indstillingerne for batterialarmerne i QuickSet eller i vinduet Egenskaber for Strømstyring.
Oplysninger om, hvordan du får adgang til QuickSet eller til vinduet Egenskaber for Strømstyring, finder
du under
"Konfiguration af strømstyringsindstillinger" i
Brugervejledningen.
Opladning af batteriet
BEMÆRK: Med Dell™ ExpressCharge™ oplader AC-adapteren, når computeren er slukket, et helt afladet batteri
til 80 procent på ca. 1 time og til 100 procent på ca. 2 timer. Opladningstiden er længere, når computeren er tændt.
Du kan lade batteriet sidde i computeren, så længe du vil. Batteriets interne kredsløb forhindrer, at batteriet bliver
overbelastet.
Når du tilslutter computeren en stikkontakt eller installerer et batteri, mens computeren er tilsluttet en
stikkontakt, kontrollerer computeren batteriets ladning og temperatur. Hvis det er nødvendigt, vil ACadapteren oplade batteriet og opretholde batteriladningen.
Hvis batteriet er varmt efter at have været brugt i computeren, eller fordi computeren bruges i varme
omgivelser, er det muligt, at batteriet ikke oplades, når du tilslutter computeren til en stikkontakt.
Batteriet er for varmt til at starte opladningen, hvis lampen blinker skiftevis grønt og orange. Fjern
computeren fra stikkontakten, og lad computeren og batteriet køle af til stuetemperatur. Tilslut derefter
computeren til en stikkontakt for at fortsætte opladningen.
Yderligere oplysninger om løsning af problemer med et batteri finder du under "Strømproblemer"
i Brugervejledningen.
Fjernelse af batteriet
FORSIGTIG: Inden du anvender disse fremgangsmåder, skal du slukke computeren, fjerne AC-adapteren fra
stikkontakten og computeren, fjerne modemet fra telefonstikket og computeren og fjerne alle andre eksterne
kabler fra computeren.
FORSIGTIG: Brug af et inkompatibelt batteri kan øge risikoen for brand eller eksplosion. Udskift kun batteriet
med et kompatibelt batteri, der er købt hos Dell. Batteriet er designet til at fungere sammen med din
Dell™-computer. Brug ikke et batteri fra andre computere sammen med computeren.
MEDDELELSE: Du skal fjerne alle eksterne kabler fra computeren for at undgå beskadigelse af stikket.
Oplysninger om udskiftning af det andet batteri, som er placeret i mediebåsen, finder du under "Anvendelse af
multimedier" i Brugervejledningen.
Lynreferenceguide 37
Page 38

Sådan fjerner du batteriet:
1
Hvis computeren er tilsluttet en dockingenhed, skal du tage den ud af dockingenheden. Du kan finde
vejledning i den dokumentation, der fulgte med dockingenheden.
2
Sørg for at computeren er slukket.
3
Skub og løft batteriet ud af batteribåsen.
1
2
1 frigørelsesknap til
batteribåssmæklås
2 batteri
Hvis du vil udskifte batteriet, skal du placere batteriet i båsen og trykke ned, indtil frigørelsesknappen til
batteribåssmæklåsen klikker.
Opbevaring af et batteri
Fjern batteriet, når du skal opbevare din computer i en længere periode. Et batteri aflades under
længerevarende opbevaring. Efter en længere opbevaringsperiode skal du oplade batteriet helt, inden du
bruger det (se "Opladning af batteriet" på side 37).
38 Lynreferenceguide
Page 39

Fejlfinding
Problemer med software og med, at computeren hænger
FORSIGTIG: Inden du påbegynder nogen af fremgangsmåderne i dette afsnit, skal du følge sikkerhedsinstruktionerne
Produktinformationsvejledningen
i
Computeren starter ikke
SØRG FOR, AT AC-ADAPTEREN ER TILSLUTTET KORREKT TIL COMPUTEREN OG STIKKONTAKTEN
Computeren reagerer ikke
MEDDELELSE: Du kan miste data, hvis du ikke kan udføre en nedlukning af operativsystemet.
LUK COMPUTEREN — Hvis du ikke kan få en reaktion ved at trykke på en tast på tastaturet eller ved at
S
bevæge musen, skal du trykke på og holde tænd/sluk-knappen nede i 8-10 sekunder, indtil computeren
slukkes. Genstart derefter din computer.
Et program reagerer ikke eller går ned gentagne gange
BEMÆRK: Software indeholder normalt installationsinstruktioner i dokumentationen eller på en diskette eller en cd.
A
FSLUT PROGRAMMET —
1
Tryk på <Ctrl><Skift><Esc> flere gange.
2
Klik på
3
Klik på det program, der ikke længere svarer.
4
Klik på
LÆS DOKUMENTATIONEN TIL SOFTWAREN — Afinstaller og geninstaller eventuelt programmet.
Jobliste
.
Afslut job
.
.
Et program er designet til et tidligere Microsoft® Windows®-operativsystem
KØR GUIDEN PROGRAMKOMPATIBILITET — Guiden Programkompatibilitet konfigurerer et program, så det
kører i et miljø, der minder om ikke-Windows XP operativsystemmiljøer.
1
Klik på
2
Følg instruktionerne på skærmen.
Der vises en helt blå skærm
SLUK COMPUTEREN — Hvis du ikke kan få en reaktion ved at trykke på en tast på tastaturet eller ved at
Start→
Alle programmer→ Tilbehør→
Guiden Programkompatibilitet→ Næste
.
bevæge musen, skal du trykke på og holde tænd/sluk-knappen nede i 8-10 sekunder, indtil computeren
slukkes. Genstart derefter din computer.
Lynreferenceguide 39
Page 40

Andre softwareproblemer
SE I SOFTWAREDOKUMENTATIONEN, ELLER KONTAKT SOFTWAREPRODUCENTEN FOR AT FÅ OPLYSNINGER OM
FEJLFINDING —
• Kontroller, at programmet er kompatibelt med det operativsystem, der er installeret på computeren.
• Kontroller, at computeren opfylder de minimumskrav til hardwaren, der er en forudsætning for at køre
softwaren. Yderligere oplysninger finder du i softwaredokumentationen.
• Kontroller, at programmet er installeret og konfigureret rigtigt.
• Kontroller, at enhedsdriverne ikke er i konflikt med programmet.
• Om nødvendigt afinstalleres og geninstalleres programmet.
SIKKERHEDSKOPIER DINE FILER MED DET SAMME.
RUG ET VIRUSSCANNINGSPROGRAM TIL AT KONTROLLERE HARDDISKEN, DISKETTER OG CD'ER.
B
EM OG LUK ALLE ÅBNE FILER OG PROGRAMMER, OG SLUK COMPUTEREN VIA MENUEN Start.
G
S
CAN COMPUTEREN FOR SPYWARE —Hvis du oplever langsom computerydelse, ofte modtager pop-up-
reklamer, eller hvis du har problemer med at oprette forbindelse til internettet, er din computer muligvis
inficeret med spyware. Brug et antivirusprogram, der indeholder beskyttelse mod spyware (dit program
skal eventuelt opgraderes) for at scanne computeren og fjerne spyware. Yderligere oplysninger finder du
ved at gå til support.dell.com og søge efter nøgleordet spyware.
KØR DELL DIAGNOSTICS — Se "Dell Diagnostics" på side 40. Hvis alle testene gennemføres uden fejl,
skyldes fejltilstanden et softwareproblem.
Dell Diagnostics
FORSIGTIG: Inden du påbegynder nogen af fremgangsmåderne i dette afsnit, skal du følge sikkerhedsinstruktionerne
i
Produktinformationsvejledningen
.
Hvornår skal du bruge Dell Diagnostics?
Hvis du kommer ud for et problem med computeren, skal du udføre kontrollerne i "Problemer med
software og med, at computeren hænger" på side 39 og køre Dell Diagnostics, inden du kontakter Dell for
at få teknisk assistance.
Det anbefales at udskrive disse fremgangsmåder, inden du går i gang.
MEDDELELSE: Dell Diagnostics fungerer kun på Dell™ -computere.
BEMÆRK: Drivers and Utilities -mediet er valgfrit og følger muligvis ikke med din computer.
Start systemkonfigurationen (se "System installationsprogram" i Brugervejledningen), undersøg
computerens konfigurationsoplysninger, og kontroller, at den enhed, du vil teste, vises
i systemkonfigurationen og at den er aktiv.
Start Dell Diagnostics fra harddisken eller fra Drivers and Utilities-mediet.
40 Lynreferenceguide
Page 41

Start af Dell Diagnostics fra harddisken
Dell Diagnostics er placeret på en skjult diagnosticeringshjælpeprogrampartition på harddisken.
BEMÆRK: Hvis computeren ikke kan vise et skærmbillede, skal du kontakte Dell (se "Kontakt Dell"
i Brugervejledningen).
1
Luk computeren. Tænd (eller genstart) computeren.
2
Hvis computeren er tilsluttet en dockingenhed, skal du tage den ud af dockingenheden. Du kan finde
vejledning i den dokumentation, der fulgte med dockingenheden.
3
Tilslut computeren til en stikkontakt.
4
Dell Diagnostics kan startes på to måder:
a
Tænd computeren. Når DELL™-logoet vises, skal du trykke på <F12> med det samme. Vælg
Diagnostics (Diagnosticering) i startmenuen, og tryk på <Enter>.
BEMÆRK: Hvis du venter for længe, og operativsystemets logo vises, skal du vente, indtil du ser
skrivebordet i Microsoft
Tryk på <Fn>-tasten og hold den nede, mens computeren starter.
b
BEMÆRK: Hvis du ser en meddelelse om, at der ikke blev fundet en partition med diagnosticeringsværktøjet,
skal du køre Dell Diagnostics fra Drivers and Utilities-mediet.
®
Windows®. Sluk derefter computeren, og prøv igen.
Computeren kører Pre-boot System Assessment (Analyse af systemet før start), som består af en række
test af systemkortet, tastaturet, harddisken og skærmen.
• Besvar eventuelle spørgsmål, der stilles under testen.
• Hvis der bliver fundet en fejl, stopper computeren og udsender en biplyd. Hvis du vil stoppe analysen og
genstarte computeren, skal du trykke på <Esc>. Hvis du vil fortsætte til den næste test, skal du trykke på
<y>. Hvis du vil teste den komponent, der havde en fejl, igen, skal du trykke på <r>.
• Hvis der bliver fundet fejl under analysen af systemet før start, skal du skrive fejlkoden/fejlkoderne
ned og kontakte Dell (se "Kontakt Dell" i
Hvis analysen af systemet før start gennemføres uden fejl, får du meddelelsen
Diagnostic Utility Partition
any key to continue
5
Tryk på en vilkårlig tast for at starte Dell Diagnostics fra diagnosticeringshjælpeprogramspartitionen på
(Tryk på en vilkårlig tast for at fortsætte).
Brugervejledningen
).
Booting Dell
(Starter partitionen med Dell Diagnostic Utility)
harddisken.
Start af Dell Diagnostics fra Drivers and Utilities-mediet
1
Indsæt
Drivers and Utilities
2
Luk computeren, og genstart den.
-mediet.
Når DELL™-logoet vises, skal du trykke på <F12> med det samme.
Press
Hvis du venter for længe, og Windows-logoet vises, skal du fortsætte med at vente, indtil du ser
skrivebordet i Windows. Sluk derefter computeren, og prøv igen.
Lynreferenceguide 41
Page 42

BEMÆRK: De næste trin ændrer kun startrækkefølgen én gang. Ved den næste opstart starter computeren
i overensstemmelse med de enheder, der er angivet i systemkonfigurationsprogrammet.
3
Når listen med startenheder vises, skal du fremhæve
CD/DVD/CD-RW Drive
4
Væ lg
Boot from CD-ROM
5
Skriv 1 for at starte
6
Væ lg
Run the 32 Bit Dell Diagnostics
(CD/DVD/CD-RW-drev) og trykke på <Enter>.
(Start fra cd-rom) i den menu, der vises, og tryk på <Enter>.
ResourceCD
-menuen, og tryk på <Enter> for at fortsætte.
(Kør 32 bit Dell Diagnostics) på den nummererede liste. Hvis
IDE CD-ROM Device
(IDE CD-ROM-enhed)
der er anført flere versioner, vælges versionen, som er passende for computeren.
7
Når Dell Diagnostics
Dell Diagnostics Main Menu (Hovedmenu for Dell-diagnosticeringer)
1
Når Dell Diagnostics er indlæst, og skærmbilledet med
Main Menu
(Hovedmenu) vises, skal du vælge den test, du vil køre.
Main Menu
(Hovedmenu) vises, skal du klikke
på knappen for den ønskede valgmulighed.
Valgmulighed Funktion
Eksprestest Udfører en hurtig test af enhederne. Testen tager typisk 10 til 20 minutter, og du
behøver ikke at gøre noget. Kør Express Test (Eksprestest) først for at øge
muligheden for hurtigt at identificere problemet.
Extended Test
(Udvidet test)
Custom Test
(Brugerdefineret test)
Liste over symptomer Viser de mest almindelige symptomer, som oftest forekommer, og giver dig
Udfører en grundig test af enhederne. Denne test tager typisk 1 time eller mere og
kræver, at du af og til besvarer nogle spørgsmål.
Tester en bestemt enhed. Du kan tilpasse den test, der skal køres.
mulighed for at vælge en test baseret på symptomet for det problem, du har.
2
Hvis der opdages et problem under en test, vises der en meddelelse med en fejlkode og en beskrivelse
af problemet. Skriv fejlkoden og beskrivelsen af problemet ned, og følg vejledningen på skærmen.
Hvis du ikke kan få rettet fejlen, skal du kontakte Dell (se "Kontakt Dell" i
BEMÆRK: Servicekoden for din computer er placeret øverst i alle testskærmbilleder. Hvis du kontakter Dell,
vil medarbejderen hos teknisk support spørge efter servicekoden.
3
Hvis du kører en test via valgmulighederne
(Liste over symptomer), kan du få yderligere oplysninger ved at klikke på den relevante fane, som er
beskrevet i nedenstående tabel.
Fane Funktion
Resultater Her vises testresultaterne og eventuelle fejl som opstod.
Fejl Her vises, hvilke fejl der opstod, fejlkoder og beskrivelser af problemet.
Hjælp Beskriver testen og angiver eventuelt, hvad der kræves for at udføre testen.
42 Lynreferenceguide
Custom Test
Brugervejledningen
(Brugerdefineret test) eller
).
Symptom Tree
Page 43

Fane Funktion
Konfiguration Her vises hardwarekonfigurationen for den valgte enhed.
Dell Diagnostics henter konfigurationsoplysningerne for alle enheder fra system
installationsprogrammet, hukommelsen og forskellige interne test og viser
oplysningerne på enhedslisten i den venstre rude på skærmen. Det er ikke sikkert,
at alle komponenter, der er installeret på computeren, eller alle enheder, der er
tilsluttet computeren, vises på listen over enheder.
Parametre Giver dig mulighed for at tilpasse testen ved at ændre testindstillingerne.
4
Hvis du kører Dell Diagnostics fra
Drivers and Utilities
-mediet, skal du fjerne mediet, når testene er
færdige.
5
Når testene er færdige, skal du lukke testskærmbilledet for at vende tilbage til skærmbilledet
Menu
(Hovedmenu). Hvis du vil afslutte Dell Diagnostics og genstarte computeren, skal du lukke
skærmbilledet
Main Menu
(Hovedmenu).
Main
Lynreferenceguide 43
Page 44

44 Lynreferenceguide
Page 45

Stikordsregister
A
antivirussoftware, 40
B
batteri
batterimåler, 36
fjerne, 37
kontrollere opladningen, 36
opbevare, 38
oplade, 37
opladningsmåler, 36
ydelse, 35
Brugerhåndbog, 28
C
cd'er
operativsystem, 30
computer
går ned, 39
langsom ydelse, 40
reagerer ikke, 39
D
Dell Diagnostics
bruge, 40
om, 40
starte fra Drivers and Utilities-
mediet, 41
starte fra harddisken, 41
Dell supportwebsted, 29
Diagnostics
Dell, 40
dokumentation
Brugerhåndbog, 28
ergonomi, 27
garanti, 27
online, 29
Produktinformationsvejledning, 27
regler, 27
sikkerhed, 27
Slutbrugerlicensaftale, 27
F
fejlfinding
Dell Diagnostics, 40
Hjælp og support, 29
problemer med software og
med, at computeren
hænger, 39
G
garantioplysninger, 27
guider
guiden
Programkompatibilitet, 39
H
hardware
Dell Diagnostics, 40
Hjælp og support, 29
hjælpefil
Windows Hjælp og support, 29
M
mærkater
Microsoft Windows, 28
servicekode, 28
Medier
Drivers and Utilities CD, 27
O
operativsystem
cd, 30
geninstallere, 30
oplysninger om ergonomi, 27
oplysninger om regler, 27
P
problemer
blå skærm, 39
computeren går ned, 39
computeren hænger, 39
computeren reagerer ikke, 39
computeren starter ikke, 39
Dell Diagnostics, 40
et program går ned, 39
et program reagerer ikke, 39
langsom computerydelse, 40
Stikordsregister 45
Page 46

programmer og Windows-
kompatibilitet, 39
software, 39-40
spyware, 40
Produktinformationsvejledning, 27
Q
QuickSet Hjælp, 30
R
ResourceCD
Dell Diagnostics, 40
S
servicekode, 28
sikkerhedsinstruktioner, 27
Slutbrugerlicensaftale, 27
software
problemer, 39-40
guiden
Programkompatibilitet, 39
Hjælp og support, 29
spyware, 40
supportwebsted, 29
systemvisninger
forfra, 32
set bagfra, 33
set fra højre, 33
set fra venstre, 33
set nedefra, 33-34
W
Windows XP
geninstallere, 30
46 Stikordsregister
Page 47

Dell™ Latitude™ D631
Pikaopas
Malli PP18L
www.dell.com | support.dell.com
Page 48

Huomautukset, varoitukset ja vaarat
HUOMAUTUS: HUOMAUTUKSET ovat tärkeitä tietoja, joiden avulla voit käyttää tietokonetta entistäkin paremmin.
VAROITUS: VAROITUKSET ovat varoituksia tilanteista, joissa laitteisto voi vahingoittua tai joissa tietoja voidaan menettää.
Niissä kerrotaan myös, miten nämä tilanteet voidaan välttää.
VAROITUS: VAARA-ilmoitukset kertovat tilanteista, joihin saattaa liittyä omaisuusvahinkojen, loukkaantumisen tai
kuoleman vaara.
Lyhenteet
Lyhenteiden luettelo on
Jos ostit Dellin™ n -sarjan tietokoneen, mitkään tässä asiakirjassa esitettävät viittaukset Microsoft
Käyttöoppaan
Sanastossa.
®
Windows® -
käyttöjärjestelmiin eivät koske sinua.
HUOMAUTUS: Jotkut ominaisuudet tai tietovälineet voivat olla valinnaisia, eikä niitä ehkä toimiteta tietokoneen
mukana. Jotkut ominaisuudet tai tietovälineet eivät ehkä ole saatavana joissain maissa.
___________________
Tämän asiakirjan tiedot voivat muuttua ilman erillistä ilmoitusta.
© 2007 Dell Inc. Kaikki oikeudet pidätetään.
Tämän tekstin kaikenlainen kopioiminen ilman Dell Inc:n kirjallista lupaa on jyrkästi kielletty.
Tekstissä käytetyt tavaramerkit: Dell, the DELL logo, Latitude, Wi-Fi Catcher, ExpressCharge ovat Dell Inc.:n tavaramerkkejä; AMD ja sen
yhdistelmät ovat Advanced Micro Devices, Inc.:n tavaramerkkejä; W i ndows Vista on Microsoftin tavaramerkki ja Microsoft Outlook sekä
Windows ovat Microsoft Corporationin rekisteröityjä tavaramerkkejä.
Muut tekstissä mahdollisesti käytetyt tavaramerkit ja tuotenimet viittaav at joko merkkien ja nimien haltijoihin tai näiden tuotteisiin. Dell Inc.
kieltää omistusoikeuden muihin kuin omiin tavaramerkkeihinsä ja tuotenimiinsä.
PP18L
Malli
Maaliskuu 2007 P/N UY447 Versio A00
Page 49

Sisältö
Tietojen etsiminen . . . . . . . . . . . . . . . . . . . . . . . . . . . . . . . . 51
Tietokoneen ottaminen käyttöön
Tietoja tietokoneesta
Akun käyttö
Vianmääritys
. . . . . . . . . . . . . . . . . . . . . . . . . . . . . . . . . . . . 59
. . . . . . . . . . . . . . . . . . . . . . . . . . . . . . . . . . . 62
. . . . . . . . . . . . . . . . . . . . . . . . . . . . . . 56
. . . . . . . . . . . . . . . . . . . . . . . . 55
Sisältö 49
Page 50

50 Sisältö
Page 51

Tietojen etsiminen
HUOMAUTUS: Jotkut ominaisuudet tai tietovälineet voivat olla valinnaisia, eikä niitä ehkä toimiteta tietokoneen
mukana. Jotkut ominaisuudet tai tietovälineet eivät ehkä ole saatavana joissain maissa.
HUOMAUTUS: Tietokoneen kanssa voidaan toimittaa lisätietoja.
Mitä etsit? Tietolähde:
• Tietokoneen diagnostiikkaohjelma
• Tietokoneen ohjaimet
• Laitteen ohjekirjat
• Notebook System Software (NSS)
Drivers and Utilities -tietoväline
HUOMAUTUS: Drivers and Utilities -tietoväline on
valinnainen, eikä sitä välttämättä toimiteta tietokoneen
mukana.
Ohjeet ja ohjaimet on asennettu tietokoneeseen
valmiiksi. Tietovälineen avulla asentaa ohjaimet
uudellaan ja suorittaa Dell Diagnosticsin (katso "Delldiagnostiikka" sivulla 64).
Tietovälineellä saattaa
olla Lueminuttiedostoja, joissa on
viimeisimpiä päivityksiä
tietokoneen teknisistä
muutoksista tai teknisiä
lisätietoja kokeneille
käyttäjille tai teknikoille.
• Takuutiedot
• Ehdot (vain USA)
• Turvallisuustiedot
• Säädöksiin liittyvät tiedot
• Ergonomiatiedot
• Loppukäyttäjän lisenssisopimus
HUOMAUTUS: Ohjain- ja opaspäivityksiä on osoitteessa
support.dell.com.
HUOMAUTUS: Drivers and Utilities -tietoväline on
valinnainen, eikä sitä välttämättä toimiteta tietokoneen
mukana.
Dell™ Tuotetieto-opas
Pikaopas 51
Page 52

Mitä etsit? Tietolähde:
• Osien poistaminen ja vaihtaminen
• Tekniset tiedot
• Järjestelmäasetusten määrittäminen
• Ongelmien vianmääritys ja ratkaiseminen
• Huoltomerkki ja pikapalvelukoodi
• Microsoft Windowsin käyttöoikeustarra
Käyttöopas
Microsoft Windowsin Ohje- ja tukikeskus
1
Va li t se
käyttö- ja järjestelmäoppaat
2
Napsauta tietokonemalliasi vastaavaa
Huoltomerkki ja Microsoft® Windows® -käyttöoikeus
Nämä tarrat ovat tietokoneessa.
• Huoltomerkin avulla voit tunnistaa tietokoneesi,
kun käytät
yhteyden tekniseen tukeen.
• Anna pikapalvelukoodi, joka ohjaa puheluasi
ottaessasi yhteyden tekniseen tukeen.
HUOMAUTUS: Microsoft Windowsin lisenssitarra on
suunniteltu uudelleen siten, että siinä on nyt reikä tai
"suojausportaali", joka parantaa suojausta.
Käynnistä
ja
support.dell.com
→
Ohje ja tuki→ Dellin
→
Järjestelmäoppaat
Käyttöopasta
-sivustoa tai otat
.
.
52 Pikaopas
Page 53

Mitä etsit? Tietolähde:
• Solutions (ratkaisuja) — vianmääritysvihjeitä, teknikoiden
kirjoittamia artikkeleja, online-kursseja ja usein kysyttyjä
kysymyksiä
• Community (yhteisö) — online-keskustelua muiden Dellin
asiakkaiden kanssa
• Upgrades (päivitykset) — komponenttien päivitysohjeita,
esimerkiksi muistin, kiintolevyaseman ja
käyttöjärjestelmän päivitysohjeet
• Customer Care (asiakaspalvelu) — yhteystiedot,
palvelupuhelu- ja tilaustiedot sekä takuu- ja korjaustiedot
• Service and support (palvelut ja tuki) — palvelupuhelujen
tila ja tukitapahtumat, palvelusopimukset, online-
Dellin tukisivusto — support.dell.com
HUOMAUTUS: Valitsemalla oman alueesi saat esiin
sitä koskevan tukisivuston.
Notebook System Software -apuohjelman lataaminen:
1
Siirry
support.dell.com
alueesi ja kirjoita huoltonumerosi.
2
Va li t se
3
Napsauta käyttöjärjestelmääsi ja etsi avainsanaa
Notebook System Software
HUOMAUTUS: support.dell.com-sivuston käyttöliittymä
voi vaihdella valintasi mukaan.
keskustelut teknisen tuen kanssa
• Reference (ohjeet) — tietokoneen ohjeet, laitekokoonpanon
tiedot, tuotetekniset tiedot ja white paper -raportit
• Downloads (ladattavat tiedostot) — sertifioidut ohjaimet,
korjaustiedostot ja ohjelmapäivitykset
• Notebook System Software (NSS) — Jos asennat uudelleen
tietokoneesi käyttöjärjestelmän, sinun tulee asentaa
uudelleen myös NSS-apuohjelma. NSS sisältää tärkeitä
käyttöjärjestelmäpäivityksiä ja tuen Dellin™ 3,5 tuuman
USB-levykeasemille, AMD™-suorittimille, optisille
asemille ja USB-laitteille. NSS on välttämätön, jotta Delltietokone toimii oikein. Ohjelma tunnistaa automaattisesti
tietokoneen ja käyttöjärjestelmän ja asentaa niiden
kokoonpanojen mukaiset päivitykset.
• Ohjelmistopäivitykset ja vianmääritysvihjeet — Usein
kysytyt kysymykset, ajankohtaiset aiheet ja
tietojenkäsittely-ympäristön yleinen kunto
Dell-tukiapuohjelma
Dell-tukiapuohjelma on tietokoneelle asennettu
automaattinen päivitys- ja ilmoitusjärjestelmä. Tämä
tuki tarjoaa reaaliaikaista tietojenkäsittely-ympäristön
kuntotarkastusta, ohjelmistopäivityksiä ja
asiaankuuluvia tukitietoja. Avaa Dell-tukiapuohjelma
tehtävärivillä olevasta
Käyttöoppaan
• Windows-käyttöjärjestelmien käyttäminen
• Työskentely ohjelmien ja tiedostojen kanssa
• Työpöydän muokkaaminen
Windowsin Ohje- ja tukikeskus
1
Va li t se
2
Kirjoita ongelmaa kuvaava sana tai lause ja napsauta
nuolikuvaketta.
3
Napsauta ohjeaihetta, joka kuvaa ongelmaa.
4
Noudata näytön ohjeita.
-sivustoon, valitse oma
Ohjaimet & lataukset
ja napsauta
.
-kuvakkeesta. Katso lisätietoja
kohdasta "Dell-tukiapuohjelma".
Käynnistä
tai
→
Ohje ja tuki
Mene
.
.
Pikaopas 53
Page 54

Mitä etsit? Tietolähde:
• Tiedot verkkotoiminnasta, Ohjatusta virranhallinnasta,
pikanäppäimistä ja muista Dell QuickSetin ohjaamista
kohdista
Dell QuickSetin ohje
Ta r k a s t e l e
hiiren kakkospainikkeella Quickset-kuvaketta, joka on
Microsoft
Katso lisätietoja Dell QuickSetistä Käyttöoppaan
kohdasta "Dell™ QuickSet".
• Käyttöjärjestelmän uudelleenasentaminen
Käyttöjärjestelmä-CD-levy
HUOMAUTUS: Operating System -CD-levy voi olla
valinnainen eikä sitä välttämättä toimiteta tietokoneen
mukana.
Käyttöjärjestelmä on jo asennettu tietokoneeseen. Jos
haluat asentaa käyttöjärjestelmän uudelleen, käytä
Operating System -CD-levyä. Katso kohta
"Microsoft
Käyttöoppaasta.
Dell QuickSet -ohjetta napsauttamalla
®
Windows® -tehtävärivillä.
®
Windows® XP:n uudelleenasentaminen"
Kun olet asentanut
käyttöjärjestelmän
uudelleen, asenna
uudelleen tietokoneen
mukana toimitettujen
laitteiden ohjaimet
Drivers and Utilities tietovälineeltä.
54 Pikaopas
Käyttöjärjestelmän tuoteavaintarra on tietokoneessa.
HUOMAUTUS: CD-levyn väri vaihtelee tilaamasi
käyttöjärjestelmän mukaan.
Page 55

Tietokoneen ottaminen käyttöön
VAROITUS: Ennen kuin teet mitään tässä osiossa mainittuja toimia, noudata
turvallisuusohjeita
1
Pura lisävarusteet pakkauksesta.
2
Aseta pakkauksessa olevat lisävarusteet esille. Tarvitset niitä valmistellessasi tietokonetta käyttöönottoa varten.
Lisävarustepakkauksessa on lisäksi käyttöohjeita sekä tilaamiasi muita ohjelmistoja tai laitteita
(PC-kortteja, levyasemia tai akkuja).
3
Varmista, että virtalähde on liitetty tietokoneeseen ja pistorasiaan.
4
Käynnistä tietokone avaamalla näyttö ja painamalla virtapainiketta (katso "Tietokone edestä
katsottuna" sivulla 56).
.
Tuotetieto-oppaassa olevia
HUOMAUTUS: Tietokone on suositeltavaa kytkeä päälle ja sammuttaa ainakin kerran ennen korttien asentamista
tai tietokoneen liittämistä telakointiasemaan tai muuhun ulkoiseen laitteeseen, kuten tulostimeen.
Pikaopas 55
Page 56

Tietoja tietokoneesta
Tietokone edestä katsottuna
13
12
1
2
3
11
10
9
8
7
1 näytön salpa 2 näyttö 3 virtapainike
4 laitteen tilan ilmaisimet 5 näppäimistö 6 kosketuslevy
7 sormenjälkilukija (lisävaruste) 8 kosketuslevyn/sauvaohjaimen
painikkeet
10 näppäimistön tilailmaisimet 11 äänenvoimakkuuden
säätöpainikkeet
13 mykistysnäppäin
6
9 sauvaohjain
12 ympäristön valotunnistin
4
5
56 Pikaopas
Page 57

Tietokone vasemmalta katsottuna
1 2 3 65 7 84 9
1 suojakaapelin paikka 2 ilmanpoistoaukko 3 ääniliittimet (2)
4 älykorttipaikka (jossa tyhjä kortti) 5 1394-liitin 6 langaton kytkin
7 Wi-Fi Catcher™ -valo 8 PC-korttipaikka 9 kiintolevy
Tietokone oikealta katsottuna
1 optinen asema
tietovälinepaikassa
1
2 tietovälinepaikan salvan vapautin 3 USB-liittimet (2)
2
3
Pikaopas 57
Page 58

Näkymä takaa
VAROITUS: Älä peitä ilma-aukkoja, älä työnnä niihin esineitä äläkä anna pölyn kerääntyä niihin. Älä säilytä
käynnissä olevaa tietokonetta -ilmatiiviissä tilassa, kuten suljetussa salkussa. Jos ilman vaihtuminen estetään,
tietokone voi vahingoittua tai voi syttyä tulipalo.
1 2 63 4 75
1 verkkoliitin (RJ-45) 2 modeemiliitin (RJ-11) 3 USB-liittimet (2)
4 sarjaliitin 5 videoliitin 6 virtasovittimen liitin
7 ilmanvaihtoaukot
Alta katsottuna
1
8
7
6
1 akun varausmittari/kuntomittari 2 akku 3 akkupaikan salvan vapautin (2)
4 laitteen lukitusruuvi (jos on) 5 muistimoduulin kansi 6 telakointilaitteen liitin
7 ilmanpoistoaukko 8 kiintolevy
2
3
4
5
58 Pikaopas
Page 59

Akun käyttö
Akun suoritusteho
HUOMAUTUS: Katso Tuotetieto-oppaasta tai tietokoneen mukana toimitetusta erillisestä takuupaperiasiakirjasta,
mitä tietokoneesi Dell-takuu kattaa.
Parhainten kannettava Dell™-tietokoneesi toimii ja BIOS-asetukset säilyvät, kun pääakku on aina
asennettuna tietokoneeseen sitä käytettäessä. Tietokoneen mukana toimitetaan yksi akku
vakiovarusteena akkupaikkaan asennettuna.
HUOMAUTUS: Koska akku ei ole välttämättä täyteen ladattu, kytke tietokoneen verkkolaitteen johto pistorasiaan
ennen tietokoneen ensimmäistä käyttökertaa. Käytä tietokonetta verkkovirralla, kunnes akku on täysin latautunut. Akun
lataustilaa voi tarkastella valitsemalla Käynnistä→ Asetukset→ Ohjauspaneeli→ Virta-asetukset→ Virtamittari.
HUOMAUTUS: Akun käyttöaika (aika, jolloin se pysyy ladattuna) vähenee ajan myötä. Sen mukaan, miten usein ja
missä oloissa akkua käytetään, voit joutua hankkimaan uuden akun tietokoneen käyttöiän aikana.
Akun käyttöaika vaihtelee käyttöolojen mukaan. Voit asentaa valinnaisen toisen akun tietovälinepaikkaan,
jolloin käyttöaika pitenee huomattavasti.
Käyttöaika lyhenee huomattavasti, kun teet esimerkiksi seuraavia toimia:
• Optisten asemien käyttö
• Käytät langattomia tiedonsiirtolaitteita, PC-kortteja, Express-kortteja, tietovälinemuistikortteja tai
USB-laitteita.
• käytät kirkkaita näyttöasetuksia, 3D-näytönsäästäjiä tai muita paljon tehoa vaativia ohjelmia, kuten
monimutkaisia 3D-grafiikkasovelluksia.
• Käytät tietokonetta maksimisuoritustilassa (katso "Virrankulutuksen hallinta-asetusten määrittäminen"
Käyttöoppaasta
).
HUOMAUTUS: On suositeltavaa, että liität tietokoneen pistorasiaan, kun kirjoitat CD- tai DVD-asemalla.
Voit tarkistaa akun latauksen ennen kuin asetat akun tietokoneeseen (katso "Akun latauksen tarkistus"
sivulla 60). Voit myös määrittää virranhallinta-asetukset ilmoittamaan, kun lataus on loppumassa
"Virrankulutuksen hallinta-asetusten määrittäminen"
VAROITUS: Yhteensopimattoman akun käyttö voi lisätä tulipalon tai räjähdyksen vaaraa. Vaihda akku vain
Delliltä hankkimaasi yhteensopivaan akkuun. Litiumioniakku on suunniteltu toimimaan Dell-tietokoneen kanssa.
Älä käytä toisen -tietokoneen akkua omassa tietokoneessasi.
VAROITUS: Älä hävitä akkuja talousjätteen mukana. Kun akkusi ei enää lataudu, ota yhteys paikalliseen
jätehuolto- tai ympäristöviranomaiseen ja kysy tietoja litiumioniakun hävittämisestä. Katso "Akun hävittäminen"
kohdasta
VAROITUS: Akun väärä käyttö voi lisätä tulipalon tai kemiallisen palovamman vaaraa. Älä riko, polta tai pura
akkua äläkä altista sitä yli 60 °C:n (140 °F) lämpötiloille. Pidä akku poissa lasten ulottuvilta. Käsittele
vahingoittunutta tai vuotavaa akkua erittäin huolellisesti. Vahingoittuneet akut voivat vuotaa ja aiheuttaa
ruumiinvammoja tai aineellisia vahinkoja.
Tuotetieto-opas
.
Käyttöoppaasta
).
Pikaopas 59
(katso
Page 60

Akun latauksen tarkistus
Dell QuickSet -akkumittari, Microsoft Windowsin Virtamittari-ikkuna ja -kuvake, akkumittari,
kuntomittari ja akun tyhjenemisvaroitus antavat tietoa akun latauksesta.
Dell™ QuickSet -akkumittari
Jos Dell QuickSet on asennettu, tuo QuickSet-akkumittari näyttöön painamalla <Fn><F3>.
Akkumittarissa näkyy tietokoneen akun tila, lataustaso ja latauksen päättymisaika.
Lisätietoja QuickSet-toiminnosta saat napsauttamalla tehtävärivin QuickSet-kuvaketta hiiren
kakkospainikkeella ja valitsemalla Ohje.
Microsoft® Windowsin® virtamittari
Windowsin virtamittari näyttää jäljellä olevan akun latauksen. Voit tarkistaa virtamittarin tiedot
kaksoisnapsauttamalla tehtävärivin -kuvaketta.
Jos tietokone on liitetty pistorasiaan, -kuvake tulee näyttöön.
Latausmittari
Painamalla akun latausmittarin tilapainiketta kerran tai painamalla ja pitämällä painiketta voit tarkistaa
seuraavat seikat:
• Akun lataus (tarkista painamalla ja
• Akun kunto (tarkista painamalla ja
Akun käyttöaika määräytyy paljolti sen mukaan, miten monta kertaa se on ladattu. Satojen lataus- ja
käyttökertojen jälkeen akut menettävät osan varauskapasiteetistaan eli kunnostaan. Akku voi näyttää
olevan "ladattu", mutta lataustaso (kunto) on silti matala.
vapauttamalla
pitämällä
tilapainiketta)
tilapainike)
Akun latauksen tarkistaminen
Tarkista akun lataus painamalla ja vapauttamalla akun latausmittarin tilapainike, mikä sytyttää
lataustasovalot. Kukin ilmaisin vastaa noin 20:tä prosenttia akun kokonaislatauksen määrästä.
Esimerkiksi jos akussa on 80 prosenttia latauksesta jäljellä, neljä ilmaisinta palaa. Jos valot eivät pala,
akku on tyhjä.
Akun kunnon tarkistaminen
HUOMAUTUS: Akun kunnon voi tarkistaa kahdella tavalla: käyttämällä akun latausmittaria alla kuvatulla tavalla
tai käyttämällä Dell QuickSetin akkumittaria. Lisätietoja QuickSet-toiminnosta saat napsauttamalla tehtävärivin
QuickSet-kuvaketta hiiren kakkospainikkeella ja valitsemalla Ohje.
Tarkista akun kunto painamalla ja pitämällä akun latausmittarin tilapainiketta vähintään 3 sekunnin
ajan. Jos yhtään ilmaisinvaloa ei syty, akku on hyvässä kunnossa ja yli 80 prosenttia alkuperäisestä
latauskapasiteetista on vielä jäljellä. Mitä useampi ilmaisin palaa, sen lyhyempi on käyttöikä. Jos viisi
ilmaisinvaloa syttyy, latauskapasiteetista on jäljellä alle 60 prosenttia ja sinun tulee alkaa miettiä uuden
akun ostoa. Katso kohdasta "Tekniset tiedot" Käyttöoppaasta lisätietoja akun käyttöiästä.
60 Pikaopas
Page 61

Akun tyhjenemisvaroitus
VAROITUS: Vältä tietojen menetys tai vahingoittuminen tallentamalla työsi heti saatuasi akun tyhjenemisvaroituksen.
Liitä tietokone sitten pistorasiaan. Jos akku tyhjenee kokonaan, tietokoneen lepotila alkaa automaattisesti.
Kun akku on tyhjentynyt noin 90-prosenttisesti, tietokoneen näyttöön tulee siitä ilmoittava varoitus. Voit
vaihtaa akun tyhjenemisvaroituksia QuickSetin avulla tai Virta-asetukset-ikkunassa. Katso kohdasta
"Virrankulutuksen hallinta-asetusten määritys"
Käyttöoppaasta lisätietoja QuickSetin tai Virta-asetukset -
ikkunan käytöstä.
Akun lataaminen
HUOMAUTUS: Dell™ ExpressCharge™-laturilla verkkolaite lataa, kun tietokone on sammutettuna, kokonaan
tyhjentyneen akun 80 prosenttiin 1 tunnin aikana ja 100 prosenttiin noin 2 tunnin aikana. Latausaika on pitempi, jos
tietokone on käynnissä. Voit jättää akun tietokoneeseen niin pitkäksi aikaa kuin haluat. Akun sisäiset piirit estävät
sen ylilatauksen.
Kun liität tietokoneen pistorasiaan tai asennat akun tietokoneen ollessa liitettynä pistorasiaan, tietokone
tarkistaa akun latauksen ja lämpötilan. Verkkolaite lataa akun tarvittaessa ja ylläpitää sen latausta.
Jos akku on kuuma sen jälkeen, kun sitä on käytetty tietokoneessa tai kuumassa ympäristössä, akku ei
ehkä lataudu, kun tietokone liitetään pistorasiaan.
Akku on liian kuuma ladattavaksi, jos -valo vilkkuu vuorotellen vihreänä ja oranssina. Irrota tietokone
pistorasiasta ja anna tietokoneen ja akun jäähtyä huoneenlämpöisiksi. Kytke tietokone sitten
sähköpistorasiaan akun latauksen jatkamiseksi.
Lisätietoja akkuongelmien ratkaisemisesta on Käyttöoppaassa kohdassa "Virtaongelmat".
Akun irrottaminen
VAROITUS: Ennen kuin suoritat nämä toimenpiteet, sammuta tietokone, irrota verkkolaite sähköpistorasiasta ja
tietokoneesta, irrota modeemi puhelinpistokkeesta ja tietokoneesta ja irrota kaikki ulkoiset johdot tietokoneesta.
VAROITUS: Yhteensopimattoman akun käyttö voi lisätä tulipalon tai räjähdyksen vaaraa. Vaihda akku vain
Delliltä hankkimaasi yhteensopivaan akkuun. Akku on suunniteltu toimimaan Dell™-tietokoneen kanssa. Älä
käytä toisen tietokoneen akkua omassa tietokoneessasi.
VAROITUS: Kaikki ulkoiset johdot on irrotettava tietokoneesta liittimen mahdollisen vaurioitumisen estämiseksi.
Lisätietoa tietovälinepaikassa olevan vara-akun vaihtamisesta on Käyttöoppaan kohdassa "Multimedian käyttäminen".
Akun irrottaminen:
Jos tietokone on kiinnitetty telakointilaitteeseen, irrota se telakoinnista. Lisätietoja saat käyttämäsi
1
telakointilaitteen ohjeesta.
2
Varmista, että tietokone on sammutettu.
3
Liu'uta ja nosta akku ulos akkupaikasta.
Pikaopas 61
Page 62

1
2
1 akkupaikan salvan vapautin 2 akku
Laita akku paikalleen asettamalla se akkupaikaan ja painamalla sitä alas, kunnes salvan vapautin napsahtaa.
Akun säilytys
Irrota akku, jos et käytä tietokonettasi pitkään aikaan. Akku tyhjenee pitkän säilytyksen aikana. Lataa
akku kokonaan pitkän varastointiajan jälkeen (katso "Akun lataaminen" sivulla 61).
Vianmääritys
Lukittumiset ja ohjelmaongelmat
VAROITUS: Ennen kuin teet mitään tässä osiossa mainittuja toimia, noudata
turvallisuusohjeita
Tietokone ei käynnisty
VARMISTA, ETTÄ VIRTALÄHDE ON LIITETTY TIETOKONEESEEN JA PISTORASIAAN.
Tietokone lakkaa reagoimasta
VAROITUS: Voit menettää tietoja, jos et pysty sammuttamaan käyttöjärjestelmää.
AMMUTA TIETOKONE — Jos tietokone ei tee mitään, kun painat näppäintä tai liikutat hiirtä, paina
S
.
virtapainiketta vähintään 8 - 10 sekuntia, kunnes tietokone sammuu. Käynnistä sitten tietokone uudelleen.
62 Pikaopas
Tuotetieto-oppaassa olevia
Page 63

Ohjelma lakkaa toimimasta tai kaatuu toistuvasti
HUOMAUTUS: Ohjelmasta on yleensä asennusohjeet sen oppaissa tai levykkeellä tai CD-levyllä.
ULJE OHJELMA —
S
1
Paina <Ctrl->, <Vaihto-> ja <Esc>-näppäimiä samaan aikaan.
2
Va li t s e
Tehtävienhallinta
3
Napsauta ohjelmaa, joka ei enää vastaa.
4
Va li t s e
Lopeta tehtävä
TARKISTA OHJELMISTON OPPAAT — Poista ohjelma ja asenna se tarvittaessa uudelleen.
Ohjelma on tarkoitettu Microsoft® Windowsin® aikaisemmalle versiolle
SUORITA OHJATTU OHJELMAN YHTEENSOPIVUUDEN VARMISTAMINEN — Ohjattu ohjelman yhteensopivuuden
.
.
varmistaminen määrittää ohjelman niin, että se toimii ympäristössä, joka muistuttaa muita kuin Windows XP
-käyttöjärjestelmäympäristöjä.
Va li t s e
1
Käynnistä→
varmistaminen
2
Noudata näytön ohjeita.
Näyttö muuttuu täysin siniseksi
SAMMUTA TIETOKONE — Jos tietokone ei tee mitään, kun painat näppäintä tai liikutat hiirtä, paina
Kaikki ohjelmat→ Apuohjelmat→
→
Seuraava
.
Ohjattu ohjelman yhteensopivuuden
virtapainiketta vähintään 8 - 10 sekuntia, kunnes tietokone sammuu. Käynnistä sitten tietokone uudelleen.
Muita ohjelmaongelmia
TARKISTA OHJELMAN OPPAAT TAI PYYDÄ VIANMÄÄRITYSTIETOJA OHJELMAN VALMISTAJALTA —
• Varmista, että ohjelma on yhteensopiva tietokoneesi käyttöjärjestelmän kanssa.
• Varmista, että tietokone vastaa ohjelman vähimmäisvaatimuksia. Katso tietoja ohjelman oppaista.
• Varmista, että ohjelma on asennettu ja määritetty oikein.
• Tarkista, että laitteen ohjaimet eivät ole ristiriidassa ohjelman kanssa.
• Poista ohjelma ja asenna se tarvittaessa uudelleen.
TEE HETI VARMUUSKOPIOT TIEDOSTOISTASI.
ARKISTA KIINTOLEVY, LEVYKKEET TAI CD-LEVYT VIRUSTORJUNTAOHJELMALLA.
T
ALLENNA JA SULJE KAIKKI AVATUT TIEDOSTOT TAI OHJELMAT JA SAMMUTA TIETOKONE Käynnistä-VALIKOSTA.
T
T
ARKISTA, ETTEI TIETOKONEESSA OLE VAKOILUOHJELMIA (SPYWARE) — Jos tietokoneesi toimii hitaasti, saat
usein muut ikkunat peittäviä mainoksia tai sinulla on ongelmia Internet-yhteyden muodostamisessa,
tietokoneeseesi on voinut tunkeutua vakoiluohjelma. Käytä virustorjuntaohjelmaa, jossa on myös
vakoiluohjelmasuojaus (ohjelmasi voi edellyttää päivitystä) ja joka käy läpi tietokoneen sisällön ja poistaa
vakoiluohjelmat. Lisätietoja saat siirtymällä osoitteeseen support.dell.com ja etsimällä hakusanalla
spyware (vakoiluohjelma).
Pikaopas 63
Page 64

SUORITA DELL-DIAGNOSTIIKKAOHJELMA — Katso "Dell-diagnostiikka" sivulla 64. Jos kaikki testit
onnistuvat, virhetila liittyy ohjelmaongelmaan.
Dell-diagnostiikka
VAROITUS: Ennen kuin teet mitään tässä osiossa mainittuja toimia, noudata
turvallisuusohjeita
Dell-diagnostiikkaohjelman käyttäminen
.
Tuotetieto-oppaassa olevia
Jos tietokoneessasi on jotain ongelmia, suorita kohdassa "Lukittumiset ja ohjelmaongelmat" sivulla 62
mainitut tarkistukset ja suorita Dell-diagnostiikkaohjelma, ennen kuin otat yhteyttä Dellin tekniseen tukeen.
Suosittelemme näiden ohjeiden tulostamista ennen aloittamista.
VAROITUS: Dell-diagnostiikkaohjelma toimii vain Dell™ -tietokoneissa.
HUOMAUTUS: Drivers and Utilities -tietoväline on lisävaruste, eikä sitä välttämättä toimiteta tietokoneen mukana.
Siirry järjestelmän asetusohjelmaan (katso kohta "Järjestelmän asetusohjelma" Käyttöoppaasta), tarkista
tietokoneen kokoonpanotiedot ja varmista, että testattava laite näkyy järjestelmäasetuksissa ja on aktiivinen.
Käynnistä Dell-diagnostiikkaohjelma joko kiintolevyltä tai lisävarusteena saatavalta Drivers and Utilities tietovälineeltä.
Dell-diagnostiikkaohjelman käynnistäminen kiintolevyltä
Dell-diagnostiikkaohjelma sijaitsee kiintolevyllä piilotettuna olevassa Diagnostic utility -osiossa.
HUOMAUTUS: Jos tietokoneen näytöllä ei näy kuvaa, ota yhteys Delliin (katso "Dellin yhteystiedot"
Käyttöoppaasta).
1
Sammuta tietokone. Käynnistä (tai käynnistä uudelleen) tietokone.
2
Jos tietokone on kiinnitetty telakointilaitteeseen, irrota se telakoinnista. Lisätietoja saat käyttämäsi
telakointilaitteen ohjeesta.
3
Liitä tietokone pistorasiaan.
4
Diagnostiikkaohjelma voidaan käynnistää kahdella tavalla:
a
Käynnistä tietokone. Kun DELL™-logo tulee näkyviin, paina heti <F12>. Valitse
käynnistysvalikosta Diagnostics ja paina <Enter>-näppäintä.
HUOMAUTUS: Jos odotat liian kauan ja käyttöjärjestelmän logo tulee näyttöön, odota, kunnes näyttöön
tulee Microsoft
Pidä <Fn>-näppäintä painettuna, kun käynnistät tietokoneen.
b
HUOMAUTUS: Jos näyttöön tulee ilmoitus siitä, että diagnostiikka-apuohjelman osiota ei löydy, suorita Dell-
diagnostiikkaohjelma lisävarusteena saatavalta Drivers and Utilities -tietovälineeltä.
Tietokone suorittaa Pre-boot System Assessment -toiminnon, joka on sarja emolevyn, näppäimistön,
kiintolevyn ja näytön toimintaa alustavasti testaavia diagnostiikkaohjelmia.
• Testien aikana sinun on ehkä vastattava joihinkin kysymyksiin.
64 Pikaopas
®
Windows® -työpöytä. Sammuta tämän jälkeen tietokone ja yritä uudelleen.
Page 65

• Jos havaitaan vika, tietokone lopettaa toimintansa ja antaa äänimerkin. Jos haluat keskeyttää testin
ja käynnistää tietokoneen uudelleen, paina <Esc>. Jos haluat jatkaa seuraavaan testiin, paina
<y>. Jos haluat testata virheen antaneen osan uudelleen, paina <r>.
• Jos Pre-boot System Assessment -toiminnon aikana havaitaan virheitä, kirjoita virhekoodi(t)
muistiin ja ota yhteyttä Delliin (katso "Dellin yhteystiedot"
Jos Pre-boot System Assessment -toiminto suoritetaan loppuun asti, näyttöön tulee viesti
Dell Diagnostic Utility Partition
käynnistetään).
5
Käynnistä Dell-diagnostiikkaohjelma kiinto levyn Diagnostics Utility -osiolta painamalla mitä tahansa
Jatka painamalla mitä tahansa näppäintä
(Dellin diagnostiikka-apuohjelman osio
Käyttöoppaasta
.
).
Booting
näppäintä.
Dell-diagnostiikkaohjelman käynnistäminen lisävarusteena saatavalta Drivers and Utilities CD -tietovälineeltä
1
Aseta
Drivers and Utilities
2
Sammuta tietokone ja käynnistä se sitten uudelleen.
-tietoväline sisään.
Kun DELL-logo tulee näkyviin, paina heti <F12>.
Jos odotat liian kauan ja Windows-logo tulee näyttöön, odota, kunnes näyttöön tulee Windows-
työpöytä. Sammuta tämän jälkeen tietokone ja yritä uudelleen.
HUOMAUTUS: Seuraavat ohjeet muuttavat käynnistysjakson vain yhdeksi kerraksi. Seuraavan kerran
tietokonetta käynnistettäessä se käynnistää järjestelmäasetuksissa määritetyt laitteet.
3
Kun käynnistyslaiteluettelo tulee esiin, korosta
IDE CD-ROM-laiteCD/DVD/CD-RW-asema
ja paina
<Enter>.
4
Valitse näyttöön tulevasta valikosta
5
Kirjoita 1
6
Va li t s e
ResourceCD
-valikon avaamiseksi ja jatka painamalla <Enter>.
Run the 32 Bit Dell Diagnostics
Boot from CD-ROM
-vaihtoehto ja paina <Enter>.
numeroidusta luettelosta. Jos luettelossa on useita versioita,
valitse tietokoneellesi sopiva versio.
7
Kun Dell-diagnostiikkaohjelman
päävalikko
tulee näkyviin, valitse suoritettava testi.
Dell-diagnostiikkaohjelman päävalikko
1
Kun Dell-diagnostiikkaohjelma on latautunut ja
Vaihtoehto Toiminto
Express Test (pikatesti) Testaa laitteet nopeasti. Testaaminen vie yleensä 10–20 minuuttia. Käyttäjän ei
tarvitse tehdä mitään testauksen aikana. Pikatestillä voit selvittää ongelman syyt
nopeasti.
Extended Test (laaja testi) Testaa laitteet läpikotaisin. Testi kestää yleensä vähintään tunnin, ja siinä täytyy
tietyin väliajoin vastata kysymyksiin.
päävalikko
avautuu, napsauta haluamaasi vaihtoehtoa.
Pikaopas 65
Page 66

Vaihtoehto Toiminto
Custom Test
(mukautettu testi)
Symptom Tree
(ongelmapuu)
2
Jos testin aikana löydetään ongelma, näyttöön tulee sanoma, jossa ilmoitetaan virhekoodi ja ongelman
Testaa tietyn laitteen. Suoritettavia testejä voi mukauttaa.
Näyttää luettelon tavallisimmista virheen ilmenemistavoista, ja voit valita testin,
joka perustuu ongelman ilmenemistapaan.
(jatkuu)
kuvaus. Kirjoita virhekoodi ja ongelman kuvaus muistiin ja noudata näyttöön tulevia ohjeita.
Jos et pysty ratkaisemaan vikaa, katso "Dellin yhteystiedot"
HUOMAUTUS: Tietokoneen huoltomerkki näkyy kunkin näytön yläosassa. Jos otat yhteyttä Delliin, tekninen
tuki kysyy huoltonumeroasi, joka on huoltomerkissä.
3
Jos suoritat testin käyttämällä
Custom Test
(mukautettu testi)- tai
Käyttöoppaasta
Symptom Tree
.
(ongelmapuu) -
vaihtoehtoa, saat lisätietoja napsauttamalla seuraavassa taulukossa kuvattuja välilehtiä.
Välilehti: Toiminto:
Results (tulokset) Näyttää testin tulokset ja havaitut virhetilanteet.
Errors (virheet) Näyttää havaitut virhetilanteet, virhekoodit ja ongelmankuvauksen.
Help (ohje) Sisältää kuvauksen testistä ja saattaa ilmoittaa testin suorittamiseen liittyviä
vaatimuksia.
Configuration
(kokoonpano)
Parameters (määreet) Voit mukauttaa testiä muuttamalla testiasetuksia.
Näyttää valitun laitteen laitteistokokoonpanon.
Dell-diagnostiikkaohjelma saa kaikkien laitteiden kokoonpanotiedot järjestelmän
asennusohjelmasta, muistista ja sisäisistä testeistä. Tiedot näytetään vasemmassa
reunassa olevassa laiteluettelossa. Laiteluettelossa ei välttämättä ole kaikkien
tietokoneeseen asennettujen komponenttien tai tietokoneeseen liitettyjen
laitteiden nimiä.
4
Jos suoritat Dell-diagnostiikkaohjelmaa
testit on suoritettu.
5
Kun testit on suoritettu, sulje testinäyttö ja palaa
diagnostiikkaohjelman käytön ja käynnistää tietokoneen uudelleen sulkemalla
66 Pikaopas
Drivers and Utilities
päävalikon
-tietovälineeltä, poista tietoväline, kun
näytölle. Voit lopettaa Dell-
päävalikon
näytön.
Page 67

Hakemisto
A
akku
irrottaminen, 61
lataaminen, 61
latauksen tarkistaminen, 60
latausmittari, 60
säilytys, 62
suoritusteho, 59
virtamittari, 60
C
CD-levyt
käyttöjärjestelmä, 54
D
Dell-diagnostiikka
Drivers and Utilities -
tietovälineeltä
käynnistäminen, 65
käynnistäminen
kiintolevyltä, 64
käyttäminen, 64
tietoja, 64
Dellin tukisivusto, 53
diagnostiikkaohjelma
Dell, 64
dokumentointi
ergonomia, 51
Käyttöopas, 52
Loppukäyttäjän
lisenssisopimus, 51
online, 53
säädökset, 51
takuu, 51
Tu o t e t i e t o - o p a s , 5 1
turvallisuus, 51
E
ergonomiatiedot, 51
H
Huoltomerkki, 52
J
järjestelmänäkymät
alta katsottuna, 58
edestä katsottuna, 56
oikealta katsottuna, 57
takaa, 58
vasemmalta katsottuna, 57
K
käyttöjärjestelmä
CD, 54
uudelleenasennus, 54
Käyttöopas, 52
L
laitteisto
Dell-diagnostiikka, 64
Loppukäyttäjän
lisenssisopimus, 51
O
ohjatut toiminnot
Ohjattu ohjelman
yhteensopivuuden
varmistaminen, 63
Ohje- ja tukikeskus, 53
ohjelmisto
ongelmat, 63
ohjetiedosto
Windowsin Ohje- ja
tukikeskus, 53
ongelmat
Dell-diagnostiikka, 64
lukittumiset, 62
ohjelma kaatuu, 63
ohjelma lakkaa toimimasta, 63
ohjelmat ja Windows-
yhteensopivuus, 63
ohjelmisto, 62-63
sininen näyttö, 63
tietokone ei käynnisty, 62
tietokone kaatuu, 62-63
tietokone lakkaa
reagoimasta, 62
tietokoneen hidas toiminta, 63
vakoiluohjelma, 63
Hakemisto 67
Page 68

Q
QuickSet-ohje, 54
Ohje- ja tukikeskus, 53
virustentorjuntaohjelmisto, 63
R
Resurssilevy
Dell-diagnostiikka, 64
S
säädöksiin liittyvät tiedot, 51
T
takuutiedot, 51
tarrat
Huoltomerkki, 52
Microsoft Windows, 52
tietokone
hidas toiminta, 63
kaatuu, 62-63
lakkaa reagoimasta, 62
Tietoväline
Drivers and Utilities, 51
tuen web-sivusto, 53
W
Windows XP
Ohjattu ohjelman
yhteensopivuuden
varmistaminen, 63
Ohje- ja tukikeskus, 53
uudelleenasennus, 54
Tuotetieto-opas, 51
turvallisuustiedot, 51
V
vakoiluohjelma, 63
vianmääritys
Dell-diagnostiikka, 64
lukittumiset ja
ohjelmaongelmat, 62
68 Hakemisto
Page 69

Dell™ Latitude™ D631
Hurtigveiledning
Modell PP18L
www.dell.com | support.dell.com
Page 70

Merknader, advarsler og OBS!
MERKNAD: Et Merknad-avsnitt inneholder viktig informasjon som hjelper deg til å bruke datamaskinen mer effektivt.
ADVARSEL: En ADVARSEL angir enten potensiell fare for maskinvaren eller tap av data, og forteller hvordan du kan unngå
problemet.
OBS! En OBS! angir en potensiell fare for skade på eiendom, personskade eller dødsfall.
Forkortelser og akronymer
For en komplett liste over forkortelser og akronymer, se ordlisten i
Hvis du har kjøpt en Dell™ n Series datamaskin, vil ingen av henvisningene i dette dokumentet til Microsoft
Windows
®
-operativsystemer være relevante.
MERKNAD: Noen funksjoner eller mediaplater kan være ekstra tilbehør og leveres ikke med alle datamaskiner. Noen
funksjoner eller mediaplater er kanskje ikke tilgjengelige i enkelte land.
brukerhåndboken
.
®
___________________
Informasjonen i dette dokumentet kan bli endret uten varsel.
© 2007 Dell Inc. Alle rettigheter forbeholdes.
Reproduksjon i enhver form uten skriftlig tillatelse fra Dell Inc. er strengt forbudt.
Varemerker brukt i denne teksten: Dell, DELL-logoen, Latitude, Wi-Fi Catcher, ExpressCharge er varemerker for Dell Inc.; AMD og
kombinasjoner med dette er varemerker for Advanced Micro De vices, Inc; Windows Vista er et varemerke og Microsoft Outlook og Windows
er registrerte varemerker for Microsoft Corporation.
Andre varemerker og varenavn kan bli brukt i dette dokumentet for å henvise til dem som innehar rettighetene til merkene og navnene, eller
til produktene. Dell Inc. fraskriver seg enhver eierinteresse for varemerker og varenavn andre enn sine egne.
PP18L
Modell
Mars 2007 P/N UY447 Rev. A00
Page 71

Innhold
Finne informasjon . . . . . . . . . . . . . . . . . . . . . . . . . . . . . . . . 73
Konfigurere datamaskinen
Om din datamaskin
Bruke et batteri
Feilsøking
. . . . . . . . . . . . . . . . . . . . . . . . . . . . . . . . 78
. . . . . . . . . . . . . . . . . . . . . . . . . . . . . . . . . . 81
. . . . . . . . . . . . . . . . . . . . . . . . . . . . . . . . . . . . 84
. . . . . . . . . . . . . . . . . . . . . . . . . . . . 77
Innhold 71
Page 72

72 Innhold
Page 73

Finne informasjon
MERKNAD: Noen funksjoner eller mediaplater kan være ekstra tilbehør og leveres ikke med alle datamaskiner.
Noen funksjoner eller mediaplater er kanskje ikke tilgjengelige i enkelte land.
MERKNAD: Ytterligere informasjon kan være vedlagt datamaskinen.
Hva leter du etter? Finn det her
• Et diagnoseprogram for datamaskinen
• Drivere til datamaskinen
• Dokumentasjon for min enhet
• Systemprogramvare (Notebook System Software - NSS)
• Garantiopplysninger
• Vilkår og betingelser (bare i USA)
• Sikkerhetsinstruksjoner
• Offentlige bestemmelser
• Informasjon om ergonomi
• Lisensavtale for sluttbruker
Drivers and Utilities (drivere og hjelpeprogrammer)
MERKNAD: Mediaplaten Drivers and Utilities kan
være ekstra tilbehør og følger derfor ikke med alle
datamaskiner.
Dokumentasjon og drivere er allerede installert
på datamaskinen. Du kan bruke mediaplaten til
å installere drivere på nytt, og til å kjøre Dell
Diagnostics (se "Dell Diagnostics" på side 86).
Viktig-filer inkludert
på mediaplaten kan
inneholde de nyeste
oppdateringene
i forbindelse med
tekniske endringer
i datamaskinen, eller
avansert teknisk
referansemateriale for
teknikere og erfarne
brukere.
MERKNAD: Oppdateringer for drivere og
dokumentasjon finnes på support.dell.com.
MERKNAD: Mediaplaten Drivers and Utilities kan
være ekstra tilbehør og følger derfor ikke med alle
datamaskiner.
Dell™ Produktveiledning
Hurtigveiledning 73
Page 74

Hva leter du etter? Finn det her
• Hvordan fjerne og bytte ut deler
• Spesifikasjoner
• Hvordan konfigurere systeminnstillinger
• Hvordan feilsøke og løse problemer
• Servicemerke og kode for ekspress-service
• Lisensmerke for Microsoft Windows
Brukerhåndbok
Hjelp og støtte for Microsoft Windows
1
Klikk på
Support
Guides
2
Klikk på
Servicemerke og Microsoft® Windows®-lisens
Disse merkene er plassert på datamaskinen.
• Bruk servicemerket til å identifisere datamaskinen
når du bruker
med teknisk støtte.
• Tast inn koden for ekspress-service for å sette over
samtalen ved kontakt med teknisk støtte.
MERKNAD: Lisensmerket for Microsoft Windows er
blitt endret med et hull, eller "sikkerhetsportal", som en
ekstra sikkerhetsforholdsregel.
Start
eller
→
Dell User and System
→
System Guides
brukerhåndboken
support.dell.com
→
Help and
.
for din datamaskin.
eller tar kontakt
74 Hurtigveiledning
Page 75

Hva leter du etter? Finn det her
• Løsninger — Tips og råd for feilsøking, artikler fra
teknikere, online-kurs og ofte stilte spørsmål
• Fellesskap — Online-diskusjoner med andre Dell- kunder
• Oppgraderinger — Informasjon om oppgradering av
komponenter, slik som minne, harddisken og operativsystemet
• Kundestøtte — Kontaktinformasjon, servicehenvendelser
og bestillingsstatus, garanti og opplysninger om reparasjon
• Service og støtte — Status for servicehenvendelser og
support-logg, servicekontrakt, elektronisk diskusjon med
teknisk støtte
• Referanse — Dokumentasjon for datamaskinen, detaljer
om datamaskinkonfigurasjonen, produktspesifikasjoner og
tekniske artikler
Nettsted for Dell Support — support.dell.com
MERKNAD: Velg Country/Region og deretter
brukersegment for å vise nettstedet for teknisk support
som passer best for deg.
Slik laster du ned Notebook System Software:
1
Gå til
support.dell.com
brukersegment, og oppgi servicekoden din.
2
Ve lg
Drivers & Downloads
og klikk på
3
Klikk på operativsystemet du bruker og søk etter
nøkkelordet
MERKNAD: Brukergrensesnittet for support.dell.com
kan avhenge av valgene du gjør.
• Nedlastinger — Godkjente drivere, patch-programmer og
programvare oppdateringer
• Notebook System Software (NSS)— Systemprogramvare
for datamaskinen, som bør installeres på nytt dersom
operativsystemet for datamaskinen blir installert på nytt.
NSS inneholder nødvendige oppdateringer for
operativsystemet og dessuten støtteprogramvare for Dell™
-3,5 tommers USB-diskettstasjoner, AMD™-prosessorer,
optiske stasjoner og USB-enheter. NSS er nødvendig for at
din Dell-datamaskin skal fungere på riktig måte. Denne
programvaren detekterer automatisk hvilken datamaskin
og hvilket operativsystem du har og installerer de aktuelle
oppdateringene for din konfigurasjon.
• Programvareoppgraderinger og feilsøkingstips — Ofte stilte
spørsmål, aktuelle emner og generell sunnhetstilstand for
ditt datamiljø
Dell Support Utility
Dell Support Utility er et automatisert oppgraderingsog meldingssystem som er installert på din datamaskin.
Denne støttefunksjonen gir sanntidsskanning av
sunnhetstilstanden til ditt databehandlingsmiljø og
dessuten relevant informasjon om hva du kan gjøre
selv. Du får tilgang til Dell Support Utility fra
ikonet på oppgavelinjen. For mer informasjon, se "Dell
Support Utility" i
• Slik bruker du Windows-operativsystemer
• Slik arbeider du med programmer og filer
• Slik gjør du skrivebordet personlig
Hjelp og støtte for Windows
1
Klikk på
2
Skriv inn et ord eller et uttrykk som beskriver
problemet, og klikk på pil-ikonet.
3
Klikk på emnet som beskriver ditt problem.
4
Følg anvisningene på skjermen.
, velg land eller
(drivere og nedlastinger)
Go
.
Notebook System Software
brukerhåndboken
Start
eller
→
Hjelp og støtte
.
.
.
Hurtigveiledning 75
Page 76

Hva leter du etter? Finn det her
• Informasjon om nettverksaktivitet, veiviseren for
strømstyring, hurtigtaster og annet som styres av Dell
QuickSet.
Dell QuickSet Help
For å se på Dell QuickSet Help,
på Microsoft
For mer informasjon om Dell QuickSet,
se "Dell™ QuickSet" i brukerhåndboken.
• Hvordan installere operativsystemet på nytt
Mediaplaten Operating System (operativsystem)
MERKNAD: Mediaplaten Operating System kan være
ekstra tilbehør og følger derfor ikke med alle
datamaskiner.
Operativsystemet er allerede installert på datamaskinen.
For å installere operativsystemet på nytt, bruk
mediaplaten Operating System. Se "Installere
Microsoft
®
Windows®-oppgavelinjen.
®
Windows® XP på nytt" i brukerhåndboken.
høyreklikk på
-ikonet
Etter at du har installert
operativsystemet på nytt,
bruk Drivers and
Utilities-mediaplaten
(ekstra tilbehør) til
å installere på nytt drivere
for enhetene som ble
levert sammen med
datamaskinen.
Merket med
produktnøkkelen for
operativsystemet er
plassert på
datamaskinen.
76 Hurtigveiledning
MERKNAD: Fargen på mediaplaten vil avhenge av
hvilket operativsystem du bestilte.
Page 77

Konfigurere datamaskinen
OBS! Før du utfører noen av prosedyrene i dette avsnittet må du følge sikkerhetsanvisningene i
Information Guide.
1
Pakk ut tilbehørsesken.
2
Sett innholdet i tilbehørsesken til side - du trenger tilbehøret for å fullføre konfigurasjonen av datamaskinen.
Tilbehørsesken inneholder også brukerdokumentasjon, all programvare og ekstra maskinvare (for
eksempel PC-kort, stasjoner eller batterier) du har bestilt.
3
Koble strømforsyningsenheten til strømkontakten på datamaskinen og til nettstrøm.
4
Åpne deretter datamaskinskjermen og trykk på av/på-knappen for å slå på datamaskinen (se "Sett
forfra" på side 78).
Product
MERKNAD: Det anbefales at du slår datamaskinen på og så av minst én gang før du installerer eventuelle kort
eller kobler datamaskinen til en forankringsenhet eller en annen ekstern enhet, slik som en skriver.
Hurtigveiledning 77
Page 78

Om din datamaskin
Sett forfra
13
12
1
2
3
11
10
9
8
7
1 skjermlås 2 skjerm 3 av/på-knapp
4 statusindikatorer for enheter 5 tastatur 6 styreplate
7 fingeravtrykksleser (ekstra
tilbehør)
10 statuslamper for tastatur 11 lydstyrkeknapper 12 sensor for omgivelseslys
13 demp-knapp
8 knapper for styreplate/styrepinne 9 styrepinne
6
4
5
78 Hurtigveiledning
Page 79

Sett fra venstre side
1 2 3 65 7 84 9
1 spor for sikkerhetskabel 2 ventilasjonsåpning 3 lydkontakter (2)
4 spor for smartkort (med
dummykort)
7 Wi-Fi Catcher™-lampe 8 spor for PC-kort 9 harddisk
5 1394-kontakt 6 trådløs-bryter
Sett fra høyre side
1
1 optisk stasjon i mediarommet 2 låsutløser for mediarommet 3 USB-kontakter (2)
2
3
Hurtigveiledning 79
Page 80

Sett bakfra
OBS! Ikke blokker ventilasjonsåpningene, ikke stikk gjenstander inn i dem, og unngå at støv samler seg i dem.
Oppbevar ikke datamaskinen der det er liten luftgjennomstrømning, for eksempel i en lukket veske, mens den er
på. For liten luftgjennomstrømning kan skade datamaskinen eller føre til brann.
1 2 63 4 75
1 nettverkskontakt (RJ-45) 2 modemkontakt (RJ-11) 3 USB-kontakter (2)
4 seriell kontakt 5 videokontakt 6 kontakt for strømforsyningsenhet
7 ventilasjonsåpninger
Sett fra undersiden
1
8
7
6
1 måler for batteriets
ladenivå/tilstandsmåler
4 låseskrue for enheten (hvis slik finnes) 5 deksel for minnemodul 6 tilkobling for dokkenhet
7 ventilasjonsåpning 8 harddisk
2 batteri 3 låsutløser for batterirom (2)
2
3
4
5
80 Hurtigveiledning
Page 81

Bruke et batteri
Batteriytelse
MERKNAD: Du finner flere opplysninger om Dells garantidekning for datamaskinen i Product Information Guide
eller i separate, trykte garantidokumenter som følger med datamaskinen.
Bruk alltid din bærbare Dell™-datamaskin med hovedbatteriet installert for å oppnå optimal ytelse fra
datamaskinen og som hjelp til å bevare BIOS-innstillingene. Det følger med ett batteri som standardutstyr
i batterirommet.
MERKNAD: Det er mulig at batteriet ikke er ladet helt opp, og bruk derfor strømforsyningsenheten for å tilkople
den nye datamaskinen en elektrisk stikkontakt første gang du bruker den. For best resultat, bruk datamaskinen med
strømforsyningsenheten inntil batteriet er fullt oppladet. For å se batteristatusen, klikk på Start→ Innstillinger→
Kontrollpanel→ Strøm innstillinger→ Strømmåler.
MERKNAD: Batteriets driftstid (hvor lenge batteriet kan forsyne strøm) reduseres med tiden. Du må kanskje kjøpe
et nytt batteri i løpet av datamaskinens levetid, avhengig av hvor ofte du bruker batteriet, og hvilke forhold det
brukes under.
Batteriets driftstid varierer avhengig av driftsforholdene. Du kan sette inn et ekstra batteri i mediarommet
for å øke driftstiden betraktelig.
Driftstiden reduseres betydelig når du blant annet gjør følgende:
• Bruker optiske stasjoner
• Bruker trådløse kommunikasjonsenheter, PC-kort, Express-kort, mediaminnekort eller USB-enheter
• Bruker skjerminnstilling med høy lysstyrke, 3D-skjermsparere og andre strømslukende programmer, slik
som komplekse 3D-applikasjoner
• Kjører datamaskinen i modus for maksimal ytelse, se under "Configuring Power Management Settings"
(innstillinger for strømbehandling) i
brukerhåndboken
.
MERKNAD: Det anbefales at du kobler datamaskinen til nettstrøm når du skriver til en CD eller DVD.
Du kan finne ut hvor mye batteriet er oppladet før du setter det inn i datamaskinen (se "Kontrollere
batteriets ladetilstand" på side 82). Du kan også innstille alternativene for strømbehandling slik at du blir
varslet når batteriet har lite kapasitet igjen
strømbehandling) i brukerhåndboken
OBS! Bruk av et batteri som ikke er tilpasset datamaskinen kan øke risikoen for brann eller eksplosjon. Skift ut
batteriet bare med et kompatibelt batteri kjøpt fra Dell. Litium-ion-batteriet er konstruert for å fungere med din
Dell-datamaskin. Bruk ikke et batteri fra andre datamaskiner i din datamaskin.
OBS! Kast ikke batteriet sammen med husholdningsavfall. Når batteriet ikke lenger lar seg lade, ring til det
lokale avfallsmottaket eller miljømyndighetene for å få råd om avhending av litium-ion-batteriet. Se "Battery
Disposal" (batterikassering) i
OBS! Feil bruk av batteriet kan øke risikoen for brann eller kjemisk brannskade. Batteriet må ikke punkteres,
brennes, demonteres eller utsettes for temperaturer over 60 °C. Oppbevar batteriet utilgjengelig for barn.
Batterier som er skadet eller lekker må håndteres med stor forsiktighet. Et skadet batteri kan lekke og forårsake
personskade eller materielle skader.
Product Information Guide
(se "Configuring Power Management Settings"
.
.
(innstillinger for
Hurtigveiledning 81
Page 82

Kontrollere batteriets ladetilstand
Dells QuickSet batterimåler, vinduet og ikonet for Microsoft Windows strømmåler, batteri ladenivåmåleren
og tilstandsmåleren, og advarselen om lavt batterinivå, gir informasjon om batteriets ladetilstand.
Dell™ QuickSet batterimåler
Hvis Dell QuickSet er installert, trykk på <Fn><F3>for å vise QuickSet batterimåler. Batterimåleren viser
status, batteriets generelle tilstand, gjeldende ladenivå, og hvor lenge det er til batteriet i datamaskinen er
fullt ladet.
Du finner mer informasjon om QuickSet ved å høyreklikke på QuickSet-ikonet på oppgavelinjen og
klikke på Help.
Microsoft® Windows® strømmåler
Strømmåleren i Windows viser gjenværende batterikapasitet. For å se på strømmåleren, dobbelt-klikk på
-ikonet på oppgavelinjen.
Hvis datamaskinen er koblet til nettstrøm, vises ikonet .
Ladenivåmåler
Ved enten et enkelttrykk eller ved å trykke på og holde inne statusknappen på ladenivåmåleren på
batteriet, kan du sjekke:
• batteriladenivået (sjekk ved å trykke på og
• batteriets generelle tilstand (sjekk ved å trykke på og
Batteriets driftstid er for en stor del avhengig av hvor mange ganger det har blitt ladet. Etter flere hundre
opp- og utladingsomganger mister batterier noe av ladekapasiteten, eller batteriets generelle tilstand blir
dårligere. Dette betyr at et batteri kan vise status "oppladet" selv om det har redusert evne til å motta lading.
slippe
statusknappen)
holde inne
statusknappen)
Kontrollere batteriets ladenivå
For å kontrollere batteriets ladenivå, trykk på og slipp opp statusknappen på batteriets ladenivåmåler for
å tenne lysindikatorene som viser ladenivået. Hver lysindikator representerer omtrent 20 prosent av batteriets
totale kapasitet. Hvis for eksempel batteriet er 80 prosent ladet, vil fire av indikatorene lyse. Batteriet er
helt utladet hvis ingen av indikatorene lyser.
Kontrollere batteriets generelle tilstand
MERKNAD: Du kan sjekke batteriets generelle tilstand på en av to måter: ved å bruke ladenivåmåleren på
batteriet, som beskrevet nedenfor, eller ved å bruke batterimåleren i Dell QuickSet. Du finner mer informasjon om
QuickSet ved å høyreklikke på QuickSet-ikonet på oppgavelinjen og klikke på Help.
82 Hurtigveiledning
Page 83

Du kan kontrollere batteriets generelle tilstand ved å trykke på og holde inne statusknappen på batterilademåleren
i minst 3 sekunder. Hvis ingen indikatorer lyser, er batteritilstanden god, og batteriet har mer enn
80 prosent igjen av sin opprinnelige kapasitet. Hver indikator representerer trinnvis degradering. Hvis
fem indikatorer lyser, har batteriet mindre enn 60 prosent igjen av sin opprinnelige ladeevne, og du bør
vurdere å skifte det ut. Du finner mer informasjon om batteriets driftstid under "Specifications"
(spesifikasjoner) i brukerhåndboken.
Advarsel om lav gjenværende batterikapasitet
ADVARSEL: Etter en advarsel om lav gjenværende batterikapasitet bør du lagre arbeidet øyeblikkelig for å unngå
å miste eller ødelegge data. Koble deretter datamaskinen til nettstrøm. Hvis batteriet lades helt ut, settes
datamaskinen automatisk i dvalemodus.
Som standard vil et pop-up-vindu varsle deg når batteriet er rundt 90 prosent utladet. Du kan endre
innstillingen for batterialarmer i QuickSet eller i vinduet Strømalternativer. Se
Management Settings" i
brukerhåndboken for informasjon om hvordan du får tilgang til QuickSet eller
"Configuring Power
vinduet Egenskaper for Strømalternativer.
Lade batteriet
MERKNAD: Med Dell™ ExpressCharge™, når datamaskinen er avslått, lader strømforsyningsenheten et
fullstendig utladet batteri til 80 prosent på rundt 1 time, og til 100 prosent på rundt 2 timer. Ladetiden er lengre når
datamaskinen er slått på. Du kan la batteriet være i datamaskinen så lenge du vil. Batteriets innvendige kretser
hindrer at batteriet blir overladet.
Når du kobler datamaskinen til nettstrøm eller setter inn et batteri mens datamaskinen er koblet til nettstrøm,
sjekker datamaskinen batteriets ladenivå og temperatur. Om nødvendig vil strømforsyningsenheten lade
opp batteriet, for deretter å holde batteriet fullt oppladet.
Hvis batteriet er varmt etter å ha vært brukt i datamaskinen, eller fordi det har ligget på et varmt sted, er
det mulig at lading av batteriet ikke starter når datamaskinen kobles til nettstrøm.
Batteriet er for varmt til at lading starter hvis indikatoren blinker vekselvis grønt og oransje. Koble
datamaskinen fra nettstrøm og la datamaskinen og batteriet avkjøles til romtemperatur. Koble deretter
datamaskinen til nettstrøm for å lade opp batteriet.
Du finner mer informasjon om hvordan du løser batteriproblemer i brukerhåndboken.
Ta ut batteriet
OBS! Før du tar ut batteriet, slå av datamaskinen, koble strømforsyningsenheten fra nettstrøm og datamaskinen,
koble modemet fra veggkontakten og datamaskinen, og fjern alle utvendige kabler fra datamaskinen.
OBS! Bruk av et batteri som ikke er tilpasset datamaskinen kan øke risikoen for brann eller eksplosjon. Skift ut
batteriet bare med et kompatibelt batteri kjøpt fra Dell. Batteriet er konstruert for å fungere med din Dell™
datamaskin. Bruk ikke et batteri fra andre datamaskiner i din datamaskin.
ADVARSEL: Du må fjerne alle utvendige kabler fra datamaskinen for å unngå mulig skade på kontaktene.
For informasjon om utskifting av batteri nummer to, plassert i mediarommet, se "Bruk av multimediaenheter"
i brukerhåndboken.
Hurtigveiledning 83
Page 84

Slik tar du ut batteriet:
1
Hvis datamaskinen er koblet til en forankringsstasjon, frakoble forankringsstasjonen. Du finner mer
informasjon i dokumentasjonen som fulgte med forankringsstasjonen.
2
Kontroller at datamaskinen er slått av.
3
Skyv og løft batteriet ut av batterirommet.
1
2
1 låsutløser for batterirom 2 batteri
For å sette batteriet tilbake, plasser batteriet i batterirommet og trykk det ned inntil batterilåsen gir fra seg
et klikk.
Lagre et batteri
Ta ut batteriet når datamaskinen skal lagres i lengre tid. Et batteri utlades i løpet av lengre lagringsperioder.
Etter en lengre lagringsperiode må batteriet opplades fullstendig før det igjen tas i bruk (se "Lade
batteriet" på side 83).
Feilsøking
Problemer med programvare og at datamaskinen henger
OBS! Før du utfører noe av det som er beskrevet i dette avsnittet, må du følge sikkerhetsanvisningene i
Information Guide.
Datamaskinen starter ikke
KONTROLLER AT STRØMFORSYNINGSENHETEN ER ORDENTLIG KOBLET TIL DATAMASKINEN OG TIL NETTSTRØM.
84 Hurtigveiledning
Product
Page 85

Datamaskinen gir ingen respons
ADVARSEL: Du kan miste data hvis du ikke er i stand til å foreta nedstenging av operativsystemet.
LÅ AV DATAMASKINEN — Hvis du ikke får noen respons når du trykker på en tast på tastaturet eller
S
beveger musen, trykk på og hold inne av/på-knappen i minst 8 til 10 sekunder, inntil datamaskinen skrur
seg av. Start deretter datamaskinen på nytt.
Et program slutter å gi respons eller krasjer gjentatte ganger
MERKNAD: Programvaren omfatter vanligvis installasjonsanvisninger i medfølgende dokumentasjon eller på en
diskett eller CD.
A
VSLUTTE PROGRAMMET —
1
Trykk på<Ctrl><Shift><Esc> samtidig.
2
Klikk på
3
Klikk på det programmet som ikke lenger gir respons.
4
Klikk på
SLÅ OPP I DOKUMENTASJONEN FOR PROGRAMVAREN — Om nødvendig avinstaller programmet og installer
Programmer
i Windows Oppgavebehandling.
Avslutt oppgave
.
det på nytt.
Et program er laget for en eldre utgave av Microsoft® Windows® operativsystem
KJØRE VEIVISEREN FOR PROGRAMKOMPATIBILITET — Veiviseren for programkompatibilitet konfigurerer et
program slik at det kjører i et miljø som er forskjellig fra Windows XP-operativsystemet.
Klikk på
1
2
Følg anvisningene på skjermen.
Start→
Alle programmer→ Tilbehør→
Veiviser for programkompatibiltet→ Neste
.
Et ensfarget blått skjermbilde vises
SLÅ AV DATAMASKINEN — Hvis du ikke får noen respons når du trykker på en tast på tastaturet eller
beveger musen, trykk på og hold inne av/på-knappen i minst 8 til 10 sekunder, inntil datamaskinen skrur
seg av. Start deretter datamaskinen på nytt.
Andre programvareproblemer
LET I DOKUMENTASJONEN FOR PROGRAMVAREN ELLER TA KONTAKT MED PROGRAMVAREPRODUSENTEN FOR Å FÅ
INFORMASJON OM FEILSØKING —
• Kontroller at programmet er kompatibelt med operativsystemet som er installert på datamaskinen.
• Kontroller at datamaskinen din oppfyller minstekravene til maskinvare for å kunne kjøre programvaren.
Se etter informasjon i dokumentasjonen for programvaren.
• Kontroller at programmet er riktig installert og konfigurert.
• Kontroller at det ikke er konflikt mellom enhetsdrivere og programmet.
• Om nødvendig avinstaller programmet og installer det på nytt.
Hurtigveiledning 85
Page 86

TA ØYEBLIKKELIG SIKKERHETSKOPI AV FILENE DINE.
K
JØR ET ANTIVIRUSPROGRAM FOR Å KONTROLLERE HARDDISKEN, DISKETTER OG MEDIAPLATER.
AGRE OG LUKK ÅPNE FILER, LUKK ÅPNE PROGRAMMER, OG SLÅ AV DATAMASKINEN FRA Start-MENYEN.
L
KANNE ETTER SPIONPROGRAMMER (SPYWARE)—Hvis du merker at datamaskinen er treg, at det ofte
S
dukker opp reklame på skjermen, eller at du har problemer med å koble deg til Internett, kan datamaskinen
være infisert med spionprogrammer (spyware). Kjør et antivirusprogram som inkluderer beskyttelse mot
spionprogrammer (programmet kan behøve en oppgradering) for å skanne datamaskinen og fjerne
spionprogrammene. Du finner mer informasjon ved å gå til support.dell.com og søke etter spyware.
KJØRE DELL DIAGNOSTICS — Se "Dell Diagnostics" på side 86. Hvis alle testene kjører uten problemer,
skyldes feiltilstanden et problem med programvaren.
Dell Diagnostics
OBS! Før du utfører noe av det som er beskrevet i dette avsnittet, må du følge sikkerhetsanvisningene i
Information Guide.
Når Dell Diagnostics skal brukes
Product
Har du problemer med datamaskinen, utfør kontrollene under "Problemer med programvare og at
datamaskinen henger" på side 84 og kjør Dell Diagnostics (diagnose) før du tar kontakt med Dell for
teknisk bistand.
Det anbefales at du skriver ut disse instruksjonene før du setter i gang.
ADVARSEL: Dell Diagnostics fungerer bare på datamaskiner fra Dell™ .
MERKNAD: Mediaplaten Drivers and Utilities er ekstra tilbehør og følger derfor ikke med alle datamaskiner.
Gå inn i systemoppsettet (se anvisninger under "System Setup" i brukerhåndboken), kontroller datamaskinens
konfigurasjonsinformasjon og sjekk at enheten du vil teste vises i systemoppsettet og er aktiv.
Start Dell Diagnostics enten fra harddisken eller fra mediaplaten Drivers and Utilities.
Starte Dell Diagnostics fra harddisken
Dell Diagnostics ligger på en skjult partisjon for diagnostikk på harddisken.
MERKNAD: Hvis datamaskinen ikke kan vise noe skjermbilde, ta kontakt med Dell, se "Contacting Dell" (kontakte
Dell) i brukerhåndboken.
1
Slå av datamaskinen. Slå på (eller omstart) datamaskinen.
2
Hvis datamaskinen er koblet til en forankringsstasjon, frakoble forankringsstasjonen. Du finner mer
informasjon i dokumentasjonen som fulgte med forankringsstasjonen.
3
Koble datamaskinen til nettstrøm.
86 Hurtigveiledning
Page 87

4
Diagnosetesting kan startes på en av følgende to måter:
a
Slå på datamaskinen. Når DELL™-logoen kommer til syne, trykk umiddelbart på <F12>. Velg
Diagnostics (diagnostikk) fra oppstartsmenyen, og trykk på <Enter>.
MERKNAD: Hvis du venter for lenge, slik at logoen for operativsystemet vises, fortsett med å vente inntil du
ser Microsoft Microsoft
Trykk på og hold nede <Fn>-tasten mens du slår på datamaskinen.
b
MERKNAD: Hvis du får en melding om at ingen partisjon med diagnoseverktøy er blitt funnet, kjør Dell
Diagnostics fra mediaplaten Drivers and Utilities.
®
Windows ®-skrivebordet. Slå deretter av datamaskinen og prøv på nytt.
Datamaskinen kjører en systemkontroll (Pre-boot System Assessment) og en rekke tester for
systemkort, tastatur, harddisk og skjerm.
• I løpet av kontrollen, svar på alle spørsmål som vises.
• Dersom en feil blir oppdaget, vil maskinen stoppe og pipe. For å stoppe testen og starte maskinen
på nytt, trykk på <Esc>, for å fortsette til neste test trykk på <y>, og for å teste på nytt
komponenten som feilet trykk på <r>.
• Dersom det blir oppdaget feil i løpet av systemkontrollen, skriv ned feilkoden(e) og ta kontakt med
Dell. Se "Contacting Dell" (kontakte Dell) i
Hvis systemkontrollen blir fullført uten feil, får du meldingen
brukerhåndboken
Booting Dell Diagnostic
.
Utility Partition. Trykk på hvilken som helst tast for å fortsette
5
Trykk hvilken som helst tast for å starte Dell Diagnostics fra diagnostikkpartisjonen på harddisken.
Starte Dell Diagnostics framediaplaten Drivers and Utilities
1
Sett inn mediaplaten
2
Slå av og start datamaskinen på nytt.
Drivers and Utilities
.
Når DELL-logoen kommer til syne, trykk umiddelbart på <F12>.
.
Hvis du venter for lenge og Windows-logoen vises, fortsett med å vente inntil du ser Windowsskrivebordet. Slå deretter av datamaskinen og prøv på nytt.
MERKNAD: Det neste trinnet endrer oppstartsekvensen bare denne ene gangen. Ved neste oppstart starter
datamaskinen slik det er spesifisert i systemoppsettprogrammet.
3
Når listen over oppstartenheter vises, marker
IDE CD-ROM-enhetCD/DVD/CD-RW-stasjon
på <Enter>.
4
Velg .
Boot from CD-ROM
5
Ta s t 1 for å starte
6
Ve lg
Run the 32 Bit Dell Diagnostics
ResourceCD
fra menyen som vises, og trykk deretter på <Enter>
-menyen og trykk på <Enter> for å fortsette.
fra den nummererte listen. Hvis flere versjoner er opplistet, velg
den som passer for din datamaskin.
7
Når
Main Menu
(hovedmenyen) i Dell Diagnostics kommer til syne, velg den testen du vil kjøre.
Hurtigveiledning 87
og trykk
Page 88

Dell Diagnostics Main Menu (hovedmeny)
1
Etter at Dell Diagnostics er lastet inn, og skjermbildet
Main Menu
(hovedmeny) vises, klikk på
knappen for ønsket alternativ.
Alternativ Funksjon
Express Test
(ekspresstest)
Extended Test
(utvidet test)
Custom test
(egendefinert test)
Symptom Tree
(symptomtre)
2
Blir det funnet et problem under testen, vises en melding med en feilkode og en beskrivelse av problemet.
Utfører en rask testing av enheter. Denne testen tar vanligvis mellom 10 og 20 minutter
og krever ingen handlinger fra din side. Kjør først Express Test (ekspresstest) for å øke
sannsynligheten for å finne problemet raskt.
Utfører en grundig kontroll av enheter. Denne testen tar vanligvis minst 1 time og
krever at du svarer på spørsmål med jevne mellomrom.
Tester en bestemt enhet. Du kan tilpasse testene du vil kjøre.
Opplister de vanligst forekommende symptomene og lar deg velge en test basert på
problemsymptomet du har.
Noter feilkoden og problembeskrivelsen og følg anvisningene på skjermen.
Hvis du ikke finner hvordan feiltilstanden kan avhjelpes, ta kontakt med Dell (se "Contacting Dell"
i brukerhåndboken
MERKNAD: Servicemerket for datamaskinen er plassert på toppen av hvert testskjermbilde. Hvis du
kontakter Dell, vil teknisk støtte-personell spørre etter servicemerket.
3
Hvis du kjører en test fra alternativene
).
Custom Test
(egendefinert test) eller
Symptom Tree
(symptomtre),
få mer informasjon ved å klikke på den aktuelle kategorien i skjermbildet, slik som beskrevet i følgende
tabell.
Kategori Funksjon
Results (resultater) Viser resultatene av testen og feiltilstander som er oppdaget.
Errors (feil) Viser feil som er oppdaget, feilkoder og en problembeskrivelse.
Help (hjelp) Beskriver testen og kan angi forutsetninger for at testen skal kunne bli utført.
Configuration
(konfigurasjon)
Parameters (parametere) Lar deg tilpasse testen ved å endre testinnstillingene.
88 Hurtigveiledning
Viser maskinvarekonfigurasjonen for den valgte enheten.
Dell Diagnostics innhenter konfigurasjonsinformasjon for alle enheter fra
systemoppsettprogrammet, minnet og forskjellige interne tester, og informasjonen
blir vist i enhetslisten på venstre side av skjermen. Enhetslisten viser kanskje ikke
navn på alle komponentene som er installert på datamaskinen, eller alle enhetene
som er koblet til datamaskinen.
Page 89

4
Når testene er fullført, og du kjører Dell Diagnostics fra mediaplaten
5
Når testene er fullført, lukk testskjermbildet for å gå tilbake til
skjermbildet
Main Menu
for å avslutte Dell Diagnostics og starte datamaskinen på nytt.
Drivers and Utilities,
skjermbildet
Main
Menu
fjern
. Lukk
platen
.
Hurtigveiledning 89
Page 90

90 Hurtigveiledning
Page 91

Stikkordregister
A
antivirus-programvare, 86
B
batteri
kontrollere ladetilstanden, 82
ladenivåmåler, 82
lading, 83
lagring, 84
strømmåler, 82
ta ut, 83
ytelse, 81
Brukerhåndbok, 74
D
datamaskin
fungerer langsomt, 86
datamaskinen
gir ingen respons, 85
krasjer, 85
datamaskinen sett fra ulike
sider
baksiden, 80
forfra, 78
høyre side, 79
undersiden, 80
venstre side, 79
Dell Diagnostics
bruk av, 86
om, 86
starte fra harddisken, 86
starte fra mediaplaten Drivers
and Utilities, 87
Dell support-nettsted, 75
diagnostikk
Dell, 86
dokumentasjon
Brukerhåndbok, 74
ergonomi, 73
garanti, 73
Lisensavtale for sluttbruker, 73
offentlig, 73
online, 75
Produktveiledning, 73
sikkerhet, 73
F
feilsøking
Dell Diagnostics, 86
Hjelp- og støttesenter, 75
problemer med programvare og
at datamaskinen henger, 84
G
garantiinformasjon, 73
H
Hjelp- og støttesenter, 75
hjelp-fil
Hjelp- og støttesenter for
Windows, 75
I
informasjon om ergonomi, 73
L
Lisensavtale for
sluttbruker, 73
M
maskinvare
Dell Diagnostics, 86
Mediaplate
Drivere og
hjelpeprogrammer, 73
Mediaplater
operativsystem, 76
merker
Microsoft Windows, 74
Servicemerke, 74
O
offentlige bestemmelser, 73
operativsystem
installere på nytt, 76
Mediaplate, 76
Stikkordregister 91
Page 92

P
V
problemer
blå skjerm, 85
datamaskinen fungerer
langsomt, 86
datamaskinen gir ingen respons, 85
datamaskinen henger, 84
datamaskinen krasjer, 85
datamaskinen starter ikke, 84
Dell Diagnostics, 86
programkrasj, 85
programmer og Windows-
kompatibilitet, 85
programmet slutter å gi
respons, 85
programvare, 84-85
spionprogrammer (spyware), 86
Produktveiledning, 73
programvare
problemer, 85
Q
veivisere
Veiviser for
programkompatibilitet, 85
W
Windows XP
Hjelp- og støttesenter, 75
installere på nytt, 76
Veiviser for
programkompatibilitet, 85
QuickSet Help, 76
R
ResourceCD
Dell Diagnostics, 86
S
Servicemerke, 74
sikkerhetsveiledning, 73
spionprogrammer (spyware), 86
support-nettsted, 75
92 Stikkordregister
Page 93

Dell™ Latitude™ D631
Snabbreferensguide
Modell PP18L
www.dell.com | support.dell.com
Page 94

Varningar och upplysningar
OBS! Kommentarer av den här typen innehåller viktig information som hjälper dig att få ut det mesta av datorn.
ANMÄRKNING: Här visas information om potentiell skada på maskinvaran eller dataförlust, samt hur du undviker detta.
VARNING! En varning signalerar risk för skada på egendom eller person, eller livsfara.
Förkortningar och akronymer
En fullständig lista över förkortningar och akronymer finns i Ordlistan i
Om du har köpt en Dell™ n Series-dator gäller inte den information i detta dokument som rör operativsystemet
Microsoft
®
Windows®.
OBS! Vissa funktioner eller media kan vara tillval och medföljer inte alla datorer. Vissa funktioner är inte tillgängliga
i alla länder.
Användarhandboken
.
___________________
Informationen i det här dokumentet kan komma att ändras.
© 2007 Dell Inc. Med ensamrätt .
Återgivning i någon form utan skriftligt tillstånd från Dell Inc. är strängt förbjuden.
Varumärken som återfinns i denna text: Dell, DELL-logotypen, Latitude, Wi-Fi Catcher, ExpressCharge är varumärken som tillhör Dell Inc.;
AMD och kombinationer därav är varumärken som tillhör Adv anced Micro Devices, Inc; W indows V ista är ett varumärke och Microsoft Outlook
och Windows är registrerade varumärken som tillhör Microsoft Corporation.
Övriga varumärken i dokumentet kan användas som hänvisning antingen till dem som gör anspråk på varumärkena eller till deras produkter.
Dell Inc. frånsäger sig allt ägarintresse av andra varumärken än sina egna.
PP18L
Modell
Mars 2007 Art.nr. UY447 Rev. A00
Page 95

Innehåll
Söka efter information . . . . . . . . . . . . . . . . . . . . . . . . . . . . . . 97
Konfigurera datorn
Om datorn
Använda batteriet
Felsökning
. . . . . . . . . . . . . . . . . . . . . . . . . . . . . . . . . . . 102
. . . . . . . . . . . . . . . . . . . . . . . . . . . . . . . . . . . 108
. . . . . . . . . . . . . . . . . . . . . . . . . . . . . . . 101
. . . . . . . . . . . . . . . . . . . . . . . . . . . . . . . 105
Innehåll 95
Page 96

96 Innehåll
Page 97

Söka efter information
OBS! Vissa funktioner eller media kan vara tillval och medföljer inte alla datorer. Vissa funktioner är inte
tillgängliga i alla länder.
OBS! Ytterligare information kan medfölja datorn.
Vad är det du letar efter? Här hittar du det
• Ett diagnostikprogram för datorn
• Drivrutiner för datorn
• Dokumentation om enheterna
• Systemprogram för en bärbar dator (NSS)
• Information om garantier
• Villkor (endast USA)
• Säkerhetsanvisningar
• Information om gällande bestämmelser
• Ergonomi
• Licensavtal för slutanvändare
Mediet Drivrutiner och verktyg
OBS! Mediet Drivers and Utilities kan vara ett tillval
och medföljer inte alla datorer.
Dokumentationen och drivrutinerna är redan
installerade på datorn. Du kan använda mediet för
att återinstallera drivrutiner och för att köra Dell
Diagnostics (se ”Dell Diagnostics” på sidan 110).
Det kan finnas filer som
heter Readme eller
Viktigt på mediet. De
innehåller rykande färsk
information om tekniska
ändringar av datorn eller
avancerat tekniskt
referensmaterial för
tekniker och erfarna
användare.
OBS! Uppdateringar av drivrutiner och dokumentation
finns på support.dell.com.
OBS! Mediet Drivers and Utilities kan vara ett tillval
och medföljer inte alla datorer.
Dell™ produktinformationsguide
Snabbreferensguide 97
Page 98

Vad är det du letar efter? Här hittar du det
• Ta bort och byta ut delar
• Specifikationer
• Konfigurera systeminställningar
• Felsökning och problemlösning
• Servicenummer och Expresskod
• Licensetikett för Microsoft Windows
Användarhandbok
Microsoft Windows Hjälp- och supportcenter
1
Klicka på
support
systemguider
2
Klicka på
Servicenummer och licens för Microsoft® Windows
Etiketterna sitter på datorn.
• Med servicenumret kan du identifiera datorn när du
besöker
• Skicka samtalet till rätt person genom att ange din
expresskod när du kontaktar support.
Start
→
Användarhandboken
support.dell.com
OBS! Licensetiketten för Microsoft Windows har fått
en ny utformning, med ett hål eller en ”säkerhetsportal”,
som en ytterligare säkerhetsåtgärd.
eller
Dells användar- och
→
→
Hjälp och
Systemguider
eller kontaktar support.
för datorn.
.
®
98 Snabbreferensguide
Page 99

Vad är det du letar efter? Här hittar du det
• Lösningar — Felsökningstips, artiklar från tekniker,
onlinekurser och vanliga frågor
• Gruppforum — Diskutera online med andra Dell-kunder
• Uppgraderingar — Uppgraderingsinformation för olika
komponenter, till exempel minnen, hårddiskar och
operativsystem
• Kundtjänst — Kontaktinformation, servicesamtal och
orderstatus, garanti och reparationsinformation
• Service och support — Status på servicejobb och
supporthistorik, servicekontrakt, onlinediskussioner med
teknisk support
• Referens — Datordokumentation, detaljer om min
datorkonfiguration, produktspecifikationer och vitbok
Dells supportwebbplats — support.dell.com
OBS! Visa lämpligt supportställe genom att välja region
och verksamhetssegment.
Ladda ner NSS-programmet:
1
Gå till
support.dell.com
affärssegment och ange ditt servicenummer.
2
Välj
Drivrutiner och nedladdningar
på
Kör
.
3
Klicka på ditt operativsystem och sök efter
nyckelordet
OBS! Användargränssnittet support.dell.com kan se
olika ut beroende på dina val.
• Nedladdningsbara filer — Certifierade drivrutiner,
korrigeringar och programuppdateringar
• Systemprogram för bärbara datorer (NSS) — Om du
installerar om datorns operativsystem bör du även installera
om NSS-programmet. NSS tillhandahåller viktiga
uppdateringar för operativsystemet och stödjer Dells™
3,5-tums USB-diskettenheter, Intel®-processorer, optiska
enheter och USB-enheter. NSS behövs för att din Delldator ska fungera korrekt. Datorn och operativsystemet
identifieras automatiskt av programmet, som dessutom
installerar uppdateringar som är lämpliga för datorns
konfiguration.
• Programuppdateringar och felsökningstips — Vanliga
frågor, aktuella ämnen och det allmänna tillståndet för
datormiljön
Funktionen Dell Support
Funktionen Dell Support är ett automatiskt
uppgraderings- och meddelandesystem som finns
installerat på datorn. Denna support tillhandahåller
tillståndssökningar i realtid av datormiljön,
programuppdateringar och relevant information om
självsupport. Öppna funktionen Dell Support från
ikonen
i aktivitetsfältet. Mer information finns
i ”Funktionen Dell Support” i
• Använda Windows-operativsystemen
• Arbeta med program och filer
• Anpassa skrivbordet
Windows Hjälp- och supportcenter
1
Klicka på
2
Skriv ett ord eller en fras som beskriver problemet
Start
och klicka på pilen.
3
Klicka på det avsnitt som beskriver problemet.
4
Följ instruktionerna på skärmen.
, välj region eller
Notebook System Software
Användarhandboken
eller
→
Hjälp och support
och klicka
.
.
.
Snabbreferensguide 99
Page 100

Vad är det du letar efter? Här hittar du det
• Information om nätverksaktivitet, guiden strömhantering,
snabbtangenter och andra objekt som styrs med Dell
QuickSet.
Hjälp om Dell QuickSet
Om du vill visa
du på QuickSet-ikonen i aktivitetsfältet i Microsoft
Windows
®
.
Mer information om Dell QuickSet finns
under ”Dell™ QuickSet” i Användarhandboken.
• Installera om operativsystemet
Cd-skivan med operativsystemet
OBS! Cd-skivan Operating System kan vara ett tillval
och medföljer inte alla datorer.
Operativsystemet är redan installerat på datorn. Om
du vill installera vom operativsystemet använder du
cd-skivan Operating System. Läs ”Installera om
Microsoft
®
Windows® XP” i Användarhandboken.
Hjälp om Dell QuickSet, högerklickar
När du har installerat
om operativsystemet
använder du mediet
Drivers and Utilities
för att installera om
drivrutinerna till de
enheter som medföljde
datorn.
Etiketten med
operativsystemets
produktnyckel sitter på
datorn.
®
100 Snabbreferensguide
OBS! Cd-skivans färg varierar beroende på vilket
operativsystem du beställde.
 Loading...