

Page 1
Instructions for using an external LCD projector with
a Dell Latitude D620.
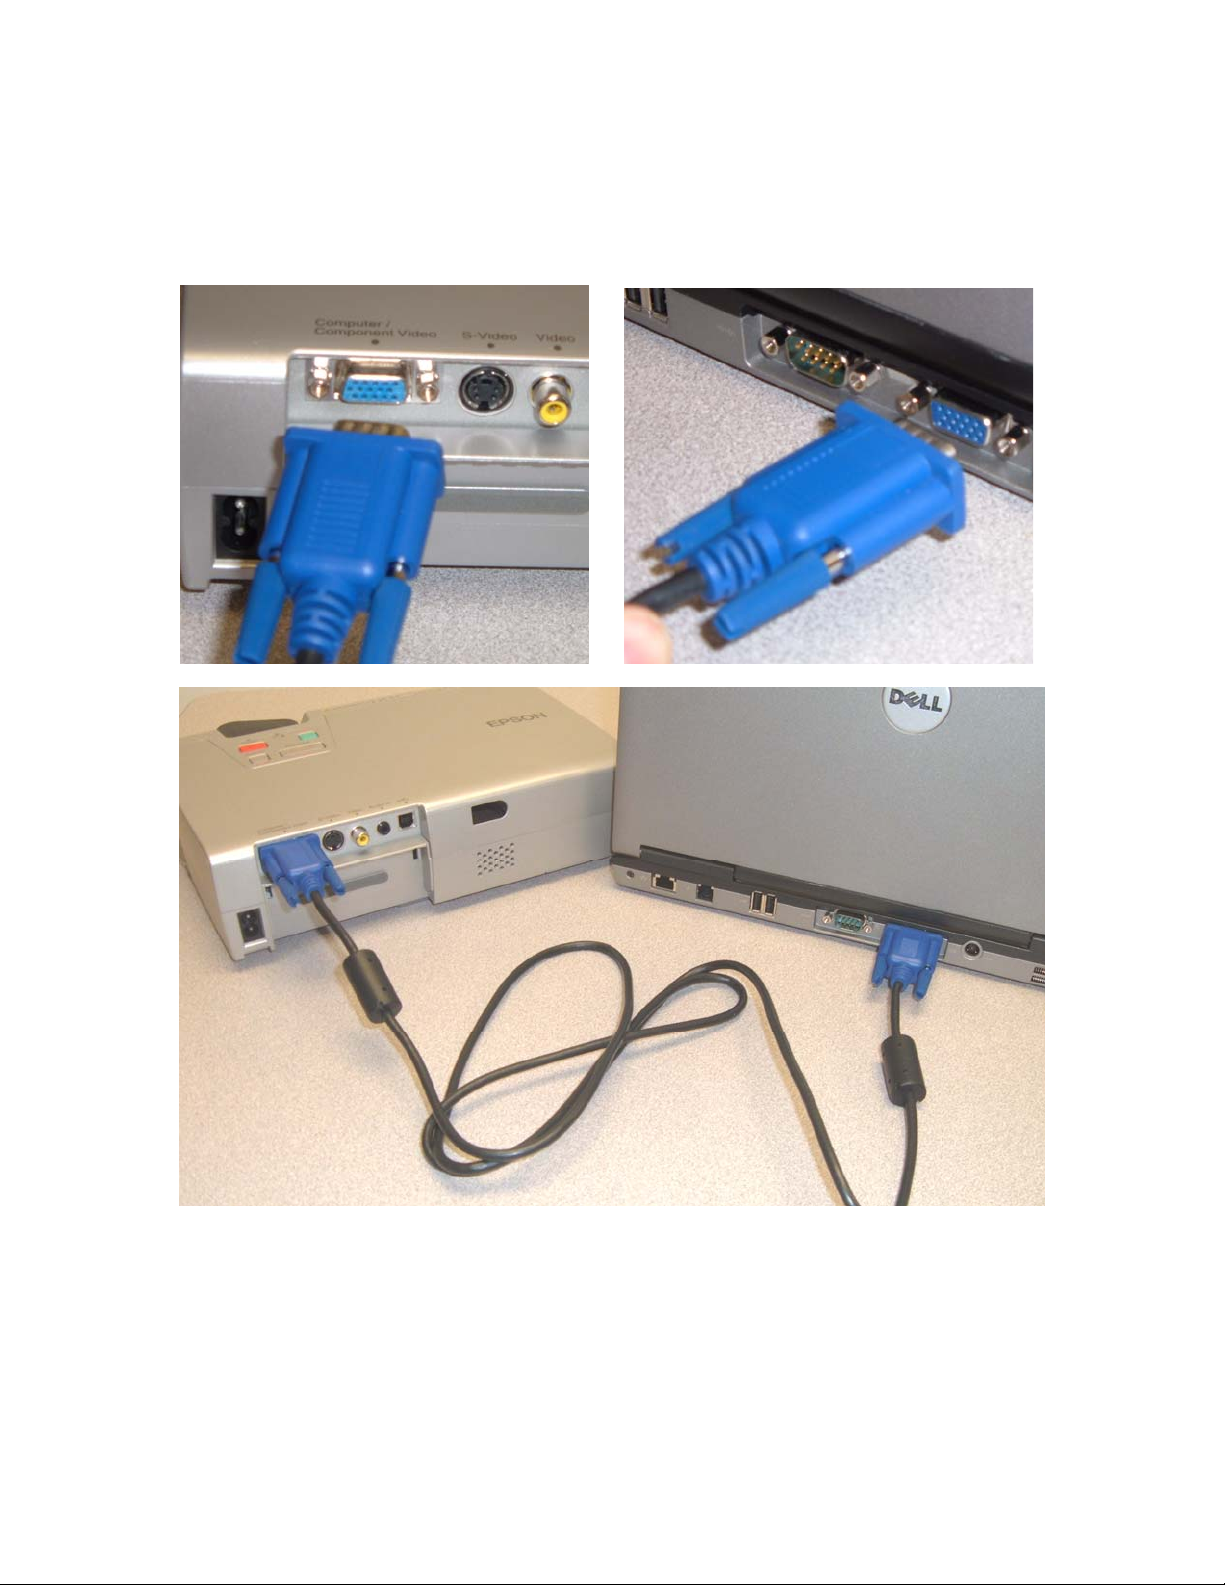
Step 1. Connect laptop and projection unit with a monitor cable:
Step 2. Apply AC power and turn on projector first.
Step 3. Apply AC power and turn on laptop second.
Step 4. Log into Windows as normal.
Page 2

Step 5. After the desktop appears, Right-Click on the desktop and select the
“Graphics Properties” with a left-click.
Step 6. In the Intel GMA control panel, click on the “Display Devices” tab on th e lefthand side. Under “Multiple Display” click on the
“Intel® Dual Display Clone” option to select it.
Then click the “Apply” button on the lower right to accept the settings.
Page 3

Step 7. In the Intel GMA control panel, click on the “Display Settin gs” tab on the
left-hand side. Click the “Notebook” tab at the top of the panel. Insure the screen
resolution is set for “1024 x 768” and that the “Display Expansion” setting is set for
“Center Desktop”. Then click the “Apply” button on the lower right to accept the
settings.
Step 8. In the Intel GMA control panel, click on the “Display Settin gs” tab on the
left-hand side. Click the “Monitor” tab at the top of the panel. Insure the screen
refresh rate is set for “60 Hertz” and that the “Display Expansion” setting is set for
“Full Screen (No Border)”. Then click the “Apply” button on the lower right to accept
the settings.
Finally – the computer should now be sending an adequate signal to the Projection
device. Insure the projection device is set for the proper computer input.
 Loading...