

Page 1

CyberLink
Media Suite
User's Guide
Page 2

Copyright and Disclaimer
All rights reserved.
To the extent allowed by law, Media Suite IS PROVIDED “AS IS”,
WITHOUT WARRANTY OF ANY KIND, EITHER EXPRESS OR
IMPLIED, INCLUDING WITHOUT LIMITATION ANY WARRANTY FOR
INFORMATION, SERVICES, OR PRODUCTS PROVIDED THROUGH
OR IN CONNECTION WITH Media Suite AND ANY IMPLIED
WARRANTIES OF MERCHANTABILITY, FITNESS FOR A PARTICULAR
PURPOSE, EXPECTATION OF PRIVACY, OR NON-INFRINGEMENT.
BY USING THIS SOFTWARE, YOU AGREE THAT CYBERLINK WILL
NOT BE LIABLE FOR ANY DIRECT, INDIRECT, OR CONSEQUENTIAL
LOSS ARISING FROM THE USE OF THIS SOFTWARE OR MATERIALS
CONTAINED EITHER IN THIS PACKAGE.
The terms and conditions here under shall be governed and
construed in accordance with the laws of Taiwan.
Media Suite is a registered trademark along with other company
and product names mentioned in this publication, used for
identification purposes and remain the exclusive property of their
respective owners.
International Headquarters
Mailing Address
Web Site
Telephone
Fax
Copyright © 2015 CyberLink Corporation. All rights reserved.
CyberLink Corporation
15F., No. 100, Minquan Rd., Xindian Dist.
New Taipei City 231, Taiwan (R.O.C.)
http://www.cyberlink.com
886-2-8667-1298
886-2-8667-1385
Page 3

Contents
....................................................1Introduction
................................................................................................2CyberLink Media Suite Programs
............................................................................2The PowerStarter Program
................................................................................................7System Requirements
....................................................11Movie
................................................................................................11Play a Movie Disc
............................................................................11Supported Disc Formats
............................................................................12Movie Disc Playback Controls
............................................................................17Playback Features
................................................................................................24Browse and Play Movies in Movie Library
............................................................................24Browsing Through Movies in the Movie Library
............................................................................25Supported Movie File Formats
............................................................................25Playing Movie Files in PowerDVD
................................................................................................26Play a Movie Folder
................................................................................................26View Online Movie Info
....................................................27Video
................................................................................................27Play Video Files
................................................................................................34Advanced Video Editing
................................................................................................35Organize Videos
................................................................................................37Easy Video Editing
............................................................................28Supported Video File Formats
............................................................................28Video Playback Controls
............................................................................35Managing Video Files
i
Page 4

CyberL ink M ed ia Su ite
................................................................................................39Upload to Social Networks
................................................................................................40Convert Videos
................................................................................................41Create a Movie Disc
................................................................................................41Edit a Movie Disc
....................................................43Photo
................................................................................................43Play Back 2D Photos in 3D Mode
................................................................................................44Import and Organize Photos
................................................................................................50Edit and Print Photos
................................................................................................53Create or Play a Slideshow
................................................................................................58Create a Photo Gallery Disc
................................................................................................60Create a Slideshow Disc
................................................................................................63Upload to Social Network
................................................................................................65Advanced Photo Adjustment
............................................................................38Making Video Fixes
............................................................................38Fine Tuning Videos
............................................................................38Trimming Videos
............................................................................39Uploading Videos to YouTube
............................................................................39Uploading Videos to Facebook
............................................................................44Importing Photos
............................................................................46Organizing Photos
............................................................................50Editing Photos
............................................................................52Print Photos
............................................................................53Playing Slideshows
............................................................................53Creating Slideshows
............................................................................60Selecting Photos for Disc
............................................................................61Creating the Disc
............................................................................61Editing Slideshow Style and Music
............................................................................62Configuring Advanced Disc Settings
............................................................................63Burning Your Disc
............................................................................64Uploading Photos to Facebook
............................................................................64Uploading Photos to Flickr
ii
Page 5

....................................................69Music
................................................................................................69Play Music
............................................................................70Supported Audio Formats
............................................................................70Music Playback Controls
............................................................................73Using the Audio Equalizer
................................................................................................74Rip an Audio CD
................................................................................................75Convert an Audio File
................................................................................................76Burn a Music Disc
................................................................................................77Record Audio
................................................................................................78Edit Audio
............................................................................78Adding Audio into the Library
............................................................................79Editing Audio
............................................................................80Audio Effects
............................................................................82Exporting Audio
....................................................83Data & Backup
................................................................................................83Create a Data Disc
................................................................................................84Copy a Disc or Burn a Disc Image
............................................................................84Copying a Disc
............................................................................85Burning a Disc Image
................................................................................................86Back Up and Restore Files
............................................................................86Backing Up Files
............................................................................88Restoring Files
................................................................................................89Duplicate a Movie Disc
................................................................................................90Organize Discs in the Disc Manager
............................................................................91Manually Importing Discs to the Disc Library
....................................................93Utilities
................................................................................................93Erase a Disc
................................................................................................93Extract Files From a Disc Image
iii
Page 6

CyberL ink M ed ia Su ite
................................................................................................94Mount a Virtual Drive
................................................................................................95Transfer Media to Devices
................................................................................................95Burn a DVD Folder
................................................................................................95Print a Disc Label
....................................................97CyberLink Mobile Apps
....................................................99Technical Support
................................................................................................99Before Contacting Technical Support
................................................................................................100Web Support
................................................................................................100Help Resources
............................................................................96Step 1 - Select a Label Type
............................................................................96Step 2 - Edit Disc Information
............................................................................96Step 3 - Edit Layout
............................................................................96Step 4 - Print
iv
Page 7

In tro du ctio n
Note: this document is for reference and informational use only. Its content
and the corresponding program are subject to change without notice.
Chapter 1:
Introduction
Welcome to CyberLink Media Suite, the all-in-one multimedia suite that opens up
the world of digital entertainment on your PC.
Using CyberLink Media Suite you can perform the following functions, and more:
play discs, movie files, disc folders, video files, photo slideshows, and music
with the world's #1 playback software on the PC.
burn music or data discs in a variety of formats.
perform advanced editing on videos with a powerful editing tool that
provides unlimited move-making possibilities.
convert photos, videos, and audio to other media formats and transfer them
to portable devices.
apply easy edits and enhancements to both your photos and videos.
make advanced adjustments on photos manually or by applying adjustment
presets.
author Blu-ray Disc, AVCHD, and DVD discs with motion menus.
organize your photos with features such as face tagging, or use them to
create dazzling slideshows and photo gallery discs.
record, trim, cut, and add effects to your audio files that you want to use in
your video editing or share with friends.
share your photos on Flickr and Facebook, and upload your videos to
YouTube or Facebook.
keep track of all your burned media and discs with the Disc Manager.
back up and restore your data.
create and print disc labels.
erase and copy discs, or duplicate a movie disc.
1
Page 8
CyberL ink M ed ia Su ite
extract files from or mount a disc image, or burn it to a disc.
CyberLink Media Suite Programs
You can access all the CyberLink Media Suite programs through the CyberLink
PowerStarter interface. It provides easy access to all of the CyberLink software on
your PC, for whatever task you have at hand. From managing your media files and
creating movies, to organizing your disc content, burning discs and much more.
The PowerStarter Program
CyberLink PowerStarter is the complete portal for all of your CyberLink software.
CyberLink PowerStarter helps you work with your media using a task-based
approach. You can also quickly launch all your CyberLink software from one
convenient location, or easily upgrade/update any of these programs.
2
Page 9

In tro du ctio n
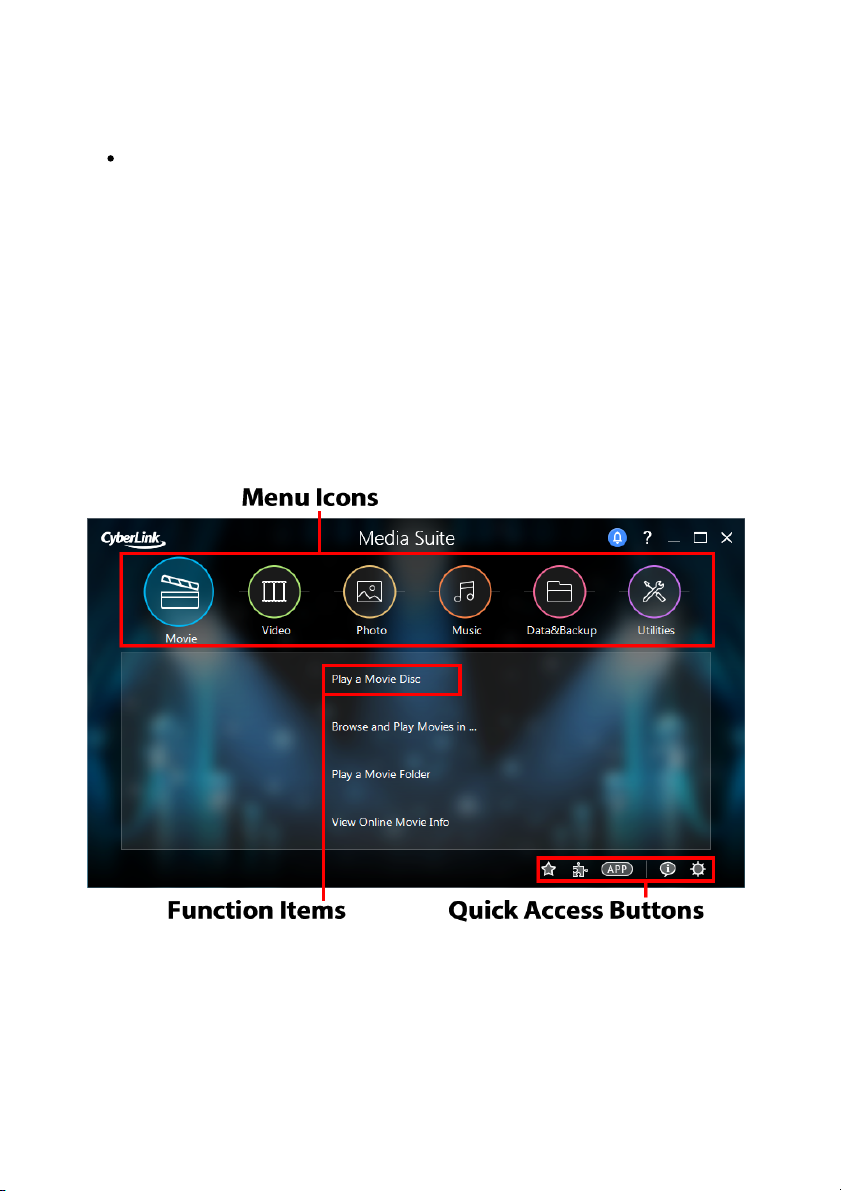
Menu Icons
Clicking a menu icon reveals a list of features and functions you can choose from,
and provides instant and direct access to all of your CyberLink programs. Click the
menu icon that corresponds to the type of media you want to access or features
you want to explore.
Movie
From the Movie menu you can watch movies on a disc or play back movie files and
folders on your hard drive. In this section you can also access MoovieLive.com to
view all the latest movie information, trailers. and reviews.
Video
In the Video menu you can organize and play the videos files on your computer, or
edit them into creative movie productions. You can also burn the videos to a disc
with menus, convert the videos to different formats, or share them with the world
by uploading them to the Internet.
Photo
The Photo menu contains a variety of functions for importing, managing, fixing,
editing, and touching up your photos. Features also include the creation of
slideshows and photo discs, and the sharing and printing of your photos.
Music
Within Music you can play back your music or burn it to a disc in a variety of
formats. You can also rip the music to your hard drive, convert it to another format,
record new audio, and edit and enhance it with rich effects.
Data & Backup
Access the Data & Backup menu to burn data files to a variety of different disc types
or search for previously burned discs in the Disc Manager. You can also copy your
3
Page 10
CyberL ink M ed ia Su ite
data and movie discs, back up and restore all of the important data on your
computer, and more.
Utilities
Use the Utilities menu to manage your discs by creating, burning or extracting files
from disc images. You can also erase rewritable discs, edit some video discs, burn
DVD folders to disc, design and print disc labels, and more.
Function Items
Select one of the menu items to reveal all the available functions and tasks you can
perform using your CyberLink software. Select any of the functions to open the
corresponding software program and complete the specified task, or access the
requested feature.
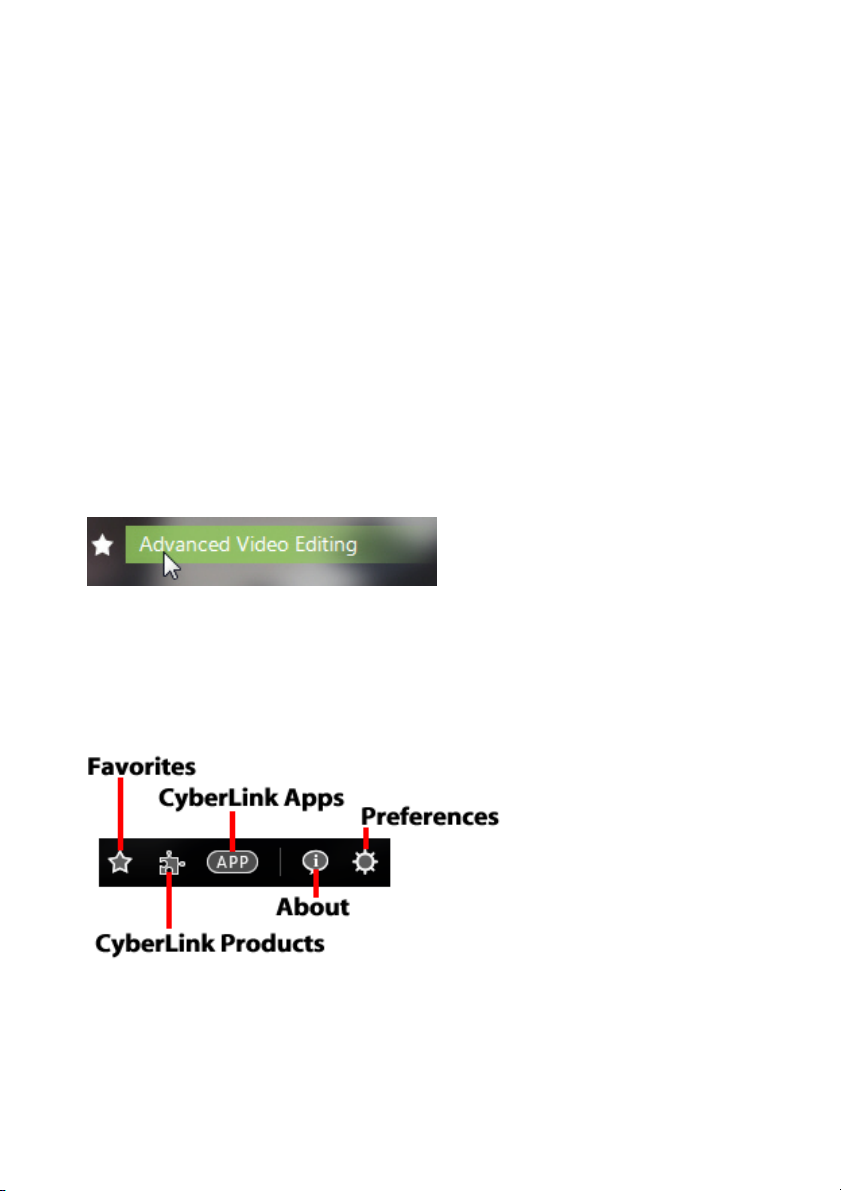
Quick Access Buttons
CyberLink PowerStarter includes the following buttons that provide quick access to
the Favorites, CyberLink Products, CyberLink Apps, About, and Preferences
windows.
4
Page 11
In tro du ctio n
Note: if you would like to remove a function/program from your favorites, just
deselect the highlighted star next to the function in the menu.
Note: the specific programs available in CyberLink PowerStarter are
dependent on the products installed on your computer and the versions you
purchased.
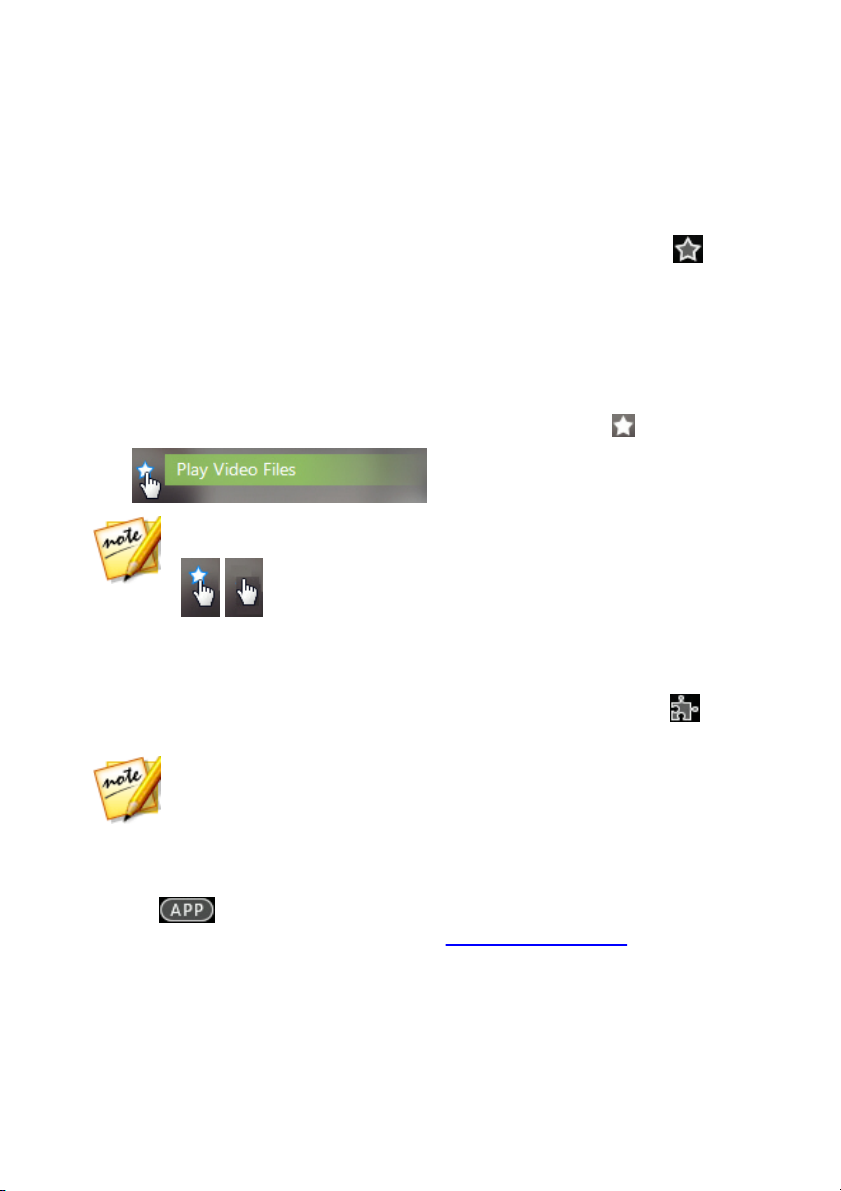
Favorites
You can add the functions and programs you use most often into the Favorites
menu, so you can quickly and easily access them when required. Click the
button to view the Favorites menu.
By default, this window is empty, but you can add a function or program to the
Favorites menu by doing this:
1. Click the menu icon to display the function/program you want to add to your
favorites.
2. Hover your mouse over the function/program and then click .
CyberLink Products
To view a list of the CyberLink programs installed on your computer, click . You
can then select any of the program names to open the corresponding software.
CyberLink Mobile Apps
Click the button to discover CyberLink's award-winning mobile apps for
your Android, iOS, and Windows devices. See CyberLink Mobile Apps for more
information.
5
Page 12

CyberL ink M ed ia Su ite
Note: CyberLink PowerStarter will default to English if your operating
system's language is not supported by the program.
About
Click to display CyberLink PowerStarter version information.
Preferences
To configure the behavior of the CyberLink PowerStarter program, click the
button, and then set your desired preferences.
Return to CyberLink Media Suite after you close a program: select this option
to return to the CyberLink Media Suite (PowerStarter) main window after you
close a program you accessed through the program portal.
Automatically check for the latest version: select this option if you want
CyberLink PowerStarter to automatically check for newer versions of the
installed software programs every 14 days. When new versions are available,
the corresponding Update and Upgrade buttons in the Upgrade window are
enabled.
Receive CyberLink product information: allows you to enable/disable banner
and running text in the About window.
Use my photos as cover photos: select this option to display your photos on
the CyberLink PowerStarter start-up window. Click to select the folder
on your computer that contains the photos you want to use.
Display language: click the arrow to the right of the settings area if you
want to change the program display language. Select the Use system default
language option to use the same language as your current operating system
language, or select the other option and manually select the UI language
from the drop down list that you want to use.
6
Page 13
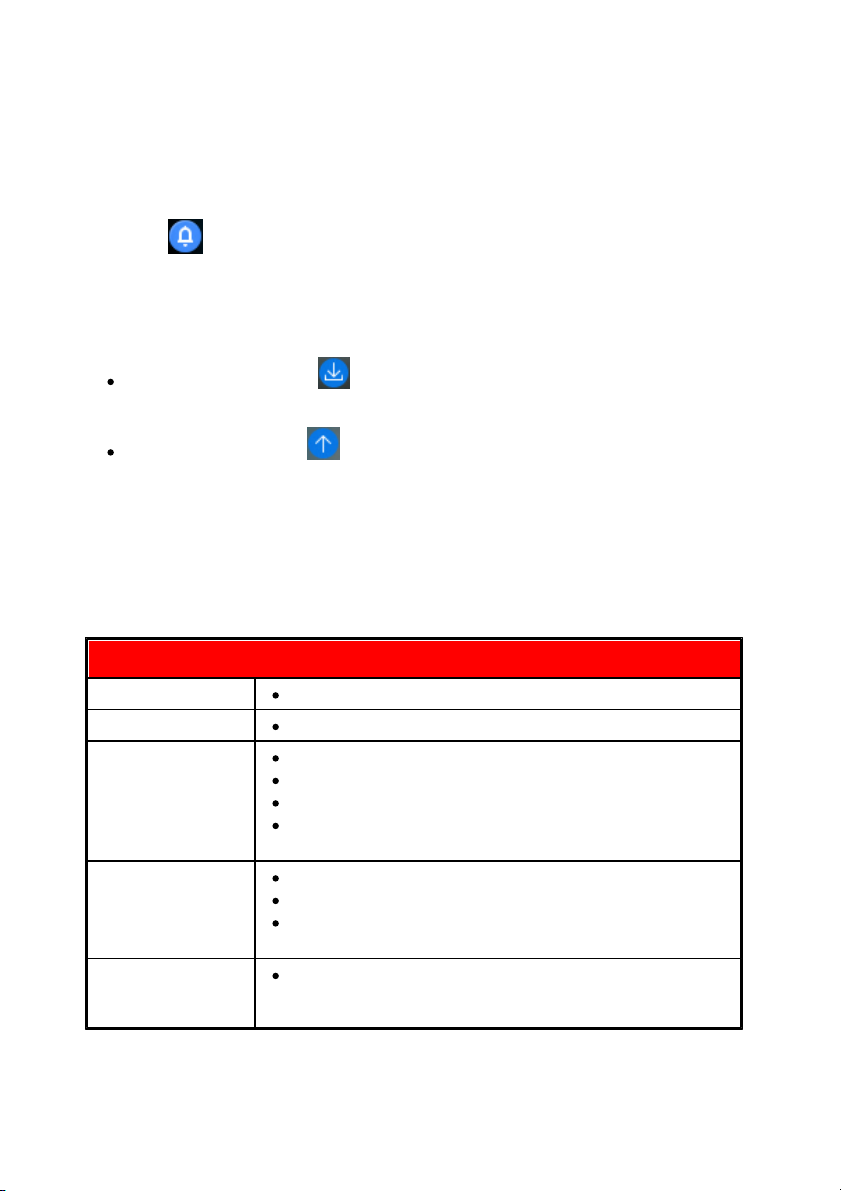
In tro du ctio n
Minimum System Requirements
Operating System
Microsoft Windows 8.1/8, 7, Vista, or above.
Screen Resolution
1024 x 768, 16-bit color or above.
Memory
1 GB required.
2 GB required for Blu-ray Disc playback.
3 GB or above recommended for 32 bit OS.
6 GB or above recommended for 64 bit OS and 3D
editing.
Hard Disk Space
5 GB required (400 MB is for Magic Music Library).
10 GB (20 GB recommended) for DVD production.
60 GB (100 GB recommended) for Blu-ray Disc/AVCHD
production.
CPU
SD video editing and export: Pentium 4 3.0 GHz or
AMD Athlon 64 X2 or above (Required).
Upgrading/Updating CyberLink Software
Select the button to access the Upgrade/Update window, where you can view
product version information for the CyberLink programs currently installed on your
computer. They are listed in a table, along with the current version number, and
buttons indicating whether or not there is a free update or an upgrade for the
software available.
When enabled, click on in the Update column to open a page that lets
you download the latest patch update for the corresponding software.
You may also click on in the Upgrade column to open a page that allows
you to upgrade a specific product, when available.
System Requirements
The system requirements listed below are recommended as minimums for working
with the programs. You may find that your system, while meeting these
recommended minimums, requires expanded capacity for some tasks.
7
Page 14
CyberL ink M ed ia Su ite
AVCHD and BD burning: Pentium Core 2 Duo E6400, or
AMD Phenom II X2 (Recommended).
Full-HD video editing and export: Intel Corei5/7 or AMD
Phenom II X4 (Recommended).
2K/4K/3D video editing profile: Intel Corei7 or AMD FX
series.
VGA
128 MB VGA VRAM or higher (1 GB or higher VRAM and
OpenCL capable are recommended).
Video Capturing
Device
OHCI IEEE 1394 compliant device.
PCI or USB 1.0/2.0 capture device compliant with WDM
standard.
DV camcorder connected via OHCI-compliant with
IEEE 1394.
DVD camcorder connected via USB 2.0.
Sony MicroMV/AVCHD/HDV camcorder.
Burning Device
A BD-RE burner is required to burn Blu-ray Discs.
A DVD burner (DVD+R/RW or DVD-R/RW) is required to
burn DVD/MiniDVD/AVCHD titles.
A CD burner (CD-R/RW) is required to burn VCD/SVCD
titles.
Microphone
A microphone is required for recording audio.
Internet
Connection
Internet connection required for initial software
activation, social media connection, and some codec
activation.
Additional Hardware Support for Blu-ray™ 3D and TrueTheater™ 3D
HDMI 1.4 Enabled
3DTV
Eye wear: active shutter glasses.
Supported hardware: HDMI 1.4 enabled 3D TV.
Supported graphics card: NVIDIA GeForce GTX 460 and
AMD Radeon HD 6800 series or above.
NVIDIA 3D Vision
NVIDIA 3D Vision or 3D Vision 2 Wireless Glasses Kit +
3D Vision-Ready Display + 3D Vision Compatible
NVIDIA Graphics Card are required.
Please download and install 3D VISION CD for Desktop
GPUs v1.38 or Verde Notebook 3D VISION CD v1.3.
120Hz Frame-sequential 3D LCD (NVIDIA 3D Vision-
8
Page 15

In tro du ctio n
Ready).
Native format: 120 fps left and right.
Eye wear: Active shutter glasses (NVIDIA 3D Vision Kit).
Supported hardware: Asus VG278H, Asus G51J-
SZ028V, Acer GD245HQ, Acer GD235H.
3D Polarizer LCD
Native format: row-interleaved.
Eye wear: polarized glasses.
Supported hardware: Zalman ZM-M220W, Acer
5738DG (Notebook).
3D Ready HDTV
(DLP)
Native format: checkerboard.
Eye wear: Active shutter glasses.
Supported hardware: Mitsubishi 1080p DLP HDTV,
Samsung 3D Ready DLP HDTV.
9
Page 16

CyberL ink M ed ia Su ite
10
Page 17
M ov ie
Note: for a detailed description of all the playback features available in
CyberLink PowerDVD, press the F1 key on your keyboard when within the
program window to open the help file.
Note: for a detailed description of all the playback features available in
CyberLink PowerDVD, press the F1 key on your keyboard when within the
program window to open the help file.
Optical Disc Types
File Formats
Blu-ray Discs*/Blu-ray 3D**
BDAV, BDMV
Chapter 2:
Movie
CyberLink Media Suite provides access to CyberLink PowerDVD, a software disc
player with all the features and controls of a normal living room disc player. It
offers feature-rich navigation controls for an interactive and tailored viewing
experience.
CyberLink PowerDVD also provides access to all the movie information you will
need from the Internet.
Play a Movie Disc
In CyberLink Media Suite you can play all of your movie discs with the world's #1
playback software on the PC, CyberLink PowerDVD. To start watching a movie disc,
select the Play a Movie Disc function within the Movie menu of CyberLink
PowerStarter.
Insert a movie disc into your disc drive, and CyberLink PowerDVD will play it
automatically. If there is a disc already in your disc drive when you opened
CyberLink PowerDVD, do this:
1. Click on the Movies/TV tab, and then .
2. Click the play button.
Supported Disc Formats
The optical disc formats that CyberLink PowerDVD supports are listed below:
11
Page 18
CyberL ink M ed ia Su ite
Discs
DVD
DVD-Video, AVCHD*, AVCREC*, DVD-VR, DVD+VR
CD
VCD, SVCD
Note: * this feature is not available in some versions of CyberLink
PowerDVD. ** If your version of CyberLink PowerDVD supports Blu-ray 3D
playback, you may have to enable playback in More Blu-ray Disc Settings.
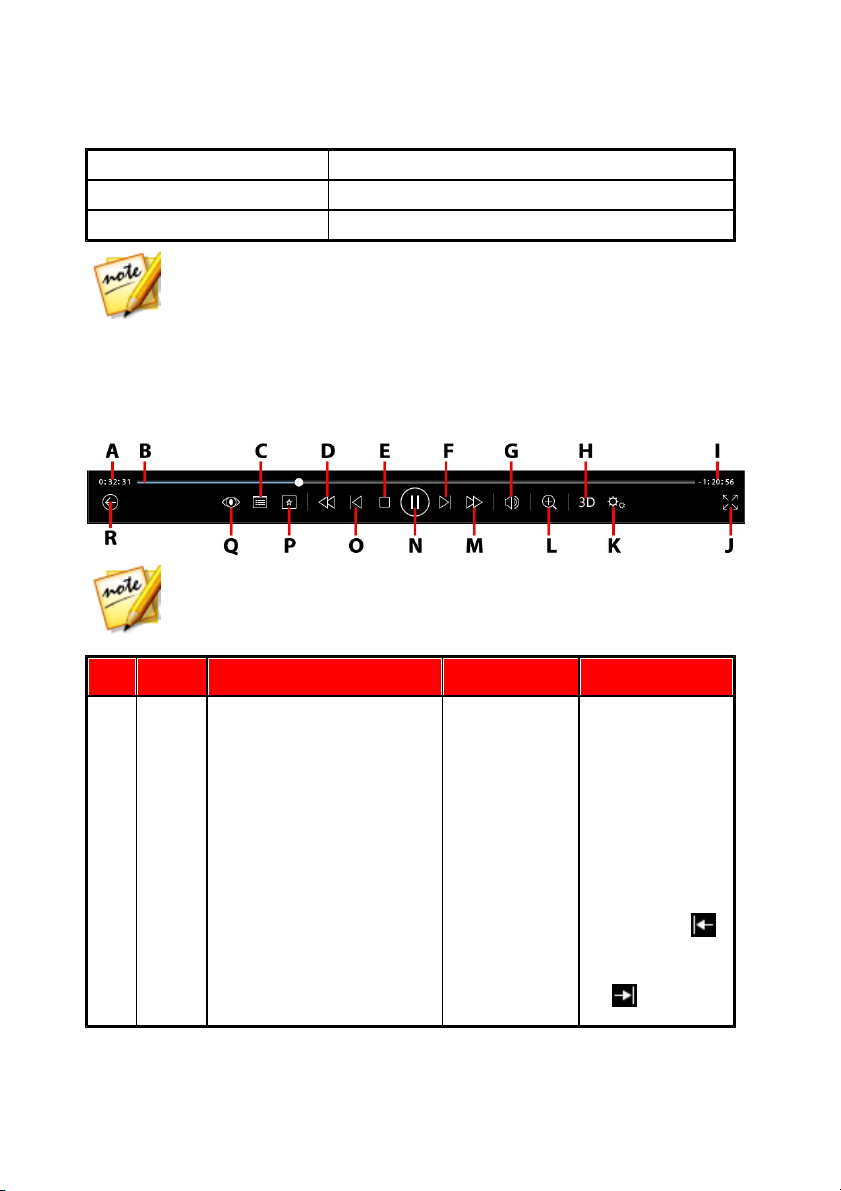
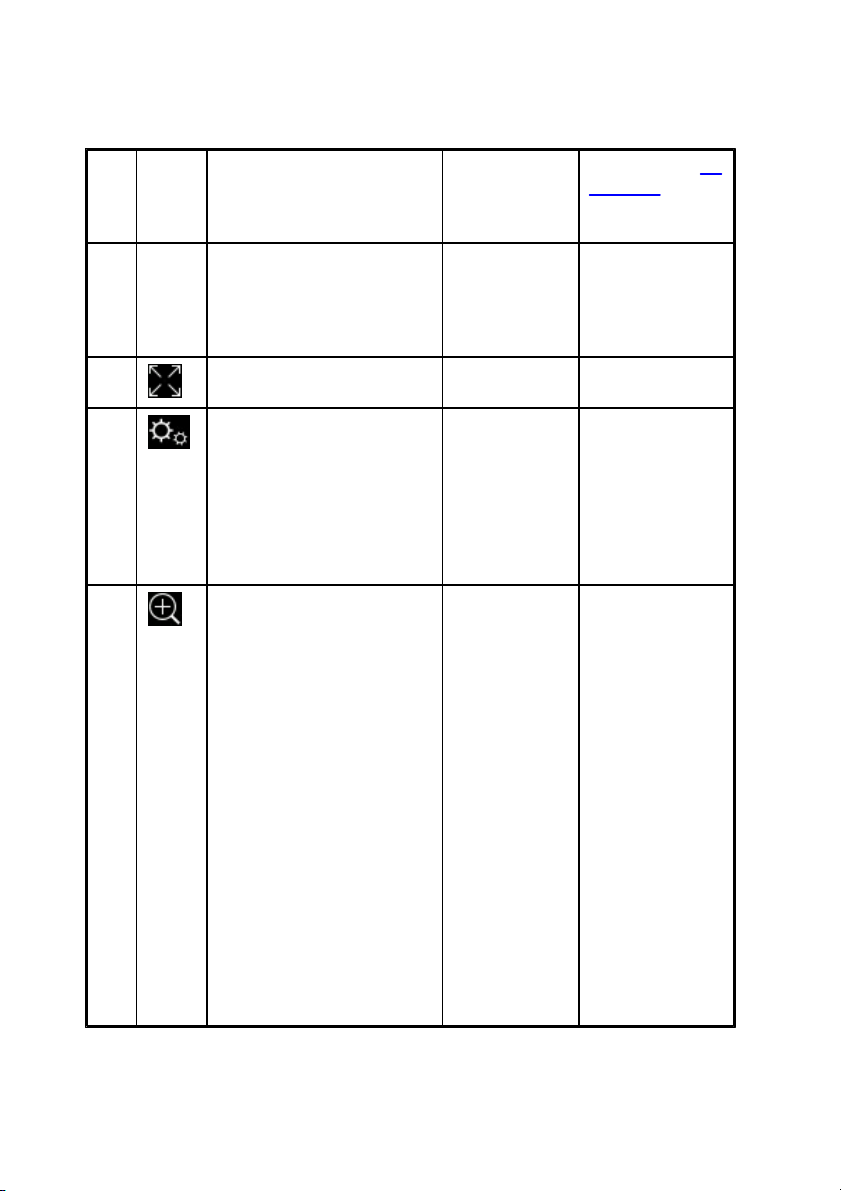
Note: the below table includes the hotkey for each specific button on the
playback controls, if available. For a complete list of all the hotkeys in
PowerDVD and the corresponding behavior, see the hotkey table in the
program's help file.
Icon
Button
Hotkey
Description
A
Elapsed time
Displays the time
elapsed for the
current movie.
Hover your
mouse over it to
reveal two
buttons that let
you jump
backward and
forward in the
movie. Click
to quickly jump
back 8 seconds,
or to skip
Movie Disc Playback Controls
When playing back a movie disc in the BD/DVD Movies section of the Media
Library tab, the playback controls display as follows:
12
Page 19

M ov ie
forward 30
seconds. If you
have a touch
enabled display,
you can also use
Gesture Controls
to skip forward
or backward
during movie
playback.
B
Navigational slider
Visually displays
elapsed playback
time. Click along
the navigational
slider to jump to
different
moments in the
movie, or click
and drag it to
use Instant Seek
to quickly
browse and find
specific scenes
in your movie.
Hover your
mouse over the
slider to use
Instant
Thumbnails to
quickly find
scenes you
previously
viewed during
DVD playback.
C
Access DVD menu
controls/Pop-up menu
(Blu-ray* playback only)
M
During DVD
playback, this
button provides
quick access to
the title and root
menus on the
13
Page 20

CyberL ink M ed ia Su ite
DVD. Click
or press M on
your keyboard to
display the popup menu over
the disc content.
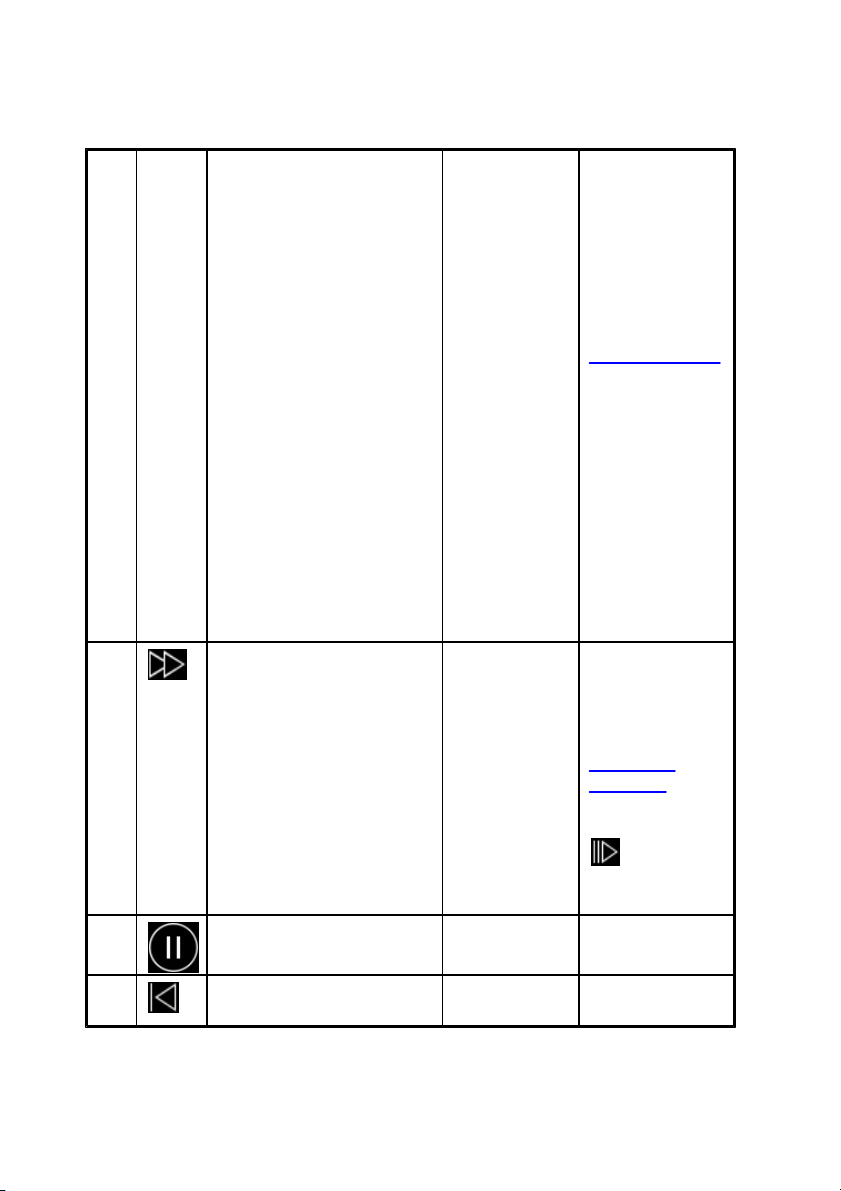
D
Rewind/Step backward
(when paused)
[
During playback
click this button
to reverse
through content
and access the
Play Speed
Navigator. When
playback is
paused, use the
button to go
to the previous
frame of video.
E
StopSStops playback
of media.
F
NextNJumps to the
next chapter on
the movie disc.
G
Mute/Volume adjustment
Q / + and -
Click to mute the
volume; click
again to turn
mute off. To
manually adjust
the volume,
hover your
mouse over this
button and then
use the slider to
increase or
decrease the
volume.
H
Enable 3D*
Enable 3D movie
14
Page 21
M ov ie
playback. See 3D
Playback for
more
information.
I
Movie duration/Remaining
time
Click to toggle
between movie
duration and
remaining
playback time.
J
Go to full screen
Z
Click to enter full
screen mode.
K
PowerDVD settings menu
Opens the
PowerDVD
settings menu,
where you can
access player
settings and
PowerDVD
preferences.
L
Zoom
Ctrl+mouse
wheel**
Hover your
mouse over this
button, and then
use the slider to
use Instant
Zoom to
digitally zoom in
or out on a DVD
movie's video
image (note: this
feature is not
available during
Blu-ray Disc
playback). When
zoomed in, you
can click and
drag on the
video image to
view different
areas of the
15
Page 22
CyberL ink M ed ia Su ite
image. ** note
that this hotkey
can be modified
in settings, so
the behavior
may differ. If you
have a touch
enabled display,
you can also use
Gesture Controls
to digitally zoom
in or out on the
video image.
Note: this
feature is not
supported on
videos that have
a resolution
greater than
2560 x 1440, or
when the output
display is greater
than 2560 x 1440.
M
Fast forward/Step forward
(when paused)
]
During playback
click this button
to fast forward
through content
and access the
Play Speed
Navigator. When
playback is
paused, use the
button to
go to the next
frame of video.
N
Play/Pause
Space bar
Plays and pauses
media playback.
O
Previous
P
Returns to the
16
Page 23
M ov ie
previous chapter
on the movie
disc.
P
Media playback menu
During playback,
this button
provides access
to the media
playback menu.
Q
TrueTheater effects
Provides access
to the
TrueTheater
video effect
controls. See
TrueTheater
Effects.
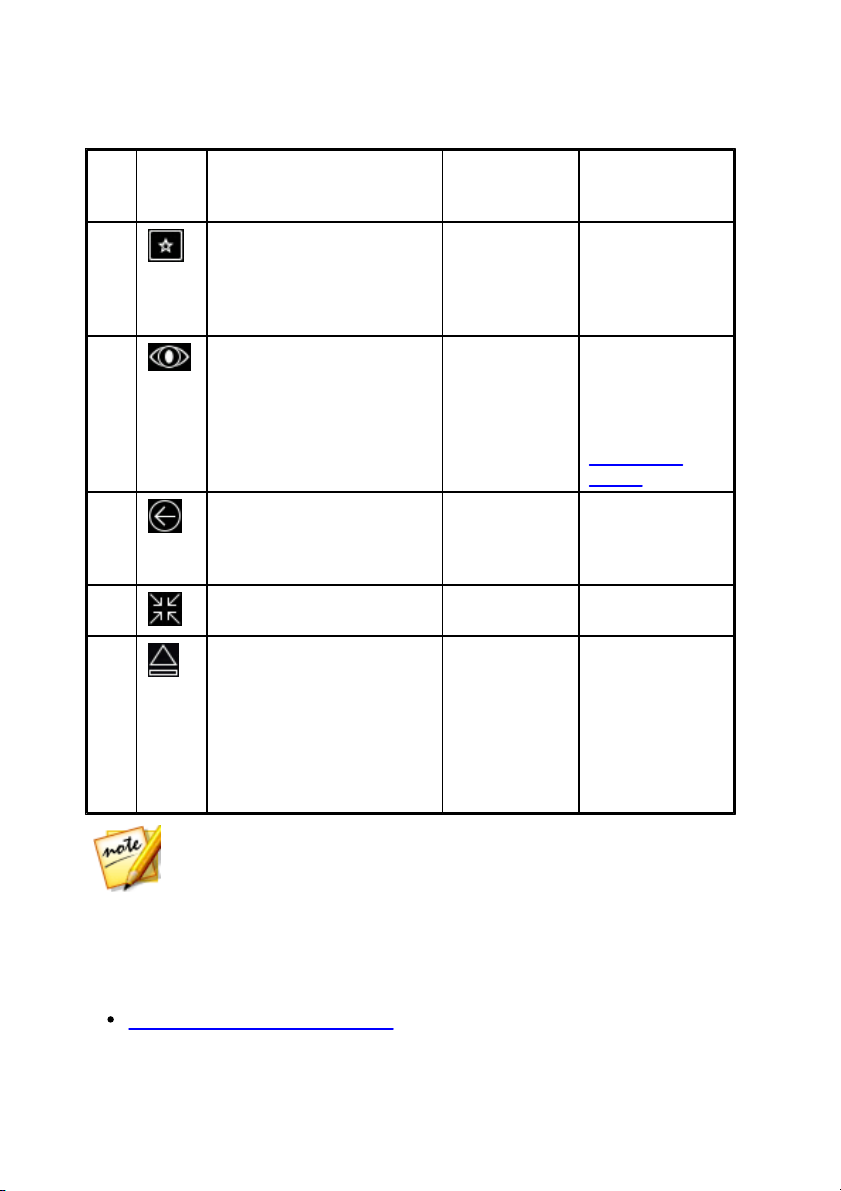
R
Return to previous window
Backspace
Click to stop
playback and
return to the
media library.
Restore from full screen
Z / Esc
Click to exit full
screen mode.
Eject disc
Ctrl+E
When playback
is stopped, this
button is
displayed. Click
it to eject the
disc in the
selected disc
drive.
Note: * this feature is not available in some versions of CyberLink
PowerDVD.
Playback Features
The following are some playback features that are sure to enhance your movie
viewing experience:
TrueTheater Video Enhancements
17
Page 24

CyberL ink M ed ia Su ite
3D Playback
Play Speed Navigator
Gesture Controls
TrueTheater Video Enhancements
During the playback of Blu-rays, DVDs, video files (including movie files and TV
shows), and videos on YouTube, you can enable TrueTheater video enhancements
to maximize the playback quality.
Click the button to open the TrueTheater window and display the following
options:
Smart Enhancement
On this tab you can apply all the TrueTheater enhancements automatically during
playback. CyberLink PowerDVD dynamically adjusts (turns on or off) TrueTheater
video enhancements to provide optimum performance, while maximizing
playback quality.
Video: select this option to enable video enhancements and make the video
look better. Drag the available slider left or right to adjust the amount of
TrueTheater video enhancements applied. TrueTheater Video enhances video
brightness, contrast, and also the color, making it more saturated and vivid.
TrueTheater will also sharpen video (if the resolution is less than 720p) to make
it look clearer.
Audio: select this option to enable audio enhancements and make the audio
sound better. Drag the available slider left or right to adjust the amount of
TrueTheater audio enhancements applied. TrueTheater Audio amplifies the
movie volume, boosting movie bass and dialogue, to provide a more
immersive media viewing experience.
Advanced Enhancement
Select this tab to manually enable and set the amount of TrueTheater
enhancements applied to the video as follows:
18
Page 25

M ov ie
Note: this feature is not available for disc playback.
Note: this feature is not available for disc playback.
Video
Select the Video option to enable the following True Theater video enhancements:
TrueTheater HD: select this option to up scale the original video to a higher
resolution version, which is sharper and artifact-free. TrueTheater HD is
capable of boosting 480p video to 1080p. Use the slider to adjust the
sharpness to the best output that suits your configuration.
TrueTheater Lighting (CyberLink Eagle Vision 2): is a video enhancement
technology developed by CyberLink that detects video content and
dynamically adjusts the brightness/contrast ratios so that you do not need to
change the video settings if the video you are watching contains scenes that
are overly dark or too bright. Use the level slider to adjust the TrueTheater
Lighting effect the desired amount.
TrueTheater Color: select this option to dynamically adjust the color
saturation ratio in the video. Use the level slider to make the colors in the
video more vivid, without affecting skin tones.
TrueTheater Motion: select this option to enable frame rate upsampling, from
24 fps up to 60 fps, to make panning scenes, particularly in action movies,
play more smoothly. TrueTheater Motion can improve the frame rate of video
content to 60 or 72 fps, depending on the output frame rate of your display.
TrueTheater Noise Reduction: select this option to reduce the amount of
video noise when playing home video files in CyberLink PowerDVD, including
High-ISO and TV signal noise. Once enabled, drag the slider to increase or
decrease the level of noise reduction on the video.
TrueTheater Stabilizer: select this option to employ motion compensation
technology when playing home video files that are shaky. This feature is ideal
for use with video files taken without a tripod or recorded while moving.
Audio
Select the Audio option to enable TrueTheater audio enhancements. Drag the
available slider left or right to adjust the amount applied. TrueTheater Audio
19
Page 26
CyberL ink M ed ia Su ite
Note: * this feature is not available in some versions of CyberLink
PowerDVD.
Note: ** if your version of CyberLink PowerDVD supports 3D Blu-ray Disc
playback, you may have to enable playback in settings.
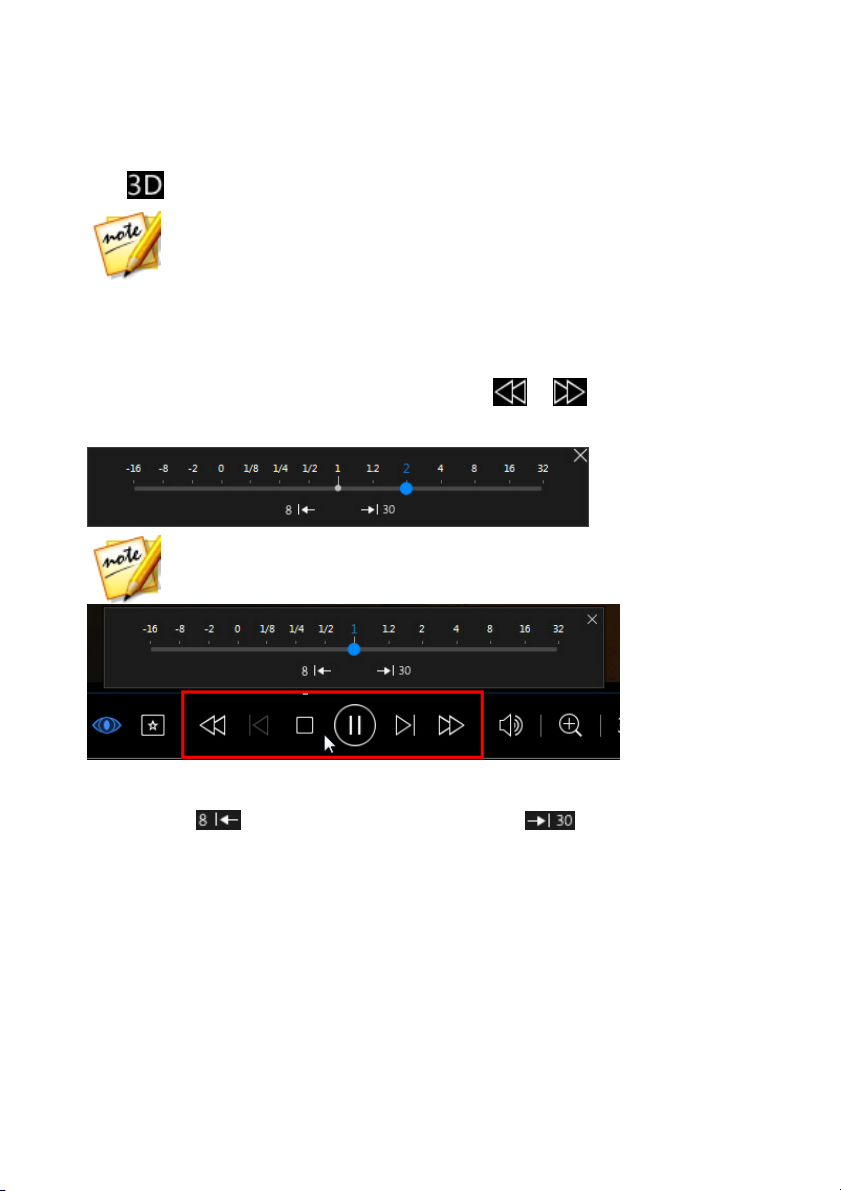
Note: 3D mode is enabled when the 3D icon on the playback controls
displays as . Note that a number of features are disabled during 3D
playback.
amplifies the movie volume, boosting movie bass and dialogue, to provide a more
immersive media viewing experience.
3D Playback
CyberLink PowerDVD supports the playback of 3D* Blu-ray Discs*, DVDs, video files,
and 3D YouTube videos, and also lets you view JPS, MPO, and side by side 3D
photos in 3D. CyberLink PowerDVD can also convert any regular 2D Blu-ray Disc**,
DVD movie, video file, YouTube video, and photo into 3D using TrueTheater 3D*.
3D Playback Warning: if you experience headaches, dizziness, nausea, blurry
eyesight or other symptoms while watching 3D video content, it is highly
recommended that you stop playback immediately and see your doctor.
Enabling 3D Playback
To enable 3D* playback, just select the button on the playback controls and
then select one of the following options:
Play 3D Media in 3D: select this option to auto enable playback of all 3D
media (3D** Blu-ray Disc or DVD, 3D video file, 3D photos). Once enabled,
CyberLink PowerDVD will automatically play 3D media in 3D once playback
starts, so that you don't need to enable 3D playback every time you play it.
Convert 2D Media to 3D: select this option if you want CyberLink PowerDVD
to convert all 2D media (2D Blu-ray Discs, DVDs, video files, YouTube videos,
photos) to 3D using TrueTheater 3D when playback starts. Once enabled, you
won't need to enable TrueTheater 3D every time you want to convert 2D
media.
20
Page 27
M ov ie
Note: * this feature is not available in some versions of CyberLink
PowerDVD.
Note: you can also access this panel by right-clicking above or below the
player controls.
If you need to adjust your 3D display configuration or the playback preferences,
click on the playback controls and then select More 3D Preferences.
Play Speed Navigator
When wanting to rewind or fast forward through content on movie discs, in movie
files, or when playing videos files, you can click the or button to access
the Play Speed Navigator for easier control.
Drag the blue control slider left to increase the rewind speed up to 16 times the
normal playback speed, or right to increase the forward speed up to 32 times. You
can also click to quickly jump back 8 seconds, or to skip forward 30
seconds.
Press the space bar on your keyboard to close the control panel and resume normal
playback.
21
Page 28

CyberL ink M ed ia Su ite
Gesture Controls
If CyberLink PowerDVD is installed on a computer that has a touch enabled display,
you can use gesture controls to browse through your media and during media
playback.
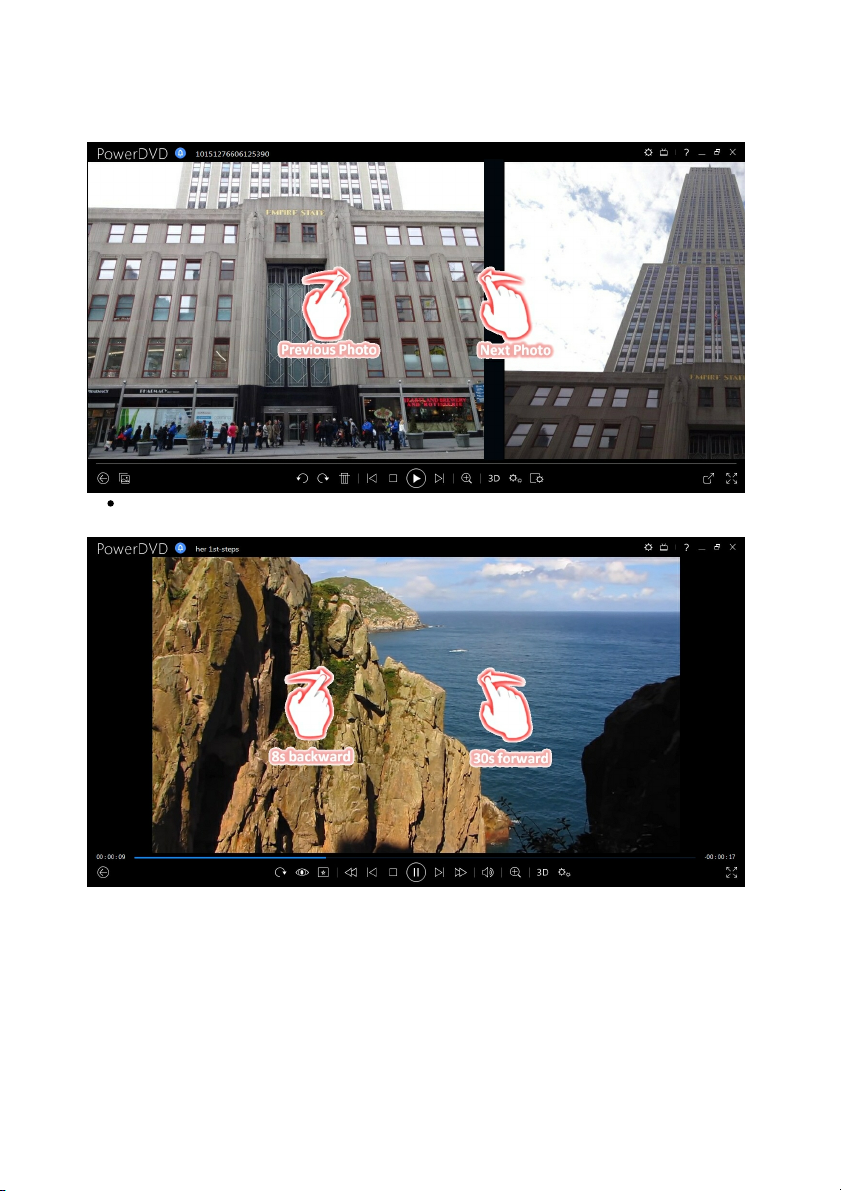
When viewing a photo, movie, or video, use the spread and pinch gestures to
zoom in and out on the image. These gesture controls are also available in
calendar view, so you can change the calendar view to show more than one
month, or zoom in on a specific day.
When viewing a photo, use the swipe right and left gestures to view the
previous or next photo. When in calendar view you can swipe up or down to
scroll through the days and months in the calendar.
22
Page 29
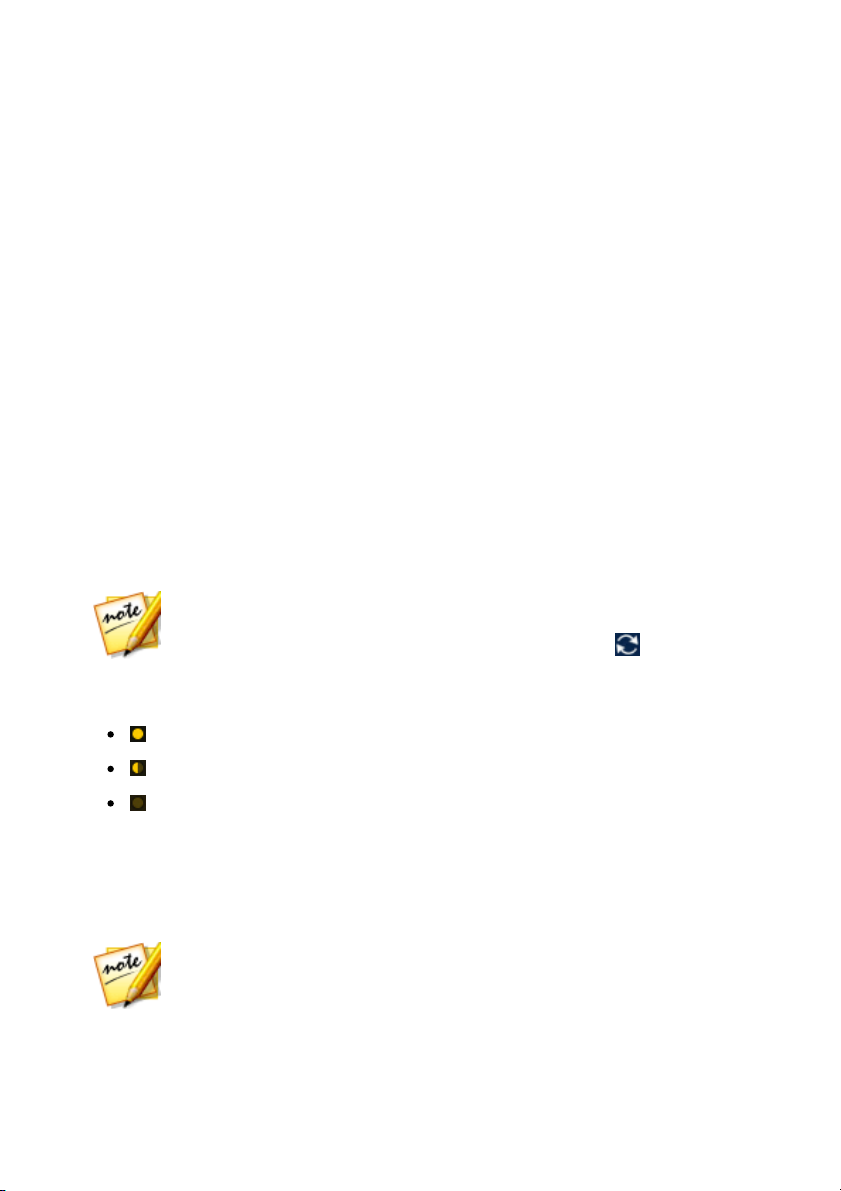
When playing movies or video files, use the swipe right gesture to quickly
jump backward 8 seconds. Swipe left to skip forward 30 seconds.
M ov ie
23
Page 30
CyberL ink M ed ia Su ite
Note: use the zoom slider on the playback controls to use Instant Scale to
dynamically resize the movie cover art to a desired size. If you are not
seeing the latest movie files in the media library, just click to refresh.
Note: if the cover art for a movie file in the library is incorrect, you can right
click on it and select Hide Online Info to remove it and the related movie
information.
Browse and Play Movies in Movie Library
Select the Browse and Play Movies in Movie Library function within the Movie
menu of CyberLink PowerStarter to launch CyberLink PowerDVD.
In the Movie Library you can browse through and play the movie files in your
personal movie library. Movies files are DVD/Blu-ray Disc* folders and individual
video files (movie files you recorded with a PVR) that are saved on your computer's
hard drive.
Browsing Through Movies in the Movie Library
When browsing through the movie files in the Movies/TV tab's Movie Library
section of the media library, you can view their movie cover art, rating information,
and more. Click the down arrow in the top right of the window to filter the movies
by 10 Recently Played Movies or Movies Not Watched Yet if required.
As you browse through the library, note the icons next to each of the movie files.
Their meanings are as follows:
- indicates the movie has not yet been watched.
- indicates the movie was partly watched, but not to the end.
- indicates the movie was previously watched.
If a movie file is not displaying the cover art, you can insert an image file (in the JPG
or PNG format) in the movie file's folder and name it “folder” to use it as the cover
art. You can also right click on the movie file and then select Set Cover Art. In the
Select Image dialog, browse to and then select an image on your computer's hard
drive to use as the cover art.
24
Page 31

M ov ie
Note: * this feature is not available in some versions of CyberLink
PowerDVD.
Note: see Video Playback Controls for a list and description of the controls
and playback features available during movie file playback.
Right-click on a movie file thumbnail in the media window and then select Locate
on Disk to view the folder where the file is located in Windows Explorer. If you'd like
to remove a movie file from the media library (and from your computer's hard
drive), just right click on it and select Delete from Disk.
Supported Movie File Formats
In CyberLink PowerDVD you can play back movie files in the following formats:
Movie file formats: 264, 265*, 26L, 3G2, 3GP, 3GP2, 3GPP, ASF, AVC, AVI, BSF*, DIV,
DIVX*, DVR-MS, FLV, H264, H265*, HEVC*, JSV, JVT, M1V, M2P, M2T, M2TS, M2V,
M4V, MK3D*, MKV, MOD, MOV, MP4, MP4V, MPE, MPEG, MPG, MPV, MTS, MVC*, QT,
TOD, TP, TPD, TRP, TS, TTS, VC1*, VOB, VRO, WM, WMV, WTV.
Playing Movie Files in PowerDVD
You can play back movie files by doing any of the following:
drag and drop a movie file directly onto the CyberLink PowerDVD user
interface or the PowerDVD desktop icon.
to play a movie file in your media library, click Movies/TV in the media panel,
and then . Browse to the folder that contains your movie files, and
then double-click on a movie file to begin playback.
to play a movie file on your hard drive, click the My Computer tab in the
media panel, and then browse to the folder that contains your movie file.
Double-click on a movie file to begin playback.
if CyberLink PowerDVD is set as the default player for a movie file on your
computer, you can also just double-click on a file in Windows Explorer to play
it back.
25
Page 32

CyberL ink M ed ia Su ite
Note: * this feature is not available in some versions of CyberLink
PowerDVD.
Play a Movie Folder
You can play back any DVD and unprotected Blu-ray Disc* folders that are on your
hard drive. To play a movie folder, do this:
1. Select the Play a Movie Folder function within the Movie menu to open
CyberLink PowerDVD.
2. Click Movies/TV in the media panel, and then .
3. Click the button on the playback controls, and then browse to and select
the movie folder.
4. Click on OK and then play button to begin playback.
View Online Movie Info
If you'd like to browse through the latest movie information available, select the
View Online Movie Info option in the Movie menu of CyberLink PowerStarter to go
to the MoovieLive web site. There you can view information about all the latest
movie releases, find out what are the top rated movies, and which are the most
watched by CyberLink PowerDVD users. You can also read movie reviews, watch
movie trailers, read bios on your favorite actors, and much more.
26
Page 33

Vid eo
Note: for a more detailed description of these programs and there functions,
please consult the product help files.
Note: for a detailed description of all the playback features available in
CyberLink PowerDVD, press the F1 key on your keyboard when within the
program window to open the help file.
Note: for a list of the available playback controls, see Video Playback
Controls. For information on some of the playback features that are
available during video file playback, see Playback Features.
Chapter 3:
Video
The video functions in CyberLink Media Suite let you play video files in CyberLink
PowerDVD, edit your videos in CyberLink PowerDirector, produce movie discs with
CyberLink PowerProducer, and much more. You can also convert videos to other
file formats with CyberLink MediaEspresso, or use CyberLink MediaShow to
organize, enhance, and share your videos.
Play Video Files
To play back videos files in CyberLink PowerDVD, select the Play Video Files
function within the Video menu of CyberLink PowerStarter. The CyberLink
PowerDVD main window displays.
You can play back videos files by doing any of the following:
drag and drop a video file directly onto the CyberLink PowerDVD user
interface or the PowerDVD desktop icon.
to play a video file in your media library, select Videos in the media panel, and
then browse to the folder that contains your videos. Double-click on a video
file to begin playback.
to play a video file on your hard drive, click the My Computer tab in the media
panel, and then browse to the folder that contains your video file. Doubleclick on a video file to begin playback.
if CyberLink PowerDVD is set as the default player for a video file on your
computer, you can also just double-click on a file in Windows Explorer to play
it back.
27
Page 34

CyberL ink M ed ia Su ite
Note: * this feature is not available in some versions of CyberLink
PowerDVD.
Note: the below table includes the hotkey for each specific button on the
playback controls, if available. For a complete list of all the hotkeys in
PowerDVD and the corresponding behavior, see the hotkey table in the
program's help file.
Icon
Button
Hotkey
Description
A
Elapsed time
Displays the time
elapsed for the
current video.
Hover your
mouse over it to
reveal two
buttons that let
you jump
backward and
forward in the
video. Click
Supported Video File Formats
In CyberLink PowerDVD you can play back videos in the following file formats:
Video formats: 264, 265*, 26L, 3G2, 3GP, 3GP2, 3GPP, ASF, AVC, AVI, BSF*, DIV,
DIVX*, DVR-MS, FLV, H264, H265*, HEVC*, JSV, JVT, M1V, M2P, M2T, M2TS, M2V,
M4V, MK3D*, MKV, MOD, MOV, MP4, MP4V, MPE, MPEG, MPG, MPV, MTS, MVC*, QT,
TOD, TP, TPD, TRP, TS, TTS, VC1*, VOB, VRO, WM, WMV, WTV.
Video Playback Controls
When playing back a video file in the Videos section of the Media Library tab, or a
movie file in the Movie Library section, the playback controls display as follows:
28
Page 35

Vid eo
to quickly jump
back 8 seconds,
or to skip
forward 30
seconds. If you
have a touch
enabled display,
you can also use
Gesture Controls
to skip forward
or backward
during video
playback.
B
Navigational slider
Visually displays
elapsed playback
time. Click along
the navigational
slider to jump to
different
moments in the
video, or click
and drag it to
use Instant Seek
to quickly
browse and find
specific scenes in
your video.
Hover your
mouse over the
slider to use
Instant Preview
to quickly find
scenes you
previously
viewed during
movie file
playback.
C
Media playback menu
During playback,
this button
29
Page 36

CyberL ink M ed ia Su ite
provides access
to the media
playback menu.
D
Previous
P
Returns to the
previous video
file in a folder/
playlist.
E
Play/Pause
Space bar
Plays and pauses
media playback.
F
Fast forward/Step forward
(when paused)
]
During playback
click this button
to fast forward
through content
and access the
Play Speed
Navigator. When
playback is
paused, use the
button to go
to the next frame
of video.
G
Zoom
Ctrl+mouse
wheel**
Hover your
mouse over the
button, and then
use the slider to
use Instant
Zoom to digitally
zoom in or out
on the video
image. When
zoomed in, you
can click and
drag on the
video image to
view different
areas of the
image.** note
that this hotkey
30
Page 37

Vid eo
can be modified
in settings, so
the behavior
may differ. If you
have a touch
enabled display,
you can also use
Gesture Controls
to digitally zoom
in or out on the
video image.
Note: this feature
is not supported
on videos that
have a resolution
greater than 2560
x 1440, or when
the output
display is greater
than 2560 x 1440.
H
PowerDVD settings menu
Opens the
PowerDVD
settings menu,
where you can
access player
settings and
PowerDVD
preferences.
I
Video duration/Remaining
time
Click to toggle
between movie
duration and
remaining
playback time.
J
Full screen
Z
Click to enter full
screen mode.
K
Enable 3D*
Enable 3D video
playback. See 3D
Playback for
more
31
Page 38

CyberL ink M ed ia Su ite
information.
L
Mute/Volume adjustment
Q / + and -
Click to mute the
volume, or to
turn mute off. To
manually adjust
the volume,
hover your
mouse over this
button and then
use the slider to
increase or
decrease the
volume.
M
NextNJumps to next
video file in a
folder/playlist.
N
StopSStops playback
of media.
O
Rewind/Step backward
(when paused)
[
During playback
click this button
to reverse
through content
and access the
Play Speed
Navigator. When
playback is
paused, use the
button to
go to the
previous frame
of video.
P
TrueTheater effects
Provides access
to the
TrueTheater
video effect
controls. See
TrueTheater
Effects.
32
Page 39

Vid eo
Q
Return to previous window
Backspace
Click to stop
playback and
return to the
media library.
Rotate right
Ctrl+.
When playing
back or browsing
video files in the
Videos section of
the media
library, click to
rotate the
current video 90
degrees in the
clockwise
direction. Note:
this feature is not
supported on
videos that have
a resolution
greater than 2560
x 1440, or when
the output
display is greater
than 2560 x 1440.
Restore from full screen
Z / Esc
Click to exit full
screen mode.
Share
When browsing
through video
files in the
Videos section of
the media
library, click this
button to share
the video on
Facebook,
YouTube, or
Vimeo.
Play to
When browsing
through video
33
Page 40

CyberL ink M ed ia Su ite
files in the
Videos section of
the media
library, click this
button to play
the current video
file on a home
media server or
device that is
connected to the
same network.
Note: * this feature is not available in some versions of CyberLink
PowerDVD.
Note: you can also drag and drop media onto the CyberLink PowerDirector
window to import it into the program.
Advanced Video Editing
Use CyberLink PowerDirector to edit all of your video files into professional-looking
movie masterpieces.
To edit your videos in CyberLink PowerDirector, do this:
1. Select the Advanced Video Editing function within the Video menu of
CyberLink PowerStarter.
2. If required, select the Full Feature Editor option to open CyberLink
PowerDirector to the edit window.
3. Click and then select one of the following options:
Import Media Files: import media files individually.
Import a Media Folder: import the entire contents of a folder that contains the
media files you want to use in your current project.
4. Proceed to edit your movie. If required, you can download additional media
from Flickr and Freesound to include in your video production, and custom
effects and titles from DirectorZone.
34
Page 41

Vid eo
Note: for a detailed description on how to edit videos in CyberLink
PowerDirector, press the F1 key on your keyboard when within the Edit
window to open the help file.
Organize Videos
You can import all of your videos into the CyberLink MediaShow library, and use
the program to organize them and prepare them for editing, burning, uploading to
the Internet, and more.
To organize your videos using CyberLink MediaShow, select the Organize Videos
function within the Video menu of CyberLink PowerStarter. The CyberLink
MediaShow main window displays.
Managing Video Files
When you are viewing the video thumbnails in the media library, there are several
management options available. Double click on a folder/tag/album etc. in the
media library to display all of the videos inside.
Adding and Editing Tags
You can add keyword search tags to your videos in the media library. Tags help you
find specific videos in the library more quickly and are useful when uploading
content to YouTube, as people use keyword tags to find media they are interested
in.
Adding Tags
To add keyword tags to a video file in the library, just right-click on the file and then
select Add Tag. You can also select some videos files or a media album in the
library and then Edit > Tag at the top of the media window. In the pop-up menu
that displays, select the keyword tags you want to add.
You can also add new keyword tags.
Adding New Tags
If you want to add a new keyword tag to the library so that it is available in the popup menu, do this:
35
Page 42

CyberL ink M ed ia Su ite
Note: you can quickly add keyword tags to some video files, or entire media
albums, simply by dragging and dropping them on to the Tags section of
the library side bar.
1. Right-click on a video file in the library and then select Add Tag.
2. Enter the new tag name in the field provided in the Add Tag window, and
then click on .
3. Select Done. The tag will be added and applied to the selected video file.
Creating and Managing Albums
You can create new albums or place your videos into existing ones, helping you
organize your videos and prepare it for slideshows, movie discs, and more.
Adding Videos to Albums
You can organize your videos into albums, which are then easier to use in
slideshows, movie projects, etc. To add videos to an album, just right-click on the
file and then select Add to Album. In the pop-up menu that displays, select one of
the following albums:
Favorite Media: select to add the video file to your favorite media album. You
can also add videos to this album at any time by selecting the button
when playing back media.
Create New Album: select to create a new album in the media library and add
the selected videos to it.
Custom Albums: any custom albums you create are in this pop-up menu. Just
select to add the video to the album.
Repeat the above process to add as many videos to an album as you wish.
Creating New Albums
If you want to add a new album to the media library, do this:
1. Select Create New Album in the Albums section, or right-click on a video file
in the library, select Add to Album > Create New Album.
36
Page 43

Vid eo
Note: the edits you make to a video file is not applied to the original source
clip. CyberLink MediaShow keeps a log of your desired changes and then
asks you to produce a new video file version when you are done editing.
Note: you can easily undo any edits that you make to a video by rightclicking on it in the media window and selecting Undo Changes. You can
also click to use the Edit Video - Log to roll back changes to a
specific version.
Note: you can also select a number of videos in the media library, rightclick on them, and then select Edit to access the Edit window.
2. In the Album Information window, enter the information as follows:
Name: enter the album name.
Date: enter a date for the album, which can be either the date the media was
shot or the date the album was created.
Location taken: if required, enter the location where the media was shot.
Description: add a description for the album, if required.
3. Select OK. The custom album is saved to the media library.
Easy Video Editing
CyberLink MediaShow offers several editing features, including trimming unwanted
portions from video clips, or performing various touch ups on videos in
preparation for editing, uploading, etc.
To fix and enhance your videos, do this:
1. Select the Easy Video Editing function within the Video menu of CyberLink
PowerStarter. The CyberLink MediaShow main window displays.
2. Select all of the videos in the media library that you want to edit, and then
drag and drop them in the media tray.
3. Select the Edit button, and then select Edit Media. The Edit window opens.
Once you are done editing videos, select the Preview button to play them back, or
Save if save them as new video files. Select the Share button to send them to
friends and family, or post them on a social media website. See Upload to Social
Networks for more information.
37
Page 44

CyberL ink M ed ia Su ite
Making Video Fixes
CyberLink MediaShow provides you with several common video fixes, including
auto lighting adjustments, fixing shaky video, and reducing unwanted video and
audio noise.
In the Edit window, select on the tab to perform the following fixes on your
videos.
Fix shaky video: select to automatically fix a video clip that contains
moments where the camera is shaking.
Auto fix lighting: select to automatically fix the lighting in the video.
Reduce video noise: select to remove blocky artifacts from a video clip’s
image.
Reduce audio noise: use this option to filter out background noises from the
audio track. Drag the slider to remove more or less noise.
Select Close to save the changes to your video, and then Back to produce and
export the video as a new file.
Fine Tuning Videos
Use the fine tune function in the Edit window to manually adjust the Brightness,
Contrast, Saturation, or White balance of videos. Select the tab to use the
sliders to adjust the video’s properties as required.
Select Close to save the changes to your video, and then Back to produce and
export the video as a new file.
Trimming Videos
Select the Trim button in the Edit window if you want to trim out some portions
from a video clip. Follow the steps on the user interface to mark the portions of the
video clip that you want to keep or remove.
Select Apply to trim the video clip, and then Back to produce and export the video
as a new file.
38
Page 45

Vid eo
Note: you can also drag and drop some videos or a whole album onto the
YouTube section of the library sidebar to quickly upload them.
Note: if you do not have a YouTube account, select the Sign up to
YouTube link to register.
Note: you can also drag and drop some videos files or a whole album onto
the Facebook section of the library sidebar to quickly upload them.
Upload to Social Networks
You can share all of your videos with your friends and family by uploading them
directly from the CyberLink MediaShow library to YouTube and Facebook.
To upload videos to a social network, select the Upload to Social Networks
function within the Video menu of CyberLink PowerStarter. The CyberLink
MediaShow main window displays.
Uploading Videos to YouTube
You can upload videos from the library directly to the YouTube video sharing web
service.
To upload a video to YouTube, do this:
1. Select all of the videos in the media library that you want to upload to
YouTube, and then drag and drop them in the media tray.
2. Select the Share tab and then the YouTube button. The Upload to YouTube
wizard displays.
3. Follow the detailed instructions in the wizard to upload your video.
4. Select the Done button once your videos are uploaded.
Uploading Videos to Facebook
You can upload videos from the library directly to your Facebook page.
To upload videos to Facebook, do this:
1. Select all of the videos in the media library that you want to upload to
Facebook, and then drag and drop them in the media tray.
39
Page 46

CyberL ink M ed ia Su ite
Note: if you do not have a Facebook account, select the Sign up to
Facebook link to register.
Note: for a more detailed description of this program and its functions,
please consult the product's help file.
Note: you can choose the Convert button to convert media using a custom
profile you create. For a detailed description of this feature, press the F1 key
on your keyboard to view the MediaEspresso help file.
2. Select the Share tab and then the Facebook button. The Upload to Facebook
wizard displays.
3. Follow the detailed instructions in the wizard to upload your videos.
4. Select the Done button once your videos are uploaded.
Convert Videos
With CyberLink MediaEspresso you can convert videos into formats compatible
with a variety of portable devices, game consoles, and more.
To convert videos, do this:
1. In the Video menu of CyberLink PowerStarter, select Convert Videos. The
CyberLink MediaEspresso program opens.
2. Click on the Import Media button and then select By File to import individual
videos files, or select By Folder to import all the videos in a specific folder.
3. Browse to and select all of the video files you want to import and convert, and
then click on the Open button.
4. Next, choose whether you want to convert the videos for use on a Mobile
Phone, Media Player, or Game Console.
5. To convert video files, select:
a preset media format profile from the Video drop-down menu. The profiles
that are available is dependent on the device model you select.
Smart Fit if you want CyberLink MediaEspresso to automatically select the
best format and resolution for you based on the source video.
More if you want to use another available profile. Set the video's format,
aspect ratio, and audio format using the profile options available. The formats
40
Page 47

Vid eo
Note: for a detailed description on how to customize your disc in CyberLink
PowerProducer, press the F1 key on your keyboard when within the program
window to open its help file.
and options that are available is dependent on the device model you select.
6. If required, select from the available conversion settings. See the Conversion
Settings section in the MediaEspresso help file for more information.
7. Click OK to start the conversion.
Create a Movie Disc
You can take the video files on your computer and produce a movie disc in the CD,
DVD or Blu-ray Disc format, complete with stylish menus, in just a few simple steps.
In CyberLink PowerProducer you can also author and burn 3D Blu-ray, AVCHD, and
DVD discs.
To produce a movie disc in CyberLink PowerProducer, do this:
1. Select the Create a Movie Disc function and then the format of the disc you
want to create within the Video menu of CyberLink PowerStarter. The
CyberLink PowerProducer select media window displays.
2. Select your disc's video format. See the Selecting Your Media section of the
CyberLink PowerProducer help file for more information.
3. Next, capture video or import existing video files into the program. See the
Importing Media into PowerProducer section of the CyberLink
PowerProducer help file for more information.
4. Select and customize a disc menu for your movie disc. See the Customizing
Disc Menus section of the CyberLink PowerProducer help file for more
information.
5. Finalize your disc by previewing your movie and then burning it to the disc.
See the Finalizing Your Disc section of the CyberLink PowerProducer help file
for more information.
Edit a Movie Disc
If you burned video onto a rewritable disc in the +VR, -VR or BDAV format, you can
go back and edit the content at a later time in CyberLink PowerProducer.
To edit a disc after burning, do this:
41
Page 48

CyberL ink M ed ia Su ite
1. Select the Edit a Movie Disc function within the Video menu of CyberLink
PowerStarter. The CyberLink PowerProducer edit disc window displays.
2. In the Confirm Disc to be Edited window, insert your target disc, select a
maximum recording speed, and then click Next.
3. Make any of the required modifications in the CyberLink PowerProducer
program as follows:
To import more media, see Importing Media into PowerProducer section of
the CyberLink PowerProducer help file.
To edit clips or slideshows, see Editing Media Clips section of the CyberLink
PowerProducer help file.
To edit slideshows, see Editing Photo Slideshows section of the CyberLink
PowerProducer help file.
To modify the disc menu, see Customizing Disc Menus section of the
CyberLink PowerProducer help file.
4. When you are done your edits click Next.
5. Click Burn to re-burn your disc with the edits applied.
42
Page 49

Ph oto
Note: for a more detailed description of these programs and there functions,
please consult the product help files.
Chapter 4:
Photo
The photo functions in CyberLink Media Suite let you organize, enhance, and share
all of your photos using CyberLink MediaShow. With CyberLink Media Suite you can
also turn your photos into dazzling slideshows and photo gallery discs, print them
out in a variety of formats, create slideshow DVDs, share them on social networks,
and much more.
Play Back 2D Photos in 3D Mode
In CyberLink MediaShow you can convert any 2D photos in the media library into
3D photos.
To convert photos to 3D, do this:
1. Select the Play Back 2D Photos in 3D Mode function within the Photo menu
of CyberLink PowerStarter. The CyberLink MediaShow main window displays.
2. Select all of the photos in the media library that you want to convert to 3D,
and then drag and drop them in the media tray.
3. Select the Create button and then 2D to 3D Photo.
4. In the Create 3D Photo window, set the following options:
Name: enter a name for the newly created 3D photos.
Type: select the format of 3D photo file. Currently only the MPO format is
available.
if required, select the button to specify the folder on your computer’s
hard drive where you want to save the converted photos.
select what you are using the converted photos for, i.e. for viewing or
printing.
5. Select OK to convert the 2D photos to 3D.
43
Page 50

CyberL ink M ed ia Su ite
Note: you can also just drag and drop photos onto the CyberLink MediaShow
window to import them into the program.
Import and Organize Photos
In the Photo feature of CyberLink Media Suite, you can import all of the photos on
your computer into CyberLink MediaShow. Once in the program, you can use
CyberLink MediaShow's photo features to organize them in albums, add keyword
search tags, tag people's faces, and much more.
To import and organize your photos using CyberLink MediaShow, select the Import
and Organize Photos function within the Photo menu of CyberLink PowerStarter.
The CyberLink MediaShow main window displays.
Importing Photos
You can easily import all of the photos on your computer, optical discs, and
removable devices into the CyberLink MediaShow program.
Supported Formats
CyberLink MediaShow supports the following photo file formats:
Photos: BMP, JPG, and PNG.
RAW photo formats: CyberLink MediaShow also supports the import of most
camera RAW photo formats.
3D photo formats: MPO.
Importing Photos from Your Computer
To import the photos in folders on your computer, do this:
1. In the CyberLink MediaShow window, click the button in the media
library.
2. Click the button to add a folder to the media library. CyberLink MediaShow
scans the folders in the list every time the program is launched and
automatically loads any new photos into the library.
44
Page 51

Ph oto
Note: if you want to remove a folder from the scanned folders list, select it
and then select .
3. Click OK to save your changes. CyberLink MediaShow will import all the
support photo formats that are in the folders you added to the scanned folder
list.
Importing from Optical/Portable Device
In CyberLink MediaShow, you can import photos from an optical device (CD, DVD,
Blu-ray Disc drive) or from portable removable devices such as mobile phones, USB
removable hard drives, memory sticks, and more.
To import from an optical/portable device, do this:
1. Ensure the device is connected (and turned on if necessary) to your computer,
and then select the Import button.
2. Select the device you want to import from in the list (optical drive, camera,
mobile phone, etc.).
3. In the Import window the content on the disc, device, portable hard drive, etc.
displays. By default, CyberLink MediaShow selects each media thumbnail for
import. Deselect any of the photos that you don’t want to import into the
library.
4. At the bottom of the Import window, set the following:
Path: set the location on your computer’s hard drive where the photos are
stored.
Folder name: enter a name for the new media folder that is added during the
import process.
Exclude duplicates: select to have CyberLink MediaShow ignore photos that
were previously imported into the library.
Delete files from source device/card after import: select this option if you
want CyberLink MediaShow to remove the photos from the portable device
after importing them.
5. Select Import Selected to import all the selected photos into the library and
into the specified folder on your computer.
45
Page 52

CyberL ink M ed ia Su ite
Note: you can quickly add keyword tags to some photos, or entire media
albums, simply by dragging and dropping them on to the Tags section of
the library side bar.
Organizing Photos
When you are viewing the photo thumbnails in the media library, there are several
management options available. Double click on a folder/tag/album etc. in the
media library to display all of the photos inside.
Adding and Editing Tags
You can add keyword search tags to your photos in the media library. Tags help
you find specific photos in the library more quickly and are useful when uploading
content to Flickr, as people use keyword tags to find media they are interested in.
Adding Tags
To add keyword tags to a photo in the library, just right-click on the file and then
select Add Tag. You can also select some photos or a media album in the library
and then Edit > Tag at the top of the media window. In the pop-up menu that
displays, select the keyword tags you want to add.
You can also add new keyword tags.
Adding New Tags
If you want to add a new keyword tag to the library so that it is available in the popup menu, do this:
1. Right-click on a photo in the library and then select Add Tag.
2. Enter the new tag name in the field provided in the Add Tag window, and
then click on .
3. Select Done. The tag will be added and applied to the selected photo.
Tagging Faces
You can manually tag the faces in your photos in the media library, or have
CyberLink MediaShow auto detect and tag the faces for you. Once the faces are
46
Page 53

tagged, the photos are then categorized in the Faces section of the media library,
Note: you can quickly tag all the faces in some photos, or whole photo
albums, simply by dragging and dropping them on to the Faces section of
the library side bar.
Note: you can also select some photos or a whole photo album in the
library and then Edit > Tag Faces at the top of the media window.
Note: select Tag faces in the media tray photos if you only want the
program to scan any photos that are currently in the media tray.
Note: if your computer's VGA card supports CUDA technology or DirectX
11, and there are enough resources available, select Enable hardware
support for face analysis to reduce the time it takes to analyze your
photos.
and included on Facebook if you choose to share them on the social media web
site.
Auto Tagging Faces
CyberLink MediaShow uses face recognition to auto detect and tag faces in your
photos. To have CyberLink MediaShow auto scan a group of photos for faces, do
this:
1. Select the Faces section in the media library side bar.
2. Select the Tag Faces button.
3. Select which photos you want to tag faces in as follows:
Tag faces in all photos: select to scan and tag faces in all of the photos in the
media library. Select the Start button to begin the tagging process.
Ph oto
Tag faces in specified photos: select if you only want to scan and tag faces in
the photos in a specific media folder. Select Next to continue and then the
folders you want to scan for faces. Select Start to begin.
Continue previous tagging process: select this option if CyberLink MediaShow
already scanned some photos for faces, but you did not complete the tagging
process.
4. CyberLink MediaShow analyzes the specified photos for faces and then
displays the results in the Tag Faces window.
47
Page 54

CyberL ink M ed ia Su ite
Note: use the drop-down to sort the tagged faces by name or tag count.
Managing Tagged Faces
After CyberLink MediaShow has analyzed photos, it groups similar faces together in
the Tag Faces window. In this window you can review each face and associate it
with a person in your media library, or add a new person. You can also skip faces if
you want to add them later.
To manage the tag faces, for each group of faces, do one of the following:
click on Select and then select the person from the list that matches the face
in the photo.
if the person tagged in the photo is not in your media library, click on Select
and then Add New Person. Enter the person’s name and then select OK to
add the person and tag the person in the photo.
if the person tagged in the photo is in the suggestion list, just select the
button with the name of the person.
select Skip to ignore the tagged face.
Manually Tagging Faces
If CyberLink MediaShow missed faces during the auto tagging process, you can
manually tag faces in your photos. To manually tag faces, do this:
1. Right-click on a photo in the media library and then select Edit.
2. In the Edit window, select Tag Faces.
3. Select Create New Tag.
4. Drag the square to the position in the photo where the face is located.
5. Resize the square if required and then select Unknown.
6. Select an existing person from the list or select Add New Person to add a new
person to the media library. Enter the person’s name and then select OK to
add the person and tag the person in the photo.
7. Repeat the process to tag other faces in the photo. Select Close when you are
48
Page 55

Ph oto
done tagging faces, and then Back to return to the media window.
Creating and Managing Albums
You can create new albums or place your photos into existing ones, helping you
organize your photos and prepare it for slideshows, and more.
Adding Photos to Albums
You can organize your photos into albums, which are then easier to use in
slideshows, etc. To add photos to an album, just right-click on the file and then
select Add to Album. In the pop-up menu that displays, select one of the following
albums:
Favorite Media: select to add the media file to your favorite media album.
You can also add media to this album at any time by selecting the button
when playing back media.
Create New Album: select to create a new album in the media library and add
the selected media to it.
Custom Albums: any custom albums you create are in this pop-up menu. Just
select to add the media to the album.
Repeat the above process to add as many photos to an album as you wish.
Creating New Albums
If you want to add a new album to the media library, do this:
1. Select Create New Album in the Albums section, or right-click on a photo in
the library, select Add to Album > Create New Album.
2. In the Album Information window, enter the information as follows:
Name: enter the album name.
Date: enter a date for the album, which can be either the date the media was
shot or the date the album was created.
Location taken: if required, enter the location where the media was shot.
49
Page 56

CyberL ink M ed ia Su ite
Note: you can easily undo any edits that you make to a photo by rightclicking on it in the media window and selecting Undo Changes. You can
also click to use the Edit Photo - Log to roll back changes to a
specific version.
Note: you can also select a number of photos in the media library, rightclick on them, and then select Edit to access the Edit window.
Description: add a description for the album, if required.
3. Select OK. The custom album is saved to the media library.
Edit and Print Photos
You can perform instant fixes, fine tuning, and apply effects to your photos within
the CyberLink MediaShow program. Once edited, you can then print them out in a
variety of sizes.
To access the editing and printing features in CyberLink MediaShow, select the Edit
and Print Photos function within the Photo menu of CyberLink PowerStarter. The
CyberLink MediaShow main window displays.
Editing Photos
CyberLink MediaShow offers several editing features, including adding creative
effects to your photos or performing various touch ups on photos in preparation
for using your media in slideshows, printing, etc.
To fix and enhance your photos, do this:
1. Select all of the photos in the media library that you want to edit, and then
drag and drop them in the media tray.
2. Select the Edit button, and then select Edit Media. The Edit window opens.
When editing a photo, select the button to compare all of the changes to your
photos side by side.
Making Photo Fixes
CyberLink MediaShow provides you with several common fixes for your photos,
including automatic adjustments, fixing red-eye, and a photo cropping feature.
50
Page 57

In the Edit window, select the tab to perform the following fixes on your
Note: select Invert to reverse the size of a fixed area.
photos.
Crop: allows you to cut out the parts of the photo you don’t want. Select a
Fixed ratio to crop a specified size out of the photo, or None to manually
select the crop area. Drag the mouse on the photo to set the area you want
cropped, and then select Apply to perform the crop.
Red-eye: select this option to remove unwanted red-eye from your photos.
Just follow the instructions on the user interface to use this feature.
Straighten: if your photo was taken unevenly and appears to be crooked,
select this option and use the Degree slider to make it more level.
Auto Brightness: select to automatically adjust the photo’s brightness.
Auto Contrast: select to automatically adjust the photo’s contrast.
Auto Balance: select to automatically adjust the photo’s color balance.
Auto Fix Lighting: select to automatically fix the lighting within the photo.
Ph oto
Select Close to save the changes to your photo, and then Back to return to the
main media window.
Fine Tuning Photos
Use the fine tune function in the Edit window to manually adjust the Brightness,
Contrast, Saturation, White balance or Sharpness of photos. Select the tab
and use the sliders to adjust the photo’s properties as required.
Select Close to save the changes to your photo, and then Back to return to the
main media window.
Adding Photo Effects
CyberLink MediaShow lets you add display and color effects to photos. Select the
tab to apply the following effects to photos in the media library.
51
Page 58

CyberL ink M ed ia Su ite
Black & White: converts color photos to black and white.
Sepia: applies a dark brown-grey hue that resembles the effect of aging on
old photographs.
Matte: adds a white matting to photos. Select and drag the focus to an area of
the photo, and then use the slider to increase or decrease the matting size.
Vignette: use your mouse to set the focus area of the vignette on the photo,
and then use the slider to adjust its Size.
Soft Focus: with your mouse, select the focus area for the effect, and then use
the sliders to adjust the effect’s Size and amount of blur (Soft) used.
Focal B&W: the focal black and white effect applies color to a focused area of
a photo, while the rest is in black and white. Use your mouse to set the focus
area, and then use the slider to adjust the Size of the colored area.
Tint: the tint effect adds highlighted color throughout your photo. Pick a
desired color and then use the slider to adjust its Intensity.
Glow: select the glow effect to make all the lighter areas of a photo appear to
glow.
Antique: select the antique effect to give your photo an old fashioned look, as
if it was taken more than 50 years ago.
Select Close to save the changes to your photo, and then Back to return to the
main media window.
Print Photos
CyberLink MediaShow lets you print out copies of your photos in a variety of sizes.
To print photos, do this:
1. Select all of the photos in the media library that you want to print, and then
drag and drop them in the media tray.
2. Select the Print button, and then Print.
3. Set the printing options as follows:
Layout: select how you want the selected photos printed out. You can select
from a variety of sizes, allowing you to print one or more photos out on a
single piece of paper.
52
Page 59

Ph oto
Printer: select the printer from the drop down menu that you want to print
your photos on.
Fit: select whether to shrink the size of the photo to fit the printing area or
have CyberLink MediaShow crop the photo to fit it.
Printer Setup: select this button to set specific printer options, such as page
layout and whether to print double-sided. The options available depend on
the printer that is connected to your computer.
No. of copies per photo: enter the number of copies you would like printed
out in the field provided.
4. Select the Print button to begin printing the photos.
Create or Play a Slideshow
With CyberLink MediaShow, you can play all the photos in the media library in a
slideshow, or use them to create a custom slideshow.
To create or play a slideshow, select the Create or Play a Slideshow function within
the Photo menu of CyberLink PowerStarter. The CyberLink MediaShow main
window displays.
Playing Slideshows
You can quickly play a slideshow with the photos in your CyberLink MediaShow
library. To play photos in a slideshow, do this:
1. Select all of the photos in the media library that you want to play in the
slideshow, and then drag and drop them into the media tray.
2. Click the button. The slideshow begins to play automatically.
3. Use the playback controls to control the playback of your slideshow.
Creating Slideshows
CyberLink MediaShow lets you create custom slideshows that include both your
photos and videos. You can select from a number of styles, and then add
background music, text, and blank slides.
Once you are done creating a slideshow, select the Preview button to play it back,
53
Page 60

CyberL ink M ed ia Su ite
or Produce if save it as a video file. Select the Share button to share the slideshow
video with friends and family.
Selecting Media for the Slideshow
To select the media for the custom slideshow, do this:
1. Select all of the media in the media library that you want to use in the
slideshow, and then drag and drop it in the media tray.
2. Select the Create button, and then select Slideshow. The Create Slideshow
window opens, displaying all of the media you selected in the slide tray.
Use the buttons on the slide tray to do the following:
if you want to add more media to the slideshow, select the button, select
it in the media library, and then select Add Selected Media. Select Close to
return to the Create Slideshow window.
if you want to add extra blank slides, or color boards, to a slideshow select
the button. Select a color and then the Add Color Board button to add
the new slide at the current location in the slideshow. Select Done when
finished.
select to rotate the media on a slide 90 degrees in the counterclockwise
direction. Select to rotate it 90 degrees in the clockwise direction.
to rearrange the slide order, just select media in the slide tray and then drag it
to the new position.
to remove media or a slide from the slideshow, select it in the slide tray and
then select the button.
54
Page 61

Designing the Slideshow
Note: you can customize the transition that is used on each slide in the
slideshow. See Customizing Slides for more information.
Note: you can customize the duration of each slide in the slideshow. See
Customizing Slides for more information.
After you have added media to the slideshow, you can customize its design by
editing the style and adding background music.
To design the slideshow, do this:
1. In the Create Slideshow window, select the Design button.
2. Edit the options as follows:
Slideshow style: select the transitions used between the slides, which gives a
slideshow its distinct style. Select No Effect if you don’t want to use any
transitions between slides.
Aspect ratio: set the aspect ratio of the slideshow.
Display duration: enter in the length of time each photo or custom slide is
displayed in the slideshow. The duration entered does not alter the length of
any video clips included in the slideshow.
Ph oto
Set default text: select this option if you want to set the default text that is
displayed when to add new text to a slide. One selected, you can either have
CyberLink MediaShow use a photo’s description or file name by default.
3. Select OK to close the Design window, and then Save to save the changes to
the slideshow.
Customizing Slides
In the Transition window you set the transition that is used on every slide in the
slideshow, and customize each slide’s duration. You can also set the audio level for
any video clips that are included in the slideshow.
To customize the slides, do this:
55
Page 62

CyberL ink M ed ia Su ite
1. Select the slide in the slide tray that you want to customize, and then select
the Transition button.
2. In the Transition window, edit the options as follows:
Display duration: enter in the length of time the selected photo or custom
slide is displayed in the slideshow.
Sound mix: if the selected slide contains a video clip, use this slider to set the
audio level between the background music and the video’s audio. Drag the
slider all the way to the Background music side if you want to completely
mute the video’s audio.
Transition: select the transition that is used at the beginning of the selected
slide.
3. Select OK to close the Transition window, and then Save to save the changes
to the slideshow.
Adding Title Text to Slides
You can add title text descriptions to slides in a slideshow, on both slides that
contain media and any blank or title slides you add.
To add text to slides, do this:
1. Select the slide in the slide tray that you want to add text to, and then select
the Add Text button.
2. Select in the title text box that displays on the slide and then enter or modify
the default text on the slide.
3. Select the button if you want to modify the title text’s font properties,
including style, color, and size.
4. Select and drag the title text box to the desired location on the slide.
5. Select to add text animation effects, if required.
6. Select to preview the text on the slide. Once you are satisfied, select
outside the text box to set the text.
56
Page 63

Ph oto
Note: to edit existing text on a slide, just double-click on the title text box.
Select to remove any unwanted text.
Note: when this option is selected, all other duration settings are ignored.
7. To add more text to this or other slides, select the Add Text button and then
repeat the above steps.
8. Select Save to save the changes to the slideshow.
Adding Music
You can add background music to your slideshow. To add background music, do
this:
1. In the Create Slideshow window, select the Music button.
2. Add background music to the slideshow as follows:
Play music during slideshow: select this option to enable background music
during the playback of the slideshow.
Match slideshow length to music: select this option to set the duration of the
entire slideshow to the length of all the music selected.
Select folder or audio file for background music: select the Browse button
and then select the audio file (in the WMA or MP3 format) that will be used as
the slideshow’s background music. You can also select a folder that contains
multiple music files.
Select and arrange background music: select this option if you want to
customize the background music in the slideshow. Use the button to add
all of the individual music files you want in the background music playlist.
Use the and buttons to set the order of the music in the playlist, and
to preview the music.
3. Select OK to close the Add Music window, and then Save to save the changes
to the slideshow.
57
Page 64

CyberL ink M ed ia Su ite
Note: you can also click the button to add the photos. Ensure that you
have the album you want to add the photos to selected in the Disc
Compilation pane before adding your photos.
Create a Photo Gallery Disc
When you create a photo gallery disc, you are essentially creating a photo album
on a disc. You can create more than one album on a single photo gallery disc.
To create and burn a photo gallery disc, do this:
1. Select the Create a Photo Gallery Disc function within the Photo menu of
CyberLink PowerStarter, and then select the type of disc (CD, DVD, Blu-ray
Disc) you want to create. The Photo Gallery Disc window opens.
2. In the Disc Compilation pane, if required, enter a custom name for the photo
album that will appear on the disc.
3. Use the search pane to find the photos you want to include on your disc.
Select the photos you want to burn and then drag and drop them in the disc
content area (Click the button to switch to the thumbnail view to make it
easier to find the exact photos you are looking for).
4. Repeat the last two steps to add more photos to an album as required. You
can also click the button to create a new album on the disc.
5. If required, click the Edit button to configure the photo gallery disc settings as
follows:
Gallery title: enter in a title for your photo gallery. The title displays on your
disc after it is burned.
Custom Logo: click on the Custom Logo button to customize the logo used in
your photo gallery, as follows:
Don't include logo in photo gallery: select this option if you don’t want to
include a logo in your created photo gallery.
Include logo in photo gallery: select this option if you want to include a
logo in your created photo gallery. Click the button to select an
image to use as the logo, replacing the default CyberLink logo.
Include URL link on logo: select this option if you want to include a URL
link on the logo. Once selected, enter the URL address in the field provided
58
Page 65

Ph oto
Note: select the Auto shut down after burning option if you want
CyberLink Power2Go to automatically shut down your computer once it has
successfully burned your disc.
(http://). When users click on the logo in the created photo gallery, they are
taken to the specified URL.
Click OK to save your changes.
Slideshow speed: enter the duration, in seconds, you want each photo or slide
to display when your photo gallery is played as a slideshow.
Background image: click the Change button to set the image that is used as
the background in the photo gallery. If none of the default images suit your
gallery disc, click the Browse button to use your own custom image.
Display EXIF information: if the images were taken with a digital camera that
supports EXIF, select this option if you want the image details displayed in
your photo gallery disc.
Add background music: if you want music to play in the background as users
browse through your photo gallery disc, select this option and then click
Browse to select the music file you want to use.
Include editor’s note: if you want to include a note or description about your
photo gallery, select this option, click Edit, and then enter the Title and
Content (note/description) in the fields provided.
Include external URL: if you want to include a web site link on the photo
gallery disc, select this option, click Edit, and then enter the web site Name
and URL (http://) in the fields provided.
Click the Preview button if you want to view what your photo gallery disc will
look like once it is burned to a disc. Click Export to create the stand-alone
photo gallery application in a folder on your hard drive.
6. After you have added all of the photos you want on your disc, click the Next
button.
7. If required, adjust the settings on the General and Options tabs (see the
related sections in Power2Go Settings for more information).
8. Click Burn when you are ready to burn your disc.
9. When the burning is complete, select one of the following options in the
window box that opens:
59
Page 66

CyberL ink M ed ia Su ite
Click View Log to view the burning log. The log opens in your default TXT
editor, where you can view and save it.
Click OK to close the window and then exit.
Create a Slideshow Disc
You can use CyberLink MediaShow to create professional looking slideshow discs
using your photos.
To begin creating a slideshow DVD disc with your photos, select the Create a
Slideshow Disc function within the Photo menu of CyberLink PowerStarter. The
CyberLink MediaShow main window displays.
Selecting Photos for Disc
To select the photos you want to include on the slideshow disc, do this:
1. Select all of the photos in the media library that you want to include on the
slideshow disc, and then drag and drop it in the media tray.
2. Select the Create button, and then select Movie Disc. The Create Movie Disc
window opens, displaying all of the photos you selected in the tray.
3. Use the buttons on the tray to do the following:
if you want to add more photos, select the Photos tab and then the
button. Select the photos in the media library, and then select Add Selected
Media. Select Close to return to the Create Movie Disc window.
to rearrange the order of the media on the disc, just select media in the tray
and then drag it to the new position.
to remove media from the disc, select it in the tray and then select the
button.
60
Page 67

Ph oto
Note: select Download to download additional disc menu templates from
DirectorZone. Once downloaded, click to import the menu templates
into CyberLink MediaShow.
Creating the Disc
In the Create Movie Disc window, just follow the outline steps to set disc properties,
as follows:
1. In the Step 1: Choose disc format section, do the following:
Format: select the format of your movie disc. DVD: creates a standard DVD
disc.
Destination drive: select the drive you want to use to burn the move to disc.
2. In Step 2: Enter movie disc title, enter a Title for your movie disc, which
displays on the disc menu’s home page.
3. In Step 3: Select menu template, select the disc menu template you want to
use on your disc. Select No Menu to have the video on your disc play
automatically when the disc is inserted into a disc player.
4. Select Save to save the changes to the slideshow disc.
Editing Slideshow Style and Music
The photos you include on the disc are turned into a slideshow. Before burning the
photos to disc, you can edit the slideshow’s style and music, if required.
To edit the slideshow style and music, do this:
1. Select the Photos tab and then to open the Style & Music window.
2. Set Slideshow style options as follows:
Style: select one of the following the slideshow styles - Fading: adds a fade in
and fade out effect between the photos in your slideshow. Motion: adds pan
and zoom effects to make your slideshow more engaging with the
appearance of motion. Cell: displays pictures in a creative, movie like
slideshow, complete with credits. If you choose to include background music,
CyberLink MediaShow uses Magic Slideshow technology to display the
photos dynamically along to the beat of the music.
Change Slideshow Opening: if you select the cell slideshow style, select this
button to enter a title and author’s name for the slideshow, which then
61
Page 68

CyberL ink M ed ia Su ite
appears on the opening slide. Deselect the Enable slideshow opening page if
you don’t want it in your slideshow.
Speed: set the playback speed of the slides in the slideshow.
3. Set Background music options as follows:
Play music during slideshow: select this option to enable background music
in the slideshow.
Match slideshow length to music: select this option to set the duration of the
entire slideshow to the length of all the music selected.
Select folder or audio file for background music: select the Browse button
and then select the audio file (in the WMA or MP3 format) that will be used as
the slideshow’s background music. You can also select a folder that contains
multiple music files.
Select and arrange background music: select this option if you want to
customize the background music in the slideshow. Use the button to add
all of the individual music files you want in the background music playlist.
Use the and buttons to set the order of the music in the playlist, and
to preview the music.
4. Select OK to close the Style & Music window, and then Save to save the
changes to the slideshow disc.
Configuring Advanced Disc Settings
Before you burn a disc, it is recommended that you first configure advanced disc
settings.
To do this, select the Advanced button in the Create Movie Disc window and then
configure the settings as follows:
Disc Selection
TV format: select the TV format (NTSC or PAL) of the video that is burned to
the disc. This format should correspond with the region in which you plan to
play the disc.
Video format: displays the format of the video that is burned to the disc.
MPEG-2: standard definition format found on most DVD discs, and therefore
takes up less space.
62
Page 69

Audio format: select the desired audio encoding used for your outputted
disc’s audio.
Aspect ratio: set the aspect ratio for the video. For DVDs you may select
between 4:3 or 16:9.
Quality: select the video quality of the disc’s video. The video quality settings
offer different bit rates, resulting in files of different sizes. The higher the
quality of the video, the larger the resulting file and the shorter the length of
video that can fit onto a disc.
Disc capacity: displays the available space on the disc currently inserted in the
selected optical drive (burning device).
Preferences
Display TV safe zone in the Preview window: select to display a box that
indicates an area that will fit on most TVs, when previewing your completed
disc. Utilizing this feature ensures that menu items are within the display
range of most TVs.
Auto menu timeout: select this option for the video on your disc to play
automatically after displaying the menu for a short duration.
Burning Your Disc
Ph oto
The final step in creating your movie disc is to select the Burn button to begin
burning your media to disc. Before you proceed, use the Preview function to
ensure your disc is exactly the way you want it.
Upload to Social Network
You can share all of your photos with your friends and family by uploading them
directly from the CyberLink MediaShow library to Flickr and Facebook.
To upload photos to a social network, select the Upload to Social Network function
within the Photo menu of CyberLink PowerStarter. The CyberLink MediaShow main
window displays.
63
Page 70

CyberL ink M ed ia Su ite
Note: you can also drag and drop some photos or a whole album onto the
Facebook section of the library sidebar to quickly upload them.
Note: if you do not have a Facebook account, select the Sign up to
Facebook link to register.
Note: you can also drag and drop some photos or a whole album onto the
Flickr section of the library sidebar to quickly upload them.
Note: if you do not have a Flickr account, select the Sign up to Flickr link
to register.
Uploading Photos to Facebook
You can upload photos from the library directly to your Facebook page.
To upload videos to Facebook, do this:
1. Select all of the photos in the media library that you want to upload to
Facebook, and then drag and drop them in the media tray.
2. Select the Share tab and then the Facebook button. The Upload to Facebook
wizard displays.
3. Follow the detailed instructions in the wizard to upload your photos.
4. Select the Done button once your photos are uploaded.
Uploading Photos to Flickr
You can upload photos from the library directly to the Flickr photo sharing web
service.
To upload photos to Flickr, do this:
1. Select all of the photos in the media library that you want to upload to Flickr,
and then drag and drop them in the media tray.
2. Select the Share tab and then the Flickr button. The Upload to Flickr wizard
displays.
3. Follow the detailed instructions in the wizard to upload your photos.
4. Select the Done button once your photos are uploaded.
64
Page 71

Ph oto
Note: if the photo files you want to import are not displayed in the current
folder, ensure that the correct file type is selected in the bottom right corner
of the Select Some Photos dialog.
Note: you can use in the bottom right of the preview
window to resize the photo thumbnails.
Advanced Photo Adjustment
You can perform more advanced adjustments on your photos using the CyberLink
PhotoDirector program. Use the controls to change a photo's white balance, tone,
or fine tune the color. You can also choose from a number of adjustment presets to
make instant adjustments.
To adjust your photos in CyberLink PhotoDirector, do this:
1. Select the Advanced Photo Adjustment function within the Photo menu of
CyberLink PowerStarter. CyberLink PhotoDirector launches.
2. If required, click on Library, and then on the Import button at the bottom of
the library panel.
3. Select one of the following import options:
Photos: select to import individual photo files. Once selected, browse to and
then select all of the photos on your computer/removable device that you
want to import, and then click Open. Thumbnails of all the photos display in
the Photo Import window.
Folder: select to import a folder that contains your photos. Once selected,
browse to and then select the folder on your computer/removable device that
you want to import photos from, and then click Select Folder. Thumbnails of
all the photos in the selected folder display in the Photo Import window.
From Camera: select to import photos directly from a digital camera or a card
reader. Ensure that your camera is connected to your computer (and turned
on) and then select From Camera to import photos from it. Once selected,
the Photo Import window displays. Select your camera (or card reader) from
the Source drop-down to display thumbnails of all the photos in the Photo
Import window.
4. Select Include subfolders, if you are importing photos from a folder, device,
or digital camera, to display and import photos that are in any subfolders.
5. Select Exclude possible duplicates to have CyberLink PhotoDirector filter out
65
Page 72

CyberL ink M ed ia Su ite
Note: you can also drag and drop photos onto the CyberLink PhotoDirector
user interface to import them into the program.
any photos that were imported previously.
6. Manually select the thumbnails of the photos you want to import, or use the
(deselect all) and (select all) buttons if necessary.
7. Select one of the following two import options:
Keep in current location: keeps the photos in their original source location.
Make extra copy in: select this option if you want CyberLink PhotoDirector to
copy the imported photos to another location you select in the Destination
drop-down.
8. If copying the photos to another location, click to select the
Destination where the imported photos are copied. You can also click to
edit the name of the photo folders in this location, if required.
9. If copying the photos to another location, you can Organize the photos by
selecting one of the following:
Put in Single Folder: puts all of the photos in one folder.
By Original Folder Structure: duplicates the original folder structure from the
source location.
By Capture Date: puts the photos in a series of folders, labeled by the date
they were captured. Click to set the date format for the folder naming.
10. Click Import. CyberLink PhotoDirector imports the photos into your project
library.
66
Page 73

11. Proceed to adjust your imported photos as required.
Note: for a detailed description on how to adjust photos in CyberLink
PhotoDirector, press the F1 key on your keyboard when within the program
to open its detailed help file.
Ph oto
67
Page 74

CyberL ink M ed ia Su ite
68
Page 75

M us ic
Note: to ensure that your computer has the required codecs for burning and
ripping music files, please make sure that Windows Media Player 10 or later
is installed on your computer.
Note: for a list of the available playback controls, see Music Playback
Controls.
Chapter 5:
Music
The music function lets you burn audio files to a DVD or CD with CyberLink
Power2Go. You can also rip music from an audio CD onto your hard drive, and play
back music using CyberLink PowerDVD. Use CyberLink WaveEditor to edit and add
useful effects to your audio files, or record your own custom audio.
Play Music
To play back music in CyberLink PowerDVD, select the Play Music function within
the Music menu of CyberLink PowerStarter. The CyberLink PowerDVD main window
displays.
To play back audio in CyberLink PowerDVD, do one of the following:
insert an audio CD into your disc drive and CyberLink PowerDVD will play it
automatically. If there is a disc already in your disc drive when you opened
CyberLink PowerDVD, click the My Computer tab in the media panel, browse
to and select the disc drive, and then click play to begin playback.
drag and drop audio files directly onto the CyberLink PowerDVD user
interface.
to play an audio file in your media library, select Music in the media panel,
and then browse to the folder that contains your audio. Double-click on an
audio file to begin playback.
to play audio files on your hard drive, click the My Computer tab in the media
panel, and then browse to the folder that contains your audio files. Doubleclick on an audio file to begin playback.
69
Page 76

CyberL ink M ed ia Su ite
Optical Disc Types
File Formats
CD
Audio, Karaoke
Note: the below table includes the hotkey for each specific button on the
playback controls, if available. For a complete list of all the hotkeys in
PowerDVD and the corresponding behavior, see the hotkey table in the
program's help file.
Icon
Button
Hotkey
Description
A
Navigational slider
Visually displays
elapsed playback
time. Click along
the navigational
slider to jump to
different
moments in the
song.
B
Elapsed time
Displays the time
elapsed in the
current song.
Hover your
mouse over it to
Supported Audio Formats
In CyberLink PowerDVD you can play back audio in the following audio formats:
Audio file formats: AAC, AC3, ADTS, AOB, APE, DTS, FLAC, M4A, MID, MKA, MP2,
MP3, MPA, OGG, RMI, WAV, WMA.
Music Playback Controls
When playing music on the Music tab, the playback controls display as follows:
70
Page 77

M us ic
reveal two
buttons that let
you jump
backward and
forward in the
song. Click
to quickly jump
back 8 seconds,
or to skip
forward 30
seconds.
C
Song duration/Remaining
time
Click to toggle
between song
duration and
remaining
playback time.
D
Shuffle
V
Plays the music
in a folder,
playlist, or on a
disc in random
order.
E
Previous
P
Returns to the
previous song in
the folder,
playlist, or on the
disc.
F
Play/Pause
Space bar
Plays and pauses
music playback.
G
Mute/Volume adjustment
Q / + and -
Click to mute the
volume, or to
turn mute off. To
manually adjust
the volume,
hover your
mouse over this
button and then
use the slider to
71
Page 78

CyberL ink M ed ia Su ite
increase or
decrease the
volume.
H
PowerDVD settings menu
Opens the
PowerDVD
settings menu,
where you can
access player
settings and
PowerDVD
preferences.
I
Play to
Select to play the
current music
file on a home
media server or
device that is
connected to the
same network.
J
NextNJumps to the
next song in the
folder, playlist, or
on the disc.
K
StopSStops music
playback.
L
Repeat
Ctrl+R
Click this button
during playback
to repeat one
or all of the
songs in a
folder/playlist.
When the button
displays as ,
the repeat
function is off.
72
Page 79

M us ic
M
Audio equalizer
When playing
back music, click
this button to
access the Audio
Equalizer presets
used to alter the
audio.
N
Song information
Displays the
album art and
song
information for
the current
music that is
playing. If you're
browsing
through media
on other tabs
during music
playback,
double-click on
the song
information to
quickly return to
the music
section of the
media library.
Using the Audio Equalizer
During music playback, click and then select Audio Equalizer to access the
equalizer and audio presets you can use to alter the audio in CyberLink PowerDVD.
73
Page 80

CyberL ink M ed ia Su ite
Note: * this feature is not available in some versions of CyberLink
Power2Go.
Select a preset from the Presets drop-down to change the sound of the audio. The
preset you should select, depends on the type of audio or genre of music you are
playing back. You can also manually adjust the sliders on the equalizer to manually
set the audio output to your custom specifications. Once you have manually set
the sliders to your liking, click the Save button. You can save up to three custom
presets using the Custom Preset 1, 2, and 3 options.
Rip an Audio CD
The Rip Audio function copies audio tracks from an audio CD to your hard drive in
the APE*, FLAC*, M4A* (AAC), MP3, WAV, or WMA format.
To rip audio files to your hard drive, do this:
1. Select the Rip an Audio CD function within the Music menu of CyberLink
PowerStarter. The CyberLink Power2Go Rip Audio window displays.
74
Page 81

M us ic
Note: if you insert a new disc or select a different drive, click to
refresh and ensure the most updated information displays.
Note: * this feature is not available in some versions of CyberLink
Power2Go.
2. Insert your disc and then select your drive from the Source drop-down.
3. Select the audio tracks that you want to copy to your hard drive.
4. Click the button and locate the folder that you want to copy the audio
tracks to.
5. In the Settings section, set the Format and Quality of the outputted audio
files.
6. Click Go to copy the files to your computer.
Convert an Audio File
You can use the Audio Converter utility in CyberLink Power2Go to convert existing
audio into one of these audio file formats: APE*, FLAC*, M4A* (AAC), MP3, WAV, or
WMA.
To convert audio files, do this:
1. Select the Convert an Audio File function within the Music menu of CyberLink
PowerStarter. The CyberLink Power2Go Audio Converter window displays.
2. Click and then select the files you want to convert. Click Open to add
them into the Audio Converter window.
3. Click the button and then select the location where you want to save
the converted audio files.
4. In the Settings section, set the Format and Quality of the converted files from
the drop-downs.
5. Click Go to convert the audio files and save the files to your computer.
75
Page 82

CyberL ink M ed ia Su ite
Note: for best search results, make sure you set up the Power2Go library
before creating a music disc. Once you do this, the music files in the library
are organized for you on the Media tab in the search pane and become
searchable using the search field.
Note: you can also click the button to add the music files or the other
available buttons to reorder and preview the music on the disc. If you want to
extract the audio from a video clip and include it on your music disc, simply
add the video clip to the disc.
Burn a Music Disc
CyberLink Power2Go makes it easy to create discs to play back your music. You can
create a regular audio CD for playback on traditional CD players, or create a DVD or
CD that contains MP3 or WMA files.
To burn an audio music CD or MP3/WMA music disc, do this:
1. Select the Burn a Music Disc function within the Music menu of CyberLink
PowerStarter. In the CyberLink Power2Go new task window, select the type of
music disc you want to create (Audio CD, WMA CD, MP3* CD, WMA DVD,
MP3* DVD).
2. Use the search pane to find the music you want to include on your disc.
3. Select the files you want to burn and then drag and drop them in the content
area.
4. If you would like to edit or add effects to a music file, select it and then click
the button to edit it in CyberLink WaveEditor*. Please consult the help file in
CyberLink WaveEditor for detailed information on editing audio in that
program. Once you finish editing an audio file, the updated file is placed back
in the content area.
5. If required, click the Edit button to set the disc's audio quality, add CD-Text,
and more.
6. Once you have added all of the content you want on your disc, click the Next
button.
7. If required, adjust the settings on the General and Options tabs (see the
related sections in Power2Go Settings for more information).
8. Click Burn when you are ready to burn your disc.
76
Page 83

Note: select the Auto shut down after burning option if you want
CyberLink Power2Go to automatically shut down your computer once it has
successfully burned your disc.
9. When the burning is complete, select one of the following options in the
Note: * this feature is not available in some versions of CyberLink
Power2Go.
window that opens:
Click View Log to view the burning log. The log opens in your default TXT
editor, where you can view and save it.
Click OK to close the window.
Record Audio
You can record your own custom audio in the WAV format in CyberLink
WaveEditor. The audio you record is then imported directly into the library and
saved to the export folder selected in Preferences.
To record audio, do this:
1. Select the Record Audio function within the Music menu of CyberLink
PowerStarter. The CyberLink WaveEditor recording window displays.
2. Set your recording preferences as follows:
M us ic
use the slider control to adjust the recording input volume.
select Time limit and then input a time if you want the recording to
automatically stop after recording for a specified duration.
select Size limit and then input an amount if you want the recording to
automatically stop after reaching the indicated file size.
select Settings to select your audio device and input.
select Profile to set the quality of the recorded audio.
select or Begin with fade-in if you want the recorded audio to fade-in, or
End with fade-out if you want it to fade-out at the end.
3. To begin recording audio, click . Click to stop recording and save/
77
Page 84

CyberL ink M ed ia Su ite
Note: for a more detailed description of this program and its functions,
please consult the product's help file.
Note: you can also drag and drop audio files into the Library area of
CyberLink WaveEditor to import them into the program.
Note: * available in the Standard version, and only in the LE version when
running the program under Windows 7. ** not available in the LE version of
CyberLink WaveEditor.
import the recorded file into the CyberLink WaveEditor library. Click Close to
return to main window.
Edit Audio
With CyberLink WaveEditor you can trim, cut, and enhance the audio files that you
want to use in your video editing or share with friends.
To edit your audio files in CyberLink WaveEditor, select Edit Audio in the Music
menu of the CyberLink PowerStarter.
Adding Audio into the Library
CyberLink WaveEditor lets you import audio from your hard drive or from a
removable device.
Importing Audio
To import audio from your hard drive or a removable device, click , browse to
its location, and then click on Open. You can import multiple audio files into the
library at once and then work on them all in CyberLink WaveEditor.
Supported Formats
CyberLink WaveEditor supports the import of audio files in the following formats:
Audio: MP3, WAV, WMA, M4A*, AC3**
78
Page 85

M us ic
Editing Tools
Click to cut the selected portion out of the audio file, and place it on
your clipboard for pasting.
Click to make a copy of the selected portion on your clipboard for
pasting.
Click to paste the audio wave form you cut or copied to the right of
the current timeline position.
Click to delete the selected portion of the audio file.
Click to crop to the selected portion of the audio file, removing the
parts of the audio file that are not selected.
Note: when you perform edits on an audio file, the original audio file is not
changed. To save the edits, you must export the audio file. See Exporting
Audio for more information.
Editing Audio
Once you have all your audio in the library, you can start editing it. Editing consists
of cropping, trimming, and even adding portions (using the paste function) to your
audio files.
To edit an audio file, do this:
1. Select the audio file in the library that you want to edit.
2. Decide whether you want to edit both channels, or just one channel.
3. Use range selection to select the portion of an audio file you want to edit.
4. Use the editing tools to perform edits on your audio files as follows:
Adjusting the Master Volume
CyberLink WaveEditor lets you adjust the volume of an audio file at any point in the
timeline. You can make it louder at a certain moment, and then quieter at another,
as required.
To adjust the master volume of an audio file, do this:
1. Use the playback controls or drag the timeline slider to location the position
79
Page 86

CyberL ink M ed ia Su ite
Note: this last step is just a recommendation, and is not necessary if you
want the audio to fade up or down from the very beginning to the desired
level.
Note: to remove a volume key and reset its position back to the original
value, select it and drag it outside the master volume area.
where you want the audio to reach its loudest/quietest point.
2. Click on the line in the master volume area and drag the volume key to
desired volume level.
3. Use the playback controls or drag the timeline slider to locate the position
where you want the change in audio level to begin.
4. Click on the line in the master volume area and drag the volume key back to
the original volume level.
5. Continue adjusting the volume keys as required to achieve the desired audio
levels throughout the audio file.
Audio Effects
Within CyberLink WaveEditor you can choose from a number of default effects and
apply them to your audio files. You can also import custom VST plug-in effects that
you downloaded and apply them to your audio.
Default Effects
The default effects available in CyberLink WaveEditor include the most widely used
for your convenience. Users that are looking for more advanced audio effects, can
import custom VST plug-in effects.
80
Page 87

M us ic
Note: to preview an effect, click it in the Effects area, select the Preview
check box, and then click the button.
Note: CyberLink does not guarantee the usability of downloaded VST plug-in
effects, nor the quality of the VST modules.
Note: CyberLink WaveEditor imports VST plug-in effects that are in the DLL
format. If the downloaded effect is in the ZIP format, you must first unzip it
before trying to import it into the program.
Importing Effects
With VST plug-in effects you can find and add the desired custom effect you want
on your audio. VST plug-in effects are widely available for download from the
Internet, and can easily be imported into CyberLink WaveEditor.
If you have downloaded a VST plug-in effect, do this to import it into CyberLink
WaveEditor:
1. From the menu select Effects > VST > Import VST Effect.
2. Click on the button and then browse to the location where the
downloaded VST plug-in effect is located.
3. Select the VST plug-in effect and then click Open.
4. Click OK to import the effect into the VST section of CyberLink WaveEditor.
Applying Effects
When applying effects to audio, you can either apply it to a selected range or the
entire clip. To apply an effect to an audio file, do this:
1. Select the audio file in the library you want to apply the effect to.
2. Decide whether you want to apply the effect to both channels, or just one
channel.
3. Use range selection to select the portion of the audio file that you want to
apply the effect to.
81
Page 88

CyberL ink M ed ia Su ite
Note: if don't select any portion of the audio file, the effect is applied to the
entire clip.
Note: * available in the Standard version, and only in the LE version when
running the program under Windows 7. ** not available in the LE version of
CyberLink WaveEditor.
4. Click on the effect you want to apply. The effect window displays.
5. Adjust the effect settings as required.
6. Click on the OK button to apply the effect to the audio file.
Exporting Audio
Every time you want to save the changes you make to an audio file, CyberLink
WaveEditor saves it as a new file. Essentially you are exporting the original file, and
saving it as new version and even in a new file format if you prefer.
To save and export your audio file as a new version, do this:
1. Select the audio file in the library you want to save/export and then click
.
2. Enter in a new file name for the file and then select the format you want to
save it as in the Save as type drop down.
3. Click on Save. The file is saved to the export folder selected in Preferences.
Supported Formats
CyberLink WaveEditor supports the export of audio files into the following formats:
Audio: MP3**, WAV, WMA, M4A*
82
Page 89

Data & Back up
Note: for best search results, make sure you set up the Power2Go library
before creating a data disc. Once you do this, the data files in the library
become searchable when you enter keywords into the search field.
Note: you can also click the button to add the data files or click the
button to create a folder on the disc.
Chapter 6:
Data & Backup
With CyberLink Media Suite you can burn your data files to a Blu-ray Disc, DVD or
CD with CyberLink Power2Go. You can also easily make an exact copy of a data
DVD or CD, or use the Disc Manager to archive and keep track of all your burned
content and discs.
Use CyberLink PowerBackup to safely back up and restore all the data on your
computer, or CyberLink PowerDVD Copy to copy a non-CSS protected DVD Video
disc.
Create a Data Disc
You can burn data files to a CD, DVD, or Blu-ray Disc. Data files can include almost
any kind of document or digital file.
To burn a data disc, do this:
1. Select the Create a Data Disc option in the Data & Backup menu of CyberLink
PowerStarter, and then select the type of disc (CD, DVD, Blu-ray Disc) you
want to create. The CyberLink Power2Go Data Disc window opens.
2. Use the search pane to find the files you want to include on your disc.
3. Select the files or folders you want to burn and then drag and drop them in
the content area.
4. After you have added all of the content that you want to burn, click the Next
button.
5. If required, adjust the settings on the General and Options tabs (see the related
sections in Power2Go Settings for more information).
6. Click Burn when you are ready to burn your disc.
83
Page 90

CyberL ink M ed ia Su ite
Note: select the Auto shut down after burning option if you want
CyberLink Power2Go to automatically shut down your computer once it has
successfully burned your disc.
Note: some discs may not be copied if they are copy-protected or contain
errors.
7. When the burning is complete, select one of the following options in the
window that opens:
Click View Log to view the burning log. The log opens in your default TXT
editor, where you can view and save it.
Click OK to close the window.
Copy a Disc or Burn a Disc Image
The Copy Disc or Burn a Disc Image function allows you to make an exact copy of a
disc. However, you must copy the disc contents onto a blank disc of the same disc
type. The Copy Disc function also allows you to burn disc images.
Copying a Disc
The copy disc option allows you to make an exact copy of a disc of any format.
However, you must copy the disc contents onto a blank disc of the same disc type.
(You cannot, for example, copy content from a CD onto a DVD.)
To copy a disc, do this:
1. Select the Copy a Disc or Burn a Disc Image function in the Data & Backup
menu of the CyberLink PowerStarter program window. In the CyberLink
Power2Go new task window, select Copy Disc to open the Copy Disc window.
2. Select your source and target drives.
3. Select a Read speed and Write speed for each disc. The speeds you should
select will depend on the burning drives you are using and the quality of the
discs.
4. Select Ignore reading error if you want CyberLink Power2Go to copy the disc
even if errors are encountered.
84
Page 91

Data & Back up
5. Select the Copy to hard disk option, if available, to also save a copy of the disc
to your computer’s hard drive.
6. Select Copy whole disc if you want to copy the entire contents of the disc
onto the destination disc.
7. Enter the Number of copies you want to burn.
8. If available, you can use the following options to assist with the burning
process:
select Perform write simulation if you want CyberLink Power2Go to simulate
the burning process first to ensure the burn will finish successfully.
if available, select Verify recorded data if you want CyberLink Power2Go to
verify that the content was successfully burned to the disc.
if available, select Enable defect management to have CyberLink Power2Go try
to fix any defects on a disc so that content burns correctly.
9. Click Copy to begin the copy and burn process.
10. When burning is complete, select an option in the window that opens:
Click View Log to view the burning log. The log opens in your default TXT
editor, where you can view and save it.
Click OK to close the window.
Burning a Disc Image
A disc image is a file on your computer that is the duplicate of the contents and file
structure of a disc. CyberLink Power2Go lets you burn a disc image to a disc.
To burn a disc image, do this:
1. Select the Copy a Disc or Burn a Disc Image function in the Data & Backup
menu of the CyberLink PowerStarter program window. In the CyberLink
Power2Go new task window, select Burn Disc Image to open the Burn Disc
Image window.
2. Click to select the disc image you want to burn to a disc.
3. Insert your disc and select your drive in the drop-down in the To section.
4. Select a Write speed for burning the disc. The speed you should select will
85
Page 92

CyberL ink M ed ia Su ite
Note: select the Auto shut down after burning option if you want
CyberLink Power2Go to automatically shut down your computer once it has
successfully burned your disc.
depend on the burning drive you are using and the quality of the disc.
5. Enter the Number of copies you want to burn.
6. If available, you can use the following options to assist with the burning
process:
select Perform write simulation if you want CyberLink Power2Go to simulate
the burning process first to ensure the burn will finish successfully.
select Verify recorded data if you want CyberLink Power2Go to verify that the
content was successfully burned to the disc.
select Enable defect management to have CyberLink Power2Go try to fix any
defects on a disc so that content burns correctly.
7. Click Burn to start the burning process.
8. When burning is complete, select an option in the window that opens:
Click View Log to view the burning log. The log opens in your default TXT
editor, where you can view and save it.
Click OK to close the window.
Back Up and Restore Files
Backing up data is an important security procedure that can save large amounts of
time and money in case of disaster, disk failure, attack by a hacker or virus, etc. By
keeping a backup copy of your important data on another medium, you can
quickly and reliably restore your data to its original state.
Backing Up Files
To back up your data, first select Back Up and Restore Files in the Data & Backup
menu of the CyberLink PowerStarter program window. Ensure that the Backup
button at the top of the window is clicked, and then follow these simple steps:
86
Page 93

Data & Back up
Note: the specific functions of this program depend on the version you have
purchased, and therefore some features may not be available.
Step 1 - Select Source
In the Backup window select the source by locating and checking the files and
folders that you want to back up in the two file directory panes. (These panes
resemble Windows Explorer in functionality.) You can choose to backup Files and
Folders or Application Data by selecting the desired file type above the directory
panes.
Step 2 - Select Destination
Click Select Destination, then set your backup destination.
Back up to: Select your backup destination from the drop-down box. Backup
destinations may include hard disk or a disc burner (depending on your
available hardware).
Back up as: Give each backup file a unique name. To save the backup file to a
different directory, click Browse, then locate and select the folder you want to
use.
Include Restore Tool: Select to create an executable (.exe) file that allows you
to restore your data on a computer that does not have the PowerBackup
program installed.
Split into volumes: Divide your backup files into volumes (portions) of the size
you specify.
Step 3 - Select Method
Click Select Method, then choose the backup method (and advanced options, if
desired) that you want to use.
Backup methods include Full, Differential and Incremental.
For more options, click Options.
87
Page 94

CyberL ink M ed ia Su ite
Step 4 - Back Up Files
Click Back Up Files. Verify that the settings are correct, then click one of the
buttons to begin your backup.
Click Back Up Now to begin backing up immediately.
Click Add to Scheduler to schedule the backup for a later time.
Restoring Files
To restore your data after a backup, first select Back Up and Restore Files in the
Data & Backup menu of the CyberLink PowerStarter program window. Click the
Restore button at the top of the window, and then follow these simple steps:
Step 1 - Select Source
In the Restore window select the source by selecting the restoration source from
the Restore from drop-down box.
Backup file: Restore from an existing backup file. To open a backup file, click
Browse, then locate and open the file you want to use.
My Catalog: Restore from existing records of previous backup jobs. (To delete
records from My Catalog, use the Edit > Delete Catalog Record or Delete All
Catalog Records command.)
Disc drive: Restore from a disc.
Once you select the source, select the files you want to restore.
Step 2 - Select Destination
Click Select Destination, then set your restoration destination.
Original location: Restore to the original location from which the files were
backed up.
Alternative location: Restore to a new location. To set a new directory, click
Browse, then locate and select the folder you want to use.
88
Page 95

Data & Back up
Single directory: Restore all of the backed up files to a single new directory.
To set a new directory, click Browse, then locate and select the folder you
want to use.
Step 3 - Select Method
Click Select Method, then choose the restoration method you want to use.
Do not overwrite: Restores only files that are not found on your hard drive,
and does not overwrite existing files.
Overwrite older files: Overwrites existing files on your hard drive if the
backed-up copy is newer.
Always overwrite the files on my computer: Overwrites existing files on your
hard drive with the backed-up copy in every case.
Ask before overwriting: Prompts you to decide which copy you want to keep.
Step 4 - Restore Files
Click Restore Files and then verify that the settings are correct. Click Restore Now
to begin restoring files immediately.
Duplicate a Movie Disc
CyberLink PowerDVD Copy is a specialized tool for copying DVD movies from disc
or hard drive onto a back-up DVD. You can likewise create a DVD folder on your
hard drive, or burn it to a DVD as a movie. Easy-to-select options and an
uncomplicated interface simplify the DVD-copying process.
To copy a movie DVD, do this:
1. Select Duplicate a Movie Disc in the Data & Backup menu of the CyberLink
PowerStarter program window. The CyberLink PowerDVD Copy window
displays.
2. Select your video source of the movie DVD you would like to copy.
3. Select the destination where to copy the movie DVD.
4. Click the button and select the specific content from the DVD you
89
Page 96

CyberL ink M ed ia Su ite
want to copy, if not all is required.
5. Click . CyberLink PowerDVD Copy burns the movie onto the disc.
Organize Discs in the Disc Manager
The Disc Manager* is a library of all the discs you have created and burned using
CyberLink Power2Go 10. These discs are automatically imported for you after you
finished the burning task. You can also import discs you burned previously into the
Disc Manager library.
To open the Disc Manager, select the Organize Discs in the Disc Manager option in
the Data & Backup menu of CyberLink PowerStarter. Note the label snapshots in the
Disc Manager window, as they are there to help you find your burned discs more
quickly.
To look for discs in the Disc Manager library, select tags on the left of the window
to filter the discs. You can also enter a keyword in the search field in the top left of
the window to search for a disc or files that were burned to them.
90
Page 97

Data & Back up
Note: you must have a webcam or other video device attached your
computer to take the label snapshot.
Right-click on a disc and select Disc Info to view information about when the disc
was created and more. To view the content that was burned to the disc in the
library, just double-click on it to view the files. If you want to view a file on the disc,
make sure the disc is in your disc drive and then double-click on the file.
Manually Importing Discs to the Disc Library
In the Disc Manager you can import discs you created with older versions of
CyberLink Power2Go or burned in other programs.
To import a disc into the Disc Manager library, do this:
1. In the Disc Manager window, click . The Import Disc window opens.
2. Insert the disc you want to import into your disc drive, and then click OK.
CyberLink Power2Go will load the disc and then display the Disc Info window.
3. If required, click on to add a label snapshot to help you identify the
disc in the Disc Manager library. See Editing the Disc Label Snapshot for more
information.
4. If required, click on Edit Tags to add keyword search tags to the disc. See
Adding Tags to Discs for more information.
5. Click OK to close the window and add the disc into the Disc Manager library.
Disc Label Snapshots
Disc label snapshots are photos that help you identify the disc in the Disc Manager
library. If you created a disc label using CyberLink LabelPrint, it is automatically
imported and used as the label snapshot in the Disc Manager.
You can edit the captured label snapshot or add a new one by taking a photo of
hand drawn text on the disc, drawings, or whatever you want and use it as the label
snapshot.
91
Page 98

CyberL ink M ed ia Su ite
Editing the Disc Label Snapshot
To edit the disc label snapshot, do this:
1. If in the Disc Info window, click the button to open the Capture Label
Snapshot window.
2. If required, select the device you want to use to capture the snapshot from
the drop-down.
3. Hold the disc or other item up to your webcam and then click . If you
don't like the snapshot that was taken, you can recapture it by repeating this
step.
4. Once you are satisfied with the label snapshot, click on Done.
Adding Tags to Discs
Keyword search tags are used to help you find discs in the Disc Manager library.
You can easily filter or search for these tags to help you find the discs.
To add tags to discs, do this:
1. If in the Disc Info window, click the Edit Tags button to open the Edit Tag
window.
2. If required, add any of the existing tags by selecting the check box next to
them.
3. To add a new tag, enter the new tag name in the field provided and then click
on .
4. Once you are done selecting and adding all the tags, click on OK to save the
changes.
92
Page 99

Utilities
Note: for a more detailed description of these programs and there functions,
please consult the product help files.
Chapter 7:
Utilities
CyberLink Media Suite provides you with a number of useful disc utilities, including
the ability to erase rewritable discs and also design and print professional looking
labels using CyberLink LabelPrint to complete the disc making process.
You can also mount a disc image, extract files from existing disc images, burn a
DVD folder, and much more.
Erase a Disc
If you are using a re-writable disc, you can erase content that was previously
recorded onto it. This allows you to reuse the same discs over and over without the
need to continually buy new discs.
To erase a disc, do this:
1. Select Erase a Disc function within in the Utilities menu of CyberLink
PowerStarter window. The Erase Rewritable Media window displays.
2. Insert your disc and select your Burner from the drop-down.
3. Select one of the following erase methods:
Quick erase: erases the disc index contained on the disc.
Full erase: erases all of the content the disc contains.
4. Click Erase to start the erase process.
Extract Files From a Disc Image
With CyberLink Power2Go you can use the CyberLink ISO Viewer to view disc
images in the ISO, P2I (Power2Go image) or RDF format on your computer’s hard
drive. This convenient tool lets you view the contents of an image file, and quickly
extract files or burn the image to a disc.
To extract files from a disc image, do this:
93
Page 100

CyberL ink M ed ia Su ite
Note: to change the view of the files in the CyberLink ISO Viewer, click .
1. Select Extract Files from a Disc Image function within in the Utilities menu of
CyberLink PowerStarter. The CyberLink ISO Viewer displays.
2. When in the CyberLink ISO Viewer, you can perform the following functions:
click the button to browse to and open an image file (in the ISO, P2I or
RDF format) on your computer. When opened, you can see all the files
contained within the image.
click on a file in the CyberLink ISO Viewer and then click to view it in its
default program.
to extract files from the image and save them to your computer, select them
and then click .
Mount a Virtual Drive
The Power2Go Virtual Drive lets you mount a disc image file and access it as if it is a
real disc drive on your computer.
To mount a disc image using the Power2Go Virtual Drive, do this:
1. Select Mount a Virtual Drive function within in the Utilities menu of CyberLink
PowerStarter window. The Power2Go Virtual Drive window displays.
2. Select the Enable virtual drive option.
3. In the Image location field, click and select the location of the image
you want to mount. CyberLink Power2Go supports the mounting of images in
the ISO, P2I (Power2Go image) or RDF formats.
4. Assign a Drive letter for the mounted disc image, by selecting it from the
drop-down. The drive letter you assign will be how you identify the mounted
drive in Windows Explorer.
5. Click on OK to mount the drive. The disc image will be available like any other
disc drive in Windows Explorer.
94
 Loading...