

Page 1

CyberLink
Medi@Show 3
User’s Guide
Page 2

Copyright and Disclaimer
All rights reserved. No part of this publication may be reproduced, stored in a retrieval system, or transmitted in any form or by any means electronic, mechanical, photocopying,
recording, or otherwise without the prior written permission of CyberLink Corporation.
To the extent allowed by law, MEDI@SHOW IS PROVIDED “AS IS”, WITHOUT WARRANTY OF ANY KIND, EITHER EXPRESS OR IMPLIED, INCLUDING WITHOUT
LIMITATION ANY WARRANTY FOR INFORMATION, SERVICES, OR PRODUCTS
PROVIDED THROUGH OR IN CONNECTION WITH MEDI@SHOW AND ANY
IMPLIED WARRANTIES OF MERCHANTABILITY, FITNESS FOR A PARTICULAR
PURPOSE, EXPECTATION OF PRIVACY, OR NON-INFRINGEMENT.
BY USING THIS SOFTWARE, YOU AGREE THAT CYBERLINK WILL NOT BE LIABLE FOR ANY DIRECT, INDIRECT, OR CONSEQUENTIAL LOSS ARISING FROM
THE USE OF THIS SOFTWARE OR MATERIALS CONTAINED EITHER IN THIS
PACKAGE.
The terms and conditions here under shall be governed and construed in accordance with the
laws of Taiwan.
Medi@Show is a registered trademark along with other company and product names mentioned in this publication, used for identification purposes and remain the exclusive property
of their respective owners.
International Headquarters
Mailing Address CyberLink Corporation
15F, #100, Min Chuan Road, Hsin Tian City
Taipei County, Taiwan, R.O.C.
Web Site www.gocyberlink.com
Telephone 886-2-8667-1298
Fax 886-2-8667-1300
Copyright © 2004 CyberLink Corporation. All rights reserved.
Page 3

Contents
Introduction.............................................. 1
Welcome ........................................................................2
Main Features ............................................................2
The Medi@Show Program ...............................................3
Edit Mode ..................................................................3
Effects Mode ..............................................................9
System Requirements .....................................................10
Program Versions ..........................................................10
Creating a Presentation ........................... 11
Collecting Multimedia Files ............................................12
Importing ................................................................12
Recording Audio ......................................................15
Arranging Your Presentation ...........................................17
Adding Slides to the Storyboard .................................17
Removing Slides from the Storyboard .........................17
Managing Clips in the Storyboard .............................18
Adding Effects ...............................................................19
Transition Effects ......................................................19
Text Effects ...............................................................20
Audio Effects ............................................................21
Masking Effects ........................................................22
Image Enhancement .................................................23
Previewing Your Presentation ..........................................25
System Settings .........................................................25
Playback Settings ......................................................26
Exporting................................................ 27
Collect Film Files ...........................................................28
Export as Distributable File .............................................29
Export as a Screen Saver ................................................31
Export in VCD/DVD Format ............................................33
Export in Web Distributable Format .................................39
Export in HTML ........................................................39
Export in DHTML ......................................................42
Export in Internet Streaming Format ...........................44
i
Page 4

CyberLink Medi@Show
Technical Support................................... 47
Web Support ................................................................ 47
Fax Support ................................................................. 47
Telephone Support ....................................................... 48
Index ..................................................... 49
ii
Page 5

Chapter 1:
Introduction
This chapter introduces the CyberLink Medi@Show program and
the components that are available in the different modes.
Descriptions in this chapter focus on the appearance of the
program, not on procedures for using the program. For
instructions on how to use the program, refer to the many
function-specific sections throughout the rest of the manual.
This chapter contains the following sections:
• Welcome on p.2
• The Medi@Show Program on p.3
• System Requirements on p.10
• Program Versions on p.10
1
Page 6

CyberLink Medi@Show
Welcome
Publishing and creating isn't what it used to be. A multi-purpose
application, Medi@Show compiles, arranges, and produces files
in a simple and straightforward software package.
Import a vast array of files via TWAIN device, personal folders,
or directly off the Internet! After compiling and assembling,
arrange and edit sequences using special effects and audio clips
to complete your presentation.
Main Features
• Integrates all types of multimedia files into one
presentation
• Acquires images directly from TWAIN-compliant
devices, such as scanners or digital camcorders
• Over 100 transition, text, and masking effects,
• Save your presentation as a screen saver, HTML/
DHTML files for Internet publication, an Internet
Streaming slideshow, an executable file for stand-alone
playback, an FLM file (the exclusive data format for
Medi@Show)
• Drag and drop files directly from your Internet browser
• Imports PowerPoint presentation files directly allowing
for original playback or as an image format for re-editing
• Supports the following file formats:
Video: AVI, DAT (MPEG-1), MPE, MPEG, MPG
Image: BMP, JFF, JPE, JPEG, JPG, JTF, PCD, PCT, PCX,
PNG, TGA, WMF
Audio: MIDI, MP3, WAV
Other:PPT
2
Page 7

Chapter 1: Introduction
The Medi@Show Program
This section offers a visual overview of the Medi@Show program
and its different components.
Edit Mode
When you first open Medi@Show, the program appears in Edit
mode as follows:
Control panel Effects Mode button
Library
Storyboard
The buttons in Effects mode are as follows:
Button Function
Switches to Edit mode.
Opens the image enhancement effects panel.
Effects buttons
3
Page 8

CyberLink Medi@Show
Control Panel
The control panel, located on the left of the program, allows you
to access many of the buttons available in Medi@Show. The
control panel is hidden when not in use - you must mouse over
the panel to display it.
New, Save
Open, Save As
Import, Export, Playback Settings
Print, WAV Recorder
Launch Medi@Show Wizard
Settings
Help, Quit
4
Page 9
Chapter 1: Introduction
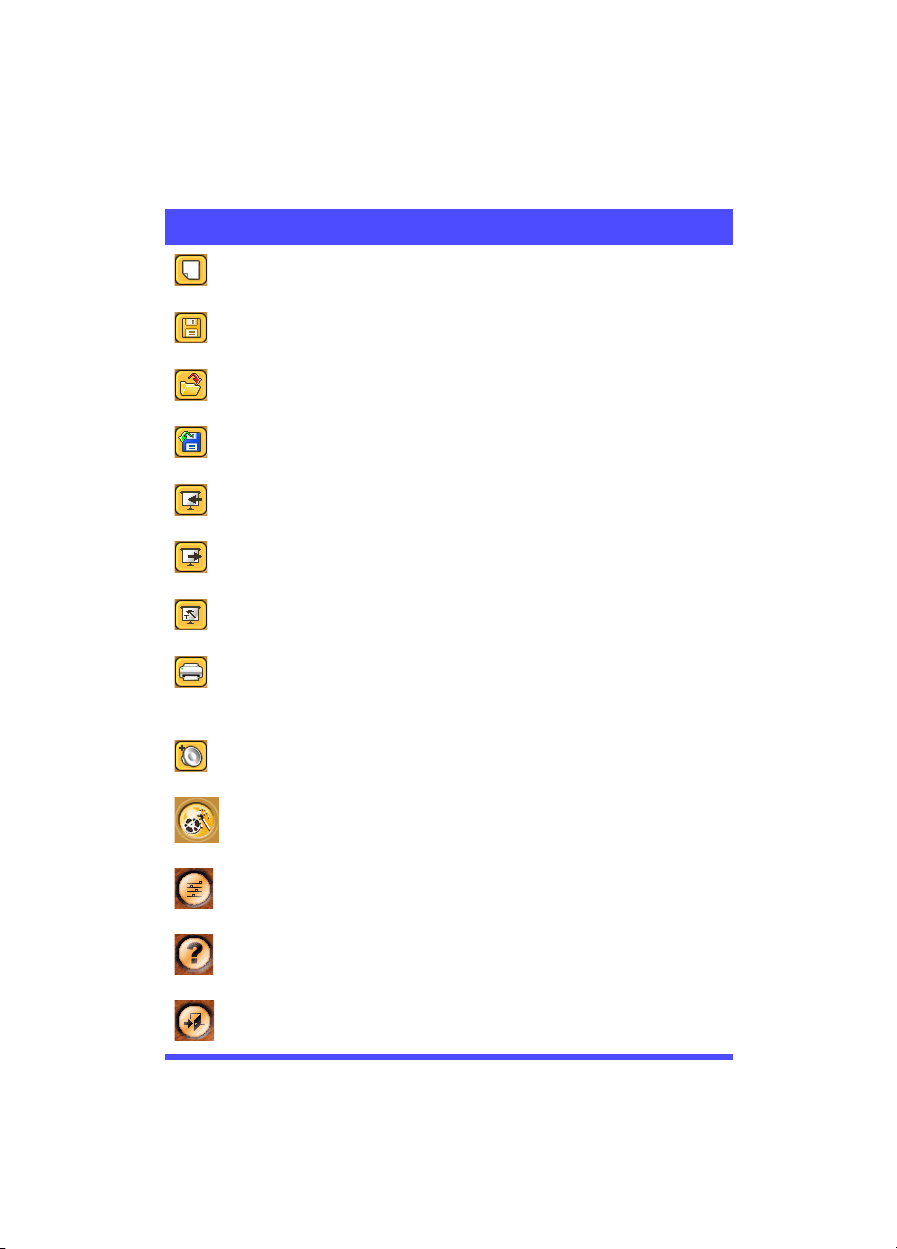
The buttons on the control panel are as follows:
Button Function
Creates a new FILM file.
Saves the open file.
Opens an existing FILM file.
Saves the open file under a different name.
Imports media files.
Exports your presentation in different formats.
Configures presentation playback settings.
Prints the selected slide(s). (This function prints
only the original image, without text or other
modifications you may have made.)
Opens the Audio Wave Recorder.
Launches the Medi@Show Wizard.
Opens the default system settings.
Opens the help system.
Exits Medi@Show.
5
Page 10

CyberLink Medi@Show
Audio Wave Recorder
Click to open the Audio Wave Recorder.
Microphone volume
Audio display panel
Time slider
Audio-in volume
The buttons on the Audio Wave Recorder are as follows:
Button Function
Plays audio files.
Pauses audio playback.
Stops audio playback.
Records audio.
Saves the recorded audio file.
Displays Audio Wave Recorder settings.
Closes the Audio Wave Recorder.
6
Page 11

Library
The buttons available in the Library are as follows:
Button Function
Opens the Thumbnail Arranger, which allows you
to select a thumbnail arrangement method.
Displays large thumbnails.
Displays medium-sized thumbnails.
Chapter 1: Introduction
Displays small thumbnails.
Advances up one page through the thumbnails in
the Library.
Scrolls up through the thumbnails in the Library.
Scrolls down through the thumbnails in the
Library.
Advances down one page through the thumbnails
in the Library.
7
Page 12
CyberLink Medi@Show
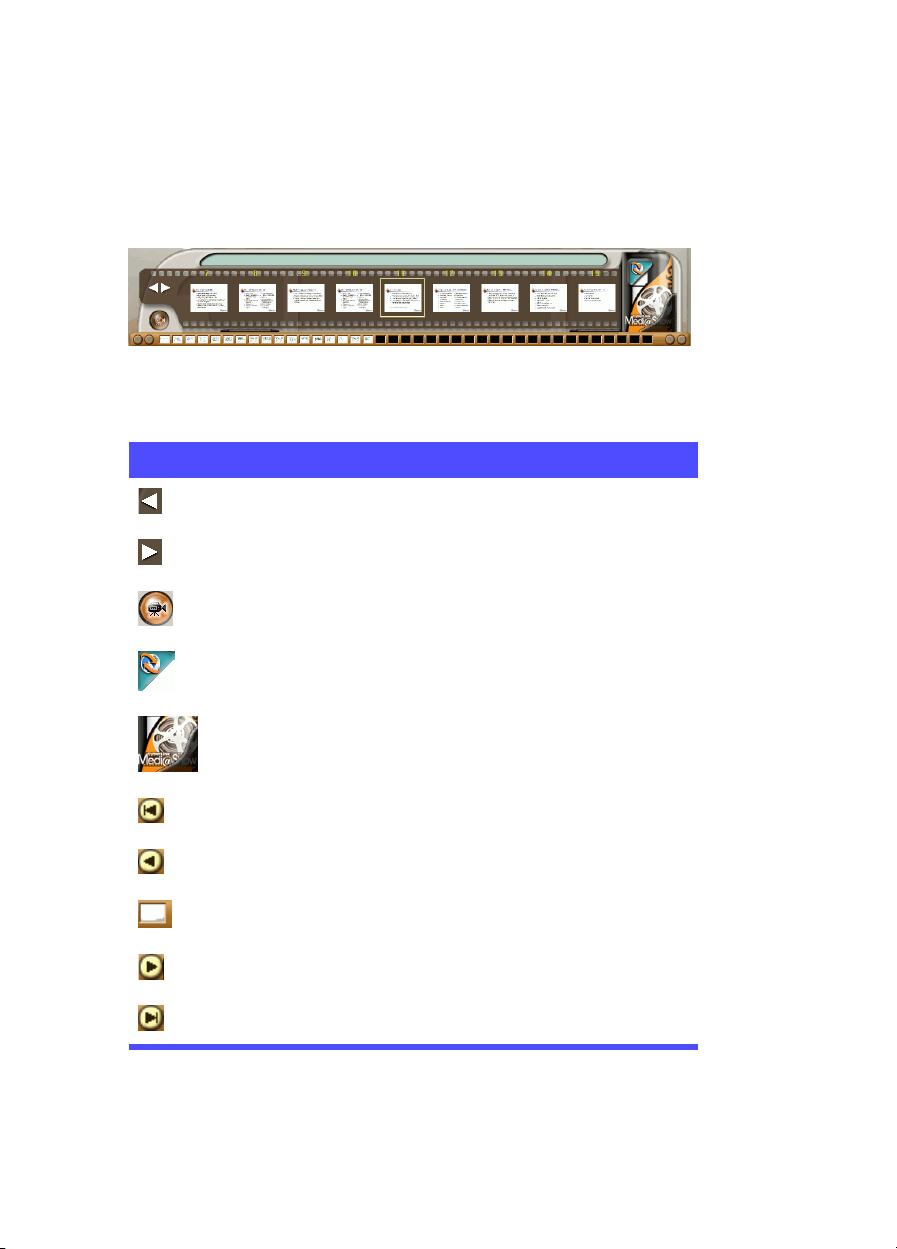
Storyboard
The Storyboard is located across the bottom of the program.
The buttons on the Storyboard are as follows:
Button Function
Scrolls film to the left.
Scrolls film to the right.
Plays the film.
Opens ClyberLink’s web page.
Opens the About dialog box.
Scrolls to the beginning of the slides.
Scrolls one slide to the left.
Jumps to the selected slide.
Scrolls one slide to the right.
Scrolls to the end of the slides.
8
Page 13
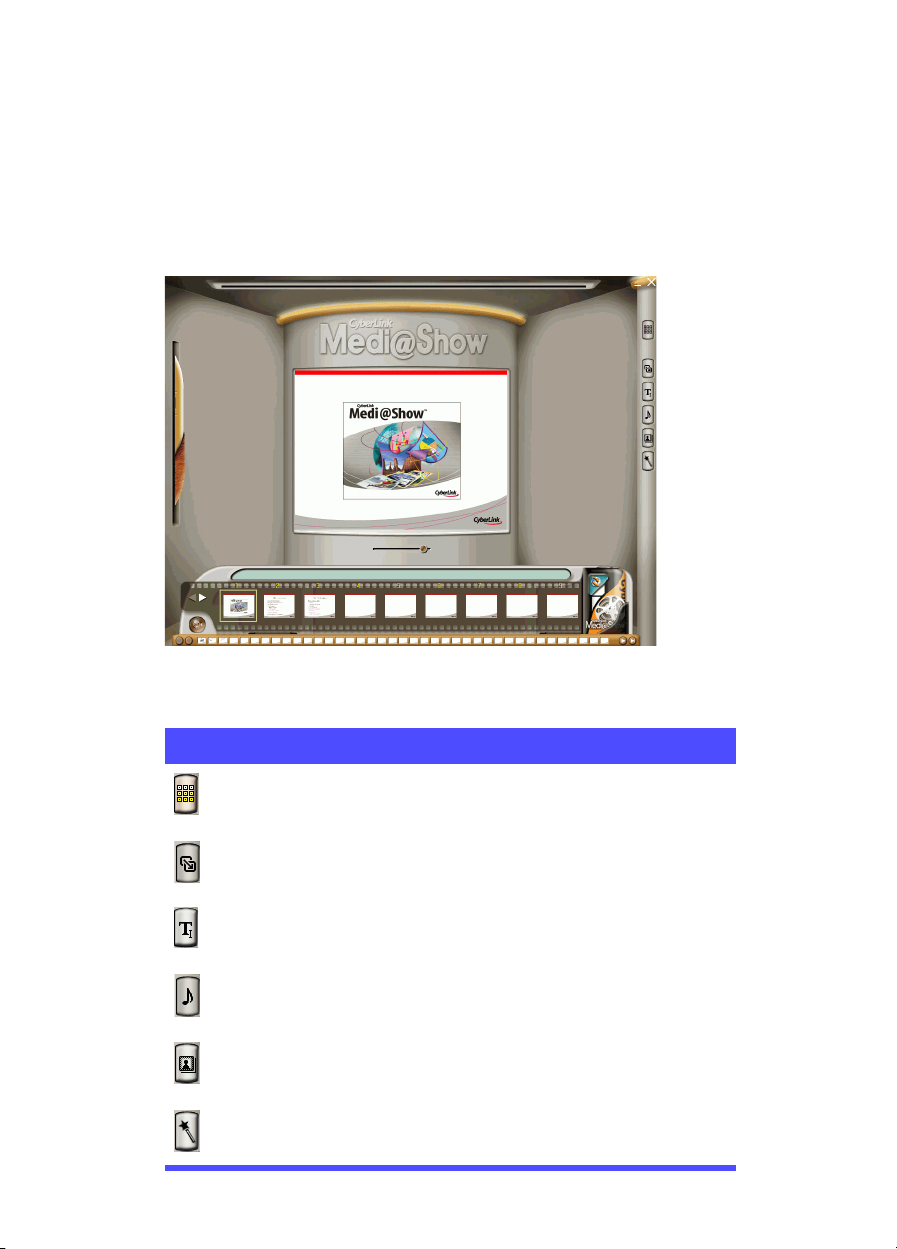
Effects Mode
When you switch to Effects mode, the program appears as
follows:
The buttons in Effects mode are as follows:
Chapter 1: Introduction
Button Function
Switches to Edit mode.
Opens the transitions effects panel.
Opens the text effects panel.
Opens the audio effects panel.
Opens the masking effects panel.
Opens the image enhancement effects panel.
9
Page 14

CyberLink Medi@Show
System Requirements
The system requirements listed below are recommended as
minimums for running the program.
Minimum Recommended
Screen
Resolution
OS Windows ME/98SE Windows XP/2000
Memory 128MB 256MB DDR
CPU Produce VCD:
HDD
Space
Burning CD-R/RW, DVD-R/RW, DVD+R/RW burner
Mic A microphone is required to record a voice-over
800 x 600, 16-bit color 1024 x 768, 32-bit color
Pentium II 450MHz
AMD Athlon 500MHz
Produce DVD:
Pentium II 700MHz
AMD Athlon 700MHz
1 GB for VCD/SVCD
10 GB for DVD
Pentium III 800MHz
AMD Athlon 700MHz
Pentium III 1GHz
AMD Athlon 1000MHz
3 GB for VCD/SVCD
15 GB for DVD
7200RPM drive
Program Versions
Some of the functions described in this manual may not be
available in your version of Medi@Show. To view a list of
functions available in the different versions of Medi@Show,
please refer to the Medi@Show readme file. You can check your
version of Medi@Show in the About dialog box.
10
Page 15

Chapter 2:
Creating a Presentation
This chapter describes the steps required for creating your
presentation: collecting media files (including importing files and
recording audio), arranging the slides in your presentation,
editing slides, and previewing your presentation.
The final step after a presentation is created - exporting - is
discussed in Exporting on p.27.
This chapter contains the following sections:
• Collecting Multimedia Files on p.12
• Arranging Your Presentation on p.17
• Adding Effects on p.19
• Previewing Your Presentation on p.25
11
Page 16

CyberLink Medi@Show
Collecting Multimedia Files
The first step in creating your presentation is collecting the media
files that it will contain. Medi@Show offers two methods of
collecting media files for use in your presentations: importing
and recording. You can import photo, video, and PowerPoint
files and record audio from a microphone or rip from an Audio
CD.
Importing
There are two ways to import files into Medi@Show:
• Wizard-based importing
• Manual importing
Wizard-based importing is the easiest method to use - especially
for users new to Medi@Show - as it automates several different
tasks.
In manual importing, you import, set your background music,
and specify your playback settings as individual tasks.
Once imported into the Library, file types are distinguished by
the coloring of their outline border:
• Blue: Photo file
• Pink: Video file
• Green: PowerPoint file
12
Page 17
Chapter 2: Creating a Presentation
Wizard-Based Importing
The Medi@Show Film Wizard prompts you to import, set your
background music, and specify your playback settings in a single
process. Unless you check the Do not show this Wizard at
startup option on the first window in the wizard, the
Medi@Show Film Wizard automatically runs each time you open
Medi@Show.
1. Click on the control panel. The Medi@Show Film
Wizard opens.
2. Check Create a new Film file, then click Next.
3. Click Browse. The Save As dialog box opens. Locate the
folder in which you want to save your file. You can also
enter a file name in the Save As dialog box.
4. Choose an import option, then click Import Now.
• Import file(s): Imports individual files.
• Import directory: Imports all of the video, image, and
PowerPoint files in a folder.
• Acquire from TWAIN device: Imports from a removable
device.
Note: You must import files to continue.
5. Select your playback settings, then click Next. For more
information, see Playback Settings on p.26.
6. Click Browse to locate a background music file (if desired),
then click Next.
7. Click Finish. Your new presentation opens. By default, all of
the files you have imported appear in the Storyboard.
Manually Importing Files
1. Click on the control panel. A drop-down men appears.
2. Click Import file(s).
3. In the dialog box that opens, locate the files you want to
import, then click Open. The files you have imported
appear in the Library.
13
Page 18

CyberLink Medi@Show
Manually Importing Folders
1. Click on the control panel. A drop-down men appears.
2. Click Import directory.
3. In the dialog box that opens, locate the folder you want to
import, then click OK. The files you have imported appear
in the Library.
Manually Acquiring Files
When you import media files manually, you can select to import
individual files, all files in a folder, or acquire from a removable
device.
1. Click on the control panel. A drop-down men appears.
2. Click Acquire from TWAIN device.
3. In the dialog box that opens, select the device you want to
import from, then click Select.
4. Select and import the files you want to use. The files you
have imported appear in the Library.
14
Page 19

Chapter 2: Creating a Presentation
Recording Audio
You can use the Audio Wave Recorder to record audio from a
microphone or to rip songs from an Audio CD. The Audio Wave
Recorder is a handy way to add narration or background music
to your presentation.
Record from a Microphone
To record from a microphone, do this:
1. Click on the Control Panel to open the Audio Wave
Recorder.
Note: Be sure your microphone is properly hooked up to your
computer.
2. Adjust the recording levels via the audio-in volume sliders,
then press Record to begin recording.
3. Click Stop to stop recording.
4. Click Save to save your new audio file.
15
Page 20

CyberLink Medi@Show
Rip an Audio CD
To rip songs from an audio CD, do this:
1. Insert an Audio CD into your computer’s disc drive.
2. Click on the Control Panel to open the Audio Wave
Recorder.
3. Click the Audio Wave Recorder’s Settings button.
4. Check the Enable Audio CD Track Recording option and
choose a track. Press OK when finished.
• To select a recording quality, click Format.... Choose a
Name, Format and select one of the Attributes (the
higher the Hz, the better quality but more memory
consumed).
5. Adjust the recording levels via the audio-in volume sliders,
then press Record to begin recording.
6. Click Stop to stop recording.
7. Click Save to save the new audio file.
16
Page 21

Chapter 2: Creating a Presentation
Arranging Your Presentation
After you have imported your media files into the Library, you
can begin adding slides into the Storyboard and arranging them
into the proper order for your presentation.
Adding Slides to the Storyboard
There are two different ways to add slides to the Storyboard:
• Drag slides from the Library into the Storyboard.
• Highlight the slides, then click the right mouse button.
Form the menu that appears, select Add to Storyboard.
Removing Slides from the Storyboard
There are three different ways to remove slides from the
Storyboard:
• Drag slides off any edge of the Storyboard.
• Highlight the slides, then press the Delete key.
• Highlight the slides, then click the right mouse button.
From the menu that appears, select Delete.
The miniature slides located across the bottom of the Storyboard
provide easy accessibility when working with a long
presentation by displaying a greater number of slides in a
smaller size. When you click on any of the slides, you jump to the
corresponding slide in the Storyboard.
17
Page 22

CyberLink Medi@Show
Managing Clips in the Storyboard
You can access a number of functions by highlighting a slide,
then clicking the right mouse button. A menu appears, from
which you can select a number of options for working with the
slides in the Storyboard.
Note: Double-clicking a file in the Storyboard automatically
switches the program to Effects mode.
18
Page 23

Chapter 2: Creating a Presentation
Adding Effects
Medi@Show’s effects include transition, text, audio, masking,
and photo effects that you can use to modify your presentation.
The audio, masking, text, and photo effects are unavailable for
video files. The effects panels are accessible on the right-hand
tool bar in Effects mode.
Drag the slider located under the Preview Window to adjust the
time setting for each slide.
Transition Effects
To add transition effects to your presentation, do this:
1. Click or double-click a slide in the Storyboard to switch
to Effects mode.
2. Click to display the transition effect panel.
3. Drag the vertical slider up or down to displays transition
effects, then click one to select it.
Note: The preview window below automatically displays the
effect on your slide
4. Drag the horizontal slider to the left or right to increase or
decrease the duration of the effect.
• Click to reset to the previously selected effect.
5. Click OK .
19
Page 24

CyberLink Medi@Show
Text Eff e c ts
To add text effects to your presentation, do this:
1. Click or double-click a slide in the Storyboard to switch
to Effects mode.
2. Click to display the transition effect panel.
1. First, set your Font Settings, then type the text in the text
entry area at the bottom of the panel. The text will
automatically appear in the center of the screen as you type.
2. To move the text box, simply click and drag the text box
(text surrounded by a dotted border) after you finish
inserting text. You may press the Ctrl key while clicking to
select multiple texts boxes. You can also cut, copy, and paste
text boxes within the text panel.
3. Choose a text effect if desired and it will be previewed
instantly.
• Click to reset to the previously selected effect.
4. Click OK .
If you wish to modify previously completed text:
1. Click on the specific text box while in the Text mode.
2. Access the Font Settings dialog box in the Text panel while
text you wish to modify is displayed in the text area.
3. To delete a block of text, click on the specific text box and
press Delete.
4. To change the text effect, click on the specific text box and
then choose another effect.
20
Page 25

Chapter 2: Creating a Presentation
Audio Effects
Medi@Show provides background music for the entire slide
show (located in Playback Settings) and foreground audio effects
for all files except video format files.
For adding audio files and effects to an existing presentation:
1. Click or double-click a slide in the Storyboard to switch
to Effects mode.
2. Click to display the transition effect panel.
3. Click the drag-down menu and select one of the following
options:
• Continue: retains the previous slide's audio effect.
• No Sound: has an absence of audio effects except for
background music.
• From List: uses the software's built-in .WAV files.
• Customize: add your own personal audio file to a slide.
Then, press to browse and open an audio file.
• Click to reset to the previously selected effect.
4. Click OK .
21
Page 26

CyberLink Medi@Show
Masking Effects
Masking blocks a specific area in an image from view. You may
use the masks provided or browse for JPG or BMP files to use
as a masking image.
1. Click . The Masking Effects panel opens.
2. Select the mask you would like to use:
• To use the masks provided, drag the slider up or down to
display masks, then click one to select it.
• To use your own image file as a mask, click , then
locate and open the image you want to use.
3. Drag the effect to the desired location on the slide in the
preview window, if desired. (This masks only a portion of a
slide.)
• Click the Zooming buttons ( or ) to zoom in or
out.
• Click a percentage to display that zoom level.
4. Click the Preview button.
• Click to reset to the previously selected effect.
• Click to clear the masking effect.
5. Click OK .
22
Page 27

Chapter 2: Creating a Presentation
Image Enhancement
Medi@Show offers a number of automatic options for fixing
images, as well as advanced options for further automatic and
manual image editing. These options are described in the
following section.
Image Comparison Options
When you open an image for enhancement, two buttons are
available above the image. These buttons switch the view
between the original and the modified photo, allowing you to
compare the results of the effect. Descriptions of the comparison
options are below:
• New: Displays the photo with the current modification
applied.
• Old: Displays the photo as it appears before the current
effect is applied, but including any modifications that
have previously been applied.
Note: If you are dissatisfied with the results you obtain when
modifying a photo, click Reset to undo the effect that you
have just applied. You can only undo the last effect applied.
Auto Photo Enhancement
Click Auto Photo Enhancement to adjust the brightness,
contrast, and balance in a photo automatically.
Redeye Removal
Clicking Auto Redeye Removal automatically removes the
redeye from a photo that is sometimes caused by flash
photography.
Note: If the subject’s head is not oriented to the top of the
photo, or if the subject’s face is in profile, the automatic
option may not adequately remove the red. In such a case,
it is recommended to use the manual option.
23
Page 28

CyberLink Medi@Show
Rotate
Click one of the rotate buttons to rotate the photo 90 degrees to
the left or right.
Advanced Editing
For even more editing options, click Advanced Editing. The
CyberLink PhotoNow! program opens. For help using the
PhotoNow! program, please see the help system it contains.
24
Page 29

Chapter 2: Creating a Presentation
Previewing Your Presentation
Select any clip from the Storyboard and press Play. If no clip is
selected, the preview automatically plays from the last clip that
was selected.
System Settings
You can set settings for that apply to all presentation files that
you create.
Click . The System Settings dialog box opens.
• Transition Effects: Previous slides won't be affected by
later default adjustments since the transition effects are
already in place and being applied.
• Text Effects: Changing the default setting will alter
default settings of previous slides that do not contain
text.
• Canvas Size: modify the default canvas size (computer's
screen resolution). If you find that playback is not
smooth, choosing a smaller canvas size may improve the
graphic display.
• Work ing d irec tory : This is the directory used for output.
If you change this directory, be sure that the hard disc it
is on has enough free space to accommodate your
presentation.
25
Page 30

CyberLink Medi@Show
Playback Settings
You can set playback settings for your presentation file and select
background music.
Click . The Playback Settings dialog box opens.
If you prefer continuous play, choose Loop. When the file reaches
the end during playback, it will automatically return to the
beginning and continue playback without pausing.
For Manual playback, the slides will advance by a click of the
mouse while Auto playback will play continuously with the
time setting for individual slides available for adjusting in Effects
Mode.
Background Music: supports four types of audio formats:
• MIDI
• WAV
• MP3
• Audio CD
Independent of the foreground narration or audio effects
assigned to each slide, the Background Music will continuously
play the selected audio file throughout the entire slide show and
is only available for modification here.
26
Page 31

Chapter 3:
Exporting
After you have finished your slide show and are ready to publish
on the Internet, the final step is exporting. Medi@Show offers
several options for exporting your presentation. You can save
your presentation as a file for later use, compile it into a playable
file or a screen saver, save as a DVD/VCD-compatible file for
burning, or publish it as a streaming presentation on the Internet.
This chapter contains the following sections:
• Collect Film Files on p.28
• Export as Distributable File on p.29
• Export as a Screen Saver on p.31
• Export in VCD/DVD Format on p.33
• Export in Web Distributable Format on p.39
27
Page 32

CyberLink Medi@Show
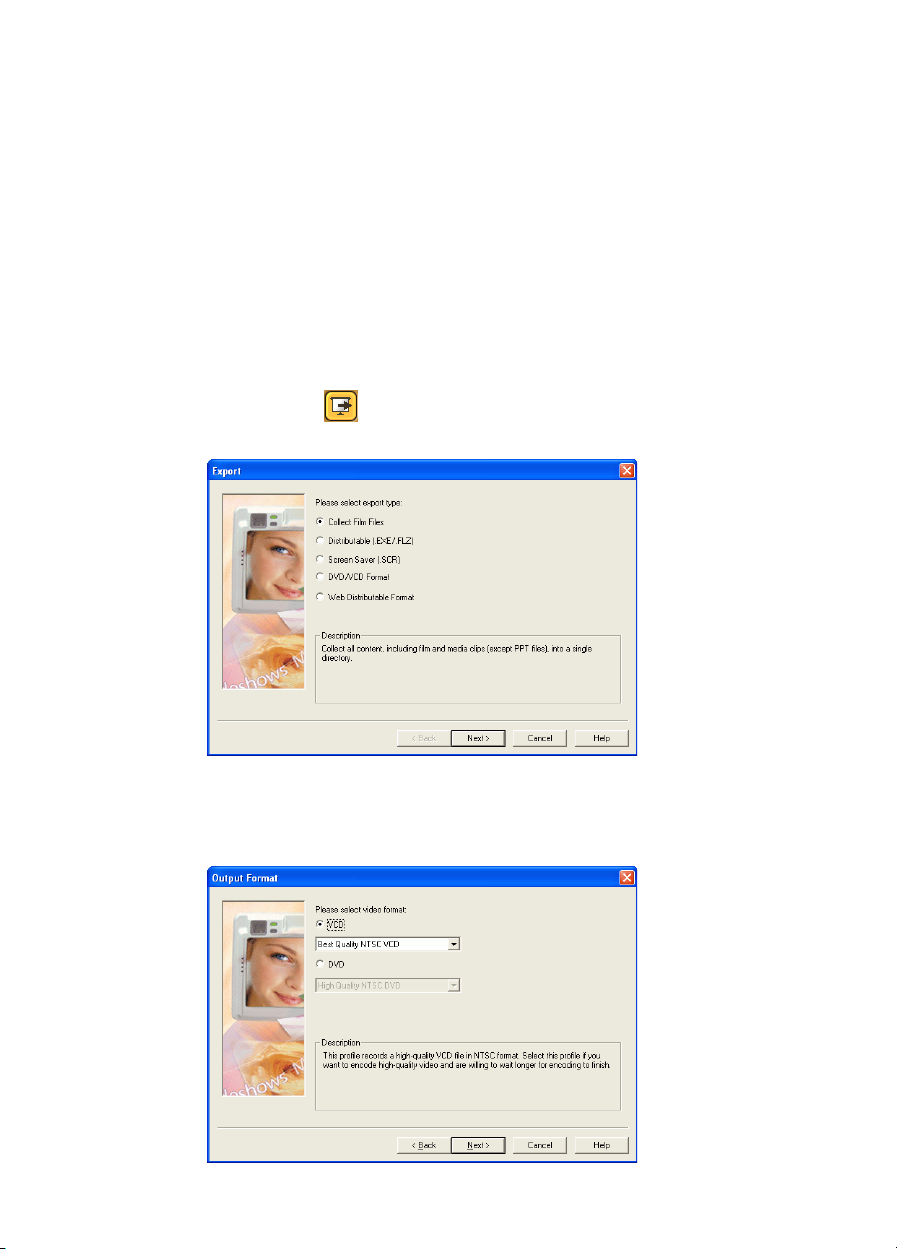
Collect Film Files
The Collect Film Files option saves your film file and all of the
multimedia clips it contains in one directory.
1. Click Export on the control panel. The Export dialog
box opens.
2. Select the Collect Film Files option, then click Next.
3. Click Browse... to locate an existing .FLM file to save your
presentation as.
• Check the Create new directory option to create a
directory under the folder you have selected in the file
name entry box.
4. Click Finish to export your presentation.
28
Page 33

Chapter 3: Exporting
Export as Distributable File
The Distributable (.EXE/.FLZ) option saves as a Medi@Show
proprietary data file (.FLZ) or executable (.EXE) format, where
you may play and view files without any required software or
browser applications.
1. Click Export on the control panel. The Export dialog
box opens.
2. Select the Distributable (.EXE/.FLZ) option, then click Next.
3. Enter a file name.
• Click Browse... to save to a different folder.
29
Page 34

CyberLink Medi@Show
•
Check Make executable file to make an .EXE file that
includes the Medi@Show standalone player. (This file
can be played on any computer.) Uncheck this option to
make an .FLZ file that can only be played in Medi@Show.
4. Click Finish to export your presentation. When the file has
been created successfully, a message appears.
5. Select your final exporting option.
• Open the file: Opens the exported file.
• Open the folder with the file: Opens the folder that
contains the exported file in Windows Explorer.
• Finish the export process: Closes the message box.
30
Page 35

Chapter 3: Exporting
Export as a Screen Saver
The Screen Saver (.SCR) option allows you to save your film file
as a desktop screen saver.
1. Click Export on the control panel. The Export dialog
box opens.
2. Select the Screen Saver (.SCR) option, then click Next.
3. Set your export file name and folder.
• Enter a file name and click Browse... to locate a
destination folder.
31
Page 36

CyberLink Medi@Show
•
Click Set as default screen saver to save your
presentation as your current screen saver. (No file name
or folder is required.)
4. Click Finish to export your presentation. When the file has
been created successfully, a message appears.
5. Select your final exporting option.
• Open the file: Opens the exported file.
• Open the folder with the file: Opens the folder that
contains the exported file in Windows Explorer.
• Finish the export process: Closes the message box.
32
Page 37
Chapter 3: Exporting
Export in VCD/DVD Format
The VCD/DVD Format option saves your film file and all of the
multimedia clips it contains in a format for burning to VCD/
DVD. You can optionally save your presentation as a file for later
burning, or burn directly to disc.
Export in VCD Format as a File
1. Click Export on the control panel. The Export dialog
box opens.
2. Select the DVD/VCD Format option, then click Next.
3. Select VCD and choose a video quality from the drop-down
box, then click Next.
33
Page 38

CyberLink Medi@Show
4. Select Export to file, then click Next.
5. Enter a file name and click Browse... to locate a destination
folder.
6. Click Finish to export your presentation.
7. Select your final exporting option.
• Open the file: Opens the exported file.
• Open the folder with the file: Opens the folder that
contains the exported file in Windows Explorer.
• Finish the export process: Closes the message box.
Export in VCD Format to Disc
1. Click Export on the control panel. The Export dialog
box opens.
34
Page 39

Chapter 3: Exporting
2. Select the DVD/VCD Format option, then click Next.
3. Select VCD and choose a video quality from the drop-down
box, then click Next.
4. Select Export to disc, then click Next.
5. Select your disc options, then click Next.
6. Click Finish to export your presentation.
7. Select your final exporting option.
• Open the file: Opens the exported file.
• Open the folder with the file: Opens the folder that
contains the exported file in Windows Explorer.
• Finish the export process: Closes the message box.
35
Page 40

CyberLink Medi@Show
Export in DVD Format as a File
1. Click Export on the control panel. The Export dialog
box opens.
2. Select the DVD/VCD Format option, then click Next.
3. Select DVD and choose a video quality from the drop-down
box, then click Next.
4. Select Export to file, then click Next
36
Page 41

Chapter 3: Exporting
5. Enter a file name and click Browse... to locate a destination
folder.
6. Click Finish to export your presentation.
7. Select your final exporting option.
• Open the file: Opens the exported file.
• Open the folder with the file: Opens the folder that
contains the exported file in Windows Explorer.
• Finish the export process: Closes the message box.
Export in DVD Format to Disc
1. Click Export on the control panel. The Export dialog
box opens.
37
Page 42

CyberLink Medi@Show
2. Select the DVD/VCD Format option, then click Next.
3. Select DVD and choose a video quality from the drop-down
box, then click Next.
4. Select Export to disc, then click Next
5. Select your disc options.
6. Click Finish to export your presentation.
7. Select your final exporting option.
• Open the file: Opens the exported file.
• Open the folder with the file: Opens the folder that
contains the exported file in Windows Explorer.
• Finish the export process: Closes the message box.
38
Page 43

Chapter 3: Exporting
Export in Web Distributable Format
The Web Distributable Format option allows you to save your
file in the following formats:
• HTML
• DHTML
• Internet Streaming Format
Export in HTML
Exporting here will lose all special effects and only keep still
images. Your export of HTML files will depend on the number of
slides in your file. For example, 9 slides will equal 9 HTML files.
Shown below using the Summer theme, it will also have the
ability to go Next and Previous.
1. Click Export on the control panel. The Export dialog
box opens.
39
Page 44

CyberLink Medi@Show
2. Select HTML, then click Next.
3. Select a template, then click Next.
40
Page 45

Chapter 3: Exporting
4. Set an export file name and size.
5. Click Finish to export your presentation.
6. Select your final exporting option.
• Open the file: Opens the exported file.
• Open the folder with the file: Opens the folder that
contains the exported file in Windows Explorer.
• Finish the export process: Closes the message box.
41
Page 46

CyberLink Medi@Show
Export in DHTML
By exporting with DHTML, your Medi@Show file will closely
resemble an executable file but the modes (manual or automatic)
will depend on your Playback Settings. Some special effects will
be unavailable (text and transition) along with the background
music. Your export will include one HTML file, JavaScript file
(.JS), and the same number of multimedia files that you have in
their original form.
1. Click Export on the control panel. The Export dialog
box opens.
2. Select the Internet Export option, then click Next.
3. Select DHTML, then click Next.
42
Page 47

Chapter 3: Exporting
4. Select a template, then click Next.
5. Replace your presentation’s special effects (if desired).
• Check the Replace special effects option, then choose
the replacement transition and text effects from the dropdown boxes.
Note: Leaving this option unchecked discards all special
effects in your exported file.
43
Page 48

CyberLink Medi@Show
6. Set an export file name and size.
7. Click Finish to export your presentation.
8. Select your final exporting option.
• Open the file: Opens the exported file.
• Open the folder with the file: Opens the folder that
contains the exported file in Windows Explorer.
• Finish the export process: Closes the message box.
Export in Internet Streaming Format
1. Click Export on the control panel. The Export dialog
box opens.
44
Page 49

Chapter 3: Exporting
2. Select the Internet Export option, then click Next.
3. Select Internet Streaming, then click Next.
4. Select a streaming format, then click Next.
• Check the Include HTML template option to create a
web page (HTML file) with your presentation embedded
in it. If you leave this option unchecked, no HTML file is
created.
45
Page 50

CyberLink Medi@Show
5. Enter a file name and click Browse... to locate a destination
folder.
6. Click Finish to export your presentation.
7. Select your final exporting option.
• Open the file: Opens the exported file.
• Open the folder with the file: Opens the folder that
contains the exported file in Windows Explorer.
• Finish the export process: Closes the message box.
46
Page 51

Technical Support
Before seeking technical support, please read your user's guide
or online help, and check out the Readme file for more
information. You may also contact your local distributor/dealer.
If your problem is still not resolved, the following sections
provide ways to obtain technical support from CyberLink.
Web Support
Web support is available 24 hours a day:
support.gocyberlink.com
In addition to frequently asked questions, our website also
provides troubleshooting techniques, the latest in product news,
and other relevant information.
Fax Support
In order to answer your technical questions as quickly as
possible, you may fax us at:
(886) 2-8667-1300
Note: Technical support is only offered to registered users, so
please make sure to include your CD-key when faxing.
47
Page 52

CyberLink Medi@Show
Telephone Support
You are welcome to call CyberLink's Technical Support Hotline
at:
(886) 2-8667-1298
Note: Technical support is only offered to registered users, so
please make sure your CD-key is ready when calling.
Phone support hours are:
Monday-Friday, 9:00 a.m. - 5:00 p.m. Taiwan local time (GMT
+8:00) excluding holidays.
When calling for support, please have your computer ready and
provide us with the following information:
• registered CD-key
• product version
• Windows version
• hardware types (capture card, sound card, VGA card)
and their specifications
• warning messages displayed
• detailed problem description and when it occurred
48
Page 53

Index
A
Acquire from TWAIN device 13
Adding Slides to the Storyboard 17
Advanced Editing 24
Audio CD recording
Audio Effects 21
audio effects 21
audio formats, supported
Audio Wave Recorder
recording in 15
visual overview
Auto Photo Enhancement 23
Auto playback setting 26
Auto Redeye Removal
B
Background Music settings 26
16
26
6
23
E
Edit Mode 3
Effects Mode 9
export options
Collect Film Files
DFTML 42
Distributable 29
DVD format disc
DVD format file 36
HTML 39
Internet Streaming Format
Screen Saver 31
VCD format disc 34
VCD format file
28
37
44
33
F
fax number for technical support 47
file formats, supported
file types, colors in Library 12
Font Settings 20
2
H
hours of technical support 48
39
HTML
C
Canvas Size setting 25
Collect Film Files
collecting media files 12
control panel visual overview 4
28
D
DHTML 42
Distributable 29
DVD format disc
DVD format file 36
37
I
Image Comparison Options 23
image comparison options
image enhancement 23
Import all media files in folder 13
Import file(s)
Internet Streaming Format 44
13
23
L
Library 7
Loop setting 26
49
Page 54

M
Managing Clips in the Workspace 18
Manual playback setting 26
Manually Acquiring Files
Manually Importing
13
Files
Folders 14
masking effects
microphone narration 15
22
14
N
New version window 23
O
Old version window 23
P
PhotoNow! 24
playback settings 26
previewing your presentation
25
T
tech support phone number 48
Text Effects 20
Text Effects setting
transition effects
Transition Effects setting 25
25
19
V
VCD format disc 34
VCD format file 33
visual overview
Audio Wave Recorder
control panel 4
6
W
website for technical support 47
Wizard-Based Importing 13
working directory 25
R
recording
Audio CD 16
microphone narration 15
Removing Slides from the Storyboard
17
Rotate 24
S
Screen Saver 31
Storyboard 8, 17
supported file formats
system requirements 10
50
2
 Loading...