

Page 1
DS-MULTIX301
› FLIP-UP HELMET
DS -MULTIX301
For your safety we advise you to
read the complete instruction manual
and all warning labels.
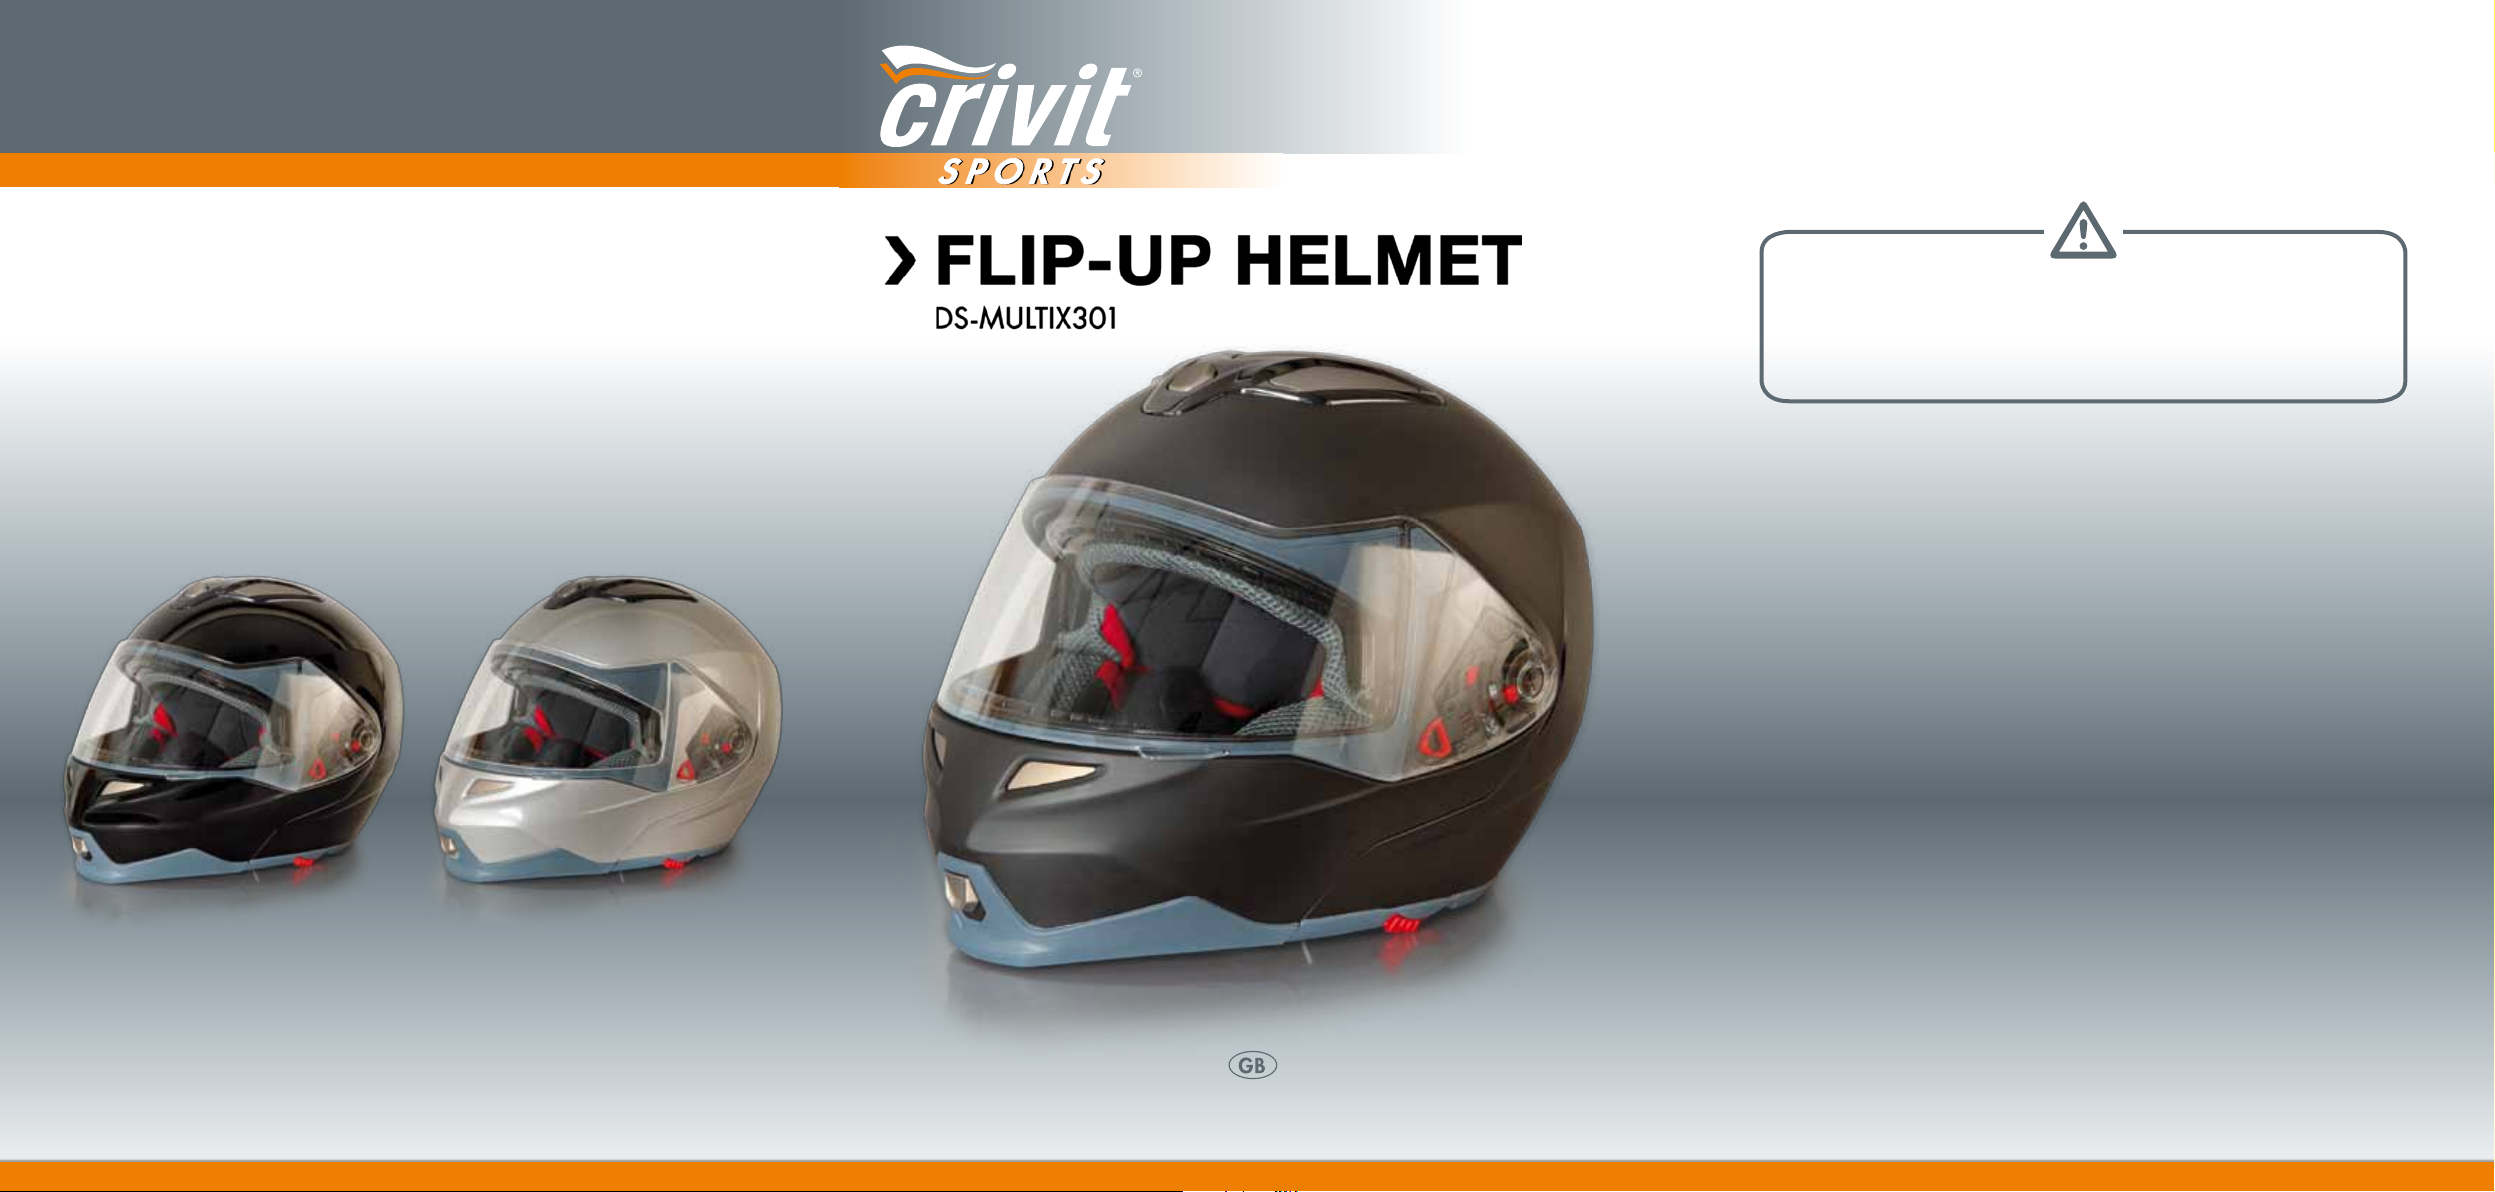
BLACK (GLOSSY) SILVER (GLOSSY)
Version: 02/2012
DELTA-SPORT HANDELSKONTOR GMBH · WRAGEKAMP 6 · D - 22397 HAMBURG
BLACK (MATT)
INSTRUCTION MANUAL
Page 2
DS-MULTIX301
› FLIP-UP HELMET
DS -MULTIX301
For your safety we advise you to
read the complete instruction manual
and all warning labels.
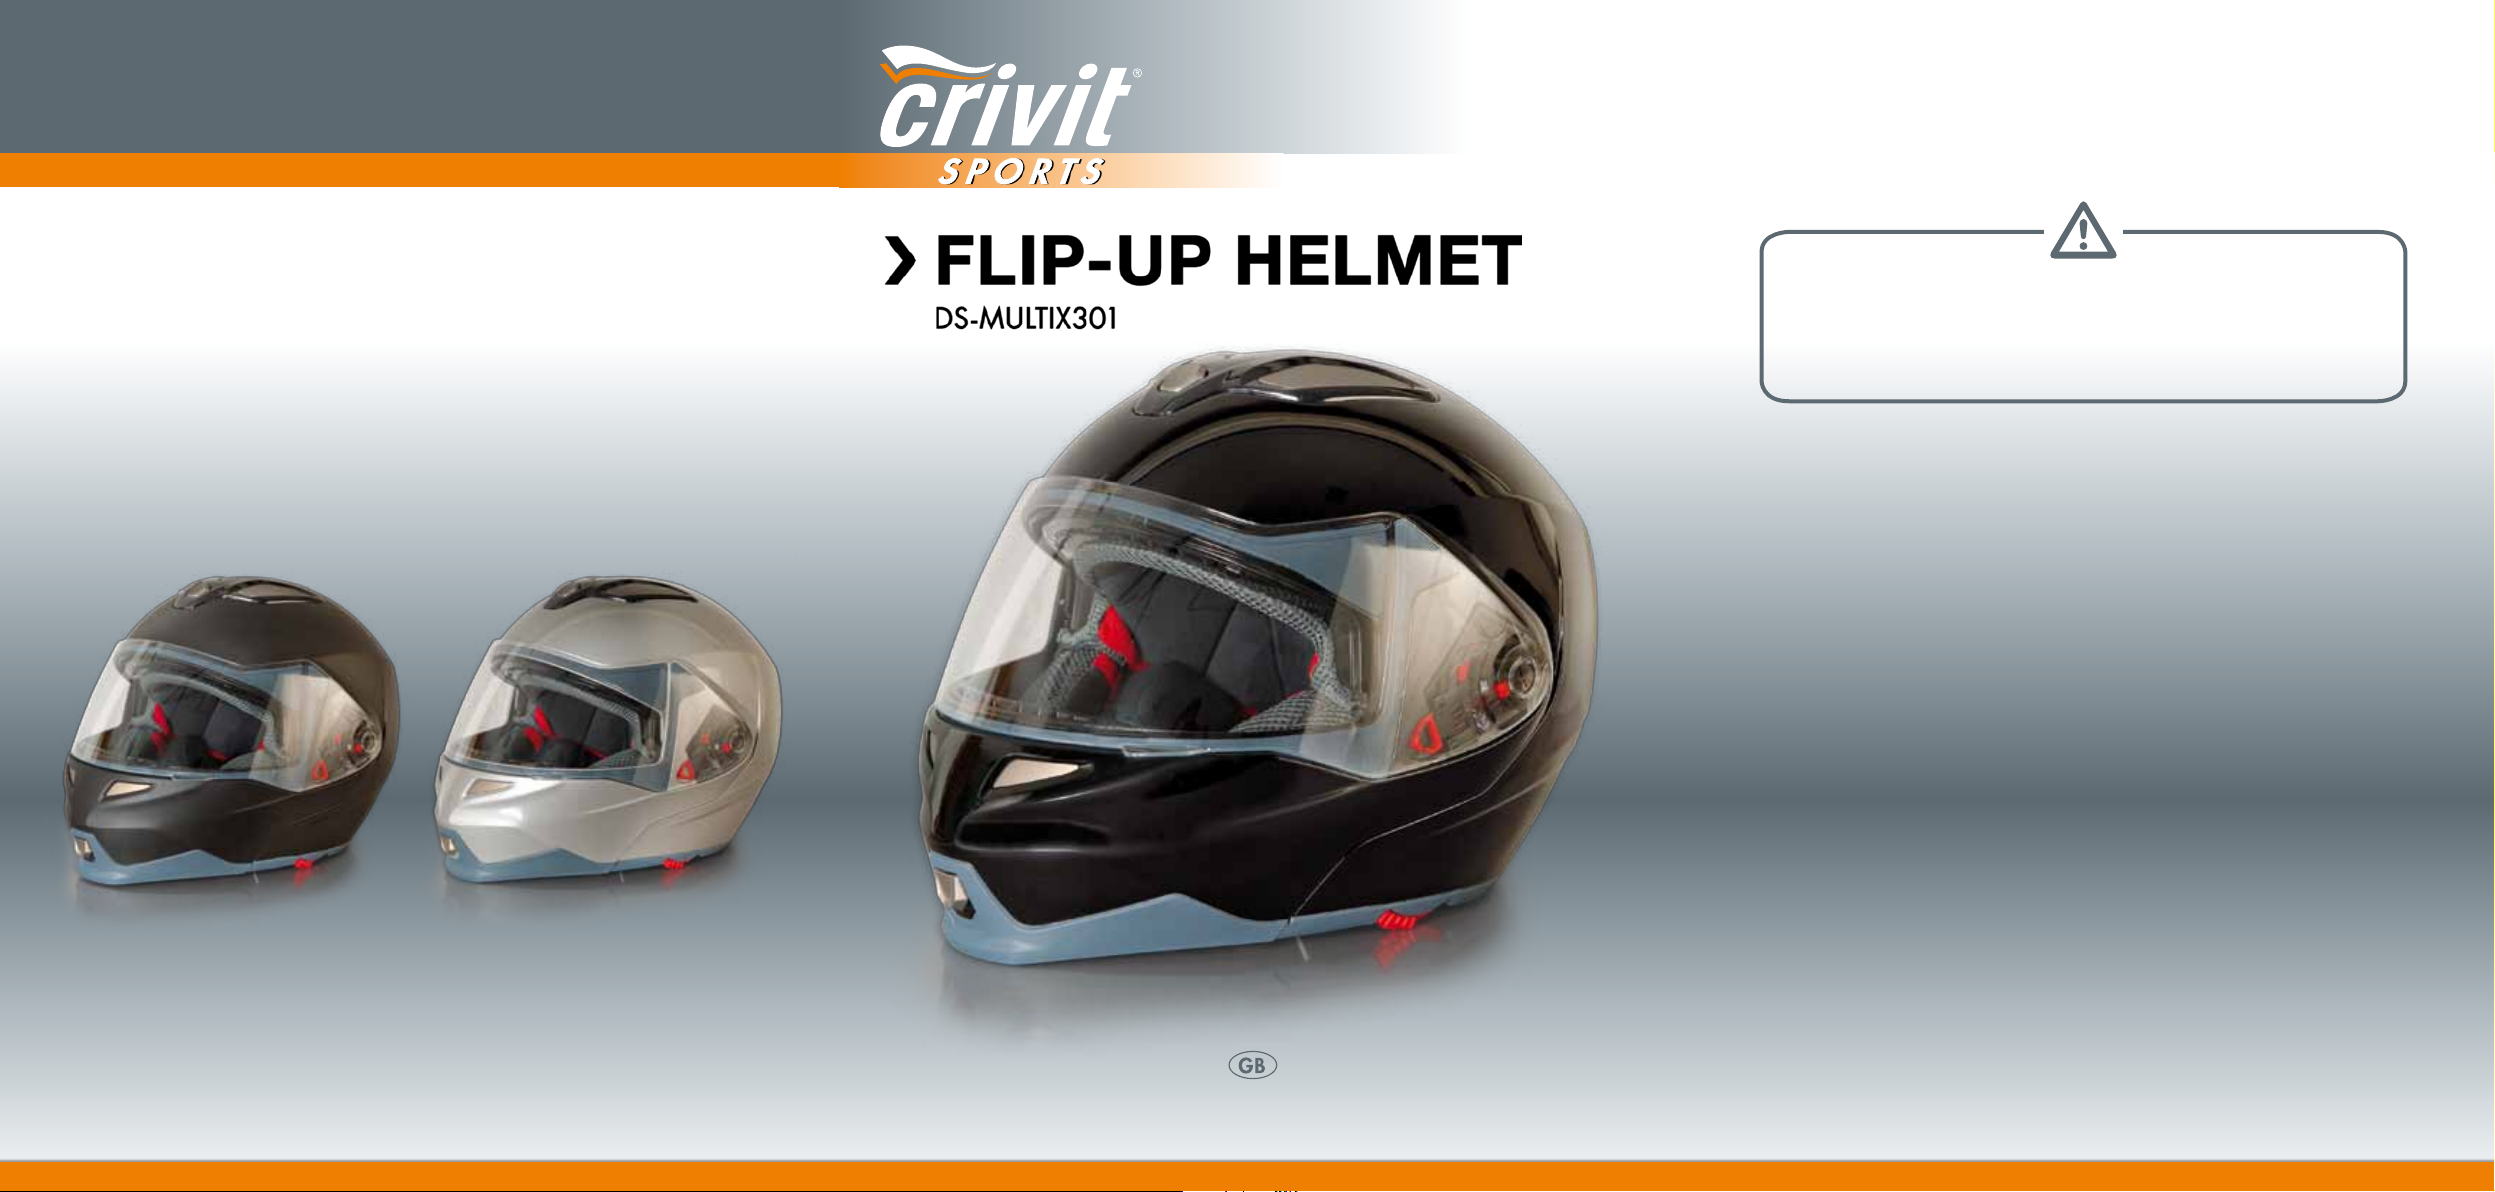
BLACK (MATT) SILVER (GLOSSY)
Version: 02/2012
DELTA-SPORT HANDELSKONTOR GMBH · WRAGEKAMP 6 · D - 22397 HAMBURG
BLACK (GLOSSY)
INSTRUCTION MANUAL
Page 3
DS-MULTIX301
› FLIP-UP HELMET
DS -MULTIX301
For your safety we advise you to
read the complete instruction manual
and all warning labels.
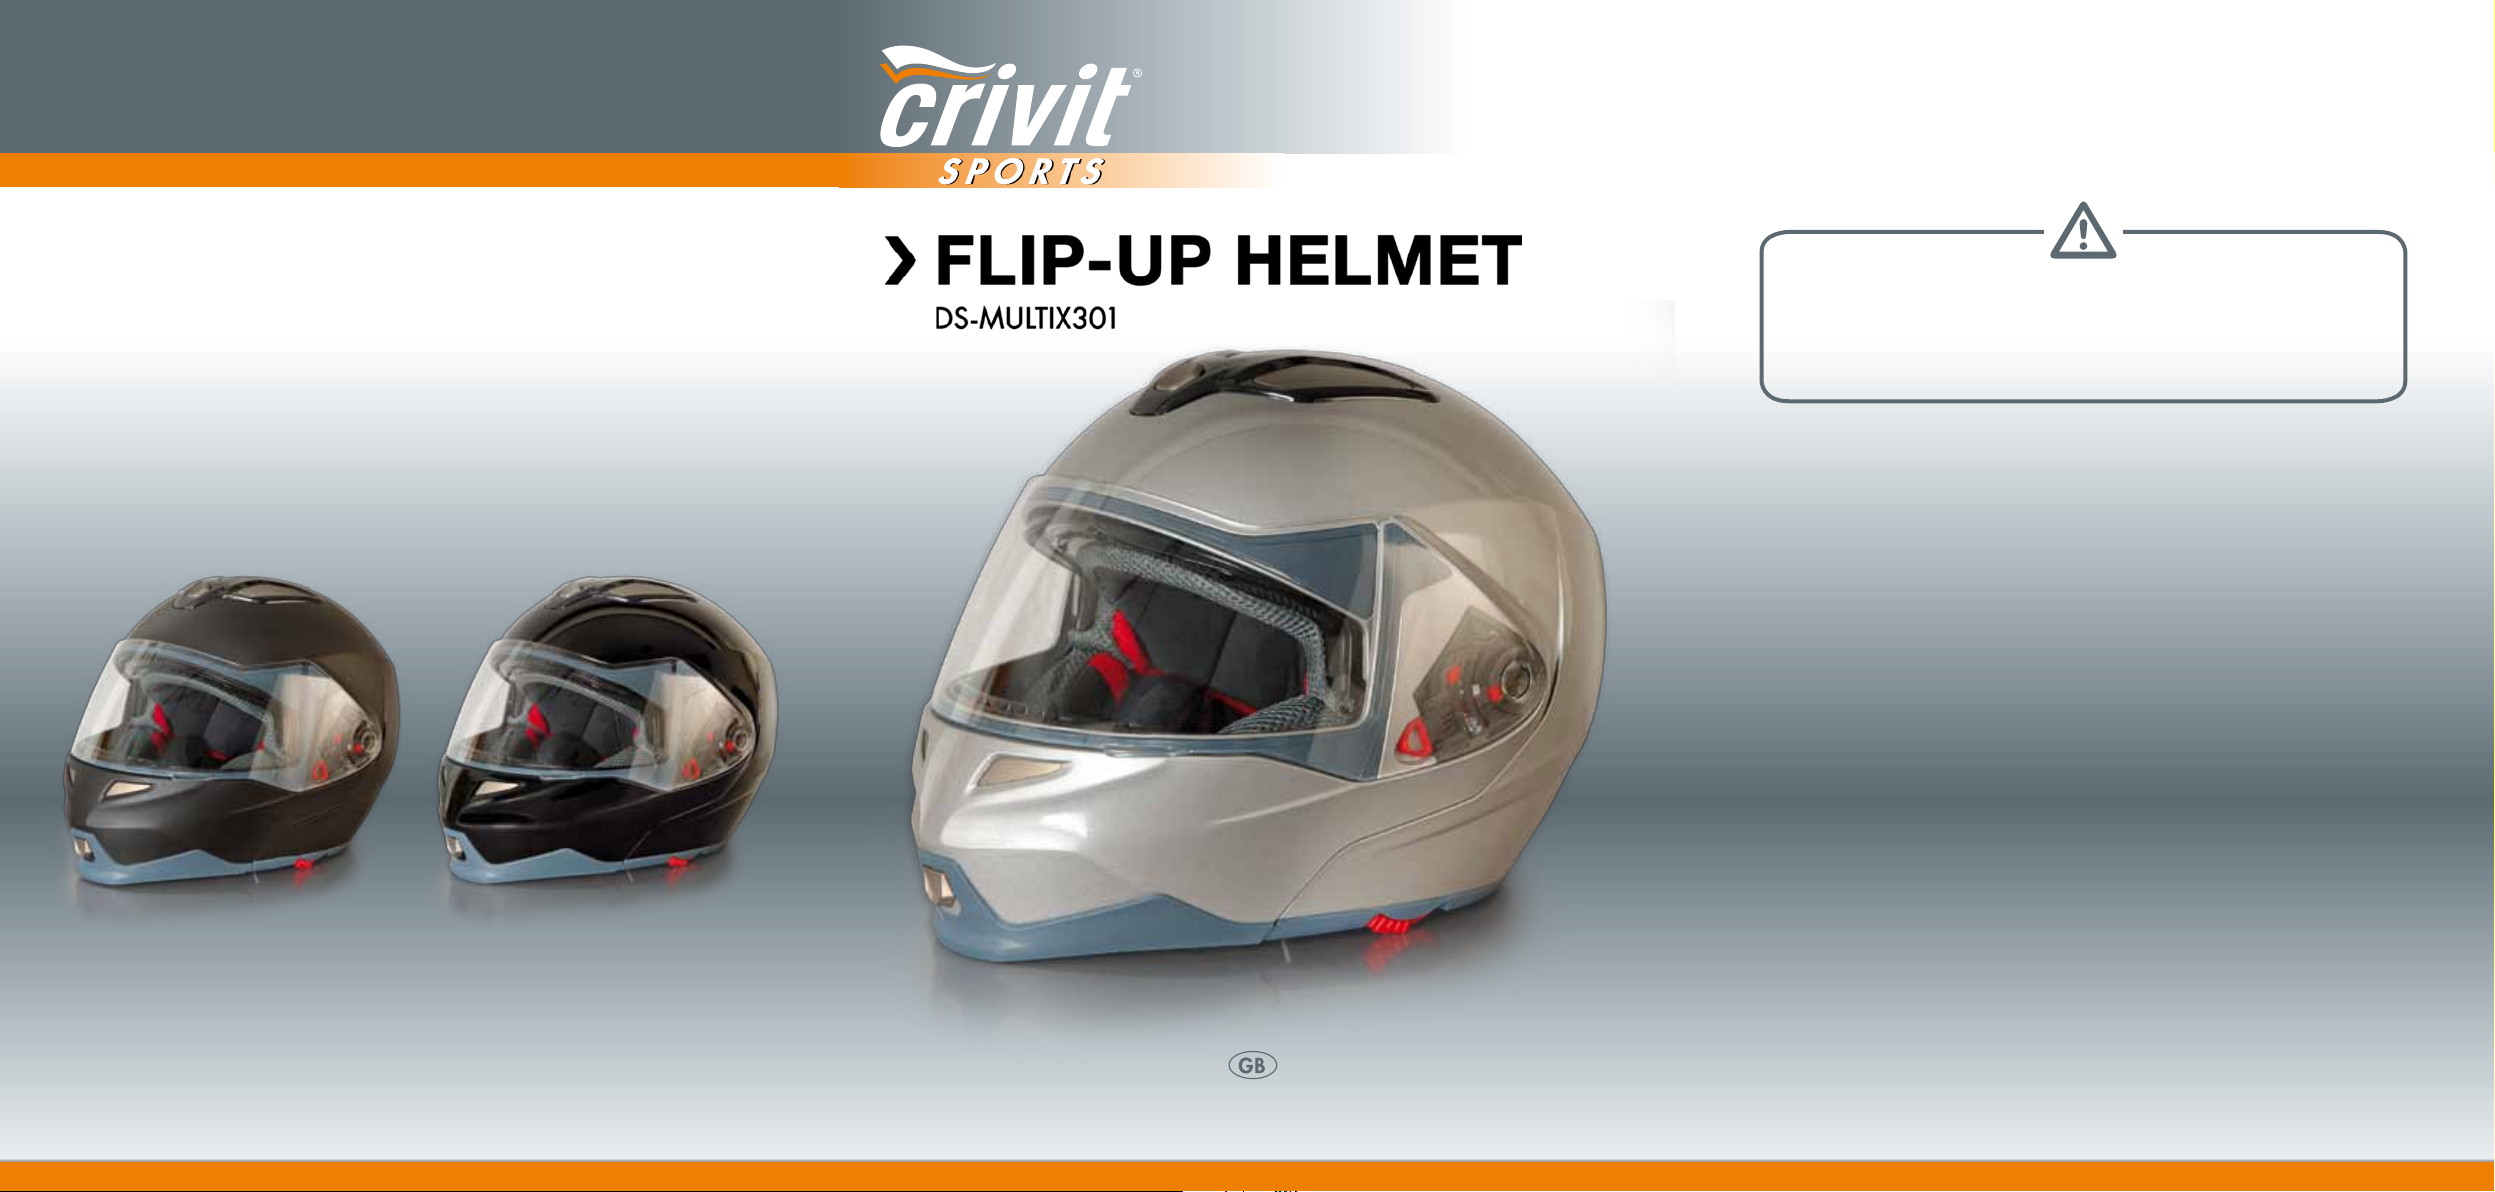
BLACK (MATT) BLACK (GLOSSY)
Version: 02/2012
DELTA-SPORT HANDELSKONTOR GMBH · WRAGEKAMP 6 · D - 22397 HAMBURG
SILVER (GLOSSY)
INSTRUCTION MANUAL
Page 4

1
Storage
When not in use, store the helmet in a dry and well ventilated place at room temperature.
Avoid sources of heat.
7
8
6
3
5
1. Top vent
2. Inside padding
3. Slider for sun shield
with safety latch
4. Chin straps with snap fastener
5. Breath deflector
6. Front vent
7. Pivoted release
8. Chin-wind deflector
9. Visor
10. Sun shield
11. Acoustic damping
12. Cheek pads
13. Visor mechanism
14. Air exhaust
15. Winter collar
16. Standard collar
Disposal instructions
Dispose of the product and all its components through a licensed disposal company or your
municipal disposal facilities. Please observe the current regulations. If in doubt, consult your
disposal facility about an environmentally friendly disposal.
3-year warranty
The product was produced with great care and under constant supervision. You receive a
three-year warranty for this product from the date of purchase. Please retain your receipt.
The warranty applies only to material and workmanship and does not apply to misuse or
improper handling. Your statutory rights, especially the warranty rights, are not affected by
this warranty.
For any complaints, please contact the service hotline below or contact us via email.
Any repairs under the warranty, statutory guarantees or through goodwill do not extend the
warranty period. This also applies to replaced and repaired parts.
Repairs after the warranty are subject to a charge.
Size S Size M Size L Size XL
IAN 69426 IAN 69425 IAN 69424 IAN 69423
PSB LOGISTICS MANAGEMENT LTD
Unit B3 Site B
The Bowman Centre
Arncott, OX25 1NZ Oxon
2
00 800 / 88 08 08 08 (Mon. - Fri. 10 am - 4 pm, free phone)
gb@nws-service.com
http://www.nws-service.com
4
3 4 13
Page 5

FLIP-UP HELMET
Instructions for use
DS-MULTIX301
We hereby congratulate you on the purchase of this motorcycle helmet. Please read the following instructions and information carefully before using your new helmet and keep these
operating instructions in a safe place for later reference!
Important information
Our helmets are manufactured in accordance with the latest technology and are specifically
designed for motorcycling. Whether the owner deems them to be suitable for any other use,
is up to him. Wearing a helmet does not exclude the possibility of injury should an accident
occur.
To guarantee adequate protection this helmet must be well fitting and securely fastened. Every
helmet that is exposed to a hard blow must be replaced.
We guarantee that this item is free of production and material defects. The guarantee does
not apply to normal wear and tear and or in case of improper use.
Scope of Delivery
The scope of delivery for your helmet consists of the following:
- Additional pair of cheek pads for individual size adjustment
- Replacement visor
- Acoustic damping
- Winter collar
- Instruction manual
Safety advice
- Warning:
When riding, the helmet may only be used if the chin piece and visor are closed.
- The helmet is equipped with a hinged sun visor, which may only be used in conjunction with
a closed visor.
- To open the chin piece ( 7 ), press the release and lift the chin piece up ( see Fig. A ).
- To close the chin part, pull the chin section down until it audibly locks into place.
A
- The retention system must always be carefully set and locked.
- Always ensure that there is no airflow restriction inside the helmet.
- Ensure that your visor is clean and scratch-free at all times. Never use smoked visors at night
or when visibility is poor. Exchange damaged visors for a genuine replacement immediately.
Your safety is at risk.
You are able to obtain replacement visors from the stipulated service address for a period of
5 years from the purchase date. Visor type: DS-MULTIX301
- Never make any changes to any part of your helmet. Do not make any alterations to the
outer shell, do not insert screws.
- The helmet may not be painted or have stickers or labels.
- The helmet is designed to absorb the energy of a blow or a collision by destroying some
of its components. In case of a further blow it wouldn’t protect you any longer. After an accident, the helmet must be replaced even though it doesn’t show external damages.
- Refrain from transporting your helmet by hanging it onto any part of your motorcycle. Keep
it away from exhaust pipes and other sources of heat.
- Never use solvents, petrol or other detergents when cleaning the shell and interior of your
helmet. Only use water and pH balanced soap. The padding can be cleaned using soap
and a small brush. The visor should be cleaned with soap and water only, leave it to air-dry.
Do not expose the visor to any source of heat!
- Only use genuine spare parts for your helmet.
5 6
Page 6

Product Characteristics
ECE-R 22.05 Homologation
This helmet is in compliance with ECE-R 22.05 standards and is homologised
accordingly. The ECE-R 22.05 standard consists of uniform conditions for the
approval of protective helmets and its visors for drivers and passengers of motorcycles and mopeds. The basic principles for these tests are the so called ECERegulations of the Economic Commission for Europe.
Significant Tests of the ECE-Regulation 22.05
- Shock absorbance
- Dynamic test of wear features
- Field of vision test
- Design strength
- Sustainability test (Strip-off test)
- Chin straps and lock test
- Shear test for outside edges
- Friction performance test of the outer shell
- Visor test (mechanical and visual characteristics)
- Chin bar, chin part damping test
Pure by HeiQ®
The inside padding is made with newly developed Pure Technology.
Pure is an anti-bacterial odour inhibitor featuring silver microcomposite particles for sports and recreational garments developed and manufactured by the
Swiss High-Tech company HeiQ®.
The micro fibres of the helmet lining are made with an innovative, anti-bacterial
effective silver-technology. The anti-bacterial effect of silver has already been
well-established for centuries. HeiQ® has further fortified these characteristics
to effectively and permanently prevent an odour formation.
A n t i F o g
The visor and the sun shade feature an anti-fog coating.
The anti-fog coating is the result of a special surface treatment that is used for
motorcycle visors among other things. This special coating prevents that the visor
fogs up quickly with breathable air. For these products this increases user safety.
Anti Scratch
To reduce the risk of scratching, the built-in visor and the replacement visor
feature a special coating. This coating prevents rapid scratching of the external
part of the visor.
TÜV certified wearing comfort
The TÜV Rhineland evaluates performance and comfort of helmets by means of
test subjects. Only helmets that meet these stringent requirements are awarded
the desired logo. Aspects such as aerodynamics, acoustics, ventilation, comfort
and fit are rated.
Toxproof
The Toxproof-sign of the Technical Inspection Authority (TÜV) Rhineland
identifies products that have been tested for toxic substances where no
health hazards can be expected according to the perception of today.
Inside Padding with Coolmax® Inserts
Coolmax® by INVISTA is a high-performance fabric fibre that supports
its wearers during sport activities. Based on the patented DuPont-fibre
technology, Coolmax® transports moisture from the body to the fabric surface where it dries
quicker than with any other fabric.
The specially developed fibres of INVISTA that are used for Coolmax®-fabrics transport the
moisture away from the body to the surface of the fabric where it has the opportunity to evaporate quickly. At the same time the uniquely formed fibres offer maximum breathing activity,
even in wet conditions. In addition the breathing activity improves the heat regulating effect.
Cheeks, forehead and neck pads of this article are equipped with Coolmax®.
Breath deflector and visor ventilation
B
The breath deflector ( 5 ) decreases fogging of the visor due to exhaled air. Additionally, the air circulation in the visor area is improved.
Construction for those who wear glasses
The helmet is also suitable for those who wear glasses. An extra soft padding improves the
wearing comfort for those who wear glasses.
HCM Technology
High Density Copolymer Matrix: High quality ABS plastic is formed under extreme heat and pressure to make a robust and impact-resistant
outer shell.
7 8
Page 7

Use and installation instructions
Inner Lining
C
Chin-Wind Deflector
D
Snap-Fastener System
E
The inner lining ( 2 ) can be completely removed and
cleaned separately (see care instructions).
To remove the inner lining, firstly remove the helmet
collar and the cheek pads. Then undo the back pressstuds of the inner lining and pull the clips of the inner
lining from the front side of the helmet ( see Fig. C ).
The chin wind deflector ( 8 ) is secured to the pivoted
piece by means of snaps.
This can be removed and re-attached as required
( see Fig. D ).
The snap-fastener enables an individual and quick
vernier adjustment of the chin strap.
Press the snap-fastener together until the helmet is sitting comfortably but firm ( see Fig. E ).
By means of the snap at the end of the chinstrap,
the excess chinstrap can be attached to additionally
secure it.
Cheek Pads
G
Acoustic Damping
H
Front Vent
I
You will receive two different pairs of cheek pads ( 12 )
for individual size adjustment.
The thinner cheek-pads are already pre-mounted as
standard. The thicker cheek pad is enclosed with the
helmet separately.
If the helmet is too loose and therefore is not sitting
firmly on your head, you can replace the thin cheek
pad with the thicker ones.
The cheek pads are affixed via three press-studs respectively in the helmet. You can easily remove the
pads ( see Fig. G ). The thicker cheek pads can now
also be affixed in the helmet with three press-studs.
You need to be able to hear that each press-stud
locks-in.
The acoustic damping ( 11 ) is for noise reduction, in
particular when driving at high speeds.
Press the acoustic damping into the cavity of the cheek
pads ( see Fig. H ). The acoustic side pad equipped
with Velcro faces towards the helmet shell.
The front vent ( 6 ) can be opened and closed by
means of a slider ( see Fig. I ).
Sun Shield
F
The integrated sun shield ( 10 ) will enable you to quickly and easily react to
changed light conditions with the aid of
the patent mechanism.
To pull out and retract the sun shield,
press the safety latch to operate the
slider ( 3 ) ( see Fig. F ).
Note:
- Please take care that the edge of the sun shield does
not block your field of vision.
- The sun shield may only be used when the visor is
closed and may only be used during the day.
9 10
Top Vent
J
The top vent ( 1 ) can be opened and closed by means
of a slider ( see Fig. J ).
Page 8

Winter Collar
K
L
Visor Replacement
M
N
To reduce the wind inlet at the bottom of the helmet
during periods with very cold temperatures, the preinstalled standard collar ( 16 ) can be replaced with
the supplied winter collar ( 15 ).
Removing the standard collar
Pull the one-piece standard collar out of the helmet
( see Fig. K ).
Inserting the Winter Collar
First attach the plastic clip in the centre at the back
part of the helmet in the groove between the outer
shell and the padding.
Once the plastic clip is completed locked-in, press the
complete winter collar again firmly onto the padding
of the helmet ( see Fig. L ).
If the pre-mounted visor ( 9 ) is damaged or severely
scratched, you can exchange it with the replacement
visor.
Removal of the Visor
- Slide the visor into the highest position (fully opened)
( see Fig. M ).
- Pull the red visor-locking lever and remove the visor
( see Fig. N ).
Inserting the Visor
- Place the replacement helmet on the hold-down
device and observe the correct positioning in the
process (fully opened) ( see Fig. M ).
- Pull the red visor-locking level and place the visor
appropriately ( see Fig. N ).
- Allow the replacement visor to snap in and close the
visor.
Selecting the correct helmet size
- Choose your helmet by measuring the circumference
of your head with a flexible tape measure. Always
try on a couple of different sizes before buying a
close fitting helmet. When wearing the helmet, the
skin of your temples should ideally move with it.
- Make sure that the helmet does not move around
when the retention system is open.
- The retention system must be set securely. The
chinstrap must sit comfortably under the chin as far
back towards the neck as possible. Fasten it as tight
as possible. The right degree of tension is reached
once you find it difficult to insert your finger between
the chinstrap and neck, yet finding it easy to breath
and swallow. Make sure that the helmet sits securely
once the retention system is on. Make sure that the
helmet does not restrict your movements, e.g. when
turning your head to look behind you.
- Make sure the helmet carries a sticker certifying
homologation.
Size table
Size
S 55 – 56 cm
M 57 – 58 cm
L 59 – 60 cm
XL 61 cm
circumference
Head
Maintenance and Care
Regular maintenance and care contributes to safety and maintaining the helmet.
Cleaning of the Helmet
- Never use solvents, petrol or other detergents when cleaning the shell and interior of your
helmet.
- Only use water and pH balanced soap.
Visor care and cleaning
- After using the helmet, with a soft cloth, lightly wipe off any grime (e.g. dead insects, dirt,
sand, dust etc.) from the visor and then fully wipe it clean using a dry soft cloth.
- When the visor gets wet (e.g. rainwater) it should always be wiped with a soft cloth.
- When cleaning the visor, never use any petroleum-based solvents or detergents containing
abrasives.
Cleaning of the Cheek Pads, Acoustic Pads and Inside Pads
- Hand wash below 30° C.
- Allow to dry at room temperature.
- Avoid sources of heat.
- When not in use, store in a dry, well ventilated place.
11 12
 Loading...