

Page 1

Page 2

Table of contents
Welcome to WordPerfect MAIL. . . . . . . . . . . . . . . . . . . . . . . . . . . . . . . . . .1
What’s included in WordPerfect MAIL. . . . . . . . . . . . . . . . . . . . . . . . . . . . . . . . 1
The WordPerfect MAIL workspace. . . . . . . . . . . . . . . . . . . . . . . . . . . . . . . . . . . 2
To show, hide, or change the display of the Navigation pane . . . . . . . . . . . . . 4
To change the display of the Preview pane. . . . . . . . . . . . . . . . . . . . . . . . . . . 4
To hide or display message header information in the Preview pane . . . . . . . . 4
To display columns in the Message list. . . . . . . . . . . . . . . . . . . . . . . . . . . . . . 4
To rearrange columns in the Message list. . . . . . . . . . . . . . . . . . . . . . . . . . . . 4
To sort a column in the Message list. . . . . . . . . . . . . . . . . . . . . . . . . . . . . . . . 5
To hide or display Calendar Peek . . . . . . . . . . . . . . . . . . . . . . . . . . . . . . . . . . 5
To flag a message. . . . . . . . . . . . . . . . . . . . . . . . . . . . . . . . . . . . . . . . . . . . . . 5
To mark a message as read or unread. . . . . . . . . . . . . . . . . . . . . . . . . . . . . . . 5
Moving between WordPerfect MAIL applications. . . . . . . . . . . . . . . . . . . . . . . . 5
To display the Calendar window. . . . . . . . . . . . . . . . . . . . . . . . . . . . . . . . . . . 5
To display the Contacts window. . . . . . . . . . . . . . . . . . . . . . . . . . . . . . . . . . . 6
To display the Mail window. . . . . . . . . . . . . . . . . . . . . . . . . . . . . . . . . . . . . . 6
Fast filing . . . . . . . . . . . . . . . . . . . . . . . . . . . . . . . . . . . . . . . . . . . . . . . . . . . . . . 6
To change the Fast File folder. . . . . . . . . . . . . . . . . . . . . . . . . . . . . . . . . . . . . 6
To quickly file messages into this folder . . . . . . . . . . . . . . . . . . . . . . . . . . . . . 6
Configuring WordPerfect MAIL. . . . . . . . . . . . . . . . . . . . . . . . . . . . . . . . . .7
Importing data from another e-mail program . . . . . . . . . . . . . . . . . . . . . . . . . . . 7
To import from Outlook Express . . . . . . . . . . . . . . . . . . . . . . . . . . . . . . . . . . 8
To import from Outlook 98, 2000, or 2002. . . . . . . . . . . . . . . . . . . . . . . . . . 9
To import from Eudora . . . . . . . . . . . . . . . . . . . . . . . . . . . . . . . . . . . . . . . . . 9
To import from Netscape 7.0. . . . . . . . . . . . . . . . . . . . . . . . . . . . . . . . . . . . 10
To import from Netscape 4.x. . . . . . . . . . . . . . . . . . . . . . . . . . . . . . . . . . . . 11
Importing Vcards . . . . . . . . . . . . . . . . . . . . . . . . . . . . . . . . . . . . . . . . . . . . . . . 12
To import Vcards. . . . . . . . . . . . . . . . . . . . . . . . . . . . . . . . . . . . . . . . . . . . . 12
Importing and exporting Mbox files . . . . . . . . . . . . . . . . . . . . . . . . . . . . . . . . . 12
To import messages from Mbox files . . . . . . . . . . . . . . . . . . . . . . . . . . . . . . 13
To export messages to an Mbox file . . . . . . . . . . . . . . . . . . . . . . . . . . . . . . . 13
Creating an account or alias. . . . . . . . . . . . . . . . . . . . . . . . . . . . . . . . . . . . . . . . 14
To create an account or alias. . . . . . . . . . . . . . . . . . . . . . . . . . . . . . . . . . . . . 15
To specify account downloading preferences. . . . . . . . . . . . . . . . . . . . . . . . . 16
To set a default account . . . . . . . . . . . . . . . . . . . . . . . . . . . . . . . . . . . . . . . . 17
Table of contents i
Page 3

Modifying and deleting e-mail accounts and aliases . . . . . . . . . . . . . . . . . . . . . .18
To modify an account or alias . . . . . . . . . . . . . . . . . . . . . . . . . . . . . . . . . . . . 1 8
To delete an account or alias. . . . . . . . . . . . . . . . . . . . . . . . . . . . . . . . . . . . . 18
Playing a sound when receiving messages. . . . . . . . . . . . . . . . . . . . . . . . . . . . . .19
To play a sound when receiving messages. . . . . . . . . . . . . . . . . . . . . . . . . . . 1 9
Designating an outgoing server . . . . . . . . . . . . . . . . . . . . . . . . . . . . . . . . . . . . .19
To designate an outgoing server . . . . . . . . . . . . . . . . . . . . . . . . . . . . . . . . . .19
Outgoing server authentication . . . . . . . . . . . . . . . . . . . . . . . . . . . . . . . . . . . . .21
To provide authentication information . . . . . . . . . . . . . . . . . . . . . . . . . . . . . 21
Deleting an outgoing server. . . . . . . . . . . . . . . . . . . . . . . . . . . . . . . . . . . . . . . .21
To delete an outgoing server. . . . . . . . . . . . . . . . . . . . . . . . . . . . . . . . . . . . .21
Creating signatures . . . . . . . . . . . . . . . . . . . . . . . . . . . . . . . . . . . . . . . . . . . . . . 2 2
To create a signature. . . . . . . . . . . . . . . . . . . . . . . . . . . . . . . . . . . . . . . . . . . 22
To choose a default signature for an account. . . . . . . . . . . . . . . . . . . . . . . . . 23
To apply a signature to a message . . . . . . . . . . . . . . . . . . . . . . . . . . . . . . . . . 24
To add a hyperlink to a signature file . . . . . . . . . . . . . . . . . . . . . . . . . . . . . . 24
To add an image to a signature file. . . . . . . . . . . . . . . . . . . . . . . . . . . . . . . . 24
Editing and deleting signatures . . . . . . . . . . . . . . . . . . . . . . . . . . . . . . . . . . . . .25
To edit a signature . . . . . . . . . . . . . . . . . . . . . . . . . . . . . . . . . . . . . . . . . . . .26
To delete a signature from your account settings. . . . . . . . . . . . . . . . . . . . . . 26
Managing a list of contacts . . . . . . . . . . . . . . . . . . . . . . . . . . . . . . . . . . .27
Displaying the Contacts window . . . . . . . . . . . . . . . . . . . . . . . . . . . . . . . . . . . .27
To display the Contacts window. . . . . . . . . . . . . . . . . . . . . . . . . . . . . . . . . .27
Importing contacts. . . . . . . . . . . . . . . . . . . . . . . . . . . . . . . . . . . . . . . . . . . . . . .28
To import contacts from another e-mail program . . . . . . . . . . . . . . . . . . . . . 28
To import contacts from the Netscape 4.x Address Book . . . . . . . . . . . . . . .28
Managing contacts. . . . . . . . . . . . . . . . . . . . . . . . . . . . . . . . . . . . . . . . . . . . . . . 29
To add a contact. . . . . . . . . . . . . . . . . . . . . . . . . . . . . . . . . . . . . . . . . . . . . .29
To categorize a contact. . . . . . . . . . . . . . . . . . . . . . . . . . . . . . . . . . . . . . . . .30
To edit a contact. . . . . . . . . . . . . . . . . . . . . . . . . . . . . . . . . . . . . . . . . . . . . .30
To delete a contact . . . . . . . . . . . . . . . . . . . . . . . . . . . . . . . . . . . . . . . . . . . .30
Managing distribution lists . . . . . . . . . . . . . . . . . . . . . . . . . . . . . . . . . . . . . . . .31
To create a distribution list. . . . . . . . . . . . . . . . . . . . . . . . . . . . . . . . . . . . . .31
To edit a distribution list . . . . . . . . . . . . . . . . . . . . . . . . . . . . . . . . . . . . . . . 3 1
To delete a distribution list. . . . . . . . . . . . . . . . . . . . . . . . . . . . . . . . . . . . . .32
Viewing contacts . . . . . . . . . . . . . . . . . . . . . . . . . . . . . . . . . . . . . . . . . . . . . . . .32
To search for a contact . . . . . . . . . . . . . . . . . . . . . . . . . . . . . . . . . . . . . . . . .32
ii Table of contents
Page 4

To sort contacts . . . . . . . . . . . . . . . . . . . . . . . . . . . . . . . . . . . . . . . . . . . . . . 32
To customize the Contacts list . . . . . . . . . . . . . . . . . . . . . . . . . . . . . . . . . . . 33
Sending e-mail from the Contacts window. . . . . . . . . . . . . . . . . . . . . . . . . . . . . 33
To send a message from the Contacts window . . . . . . . . . . . . . . . . . . . . . . . 33
To send contact information from the Contacts window. . . . . . . . . . . . . . . . 33
Printing contact information. . . . . . . . . . . . . . . . . . . . . . . . . . . . . . . . . . . . . . . 34
To preview contact information before you print it. . . . . . . . . . . . . . . . . . . . 34
To print contact information . . . . . . . . . . . . . . . . . . . . . . . . . . . . . . . . . . . . 34
Using the Calendar . . . . . . . . . . . . . . . . . . . . . . . . . . . . . . . . . . . . . . . . . .35
Viewing calendars. . . . . . . . . . . . . . . . . . . . . . . . . . . . . . . . . . . . . . . . . . . . . . . 3 5
To display the Calendar window. . . . . . . . . . . . . . . . . . . . . . . . . . . . . . . . . . 36
To display or hide available calendars. . . . . . . . . . . . . . . . . . . . . . . . . . . . . . 36
To change the Calendar view . . . . . . . . . . . . . . . . . . . . . . . . . . . . . . . . . . . . 36
To display or hide Calendar Peek . . . . . . . . . . . . . . . . . . . . . . . . . . . . . . . . . 36
Navigating calendars. . . . . . . . . . . . . . . . . . . . . . . . . . . . . . . . . . . . . . . . . . . . . 37
To scroll through the Calendar. . . . . . . . . . . . . . . . . . . . . . . . . . . . . . . . . . . 37
To advance to the current date. . . . . . . . . . . . . . . . . . . . . . . . . . . . . . . . . . . 3 7
To advance to a specified date . . . . . . . . . . . . . . . . . . . . . . . . . . . . . . . . . . . 37
To navigate the Calendar by using the Date Picker . . . . . . . . . . . . . . . . . . . 37
Managing multiple calendars. . . . . . . . . . . . . . . . . . . . . . . . . . . . . . . . . . . . . . . 38
To add a calendar. . . . . . . . . . . . . . . . . . . . . . . . . . . . . . . . . . . . . . . . . . . . . 38
To change the default calendar. . . . . . . . . . . . . . . . . . . . . . . . . . . . . . . . . . . 39
To display or hide events from other calendars. . . . . . . . . . . . . . . . . . . . . . . 39
To edit a calendar’s settings . . . . . . . . . . . . . . . . . . . . . . . . . . . . . . . . . . . . . 39
To delete a calendar. . . . . . . . . . . . . . . . . . . . . . . . . . . . . . . . . . . . . . . . . . . 39
Importing and exporting calendars . . . . . . . . . . . . . . . . . . . . . . . . . . . . . . . . . . 40
To import your calendar from Microsoft Outlook. . . . . . . . . . . . . . . . . . . . . 40
To import your calendar from iCalendar. . . . . . . . . . . . . . . . . . . . . . . . . . . . 40
To export a calendar. . . . . . . . . . . . . . . . . . . . . . . . . . . . . . . . . . . . . . . . . . . 41
Subscribing to calendars . . . . . . . . . . . . . . . . . . . . . . . . . . . . . . . . . . . . . . . . . . 42
To subscribe to a calendar . . . . . . . . . . . . . . . . . . . . . . . . . . . . . . . . . . . . . . 42
To download changes from a calendar manually. . . . . . . . . . . . . . . . . . . . . . 42
To edit the settings for a calendar to which you have subscribed. . . . . . . . . . 42
To unsubscribe from a calendar . . . . . . . . . . . . . . . . . . . . . . . . . . . . . . . . . . 43
Printing calendars. . . . . . . . . . . . . . . . . . . . . . . . . . . . . . . . . . . . . . . . . . . . . . . 4 3
To preview a calendar before you print it . . . . . . . . . . . . . . . . . . . . . . . . . . . 43
To print a calendar . . . . . . . . . . . . . . . . . . . . . . . . . . . . . . . . . . . . . . . . . . . . 43
Table of contents iii
Page 5

Creating events . . . . . . . . . . . . . . . . . . . . . . . . . . . . . . . . . . . . . . . . . . . . . . . . .44
To create an event. . . . . . . . . . . . . . . . . . . . . . . . . . . . . . . . . . . . . . . . . . . . .45
To view the details of an event . . . . . . . . . . . . . . . . . . . . . . . . . . . . . . . . . . .46
Editing events . . . . . . . . . . . . . . . . . . . . . . . . . . . . . . . . . . . . . . . . . . . . . . . . . .46
To edit an event . . . . . . . . . . . . . . . . . . . . . . . . . . . . . . . . . . . . . . . . . . . . . . 46
Searching for events. . . . . . . . . . . . . . . . . . . . . . . . . . . . . . . . . . . . . . . . . . . . . .47
To search for an event. . . . . . . . . . . . . . . . . . . . . . . . . . . . . . . . . . . . . . . . . . 47
Deleting events . . . . . . . . . . . . . . . . . . . . . . . . . . . . . . . . . . . . . . . . . . . . . . . . .48
To delete an event . . . . . . . . . . . . . . . . . . . . . . . . . . . . . . . . . . . . . . . . . . . .48
To display or hide deleted events . . . . . . . . . . . . . . . . . . . . . . . . . . . . . . . . .48
Configuring spam protection . . . . . . . . . . . . . . . . . . . . . . . . . . . . . . . . . .49
Setting up SAproxy Pro . . . . . . . . . . . . . . . . . . . . . . . . . . . . . . . . . . . . . . . . . . .50
To enable spam protection for an e-mail account . . . . . . . . . . . . . . . . . . . . .50
To adjust the spam threshold . . . . . . . . . . . . . . . . . . . . . . . . . . . . . . . . . . . . 50
To add a subject tag to spam messages . . . . . . . . . . . . . . . . . . . . . . . . . . . . .51
To adjust the safety level. . . . . . . . . . . . . . . . . . . . . . . . . . . . . . . . . . . . . . . . 5 1
Training SAproxy Pro . . . . . . . . . . . . . . . . . . . . . . . . . . . . . . . . . . . . . . . . . . . .51
To train SAproxy Pro . . . . . . . . . . . . . . . . . . . . . . . . . . . . . . . . . . . . . . . . . .52
Using the white list and blacklist. . . . . . . . . . . . . . . . . . . . . . . . . . . . . . . . . . . .53
To add a single entry to the white list. . . . . . . . . . . . . . . . . . . . . . . . . . . . . . 54
To add all your contacts to the white list. . . . . . . . . . . . . . . . . . . . . . . . . . . .54
To add an entry to the blacklist . . . . . . . . . . . . . . . . . . . . . . . . . . . . . . . . . .54
Using rules. . . . . . . . . . . . . . . . . . . . . . . . . . . . . . . . . . . . . . . . . . . . . . . . . . . . .54
To create a rule. . . . . . . . . . . . . . . . . . . . . . . . . . . . . . . . . . . . . . . . . . . . . . .55
Using community blacklists. . . . . . . . . . . . . . . . . . . . . . . . . . . . . . . . . . . . . . . .56
To enable the community blacklists . . . . . . . . . . . . . . . . . . . . . . . . . . . . . . .56
Using historical averaging . . . . . . . . . . . . . . . . . . . . . . . . . . . . . . . . . . . . . . . . . 57
To disable historical averaging . . . . . . . . . . . . . . . . . . . . . . . . . . . . . . . . . . .58
Searching in WordPerfect MAIL . . . . . . . . . . . . . . . . . . . . . . . . . . . . . . . .59
Understanding the basics of searching . . . . . . . . . . . . . . . . . . . . . . . . . . . . . . . . 59
Searching the Inbox. . . . . . . . . . . . . . . . . . . . . . . . . . . . . . . . . . . . . . . . . . . . . .60
To search your Inbox . . . . . . . . . . . . . . . . . . . . . . . . . . . . . . . . . . . . . . . . . . 6 0
One-Click searching. . . . . . . . . . . . . . . . . . . . . . . . . . . . . . . . . . . . . . . . . . . . . . 6 0
To use one-click search . . . . . . . . . . . . . . . . . . . . . . . . . . . . . . . . . . . . . . . . . 6 1
Performing easy and complex searches. . . . . . . . . . . . . . . . . . . . . . . . . . . . . . . . 6 1
To perform an easy search. . . . . . . . . . . . . . . . . . . . . . . . . . . . . . . . . . . . . . . 61
iv Table of contents
Page 6

To search a specific folder. . . . . . . . . . . . . . . . . . . . . . . . . . . . . . . . . . . . . . . 62
To perform a complex search . . . . . . . . . . . . . . . . . . . . . . . . . . . . . . . . . . . . 62
Searching by dates. . . . . . . . . . . . . . . . . . . . . . . . . . . . . . . . . . . . . . . . . . . . . . . 64
To search by date. . . . . . . . . . . . . . . . . . . . . . . . . . . . . . . . . . . . . . . . . . . . . 64
Using searching shortcuts . . . . . . . . . . . . . . . . . . . . . . . . . . . . . . . . . . . . . . . . . 64
Saving searches . . . . . . . . . . . . . . . . . . . . . . . . . . . . . . . . . . . . . . . . . . . . . . . . . 65
To save your search . . . . . . . . . . . . . . . . . . . . . . . . . . . . . . . . . . . . . . . . . . . 66
Navigating searches. . . . . . . . . . . . . . . . . . . . . . . . . . . . . . . . . . . . . . . . . . . . . . 67
To navigate searches. . . . . . . . . . . . . . . . . . . . . . . . . . . . . . . . . . . . . . . . . . . 67
Using Web shortcuts. . . . . . . . . . . . . . . . . . . . . . . . . . . . . . . . . . . . . . . . . . . . . 68
To find a word in the dictionary. . . . . . . . . . . . . . . . . . . . . . . . . . . . . . . . . . 68
To find a word in the thesaurus . . . . . . . . . . . . . . . . . . . . . . . . . . . . . . . . . . 68
To search the Web. . . . . . . . . . . . . . . . . . . . . . . . . . . . . . . . . . . . . . . . . . . . 68
To find news items. . . . . . . . . . . . . . . . . . . . . . . . . . . . . . . . . . . . . . . . . . . . 69
To find a stock quote . . . . . . . . . . . . . . . . . . . . . . . . . . . . . . . . . . . . . . . . . . 69
To locate a contact. . . . . . . . . . . . . . . . . . . . . . . . . . . . . . . . . . . . . . . . . . . . 69
To find a phone number. . . . . . . . . . . . . . . . . . . . . . . . . . . . . . . . . . . . . . . . 70
To find news items. . . . . . . . . . . . . . . . . . . . . . . . . . . . . . . . . . . . . . . . . . . . 70
Working with folders . . . . . . . . . . . . . . . . . . . . . . . . . . . . . . . . . . . . . . . .71
Creating folders. . . . . . . . . . . . . . . . . . . . . . . . . . . . . . . . . . . . . . . . . . . . . . . . . 71
To create a new folder . . . . . . . . . . . . . . . . . . . . . . . . . . . . . . . . . . . . . . . . . 71
Renaming, emptying, and deleting folders. . . . . . . . . . . . . . . . . . . . . . . . . . . . . 72
To rename a folder. . . . . . . . . . . . . . . . . . . . . . . . . . . . . . . . . . . . . . . . . . . . 72
To empty a folder. . . . . . . . . . . . . . . . . . . . . . . . . . . . . . . . . . . . . . . . . . . . . 7 2
To delete a folder. . . . . . . . . . . . . . . . . . . . . . . . . . . . . . . . . . . . . . . . . . . . . 72
Viewing folder properties . . . . . . . . . . . . . . . . . . . . . . . . . . . . . . . . . . . . . . . . . 72
To view folder properties . . . . . . . . . . . . . . . . . . . . . . . . . . . . . . . . . . . . . . . 72
Moving messages to folders. . . . . . . . . . . . . . . . . . . . . . . . . . . . . . . . . . . . . . . . 73
To move a message to a folder . . . . . . . . . . . . . . . . . . . . . . . . . . . . . . . . . . . 73
Grouping messages. . . . . . . . . . . . . . . . . . . . . . . . . . . . . . . . . . . . . . . . . .75
Grouping messages by thread . . . . . . . . . . . . . . . . . . . . . . . . . . . . . . . . . . . . . . 75
To group or ungroup messages by thread. . . . . . . . . . . . . . . . . . . . . . . . . . . 75
Creating, editing, and deleting rules for messages . . . . . . . . . . . . . . . . . . . . . . . 76
To create a rule . . . . . . . . . . . . . . . . . . . . . . . . . . . . . . . . . . . . . . . . . . . . . . 76
To edit a rule . . . . . . . . . . . . . . . . . . . . . . . . . . . . . . . . . . . . . . . . . . . . . . . . 77
To delete a rule . . . . . . . . . . . . . . . . . . . . . . . . . . . . . . . . . . . . . . . . . . . . . . 77
Table of contents v
Page 7

Applying rules. . . . . . . . . . . . . . . . . . . . . . . . . . . . . . . . . . . . . . . . . . . . . . . . . . 78
To apply a rule to messages in a folder . . . . . . . . . . . . . . . . . . . . . . . . . . . . .78
To apply a rule to a group of selected messages. . . . . . . . . . . . . . . . . . . . . . . 7 8
Creating, editing, and deleting mailing list Smart Groups . . . . . . . . . . . . . . . . . 79
To create a mailing list Smart Group . . . . . . . . . . . . . . . . . . . . . . . . . . . . . .79
To edit a mailing list Smart Group. . . . . . . . . . . . . . . . . . . . . . . . . . . . . . . .80
To delete a mailing list Smart Group . . . . . . . . . . . . . . . . . . . . . . . . . . . . . . 8 1
Creating, editing, and deleting RSS feed Smart Groups . . . . . . . . . . . . . . . . . . . 81
To create a RSS feed Smart Group . . . . . . . . . . . . . . . . . . . . . . . . . . . . . . . .81
To edit a RSS feed Smart Group . . . . . . . . . . . . . . . . . . . . . . . . . . . . . . . . . .82
To delete a RSS feed . . . . . . . . . . . . . . . . . . . . . . . . . . . . . . . . . . . . . . . . . . .83
Designating a lifecycle for Smart Groups . . . . . . . . . . . . . . . . . . . . . . . . . . . . . .83
To change the lifecycle for a Smart Group. . . . . . . . . . . . . . . . . . . . . . . . . . .83
Backing up WordPerfect MAIL . . . . . . . . . . . . . . . . . . . . . . . . . . . . . . . . .85
Using multiple datastores . . . . . . . . . . . . . . . . . . . . . . . . . . . . . . . . . . . . . . . . . 85
To create an additional datastore . . . . . . . . . . . . . . . . . . . . . . . . . . . . . . . . .85
Backing up datastores . . . . . . . . . . . . . . . . . . . . . . . . . . . . . . . . . . . . . . . . . . . .86
To back up a datastore . . . . . . . . . . . . . . . . . . . . . . . . . . . . . . . . . . . . . . . . .86
Moving datastores . . . . . . . . . . . . . . . . . . . . . . . . . . . . . . . . . . . . . . . . . . . . . . . 87
To move a datastore . . . . . . . . . . . . . . . . . . . . . . . . . . . . . . . . . . . . . . . . . . . 87
Checking, rebuilding, and compacting datastores. . . . . . . . . . . . . . . . . . . . . . . .87
To check a datastore. . . . . . . . . . . . . . . . . . . . . . . . . . . . . . . . . . . . . . . . . . . 88
To compact a datastore. . . . . . . . . . . . . . . . . . . . . . . . . . . . . . . . . . . . . . . . .88
To rebuild a datastore. . . . . . . . . . . . . . . . . . . . . . . . . . . . . . . . . . . . . . . . . .88
Keyboard shortcuts in WordPerfect MAIL. . . . . . . . . . . . . . . . . . . . . . . . .89
Keyboard shortcuts for working with messages . . . . . . . . . . . . . . . . . . . . . . . . . 8 9
Keyboard shortcuts for editing messages . . . . . . . . . . . . . . . . . . . . . . . . . . . . . .90
Setting e-mail preferences . . . . . . . . . . . . . . . . . . . . . . . . . . . . . . . . . . . .91
Setting WordPerfect MAIL as your default mail application. . . . . . . . . . . . . . . .92
To set WordPerfect MAIL as your default mail application. . . . . . . . . . . . . .92
Configuring message text settings . . . . . . . . . . . . . . . . . . . . . . . . . . . . . . . . . . .93
To change the appearance of message text . . . . . . . . . . . . . . . . . . . . . . . . . .93
To change the text format used for outgoing messages . . . . . . . . . . . . . . . . .93
To change plain text font preferences . . . . . . . . . . . . . . . . . . . . . . . . . . . . . . 9 4
To change HTML font preferences . . . . . . . . . . . . . . . . . . . . . . . . . . . . . . . . 9 4
vi Table of contents
Page 8

Managing WordPerfect MAIL. . . . . . . . . . . . . . . . . . . . . . . . . . . . . . . . . . . . . . 94
To exit WordPerfect MAIL . . . . . . . . . . . . . . . . . . . . . . . . . . . . . . . . . . . . . 94
To minimize WordPerfect MAIL . . . . . . . . . . . . . . . . . . . . . . . . . . . . . . . . . 95
To enable message notification. . . . . . . . . . . . . . . . . . . . . . . . . . . . . . . . . . . 95
To restore preferences. . . . . . . . . . . . . . . . . . . . . . . . . . . . . . . . . . . . . . . . . . 95
Composing messages. . . . . . . . . . . . . . . . . . . . . . . . . . . . . . . . . . . . . . . . . . . . . 95
To compose a message . . . . . . . . . . . . . . . . . . . . . . . . . . . . . . . . . . . . . . . . . 95
To compose a message using Smart Auto Complete . . . . . . . . . . . . . . . . . . . 96
Selecting a signature . . . . . . . . . . . . . . . . . . . . . . . . . . . . . . . . . . . . . . . . . . . . . 97
To select a signature. . . . . . . . . . . . . . . . . . . . . . . . . . . . . . . . . . . . . . . . . . . 97
Customizing headers . . . . . . . . . . . . . . . . . . . . . . . . . . . . . . . . . . . . . . . . . . . . . 98
To customize the message header. . . . . . . . . . . . . . . . . . . . . . . . . . . . . . . . . 98
Using the Spelling Checker. . . . . . . . . . . . . . . . . . . . . . . . . . . . . . . . . . . . . . . . 98
To check the spelling . . . . . . . . . . . . . . . . . . . . . . . . . . . . . . . . . . . . . . . . . . 98
To automatically check the spelling of outgoing messages . . . . . . . . . . . . . . 99
Setting spelling options. . . . . . . . . . . . . . . . . . . . . . . . . . . . . . . . . . . . . . . . . . . 99
To set spelling options . . . . . . . . . . . . . . . . . . . . . . . . . . . . . . . . . . . . . . . . . 9 9
Adding and customizing dictionaries. . . . . . . . . . . . . . . . . . . . . . . . . . . . . . . . 100
To add a dictionary . . . . . . . . . . . . . . . . . . . . . . . . . . . . . . . . . . . . . . . . . . 100
To add or delete words from a dictionary . . . . . . . . . . . . . . . . . . . . . . . . . . 101
To create a new dictionary . . . . . . . . . . . . . . . . . . . . . . . . . . . . . . . . . . . . . 101
To export words from a dictionary . . . . . . . . . . . . . . . . . . . . . . . . . . . . . . . 102
To delete a dictionary file. . . . . . . . . . . . . . . . . . . . . . . . . . . . . . . . . . . . . . 102
Sending attachments. . . . . . . . . . . . . . . . . . . . . . . . . . . . . . . . . . . . . . . . . . . . 102
To add an attachment to your message . . . . . . . . . . . . . . . . . . . . . . . . . . . 102
To delete an attachment from a message . . . . . . . . . . . . . . . . . . . . . . . . . . 103
Specifying message priority . . . . . . . . . . . . . . . . . . . . . . . . . . . . . . . . . . . . . . . 10 4
To specify message priority. . . . . . . . . . . . . . . . . . . . . . . . . . . . . . . . . . . . . 10 4
To display the Priority column. . . . . . . . . . . . . . . . . . . . . . . . . . . . . . . . . . 104
Saving draft messages . . . . . . . . . . . . . . . . . . . . . . . . . . . . . . . . . . . . . . . . . . . 104
To save a message as a draft. . . . . . . . . . . . . . . . . . . . . . . . . . . . . . . . . . . . 10 5
To complete and send a draft message . . . . . . . . . . . . . . . . . . . . . . . . . . . . 105
Sending messages . . . . . . . . . . . . . . . . . . . . . . . . . . . . . . . . . . . . . . . . . . . . . . 105
To send a message . . . . . . . . . . . . . . . . . . . . . . . . . . . . . . . . . . . . . . . . . . . 105
Resending a message. . . . . . . . . . . . . . . . . . . . . . . . . . . . . . . . . . . . . . . . . . . . 106
To resend a message. . . . . . . . . . . . . . . . . . . . . . . . . . . . . . . . . . . . . . . . . . 106
Printing messages . . . . . . . . . . . . . . . . . . . . . . . . . . . . . . . . . . . . . . . . . . . . . . 106
Table of contents vii
Page 9

To specify the printing layout. . . . . . . . . . . . . . . . . . . . . . . . . . . . . . . . . . . 107
To print a message . . . . . . . . . . . . . . . . . . . . . . . . . . . . . . . . . . . . . . . . . . .107
Replying to messages. . . . . . . . . . . . . . . . . . . . . . . . . . . . . . . . . . . . . . . . . . . . 108
To reply to a message . . . . . . . . . . . . . . . . . . . . . . . . . . . . . . . . . . . . . . . . . 108
Forwarding messages. . . . . . . . . . . . . . . . . . . . . . . . . . . . . . . . . . . . . . . . . . . .109
To forward a message. . . . . . . . . . . . . . . . . . . . . . . . . . . . . . . . . . . . . . . . . 10 9
Sorting messages . . . . . . . . . . . . . . . . . . . . . . . . . . . . . . . . . . . . . . . . . . . . . . .110
To sort messages. . . . . . . . . . . . . . . . . . . . . . . . . . . . . . . . . . . . . . . . . . . . .110
To select the sort order for messages. . . . . . . . . . . . . . . . . . . . . . . . . . . . . .110
Configuring the HTML viewer. . . . . . . . . . . . . . . . . . . . . . . . . . . . . . . . . . . . .110
To view a message in a browser window . . . . . . . . . . . . . . . . . . . . . . . . . . . 11 1
To change HTML viewer settings. . . . . . . . . . . . . . . . . . . . . . . . . . . . . . . .111
Applying security zones and zone overrides . . . . . . . . . . . . . . . . . . . . . . . . . . .111
To change security zones. . . . . . . . . . . . . . . . . . . . . . . . . . . . . . . . . . . . . . .111
To change zone settings . . . . . . . . . . . . . . . . . . . . . . . . . . . . . . . . . . . . . . .112
To change zone overrides . . . . . . . . . . . . . . . . . . . . . . . . . . . . . . . . . . . . . . 112
Creating categories. . . . . . . . . . . . . . . . . . . . . . . . . . . . . . . . . . . . . . . . . . . . . .113
To create a category . . . . . . . . . . . . . . . . . . . . . . . . . . . . . . . . . . . . . . . . . . 113
To assign a category to a message. . . . . . . . . . . . . . . . . . . . . . . . . . . . . . . . 11 3
To assign more than one category to a message. . . . . . . . . . . . . . . . . . . . . . 114
To display the Categories column . . . . . . . . . . . . . . . . . . . . . . . . . . . . . . . . 114
Setting message status . . . . . . . . . . . . . . . . . . . . . . . . . . . . . . . . . . . . . . . . . . . 114
To assign a status to a message. . . . . . . . . . . . . . . . . . . . . . . . . . . . . . . . . . 115
To add a new status designation. . . . . . . . . . . . . . . . . . . . . . . . . . . . . . . . .115
To delete a status designation. . . . . . . . . . . . . . . . . . . . . . . . . . . . . . . . . . .115
To add the status column to the Message list . . . . . . . . . . . . . . . . . . . . . . .115
viii Table of contents
Page 10

Welcome to WordPerfect MAIL
Welcome to WordPerfect MAIL, a robust and innovative e-mail app lica t ion that
provides you with the comprehensive e-mail, contact management, and scheduling
tools you need to organize your information. WordPerfect MAIL also includes powerful
search capabilities and world-class spam-blocking features.
In this section, you’ll learn about
• what’s included in WordPerfect MAIL
• the Word Perfect MAIL workspace
• switching between WordPerfect MAIL applications
• fast filing
What’s included in WordPerfect MAIL
Word Perfect MAIL includes many powerful features.
• The user interface is optimized to keep everything right where you need it. The
toolbar lets you switch between the
the message list displays categories to help you sort your e-mail.
• Searching is easy with saved searches and the WordPerfect MAIL Search bar. You
can quickly locate contacts and calendar ev ents or access Web sites.
• The leading spam blocker, SAproxy Pro, is integrated into WordPerfect MAIL.
Mail, Contacts, and Calendar windows, and
WordPerfect MAIL also includes the Calendar, which has many useful features that
enable you to do the following:
• create calendars or import them from other application s
• view calendars in the day, week, or month view
• schedule events quickly and easily using the Calendar window or Calendar Peek
• subscribe to other people’s calendars
Welcome to WordPerfect MAIL 1
Page 11
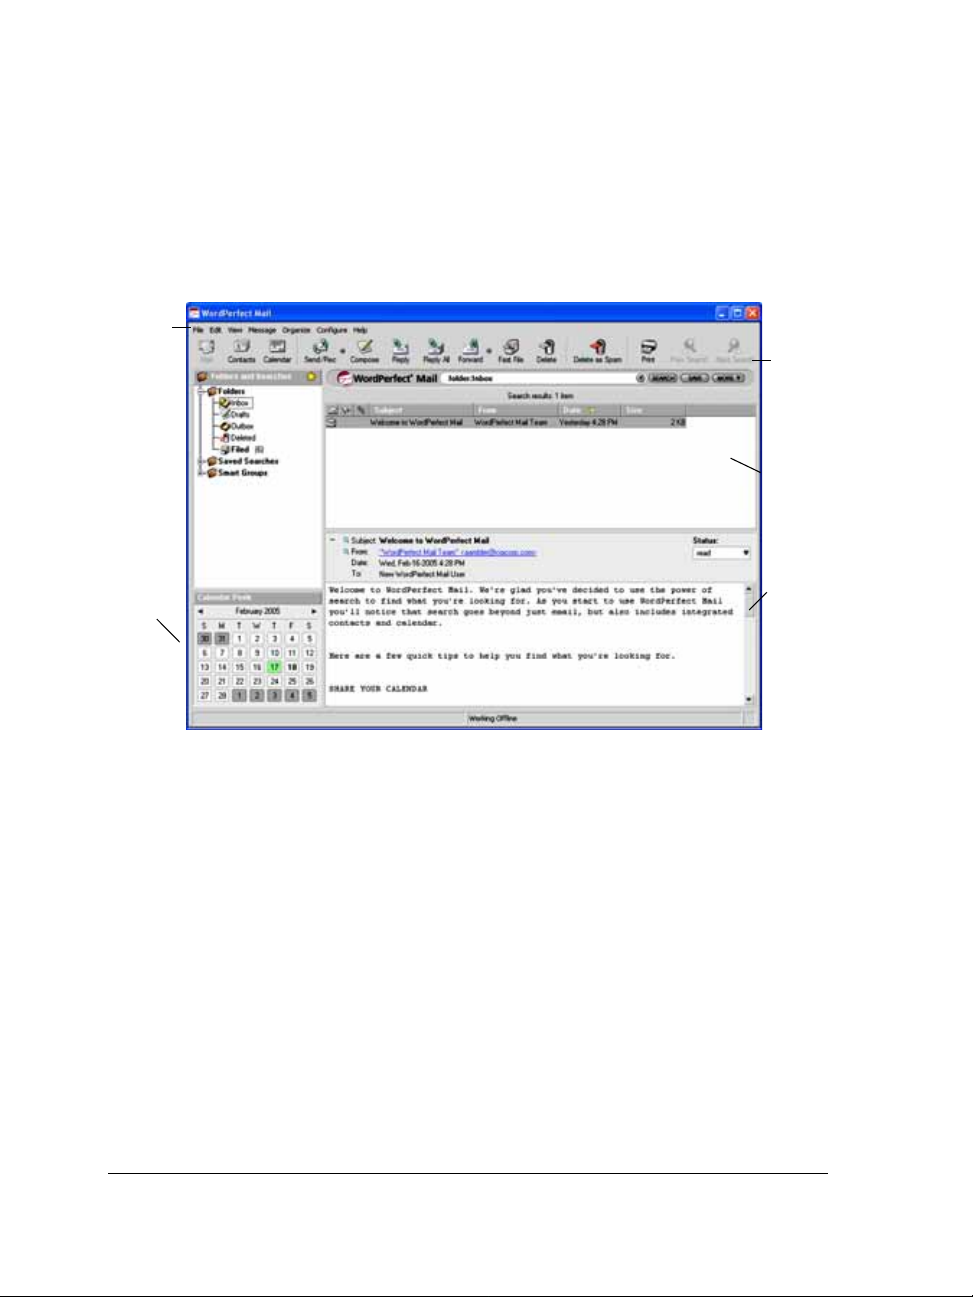
The WordPerfect MAIL workspace
The main application window is the Mail window, which appears by default the first
time you start the application. The other two windows in WordPerfect MAIL are the
Contacts window and the Calendar window. Whichever window is open when you
quit WordPerfect MAIL is the one that opens the next time you start the application.
Mail
toolbar
Navigation
pane
Search
bar
Message
list
Calendar
Peek
The mail window is the main application window in WordPerfect MAIL.
Preview
pane
Navigation pane
By default, the Navigation pane appears on the left side of the Mail window. In the
Folders section of the Folders and Searches area, you can quickly identify the
hierarchy and status of e-mail messages. The folders that are included in WordPerfect
MAIL are the standard folders found in most e-mail programs:
Inbox, Drafts, Outbox,
Deleted, and Filed folders.
The two other sections found in of the Folders and Searches area are Saved Searches
and
Smart Groups. The default structure of Saved Searches lets you view messages in
three different modes: Inbox by Address, Inbox by Account, and Everything by
Category. For more information about Saved Searches, see
“Saving searches” on
page 65.
2 WordPerfect Mail User Guide
Page 12

Smart Groups help you manage opt-in subscriptions to di stri buti on lists that send
industry reports, news, and other information on a daily, weekly, or monthly basis. For
more information about Smart Groups, see
“Creating, editing, and deleting mailing list
Smart Groups” on page 79 and “Creat ing, editing, and deletin g RSS feed S m art
Groups” on page 81.
You can also show, hide, or change the display of the Navigation pane.
Preview pane
The Preview pane displays the full body of e-mail messages, the header area (containing
the
Subject, From, Date, and To fields), a list of attachments, and the status of these
messages. By default, the
each message as you select it in the
Preview pane appears below the Message list, and displays
Message list.
You can move the Preview pane. You can also hide or display message header
information in the
Preview pane.
Message list
The Message list displays all of the e-mail messages contained in the folder you select
in the
Navigation pane. By default, the Message list appears to the right of the
Navigation pane, and above the Preview pane. For the selected folder, the Message
list displays all of the messages by date in descending order (that is, with the most recent
messages first).
You can hide, display, or sort columns in the Message list.
Calendar Peek
Calendar Peek appears in the Mail window and displays the current month and a brief
description of any events scheduled in that month. It appea rs below the
Searches
area of the Navigation pane.
Folders and
You can hide or display Calendar Peek. You can also create and edit events in Calendar
Peek
without leaving the Mail window. For more information about using Calendar
Peek, see
Welcome to WordPerfect MAIL 3
“Using the Calendar” on page 35.
Page 13
To show, hide, or change the display of the Navigation pane
To Do the following
Show or hide the Navigation pane
Display the folder list or the Favorites list In the top-rig h t corner of the Navigation
Expand the folder list Click the plus icon (+) next to a folder.
Collapse the folder list Click the minus icon (–) next to a folder.
Click View
mark next to Navigation pane indicates
that the Navigation pane is displayed.
pane, click the star icon to display the
folder list. Click the book icon to display
the Favorites list.
` Navigation pane. A check
To change the display of the Preview pane
1 Click View ` Preview pane, and click one of the following commands:
• None — hides the Preview pane
• Right — displays messages on the right side of the Mail window
• Bottom — displays the Preview pane below the message list
To hide or display message header information in the Preview pane
•In the Preview pane, click one of the following icons:
• +(plus icon) — displays the complete message header
• – (minus icon) — displays only the message subject and status
To display columns in the Message list
1 Click View ` Customize columns.
2 In the Customize columns list, enable any of the check boxes.
3 Click OK.
To rearrange columns in the Message list
1 Click View ` Customize columns.
2 Click a column heading, and click one of the following buttons:
4 WordPerfect Mail User Guide
Page 14

• Move up — moves the column to the left in the Message list
• Move down — moves the column to the right in the Message list
You can also rearrange columns by draggin g them in the Message list.
To sort a column in the Message list
• From the column heading, click the arrow to sort the column in ascending order
or the arrow to sort the column in descending order.
To hide or display Calendar Peek
•Click View ` Calendar Peek.
A check mark next to Calendar Peek indicates that Calendar Peek is displayed.
To flag a message
1 In the Message list, click to select the message you want to fla g.
2 Click Organize ` Mark ` Flagged.
To mark a message as read or unread
1 In the Message list, click to select the message you want to ma rk.
2 Click Organize ` Mark ` Rea d.
Moving between WordPerfect MAI L applications
You can switch between the Mail, Calend ar, and Contacts windows. The menus and
toolbars reflect the tasks performed most often in a given application; therefor e, they
differ slightl y be t ween applicat ions. Yo u can also
For more information about using the Calendar, see “Using the Calendar” on page 35.
For more information about working with contacts, see “Managing a list of c ontacts”
on page 27.
To display the Calendar window
•Click the Calendar button .
Welcome to WordPerfect MAIL 5
Page 15

To display the Contacts window
•Click the Contacts button .
To display the Mail window
•Click the Mail button .
Fast filin g
Fast filing lets you quickly move messages to a designated folder. By default, the fast
filing feature automatically stores your files to the
another folder.
To change the Fast File folder
1 Click Configure ` Preferences.
2 In the General settings area, click the Find butto n (...) next to the Fast filing
folder
box.
3 Click to select the folder you want to use.
To quickly file messages into this folder
Filed folder, but you can specify
1 In the Message list, select the message or messages you wa nt to fi le.
2 Click the Fast file button on the toolbar.
6 WordPerfect Mail User Guide
Page 16

Configuring WordPerfect MAIL
Before you can start using WordPerfect MAIL, you need to configure a variety of
settings, such as specifying an e-mail server and other e-mail accou nt inform ation.
In this section, you’ll learn about
• importing data from an e-mail program
• importing Vcards
• importing and exporting M box fi les
• creating an account or alias
• modifying and deleting e-mail accounts and aliases
• playing a sound when receiving messages
• designating an outgoing server
• outgoing server authentication
• deleting an outgoing server
• creating signatures
• editing and deleting signatures
Importing data from another e-mail program
When you start WordPerfect MAIL, you are prompted to import data from another email program. You can import into W ordPerfect MAIL all existing account information
from Outlook Express; Microsoft Outlook 98, 2000, 2002; Eudora; or Netscape 7.0 or
4.x. This includes contacts, messages, contact data, and calendar events.
Before you start the importing process, close the e-mail application, temporarily disable
any anti-viru s and anti-spam applications that are running, and disconnec t f ro m t h e
Internet. After completing the importing process, you can res tart the ant i-vir us
program.
If you don’t want to import the data, you can cancel the importing process a nd
manually set up your accounts. You can import e-mail accounts at a later time.
Configuring WordPerfec t MAIL 7
Page 17
To import from Outlook Express
1 Click File ` Import.
2 In the Import wizard, choose Outlook Express.
3 Click Next.
4 On the Select identity page, enable of the following options:
• WordPerfect MAIL will now import settings, mail, and contacts from Main
identity of Outlook Express —
an identify from the Import from lis t box.
• Browse to select the Outlook Express Datastore folder that you would like
to import from —
If you choose this option, click Browse and choose the drive
and folder where the datastore is found.
5 Click Next.
6 On the Select items page, enable any of the following check boxes:
• Account data
• Messages
• Contacts
7 Click Next.
8 Click Import now.
The Status dialog box opens as WordPerfect MAIL imports the messages, folders,
account settings, and contacts from Outlook Express. After the import is complete,
the folders and messages appear in WordPerfect MAIL. Your e-mail account is
already set up in
Express are available in the
Accounts and Aliases, and any contacts you had in Outlook
Contacts list.
If you choose this option, you can also choose
The default file location for the Outlook Express information is
X:\Documents and Settings\<username>\Loca l Settings\Application
Data\Identities
(where “X” corresponds to the drive where Outlook Express
is installed).
WordPerfect MAIL places your entire folder structure, including all messages,
in a folder named
WordPerfect MAIL’s existing folders or create a new folder by clicking
Outlook Express. You can change this to one of
Change
and selecting a new folder.
Related Topics
8 WordPerfect Mail User Guide
Page 18
To import from Outlook 98, 2000, or 2002
1 Click File ` Import.
2 In the Import wizard, choose Microsoft Outlook.
3 Click Next.
4 Click Browse.
5 Choose the drive and folder where the PST file you want to import is stored.
6 Click Choose.
7 Choose the drive and folder where the datastore is stored.
8 Click Next.
9 On the Select items page, enable any of the following check boxes:
• Contacts
• Account data
• Messages
• Calendar
If you want to change the default folder location, click Change.
10 Click Next.
11 Click Import now.
WordPerfect MAIL places your entire folder structure, including all messages,
in a folder named
The default location of the PS T file is usually: X:\Documents a nd
Settings\<Username>\Local Settings\Application Data\Microsoft\Outlook
(where “X” corresponds to the drive where Outlook is installed).
Microsoft Outlook.
If you import only one specific folder, WordPerfect MAIL imports only the
messages within that folder; it does not import subfolders. If you import
everything, all folders are imported.
Related Topics
To import from Eu dora
1 Click File ` Import.
2 In the Import wizard, choose Eudora.
Configuring WordPerfec t MAIL 9
Page 19

3 Click Next.
4 Click Browse.
5 Choose the drive and folder where the INI file you want to import is stored.
6 Click Next.
7 On the Select items page, enable any of the following check boxes:
• Contacts
• Account data
• Messages
WordPerfect MAIL places the entire folder structure, including all messages, inside
a folder called Eudora. You can change this to another folder or a new folder.
8 Click Next.
9 Click Import now.
A status window opens as WordPerfect MAIL imports the messages, folders,
account settings, and contacts. After the import is complete, the folders and
messages appear in WordP erfect MAIL. Your e-mail account is already set up in
Accounts and aliases.
Related Topics
To import from Netscape 7.0
1 Click File ` Import.
2 In the Import wizard, choose Netscape.
3 Click Next.
4 Click Browse.
5 Choose the drive and folder where the PREFS.JS file you want to imp ort is stored.
6 Click Next.
7 On the Select items page, enable any of the following check boxes:
• Contacts
• Account data
• Messages
WordPerfect MAIL places the entire folder structure, including all messages, in a
folder called Netscape. You can change this to another folder or a new folder.
8 Click Next.
10 WordPerfect Mail User Guide
Page 20

9 Click Import now.
A status window opens as WordPerfect MAIL imports the messages, folders,
account settings, and contacts. After the import is complete, the folders and
messages appear in WordP erfect MAIL. Your e-mail account is already set up in
Accounts and aliases, and any contacts yo u h ad in Netscape are available in the
Contacts list.
The PREFS.JS file is usually located in: X:\Program
Files\Netscape\Users\default\prefs.js (where “X” corresponds to the drive
where Netscape is installed).
Related Topics
To import from Netscape 4.x
1 Click File ` Import.
2 In the Import wizard, choose Netscape 4x Address Book.
3 Click Next.
4 Click Browse.
5 Choose the drive and folder where the PREFS.JS file you want to import is stor ed.
6 Click Next.
7 On the Select items page, enable any of the following check boxes:
• Account data
• Messages
8 Click Next.
9 Click Import now.
A status window opens as WordPerfect MAIL imports your messages, folders, and
account settings. Once the import process is complete, the folders and messages
appear in WordPerfect MAIL. Your e-mail account is already set up in
and aliases
.
Accounts
The PREFS.JS file is usually located in: X:/Program Files/Netscape/Users/
default/prefs.js (where “X” indicates the drive where Ne tscap e is installed).
Configuring WordPerfec t MAIL 11
Page 21

Related Topics
Importin g Vc ards
Word Perfect MAIL lets you import Vcards from other e-mail applications. A Vcard is
similar to an electronic business card. Y ou can import individual or a collection of Vcards
as contacts.
Before you start the importing process, close the e-mail application, temporarily disable
any anti-viru s and anti-spam applications that are running , a nd d isconnect fro m t h e
Internet. After you complete the importing process, you can restart the anti-virus
program.
To import Vcards
1 Click File ` Import.
2 In the Import wizard, choose Vcard.
3 Click Next.
4 Click Browse.
5 Choose the drive and folder where the Vcard file is stored.
6 Choose the Vcard(s).
7 Click Open.
8 Click Next.
9 Click Import now.
Related Topics
Importing an d exporting Mb ox files
You can easily import and export Mbox files. Mbox is a standard file format that many
e-mail programs use to store e-mail messages. WordPerfect MAIL uses Mbox files to
exchange messages (through importing and exportin g) between your existing e-mail
program and WordPerfect MAIL.
Before you start the importing process, close the e-mail application, temporarily disable
any anti-viru s and anti-spam applications that are running , a nd d isconnect fro m t h e
12 WordPerfect Mail User Guide
Page 22

Internet. After completing the importing process, you can res tart the ant i-vir us
program.
To import messages from Mbox files
1 Click File ` Import.
2 Choose Mbox.
3 Click Next.
4 Click Browse, and choose the drive and folder where the Mbox file is stored.
5 Choose the Mbox file.
6 Click Open.
7 Click Next.
8 On the Select destination page, click Next.
If you want to import the messages to a different folder, click Change.
9 Click Import now.
Word Perfect MAIL imports the Mbox file.
Related Topics
To export messages to an Mbox file
1 Click File ` Export ` Mbox.
2 Choose one of the following exporting options:
• Selected messages — includes only selected mess age s
• All messages in folder — includes all messages from the chosen folder
If you want to export the messages to different Mbox file, click the Browse button
(...) in the
file is stored.
You can also
Include messages from a new search Click Search form, and choose the
Include messages from an existing search Click Recent searches, then choose a search
Configuring WordPerfec t MAIL 13
Target Mbox file area, and choose the drive and folder where the Mbox
searching criteria.
from the Recent searches list .
Page 23
You can also
Export messages that are in the Deleted
folder when you select the Search option
Limit the number of messages you want to
export
If you are exporting your Spam Saved Search to train SAproxy Pro, you need
to enable the
Include deleted messages check box. The messages in the Spam
Saved Search are considered deleted.
You can export to Mozilla by clicking the Browse button (...) in the Target
Mbox fi le
area and choosing the drive and folder where the Mozilla mail folder
is found. It is typically found at X:\Documents and
Settings\<Username>\Application Data\Mozilla\Profiles\<profile
name>\<random string>.slt\Mail\<account name> (where “X” indicates
the drive where Mozilla is installed). To proceed, copy the Mbox file into this
folder and start Mozilla Mail. It will recognize this folder and the messages in
it.
You can export to Netscape 4.x by clicking the Browse button (...) in the
Target Mbox file area and choosing the drive and folder where the Netscape
Messenger mail folder is stored. It is typically found at X:\Program
Files\Netscape\Users\<username>\Mail (where “X” indicates the drive where
Netscape is installed). To proceed, copy the Mbox file into this folder and start
Netscape Messenger. It will recognize this folder and the messages in it.
Enable the Include deleted messages
check box.
Enable the Limit exported messages
count to check box, and type a number in
the box.
Related Topics
Creating an account or alias
You can create an account or alias in WordPerfect MAIL. When you set up a new
account, the downloading preferences are already configured for you. Y ou can, however ,
change them. You can also specify a default e-mail account, which is the e-mail address
14 WordPerfect Mail User Guide
Page 24

Word Perfect MAIL automatically uses when you create ne w messages. This account
name (e-mail address) appears in the
From: field of your message.
To create an account or alias
1 Click Configure ` Accounts and aliases.
2 Click Add.
3 In the Select account type area, enable one of the following options:
• POP account
• IMAP account
• Alias
If you do not know whether your account is a POP or IMAP account or an alias,
check with your e-mail provider.
4 Click Next.
5 On the Accounts details page, type a name in the Display name text box.
6 Type the e-mail address you want to use for this account or alias in the E-mail
address
7 Choose a signature from the Signature list box.
If you want create a different signature for outgoing messages, click Add.
8 Click Next.
text box.
9 On the Server details page, complete the information about your POP or IMAP
server.
10 Click Finish.
You can also
Choose a different reply to address Click Advanced, enable the Reply to check
box, and type the e-mail address in the
Reply to text box.
Choose a different Bcc address Click Advanced, enable the Bcc copy to
check box, and type the e-mail address in the
Bcc copy to text box.
Configuring WordPerfec t MAIL 15
Page 25

You can also
Choose a specific SMTP server Click Advanced, enable the Use specific
SMTP server check box, and choose a server
from the Server list box. This field overrides
the default SMTP setting you selected under
Outgoing servers.
Leave downloaded messages on the server On the Server details page, enable the
Leave downloaded messages on the
server check box.
Download messages on startup On the Server details page, enable the
Download on startup check box.
Specify download intervals On the Server details page, enable the
Download every check box and type a
number in the Minutes box.
If you are an IMAP user, be aware that WordPerfect MAIL downloads
messages only from the
Inbox: other folders and messages are not
downloaded. The message status (read, unread, replied to, and so on) is not
synchronized with the server. If new folders are created locally and/or i f
messages are moved to the new folder, they will not be reflected as such on the
server and will still remain in the Inbox.
WordPerfect MAIL automatically sets POP accounts to 110 and IMAP
accounts to 143. Do not adjust these values unless your ISP instructs you to do
so.
SSL (Secure Socket Layer) provides an extra layer of security when receiving
messages. This service is usually set up by your e-mail provider. Select this
option only if your e-mail service requires SSL.
Related Topics
To specify account downloading preferences
1 Click Configure ` Accounts and aliases.
2 Choose an account from the list.
3 Click Edit.
16 WordPerfect Mail User Guid e
Page 26
4 In the Download settings area, disable the Turn on Spam protection check box.
This disables SAproxy Pro.
We recommend that you do this only if you are performing a task that requires you
to temporarily disable spam protection software, such as importing files from other
e-mail applications into WordPerfect MAIL.
5 Enable the Download every ___ check box, and type a number in the Minutes
box.
This changes the frequency with which WordPerfect MAIL downloads from the
server.
6 Enable the Download on startup check box.
If you disable this check box, you need to manually download messages by clicking
the Send/Rec button on the Mail toolbar.
7 Enable the Leave downloaded messages on the server check box.
If you have limited space on your e-mail server, disable this check box.
You can also
Perio dically remo ve message s from serv er Enable the Remove messages from server
after check box and typ e a nu m ber in the
days box.
Remove deleted messages from the server Enable the Remove messages from server
when moved to deleted folder check box.
Modify the advanced settings Click More options.
Leaving messages on the server ensures that no message gets lost. You should,
however, periodically delete messages from the server so that your server
mailbox does not get overloaded. This is especially important if you are using
a webmail account such as Yahoo! or Juno.
Related Topics
To set a default account
1 Click Configure ` Accounts and aliases.
2 Choose an account from the Default account list box.
Configuring WordPerfec t MAIL 17
Page 27
You can manually change the default account na me i n the From: field when
you compose a message
Modifying and deleting e-mail accounts and aliases
After you have set up an account or an alias, you can edit your account information as
necessary. If you no longer use an account or alias, you can delete it.
To modify an account or alias
1 Click Configure ` Accounts and aliases.
2 Choose the account or alias you want to modify.
3 Click Edit.
Unless you are having trouble receiving mail, you should not need to edit the
server set t ings.
Related Topics
To delete an account or alias
1 Click Configure ` Accounts and aliases.
2 Choose the account or alias you want to delete.
3 Click Delete.
If you delete an account accidentally, you can restore it by clicking Cancel to
close the
Configuration dialog box.
Related Topics
18 WordPerfect Mail User Guide
Configuration dialog box. This discards any changes you made in the
Page 28

Playing a sound when receiving messages
WordPerfect MAIL can notify you of incoming e-mail messages by playing a sound. The
default configuration is to not play a sound, but, if you prefer, you can turn on this
option.
To play a sound when receiving messages
1 Click Configure ` Accounts and aliases.
2 Enable the Play sound when message arrives check box.
3 Click the Browse (...) button.
This automatically selects the default file that comes with WordPerfect MAIL,
defaultwave.wav.
If you want to choose a different sound file, choose the drive and folder where the
sound file is stored.
4 Click Open.
Related Topics
Designating an outgoing server
To send e-mail messages, you need to configure WordPerfect MAIL to use an outgoing
server. The outgoing server is sometimes different from your incoming server — for
example, if you want to receive messages from a Website, such as Yahoo!. The outgoing
server settings, however, need to follow the requirements for your Internet Service
Provider (ISP) or e-mail service provider.
You can change the outgoing server information for any account, at any time. For
example, if you switch to a different e-mail service provider.
To designate an outgoing server
1 Click Configure ` Outgoing servers.
2 Click Add.
3 In the Basic area, type the server address required to send outgoing messages in
the
Server address text box.
Configuring WordPerfec t MAIL 19
Page 29
If you do not know this information, please check with your e-mail provider or your
Internet Service Provider.
4 Click Set as default.
If the server requires a secure connection, enable the This server requ ires a
secure connection (SSL)
check box.
If the server requires authentication, enable the This server requires
authentication
You can also
check box, and click Settings.
Specify a server port, if required by your
service provider
Specify a timeout, if requ ired by y our service
provider
Specify an envelope address, if required by
your service provider
The two security settings that are available are SSL (S ecure Socket Layer) and
authentication. Select SSL only if you know your ISP requires it.
Authentication means that your ISP requires you to send your user name and
password along with your outgoing message. If your ISP requires
authentication, select this option and enter the user name and password.
The server port is the virtual communication port that the application uses to
send a message. For certain types of servers, these settings are always the same.
For example, for outgoing messages, a POP server always uses Server port 25.
Using a timeout can be useful if you are getting “connection has timed out”
errors. If you increase this number, it will take more time to send messages if
the server does not respond right away.
In an effort to thwart spam, SMTP servers require that you use a specific
envelope address.
Type a num b e r in the Server port box.
Type a num b e r in the Seconds box.
Enable the Use specific envelope address
check box, and type an address in the
Address text box.
Related Topics
20 WordPerfect Mail User Guide
Page 30

Outgoing server authentication
When you add or edit an outgoing server that requires authentication by your ISP
(Internet Service Provider) or e-mail service provider, you need to provide
authentication information.
To provide authentication information
1 Click Configuration ` Outgoing servers.
2 Choose the server for which you need to provide authentication info rma tion .
3 Click Edit.
4 Enable the This server requires authentication check box.
5 Click Settings.
6 In the Outgoing server authentication dialog box, enable the Use same account
and password as my incoming main account
You can also
option.
Log in using a name and password that are
different from the incoming account
Specify that the outgoing server store a
password
Related Topics
Enable the Login using option, and type the
user name and password in the boxes
provided.
Enable the Remember password check
box.
Deleting an outgoing server
If you change e-mail servers or Internet Service Providers (ISP), you may want to delete
the account or server. Before deleting a server, you must verify if you have another
account that depends on that server.
To delete an outgoing server
1 Click Configuration ` Outgoing servers.
2 Select the server you want to delete.
Configuring WordPerfect MAIL 21
Page 31

3 Click Delete.
The server is removed from the list of Outgoing servers.
If you accidentally delete a server, you can restore it by clicking Cancel to close
the
Configuration dialog box. This discards any changes you made in the
Configuration dialog box.
Related Topics
Creating signatures
WordPerfect MAIL lets you add a signature at the bottom of every message. You can
create as many signatures as you want, such as one for work-related messages and one
for personal messages.
You can associate specific signatures with accounts or aliases. When you send a message,
Word Perfect MAIL uses the default account (e-mail address) and signature. You can
change which signature you use as the default so that it automatically appears on all
new messages.
The purpose of a signature, in general, is to identify who you are to your message
recipients and to provide contact information, such as phone and fax num bers. Both
business and personal signatures often includ e Web addresses (URLs), which may be
associated with a business or a professional organi zation. You can also personali ze
signatures by adding small images.
When designing your signature, we recommend that you keep it brief, both for
appearance and for conserving disk space on e-mail servers.
To create a signature
1 Click Configure ` Signatures.
2 Click Add.
3 In the New signature dialog box, type a name for the signature file in the Name
box.
text
This name does not appear in the signature. It is used to identify the signature file.
4 Type the text that you want to appear at the bottom of your e-mail messages.
5 Choose a font from the Font list box.
22 WordPerfect Mail User Guide
Page 32
6 Choose a font size from the Size list box.
7 Click OK.
The new signature appears in the Signatures list. To change the order in which it
appears in the
down
buttons.
Signatures list in the message window, click the Move up or Move
8 Click OK to close the Configuration dialog box.
You can also
Change the tex t f ormatting Click the Bold, Italic, or Underline
buttons.
Change the te xt color Click the Color butt on, and click a color on
the Basic colors palette.
Add a list Click the Ordered list or Bulleted list
button.
Indent text Click the Indent button.
Remove indentation Click Unindent.
Change the text justification Click the Left, Centre, Right, or Justify
button.
The default setting for outgoing messages is to use plain text and the font
attributes selected in the
Preferences dialog box. You can change these
settings for all outgoing messages, or you can switch to HTML to customiz e
each signature.
Although there is no limit as to how long a signature can be, it should comprise
no more than a few lines of information and not significantly increase the size
of the message.
Related Topics
To choose a default signature for an account
1 Click Configure ` Accounts and aliases.
Configuring WordPerfect MAIL 23
Page 33

2 Choose an account from the list.
3 Click Edit.
4 Choose a signature from the Signature list.
Related Topics
To apply a signature to a message
• In new message, click the down arrow next to the Signatures button on the
toolbar, and choose a signature file from the list.
Related Topics
To add a hyperlink to a signature file
1 Click Configure ` Signatures.
2 Click Add.
3 In the New signature dialog box, type a name for the signature file in the Name
text
box.
4 In the text box, type the text you want to apply the hyperlink to in the text box.
5 Click the Hyperlink button.
6 Choose a hyperlink type from the Typ e list box.
7 Type a URL in the URL tex t box.
Related Topics
To add an image to a signature file
1 Click Configure ` Signatures.
2 Click Add.
3 In the New signature dialog box, type a name for the signature file in the Name
text
box.
4 Click the Add image button.
5 In the Picture source are a, c lick Browse.
24 WordPerfect Mail User Guide
Page 34

6 Choose the drive and folder where the image file is stored.
7 Type text in the Alternate text box.
This text displays in place of the image when the image is turned off or when
images are not available on the recipient’s computer. The alternate text is also
displayed when the image is loading.
8 From the Alignment list box, choose one of the following alignment options:
• Bottom or baseline — aligns the bottom of the image with the baseline of the
text
• Middle — aligns the middle of the image with the baseline of the text
• Top — aligns the top of the image with the top of the largest item in the line
• Left — aligns the image with the left margin, allowing text to wrap around the
image
• Right — aligns the image with the right margin, allowing text to wrap around
the image
• Texttop — aligns the top of the image with the top of the surrounding text
• Absmiddle — aligns the mi ddle of the im ag e with the mi ddle of the line of text
• Absbottom — aligns the bottom of the image with the bottom of the line of
text
9 Type a number to specify the width (in pixels) of the border you want to display
around the image in the
Border thickness box.
The value can be between 0 and 999.
You can also
Add a space to the sides of an image In the Spacing area, type the number of
pixels in the Horizontal box. The value can
be between 0 and 999.
Add a space to the top and bottom of an
image
Related Topics
In the Spacing area, type the number of
pixels in the Vertical box. The value can be
between 0 and 999.
Editing and deleting signatures
You can edit or delete signatures.
Configuring WordPerfect MAIL 25
Page 35

To edit a signature
1 Click Configure ` Signatures.
2 Choose the signature you want to edit from the Available signatures list.
3 Click Edit.
Although there is no limit as to how long a signature can be, it should comprise
no more than a few lines of information and not significantly increase the size
of the message.
Attributes such as color, appear only if you format your outgoing messages
using HTML.
Related Topics
To delete a signature from your account settings
1 Click Configure ` Signatures.
2 Choose the Signature you want to delete.
3 Click Delete.
Related Topics
26 WordPerfect Mail User Guid e
Page 36

Managing a list of contacts
In WordPerfect MAIL, the Contacts window displays information about the peop le
you have added to your list of contacts. You can add to the Contacts list either by
importing contact information from other e-mail programs or by creating new entries.
You can also create distribution lists of contacts.
WordPerfect MAIL also lets you view, e-mail, and print contacts.
In this section, you’ll learn about
• displaying the Contacts window
• importing contacts
• managing contacts
• managing distribution lists
• viewing contacts
• sending e-mail from the Contacts window
• printing contact information
Displaying the Contacts window
You can display the Contacts window.
To display the Contacts window
•Click the Contacts button .
The Contacts window opens.
Related topics
Managing a list of contacts 27
Page 37

Importing contacts
You can import con tacts from other e-mail programs into WordPerfect MAIL.
If you have imported your account, folders, and messages from Netsca pe 4.x, you ca n
import contacts from your Address Book into WordPerfect MAIL.
To import contacts from another e-mail program
1 Click File ` Import.
The Import wizard opens.
2 Select the program from which you want to import contacts, an d then click Next.
3 If you are prompted to choose an identity, select the one from which you want to
import, and then c l ic k
4 When prompted to choose items to import, enable the Contacts check box and
disable the
5 Click Import now.
Your contacts from the selected e-mail prog ra m are imp orted.
Account data and Messages check boxes, and then click Next.
To import contacts from the Netscape 4.x Address Book
1 In Netscape Communicator 4.x, open the Address Book, and export it to the LDIP
format.
Remember which folder you’ve exported to.
2 In WordPerfect MAIL, click File ` Import.
The Import wizard opens.
Next.
3 When prompted to choose the program from which you want to import contacts,
select
Netscape 4.x Address Book, and then click Next.
4 Navigate to the LDIF file you exported, and then click Next.
5 Click Import now.
Your contacts are imported.
Related topics
28 WordPerfect Mail User Guide
Page 38
Managing contacts
WordPerfect MAIL lets you add new contacts to your Contacts list.
You can create categories and assign them to contacts to h elp you fi nd and classify
contact information. For example, you can create a category that has a conference name,
and then assign that category to all contacts you met at that conference. Categories are
an excellent way to associate contacts with places, events, businesses, and activities.
After you have added a contact to your Contacts list, you can edit that contact’s
information as required.
You can delete contacts. You can also choose to display or hide deleted contacts, or
delete contacts permanently.
To prevent e-mail from your contacts from being classified as junk (or “spam”),
you can add your contacts to the SAproxy Pr o white lis t. For more info rmation,
see
“To add all your contacts to the white list” on page 54.
To add a contact
1 In the Contacts window, click the New button on the property bar, or click
Contact ` New ` New contact.
The New contact dialog box opens.
2 Click the Name and Notes tab, and provide any basic information you want to
include.
3 Click the Internet tab, and then click Add.
4 In the Internet addresses dialog box that appears, do the following:
• From the Type list box, choose whether you want to associate an email or a URL
with this contact.
• From the Label list box, choose whether this is a work, home, or other address.
• In the Address box, type the email addr ess or URL you want to associate with
this contact.
• If you have provided an e-mail address, enable the Set as preferred check box to
have this e-mail address appear in the
Click OK to commit your changes and return to the New contact dialog box.
5 Click the Telephone tab, and click Add.
6 In the Telephone numbers dialog box that appears, do the following:
• From the Label list box, choose a label for the phone number.
Managing a list of contacts 29
Contacts window.
Page 39

• In the Telephone number box, type the phone number. Use separators (periods
or parentheses) if you want.
• If you want, type in the Comment box.
• Enable the Set as preferred check box to have this phone number appear in the
Contacts window.
Click OK to commit your changes and return to the New contact dialog box.
7 Click the Postal tab, and click Add.
8 In the Postal addresses dialog box that appears, do the following:
• From the Label list box, choose a label for the address.
• Type in the address fields.
Click OK to commit your changes and return to the New contact dialog box.
9 Click the Summary tab to review the information you’ve provided.
10 Click Save to add this contact to your Contacts list.
To categorize a contact
•In the Contacts window, right-click a contact in the Contacts list, click
Categories, and then click the category that you want to apply to this contact.
If you want to apply an additional category to this contact, repeat this step.
You can apply a category to multiple files at the same time by first selecting
them. Hold
range, or hold
Shift and click two contacts to select all contacts within that
Ctrl and click all the individual files that you want to select.
To edit a contact
1 In the Contacts window, double-click a contact in the Contacts list.
The Summary page of that contact’s dialog box opens.
2 Click the tab whose information you want to edit and make the desired changes.
3 Click Save.
To delete a contact
1 In the Contacts window, click to select the contact that you want to delete.
2 Click Organize ` Delete.
The contact is marked as deleted.
30 WordPerfect Mail User Guide
Page 40

To display or hide deleted contacts, click View ` Show deleted contacts.
Deleted contacts are displayed with a line through them.
To permanently delete a contact that is marked as deleted, click to select it, and
then click
Related topics
Organize ` Delete.
Managing distribution lists
WordPerfect MAIL lets you create distribution lists, so that you can send e-m ail to
multiple contacts simultaneously without providing all the e-mail addresses separately.
You can create, edit, and delete distribution lists at any time.
To create a distribution list
1 In the Contacts window, click Contact ` New ` Distribution list.
2 In the Name box, type a name for the distribution list.
3 From the Address book list box, choose the address book in which the e-mail
addresses you want to add are stored.
4 Click Add.
The Enter email addresses dialog box appears.
5 For each e-mail address that you want to add to the distribution list, do one of the
following:
• Type the e-mail address. As you type, WordPerfect MAIL displays matching email addresses that you have stored to your
messages to in the past. Scroll through the list by pressing the arrow keys, and
press
Enter to choose the selected e-mail address.
• Click the Email addresses link, and select the e-mail addresses from the
Contacts list that appears.
WordPerfect MAIL automatically inserts a comma between each ema il address.
Contacts list or that you have sent
To edit a distribution list
1 In the Contacts window, double-click a distribution list in the Contacts list.
A dialog box for that distribution list opens.
Managing a list of contacts 31
Page 41

2 Make any of the following changes to the distribution list:
• To add an e-mail address, click Add.
• To edit an e-mail address, select it and click Edit.
• To remove an e-mail address, select it and click Remove.
To delete a distribution list
1 In the Contacts window, click to select the distribution list that you want to delete.
2 Click Organize ` Delete.
The distribution list is marked as deleted.
To display or hide deleted distribution lists, click View ` Show deleted
contacts
To permanently delete a distribution list that is marked as deleted, click to
select it, and then click
Related topics
. Deleted distribution lists are displayed with a line through them.
Organize ` Delete.
Viewing contacts
You can easily search fo r and so rt con tacts.
You can also customize the Contacts list.
To search for a contact
1 In the Contacts window, type in the Search box Search bar.
You can search by any contact information you have provided, such as the contact’s
name, email address, or organization.
2 Click Search.
The Contacts list displays the contacts that match the search criteria.
3 Click All to restore the Contacts list.
To sort contacts
•In the Contacts window , cl ick any column in the Contacts list to sort entries by
that column. Click again to toggle between descending and ascending order.
32 WordPerfect Mail User Guide
Page 42
You can also sort contacts by clicking View ` Sort by and then clicking the
column by which you want to sort.
To customize the Contacts list
1 In the Contacts window, click View ` Customize columns.
You can also right-click th e c o l u m n header area and t h en click Customize
columns
2 In the Customize columns dialog box, do the following:
• Enable the check boxes next to the columns that you want to display in the
Contacts list.
• Click Move up or Move down to change the order of any selected column.
Related topics
.
You can also reorder the columns in the Contacts list by dragging them.
Sending e-mail from the Contacts window
You can send a message directly from the Cont acts window.
You can also send contact information to others from within the Contacts window.
Remember to check with your contacts before forwa rdi ng thei r i nformation.
To send a message from the Contacts window
•In the Contacts window, select the contact and do one of the following:
• Click the Compose button.
• Click Contact ` Compose message to.
• Right-click the contact, and click Compose message to.
A new message addressed to that contact is begun.
To send contact information from the Contacts window
•In the Contacts window, select the contact whose information you want to send as
Managing a list of contacts 33
Page 43

an attachment, and do one of the following:
• Click Contact ` Send as attachment .
• Right-click the contact, and click Send as attachme nt.
A new message is begun with the contact’s information attached as a VCF format
Vcard file.
Related topics
Printing contact information
You can print contact informati on. When pri nting, WordPerfect MAIL uses the
information stored in the Preview pane.
To preview contact information before you print it
1 In the Contacts window, click to select the contacts and distribution lists in the
Contacts list whose information you want to print.
Hold Shift and click two entries to select all entries within that range, or hold Ctrl
while you click to select non-contiguous entries.
2 Click File ` Print preview.
3 In the Print preview window that appears, do any of the following:
• Click the arrow buttons to scroll through the pages.
• Type a number in the Page box to advance to that page.
To print contact information
1 In the Contacts window, click to select the contacts and distribution lists in the
Contacts list whose information you want to print.
Hold Shift and click two entries to select all entries within that range, or hold Ctrl
while you click to select non-contiguous entries.
2 Click File ` Print.
The Print dialog box opens.
3 Specify any settings, and then click Print.
Related topics
34 WordPerfect Mail User Guide
Page 44

Using the Calendar
The Calendar feature in WordPerfect MAIL lets you schedule events, such as meetings,
appointments, and conferences.
WordPerfect MAIL comes with one default calendar: My Calendar. All new events are
associated with this calendar unless you create or subscribe to other calendars.
Although you can view only one calendar at a time, you can display or hide the events
associated with other calendars.
To set up and maintain a calendar, you can import and export calendar events between
WordPerfect MAIL and Microsoft Outlook. You can also subscribe to a calendar from a
remote source, to display its events. After you have set up a calendar, you can manage
its events.
In this section, you’ll learn about
• viewing calendars
• navigating calendars
• managing multiple calendars
• importing and exporting calendars
• subscribing to calendars
• printing calendars
• creating events
• editing events
• searching for events
• deleting events
Viewing calendars
You can access the Calendar feature fro m eithe r the Calendar window or the Mail
window.
Using the Calendar 35
Page 45

When you’re in the Calendar window, you can choose which calendars you want to
display. You can also view events by day, week, or month; the default view is by week
starting on Sunday, with each day showing in half-hour intervals. The property bar
displays the current view, as well as the date or date range currently displayed.
When you’re in the Mail window , you can use Calendar Peek, which is a small monthly
calendar positioned below the
Word Perfect MAIL is to display
Folders and searches pane. The default setting in
Calendar Peek, but you can hide it if you want.
To display the Calendar window
•Click the Calendar button .
The Calendar window opens. The default view is by week starting on Sunday , with
each day showing in half-hour intervals.
To display or hide available calendars
•In the Calendar window , click View ` Calendars, and then click the calendars you
want to display or hide.
A check mark indicates that a calendar is displayed. Events for all calendars are
displayed in the
Calendar window using the color-coding that you assign to them.
To change the Calendar view
•In the Calendar window, click View ` Calendars, and then clic k one of the
following:
• Day view — Displays the calendar by days
• Week view — Displays the calendar by weeks
• Month view — Displays the calendar by months
The current date is highlighted.
You can also change the Calendar view by choosing a view from the list box on
the property bar.
To display or hide Calendar Peek
•In the Mail window, click View ` Calendar Peek.
36 WordPerfect Mail User Guide
Page 46

Related topics
Navigating calendars
The Calendar window lets you navigate the Calendar by scrolling or by advancing to
the current date or to a specified date.
If you prefer to navigate the Calendar graphically, you can use the Date Picker, which
appears when you position the mouse over the date field on the property bar.
To scroll through the Calendar
•In the Calendar window, click the arrows to the right of the date field on the
property bar.
To advance to the current date
•In the Calendar window, click View ` Go to ` Today.
To advance to a specified date
1 In the Calendar window, click View ` Go to ` Date.
The Go to date dialog box appears.
2 In the Date box, type the date you want to access.
3 From the Show in list box, choose a view.
To navigate the Calendar by using the Date Picker
1 In the Calendar window, choose a view.
2 Position the pointer over the date field on the property bar.
The Date Picker displays.
3 If applicable, click the year you want to display.
You cannot choose a year from within the Day view.
4 Click the day, week, or month you want to display.
5 Position the pointer outside the Date Picker to close it.
Related topics
Using the Calendar 37
Page 47

Managing multiple calendars
When you install WordPerfect MAIL, the default calendar is called My Calendar. You
cannot rename or delete this calendar, but if you want, you can designate it for a
particular use and create other calendars as needed. For example, you can maintain one
calendar for your personal and business affairs and additional calendars for other people
in your organization.
You can manage multiple calendars. WordPerfect MAIL can integrate events from all
calendars into a “master” view in the
with each calendar in a unique color. You can choose to view all events from all
calendars, or you can hide certain calendars when you do not need this information. You
can edit a calendar’s settings at any time, such as the color assigned to its events.
You can delete the calendars you create when you no longer need them. The only
calendar you cannot delete is the default one, My Calendar.
To add a calendar
1 Click Configure ` Calendars.
The Configuration dialog box appears.
2 Click Add.
The Add calendar dialog box opens.
3 In the Select calen dar type area, enable the New cale n dar option, and then c lic k
Next.
Calendar window, displaying events associated
4 In the Name box, type the name you want to use for this calendar.
5 Click the Color button.
The Select color dialog box appears.
6 Assign a color to the calendar by doing any of the following:
• Click a box to select that basic color. If you want, alter the color by adjusting the
slider.
• Click anywhere in the color palette to select that color. If you want, alter the
color by adjusting the slider.
• Type values in the Hue, Saturation, Value, Red, Green, and Blue boxes.
If you want to save the color you’ve chosen to the Custom colors list, click Add to
custom colors
7 Click Finish.
38 WordPerfect Mail User Guide
, and then click OK to close the Select color dialog box.
Page 48

When assigning a color to a calendar, make sure it is light enough for the text
that displays over it to be legible.
To change the default calendar
1 Click Configure ` Calendars.
The Configuration dialog box appears.
2 Choose a calendar from the Default calendar list box.
By default, all new events are added to the default calend ar.
To display or hide events from other calendars
•In the Calendar window, click View, and click to display or hide events from other
calendars.
A check mark indicates that events from that calendar are displayed.
To edit a calendar’s settings
1 Click Configure ` Calendars.
The Configuration dialog box opens.
2 Select the calendar that you want to edit, and click Edit.
The Edit calendar dialog box opens.
Make your desired changes.
To delete a calendar
1 Click Configure ` Calendars.
The Configuration dialog box appears.
2 From the Available calendars list, select the calendar you want to delete.
3 Click Delete.
When you del ete a calendar, any events associated with i t are also deleted.
Related topics
Using the Calendar 39
Page 49

Importing an d e x po r t ing calendars
You can import a calendar from Microsoft Outlook.
You can also import a calendar from another e-mail application that supports iCalendar,
the standardized Internet format for calendar, or ICS, files. Similar to HTML, iCalendar
enables people to exchange calendar information over th e Internet a nd be tween
applications.
You can export a calendar to another e-mail application that has a calendar feature, such
as Microsoft Outlook, or to any application that can read ICS files. Each calendar that
you create in WordPerfect MAIL has its own ICS file.
To import your calendar from Microsoft Outlook
1 In the Calendar window, click File ` Import.
The Import Wizard opens.
2 From the list of available programs, select Microsoft Outlook, and then click
Next.
3 Click Browse, and navigate to the Microsoft Outlook PST file that contains the
calendar that you want to import.
4 Accept the default WordPerfect MAIL datastore into which to import the calendar,
or click
Choose to select another datastore.
5 Click Next to continue.
6 Enable the Calendar check box.
If you also want to import account data, messages, or contacts, enable the
corresponding check boxes.
7 Click Next to continue.
8 Read the instructions for completing the import process, and then click Import
now
.
The imported calendar information is integrated into the calendar you’ve specified.
To import your calendar from iCalendar
1 In the Calendar window, click File ` Import.
The Import wizard opens.
2 From the list of available programs, select iCalendar, and then click Next.
40 WordPerfect Mail User Guide
Page 50

3 Do one of the following:
• Type the name of the ICS file that you want to import.
• Click Browse to navigate to the ICS file that you want to import.
4 Click Next to continue.
5 If you do not want to import the ICS file into the default My Calendar, do one of
the following:
• Type the name of the calendar into which you want to import the ICS file.
• Click Change to select the calendar into which you want to import the ICS file.
If you want, in the
the imported events by clicking
Select calendar dialog box, you can create a new calendar for
New calendar.
6 Click Next to continue.
7 Read the instructions for completing the import process, and then click Import
now
.
The imported calendar information is integrated into the calendar you’ve specified.
To export a calendar
1 If you want to export only specified events, select those events.
2 In the Calendar window, click File ` Export.
The Export to ICS dialog box opens.
3 Enable one of the following options:
• Selected events — Imports only the events you’v e selected
• All events in calendar — Imports all events in the calendar
• Search — Lets you provide search parameters for locating the events you want
to export
4 Enable any of the following check boxes:
• Include deleted events — Includes deleted events in the export
• Limited exported events count to — Lets you specify the number of events
you want to import
5 Accept the default Target ICS file, or click ... to select another ICS file to export
to.
Related topics
Using the Calendar 41
Page 51

Subscribing to ca lendars
A group of people can create an interactive environment for scheduling activities by
publishing their own calendars and subscribing to each others’. A calendar is published
by uploading its ICS file to a shared location, such as an external Intern et server, an
intranet site, or your network; this makes the information available to anyone who can
access that location.
You can subscribe to a published calendar. You can also set how often changes to that
calendar are downloaded, although you can manually downloa d changes at any time.
You can edit the settings for a calendar to whi ch you ha ve subscribed. You can als o
unsubscribe from a calendar.
To subscribe to a calendar
1 Click Configure ` Calendars.
2 Click Add.
The Add calendar dialog box opens.
3 In the Name box, type the name of the calendar to which you want to subscribe.
If you want, click the Color button to choose a different color for the calendar.
Events from this calendar display in the color you select.
4 In the Subscription information area, do the following:
• In the Location box, type the location of the published calendar (that is, the ICS
file) to which you want to subscribe. The valid URL formats for accessing this
location are http, file, and ftp.
• If the location requires authentication, enable the Authentication required
check box, and type your username and password.
• If you want to specify how often changes are downloaded, enable the Accept
changes from server every
check box, type a number, and choose a unit.
To download changes from a calendar manually
•Click File ` Publish/subscribe.
To edit the settings for a calendar to which you have subscribed
1 Click Configure ` Calendars.
2 Select the calendar that you want to edit, and click Edit.
42 WordPerfect Mail User Guide
Page 52

The Edit calendar dialog box opens.
3 Make your desired changes.
To unsubscribe from a calendar
1 Click Configure ` Calendars.
2 From the Available calendars list, select the calendar from which you want to
unsubscribe.
3 Click Delete.
Related topics
Printing calendars
You can print a calendar using a variety of formatting options.
Before you print a calendar, you may want to preview it. You can adjust printing
options, such as the layout, from within the
When you print a calendar, you can choose the view and date range.
To preview a calendar before you print it
Print preview window.
1 In the Calendar window, click File ` Print preview.
The Print preview window displays the current calenda r vi ew.
2 Navigate the print preview by doing one of the following:
• Click the arrow buttons to scroll through the pages.
• Type a number in the Page box to advance to that page.
In the P rint preview dialog box, you can click Setup to open the Print dialog
box.
To print a calendar
1 In the Calendar window, click File ` Print.
The Print dialog box opens.
2 Do any of the following:
Using the Calendar 43
Page 53

• In the Print this calendar area, disable the check box that corresponds to any
calendar that you do not want to print, or enable the
check box.
• In the Print style area, choose a view to print a standard calendar for that view,
with the previous and next month displayed in the upper-right corner. If you
choose the
the
Agenda style check box, events are printed in a list format, by date.
• In the Print range area, choose the start and end dates for the time span that
you want to print.
3 Click Print to print using the settings you’ve specified.
In the Print dialog box, you can click Preview to open the Print preview
dialog box or
Related topics
Events view, each event is printed on a separate page. If you enable
Settings to change any printer settings.
Select all visible calendars
Creating events
You can create a new event in a calenda r.
When you create an event, you can specify several details for it, including the following:
• The participants you want to invite to it
• The date, time, and duration of it
• The calendar in which you want to schedule it. Events display in the color
associated with the calendar in which they are scheduled.
• The category to which you want to assign it. The three default categories are
business, personal, and community, but you can customize the list of categories.
• The priority you want to assign it. Events can be given a Low, Normal, or High
priority; each one has a distinct color associated with it, to help you quickly
distinguish the importance of an event.
• The time designator you want to assign it. Free indicates that you are available.
Busy indicates that you have a scheduled event and are unavailable. Busy-tentative
indicates that you have a scheduled event but may be available all the same.
Unavailable indicates that you do not have an event scheduled but, re gar dless, are
not available. Cancelled means that you had an event scheduled, but it has been
cancelled.
44 WordPerfect Mail User Guide
Page 54

• The recurrence of the event
After you have created an event, you can view its details at any time.
To create an event
1 In the Calendar window, double-click the date and time at which you want to
create the event.
You can also create an event by doing one of the following:
• Right-click the desired date and time, and click New.
• Click the New event button on the toolbar.
• Click Event ` New.
The New event dialog box opens.
2 Click the Basics tab, and on the Basics page, do the following:
• In the Subject box, type a title for the event.
• In the Participants box, type the e-mail addresses of the participants you want
to invite to the event.
• If you want, edit the values in the Start date and End date boxes, specify the
meeting’s length by choosing a duration from the
the
All day event check box to make the event last all day.
• From the Calendar list box, choose the calendar to which you want to assign the
event.
• From the Category list box, choose the category that you want to assign to the
event.
• From the Priority list box, choose a priority for the even t.
• From the Free/busy time li st box, choose a time desig nator for the event.
• If you want to set a reminder for the event, enable the Reminder check box and
specify when you want to display the reminder.
3 Click the Notes tab, and on the Notes page, type any notes you want to associate
with the event.
Duration list box, or enable
4 If you want the event to recur, click the Recurrence tab, and on the Recurrence
page, do the following:
• If you want, in the Appointment time area, edit the values in the Start date
and
End date boxes, or specify the meeting’s length by choosing a duration from
the
Duration list box.
• In the Recurrence pattern area, enable the option that corresponds to how
often you want the event to recur, and choose from its associated settings that
display.
Using the Calendar 45
Page 55

• In the Range of recurrence area, specify the start date for the event, and specify
whether it has no end date, whether it ends after a given number of occurrences,
or whether it ends on a specified date.
5 If you want to review the settings you’ve specified, click the Summary tab.
6 Click Save.
The event is added to the calendar you’ve specified and is displayed in the color
associated with that calendar. If you invited participants to the event, WordPerfect
MAIL sends them an invitation by e-mail.
To view the details of an event
1 In the Calendar window, double-click the event whose details you want to view.
You can also view the details of an event by doing one of the following :
• Click the event, and then click the Open event button on the toolbar.
• Click the event, and then click Event ` Open event.
A dialog box for the event displays.
2 Do any of the following:
• Click the Summary tab to view basic details about the event.
• Click the Basics tab to view specifics about the event.
• Click the Notes tab to view any notes associated with the event.
• Click the Recurrence tab to view whether the event recurs.
Related topics
Editing events
After you create an event, you can edit it at any point.
To edit an event
1 In the Calendar window, double-click the event that you want to edit.
You can also edit an event by doing one of the following:
• Click the event, and then click the Open event button on the toolbar.
• Click the event, and then click Event ` Open event.
A dialog box for the event displays.
46 WordPerfect Mail User Guide
Page 56

2 Click the Basics tab to edit the subject, participants, start and end times, duration,
assigned calendar, category, priority, time designator, or reminder for the event.
3 Click the Notes tab to edit the notes for the event.
4 Click the Recurrence tab to edit the recurrence of the event.
5 Click the Summary tab to the new settings you’ve specified.
6 Click Save to commit the changes you’ve made.
If you’ve made changes to a recurring event, you are prompted to decide whe ther
you want to apply the changes you’ve made to the entire series or to just this one
occurrence.
You can change the date or time of an event from directly within the Calendar
window. In the calendar, position the pointer over the event, and when the
four-sided arrow appears, drag the event to a new day or time. The original
event is deleted, and a new event is created using the day and time you’ve
chosen.
You can change the duration of an event from directly within the Calendar
window. In the calendar, position the pointer over the top or bottom of the
event, and when the two-sided arrow appears, drag to change the duration of
the event.
You can move an event to another calendar from directly within the Calendar
window. In the
Organize ` Move to, and then click the calendar to which you want to move
the event. The event changes to the color that’s assigned to its new calendar
(provided that events from that calendar are currently displayed).
Calendar window, click the event you want to move, click
Related topics
Searching for events
You can search for events. You enter search criteria, such as the event name or
description, dates, participants, or notes.
To search for an event
1 In the Calendar window, type in the Search box on the property b ar.
Using the Calendar 47
Page 57

You can search for any informati on tha t co rresponds to event details in the New
event
dialog box.
2 Click Search.
If the event is located, it is highlighted in yellow. You may need to change views to
display the event.
If more than one event meeting your search criteria is located, click the a rrow
buttons to scroll through those events.
3 Click All to restore the calendar view.
Related topics
Deleting events
You can delete an event from any calendar you have created. You can also display or hide
deleted events in your calendar .
To delete an event
1 In the Calendar window, click the event you want to delete to select it.
2 Do one of the following:
• Click Organize ` Delete.
• Press Delete.
To display or hide deleted events
•In the Calendar window, click View ` Show deleted events.
A check mark indicates that deleted events are displayed.
Related topics
48 WordPerfect Mail User Guide
Page 58
Configuring spam protection
WordPerfect MAIL includes SAproxy Pro, a software program designed to protect you
from junk e-mail, or “spam.” SAproxy Pro uses five techniques to fight spam:
• learning from stored e-mails
• filtering incoming e-mails by using a white list and blacklist system
• scanning incoming e-mails by using of rules
• consulting with community blacklists
• calculating historical averages on e-mails received
This five-point protection system is what makes SAproxy Pro the most comprehensive
anti-spam prog ram available.
SAproxy Pro works by grading e-mail messages on a point system as they are received.
Each of the five anti-spam techniques adds points to a message’s spam score if the
message is suspected of being spam and subtracts points if the message is deter mi ned
to be legitimate. If the total spam score for an e-mail message equals or exceeds the
threshold set by the user, the message is marked as spam.
Rules and Smart Groups still apply when a message is marked as spam. If a
message that is marked as spam qualifies for a rule or Smart Group that you
have created, the message is sent to the folder that is specified by that rule or
Smart Group. However, SAproxy Pro still treats the message as spam, by
changing its subject line and attaching it to the spam report (as per the default
settings for SAproxy Pro).
In this section, you’ll learn about
• setting up SAproxy Pro
• training SAproxy Pro
• using the white list and blacklist
• using rules
• using community blacklists
• using historical averaging
Configuring spam protection 49
Page 59

Setting up SAproxy Pro
SAproxy Pro is integrated into WordPerfect MAIL, so there’s no need to install it
separately. However, to begin filtering spam from an e-mail account, you must enable
spam protection for it.
A message is marked as spam if its total spam score equals or exceeds the default spam
threshold. SAproxy Pro lets you adjust the spam threshold.
SAproxy Pro can add a textual tag to the subject line of spam messages, so that you can
identify them more easily . By default, SAproxy Pro does not include a subject tag, but
you can change this at any time.
Sometimes, spam contains attachments or coding that can damage your computer or
inform the sender that your e-mail address is valid. SAproxy Pro lets you increase or
decrease the level of safety it provides when marking spam .
To enable spam protection for an e-mail account
1 In the Mail window, click Configure ` Accounts and aliases.
2 Select an account, and click Edit.
The Mail accounts settings dialog box appears.
3 In the Download settings area, enable the Turn on spam protection check box.
You can also turn on spam protection when y ou are adding a new account or
alias.
To adjust the spam threshold
1 In the Mail window, click Configure ` Spam protection.
The SAproxy Pro configuration window appears.
2 Click the Rules tab.
3 In the Adjust spam threshold area, drag the slider to set a new spam threshold .
It is recommended that you test your new spam threshold for a few days, to
make sure that it meets your needs.
50 WordPerfect Mail User Guide
Page 60

To add a subject tag to spam messages
1 In the Mail window, click Configure ` Spam protection.
The SAproxy Pro configuration window appears.
2 Click the Tagging options tab.
3 In the Adjust spam subject area, enable the Modify subject line of spam
messages
4 Do any of the following:
• If you want to change the content of the subject tag, edit the text in the Subject
tag
• If you want to display the spam score in the subject line of spam messages, enable
the
check box.
box.
Include spam points check box.
To adjust the safety level
1 In the Mail window, click Configure ` Spam protection.
The SAproxy Pro configuration window appears.
2 Click the Tagging options tab.
• In the Adjust safety level area, adjust the slider to the level of safety you want to
use:
• High — Attaches the spam message in text format
• Medium — Attaches the spam message in its original format
• Low — Leaves the spam message as is. This is the default setting.
Related topics
Training SAproxy Pro
You can “train” SAproxy Pro to recognize which messages you consider to be spam and
which ones you consider to be legitimate. This is a powerful feature that remains
effective even as spammers change their tactics over time.
To train SAproxy Pro, you must provide it with a repository of message s that have
already been classified as either spam or legitimate e-mail. The Training Database
creates “tokens” from the words, phrases, and header information in the classi fied
messages that you provide it. After the Tra in i ng Database has analyzed 200 spam
messages and 200 legitimate messages, the Bayesian filter activates and begins using
the tokens to calculate how many points to add to each incoming message’s spam score.
Configuring spam protection 51
Page 61

Each folder of messages that you provide the Training Databa se must be i n
Mbox format. For information on exporting messages to the Mbox format, see
“Importing and exporting Mbox files” on page 12.
In addition, for best results, each folder of messages that you provide the
Training Database must contain either spam e-mail only or legitimate e-ma i l
only.
It is highly recommended that you store e-mails that are not marked by
SAproxy Pro as spam. That way, you can use them to train SAproxy Pro.
To train SAproxy Pro
1 In the Mail window, click Configure ` Spam protection.
The SAproxy Pro configuration window appears.
2 Click the Training tab.
3 Click the Training wizard button.
4 Click Next.
5 Click Browse, and locate the Mbox file that you want to use.
6 In the Learn these messages as area, enable one of the following options:
• Spam — Sets the folder as containing spam messages
• Not-spam — Sets the folder as containing legitimate messages
7 Click Next.
You can ignore any warnings that appear.
8 Click Next.
SAproxy Pro displays a report detailing how many messages ar e in the Training
Database. SAproxy Pro learns only from messages it hasn’t yet analyzed, so if
you’ve already trained it using a particular folder, it reports that no messages have
been learned.
9 Click Finish.
To determine how many messages are in your Traini ng Da tabase, click
Configure ` Spam protection, and when the SAproxy Pro configuration
window appears, click the
current number of messages in the Training Database.
52 WordPerfect Mail User Guide
Training tab. The Training page displays the
Page 62
Related topics
Using the white list and blacklist
One of the points of protection used by SAproxy Pro is the white list and blacklist,
which let you personalize SAproxy Pro and improve its performan ce.
Using the white list
You can add e-mail addresses to the white list so that messages from that address a re
never marked as spam. You can also add an enti re domain to the white list.
You may want to add your company’s domain to your white list, so that you
always receive e-mail from senders within your company.
When SAproxy Pro reviews a message from a sender or domain that is on its white list,
it subtracts 50 points from that message’s spam score. This guarantees that the e-mail
will not be marked as spam, no matter how many points are assigned to it by other rules
or spam tools.
If you rarely receive e-mail from people who are not on your white list, you can
lower your spam threshold to 2.0. This marks all messages as spam except the
ones from senders on your white list.
Using the blacklist
If you are receiving spam from a particular e-mail address, you can add that address to
the blacklist. If a particular domain is responsible for a lot of spam, you can add that
domain (and therefore all senders who use that domain) to you r blac klis t.
If you receive spam from a particular domain, but you also receive legitim ate
e-mail from contacts who use that domain, you may wa nt to a dd the doma in
to your blacklist but add those legitimate senders to your white list.
When SAproxy Pro reviews a message from a sender or domain that is on its blacklist,
it adds 100 points to that message’s spam score. This guarantees that the e-mail will be
marked as spam.
Configuring spam protection 53
Page 63

To add a single entry to the white list
1 In the Mail window, click Configure ` Spam protection.
The SAproxy Pro configuration window appears.
2 Click the Whitelist tab.
3 Click Add.
4 From the list box, specify the type of white list entry by choosing either Email
address
5 In the text box, type the e-mail address or domain name.
or Entire domain.
To add all your contacts to the white list
1 In the Mail window, click the Contacts button .
The Contacts window appears.
2 Click File ` Send all contacts to Whitelist.
To add an entry to the blacklist
1 In the Mail window, click Configure ` Spam protection.
The SAproxy Pro configuration window appears.
2 Click the Blacklist tab.
3 Click Add.
4 From the list box, specify the type of blacklist entry by choosing either Email
address
5 In the text box, type the e-mail address or domain name.
Related topics
or Entire domain.
Using rules
One point of protection used by SAproxy Pro is a set of rules that tests the body , subject,
and header of a message for indications of spam. These rules were created by the opensource SpamAssassin community and are updated throughout the year as the
community continues to combat new and improved spam tactics.
SAproxy Pro scans each message looking for the following:
54 WordPerfect Mail User Guide
Page 64
• Key words or phrases, such as “Buy Now” or “Click Here”
• Indicatio ns of known scams
• A suspicious list of recipients. Spam senders often use programs that generate an
alphabetical list of recipients.
• HTML coding (as opposed to plain text)
• Webbugs — that is, images within the e-mail that inform the sender when you
have viewed the message
• Other header information that can indicate spam
Each rule, when triggered, adds points to the message’s spam score, thereby improving
the chance that the e-mail is marked as spam.
If you want, you can also create your own rules. For example, you can create a rule that
targets a specific kind of spam that SAproxy Pro does not detect, or you can create a
rule that subtracts spam points from messages so that they are less likely to be marked
as spam.
To create a rule
1 In the Mail window, click Configure ` Spam protection.
The SAproxy Pro configuration window appears.
2 Click the Rules tab.
3 Click Add.
The Add custom rule dialog box appears.
4 In the Keyword or phrase box, type the specific word or phrase that you want the
rule to look for.
5 In the Score box, type the number of spam points that you want to attribute to the
key word or phrase. Use a positive number for messages that y ou wa nt to mark as
spam, or use a negative number for legitimate e-mail.
When you create a rule that targets spam, make sure to lower the spam point
for the rule if you include a word or phrase that you often use in legitimate email. That way, SAproxy Pro marks those messages as spam only if they receive
a high enough score from the other points of protection.
Related topics
Configuring spam protection 55
Page 65
Using community blacklists
One point of protection you can have SAproxy Pro use is to check every e-mail yo u
receive against two types of community blacklists on the Internet: spam databases and
lists of suspicious Internet Protocol (IP) addresses.
Online spam databases are collaborative efforts. Internet users cont ribute to them by
submitting spam messages. SAproxy Pro supports two such data ba ses:
• Razor2 — Vipul’s Razor database (http://razor.sourceforge.net)
• DCC — Distributed Checksum Clearinghouse (http://www.rhyolite.com/antispam/dcc/)
The Realtime Blackhole List (RBL) provides the server IP addresses for Internet Service
Providers (ISPs) whose customers are responsible for sending spam or whose serv ers
have been hijacked for spam relay. By checking each e-mail against the RBL, SAproxy
Pro can receive the latest data on suspicious e-mails.
SAproxy Pro can contact these community blacklists, to check each message against
them. When SAproxy Pro finds a match, it adds spam points to the message’s spam
score.
SAproxy Pro can also verify the authenticity of the sender’s mail server.
Because using community blacklists requires a fast Internet connection and
increases download time by about one second per message, it is recommended
for broadband users only.
We recommend that you use community blacklists if possible, because they
dramatically increase the effectiveness of SAproxy Pro.
To enable the community blacklists
1 In the Mail window, click Configure ` Spam protection.
The SAproxy Pro configuration window appears.
2 Click the Community tab.
3 Enable the Check with Community Blacklists check box.
4 For each community blacklist that you want to use, enable its check box and set the
number of seconds for which you want SAproxy Pro to try to connect with it before
giving up.
56 WordPerfect Mail User Guid e
Page 66

5 If you want, adjust the number of attempts and delay between attempts for
verifying the authenticity of the sender’s mail server.
Test out your settings, and make adjustments as necessary until you are
satisfied with the download time.
Related topics
Using historical averaging
Historical averaging is often called the “automatic white list” (AWL). A score-averaging
system, it keeps track of the historical average of a sender’s e-mail messages, pushing
the spam score of any subsequent messages from that sender towa rds tha t av era ge.
Because an e-mail’s header information can be forged, SAProxy Pro identifies senders
not only by their e-mail address, but also by their IP address. If an e-mail appears to be
from an address you recognize, the AWL verifies that the IP address used to send it
matches the one used in previous messages from that sender.
Although it is the default for SAproxy Pro to use historical averaging, you can disable
it at any time.
Understanding the AWL
Let’s say that you receive a message from someone who has nev er before sent you a
message, and that message receives a spam score of 20.0. Now let’s say that you receive
a second message from that sender. If that message has a spam score of 2.0 before the
A WL is applied to it, the AWL increases its score to 11.0 by assigning 9.0 spam points
to it.
Now let’s say that you receive a message from someone else who has never before sent
you a message, and that message receives a spam score of 0. Now let’s say that you
receive a second message from that sender. If that message has a spam score of 7.0 before
the AWL is applied to it, the AWL decreases its score to 3.5 by assigning -3.5 spam
points to it.
In this way, the AWL can calculate the likelihood that e-mail from a particular sender
is spam, and its calculations become more accurate ever y time you receive an e-mail
from that sender.
The AWL algorithm uses a database of entries. Each entry contains the following:
Configuring spam protection 57
Page 67

• a key, which is formed from the e-mail address and IP address of the sender
•a TOTAL score
•a COUNT number
The MEAN score for the entry is its TOTAL divided by its COUNT. The current algorithm
works as follows:
• Compute the SCORE of the message without AWL
•Compute AWL DELTA as (MEAN – SCORE) × auto_whitelist_factor
•Increment TOTAL by SCORE
•Increment COUNT by one
• Set the final score of the message to SCORE + DELTA
The historical average calculated by the AWL is stored in the file auto-whitelist, which
is located in your
Spamassassin folder.
To disable historical averaging
1 Navigate to your Spamassassin folder.
• For Windows 2000 and XP, the Spamassassin folder is located by default at
X:\Documents and Settings\<user name>\My Documents (where X is the
letter that corresponds to the drive to which you’ve installed W ordPerfect MAIL).
• For Windows 98 and ME, the Spamassassin folder is located by default at
X:\Program Files\Corel\SAproxy Pro (where X is the letter tha t corresponds to
the drive to which you’ve installed WordPerfect MAIL).
2 Right-click the auto-whitelist file, and click Open with ` Choose program.
3 The Open with dialog box appears.
4 Select Notepad, and click OK.
The coding stored in this file is unreadable.
5 Select the contents of the file, and then delete them.
6 Save the file, and then exit Notepad.
Although you can delete the auto-whitelist file, it is recreated every time
SAproxy Pro examines a new message.
Related topics
58 WordPerfect Mail User Guide
Page 68
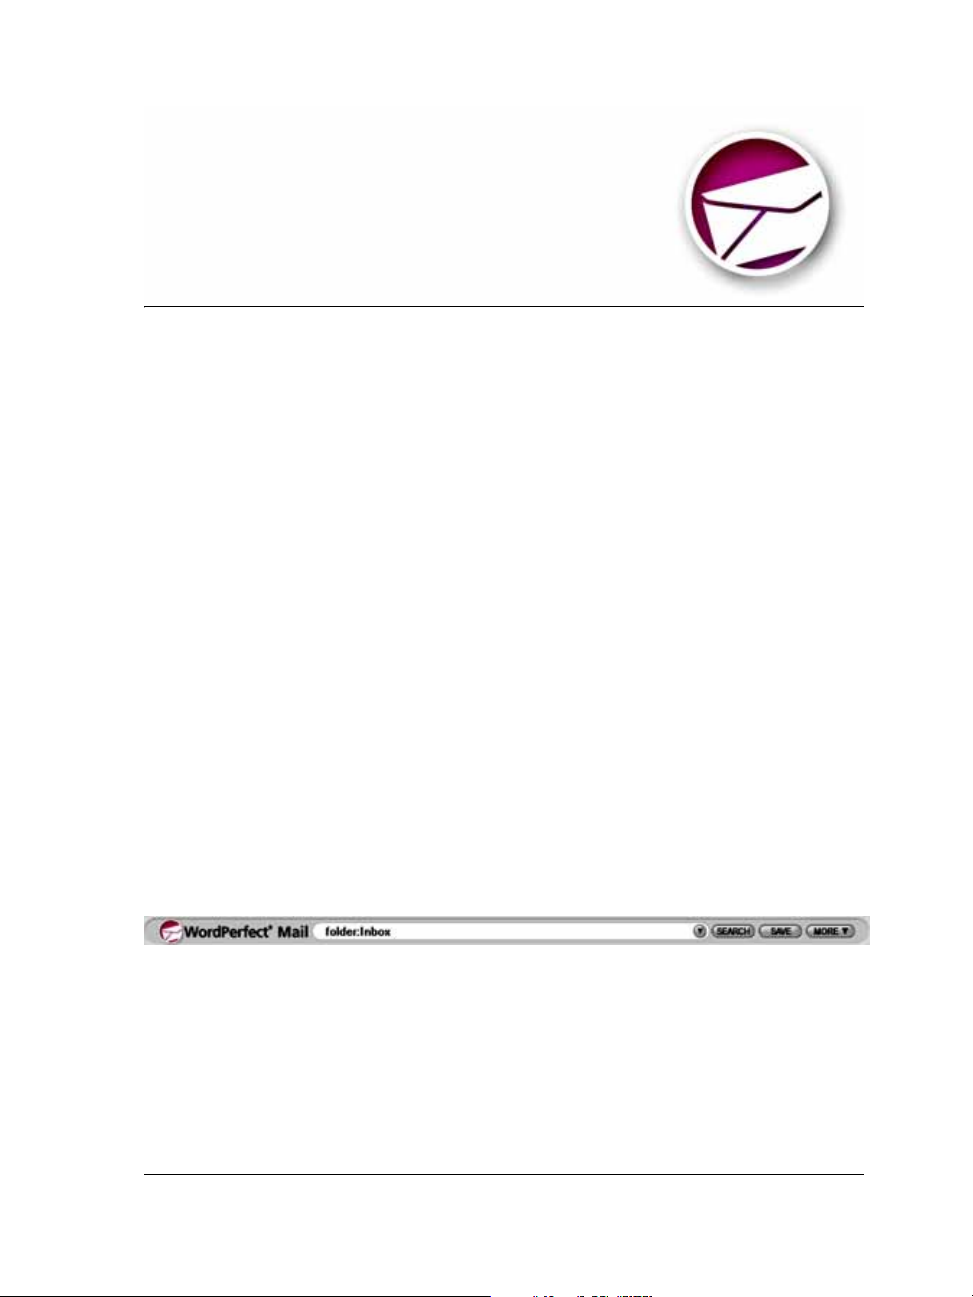
Searching in WordPerfect MAIL
The core strength of WordPerfect MAIL is its search capability, whi ch lets you find
messages, contacts, documents, and calendar events quickly and easily. More
importantly, it lets you create simple or complex search parameters, save them, and use
them to immediately view all incoming messages that meet the paramete rs.
In this section, you’ll learn about
• understanding the basics of searching
• searching the Inbox
• one-click searching
• performing easy and complex searches
• searching by dates
• using searching shortcuts
• saving searches
• navigating searches
• using Web shortcuts
Understanding the basics of searching
The easiest way to search is to use the Search bar. By default, the Search bar reflects
which folder is selected in the
Folders and Searches pane.
When performing a search, you need to type the keyword or phrase tha t you want to
find in the messages. This is also know as a search string. The search string can contain
the search parameters you entered or the name or tag associated with a folder, saved
search, or Smart Group. For more information about Smart Groups, see
editing, and deleting mailing list Smar t Groups” on page 79 or “Creating, editing, and
deleting RSS feed Smart Groups” on pa ge 81.
Searching in WordPerfect MAIL 59
“Creating,
Page 69
How does W ordP erfect MAIL search so many e-mail messages so quickly? W ordP erfect
MAIL applies server-class, highly scalable algorithms to the e-mails — the type of
algorithms that drive Internet search engines. This involves such technologies as fulltext indexes and disk-based pattern matchers. W ordP erfect MAIL redesigned and tuned
these algorithms for the disk and memory characteristics of desktop systems. The result
is a technology that meets the needs of personal search requirements.
Searching the Inbox
You can search your Inbox to find specific messages. For example, you can search for
messages from an individual sender or messages that conta i ns a par ticu lar word.
To search your Inbox
1 In the Folders and Searches pane, click the Inbox folder.
2 Click in the Search bar.
The text in the Search bar is highlighted.
3 Click after the word Inbox, and type the word or phrase that you want to find in
the messages.
WordPerfect MAIL displays all messages that contain the word or phrase you
typed (except messages that have been deleted). The search includes searching
inside attachments, such as text-based files from WordPerfect, Quattro Pro,
and Presentations.
You can access the Search bar by pressing F6.
Related Topics
One-Click sear ching
One-Click search is a powerful and convenient feature in W ordP erfect MAIL. It lets you
search for messages that have the same subject or name as that contained in the header
of a selected message.
60 WordPerfect Mail User Guide
Page 70

To use one-click search
1 In the Message list, select the message you want to use as the basi s for the sea rch.
If necessary, you can locate the message by entering the person’s name or keywords
in the
Search bar and clicking the Search button.
2 Do one of the following:
• In the Preview pane, click the magnifying glass icon next to the Subject fiel d
to search for all messages that contain the same words in the Subject line.
• Click the magnifying glass icon ne xt to the From field to search for all
messages that contain the sender’s name.
The search results appear in the Message list, with the number of messages
that met the search criteria appearing in the title bar.
Related Topics
Performing easy and complex searches
You can perform searches using diff eren t levels of complexity. Easy searches are those
that use a simple keyword or phrase, such as a person’s name, a subject, or a word in a
document or presentation you received as an attachment. Rather than having to locate
messages that you may have previously sorted and stored in folders , you can locate a
message or document using search criteria.
A second method for performing an easy search is to reuse search parameters you have
created previously and saved.
When you are accustomed to the simple searching method, you can try setting up more
complex search criteria. You can also create more complicated searches by typing in
some shortcuts.
To perform an easy search
1 Click in the Search bar.
The text in the Search bar is highlighted. The text that appears in the Search bar
reflects which folder is selected in the
your search to that folder or override that location and perform a system-wide
search.
Searching in WordPerfect MAIL 61
Folders and Searches pane. You can limit
Page 71

2 Type the keyword or phrase that you want to find in the messa ges, o verr idin g the
highlighted text as you type.
3 Click the Search button.
The search results shown include all messages from your datastore, except those
that have been deleted. In addition, you should see messages from many different
folders and views, including messages you sent.
4 Find the specific message you want to view.
5 Click it to display the full message in the Preview pane.
You can access the Search bar by pressing F6.
Related Topics
To search a specific folder
1 In the Folders and Searches pane, click the folder you wa n t to searc h.
2 Click in the Search bar after the text that identifies the location, and type your
search word(s) or phrase.
For example, if you type folder:Filed training, WordPerfect MAIL searches for all
messages and documents that contain the word
have to add a colon or other punctuation marks between the location a nd search
criteria.
3 Click the Search button.
All messages containing the search criteria appear in the Message list, and the
number of search results appear in the title bar of the
Training. Notice that you do not
Message list.
In the Search bar, you can change the folder in which you want to search by
selecting the text after the colon and typing a different folder name.
Related Topics
To perform a complex search
1 Click the More button on the Search bar.
This opens the Search form.
62 WordPerfect Mail User Guid e
Page 72

2 In the Look for words area, choose one of the following options from the first list
box:
• Anywhere — searches for the word(s) in any part of an e-mail message
• In subject — searches for the word(s) only in the subject hea di ng
3 In the Look for words area, choose one of the following options from the Look
for
list box:
• All of — locates all messages con taini n g all search words. It is shown in
parentheses in the
Search bar . For examp l e: subject:(event)
• Any of — locates messages that contain any of the search words. The word OR
appears in the
Search bar. For example: subject:(event OR bu dget)
• None of — excludes any messages that contain any of the search words. A
minus sign appears before the search words conta i ned in the
example:
subject:-(event OR budget)
Search bar. For
4 Type the word(s) you want to search for in the Look for words text box.
If you want to search for an e-mail message from a specific sender, choose a search
option from the
From contains list box and type the senders’s name in the text
box.
If you want to search for an e-mail message that you sent, choose a search option
from the
To/CC contains list box and type the name of the receiver in the text box.
5 Choose the folder you want to search from the Folder list box.
If you want to search all folders and searches, choose the <top> option.
6 Click the Search button.
You can also
Search for e-mail messages by status Choose a status option from the Status list
box.
Search for e-mail message by category Choose a category from the Category list
box.
For more information about performing sea rches, see “Using searchi ng
shortcuts” on page 64.
Related Topics
Searching in WordPerfect MAIL 63
Page 73

Searching by dates
When you create search parameters, you have a variety of date options to choose from.
This allows you, for example, to find messages that were received or sent on a specific
date.
To search by date
1 Click the More button on the Search toolbar.
This opens the Search form.
2 Choose one the following ranges from the Date range list box:
• Anytime — searches all messages
• Today — limits the search to the current day
• Yesterday — limits search to the day before the current day
• Last 7 days — limits the search to the seven days prior to the current day
• Previous week — limits the search to the previous calendar week (Sunday
through Saturday) regardless of whether the current day is a Monday or a Friday.
For example, if the current day is Wednesday, September 24, the Previous week
would be September 14 to Septembe r 20.
• Last 30 days — limits the search to the 30 days prior to the current day
• Previous month — limits the search to the previous calendar month (1st
through 30/31st) regardless of which day in the current mon th you are in. For
example, if the current day is Wednesday, September 24, the prev io us mon th
would be all of August.
• Last 3 months — limits the search to the 90 days prior to the current day
• Custom — opens the Create custom date range dialog box, which lets you to
specify the age of the messages you are searching for. You can choose from hours,
days, weeks, or months, and enter a numeric range.
Using searching shortcuts
You can enter sear ch pa rameters directly in the Search bar using the shortcuts in the
following table.
To find messages Type directly in the Search bar
from John from:john or fr:john
from John Smith from:(john smith) or fr:(john smith)
64 WordPerfect Mail User Guide
Page 74

from John and addressed to Betty about
“budget”
received in the last 24 hours after:1-day or after:24-hours
from John last week fr:john after:14-days before:7-days
from John in the past 2 days fr:john after:2-days
with “budget” in the subject subject: budget or su:budget
from John with “budget” in the subject fr:john su:budget
fr:john to:betty budget
from OR to John, with “budget” in the
subject
from John, but not John Smith fr:john -from:(john smith)
from Betty’s mycompany account: fr:betty@mycompany.com
from John, containing any word start in g
with “test” (e.g, “testing”, “tested”, “tester”)
subject contains any word with the string
“commit” in the middle (e.g., uncommitted,
committed, etc)
from anyone at mycompany.com fr:mycompany.com
Related Topics
person:john su:budget or per:john su:budget
or (from:john OR to:joh n) su: budget
fr:john test*
(Note: This can be sl ow if the pattern
matches lots of words)
su:*commit*
Saving searches
After you create search parameters, you can save them. You can reuse these search
parameters repeatedly to find existing and new messa ges.
Saved search groups
The following table shows the hierarchical structure that WordPerfect MAIL uses to
store saved searches. You can modify any of these groups or create your own.
Group by Description
Searching in WordPerfect MAIL 65
Page 75

Address mode The importance of a message can sometimes
be based on how a message is sent to you .
This groups messages by the following:
Me only — identifies which messages were
sent only to you
Me too — identifies messages sent to
multiple people or copied to you
Other — specifies distribution lists or blind
copies (Bccs)
This is very useful for someon e who is copied
quite often and needs to quickly see which
messages are specifically for them and which
are not.
Account This groups your messages by account. If
you have a work account, a personal account,
and a Web mail account, you can use Group
by to sort your messages into these groups.
Category If you have created categories and would like
to sort your saved searches by categories, use
Group by. You can also sort by categories on
an ad-hoc basis using the Category column
in the Message list.
Status This groups your messages by Status.
Priority This groups your saved searches by Priority.
Smart Group This groups your messages by Smart
Group.
Related Topics
To save your search
1 Click the More button on the Search bar.
This opens the Search form.
2 Enter the search parameters in the Search form.
3 Click the Save button.
4 Type a name for the search in the Saved search text box.
66 WordPerfect Mail User Guide
Page 76

5 Choose the folder where you want to save the search from the Select parent list
box.
The <top> option saves the search in the root of the Saved searches folder. The
other options save the search in one the
Saved searches subfolders.
6 Choose an option from the Group by list box, which reflects the columns in the
Message list.
7 Click OK to save the search.
You can also
Modify the search parameters Click Search form.
Choose another set of searc h param e ters to
save
Display the number of messages returned
from a search
Go to the last message viewed in the search
results
Related Topics
Click Recent searches, select a search, and
click OK.
In the Display settings area, enable the
Show count of check box and se l ect All or
Unread.
In the Display settings area, enable the
Remember last selected message check
box.
Navigating searches
Once you perform a search, the search locations and criteria appear in the Search bar
list box. You can navigate through this list to select a search.
To navigate searches
• Click one of the following buttons on the toolbar:
• Prev search — moves to the message that was last highlighted in the results of
the previous search
• Next search — moves you forward through all your searches until you are back
where you started
Related Topics
Searching in WordPerfect MAIL 67
Page 77

Using Web shortcuts
You can look up words in an online dictionary and thesaurus, search the Web, look for
news items, find stock quotes, contacts, phone numbers, and archiv ed websites.
To find a word in the dictionary
1 In any WordPerfect MAIL window, type define: in the Search bar (including the
colon).
If you want to perform a search, you must use all lowercase letters with no spaces.
2 Type the word you want to look up.
3 Click the Search button.
Word Perfect MAIL launches your default Web browser and displays the website
http://dictionary.reference.com, which displays all entries that match the word
you typed in the
Related Topics
To find a word in the thesaurus
1 In any WordPerfect MAIL window, type similar: in the Search bar (including the
colon).
If you want to perform a search, you must use all lowercase letters with no spaces.
Search bar.
2 Type the word you want to look up.
3 Click the Search button.
WordPerfect MAIL launches your default browser and displays the Web site http://
thesaurus.reference.com
entered in the Search bar.
Related Topics
, which displays all entries that match the word you
To search the Web
1 In any WordPerfect MAIL window, type google: in the Search bar (inclu ding the
colon).
If you want to perform a search, you must use all lowercase letters with no spaces.
68 WordPerfect Mail User Guide
Page 78

2 Type the topic you want to look up.
3 Click the Search button.
WordPerfect MAIL launches your default browser and displays the Web site http://
google.com
Search bar.
, which displays all entries that match the topic you entered in the
To find news items
1 In any WordPerfect MAIL window , type news: in the Search bar (including the
colon).
If you want to perform a search, you must use all lowercase letters with no spaces.
2 Type the topic you want to look up.
3 Click the Search button.
WordPerfect MAIL launches your default browser and displays the Web site http://
news.google.com
the Search bar.
, which displays all entries that match the topic you entered in
To find a stock quote
1 In any WordPerfect MAIL window , type stock: in the Search bar (including the
colon).
If you want to perform a search, you must use all lowercase letters with no spaces.
2 Type the ticker symbol (the four letter stock symbol) for the compa ny whose stock
performance you want to review
3 Click the Search button.
WordPerfect MAIL launches your default browser and displays the Web site http://
finance.yahoo.com
symbol you entered in the
Related Topics
, displaying detailed information on the stock whose ticker
Search bar.
To locate a contact
1 In any WordPerfect MAIL window, type the n am e (or part of the name) of the
person you want to find in your
2 Click the Search button.
Searching in WordPerfect MAIL 69
Contacts list in the Search bar.
Page 79

All names matching the search criteria appear on top of Calendar Peek. The
names are underlined, providing a link to the
Related Topics
Contact dialog box for each person.
To find a phone number
1 In any WordPerfect MAIL window, type phone: in the Search bar (including the
colon).
If you want to perform a search, you must use all lowercase letters with no spaces.
2 Type the First name and the Last name of the person whose pho ne number you
want to find.
3 Click the Search button.
WordPerfect MAIL launches your default browser and displays the Web site http://
phone.people.yahoo.com
ticker symbol you entered in the
You can search for other phone numbers by typ in g 411: and clicking the
Search button. This displays the Web site http://411.com, allowing you to
search for phone numbers, addresses, and zip codes.
, displaying detailed information on the stock whose
Search bar.
To find news items
1 In any WordPerfect MAIL window, type wayback: in the Search bar (including
the colon).
2 Click the Search button.
WordPerfect MAIL launches your default browser and displays the Web site http://
web.archive.org
Search bar.
, which displays all entries that match the topic you entered in the
Page 80

Working with fo lders
The traditional way to categorize and save e-mail messages is to use folders. With
WordPerfect MAIL, you can create and maintain folders in which to store messages .
In this section, you’ll learn about
• creating a folder
• renaming, emptying, and deleting a folder
• viewing folder properties
• moving messages to folders
Creating folders
WordPerfect MAIL lets you create folders to organize and store your e-mail messa ges.
To create a new folder
1 Click Organize ` Folders `New folder.
2 Type a name for the folder in the Folder name text box.
If you want the folder to be at the top level - the same level as your Inbox - leave
<top> from the
If you want the folder to be a subfolder of another folder, choose the folder’s name
in the
Parent folder list box.
Parent folder list box.
You can also
Display the number of unread messages in
the folder
Display the last message viewed in the folder
upon opening
Working with folders 71
Enable the Show count of unread
messages check box and choose an option
from the list box.
Enable the Remember last selected
message check box.
Page 81

Related Topics
Renaming, emptying, and deleting folders
You can rename and delete only the folders that you create. You can also delete a folder’s
contents by emptying it. You cannot rename or delete folders that come with
WordPerfect MAIL, which are considered to be system folders, but you can change their
properties. The system folders include
To rename a folder
1 In the Navigation pane, choose the folder you want to rename.
2 Click Organize ` Folders ` Rename.
The folder name is highlighted.
3 Type the new folder name.
4 Press Enter to apply the change.
To empty a folder
•In the Navigation pane, right-click the folder you want to empty and click Empty
folder.
Inbox, Drafts, Outbox, Deleted, and Filed.
To delete a folder
1 In the Navigation pane, choose the folder you want to delete.
2 Click Organize ` Folders ` Delete.
Related Topics
Viewing folder properties
You can view how many messages a re con tained in a folder. You can also choose to
automatically highlight the last message you viewed in a selected folder.
To view folder properties
1 Click a folder in the Navigation pane.
72 WordPerfect Mail User Guide
Page 82

2 Click Organize ` Folders ` Properties.
3 In the Display settings area, enable the Show count of check box, and choose an
option from the list box.
The count appears after the folder name in the Folders and Searches pane.
4 Enable the Remember last selected message check box to automatically display
the last selected message in the
Related Topics
Message List and Preview panes.
Moving messages to folders
There are different ways to move messages in and out of folders.
To move a message to a folder
• Drag a message from the Message list to a folder in the Navigation pane.
If you prefer, you can select the message, click Organize ` Move to, and choose
the folder you want to move it to.
You cannot move a message into a Saved Search because any message that
meets the search criteria already appears in that
include additional types of messages in a
search criteria to include messages of that type.
Saved Search. If you want to
Saved Search, you must update the
Related Topics
Working with folders 73
Page 83

Page 84

Grouping messages
Word Perfect MAIL offers you several ways of grouping e-mail messages. Groupin g
allows you to organize the e-mail messages that you send and receive. You can use
threads, rules, and Smart Groups for grouping messages.
In the section, you’ll learn about
• grouping messages by thread
• creating, editing, and deleting rules for messages
• applying rules
• creating, editing, and deleting mailing list Smart Groups
• creating, editing, and deleting RSS feed Sma rt Groups
• designating a lifecycle
Grouping messages by thread
Word Perfect MAIL lets you group messages by thread. When you fir st down load
messages into WordPerfect MAIL, some messages appear with a plus sign (+) next to
them. Clicking the plus sign expands the list of messages, and which contain the same
subject. This is called a thread. It is a very useful method for tracking e-mail
conversations related to a particular subject.
To group or ungroup messages by thread
• In the e-mail window, click View ` Group by threads.
If there is a check mark next to Group by threads in the View menu, the option is
enabled.
Related Topics
Grouping messages 75
Page 85

Creating, editing, and deleting rules for messages
You can create rules for both incoming and outgoing messages. Rules let you identify
certain types of messages and perform actions on all message s that mee t the speci fie d
criteria. For example, you can request that all message from a certain person be moved
into a folder or be tagged with a category . Rules, in general, help you manage messages
more efficiently. Once you create a rule, you can edit it to meet new search criteria or
perform different actions. If you no longer need the rule, you can delete it.
Most rules are created for incoming messages, to handle tasks such as moving messages
into specific folders or adding a category to a message.
You can also create an outgoing rule. For example, you may want to follow up on the
status of a project with several team members. You can create an outgoing rule that
looks for messages sent to those members, and create a category called “Follow-up.”
Then, you can quickly go into your
review messages sent to those people.
WordPerfect MAIL executes rules on incoming messages as they are downloaded from
the server into your Inbox, and on outgoing messages as they are uploaded to the server.
Before you create a rule, you need to know which search criteria to use to identify the
messages. You can test a rule by creating a simple sea rch, to mak e sure i t finds the
correct messages.
Sent folder and sort by the category “Follow-up” to
Related Topics
To create a rule
1 Click Configure ` Rules.
2 Click Add.
This opens the Add rule wizard.
3 Type a Name for the new rule in the Name text box.
4 In the Enable this rule for area, enable one of the following check boxes:
• Incoming messages
• Outgoing messages
5 Click Next.
6 Click one of the following buttons:
76 WordPerfect Mail User Guide
Page 86

• Recent searches — lets you choose a search string and use it as the new rule, or
use it as the foundation for a more complex set of search criteria
• Search form — lets you choose complex search pa ra meters
If you want to apply the rule to all messages or manually apply a rule to messages
at a later time, leave the
Search text box blank.
7 Click Next.
8 In the Specify actions page, click Add.
The Action dialog box opens.
If you want to view all available actions, click Show all.
9 Choose an action from the Actions list.
If you choose an action that has additional options, choose an option from the list
displayed below the
Actions list.
10 Click Finish.
You can add multiple actions to a rule by selecting the action, clicking Add,
and clicking
OK, and repeating the procedure. Each action is added to the
Specify actions list.
You can prioritize the actions by choosing an action from the Specify actions
list and clicking
Move up or Move down.
Related Topics
To edit a rule
1 Click Configure ` Rules.
2 Choose the rule you want to modify from the Available rules list.
3 Click Edit.
Related Topics
To delete a rule
1 Click Configure ` Rules.
2 Choose the rule you want to modify from the Available rules list.
Grouping messages 77
Page 87

3 Click Delete.
Related Topics
Applying rules
You can apply rules to messages that are alread y stored in folders, or to a group of
messages you select. You can apply one or more rules to messages, including creating a
new rule and applying it to all messages in your Inbox.
To apply a rule to messages in a folder
1 Click Organize ` Appl y rules.
2 In the Apply the following rules list, enable the check box next to the rule(s) you
want to apply.
3 Enable the All messages in folder option.
If you want to choose a different folder, click the Find button (...), and choose the
folder you want to apply the rule(s) to.
4 Click Apply now.
A status window opens telling you how many messages the rule is being applied to.
To apply a rule to a group of selected messages
1 In the Message list, choose the message(s) to which you want to apply a rule.
2 Click Organize ` Appl y rules.
3 In the Apply the following rules list, enable the check box next to the rule(s) you
want to apply.
4 Enable the Selected messages option.
5 Click Apply now.
Related Topics
78 WordPerfect Mail User Guide
Page 88

Creating, editing, and deleting mailin g li st Sma r t Groups
Many people enjoy subscribing to online mailing lists that send industry reports, news,
or other such information on a daily , weekly , or monthly basis. To help you manage these
e-mails, WordPerfect MAIL lets you create and edit Smart Groups. Smart Groups first
identify messages as belonging to one Smart Group versu s another, and then
automatically moves them from your Inbox to other folders.
Before you create a mailing list Smart Group, you need to know what search parameters
to use to identify messages that come from a mailing list. A common parameter to use
is the From field. For example, if you have signed up to receive e-mail from a website or
news source, such as Google News Alert, this an example of what the search would look
like:
From:newsalert@google.com
In addition, if you belong to a distribution list, such as a Yahoo! Group, you can’t use
the From field because anyone can contribute, but you can use the To/Cc field. For
example, you could join a Yahoo! Group called “WordPerfect MAIL Fans,” where
Word Perfect MAIL enthusiasts share tips and tricks about using WordPerfect MAIL.
This an example of what the search would look like:
To/cc:WordPerfect MAILfans@yahoogroups.com
Once you set up search parameters, you can create a mai l ing list Smart Group.
Related Topics
To create a mailing list Smart Group
1 Click Configure ` Smart groups.
2 Click Add.
3 Enable the Mailing list option.
4 Click Next.
5 Click one of the following buttons:
• Recent searches — lets you choose a search string and use it as the new rule, or
use it as the foundation for a more complex set of search criteria
• Search form — lets you choose complex search pa ra meters
6 Click Next.
7 Type a name for the mailing list in the Mailing list title text box.
Grouping messages 79
Page 89

8 Type any information you want to save about the mailing list in the Notes box.
This is a good place to save information such as passwords associated with the
subscription and/or directions for un-subscri bi ng .
9 Click Next.
10 In the Please pick a standard lifecycle or create one of you own area, enable
one of the following lifecycle options:
• After 3 days
• Immediately
• Do not use a lifecycle for this Smart Group
• Create a custom lifecycle
If you choose the Create a custom lifecycle option, specify the lifecy cle deta ils in
the
Smart Groups message lifecyle dialog box and click Accept changes.
11 Click Finish.
For more information about choosing lifecycles, see “Designating a lifecycle for
Smart Groups” on page 83.
Related Topics
To edit a mailing list Smart Group
1 Click Configure ` Smart groups.
2 Choose a Smart Group from the list.
3 Click Edit.
4 Modify any of the settings in the Mailing list dialog box.
5 Click Accept changes.
You can also
Modify the lifecycle settings In the Lifecycle settings area, click Edit
details.
Display the number of unread messages in
the Smart Group
80 WordPerfect Mail User Guide
In the Display settings area, enable the
Show count of unread messages check
box and choose All or Unread from the list
box.
Page 90

You can also
View the last message you opened in the
Mailing list
Related Topics
In the Display settings area, enable the
Remember last selected message check
box.
To delete a mailing list Smart Group
1 Click Configure ` Smart groups.
2 Choose a Smart Group from the list.
3 Click Delete.
Deleting the Mailing List Smart Group does not delete its messages.
Related Topics
Creating, editing, and deleting RSS feed Smart Groups
RSS, Really Simple Syndication, is a system designed for distributing syndicated news
from popular websites like CNN, Wired, The Motley Fool, and others. You can create
a Smart Group to manage the RSS feeds tha t you receive.
After you create the RSS Feed Smart Group, you can adjust its settings or delete it.
If you added one of the default RSS feeds to a Smart Group, it is deleted from the Smart
Group list, but it’s not, however, deleted from the list of available RSS feeds.
The advantage of receiving news and other in f o rmation using RSS is that yo u do not
have to reveal your e-mail address to the provider. RSS feeds behave like standard e-mail
messages, but you must click on a link in the message itself to view the RSS feed
content.
To create a RSS feed Smart Group
1 Click Configure ` Smart groups.
2 Click Add.
Grouping messages 81
Page 91

3 Enable the RSS feed option.
4 Click Next.
5 Scroll down to the Custom RSS feed area.
6 Type a name in the Enter subscription title box.
You can use whatever title you want. The name you choose a ppea rs un der Smart
Groups
in the Navigation pane and in the Configuration dialog box under
Smart Groups.
7 Type the RSS URL in the Enter RSS feed URL box.
If you want to include a description of the RSS feed, type the description in the
Enter description box.
8 Click Next.
9 Select one of the Lifecycle options, and click Finish.
If you choose the Create a custom lifecycle option, the Smart Groups message
lifecycle
dialog box opens. You then need to specify lifecycle settings a nd click
Accept changes.
You can also
Choose an available RSS feed In the Select from popular RSS feeds or
create your own list, click an RSS feed and
click Next.
Related Topics
To edit a RSS feed Smart Group
1 Click Configure ` Smart Groups.
2 Choose a Smart Group from the list.
3 Click the Edit.
4 In the RSS feed dialog box, modify any of the settings.
5 Click Accept changes.
82 WordPerfect Mail User Guide
Page 92

You can also
Modify the lifecycle settings In the Lifecycle settings area, click Edit
details
.
Display the number of unread messages in
the Smart Group
View the last message you opened in the
Mailing list
Related Topics
In the Display settings area, enable the
Show count of unread messages check
box and choose
box.
In the Display settings area, enable the
Remember last selected message check
box.
To delete a RSS feed
1 Click Configure ` Smart Groups.
2 Choose the RSS feed.
3 Click Delete.
Related Topics
Designating a lifecycle for Smart Groups
All or Unread from the list
You can use a lifecyle to automatically move or delete messages in your Smart Groups.
Lifecycles are especially useful for Smart Groups that are time-sensi tive, such as Ne ws
or Stock Alerts, which are outdated after only a few days. In other cases, such as news
related to your industry, or job postings, you may want to keep these messages for a
longer period of time, perhaps selecting the option to delete them after 60 days.
You can apply lifecycle options to both Mailing list and RSS feed Smart Groups. You
can change these options at any time.
To change the lifecycle for a Smart Group
1 Configure ` Smart Groups.
Grouping messages 83
Page 93

2 Choose the Smart Group whose lifecycle you want to modify.
3 Click Edit details.
4 In the Lifecycle settings a rea , enable Automatically manage messages check
box.
5 Click Edit details.
6 Enable the Move check box.
7 Choose an option from the Move to list box and type the number of days in the
Days old box. The messages are moved to the specified folder after the specified
number of days.
8 Enable the Delete check box.
9 Type the number of days in the Days old box.
10 Click Accept changes.
11 In the Mailing list dialog box, click Accept changes.
You can exclude messages that are sent to you by enabling the Exclude
messages sent to me
check box.
If you set up a Smart Group to automatically delete messages but then realize
you’d like to save them, just perform any action on a message in that group
(such as moving it to another folder or flagging it) to reset the Lifecycle options
to their default settings.
84 WordPerfect Mail User Guide
Page 94

Backing up WordPerfect MAIL
Word Perfect MAIL makes it is easy to archive information by using datas tores. A
datastore is a Windows folder that contains your messages, account settings, contacts,
and calendar.
In this section, you’ll learn about
• using multiple datastores
• backing up datastores
• moving datastores
• checking, rebuilding, and compacting datastores
Using multiple datastores
One of the advantages of W ordPerfect MAIL is that it lets you use multiple datastores,
so that users can share a computer but maintain their e-mail separately. To do this, you
create a folder for the datastore and then create a new shortcut to WordPerfect MAIL
that uses this datastore.
If you want, you can use the procedure that follows to run WordPerfect MAIL
from a backup datastore. For more information about backing up a datastore,
see
“Backing up datastores” on page 86.
To create an additional datastore
1 On your computer, create a new folder that you would like to use for the additional
datastore.
The folder name must not contain spaces, nor non-alphabetic characters, such as an
apostrophe (') or ampersand (&).
2 On the desktop, right-click the WordPerfect MAIL icon, and click Copy.
3 On the desktop, right-click anywhere, and click Paste.
Backing up WordPerfect MAIL 85
Page 95

A new WordPerfect MAIL icon appears. However, until you direct it to the folder
you’ve created, it will still link to your old datastore.
4 On the desktop, right-click the new W ordPerfect MAIL icon, and click Properties.
5 On the General page, rename the shortcut to represent the new datastore.
6 On the Shortcut page, click the Target box, and after the existing syntax, type a
space, followed by
For example, if you installed WordPerfect MAIL to the default location
C:\Program Files\Corel\WordPerfect MAIL\bin\WordPerfect MAIL.exe and
created the datastore folder at
would be as follows:
• "C:\Program Files\Corel\WordPerfect MAIL\bin\ WordPerfect MAIL.exe" iC:\WordPerfectMail2
7 Click OK.
The new WordPerfect MAIL shortcut is ready for use. Double-clicking the icon
opens an instance of WordPerfect MAIL that uses the new datastore.
Related topics
-i, followed by the location of the folder you have created.
C:\WordPerfectMail2, the shortcut’s new target
Backing up datastores
You can back up a WordPerfect MAIL datastore.
Because a datastore is a Windows folder, all subfolders and files in that folder
constitute the datastore. Often, however, these files are hidden in Windows, so
you must be sure to show them if you want to copy your entire Datastore.
To back up a datastore
1 On your computer, locate the datastore folder.
If you cannot locate the datastore folder, click Help ` About. In the About
WordPerfect MAIL
location of the datastore folder. The default datastore location is as follows (where
X is the letter that corresponds to the drive to which you’ve installed WordPerfect
MAIL):
• X:\Documents and Settings\<username>\Application
Data\Corel\WordPerfect MAIL\
86 WordPerfect Mail User Guide
dialog box that appears, the path beside Datastore shows the
Page 96

2 Make sure that the datastore folder does not contain hidden files.
3 Copy the datastore folder to the backup location of your choice, such as a different
drive or a removable storage device.
Related topics
Moving datastore s
If you want to copy your e-mail, address, contacts, and calendar to another computer,
you can do so without losing any of your information or customized settings. T o do this,
you move your datastore to the new location and then direct the new installation of
WordPerfect MAIL to it.
To move a datastore
1 Back up the datastore folder, moving it from its location on the old computer to a
location on the new computer.
For instructions on backing up your datastore folder to a new location, see Backing
up WordPerfect MAIL.
2 Install Wor dPerfect MAIL on your new computer.
3 During the installation process, after you choose the program location, you can
specify the location of the datastore folder by clicking the
navigating to it or by typing the path.
4 Complete the installation process.
WordPerfect MAIL uses the datastore you’ve specified to load all your messag es,
contacts, preferences, and account information.
Browse button and
Related topics
Checking, rebuilding, and compacting datastores
You can check, compact, or rebuild a datastore.
Checking a datastore searches for any inconsistencies in that datastore, and it can help
repair the datastore when problems are identified. This operation takes anywhere from
Backing up WordPerfect MAIL 87
Page 97

a few minutes to an hour, depending on the size of the datastore. WordPerfect MAIL
must shut down to perform the check, but it restarts afterwards.
Compacting a datastore reduces its size, to free up space on your hard drive. This
operation takes a few minutes or more, depending on the size of the datastore, the harddrive space available, and the performance of the computer. When a datastore is
compacted, you cannot compact it a second time to free up additional space.
Rebuilding a datastore optimizes the performance of the WordPerfect MAIL search
engine by re-indexing all of your messages. This operation takes a nywhere from a few
minutes to a few hours, depending on the size of your datastore. WordPerfect MAIL
must shut down to perform the check, but it restarts afterwards. It is recommend that
you perform this operation at a time when you won’t need to use the comp uter for a
while.
To check a datastore
•In the Mail window, click Help ` Advanced tools ` Check datastore.
To compact a datastore
•In the Mail window, click Help ` Advanced tools ` Compact datastore.
To rebuild a datastore
•In the Mail window, click Help ` Advanced tools ` Rebuild datastore.
Related topics
88 WordPerfect Mail User Guide
Page 98

Keyboard shortcuts in W ordPerfect MAIL
Word Perfect MAIL includes many shortcuts that enable you to use the keybo ard
rather than the mouse to perform certain actions.
In this section, you’ll learn about
• keyboard shortcuts for working with messages
• keyboard shortcuts for editing messages
Keyboard shortcuts for working with messages
The table below lists shortcuts for working with messages in the Preview pane or
Message list.
Command Keyboard Shortcut Action
Organize
Message
Message
Message
File
Resend Ctrl + Shift + S Resends the message
Message
Message
attachment
Keyboard shortcuts in WordPerfect MAIL 89
` Delete
` Open
` Reply
` Reply all
` Send
` Forward inline
` Forward as
Delete Deletes the message from
the Message list
Ctrl + O Opens the message from the
Message list
Ctrl + R Replies to the sender
Ctrl + Shift + R Sends a r eply t o all r ecipien t s
Ctrl + Enter Sends the message
Ctrl + T Forwards the message inline
to a new recipient
Ctrl + Shift + T Forwards the message to a
new recipient as an
attachment
Page 99

File ` Print
Ctrl + P Prints the me ssage
File
` Save as
Message
File
Edit
Organize
Related topics
` Compose
` Receive all
` Find
` Fast file
Ctrl + S Saves the message as a file
Ctrl + N Creates a new message
Ctrl + M Gets new messages (sim il ar
to Refresh)
F3 or Ctrl + F Brings up the Find window
so you can find text w it h in a
message
Insert Moves the file to the
specified folder
Keyboard shortcuts for editing messages
You can use the following keyboard shortc uts when editing messages in WordPerfect
MAIL.
Edit Shortcut
Edit
` Undo
Ctrl + Z
Edit
` Redo
Edit
` Cut
Edit
` Copy
Edit
` Paste
Edit
` Select all
Options
Related topics
90 WordPerfect Mail User Guide
` Spelling ` Check spelling
Ctrl + Y
Ctrl + X
Ctrl + C
Ctrl + V
Ctrl + A
F7
Page 100

Setting e-mail preferences
WordPerfect MAIL lets you set e-mail preferences. You can choose WordPerfect MAIL
as your default e-mail application. There are also many options for modifying the look
of e-mail of text and customizing the messages you send. In addition, you have
different ways of sending, receiving, and saving messages.
In this section, you’ll learn about
• setting WordPerfect MAIL as the default mail application
• configuring message text settings
• managing WordPerfect MAIL
• composing messages
• selecting a signature
• customiz ing headers
• using the Spelling Checker
• setting spelling options
• adding and customizing dictionaries
• sending attachments
• specifying message priority
• saving draft messages
• sending messages
• resending messages
• printing messages
• replying to messages
• forwarding messages
• sorting messages
• configuring the HTML Viewer
• applying security zones and zone overrides
• creating categories
• setting message status
Setting e-mail preferences 91
 Loading...