

Page 1
GUIDEBOOK
Page 2

Copyright © 2012 Corel Corporation. All rights reserved.
CorelDRAW® Graphics Suite X6 Guidebook
Product specifications, pricing, packaging, technical support and information (“specifications”)
refer to the retail English version only. The specifications for all other versions (including other
language versions) may vary.
Information is provided by Corel on an "as is" basis, without any other warranties or conditions,
express or implied, including, but not limited to, warranties of merchantable quality, satisfactory
quality, merchantability or fitness for a particular purpose, or those arising by law, statute, usage
of trade, course of dealing or otherwise. The entire risk as to the results of the information provided
or its use is assumed by you. Corel shall have no liability to you or any other person or entity for
any indirect, incidental, special, or consequential damages whatsoever, including, but not limited
to, loss of revenue or profit, lost or damaged data or other commercial or economic loss, even if
Corel has been advised of the possibility of such damages, or they are foreseeable. Corel is also not
liable for any claims made by any third party. Corel's maximum aggregate liability to you shall not
exceed the costs paid by you to purchase the materials. Some states/countries do not allow
exclusions or limitations of liability for consequential or incidental damages, so the above
limitations may not apply to you.
Corel, the Corel logo, the Corel balloon, Corel CAPTURE, Corel CONNECT, Corel DESIGNER, Corel
Digital Studio, CorelDRAW, Corel PHOTO-PAINT, Corel VideoStudio, Corel WinDVD, Painter,
PaintShop Pro, PowerClip, PowerTRACE, Smart Carver, WinZip, and WordPerfect are trademarks or
registered trademarks of Corel Corporation and/or its subsidiaries in Canada, the U.S., and/or other
countries. Other product, font, and company names and logos may be trademarks or registered
trademarks of their respective companies.
All images included in this publication are attributed to the artists who created them. Some images
may have been cropped and/or resized, backgrounds may have been added, and images may have
been combined with other images on the same page. In the Gallery section, the artists' names have
been added to the images, and image elements that contain brand names and logos have been
removed.
116011
Page 3

Contents
Part One: Introduction
Chapter 1: Welcome . . . . . . . . . . . . . . . . . . . . . . . . . . . . . . . . . . . . . . . . . . . . . . . . . . . . . . . . 3
Chapter 2: Installation and Support . . . . . . . . . . . . . . . . . . . . . . . . . . . . . . . . . . . . . . . . . . . . 11
Chapter 3: What’s New . . . . . . . . . . . . . . . . . . . . . . . . . . . . . . . . . . . . . . . . . . . . . . . . . . . . . 15
Part Two: Getting Started
Chapter 4: CorelDRAW Basics . . . . . . . . . . . . . . . . . . . . . . . . . . . . . . . . . . . . . . . . . . . . . . . . 27
Chapter 5: Corel PHOTO-PAINT Basics . . . . . . . . . . . . . . . . . . . . . . . . . . . . . . . . . . . . . . . . . . 47
Part Three: Color, Type, and Styles
Chapter 6: Color Basics . . . . . . . . . . . . . . . . . . . . . . . . . . . . . . . . . . . . . . . . . . . . . . . . . . . . . 71
Chapter 7: Color Management . . . . . . . . . . . . . . . . . . . . . . . . . . . . . . . . . . . . . . . . . . . . . . . 89
Chapter 8: Working with Text . . . . . . . . . . . . . . . . . . . . . . . . . . . . . . . . . . . . . . . . . . . . . . . 105
Chapter 9: Styles and Style Sets . . . . . . . . . . . . . . . . . . . . . . . . . . . . . . . . . . . . . . . . . . . . . . 117
Part Four: Guide to Digital Content
Chapter 10: Finding and Managing Content . . . . . . . . . . . . . . . . . . . . . . . . . . . . . . . . . . . . 129
Chapter 11: Content Types . . . . . . . . . . . . . . . . . . . . . . . . . . . . . . . . . . . . . . . . . . . . . . . . . 135
Chapter 12: Templates . . . . . . . . . . . . . . . . . . . . . . . . . . . . . . . . . . . . . . . . . . . . . . . . . . . . 157
Part Five: Tips and Techniques
Chapter 13: Sign Making . . . . . . . . . . . . . . . . . . . . . . . . . . . . . . . . . . . . . . . . . . . . . . . . . . 167
Chapter 14: Illustration . . . . . . . . . . . . . . . . . . . . . . . . . . . . . . . . . . . . . . . . . . . . . . . . . . . . 181
Chapter 15: Page Layout . . . . . . . . . . . . . . . . . . . . . . . . . . . . . . . . . . . . . . . . . . . . . . . . . . . 199
Part Six: Insights from the Experts
Chapter 16: Design of a Soccer Club Logo . . . . . . . . . . . . . . . . . . . . . . . . . . . . . . . . . . . . . . 221
Chapter 17: The Story of a Reader Chair . . . . . . . . . . . . . . . . . . . . . . . . . . . . . . . . . . . . . . . 235
Chapter 18: Concept Art . . . . . . . . . . . . . . . . . . . . . . . . . . . . . . . . . . . . . . . . . . . . . . . . . . . 251
Contents | i
Page 4

Part Seven: Gallery . . . . . . . . . . . . . . . . . . . . . . . . . . . . . . . . . . . . . . . . . . . . . 263
Index . . . . . . . . . . . . . . . . . . . . . . . . . . . . . . . . . . . . . . . . . . . . . . . . . . . . . . . 299
ii | CorelDRAW Graphics Suite X6 Guidebook
Page 5

Image created by
Joseph Diaz
USA
Part One
Introduction
Page 6

Page 7

Chapter 1: Welcome
What’s included in
CorelDRAW Graphics Suite X6 4
About this guidebook 4
Guidebook conventions 5
Other learning resources 6
Chapter 1: Welcome | 3
Page 8

Chapter 1: Welcome
Welcome to CorelDRAW® Graphics Suite X6, a
comprehensive software solution for graphic
design, page layout, and photo editing.
What’s included in CorelDRAW Graphics Suite X6
CorelDRAW Graphics Suite X6 includes the
following applications:
•CorelDRAW®
•Corel® PHOTO-PAINT™
•Corel CAPTURE™
• Corel® CONNECT™
• Bitstream® Font Navigator®
CorelDRAW
CorelDRAW is an intuitive and versatile
graphics application for creating high-quality
vector illustrations, logo designs, and page
layouts.
Corel PHOTO-PAINT
Corel CONNECT
Corel CONNECT is an application that provides
easy access to content such as clipart, photos,
fonts, and more.
Bitstream Font Navigator
Bitstream Font Navigator is an application for
browsing, organizing, and managing fonts.
About this guidebook
This guidebook is designed to enrich your
experience of working with CorelDRAW and
Corel PHOTO-PAINT and to inspire you to do
more than you ever thought possible.
Individual chapters introduce you to the
workspace of each application and provide tips
and techniques that can help you, regardless of
your skill level.
This guidebook is divided into seven parts.
Part One: Introduction
Corel PHOTO-PAINT is a complete imageediting application that lets you retouch and
enhance photos as well as create original
bitmap illustrations and paintings. You can
easily correct red-eye or exposure problems,
retouch RAW camera files, and prepare images
for the Web.
Corel CAPTURE
Corel CAPTURE is an easy-to-use application
for capturing images from your computer
screen.
4 | CorelDRAW Graphics Suite X6 Guidebook
Chapters 1 through 3 describe the new
features of CorelDRAW Graphics Suite X6 as
well as the learning resources that are available
online and within each application.
Part Two: Getting Started
Chapters 4 and 5 present basic information
about CorelDRAW and Corel PHOTO-PAINT,
Page 9
including workspace tours that describe the
main tools in each application.
To access this guidebook in PDF format,
click Help ` Guidebook.
Part Three: Color, Type, and Styles
Chapters 6 through 9 provide a review of
fundamental color concepts and show you
how to work with color and text as well as
format objects by using styles and style sets.
Part Four: Guide to Digital Content
Chapters 10 through 12 provide information
about working with Corel CONNECT and
introduce the available content, such as clipart,
photos, and fonts.
Part Five: Tips and Techniques
Chapters 13 through 15 give you useful tips
about the specific workflows for sign making,
illustration, and page layout.
Part Six: Insights from the Experts
Chapters 16 through 18 present tutorials by
graphic design professionals from diverse
industries who use CorelDRAW Graphics Suite
in their everyday work. In these chapters, the
authors share how the software helps them
express their creativity and artistic freedom as
they create a sports team logo, furniture
design, and concept painting.
To access the tutorials as individual PDFs,
click Help ` Insights from the experts.
Part Seven: Gallery
A stunning collection of artwork, created in
CorelDRAW Graphics Suite by professional
designers and illustrators, is included in this
last part of the guidebook.
Guidebook conventions
The following conventions make it easy to
locate information in the guidebook.
References to the application interface
References to elements of the application
interface, such as menu commands, are
indicated by bold formatting. For example,
“Click File ` Open” refers to clicking File on
the menu bar and then clicking the Open
command.
Tips
The guidebook contains brief tips, which may
highlight portions of your workflow, offer
creative ideas that you can try out, or provide
information about performing a task. These
tips are indented and marked by a special icon
for easy reference.
Color-coded pages
Each part of the guidebook is coded for easy
reference with a distinctive band of color in the
upper-left or upper-right area of the page.
Cross-references
If you want to learn more about a specific
subject, you can use the cross-references. Two
types of cross-references are used in this
guidebook:
• cross-references to the Help in an
application
• cross-references to a specific page in the
Guidebook
If a cross-reference points to the Help, you can
access the information by starting the specific
Chapter 1: Welcome | 5
Page 10
application, clicking Help ` Help topics, and
then browsing or searching for the relevant
topic.
Other learning resources
In addition to this guidebook, various other
learning resources can help you get started
with CorelDRAW Graphics Suite X6. For
example, you can use the Help to learn about
basic tools and techniques, visit the
CorelDRAW.com community to ask questions
and receive help and suggestions from other
users, or watch video tutorials to see graphic
design in action.
Help
The Help is accessible from within the
application and provides comprehensive
information about product features. You can
browse through a list of topics, look up tools
and topics in the index, or search for specific
words.
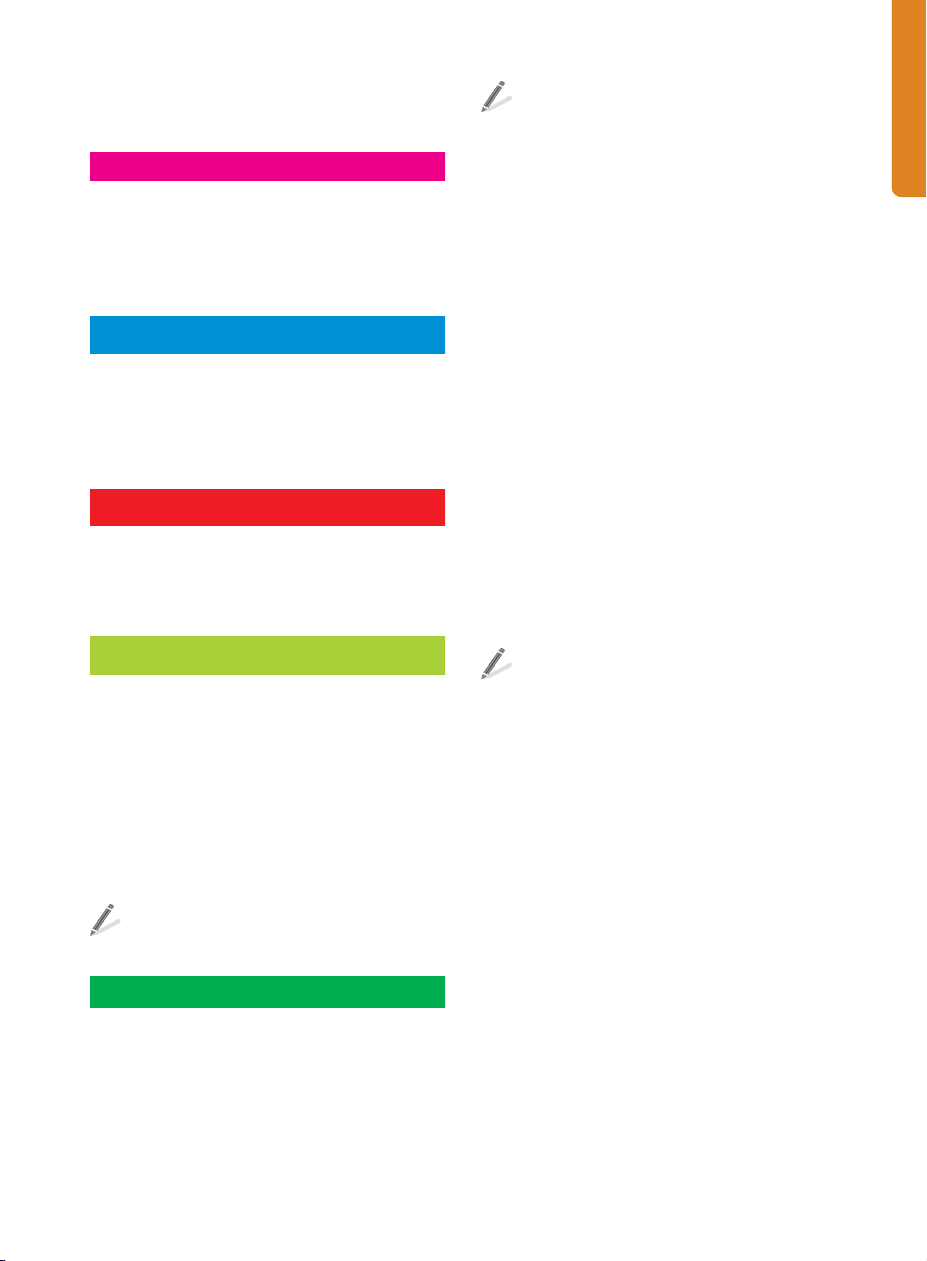
Example of a tooltip
Hints
Hints provide instant information about tools
in the toolbox. When you click a tool, a hint
appears, telling you how to use the tool. Hints
are displayed by default in the Hints docker on
the right side of the application window, but
you can hide them when you no longer need
them.
To access the Help, click Help ` Help
topics. The application displays the Webbased Help if an Internet connection is
available, or local Help if there is no
Internet connection.
Tooltips
Tooltips provide helpful information about
application controls when you position the
pointer over icons, buttons, and other interface
elements.
6 | CorelDRAW Graphics Suite X6 Guidebook
Hints docker in CorelDRAW
Page 11
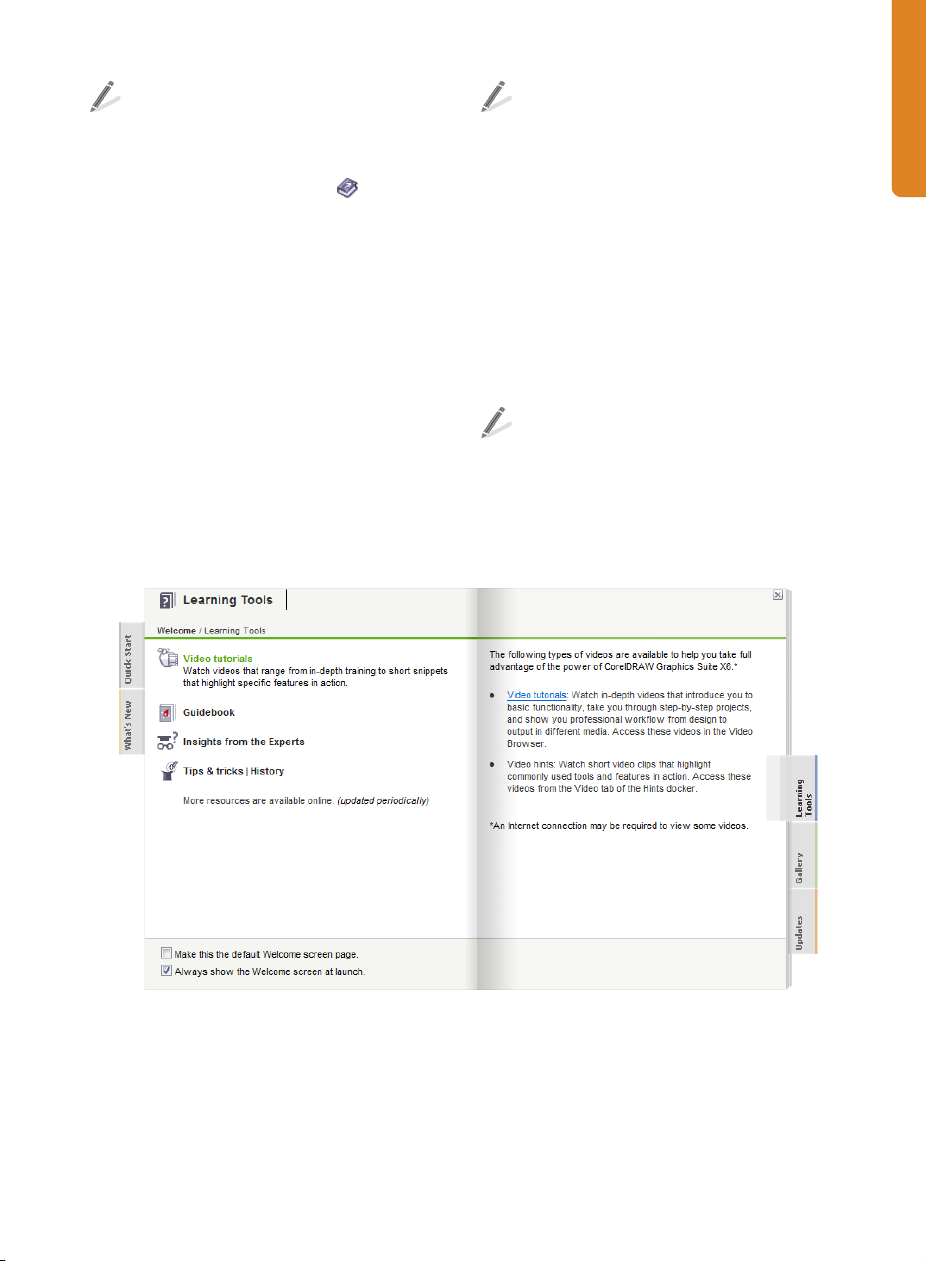
To display or hide Hints, click Help ` Hints.
To find additional information about a
tool, you can access a relevant Help topic
by clicking the Help button in the
upper-right corner of the Hints docker.
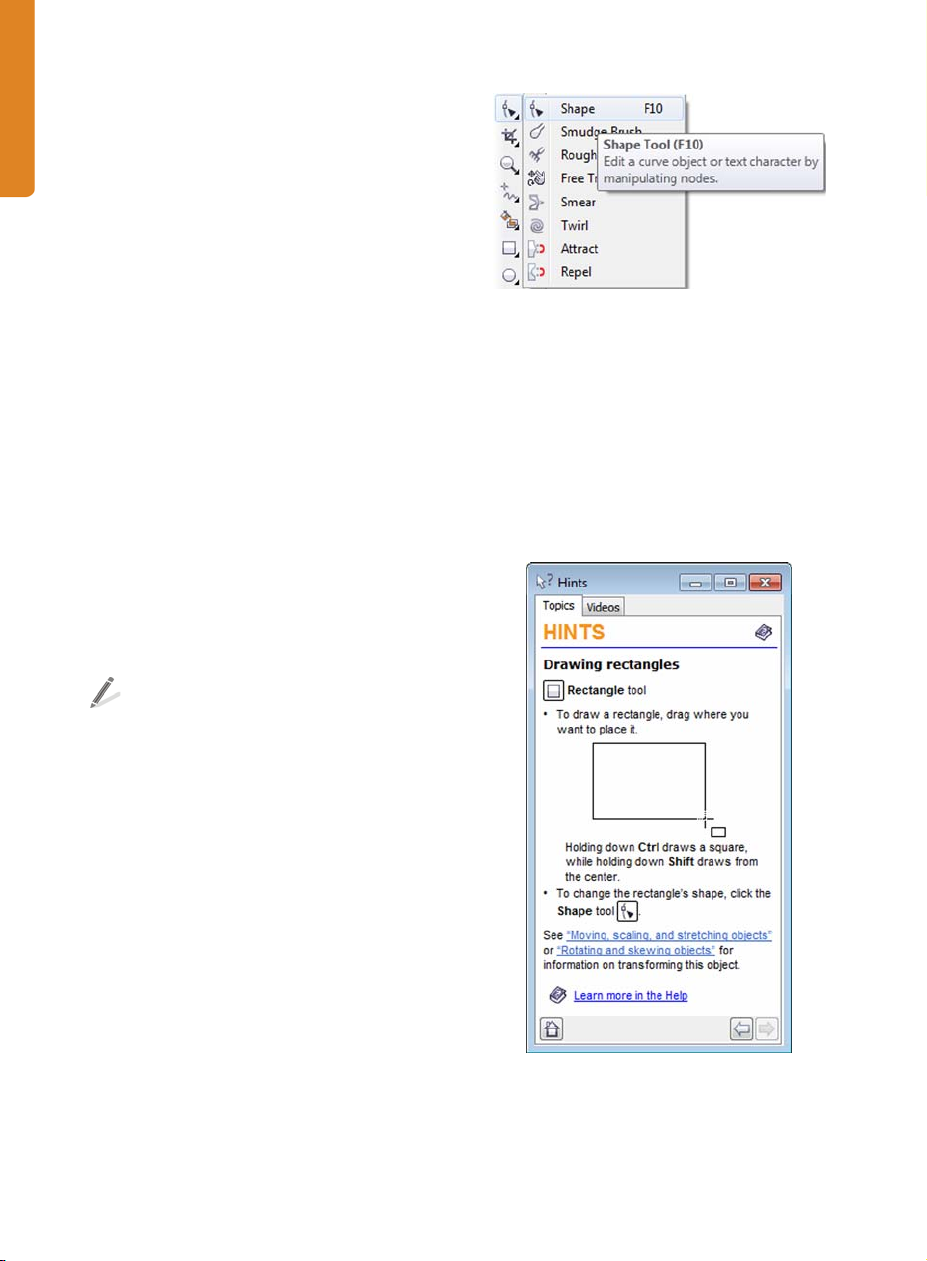
Welcome screen
The Welcome screen gives you easy access to
resources in the applications and lets you
quickly complete common tasks, such as
opening files and starting files from templates.
You can also find out about the new features
in CorelDRAW Graphics Suite X6 and get
inspired by graphic designs that are featured
on the Gallery pages. In addition, you can find
tutorials and tips, and get the latest product
updates.
You can access the Welcome screen by
clicking Help ` Welcome screen.
Videos
Short videos are available to show you how to
complete basic tasks such as drawing, shaping,
and coloring objects in CorelDRAW, or masking
and cropping in Corel PHOTO-PAINT. In
addition, longer video tutorials introduce you
to the working environment of CorelDRAW
and Corel PHOTO-PAINT and guide you
through specific tasks and techniques.
To access the short videos, click the Videos
tab in the Hints docker.
To access the video tutorials, click Help `
Video tutorials.
Welcome screen in CorelDRAW
Chapter 1: Welcome | 7
Page 12

Web-based resources
The following resources are available on the
Corel Web site (www.corel.com) to help you
get the most out of CorelDRAW Graphics Suite
X6:
• Corel Knowledge Base — The articles in
this searchable database were written by
members of the Corel Technical Support
team in response to questions by users of
CorelDRAW Graphics Suite.
• CorelDRAW.com community — In this
online environment, you can share your
experience with the product, ask
questions, and receive help and
suggestions from other users.
• Tips and tricks — This valuable
information is provided by the Corel
Documentation team to help you take full
advantage of product features.
• Tutorials — In-depth tutorials let you
share the knowledge and techniques of
CorelDRAW Graphics Suite experts.
• Third-party resources — For additional
information about the tools in the suite,
you can access third-party print and online
resources that cover various areas of
graphic design.
If your installation of CorelDRAW Graphics
Suite X6 includes VBA or VSTA, you can
access the macro programming guide by
clicking Start ` All programs `
CorelDRAW Graphics Suite X6 `
Documentation.
Network deployment guide
The CorelDRAW Graphics Suite X6 Deployment
Guide is a step-by-step resource for deploying
CorelDRAW Graphics Suite X6 to a network.
This guide is provided to customers who
purchase a volume (“multi-seat”) license of
CorelDRAW Graphics Suite X6 for their
organizations.
To purc ha se a v olume license of
CorelDRAW Graphics Suite X6 and obtain
the CorelDRAW Graphics Suite X6
Deployment Guide, contact Corel Support
Services (www.corel.com/support).
Customized training and integration
resources
Corel Corporation has training partnerships
with other firms and provides resources for
developers and consultants.
Corel customized training
Macro programming guide
The CorelDRAW Graphics Suite X6 Macro
Programming Guide provides a streamlined
instructional approach to programming
macros for CorelDRAW Graphics Suite X6. By
creating macros with CorelDRAW and
Corel PHOTO-PAINT, you can automate tasks
and provide customized solutions. You can use
either Microsoft® Visual Basic for Applications
(VBA) or Microsoft® Visual Studio® Tools for
Applications (VSTA) to create macros.
8 | CorelDRAW Graphics Suite X6 Guidebook
Corel Training Specialists can provide you with
customized training, tailored to your work
environment, to help you get the most out of
the Corel software that you have installed.
These experts can help you develop a
curriculum that is practical and relevant to the
needs of your organization. For more
information, visit www.corel.com/
customizedtraining.
Page 13

Corel Training Partners
A Corel Training Partner (CTP) is an
independent, officially accredited local
organization that provides training and
training resources for Corel products. CTPs are
located worldwide for your convenience. To
find a partner near you, visit www.corel.com.
Corel Technology Partners
Corel Technology Partners are businesses that
embed Corel technology within their products,
develop plug-in applications for Corel
software, or integrate standalone applications
into Corel technology solutions. This
comprehensive program is designed especially
for developers and consultants, and it includes
the necessary components for designing,
developing, testing, and marketing custom
solutions that are related to Corel products.
For more information about Corel Technology
Partners, please e-mail Corel Corporation at
techpartner@corel.com.
Chapter 1: Welcome | 9
Page 14

Page 15

Chapter 2: Installation and Support
Installing CorelDRAW Graphics Suite
applications 12
Changing languages 12
Updating Corel products 12
Corel Support Services 13
About Corel Corporation 13
Chapter 2: Installation and Support | 11
Page 16

Chapter 2: Installation and Support
CorelDRAW Graphics Suite X6 is easy to install,
register, and customize.
Installing CorelDRAW Graphics Suite applications
The installation wizard makes it easy to install
CorelDRAW Graphics Suite applications and
components. You can install the applications
with the default settings, or you can customize
the installation by choosing different options.
When you insert the installation disc in the
DVD drive, the installation wizard starts
automatically. Follow the instructions on the
screen to complete the installation.
(Windows® 7 and Windows Vista®) If the
installation wizard does not start
automatically, click Start on the Windows
taskbar, and type X:\autorun.exe in the
search box, where X is the letter that
corresponds to the DVD drive.
(Windows® XP) If the installation wizard
does not start automatically, click Start on
the Windows taskbar, and click Run. Type
X:\autorun.exe, where X is the letter that
corresponds to the DVD drive.
After you install the applications, you can also
use the installation wizard to do the following:
• add and delete components in the current
installation
• repair the current installation by
reinstalling all application features
• uninstall CorelDRAW Graphics Suite
Before repairing an installation, try
resetting the current workspace to the
default settings by holding down F8 while
starting the application.
For more information, see “Installing
CorelDRAW Graphics Suite applications” in the
Help.
Changing languages
If an application has been installed in more
than one language, you can change the
language of the user interface and Help at any
time.
To change the language of the application,
click To ol s ` Options. In the list of
categories, click Global, and choose a
language from the Select the language
for the user interface list box. Restart the
application to apply the new language
settings.
If you did not install a specific language when
you first installed the product, you can do so
later. For more information, see “Changing
languages” in the Help.
Updating Corel products
During product installation, you can choose
the option to download product updates.
To check for product updates at any time,
click Help ` Updates.
12 | CorelDRAW Graphics Suite X6 Guidebook
Page 17

Corel Support Services
Corel Support Services can provide you with
prompt and accurate information about
product features, specifications, pricing,
availability, services, and technical support.
For the most current information on support
services available for your Corel product, visit
www.corel.com/support.
About Corel Corporation
Corel is one of the world's top software
companies, with more than 100 million active
users in over 75 countries. We develop
software that helps people express their ideas
and share their stories in more exciting,
creative, and persuasive ways. Through the
years, we've built a reputation for delivering
innovative, trusted products that are easy to
learn and use, helping people achieve new
levels of productivity. The industry has
responded with hundreds of awards for
software innovation, design, and value.
Our award-winning product portfolio includes
some of the world's most widely recognized
and popular software brands, including
CorelDRAW® Graphics Suite, Corel® Painter™,
Corel DESIGNER® Technical Suite, Corel®
PaintShop™ Pro, Corel® VideoStudio®,
Corel® WinDVD®, Corel® WordPerfect®
Office, and WinZip®. Our global headquarters
are in Ottawa, Canada, with major offices in
the United States, United Kingdom, Germany,
China, Taiwan, and Japan.
Chapter 2: Installation and Support | 13
Page 18

Page 19

Chapter 3: What’s New
Work faster and more efficiently 16
Create layouts with ease 19
Design with style and creativity 22
Chapter 3: What’s New | 15
Page 20
Chapter 3: What’s New
The new and enhanced features of CorelDRAW
Graphics Suite can help you express your
creative ideas compellingly.
To access the list of new features from the
application, click Help ` What’s new.
To learn what was new in previous versions
of CorelDRAW Graphics Suite, click Help `
Highlight what’s new, and choose a
version. Menu commands and tools for
features introduced or improved in that
version are highlighted.
Work faster and more efficiently
From organizing project assets and accessing
the suite’s vast collection of content, to quickly
identifying available formatting options and
removing unwanted areas in photos,
CorelDRAW Graphics Suite X6 offers several
workflow innovations that help you be more
efficient and productive.
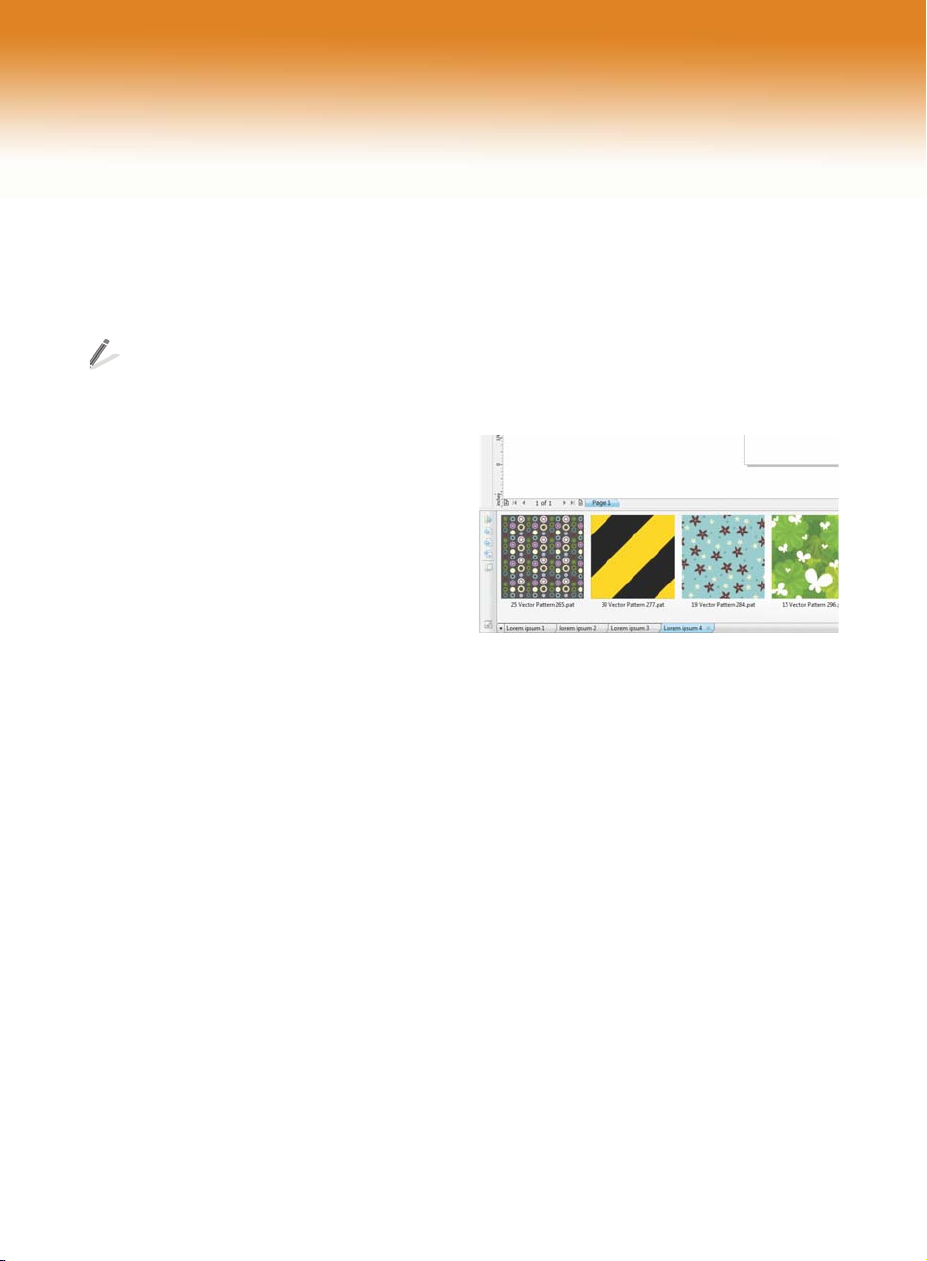
Multiple trays in Corel CONNECT (New!)
Corel CONNECT now lets you work with several
trays at the same time, which gives you
increased flexibility in organizing assets for
multiple projects. Trays help you gather
content from various folders or online sources,
and are shared among CorelDRAW,
Corel PHOTO-PAINT, and Corel CONNECT.
You can use and maintain separate trays for
different types of content. For example, you
might be working on a project that requires
photos, vector graphics, and bitmap icons.
Keeping these types of content in separate
trays provides a way to find assets quickly and
easily. As an added convenience, you can open
files from the tray to get a full-size preview. You
can also rename trays or change the default
folder to which trays are saved.
Multiple trays help you find assets quickly and easily.
Search capability in Corel CONNECT
(New!)
The new Corel CONNECT search toolbar lets
you instantly extract images from a web site.
Simply type a web address in the Search and
address box, and Corel CONNECT
immediately gathers all images defined with an
HTML <img> tag from the Web site, making
it quick and easy to leverage content assets
from online sources. You can also type search
terms or a folder path to have Corel CONNECT
search your computer, network, or other online
resources for content.
Content (New and enhanced!)
The improved Corel CONNECT provides quick
access to all CorelDRAW Graphics Suite X6
16 | CorelDRAW Graphics Suite X6 Guidebook
Page 21
content, while also helping you acquire
additional content from online vendors.
Corel CONNECT lets you access a wealth of content.
The suite’s content library includes:
• 10,000 high quality clipart and digital
images
• 1,000 professional, high-resolution digital
photos
• 1,000 OpenType® fonts, including
premium fonts such as Helvetica®
• 350 professionally designed templates
• 2,000 vehicle templates
• 800 frames and patterns, and more.
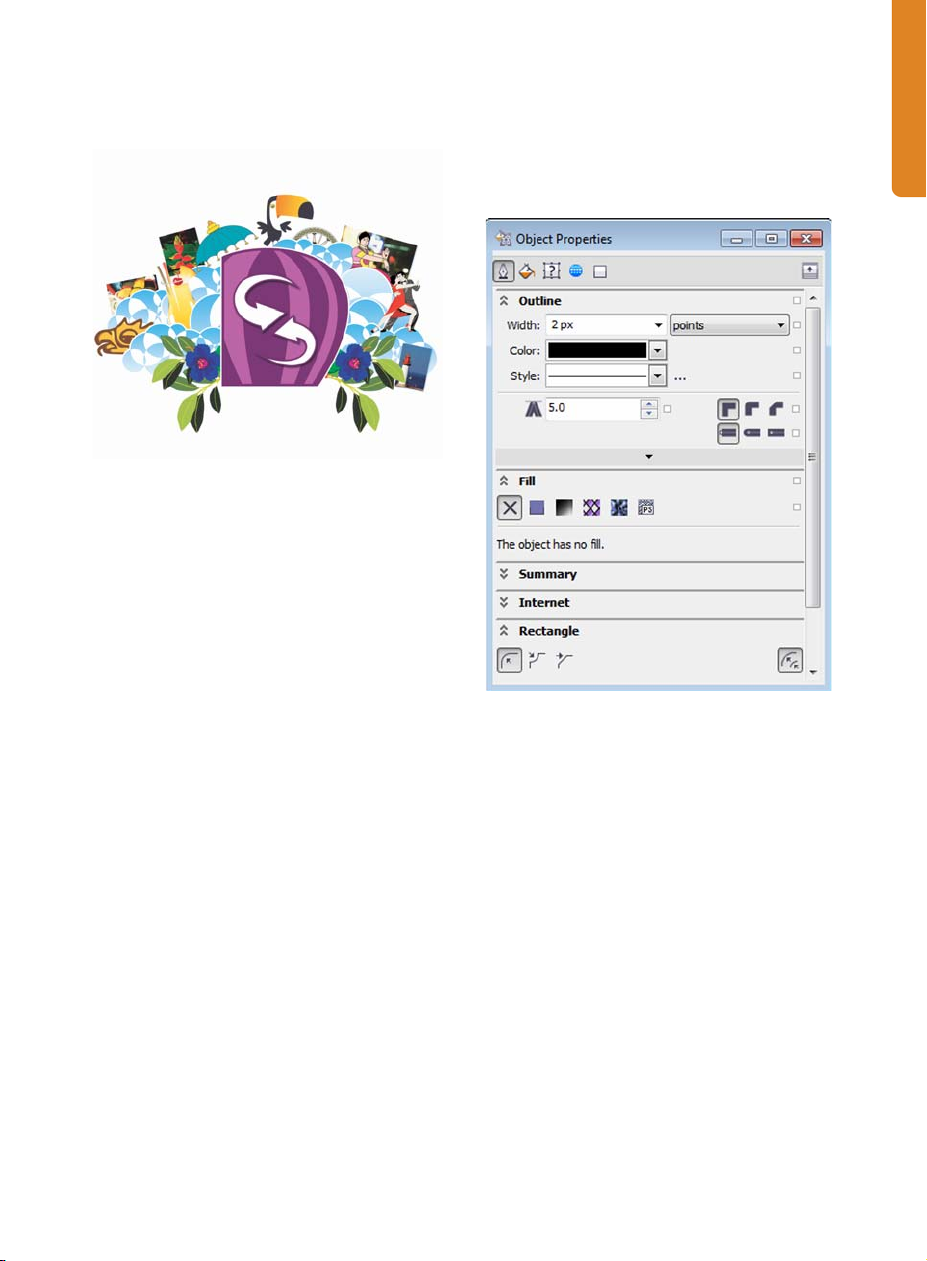
Object Properties docker (New!)
In CorelDRAW X6, the redesigned Object
properties docker now presents only object-
dependent formatting options and properties.
By grouping all object settings in one location,
this docker helps you fine-tune your designs
faster than ever before.
For example, if you create a rectangle, the
Object properties docker automatically
presents outline, fill, and corner formatting
options, as well as the rectangle’s properties. If
you create a text frame, the docker instantly
displays character, paragraph, and frame
formatting options, as well as the text frame’s
properties.
The redesigned Object properties docker groups all
object settings in one location.
Smart Carver (New!)
In Corel PHOTO-PAINT X6, the new
Smart Carver™ tool makes it easy to remove
unwanted areas from a photo and
simultaneously adjust the photo’s aspect ratio.
For example, you might want to define an area
of a photo that you would like to keep or
remove, such as a person in the photo. The
versatile Object removal brush lets you
choose to paint either the area of the photo
that you want to preserve or the area that you
want to remove.
Chapter 3: What’s New | 17
Page 22
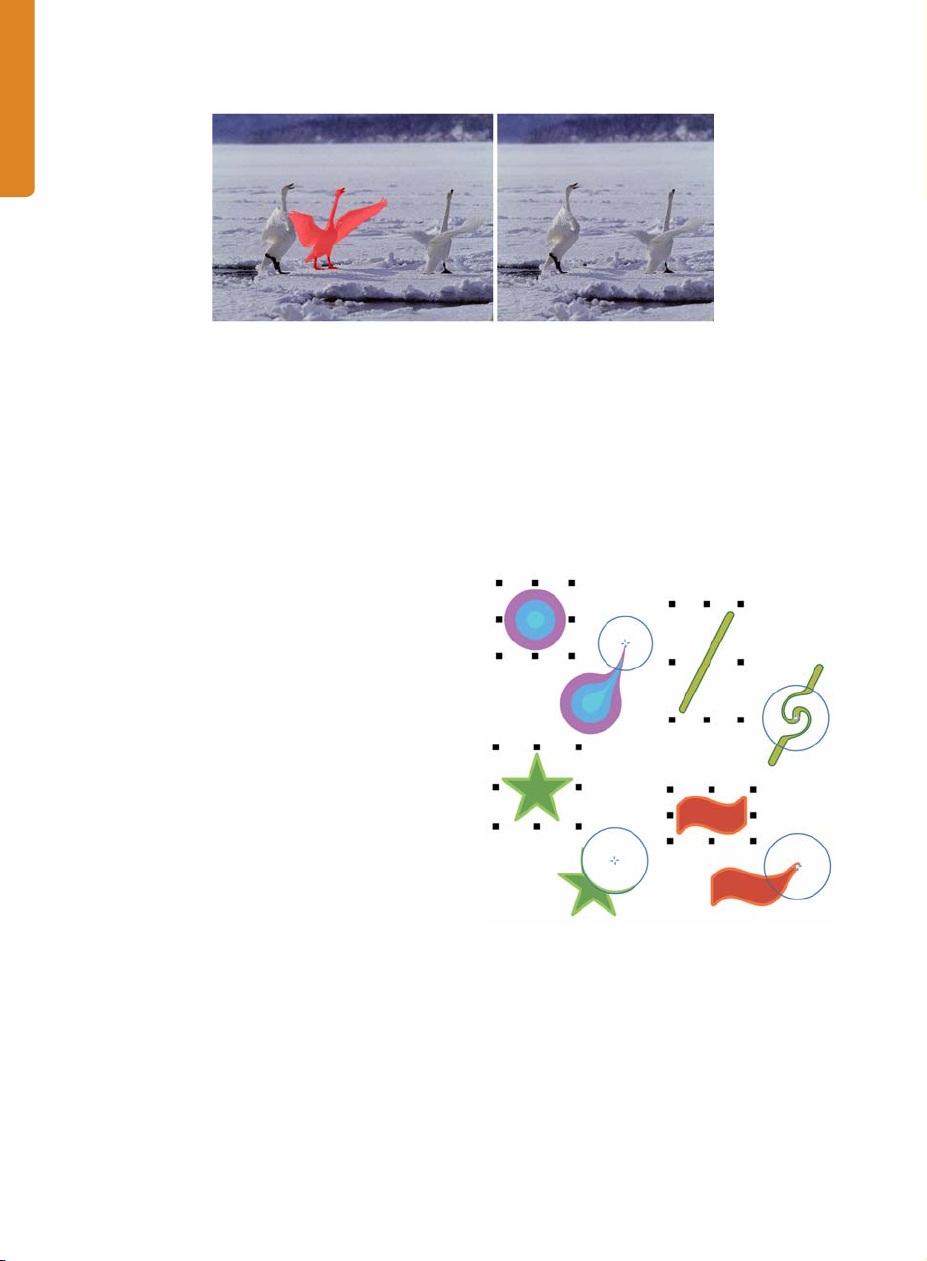
The Smart Carver makes it easy to remove unwanted areas and adjust the photo’s aspect ratio.
You can also use the Smart Carver to change a
photo’s aspect ratio without distorting
anything in the photo. For example, if you
want to resize a photo to print at a certain size,
you can paint the photo’s subjects and then
use the Smart Carver presets to contract or
expand the photo’s background vertically and
horizontally.
Shape tools (New!)
CorelDRAW X6 introduces four additional
shaping tools that provide new creative
options for refining vector objects. The new
Smear tool lets you shape an object by pulling
extensions or making indents along its outline.
The size of the brush nib and the Pressure
setting let you control the intensity of the
effect, and you can choose between smooth
curves or curves with sharp corners.
Alternatively, you can use the pressure of your
digital pen to determine the intensity of the
smear effect.
The new Twir l tool lets you apply twirl effects
to objects. The size of the brush nib lets you
determine the size of the twirls, and the Rate
setting lets you control the speed of the effect.
You can also choose either a counterclockwise
or a clockwise twirl.
In addition, you can use the new Attract and
Repel tools to shape curves by attracting
nodes or by pushing nodes away from other
nodes in close proximity. To control the shaping
effect, you can vary the size of the brush nib
and the speed at which the nodes are attracted
or repelled.
The new shaping tools provide creative options for
refining vector objects.
Clip masks for groups of objects (New!)
With Corel PHOTO-PAINT X6, you can now
apply a clip mask to a group of objects without
modifying the individual objects within the
18 | CorelDRAW Graphics Suite X6 Guidebook
Page 23
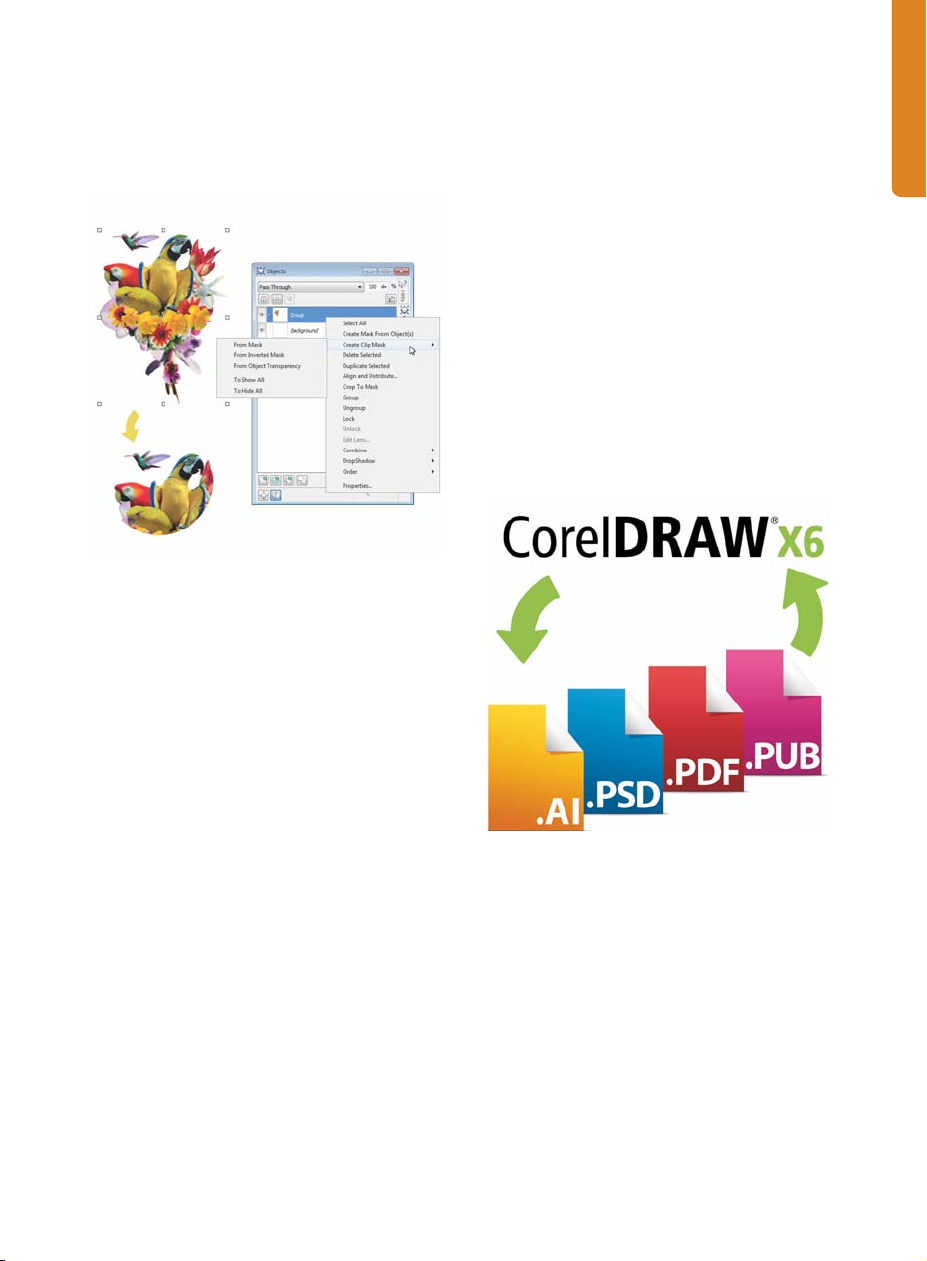
group. For example, you can adjust
transparency levels for the whole group
without altering the pixels of the individual
objects.
You can apply a clip mask to a group of objects.
Pass Through merge mode (New!)
Corel PHOTO-PAINT X6 introduces a new Pass
Through merge mode that you can apply to
groups, which gives you more control when
applying a lens or special effect. If you choose
Pass Through, the lens or effect will apply to all
objects, including those layered below the
group.
Native 64-bit support (New!)
CorelDRAW Graphics Suite X6 provides
support for 64-bit processors, which allows
you to work faster than ever before with large
files in CorelDRAW and large images in
Corel PHOTO-PAINT.
Adobe CS5 and Microsoft Publisher
2010 support (Enhanced!)
The enhanced import and export support for
Adobe® Illustrator® CS5 and Adobe®
Photoshop® CS5, as well as import support for
Adobe® Acrobat® X and Microsoft®
Publisher 2010, ensures that you can exchange
files with colleagues and clients.
Multi-core processor support (New!)
CorelDRAW Graphics Suite X6 has been
optimized for the latest multi-core processors.
The increased support lets you continue
working while the suite performs resourceintensive tasks in the background. The result is
fast and responsive performance, which means
less waiting when you export files, print
multiple documents, or copy and paste large
objects.
Enhanced support for Adobe CS5, Adobe Acrobat, and
Microsoft Publisher files facilitates file exchange with
colleagues and clients.
Create layouts with ease
With new and improved master layer
functionality, new temporary alignment
guides, new advanced OpenType support, and
enhanced complex script support for working
with foreign language text, CorelDRAW
Graphics Suite X6 makes it easier than ever
before to lay out your project.
Chapter 3: What’s New | 19
Page 24
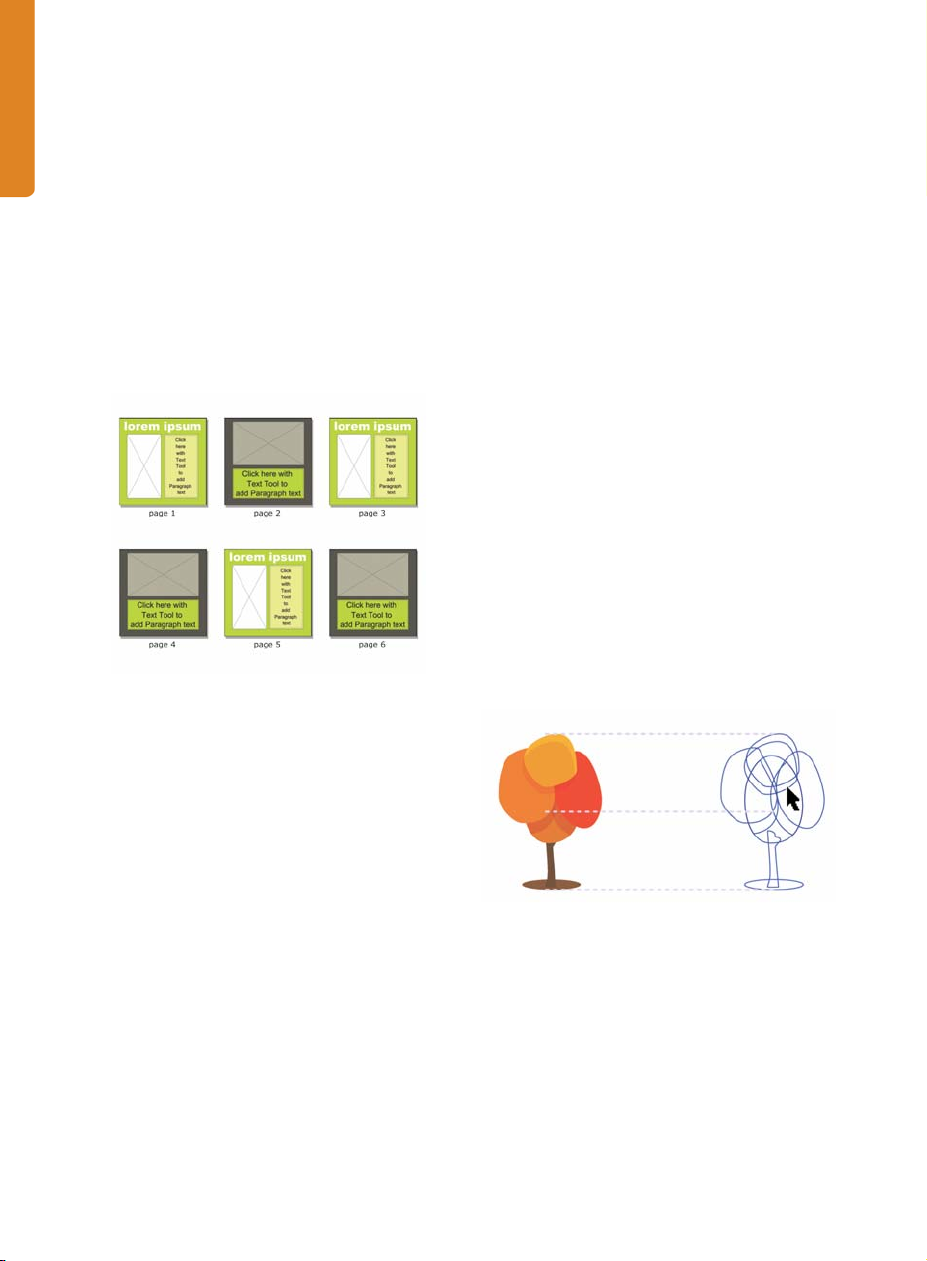
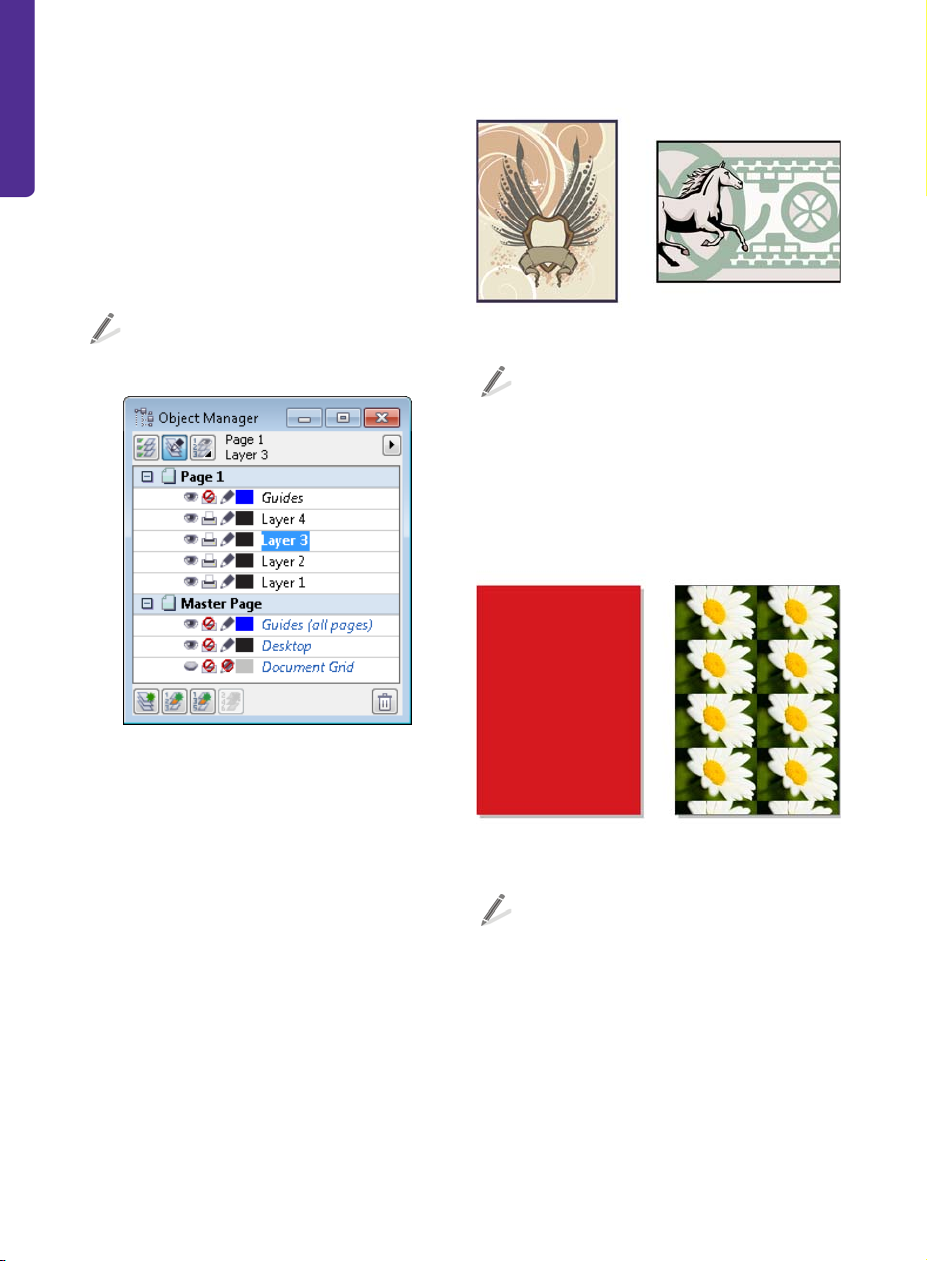
Master layers (New and enhanced!)
Alignment guides (New!)
With CorelDRAW X6, the new and improved
odd-page, even-page, and all-page master
layers make it easier to create page-specific
designs for multipage documents. If you are
laying out multipage documents, such as
brochures and flyers, it’s now easy to
incorporate page-specific headers, footers,
and page numbers. For example, you might
want to have different headers on even and
odd pages.
Examples of CorelDRAW X6 page layouts with different
odd-page and even-page master layers
The new alignment guides help you position
objects more quickly, appearing on the fly with
suggested alignment to existing objects on the
page. These temporary guidelines appear
when you create, resize, or move objects in
relation to other nearby objects. Alignment
guides interactively connect the centers and
the edges of objects, and you also can choose
to display alignment guides from the edges of
one object to the center of another object.
You can modify the default settings for
alignment guides to suit your needs. For
example, if you are working with a group of
objects, you can display alignment guides for
individual objects within the group, or for the
bounding box of the group as a whole. In
addition, you can specify margins for
alignment guides to help you align objects at a
set distance from the edge of another object.
You can also specify whether the alignment
guides follow only the margins or the actual
edges of the object as well.
Page numbering (New!)
With CorelDRAW X6, the new Insert page
number command helps you instantly add
page numbers on all pages of a document,
starting on a specific page, or at a particular
number. This flexibility is ideal for working with
multiple CorelDRAW files that will eventually
become a single publication.
You can choose from alphabetic, numeric, or
roman formats, and you can display page
numbers in lower-case or upper-case letters. In
addition, page numbers are automatically
updated when you add or delete pages in your
document. You can also insert a page number
inside existing artistic or paragraph text.
20 | CorelDRAW Graphics Suite X6 Guidebook
Using alignment guides to position objects quickly
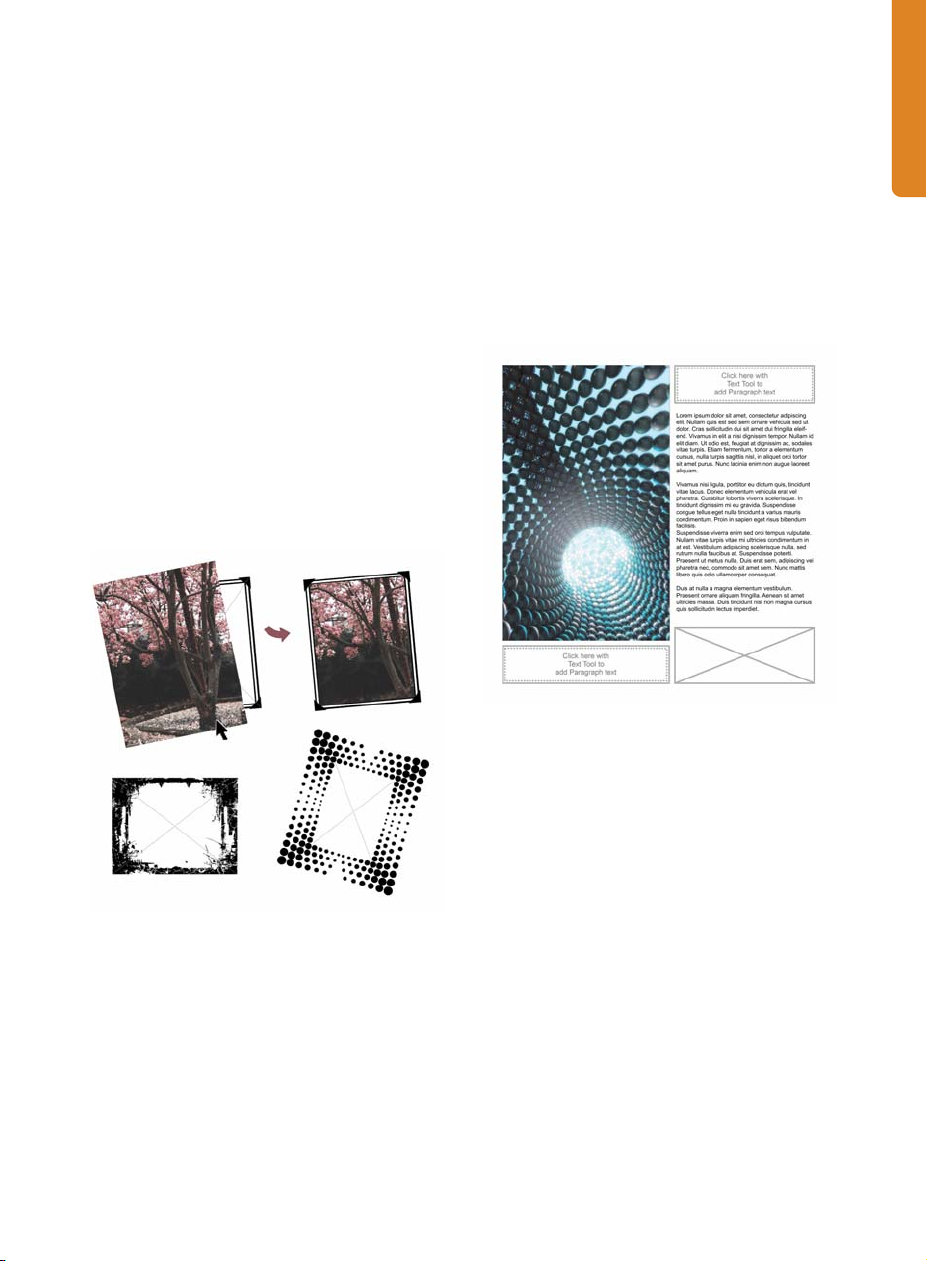
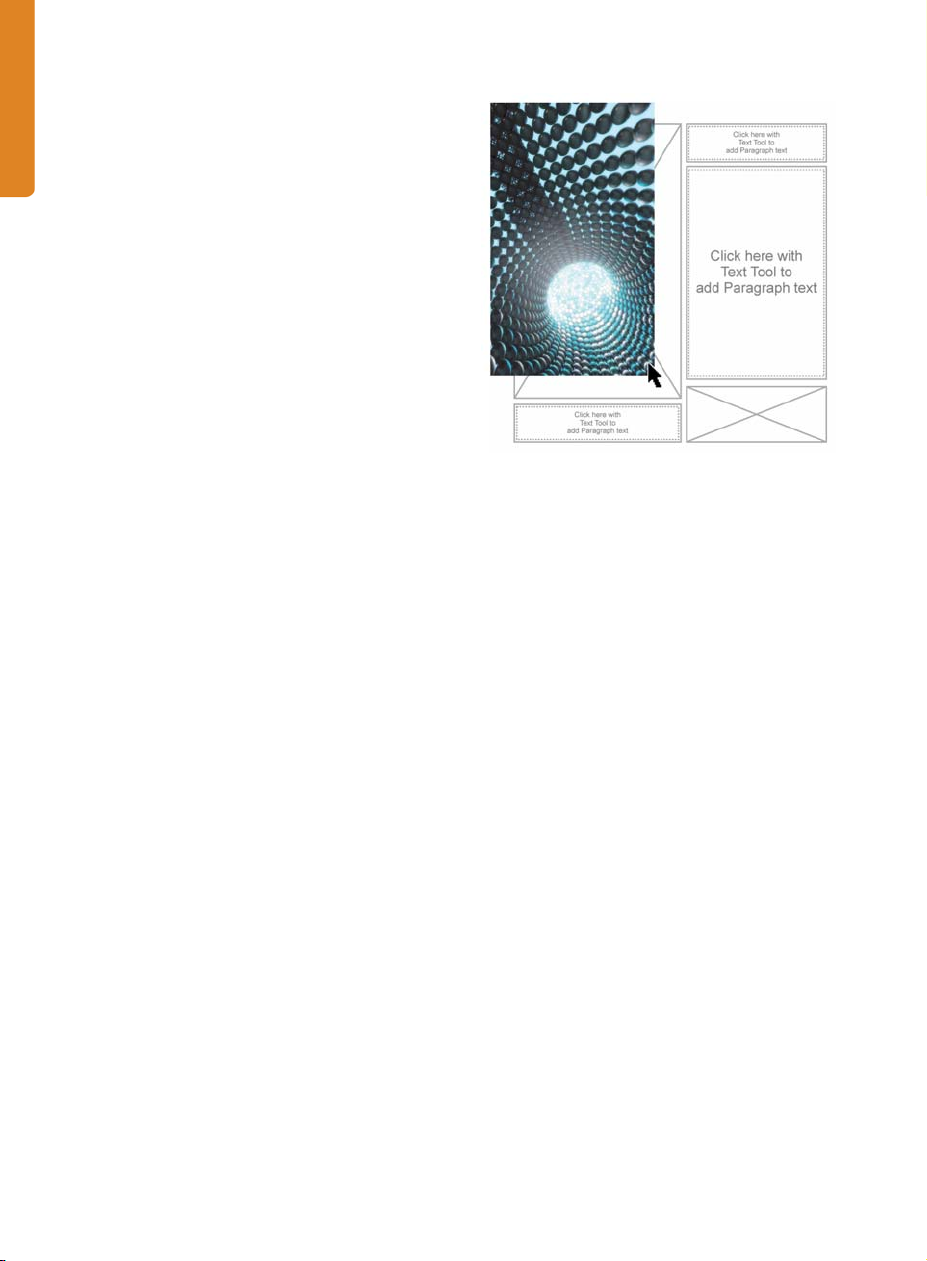
Interactive frames (New!)
CorelDRAW X6 provides interactive frames that
help you efficiently generate mock-ups of
design ideas. The new empty PowerClip™ and
text frame functionality lets you populate your
designs with placeholder PowerClip and text
frames, which makes it easier to preview a
Page 25
layout before finalizing its individual content
components.
You can now drag content over a PowerClip
frame, and then choose either to add the
content to the frame or to replace any existing
frame content. PowerClip frames also now give
you the option of centering content within the
frame or scaling content to fit proportionally
within the frame. In addition, you can easily
create text frames from any closed curve
object, and then edit the frames to take on any
shape imaginable.
The interactive frame functionality has also
been implemented in a collection of predesigned picture frames included with the
suite, giving you stylish, content-ready design
assets that you can customize with ease.
For convenience and flexibility, you can also use
custom placeholder text in any language
supported by CorelDRAW. You simply create an
RTF file containing the text that you want to
use, save it to the default placeholder text
folder, and CorelDRAW X6 will use that text
whenever you invoke the Insert placeholder
text command. For more information about
creating a custom placeholder text file,
“Placeholder text” on page 210.
Choose from a collection of pre-designed interactive
frames to frame your image.
Placeholder text (New!)
With CorelDRAW X6, the new Insert
placeholder text command lets you right-
click any text frame and immediately populate
it with placeholder text. This makes it easier to
assess the appearance of your document prior
to finalizing its content.
You can create custom placeholder text for your
documents.
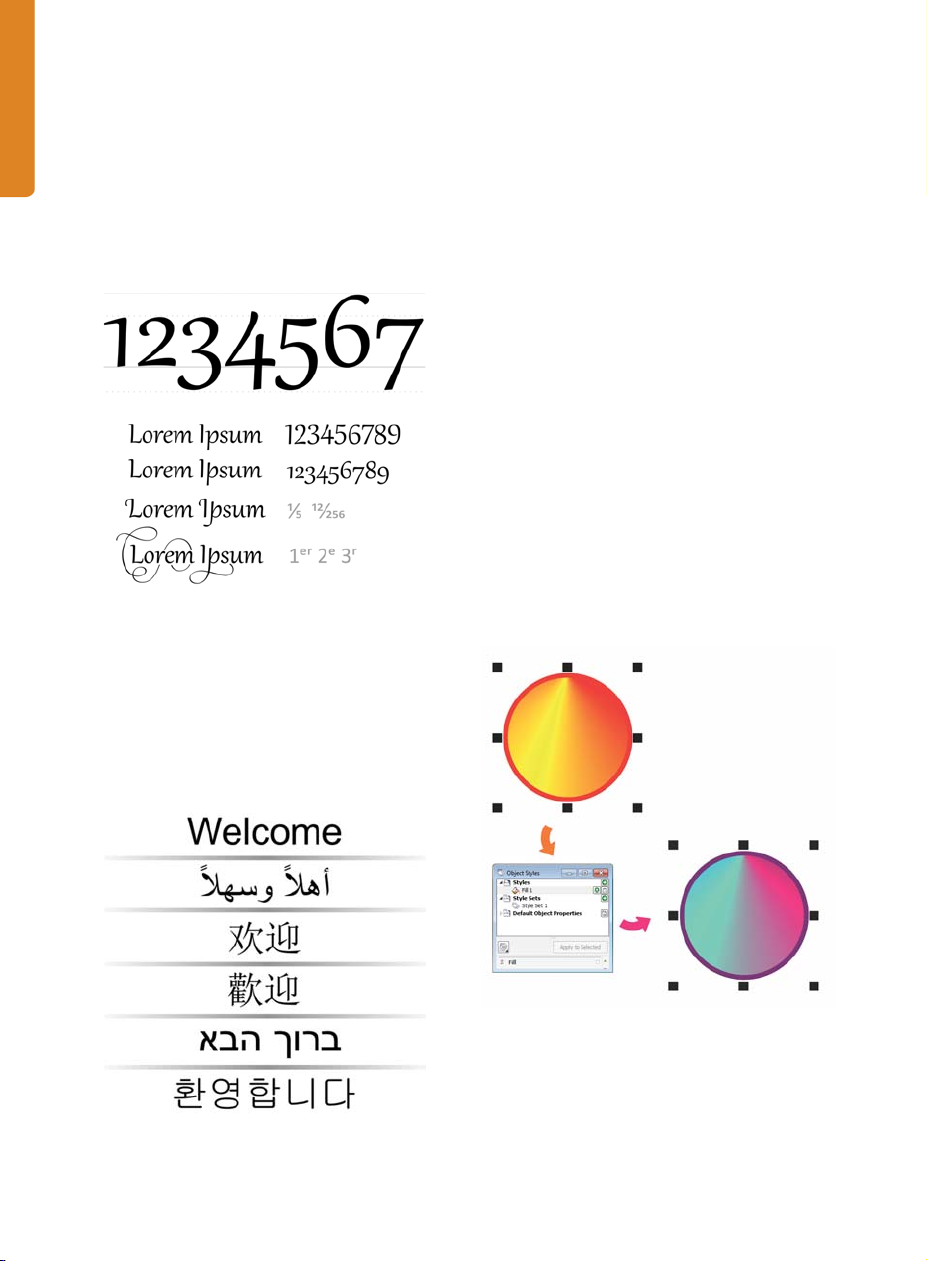
Advanced OpenType support (New!)
The reengineered text engine lets you take
greater advantage of advanced OpenType
typography features, such as contextual and
stylistic alternates, fractions, ligatures, ordinals,
ornaments, small caps, swashes, and more.
OpenType fonts are based on Unicode, which
makes them ideal for cross-platform design
work. In addition, the extended character sets
offer outstanding language support.
Accessible from the Object properties
docker, the OpenType features let you choose
alternative appearances for individual
characters, or glyphs, to suit your stylistic
Chapter 3: What’s New | 21
Page 26
preference, provided that the font supports
advanced OpenType. For example, you can
apply a different number, fraction, or ligature
glyph to achieve a certain look for your text. In
addition, you can let CorelDRAW prompt you
when an OpenType feature is available for the
selected text by enabling the Interactive
OpenType option.
OpenType fonts let you choose alternate appearances
for selected characters.
Complex script support (Enhanced!)
Design with style and creativity
With its rebuilt styles engine, new Object
styles docker, new color styles
implementation, new color harmony
functionality, and content-ready picture
frames, CorelDRAW Graphics Suite X6 helps
you focus on bringing your unique sense of
style and creativity to your designs.
Styles engine and docker (New!)
In CorelDRAW X6, the revamped styles engine
introduces a new Object styles docker that
simplifies the creation, application, and
management of styles. A style is a set of
properties that governs the appearance of
objects. CorelDRAW X6 also introduces new
style sets, which are groups of styles that make
it easier to have consistent formatting across
multiple objects, produce iterative versions,
and apply formatting with speed and
consistency.
With CorelDRAW X6, the complex script
support built into the overhauled text engine
ensures proper typesetting for glyphs used by
Asian and Middle Eastern languages.
Text engine improvements ensure that multilingual
glyphs display correctly in your documents.
22 | CorelDRAW Graphics Suite X6 Guidebook
You can quickly change the look of an object by
applying a style set.
You can create and apply styles and style sets to
graphic objects, artistic and paragraph text,
callout and dimension objects, and objects
Page 27
created with the Artistic media tool. For
example, you can define an outline style by
specifying attributes such as outline width,
color, and line type. For text objects, you can
define a character style by specifying font type,
font style and size, text color, background
color, character position, caps and more.
With style sets, you can group multiple styles,
which lets you combine properties from
different types of styles. For example, you can
use a style set to define fill and outline
properties for a graphic object, or you can
define character and paragraph styles to set
the appearance of paragraph text. This makes
it faster and easier to later adjust those
properties, which is especially convenient for
creating iterative designs. You can also create
child styles or style sets that retain some but
not all properties of the parent style or style set.
This is particularly useful when working with
long documents. For example, you can assign
a parent character style for headings and a
child character style for subheadings.
Managing document colors by using the Color styles
docker
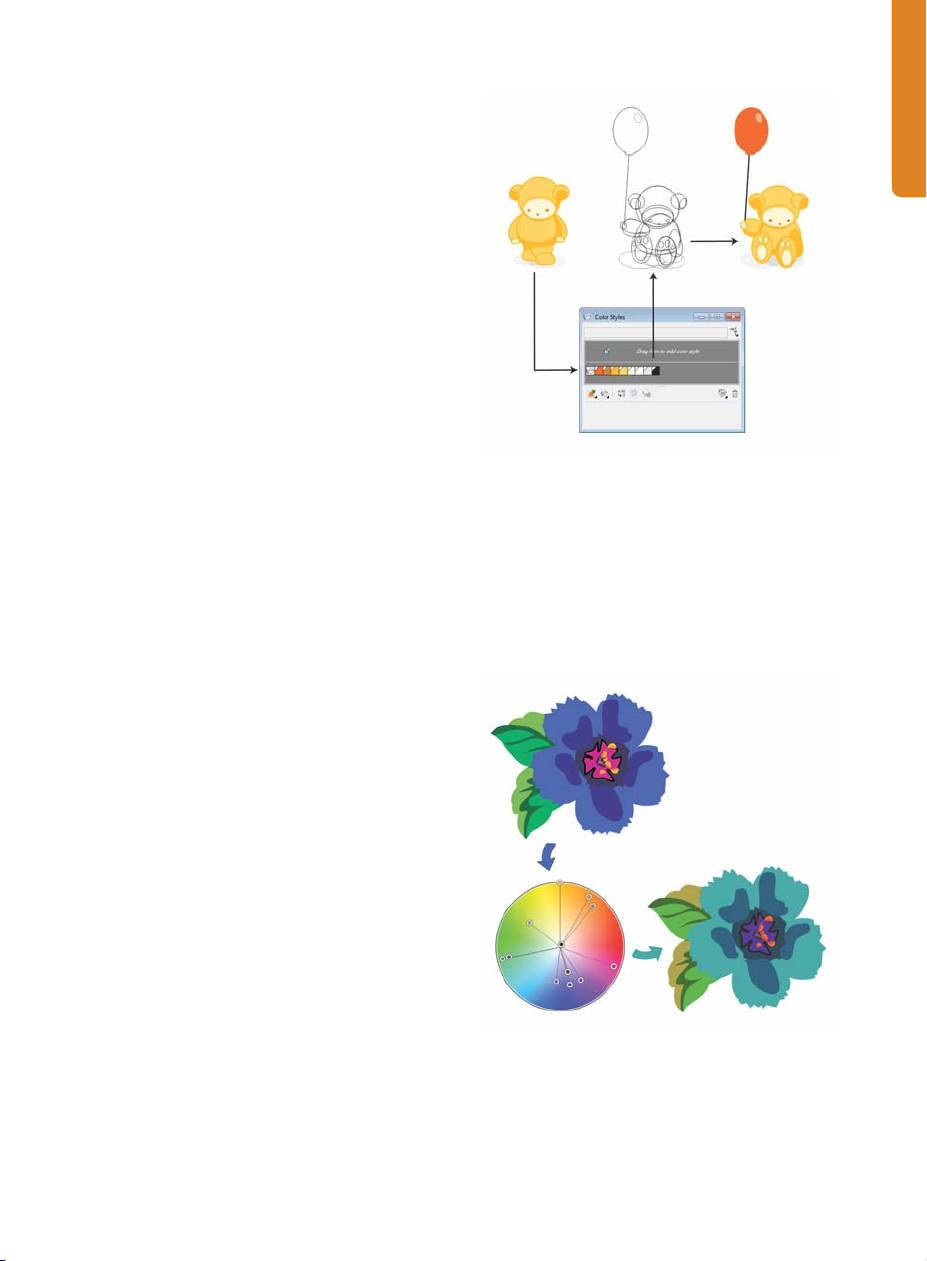
Color harmonies (New!)
The new color harmony functionality lets you
group color styles so you can quickly and easily
produce iterative designs with varying color
schemes.
Color styles (New!)
The new Color styles docker lets you add the
colors used in a document as color styles,
which makes it easier than ever before to
implement a color change throughout a
project. To create a color style from an object,
simply drag the object to the Color styles
docker. If you apply that color style to other
objects, you can quickly change the color style
and all objects that have this style are instantly
updated.
In addition, you can break the link between an
object and a color style at any time, so you can
edit the object independently. You can also
convert color styles to different color modes or
to spot colors to prepare your document for
production printing.
Color harmonies let you change combinations of colors
easily.
By combining two or more color styles into a
harmony, you are linking the colors into a hue-
Chapter 3: What’s New | 23
Page 28
based relationship. This lets you modify all
colors simultaneously, altering the color
composition of your artwork in one step, and
quickly prepare a variety of alternate color
schemes. You can also edit the individual color
styles in a harmony.
In addition, you can create a special type of
color harmony called a gradient, which
consists of one master color style and a
number of varying shades of that color. When
you alter the master color, the gradient colors
automatically adjust to the same degree that
the master color was altered. This is especially
useful when outputting multiple color
variations of the same design.
Content-ready pre-designed frames
(New!)
With CorelDRAW Graphics Suite X6, the
collection of frames included in the content
library has been enhanced to support the new
empty PowerClip functionality. This lets you
instantly populate the frames with photos or
graphics, saving you time and effort. In
addition, some of the included frames are textready, so you can immediately add your own
custom text message.
Adding an image to an empty PowerClip frame
24 | CorelDRAW Graphics Suite X6 Guidebook
Page 29

Image created by
Gabriel González Díaz
Mexico
Part Two
Getting Started
Page 30

Page 31

Chapter 4: CorelDRAW Basics
Workspace overview 28
Starting a document 33
Zooming, panning, and scrolling 34
Creating objects 34
Working with bitmaps 36
Selecting, sizing, and transforming objects 37
Coloring and styling objects 38
Positioning objects 42
Grouping and combining objects 43
Organizing objects 43
Working with pages 44
Sharing your work 44
Setting preferences 46
Chapter 4: CorelDRAW Basics | 27
Page 32

Chapter 4: CorelDRAW Basics
This chapter introduces you to the CorelDRAW workspace and provides an overview of basic tasks,
such as starting and viewing documents, modifying and organizing objects, and creating page
layouts. Additional topics include sharing work and setting preferences. As you learn to use
CorelDRAW, this chapter can help identify tasks and features that you may want to explore further
in the Help.
Workspace overview
The CorelDRAW workspace provides a wide range of tools and commands for creating unique
graphic designs. This section describes the application window and the toolbox.
Application window
Document
window
Standard toolbar Property bar
Document
navigator
Menu bar Title bar
Status bar
palette
RulersToolbox
Drawing page
DockerDocument
Color palette
28 | CorelDRAW Graphics Suite X6 Guidebook
Page 33

The following list describes the main
components of the CorelDRAW application
window.
•The toolbox contains tools for creating,
filling, and modifying objects in a
document.
•The standard toolbar contains shortcuts
to basic menus and commands, such as
opening, saving, and printing documents.
Additional toolbars contain shortcuts for
more specific tasks.
•The menu bar contains drop-down
menus of related commands.
•The title bar displays the title of the
current document.
•The property bar contains controls that
change according to the active tool. For
example, when you use the Te xt tool, the
property bar changes to display controls
for creating and editing text.
•A docker lets you access commands and
settings that are associated with a specific
tool or task.
• The horizontal and vertical rulers let you
determine the size and position of objects
in a document.
•The document navigator lets you add
pages to a document, or move from page
to page within a document.
•The document window is the workspace
area that is bordered by scroll bars and
other controls. It includes the drawing
page and surrounding area.
•The drawing page is the rectangle that
represents the printable section of the
document window.
•The Document palette lets you keep
track of the colors that are used in a
document.
•The color palette is a dockable bar that
contains color swatches.
•The status bar displays information about
the properties of an object, such as type,
size, color, and fill. Color proofing status,
color profiles, and other information
about document colors are also displayed.
Toolbox
The toolbox contains a range of tools that you
can use for specific drawing and editing tasks.
Some tools let you draw shapes, and other
tools let you apply colors, patterns, or other
types of fills to objects.
Some tools belong to flyouts, which are groups
of related tools. A small arrow in the lowerright corner of a toolbox button indicates that
the tool belongs to a flyout. The last-used tool
in the flyout appears on the button. You can
access the tools in a flyout by clicking the flyout
arrow.
Flyout arrow
Toolbox
Flyout
In the default workspace, clicking the flyout arrow on
the Shape tool opens a flyout of related tools.
The following section summarizes the main
categories of tools that are available in the
toolbox. For more information about specific
tools, see “Workspace tools” in the Help.
Chapter 4: CorelDRAW Basics | 29
Page 34

Pick tool
The Pick tool and the Freehand
pick tool let you select, size, skew,
and rotate objects.
Shape tools
Shape tools let you draw many
different shapes, including
rectangles, ellipses, stars, polygons,
and spirals. Additional tools in this
category (not shown here) let you
draw shapes such as smileys,
arrows, banners, and flowcharts.
Shape editing tools
Shape editing tools let you change
the shape of an existing object.
30 | CorelDRAW Graphics Suite X6 Guidebook
Page 35

Curve tools
Curve tools let you draw lines and
curves, such as freehand lines,
straight lines, and Bézier curves. You
can also use the Artistic media
tool to spray images, draw
calligraphic lines, or add
brushstrokes.
Fill tools
Fill tools let you apply various fills to
objects, such as uniform, fountain,
and mesh fills.
Interactive tools
Interactive tools let you apply special
effects to objects, such as blends,
contours, drop shadows, extrusions,
and transparencies.
Chapter 4: CorelDRAW Basics | 31
Page 36

Cropping and erasing tools
Cropping and erasing tools let you
remove parts of a document.
Dimension tools
Dimension tools let you draw
slanted, straight, and angular
dimension lines to measure parts of
objects in a document.
Connector tools
Connector tools let you draw lines
that connect objects in diagrams
and flowcharts.
32 | CorelDRAW Graphics Suite X6 Guidebook
Page 37

Text tool
The Te xt tool lets you type words
directly on-screen as artistic or
paragraph text.
Table tool
The Ta bl e tool lets you draw and
edit tables.
Zoom tool
The Zoom tool lets you change the
magnification level in the document
window.
For more information about workspace
components, see “CorelDRAW workspace
tour” in the Help.
Starting a document
When you start a new document (File ` New),
you can set various document properties in the
Create a new document dialog box.
You can name the document, set the page size,
select a color mode, such as CMYK or RGB, and
set color profiles.
The Create a new document dialog box lets you
specify a wide range of document properties.
Chapter 4: CorelDRAW Basics | 33
Page 38

Zooming, panning, and scrolling
Drawing common shapes
You can change the view of a document by
zooming in to get a closer look or by zooming
out to see a larger area. You can experiment
with a variety of zoom options to determine
the amount of detail that you want.
Left: The Zoom to ol is u sed to se lec t a n ar ea to m ag nif y.
Right: The area is magnified.
Panning and scrolling are two additional ways
to view specific areas of a document. When
you work at high magnification levels or with
large documents, you may not be able to see
all the content at the same time. Panning lets
you “grab” the document and move it around
in the document window to focus on a desired
area. Scrolling lets you move the document up,
down, or sideways in the document window so
that you can view the areas that are currently
hidden.
Creating objects
Objects are the building blocks of a document.
By using the tools in the toolbox, you can
create different types of objects: shapes, lines
and curves, text, and tables.
CorelDRAW provides many tools that let you
draw common shapes, such as rectangles,
circles, stars, and arrows. After you create a
shape, you can modify it by stretching it,
applying a pattern fill, or adding a drop
shadow.
One of the simplest shapes that you can create
is a rectangle.
Click the Rectangle tool in the toolbox.
On the drawing page, drag to draw the
rectangle.
The Rectangle tool is used to draw a single rectangle
(left), which can be used as a graphic element in a
finished project (right).
You can create objects of different shapes by
using the following tools:
•The Ellipse tool lets you draw circles and
ellipses.
•The Polygon tool lets you draw polygons.
•The Graph paper tool lets you draw a
grid.
•The Spiral tool lets you draw symmetrical
and logarithmic spirals.
34 | CorelDRAW Graphics Suite X6 Guidebook
Page 39

•The Basic shapes tool lets you draw a full
set of shapes, such as hexagrams, smileys,
and right-angle triangles.
•The Arrow shapes tool lets you draw
arrows with a specified shape, direction,
and number of arrowheads.
•The Flowchart shapes tool lets you draw
flowchart symbols.
Creating lines and curves
If you want to create your own unique shapes,
you can use one of the curve tools that let you
draw an almost unlimited variety of shapes.
Before you get started, however, it's a good
idea to get familiar with the following basic
concepts.
After drawing a line, you can convert it to a
curve. This is helpful when you want to make
detailed changes to the basic shape of a line.
When you convert a line to a curve, you are
essentially reducing the line to a series of
points, called nodes. By moving the nodes, you
change the line’s shape.
Top: Straight line. Middle: The line has been converted
to curves and now contains curve nodes. Bottom: The
curve is shaped by manipulating the nodes.
A line in which the starting point and endpoint
do not meet is called an open path. You can
join the points to make a closed path. This is
useful for adding a fill to the area enclosed by
the line.
Left: Open path. Right: Closed path with a fill added.
CorelDRAW provides many tools for drawing
lines and curves, including the following:
•The Freehand tool lets you draw line
segments and curves by using a mouse or
pen tablet.
•The Artistic media tool provides access to
four additional tools:
•The Brush tool lets you draw lines that
look like brushstrokes.
•The Sprayer tool lets you spray
objects, such as snowflakes or bubbles,
along a path.
•The Calligraphic tool lets you draw
lines that resemble strokes drawn with
a calligraphy pen.
•The Pressure tool lets you draw lines
that resemble strokes drawn with a
pressure-sensitive pen.
•The Pen tool lets you draw curves and
straight lines one segment at a time.
Chapter 4: CorelDRAW Basics | 35
Page 40

Creating text
You may need to include text in your
documents. CorelDRAW lets you create two
types of text:
• Paragraph text is contained within a text
frame. You can change many common
formatting properties of paragraph text,
such as font type and size, text color, and
font style. Paragraph text is ideal for larger
blocks of text.
• Artistic text is not contained within a text
frame, and you can add special effects to it
such as contouring and drop shadows.
Artistic text is ideal for logos, banners, and
headlines.
offer a quick way to create a pleasing layout for
your documents.
The Ta bl e tool was used to design this Web page.
You can create tables by using the Tab l e tool.
When you click the Tab l e tool, controls for the
tool become available on the property bar.
After specifying the number of rows and
columns, you can simply drag diagonally on
the drawing page to create the table.
Left: Paragraph text. Right: Artistic text, formatted as a
logo.
You can create both paragraph and artistic text
by using the Te x t tool. For more information,
see “Working with Text” on page 105.
Creating tables
One way to organize graphic and text objects
in a document is by creating a table and
inserting the objects into the table cells. Tables
36 | CorelDRAW Graphics Suite X6 Guidebook
Working with bitmaps
The document that you create with
CorelDRAW is a vector graphic. Vector graphics
are resolution-independent, which means that
the graphic is not compromised when you
scale or distort it. Vector graphics are based on
mathematical equations, which remain the
same regardless of the changes you make.
When you import a photograph into
CorelDRAW, the photograph is imported as a
bitmap image. Bitmap images are based on
pixels, which are tiny units of color. You can
think of a vector graphic as composed of lines
and fills, and a bitmap image as composed of
a mosaic of colors.
Page 41

Left: Vector image with smooth lines. Right: Pixelated
bitmap image that demonstrates the “mosaic” nature of
bitmap files.
There are two ways in which you can work with
bitmap images in CorelDRAW: You can insert a
bitmap into your document, and you can open
Corel PHOTO-PAINT from within CorelDRAW
to edit a bitmap.
Inserting bitmaps
When you import a bitmap image into
CorelDRAW, you can either embed it or link it
to an external file. When you link to an external
file, any edits that you make to the external file
are automatically applied to the imported file
in CorelDRAW. After you import a bitmap, the
status bar provides information about the color
mode, size, and resolution of the bitmap.
When you import the bitmap into the
document, you can make changes to the
bitmap by using the Edit bitmap feature in
CorelDRAW.
Editing bitmaps
within CorelDRAW. When you finish editing a
bitmap, you can quickly resume your work with
CorelDRAW.
To open a bitmap in Corel PHOTO-PAINT,
click the Edit bitmap button on the
property bar.
Selecting, sizing, and transforming objects
After adding an object to your document, you
may want to modify the object. CorelDRAW
provides several tools that let you select, resize,
or transform objects.
To modify an object, you must first select it.
You can select an object by using the Pick tool.
After you select an object with the Pick tool, a
bounding box with an “X” at the center
appears around the object. The bounding box
contains control handles that allow you to
transform the object.
The object on the right has been selected, which is
indicated by a bounding box with an “X” in the center.
You can access Corel PHOTO-PAINT, a
complete bitmap-editing program, from
You can change an object by sizing, skewing,
stretching, rotating, or mirroring it.
Chapter 4: CorelDRAW Basics | 37
Page 42

• Sizing lets you change the width and
height of an object.
• Skewing lets you slant an object to one
side.
• Stretching lets you change the height
and width of an object nonproportionally.
• Mirroring lets you create a horizontal or
vertical mirror image of an object.
Coloring and styling objects
In addition to transforming objects, you can
style your objects artistically. For example, you
can apply a unique outline or fill, or add a drop
shadow to create the illusion of depth. You can
also make objects transparent.
• Rotating lets you turn an object around
its center axis or a point relative to its
position.
38 | CorelDRAW Graphics Suite X6 Guidebook
A solid red fill has been added to the bottom cube.
Page 43

A blue fill and a drop shadow have been applied to the
bottom rectangle, giving it a three-dimensional
appearance.
A transparency effect has been applied to the bottom
circle, so that it appears to be under water.
Formatting outlines
You can change the outline of an object in
various ways. Depending on your design
needs, you can choose a different outline color,
thickness, or style (such as a dashed or dotted
line).
Upper left: Triangle outline with no formatting applied.
Lower right: Triangle outline formatted with color and a
dashed-line pattern.
A list of preset arrowheads is also available. To
add arrowheads to the starting point or
endpoint of a line, you can choose a preset
from the list or create a custom arrowhead.
Choosing fills
CorelDRAW provides a wide range of fills to
help you add patterns and texture to your
objects. You can fill an object with one color, or
with a blend of two or more colors. Or you can
select a more complex fill, such as a texture or
pattern, or create your own fill.
To change the appearance of outlines, you
can use controls in the Outline pen dialog
box, the Outline page of the Object
properties docker, or the property bar.
Top to bottom: Uniform fill, fountain fill, and pattern fill
applied to objects.
Chapter 4: CorelDRAW Basics | 39
Page 44

To add a fill to an object, click either the Fill
tool or the Interactive fill tool.
The Fill tool lets you choose one of five fill
types, each with a wide range of options. The
Interactive fill tool lets you apply a fill
dynamically by using property bar controls
while drawing in the document window. The
following list describes the types of fills that are
available for each tool.
Fill tool
•The Uniform fill is a single-color fill.
•The Fountain fill is a blended fill of two
or more colors.
•The Pattern fill is a patterned design,
such as a floral wallpaper design.
•The Te x t u re fi ll has a textured effect that
mimics various surfaces, such as marble,
ocean surface, and moon terrain.
•The PostScript fill supports transparency
in a range of patterns.
Interactive fill tool
•The Interactive fill lets you create a
fountain fill and apply changes to it in real
time.
•The Mesh fill lets you manipulate a mesh
grid to control the colors and blends in a
custom fountain fill.
For more information, see “Filling objects” in
the Help.
When you add transparency to an object,
anything behind the object shows through.
Transparency was added to the object on the left to
create the illusion of water, and to the object on the
right to create the illusion of glass. The Drop shadow
tool was used to intensify the effect in both objects.
You can adjust the measure of transparency to
determine how opaque the object is. A fully
opaque object completely blocks anything
behind it, whereas a fully transparent object is
invisible.
To apply transparency to an object, you have
several choices. You can use the Interactive
transparency tool to apply a transparency fill,
or you can use a transparency lens effect. In
addition, you can control the way the
transparency is blended in the object, and you
can copy transparencies from one object to
another. You can also specify whether to apply
the transparency to the fill or to the object
outline, or to both.
Adding transparency
You can apply transparency to create a realistic
rendering of objects such as water and glass.
40 | CorelDRAW Graphics Suite X6 Guidebook
Adding effects
CorelDRAW offers a range of tools that you can
use to add three-dimensional effects to
objects.
Page 45

• Extrusions
•Chamfers
•Drop shadows
• Contours
• PowerClips
•Bevels
Reusing color and objects
To save time and maintain a uniform look in
your document, you can reuse colors and
objects.
You can sample color from anywhere in your
document and then copy that color to another
object.
The orange color is sampled from the graphic on the left
and applied to the graphic on the right.
To sample color, click the Color
eyedropper tool, and click the color. The
Color eyedropper tool automatically
switches to the Apply color mode. To
apply the color, point to an object, and
click.
When you use a color in your document, the
color is added to the Document palette,
which is docked at the bottom of the
application window when you start a new
document or open an existing document.
Chapter 4: CorelDRAW Basics | 41
Page 46

Colors are added to the Document palette
when you add a color from one of the color
libraries, when you sample a color from
another document or another application, and
when you apply fills to objects.
The Document palette is automatically updated as you
add colors to your document. You can use this palette
to create a color scheme for your project.
To reuse objects in your documents, you can
either copy and paste the objects, or you can
duplicate them. Using the first method, you
can copy an object to the Clipboard and then
paste the object in your document. Using the
second method, you can quickly create
multiple duplicates of the object and place
them in your document.
To create one copy of an object, click Edit
` Copy. To create a series of duplicates,
click Edit ` Step and repeat.
Positioning objects
CorelDRAW provides several tools to help you
position and align objects on the page. You
can use these tools to avoid small gaps or
misalignments that are not apparent on-screen
but become noticeable after printing.
You can use snapping to align an object with
another object in a document. When snapping
is turned on, snap points appear in various
locations around an object, such as the corner,
center, or edge.
Left: The blue rectangle is dragged down to snap to the
red rectangle. Right: The two objects are snapped
together.
Left: The object has been copied and pasted. Right: The
object has been duplicated.
42 | CorelDRAW Graphics Suite X6 Guidebook
To turn on object snapping, click View `
Snap to ` Snap to objects.
If you want to align an object with another
object but do not want to snap directly to the
object, you can use dynamic guides. Dynamic
guides are temporary guidelines that are based
on one of the following snap points of an
object: center, node, quadrant, or text
baseline. You can drag the object along the
Page 47

dynamic guide. The distance from the base
object is measured as you move the object.
Left: A vertical dynamic guide is used to align objects.
Right: A horizontal dynamic guide is used to align
objects.
To turn on dynamic guides, click View `
Dynamic guides.
You can also use the document grid to align
objects within the document window. The
document grid is a series of intersecting lines in
which each small square acts as a snapping
point. You can reduce the size of these squares
for more precise alignment in your document.
To display the document grid, click View `
Grid ` Document grid.
Grouping and combining objects
You may want to make changes to a group of
objects or move them without changing their
position in relation to each other. CorelDRAW
lets you group objects to manage them more
easily. When you group objects, each object
retains its own properties. When you finish
working with the objects as a group, you can
ungroup them and work on each one
individually.
The three chair images are selected as a group.
To group objects, marquee select the
objects, and click Arrange ` Group.
By combining two or more objects, you can
create a single curve object that has the fill and
outline attributes of the last selected object.
You can edit this curve object whenever
necessary. In addition, you can combine
objects as a way of creating objects with holes.
Objects can be placed on the drawing page by aligning
them with a grid.
To combine objects, click Arrange `
Combine.
For more information, see “Combining
objects” in the Help.
Organizing objects
The more objects you add to your document,
the more difficult it is to find and select specific
objects. To organize objects, you can add layers
Chapter 4: CorelDRAW Basics | 43
Page 48
to your document. Layers make it easier to view
and work with multiple objects simultaneously.
The Object manager docker lets you add,
move, and delete layers in a document. You
can set up layers before you begin working on
your document, or you can add them as
needed and then move existing objects to the
the newly added layers.
To open the Object manager docker, click
To ol s ` Object manager.
The Object manager docker lets you select and modify
page layers.
For more information about layers, see
“Working with layers” in the Help.
Working with pages
Depending on your desired output, you can
customize the look of your pages by specifying
different page layouts, such as a booklet, tent
card, or brochure. You can also toggle the
page orientation between landscape and
portrait, and you can create a custom page
size.
Left: Portrait orientation. Right: Landscape orientation.
To set the page size, click Layout ` Page
setup. You can select from a long list of
common paper sizes, including legal,
business card, and various envelope sizes.
You can specify a background for your pages.
A background consists of a single color or a
bitmap, which is tiled to fit the page.
Left: Page with a solid red background. Right: Page with
a tiled bitmap background.
To add a background to your page, click
Layout ` Page background.
Sharing your work
To share your finished document with others,
you can print a copy on a personal printer. Or
for high-quality output, such as signs or vehicle
wraps, you can send your document to a
commercial printer. You can also export your
44 | CorelDRAW Graphics Suite X6 Guidebook
Page 49

work to a different file format, such as Adobe®
Portable Document Format (PDF) or Adobe
Illustrator (AI).
If your document has multiple layers, and you
do not want to print them all, you can specify
which ones to print. Make sure that the layers
to be printed are visible and enabled for
printing in the Object manager docker.
In this example, the objects on Layer 2 are visible in the
document window and are enabled for printing. The
objects on Layer 1 are visible, but will not appear in the
printed copy of the document.
You can preview your work before printing to
ensure that everything will appear as it should.
To preview a print job, click File ` Print
preview.
If you are using a print service provider, you
must ensure that your document meets the
provider’s criteria. Consult with the print
service provider if you do not have this
information, so that you know which options
to enable in the document.
To prepare a print job for a print service
provider, click File ` Collect for output.
Follow the instructions in the Collect for
output wizard.
To export your work to another file format,
click File ` Export, and choose a file
format.
To pri nt to a p erso n al printer, click File `
Print. In the Print dialog box, choose a
printer from the Printer list box, and
choose a print range option.
The Print dialog box lets you set printing preferences for
your document.
Export dialog box
Depending on which file format you choose
when exporting a file, you can set additional
options. For example, with the Adobe
Illustrator (AI) file format, you can choose a
specific version of Adobe Illustrator in the
Export dialog box.
Chapter 4: CorelDRAW Basics | 45
Page 50

When you save your work as a PDF file, you can
use PDF presets, which optimize the file for
various types of output, such as document
distribution, prepress, and the Web.
To save your work as a PDF file, click File `
Export. From the Save as type list box,
choose PDF - Adobe Portable
Document Format.
Setting preferences
You can set many different preferences in
You can set export options for Adobe Illustrator files.
Preference Description How to set
CorelDRAW to customize various features. The
following table lists and describes three
examples of these preferences.
Unit of measure The selected unit of measure
for the horizontal and vertical
rulers, such as inches, pixels
or points
Backup files The folder location to save
backup files, and any autobackup settings
Nudge distance The increment by which you
move an object when you
press an arrow key
Click View ` Setup ` Grid
and ruler setup, and click
Rulers. In the Units area,
choose a unit of measure for
the horizontal and vertical
rulers.
Click Tools ` Options. In the
Workspace list of categories,
click Save to access the
backup file settings.
Click View ` Setup ` Grid
and ruler setup, and click
Rulers. Type a value in the
Nudge box.
46 | CorelDRAW Graphics Suite X6 Guidebook
Page 51

Chapter 5: Corel PHOTO-PAINT Basics
Workspace overview 48
Acquiring images 57
Cropping and rotating 57
Changing image size and resolution 58
Changing color modes 60
Retouching 60
Adjusting color and tone 62
Working with masks 64
Working with objects and lenses 65
Sharing your work 66
Setting preferences 67
Chapter 5: Corel PHOTO-PAINT Basics | 47
Page 52

Chapter 5: Corel PHOTO-PAINT Basics
This chapter introduces you to the Corel PHOTO-PAINT workspace and provides an overview of
basic tasks, such as bringing in images from your scanner or digital camera, adjusting image size
and resolution, and retouching photos to fix common problems. Additional topics include using
masks, objects, and lenses in image editing, and sharing work by exporting to different file formats
or by using ConceptShare™. As you learn to use Corel PHOTO-PAINT, this chapter can help identify
tasks and features that you may want to explore further in the Help.
Workspace overview
The Corel PHOTO-PAINT workspace provides a wide range of tools and commands for viewing and
editing images. This section describes the application window and the toolbox.
Application window
Toolbox Standard toolbar Property bar
Menu bar
Status bar
Navigator pop-up DockerImage paletteImage window Color palette
48 | CorelDRAW Graphics Suite X6 Guidebook
Page 53

The following list describes the main
components of the Corel PHOTO-PAINT
application window.
•The toolbox contains tools for editing,
creating, and viewing images, as well as
the color control area, which lets you
choose colors and fills.
•The menu bar contains drop-down
menus of related commands.
•The standard toolbar contains shortcuts
to basic menu commands, such as
opening, saving, and printing. Additional
toolbars contain shortcuts for more
specific tasks.
To access a toolbar, click Window `
Toolbars, and click a toolbar name.
•The property bar contains controls that
change according to the active tool. For
example, when you use the Zoom tool,
the property bar changes to display
controls for zooming.
•The image window is the area where the
active image appears.
•The Image palette lets you keep track of
the colors that are used in an image.
•The status bar displays information about
the active image, the active tool, the
available memory on your computer, and
the color proofing status. The status bar
also displays tips related to the active tool.
•The Navigator pop-up button lets you
find and focus on a specific area of the
image. This feature is available only when
the entire image is too large to be viewed
all at once.
•A docker lets you access additional
commands and image information.
Dockers can be kept open while you work
on an image. They can also be attached
(docked) to either side of the application
window, or floated (undocked) and moved
to wherever you need them as you work.
Dockers can also be minimized to save
valuable screen space.
To open a docker, click Window `
Dockers, and click a docker.
•A color palette is a collection of color
swatches. You can change the foreground
and fill colors by using the default color
palette, which appears on the right side of
the application window.
To access additional color palettes, click
Window ` Color palettes, and click a
color palette.
Toolbox
The toolbox contains tools for editing,
creating, and viewing images. Some tools
belong to flyouts, which are groups of related
tools. A small arrow in the lower-right corner
of a toolbox button indicates that the tool
belongs to a flyout. The last-used tool in the
flyout appears on the button. You can access
the tools in a flyout by clicking the flyout arrow.
Example of a flyout
The following section briefly describes the tools
that are located in the toolbox.
Chapter 5: Corel PHOTO-PAINT Basics | 49
Page 54

Pick tools
The Object pick tool lets you select,
position, and transform objects.
The Mask transform tool lets you
position, size, and rotate editable
areas.
Mask tools
The Rectangle mask tool and the
Ellipse mask tool let you define
rectangular and elliptical editable
areas.
The Freehand mask tool lets you
define irregularly shaped or
polygonal editable areas.
The Lasso mask tool lets you define
editable areas that are irregular in
shape and surrounded by pixels of
similar colors.
50 | CorelDRAW Graphics Suite X6 Guidebook
Page 55
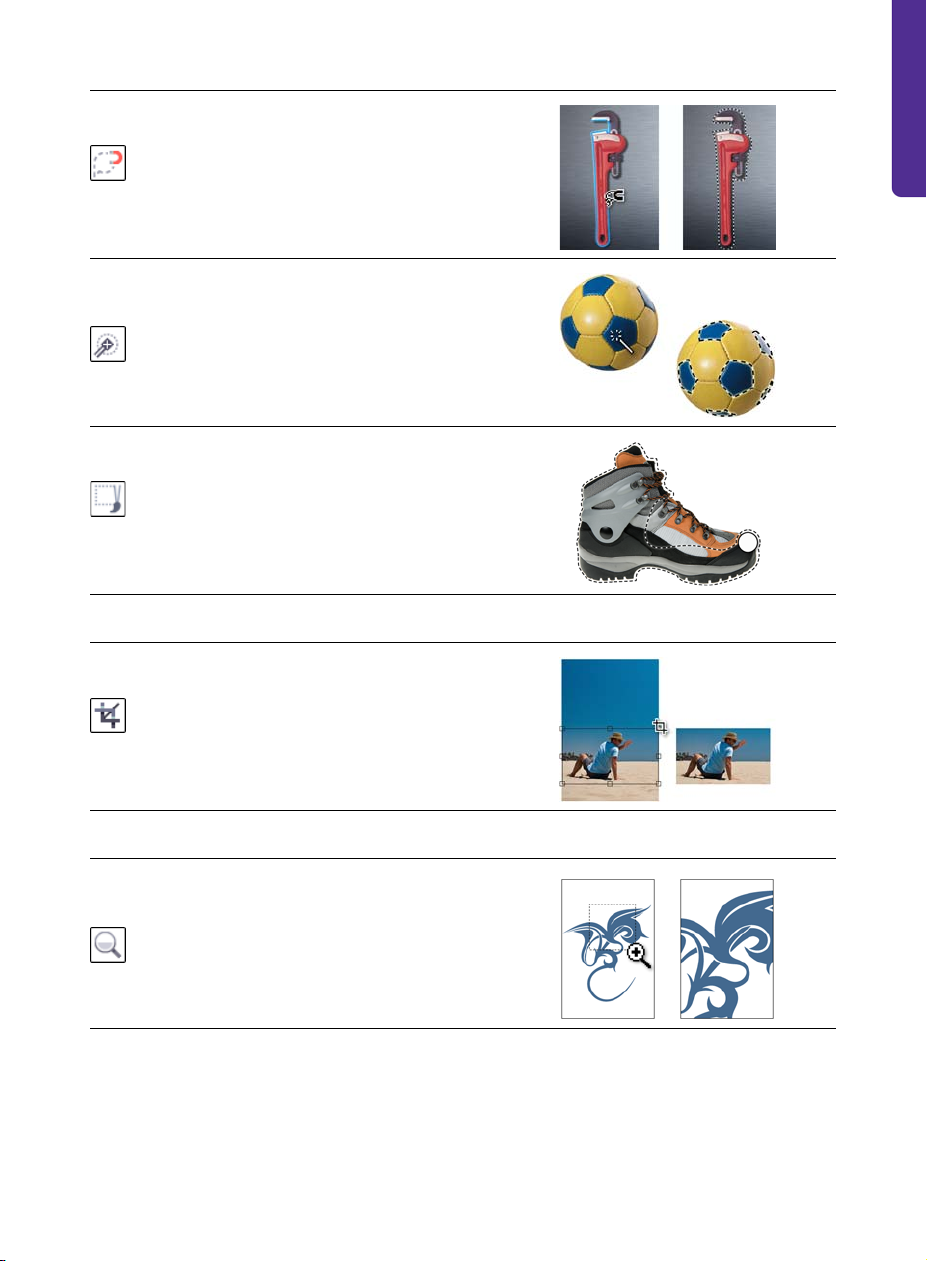
The Magnetic mask tool lets you
position a mask marquee along the
edge of an image element. An edge
is indicated by an outline that is
colored in contrast to the
surrounding area.
The Magic wand mask tool lets
you define editable areas of irregular
shape. Pixels that are adjacent to,
and similar in color to, the first pixel
that you click are included in the
editable area.
The Brush mask tool lets you
define an editable area by painting
it with a brush.
Crop tool
The Crop tool lets you remove
unwanted areas and straighten
crooked images.
Zoom tools
The Zoom tool lets you change the
magnification level in the image
window.
Chapter 5: Corel PHOTO-PAINT Basics | 51
Page 56

The Pan tool lets you drag areas of
an image into view when the image
is larger than the image window.
Eyedropper tool
The Eyedropper tool lets you
sample colors from an image.
Eraser tool
The Eraser tool lets you erase areas
of an object or image to reveal the
underlying object or background.
Te x t to ol
The Te xt tool lets you add text to
your image and edit existing text
objects.
Touch-up tools
The Red-eye removal tool lets you
remove the red-eye effect from the
eyes of photo subjects.
52 | CorelDRAW Graphics Suite X6 Guidebook
Page 57

The Clone tool lets you duplicate
part of an image and apply it to
another part of the same image or
to another image.
The Touch-up brush tool lets you
remove image imperfections, such
as tears, scratch marks, and
wrinkles, by blending textures and
colors.
Shape tools
The Rectangle tool, Ellipse tool,
and Polygon tool let you draw
rectangles, squares, ellipses, circles,
and polygons.
The Line tool lets you draw single or
joined straight-line segments by
using the foreground color.
The Path tool lets you create and
edit paths.
Chapter 5: Corel PHOTO-PAINT Basics | 53
Page 58

Fill tools
The Fill tool lets you fill areas with
one of four fill types: uniform,
fountain, bitmap, or texture.
The Interactive fill tool lets you
apply a fill to an entire image,
object, or selection and then adjust
the fill directly in the image window.
Brush tools
The Paint tool lets you paint on an
image by using the foreground
color.
The Effect tool lets you correct
color and tone.
The Image sprayer tool lets you
load one or more images and apply
them in a repeating sequence as you
paint.
54 | CorelDRAW Graphics Suite X6 Guidebook
Page 59

The Undo brush tool lets you
restore image areas to their
appearance before your last
brushstroke.
The Replace color brush tool lets
you replace the foreground color in
your image with the background
color.
Interactive/Transparency tools
The Drop shadow tool lets you add
shadows to objects.
The Object transparency tool lets
you make the colors of an object
fade gradually toward the image
background color.
The Color transparency tool lets
you make specific pixels in an object
transparent, based on their color
value.
The Object transparency brush
tool lets you brush areas on an
object to make them more
transparent.
Chapter 5: Corel PHOTO-PAINT Basics | 55
Page 60

Image slicing tool
The Image slicing tool lets you cut
a large image into smaller sections
for use on the Web.
Color control area
The foreground color is the color
that you apply to an image or text
by using the brush tools. The
background color is the color that
appears when you erase portions of
the background or increase the
paper size. The fill color is the color
that you apply by using the shape
and fill tools.
The Swap color arrow lets you
switch the foreground and
background colors.
Foreground color
Swap color
Background color
You can change the foreground,
Fill color
background, or fill color by doubleclicking the respective color swatch.
Reset color
The Reset color icon lets you return
to the default colors: black as the
foreground and fill color, and white
as the background color.
For more information about workspace components, see “Corel PHOTO-PAINT workspace tour” in
the Help.
56 | CorelDRAW Graphics Suite X6 Guidebook
Page 61

Acquiring images
You can acquire photos from your digital
camera by connecting your camera or a media
card reader to your computer and using one of
the following methods:
• If your digital camera or card reader
appears as a drive on your computer, you
can copy images directly to a folder on
your hard disk, and then open them in
Corel PHOTO-PAINT.
• You can load images directly into
Corel PHOTO-PAINT by using Windows
Image Acquisition (WIA) or the TWAIN
driver of your digital camera. WIA is a
standard interface and driver for loading
images from peripheral devices, such as
scanners and digital cameras.
• You can use the software provided with
your digital camera to save the images to
your computer, and then open the images
in Corel PHOTO-PAINT. For more
information, see the documentation that
was provided with your digital camera.
To crop an image, click the Crop tool
in the toolbox, and drag in the image
window.
The selected area indicates the portion of the image that
will remain. The area outside the selection will be
cropped.
Often, you may need to rotate an image to
change its orientation to portrait or landscape.
To rotate an image, click Image ` Rotate,
and click a menu command.
You can scan images and pages into
Corel PHOTO-PAINT by using WIA, the TWAIN
driver, or your scanner software. Sometimes,
scanned images contain lines, moiré (a wave
pattern), or noise (speckled effect). You can
remove these defects by using special effects
filters. For more information, see “Retouching”
on page 60.
For more information, see “Acquiring images
from scanners and digital cameras” in the
Help.
Cropping and rotating
Cropping lets you remove unwanted areas
from images to improve their composition.
Top: The image has been selected for rotation.
Bottom: The image has been rotated.
Chapter 5: Corel PHOTO-PAINT Basics | 57
Page 62

If you need to straighten photos that were
taken or scanned at an angle, you can use the
Straighten image dialog box (Adjust `
Straighten image).
Top: The Straighten image dialog box displays a
crooked image. Bottom: The image has been
straightened.
Changing image size and resolution
The term “image size” often refers to the pixel
dimensions — that is, to the image’s height
and width expressed in pixels. Image resolution
refers to the number of pixels per inch (ppi)
within an image. The pixels-per-inch
measurement corresponds to dots per inch
(dpi) in discussions of printing or scanning.
Note that the image size in pixels differs from
file size, which is measured in kilobytes (KB),
megabytes (MB), or gigabytes (GB).
Image resolution determines how sharp and
detailed an image is when it is displayed on a
monitor or printed. The resolution you choose
depends on how the image is output. Typically,
images that are created for display on
computer monitors or for the Web are 96 or
72 dpi. Images that are intended to be printed
on desktop printers are usually 150 dpi,
whereas professionally printed images are
usually 300 dpi or higher.
Resolution of 72 dpi (left) and 300 dpi (right)
The image size (pixel dimensions) and
resolution determine the amount of image
data in a file. The more pixels an image
contains, the higher its quality. However, a
larger image produces a larger file. Often, you
must adjust the image size or resolution to
optimize image quality while keeping the file
size manageable.
Increasing image resolution for print
Images that are intended for print need to have
a high image resolution. To prepare a photo
taken with a digital camera for print, you need
to maintain the original file size (the number of
pixels) and increase the resolution (the number
of pixels per inch) to at least 300 dpi. This
method decreases the width and height of the
image and creates a better printed result.
Alternatively, you can specify a smaller width
and height, which automatically increases the
resolution values.
You can increase the image resolution in
the Resample dialog box (Image `
Resample).
58 | CorelDRAW Graphics Suite X6 Guidebook
Page 63

The Resample dialog box (top) shows that the photo
(bottom) has a resolution of 72 dpi, which is too low for
print.
accomplish this by resampling, a process that
changes the image resolution. Resampling
(also called downsampling or upsampling)
often causes blurring, but you can counteract
this effect by applying the Unsharp mask
filter (Effects ` Sharpen ` Unsharp mask) to
the resampled image.
To increase the image resolution for print, the Maintain
original size check box is enabled first. Next, the
resolution is increased to 300 dpi, and the width and
height of the image are automatically adjusted.
Reducing file size and image
dimensions
If you want to use an image on a Web page,
you need to reduce its file size. You can
Top: The Resample dialog box shows that a photo is
not suitable for Web use. Bottom: To prepare the photo
for the Web, the unit of measure is changed to pixels.
Then, the image resolution is decreased to 72 dpi, which
automatically decreases the width and height of the
image, along with the file size.
The photo that you are preparing for the Web
may require specific width or height in pixels.
You can specify the exact dimensions you need
in the Resample dialog box. When you specify
these settings, the image resolution and the
file size are automatically adjusted.
Chapter 5: Corel PHOTO-PAINT Basics | 59
Page 64

In this example, the width of a photo is decreased from
1,800 pixels to 200. The height of the photo is
automatically decreased in proportion to the width
because the Maintain aspect ratio check box is
enabled.
Tips on resizing images
• Avoid increasing the image size by more
than 125%. Otherwise, images may
appear stretched and pixelated.
• Resize an image after you have retouched
and corrected it.
• Resize an image after you have cropped
unwanted areas. Decreasing the image
size after cropping ensures that the image
has as much useful information as
possible.
• The size of the image on your screen
depends on the pixel height and width of
the image, on the zoom level, and on your
monitor settings. As a result, an image
that is displayed on your monitor may
differ in size from a printed version.
Changing color modes
A color mode defines the number and kind of
colors that make up an image. Black and white,
grayscale, RGB, CMYK, and paletted are
examples of color modes. You can convert
images to different color modes, depending on
their intended use. For example, the CMYK
color mode is recommended for images to be
sent for commercial printing. The RGB color
mode is best for Web photos, and the paletted
color mode is best for GIF images.
Whenever you convert an image, you may lose
color information. For this reason, you should
finish editing and then save a copy of the
image before converting the image to a new
color mode. For more information, see
“Changing color modes” in the Help.
To convert an image to a different color
mode, click Image, and then click a
Convert to command.
Available Convert to commands
For more information about changing the
image size and resolution, see “Changing
image dimensions, resolution, and paper size”
in the Help.
60 | CorelDRAW Graphics Suite X6 Guidebook
Retouching
With Corel PHOTO-PAINT, you can fix common
problems in digital photos and scanned images
by using tools and special effect filters.
Page 65
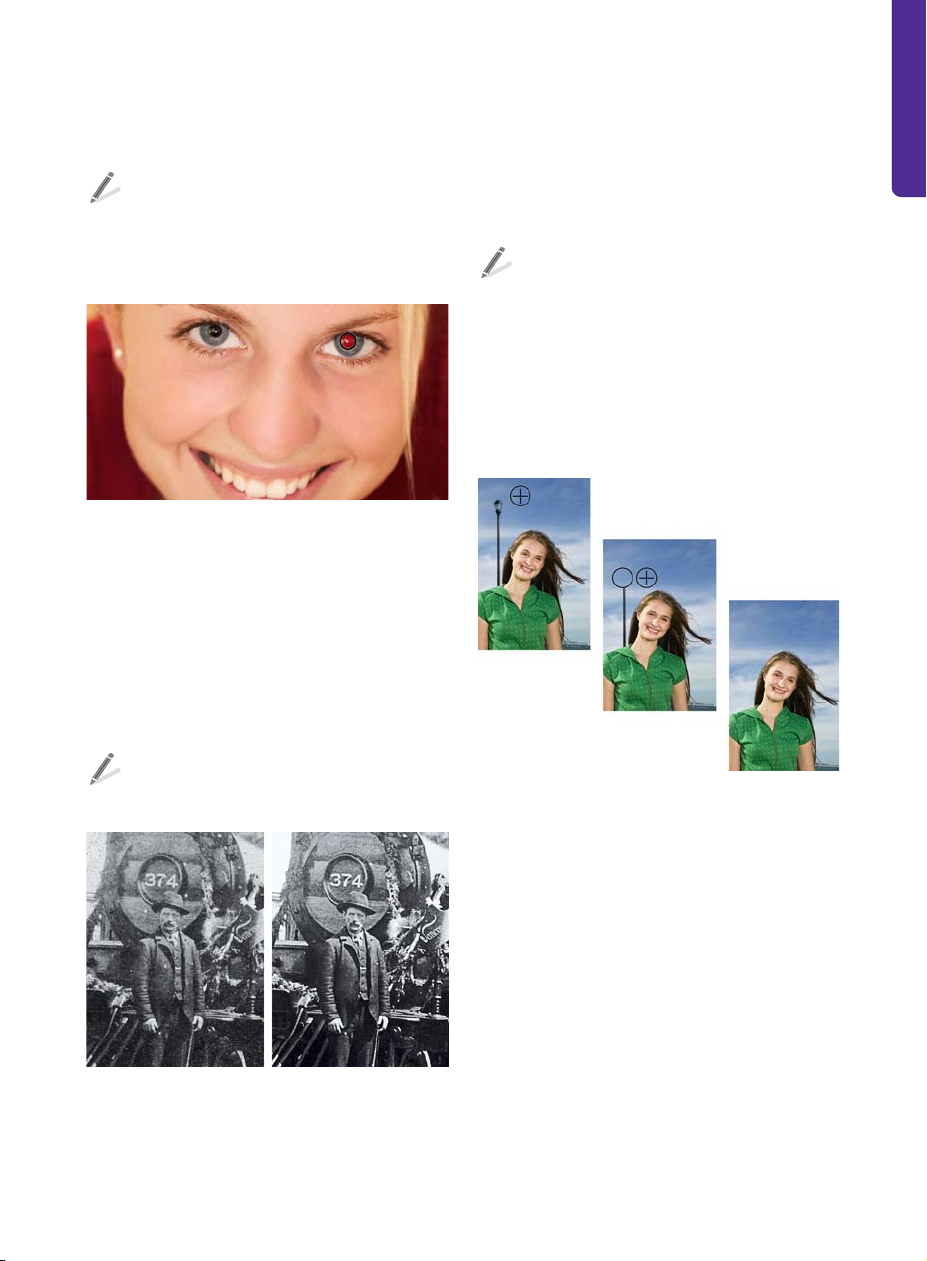
One common problem in photos is red-eye,
which occurs when light from a flash reflects
off the back of a person’s eye.
To remove red-eye, start by zooming in on
the eye. Then, click the Red-eye removal
tool, adjust the brush size to match the size
of the eye, and click the eye.
The Red-eye removal tool has been used on the photo
subject to correct the right eye and select the left eye.
Dust and scratch marks are another common
problem in images. You can remove dust and
scratch marks by applying a filter to the entire
image. If an image has one or more scratches
in a specific area, you can create a mask
around the scratches and apply the filter to the
editable area.
If a scratch or blemish is fairly large or is located
in an area with varied color and texture (such
as leaves on a tree), you can achieve better
results by cloning image areas. When you
clone, you copy pixels from one image area to
another.
To clone image areas, click the Clone tool,
and choose Clone from the Brush
category: Clone picker on the property
bar. Next, click to set the source point, and
drag where you want to apply the pixels
from the source point. To reset the source
point, right-click the area that you want to
clone.
To remove dust and scratch marks, click
Image ` Correction ` Dust and scratch.
Left: The dust marks reduce image quality. Right: Dust
marks have been removed in the retouched image.
Left: The source point is set to clone areas of the sky.
Middle: Cloned sky areas are copied on top of the post.
Right: Retouched image.
If you use a soft-edge brush and a greater
transparency value, the cloned areas blend
seamlessly in the image.
Photos from digital cameras may often contain
specks of random colors, which are collectively
referred to as “noise.” These specks are caused
by poor lighting conditions or limitations of the
camera sensor. You can remove noise from
digital photos or scanned images by clicking
Effects ` Noise ` Remove noise.
Chapter 5: Corel PHOTO-PAINT Basics | 61
Page 66

To remove noise and artifacts from photos
in the JPEG format, click Effects ` Blur `
Smart blur.
Left: Noise appears as mottled colors and interferes with
the photo's clarity. Right: The noise has been removed
to reveal a clearer picture.
In addition to noise, scanned images may
contain lines or moiré (a wave pattern).
To remove lines from a scanned image,
click Image ` Transfo r m ` Deinterlace.
To remove moiré, click Effects ` Noise `
Remove moiré.
For more information, see “Retouching” in the
Help.
Adjusting color and tone
When you need to adjust the color and tone of
photos, the Image Adjustment Lab (Adjust `
Image Adjustment Lab) should be your first
stop. It lets you brighten or darken a photo,
improve the contrast, reveal image detail, and
correct washed-out colors. You can experiment
with different settings and capture them in
snapshots, so that you can compare different
versions and choose the best result. For more
information, see “Adjusting color and tone” in
the Help.
Left: The image contains moiré, which appears as a
wavy grid of discolored lines. Right: The moiré has been
removed.
62 | CorelDRAW Graphics Suite X6 Guidebook
Image Adjustment Lab
Some common color corrections are described
and illustrated in the following table.
Page 67

Color correction Before After
You can correct photos that
have an overall color cast, in
which the photo appears to
be tinted with one color. Note
the blue color cast in the
Before photo. The blue cast
has been corrected in the
After photo.
You can increase the color
saturation for photos that
contain dull colors. In the
Before photo, the colors are
muted. In the After photo,
the color saturation has been
increased to create more vivid
colors.
If a photo contains dark
shadows that obscure the
photo subjects, you can
brighten the photo by
lightening the shadows. In
the Before photo, shadows
darken both the grass and
photo subjects. In the After
photo, the shadows have
been lightened to make the
subjects more visible.
Chapter 5: Corel PHOTO-PAINT Basics | 63
Page 68
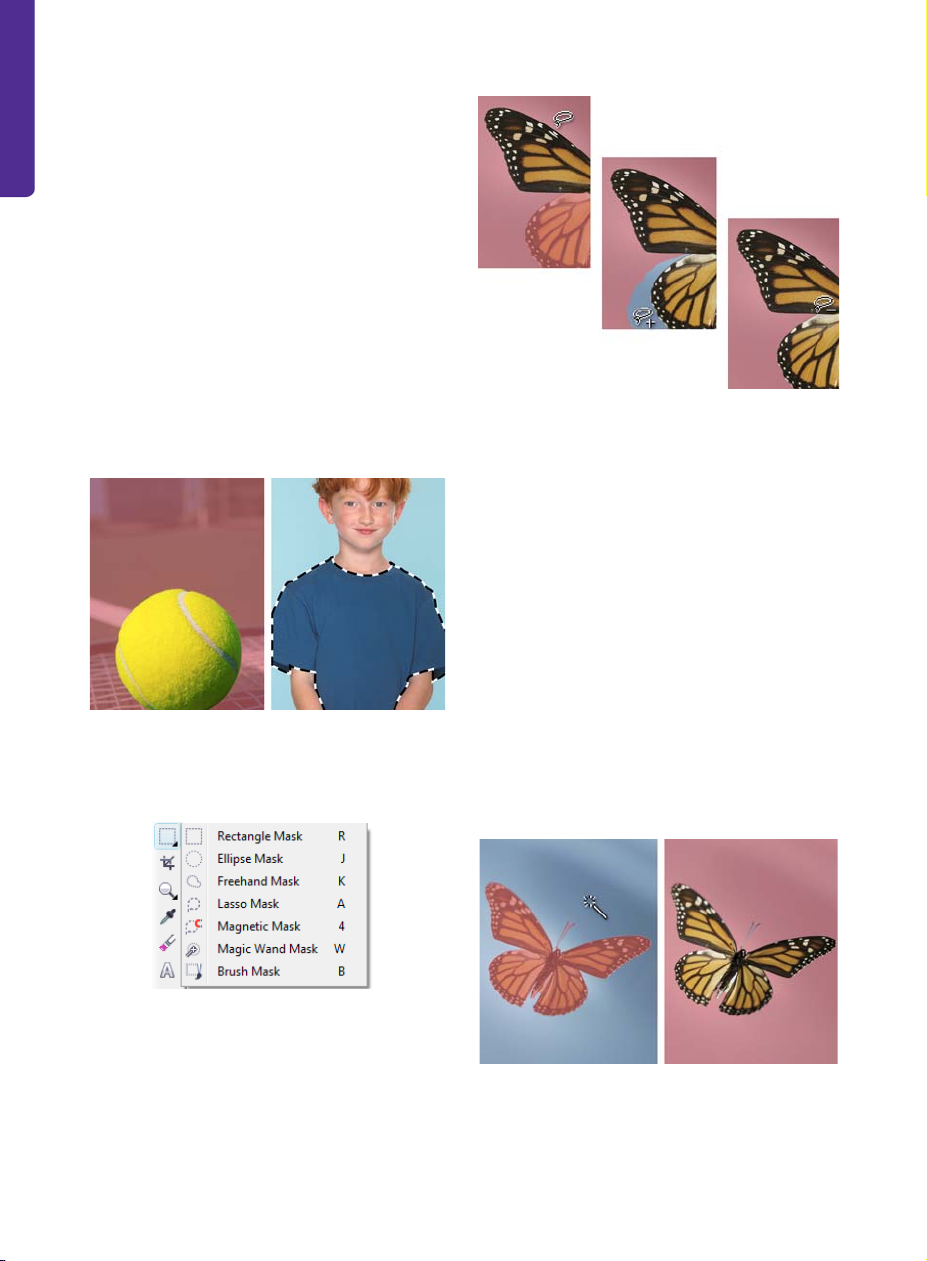
Working with masks
A mask is used in image editing to isolate a
particular area (the editable area) without
affecting the remaining part (the protected
area). Editable areas are sometimes called
“selections” in other applications.
You can display a mask overlay that appears
only over protected areas to make it easy to
differentiate between protected and editable
areas. The border separating an editable area
and its corresponding protected area is
indicated by a dashed outline, called the mask
marquee. You can display the mask marquee
only when the mask overlay is hidden.
Left: Mask overlay. Right: Mask marquee.
You can define editable areas by using the
mask tools in the toolbox.
Left: The editable area includes a part of the wing.
Middle: The remaining part of the wing is added to the
editable area, along with some blue background.
Right: The blue background is removed from the
editable area.
In addition, you can adjust the edges of an
editable area so that it blends smoothly into
the protected areas. For more information, see
“Adjusting the edges of editable areas” in the
Help.
You can invert a mask so that the protected
area becomes editable and the editable area
becomes protected. For example, if you want
to edit a photo subject that is set against a
plain background, the easiest method is to
select the background and then invert the
mask, as shown in the following illustration.
Mask tools
After defining an editable area, you may want
to adjust the area’s shape and position. If you
want to subtract from or add to an editable
area, you can access mask modes from the
property bar when a mask tool is active.
64 | CorelDRAW Graphics Suite X6 Guidebook
Left: The Magic wand mask tool is used to select the
background. Right: The mask is inverted to select the
butterfly.
Page 69

For more information about masks, see
“Working with masks” in the Help.
Working with objects and lenses
Objects are transparent layers that float above
the background and stack on top of one
another. For example, when you open a photo,
it becomes the background. Any new objects
are stacked above the background as they are
created.
Using objects offers many advantages. Objects
can be repositioned, resized, rotated, and
edited without affecting other objects or the
background. In addition, you can place an
object behind or in front of other objects, and
you can use merge modes to control how an
object blends with the underlying objects or
background.
To create an object from the background,
click Object ` Create ` Create from
background.
An editable area is selected and copied (left) to create a
new object (right).
Lenses, which are also known as “adjustment
layers,” are special objects that let you preview
special effects and image adjustments without
permanently altering the image pixels.
To create a lens that covers an entire image
or the editable area of a mask, click Object
` Create ` New lens.
Left: The Multiply merge mode is used to blend two
objects. Right: Blended image.
To create objects from brushstrokes and
shapes, click Object ` Create ` New
object, and paint or draw in the image
window.
To create an object from an editable area,
click Object ` Create ` Object: copy
selection.
Left: Original image. Middle: A lens is applied to the
entire image. Right: A lens is applied to an editable area.
You can apply multiple lenses to view the effect
of applying multiple image adjustments.
Chapter 5: Corel PHOTO-PAINT Basics | 65
Page 70

The Object pick tool and the Objects docker
can help you select, transform, and organize
objects and lenses in an image.
Object pick tool and property bar controls
open in the image window in the original file
format.
To prepare an image for printing, you can save
or export to the TIFF file format. To prepare an
image for the Web, you can export it to JPEG,
PNG, or GIF. The JPEG and PNG file formats are
ideal for photos, which usually contain color
gradations. The GIF file format is suitable for
images that contain solid colors.
Objects docker
Sharing your work
To share your images with others, you can save
or export them to other file formats (such as
TIFF, JPEG, or PDF), print them, or upload them
to ConceptShare. Regardless of how you
intend to use an image, it is a good idea to
keep a copy of the file in the Corel PHOTOPAINT (CPT) file format. Saving to the CPT file
format retains all image properties: objects,
the most recently created mask, alpha
channels, grids, guidelines, and color
information.
To change the file format of an image, you can
save it (File ` Save as) or export it (File `
Export) to a different file format. When you
use the Save as command, the image appears
in the image window in the new file format.
When you export an image, the image remains
66 | CorelDRAW Graphics Suite X6 Guidebook
Export dialog box
You can also quickly save an image to a PDF
file by clicking File ` Publish to PDF. The
Publish to PDF dialog box lets you access
PDF presets that optimize the PDF file for its
intended use — for example, Document
distribution, Prepress, or Web.
Corel PHOTO-PAINT provides extensive options
for printing your work. The Print dialog box
(File ` Print) lets you specify the layout and
scale of a print job, preview print jobs, and set
various prepress options, such as whether to
print crop marks and registration marks. In
addition, you can view a summary of issues
and problems, along with suggestions for
resolving them. For more information, see the
“Printing” section of the Help.
With ConceptShare (File ` Publish image to
ConceptShare), you can publish an image to
Page 71

a Web-based environment to share designs
and ideas with clients and co-workers. For
more information, see “Collaborating” in the
Help.
Setting preferences
In Corel PHOTO-PAINT, you can change the
default workspace settings and other options
according to your preferences. You can specify
settings such as unit of measure, type of
pointer, and default zoom level. In addition,
you can specify auto-save settings or set
display options to choose the color of paths,
mask tints, guidelines, and transparency grid
patterns.
To set preferences, click Tools ` Options.
To restore the default workspace settings
and options at any time, restart
Corel PHOTO-PAINT while holding down
F8.
For more information about setting
preferences, see “Setting options” in the Help.
General page of the Options dialog box
Chapter 5: Corel PHOTO-PAINT Basics | 67
Page 72

Page 73

Image created by
Om Prakash Thapa
India
Part Three
Color, Type, and
Styles
Page 74

Page 75

Chapter 6: Color Basics
How are colors defined? 72
Choosing a color mode 75
Using process and spot colors 76
Choosing colors 77
Working with color styles and harmonies 81
Using the Document palette, Color Styles palette,
and Image palette
Displaying and organizing color palettes 86
Creating custom palettes 88
84
Chapter 6: Color Basics | 71
Page 76

Chapter 6: Color Basics
In CorelDRAW or Corel PHOTO-PAINT,
choosing color is a critical part of your
workflow. Color is an important design
element because it helps you set a tone or
convey a specific meaning.
This chapter introduces you to the different
methods of choosing and using color in
CorelDRAW and Corel PHOTO-PAINT.
How are colors defined?
Color is literally in the eye of the beholder. The
sensation of color is a result of the human eye’s
response to light and the nervous system’s
interpretation of that response.
Color perception depends on the eye’s response to light.
Through the use of color models, this complex
process has been defined mathematically. The
color models allow software applications (such
as CorelDRAW and Corel PHOTO-PAINT) and
digital devices (such as computers, monitors,
digital cameras, and printers) to store,
manipulate, and accurately reproduce color.
Color models, such as Lab, RGB, CMYK, and
HSB, provide a systematic way of organizing
and reproducing a broad range of colors from
a small set of primary colors. Each color is
defined numerically. The numeric values allow
the colors to be interpreted, communicated,
and reproduced by a wide range of devices and
applications.
Each color model has a unique way of defining
colors numerically.
Lab color model
The Lab color model was developed by the
Commission Internationale de l’Eclairage (CIE).
Unlike the RGB and CMYK color models, the
Lab color model is based on how the human
eye perceives color, rather than on how
monitors, printers, digital cameras, and other
devices reproduce color. For this reason, Lab is
known as a device-independent color model.
RGB and CMYK are considered devicedependent color models, because the same
colors appear different when they are printed
or displayed on different devices.
In the Lab color model, the range (or gamut) of
all visible colors is represented as a horseshoe-
72 | CorelDRAW Graphics Suite X6 Guidebook
Page 77

shaped figure. This figure is often used as a
reference for comparing the range of colors
that other color models can produce. Lab is
also used in color management as a reference
for converting colors from one color space to
another.
Lab color model
RGB color model
The RGB color model uses the components
red (R), green (G), and blue (B) to define the
amounts of red, green, and blue light in a
given color. In a 24-bit image, each component
is expressed as a number from 0 to 255. In an
image with a higher bit rate, such as a 48-bit
image, the value range is greater. The
combination of these components defines a
single color.
In additive color models, such as RGB, color is
produced from transmitted light. RGB is
therefore used on monitors, where red, blue,
and green lights are blended in various ways to
reproduce a wide range of colors. When red,
blue, and green lights are combined at their
maximum intensities, the eye perceives the
resulting color as white. In theory, the colors
are still red, green and blue, but the pixels on a
monitor are too close together for the eye to
differentiate the three colors. When the value
of each component is 0, which signifies an
absence of light, the eye perceives the color as
black.
RGB is the most commonly used color model,
because it allows a broad range of colors to be
stored and displayed.
RGB color model. White is the result of combining the
three RGB colors at their maximum intensities.
CMYK color model
The CMYK color model, which is used in
printing, uses the components cyan (C),
magenta (M), yellow (Y), and black (K) to
define color. Values for these components
range from 0 to 100 and represent
percentages.
In subtractive color models, such as CMYK,
color (that is, ink) is added to a surface, such as
white paper. The color then “subtracts”
brightness from the surface. When the value of
each color component (C,M,Y) is 100, the
Chapter 6: Color Basics | 73
Page 78

resulting color is black. When the value of each
component is 0, no color is added to the
surface, so the surface itself is revealed — in
this case, the white paper. Black (K) is included
in the color model for printing purposes
because black ink is more neutral and darker
than blending equal amounts of C, M, and Y.
Black ink produces sharper results, especially
for printed text. In addition, black ink is usually
less expensive than using colored ink.
CMYK color model. Black is the result of combining the
three CMY colors at their maximum intensities.
HSB color model
The HSB color model uses hue (H), saturation
(S), and brightness (B) as components for
defining color. HSB is also known as HSV (with
the components hue, saturation, and value).
Hue describes the pigment of a color and is
expressed in degrees to represent the location
on the standard color wheel. For example, red
is 0 degrees, yellow is 60 degrees, green is 120
degrees, cyan is 180 degrees, blue is 240
degrees, and magenta is 300 degrees.
Saturation describes the vividness or dullness
of a color. Values of saturation range from 0 to
100 and represent percentages (the higher the
value, the more vivid the color). Brightness
describes the amount of white in the color. Like
saturation values, brightness values range from
0 to 100 and represent percentages (the higher
the value, the brighter the color).
HSB color model
Grayscale color model
The grayscale color model defines color by
using only one component, lightness, which is
expressed in values that range from 0 to 255 in
8-bit images. The value range varies,
depending on the bit rate of the image. Each
grayscale color has equal values of the red,
green, and blue components of the RGB color
model.
Grayscale color model
74 | CorelDRAW Graphics Suite X6 Guidebook
Page 79

Choosing a color mode
When you create a new CorelDRAW document
or Corel PHOTO-PAINT image, you must
choose a color mode, preferably based on the
color model that corresponds to the project’s
destination. The color mode determines the
colors to be used in the application. For
example, if you know that the intended
destination for your project is the Web, you can
choose the RGB color mode. By choosing the
correct color mode when you start a project,
you can take some of the guesswork out of
choosing colors. As a result, the colors in your
projects will be reproduced more accurately.
palette, which lets you find suitable colors
more easily. The primary color mode is used as
the default color mode when you export a
document as a bitmap or in the
Adobe Illustrator (AI) file format. For example,
if you set the RGB color mode as your primary
color mode and export a document as a JPEG,
the color mode is automatically set to RGB.
To specify the color mode for a new
CorelDRAW document, choose an item
from the Primary color mode list box in
the Create a new document dialog box.
The CMYK color mode is recommended for printed
material, while the RGB color mode is recommended for
material that will be viewed online.
If you don’t know your project’s ultimate
destination, or if your project will be both
printed and viewed online, you should choose
the RGB color mode. This color mode lets you
store a broad range of colors and can be easily
converted to CMYK for printing.
Choosing a color mode for a
CorelDRAW document
In CorelDRAW, the primary color mode
determines the colors in the default color
The primary color mode is set to CMYK for a new
CorelDRAW document.
The CorelDRAW primary color mode does not
restrict the type of colors that you can apply to
a drawing. For example, if you set the color
mode to RGB, you can still apply, and
accurately display, colors from a CMYK color
palette in the document.
Chapter 6: Color Basics | 75
Page 80
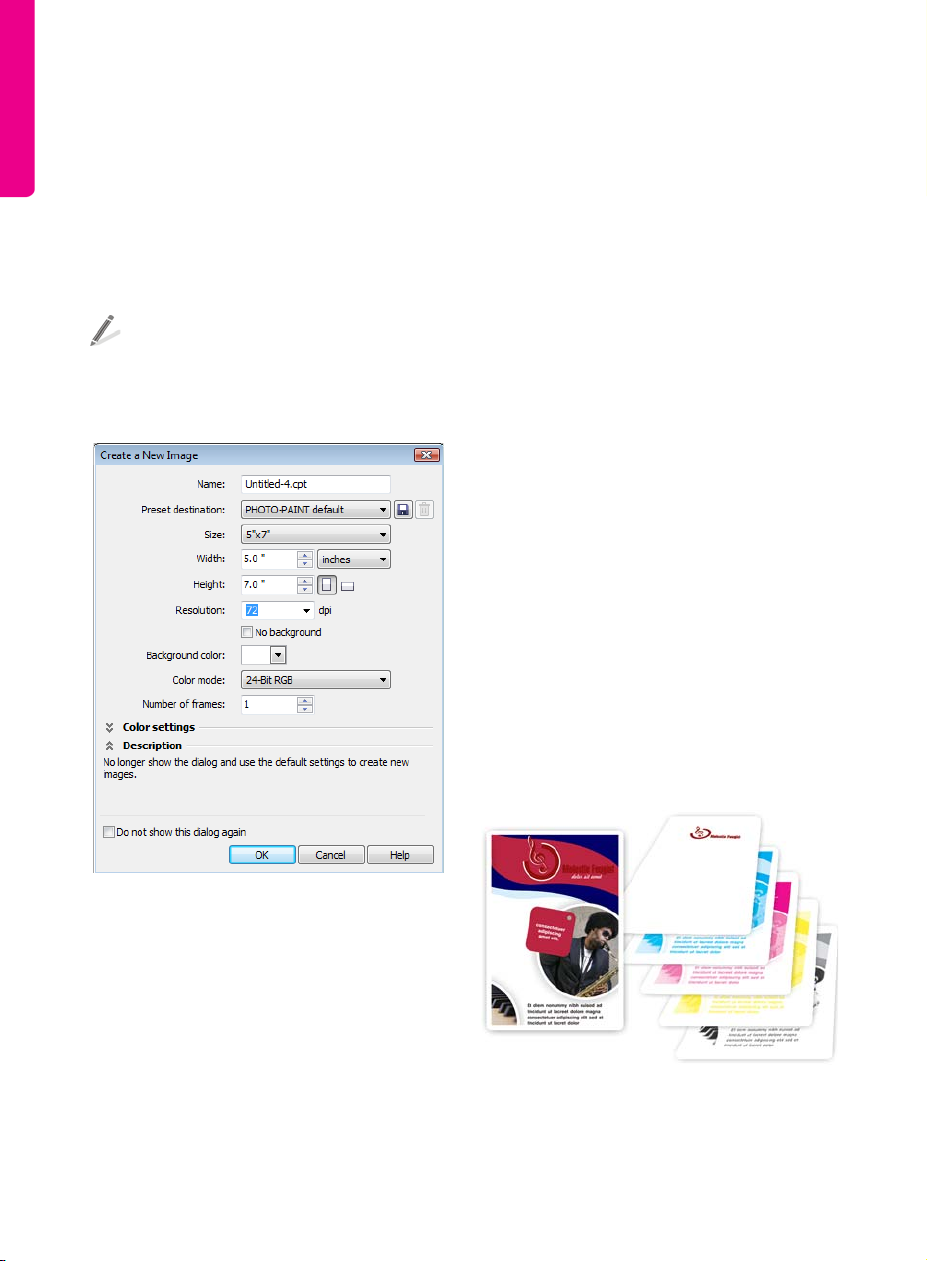
Choosing a color mode for a
Corel PHOTO-PAINT image
In Corel PHOTO-PAINT, the color mode that
you choose for a new image determines the
default color palette. For example, if you
choose the RGB color mode, the default color
palette displays only RGB colors, which makes
it easy to choose and apply the correct colors.
To specify the color mode for a new
Co re l P HO TO- PAI NT im ag e, ch oo se an ite m
from the Color mode list box in the
Create a new image dialog box.
is converted to RGB when it is applied to the
image. If you tag a specific channel with a spot
color, you can apply the spot color to the
channel. However, if you apply a spot color to
the image background, the color is converted
to the RGB color mode.
Using process and spot colors
When you send a document to a print service
provider, you can specify either process color or
spot color as the method of color printing. The
primary difference between these two
methods is the number of inks, or separations,
that are required to reproduce colors.
Process colors
A typical project may contain hundreds of
colors, but you do not need hundreds of color
separations when you print it. Only four inks
(cyan, magenta, yellow, and black) are needed
to print full-color documents. The colors that
are produced by mixing these four standard
printing inks are known as process colors. By
choosing colors from any of the color palettes
in CorelDRAW Graphics Suite X6, you can use
process colors in your projects.
The color mode is set to 24-Bit RGB for a new
Corel PHOTO-PAINT image.
Unlike the primary color mode in CorelDRAW,
the color mode in Corel PHOTO-PAINT
determines and limits the colors that you can
apply to an image. For example, if you choose
the RGB color mode, you can apply only RGB
colors to the image. When you choose a color
from another palette, such as CMYK, the color
76 | CorelDRAW Graphics Suite X6 Guidebook
Cyan (C), magenta (M), yellow (Y), and black (K) color
separations are used to reproduce full-color images.
Page 81

Spot colors
Often, spot colors are custom premixed inks
that require separate printing plates. Spot
colors are often used in addition to process
colors. For example, you can add a spot color
to a CMYK project if that color cannot be
reproduced by using CMYK values.
You can choose a spot color from any of the
spot-color palettes that appear in the Palette
libraries folder of the Color palette
manager docker. Examples of these spot-color
palettes are PANTONE®, HKS®, and TOYO.
•If you need to print a specific color
accurately (for example, the color of a
corporate logo in a brochure), use a spot
color instead of a process color.
• Remember that although you can define
process colors by using RGB values, the
printed output will use CMYK inks.
Because the colors are converted from RGB
to CMYK before ink is applied to the paper,
a shift in color may result.
Choosing colors
CorelDRAW and Corel PHOTO-PAINT provide
various tools and features to help you choose
the best colors for your projects. You can
choose colors from any of the palettes,
viewers, harmonies, and eyedropper tools that
are available with the following workspace
components:
• color palettes
• Object properties docker (CorelDRAW)
• Color styles docker (CorelDRAW)
• Uniform fill dialog box
• Color docker
• Color eyedropper tool (CorelDRAW)
• Eyedropper tool (Corel PHOTO-PAINT)
The spot-color palettes are stored in the Spot folder of
the Color palette manager docker.
Tips on using process and spot colors
If you need help in deciding how to use spot
colors and process colors in your project,
consider the following:
• To minimize printing costs, use process
colors for projects that contain multiple
colors, and spot colors for projects that
contain very few colors.
Color palettes
The default color palette in CorelDRAW or
Corel PHOTO-PAINT provides 99 color
swatches that are based on the color mode of
your document or image. Each color swatch in
turn provides numerous shades and tones
from which to choose.
To fill an object with color in CorelDRAW,
select the object, and click a color on the
color palette.
Chapter 6: Color Basics | 77
Page 82

Clicking the blue color swatch on the color palette fills
the circle with blue.
To change the outline color of an object in
CorelDRAW, right-click any color on the
color palette.
Clicking the red color swatch on the color palette
changes the Foreground color swatch to red.
To change the fill color in
Corel PHOTO-PAINT, right-click a color on
the color palette.
Right-clicking the red color swatch on the color palette
changes the Fill color swatch to red.
To access different shades of a color, hold
down a color swatch until a pop-up color
palette appears.
Right-clicking the blue color swatch on the color palette
changes the circle’s outline color to blue.
To change the foreground color in
Corel PHOTO-PAINT, click a color on the
color palette.
78 | CorelDRAW Graphics Suite X6 Guidebook
Holding down the red color swatch displays various
shades of red in a pop-up color palette.
Page 83
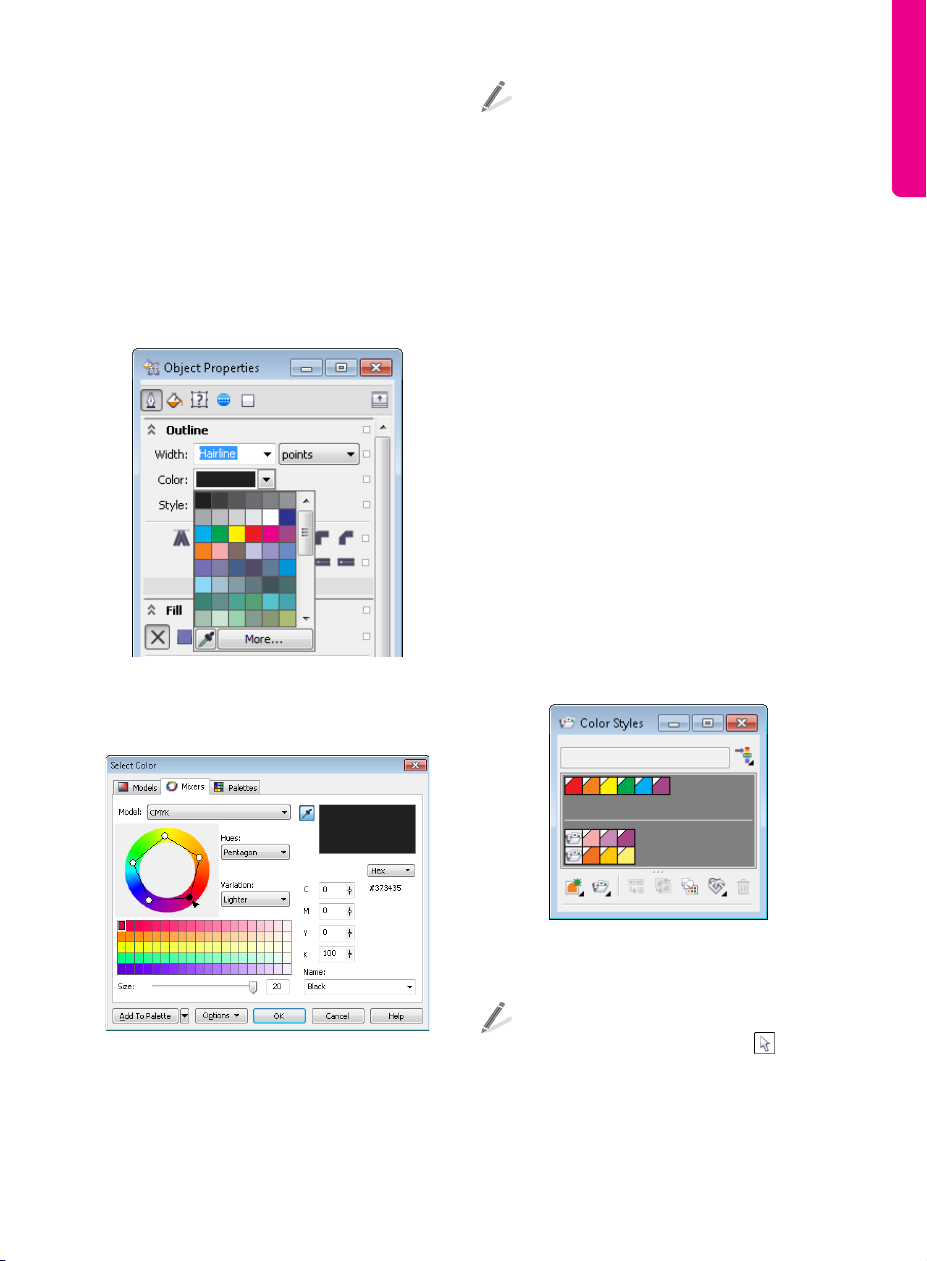
Object Properties docker
The Object properties docker (Window `
Dockers ` Object properties) in CorelDRAW
allows you to define object properties,
including outlines and fills. It lets you pick an
outline or fill color from the standard color
picker, or create a custom color using color
models, mixers, and additional palettes
available in the Select color dialog box.
The color pickers in the Object properties docker
allow you to choose a color or create a custom color for
an object fill and outline.
To dis play th e Select color dialog box in
CorelDRAW, open the color picker in the
Outline, Fill, or Character section of the
Object properties docker, and click
More.
Color Styles docker
The Color styles docker lets you create, apply,
and edit color styles. When you apply a color
style to multiple objects, you can
simultaneously update all the objects by
modifying the color style. The Color styles
docker also lets you organize color styles in
groups called harmonies. A harmony allows
you to link color styles in a specific relationship,
so that when you edit one style in the
harmony, the other styles get updated without
changing the color relationship. Use this
feature to preview a drawing in different color
schemes or modify the entire color
composition in one step. For more information
about using color styles and harmonies, see
“Working with color styles and harmonies” on
page 81.
Mixers page of the Select color dialog box
The top section of the styles list includes individual color
styles, while the bottom section contains color harmony
folders.
To apply a color style in CorelDRAW, select
an object by using the Pick tool , and in
the Color styles docker, double-click a
Chapter 6: Color Basics | 79
Page 84

color style to apply a fill, or right-click a
color style to apply an outline.
Uniform Fill dialog box
The Uniform fill dialog box gives you access
to additional color palettes and lets you use
various methods for choosing and editing
colors. For example, you can use color viewers
or color mixers to specify the color you want.
To dis play th e Uniform fill dialog box in
CorelDRAW, click the Fill tool in the
toolbox, and click Uniform fill.
Color docker
Eyedropper tools
Eyedropper tools let you quickly choose a color
from one area of your document or image and
apply it to another area. These tools are useful
when you want to ensure an exact match with
an existing color in your project. You can also
use eyedropper tools to match colors from
images outside the image or document,
outside the application, or on the desktop.
Uniform fill dialog box
Color docker
The Color docker provides the same variety of
color mixers, viewers, and palettes that are
already available in the Uniform fill dialog box
as well as some additional controls, such as
color sliders. It also has one advantage over the
Uniform fill dialog box: You can keep it open
at all times.
To di sp lay th e Color docker, click Window
` Dockers ` Color.
80 | CorelDRAW Graphics Suite X6 Guidebook
To choose a color from an item on your
desktop, click the Color eyedropper tool
in the CorelDRAW toolbox, and click
Select from desktop on the property bar.
Then, click a color on your desktop.
Clicking Select from desktop on the property bar lets
you select a color outside CorelDRAW.
Eyedropper tools are also available for adding
colors to color palettes, dockers, and dialog
boxes.
Page 85

To add a color to the Document palette in
CorelDRAW, click the eyedropper button
on the palette, and click a color in the
document window.
The eyedropper button on the Document palette
it, all objects that use this style are
automatically updated. Because an infinite
number of colors are available in CorelDRAW,
color styles can make it easier to apply the
exact color you want.
You can create a color style from an existing
object or from scratch. When you create a
color style, it is saved to the active drawing and
to the Color styles palette.
To create a color style, drag a swatch from
any open palette, or drag an object from
the document window, to the top gray
area of the Color styles docker.
To add a color to the Uniform fill dialog
box in Corel PHOTO-PAINT, click the Fill
tool. On the property bar, click the
Uniform button for the Fill control, and
click the Edit fill button. Then, click the
Eyedropper button in the dialog box, and
click a color in the image window.
The eyedropper button in the Uniform fill dialog box
Working with color styles and harmonies
A color style is a color that you save and apply
to objects in your CorelDRAW document. A
color style is reusable, and any time you update
When you create a color style, you can edit it in
the Color editor by using a variety of controls,
such as color sliders, mixers, and custom
palettes. Most of these controls are also
available in the Select color and Uniform fill
dialog boxes, and the Color docker.
Select a color style in the color styles list, and edit its
properties in the Color editor. You can distinguish a
color style from a regular color by the white triangle in
the upper-left corner of the color swatch.
Chapter 6: Color Basics | 81
Page 86

When you create a color style in the Color styles docker
(left), it is automatically added to the Color styles
palette (right). The Color styles palette is not open by
default.
You can select all color styles that are not used
in a document. You can also convert color
styles to different color modes or to spot colors
to prepare your document for production
printing.
To select all color styles that are not used in
a document, click the Select unused
button in the Color styles docker.
You can create a color harmony from scratch or
from the colors of an existing object.
To create a color harmony from scratch,
click the New color harmony button ,
and choose New color harmony. Then,
drag color swatches from any open palette
to the harmony folder in the Color styles
docker.
To create a color harmony from an existing
object, drag the object to the bottom part
of the gray area in the Color styles docker,
and specify options in the Create color
styles dialog box.
Color styles can be combined into groups
called harmonies. A harmony allows you to link
color styles into hue-based relationships and
modify them together as a set. By editing color
styles in a harmony, you can quickly create a
variety of alternate color schemes by shifting
the colors together, or you can alter the color
composition of your artwork in one step.
Color styles grouped in a harmony
82 | CorelDRAW Graphics Suite X6 Guidebook
The color harmony was created by dragging the clipart
from the document window to the lower section of the
color styles list in the Color styles docker.
When you edit a harmony, you can change all
color styles simultaneously by preserving the
relationship between them, or you can modify
individual color styles within the harmony.
Page 87

Using the Harmony editor, you can experiment with
different color schemes. By changing one color, you can
also find other colors that go well with that color.
CorelDRAW allows you to create a special type
of color harmony called a gradient. A gradient
consists of a master color style and a number
of shades of that color. In most of the available
color models and palettes, the derivative styles
share the same hue as the master style but
have different saturation and brightness levels.
In the PANTONE MATCHING SYSTEM® and
custom spot color palettes, the master style
and the derivative styles are linked to one
another but have different tint levels.
To create a gradient, select a color style in
the Color styles docker, click the New
color harmony button , and choose
New gradient. Specify the settings you
want in the New gradient dialog box.
The New gradient dialog box allows you to specify the
number and type of shades that you want to create from
the selected master style.
When you change the hue of the master style
in a gradient, you automatically update the
related color styles, based on the new hue and
the original saturation and brightness values.
After you create a gradient, you can apply it to the
design elements in your document.
Chapter 6: Color Basics | 83
Page 88

By selecting the gradient folder and dragging any of the
selector rings in the Harmony editor color wheel, you
can see a real-time preview of your drawing in different
colors.
Using the Document palette, Color Styles palette, and Image palette
When you start a new document in
CorelDRAW, the Document palette appears.
When you start a new image in
Corel PHOTO-PAINT, the Image palette
appears. These palettes are empty palettes that
let you keep track of the colors that you use. By
default, they appear docked at the bottom of
the application window. The Color styles
palette is another palette that is created
automatically in CorelDRAW when you start a
new document, but it is not open by default. It
helps you keep track of the color styles that you
create.
Adding colors to the Document, Color
Styles, or Image palette
Whenever you create a color style in your
document, it is added to the Color styles
palette, but it does not automatically appear in
the Document palette. You can add the color
style to the Document palette by applying it
to an object in your document, or by manually
dragging it from the Color styles docker or
the Color styles palette to the Document
palette.
To add a color or color style to the
Document palette in CorelDRAW, select
an object, and click a color on the default
color palette or double-click a color style
on the Color styles palette.
The blue color that was applied to the circle was
automatically added to the Document palette. The red
color style was added to the Document palette only
after it was applied to the circle outline.
If an image contains a color or a color style that
you want to use in the future, you can add it to
the Document, Color styles, or Image
palette by using the eyedropper button.
Whenever you add a color to your document,
the color is automatically added to the
Document palette or Image palette.
84 | CorelDRAW Graphics Suite X6 Guidebook
To add multiple colors to the Image
palette in Corel PHOTO-PAINT, click the
eyedropper button on the palette, and
Page 89

while holding down Ctrl, click the colors in
the image window.
You can quickly add multiple colors to the Image
palette by using the eyedropper.
To quickly add colors from a bitmap to the
Document palette in CorelDRAW, drag
the bitmap to the Document palette.
To add a color or color style to the
Document or Color styles palette in
CorelDRAW from the Uniform fill dialog
box, select an object, and double-click the
Fill color icon on the status bar. In the
Uniform fill dialog box, choose a color,
click the arrow next to the Add to palette
button, and choose a palette. Then, click
Add to palette. The Color styles palette
is available in the drop-down list after you
display it.
When dragging an image to the Document palette,
you can choose how many colors are added.
You can also add colors to the Document,
Color styles, or Image palette from a color-
related dialog box, such as the Uniform fill
dialog box or the Select color dialog box. By
moving the colors or color styles to the palette,
you can save them for future use.
You can add a color to the Document or Color styles
palette from the Uniform fill dialog box.
In CorelDRAW, when you open a document
that was created with a previous version of the
software, only custom spot colors are added to
the Document palette.
In Corel PHOTO-PAINT, when you open an
existing image, such as a photo, no colors are
displayed on the Image palette.
To add the colors in a photo to the Image
palette in Corel PHOTO-PAINT, open the
file that contains the photo, click the arrow
button on the Image palette, and click
Add colors from image.
Chapter 6: Color Basics | 85
Page 90

You can quickly add the most dominant colors from an
image to the Image palette by clicking Add colors
from image.
In CorelDRAW, you can reset the Document
or Color styles palette so that it does not
display colors or color styles that are not used
in the document.
To clear the Document or Color styles
palette of colors and color styles that are
not used in the current document, click the
arrow button, choose Palette, and click
Reset palette.
Displaying and organizing color palettes
The Color palette manager docker lets you
quickly access and display all the available color
palettes, including the Document and Color
styles palettes in CorelDRAW or the Image
palette in Corel PHOTO-PAINT.
To ope n the Color palette manager
docker in CorelDRAW, click Window `
Dockers ` Color palette manager.
To ope n the Color palette manager
docker in Corel PHOTO-PAINT, click
Window ` Color palettes ` More
palettes.
Opening the Color palette manager docker in
CorelDRAW
Opening the Color palette manager docker in
Corel PHOTO-PAINT
To display or hide a color palette in the
Color palette manager docker in
CorelDRAW, click the icon next to the
name of the color palette.
86 | CorelDRAW Graphics Suite X6 Guidebook
Page 91

Color palette manager docker
Palette Libraries folder
The Palette libraries folder of the Color
palette manager docker contains collections
of preset color palettes.
The two main libraries of color palettes are
Process and Spot. The color palette libraries
are locked, which means that they cannot be
edited. (The individual palettes can be copied
as custom palettes, however, as explained in
the next section.)
The color palettes in the Color palette
manager docker are divided into two main
folders: My palettes and Palette libraries.
My Palettes folder
You can use the My palettes folder to store all
the custom color palettes or color styles
palettes that you create. You can add folders to
store and organize the palettes for different
projects. You can also copy a color palette or a
color style palette or move the palette to a
different folder.
To quickly move a palette from one folder
to another, drag the palette to the new
folder.
The Palette libraries folder contains spot and process
color palettes.
The Process library contains the default RGB,
CMYK, and Grayscale color palettes. In
addition, you can find preset color palettes
Chapter 6: Color Basics | 87
Page 92

that are based on particular themes and
grouped in folders such as Nature and People.
The Spot library contains color palettes that
are provided by third-party manufacturers,
including HKS Colors, PANTONE, Focoltone®,
and TOYO. You can use these color palettes
when you need specific company-approved
colors for your printed projects.
Creating custom palettes
You can create a custom palette to store all the
colors or color styles that you need for a
current or future project. By creating custom
palettes, you can easily share a collection of
colors or color styles with other people. You
can access custom palettes from the My
palettes folder of the Color palette
manager docker. Custom palettes can include
colors or color styles from any color model,
including spot colors, or from any color palette
in the Palette libraries folder.
You cannot edit a palette in the Palette
libraries folder. However, you can copy the
palette to create a custom palette, which can
then be edited.
To copy a color palette from the Palette
libraries folder of the Color palette
manager docker, drag the palette to the
My palettes folder.
A custom color palette was added to the My palettes
folder.
88 | CorelDRAW Graphics Suite X6 Guidebook
A copy of the PANTONE Solid coated spot color palette
was created by dragging it from the Palette libraries to
the My palettes folder.
Page 93

Chapter 7: Color Management
Understanding color management 90
Color management settings in
CorelDRAW Graphics Suite X6 94
Working with color profiles 97
Soft proofing 98
Working with color management policies 100
Managing colors when opening documents
Managing colors when importing and pasting
files 102
Managing colors for print 102
Using a safe CMYK workflow 103
Managing colors for online viewing 103
Chapter 7: Color Management | 89
101
Page 94

Chapter 7: Color Management
This chapter answers some basic questions
about color management and introduces you
to the color management features of
CorelDRAW Graphics Suite X6.
Understanding color management
This section provides answers to the following
commonly asked questions about color
management:
• Why don’t colors match?
• What is color management?
• Why do I need color management?
• How do I get started with color
management?
• Is my monitor displaying the correct
colors?
• Should I assign a color profile or convert
colors to a color profile?
• What is a rendering intent?
Why don’t colors match?
Each tool in your workflow has its own method
of interpreting color. In addition, each tool has
its own range of available colors, called a color
space, which is a set of numbers that define
how colors are represented.
In other words, when defining and interpreting
color, each tool speaks a unique language.
Consider a color in the color space of your
digital camera: a vivid blue RGB color with the
values Red = 0, Green = 0, and Blue =255.
This color may appear as a different color in the
color space of your monitor. In addition, the
color space of your printer may not contain a
match for this color. As a result, when your
document moves through the workflow, this
vivid blue color gets lost in the translation and
is not accurately reproduced. A color
management system is designed to improve
the communication of color in the workflow so
that the color of the output matches your
intended color.
Different tools can be used during the creation
and sharing of a document. For example, you
can start with a file that was created in another
application, or you can import an image that
was captured by a digital camera or acquired
from a scanner. After finishing the document,
you can share it with a colleague by either
printing or e-mailing it.
90 | CorelDRAW Graphics Suite X6 Guidebook
Example of a document workflow
Page 95

1
3
Colors are defined by their color space. 1. Lab color
space. 2. sRGB color space, displayed against the Lab
color space. 3. U.S. Web Coated (SWOP®) v2 color
space. 4. ProPhotoRGB color space.
2
4
What is color management?
Color management is a process that lets you
predict and control color reproduction,
regardless of the source or destination of the
document. It ensures a more accurate color
representation when a document is viewed,
modified, shared, exported to another file
format, or printed.
only for online viewing, color management
may not be as important. However, if you plan
to open documents in another application or if
you are creating documents for print or
multiple types of output, then proper color
management is essential.
Color management lets you do the following:
• reproduce colors consistently across your
workflow, especially when opening
documents that were created in other
applications
• reproduce colors consistently when
sharing files with others
• preview (or “soft-proof”) colors before
they are sent to their final destination,
such as a printing press, a desktop printer,
or the Web
• reduce the need to adjust and correct
documents when sending them to
different destinations
A color management system does not offer
identical color matching, but it greatly
improves color accuracy.
A color management system, also known as a
color engine, uses color profiles to translate the
color values from one source to another. For
example, it translates the colors that are
displayed on the monitor into the colors that a
printer can reproduce. Color profiles define the
color space of monitors, scanners, digital
cameras, printers, and the applications that
you use to create or edit documents.
Why do I need color management?
If your document requires accurate color
representation, you may want to learn more
about color management. The complexity of
your workflow and the ultimate destination of
your documents are also important
considerations. If your documents are destined
How do I get started with color
management?
Here are some suggestions for adding color
management to your workflow:
• Make sure that your monitor is displaying
the correct colors. For more information,
see “Is my monitor displaying the correct
colors?” on page 92.
• Install color profiles for any input or
output devices that you are planning to
use. For more information, see “Installing
and loading color profiles” on page 97.
• Become familiar with the color
management features of CorelDRAW and
Corel PHOTO-PAINT. The default settings
for color management produce good color
Chapter 7: Color Management | 91
Page 96

results, but you can change these default
settings so that they suit your specific
workflow. For more information, see
“Color management settings in
CorelDRAW Graphics Suite X6” on
page 94.
• Soft-proof documents to preview final
results on-screen. For more information,
see “Soft proofing” on page 98.
• Embed color profiles when saving or
exporting files. In this way, you help ensure
color consistency when the files are
viewed, modified, or reproduced. For more
information, see “Embedding color
profiles” on page 98.
Is my monitor displaying the correct
colors?
Calibrating and profiling the monitor are
essential steps for ensuring color accuracy.
When you calibrate a monitor, you set it to
display colors according to an established
standard of accuracy. After calibration, you can
create a color profile of the monitor, which
describes how the monitor interprets colors.
This custom color profile is usually installed in
your operating system by the profiling
software, so it can be shared with other devices
and applications. Calibration and profiling
work together to achieve color accuracy: If a
monitor is incorrectly calibrated, its color
profile is not useful.
Calibration and profiling are complex and
usually require third-party calibration devices,
such as colorimeters and specialized software.
Furthermore, improper calibration may do
more harm than good. You can learn more
about monitor calibration and custom color
profiles by researching color management
techniques and products. You can also refer to
the documentation that was provided with
your operating system or monitor.
How you perceive the color that your monitor
displays is also important for managing color
consistency. Your perception is influenced by
the environment in which you are viewing the
documents. Here are some ways to create a
suitable viewing environment:
• Ensure that your room has a consistent
flow of light. For example, if the room is
filled with sunlight, use a shade, or if
possible, work in a room without
windows.
• Set the monitor background to a neutral
color, such as gray, or apply a grayscale
image. Avoid using colorful wallpapers
and screensavers.
• Don’t wear bright clothing that can clash
with the display of colors on the monitor.
For example, wearing a white shirt reflects
onto the monitor and alters your
perception of color.
Should I assign a color profile or
convert colors to a color profile?
When you assign a color profile, the color
values, or numbers, in the document do not
change. Instead, the application uses the color
profile to interpret the document colors.
However, when you convert colors to another
color profile, the color values in the document
change.
The best practice is to choose a suitable color
space when you create a document and to use
the same color profile throughout your
92 | CorelDRAW Graphics Suite X6 Guidebook
Page 97

workflow. You should avoid assigning color
profiles and converting colors to other color
profiles while working on a document.
What is a rendering intent?
A color management system can perform
effective translation of document colors to
multiple devices. However, when converting
colors from one color space to another, a color
management system may be unable to match
certain colors. This translation failure occurs
because some colors in the source may not fit
within the range (or gamut) of the destination
color space. For example, the bright red and
blue colors that you see on your monitor are
often outside the gamut of colors that your
printer can produce. These “out-of-gamut”
colors can dramatically change the look of the
document, depending on how they are
interpreted by the color management system.
Each color management system has four
methods of interpreting out-of-gamut colors
and mapping them into the gamut of the
destination color space. These methods are
known as “rendering intents.” The choice of a
rendering intent depends on the graphical
content of the document.
sRGB color space
U.S. Web Coated (SWOP)
v2 color space
Out-of-gamut colors
Man y colors in an sRGB docume nt ma y b e o ut of gamut
for the U.S. Web Coated (SWOP) v2 color space. The
out-of-gamut colors are mapped into gamut according
to the rendering intent.
The following rendering intents are available:
•The Relative colorimetric rendering
intent is suitable for logos or other
graphics that contain only a few out-ofgamut colors. It matches the out-of-gamut
source colors with the closest in-gamut
colors at the destination. This rendering
intent causes the white point to shift. If
you print on white paper, the whiteness of
the paper is used to reproduce the white
areas of the document. Therefore, this
rendering intent is a good option if your
document will be printed.
•The Absolute colorimetric rendering
intent is suitable for logos or other
graphics that require very precise colors. If
no match is found for the source colors,
then the closest possible match is used.
The Absolute colorimetric and Relative
colorimetric rendering intents are similar,
Chapter 7: Color Management | 93
Page 98

but the Absolute colorimetric rendering
intent preserves the white point through
the conversion and does not adjust for the
whiteness of the paper. This rendering
intent is used mainly for proofing.
•The Perceptual rendering intent is
suitable for photographs and bitmaps that
contain many out-of-gamut colors. The
overall color appearance is preserved by
changing all the colors, including the ingamut colors, to fit within the range of
colors at the destination. This rendering
intent maintains the relationships between
colors to produce the best results.
•The Saturation rendering intent produces
more concentrated solid colors in business
graphics, such as charts and graphs.
Colors may be less accurate than those
produced by other rendering intents.
The number of out-of-gamut colors (indicated by the
green overlay) may influence your choice of a rendering
intent. Left: The Relative colorimetric rendering
intent is suitable for this photo, which contains only a
few out-of-gamut colors. Right: The Perceptual
rendering intent is a good choice for this photo, which
contains many out-of-gamut colors.
Color management settings in CorelDRAW Graphics Suite X6
CorelDRAW Graphics Suite X6 has two types
of color management settings: default settings
for color management and document color
settings. The default settings for color
management control the colors of new
documents and any documents that do not
contain color profiles (also known as
“untagged documents”). Documents that
were created in earlier versions of
CorelDRAW Graphics Suite are treated as
untagged. Document color settings affect only
the colors of the active document.
Default settings for color management
The default settings for color management are
essential for producing consistent colors.
To access the default settings, click Tools `
Color management ` Default settings.
Point to a control to view its description, or
click the Help button in the dialog box to
find a relevant Help topic.
You can modify the default settings to suit your
particular needs for color management.
• Presets can help ensure that your color
settings are correct for the geographic
region where the documents are created
or for the location of their final output.
Examples are the North America
Prepress preset, which is suitable for
projects to be printed by North American
print service providers, and the Europe
Web preset, which is suitable for Web
projects that are created in Europe. For
more information, see “Working with
color management presets” in the Help.
•The default color profiles define the
RGB, CMYK, and grayscale colors in new
and untagged documents. You can
change these settings so that all new
documents use the color profiles that you
specify. In some applications, default color
94 | CorelDRAW Graphics Suite X6 Guidebook
Page 99

profiles are called “working space
profiles.”
•The primary color mode determines the
document color palette that is displayed
when you open or start a document as
well as the default color mode of a
document that is exported as a bitmap.
The primary color mode is set for all new
and untagged documents, but you can
change this setting for the active
document in the Document color
settings dialog box. Note that the primary
color mode does not limit colors in a
CorelDRAW document to a single color
mode. The Primary color mode control
is not available in Corel PHOTO-PAINT,
where images always contain colors in a
single color mode.
•The rendering intent lets you choose a
method for mapping out-of-gamut colors
in new and untagged documents. If the
default rendering intent is not suitable for
the active document, you can change it in
the Document color settings dialog
box.
•The color-conversion settings
determine how colors are matched when
you are converting colors from one color
profile to another. For example, you can
change the color engine or specify options
for converting pure black colors in RGB,
CMYK, Lab, or grayscale documents.
•The Spot color definition control lets
you display spot colors by using their Lab,
CMYK, or RGB color values. These
alternative color values are also used when
spot colors are converted to process
colors.
• Color management policies manage
colors in files that you open, or in files that
you import or paste into an active
document.
The Default color management settings dialog box in CorelDRAW lets you specify a wide range of settings.
Chapter 7: Color Management | 95
Page 100

Document color settings
You can view and change the color settings of
the active document, without affecting new
and untagged documents.
To access document color settings, click
To ol s ` Color management `
Document settings.
The upper part of the Document color
settings dialog box lists both the profiles that
are assigned to the active document and the
default color profiles of the application. The
color profiles that are assigned to an active
document determine the document color
space for RGB, CMYK, and grayscale colors.
The controls in the Edit document color
settings area let you assign other color
profiles to a document or convert colors to
other color profiles.
The Document color settings dialog box in CorelDRAW lets you view and modify the color settings in the active
document without changing the default settings for color management.
96 | CorelDRAW Graphics Suite X6 Guidebook
 Loading...