

Page 1
Page 2

Page 3

Brief contents
Contents . . . . . . . . . . . . . . . . . . . . . . . . . . . . . . . . . . . . . . . . . . . . i
Welcome to CorelDRAW Graphics Suite X4 . . . . . . . . . . . . . . . . . .1
CorelDRAW . . . . . . . . . . . . . . . . . . . . . . . . . . . . . . . . . . . . . . . . . 25
Corel PHOTO-PAINT . . . . . . . . . . . . . . . . . . . . . . . . . . . . . . . . . . 279
Glossary. . . . . . . . . . . . . . . . . . . . . . . . . . . . . . . . . . . . . . . . . . . 427
CorelDRAW Index . . . . . . . . . . . . . . . . . . . . . . . . . . . . . . . . . . .465
Corel PHOTO-PAINT Index . . . . . . . . . . . . . . . . . . . . . . . . . . . . . 483
Page 4

Page 5

Contents
Section I: Welcome to CorelDRAW Graphics Suite X4
Welcome . . . . . . . . . . . . . . . . . . . . . . . . . . . . . . . . . . . . . . . . . . . . . . . . . . .3
CorelDRAW Graphics Suite X4 applications. . . . . . . . . . . . . . . . . . . . . . . . . . . . 3
What’s new in CorelDRAW Graphics Suite . . . . . . . . . . . . . . . . . . . . . . . . . . . . 4
Installing CorelDRAW Graphics Suite applications. . . . . . . . . . . . . . . . . . . . . . . 9
Changing languages . . . . . . . . . . . . . . . . . . . . . . . . . . . . . . . . . . . . . . . . . . . . . 11
Registering Corel products . . . . . . . . . . . . . . . . . . . . . . . . . . . . . . . . . . . . . . . . 12
Updating Corel products . . . . . . . . . . . . . . . . . . . . . . . . . . . . . . . . . . . . . . . . . . 12
Corel Support Services . . . . . . . . . . . . . . . . . . . . . . . . . . . . . . . . . . . . . . . . . . . . 12
Working with network installations . . . . . . . . . . . . . . . . . . . . . . . . . . . . . . . . . 13
About Corel Corporation . . . . . . . . . . . . . . . . . . . . . . . . . . . . . . . . . . . . . . . . . . 13
Learning resources . . . . . . . . . . . . . . . . . . . . . . . . . . . . . . . . . . . . . . . . . .15
Using the Help, user guide, and tooltips . . . . . . . . . . . . . . . . . . . . . . . . . . . . . . 15
Using Hints . . . . . . . . . . . . . . . . . . . . . . . . . . . . . . . . . . . . . . . . . . . . . . . . . . . 19
Welcome screen . . . . . . . . . . . . . . . . . . . . . . . . . . . . . . . . . . . . . . . . . . . . . . . . 20
CorelTUTOR . . . . . . . . . . . . . . . . . . . . . . . . . . . . . . . . . . . . . . . . . . . . . . . . . . 20
Insights from the Experts . . . . . . . . . . . . . . . . . . . . . . . . . . . . . . . . . . . . . . . . . 21
Training videos . . . . . . . . . . . . . . . . . . . . . . . . . . . . . . . . . . . . . . . . . . . . . . . . . 21
Tips and tricks . . . . . . . . . . . . . . . . . . . . . . . . . . . . . . . . . . . . . . . . . . . . . . . . . 21
Using the VBA programming guide . . . . . . . . . . . . . . . . . . . . . . . . . . . . . . . . . 22
Using Web-based resources . . . . . . . . . . . . . . . . . . . . . . . . . . . . . . . . . . . . . . . . 22
Using customized training and integration resources . . . . . . . . . . . . . . . . . . . . . 22
Section II: CorelDRAW
CorelDRAW workspace tour . . . . . . . . . . . . . . . . . . . . . . . . . . . . . . . . . . .27
CorelDRAW terms . . . . . . . . . . . . . . . . . . . . . . . . . . . . . . . . . . . . . . . . . . . . . . 27
Application window . . . . . . . . . . . . . . . . . . . . . . . . . . . . . . . . . . . . . . . . . . . . . 28
Workspace tools . . . . . . . . . . . . . . . . . . . . . . . . . . . . . . . . . . . . . . . . . . . . . . . . 30
Contents i
Page 6

CorelDRAW basics . . . . . . . . . . . . . . . . . . . . . . . . . . . . . . . . . . . . . . . . . . .39
Vector graphics and bitmaps . . . . . . . . . . . . . . . . . . . . . . . . . . . . . . . . . . . . . . . 39
Starting and opening drawings. . . . . . . . . . . . . . . . . . . . . . . . . . . . . . . . . . . . . . 40
Finding content . . . . . . . . . . . . . . . . . . . . . . . . . . . . . . . . . . . . . . . . . . . . . . . . . 43
Undoing, redoing, and repeating actions . . . . . . . . . . . . . . . . . . . . . . . . . . . . . . 44
Zooming, panning, and scrolling . . . . . . . . . . . . . . . . . . . . . . . . . . . . . . . . . . . . 45
Saving drawings. . . . . . . . . . . . . . . . . . . . . . . . . . . . . . . . . . . . . . . . . . . . . . . . . 47
Closing drawings and quitting CorelDRAW . . . . . . . . . . . . . . . . . . . . . . . . . . . 49
Exploring basic tasks . . . . . . . . . . . . . . . . . . . . . . . . . . . . . . . . . . . . . . . . . . . . . 50
Drawing shapes. . . . . . . . . . . . . . . . . . . . . . . . . . . . . . . . . . . . . . . . . . . . .51
Drawing rectangles and squares . . . . . . . . . . . . . . . . . . . . . . . . . . . . . . . . . . . . . 51
Drawing ellipses, circles, arcs, and pie shapes . . . . . . . . . . . . . . . . . . . . . . . . . . . 53
Drawing polygons and stars . . . . . . . . . . . . . . . . . . . . . . . . . . . . . . . . . . . . . . . . 55
Drawing spirals . . . . . . . . . . . . . . . . . . . . . . . . . . . . . . . . . . . . . . . . . . . . . . . . . 57
Drawing predefined shapes . . . . . . . . . . . . . . . . . . . . . . . . . . . . . . . . . . . . . . . . 58
Drawing by using shape recognition . . . . . . . . . . . . . . . . . . . . . . . . . . . . . . . . . 59
Working with lines, outlines, and brushstrokes . . . . . . . . . . . . . . . . . . . .63
Drawing lines . . . . . . . . . . . . . . . . . . . . . . . . . . . . . . . . . . . . . . . . . . . . . . . . . . 63
Drawing calligraphic, pressure-sensitive, and preset lines . . . . . . . . . . . . . . . . . . 68
Formatting lines and outlines . . . . . . . . . . . . . . . . . . . . . . . . . . . . . . . . . . . . . . . 71
Copying, converting, and removing outlines . . . . . . . . . . . . . . . . . . . . . . . . . . . 73
Applying brushstrokes . . . . . . . . . . . . . . . . . . . . . . . . . . . . . . . . . . . . . . . . . . . . 74
Spraying objects along a line . . . . . . . . . . . . . . . . . . . . . . . . . . . . . . . . . . . . . . . 76
Drawing flow and dimension lines . . . . . . . . . . . . . . . . . . . . . . . . . . . . . . . . . . . 78
Working with objects . . . . . . . . . . . . . . . . . . . . . . . . . . . . . . . . . . . . . . . . 81
Selecting objects. . . . . . . . . . . . . . . . . . . . . . . . . . . . . . . . . . . . . . . . . . . . . . . . . 81
Transforming objects . . . . . . . . . . . . . . . . . . . . . . . . . . . . . . . . . . . . . . . . . . . . . 83
Copying, duplicating, and deleting objects . . . . . . . . . . . . . . . . . . . . . . . . . . . . . 86
Creating objects from enclosed areas . . . . . . . . . . . . . . . . . . . . . . . . . . . . . . . . . 90
Creating a boundary around selected objects . . . . . . . . . . . . . . . . . . . . . . . . . . . 90
Copying object properties, transformations, and effects . . . . . . . . . . . . . . . . . . . 91
Positioning objects . . . . . . . . . . . . . . . . . . . . . . . . . . . . . . . . . . . . . . . . . . . . . . . 92
Aligning and distributing objects . . . . . . . . . . . . . . . . . . . . . . . . . . . . . . . . . . . . 95
ii Contents
Page 7

Snapping objects . . . . . . . . . . . . . . . . . . . . . . . . . . . . . . . . . . . . . . . . . . . . . . . . 98
Using dynamic guides . . . . . . . . . . . . . . . . . . . . . . . . . . . . . . . . . . . . . . . . . . . 100
Changing the order of objects . . . . . . . . . . . . . . . . . . . . . . . . . . . . . . . . . . . . . 101
Grouping objects. . . . . . . . . . . . . . . . . . . . . . . . . . . . . . . . . . . . . . . . . . . . . . . 103
Combining objects. . . . . . . . . . . . . . . . . . . . . . . . . . . . . . . . . . . . . . . . . . . . . . 104
Inserting bar codes . . . . . . . . . . . . . . . . . . . . . . . . . . . . . . . . . . . . . . . . . . . . . 106
Shaping objects. . . . . . . . . . . . . . . . . . . . . . . . . . . . . . . . . . . . . . . . . . . .107
Using curve objects . . . . . . . . . . . . . . . . . . . . . . . . . . . . . . . . . . . . . . . . . . . . . 107
Selecting and moving nodes . . . . . . . . . . . . . . . . . . . . . . . . . . . . . . . . . . . . . . 108
Manipulating segments . . . . . . . . . . . . . . . . . . . . . . . . . . . . . . . . . . . . . . . . . . 110
Adding and removing nodes . . . . . . . . . . . . . . . . . . . . . . . . . . . . . . . . . . . . . . 111
Using node types. . . . . . . . . . . . . . . . . . . . . . . . . . . . . . . . . . . . . . . . . . . . . . . 112
Breaking the path of curve objects. . . . . . . . . . . . . . . . . . . . . . . . . . . . . . . . . . 113
Applying distortion effects. . . . . . . . . . . . . . . . . . . . . . . . . . . . . . . . . . . . . . . . 115
Shaping objects by using envelopes . . . . . . . . . . . . . . . . . . . . . . . . . . . . . . . . . 117
Cropping, splitting, and erasing objects . . . . . . . . . . . . . . . . . . . . . . . . . . . . . . 119
Filleting, scalloping, and chamfering corners . . . . . . . . . . . . . . . . . . . . . . . . . . 124
Welding and intersecting objects. . . . . . . . . . . . . . . . . . . . . . . . . . . . . . . . . . . 126
Creating PowerClip objects . . . . . . . . . . . . . . . . . . . . . . . . . . . . . . . . . . . . . . . 128
Working with color . . . . . . . . . . . . . . . . . . . . . . . . . . . . . . . . . . . . . . . . .131
Choosing colors . . . . . . . . . . . . . . . . . . . . . . . . . . . . . . . . . . . . . . . . . . . . . . . . 131
Creating custom color palettes. . . . . . . . . . . . . . . . . . . . . . . . . . . . . . . . . . . . . 135
Filling objects . . . . . . . . . . . . . . . . . . . . . . . . . . . . . . . . . . . . . . . . . . . . .137
Applying uniform fills . . . . . . . . . . . . . . . . . . . . . . . . . . . . . . . . . . . . . . . . . . . 137
Applying fountain fills. . . . . . . . . . . . . . . . . . . . . . . . . . . . . . . . . . . . . . . . . . . 138
Applying pattern fills . . . . . . . . . . . . . . . . . . . . . . . . . . . . . . . . . . . . . . . . . . . 140
Applying mesh fills . . . . . . . . . . . . . . . . . . . . . . . . . . . . . . . . . . . . . . . . . . . . . 142
Applying fills to areas . . . . . . . . . . . . . . . . . . . . . . . . . . . . . . . . . . . . . . . . . . . 143
Working with fills . . . . . . . . . . . . . . . . . . . . . . . . . . . . . . . . . . . . . . . . . . . . . . 145
Adding three-dimensional effects to objects . . . . . . . . . . . . . . . . . . . . .147
Contouring objects . . . . . . . . . . . . . . . . . . . . . . . . . . . . . . . . . . . . . . . . . . . . . 147
Applying perspective to objects . . . . . . . . . . . . . . . . . . . . . . . . . . . . . . . . . . . . 150
Contents iii
Page 8

Creating extrusions . . . . . . . . . . . . . . . . . . . . . . . . . . . . . . . . . . . . . . . . . . . . . 151
Creating bevel effects . . . . . . . . . . . . . . . . . . . . . . . . . . . . . . . . . . . . . . . . . . . . 152
Creating drop shadows. . . . . . . . . . . . . . . . . . . . . . . . . . . . . . . . . . . . . . . . . . . 154
Blending objects . . . . . . . . . . . . . . . . . . . . . . . . . . . . . . . . . . . . . . . . . . . . . . . 156
Changing the transparency of objects . . . . . . . . . . . . . . . . . . . . . . . . . .159
Applying transparencies . . . . . . . . . . . . . . . . . . . . . . . . . . . . . . . . . . . . . . . . . . 159
Working with pages and layout tools. . . . . . . . . . . . . . . . . . . . . . . . . . .161
Specifying the page layout . . . . . . . . . . . . . . . . . . . . . . . . . . . . . . . . . . . . . . . . 161
Choosing a page background . . . . . . . . . . . . . . . . . . . . . . . . . . . . . . . . . . . . . . 163
Adding, duplicating, renaming, and deleting pages . . . . . . . . . . . . . . . . . . . . . 164
Using the rulers . . . . . . . . . . . . . . . . . . . . . . . . . . . . . . . . . . . . . . . . . . . . . . . . 166
Setting up the grid. . . . . . . . . . . . . . . . . . . . . . . . . . . . . . . . . . . . . . . . . . . . . . 166
Setting up guidelines . . . . . . . . . . . . . . . . . . . . . . . . . . . . . . . . . . . . . . . . . . . . 167
Working with tables . . . . . . . . . . . . . . . . . . . . . . . . . . . . . . . . . . . . . . . .171
Adding tables to drawings . . . . . . . . . . . . . . . . . . . . . . . . . . . . . . . . . . . . . . . . 171
Selecting, moving, and navigating table components . . . . . . . . . . . . . . . . . . . . 173
Inserting and deleting table rows and columns. . . . . . . . . . . . . . . . . . . . . . . . . 176
Resizing table cells, rows, and columns. . . . . . . . . . . . . . . . . . . . . . . . . . . . . . . 177
Formatting tables and cells . . . . . . . . . . . . . . . . . . . . . . . . . . . . . . . . . . . . . . . 178
Working with text in tables . . . . . . . . . . . . . . . . . . . . . . . . . . . . . . . . . . . . . . . 180
Converting tables to text . . . . . . . . . . . . . . . . . . . . . . . . . . . . . . . . . . . . . . . . . 181
Merging and splitting tables and cells . . . . . . . . . . . . . . . . . . . . . . . . . . . . . . . 181
Manipulating tables as objects . . . . . . . . . . . . . . . . . . . . . . . . . . . . . . . . . . . . . 182
Adding images, graphics, and backgrounds to tables . . . . . . . . . . . . . . . . . . . . 183
Importing tables in a drawing . . . . . . . . . . . . . . . . . . . . . . . . . . . . . . . . . . . . . 183
Working with layers . . . . . . . . . . . . . . . . . . . . . . . . . . . . . . . . . . . . . . . . 185
Creating layers . . . . . . . . . . . . . . . . . . . . . . . . . . . . . . . . . . . . . . . . . . . . . . . . . 185
Changing layer properties . . . . . . . . . . . . . . . . . . . . . . . . . . . . . . . . . . . . . . . . 189
Moving and copying layers and objects . . . . . . . . . . . . . . . . . . . . . . . . . . . . . . 192
Adding and formatting text . . . . . . . . . . . . . . . . . . . . . . . . . . . . . . . . . . 195
Adding and selecting text . . . . . . . . . . . . . . . . . . . . . . . . . . . . . . . . . . . . . . . . 195
Changing the appearance of text . . . . . . . . . . . . . . . . . . . . . . . . . . . . . . . . . . . 198
iv Contents
Page 9

Finding, editing, and converting text. . . . . . . . . . . . . . . . . . . . . . . . . . . . . . . . 200
Aligning and spacing text . . . . . . . . . . . . . . . . . . . . . . . . . . . . . . . . . . . . . . . . 202
Shifting and rotating text . . . . . . . . . . . . . . . . . . . . . . . . . . . . . . . . . . . . . . . . 206
Moving text . . . . . . . . . . . . . . . . . . . . . . . . . . . . . . . . . . . . . . . . . . . . . . . . . . 208
Fitting text to a path . . . . . . . . . . . . . . . . . . . . . . . . . . . . . . . . . . . . . . . . . . . . 208
Formatting paragraph text . . . . . . . . . . . . . . . . . . . . . . . . . . . . . . . . . . . . . . . 211
Combining and linking paragraph text frames . . . . . . . . . . . . . . . . . . . . . . . . . 213
Wrapping paragraph text around objects and text. . . . . . . . . . . . . . . . . . . . . . 216
Inserting formatting codes. . . . . . . . . . . . . . . . . . . . . . . . . . . . . . . . . . . . . . . . 217
Working with bitmaps . . . . . . . . . . . . . . . . . . . . . . . . . . . . . . . . . . . . . .219
Converting vector graphics to bitmaps . . . . . . . . . . . . . . . . . . . . . . . . . . . . . . 219
Cropping and editing bitmaps . . . . . . . . . . . . . . . . . . . . . . . . . . . . . . . . . . . . . 220
Straightening bitmaps . . . . . . . . . . . . . . . . . . . . . . . . . . . . . . . . . . . . . . . . . . . 222
Applying special effects to bitmaps . . . . . . . . . . . . . . . . . . . . . . . . . . . . . . . . . 223
Using the Image Adjustment Lab . . . . . . . . . . . . . . . . . . . . . . . . . . . . . . . . . . 223
Editing bitmaps with Corel PHOTO-PAINT . . . . . . . . . . . . . . . . . . . . . . . . . 223
Tracing bitmaps and editing traced results . . . . . . . . . . . . . . . . . . . . . .225
Tracing bitmaps . . . . . . . . . . . . . . . . . . . . . . . . . . . . . . . . . . . . . . . . . . . . . . . 225
PowerTRACE controls . . . . . . . . . . . . . . . . . . . . . . . . . . . . . . . . . . . . . . . . . . 229
Fine-tuning traced results . . . . . . . . . . . . . . . . . . . . . . . . . . . . . . . . . . . . . . . . 231
Adjusting colors in traced results . . . . . . . . . . . . . . . . . . . . . . . . . . . . . . . . . . . 234
Setting default tracing options. . . . . . . . . . . . . . . . . . . . . . . . . . . . . . . . . . . . . 238
Tips for tracing bitmaps and editing traced results . . . . . . . . . . . . . . . . . . . . . 239
Working with templates . . . . . . . . . . . . . . . . . . . . . . . . . . . . . . . . . . . . .241
Searching for templates . . . . . . . . . . . . . . . . . . . . . . . . . . . . . . . . . . . . . . . . . . 241
Creating templates . . . . . . . . . . . . . . . . . . . . . . . . . . . . . . . . . . . . . . . . . . . . . 244
Using saved templates to create files . . . . . . . . . . . . . . . . . . . . . . . . . . . . . . . . 246
Editing templates . . . . . . . . . . . . . . . . . . . . . . . . . . . . . . . . . . . . . . . . . . . . . . 246
Managing color for display, input, and output . . . . . . . . . . . . . . . . . . .247
Understanding the Color Management dialog box. . . . . . . . . . . . . . . . . . . . . . 247
Working with color profiles. . . . . . . . . . . . . . . . . . . . . . . . . . . . . . . . . . . . . . . 249
Contents v
Page 10

Printing basics . . . . . . . . . . . . . . . . . . . . . . . . . . . . . . . . . . . . . . . . . . . . .253
Printing your work . . . . . . . . . . . . . . . . . . . . . . . . . . . . . . . . . . . . . . . . . . . . . 253
Laying out print jobs . . . . . . . . . . . . . . . . . . . . . . . . . . . . . . . . . . . . . . . . . . . . 254
Previewing print jobs . . . . . . . . . . . . . . . . . . . . . . . . . . . . . . . . . . . . . . . . . . . . 255
Merging files . . . . . . . . . . . . . . . . . . . . . . . . . . . . . . . . . . . . . . . . . . . . . . . . . . 256
Working with commercial printers . . . . . . . . . . . . . . . . . . . . . . . . . . . . .261
Printing printers’ marks . . . . . . . . . . . . . . . . . . . . . . . . . . . . . . . . . . . . . . . . . . 261
Printing color separations. . . . . . . . . . . . . . . . . . . . . . . . . . . . . . . . . . . . . . . . . 264
Printing to film . . . . . . . . . . . . . . . . . . . . . . . . . . . . . . . . . . . . . . . . . . . . . . . . 266
Publishing to PDF . . . . . . . . . . . . . . . . . . . . . . . . . . . . . . . . . . . . . . . . . .267
Saving documents as PDF files . . . . . . . . . . . . . . . . . . . . . . . . . . . . . . . . . . . . . 267
Importing and exporting files . . . . . . . . . . . . . . . . . . . . . . . . . . . . . . . . .271
Importing files . . . . . . . . . . . . . . . . . . . . . . . . . . . . . . . . . . . . . . . . . . . . . . . . . 271
Exporting files . . . . . . . . . . . . . . . . . . . . . . . . . . . . . . . . . . . . . . . . . . . . . . . . . 273
Collaborating. . . . . . . . . . . . . . . . . . . . . . . . . . . . . . . . . . . . . . . . . . . . . .277
Using CorelDRAW ConceptShare . . . . . . . . . . . . . . . . . . . . . . . . . . . . . . . . . . 277
Section III: Corel PHOTO-PAINT
Corel PHOTO-PAINT workspace tour . . . . . . . . . . . . . . . . . . . . . . . . . . . .281
Corel PHOTO-PAINT terms . . . . . . . . . . . . . . . . . . . . . . . . . . . . . . . . . . . . . 281
Exploring the application window . . . . . . . . . . . . . . . . . . . . . . . . . . . . . . . . . . 282
Toolbars. . . . . . . . . . . . . . . . . . . . . . . . . . . . . . . . . . . . . . . . . . . . . . . . . . . . . . 284
Toolbox . . . . . . . . . . . . . . . . . . . . . . . . . . . . . . . . . . . . . . . . . . . . . . . . . . . . . . 286
Property bar. . . . . . . . . . . . . . . . . . . . . . . . . . . . . . . . . . . . . . . . . . . . . . . . . . . 290
Dockers . . . . . . . . . . . . . . . . . . . . . . . . . . . . . . . . . . . . . . . . . . . . . . . . . . . . . . 290
Color palette . . . . . . . . . . . . . . . . . . . . . . . . . . . . . . . . . . . . . . . . . . . . . . . . . . 291
Status bar. . . . . . . . . . . . . . . . . . . . . . . . . . . . . . . . . . . . . . . . . . . . . . . . . . . . . 291
Bringing images into Corel PHOTO-PAINT. . . . . . . . . . . . . . . . . . . . . . . .293
Opening images. . . . . . . . . . . . . . . . . . . . . . . . . . . . . . . . . . . . . . . . . . . . . . . . 293
Importing files . . . . . . . . . . . . . . . . . . . . . . . . . . . . . . . . . . . . . . . . . . . . . . . . . 295
Acquiring images from scanners and digital cameras . . . . . . . . . . . . . . . . . . . . 296
vi Contents
Page 11

Creating images . . . . . . . . . . . . . . . . . . . . . . . . . . . . . . . . . . . . . . . . . . . . . . . 297
Displaying images and image information. . . . . . . . . . . . . . . . . . . . . . .299
Viewing images . . . . . . . . . . . . . . . . . . . . . . . . . . . . . . . . . . . . . . . . . . . . . . . . 299
Zooming . . . . . . . . . . . . . . . . . . . . . . . . . . . . . . . . . . . . . . . . . . . . . . . . . . . . . 301
Viewing image information . . . . . . . . . . . . . . . . . . . . . . . . . . . . . . . . . . . . . . . 301
Cropping and changing orientation . . . . . . . . . . . . . . . . . . . . . . . . . . . .303
Cropping images . . . . . . . . . . . . . . . . . . . . . . . . . . . . . . . . . . . . . . . . . . . . . . . 303
Straightening images. . . . . . . . . . . . . . . . . . . . . . . . . . . . . . . . . . . . . . . . . . . . 304
Rotating and flipping images. . . . . . . . . . . . . . . . . . . . . . . . . . . . . . . . . . . . . . 307
Working with color . . . . . . . . . . . . . . . . . . . . . . . . . . . . . . . . . . . . . . . . .309
Choosing colors . . . . . . . . . . . . . . . . . . . . . . . . . . . . . . . . . . . . . . . . . . . . . . . . 309
Using spot color channels . . . . . . . . . . . . . . . . . . . . . . . . . . . . . . . . . . . . . . . . 311
Changing color modes . . . . . . . . . . . . . . . . . . . . . . . . . . . . . . . . . . . . . .315
Changing the color mode of images . . . . . . . . . . . . . . . . . . . . . . . . . . . . . . . . . 315
Converting images to the paletted color mode . . . . . . . . . . . . . . . . . . . . . . . . . 316
Adjusting color and tone . . . . . . . . . . . . . . . . . . . . . . . . . . . . . . . . . . . .319
Using the Image Adjustment Lab . . . . . . . . . . . . . . . . . . . . . . . . . . . . . . . . . . 319
Using individual color-adjustment effects and tools . . . . . . . . . . . . . . . . . . . . . 325
Using the Tone Curve filter . . . . . . . . . . . . . . . . . . . . . . . . . . . . . . . . . . . . . . . 328
Working with color channels. . . . . . . . . . . . . . . . . . . . . . . . . . . . . . . . . . . . . . 330
Changing image dimensions, resolution, and paper size. . . . . . . . . . . .333
Changing image dimensions . . . . . . . . . . . . . . . . . . . . . . . . . . . . . . . . . . . . . . 333
Changing image resolution . . . . . . . . . . . . . . . . . . . . . . . . . . . . . . . . . . . . . . . 334
Changing paper size . . . . . . . . . . . . . . . . . . . . . . . . . . . . . . . . . . . . . . . . . . . . 335
Retouching . . . . . . . . . . . . . . . . . . . . . . . . . . . . . . . . . . . . . . . . . . . . . . .337
Removing red-eye . . . . . . . . . . . . . . . . . . . . . . . . . . . . . . . . . . . . . . . . . . . . . . 337
Removing dust and scratch marks . . . . . . . . . . . . . . . . . . . . . . . . . . . . . . . . . . 337
Cloning image areas . . . . . . . . . . . . . . . . . . . . . . . . . . . . . . . . . . . . . . . . . . . . 340
Sharpening images . . . . . . . . . . . . . . . . . . . . . . . . . . . . . . . . . . . . . . . . . . . . . 342
Erasing image areas . . . . . . . . . . . . . . . . . . . . . . . . . . . . . . . . . . . . . . . . . . . . . 344
Contents vii
Page 12

Working with lenses . . . . . . . . . . . . . . . . . . . . . . . . . . . . . . . . . . . . . . . .347
Creating lenses. . . . . . . . . . . . . . . . . . . . . . . . . . . . . . . . . . . . . . . . . . . . . . . . . 347
Editing lenses. . . . . . . . . . . . . . . . . . . . . . . . . . . . . . . . . . . . . . . . . . . . . . . . . . 352
Combining lenses with the image background . . . . . . . . . . . . . . . . . . . . . . . . . 353
Working with masks . . . . . . . . . . . . . . . . . . . . . . . . . . . . . . . . . . . . . . . .355
Distinguishing protected and editable areas . . . . . . . . . . . . . . . . . . . . . . . . . . . 355
Defining editable areas. . . . . . . . . . . . . . . . . . . . . . . . . . . . . . . . . . . . . . . . . . . 356
Defining editable areas by using color information . . . . . . . . . . . . . . . . . . . . . . 358
Inverting and removing masks . . . . . . . . . . . . . . . . . . . . . . . . . . . . . . . . . . . . . 361
Cutting out images . . . . . . . . . . . . . . . . . . . . . . . . . . . . . . . . . . . . . . . . . . . . . 362
Applying special effects . . . . . . . . . . . . . . . . . . . . . . . . . . . . . . . . . . . . .365
Working with special effects . . . . . . . . . . . . . . . . . . . . . . . . . . . . . . . . . . . . . . 365
Applying color and tone effects . . . . . . . . . . . . . . . . . . . . . . . . . . . . . . . . . . . . 367
Managing plug-ins. . . . . . . . . . . . . . . . . . . . . . . . . . . . . . . . . . . . . . . . . . . . . . 368
Drawing and painting . . . . . . . . . . . . . . . . . . . . . . . . . . . . . . . . . . . . . . .369
Drawing shapes and lines . . . . . . . . . . . . . . . . . . . . . . . . . . . . . . . . . . . . . . . . . 369
Applying brushstrokes . . . . . . . . . . . . . . . . . . . . . . . . . . . . . . . . . . . . . . . . . . . 371
Spraying images. . . . . . . . . . . . . . . . . . . . . . . . . . . . . . . . . . . . . . . . . . . . . . . . 374
Using a pressure-sensitive pen . . . . . . . . . . . . . . . . . . . . . . . . . . . . . . . . . . . . . 375
Filling images . . . . . . . . . . . . . . . . . . . . . . . . . . . . . . . . . . . . . . . . . . . . .377
Applying uniform fills . . . . . . . . . . . . . . . . . . . . . . . . . . . . . . . . . . . . . . . . . . . 377
Applying fountain fills . . . . . . . . . . . . . . . . . . . . . . . . . . . . . . . . . . . . . . . . . . . 378
Applying bitmap fills . . . . . . . . . . . . . . . . . . . . . . . . . . . . . . . . . . . . . . . . . . . . 379
Applying texture fills . . . . . . . . . . . . . . . . . . . . . . . . . . . . . . . . . . . . . . . . . . . . 381
Applying gradient fills . . . . . . . . . . . . . . . . . . . . . . . . . . . . . . . . . . . . . . . . . . . 382
Working with objects . . . . . . . . . . . . . . . . . . . . . . . . . . . . . . . . . . . . . . . 385
Creating objects . . . . . . . . . . . . . . . . . . . . . . . . . . . . . . . . . . . . . . . . . . . . . . . . 385
Grouping and combining objects . . . . . . . . . . . . . . . . . . . . . . . . . . . . . . . . . . . 388
Modifying objects . . . . . . . . . . . . . . . . . . . . . . . . . . . . . . . . . . . . . . . . . .391
Transforming objects . . . . . . . . . . . . . . . . . . . . . . . . . . . . . . . . . . . . . . . . . . . . 391
Changing the edges of objects . . . . . . . . . . . . . . . . . . . . . . . . . . . . . . . . . . . . . 395
viii Contents
Page 13

Adding drop shadows to objects . . . . . . . . . . . . . . . . . . . . . . . . . . . . . . . . . . . 398
Working with raw camera files . . . . . . . . . . . . . . . . . . . . . . . . . . . . . . . .401
Using raw camera files. . . . . . . . . . . . . . . . . . . . . . . . . . . . . . . . . . . . . . . . . . . 401
Bringing raw camera files into Corel PHOTO-PAINT . . . . . . . . . . . . . . . . . . 402
Adjusting the color and tone of raw camera files . . . . . . . . . . . . . . . . . . . . . . . 404
Sharpening and reducing noise in raw camera files. . . . . . . . . . . . . . . . . . . . . . 408
Previewing raw camera files and obtaining image information. . . . . . . . . . . . . 409
Creating images for the Web . . . . . . . . . . . . . . . . . . . . . . . . . . . . . . . . .411
Exporting and optimizing images for the Web . . . . . . . . . . . . . . . . . . . . . . . . 411
Creating and editing rollovers . . . . . . . . . . . . . . . . . . . . . . . . . . . . . . . . . . . . . 413
Saving and closing . . . . . . . . . . . . . . . . . . . . . . . . . . . . . . . . . . . . . . . . .417
Saving images . . . . . . . . . . . . . . . . . . . . . . . . . . . . . . . . . . . . . . . . . . . . . . . . . 417
Exporting images to other file formats . . . . . . . . . . . . . . . . . . . . . . . . . . . . . . . 419
Closing images . . . . . . . . . . . . . . . . . . . . . . . . . . . . . . . . . . . . . . . . . . . . . . . . 420
Printing basics . . . . . . . . . . . . . . . . . . . . . . . . . . . . . . . . . . . . . . . . . . . . .423
Printing your work . . . . . . . . . . . . . . . . . . . . . . . . . . . . . . . . . . . . . . . . . . . . . 423
Laying out print jobs . . . . . . . . . . . . . . . . . . . . . . . . . . . . . . . . . . . . . . . . . . . . 424
Previewing print jobs. . . . . . . . . . . . . . . . . . . . . . . . . . . . . . . . . . . . . . . . . . . . 425
Glossary . . . . . . . . . . . . . . . . . . . . . . . . . . . . . . . . . . . . . . . . . . . . . . . . . .427
CorelDRAW Index . . . . . . . . . . . . . . . . . . . . . . . . . . . . . . . . . . . . . . . . . .465
Corel PHOTO-PAINT Index . . . . . . . . . . . . . . . . . . . . . . . . . . . . . . . . . . . .483
Contents ix
Page 14

Page 15
Section I: Welcome to
CorelDRAW Graphics Suite X4
Page 16

Page 17

Welcome
CorelDRAW® Graphics Suite X4 delivers powerful software for graphic design, page
layout, and photo editing.
In this section, you’ll learn about
• CorelDRAW Graphics Suite X4 applications
• what’s new in CorelDRAW Graphics Suite
• installing CorelDRAW Graphics Suite applications
• changing languages
• registering Corel products
• updating Corel products
• Corel® Support Services™
• working with network installations
• Corel Corporation
CorelDRAW Graphics Suite X4 applications
This section describes the major applications included in
CorelDRAW Graphics Suite X4.
CorelDRAW
CorelDRAW is an intuitive graphics design application that is built to meet the
demands of today’s graphics professionals. Whether you work in advertising, printing,
publishing, sign making, engraving, or manufacturing, CorelDRAW offers the tools
you need to create accurate and creative vector illustrations, and professional-looking
page layouts and graphic designs.
CorelDRAW Graphics Suite X4: Welcome 3
Page 18

Corel PHOTO-PAINT
Corel PHOTO-PAINT® is a complete image-editing application that lets you retouch
and enhance photos. Whether you’re correcting red-eye, color, or exposure problems,
cutting out image areas, or creating and preparing images for print and for the Web,
Corel PHOTO-PAINT gives you powerful tools that are fast and easy to use.
What’s new in CorelDRAW Graphics Suite
This section outlines the new features in CorelDRAW Graphics Suite.
What’s new in CorelDRAW
The enhanced layout tools, text improvements, new design assets, redesigned user
interface, and improved workflow can boost your productivity and give you a more
enjoyable work experience.
Independent layers
You can now control and edit layers independently for each page of your document.
Local, independent guidelines can be added for individual pages, and master guidelines
can be added for the entire document.
Tables
A new interactive table feature lets you create and import tables to provide a structured
layout for text and graphics in drawings. You can easily align, resize, or edit tables and
cells to adapt them to your designs.
Live text preview
Live text preview lets you directly interact with on-screen text, experiment with
different settings, and evaluate the results before applying changes.
Easy font identification
You can quickly identify the font in a client’s artwork by capturing a sample and
sending it to the WhatTheFont™ page of the MyFonts® Web site (available in English
only): http://www.myfonts.com/WhatTheFont.
4CorelDRAWGraphicsSuiteX4UserGuide
Page 19

Mirroring paragraph text
Now you can interactively mirror paragraph text horizontally or vertically, or both,
when preparing your text for output.
Better support for quotation marks
Quotation marks are customized for specific languages. You can edit the quotation
mark styles and choose which styles are automatically inserted when you type in
different languages.
Raw camera file support
When importing raw files directly from your digital camera, you can view information
about file properties and camera settings, adjust image color and tone, and improve
image quality. Interactive controls let you preview changes quickly.
Enhanced compatibility
Supported file formats now include Adobe® Illustrator® CS3 (AI); Photoshop® CS3
(PSD); Acrobat® 8 (PDF); AutoCAD® (DXF™ and DWG™); Microsoft® Word
2007 (DOC or RTF, import only); Microsoft® Publisher 2002, 2003, and 2007 (PUB,
import only); Adobe® Portable Document Format (PDF 1.7 and PDF/A, including
PDF comments); and Corel® Painter™ X.
Templates and search capability for templates
New templates are available to help you get started with your design projects. When
starting a new project, you can easily find the right template on your computer. You can
browse, preview, or search for templates by name, category, keywords, or notes. You can
also view useful information about the template, such as category and style.
Extras
The CorelDRAW Graphics Suite X4 disc puts 4,000 new clipart images at your
fingertips. These high-quality vector graphics in CorelDRAW format can be easily
searched and adapted for use in your designs.
New fonts
An extended selection of new fonts includes single-line engraving fonts and
OpenType® cross-platform fonts that offer enhanced language support for Latin,
Greek, and Cyrillic layouts.
CorelDRAW Graphics Suite X4: Welcome 5
Page 20

Enhanced search functionality
You can use keywords, notes, file type, date, or text when you search for CorelDRAW
X4 files from Windows® Explorer. You can add or edit file properties within the
application, or from Windows Explorer, Windows Search, Windows Desktop Search, or
Windows Vista® Search.
Updated user interface and improved thumbnails
Redesigned icons, menus, and controls within the application create a fresh look and
provide a more intuitive working environment. New high-quality thumbnails let you
preview CorelDRAW documents when you browse and organize your files.
Corel PowerTRACE enhancements
Centerline tracing with Corel® PowerTRACE™ produces more accurate curves or
strokes for tracing technical illustrations, line drawings, or signatures. Improved
smoothing, color, and corner control help you optimize traced results. In addition, you
can control the colors of traced results more easily by editing, merging, or deleting
colors.
Review and collaboration tools
CorelDRAW® ConceptShare™ is a valuable collaboration tool that lets you share
designs and ideas and receive real-time feedback from clients in a Web-based
environment. You can create multiple workspaces, upload your designs, and invite
others to post comments.
Improved print merge functionality
Invitations, labels, and other projects that apply personalized text to the same design
are now easier to create. Improved print merge functionality gives you more control and
makes it easier to create and edit merged data.
Search capability when saving and opening files
You can organize your projects more easily by adding keywords or notes when saving
your files. When opening and saving files, Windows Vista users can search by author,
subject, file type, date, keywords, and other file properties.
Enhanced color management
Support has been added for the Adobe Color Management Module (CMM). On the
Windows Vista operating system, you can also use the Windows Color System CMM.
6CorelDRAWGraphicsSuiteX4UserGuide
Page 21

Automatic product updates
Now you can receive messages and information about new content, service packs, and
product updates, and conveniently access a product registration site, from within the
application.
What’s new in Corel PHOTO-PAINT
Image editing is enhanced by more flexible tone-curve corrections, a quick
image-straightening feature, new lens effects, added histogram feedback, and the
ability to open and edit raw camera files. In addition, a more efficient workflow,
redesigned user interface, and enhanced file compatibility can help you complete your
graphic design tasks more quickly.
Raw camera file support
When importing raw files from your digital camera, you can view information about
file properties and camera settings, adjust image color and tone, and improve image
quality. Interactive controls let you preview changes quickly.
Added histogram feedback
More features and effects now provide real-time histogram feedback, so you can edit
images more efficiently. You can preview image adjustments and compare results when
you adjust image tone in the Image Adjustment Lab and the Tone Curve dialog box, or
when you process raw camera files.
Improved tone-curve manipulation
Interactive settings and a redesigned user interface let you adjust image tone with
greater flexibility and control. You can easily perform precise tonal corrections by
selecting, adding, or deleting nodes along the tone curve.
Custom image straightening
Images that were scanned or photographed at an angle can be straightened quickly and
easily. Interactive controls let you correct image orientation and preview the results.
New lens effects
With the new lens effects, you can convert individual colors to black and white, mix
color channels for creative effect, map gradient colors, or apply a photographic filter to
your image.
CorelDRAW Graphics Suite X4: Welcome 7
Page 22

Enhanced compatibility
You can open or save files in the Photoshop CS3 format, ensuring a smooth
image-editing workflow. You can also open Corel Painter X files or save files in the PDF
1.7 or PDF/A format.
Enhanced search functionality
Now you can use keywords, notes, author, subject, date, or file type when viewing,
organizing, or searching for files from Windows Explorer. You can add or edit file
properties within the application, or from Windows Explorer, Windows Desktop
Search, or Windows Vista Search.
Updated user interface and improved thumbnails
Redesigned icons, menus, and controls within the application create a fresh look and
provide a more intuitive working environment. New, high-quality thumbnails let you
preview Corel PHOTO-PAINT documents when you browse and organize your files.
Extras
The CorelDRAW Graphics Suite X4 disc includes a selection of high-quality photos on
various subjects and themes to add inspiration to your projects. The high-resolution
images can be easily searched and are suitable for high-quality printing.
Review and collaboration tools
CorelDRAW ConceptShare is a valuable collaboration tool that lets you share designs
and ideas and receive real-time feedback from clients in a Web-based environment. You
can create multiple workspaces, upload your designs, and invite others to post
comments.
Search capability when saving and opening files
You can organize your projects more easily by adding keywords or notes when saving
your files. When opening and saving files, Windows Vista users can search by author,
subject, file type, date, keywords, and other file properties.
Automatic product updates
Now you can receive messages and information about new content and product
updates, and conveniently access a product registration site, from within the
application.
8CorelDRAWGraphicsSuiteX4UserGuide
Page 23

Enhanced color management
Support has been added for the Adobe Color Management Module (CMM). On the
Windows Vista operating system, you can also use the Windows Color System CMM.
To highlight what was new in earlier versions of CorelDRAW Graphics Suite
•Click Help ` Highlight what’s new, and click one of the following commands:
• Since version X3 — highlights menu commands and tools for features
introduced or improved in version X4
• Since version 12 — highlights menu commands and tools for features
introduced or improved in versions X3 and X4
• Since version 11 — highlights menu commands and tools for features
introduced or improved in version 12 and later
• Since version 10 — highlights menu commands and tools for features
introduced or improved in version 11 and later
• Since version 9 — highlights menu commands and tools for features introduced
or improved in version 10 and later
• No highlight — removes highlighting from menu commands and tools in the
toolbox
Installing CorelDRAW Graphics Suite applications
The installation wizard makes it easy to install CorelDRAW Graphics Suite applications
and components. You can use the installation wizard to quickly install the applications
with the default settings, or you can customize the installation by choosing different
options.
You can also use the installation wizard to do the following:
• add and delete components in the current installation
• repair the current installation by reinstalling all application features
• uninstall CorelDRAW Graphics Suite
To install CorelDRAW Graphics Suite applications
1 Close all applications, including all virus detection programs.
2 Insert the disc in the CD drive.
CorelDRAW Graphics Suite X4: Welcome 9
Page 24

If the installation wizard does not start automatically, click Start on the Windows
taskbar, and click Run. Type D:\Setup\Setup, where D is the letter that
corresponds to the CD drive.
3 Read the license agreement, and then enable the I accept the terms in the license
agreement check box.
4 Click Next.
5 Ty p e y o u r n a m e i n t h e User name text box.
6 Type your serial number in the Serial number text box.
The serial number is not case-sensitive, and the dashes are optional.
7 Click Next.
8 Follow the installation wizard instructions for installing the software.
To add or delete components in a CorelDRAW Graphics Suite installation
1 Close all applications.
2 On the Windows taskbar, click Start ` Control panel.
3 Click Add or remove programs (Windows XP).
If your operating system is Windows Vista, click Uninstall a program.
4 In the Add or remove programs dialog box, choose
CorelDRAW Graphics Suite from the list, and click Change/Remove.
If your operating system is Windows Vista, double-click
CorelDRAW Graphics Suite from the Uninstall or change a program page.
5 Follow the instructions that appear.
To repair a CorelDRAW Graphics Suite installation
1 Close all applications.
2 On the Windows taskbar, click Start ` Control panel.
3 Click Add or remove programs.
If your operating system is Windows Vista, click Uninstall a program.
4 In the Add or remove programs dialog box, choose
CorelDRAW Graphics Suite from the list, and click Change/Remove.
If your operating system is Windows Vista, double-click
CorelDRAW Graphics Suite from the Uninstall or change a program page.
10 CorelDRAW Graphics Suite X4 User Guide
Page 25

5 Follow the instructions that appear.
To uninstall CorelDRAW Graphics Suite
1 On the Windows taskbar, click Start ` Control Panel.
2 Click Add/Remove programs.
If your operating system is Windows Vista, click Uninstall a program.
3 In the Add or remove programs dialog box, choose
CorelDRAW Graphics Suite from the list, and click Change/Remove.
If your operating system is Windows Vista, double-click
CorelDRAW Graphics Suite from the Uninstall or change a program page.
4 Follow the installation wizard instructions.
Changing languages
If an application has been installed in more than one language, you can change the
language of the user interface and Help at any time.
If you did not install a specific Writing Tools language when you first installed the
product, you can do so now.
To change the language of the user interface and Help
1 Click To o l s ` Options.
2 In the list of categories, click Global.
3 Choose a language from the Select the language for the user interface list box.
4 Restart the application.
To add a language for Writing Tools
1 Close any open programs.
2 On the Windows taskbar, click Start ` Control panel.
3 Click the Add or remove programs icon.
If your operating system is Windows Vista, click Uninstall a program.
4 Choose CorelDRAW Graphics Suite from the Currently installed programs
list.
CorelDRAW Graphics Suite X4: Welcome 11
Page 26

If your operating system is Windows Vista, double-click
CorelDRAW Graphics Suite from the Uninstall or change a program page.
5 Click Change/Remove.
6 On the feature tab, click Writing to o l s , and enable the check box next to the
language that you want to install.
7 Follow the instructions in the installation wizard.
Registering Corel products
Registering Corel products is important. Registration provides you with timely access
to the latest product updates, valuable information about product releases, and access
to free downloads, articles, tips and tricks, and special offers.
You can register in one of the following ways:
• online — If you are connected to the Internet, you can start online registration
when you install the Corel graphics application. You can also register online at a
later date by clicking Help ` Registration. If no Internet connection is detected, a
list of options appears in a dialog box.
• by phone — You can call the Corel Customer Service Center nearest you.
Updating Corel products
During product installation, you can choose the option to download product updates
and service packs. You can also receive product updates and service packs by clicking
Help ` Updates.
Corel Support Services
Corel Support Services can provide you with prompt and accurate information about
product features, specifications, pricing, availability, services, and technical support. For
the most current information on support services available for your Corel product,
please visit www.corel.com/support.
12 CorelDRAW Graphics Suite X4 User Guide
Page 27

Working with network installations
If you purchased multiple licenses of CorelDRAW Graphics Suite, you have the option
of deploying the applications to your organization’s network. The
CorelDRAW Graphics Suite X4 Deployment Guide can provide more information about
network installations. To acquire a copy of the CorelDRAW Graphics Suite X4 Deployment
Guide, please contact Corel Support Services.
About Corel Corporation
Corel is a leading developer of graphics, productivity, and digital media software, with
more than 100 million users worldwide. The company’s product portfolio includes some
of the world’s most popular and widely recognized software brands, including
CorelDRAW® Graphics Suite, Corel® Paint Shop Pro®, Corel® Painter™, Corel
DESIGNER®, Corel® WordPerfect® Office, WinZip®, and iGrafx®. In 2006, Corel
acquired InterVideo, makers of WinDVD®, and Ulead, a leading developer of video,
imaging, and DVD authoring software. Designed to help people become more
productive and express their creative potential, Corel’s full-featured software products
set a higher standard for value in being easier to learn and use. The industry has
responded with hundreds of awards recognizing Corel’s leadership in software
innovation, design, and value. Corel’s products are sold in more than 75 countries
through a well-established network of international resellers, retailers, original
equipment manufacturers, online providers, and Corel’s global Web sites. With its
headquarters in Ottawa, Canada, the company has major offices in the United States,
the United Kingdom, Germany, China, and Japan. Corel’s stock is traded on the
NASDAQ under the symbol CREL and on the TSX under the symbol CRE.
CorelDRAW Graphics Suite X4: Welcome 13
Page 28

Page 29

Learning resources
You can learn to use CorelDRAW Graphics Suite X4 in various ways: by reading the
user guide; by accessing the Help, Hints, and tooltips; by completing project-based
tutorials; and by exploring the resources on the Corel Web site (www.corel.com). On
the Web site, you can access tips, additional tutorials, and training and integration
resources. You can also check the Readme file (readme.html), which is installed with
the program, to learn the latest information about the software.
In this section, you’ll learn about
• using the Help, user guide, and tooltips
• using Hints
•Welcome screen
•CorelTUTOR™
•Insights from the Experts
• training videos
• tips and tricks
• using the VBA programming guide
• using Web-based resources
• using customized training and integration resources
Using the Help, user guide, and tooltips
This user guide provides information about commonly used product features. The user
guide is also available in PDF format.
The Help provides comprehensive information about product features from directly
within the program. You can browse through the entire list of topics, check the index,
or search the Help for a given word or phrase. From the Help window, you can also
access the Corel® Knowledge Base™ on the Corel Web site.
Tooltips provide information about the icons and buttons found in the program. To view
a tooltip, position the pointer over an icon, button, or other application control.
CorelDRAW Graphics Suite X4: Learning resources 15
Page 30

Documentation conventions
The following table describes important conventions used in the user guide and Help.
Convention Description Examples
Menu
` Menu command
list box A list of options that drops
docker A window that contains
Enter Enter key Type a value in the Eraser
A menu item and menu
command that you need to
click in sequence
down when a user clicks the
down arrow button
available commands and
settings relevant to a specific
tool or task
A note contains important
information that is relevant
to the preceding steps. It
may describe conditions
under which the procedure
can be performed.
A tip contains suggestions
for performing the preceding
steps. It may present
alternatives to the steps, or
other benefits or uses of the
procedure.
Click File
Choose a value from the
Force field list box on the
property bar.
Double-click the name of the
group in the Object
manager docker.
thickness box on the
property bar, and press
Enter.
A compound blend cannot
be copied or cloned.
If you click the Equal
margins button, you must
specify values in the To p / l e f t
margin boxes.
Trimming an object can
reduce the drawing file size.
You can also create a
hyperlink by using the
Internet toolbar.
` Open.
To use the Help
1 Click Help ` Help topics.
2 Click one of the following tabs:
16 CorelDRAW Graphics Suite X4 User Guide
Page 31

• Contents — lets you browse through topics in the Help. To open a topic, click
the topic heading in the left pane.
• Index — lets you use the index to find a topic. Use the scroll bar to browse, or
type a word or phrase in the search box to find a particular index entry.
• Search — lets you search the full text of the Help for a particular word or phrase
You can also
View context-sensitive Help from within a
dialog box
Print a specific Help topic Open a Help topic, click the page that you
Access the Corel Knowledge Base and other
online resources
Click the Help button in the dialog box.
want to print, and click Print at the top of
the Help window.
Click Resources at the top of the Help
window, and click a link to one of the
resources described under “Using Web-based
resources.”
To search the Help
1 Click Help ` Help topics.
2 Click the Search tab, and type a word or phrase in the search box.
For example, if you are looking for information about the RGB color mode, you can
type “RGB” to display a list of relevant topics. To search for a phrase, type the
phrase, and enclose it in quotation marks (for example, type “dynamic guides” or
“color mode”).
3 Click the List topics button.
4 Choose a topic from the list that appears, and press Enter.
If your search results do not include any relevant topics, check whether you spelled
the search word or phrase correctly. Note that the English Help uses American
spelling (for example, “color,” “favorite,” “center,” and “rasterize”), so searching for
British spellings (“colour,” “favourite,” “centre,” and “rasterise”) produces no
results.
You can also
Search for a word or phrase in a list of topics
generated by the previous search
CorelDRAW Graphics Suite X4: Learning resources 17
Enable the Search previous results check
box.
Page 32

You can also
Search for all forms of a word Enable the Match similar words check box.
For example, if you type “blend” and enable
this check box, the search results will include
topics that contain the words “blends” and
“blending.”
Search only the titles of Help topics Enable the Search titles only check box.
Repeat a recently performed search On the search box, click the arrow that
points down, and choose a word or phrase.
Search by using the Boolean operators AND,
OR, NEAR, or NOT
Type a search term in the box, and click the
flyout arrow that points to the right. Choose
a Boolean operator from the following list,
type another search term in the search box,
and press Enter.
AND — lets you find topics that contain all
search terms in the search box
OR — lets you find topics that contain at
least one of the words in the search box
NEAR — lets you find topics in which the
search terms appear close to each other.
NEAR provides more results than when you
use only a phrase search, and more relevant
results than when you search for individual
words.
NOT — lets you find topics that contain the
search term you type before NOT and that
do not contain the search term you type after
NOT.
To access the user guide in PDF format
• On the Windows Start menu, click Start ` All Programs `
CorelDRAW Graphics Suite X4 ` Documentation `
CorelDRAW Graphics Suite X4 User Guide PDF.
18 CorelDRAW Graphics Suite X4 User Guide
Page 33

Using Hints
Hints provide information about tools in
the toolbox from within the application.
When you click a tool, a hint appears,
telling you how to use the tool. If you need
additional information about a tool, you
can access a relevant Help topic by clicking
the Help button in the upper-right corner
of the Hints docker.
Hints are displayed by default in the Hints
docker on the right side of the program
window, but you can hide them when you
no longer need them.
Hints docker
To use Hints
To Do the following
Display or hide Hints
Display information about a tool Click the tool, or perform an action with a
Get additional information about the active
tool
Navigate to previously viewed topics Click the Back and Forward buttons at the
CorelDRAW Graphics Suite X4: Learning resources 19
Click Help
When the Hints command is enabled, the
Hints docker appears and provides
information about the active tool in the
toolbox.
tool that is already active.
Click the Help button in the upper-right
corner of the Hints docker.
bottom of the Hints docker.
` Hints.
Page 34

Welcome screen
The Welcome screen lets you quickly complete common tasks, such as opening files and
starting files from templates. You can find out about the new features in
CorelDRAW Graphics Suite X4 and get inspired by graphic designs featured on the
Gallery page. In addition, you can access tutorials and tips, and get the latest product
updates.
The Welcome screen appears when you start CorelDRAW or Corel PHOTO-PAINT.
You can also access the Welcome screen by clicking Help ` Welcome screen.
Welcome screen
CorelTUTOR
CorelTUTOR provides a series of project-based tutorials that introduce you to the basic
and advanced features of CorelDRAW and Corel PHOTO-PAINT. You can access the
tutorials from the Welcome screen.
To access CorelTUTOR
1 Click Help ` CorelTUTOR.
The Welcome screen appears.
2 On the Learning tools page, click CorelTUTOR.
20 CorelDRAW Graphics Suite X4 User Guide
Page 35

Insights from the Experts
CorelDRAW Handbook: Insights from the Experts contains a series of tutorials written by
design professionals who use CorelDRAW Graphics Suite X4 in their daily work. The
tutorials show the workflow that the authors used to create their designs with
CorelDRAW Graphics Suite. The handbook is available both as a printed publication
and in PDF format.
To access Insights from the Experts
1 Click Help ` Insights from the experts.
The Welcome screen appears.
2 On the Learning tools page, click Insights from the experts.
Training videos
Your software DVD contains video training that lets you learn about a wide range of
tools and basic features in CorelDRAW and Corel PHOTO-PAINT. You can create
interesting and unique designs by following project-based tutorials, and learn about
industry-specific workflows, such as sign making, laser engraving, and screen printing.
In addition, you can learn about basic design principles and guidelines for preparing
images for specific media, such as for print or the Web.
Tips and tricks
Quick tips highlight useful tools and shortcuts, and give you a starting point for
exploring some of the CorelDRAW Graphics Suite features.
To access tips and tricks
1 Click Help ` Welcome screen.
The Welcome screen appears.
2 Click the Learning tools tab, and click Tips & tricks.
CorelDRAW Graphics Suite X4: Learning resources 21
Page 36

Using the VBA programming guide
The new VBA Programming Guide for CorelDRAW Graphics Suite X4 will help you
automate tasks and create custom solutions by using Microsoft® Visual Basic® for
Applications (VBA) in CorelDRAW and Corel PHOTO-PAINT. If your installation of
CorelDRAW Graphics Suite X4 includes VBA, the guide is accessible from a link in the
VBA Help for CorelDRAW or the VBA Help for Corel PHOTO-PAINT.
Using Web-based resources
The following Web-based resources can help you get the most out of
CorelDRAW Graphics Suite:
• Corel Knowledge Base — articles written by the Corel Technical Support Services
team in response to questions by CorelDRAW Graphics Suite users
• CorelDRAW.com community — an online environment to share your experience
with the product, ask questions, and receive help and suggestions from other users
• Tips and tricks on the Corel Web site — valuable information provided by the
Corel Documentation Team to help you take full advantage of product features
• Tutorials on the Corel Web site — in-depth tutorials in which CorelDRAW
Graphics Suite experts share their knowledge and techniques
An active Internet connection is required to access Web-based resources.
Using customized training and integration resources
Corel Corporation has training partnerships with other firms and provides professional
services for its software products.
Corel customized training
Corel Training Specialists can provide you with customized training, tailored to your
work environment, to help you get the most out of the Corel software that you’ve
installed. These experts will help you develop a curriculum that is practical and
relevant to the needs of your organization. For more information, please visit
www.corel.com/customizedtraining.
Corel Training Partners
A Corel® Training Partner (CTP) is an independent, officially accredited local
organization that provides training on Corel products. CTPs are located worldwide for
22 CorelDRAW Graphics Suite X4 User Guide
Page 37

your convenience. To find a partner near you, please visit
www.corel.com/trainingpartners.
Corel Professional Services
Corel Corporation is committed to providing workflow solutions that save you both
time and money. To simplify the process of deploying Corel applications across your
organization, Corel® Professional Services™ offers a comprehensive range of costeffective solutions to meet your technology needs. This group brings together highly
skilled experts from across the company who are dedicated to finding top-notch
solutions. You’ll receive assistance from this knowledgeable team through all stages of
your project, from application development and support to software systems integration
and training.
For more information, you can visit the Corel Professional Services Web site visit at
www.corel.com/proservices.
Corel Technology Partners
Corel Technology Partners are businesses that embed Corel technology in their
products, develop plug-in applications for Corel software, or integrate standalone
applications into Corel technology solutions. This comprehensive program is designed
especially for developers and consultants. It includes all the necessary components to
successfully design, develop, test, and market custom solutions related to Corel
products.
For more information about Corel Technology Partners, please e-mail Corel Corporation
at techpartner@corel.com.
CorelDRAW Graphics Suite X4: Learning resources 23
Page 38

Page 39

Section II: CorelDRAW
Page 40

Page 41

CorelDRAW workspace tour
Becoming familiar with the terminology and workspace of CorelDRAW will help you
easily follow this user guide’s concepts and procedures.
In this section, you’ll learn about
•CorelDRAW terms
• the application window
• the workspace tools
CorelDRAW terms
Before you get started with CorelDRAW, you should be familiar with the following
terms.
Term Description
object An element in a drawing such as an image, shape, line,
text, curve, symbol, or layer
drawing The work you create in CorelDRAW; for example,
custom artwork, logos, posters, and newsletters
vector graphic An image generated from mathematical descriptions
that determine the position, length, and direction in
which lines are drawn
bitmap An image composed of grids of pixels or dots
docker A window containing available commands and
settings relevant to a specific tool or task
flyout A button that opens a group of related tools or menu
items
CorelDRAW: CorelDRAW workspace tour 27
Page 42
Term Description
1 432 5 6 7
8 9 10 11 12 13
artistic text A type of text to which you can apply special effects,
such as shadows
paragraph text A type of text to which you can apply formatting
options, and which can be edited in large blocks
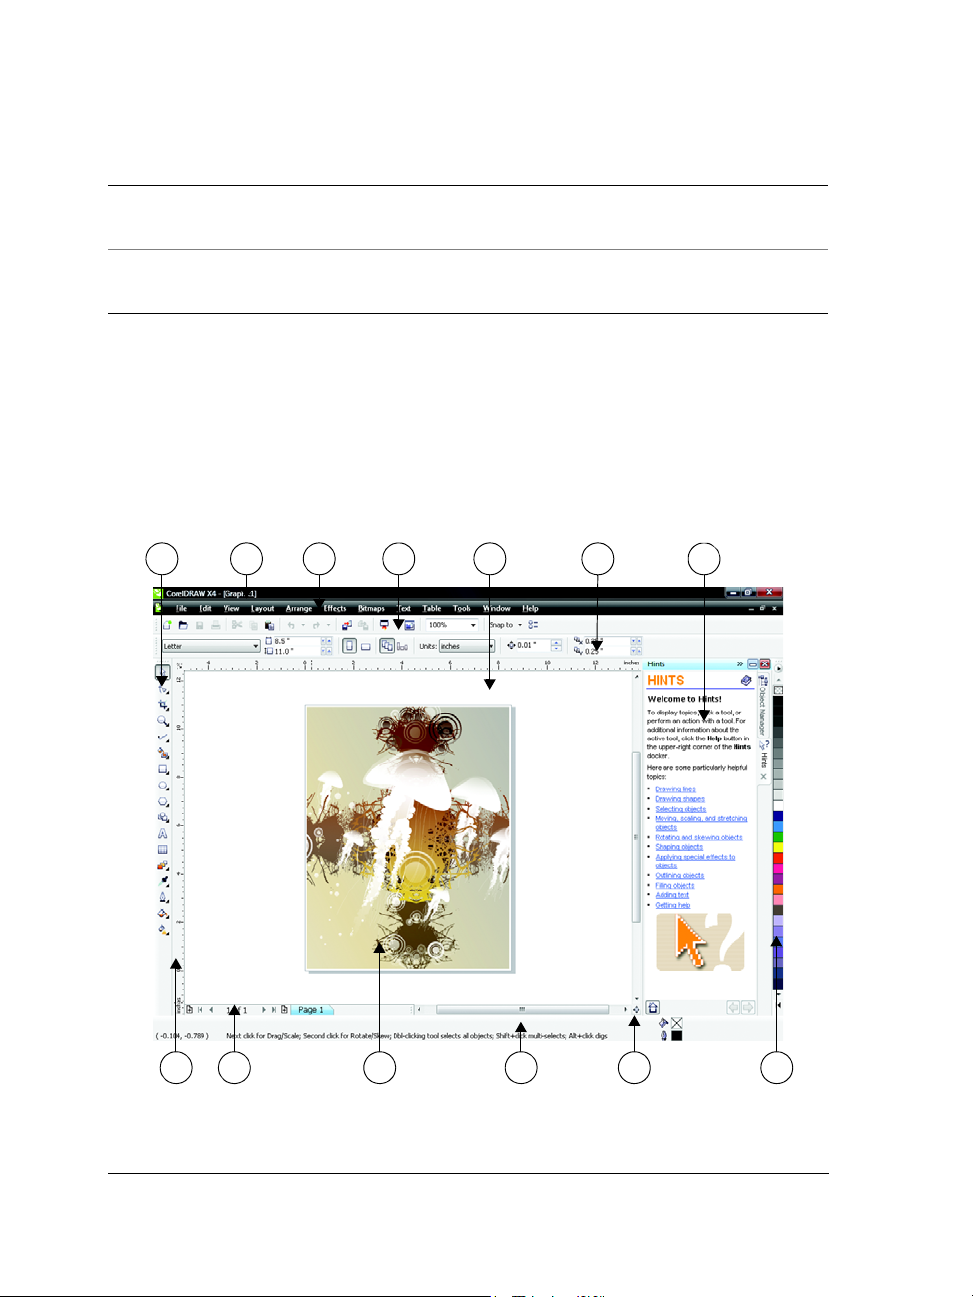
Application window
When you launch CorelDRAW, the application window opens containing a drawing
window. Although more than one drawing window can be opened, you can apply
commands to the active drawing window only.
The CorelDRAW application window appears below.
Circled numbers correspond to the numbers in the following table, which
describes the main components of the application window.
28 CorelDRAW Graphics Suite X4 User Guide
Page 43

Part Description
1. Toolbox A floating bar with tools for creating, filling, and
modifying objects in the drawing
2. Title bar The area displaying the title of the currently open drawing
3. Menu bar The area containing pull-down menu options
4. Toolbar A detachable bar that contains shortcuts to menu and
other commands
5. Drawing window The area outside the drawing page bordered by the scroll
bars and application controls
6. Property bar A detachable bar with commands that relate to the active
tool or object. For example, when the text tool is active,
the text property bar displays commands that create and
edit text.
7. Docker A window containing available commands and settings
relevant to a specific tool or task
8. Rulers Horizontal and vertical borders that are used to determine
the size and position of objects in a drawing
9. Document navigator The area at the bottom left of the application window that
contains controls for moving between pages and adding
pages
10. Drawing page The rectangular area inside the drawing window. It is the
printable area of your work area.
11. Status bar An area at the bottom of the application window that
contains information about object properties such as type,
size, color, fill, and resolution. The status bar also shows
the current mouse position.
12. Navigator A button at the lower-right corner that opens a smaller
display to help you move around a drawing
13. Color palette A dockable bar that contains color swatches
To toggle between displaying and hiding the status bar, click Window `
To o l b a r s ` Status bar.
CorelDRAW: CorelDRAW workspace tour 29
Page 44

Workspace tools
Application commands are accessible through the menu bar, toolbars, toolbox, property
bar, and dockers. The property bar and dockers provide access to commands that relate
to the active tool or current task. The property bar, dockers, toolbars, and toolbox can
be opened, closed, and moved around your screen at any time.
You can customize many of these workspace tools to suit your needs. For more
information, see “Customizing CorelDRAW” in the Help.
Standard toolbar
The standard toolbar, which appears by default, contains buttons and controls that are
shortcuts to many of the menu commands. For information about customizing the
position, contents, and appearance of toolbars, see “Customizing toolbars” in the Help.
Click this button To
Start a new drawing
Open a drawing
Save a drawing
Print a drawing
Cut selected objects to the Clipboard
Copy selected objects to the Clipboard
Paste the Clipboard contents into a drawing
Undo an action
Restore an action that was undone
30 CorelDRAW Graphics Suite X4 User Guide
Page 45

Click this button To
Import a drawing
Export a drawing
Start Corel applications
Open the Welcome screen
Set a zoom level
Enable or disable automatic alignment for the grid,
guidelines, objects, and dynamic guides
Open the Options dialog box
More about toolbars
In addition to the standard toolbar, CorelDRAW has toolbars for specific kinds of tasks.
For example, the Te x t toolbar contains commands relevant to using the Te x t tool. If
you use a toolbar frequently, you can display it in the workspace at all times.
The following table describes toolbars other than the standard toolbar.
Toolbar Description
Text Contains commands for formatting and aligning text
Zoom Contains commands for zooming in and out of a
drawing page by specifying percentage of original
view, clicking the Zoom tool, and selecting a page
view
Internet Contains commands for Web-related tools for creating
rollovers and publishing to the Internet
CorelDRAW: CorelDRAW workspace tour 31
Page 46
Toolbar Description
Flyout arrow
Toolbox
Flyout
Print merge Contains commands for print merge items that
combine text with a drawing such as creating and
loading data files, creating data fields for variable text,
and inserting print merge fields
Transform Contains commands for skewing, rotating, and
mirroring objects
Macros Contains commands for editing, testing, and running
macros
To toggle between displaying and hiding a toolbar, click Window ` To o l b a r s ,
and click the command with the toolbar name.
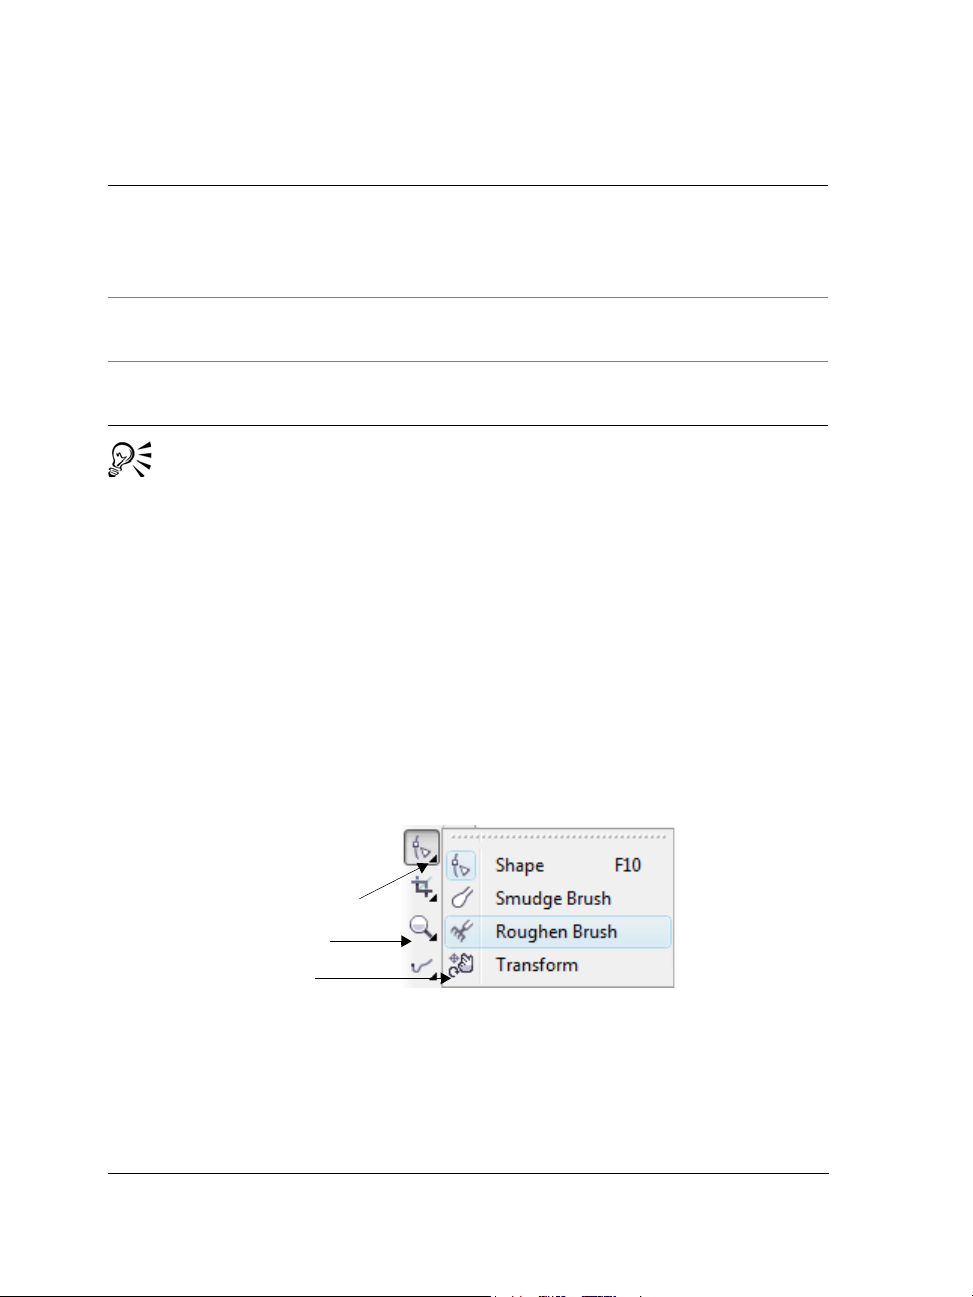
Exploring the toolbox
The toolbox contains tools for drawing and editing images. Some of the tools are visible
by default, while others are grouped in flyouts. Flyouts open to display a set of related
CorelDRAW tools. A small flyout arrow in the lower-right corner of a toolbox button
indicates a flyout. You can access the tools in a flyout by clicking the flyout arrow. After
you open a flyout, you can easily scan the contents of other flyouts by hovering over any
of the toolbox buttons which have flyout arrows. Flyouts function like toolbars when
you drag them away from the toolbox. This lets you view all the related tools while you
work.
In the default workspace, clicking the flyout arrow on the Shape tool opens the
Shape edit flyout.
The following table provides descriptions of the tools in the CorelDRAW toolbox.
32 CorelDRAW Graphics Suite X4 User Guide
Page 47
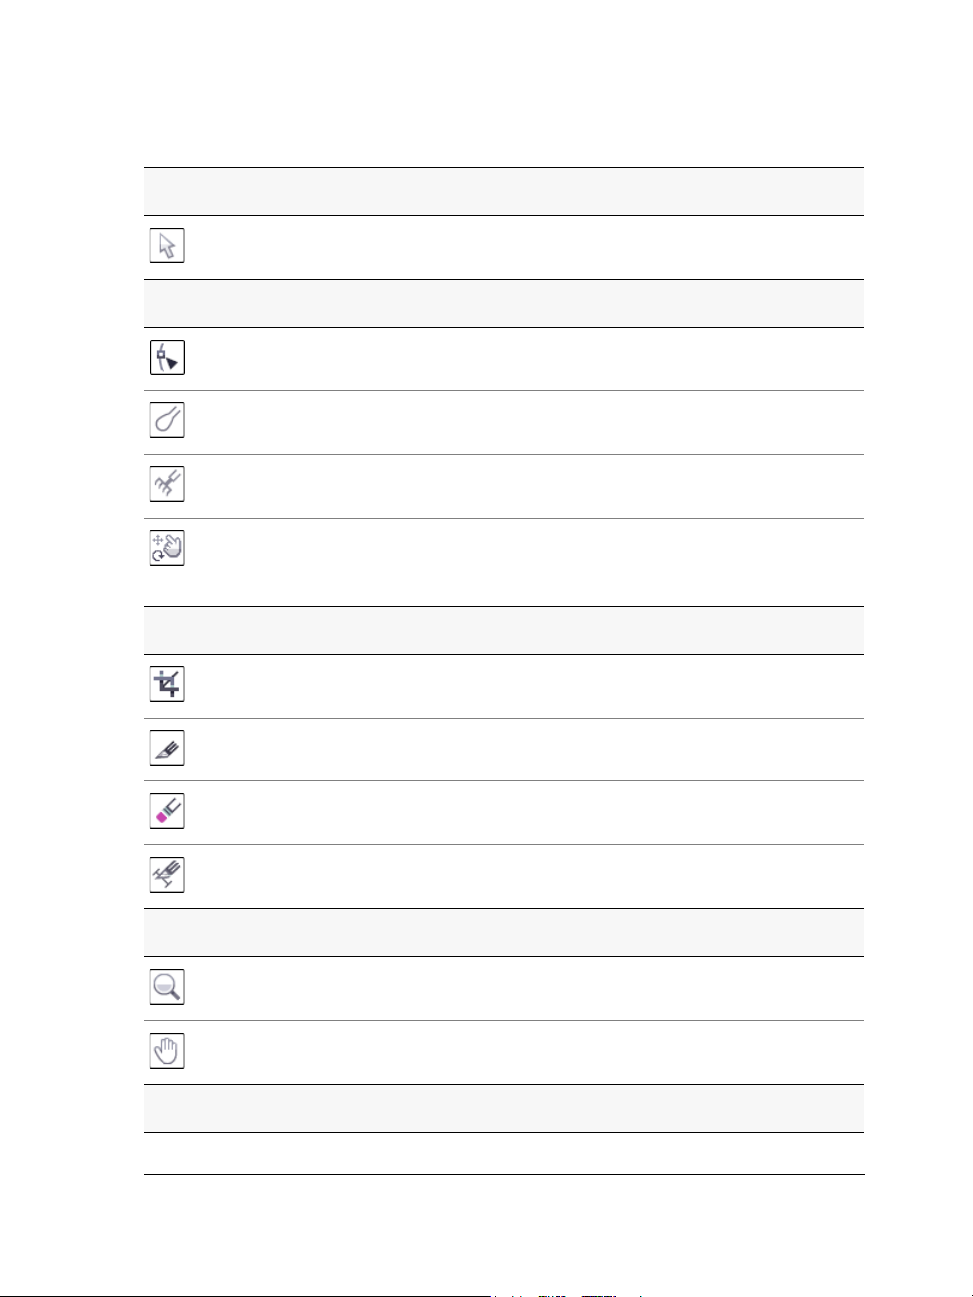
Tools
Pick tool
Shape Edit tools
Crop tools
The Pick tool lets you select, size, skew, and rotate
objects.
The Shape tool lets you edit the shape of objects.
The Smudge brush tool lets you distort a vector
object by dragging along its outline.
The Roughen brush tool lets you distort the outline
of a vector object by dragging along the outline.
The Tr a n s f o r m tool lets you transform an object by
using the Free rotation, Free angle reflection, Free
scale, and Free skew tools.
The Crop tool lets you remove unwanted areas in
objects.
The Knife tool lets you cut through objects.
The Eraser tool lets you remove areas of your
Zoom tools
Curve tools
CorelDRAW: CorelDRAW workspace tour 33
drawing.
The Virtual segment delete tool lets you delete
portions of objects that are between intersections.
The Zoom tool lets you change the magnification
level in the drawing window.
The Hand tool lets you control which part of the
drawing is visible in the drawing window.
Page 48

Smart tools
The Freehand tool lets you draw single line segments
and curves.
The Bézier tool lets you draw curves one segment at a
time.
The Artistic media tool provides access to the Brush,
Sprayer, Calligraphic, and Pressure tools.
The Pen tool lets you draw curves one segment at a
time.
The Polyline tool lets you draw lines and curves in
preview mode.
The 3-point curve tool lets you draw a curve by
defining the start, end, and center points.
The Connector tool lets you join two objects with a
line.
The Dimension tool lets you draw vertical,
horizontal, slanted, or angular dimension lines.
The Smart fill tool lets you create objects from
enclosed areas and then apply a fill to those objects.
The Smart drawing tool converts your freehand
Rectangle tools
Ellipse tools
34 CorelDRAW Graphics Suite X4 User Guide
strokes to basic shapes and smoothed curves.
The Rectangle tool lets you draw rectangles and
squares.
The 3-point rectangle tool lets you draw rectangles
at an angle.
The Ellipse tool lets you draw ellipses and circles.
Page 49

Object tools
Perfect Shapes tools
The 3-point ellipse tool lets you draw ellipses at an
angle.
The Polygon tool lets you draw symmetrical polygons
and stars.
The Star tool lets you draw perfect stars.
The Complex star tool lets you draw complex stars
that have intersecting sides.
The Graph paper tool lets you draw a grid of lines
similar to that on graph paper.
The Spiral tool lets you draw symmetrical and
logarithmic spirals.
The Basic shapes tool lets you choose from a full set
of shapes, including hexagram, a smiley face, and a
right-angle triangle.
The Arrow shapes tool lets you draw arrows of
various shape, direction, and number of heads.
The Flowchart shapes tool lets you draw flowchart
Text tool
CorelDRAW: CorelDRAW workspace tour 35
symbols.
The Banner shapes tool lets you draw ribbon objects
and explosion shapes.
The Callout shapes tool lets you draw callouts and
labels.
The Te x t tool lets you type words directly on the
screen as artistic or paragraph text.
Page 50
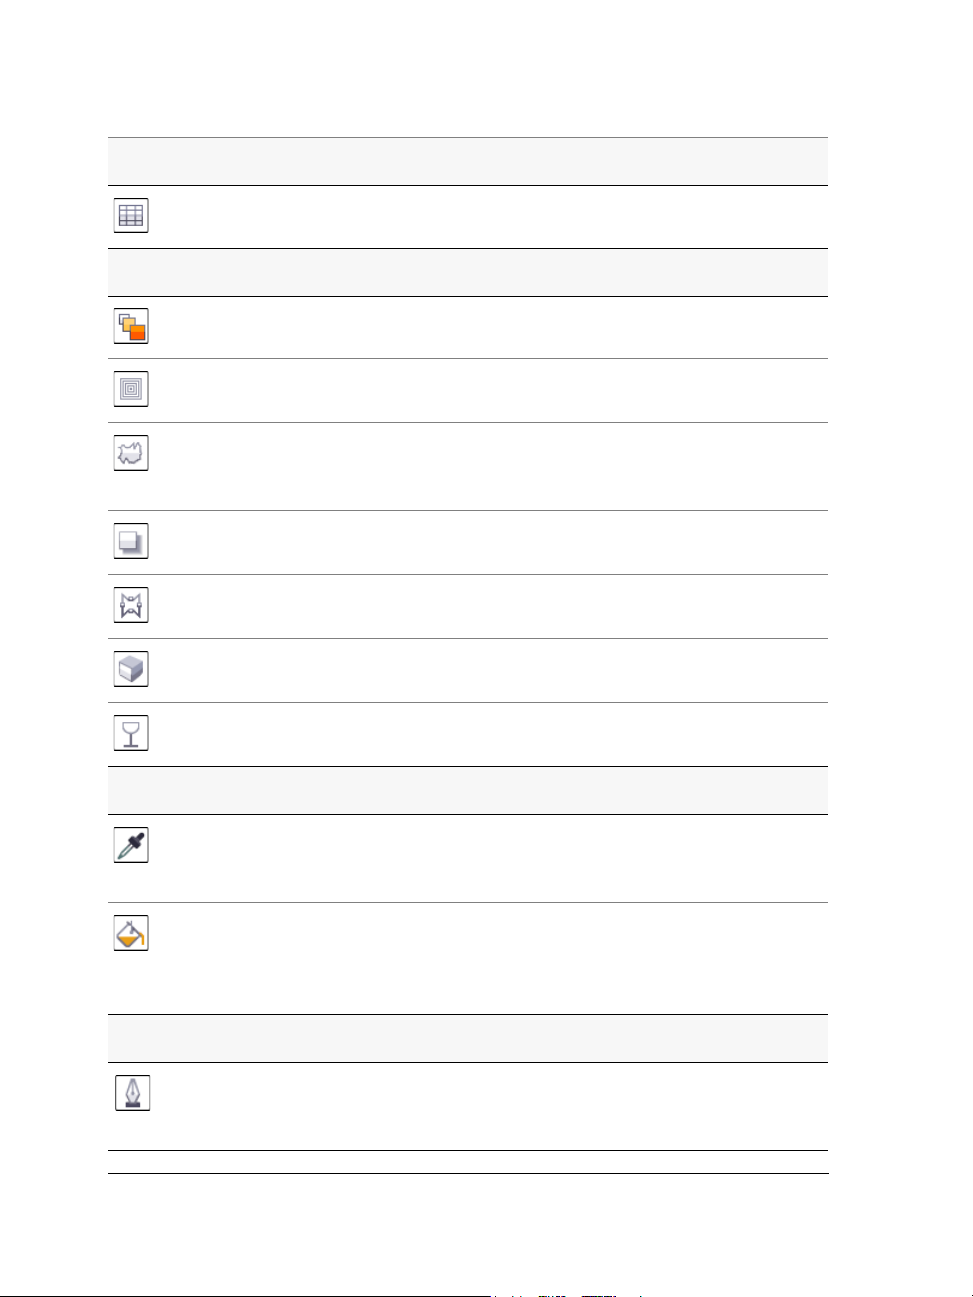
Table tool
Interactive tools
The Ta b l e tool lets you draw and edit tables.
The Blend tool lets you blend two objects.
The Contour tool lets you apply a contour to an
object.
The Distort tool lets you apply a Push or Pull
distortion, a Zipper distortion, or a Twister distortion
to an object.
The Drop shadow tool lets you apply a drop shadow
to an object.
The Envelope tool lets you shape an object by
dragging the nodes of the envelope.
The Extrude tool lets you apply the illusion of depth
to objects.
The Tr a n s p a r e n c y tool lets you apply transparencies
to objects.
Eyedropper tools
The Eyedropper tool lets you select and copy object
Outline tool
36 CorelDRAW Graphics Suite X4 User Guide
properties, such as fill, line thickness, size, and effects,
from an object on the drawing window.
The Paintbucket tool lets you apply object
properties, such as fill, line thickness, size and effects,
to an object in the drawing window after you select
these properties with the Eyedropper tool.
The Outline tool opens a flyout that gives you quick
access to items such as the Outline pen dialog box
and Outline color dialog box.
Page 51
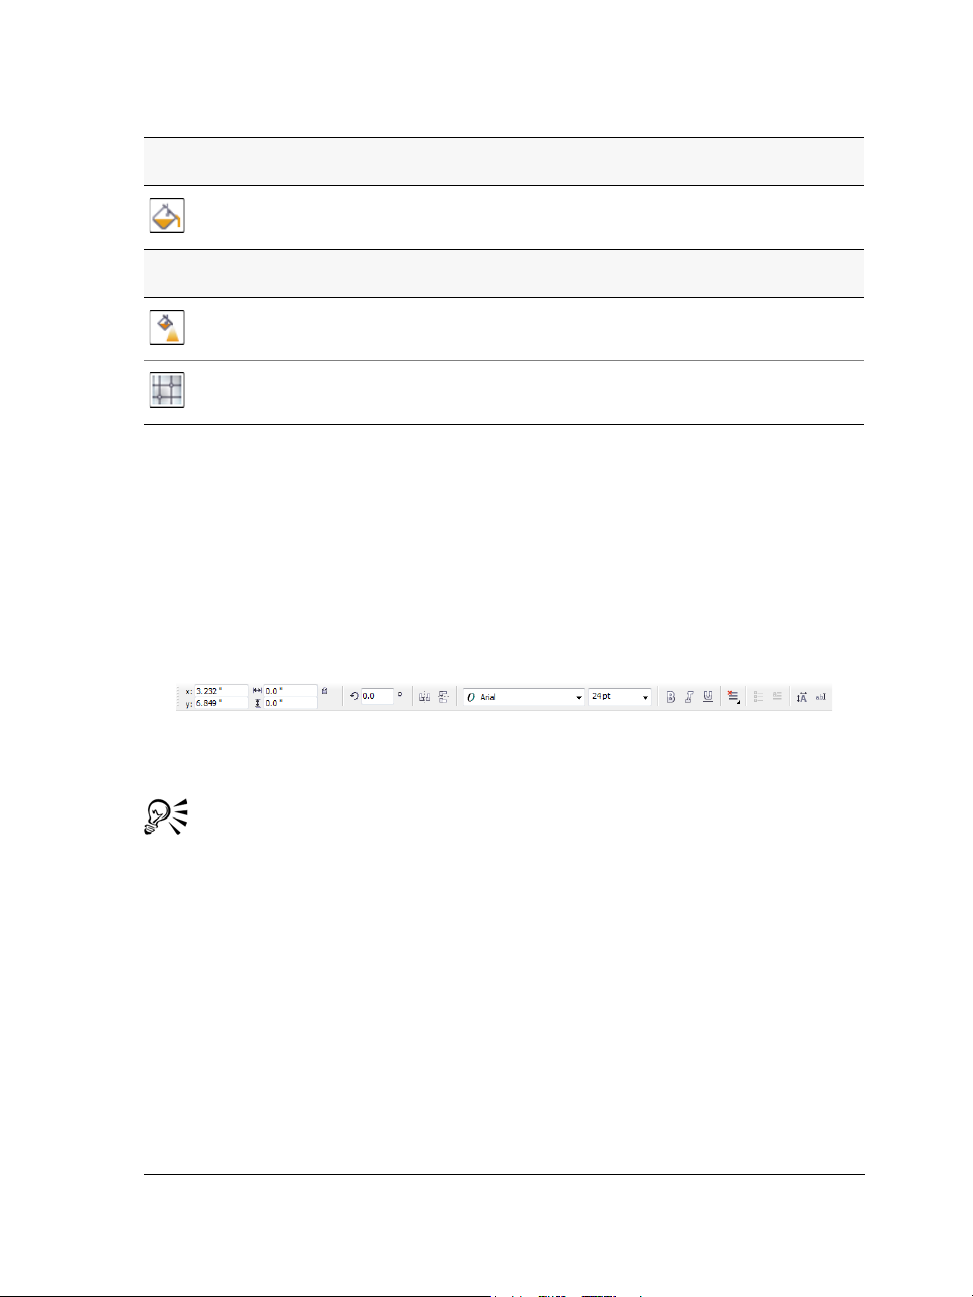
Fill tool
The Fill tool opens a flyout that gives you quick access
Interactive fill tools
to items such as the fill dialog boxes.
The Interactive fill tool lets you apply various fills.
The Mesh fill tool lets you apply a mesh grid to an
object.
Property bar
The property bar displays the most commonly used functions that are relevant to the
active tool or to the task you’re performing. Although it looks like a toolbar, the
property bar content changes depending on the tool or task.
For example, when you click the Te x t tool in the toolbox, the property bar displays textrelated commands. In the example below, the property bar displays text, formatting,
alignment, and editing tools.
You can customize the contents and position of the property bar to suit your needs. For
more information, see “Customizing the property bar” in the Help.
To toggle between displaying and hiding the property bar, click Window `
To o l b a r s ` Property bar.
Dockers
Dockers display the same types of controls as a dialog box, such as command buttons,
options, and list boxes. Unlike most dialog boxes, you can keep dockers open while
working on a document, so you can readily access the commands to experiment with
different effects. Dockers have features similar to palettes in other graphics programs.
To access a docker, click Window ` Dockers, and click a docker.
Dockers can be either docked or floating. Docking a docker attaches it to the edge of
the application window. Undocking a docker detaches it from other parts of the
CorelDRAW: CorelDRAW workspace tour 37
Page 52

workspace, so it can be easily moved around. You can also collapse dockers to save screen
space.
If you open several dockers, they usually appear nested, with only one docker fully
displayed. You can quickly display a docker hidden from view by clicking the docker’s
tab.
Left: Docked and nested dockers. Right: A floating docker. To dock a floating
docker, click the docker’s title bar, and drag to position the pointer on the edge
of the drawing window. To close a docker, click the X button at the top corner;
to collapse or expand a docker, click the arrow button at the top corner.
Status bar
The status bar displays information about selected objects (such as color, fill type, and
outline, cursor position, and relevant commands).
See “Customizing the status bar” in the Help for information about customizing the
contents and appearance of the status bar.
38 CorelDRAW Graphics Suite X4 User Guide
Page 53

CorelDRAW basics
CorelDRAW lets you create and edit drawings.
In this section, you’ll learn about
• vector graphics and bitmaps
• starting and opening drawings
• finding content
• undoing, redoing, and repeating actions
• zooming, panning, and scrolling
• saving drawings
• closing drawings and quitting CorelDRAW
• exploring basic tasks
Vector graphics and bitmaps
The two main types of computer graphics are vector graphics and bitmaps. Vector
graphics are made of lines and curves, and they are generated from mathematical
descriptions that determine the position, length, and direction in which lines are drawn.
Bitmaps, also known as raster images, are composed of tiny squares called pixels; each
pixel is mapped to a location in an image and has numerical color values.
Vector graphics are ideal for logos and illustrations because they are resolutionindependent and can be scaled to any size, or printed and displayed at any resolution,
without losing detail and quality. In addition, you can produce sharp and crisp outlines
with vector graphics.
Bitmaps are excellent for photographs and digital paintings because they reproduce
color gradations well. Bitmaps are resolution-dependent — that is, they represent a
fixed number of pixels. While they look good at their actual size, they can appear jagged
or lose image quality when scaled, or when displayed or printed at a resolution higher
than their original resolution.
CorelDRAW: CorelDRAW basics 39
Page 54
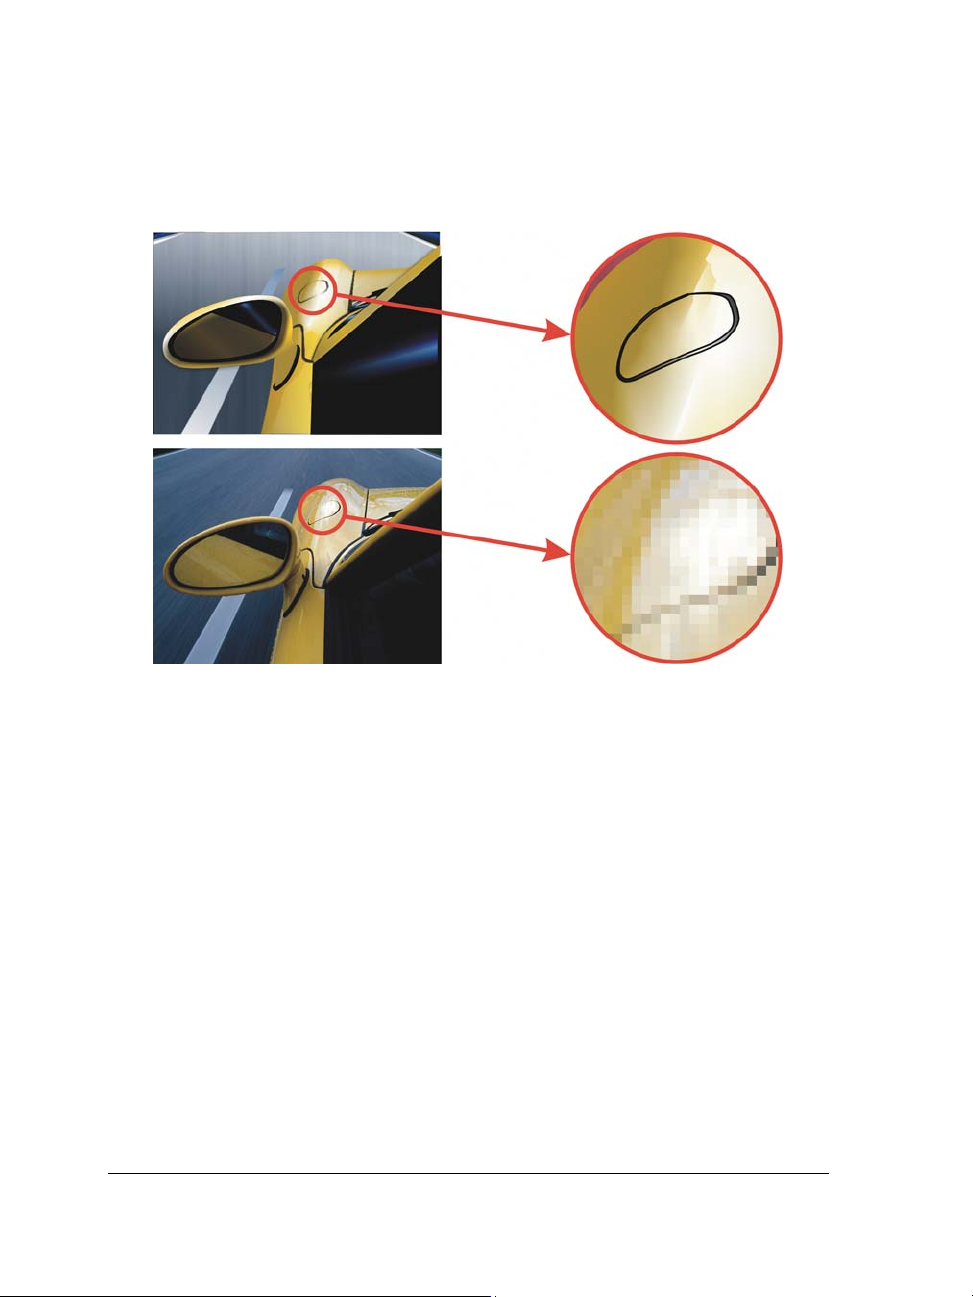
You can create vector graphics in CorelDRAW. You can also import bitmaps (such as
JPEG and TIFF files) in CorelDRAW and integrate them into your drawings. For
information about working with bitmaps, see “Working with bitmaps” on page 219.
The top illustration is a vector graphic consisting of lines and fills. The bottom
version is a bitmap made up of pixels.
Starting and opening drawings
CorelDRAW lets you start a new drawing from a blank page, from a template, or from
an existing drawing. A blank page gives you the freedom to specify every aspect of a
drawing. A template provides you with a starting point and leaves the amount of
customization up to you. Basing a new drawing on an existing drawing lets you reuse
objects and page settings. CorelDRAW lets you open existing drawings saved to the
CorelDRAW (CDR) format as well as drawings and projects saved to various file formats
such as Corel DESIGNER (DSF or DES), Adobe Illustrator (AI), Adobe Portable
Document Format (PDF), Encapsulated PostScript® (EPS), and Computer Graphics
Metafile (CGM). However, you may not be able to open certain files, depending on their
file type and contents. In such cases, you can try importing the files as objects in an open
drawing. For information about the file formats you can import in CorelDRAW, see
“Supported file formats” in the Help.
40 CorelDRAW Graphics Suite X4 User Guide
Page 55

If the drawing you are opening is from an earlier version of CorelDRAW and contains
text in a language different from the language of your operating system, you can choose
code page settings to ensure that text is properly converted according to the Unicode™
Standard. Code page settings help you correctly display text outside the drawing
window, such as keywords, file names, and text entries in the Object manager and
Object data manager dockers. To display text correctly in the drawing window, you
need to use encoding settings. For more information, see “Encoding text” in the Help.
If the drawing you are opening contains an embedded International Color
Consortium® (ICC) profile, you can extract and save the profile. You can also preserve
a drawing’s layers and pages.
If you are using Windows Vista, you can search for drawings by different criteria, such
as filename, text within the file, and other properties attached to the file. For more
information about searching for files on Windows Vista, see the Windows Vista Help.
You can also display previous versions of a drawing.
To start CorelDRAW
•Click Start ` All programs ` CorelDRAW Graphics Suite X4 `
CorelDRAW X4.
To start a drawing
To Do the following
Start a drawing from a blank page Do one of the following:
•On the Welcome Page, click Quick Start
` New Blank Document.
•In the application window, click File `
New.
Start a drawing from a template Click File ` New from template, choose a
template, and click Open.
When you start a drawing from a blank page, the drawing is based on the
default CorelDRAW template.
You can specify different page layout settings. For more information, see
“Specifying the page layout” on page 161.
CorelDRAW: CorelDRAW basics 41
Page 56

To open a drawing
1 Click File ` Open.
2 Locate the folder where the drawing is stored.
3 Click a filename.
4 Click Open.
You can also
Embed International Color Consortium
(ICC) profile to the color folder in which the
application is installed
Maintain layers and pages when you open
files
View thumbnail of a drawing (Windows Vista) Click the arrow button
Choose a code page (Windows Vista) Choose a code page from
Enable the Extract embedded ICC profile
check box.
This option is not available for all file
formats.
Enable the Maintain layers and pages
check box.
If you disable the check box, all layers are
combined in a single layer.
This option is not available for all file
formats.
next to the Views button, and click Extra
Large Icons, Large Icons, Medium Icons,
or Small Icons.
(Windows XP) Do one of the following:
•Enable the Preview check box.
•Click the View menu button, and select
Thumbnails.
the Select code page list box. This option is
not available for all file formats.
(Windows XP) Choose a code page from the
Code page list box.
42 CorelDRAW Graphics Suite X4 User Guide
Page 57

You can also
Search for a drawing (Windows Vista) Type a word or phrase in the search box.
The search box looks for files only in the
current folder and subfolders. To search for a
drawing in another location, you must first
navigate to the folder where the drawing is
stored.
Access a previous version of a file (Windows
Vis ta)
Do one of the following:
•Click the arrow button next to the Open
button, and click Show previous
versions.
•Right-click a file, and click Restore
previous versions.
You can access a previous version of a file
only if System Protection is turned on.
For detailed information about accessing
previous versions of files, see the Windows
Vis ta Help.
You can also open a drawing by clicking the Open button on the toolbar.
Finding content
You can browse for clipart, photo images, and other content by using such user-tagged
data as keyword, title, author, note, subject, date modified, or rating. CorelDRAW is
fully integrated with the search capabilities that are offered by Windows Vista. If your
operating system is Windows XP, you can use the Windows Desktop Search to find files.
To search for content with Windows Vista
1 Do one of the following:
• Click File ` Open to open a file.
• Click File ` Import to import a file into your current drawing.
2 Type a word or phrase in the Search box.
CorelDRAW: CorelDRAW basics 43
Page 58

You can search for data such as filename, title, subject, author, keyword, comment,
bitmap names, or object names. For more information on searching, see the
Windows Vista Help.
To browse for images online, you must be connected to the Internet.
To search for content with Windows XP
1 Use the Windows Desktop Search to find the file.
2 Click and drag the file into CorelDRAW.
Undoing, redoing, and repeating actions
You can undo the actions you perform in a drawing, starting with the most recent
action. If you don’t like the result of undoing an action, you can redo it. Reverting to
the last saved version of a drawing also lets you remove one or more actions. Certain
actions applied to objects, such as stretching, filling, moving and rotating, can be
repeated to create a stronger visual effect.
Customizing the undo settings lets you increase or decrease the number of actions that
you can undo or redo.
To undo, redo, and repeat actions
To Do the following
Undo an action Click Edit ` Undo.
Redo an action Click Edit ` Redo.
Undo or redo a series of actions Click To o l s ` Undo. In the Undo docker,
choose the action that precedes all the
actions you want to undo, or choose the last
action you want to redo.
Revert to the last saved version of a drawing Click File ` Revert.
Repeat an action Click Edit ` Repeat.
44 CorelDRAW Graphics Suite X4 User Guide
Page 59

When you undo a series of actions in the Undo docker, all actions listed below
the action you choose are undone.
When you redo a series of actions in the Undo docker, the action you choose
and all actions listed between it and the last undone action are redone.
You can repeat an action on another object or group of objects by selecting the
object or objects and clicking Edit ` Repeat.
You can also undo or redo actions by clicking the Undo button or Redo
button on the Standard toolbar.
You can also undo or redo a series of actions by clicking the arrow button next
to the Undo button or Redo button on the Standard toolbar and
choosing an action from the list.
Zooming, panning, and scrolling
You can change the view of a drawing by zooming in to get a closer look or by zooming
out to see more of the drawing. You can experiment with a variety of zoom options to
determine the amount of detail you want. Another way in which you can view specific
areas of a drawing is by panning. When you work at high magnification levels or with
large drawings, you may not be able to see the whole drawing. Panning and scrolling
let you view areas that aren’t displayed by moving the page around in the drawing
window.
You can use the Hand tool to pan around a large image and view particular
areas.
CorelDRAW: CorelDRAW basics 45
Page 60

You can zoom in and out while you are panning, and you can pan while you are
zooming; this saves you from having to alternate between the two tools.
If you use a mouse wheel, by default the wheel will zoom in to or out from the
image.
To scroll vertically using a mouse wheel, press Alt while you move the wheel.
To scroll horizontally, press Ctrl while you move the wheel.
To zoom
1 In the toolbox, click the Zoom tool .
2 On the property bar, click one of the following buttons:
• Zoom in
• Zoom out
• Zoom to selected
• Zoom to all objects
• Zoom to page
• Zoom to page width
• Zoom to page height
The Zoom to selected button is available only when you select one or more
objects before you click the Zoom tool.
When you are not editing text, you can also access the Zoom tool by pressing
the
Z key.
You can also zoom in by double-clicking or dragging anywhere in the drawing
window using the Hand tool . To zoom out, right-click in the drawing
window.
To pan in the drawing window
1 In the toolbox, click the Hand tool .
2 Drag in the drawing window until the area you want to view appears.
46 CorelDRAW Graphics Suite X4 User Guide
Page 61

When you are not editing text, you can also access the Hand tool by pressing
the H key.
If you want to pan in the drawing window while zoomed in on the drawing,
click the Navigator button in the bottom-right corner of the drawing
window or press the N key and drag the cross-haired pointer around in the
Navigator pop-up window.
You can quickly center the page in the drawing window by double-clicking the
Zoom tool in the toolbox.
Using the Navigator, you can display any part of a drawing without having
to zoom out.
Saving drawings
By default, drawings are saved to the CorelDRAW file format (CDR) and are
compatible with the latest version of the application. You can also save a drawing that
is compatible with an earlier version of CorelDRAW Graphics Suite. This is especially
useful if you want to use the drawing with Corel R.A.V.E.™
You can save a drawing to other vector file formats as well. If you want to use a drawing
in another application, you must save it to a file format that is supported by that
application. For information about file formats supported by CorelDRAW, see
“Supported file formats” in the Help.
When you save a drawing, CorelDRAW lets you add reference information so that you
can easily find and organize drawings later on. In Windows Vista, you can attach tags
CorelDRAW: CorelDRAW basics 47
Page 62

(also known as properties) such as title, subject, and rating. In Windows XP, you can
assign notes and keywords to a drawing.
If your drawing will be viewed on a system that does not have all of the fonts used in
the drawing, you can embed all fonts to ensure that text will appear as originally
created.
You can also save selected objects in a drawing. For large drawings, saving only the
selected objects reduces the file size, which can decrease the time it takes to load the
drawing.
A drawing can also be saved as a template, allowing you to create other drawings with
the same properties. For information about saving a drawing as a template, see
“Working with templates” on page 241.
To save a drawing
1 Click File ` Save as.
2 Type a filename in the File name list box.
3 Locate the folder where you want to save the file.
If you want the drawing to be compatible with a previous version of CorelDRAW,
choose a version from the Ve rs io n list box.
If you want to save the drawing to a vector file format other than CorelDRAW
(CDR), choose a file format from the Save as type list box.
You can also
Save only selected objects
Add reference information (Windows Vista) Do any the following:
Save notes or keywords with the file
(Windows XP)
48 CorelDRAW Graphics Suite X4 User Guide
Select the objects. Click File
Enable the Selected only check box. Locate
the folder where you want to save the file.
Type a filename in the File name list box.
Click Save.
•Type a title, subject, tag, comment,
author, or revision number in the
corresponding box.
•Assign a rating to the file.
•Add copyright information.
Type notes or keywords in the corresponding
box.
` Save as.
Page 63

You can also
Embed fonts in a drawing Enable the Embed fonts using
Tr u e D o c ( T M ) check box.
Saving a drawing to a previous version of CorelDRAW may result in loss of
certain effects that were not available in the previous version of the application.
When you save to a previous version of CorelDRAW, the content and
appearance of the document is maintained, but layers are affected in the
following ways:
• Layer names are reset to CorelDRAW default names.
• The number of layers per page is set according to the page with the
most layers.
• Master layers are converted to local layers, with the exception of the
default master layers (Guides, Grid, Desktop).
• Local Guides layers are converted to regular layers.
For more information about layers, see “Working with layers” on page 185.
You can also save a drawing by clicking File ` Save.
Closing drawings and quitting CorelDRAW
You can close one or all open drawings at any time before quitting CorelDRAW.
To close drawings
To Do the following
Close one drawing Click File ` Close.
Close all open drawings Click Window ` Close all.
CorelDRAW: CorelDRAW basics 49
Page 64

To qu it Co relD RAW
•Click File ` Exit.
You can also quit CorelDRAW by pressing Alt + F4.
Exploring basic tasks
CorelDRAW has a virtually unlimited number of tools and capabilities to help you
create drawings. The following table provides you with the basic features of
CorelDRAW to help you get started.
For information about See
Drawing lines “Working with lines, outlines, and
brushstrokes” on page 63
Drawing shapes “Drawing shapes” on page 51
Creating and manipulating objects “Working with objects” on page 81
Adding color to objects “Filling objects” on page 137
Adding text to a drawing “Adding and selecting text” on page 195
Creating drawings for use on the Web “Publishing to the Web” in the Help
Printing drawings “Printing basics” on page 253
Need more information?
The CorelDRAW Help has more information to help you get started with the
program. To access this information, see “CorelDRAW basics” in the “Getting
started” section of the Help.
50 CorelDRAW Graphics Suite X4 User Guide
Page 65

Drawing shapes
CorelDRAW lets you draw basic shapes, which you can modify by using special effects
and reshaping tools.
In this section, you’ll learn about
• drawing rectangles and squares
• drawing ellipses, circles, arcs, and pie shapes
• drawing polygons and stars
• drawing spirals
• drawing predefined shapes
• drawing by using shape recognition
Drawing rectangles and squares
CorelDRAW lets you draw rectangles and squares. You can draw a rectangle or square
by dragging diagonally with the Rectangle tool or by specifying the width and height
with the 3-point rectangle tool. The 3-point rectangle tool lets you quickly draw
rectangles at an angle.
After you draw a rectangle or square, you can reshape it by rounding one or more of its
corners.
You can create a rectangle by first drawing its baseline and then drawing its
height. The resulting rectangle is angled.
CorelDRAW: Drawing shapes 51
Page 66

To draw a rectangle or square by dragging diagonally
To Do the following
Draw a rectangle
Draw a square
In the toolbox, click the Rectangle tool .
Drag in the drawing window until the
rectangle is the size you want.
In the toolbox, click the Rectangle tool .
Hold down Ctrl, and drag in the drawing
window until the square is the size you want.
You can draw a rectangle from its center outward by holding down Shift as
you drag. You can also draw a square from its center outward by holding down
Shift + Ctrl as you drag.
You can draw a rectangle that covers the drawing page by double-clicking the
Rectangle tool.
To round the corners of a rectangle or square
1 Click a rectangle or square.
2 Type values in the Corner roundness areas on the property bar.
To apply the same roundness to all corners, click the Round corners together
button on the property bar.
You can also round the corners of a selected rectangle or a square by filleting.
For more information, see “Filleting, scalloping, and chamfering corners” on
page 124.
You can also round the corners of a selected rectangle or square by using the
Shape tool
To set default corner roundness, click To o l s ` Options, and double-click
To o l b o x from the Wo r ks p a ce list of categories. Then, click Rectangle tool,
and move the slider or enter a number.
to drag a corner node toward the shape’s center.
52 CorelDRAW Graphics Suite X4 User Guide
Page 67

Drawing ellipses, circles, arcs, and pie shapes
You can draw an ellipse or circle by dragging diagonally with the Ellipse tool, or you
can draw an ellipse by using the 3-point ellipse tool to specify its width and height.
The 3-point ellipse tool lets you quickly create an ellipse at an angle, eliminating the
need to rotate the ellipse.
Using the Ellipse tool, you can draw a new arc or pie shape, or you can draw an ellipse
or circle and then change it to an arc or a pie shape.
Using the 3-point ellipse tool, you can draw an ellipse by first drawing its
centerline and then drawing its height. This method lets you draw ellipses at
an angle.
To draw an ellipse or a circle by dragging diagonally
To Do the following
Draw an ellipse
Draw a circle
In the toolbox, click the Ellipse tool .
Drag in the drawing window until the ellipse
is the shape you want.
In the toolbox, click the Ellipse tool .
Hold down Ctrl, and drag in the drawing
window until the circle is the size you want.
You can draw an ellipse or a circle from its center outward by holding down
Shift as you drag.
To draw an ellipse by specifying width and height
1 In the toolbox, click the 3-point ellipse tool .
2 In the drawing window, drag to draw the centerline of the ellipse at the angle you
want.
CorelDRAW: Drawing shapes 53
Page 68

The centerline runs through the center of the ellipse and determines its width.
3 Move the pointer to define the height of the ellipse, and click.
To draw an arc or a pie shape
To Do the following
Draw an arc In the toolbox, click the Ellipse tool. Click
the Arc button on the property bar. Drag in
the drawing window until the arc is the
shape you want.
Draw a pie shape In the toolbox, click the Ellipse tool. Click
the Pie button on the property bar. Drag in
the drawing window until the pie is the
shape you want.
To draw an arc, the ellipse or circle must have an outline.
You can change the direction of a selected arc or pie shape by clicking the
Clockwise/counterclockwise arcs or pies button
You can constrain the movement of the node to 15-degree increments by
holding down Ctrl as you drag.
on the property bar.
To use the Shape tool to create a pie shape, drag the node of the ellipse (left) to
the inside of the ellipse (center). To create an arc, drag the node to the outside
of the ellipse (right).
54 CorelDRAW Graphics Suite X4 User Guide
Page 69

Drawing polygons and stars
CorelDRAW lets you draw polygons and two types of stars: perfect and complex.
Perfect stars are traditional-looking stars and can have a fill applied to the entire star
shape. Complex stars have intersecting sides and produce original results with a fill
applied.
Left to right: Polygon, perfect star, and complex star, each with a fountain fill
applied
You can modify polygons and stars. For example, you can change the number of sides
on a polygon or the number of points on a star, and you can sharpen the points of a star.
You can also use the Shape tool to reshape polygons and complex stars, just as you
would with any other curve object. For more information about working with curve
objects, see “Using curve objects” on page 107. Perfect stars can also be reshaped, but
with some restrictions.
To draw a polygon
• In the toolbox, click the Polygon tool , and drag in the drawing window until
the polygon is the size you want.
You can draw a polygon from its center by holding down Shift as you drag.
You can draw a symmetrical polygon by holding down Ctrl as you drag.
CorelDRAW: Drawing shapes 55
Page 70

To draw a star
To Do the following
Draw a perfect star
Draw a complex star In the toolbox, click the Complex star tool
In the toolbox, click the Star tool , and
drag in the drawing window until the star is
the size you want.
, and drag in the drawing window until
the star is the size you want.
You can draw a star from its center by holding down Shift as you drag.
You can draw a symmetrical star by holding down Ctrl as you drag.
To modify a polygon
To Do the following
Change the number of sides of a polygon Select a polygon, type a value in the
Number of points or sides on polygon,
star or complex star box on the property
bar, and press Enter.
Reshape a polygon into a star
Select a polygon, click the Shape tool ,
and drag a node on the polygon until the
star is the shape you want.
Left to right: The Shape tool was used to change a polygon into a star that
can be shaped as a curve object. The line segments of the star were then converted
to curves and adjusted to produce the starfish shape.
56 CorelDRAW Graphics Suite X4 User Guide
Page 71

To modify a star
To Do the following
Change the number of points on a star Select a star, type a value in the Number of
points or side on polygon, star or
complex star box on the property bar, and
press Enter.
Sharpen a star’s points Select a star, and type a value in the
Sharpness of star and complex star box
on the property bar.
Reshape a star
Select a star, click the Shape tool , and
drag a node on the star.
When you use the Shape tool to reshape a perfect star, the node movement is
constrained. Also, on perfect stars, you cannot add or delete nodes, nor can you
convert line segments to curves.
Drawing spirals
You can draw two types of spirals: symmetrical and logarithmic. Symmetrical spirals
expand even ly so that the di stance between each revo lution is equal. Logarit hmic spir als
expand with increasingly larger distances between revolutions. You can set the rate by
which a logarithmic spiral expands outward.
A symmetrical spiral (left) and a logarithmic spiral (right)
CorelDRAW: Drawing shapes 57
Page 72

To draw a spiral
1 In the toolbox, click the Spiral tool .
2 Type a value in the Spiral revolutions box on the property bar.
3 On the property bar, click one of the following buttons:
• Symmetrical spiral
• Logarithmic spiral
If you want to change the amount by which the spiral expands as it moves
outward, move the Spiral expansion slider.
4 Drag diagonally in the drawing window until the spiral is the required size.
You can draw a spiral from its center outward by holding down Shift as you
drag.
You can also draw a spiral with even horizontal and vertical dimensions by
holding down Ctrl as you drag.
Drawing predefined shapes
Using the Perfect Shapes™ collection, you can draw predefined shapes. Certain
shapes — specifically basic shapes, arrow shapes, banner shapes, and callout shapes —
contain glyphs. You can drag a glyph to modify the appearance of a shape.
Using the Shape tool, you can drag a glyph to alter a shape.
You can add text to the inside or outside of the shape. For example, you might want to
put a label inside a flowchart symbol or a callout.
58 CorelDRAW Graphics Suite X4 User Guide
Page 73

To draw a predefined shape
1 In the toolbox, click one of the following tools:
• Basic shapes
• Arrows shapes
• Flowchart shapes
• Banner shapes
• Callout shapes
2 Open the Perfect Shapes picker on the property bar, and click a shape.
3 Drag in the drawing window until the shape is the size you want.
Like other shapes, shapes that are drawn with a Perfect Shapes tool can be
modified.
To modify a predefined shape
1 Select a shape that contains a glyph.
2 Drag a glyph until you achieve the shape you want.
The right-angle, heart, lightning bolt, explosion, and flowchart shapes do not
contain glyphs.
To add text to a predefined shape
1 Click the Te x t tool .
2 Position the cursor inside the shape’s outline until it changes to a text cursor .
3 Type inside the shape, choose a font, and format the text.
Drawing by using shape recognition
You can use the Smart drawing tool to draw freehand strokes that can be recognized
and converted to basic shapes. Rectangles and ellipses are translated to native
CorelDRAW objects; trapezoids and parallelograms are translated to Perfect Shapes
objects; lines, triangles, squares, diamonds, circles, and arrows are translated to curve
objects. If an object is not converted to a shape, it is smoothed. Objects and curves
drawn with shape recognition are editable. You can set the level at which CorelDRAW
CorelDRAW: Drawing shapes 59
Page 74

recognizes shapes and converts them to objects. You can also specify the amount of
smoothing applied to curves.
You can set the amount of time to elapse between making a pen stroke and the
implementation of shape recognition. For example, if the timer is set to one second and
you draw a circle, shape recognition takes effect one second after you draw the circle.
You can make corrections as you draw. You can also change the thickness and line style
of a shape that was drawn by using shape recognition.
Shapes created with the Smart drawing tool are recognized and smoothed.
To draw a shape or line by using shape recognition
1 Click the Smart drawing tool .
2 Choose a recognition level from the Recognition level list box on the property bar.
3 Choose a smoothing level from the Smoothing level list box on the property bar.
4 Draw a shape or line in the drawing window.
The Smart drawing tool property bar is displayed only when the Smart
drawing tool is selected.
To set shape recognition delay
1 Click To o l s ` Customization.
2 In the To o l b o x list of categories, click Smart drawing tool.
3 Move the Drawing assistance delay slider.
The minimum delay is 10 milliseconds; the maximum is 2 seconds.
60 CorelDRAW Graphics Suite X4 User Guide
Page 75

To make a correction while using shape recognition
• Before the delay recognition period has elapsed, hold down Shift, and drag over the
area you want to correct.
You must start erasing the shape or line from the last point drawn.
If you are drawing a freehand shape consisting of several curves, you can delete
the last curve drawn by pressing Esc.
Need more information?
For more information about drawing shapes, see “Drawing shapes” in the “Lines,
shapes, and outlines” section of the Help.
CorelDRAW: Drawing shapes 61
Page 76

Page 77

Working with lines, outlines, and brushstrokes
CorelDRAW lets you add lines and brushstrokes by using a variety of techniques and
tools. After you draw lines or apply brushstrokes to lines, you can format them. You
can also format the outlines that surround objects.
CorelDRAW provides preset objects that you can spray along a line. You can also create
flow and dimension lines in drawings.
You can also draw lines by using shape recognition. For more information, see “Drawing
by using shape recognition” on page 59.
In this section, you’ll learn about
• drawing lines
• drawing calligraphic, pressure-sensitive, and preset lines
• formatting lines and outlines
• copying, converting, and removing outlines
• applying brushstrokes
• spraying objects along a line
• drawing flow and dimension lines
Drawing lines
A line is a path between two points. Lines can consist of multiple segments, and the line
segments can be curved or straight. The line segments are connected by nodes, which
are depicted as small squares. CorelDRAW provides various drawing tools that let you
draw curved and straight lines, and lines containing both curved and straight segments.
Freehand and Polyline tools
The Freehand
sketching on a sketchpad. If you make a mistake while drawing, you can erase the
unwanted part immediately and continue drawing. When drawing straight lines or
segments, you can constrain them to straight vertical or horizontal lines.
CorelDRAW: Working with lines, outlines, and brushstrokes 63
and Polyline tools let you draw freehand lines as if you were
Page 78
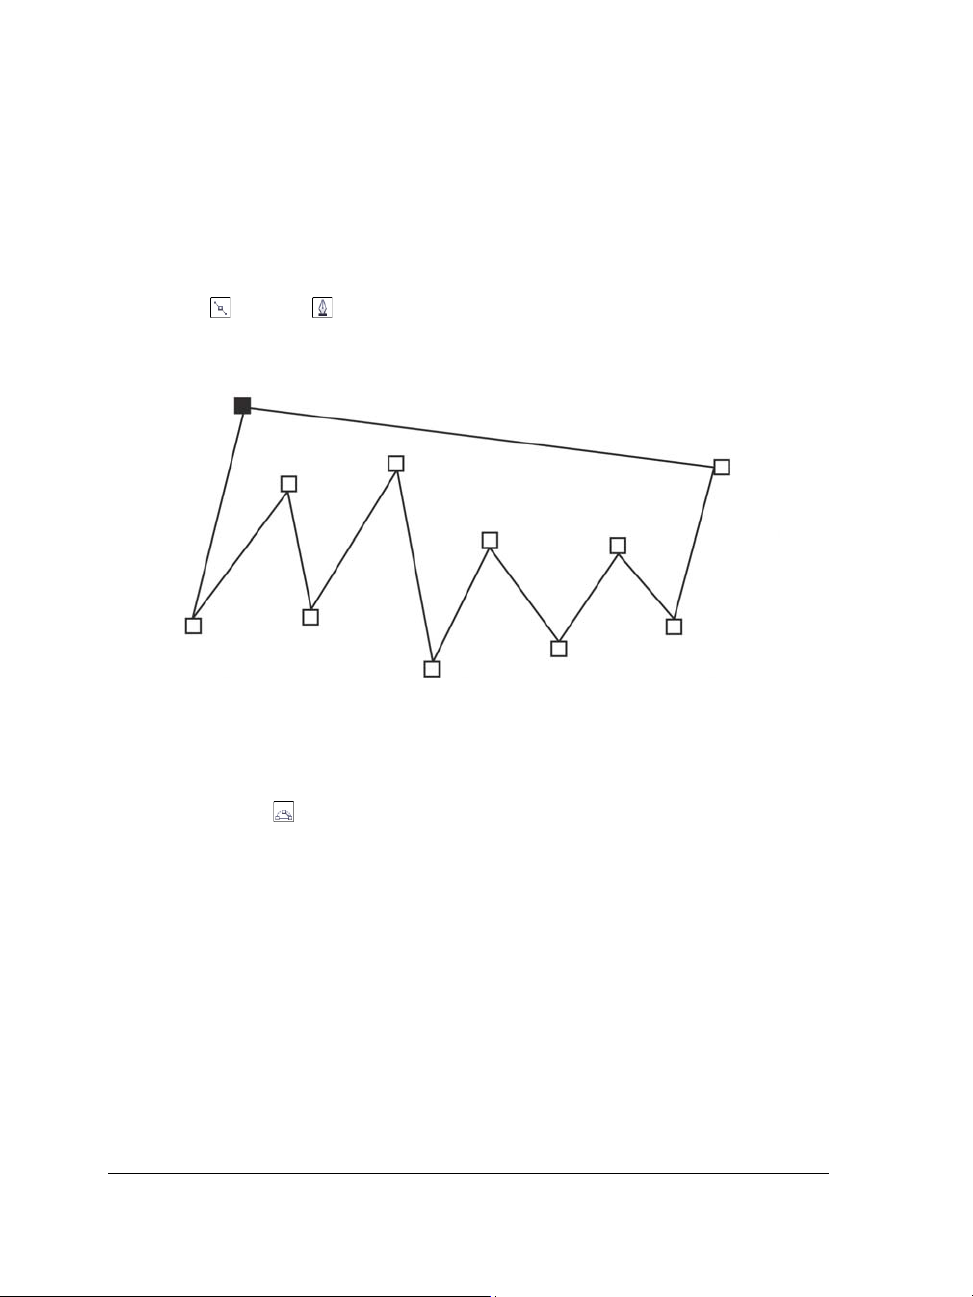
The Freehand tool lets you control the smoothness of the curved line you are drawing
as well as add segments to an existing line. However, the Polyline tool is easier to use
for quickly drawing a complex line that consists of alternating curved and straight
segments.
Bézier and Pen tools
The Bézier
and Pen tools let you draw lines one segment at a time by placing
each node with precision and controlling the shape of each curved segment. When using
the Pen tool, you can preview the line segments you are drawing.
You can draw lines with multiple segments by using the Bézier tool and
clicking each time you want the line to change direction.
3-point curve tool
The 3-point curve
tool lets you draw simple curved lines by specifying their width
and height. Use this tool to create arc shapes quickly without manipulating nodes.
64 CorelDRAW Graphics Suite X4 User Guide
Page 79
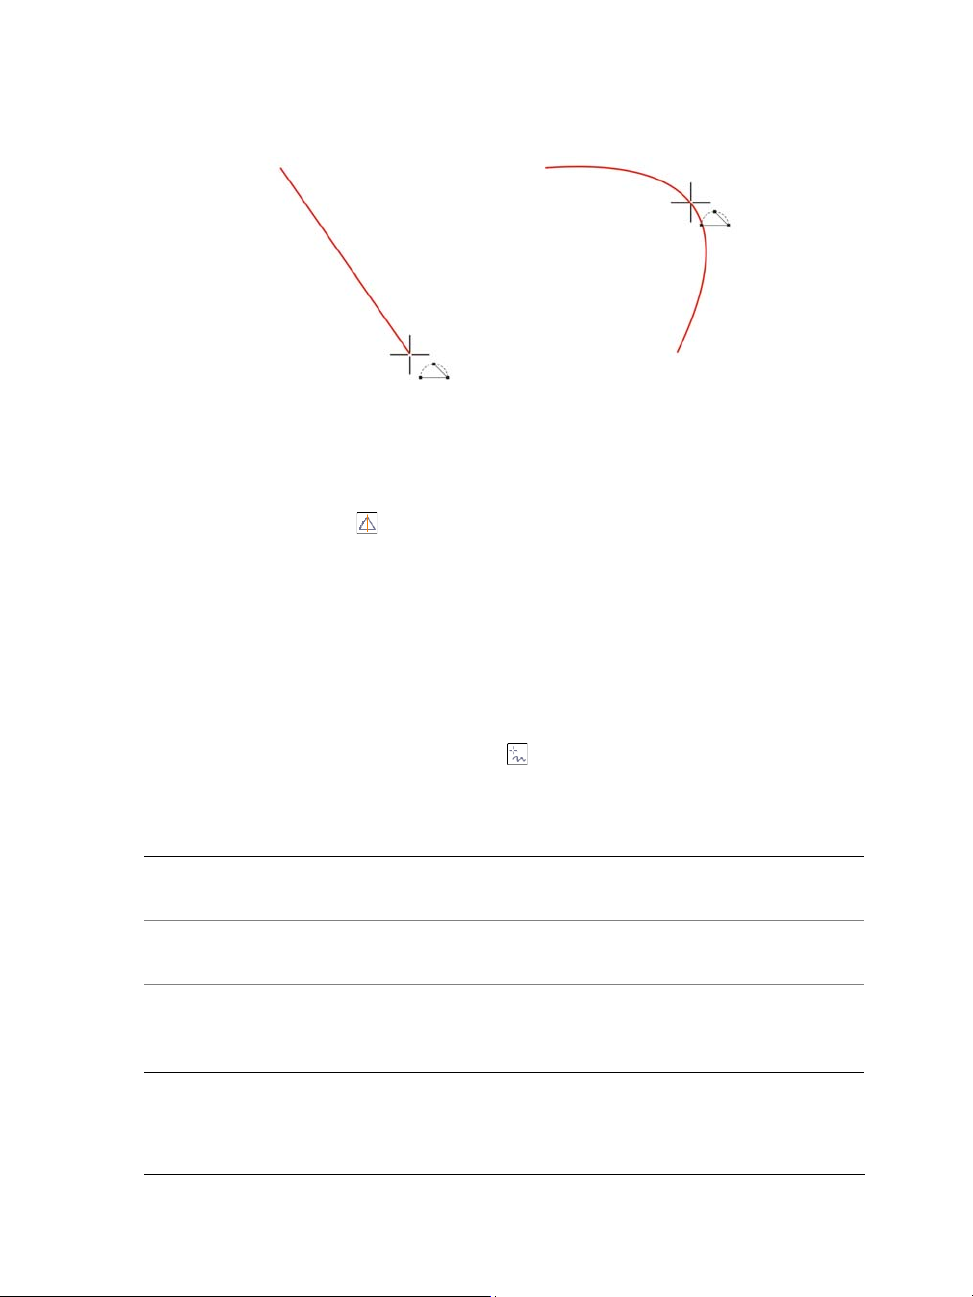
You can draw a curved line by specifying its width (left), and then specifying
its height and clicking the page (right).
Smart drawing tool
The Smart drawing tool
lets you use shape recognition to draw straight and curved
lines. For more information, see “Drawing by using shape recognition” on page 59.
Using nodes and control handles
Some lines have nodes and control handles that you can manipulate to shape lines as
you draw. For information about node types, see “Using curve objects” on page 107.
To draw a line by using the Freehand tool
1 In the toolbox, click the Freehand tool .
2 Perform a task from the following table.
To Do the following
Draw a curved line Click where you want to start the curved
line, and drag.
Draw a straight line Click where you want to start the line, and
then click where you want the line to end.
Control the smoothness of a curved line Type a value in the Freehand smoothing
box on the property bar. Higher values
produce smoother curves.
CorelDRAW: Working with lines, outlines, and brushstrokes 65
Page 80

To Do the following
Add line segments to an existing line Click the end node of a selected line, and
click where you want the new segment to
end.
Create a closed shape from two or more
connected lines
In a line that contains two segments, click
the end node, and then click the start node.
You can constrain a line created with the Freehand tool to a predefined angle,
called a constrain angle, by holding down Ctrl while you drag. This feature is
useful for drawing straight vertical and horizontal lines.
You can erase a portion of a curved freehand line by holding down Shift and
dragging backward over the line before releasing the mouse button.
To draw a line by using the Polyline tool
1 In the toolbox, click the Polyline tool .
2 Do one of the following:
• To draw a straight segment, click where you want to start the line segment, and
then click where you want to end it.
• To draw a curved segment, click where you want to start the segment, and drag
across the drawing page.
You can add as many segments as you want and alternate between curved and
straight segments.
3 Double-click to end the line.
You can close an open object by clicking the Auto-close curve button on
the property bar.
To draw a line by using the Bézier tool
1 In the toolbox, click the Bézier tool .
2 Do one of the following:
• To draw a curved segment, click where you want to place the first node, and drag
the control handle to where you want to place the next node. Release the mouse
button, and drag the control handle to create the curve.
66 CorelDRAW Graphics Suite X4 User Guide
Page 81

• To draw a straight segment, click where you want to start the line segment, and
click where you want to end it.
You can add as many segments as you want.
3 Press the Spacebar to finish the line.
You can also
Draw a curved segment followed by a
straight segment
Draw a straight segment followed by a
curved segment
Change curve angle to preset increments as
you draw
Draw a curved segment, double-click the
end node, and click where you want the
straight segment to end.
Draw a straight segment. Click the endpoint
of the segment, drag to where you want, and
release the mouse button. Drag to draw a
curve.
While holding down Ctrl, drag a control
handle.
To draw a line by using the Pen tool
1 In the toolbox, click the Pen tool .
2 Do one of the following:
• To draw a curved segment, click where you want to place the first node, and drag
the control handle to where you want to place the next node. Release the mouse
button, and drag the control handle to create the curve you want.
• To draw a straight segment, click where you want to start the line segment, and
click where you want to end it.
You can add as many segments as you want and alternate between curved and
straight segments. For more information about alternating curved and straight
segments, see “To draw a line by using the Bézier tool” on page 66.
3 Double-click to finish the line.
You can also
Preview a line while drawing Enable the Preview mode button in the
property bar. Click on the drawing page, and
release the mouse button. Move the mouse,
and click to finish the line.
CorelDRAW: Working with lines, outlines, and brushstrokes 67
Page 82

You can also
Add a node to a line
Delete a node from a line Point to a node, and click when the pointer
Enable the Auto add-delete button on
the property bar. Point to where in the line
you want to add a node, and click when the
pointer changes to the Add node state .
changes to the Delete node state .
To draw a curve by specifying width and height
1 In the toolbox, click the 3-point curve tool .
2 Click where you want to start the curve, and drag to where you want the curve to
end.
3 Release the mouse button, and click where you want the center of the curve to be.
Drawing calligraphic, pressure-sensitive, and preset lines
CorelDRAW lets you simulate the effect of a calligraphic pen when you draw lines.
Calligraphic lines vary in thickness according to the direction of the line and the angle
of the pen nib. By default, calligraphic lines appear as closed shapes drawn with a pencil.
You can control the thickness of a calligraphic line by changing the angle of the line you
draw in relation to the calligraphic angle you choose. For example, when the line you
draw is perpendicular to the calligraphic angle, the line is at the maximum thickness
specified by the pen width. Lines drawn at the calligraphic angle, however, have little
or no thickness.
68 CorelDRAW Graphics Suite X4 User Guide
Page 83

A calligraphic pen allows you to draw lines of various thicknesses.
CorelDRAW lets you create pressure-sensitive lines which vary in thickness. You can
create this effect using the mouse or a pressure-sensitive pen and graphics tablet. Both
methods result in lines with curved edges and varying widths along a path. For
information about using a pressure-sensitive pen on a graphics tablet, see the
manufacturer’s instructions.
A flower drawn by using three different artistic media lines: calligraphic lines
(left), pressure-sensitive lines of variable thickness (center), and flat preset lines
(right).
CorelDRAW provides preset lines that let you create thick strokes in a variety of shapes.
After you draw a calligraphic or preset line, you can apply a fill to it as you would to any
other object. For information about applying fills, see “Filling objects” on page 137.
CorelDRAW: Working with lines, outlines, and brushstrokes 69
Page 84

To draw a calligraphic line
1 In the toolbox, click the Artistic media tool .
2 Click the Calligraphic button on the property bar.
If you want to set the width of the line, type a value in the Artistic media tool
width box on the property bar.
3 Type a value in the Calligraphic angle box on the property bar.
If you want to smooth the edges of the line, type a value in the Freehand
smoothing box on the property bar.
4 Drag until the line is the shape you want.
The width you set is the maximum line width. The angle of the line you draw
in relation to the calligraphic angle determines the line’s actual width.
To draw a pressure-sensitive line
1 In the toolbox, click the Artistic media tool .
2 Click the Pressure button on the property bar.
If you are using the mouse, press the Up arrow or Down arrow to simulate
changes in pen pressure and change the width of the line.
3 Drag until the line is the shape you want.
If you want to change the width of the line, type a value in the Artistic media tool
width box on the property bar.
To draw a preset line
1 In the toolbox, click the Artistic media tool .
2 Click the Preset button on the property bar.
3 Choose a preset line shape from the Preset stroke list list box.
If you want to smooth the edges of the line, type a value in the Freehand
smoothing box on the property bar.
4 Drag until the line is the shape you want.
If you want to set the width of the line, type a value in the Artistic media tool
width box on the property bar.
70 CorelDRAW Graphics Suite X4 User Guide
Page 85

Formatting lines and outlines
Lines are treated the same way as outlines of closed shapes, such as ellipses and
polygons. You can change the appearance of both lines and outlines by using the
controls of the Outline pen dialog box, the Outline page of the Object properties
docker, and the property bar. For example, you can specify the color, width, and style
of lines and outlines.
You can choose a corner style to control the corner shape in lines and choose a line cap
style to change the appearance of a line’s endpoints. By default, an outline is applied on
top of an object’s fill, but you can apply it behind the fill, with the fill overlapping the
outline. You can also link the outline thickness to an object’s size so that the outline
increases when you increase the object’s size and decreases when you decrease the
object’s size.
When an object contains lines that meet at sharp angles, you can set the miter limit to
determine their corner shape. Corners with angles above the miter limit are pointed
(mitered); corners with angles below the miter limit are beveled (squared off).
You can create calligraphic outlines. A calligraphic outline varies in thickness, creating
the effect of a hand-made drawing. In addition, you can add arrowheads to lines and
curves. You can create new arrowheads and edit existing arrowheads.
The default line and outline properties for each new object that you draw are as follows:
• hairline width
• CMYK black color
•solid line
• square corner and line cap styles
• no arrowheads applied
• outline applied on top of an object’s fill
In some programs, outlines are known as strokes or thick lines.
Creating cuttable outlines
To create a cuttable outline for devices such as plotters and vinyl cutters, which cannot
interpret outline width; you need first to convert the outline to an object. For more
information, see “Copying, converting, and removing outlines” on page 73.
Another way to create a cuttable outline is by using a contour effect. For more
information, see “To contour an object” on page 148.
CorelDRAW: Working with lines, outlines, and brushstrokes 71
Page 86

To specify line and outline settings
1 Select an object.
2 In the toolbox, click the Outline tool , and click Outline pen.
3 Open the color picker, and click a color.
4 Type a value in the Width box.
5 Choose a line style from the Style box.
You can also
Set the shape of corners In the Corners area, choose a corner style.
Set the appearance of endpoints in open
paths
Apply an outline behind an object’s fill Enable the Behind fill check box.
Link the outline thickness to an object’s size Enable the Scale with image check box.
Create a line style Click Edit style, and move the slider in the
Edit a line style Choose a line style from the Style list box,
Set the miter limit Type a value in the Miter limit box.
Choose a cap style in the Line caps area.
Edit line style dialog box. By clicking the
boxes to the left of the slider, you can specify
the placement and frequency of the dots in
the new line style you create. Click Add.
and click Edit style. Create a line style in the
Edit line style dialog box, and click
Replace.
You can quickly access the Outline pen dialog box by double-clicking the
Outline icon on the status bar.
You can also change the outline width of a selected object by typing a value in
the Outline width box on the property bar.
To create a calligraphic outline
1 Select an object.
2 In the toolbox, click the Outline tool , and click Outline pen.
72 CorelDRAW Graphics Suite X4 User Guide
Page 87

3 In the Corners area, enable a corner style.
4 In the Calligraphy area, type a value in the Stretch box to change the width of the
pen’s nib.
The value range is from 1 to 100, with 100 as the default setting. Reducing the
value makes square nibs rectangular and round nibs oval, creating a more
pronounced calligraphic effect.
5 Ty p e a v a lu e i n t h e Angle box to change the orientation of the pen in relation to the
drawing surface.
To reset Stretch and Angle values to their original values, click Default.
You can also adjust the Stretch and Angle values by dragging in the Nib
shape preview box.
To add an arrowhead
1 Select a line or curve.
2 In the toolbox, click the Outline tool , and click Outline pen.
3 In the Arrows area, open the Start arrowhead picker, and click a line-ending
shape.
4 Open the End arrowhead picker, and click a line-ending shape.
Copying, converting, and removing outlines
CorelDRAW lets you copy outline properties to other objects. For information about
copying outline properties, see “To copy fill, outline, or text properties from one object
to another” on page 91.
You can also convert an outline to an object, and you can remove an outline. Converting
an outline to an object creates an unfilled closed object with the outline’s shape. You can
apply fills and special effects to the new object. Converting outline to an object can be
used to create cuttable outlines for devices such as plotters, engraving machines, and
vinyl cutters, which cannot interpret outline width in CorelDRAW files.
CorelDRAW: Working with lines, outlines, and brushstrokes 73
Page 88

To convert an outline to an object
1 Select an object.
2 Click Arrange ` Convert outline to object.
The outline becomes an unfilled closed object independent of the original object’s
fill. If you want to apply a fill to the new object, the fill is applied to the area, which
was the original object’s outline.
A star with an outline applied (left); the outline has been converted to an object
independent of the original fill (center); a fountain fill was applied to the new
closed object.
To remove the outline of an object
1 Select an object.
2 On the property bar, choose None from the Outline width list box.
You can also remove an object’s outline by selecting the object and rightclicking
No Color on the color palette.
Applying brushstrokes
CorelDRAW lets you apply a variety of preset brushstrokes, ranging from strokes with
arrowheads to ones that are filled with rainbow patterns. When you draw a preset
brushstroke, you can specify some of its attributes. For example, you can change the
width of a brushstroke and specify its smoothness.
You can also create custom brushstrokes by using an object or a group of vector objects.
When you create a custom brushstroke, you can save it as a preset.
74 CorelDRAW Graphics Suite X4 User Guide
Page 89

To apply a preset brushstroke
1 In the toolbox, click the Artistic media tool .
2 Click the Brush button on the property bar.
3 Choose a brushstroke from the Brushstroke list box.
If you want to smooth the edges of the brushstroke, type a value in the Freehand
smoothing box on the property bar.
4 Drag until the stroke is the shape you want.
If you want to set the width of the stroke, type a value in the Artistic media tool
width box on the property bar.
If you have access to a brushstroke that isn’t listed in the Brushstroke list box,
you can apply it by clicking the Browse button on the property bar and
locating the brushstroke file.
To create a custom brushstroke
1 Select an object or a set of grouped objects.
2 In the toolbox, click the Artistic media tool .
3 Click the Brush button on the property bar.
4 Click the object or grouped objects.
5 Click the Save artistic media stroke button on the property bar.
6 Type a filename for the brushstroke.
7 Click Save.
Custom brushstrokes can be accessed from the Brushstroke list box on the
property bar.
To delete a custom brushstroke, choose the brushstroke from the Brushstroke
list box on the property bar, and click the Delete button .
You can create custom brushstrokes by clicking Effects ` Artistic media and
specifying the settings you want in the Artistic media docker.
CorelDRAW: Working with lines, outlines, and brushstrokes 75
Page 90

Spraying objects along a line
CorelDRAW lets you spray a series of objects in a line. Besides graphic and text objects,
you can import bitmaps and symbols to spray along a line.
You can control how a sprayed line appears by adjusting the spacing between objects,
so they are closer or farther apart from each other. You can also vary the order of objects
in the line. For example, if you are spraying a series of objects that includes a star, a
triangle, and a square, you can change the spray order so that the square appears first,
followed by the triangle and then the star. CorelDRAW also lets you shift the position
of objects in a sprayed line by rotating them along the path or offsetting them in one of
four different directions: alternating, left, random, or right. For example, you can
choose a left offset direction to align the objects you spray to the left of the path.
You can also create a new spraylist with objects of your own.
Objects sprayed along a curved line (left). The objects and line were edited after
the objects were sprayed (right).
To spray a line
1 In the toolbox, click the Artistic media tool .
2 Click the Sprayer button on the property bar.
3 Choose a spraylist from the Spraylist file list box on the property bar.
If the spraylist you want is not listed, click the Browse button on the property bar
to select the folder in which the file is located.
4 Drag to draw the line.
76 CorelDRAW Graphics Suite X4 User Guide
Page 91

You can also
Adjust the number of objects sprayed at each
spacing point
Adjust the spacing between dabs Type a number in the bottom box of the
Set the spray order Choose a spray order from the Choice of
Adjust the size of spray objects Type a number in the top box of the Size of
Increase or decrease the size of the spray
objects as they progress along the line
Reset a spraylist to its saved settings
Type a number in the top box of the Dabs/
spacing of objects to be sprayed
box on the property bar.
Dabs/spacing of objects to be sprayed
box on the property bar.
spray order list box on the property bar.
objects to be sprayed box on the property
bar.
Type a number in the bottom box of the Size
of objects to be sprayed box on the
property bar.
Click the Reset values button on the
property bar.
Increasing the value for the size of spray objects along the line causes objects to
become larger as they are distributed along the path.
Spraylists that have more complex objects use more system resources.
CorelDRAW requires more time to produce lines when complex objects are
used, and these objects increase the file size. Using symbols for each group in
the list can help reduce file si ze and eas e the dema nds on your system. For mo re
information about creating symbols, see “Working with symbols” in the Help.
To create a new spraylist
1 Click Effects ` Artistic media.
2 Select an object, a set of grouped objects, or a symbol.
3 Click the Save button on the Artistic media docker.
4 Enable Object sprayer.
5 Click OK.
CorelDRAW: Working with lines, outlines, and brushstrokes 77
Page 92
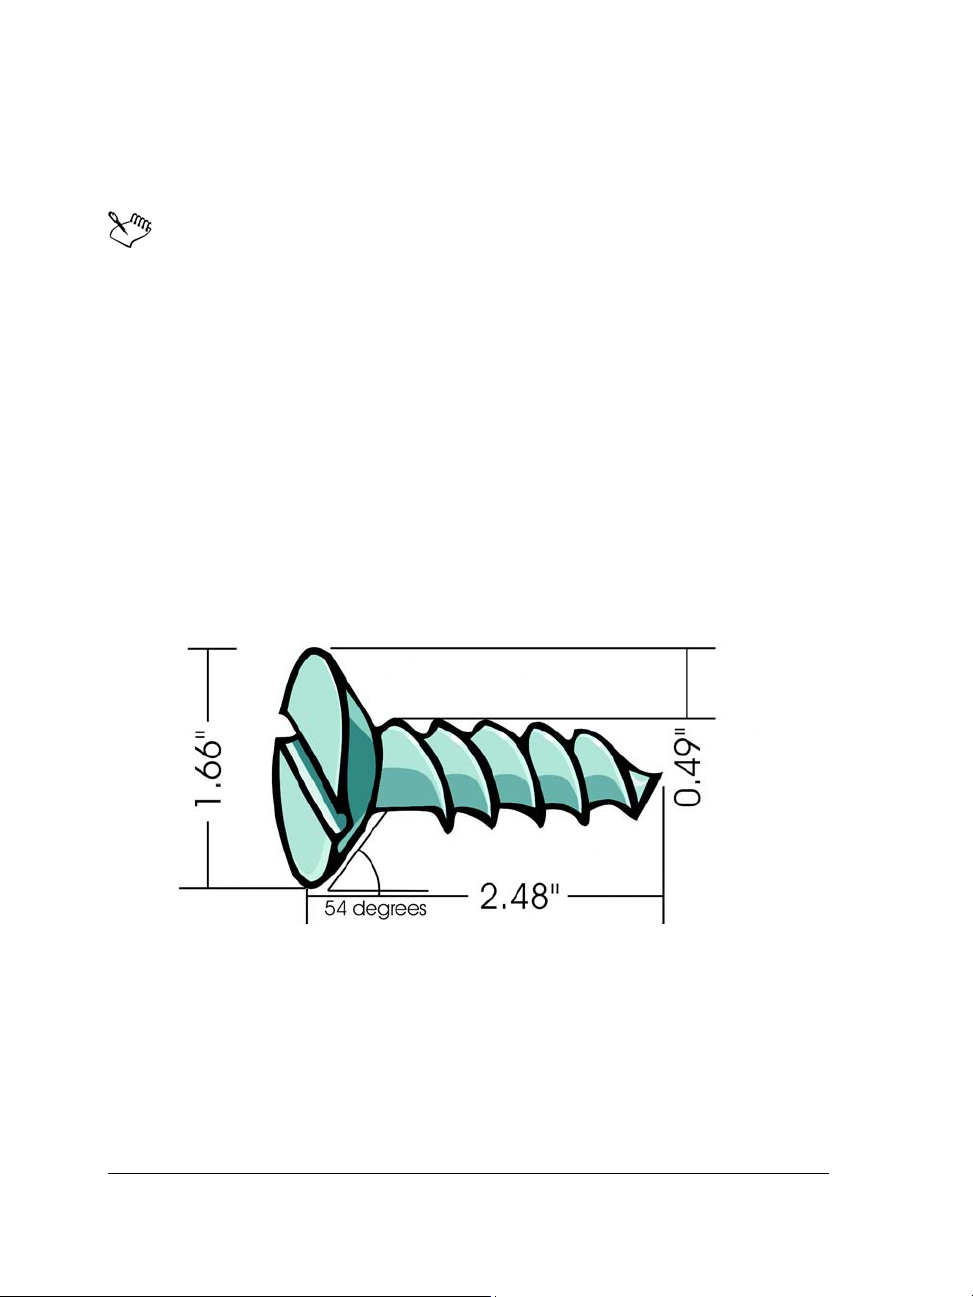
6 Type a filename in the Filename box.
7 Click Save.
Spraylists are saved as CorelDRAW (CDR) files and can be accessed from the
Spraylist file list box on the Artistic media property bar.
Drawing flow and dimension lines
You can draw flow lines in flowcharts and organizational charts to connect chart shapes.
Objects stay connected by these lines even when you move one or both objects. For
information about drawing flowchart shapes, see “Drawing predefined shapes” on
page 58.
You can draw callout lines that label and draw attention to objects.
You can also draw dimension lines to indicate the distance between two points in a
drawing or the size of objects. By default, dimension lines and the measurements shown
on the lines change when you change an object’s size.
Dimension lines can show the sizes of parts of an object.
To be able to use flow, callout, and dimension lines with precision, you need to snap
them to specific nodes in objects. For more information about snapping and snapping
modes, see “Snapping objects” on page 98.
78 CorelDRAW Graphics Suite X4 User Guide
Page 93

To draw a flow line between two or more objects
1 In the toolbox, click the Connector tool .
2 On the property bar, click one of the following buttons:
• Angled connector — to create a flow line containing right angles. The flow
line can be a sequence of vertical or horizontal segments, or both.
• Straight connector
— to create a straight flow line at any angle
3 Drag from a node on one object to a node on another object.
To draw a callout
1 In the toolbox, click the Dimension tool .
2 Click the Callout tool on the property bar.
3 Click where you want the first callout segment to start.
4 Click where you want the second segment to start.
5 Click where you want the second segment to end.
A text cursor is displayed at the end of the callout line, indicating where to type
a label for the object.
6 Type the callout text.
To draw a dimension line
1 In the toolbox, click the Dimension tool .
2 On the property bar, click one of the following buttons:
• Vertic a l dimens i on tool
— to create a vertical dimension line that measures
the vertical distance between any two nodes (along the y-axis)
• Horizontal dimension tool
— to create a horizontal dimension line that
measures the horizontal distance between any two nodes (along the x-axis)
• Slanted dimension tool — to create a slanted dimension line that measures
the length of slanted line segments
• Auto dimension tool — to create a vertical or horizontal dimension line
3 Click the start point and endpoints of the dimension line.
4 Click where you want to place the dimension text.
CorelDRAW: Working with lines, outlines, and brushstrokes 79
Page 94

You can also
Draw an angular dimension line Click the Angular dimension tool button
on the property bar. Click where you
want the two lines that measure the angle to
intersect. Click where you want the first line
to end, and click where you want the second
line to end. Click where you want the angle’s
label to appear.
Need more information?
For more information about working with lines, outlines, and brush strokes, see
“Working with lines, outlines, and brush strokes” in the “Lines, shapes, and
outlines” section of the Help.
80 CorelDRAW Graphics Suite X4 User Guide
Page 95

Working with objects
Working with objects is an essential part of creating drawings.
In this section, you’ll learn about
• selecting objects
• transforming objects
• copying, duplicating, and deleting objects
• creating objects from enclosed areas
• creating a boundary around selected objects
• copying object properties, transformations, and effects
• positioning objects
• aligning and distributing objects
• snapping objects
• using dynamic guides
• changing the order of objects
•grouping objects
•combining objects
• inserting bar codes
Selecting objects
Before you can change an object, you must select it. You can select visible objects,
objects that are hidden from view by other objects, and a single object in a group or a
nested group. In addition, you can select objects in the order in which they were created,
select all objects at once, and deselect objects.
CorelDRAW: Working with objects 81
Page 96

A bounding box appears around a selected object, and an “X” appears at its
center.
To select objects
To Do the following
Select an object
Select multiple objects
Select all objects Click Edit ` Select all ` Objects.
Select an object in a group Hold down Ctrl, click the Pick tool, and
Select an object in a nested group
Select an object hidden from view by other
objects
Click the Pick tool , and then click an
object.
Click the Pick tool , hold down Shift,
and click each object that you want to select.
then click an object in a group.
Hold down Ctrl, click the Pick tool , and
then click an object one or more times, until
a selection box appears around it.
Hold down Alt, click the Pick tool , and
then click the topmost object one or more
times, until a selection box appears around
the hidden object.
The status bar displays a description of each hidden object as you select it.
82 CorelDRAW Graphics Suite X4 User Guide
Page 97

You can also select one or more objects by clicking the Pick tool and then
dragging around the object or objects. This method is known as marquee
selecting.
To deselect objects
To Do the following
Deselect all objects
Deselect a single object among multiple
selected objects
Click the Pick tool , and click a blank
space in the drawing window.
Hold down Shift, click the Pick tool ,
and then click the object.
Transforming objects
You can change the appearance of objects in the drawing window by using the following
transformations.
Transformation Example
Sizing lets you change the width and height
of an object.
Scaling lets you size an object to a
percentage of its original size.
CorelDRAW: Working with objects 83
Page 98

Transformation Example
Skewing lets you slant an object to one side.
Stretching lets you change the height and
width of an object nonproportionally.
Rotating lets you turn an object around its
center axis or a point relative to its position.
Mirroring lets you create a horizontal or
vertical mirror image of an object.
84 CorelDRAW Graphics Suite X4 User Guide
Page 99

Transforming objects interactively
You can transform an object interactively by using the mouse and the Pick tool. This
method is the quickest, but it is not recommended if you want to transform an object
with precision.
Other methods for transforming objects
You can transform an object in any of the following ways:
• For more precise results, you can select an object with the Pick tool and adjust
settings on the property bar. For example, you can specify a precise rotation angle
or specify the size of an object.
•The Transformation docker lets you transform objects with precision and apply
the transformation to the duplicate of an object, which is created automatically.
This feature lets you experiment with transformations without affecting the
original object. You can access the Tr a n s f o r m a t i o n docker by clicking Arrange `
Tr a n s f o r m a t i o n s and clicking a command.
•The Tr a n s f o r m toolbar also lets you transform objects with precision. You can
access the Tr a n s f o r m toolbar by clicking Windows ` To o l b a r s ` Tr a n s f o r m .
Each of these methods lets you apply transformations to a single object or to multiple
objects simultaneously.
Clearing and redoing transformations
All transformations can be simultaneously cleared at any time.
To transform an object interactively
1 Select an object by using the Pick tool.
The bounding box of the object appears. The bounding box includes eight selection
handles that you can use to size, stretch, and mirror the object. If you re-click the
CorelDRAW: Working with objects 85
Page 100

object, new handles appear. You can use these handles to rotate and skew the
1 32
object.
Handle types: selection (1), rotation (2), and skew (3)
2 Perform a task from the following table.
To Do the following
Size or scale an object Drag a corner selection handle.
Stretch an object Drag a middle selection handle.
Skew an object Click the object to display the skew handles,
and drag a skew handle.
Rotate an object Click the object to display the rotation
handles, and drag a rotation handle.
Mirror an object Hold down Ctrl, and drag a selection handle
to the opposite side of the object.
To clear all transformations applied to an object
1 Select an object.
2 Click Arrange ` Clear transformations.
Copying, duplicating, and deleting objects
CorelDRAW provides you with several ways to copy objects. When you no longer need
an object, you can delete it.
86 CorelDRAW Graphics Suite X4 User Guide
 Loading...