

Page 1

Page 2

Copyright © 2019 Corel Corporation. All rights reserved.
CorelDRAW® 2019 User Guide
The features documented in this User Guide are available in the full version of CorelDRAW Graphics Suite. Some features may not be
available in your version of the product.
Product specifications, pricing, packaging, technical support and information (“specifications”) refer to the retail English version only. The
specifications for all other versions (including other language versions) may vary.
Information is provided by Corel on an “as is” basis, without any other warranties or conditions, express or implied, including, but not
limited to, warranties of merchantable quality, satisfactory quality, merchantability or fitness for a particular purpose, or those arising by law,
statute, usage of trade, course of dealing or otherwise. The entire risk as to the results of the information provided or its use is assumed
by you. Corel shall have no liability to you or any other person or entity for any indirect, incidental, special, or consequential damages
whatsoever, including, but not limited to, loss of revenue or profit, lost or damaged data or other commercial or economic loss, even if Corel
has been advised of the possibility of such damages, or they are foreseeable. Corel is also not liable for any claims made by any third party.
Corel's maximum aggregate liability to you shall not exceed the costs paid by you to purchase the materials. Some states/countries do not
allow exclusions or limitations of liability for consequential or incidental damages, so the above limitations may not apply to you.
Corel, the Corel logo, the Corel balloon logo, Corel DESIGNER, CorelDRAW, the CorelDRAW balloon logo, Corel Font Manager, CAPTURE,
CONNECT, LiveSketch, PaintShop, PaintShop Pro, Painter, PHOTO-PAINT, PowerClip, PowerTRACE, Presentations, Quattro, Quattro Pro,
VideoStudio and WordPerfect are trademarks or registered trademarks of Corel Corporation and/or its subsidiaries in Canada, the U.S. and/
or other countries. Other product, font and company names and logos may be trademarks or registered trademarks of their respective
companies.
Patents: www.corel.com/patent
2102059
Page 3

Contents
Get started...........................................................................................................................................................................................19
Install CorelDRAW Graphics Suite......................................................................................................................................................... 21
System requirements.......................................................................................................................................................................21
Prepare for installation................................................................................................................................................................... 22
Install CorelDRAW Graphics Suite applications................................................................................................................................ 22
Installation options......................................................................................................................................................................... 22
Modify and repair installations....................................................................................................................................................... 24
Uninstall CorelDRAW Graphics Suite...............................................................................................................................................24
FAQ................................................................................................................................................................................................ 25
Corel accounts and services.................................................................................................................................................................. 27
Authenticate CorelDRAW Graphics Suite.........................................................................................................................................27
Account settings.............................................................................................................................................................................28
Updates.......................................................................................................................................................................................... 28
Change user credentials..................................................................................................................................................................28
Corel Support Services....................................................................................................................................................................29
About Corel....................................................................................................................................................................................29
What’s new in CorelDRAW Graphics Suite?..........................................................................................................................................31
Individuality.................................................................................................................................................................................... 31
Creativity.........................................................................................................................................................................................32
Productivity.....................................................................................................................................................................................33
What was new in previous versions................................................................................................................................................34
Learning resources................................................................................................................................................................................35
Get help......................................................................................................................................................................................... 35
Help and tooltips............................................................................................................................................................................36
Hints...............................................................................................................................................................................................38
Welcome screen............................................................................................................................................................................. 38
Quick Start Guide...........................................................................................................................................................................38
Video resources.............................................................................................................................................................................. 39
Developers’ website........................................................................................................................................................................ 39
Network deployment guide............................................................................................................................................................ 39
Contents | 1
Page 4

Web-based resources......................................................................................................................................................................39
Start and set up...................................................................................................................................................................................41
Start and quit CorelDRAW..............................................................................................................................................................41
Change the language..................................................................................................................................................................... 41
Startup settings.............................................................................................................................................................................. 42
CorelDRAW basics................................................................................................................................................................................ 43
Vector graphics and bitmaps..........................................................................................................................................................43
Start and open drawings................................................................................................................................................................ 44
Scan images................................................................................................................................................................................... 47
Work with multiple drawings......................................................................................................................................................... 48
Undo, redo, and repeat actions......................................................................................................................................................49
Zoom, pan, and scroll.................................................................................................................................................................... 50
Preview drawings............................................................................................................................................................................52
Viewing modes...............................................................................................................................................................................54
Views..............................................................................................................................................................................................55
Save drawings................................................................................................................................................................................ 56
Locked files.....................................................................................................................................................................................58
Back up and recover files............................................................................................................................................................... 58
Add and access drawing information............................................................................................................................................. 59
Close drawings............................................................................................................................................................................... 60
Explore basic tasks..........................................................................................................................................................................60
CorelDRAW.app, CorelDRAW, and Corel Cloud............................................................................................................................... 61
CorelDRAW workspace tour..................................................................................................................................................................63
CorelDRAW terms...........................................................................................................................................................................63
Application window....................................................................................................................................................................... 64
Standard toolbar............................................................................................................................................................................ 66
Toolbox...........................................................................................................................................................................................69
Property bar....................................................................................................................................................................................82
Dockers...........................................................................................................................................................................................82
Status bar.......................................................................................................................................................................................84
Choose a workspace.......................................................................................................................................................................84
2 | CorelDRAW 2019 User Guide
Page 5

Creative tools and content................................................................................................................................................................... 87
Content types................................................................................................................................................................................. 87
Change content locations...............................................................................................................................................................89
Acquire applications, plug-ins, and content....................................................................................................................................89
Find images with the CONNECT Content docker............................................................................................................................ 90
Use and manage images with the CONNECT Content docker......................................................................................................... 93
CONNECT Browser..........................................................................................................................................................................95
Find content with the CONNECT Browser....................................................................................................................................... 97
View content in the CONNECT Browser..........................................................................................................................................99
Use content from the CONNECT Browser..................................................................................................................................... 100
Manage content with the Tray docker.......................................................................................................................................... 102
Sync trays with OneDrive..............................................................................................................................................................104
Touchscreen and wheel devices.......................................................................................................................................................... 107
Touch............................................................................................................................................................................................107
Wheel devices...............................................................................................................................................................................109
Using a document management system with CorelDRAW Graphics Suite...........................................................................................115
Understanding document management systems...........................................................................................................................115
Getting started with Microsoft SharePoint....................................................................................................................................116
Checking documents in and out of a document library................................................................................................................ 117
Viewing documents and document properties..............................................................................................................................118
Lines, shapes, and outlines................................................................................................................................................................119
Lines, outlines, and brushstrokes........................................................................................................................................................ 121
Lines............................................................................................................................................................................................. 121
Calligraphic and preset lines......................................................................................................................................................... 130
LiveSketch..................................................................................................................................................................................... 132
Format lines and outlines............................................................................................................................................................. 138
Add arrowheads to lines and curves.............................................................................................................................................143
Copy, convert, remove, and replace outlines.................................................................................................................................145
Brushstrokes................................................................................................................................................................................. 148
Brushstrokes and stylus input....................................................................................................................................................... 149
Spray objects along a line............................................................................................................................................................ 151
Contents | 3
Page 6

Connector and callout lines.......................................................................................................................................................... 153
Dimension lines............................................................................................................................................................................ 157
Pressure-sensitive pens and devices...............................................................................................................................................160
Shapes................................................................................................................................................................................................163
Rectangles and squares................................................................................................................................................................ 163
Ellipses, circles, arcs, and pie shapes............................................................................................................................................ 166
Polygons and stars........................................................................................................................................................................168
Spirals...........................................................................................................................................................................................170
Grids.............................................................................................................................................................................................170
Predefined shapes.........................................................................................................................................................................171
Use shape recognition..................................................................................................................................................................172
Shape objects..................................................................................................................................................................................... 175
Curve objects................................................................................................................................................................................176
Select and move nodes................................................................................................................................................................ 177
Align and distribute nodes........................................................................................................................................................... 179
Manipulate segments................................................................................................................................................................... 186
Join curves....................................................................................................................................................................................187
Copy and cut segments................................................................................................................................................................189
Add, remove, and join nodes....................................................................................................................................................... 189
Node types................................................................................................................................................................................... 191
Transform nodes...........................................................................................................................................................................192
Break the path of curve objects....................................................................................................................................................193
Mirror changes in curve objects................................................................................................................................................... 194
Skew and stretch objects..............................................................................................................................................................195
Smudge and smear objects.......................................................................................................................................................... 196
Roughen objects...........................................................................................................................................................................199
Smooth objects............................................................................................................................................................................ 201
Attract or push away nodes to shape.......................................................................................................................................... 202
Apply distortion effects.................................................................................................................................................................203
Add twirl effects...........................................................................................................................................................................205
Shape objects by using envelopes................................................................................................................................................ 206
4 | CorelDRAW 2019 User Guide
Page 7

Crop and erase objects................................................................................................................................................................. 214
Split objects..................................................................................................................................................................................218
Trim objects..................................................................................................................................................................................220
Fillet, scallop, and chamfer corners.............................................................................................................................................. 222
Weld and intersect objects........................................................................................................................................................... 225
PowerClip objects......................................................................................................................................................................... 226
Options for nodes, handles, and previews.................................................................................................................................... 232
Symmetrical drawing.......................................................................................................................................................................... 237
Create symmetry...........................................................................................................................................................................238
Editing symmetry..........................................................................................................................................................................240
Fuse curves in symmetry groups...................................................................................................................................................245
Remove symmetry and break symmetry links................................................................................................................................ 246
Objects, symbols, and layers............................................................................................................................................................. 249
Objects............................................................................................................................................................................................... 251
Select objects................................................................................................................................................................................252
Transform objects......................................................................................................................................................................... 255
Copy, duplicate, and delete objects.............................................................................................................................................. 258
Create objects from enclosed areas.............................................................................................................................................. 261
Create a boundary around objects............................................................................................................................................... 261
Use object coordinates to draw and modify objects..................................................................................................................... 262
Copy object properties, transformations, and effects.................................................................................................................... 270
Clone objects................................................................................................................................................................................271
Position objects.............................................................................................................................................................................272
Align and distribute objects..........................................................................................................................................................274
Apply object hinting.....................................................................................................................................................................278
Snap objects.................................................................................................................................................................................278
Dynamic guides............................................................................................................................................................................ 281
Alignment guides......................................................................................................................................................................... 285
Change the order of objects.........................................................................................................................................................289
Size and scale objects...................................................................................................................................................................290
Rotate and mirror objects.............................................................................................................................................................291
Contents | 5
Page 8

Modify objects with the Properties docker....................................................................................................................................293
Fit objects to a path.....................................................................................................................................................................295
Group objects...............................................................................................................................................................................299
Combine objects...........................................................................................................................................................................301
Lock objects..................................................................................................................................................................................302
Find and replace objects...............................................................................................................................................................303
Hide and show objects................................................................................................................................................................. 304
Constrain objects..........................................................................................................................................................................305
Bar codes......................................................................................................................................................................................306
Link and embed objects..................................................................................................................................................................... 309
Insert linked or embedded objects................................................................................................................................................309
Edit linked or embedded objects.................................................................................................................................................. 310
QR codes............................................................................................................................................................................................311
Insert QR codes............................................................................................................................................................................ 311
Edit QR codes...............................................................................................................................................................................312
Validate QR codes........................................................................................................................................................................ 314
Layers................................................................................................................................................................................................. 317
Create layers.................................................................................................................................................................................317
View layers, pages, and objects....................................................................................................................................................320
Change layer properties................................................................................................................................................................323
Find, move, and copy layers and objects...................................................................................................................................... 325
Symbols.............................................................................................................................................................................................. 327
Create, edit, and delete symbols...................................................................................................................................................327
Use symbols in drawings.............................................................................................................................................................. 329
Symbol collections and libraries.................................................................................................................................................... 331
Reference: Symbols.......................................................................................................................................................................332
Manage and track projects................................................................................................................................................................. 335
Set up the project database......................................................................................................................................................... 335
Assign and copy object data........................................................................................................................................................ 336
Object data summary................................................................................................................................................................... 337
Track project time......................................................................................................................................................................... 338
6 | CorelDRAW 2019 User Guide
Page 9

Color, fills, and transparencies...........................................................................................................................................................345
Color.................................................................................................................................................................................................. 347
Color models................................................................................................................................................................................ 347
Color depth.................................................................................................................................................................................. 349
Choose colors...............................................................................................................................................................................350
Document palette.........................................................................................................................................................................355
Create and edit color palettes...................................................................................................................................................... 357
Organize and show color palettes................................................................................................................................................ 360
Show or hide color palettes......................................................................................................................................................... 362
Set color palette properties.......................................................................................................................................................... 363
Fills..................................................................................................................................................................................................... 365
Uniform fills..................................................................................................................................................................................365
Fountain fills.................................................................................................................................................................................366
Vector and bitmap pattern fills.....................................................................................................................................................371
Two-color pattern fills...................................................................................................................................................................376
Texture fills................................................................................................................................................................................... 377
PostScript fills............................................................................................................................................................................... 379
Mesh fills......................................................................................................................................................................................380
Apply fills to areas........................................................................................................................................................................383
Work with fills..............................................................................................................................................................................384
Object transparency............................................................................................................................................................................387
Uniform transparency................................................................................................................................................................... 388
Fountain transparency.................................................................................................................................................................. 389
Pattern transparency.....................................................................................................................................................................391
Texture transparency.....................................................................................................................................................................394
Copy, freeze, and remove transparencies......................................................................................................................................395
Merge modes............................................................................................................................................................................... 396
Find, manage, and save fills and transparencies................................................................................................................................. 399
Find and view fills and transparencies.......................................................................................................................................... 399
Manage fills and transparencies................................................................................................................................................... 401
Save fills and transparencies......................................................................................................................................................... 403
Contents | 7
Page 10

Color management.............................................................................................................................................................................405
About color management............................................................................................................................................................ 405
Get started with color management.............................................................................................................................................409
Install, load, and embed color profiles......................................................................................................................................... 412
Assign color profiles..................................................................................................................................................................... 413
Convert colors to other color profiles........................................................................................................................................... 414
Color-conversion settings.............................................................................................................................................................. 414
Soft proofing................................................................................................................................................................................415
Color management presets........................................................................................................................................................... 418
Color management policies.......................................................................................................................................................... 419
Manage colors when opening documents....................................................................................................................................420
Manage colors when importing and pasting files.........................................................................................................................421
Manage colors for print............................................................................................................................................................... 421
Use a safe CMYK workflow.......................................................................................................................................................... 422
Manage colors for online viewing................................................................................................................................................ 422
Special effects....................................................................................................................................................................................423
Lenses.................................................................................................................................................................................................425
Apply lenses................................................................................................................................................................................. 425
Edit lenses.................................................................................................................................................................................... 427
Add 3D effects................................................................................................................................................................................... 429
Contour objects............................................................................................................................................................................429
Apply perspective..........................................................................................................................................................................432
Create extrusions.......................................................................................................................................................................... 435
Create bevel effects...................................................................................................................................................................... 439
Add drop shadows.......................................................................................................................................................................441
Add block shadows......................................................................................................................................................................443
Blend objects................................................................................................................................................................................446
Mosaics.............................................................................................................................................................................................. 453
Vector mosaics (Pointillizer effect).................................................................................................................................................453
Bitmap mosaics (PhotoCocktail effect).......................................................................................................................................... 457
Add movement and focus.................................................................................................................................................................. 461
8 | CorelDRAW 2019 User Guide
Page 11

Impact effects...............................................................................................................................................................................461
Text.....................................................................................................................................................................................................469
Add and manipulate text................................................................................................................................................................... 471
Import and paste text...................................................................................................................................................................471
Artistic text................................................................................................................................................................................... 473
Paragraph text..............................................................................................................................................................................473
Add columns to text frames.........................................................................................................................................................477
Combine and link paragraph text frames......................................................................................................................................478
Align text to the baseline grid......................................................................................................................................................480
Select text.....................................................................................................................................................................................481
Find, edit, and convert text.......................................................................................................................................................... 482
Shift, rotate, mirror, and flip text..................................................................................................................................................484
Move text..................................................................................................................................................................................... 486
Wrap text..................................................................................................................................................................................... 487
Fit text to a path.......................................................................................................................................................................... 488
Special characters, symbols, and glyphs........................................................................................................................................490
Embed graphics............................................................................................................................................................................494
Legacy text................................................................................................................................................................................... 494
Format text.........................................................................................................................................................................................495
Choose typefaces and fonts..........................................................................................................................................................495
Format characters.........................................................................................................................................................................498
Change text color.........................................................................................................................................................................499
Kern a range of characters........................................................................................................................................................... 501
Changing text case.......................................................................................................................................................................501
OpenType features........................................................................................................................................................................502
Adjust character and word spacing.............................................................................................................................................. 507
Adjust line and paragraph spacing...............................................................................................................................................508
Add bullets to text....................................................................................................................................................................... 510
Drop caps.....................................................................................................................................................................................511
Change character position and angle........................................................................................................................................... 512
Align text......................................................................................................................................................................................513
Contents | 9
Page 12

Add tabs and indents................................................................................................................................................................... 516
Text styles..................................................................................................................................................................................... 517
Hyphenate text............................................................................................................................................................................. 517
Formatting codes..........................................................................................................................................................................519
Nonprinting characters................................................................................................................................................................. 520
Work with text in different languages................................................................................................................................................ 523
Format Asian text......................................................................................................................................................................... 523
Line-breaking rules for Asian text................................................................................................................................................. 524
OpenType support for Asian text.................................................................................................................................................. 525
Format multilingual text............................................................................................................................................................... 525
Display text correctly in any language.......................................................................................................................................... 527
Manage fonts.....................................................................................................................................................................................529
Change the default font............................................................................................................................................................... 529
Substitute fonts............................................................................................................................................................................ 530
Embed fonts.................................................................................................................................................................................531
View fonts....................................................................................................................................................................................532
Filter fonts.................................................................................................................................................................................... 533
Search for fonts............................................................................................................................................................................535
Acquire more fonts...................................................................................................................................................................... 536
Choose fonts................................................................................................................................................................................ 537
Corel Font Manager......................................................................................................................................................................539
Writing tools...................................................................................................................................................................................... 541
QuickCorrect................................................................................................................................................................................. 541
Spell Check and Grammatik..........................................................................................................................................................543
Thesaurus..................................................................................................................................................................................... 545
Work with languages................................................................................................................................................................... 546
Customize the writing tools......................................................................................................................................................... 546
Checking styles............................................................................................................................................................................. 548
Word lists..................................................................................................................................................................................... 548
Check statistics............................................................................................................................................................................. 550
Reference: Writing tools............................................................................................................................................................... 551
10 | CorelDRAW 2019 User Guide
Page 13

Templates and styles..........................................................................................................................................................................557
Templates........................................................................................................................................................................................... 559
Use templates...............................................................................................................................................................................559
Find templates..............................................................................................................................................................................560
Manage templates........................................................................................................................................................................562
Create templates...........................................................................................................................................................................563
Edit templates.............................................................................................................................................................................. 564
Styles and style sets............................................................................................................................................................................565
Create styles and style sets........................................................................................................................................................... 566
Apply styles and style sets............................................................................................................................................................ 568
Edit styles and style sets............................................................................................................................................................... 569
Manage default object properties.................................................................................................................................................570
Export and import style sheets..................................................................................................................................................... 571
Assign keyboard shortcuts to styles or style sets........................................................................................................................... 572
Find objects that use a specific style or style set........................................................................................................................... 572
Break the link between objects and styles or style sets................................................................................................................. 573
Color styles.........................................................................................................................................................................................575
Create and apply color styles........................................................................................................................................................575
Edit color styles............................................................................................................................................................................ 578
View color styles...........................................................................................................................................................................581
Export and import color styles......................................................................................................................................................583
Break the link between a color style and an object...................................................................................................................... 583
Pages and layout............................................................................................................................................................................... 585
Pages and layout tools....................................................................................................................................................................... 587
Page layout...................................................................................................................................................................................587
Page background..........................................................................................................................................................................590
Add, duplicate, rename, and delete pages................................................................................................................................... 591
Insert page numbers.................................................................................................................................................................... 593
Rulers............................................................................................................................................................................................595
Calibrate the rulers....................................................................................................................................................................... 597
Contents | 11
Page 14

Document grid and pixel grid.......................................................................................................................................................597
Baseline grid.................................................................................................................................................................................599
Set up guidelines..........................................................................................................................................................................600
Modify guidelines......................................................................................................................................................................... 602
Drawing scale...............................................................................................................................................................................603
Tables................................................................................................................................................................................................. 605
Add tables....................................................................................................................................................................................605
Select, move, and navigate table components..............................................................................................................................607
Insert and delete table rows and columns....................................................................................................................................609
Resize table cells, rows, and columns........................................................................................................................................... 611
Format tables and cells.................................................................................................................................................................612
Text in tables................................................................................................................................................................................ 615
Convert tables to text................................................................................................................................................................... 616
Merge and split tables and cells...................................................................................................................................................617
Manipulate tables as objects........................................................................................................................................................ 618
Add images, graphics, and backgrounds to tables....................................................................................................................... 619
Import tables................................................................................................................................................................................619
Bitmaps.............................................................................................................................................................................................. 621
Work with bitmaps.............................................................................................................................................................................623
Convert vector graphics to bitmaps..............................................................................................................................................623
Import bitmaps.............................................................................................................................................................................625
Crop bitmaps................................................................................................................................................................................625
Bitmap dimensions and resolution................................................................................................................................................625
Straighten bitmaps....................................................................................................................................................................... 627
Correct perspective distortions...................................................................................................................................................... 629
Use Digimarc watermarks to identify bitmaps...............................................................................................................................630
Remove dust and scratch marks from bitmaps.............................................................................................................................632
Change and mask colors in bitmaps.............................................................................................................................................632
Image Adjustment Lab................................................................................................................................................................. 634
Adjust color and tone.................................................................................................................................................................. 638
Tone Curve filter........................................................................................................................................................................... 644
12 | CorelDRAW 2019 User Guide
Page 15

Transform color and tone............................................................................................................................................................. 647
Edit bitmaps with Corel PHOTO-PAINT......................................................................................................................................... 648
Apply special effects to bitmaps...................................................................................................................................................648
Special effects categories....................................................................................................................................................................655
3-D............................................................................................................................................................................................... 655
Art strokes....................................................................................................................................................................................659
Blur...............................................................................................................................................................................................665
Camera......................................................................................................................................................................................... 670
Color transform............................................................................................................................................................................ 674
Contour........................................................................................................................................................................................ 676
Creative........................................................................................................................................................................................ 677
Custom.........................................................................................................................................................................................681
Distort.......................................................................................................................................................................................... 683
Noise............................................................................................................................................................................................ 688
Sharpen........................................................................................................................................................................................ 691
Texture..........................................................................................................................................................................................693
Bitmap color modes........................................................................................................................................................................... 699
Change the color mode of bitmaps..............................................................................................................................................699
Change bitmaps to black-and-white............................................................................................................................................. 700
Change bitmaps to duotones....................................................................................................................................................... 701
Change bitmaps to the paletted color mode................................................................................................................................702
Trace...................................................................................................................................................................................................705
Trace bitmaps............................................................................................................................................................................... 705
PowerTRACE controls....................................................................................................................................................................708
Preview traced results...................................................................................................................................................................709
Fine-tune traced results................................................................................................................................................................ 710
Adjust colors in traced results...................................................................................................................................................... 712
Default tracing options.................................................................................................................................................................714
Tips for tracing bitmaps............................................................................................................................................................... 715
RAW camera files............................................................................................................................................................................... 717
Use RAW camera files.................................................................................................................................................................. 717
Contents | 13
Page 16

Import RAW camera files in CorelDRAW.......................................................................................................................................718
Adjust the color and tone of RAW camera files............................................................................................................................720
Sharpen RAW camera files and reduce noise................................................................................................................................723
Preview RAW camera files and obtain image information.............................................................................................................724
Printing.............................................................................................................................................................................................. 725
Print basics......................................................................................................................................................................................... 727
Print your work............................................................................................................................................................................ 727
Lay out print jobs......................................................................................................................................................................... 728
Preview print................................................................................................................................................................................ 729
Print styles.................................................................................................................................................................................... 730
Fine-tune print jobs......................................................................................................................................................................731
Print colors accurately...................................................................................................................................................................732
Print to a PostScript printer.......................................................................................................................................................... 734
Print merge...................................................................................................................................................................................736
Preflight summaries...................................................................................................................................................................... 739
Prepare files for print service providers...............................................................................................................................................741
Prepare for a print service provider...............................................................................................................................................741
Imposition layouts........................................................................................................................................................................ 742
Printers’ marks..............................................................................................................................................................................744
Maintain OPI links........................................................................................................................................................................ 746
Color separations..........................................................................................................................................................................747
Color trapping and overprinting................................................................................................................................................... 748
In-RIP trapping settings................................................................................................................................................................ 751
Print to film..................................................................................................................................................................................753
Prepare banners for printing.........................................................................................................................................................754
Work with a print service provider............................................................................................................................................... 756
Web graphics.....................................................................................................................................................................................757
Create objects for the web.................................................................................................................................................................759
Create pixel-perfect graphics for the web..................................................................................................................................... 759
Export bitmaps for the web......................................................................................................................................................... 760
14 | CorelDRAW 2019 User Guide
Page 17

Export and upload bitmaps to WordPress.................................................................................................................................... 765
Save and apply web presets......................................................................................................................................................... 766
Export objects with transparent colors and backgrounds.............................................................................................................. 767
Web-compatible text.................................................................................................................................................................... 767
Rollovers....................................................................................................................................................................................... 768
Bookmarks and hyperlinks............................................................................................................................................................ 769
Add hotspots and alternate text to objects.................................................................................................................................. 771
File formats........................................................................................................................................................................................773
Import and export files....................................................................................................................................................................... 775
Import files...................................................................................................................................................................................775
Export files....................................................................................................................................................................................778
Export to PDF..................................................................................................................................................................................... 781
Export to PDF............................................................................................................................................................................... 781
PDF hyperlinks, bookmarks, and thumbnails.................................................................................................................................784
Reduce PDF file size......................................................................................................................................................................784
Text and fonts in PDF files............................................................................................................................................................785
Encode PDF files...........................................................................................................................................................................787
View options for EPS files.............................................................................................................................................................787
PDF color management options....................................................................................................................................................788
PDF security options..................................................................................................................................................................... 789
Optimize PDF files........................................................................................................................................................................ 790
PDF preflight summaries...............................................................................................................................................................791
Prepare PDF files for a print provider............................................................................................................................................792
Work with office productivity applications..........................................................................................................................................795
Import files from office productivity applications.......................................................................................................................... 795
Export files to office productivity applications...............................................................................................................................795
Add objects to documents........................................................................................................................................................... 795
Supported file formats........................................................................................................................................................................797
Adobe Illustrator (AI)....................................................................................................................................................................798
Adobe Type 1 Font (PFB).............................................................................................................................................................. 800
Windows Bitmap (BMP)................................................................................................................................................................801
Contents | 15
Page 18

OS/2 Bitmap (BMP).......................................................................................................................................................................802
Computer Graphics Metafile (CGM)..............................................................................................................................................802
CorelDRAW (CDR).........................................................................................................................................................................803
Corel Presentation Exchange (CMX).............................................................................................................................................. 803
Corel PHOTO-PAINT (CPT)............................................................................................................................................................. 804
Corel Symbol Library (CSL)............................................................................................................................................................ 804
Cursor Resource (CUR)..................................................................................................................................................................805
Microsoft Word (DOC, DOCX, or RTF).......................................................................................................................................... 805
Microsoft Publisher (PUB)............................................................................................................................................................. 807
CorelDESIGNER (DES, DSF, DS4, or DRW).................................................................................................................................... 807
AutoCAD Drawing Database (DWG) and AutoCAD Drawing Interchange Format (DXF).................................................................808
Encapsulated PostScript (EPS)....................................................................................................................................................... 810
PostScript (PS or PRN)...................................................................................................................................................................814
GIF................................................................................................................................................................................................815
JPEG (JPG).................................................................................................................................................................................... 815
JPEG 2000 (JP2)........................................................................................................................................................................... 816
Kodak Photo CD Image (PCD).......................................................................................................................................................817
PICT (PCT).....................................................................................................................................................................................818
PaintBrush (PCX)...........................................................................................................................................................................819
Adobe Portable Document Format (PDF)...................................................................................................................................... 820
HPGL Plotter File (PLT).................................................................................................................................................................. 822
Portable Network Graphics (PNG)................................................................................................................................................. 823
Adobe Photoshop (PSD)............................................................................................................................................................... 824
Corel Painter (RIF)......................................................................................................................................................................... 825
Scalable Vector Graphics (SVG).....................................................................................................................................................825
Adobe Flash (SWF)....................................................................................................................................................................... 829
TARGA (TGA)................................................................................................................................................................................830
TIFF...............................................................................................................................................................................................831
TrueType Font (TTF).......................................................................................................................................................................831
Visio (VSD)....................................................................................................................................................................................832
WordPerfect Document (WPD)......................................................................................................................................................832
16 | CorelDRAW 2019 User Guide
Page 19

WordPerfect Graphic (WPG)..........................................................................................................................................................832
RAW camera file formats..............................................................................................................................................................833
Wavelet Compressed Bitmap (WI).................................................................................................................................................833
Windows Metafile Format (WMF).................................................................................................................................................834
Additional file formats..................................................................................................................................................................834
Recommended formats for importing graphics.............................................................................................................................835
Recommended formats for exporting graphics............................................................................................................................. 836
General notes on importing text files........................................................................................................................................... 836
Customize and automate.................................................................................................................................................................. 839
Setting basic preferences....................................................................................................................................................................841
Disabling warning messages......................................................................................................................................................... 841
Viewing system information......................................................................................................................................................... 841
Customize CorelDRAW........................................................................................................................................................................843
Choose options.............................................................................................................................................................................843
Save and restore defaults............................................................................................................................................................. 844
Create workspaces........................................................................................................................................................................844
Import and export workspaces..................................................................................................................................................... 845
Customize workspace appearance................................................................................................................................................ 846
Customize keyboard shortcuts...................................................................................................................................................... 848
Customize menus......................................................................................................................................................................... 849
Customize toolbars.......................................................................................................................................................................851
Customize the toolbox................................................................................................................................................................. 854
Customize the property bar.......................................................................................................................................................... 854
Customize the status bar..............................................................................................................................................................855
Customize filters...........................................................................................................................................................................856
Use macros and scripts to automate tasks......................................................................................................................................... 859
Macros......................................................................................................................................................................................... 859
JavaScript scripts...........................................................................................................................................................................866
Reference........................................................................................................................................................................................... 869
CorelDRAW for Adobe Illustrator users...............................................................................................................................................871
Contents | 17
Page 20

Comparing terminology................................................................................................................................................................871
Comparing tools...........................................................................................................................................................................872
Using the Adobe Illustrator workspace.........................................................................................................................................875
Glossary.............................................................................................................................................................................................. 877
18 | CorelDRAW 2019 User Guide
Page 21

Get started
Install CorelDRAW Graphics Suite.......................................................................................................................................................... 21
Corel accounts and services................................................................................................................................................................... 27
What’s new in CorelDRAW Graphics Suite?........................................................................................................................................... 31
Learning resources................................................................................................................................................................................. 35
Start and set up.................................................................................................................................................................................... 41
CorelDRAW basics..................................................................................................................................................................................43
CorelDRAW workspace tour...................................................................................................................................................................63
Creative tools and content.....................................................................................................................................................................87
Touchscreen and wheel devices........................................................................................................................................................... 107
Using a document management system with CorelDRAW Graphics Suite............................................................................................ 115
Get started | 19
Page 22

20 | CorelDRAW 2019 User Guide
Page 23

Install CorelDRAW Graphics Suite
This section contains the following topics:
• “System requirements” (page 21)
• “Prepare for installation” (page 22)
• “Install CorelDRAW Graphics Suite applications” (page 22)
• “Installation options” (page 22)
• “Modify and repair installations” (page 24)
• “Uninstall CorelDRAW Graphics Suite” (page 24)
• “FAQ” (page 25)
System requirements
The following list includes the minimum system requirements. Note that for optimum performance, you need more RAM and hard disk
space than indicated in the list.
• Windows 7, Windows 8, or Windows 10, in 32-bit or 64-bit, all with the latest updates and service packs
• Intel Core i3/5/7 or AMD Athlon 64
• 2 GB RAM
• 1 GB hard disk space
Electronic software downloads require more space to allow for the download, the uncompressed setup files, and the actual installation,
which includes copies of the source files as well.
• Mouse, tablet, or multi-touch screen
• Display resolution
• 1280 x 720 screen resolution at 100% (96 dpi)
• 1920 x 1080 at 150%
• 2560 x 1440 at 200%
• DVD drive (required for installing the box version of the software)
• Microsoft .NET Framework 4.7.2
• Microsoft Internet Explorer 11 or later
• Internet connection is required to sign in to authenticate CorelDRAW Graphics Suite, receive performance and stability updates, and use
online features, such as QR Codes.
Install CorelDRAW Graphics Suite | 21
Page 24

If the required version of Microsoft .NET Framework is not available on your computer, it will be installed during product installation.
Prepare for installation
• Make sure that your system’s date and time are set correctly.
• Make sure that your system has the latest updates installed.
• Close all applications, including all virus detection programs and applications that are open in the system tray or on the Windows
taskbar. Not doing so may increase the installation time and interfere with the installation.
• Log in as a user with administrative privileges.
• Make sure that you have enough free disk space available on the drive where you want to install the application.
• Delete the contents of the system’s TEMP folders to avoid file and memory conflicts. To navigate to the Temp folders, type %temp% in
the Search box on the Windows 7 SP1 or Windows 10 Start menu, or the Windows 8 desktop.
• Make sure that your system is connected to the Internet.
• Install CorelDRAW® Graphics Suite in its own directory to avoid conflicts with previous versions.
Install CorelDRAW Graphics Suite applications
The installation wizard makes it easy to install CorelDRAW Graphics Suite applications and components. You can choose a typical installation
to quickly install the suite, or you can customize the installation by choosing different options.
To install CorelDRAW Graphics Suite applications
1 Close all applications, including all virus detection programs.
For smooth installation, we recommend that you restart Windows. This action will ensure that no restart is required by the latest system
updates, and there are no memory issues.
2 Do one of the following:
• Download the product from the link provided on your order confirmation.
• Insert the DVD in the DVD drive.
3 In the installation wizard, review the End User License Agreement and the Terms of Service by clicking the corresponding links.
4 Enable the I agree to the End User License Agreement check box, and click Accept.
5 Type your name in the Full name text box.
6 Type your serial number in the Serial number text box.
The serial number is not case-sensitive, and the dashes are optional.
7 Click Next.
8 Follow the instructions for installing the software.
Installation options
You can choose between the following types of installations:
• Typicalinstallation — automatically installs the main programs and utilities of the suite to a default location in the Program Files folder.
If later you need a component that is not installed, you can modify your installation.
• Custominstallation — lets you choose additional features, exclude components that you don’t need, and specify where to install the
suite.
• Deployment — available only for multiseat purchases. This option lets you create a server image for installing the software to individual
workstations. For more information, see the CorelDRAW Graphics Suite 2019 Deployment Guide.
22 | CorelDRAW 2019 User Guide
Page 25

Programs
The following table lists the programs that are installed by default. To exclude a program from the installation, you must choose Custom
installation.
Program Description
CorelDRAW® 2019
An intuitive and versatile graphics application for creating highquality vector illustrations, logo designs, and page layouts
Corel PHOTO-PAINT® 2019
A complete image-editing application that lets you retouch and
enhance photos as well as create original bitmap illustrations and
paintings
CAPTURE™ 2019
An easy-to-use application for capturing images from your
computer screen
Corel Font Manager™ 2019
An application for finding, organizing, and managing fonts
Program features and utilities
The following table lists the program features that you can install. Not all components are available in all versions of the software.
Feature or utility Description Notes
Microsoft Visual Basic for Applications 7.1 A subset of the Microsoft Visual Basic
(VB) programming environment, which is
suitable for beginners.
You can use VBA to create basic macros
for personal use, but you can also use it to
create more advanced macro projects.
Microsoft Visual Studio Tools for
Applications (VSTA)
A built-in program environment that allows
developers and other programming experts
to use VSTA for creating the most advanced
macro projects
Windows Shell Extension Lets you view thumbnails of native Corel
files such as CorelDRAW (CDR), Corel
PHOTO-PAINT (CPT), pattern fill (FILL), and
other native file.
GPL Ghostscript Highly recommended if you import EPS
and PDF files in your documents. This
feature lets you isolate and use individual
elements of imported EPS files rather than
To use VSTA with CorelDRAW Graphics
Suite, you must have your own copy of
Microsoft Visual Studio 2017 installed.
If you install Microsoft Visual Studio after
installing CorelDRAW Graphics Suite,
you must re-install the VSTA feature by
modifying your CorelDRAW Graphics Suite
installation. For more information, see “To
modify or repair a CorelDRAW Graphics
Suite installation” on page 24.
If you have installed CorelDRAW Graphics
Suite or CorelDRAWTechnicalSuite
before, this option does not appear in the
installation wizard.
Included with the Typical installation
Install CorelDRAW Graphics Suite | 23
Page 26

Feature or utility Description Notes
only header images. It also improves the
import of PDF files generated by third-party
applications.
Language packs Let you use the programs and Help in two
or more languages
Install desktop shortcuts Adds product icons to your desktop for easy
access
Copy installation files Lets you maintain and update the software
without using the installation disc
This option is included only with
multilingual versions of the software and
requires Custom installation.
Included with the Typical installation
Included with the Typical installation
Modify and repair installations
You can also use the installation wizard to do the following:
• modify the current installation by adding or deleting components
• repair the current installation by fixing errors such as missing or corrupt files as well as inaccurate shortcuts and registry entries
Repairing an installation is helpful when you encounter problems in using the application, or when you suspect that the installation is
corrupt.
Before repairing an installation, try resetting the current workspace to the default settings by holding down F8 while starting the
application. Note that when you reset the workspace, all workspace preferences are reset.
To modify or repair a CorelDRAW Graphics Suite installation
1 Close all applications.
2 On the Windows Control Panel, click Uninstall a program.
3 Double-click the suite’s name on the Uninstall or change a program page.
4 Enable one of the following options:
• Modify — to add or delete program components and languages. Follow the instructions in the wizard that appears. To add
languages, open the Product languages list box on page 3 of the wizard, and enable the check boxes for the languages you want to
install.
• Repair — to fix errors in the current installation
Program features and utilities that are already installed may not appear in the wizard, or their check boxes appear disabled.
Certain features, such as Copy installation files and Install desktop shortcuts, cannot be added by modifying your installation.
Uninstall CorelDRAW Graphics Suite
You can uninstall CorelDRAW Graphics Suite from the Control Panel. If you want to uninstall the product and then reinstall it with the same
serial number on another computer, make sure to uninstall while being connected to the Internet. This will restore by one the number of
computers on which you can legitimately install the product.
24 | CorelDRAW 2019 User Guide
Page 27

To uninstall CorelDRAW Graphics Suite
1 On the Windows Control Panel, click Uninstall a program.
2 Double-click the suite’s name on the Uninstall or change a program page.
3 Enable the Remove option in the wizard that appears, and follow the instructions.
To completely uninstall the product by removing user files, such as presets, user-created fills, and customized files, enable the Remove
user files check box.
Any additional components and applications that you installed with the suite, such as the Corel Graphics - Windows Shell Extension,
GPL Ghostscript, or Microsoft Visual Studio Tools for Applications (VSTA), must be uninstalled separately.
FAQ
If your question is not included in the list of frequently asked questions (FAQ) below, visit Corel® Support Services, and search the Corel®
Knowledge Base.
• “I am upgrading my version of the software. Do I need to uninstall the previous version?” (page 25)
• “What is the difference between an upgrade and an update?” (page 25)
• “What if I lost my serial number and need to reinstall the software?” (page 25)
• “What is the difference between Typical and Custom installation? Which type of installation is suitable for me?” (page 25)
• “Why do you ask me to update my operating system with the latest service packs and critical updates?” (page 25)
• “How do I deploy CorelDRAW Graphics Suite to my organization’s network?” (page 26)
• “How do I change the language of the user interface and Help?” (page 26)
I am upgrading my version of the software. Do I need to uninstall the previous version?
No, you don’t need to uninstall the previous version. By default, the new version is installed to a separate folder, which ensures that you
can work with both versions. Do not change the installation folder to install the upgrade and the previous version to the same folder.
What is the difference between an upgrade and an update?
An upgrade lets you install the latest major version of the software. After a major version is released, updates usually follow to offer
defect fixes, and performance and stability improvements. Updates have the name of the major version with a number appended — for
example, .1. Usually, the application notifies you when a product update is available, but you can also check for updates by clicking Help
Updates.
What if I lost my serial number and need to reinstall the software?
Do one of the following:
• For download versions, check the email you received from Corel when you purchased the product.
• Sign in on corel.com to access Your Account page.
• If you purchased a box, check the cover of the installation disk.
What is the difference between Typical and Custom installation? Which type of installation is suitable for me?
See “Installation options” on page 22.
Why do you ask me to update my operating system with the latest service packs and critical updates?
We ask you to install the latest service packs and critical updates in order to:
• protect your computer from malicious software
• resolve Windows issues and defects
• ensure smooth operation of the operating system and your Corel software
• help meet the minimum system requirements
• help speed up the installation process
• reduce the likelihood of needing to restart your operating system
Install CorelDRAW Graphics Suite | 25
Page 28

• ensure that system drivers are up-to-date and optimized for the suite.
How do I deploy CorelDRAW Graphics Suite to my organization’s network?
If you purchased multiple licenses of CorelDRAW Graphics Suite, you have the option of deploying the applications to your organization’s
network.
The CorelDRAW Graphics Suite 2019 Deployment Guide provides more information about network installations. To purchase a volume
license of the software, please contact Corel® Support Services.
How do I change the language of the user interface and Help?
You can change the language of the user interface and Help only if you have purchased and installed a multilingual version of the suite.
For more information, see “To change the language of the user interface and Help” on page 42.
26 | CorelDRAW 2019 User Guide
Page 29

Corel accounts and services
This section contains the following topics:
• “Authenticate CorelDRAW Graphics Suite” (page 27)
• “Account settings” (page 28)
• “Updates” (page 28)
• “Change user credentials” (page 28)
• “Corel Support Services” (page 29)
• “About Corel” (page 29)
Authenticate CorelDRAW Graphics Suite
Authentication lets you access online features and content that are included with your software. You can authenticate
CorelDRAWGraphicsSuite after the suite installation, before starting an application, or while using an application.
To authenticate CorelDRAWGraphicsSuite, you must sign in with your Corel.com account. This action associates your product with your
account. If you don’t have a Corel.com account or you want to associate your product with a new account, you need to create an account
before signing in.
After you install and authenticate CorelDRAWGraphicsSuite, the product appears in Your Account page on corel.com. If you want to
associate the product with a different account, you must change your user credentials. For more information, see “Change user credentials”
on page 28.
To authenticate CorelDRAW Graphics Suite
1 Click the Sign-in button in the upper-right corner of the application window.
2 In the dialog box that appears, do one of the following:
• Sign in by entering the email address and the password associated with your Corel.com account.
• Follow the instructions to create an account, and sign in.
You can now access online features provided you have Internet connection.
Corel accounts and services | 27
Page 30

Account settings
You can check your account settings by accessing Your Account page from within the application. On Your Account page, you can find out
more about the products associated with your account, and you can access support and set your communication preferences.
In those rare cases when your account settings may not reflect your latest transaction, you can refresh your account from within the
application.
To check your corel.com account
•
Click Help Account Settings .
Updates
Product updates, formerly known as service packs, include performance and stability improvements that enhance your product experience.
By default, you are automatically notified when product updates and news become available. You can customize the update and message
settings. For example, you can choose how often to receive updates and offers as tray notifications: daily, weekly, monthly, or not at all.
To view information about product updates, click Help Updates .
To customize update and message settings, click Help Message Settings .
Change user credentials
As a user and owner of CorelDRAWGraphicsSuite, you must know your user credentials:
• your product serial number — lets you install and reinstall your product. The serial number is the unique identifier of your product
license.
• the email address associated with your Corel.com account. For each Corel.com account, a unique email address and password are
required. When you authenticate your product to access online features and content, you sign in with a specific Corel.com account,
associating the product with that account and its email address.
This topic describes two typical cases in which you need to change your account settings and then update your user credentials in the
installed product to match the new account settings. Updating your user credentials ensures that you don’t need to uninstall and reinstall
the product.
You want to merge two product subscriptions that you purchased with the same Corel.com account at a different time so that the
subscriptions have the same renewal date.
In this case, each subscription is associated with a different serial number. You must first go to Your Account page, and then associate both
subscriptions with one of the serial numbers. Second, you must edit the user credentials in the product that now has an obsolete serial
number.
Step 1: Go to Your Account page by signing in on corel.com, and then click Merge in the Product Status area. On the Subscriptions page,
select the subscriptions that you want to merge. Proceed to the Confirm selection page, and choose the serial number that you want to
keep.
Step 2: Start the version of CorelDRAW or Corel PHOTO-PAINT that now has an obsolete serial number. Click Tools Options Global. In
the left pane of the dialog box, click User ID. Next, click Edit Credentials, and in the dialog box, type the serial number that you chose in
step 1.
28 | CorelDRAW 2019 User Guide
Page 31

You have two Corel.com accounts associated with different email addresses, and you want to merge the two accounts.
First, you must call Corel Support Services to merge the accounts for you, and then you must update your email address through the
product.
Step 1: Contact Corel Support Services with a request to merge the two accounts for you. You will be asked to provide an active email
address for your merged account. If you have subscriptions or Upgrade Programs in each account, they are associated with different serial
numbers so you need to choose one of the serial numbers.
Step 2: Start the version of CorelDRAW or Corel PHOTO-PAINT that is now associated with an obsolete account and email address. Click
Tools Options Global. In the left pane of the dialog box, click User ID . Click Edit Credentials, and in the dialog box that appears, type
the email address that you chose for your merged account. Type your password. If necessary, type the serial number that you chose in step 1.
Corel Support Services
Corel Support Services can provide you with prompt and accurate information about product features, specifications, pricing, availability,
services, and technical support. For the most current information on support services available for your Corel product, please visit
www.corel.com/support.
About Corel
Over the years, Corel has brought a spirit of innovation to the development of a range of award-winning products that includes graphics,
painting, photo, video and office software. We’ve also earned a reputation for delivering high-quality products that are easy to learn and
use, and help people achieve new levels of productivity. But more than that, we’ve built a relationship with our community of users—tens of
millions strong—who have amazed and delighted us with everything they create using our software.
Corel’s product line includes CorelDRAW Graphics Suite, CorelDRAW Technical Suite, Corel® Painter®, Corel® PaintShop® Pro, Corel®
VideoStudio®, WinDVD, Corel® WordPerfect® Office, and WinZip. For more information about Corel, please visit www.corel.com.
Corel accounts and services | 29
Page 32

30 | CorelDRAW 2019 User Guide
Page 33

What’s new in CorelDRAW Graphics Suite?
The new and enhanced features of CorelDRAW Graphics Suite 2019 are described in the following topics:
• “Individuality” (page 31)
• “Creativity” (page 32)
• “Productivity” (page 33)
Individuality
CorelDRAW Graphics Suite 2019 ensures that you can work the way that best suits your creative style.
New! Objects docker
How users work with and manage design elements, layers and pages has been totally re-imagined in CorelDRAW Graphics Suite 2019. The
new Objects docker, which replaces the Object Manager docker from previous versions, lets you work faster and smarter by giving you direct
control over the structure of a document and fast access to its components. For more information, see “Transform objects ” on page 255.
What’s new in CorelDRAW Graphics Suite? | 31
Page 34

Enhanced! Options workflow
The interface for setting document, application, and suite-wide preferences has been reorganized in CorelDRAW Graphics Suite 2019,
making it quicker and easier to tailor your design environment to best suit the way you work.
Creativity
Be more creative with an enhanced template workflow, new non-destructive bitmap effects, and more.
Enhanced! Template workflow
A redesigned template workflow helps boost your productivity. You can download new templates, add your own library, easily migrate a
collection anywhere, and modify properties — all within the suite. What’s more, there are a wide range of totally refreshed and updated
templates that can help anyone deliver professional results. Because they’re all easily customizable, producing a design with just the right
look for is effortless. For more information, see “Templates ” on page 559.
New! Non-destructive bitmap effects
CorelDRAW 2019 makes it easy to apply, modify, and experiment with bitmap effects on both vectors and bitmaps, all without altering the
source image or object. The new Effects tab in the Properties docker is the hub for non-destructive editing, allowing for quick adjustments
and unlimited experimentation. For more information, see “Apply special effects to bitmaps” on page 648.
32 | CorelDRAW 2019 User Guide
Page 35

Productivity
Increase your productivity with the performance enhancements and high-caliber, yet intuitive, new features of CorelDRAW Graphics Suite
2019.
Enhanced! Print Merge
CorelDRAW 2019 has updated the way you combine a drawing with snippets of variable text to produce several different copies of a design.
With overhauled UI and a streamlined workflow, the Print Merge feature makes it even easier to combine a graphic with a data source to
quickly generate personalized mass mailings, targeted marketing pieces, business cards, certificates, and more. For more information, see
“Print merge ” on page 736.
Enhanced! Digital asset management
The way users interact with design assets has undergone a complete overhaul in CorelDRAW Graphics Suite 2019. When working with
images, clipart, fills, templates, fonts and more, totally redesigned UI helps boost your productivity and deliver improved performance. A
streamlined interface allows you to use, create, and find what you’re looking for faster than ever. You can download new packs, add your
own library, easily migrate an asset collection anywhere, and modify asset properties — all within the suite. What’s more, the new CONNECT
Content docker provides a central location where you can search, and browse vector and raster images, as well as access more graphics. For
more information, see “Creative tools and content ” on page 87.
What’s new in CorelDRAW Graphics Suite? | 33
Page 36

Enhanced! Performance
You can work faster than ever thanks to performance enhancements.
New! Pixel-perfect workflow
CorelDRAW 2019 takes the guesswork out of creating clean, crisp images for the web with a series of new features that ensure pixel-perfect
precision. For more information, see “Create pixel-perfect graphics for the web” on page 759.
Enhanced! PDF/X support
CorelDRAW Graphics Suite 2019 offers a greater variety of ISO-compliant PDF/X export options. New support for PDF/X4 helps ensure easy
output of files that are compatible with the widest range of devices and compliant with the latest print-industry standards.
New! Find and Replace docker
The new Find and Replace docker in CorelDRAW 2019 offers a straightforward, intuitive interface that lets you locate drawings components
and change their attributes faster than ever. There’s a new option that lets you select an object and use its properties as the basis of a
search. You can simultaneously replace multiple object properties, such as color, fill, and outline. And finding and text replacing text is
enhanced to include text in PowerClips and nested in grouped objects. For more information, see “Find and replace objects ” on page
303, “To find and replace fill colors ” on page 386, “Copy, convert, remove, and replace outlines ” on page 145, and “Find, edit, and
convert text ” on page 482.
What was new in previous versions
You can easily identify what features have been improved or introduced since the last version of CorelDRAW Graphics Suite that you used.
To find out what was new in previous versions of CorelDRAWGraphicsSuite
•
Click Help Highlight what’s new , and click one of the following commands:
• Since version 2018— highlights menu commands and tools for features introduced or improved in this version
• Since version 2017— highlights menu commands and tools for features introduced or improved in version 2017, 2018, and 2019
• Since version X8— highlights menu commands and tools for features introduced or improved in version X8, 2017, 2018, and 2019
• No highlight — removes highlighting from menu commands and tools in the toolbox
34 | CorelDRAW 2019 User Guide
Page 37

Learning resources
You can learn to use the product in various ways: by reading the Quick Start Guide; by accessing the Help, Hints, and tooltips, and by
exploring the resources on the Corel website (www.corel.com). You can also check the Readme file (readme.html), which is installed with
the software.
This section contains the following topics:
• “Get help” (page 35)
• “Help and tooltips” (page 36)
• “Hints” (page 38)
• “Welcome screen” (page 38)
• “Quick Start Guide” (page 38)
• “Video resources” (page 39)
• “Developers’ website” (page 39)
• “Network deployment guide” (page 39)
• “Web-based resources” (page 39)
Get help
Various learning resources are available. The following table can help you decide what learning resources to consult when you need
assistance. You can access more information about some resources by clicking the corresponding links.
To See
Start learning the applications “Video resources ” on page 39
“Quick Start Guide ” on page 38
Learn about new and enhanced features “Video resources ” on page 39
Obtain additional information about product tools and features “Help and tooltips ” on page 36
“Web-based resources ” on page 39
“Hints ” on page 38
Learning resources | 35
Page 38

To See
Download a list of keyboard shortcuts CorelDRAW Graphics Suite Quick Reference Card
Advance your knowledge of the suite by learning from graphics
design experts
Insights from the Experts, a series of tutorials by graphic design
professionals who use CorelDRAW Graphics Suite in their everyday
work. You can access these online tutorials as individual PDF files
directly from the Corel website.
“Web-based resources ” on page 39
Learn to automate tasks by using macros (or scripts) Community website for developers
Find information about deploying the suite on a network CorelDRAW Graphics Suite 2019 Deployment Guide
Find specific information about the latest version of the suite Readme file (readme.html), which is installed with the software. To
find it, navigate to the folder where the product is installed, open
the Languages folder, and open the language folder you want.
Documentation conventions
The following table describes important conventions used in the documentation.
Convention Description Examples
Menu Menu command
A menu item and menu command that you
Click File Open .
need to click in sequence
A note contains important information
that is relevant to the preceding steps. It
may describe conditions under which the
procedure can be performed.
A compound blend cannot be copied or
cloned.
If you click the Equal margins button, you
must specify values in the Top/left margin
boxes.
A tip contains suggestions for performing
the preceding steps. It may present
alternatives to the steps, or other benefits or
uses of the procedure.
Trimming an object can reduce the drawing
file size.
You can change the number of swatches in
the color grid by dragging the Size slider.
Help and tooltips
The Help provides comprehensive information about product features from within the application.
An active Internet connection is required to access the help. If you often work offline, download the CorelDRAW User Guide.
You can browse through the entire list of topics or search for specific words. You can also access the Corel Knowledge Base on the Corel
website and other online resources, such as videos, from the Help window.
36 | CorelDRAW 2019 User Guide
Page 39

The Help is also available online in a print-friendly PDF format. You can access the User Guide PDF from within the application or download it
from product.corel.com.
Tooltips provide helpful information about application controls when you position the pointer over icons, buttons, and other user interface
elements.
To use the Help
1
Click Help Product Help .
2 Perform a task from the following table.
To Do the following
Browse through topics in the Help
Click the Contents tab. To open a topic, click the topic
heading in the left pane.
Search the full text of the Help for a particular word or phrase Click the Search tab, and type a word or phrase in the search box.
For example, if you are looking for information about the RGB color
mode, you can type “RGB” to display a list of relevant topics. To
search for a phrase, type the phrase, and enclose it in quotation
marks (for example, type “dynamic guides” or “color mode”).
Choose a topic from the list that appears.
Tip: If your search results do not include any relevant topics, check
whether you spelled the search word or phrase correctly. Note
that the English Help uses American spelling (for example, “color,”
“favorite,” “center,” and “rasterize”), so searching for British
spellings (“colour,” “favourite,” “centre,” and “rasterise”) produces
no results.
Print a specific Help topic Open the page that you want to print, and click Print at the top of
the Help window.
You can also access the Help by pressing F1 .
View context-sensitive Help from within a dialog box by clicking the Help button in the dialog box.
To access the CorelDRAW 2019 User Guide
•
Click Help User Guide .
An active Internet connection is required to access the User Guide. If you often work offline, download the User Guide from
product.corel.com.
Learning resources | 37
Page 40

Hints
Hints provide information about tools in the toolbox from within the application. When you click a tool, a hint appears in the Hints docker
on the right side of the application window, telling you how to use the tool. If you need additional information about a tool, you can access
relevant learning resources such as a Help topic, video, or written tutorial. You can hide the Hints at any time.
To use Hints
To Do the following
Display or hide Hints
Display information about a tool Click the tool, or perform an action with a tool that is already
Get additional information about the active tool In the Learn more section, click a link to a relevant Help topic,
Navigate to previously viewed topics Click the Back and Forward buttons at the bottom of the Hints
Click Help Hints .
When the Hints command is enabled, the Hints docker appears
and provides information about the active tool in the toolbox.
active.
video, or a written tutorial.
docker.
Welcome screen
The Welcome Screen appears when you start the application. With the Welcome Screen, you can quickly start or open a document, choose a
workspace that suits your needs, access online learning videos and other learning resources, and get inspired by a gallery of original artwork
created with CorelDRAW.
To access the Welcome screen
•
Click Help Welcome screen .
You can also access the Welcome screen by clicking the Welcome screen button on the tab bar.
Quick Start Guide
The Quick Start Guide, available in PDF format, can help you get started quickly with the suite by introducing you to useful tools and
features.
To access the Quick Start Guide
•
Click Help Quick Start Guide .
38 | CorelDRAW 2019 User Guide
Page 41

An active Internet connection is required to access the Quick Start Guide. If you often work offline, download the Quick Start Guide
from product.corel.com.
Video resources
You can access video learning resources from the Welcome screen as well as from the Help menu.
The video tutorials show you how to complete basic tasks such as drawing, shaping, and coloring objects in CorelDRAW, or masking and
cropping in Corel PHOTO-PAINT and help you get the most out of features such as symmetry, font management, fills and transparencies,
alignment tools, QR codes, bitmap and vector effects, and more. Some videos don't have sound but include captions that provide useful
tips and help you understand the features that are shown. Whether you are a new or long-time user, you will find useful demos and tips to
boost your productivity and expand your experience.
To access a video
•
Click Help Video tutorials .
Developers’ website
Whether you are automating tasks by using macros or scripts, creating custom tools, or developing commercial solutions that integrate
with CorelDRAW Graphics Suite; the developer community website can help you with its wealth of useful resources: a programming guide,
detailed Object Model reference documentation with code samples, and in-depth programming articles.
You can use either Microsoft Visual Basic for Applications (VBA) or Microsoft Visual Studio Tools for Applications (VSTA) to create macros and
customized solutions for CorelDRAW and Corel PHOTO-PAINT.
Network deployment guide
The CorelDRAW Graphics Suite 2019 Deployment Guide is a step-by-step resource for deploying CorelDRAW Graphics Suite 2019 to a
network. This guide is provided to customers who purchase a volume (“multi-seat”) license of CorelDRAW Graphics Suite 2019 for their
organization. To purchase a volume license of the software and obtain its deployment guide, please contact Corel Support Services.
Web-based resources
The following web-based resources can help you get the most out of CorelDRAW Graphics Suite:
• Corel Knowledge Base — articles written by the Corel Technical Support Services Team in response to questions by users
• Community.CorelDRAW.com — an online environment to share your experience with the product, ask questions, and receive help and
suggestions from other users
• Tutorials on the Corel website — in-depth tutorials in which CorelDRAW Graphics Suite experts share their knowledge and techniques
An active Internet connection is required to access web-based resources.
Learning resources | 39
Page 42

40 | CorelDRAW 2019 User Guide
Page 43

Start and set up
This section contains the following topics:
• “Start and quit CorelDRAW” (page 41)
• “Change the language” (page 41)
• “Startup settings” (page 42)
Start and quit CorelDRAW
You can start CorelDRAW from the Windows taskbar and end a CorelDRAW session from the application window.
To start and quit CorelDRAW
To Do the following
Start CorelDRAW Do one of the following:
• (Windows 7 and Windows 10) From the Windows
taskbar, click Start Programs CorelDRAW Graphics
Suite 2019 CorelDRAW.
• (Windows 8) Click the CorelDRAW 2019 tile on your
desktop.
Quit CorelDRAW
Click File Exit .
Change the language
If an application has been installed in more than one language, you can change the language of the user interface and Help at any time.
Start and set up | 41
Page 44

To change the language of the user interface and Help
1
Click Tools Options Global.
2 Click General.
3 Choose a language from the User interface language list box.
If you want to change the language of the user interface and Help when you start the application, enable the Ask me the next time the
application starts check box.
4 Restart the application.
If there is only one language available in the User interface language list box, you must first install the additional languages that you
want. For more information, see “To modify or repair a CorelDRAW Graphics Suite installation” on page 24.
Startup settings
You can specify the startup settings for CorelDRAW , which control how the application appears when it’s opened. For example, you can
start the application with the Welcome screen open or a new blank document.
To change startup settings
1
Click Tools Options CorelDRAW.
2 Click General.
3 In the Getting started area, choose an option from the On CorelDRAW start-up list box.
If you want to hide the Create a new document dialog box when starting documents, disable the Show New Document dialog box
check box.
42 | CorelDRAW 2019 User Guide
Page 45

CorelDRAW basics
CorelDRAW lets you create and edit drawings. In this section, you can find information about commonly performed tasks.
This section contains the following topics:
• “Vector graphics and bitmaps” (page 43)
• “Start and open drawings” (page 44)
• “Scan images” (page 47)
• “Work with multiple drawings” (page 48)
• “Undo, redo, and repeat actions” (page 49)
• “Zoom, pan, and scroll” (page 50)
• “Preview drawings” (page 52)
• “Viewing modes” (page 54)
• “Views” (page 55)
• “Save drawings” (page 56)
• “Locked files” (page 58)
• “Back up and recover files” (page 58)
• “Add and access drawing information” (page 59)
• “Close drawings” (page 60)
• “Explore basic tasks” (page 60)
• “CorelDRAW.app, CorelDRAW, and Corel Cloud” (page 61)
Vector graphics and bitmaps
The two main types of computer graphics are vector graphics and bitmaps. Vector graphics are made of lines and curves, and they are
generated from mathematical descriptions that determine the position, length, and direction in which lines are drawn. Bitmaps, also known
as raster images, are composed of small squares called pixels; each pixel is mapped to a location in an image and has numerical color values.
Vector graphics are ideal for logos and illustrations because they are resolution-independent and can be scaled to any size, or printed and
displayed at any resolution, without losing detail and quality. In addition, you can produce sharp and crisp outlines with vector graphics.
Bitmaps are excellent for photographs and digital paintings because they reproduce color gradations well. Bitmaps are resolution-dependent
— that is, they represent a fixed number of pixels. They look good at their actual size, but they can appear jagged or lose image quality
when scaled, or when displayed or printed at a resolution higher than their original resolution.
CorelDRAW basics | 43
Page 46

You can create vector graphics in CorelDRAW. You can also import bitmaps (such as JPEG and TIFF files) into CorelDRAW and add them to
your drawings. For information about working with bitmaps, see “Work with bitmaps” on page 623.
Top: A vector graphic consists of lines and fills. Bottom: A bitmap is made up of pixels.
Start and open drawings
CorelDRAW lets you start a new drawing from a blank page, a template, or an existing drawing. A blank page gives you the freedom to
specify every aspect of a drawing. A template provides you with a starting point and leaves the amount of customization up to you.
For information about starting a drawing from a template, see “To start a document from a template” on page 560. For more information
about creating and using templates, see “Templates” on page 559.
Notes for starting new drawings
When starting a new drawing, CorelDRAW lets you specify page, document, and color management settings. You can choose from a list of
preset settings, which are based on how you intend to use the drawing. For example, you can choose the Web option if you are creating
a drawing for the Internet, or the Default CMYK option if you are creating a document destined for commercial printing. However, if the
preset settings are not suitable for the drawing that you want to create, you can also customize the settings and save them for future use.
Notes for opening existing drawings
Basing a new drawing on an existing drawing lets you reuse objects and page settings. CorelDRAW lets you open existing drawings saved
to the CorelDRAW (CDR) format as well as drawings and projects saved to various file formats such as Corel DESIGNER (DSF or DES), Adobe
Illustrator (AI), Adobe Portable Document Format (PDF), Encapsulated PostScript (EPS), and Computer Graphics Metafile (CGM). However,
you may not be able to open certain files, depending on their file type and contents. In such cases, you can try importing the files as objects
in an open drawing. For information about the file formats that you can import into CorelDRAW, see “Supported file formats” on page
797.
If the drawing you are opening is from an earlier version of CorelDRAW and contains text in a language different from the language of your
operating system, you can choose code page settings to ensure that text is properly converted according to the Unicode Standard. Code
page settings help you correctly display text such as keywords, file names, and text entries outside the drawing window — for example, in
the Objects and Object Data Manager dockers. To display text correctly in the drawing window, you must use encoding settings. For more
information, see “Display text correctly in any language” on page 527.
If the drawing you are opening contains an embedded International Color Consortium (ICC) profile, the embedded color profile remains the
document’s color profile. For more information, see “About color management” on page 405.
44 | CorelDRAW 2019 User Guide
Page 47

You can search for drawings by different criteria, such as filename, title, subject, author, keyword, comment, text within the file, and other
properties attached to the file. For more information about searching for files, see the Windows Help. For more information about browsing
and searching for content, see “Find content with the CONNECT Browser ” on page 97.
You can also display previous versions of a drawing.
To start a drawing
1 Do one of the following:
•
On the Welcome screen, click Get started New document.
•
In the application window, click File New.
2 Type a filename in the Name text box.
3 From the Preset destination list box, choose an output destination for the drawing:
• CorelDRAW default — applies the CorelDRAW default settings for creating graphics that are destined for printing
• Default CMYK — applies settings for creating graphics that are destined for commercial printing
• Default RGB — applies settings for creating graphics that are destined for printing to a high-fidelity printer
• Web — applies settings for creating graphics that are destined for the Internet
• Custom — lets you customize destination settings for a document
You can also
Change the unit of measurement for the page Choose a unit of measurement from the Drawing units list box.
Change the page size Choose a page size for the drawing from the Size list box or type
values in the Width and Height boxes.
Change the page orientation Click one of the following page orientation buttons:
•Portrait
•Landscape
Set the number of pages Type a value in the Number of pages box.
Set the default color mode for the document to RGB or CMYK Choose a color mode from the Primary color mode list box.
Set the resolution for effects that will likely be rasterized, such as
transparency, drop shadow, and bevel effects
Choose a rendering resolution from the Rendering resolution list
box.
Choose the preview mode for the drawing Choose a preview mode from the Preview mode list box.
Choose an RGB profile for the drawing In the Color settings area, choose a default RGB profile from the
RGB profile list box.
Choose a CMYK profile for the drawing Choose a default CMYK profile from the CMYK profile list box.
Choose a Grayscale profile for the drawing Choose a default Grayscale profile from the Grayscale profile list
box.
CorelDRAW basics | 45
Page 48

You can also
Choose a default method for out-of-gamut colors to be mapped
Choose an option from the Rendering intent list box.
into gamut
When you choose a color mode from the Primary color mode list box, it becomes the default color mode for the document. The
default color mode affects how colors work together in effects such as blends and transparencies. It does not restrict the type of
colors that you can apply to a drawing. For example, if you set the color mode to RGB, you can still apply colors from a CMYK color
palette to the document.
The primary color mode also specifies the default color mode for exporting documents. For example, if you choose the RGB color
mode and export a document as a JPEG, the color mode is automatically set to RGB.
The settings that are displayed in the Color settings area of the Create a new document dialog box are based on the settings that
are specified in the Default color management settings dialog box.
If you do not want to show the Create a new document dialog box and prefer to use the last used settings to create new
documents, enable the Do not show this dialog again check box.
You can restore the Create a new document dialog box when starting drawings by clicking Tools O ptions CorelDRAW, clicking
General, and enabling the Show New Document dialog box check box.
To create a custom preset
1
In the application window, click File New.
2 In the Create a new document dialog box, choose the settings that you want to save as a preset destination.
3
Click the button next to the Preset list box, and click Save Preset.
4 In the Add preset dialog box, type a name for the new destination preset.
You can delete a destination preset by choosing the preset name from the Preset list box, clicking the button and then clicking
Delete Preset.
To open a drawing
1
Click File Open .
2 Locate the folder where the drawing is stored.
3 Click a filename.
4 Click Open.
You can also
Extract an embedded International Color Consortium (ICC) profile
to the color folder in which the application is installed
Maintain layers and pages when you open files Enable the Maintain layers and pages check box.
Enable the Extract embedded ICC profile check box.
This option is not available for all file formats.
46 | CorelDRAW 2019 User Guide
Page 49

You can also
If you disable the check box, all layers are combined in a single
layer.
This option is not available for all file formats.
View thumbnail of a drawing Click the arrow button next to the Views button, and click Extra
large icons, Large icons, Medium icons, or Small icons.
Choose a code page Choose a code page from the Select code page list box. This
option is not available for all file formats.
Search for a drawing Type a word or phrase in the search box.
The search box looks for files only in the current folder and
subfolders. To search for a drawing in another location, you must
first navigate to the folder where the drawing is stored.
Access a previous version of a file Right-click a file, and click Restore previous versions.
You can access a previous version of a file only if System Protection
is turned on.
For detailed information about accessing previous versions of files,
see the Windows Help.
You can view file information, such as version number and compression ratio. For example, a compression ratio of 80percent means
that the file size was reduced by 80 percent after the file was saved. You can also see in what application and language the drawing
was last saved, and you can view keywords and notes associated with a drawing.
To open a file you have recently worked on, click File Open Recent , and click the filename. To clear the list of recently opened files,
click File Open Recent Clear Menu.
If you have multiple files open, you can navigate between them by clicking Window, and then clicking the name of the file that you
want to display in the drawing window.
Scan images
You can scan images in CorelDRAW by using a compatible TWAIN driver. CorelDRAW supports scanners that use Microsoft Windows Image
Acquisition (WIA), which provides a standard interface for scanning images.
If your scanner does not support WIA, but has a compatible TWAIN driver, you may be able to use this driver for scanning images in
CorelDRAW. TWAIN is supported by both the 32-bit and 64-bit versions of CorelDRAW. However, note that there are few 64-bit TWAIN
drivers available.
The software interfaces and options vary. For information about using the software associated with your scanner, see the manufacturer’s
documentation.
CorelDRAW basics | 47
Page 50

To scan images
1
Click File Acquire Image , and click one of the following commands:
• Select WIA source — for a scanner that uses a WIA driver
• Select TWAIN source — for a scanner that uses a TWAIN driver
A command appears disabled if a compatible WIA or TWAIN scanner driver is not installed.
2 Choose a scanner from the dialog box that appears.
3 Click Select.
4
Click File Acquire Image Acquire .
5 Preview the image, and select the area that you want to scan.
WIA, in combination with some scanners, supports scanning of multiple areas to separate files.
6 Click Scan.
On your scanner’s interface, this button may have a different name, such as OK or Send.
To scan additional images during the same session, click File Acquire Image Acquire.
Work with multiple drawings
Multiple drawings can be opened in a single drawing window, making it easy to handle many drawings simultaneously. You can access each
open drawing from its tab at the top of the drawing window, and you can start new drawings.
Open drawings appear docked, but you can undock any drawing you want and drag it inside or outside the application window.
You can also arrange drawings in overlapping (cascading) windows, side by side, or stacked vertically.
To work with multiple drawings
To Do the following
Switch to another open drawing At the top of the drawing window, click the tab that has the
filename you want.
An asterisk after the filename shows that the file has unsaved
changes.
Start another drawing Click the New button to the right of the last tab in the drawing
window.
Undock a drawing Drag the tab to a new position inside or outside the application
window.
To arrange multiple drawing windows
• Click Window, and click one of the following commands:
• Cascade — arranges drawings so that they overlap and the title bars are visible
• Tile Horizontally — arranges drawings side by side
• Tile Vertically — stacks drawings vertically
48 | CorelDRAW 2019 User Guide
Page 51

Undo, redo, and repeat actions
You can undo the actions that you perform in a drawing, starting with the most recent action. If you don’t like the result of undoing an
action, you can redo it. Reverting to the last saved version of a drawing also lets you remove one or more actions. Certain actions applied to
objects, such as stretching, filling, moving, and rotating, can be repeated to create a stronger visual effect.
Customizing the Undo settings lets you increase or decrease the number of actions that you can undo or redo.
To undo, redo, and repeat actions
To Do the following
Undo an action
Redo an action
Undo or redo a series of actions
Click Edit Undo [Last Action] .
Click Edit Redo .
Click Window Dockers History . In the History docker, click the
action that precedes all the actions that you want to undo, or click
the last undone action that you want to redo.
Revert to the last saved version of a drawing
Click File Revert .
Repeat an action
Click Edit Repeat .
When you undo a series of actions in the History docker, all actions listed below the action that you click are undone.
When you redo a series of actions in the History docker, the action that you click and all preceding undone actions are redone.
You can repeat an action on another object or group of objects by selecting the object or objects and clicking Edit Repeat .
You can also undo or redo a series of actions by clicking the arrow button next to the Undo button or Redo button on the
standard toolbar and choosing an action from the list.
To specify the Undo settings
1
Click Tools Options CorelDRAW.
2 Click General in the left pane of the dialog box that appears.
3 In the Undo levels area, type a value in the Regular box to specify the number of actions that can be reversed when you use the Undo
command with vector objects.
The value that you specify is limited only by your computer’s memory resources. The higher the value you specify, the greater the
demand on memory resources.
CorelDRAW basics | 49
Page 52

Zoom, pan, and scroll
You can change the view of a drawing by zooming in to get a closer look or by zooming out to see more of the drawing. You can
experiment with a variety of zoom options to determine the amount of detail you want.
You can also zoom in and out in preset increments by using common keyboard shortcuts, supported by web browsers and other
applications.
Panning and scrolling are two additional ways to view specific areas of a drawing. When you work at high magnification levels or with large
drawings, you may not be able to see the whole drawing. Panning and scrolling let you move the page around in the drawing window to
view previously hidden areas.
You can use the Pan tool to pan around a large image and view particular areas.
You can zoom in and out while you are panning, and you can pan while you are zooming. In this way, you can avoid having to alternate
between the two tools.
You can also use the Quick Pan mode to switch from any active tool to the Pan tool. This feature lets you pan without having to change
tools.
If you use a mouse wheel, the wheel zooms in and zooms out by default. You can also use the mouse wheel to scroll.
You can specify default zooming and panning settings.
To zoom
1
In the toolbox, click the Zoom tool .
2 On the property bar, click one of the following:
•
Zoom in
•
Zoom out
•
Zoom to selected
•
Zoom to all objects
•
Zoom to page
•
Zoom to page width
•
Zoom to page height
50 | CorelDRAW 2019 User Guide
Page 53

The Zoom to selected button is available only if one or more objects are selected before you click the Zoom tool.
You can also zoom in, zoom out, and zoom to all objects by using the zoom commands in the View menu.
When you are not editing text, you can also access the Zoom tool by pressing Z.
Using the Zoom tool, you can also zoom in by clicking anywhere in the drawing window or dragging to select a specific area to
magnify. To zoom out, right-click in the drawing window, or drag with the right mouse button to select a specific area.
You can also zoom in by using the Pan tool and double-clicking in the drawing window. To zoom out, right-click in the drawing
window.
To zoom using keyboard shortcuts
• Do one of the following:
• To zoom in, press Ctrl+(+) .
• To zoom out, press Ctrl+(-) .
You can use these keyboard shortcuts to adjust the zoom level in the document window as well as in dialog boxes and labs that
feature preview windows such as the Print Preview dialog box, PowerTRACE, Image Adjustment Lab, and more.
To pan in the drawing window
1
In the toolbox, click the Pan tool .
2 Drag in the drawing window until the area you want to view appears.
When you are not editing text, you can also access the Pan tool by pressing the H key.
To pan in the drawing window while zoomed in on the drawing, click the Navigator button in the lower-right corner of the
drawing window.
You can quickly center the page in the drawing window by double-clicking the Pan tool in the toolbox.
Using the Navigator, you can display any part of a drawing without having to zoom out.
CorelDRAW basics | 51
Page 54

To switch to the Quick Pan mode
1 Click any selection, drawing, or shaping tool, and start using it.
2 Hold down the middle mouse button or wheel, and drag in the drawing window.
To specify default zoom settings
1
Click Tools Options Tools.
2 In the left pane of the dialog box that appears, click Zoom/Pan.
3 To specify the action of the Zoom or Pan tool when you right-click in the drawing window, enable one of the following options:
• Zoom out — zooms out by a factor of 2
• Context menu — displays a menu of commands that let you zoom to a specific level
4 To specify how the page appears when the zoom is set to 100%, enable or disable the Zoom relative to 1:1 check box.
• When the option is enabled, a 100% zoom displays real-world dimensions.
• When the option is disabled, a 100% zoom displays the full page, regardless of real-world dimensions.
5 To specify how the page appears when you zoom in and out using the mouse wheel, enable or disable the Center mouse when
zooming with the mouse wheel check box.
• When the option is enabled, the area where the mouse pointer is located moves to the center of the screen as you zoom in and out
using the mouse wheel.
• When the option is disabled, the area where the mouse pointer is located stays in the same position as you zoom in and out using the
mouse wheel.
To establish default setting for the mouse wheel
1
Click Tools Options CorelDRAW.
2 In the left pane of the dialog box that appears, click Display.
3 To specify the default action of the mouse wheel, choose Zoom or Scroll from the Default action for mouse wheel list box.
To scroll by using a mouse wheel
• Do one of the following:
• To scroll vertically, press Shift while you move the wheel.
• To scroll horizontally, press Ctrl while you move the wheel.
The mouse wheel can be used for scrolling only if the Scroll option for the mouse is enabled. For more information, see “To establish
default setting for the mouse wheel” on page 52.
Preview drawings
You can preview a drawing to see how it will look when printed or exported. When you preview a drawing, only the objects on the drawing
page and in the immediate area of the drawing window are displayed, and you can see all layers that are set to print in the Objects docker.
If you want a closer look at specific objects in a drawing, you can select and preview them. When you preview selected objects, the rest of
the drawing is hidden.
Before you preview a drawing, you can specify the preview mode. The preview mode affects the speed with which your preview appears as
well as the amount of detail displayed in the drawing window.
By default, the borders of a page are displayed in the drawing window, but you can hide them at any time. If a drawing is intended for print,
you can display the area that will actually print as well as the bleed, the part of the drawing that extends beyond the page border. Bleeds are
52 | CorelDRAW 2019 User Guide
Page 55

useful when a drawing contains a color page background or objects that are positioned on the page border. Bleeds ensure that no white
space appears between the edges of a drawing and the edge of the paper after the printer cuts, binds, and trims the document.
To preview a drawing
•
Click View Full-screen Preview .
Click anywhere on the screen, or press any key, to return to the application window.
You can press Page up and Page down to preview pages in a multipage drawing.
To preview selected objects
1 Select the objects.
2
Click View Preview Selected Only .
Click anywhere on the screen, or press any key, to return to the application window.
If Preview selected only mode is enabled and no objects are selected, Full-screen preview displays a blank screen.
To choose a full-screen preview mode
1
Click Tools Options CorelDRAW.
2 In the left pane of the dialog box that appears, click Display.
3 In the Full-screen preview area, enable one of the following options:
• Use normal view — Drawings appear without PostScript fills or high‑resolution bitmaps, and no anti-aliasing is used.
• Use enhanced view — Drawings appear with PostScript fills, and anti-aliasing is used to sharpen the display of the drawings.
To set the page display
1
Click Layout Document Options.
2 In the left pane of the dialog box that appears, click Page Size.
3 Enable or disable the following check boxes:
• Show page border — shows or hides page borders
• Show bleed area — shows or hides the area of the drawing extending beyond the page border. To change the bleed area, type a
value in the Bleed box.
When preparing a drawing for commercial printing, you may also need to set a bleed limit. For more information, see “To set a bleed
limit” on page 745.
You can also click View Page Page border, or View Page Bleed.
You can display the printable area of a drawing by clicking View Page Printable area. The printable area is usually indicated by
two dotted lines inside or around the page, depending on the current printer settings. One outline indicates the area that can be
printed on the current printer; the other outline indicates the paper size that your printer is set to use.
CorelDRAW basics | 53
Page 56

Viewing modes
As you work, CorelDRAW lets you display a drawing in any of the following modes:
• Wireframe — displays an outline of the drawing by hiding fills, extrusions, contours, and drop shadows; also displays the bitmaps in
monochrome. This mode lets you quickly preview basic elements in a drawing.
• Normal — displays a drawing without PostScript fills or high-resolution bitmaps. This mode refreshes and opens slightly faster than the
Enhanced mode.
• Enhanced — displays a drawing with PostScript fills, high-resolution bitmaps, and anti-aliased vector graphics.
• Pixels — displays a pixel-based rendition of the drawing, which allows you to zoom in on an area of an object, and then position and
size the object more precisely. This view also lets you see what the drawing will look like when it is exported to a bitmap file format.
• Simulate overprints — simulates the color of areas where overlapping objects were set to overprint and displays PostScript fills, highresolution bitmaps, and anti-aliased vector graphics. For information about overprinting objects, see “To overprint selected color
separations” on page 749.
• Rasterize complex effects — rasterizes the display of complex effects, such as transparencies, bevels, and drop shadows when in
Enhanced view. This option is useful for previewing how the complex effects will be printed. To ensure the successful printing of complex
effects, most printers require complex effects to be rasterized.
The viewing mode you choose affects the amount of time it takes for a drawing to open or be displayed on the monitor. For example, a
drawing displayed in Wireframe view takes less time to refresh or open than does a drawing displayed in Simulate Overprints view.
Wireframe viewing mode (left); Enhanced viewing mode (center), and Simulate overprints viewing
mode (right). The fill for the gray diamond shape and the cup’s shadow are set to overprint.
To choose a viewing mode
• Click View, and click one of the following modes:
• Wireframe
• Normal
• Enhanced
• Pixels
• Simulate overprints
• Rasterize complex effects
If you are overprinting, it is important to preview the objects in the Simulate overprints mode before printing. The type of objects
you are overprinting and the type of colors you are mixing determine how overprinted colors are combined. For more information
about overprinting, see “Color trapping and overprinting” on page 748.
To set the default viewing mode, click Layout Document Options, click General, and choose an option from the View mode list
box.
54 | CorelDRAW 2019 User Guide
Page 57

You can quickly switch between the selected viewing mode and the previous viewing mode by pressing Shift + F9 .
Views
You can save a view of any part of a drawing. For example, you can save a view of an object at 230% magnification and then return to this
specific view at any time.
If a document contains multiple pages, you can view them all at once by using the Page Sorter view. You can also display consecutive lefthand and right-hand pages on the screen at the same time (facing pages) and create objects that span two pages.
To save a view
1
Click Window Dockers Views .
2
Click the Add current view button .
You can also
Rename a view Double-click a view name, and type a new name.
Delete a saved view
You can also save the current view by clicking the Zoom or Pan tool in the toolbox, clicking in the Zoom levels list box on the
standard toolbar, typing a name, and pressing Enter .
Click a view, and click the Delete current view button .
To switch to a saved view
1
Click Window Dockers Views .
2 Click a view in the Views docker.
You can also switch to a saved view by selecting it from the Zoom levels list box on the standard toolbar.
To view all pages in a multipage document
•
Click View Page Sorter View.
To return to the default page view, click the Page sorter view button on the property bar.
To view facing pages
1
Click Layout Page Layout.
2 Enable the Facing pages check box.
3 Choose one of the following settings from the Start on list box:
• Left side — starts the document on a left-hand page
• Right side — starts the document on a right-hand page
CorelDRAW basics | 55
Page 58

You cannot view facing pages if the document uses a Tent Card or Top-fold Card layout style, or if it contains multiple page
orientations. The Leftside option is available only for the Full Page and Book layout styles.
When you enable the Facing pages check box, the content on the facing pages is merged on one page. The layer structure for
the merged page is based on the left-hand page. The layers from the right-hand page are inserted above the layers on the lefthand page. This rule also applies if you reorder the pages. If you disable the Facing pages check box, the layers and content are
redistributed across separate pages. Objects that cross both pages are assigned to a page according to where the center of the object
is found.
It is recommended that you avoid switching back and forth between individual pages and facing pages within the same document.
Save drawings
By default, drawings are saved to the CorelDRAW file format (CDR) and are compatible with the latest version of the application. You can
also save a drawing that is compatible with an earlier version of CorelDRAW Graphics Suite and specify save options. Such options are useful
when the file contains new text, fill, outline, and transparency features that are not supported in earlier versions.
You can save a drawing to other vector file formats as well. If you want to use a drawing in another application, you must save it to a file
format that is supported by that application. For information about saving files to other formats, see “Export files” on page 778.
The application makes it easy to tell if a drawing has unsaved changes by adding an asterisk after its filename.The asterisk is added in
different locations where the filename appears such as the Windows menu, the title bar, and the document tab.
The asterisk after the filename on the document tab shows that the file LoremIpsum_1.cdr
has unsaved changes. The file LoremIpsum_2.cdr has no unsaved changes.
When saving a drawing, you can embed the used fonts to facilitate file sharing. By default, CorelDRAW embeds all used fonts, with the
exception of Asian fonts and fonts that do not have embedding permissions. For more information, see “Manage fonts” on page 529.
When you save a drawing, CorelDRAW lets you add reference information so that you can easily find and organize drawings later on. You
can attach tags (also known as properties) such as title, subject, and rating.
You can also save selected objects in a drawing. For large drawings, saving only the selected objects reduces the file size, which can decrease
the time it takes to load the drawing.
When saving a file, you can use advanced options to control how bitmaps, textures, and vector effects, such as blends and extrusions, are
saved with the drawing.
You can also save a drawing as a template, which lets you create other drawings with the same properties. For information about saving a
drawing as a template, see “Templates” on page 559.
To save a drawing
1
Click File Save as .
2 Type a filename in the File name box.
3 Locate the folder where you want to save the file.
If you want to save the drawing to a vector file format other than CorelDRAW (CDR)
You can also
Save only selected objects Enable the Selected only check box.
This option is available only if there are selected objects in the
drawing.
56 | CorelDRAW 2019 User Guide
Page 59

You can also
Embed fonts Enable the Embed fonts check box.
This check box is unavailable when you save a drawing to an earlier
version of CorelDRAW.
Add reference information Do any of the following:
•Type a title and subject in the corresponding box.
•Assign a rating to the file.
If you are using an expired trial version of CorelDRAW, you will not be able to save drawings.
Saving a drawing to a previous version of CorelDRAW may result in loss of certain effects that were not available in the previous
version of the application.
You can also save a drawing by clicking File Save .
You can also save a drawing by clicking the Save button on the Standard toolbar.
To use advanced options when saving
1
Click File Save as .
2 Click Advanced.
3 Enable any of the following check boxes:
• Save in Corel Presentation Exchange (CMX) format — saves a drawing as a Corel® Presentations™ Exchange (CMX) file so that you
can open and edit it in other Corel applications, such as WordPerfect
• Use bitmap compression — reduces the file size by compressing bitmap effects, such as bitmap extrusions, transparencies, and drop
shadows
• Use graphic object compression — reduces the file size by compressing vector objects, such as polygons, rectangles, ellipses, and
perfect shapes
Using compression increases the time required for opening and saving a drawing.
4 If a drawing contains texture fills, enable one of the following options:
• Save texture fills with the file — saves custom texture fills with the file
• Rebuild texture fills when opening the file — re-creates texture fills when you open the saved drawing
5 If a drawing contains blends and extrusions, enable one of the following options:
• Save blends and extrusions with the file — saves all blends and extrusions included in a drawing
• Rebuild blends and extrusions when opening the file — re-creates blends and extrusions when you open the saved drawing
Choosing to save textures, blends, and extrusions with the file increases the file size but lets you open and save a drawing more
quickly. Conversely, choosing to rebuild textures, blends, and extrusions when a saved drawing is opened decreases the file size but
increases the time required for saving or opening a drawing.
To save a drawing that is compatible with an older version of CorelDRAW
1
Click File Save as .
2 Type a filename in the File name box.
CorelDRAW basics | 57
Page 60

3 Locate the folder where you want to save the file.
4 Choose a version from the Version list box.
5 Click Save.
If the drawing includes new features; enable one of the following options in the Save to a previous version dialog box:
• Keep appearance — preserves the appearance of text, fills, outlines and transparencies when the file is opened in a previous version
of CorelDRAW. However, this option may limit editing.
• Keep editable — preserves the file editable. However, this option may change the appearance of text, outlines, fills, and
transparencies when the file is opened in a previous version of CorelDRAW.
You can also
Specify save settings
Click Tools Options CorelDRAW. Click Save, and enable one of
the following options:
•Keep appearance (suitable for limited edits)
•Keep editable (may change appearance)
Disable the prompt that appears when saving to an earlier version
Click Tools Options CorelDRAW. Click Save, and disable the
Ask when saving check box.
Locked files
In a corporate environment you may open a locked file that is already being edited by another user. You can save changes that you make to
a locked file in one of the following ways:
•
If the other user has modified the file or still has the file open, you must save the file with a new name by clicking File Save As .
•
If the other user has closed the file without modifying it, you can save the changes by clicking File Save .
Back up and recover files
CorelDRAW can save backup copies of drawings and prompt you to recover them in the event of a system error. The back-up feature creates
a copy of the drawing when you save a drawing. This backup copy does not contain the changes that you made since you last opened the
file. The backup copy is named backup_of_filename, and by default is stored in the same folder as the original drawing. You can change
the location where backup files are created.
The auto-backup feature saves drawings that you have opened and modified. Auto-backup files are named auto_backup_of_filename.
During any working session with CorelDRAW, you can set the time interval for automatically backing up files and specify whether you
want the files to be saved in your temporary folder (the default location) or in a folder of your choice. You can recover the backup files
from the temporary or specified folder when you restart CorelDRAW after a system error. If you choose not to recover the backup file, it is
automatically erased when you quit the application.
To specify backup and auto-backup settings
1
Click Tools Options CorelDRAW.
2 In the left pane of the dialog box that appears, click Save.
3 Perform a task from the following table.
To Do the following
Create a backup file before saving Enable the Back up original file before saving check box.
58 | CorelDRAW 2019 User Guide
Page 61

To Do the following
Change the location where backup files are created In the Back up original file to area, enable the Choose location
option. Click Browse, and navigate to the folder you want.
Specify auto-backup settings To set how often to back up the file automatically, enable the Back
up every check box, and choose a value from the Minutes list box.
To choose the location for auto-backup files, in the Back up to
area, enable one of the following options:
•Temporary folder — lets you save auto-backup files in the
temporary folder
•Choose location — lets you specify the folder for auto-backup
files
Disable the auto-backup feature Choose Never from the Minutes list box.
All open or modified files that are not in the CorelDRAW (CDR) file format are backed up as CorelDRAW files.
You can cancel the creation of an auto-backup file by pressing Esc while a file is being saved.
To recover a backup file
1 Restart CorelDRAW.
2 Click OK in the file recovery dialog box that appears.
The file recovery dialog box appears upon startup after a system error.
3 Save and rename the file in the specified folder.
If you click Cancel, CorelDRAW ignores the backup file and deletes it when you quit the application.
Add and access drawing information
CorelDRAW lets you add reference information, such as language, title, author, subject, keywords, rating, and other notes to a drawing.
Although adding document information is optional, doing so makes it easier to organize and locate drawings later on.
The application also lets you access other important document information, such as the number of pages and layers, fonts, object and text
statistics, and the types of objects the drawing contains. You can also view color information such as the color profiles that are used to
define document colors as well as the primary color mode and rendering intent.
To add and access drawing information
1
Click File Document Properties.
2 In the Document Properties dialog box, type text in any of the following boxes:
• Language
• Title
• Subject
CorelDRAW basics | 59
Page 62

• Author
• Copyright
• Keywords
• Notes
3 To specify a rating, choose a rating from the Rating list box.
4 Click OK.
You can modify the drawing information at any time.
Close drawings
You can close one drawing, or multiple drawings, at any time before quitting CorelDRAW.
To close drawings
To Do the following
Close one drawing
Click File Close .
Close all drawings
Click File Close All .
If you are unable to close a document, you may have a task, such as printing or saving, in progress or a task that has failed. Please
refer to the status bar to view the status of a task.
Explore basic tasks
CorelDRAW has a virtually unlimited number of tools and capabilities to help you create drawings. The following table provides you with the
basic features of CorelDRAW to help you get started.
For information about See
Drawing lines “Format lines and outlines ” on page 138
Drawing shapes “Shapes ” on page 163
Creating and manipulating objects “Transform objects ” on page 255
Adding color to objects “Fills ” on page 365
60 | CorelDRAW 2019 User Guide
Page 63

For information about See
Adding text to a drawing “Add and manipulate text ” on page 471
Creating drawings for use on the web “Export bitmaps for the web ” on page 760
Printing drawings “Print basics ” on page 727
CorelDRAW.app, CorelDRAW, and Corel Cloud
Available exclusively to CorelDRAW Graphics Suite users, CorelDRAW.app is a web-based application for creating vector graphics. Access it
from any device to capture your ideas into designs instantly or share your designs with customers.
CorelDRAW. app is integrated with CorelDRAW. You can save files created in CorelDRAW.app or CorelDRAW to Corel Cloud, an online
storage for files, and then open these files in either one of the applications. For example, you can create a design in CorelDRAW.app, save it
Corel Cloud, and later edit the design in CorelDRAW, taking advantage of its wide array of editing tools. After you have finished editing, you
can save and upload the file to Corel Cloud directly from CorelDRAW. The edited file can be opened in CorelDRAW.app for annotation, not
for editing, and then saved to Corel Cloud. If you need to edit the file, you can open it in CorelDRAW from Corel Cloud.
CorelDRAW.app and CorelDRAW share some features, but they also differ. For information about saving, editing, and opening files with
CorelDRAW.app, view a tutorial from within the app by clicking Help Learning Tutorial.
Important notes!
• To open files created in CorelDRAW. app in CorelDRAW and vice versa, you must save them as CorelDRAW (CDR) files.
• The first time you access Corel Cloud from CorelDRAW, you will be prompted to sign in with the password associated with your Corel
account. You need to sign in only once a year.
• An Internet connection is required to open files from and save files to Corel Cloud.
To access CorelDRAW.app
1 Go to https://coreldraw.app.
2 In the Sign in to Corel Cloud dialog box, type the password associated with your Corel.com account.
To open a CorelDRAW (CDR) file saved in Corel Cloud
1
In CorelDRAW, click File Open from Corel Cloud .
2 Double-click the file you want to open.
You can also open a CDR file from Corel Cloud by clicking the Open from Corel Cloud button on the standard toolbar.
To save a CorelDRAW (CDR) file to Corel Cloud
1
In CorelDRAW, click File Save to Corel Cloud .
2 Type a file name in the File name box.
You can also save a CorelDRAW file to CorelDRAW cloud by clicking the Save to Corel Cloud button on the standard toolbar.
CorelDRAW basics | 61
Page 64

62 | CorelDRAW 2019 User Guide
Page 65

CorelDRAW workspace tour
Becoming familiar with the terminology and workspace of CorelDRAW will help you follow the concepts and procedures in the user guide
and in the Help.
In this section, you’ll learn about
• “CorelDRAW terms” (page 63)
• “Application window” (page 64)
• “Standard toolbar” (page 66)
• “Toolbox” (page 69)
• “Property bar” (page 82)
• “Dockers” (page 82)
• “Status bar” (page 84)
• “Choose a workspace” (page 84)
CorelDRAW terms
Before you get started with CorelDRAW, you should be familiar with the following terms.
Term Description
Object An element in a drawing such as an image, shape, line, text, curve,
symbol, or layer
Drawing The work you create in CorelDRAW; for example, custom artwork,
logos, posters, and newsletters
Vector graphic An image generated from mathematical descriptions that
determine the position, length, and direction in which lines are
drawn
Bitmap An image composed of grids of pixels or dots
CorelDRAW workspace tour | 63
Page 66

Term Description
Docker A window that contains commands and settings relevant to a
specific tool or task
Flyout A group of related tools or menu items
List box A list of options that drops down when a user clicks the down
arrow button
Artistic text A type of text to which you can apply special effects, such as
shadows
Paragraph text A type of text to which you can apply formatting options, and
which can be edited in large blocks
Application window
The CorelDRAW application window appears below.
64 | CorelDRAW 2019 User Guide
Page 67

Circled numbers correspond to the numbers in the following table, which describes
the main components of the application window. Artwork by Ludmila Zoldakova.
Part Description
1. Toolbox Provides tools for creating and modifying objects in the drawing
2. Document tab Lets you quickly move between open documents
3. Title bar Displays the title of the currently selected drawing
4. Menu bar Contains pull-down menu options
5. Toolbar Contains shortcuts to menu and other commands
6. Drawing window The area outside the drawing page bordered by the scroll bars and
application controls
CorelDRAW workspace tour | 65
Page 68

Part Description
7. Property bar A detachable bar with commands that relate to the active tool or
object. For example, when the Text tool is active, the text property
bar displays commands for creating and editing text.
8. Docker Displays task- and tool-related controls, such as command buttons,
options, and list boxes for modifying drawings
9. Rulers Horizontal or vertical bars marked off in units and used to
determine the size and position of objects
10. Document palette A detachable bar that contains color swatches for the current
document
11. Document navigator Provides controls for managing pages
12.Drawing page The printable area inside the drawing window
13. Status bar Displays object position and properties, such as type, size, color, fill,
and resolution
14. Navigator A button that opens a smaller display to help you move around a
drawing
15. Color palette A detachable bar that contains color swatches
To toggle between displaying and hiding the rulers, see “To hide or display the rulers” on page 596.
You can customize the appearance of the application workspace by setting a scaling level, choosing a theme, and changing the color
of the desktop and the window borders. For more information, see “Customize workspace appearance” on page 846.
Standard toolbar
The standard toolbar, which appears by default, contains buttons and controls that are shortcuts to many of the menu commands. For
information about customizing the contents and appearance of the toolbar, see “Customize toolbars” on page 851.
Click this button To
Start a new drawing
Open a drawing
66 | CorelDRAW 2019 User Guide
Page 69

Click this button To
Save a drawing
Print a drawing
Cut selected objects to the Clipboard
Copy selected objects to the Clipboard
Paste the Clipboard contents into a drawing
Undo an action
Restore an action that was undone
Import a drawing
Export a drawing
Publish to PDF
Set a zoom level
Display Full-screen preview
Show or hide rulers
CorelDRAW workspace tour | 67
Page 70

Click this button To
Show or hide grid
Show or hide guidelines
Disable all snapping. Click again to restore the selected snapping
options.
Enable or disable automatic alignment for the pixels, document
grid, baseline grid, guidelines, objects, and page
Open the CorelDRAW Options dialog box
Start Corel applications and plug-ins, or access the Get More
dialog box to download other creative tools
More about toolbars
In addition to the standard toolbar, CorelDRAW has toolbars for specific tasks. For example, the Text toolbar contains commands relevant to
using the Text tool. If you use a toolbar frequently, you can display it in the workspace at all times.
For information about customizing the position, contents, and appearance of toolbars, see “Customize toolbars” on page 851.
The following table describes toolbars other than the standard toolbar.
Toolbar Description
Zoom Contains commands for zooming in and out of a drawing page by
specifying percentage of original view, clicking the Zoom tool, and
selecting a page view
Text Contains commands for formatting and aligning text
Layout Contains commands for converting objects to PowerClip frames
and text frames, displaying alignment guides as well as setting
columns and margins
Transform Contains commands for skewing, rotating, and mirroring objects
Macros Contains commands for editing, testing, and running macros
Internet Contains commands for web-related tools for creating rollovers and
publishing to the Internet
68 | CorelDRAW 2019 User Guide
Page 71

Toolbar Description
Project Timer Contains controls that let you track the time spent on project tasks
To toggle between displaying and hiding a toolbar, click Window Toolbars, and click the command with the toolbar name.
To lock all toolbars so that you don’t inadvertently change their position, click Window Toolbars Lock toolbars.
Toolbox
The toolbox contains tools for drawing and editing images. Some of the tools are visible by default, while others are grouped in flyouts.
Flyouts open to display a set of related CorelDRAW tools. A small flyout arrow in the lower-right corner of a toolbox button indicates a
flyout. You can access the tools in a flyout by clicking the flyout arrow. After you open a flyout, you can easily scan the contents of other
flyouts by hovering over any of the toolbox buttons which have flyout arrows.
In the default workspace, clicking the flyout arrow on the Shape tool opens the Edit Shape Tools flyout.
Some tools in the toolbox are not visible by default. You can choose which tools to display in the toolbox.
Locate tools
The following illustration shows all flyouts in the default CorelDRAW toolbox and can help you locate tools more easily.
CorelDRAW workspace tour | 69
Page 72

To toggle between displaying and hiding the toolbox, click Window Toolbars Toolbox.
To hide or display tools in the toolbox, click the Quick customize button , and enable or disable the corresponding check boxes.
For more information, see “Customize the toolbox” on page 854.
The following table provides descriptions of the tools in the CorelDRAW toolbox.
Pick tools
The Pick tool lets you select, size, skew, and
rotate objects.
70 | CorelDRAW 2019 User Guide
Page 73

Edit shape tools
The Freehand pick tool lets you select
objects by using a freehand selection
marquee.
The Free transform tool lets you transform
an object by using the Free rotation, Free
angle reflection, Free scale, and Free skew
tools.
The Shape tool lets you edit the shape of
objects.
The Smooth tool lets you smooth curved
objects to remove jagged edges and reduce
the number of nodes.
The Smear tool lets you shape an object by
pulling extensions or making indents along
its outline.
CorelDRAW workspace tour | 71
Page 74
The Twirl tool lets you create swirl effects by
dragging along the edge of objects.
The Attract and Repel tool lets you shape
objects by attracting nodes to the cursor or
pushing nodes away from the cursor.
The Smudge tool lets you distort a vector
object by dragging along its outline.
Crop tools
The Roughen tool lets you distort the
outline of a vector object by dragging along
the outline.
The Crop tool lets you remove unwanted
areas in objects.
72 | CorelDRAW 2019 User Guide
Page 75
The Knife tool lets you slice objects, groups
of objects, and bitmaps along any path you
specify.
The Virtual segment delete tool lets you
delete portions of objects that are between
intersections.
The Eraser tool lets you remove areas of
your drawing.
Zoom tools
Curve tools
The Zoom tool lets you change the
magnification level in the drawing window.
The Pan tool lets you control which part
of the drawing is visible in the drawing
window.
CorelDRAW workspace tour | 73
Page 76

The Freehand tool lets you draw single line
segments and curves.
The 2-point line tool lets you draw a
straight two-point line segment.
The Bézier tool lets you draw curves one
segment at a time.
The Pen tool lets you draw curves one
segment at a time.
The B-spline tool lets you draw curved lines
by setting control points that shape the
curve without breaking it into segments.
The Polyline tool lets you draw lines and
curves in preview mode.
74 | CorelDRAW 2019 User Guide
Page 77
Drawing tools
The 3-point curve tool lets you draw a
curve by defining the start, end, and center
points.
The Artistic media tool provides access to
the Preset, Brush, Sprayer, Calligraphic ,
and Expression tools.
The Smart drawing tool converts your
freehand strokes to basic shapes and
smoothed curves.
Rectangle tools
The LiveSketch tool lets you sketch naturally
with intelligent stroke adjustment.
The Rectangle tool lets you draw rectangles
and squares.
CorelDRAW workspace tour | 75
Page 78
Ellipse tools
The 3-point rectangle tool lets you draw
rectangles at an angle.
The Ellipse tool lets you draw ellipses and
circles.
The 3-point ellipse tool lets you draw
ellipses at an angle.
Shape tools
76 | CorelDRAW 2019 User Guide
The Polygon tool lets you draw symmetrical
polygons and stars.
The Star tool lets you draw perfect stars.
Page 79
The Spiral tool lets you draw symmetrical
and logarithmic spirals.
The Common shapes tool lets you
choose from a full set of shapes, including
hexagram, a smiley face, and a right-angle
triangle.
The Impact tool lets you create graphic
effects in a style inspired by comic books
and contemporary illustrations.
Text tools
The Graph paper tool lets you draw a grid
of lines similar to that on graph paper.
The Text tool lets you type words directly on
the screen as artistic or paragraph text.
CorelDRAW workspace tour | 77
Page 80

Dimension tools
The Table tool lets you draw and edit tables.
The Parallel dimension tool lets you draw
slanted dimension lines.
The Horizontal or vertical dimension
tool lets you draw horizontal or vertical
dimension lines.
The Angular dimension tool lets you draw
angular dimension lines.
The Segment dimension tool lets you
display the distance between end nodes in
single or multiple segments.
78 | CorelDRAW 2019 User Guide
Page 81

Connector tools
The 3-point callout tool lets you draw a
callout with a two-segment leader line.
The Connector tool lets you draw straight,
right-angle, and rounded right-angle
connector lines.
The Anchor editing tool lets you modify
connector line anchor points.
Effect tools
The Drop shadow tool lets you apply a
drop shadow to an object.
The Contour tool lets you apply a contour
to an object.
CorelDRAW workspace tour | 79
Page 82

The Blend tool lets you blend two objects.
The Distort tool lets you apply a Push or
Pull distortion, a Zipper distortion, or a
Twister distortion to an object.
The Envelope tool lets you shape an object
by dragging the nodes of the envelope.
Transparency tool
The Extrude tool lets you apply the illusion
of depth to objects.
The Block shadow tool lets you add solid
vector shadows to objects and text.
80 | CorelDRAW 2019 User Guide
Page 83

Eyedropper tools
The Transparency tool lets you apply
transparencies to objects.
The Color eyedropper tool lets you select
and copy a color from an object on the
drawing window or the desktop.
The Attributes eyedropper tool lets you
select and copy object properties, such as
line thickness, size and effects, from an
object on the drawing window.
Fill tools
The Interactive fill tool lets you apply
various fills.
The Smart fill tool lets you create objects
from enclosed areas and then apply a fill to
those objects.
CorelDRAW workspace tour | 81
Page 84

Outline tool
Property bar
The Mesh fill tool lets you apply a mesh
grid to an object.
The Outline tool opens a flyout that gives
you quick access to items such as the
Outline pen dialog box and Outline color
dialog box. This tool is not displayed by
default in the toolbox. For information
about how to display it, see “To customize
the toolbox” on page 854.
The property bar displays the most commonly used functions that are relevant to the active tool or to the task you’re performing. Although
it looks like a toolbar, the property bar content changes depending on the tool or task.
For example, when you click the Text tool in the toolbox, the property bar displays text-related commands. In the example below, the
property bar displays text formatting, alignment, and editing tools.
You can customize the contents and position of the property bar to suit your needs. For more information, see “Customize the property bar”
on page 854.
To toggle between displaying and hiding the property bar, click Window Toolbars Property bar.
To hide or display controls on the property bar, click the Quick customize button , and enable or disable the corresponding
check boxes.
Dockers
Dockers display the same types of controls as a dialog box, such as command buttons, options, and list boxes. Unlike most dialog boxes, you
can keep dockers open while working on a document, so you can readily access the commands to experiment with different effects. Dockers
have features similar to palettes in other graphics programs.
Dockers can be either docked or floating. A docked docker is attached to the edge of the application window, a toolbar, or a palette. A
floating docker is not attached to a workspace element. If you open several dockers, they usually appear nested, with only one docker fully
displayed. You can display a docker hidden from view by clicking the docker’s tab.
You can move dockers, and you can collapse dockers to save screen space.
82 | CorelDRAW 2019 User Guide
Page 85

An example of a docker. When you open the Properties docker and click an object in
the drawing window, you can access various options for modifying object properties.
In this example, the Properties and the Objects dockers are docked and nested. The Transform docker is floating.
To open a docker
•
Click Window Dockers , and click a docker.
CorelDRAW workspace tour | 83
Page 86

To open or close dockers, you can also click the Quick customize button on the right side of a docker, and enable or disable the
corresponding check boxes.
You can also close a docker by clicking the X button on its title bar. Clicking the X button on the title bar closes all nested dockers in a
group. To close only a specific docker, click the X button on the docker tab.
To move dockers
To move Do the following
A docker Drag the docker tab to a new location.
Multiple nested dockers Drag the title bar of the active docker to a new location.
To dock a floating docker
• Drag the docker’s title bar or tab to an edge of the drawing window and position the pointer along the edge. When a gray preview of
the docker’s position appears, release the mouse button.
To collapse a docker
•
Click the Collapse docker button on the docker’s title bar.
To expand a collapsed docker, click its tab.
Status bar
The status bar displays information about selected objects (such as color, fill type, outline, cursor position, and relevant commands). It also
displays document color information, such as the document color profile and color proofing status.
You can edit the fill and outline of selected objects by clicking the Fill and Outline icons on the status bar.
See “Customize the status bar ” on page 855 for information about customizing the contents and appearance of the status bar.
To hide the status bar
•
To hide the status bar, click Window Toolbars Status Bar.
Choose a workspace
CorelDRAW includes a collection of workspaces that are designed to help you increase your productivity. A workspace is a configuration
of settings that specifies how the various command bars, commands, and buttons are arranged when you open the application. You can
choose a workspace from the Welcome Screen, or you can switch to a different workspace from within the application.
84 | CorelDRAW 2019 User Guide
Page 87

The specialized workspaces in CorelDRAW are configured according to specific workflows or tasks, such as page layout work or illustrating.
Their purpose is to make more accessible the tools that you use most often.
The following table describes the available workspaces.
Workspace Description
Lite This workspace makes CorelDRAW’s most commonly used tools
and features more accessible. If you are new to CorelDRAW, the
Lite workspace is ideal for getting started.
Default This workspace has been redesigned to provide a more intuitive
placement of tools and controls.This workspace is ideal for users
who have experience with other vector graphics software, as well
as users who are familiar with CorelDRAW.
Help topics are based on the Default workspace.
Touch Optimized for touch-enabled devices, the Touch workspace is ideal
for field work and sketching. Complete your tasks by using touch,
dial, or a stylus, without needing a mouse or keyboard.
Illustration This workspace is designed to make the process of creating book
cover designs, magazine ads, storyboards, and other types of
illustrations more intuitive and efficient.
Page layout This workspace is optimized for arranging graphics and text objects
so you can create compelling layouts for business cards, branding
materials, product packaging, or multipage documents such as
brochures and newsletters.
Adobe Illustrator Simulates the Adobe Illustrator workspace by positioning the
CorelDRAW features where you would find the equivalent feature
in Adobe Illustrator. This workspace is useful if you recently
switched from Adobe Illustrator to CorelDRAW and you are not
familiar with the CorelDRAW workspace.
If you have a unique workflow, you can create a custom workspace that is optimized for your specific needs. For more information, see
“Create workspaces” on page 844.
To choose a workspace
•
Click Window Workspace , and choose one of the available workspaces.
You can also choose a workspace from the Welcome Screen or from the Workspaces dialog box (Tools Options Workspaces).
CorelDRAW workspace tour | 85
Page 88

86 | CorelDRAW 2019 User Guide
Page 89

Creative tools and content
You can expand your collection of creative tools by downloading free tools and content and purchasing apps, plug-ins, and content packs.
You can also search and manage content, such as vector and bitmap (also known as raster) images in local or network folders and on
portable devices. When you find the content that you need, you can insert it into your document or open it in its associated application.
CorelDRAW is fully integrated with the search capabilities that are offered by Windows. By default, the application searches all locations that
Windows Search is configured to index. For information about modifying indexing options in Windows Search, see the Windows Help.
This section contains the following topics:
• “Content types” (page 87)
• “Change content locations” (page 89)
• “Acquire applications, plug-ins, and content” (page 89)
• “Find images with the CONNECT Content docker” (page 90)
• “Use and manage images with the CONNECT Content docker” (page 93)
• “CONNECT Browser” (page 95)
• “Find content with the CONNECT Browser” (page 97)
• “View content in the CONNECT Browser” (page 99)
• “Use content from the CONNECT Browser” (page 100)
• “Manage content with the Tray docker” (page 102)
• “Sync trays with OneDrive” (page 104)
Content types
Content types include images (vector and bitmap graphics), fills (fountain, bitmap patterns, and vector patterns), fonts, image lists, palettes,
photo frames, and templates. For information about fills, see “Find and view fills and transparencies” on page 399. For information about
templates, see “Find templates” on page 560. For information about fonts, see the Corel Font Manager Help or “Acquire more fonts” on
page 536.
To find vector and bitmap graphics stored in local and network folders, and portable devices, use the CONNECT Content docker. To find
images on Flickr, sync content with OneDrive, or download all images used on a website, use the CONNECT Browser docker.
Creative tools and content | 87
Page 90
Sample vector images
Sample bitmap images
Sample vector patterns
Sample bitmap patterns
Sample photo frames
Sample image lists
88 | CorelDRAW 2019 User Guide
Page 91

Change content locations
Images, fills, fonts, image lists, photo frames, trays, and templates are saved to your Documents\Corel\Corel Content\[Content Type]
folders. You can change the location of some or all these content files by browsing to different folders. For example, you can choose to save
templates and fonts to a new location, but leave other content files in your Documents\Corel\Corel Content folder.
When you change a content location, you can choose to move the content files from the old location to the new location.
You can reset individual or multiple content locations to their default folders from the Global Options dialog box. Alternatively, you can reset
all content locations when you reset the application to its default settings by holding down F8 during startup. With this method, all files
saved to custom locations remain in place. To restore your custom content locations, you must browse again to the respective folders.
To change a content location
1
Click Tools Options Global.
2 Click File Locations.
3 Click the location that you want to change, and click Edit.
4 In the Select Folder dialog box, navigate to the folder you want.
If you want to move the content files saved to the old location to the new folder, click Yes in the Move Content dialog box.
You can also
Reset the location of a single content type Click the content type name, and click Reset.
Reset the locations of multiple content types Holding down Ctrl, click the content types you want, and click
Reset.
Acquire applications, plug-ins, and content
The Get More dialog box lets you download apps and plug-ins as well as creative tools and content such as fill packs and font packs from
within CorelDRAW. The selection is updated with new offerings as they become available. Some items are free whereas other items are
available for purchase.
Both applications and plug-ins require installation.
To uninstall an application or a plug-in, go to the Control Panel of the operating system.
AfterShot 3 HDR
Corel® AfterShot™ 3 HDR lets you make easy corrections and enhancements to your RAW or JPEG photos, and apply adjustments to
thousands of photos at once with batch-processing tools. Plus, you can create high dynamic range (HDR) images with the HDR module,
included in AfterShot 3 HDR. Download Corel AfterShot 3 HDR for free from within CorelDRAW, and quickly learn professional-grade photo
editing. To access even more powerful photo-management and photo-editing features, upgrade to the latest version of AfterShot Pro from
within the Get More dialog box.
Restore purchases
After you purchase creative tools, check marks appear beside their names. If you reinstall the suite or install it on another computer, you can
restore your purchases. The items that you have purchased will appear in the Get More dialog box, so that you can download them and
reinstall them.
Creative tools and content | 89
Page 92

To access the Get More dialog box
• Click the Launch button on the standard toolbar, and click Get More.
To download AfterShot 3 HDR
• Click the Launch button on the standard toolbar, and click AfterShot 3 HDR.
After downloading AfterShot 3 HDR, you can start it from the Launch button on the standard toolbar.
For detailed information about how to use AfterShot 3 HDR, start the application and access the Help by pressing F1 .
To access an application or a plug-in
• Click the Launch button on the standard toolbar, and click the application or plug-in that you want to use.
To restore your purchases
1
Click Help Restore Purchases .
2 In the dialog box that appears, type the email address that was used to make the purchases, and click Continue.
A list of your purchases is displayed.
3 Click Close.
The list of offerings in the Get More dialog box is updated to show which items you have already purchased.
4 Download the items you want.
Find images with the CONNECT Content docker
The CONNECT Content docker (Window Dockers CONNECT Content) provides a central location where you can search and browse
vector and bitmap images in local or network folders and on portable devices. After you find the image you need, you can add it to your
project. For more information, see “Use and manage images with the CONNECT Content docker” on page 93.
To get you started, Corel provides local content that is stored in your Documents\Corel\Corel Content\Images folder. If you are looking to
expand your image collection, you can download additional image packs from within the Get More dialog box.
To access images that are saved to local folders outside your Documents\Corel\Corel Content\Images folder, you can create links, known
as aliases, to these folders. In addition, aliases can be used to access images saved to shared network locations as well as secondary storage
devices such as USB flash drives, and portable hard drives.
90 | CorelDRAW 2019 User Guide
Page 93
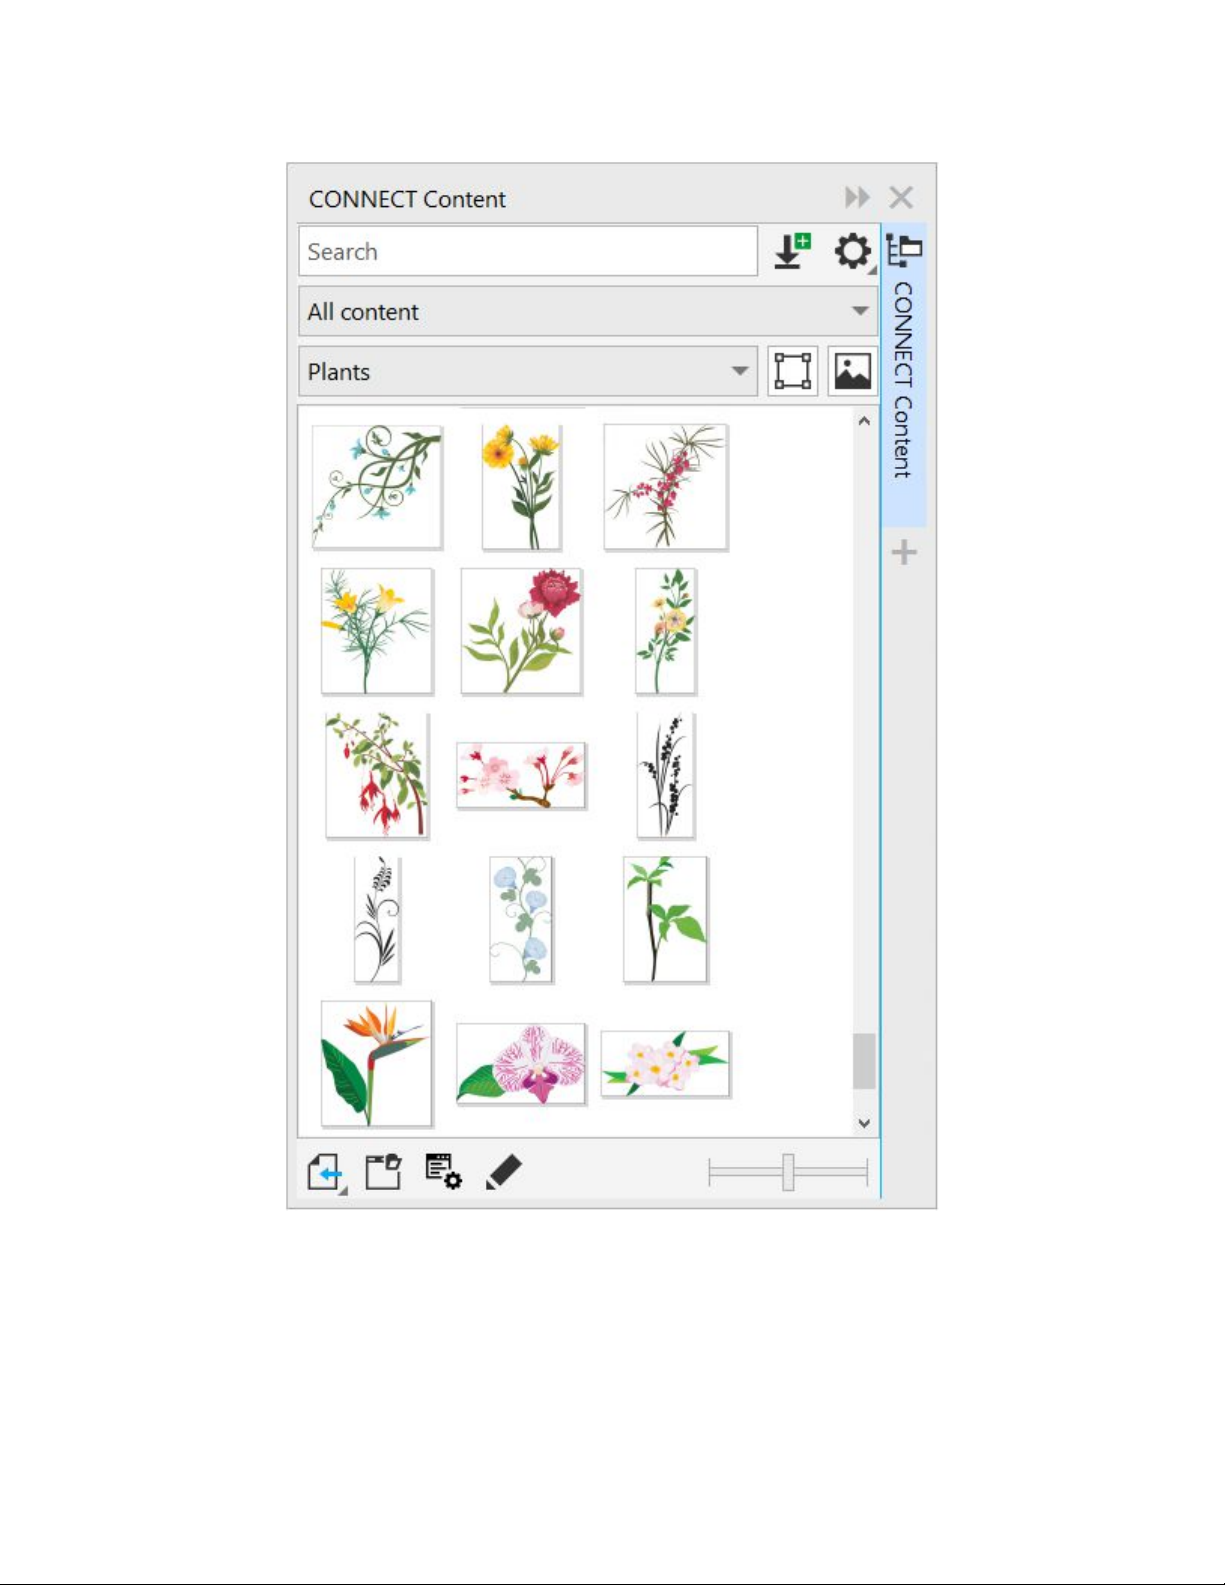
You can search by the file name, title, or tags associated with images. For example, if you type “tree” in the text field, the application
automatically filters out all files that do not match, and you see only the files that have the word “tree” in the file name, title, or tags.
You can narrow the search results by choosing the content source (for example, a specific folder location) and category (for example,
Nature). You can also view the list of your favorite or most recently used images, and you can sort images by the name and the date they
were created or modified.
By default, you can browse and search the entire All content library, stored in your Documents\Corel\Corel Content\Images folder. You can
also search and browse one folder or list at a time.
Creative tools and content | 91
Page 94

After you copy a folder that contains images to your computer, it may take some time for your operating system to index the folder. To view,
browse, and search content in such a folder right away, you may need to reindex the folder.
You can increase the size of thumbnails, and you can decrease thumbnail size to view more search results at a glance.
To find, filter, and sort images
1
Click Window Dockers CONNECT Content.
2 Type a word in the Search box, and press Enter.
Thumbnails that match the search term appear in the viewing pane.
To search and browse all available content, choose All content from the Choose content source list box.
You can also
Filter images From the Choose content source list box, choose an item other
than All content. Choose a category from the Filter content list
box.
To view only clipart and vector graphics, click the Show vector
images button .
To view only photos and other bitmaps, click the Show raster
images button .
View the most recently used images From the Choose content source list box, choose Recent.
View your favorite images From the Choose content source list box, choose Favorites. For
information about how to mark content as favorite, see “To tag,
delete, and edit the properties of images ” on page 94.
Sort images
Click the Options for folder or alias button , and choose one
of the following:
•Sort by name sorts templates by file name, in alphabetical order.
•Sort by date created sorts images by the date they were created,
starting with the last created image.
•Sort by last modified sorts images by the date they were
modified, starting with the last modified image.
Images in your Favorites list are automatically sorted by the date
you marked them as favorites, starting with the last image added
to Favorites.
Images in your Recent list are automatically sorted by the date you
used them, starting with the last used image.
Browse or search all items in your All content library From the Choose content source list box, choose All content.
Click the Options for folder or alias button , and make sure
the Browse recursively command is enabled.
92 | CorelDRAW 2019 User Guide
Page 95

You can also
Reindex a folder
Click the Options for folder or alias button , and click
Reindex folder.
To download and add a new image pack
1
Click Window Dockers CONNECT Content.
2 Click the Get More button.
3 In the Get More dialog box, click the image pack you want.
4 Do one of the following:
• Click Buy Now, and follow the onscreen instructions to purchase the item.
• Click Download if the item is included in your product or subscription.
To add an alias to a location that contains images
1 In the CONNECT Content docker, open the Choose content source list box, and click Add new.
2 Click Create alias.
3 Browse to the folder or location you want in the Locate content library dialog box.
4 Click Select Folder.
If you cannot see the images right away, click the Options for folder or alias button, and click Reindex folder.
To view the filename and location of an image
• Hold the pointer over a thumbnail.
To adjust the size of image thumbnails
• Move the Thumbnail size slider.
Use and manage images with the CONNECT Content docker
After you find the vector or bitmap image you need, you can place it into your project as an embedded or linked object. When inserting a
vector graphic, you can place it at the original position where it was created relative to the page.
You can manage the list of your local packs and aliases (links to local folders, network locations, and secondary storage devices). For
example, you can rename the local packs or aliases, and you can remove aliases from the list. If an alias no longer works because the folder
has been moved, you can browse to the new location to restore the link.
To find the images you like with ease, you can tag them as favorites. In addition, you can view and change the properties of an image. For
example, you can change its title, add new tags, and delete existing tags. When you no longer need an image, you can delete it.
To insert content in the active document
1 In the CONNECT Content docker, click a thumbnail.
2
Click the Import button and choose one of the following commands:
• Import and link — inserts the file as a linked object
• Import at original position — lets you place a vector graphic at the original position where it was created relative to the page. The
graphic is placed as an embedded object.
• Import — inserts the file as an embedded object
3 Follow the onscreen instructions.
Creative tools and content | 93
Page 96

You can also insert a file into an active document as an embedded object by dragging the file from the viewing pane to the active
document.
You can also insert a file into an active document by right-clicking the file in the viewing pane and choosing an Import command.
To open and edit an image
1 In the CONNECT Content docker, click a thumbnail.
2
Click the Edit button .
The file opens in its associated application.
To update the list of folders and aliases in the CONNECT Content docker
1
Click Window Dockers CONNECT Content.
2 Choose a content folder or an alias from the Choose content source list box under All content.
3
Click the Options for folder or alias button , and perform a task from the following table.
To Do the following
Rename a content pack or alias Click Rename, and in the Rename dialog box, type a name in the
Name box.
Browse to a folder that has been moved or renamed Click Browse, and navigate to the folder that contains the images.
Remove an alias from the list Click Remove .
Open the content pack or alias in Windows Explorer Click Open folder location.
To tag, delete, and edit the properties of images
1
Click Window Dockers CONNECT Content.
2 Perform an action from the following table.
To Do the following
Tag an image as favorite Right-click a thumbnail, and click Favorite.
Edit image properties Right-click a thumbnail, and click Properties. In the Properties
dialog box, do any of the following:
•Choose a language from the Language list box.
•Type a new name in the Title box.
•Choose a category from the Category list box to categorize the
image.
•To assign a custom category, choose New category from the
Category list box, and type the category name in the box.
•
Add or delete tags in the Tags box.
94 | CorelDRAW 2019 User Guide
Page 97

To Do the following
Delete a file from your local library Right-click a thumbnail, and click Delete.
CONNECT Browser
You can browse and search for content by using the CONNECT Browser. You can use the Tray docker to store content for later use.
The CONNECT Browser has two viewing modes: single pane and full view. In full view, all panes are displayed. In single-pane view, either the
viewing pane or the Libraries, Favorite folders, and Folders panes are displayed. You can resize the docker to display all panes or toggle
between the viewing pane and the Libraries, Favorite folders, and Folders panes.
The CONNECT Browser with the viewing pane hidden (left) and the navigation pane hidden
(right). Click the toggle arrow (1) to display or hide panes. Resize the docker to display both panes.
You can customize the size and display of individual panes.
Creative tools and content | 95
Page 98

The grab area (1, 2, 3) lets you resize a pane.
You can use the Favorite folders pane to create shortcuts to folders that you visit frequently. You can add locations to and remove locations
from the Favorite folders pane.
To display or hide the CONNECT Browser and the Tray docker
To Do the following
Display or hide the CONNECT Browser docker
Display or hide the Tray docker
96 | CorelDRAW 2019 User Guide
Click Window Dockers CONNECT Browser .
Click Window Dockers Tray.
Page 99

To resize a pane
• Point to the pane’s grab area, and when the cursor changes to a two-directional arrow, drag the edge of the pane.
To display or hide a pane
• Click the arrow to toggle between displaying and hiding the pane.
To add a location to the Favorite Folders pane
• Drag a folder from the Libraries, Folders, or viewing pane to the Favorite folders pane.
You can also add locations to the Favorite folders pane by right-clicking a folder in the Libraries or Folders pane, and clicking Add
to Favorites.
To remove a location from the Favorite Folders pane
• Right-click a location in the Favorite folders pane, and click Remove from Favorites.
Find content with the CONNECT Browser
With the CONNECT Browser, you can browse for content, or you can search for content by using keywords.
You can browse and search for content in one or multiple locations on your computer or local network. You can also browse and search
online on Flickr ®. The images that you find online are often subject to usage restrictions and may be watermarked or low-resolution. For
information about using such images, see “Use content from the CONNECT Browser” on page 100.
Note that online content is unavailable in workplaces with restricted Internet access.
You can also navigate to previously viewed content.
Searching for content
You can search by the name, category (for example, clipart, photo images, or fonts), or reference information (for example, tags or notes)
associated with a file. When you type a term in the Search and address box and initiate a search, all matching files are displayed as
thumbnail images in the viewing pane. For example, if you type flower , the application automatically filters out all files that do not match
and displays only the files that have the word flower in the filename, category, or tags assigned to the file. You can also type phrases
and multiple words, and you can fine-tune your search by using Boolean operators such as AND, NOT, and OR. For example, you can
find content that contains both flower and sun images by typing flowers AND sun. For information about adding tags and reference
information, see “To add and access drawing information ” on page 59.
To increase the search speed for local content and improve results, you can adjust the Windows Search options by adding more locations to
the index.
You can also find all images on a webpage by typing the web address. For example, typing www.corel.com displays all the images that
appear on the Corel website.
Refining your search
By default, your search results include all relevant content such as vector graphics, bitmaps, and fonts. You can narrow down the search
results by excluding content. For example, if you are searching for graphics, you can display only vector graphics or only bitmaps. If you want
to choose a font for your project, you can display only fonts.
You can widen the scope of a search, and you can cancel a search at any time.
Creative tools and content | 97
Page 100

To browse and search for content
1
Click Window Dockers CONNECT Browser .
2 Click a location in one of the following panes:
• Libraries — lets you browse and search local content
• Favorite folders — lets you browse and search your favorite locations
• Folders — lets you browse the folder structure available on your computer
3 Type a word or multiple words in the Search and address box, and press Enter.
Files that match the search terms appear in the viewing pane.
If you want to search for a phrase, enclose the phrase with quotation marks.
You can also
Search for content in multiple locations Enable the check boxes for the libraries and folders that you want
to search, and click the Refresh button .
Show or hide search results for a location In the viewing pane, click the Show/Hide arrow to the right of the
location.
Specify how many Flickr online search results to display In the Libraries pane, click the Configure content libraries button
. Click Flickr, and choose a number from the Search results list
box. This number determines the initial number of search results
that are displayed in the viewing pane, as well as the additional
results that are displayed each time you click More from.
Fine-tune a search by using Boolean operators Type one of the following Boolean operators between the search
terms:
AND — lets you find content that contains all search terms in the
Search and address box. Instead of AND, you can also use the plus
sign (+).
NOT — lets you exclude content that contains the search term after
NOT. Instead of NOT, you can also use the minus sign (-).
OR — lets you find content that contains at least one of the search
terms
You can browse the contents of only one folder at a time.
To specify the location where you want to browse for content, type or paste a path in the Search and address box, and press Enter.
The Search and address bar keeps track only of the locations that you enter manually. To delete all locations, click the drop-down
arrow, and click Clear list.
If you want to browse the folder where a file is stored or access the source webpage of an image, right-click the file, and click Open
source location.
98 | CorelDRAW 2019 User Guide
 Loading...