

Page 1
Page 2

Corel® AfterShot® Pro 3
User Guide
Page 3

Contents
Quick Start . . . . . . . . . . . . . . . . . . . . . . . . . . . . . . . . . . . . . 1
Welcome . . . . . . . . . . . . . . . . . . . . . . . . . . . . . . . . . . . . . . . 9
What is Corel AfterShot Pro?. . . . . . . . . . . . . . . . . . . . . . . . . . . . . 9
What’s new in Corel AfterShot Pro 3? . . . . . . . . . . . . . . . . . . . . . 14
Workspace tour . . . . . . . . . . . . . . . . . . . . . . . . . . . . . . . . . . . . . 16
Understanding non-destructive editing . . . . . . . . . . . . . . . . . . . . 18
Understanding the Library . . . . . . . . . . . . . . . . . . . . . . . . . . . . . . 22
Understanding the export process . . . . . . . . . . . . . . . . . . . . . . . . 24
System requirements. . . . . . . . . . . . . . . . . . . . . . . . . . . . . . . . . . 26
Supported cameras and file formats . . . . . . . . . . . . . . . . . . . . . . 27
About image size . . . . . . . . . . . . . . . . . . . . . . . . . . . . . . . . . . . . 28
Learning how to use Corel AfterShot Pro . . . . . . . . . . . . . 31
Using the Help system. . . . . . . . . . . . . . . . . . . . . . . . . . . . . . . . . 31
Corel AfterShot Pro User Guide PDF. . . . . . . . . . . . . . . . . . . . . . . 32
Learning with video tutorials . . . . . . . . . . . . . . . . . . . . . . . . . . . . 32
Using Web-based resources. . . . . . . . . . . . . . . . . . . . . . . . . . . . . 32
Library and catalogs . . . . . . . . . . . . . . . . . . . . . . . . . . . . . 35
About the Library . . . . . . . . . . . . . . . . . . . . . . . . . . . . . . . . . . . . 35
About catalogs . . . . . . . . . . . . . . . . . . . . . . . . . . . . . . . . . . . . . . 36
Importing images . . . . . . . . . . . . . . . . . . . . . . . . . . . . . . . . . . . . 37
Managing your Library . . . . . . . . . . . . . . . . . . . . . . . . . . . . . . . . 39
Portable catalogs . . . . . . . . . . . . . . . . . . . . . . . . . . . . . . . . . . . . 43
File System mode . . . . . . . . . . . . . . . . . . . . . . . . . . . . . . . 45
Image settings in File System mode . . . . . . . . . . . . . . . . . . . . . . . 45
Editing photos. . . . . . . . . . . . . . . . . . . . . . . . . . . . . . . . . . 47
Contents i
Page 4

About non-destructive editing. . . . . . . . . . . . . . . . . . . . . . . . . . . 48
About adjustment tools . . . . . . . . . . . . . . . . . . . . . . . . . . . . . . . 49
Standard tools . . . . . . . . . . . . . . . . . . . . . . . . . . . . . . . . . . . . . . 52
Histogram. . . . . . . . . . . . . . . . . . . . . . . . . . . . . . . . . . . . . . . . . . 52
Basic Adjustments. . . . . . . . . . . . . . . . . . . . . . . . . . . . . . . . . . . . 53
Presets . . . . . . . . . . . . . . . . . . . . . . . . . . . . . . . . . . . . . . . . . . . . 57
Color tools . . . . . . . . . . . . . . . . . . . . . . . . . . . . . . . . . . . . . . . . . 57
Tone tools. . . . . . . . . . . . . . . . . . . . . . . . . . . . . . . . . . . . . . . . . . 63
Detail tools . . . . . . . . . . . . . . . . . . . . . . . . . . . . . . . . . . . . . . . . . 65
Metadata tools . . . . . . . . . . . . . . . . . . . . . . . . . . . . . . . . . . . . . . 71
Plugins . . . . . . . . . . . . . . . . . . . . . . . . . . . . . . . . . . . . . . . . . . . . 73
Selective editing . . . . . . . . . . . . . . . . . . . . . . . . . . . . . . . . . . . . . 77
Retouching with Heal, Clone, or Blemish Remover . . . . . . . . . . . . 84
Removing red eye . . . . . . . . . . . . . . . . . . . . . . . . . . . . . . . . . . . . 88
Cropping . . . . . . . . . . . . . . . . . . . . . . . . . . . . . . . . . . . . . . . . . . 88
Straightening . . . . . . . . . . . . . . . . . . . . . . . . . . . . . . . . . . . . . . . 89
Working with Presets . . . . . . . . . . . . . . . . . . . . . . . . . . . . . . . . . 90
Copying and pasting settings . . . . . . . . . . . . . . . . . . . . . . . . . . . 93
Undoing changes . . . . . . . . . . . . . . . . . . . . . . . . . . . . . . . . . . . . 95
About default settings. . . . . . . . . . . . . . . . . . . . . . . . . . . . . . . . . 96
Using the History palette. . . . . . . . . . . . . . . . . . . . . . . . . . . . . . . 97
Editing photos in an external image editor . . . . . . . . . . . . . . . . . 98
Corel AfterShot HDR. . . . . . . . . . . . . . . . . . . . . . . . . . . . . 101
Working with Corel AfterShot HDR . . . . . . . . . . . . . . . . . . . . . . 101
Organizing images . . . . . . . . . . . . . . . . . . . . . . . . . . . . . . 103
Versions . . . . . . . . . . . . . . . . . . . . . . . . . . . . . . . . . . . . . . . . . . 103
Stacks . . . . . . . . . . . . . . . . . . . . . . . . . . . . . . . . . . . . . . . . . . . . 105
Thumbnail indicators . . . . . . . . . . . . . . . . . . . . . . . . . . . . . . . . 108
Sorting . . . . . . . . . . . . . . . . . . . . . . . . . . . . . . . . . . . . . . . . . . . 109
Filtering . . . . . . . . . . . . . . . . . . . . . . . . . . . . . . . . . . . . . . . . . . 110
ii Corel AfterShot Pro 3
Page 5

Labels . . . . . . . . . . . . . . . . . . . . . . . . . . . . . . . . . . . . . . . . . . . . 111
Ratings . . . . . . . . . . . . . . . . . . . . . . . . . . . . . . . . . . . . . . . . . . . 113
Flags. . . . . . . . . . . . . . . . . . . . . . . . . . . . . . . . . . . . . . . . . . . . . 113
Keywords. . . . . . . . . . . . . . . . . . . . . . . . . . . . . . . . . . . . . 115
Effective use of keywords . . . . . . . . . . . . . . . . . . . . . . . . . . . . . 115
Working with keywords and keyword sets . . . . . . . . . . . . . . . . . 117
Metadata. . . . . . . . . . . . . . . . . . . . . . . . . . . . . . . . . . . . . 123
Types of metadata . . . . . . . . . . . . . . . . . . . . . . . . . . . . . . . . . . 123
Storing and sharing metadata . . . . . . . . . . . . . . . . . . . . . . . . . . 124
Working with metadata . . . . . . . . . . . . . . . . . . . . . . . . . . . . . . 125
Viewing metadata. . . . . . . . . . . . . . . . . . . . . . . . . . . . . . . . . . . 125
Editing metadata . . . . . . . . . . . . . . . . . . . . . . . . . . . . . . . . . . . 126
Managing metadata sets. . . . . . . . . . . . . . . . . . . . . . . . . . . . . . 126
Finding photos by using metadata . . . . . . . . . . . . . . . . . . . . . . 128
Metadata in images that you output . . . . . . . . . . . . . . . . . . . . . 130
Adding metadata in other applications . . . . . . . . . . . . . . . . . . . 131
Watermarks. . . . . . . . . . . . . . . . . . . . . . . . . . . . . . . . . . . 133
Watermark settings. . . . . . . . . . . . . . . . . . . . . . . . . . . . . . . . . . 134
Saving watermarks as presets . . . . . . . . . . . . . . . . . . . . . . . . . . 137
Exporting images. . . . . . . . . . . . . . . . . . . . . . . . . . . . . . . 139
About exporting . . . . . . . . . . . . . . . . . . . . . . . . . . . . . . . . . . . . 139
Exporting without a batch preset . . . . . . . . . . . . . . . . . . . . . . . 140
Exporting with a batch preset . . . . . . . . . . . . . . . . . . . . . . . . . . 142
Using batches with folders . . . . . . . . . . . . . . . . . . . . . . . . . . . . 143
Pausing, resuming, and stopping batches . . . . . . . . . . . . . . . . . 143
Managing batches . . . . . . . . . . . . . . . . . . . . . . . . . . . . . . . . . . 144
Understanding export settings. . . . . . . . . . . . . . . . . . . . . . . . . . 146
Web Galleries . . . . . . . . . . . . . . . . . . . . . . . . . . . . . . . . . . . . . . 151
Copying images . . . . . . . . . . . . . . . . . . . . . . . . . . . . . . . . . . . . 155
Contents iii
Page 6

Adjusting the workspace . . . . . . . . . . . . . . . . . . . . . . . . . 159
Showing and hiding panels. . . . . . . . . . . . . . . . . . . . . . . . . . . . 160
Viewing options . . . . . . . . . . . . . . . . . . . . . . . . . . . . . . . . . . . . 161
Multi-Image View . . . . . . . . . . . . . . . . . . . . . . . . . . . . . . . . . . . 161
Resizing panels . . . . . . . . . . . . . . . . . . . . . . . . . . . . . . . . . . . . . 162
Magnifier . . . . . . . . . . . . . . . . . . . . . . . . . . . . . . . . . . . . . . . . . 163
Metadata viewer . . . . . . . . . . . . . . . . . . . . . . . . . . . . . . . . . . . . 164
Slideshows . . . . . . . . . . . . . . . . . . . . . . . . . . . . . . . . . . . . 165
About slideshows . . . . . . . . . . . . . . . . . . . . . . . . . . . . . . . . . . . 165
Slideshow settings . . . . . . . . . . . . . . . . . . . . . . . . . . . . . . . . . . 166
Playing a slideshow . . . . . . . . . . . . . . . . . . . . . . . . . . . . . . . . . . 167
Printing . . . . . . . . . . . . . . . . . . . . . . . . . . . . . . . . . . . . . . 169
Printing with Corel AfterShot Pro. . . . . . . . . . . . . . . . . . . . . . . . 169
Printing a folder of images . . . . . . . . . . . . . . . . . . . . . . . . . . . . 171
Print settings. . . . . . . . . . . . . . . . . . . . . . . . . . . . . . . . . . . . . . . 171
Controlling print jobs and page breaks . . . . . . . . . . . . . . . . . . . 172
Managing print batches . . . . . . . . . . . . . . . . . . . . . . . . . . . . . . 174
Print layouts . . . . . . . . . . . . . . . . . . . . . . . . . . . . . . . . . . . . . . . 175
Application preferences . . . . . . . . . . . . . . . . . . . . . . . . . . 181
Accessing preferences . . . . . . . . . . . . . . . . . . . . . . . . . . . . . . . . 182
General preferences . . . . . . . . . . . . . . . . . . . . . . . . . . . . . . . . . 182
Display preferences . . . . . . . . . . . . . . . . . . . . . . . . . . . . . . . . . . 183
Color Management preferences. . . . . . . . . . . . . . . . . . . . . . . . . 185
Import and Cache preferences. . . . . . . . . . . . . . . . . . . . . . . . . . 185
Renaming preferences. . . . . . . . . . . . . . . . . . . . . . . . . . . . . . . . 186
Sequence preferences . . . . . . . . . . . . . . . . . . . . . . . . . . . . . . . . 187
Keyboard preferences . . . . . . . . . . . . . . . . . . . . . . . . . . . . . . . . 187
Soft Proofing preferences . . . . . . . . . . . . . . . . . . . . . . . . . . . . . 188
Copy Sets preferences . . . . . . . . . . . . . . . . . . . . . . . . . . . . . . . . 188
iv Corel AfterShot Pro 3
Page 7

Defaults preferences . . . . . . . . . . . . . . . . . . . . . . . . . . . . . . . . . 189
Crop preferences. . . . . . . . . . . . . . . . . . . . . . . . . . . . . . . . . . . . 189
External Editor preferences . . . . . . . . . . . . . . . . . . . . . . . . . . . . 190
Performance preferences . . . . . . . . . . . . . . . . . . . . . . . . . . . . . . 190
Hardware Acceleration preferences . . . . . . . . . . . . . . . . . . . . . . 190
Additional information . . . . . . . . . . . . . . . . . . . . . . . . . . 193
Renaming formats. . . . . . . . . . . . . . . . . . . . . . . . . . . . . . . . . . . 193
Metadata tags . . . . . . . . . . . . . . . . . . . . . . . . . . . . . . . . . . . . . 204
File locations . . . . . . . . . . . . . . . . . . . . . . . . . . . . . . . . . . . . . . . 206
Command line options . . . . . . . . . . . . . . . . . . . . . . . . . . . . . . . 208
Custom print layouts. . . . . . . . . . . . . . . . . . . . . . . . . . . . . . . . . 209
About color management . . . . . . . . . . . . . . . . . . . . . . . . . . . . . 211
Terminology . . . . . . . . . . . . . . . . . . . . . . . . . . . . . . . . . . . . . . . 214
Updating and extending the application . . . . . . . . . . . . . 219
Finding and installing downloadable content. . . . . . . . . . . . . . . 219
Providing feedback for downloadable content. . . . . . . . . . . . . . 220
Restoring purchases . . . . . . . . . . . . . . . . . . . . . . . . . . . . . . . . . 220
Contents v
Page 8

vi Corel AfterShot Pro 3
Page 9

Quick Start
This section introduces some of the basic tasks that you can accomplish
in Corel AfterShot Pro. If you're looking for a quick way to start working
with the application, take a few minutes to go through the steps
below. The steps include handy shortcuts and tips that help you work
quickly.
There are three main steps:
1.Open your photos in Corel AfterShot Pro.
2.Select and edit one or more photos.
3.Output your edited photos individually or as a batch.
Before you begin, see “Workspace tour” on page 16 for a quick
overview of the workspace.
Step one: Open your photos
To get you started quickly, we're going t
on your computer. After you're familiar with the application, you can
choose to build a Library by importing photos into Corel AfterShot Pro.
When you're ready for more information, see“About the Library” on
page 35.
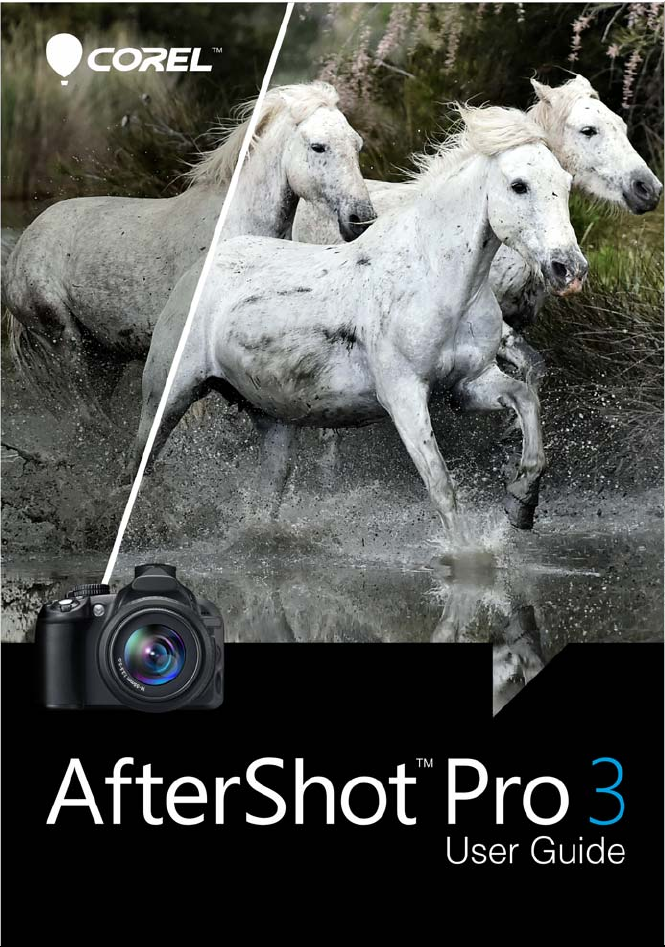
To navigate to your photos
• In Corel AfterShot Pro, click the File System tab, and navigate to
your folder in the Directory View.
ork directly from the folders
o w
Quick Start 1
Page 10
When you click a folder, the photos from the folder are displayed
as thumbnails in the Thumbnail panel.
Thumbnail panel, displayed as a strip in Standard View
Step two: Selecting and editing photos
To view and adjust images, you need to
select them. The Thumbnail
panel displays thumbnails of the photos that are in the active folder.
When you select a thumbnail, the Preview panel displays a larger view
of the photo. When you edit a photo, the original file (master file) is
never altered — edit information is saved separately and what you see
onscreen is a master version, a preview that shows your edits. You can
edit the entire photo or a selected area of the photo. When you are
finished editing a photo, you can simply move on to the next photo, or
you can save your changes as a new version. This means that you
capture the edits as a variation of the original file. The version can be
viewed as a thumbnail or in the Preview panel. It can also be output.
2 Corel AfterShot Pro 3
Page 11

To preview and select photos
1 In the Browse panel, click the File System tab.
2 Navigate to the folder you want. The Thumbnail panel displays the
photos that are in the folder.
3 Click a thumbnail to display it in the Preview panel.
Before you start editing, you can choose between viewing the
directly on the master version of your file, or creating a new
edits
version for editing by pressing Insert or by right-clicking the
th
bnail and choosing Version > New Version from Defaults.
um
You can also
Scroll quickly through thumbnails
Compare two or more photos (or
versions) in the Preview panel
Select all thumbnails
Deselect thumbnails Click a background area of the
[ or ].
Press
Click the
View
and
click the thumbnails. The Preview
panel displays the selected
photos.
This is a great way to select and
flag the best photo in a series of
similar photos. For more
information about flagging and
organizing your photos, see
“Organizing images” on
page 103.
Press
Thumbnail panel or press
Toggle Multi-Image
button (or press M),
Ctrl + click or Command-
Ctrl + A or Command-A.
Ctrl +
D or Command-D.
Note: The last image you select is called the active image. While
in Multi-Image View mode, metadata changes, adjustments,
and other edits apply only to the active image.
Quick Start 3
Page 12
To edi t a p hot o
1 In the Browse panel, navigate to the folder you want.
The Thumbnail panel displays the ph
2 Click a thumbnail to display it in the Preview panel.
3 Experiment by trying any of the editing actions in the following
table.
To Do the following
otos that are in the folder.
Flag or add
keywords (i.e. add
metadata)
• Flag — click a thumbnail and on the Top
toolbar click the Flag as Pick button or
press . (period key). To mark a photo as a
reject, click the Flag as Reject button
or press , (comma key).
• Keywords — on the Tools panel, click the
Metadata tab, click inside the Keywords
box, and type one or more keywords,
separated by commas.
Crop a photo On the AfterShot Pro toolbar at the bottom of
the Preview panel, click the
Crop tool . In the
Cropping palette, adjust the settings that you
want, and in the Preview panel, drag the crop
area over the area that you want to preserve.
Click
Done in the Cropping palette.
Adjust the color,
tone, or sharpness
of the entire
photo
In the Tools panel, click the
adjust the settings you want in the
Standard tab, and
Adjustments section.
Basic
4 Corel AfterShot Pro 3
Page 13

To Do the following
Edit a selected
area only
1 Click the
the upper-right corner of the window.
2 In the
button at the top of the palette. A new editing
layer is created.
3 Click a
tool, click an area that you want to adjust, and
adjust the
bottom of the
4 In the
panel, adjust any of the settings you want — the
changes apply to the selected area(s) of the
current layer.
Open Layer Manager button in
Layers palette, click the +Adjust
Region tool, such as the Circle Region
Size, Feather, or other settings at the
Layers palette.
Basic Adjustments section of the Tools
Tip: There are some handy ways to undo actions. Here are a
few you can try:
• To undo one action at a time, press Ctrl + Z or
Command-Z.
•
To reset a Tools panel slider to its original setting,
double-click the slider name.
• To clear all the changes that you've made to a photo,
right-click the thumbnail, and choose Settings >
Apply Default Settings from the context menu.
To show your edits on a new version
• In the Thumbnail panel, right-click or Control-click an edited
photo (master version), and from the context menu, choose
Version > New Version from Current.
Note: You can confirm that a photo has been edited by looking
for the Edit icon in the corner of the thumbnail.
Quick Start 5
Page 14
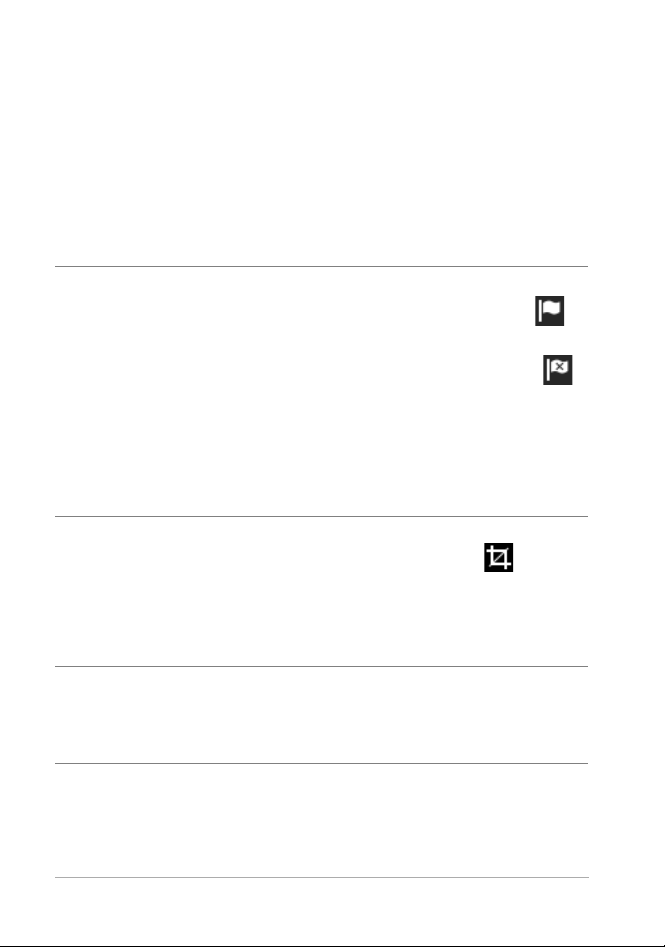
A new thumbnail appears next to the thumbnail of the master
version. By default, versions use the following naming convention:
original file name + version number (_v2, _v3, ...).
Three edited versions based on the same master file
You can now return to the master version and edit it in a new way and
create another version. To start from the original settings, you can clear
the edits made to the master version by right-clicking or Control-
lick
ing the thumbnail, and choosing Settings > Apply Default
c
Se
ttings from the context menu.
Tip: Whether you choose to create a new version before or after
editing a master version depend
s on your workflow. For
example, if you know that you want to make several versions
from the outset, you can create a version before you start
editing, so you can always see how the original master file
looks. If you want to quickly fix a photo, you can simply edit the
master version—you can create other versions later if you want.
The non-destructive nature of editing in Corel AfterShot Pro
gives you maximum flexibility.
tos, see “Editing photos” on
For more information about editing
pho
page 47.
Step three: Exporting photos for sharing and print
After you organize and edit your photos, you can share your work by
rting your photos. Exporting lets you save your photos to a
expo
standard file format so that you can share your work on the Web, via
email, or use your files in other applications. You can also output your
6 Corel AfterShot Pro 3
Page 15
files to print. There are a number of standard output choices, called
batches, that let you output quickly, but you can also create a custom
batch. For example, you can choose file type, quality, color space, and
image size. You can also set a naming convention to rename the files
when they are output and you can apply presets. For more information
about outputting, see Exporting images.
To get you started quickly, let's use standard batches to save to JPEG
and print a couple of 5 x 7 inch photos.
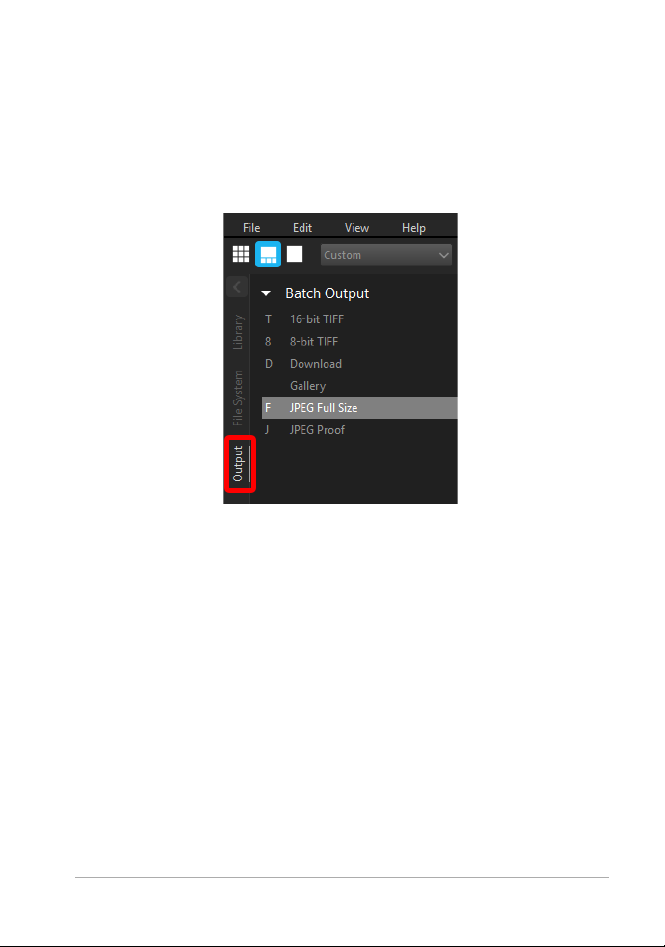
To output to a full-sized JPEG
1 In the Thumbnail panel, select one or more photos that you want
to output.
2 Do one of the following:
• • In the Browse panel, click the Output tab, and in the Batch
Out
put section, drag the thumb
• • Press F (shortcut key assigned to JPEG Full Size batch).
3 In the Select a Destination dialog box, choose a folder where the
files will be saved.
nails to JPEG Full Size.
Quick Start 7
Page 16

After you select a destination folder, files are saved automatically
to that folder for the rest of the session. You can change the
destination and access other output settings by double-clicking a
batch name in the Batch Output or Printing section.
To print to a standard print size
1 In the Thumbnail panel, select two photos that you want to print.
2 In the Browse panel, click the Output tab, and in the Printing
section, drag the thumbnails to a batch name, such as 5x7 Qty.2.
Numbers appear ne
nu
mber of photos printed and the total number of photos in the
xt to the batch name, (0 of 2), to indicate the
batch.
3 Double-click the batch name to preview the print job in the Print
Settings dialog box.
4 In the Print Layout section, enable the Scale crop or Scale reduce
option (matches the photos to the selected print ratio) and
preview the results.
5 Choose your printer from the drop-down list in the bottom left
corner.
6 Click Print.
Moving on
Now that you have been introduced to the basics, here are some
additional topics that will provide you with more detailed information:
• About the Library
• Managing your Library
• Editing photos
• Organizing images
• Exporting images
8 Corel AfterShot Pro 3
Page 17

Welcome
In this section, you’ll learn about
• What is Corel AfterShot Pro?
• What’s new in Corel AfterShot Pro 3?
• Workspace tour
• Understanding non-destructive editing
• Understanding the Library
• Understanding the export process
• System requirements
• Supported cameras and file formats
• About image size
What is Corel AfterShot Pro?
Corel AfterShot Pro is a fast, flexible workflow application for digital
photos, including RAW formats, JPEG, and TIFF. Corel AfterShot Pro is
designed to help you organize, optimize, and output your photos. You
can work with individual photos or tap into powerful and flexible
multi-image processing options that let you adjust and output your
photos so you can print them or share them via email or the Web. Corel
AfterShot Pro is completely non-destructive; your original image files
are always safe. You can use Corel AfterShot Pro on its own, or with
your favorite image editing software.
For a full list of learning resources, from the menu bar choose Help >
Learning Center.
Welcome 9
Page 18

How is Corel AfterShot Pro different from other imageediting software?
There are a few things that set Corel AfterShot Pro apart from
traditional image-editing software. Let's take a look at these
differences.
Action
Open files
that you
want to edit
Edit files Start editing each
Traditional imageeditor
File > Open File,
open one or more
files.
open file, when
finished, the editing
information is saved
to the file.
Corel AfterShot Pro
As a workflow application,
you tend to work with folders,
so click the
and click a folder. You can
then right-click to import the
folder to the
thumbnail and start editing.
Start editing, creating one or
more looks (versions) for each
photo. The edits are saved
automatically to a sidecar file
(XMP) so that your original file
is never affected. You can
really experiment, even
between editing sessions.
File System tab,
Library or click a
10 Corel AfterShot Pro 3
Page 19

Action
Traditional imageeditor
Corel AfterShot Pro
Save the files
File > Save, usually
for each file that you
want to output, save
to the file format you
want (such as JPEG).
You either overwrite
your existing file, or
create a new file.
Select as many thumbnails
(photos or looks) as you want,
and to export to a standard
JPEG, press
F. Want TIFF? Press
T. New files are created, your
original file is never affected.
*Corel AfterShot Pro lets you
export multiple files at one
time, and offers a range of
settings that let you customize
your output. Choose
File >
Export or right-click any of
the batch presets in the
Output
section of the
Batch
Output tab to access the
settings.
What is photo workflow?
Photo workflow refers to all the activities that occur between the initial
image capture and the final photo output. Photographers have very
different workflows, depending on the volume of photos they take and
what they do with the photos. Your workflow might be as simple as
downloading images from your camera's memory card and printing
them on a printer that is attached to your computer. A photo workflow
might also include any of the following:
• Organizational tasks, such as adding keywords and star ratings so
ou
can search and sort your images
y
• Editing and adjusting photos to correct, enhance, or creatively
manipulate photos
• Backing up and archiving photos
• Sharing photos through email or on the Web
Welcome 11
Page 20
• Printing photos in-house, through online printing services, service
bureaus, or prepress facilities
Corel AfterShot Pro supports a wide range of workflow options and
workin
yles to ensure that you can get the best quality from your
g st
photos in the least amount of time.
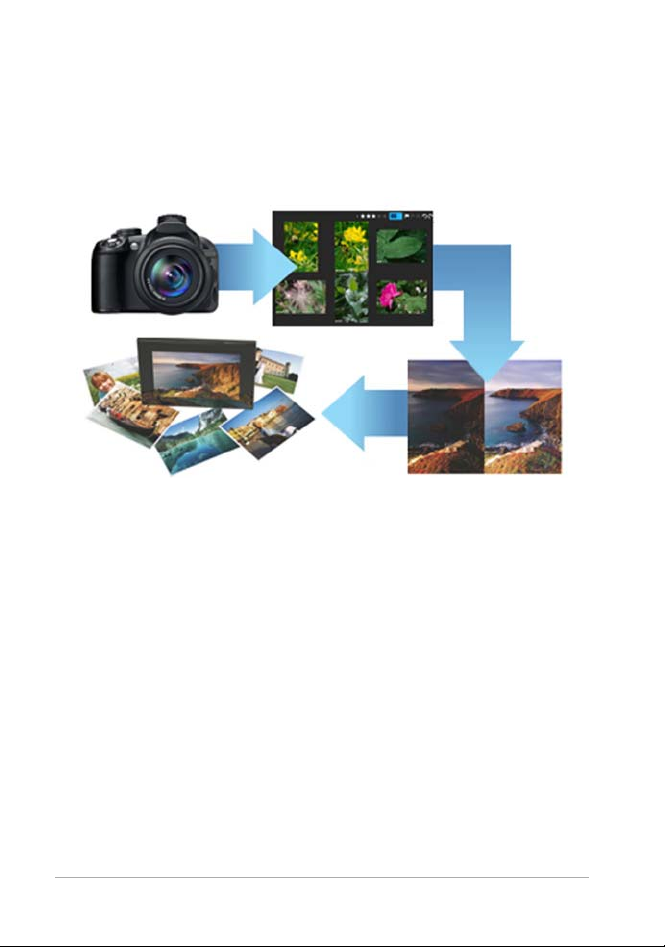
Photo workflow: 1. Transfer photos from your camera to your
computer, 2. Import the photos into Corel AfterShot Pro, 3.
Edit your photos, creating one or more versions, 4. Export a
version to a JPEG or TIFF file.
Corel AfterShot Pro is organized into three workflow areas: Asset
management, Image editing, and Output generation.
Asset management lets you catalog your original digital photos as
master files and view, add, browse and search photo metadata. As
your photo library grows from hundreds to thousands of photos,
maintaining a coherent, organized, searchable library becomes critical.
Corel AfterShot Pro provides all the tools needed to catalog your
current photographs, and makes it easy to add to your library.
12 Corel AfterShot Pro 3
Page 21
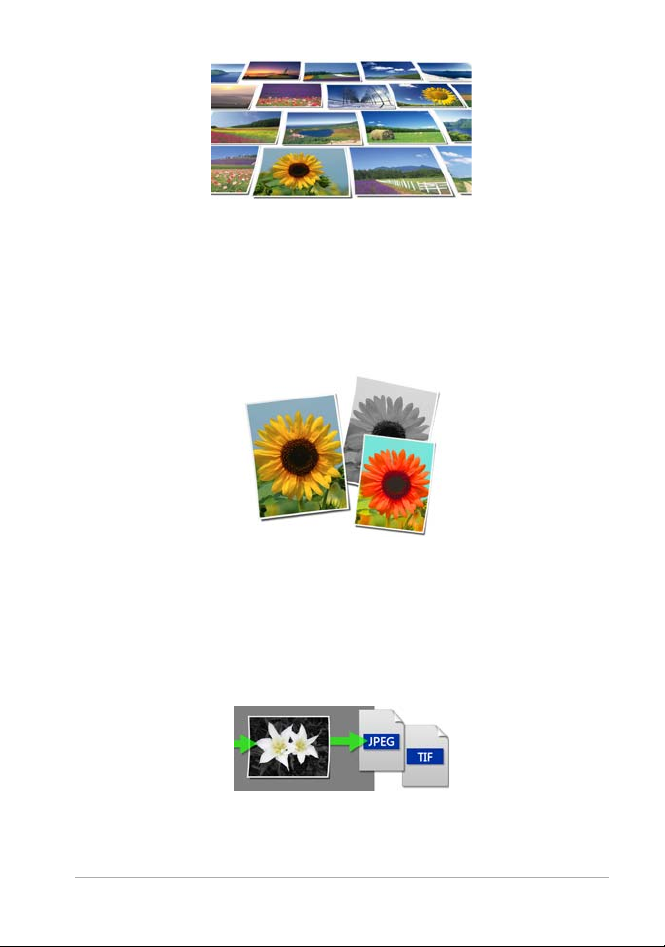
Image editing lets you adjust and correct elements such as exposure,
white balance, detail, and distortions. You can get creative with a
variety of editing features that you can apply to an entire photo or a
selected area. For example, you can use selective editing to select one
color area in your photo and apply a color to that area without
affecting the rest of the photo.
Output generation lets you share the photos that you have worked on
in Corel AfterShot Pro. Your photos can be output in a wide range of
formats that you can print, email, or share on the Web. The powerful
Batch Conversion feature lets you take advantage of multi-image
processing.
Welcome 13
Page 22

What’s new in Corel AfterShot Pro 3?
New! Comprehensive Watermarking
Protect and promote your work with versatile and quick-to-apply new
termarking features. Deter unauthorized copying, brand your
Wa
photos with your logo or contact info, or add any text and graphics.
Apply watermarks to individual photos or batches, and easily adjust
size, rotation, position, transparency and more. For more information,
see “Watermarks” on page 133.
Enhanced! Highlight Recovery
Regain more of the detail and tone from your overexposed photos with
hanced Highlight Recovery in AfterShot Pro 3. Powered by a new
en
algorithm, this feature lets you access more of the data in your RAW
files for superior image quality. A Highlight Recovery Range slider gives
you finer control over specific areas to adjust within your image. For
more information, see “Tone tools” on page 63.
New! Blemish Remover
Save time and edit faster by doing more touchups and photo
ns in AfterShot Pro 3, rather than jumping to Corel PaintShop
ectio
corr
Pro or Adobe PhotoShop. The new Blemish Remover offers circle,
brush, polygon and freehand tools for detailed editing, making
portrait editing faster and easier than ever. Remove dust, spots,
smudges and a variety of imperfections on any photo. For more
information, see “Retouching with Heal, Clone, or Blemish Remover”
on page 84.
New! Image Preset Library
Now it’s easier to tap into the power o
f presets to automate more of
your repetitive processing jobs or quickly reproduce a look that would
otherwise be tedious to replicate. The new Image Preset Library in
14 Corel AfterShot Pro 3
Page 23

AfterShot Pro 3 lets you browse, preview and download free and forpurchase presets. For more information, see “Finding and installing
downloadable content” on page 219.
New! Lens Corrections
ew
Update to Corel AfterShot Pro 3 for n
, sought-after lens corrections
that build on the hundreds of lenses already supported by Corel
AfterShot to quickly correct the different types of distortion introduced
by various lenses. Join the AfterShot Pro community on Facebook to
discover when new lens corrections are posted or to share your own.
For more information, see “Lens Correction” on page 67.
Enhanced! See what’s new with Plugins
The new Plugin Manager lets you find and insta
ll plugins in a flash
from within AfterShot Pro 3. Extend your software with free plugins
from the community, purchase plugins and get updates. Want to try
making your own plugins? Our unique plugin API and toolkit let you
make pro-quality plugins that tap into the full power of the AfterShot
Pro processing pipeline. A love of photography, a knowledge of C++
and the updated Plugin SDK are all you need. Share your plugins freely
with the AfterShot community, or work with Corel to sell them. Want
to learn more? Contact Corel via the Feedback Helper. For more
information, see “Updating and extending the application” on
page 219.
New! Camera profiles
Corel constantly delivers support for today's most popular, powerful
d creative cameras, including professional DSLRs, flexible and high-
n
a
quality mirrorless cameras, and many more. A new dynamic camera
profile updater notifies you when new cameras are added and a new
feedback mechanism captures and prioritizes your requests with Corel.
Welcome 15
Page 24
For more information, see “Updating and extending the application”
on page 219.
Get involved!
Corel has built AfterShot Pro to give you, the photographer, control,
you make your own plugins, lens corrections and presets.
letting
Similarly, a new feedback loop makes it easier for you to send your
ideas and requests to the Corel Photo team—better helping us to meet
your needs. Simply click ‘feedback’ and send us your comments.
“Providing feedback for downloadable content” on page 220.
Workspace tour
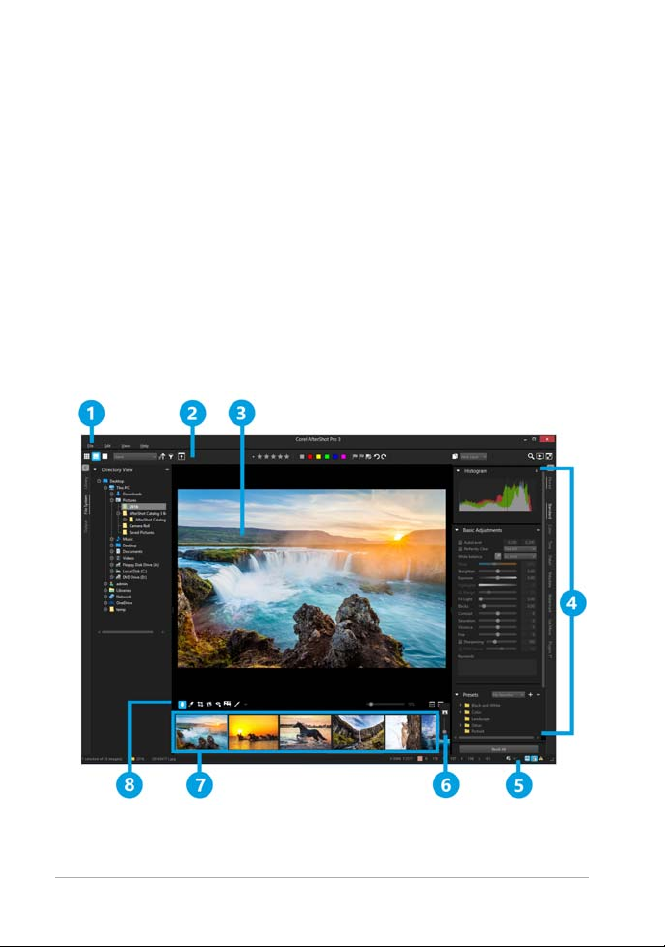
The Corel AfterShot Pro workspace includes the following elements:
16 Corel AfterShot Pro 3
Page 25

1. Menu bar
The menu bar is used to acce
ss common functions and features. For
example, you can import folders, set your preferences, or access the
Help.
2. Top toolbar
This toolbar contains a variety of search, metadata, layer, and viewing
commands.
3. Preview panel
rsion o
The Preview panel lets you view a large ve
f the photo that is
selected in the Thumbnail panel. When Multi-Image View is enabled,
the Preview panel displays previews of
all the selected thumbnails. You
can view image adjustments and zoom into or out of the selected
images.
4. Tools panel
Like the Browse panel, the Tools panel
has tabs for pages that contain
a number of sections. For example, the Standard page displays the
Histogram, Basic Adjustments, and Presets sections. Sections can be
pinned so they stay visible.
The Tools panel can be hidden so that more room is available for
viewing your images. Just click the arrow
at the top of the Tools
panel tabs to hide or show this panel.
Included in the Tools panel is the Get More page. It is home to a
collection of downloadable content that includes camera profile
updates, plugins, and image presets. For more information, see
5. Status bar
The Status bar lets you view information about the current image and
cess
viewing controls such as Toggle Multi-Image View
ac
Welcome 17
and Lock
Page 26

Position and Zoom. Soft-proofing and Clipping Warning controls
are also accessible here.
6. Thumb Zoom toolbar
This toolbar contains the Thumbnail Size control which lets you adjust
of the thumbnails in the Thumbnail panel.
the size
7. Thumbnail panel
At the bottom of the main Corel AfterShot Pro window, this panel
shows th
umbnails for the folder, container, search or browse category
selected with the Browse panel. All the images in the folder are initially
visible in the Thumbnail panel, but you can filter the images to show
only the thumbnails that match a specific set of criteria.
8. AfterShot Pro toolbar
wing options for the Preview
This toolbar contains editing tools and
vie
panel.
9. Browse panel
The Browse panel is your main access p
oint for your photos. The panel
has tabs for the Library, File System, and Output pages. Some pages
rther divided into sections. For example, the Library page consists
are fu
of a Cat
alogs section and a Metadata Browser section. The Browse
panel can be hidden so that more room is available for viewing your
images. Just click th
e left arrow at the top of the Browse panel tabs
to hide or show the panel.
There are many ways to adjust and customize the Corel AfterShot Pro
workspace. “Adjusting the workspace” on page 159.
Understanding non-destructive editing
Corel AfterShot Pro is a non-destructive image editor, meaning that
adjustments you make to your images in Corel AfterShot Pro will never
18 Corel AfterShot Pro 3
Page 27
alter the data in the original image. You are free to experiment as much
as you want, knowing that you can always revert to the original
version. As a non-destructive image editor, the adjustments you create
are stored either in a sidecar XMP file, within the Corel AfterShot Pro
catalog database, or both. This means that when you're ready to share
or export your work, you need to output the versions you want to a
standard file format.
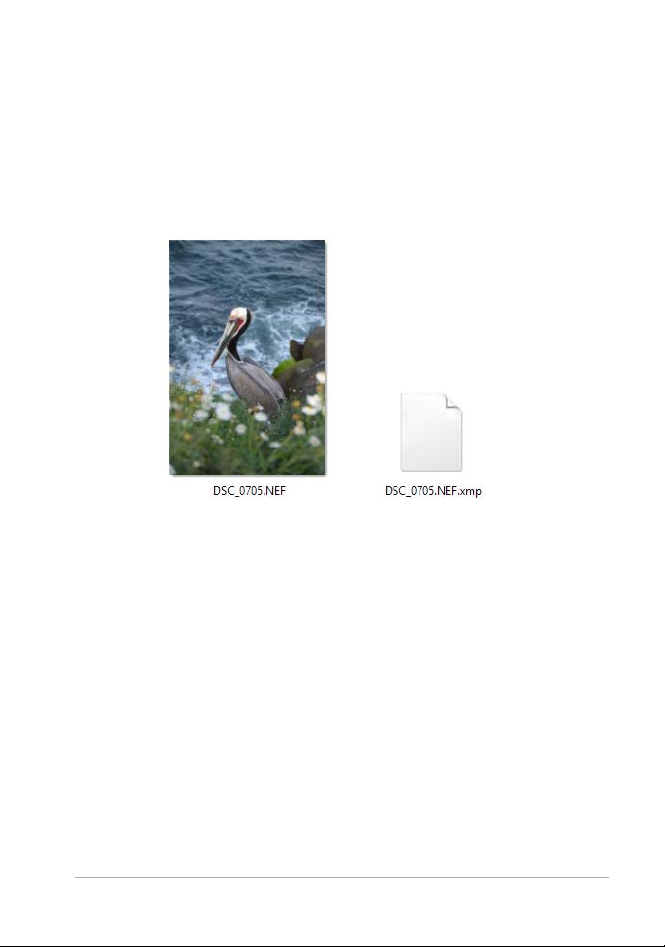
All your edits are saved in a sidecar file (XMP)
When you edit a photo in Corel AfterShot Pro, a new version is created
that contains the adjustments you've made. Corel AfterShot Pro allows
more than one set of image adjustments to be made on a single photo,
allowing you to efficiently make many versions of a single image.
Creating a new version does not make a copy of the original master
file, but rather just allows you to apply different image adjustments
and metadata to the same Master file.
Welcome 19
Page 28
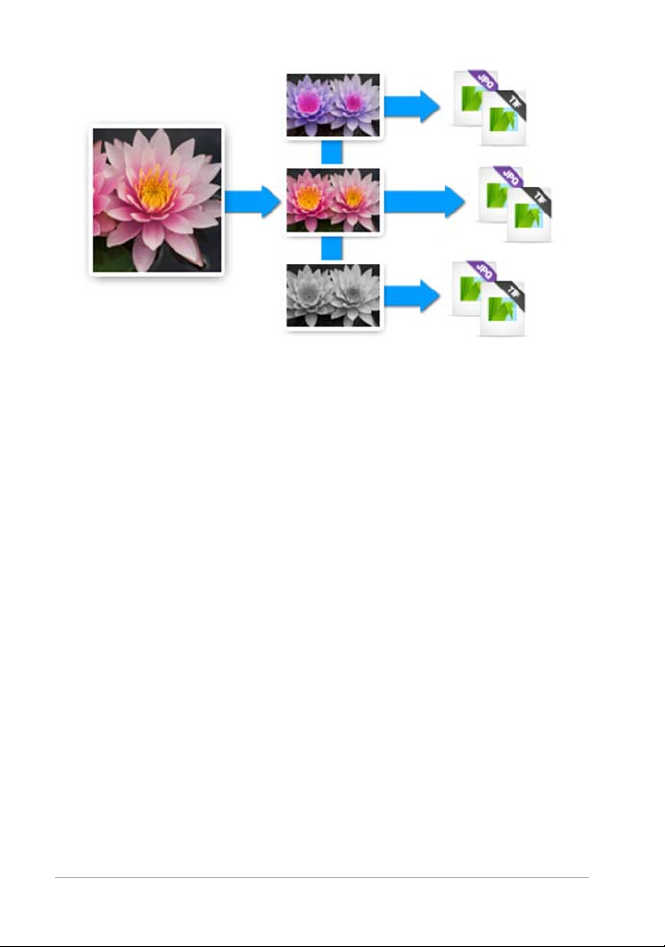
Master version from original (left) and edited versions (center).
The changes are committed only when you output to JPEG or
TIFF.
XMP files
Corel AfterShot Pro stores its settings in an XMP file that is slightly
diff
erent from other popular image editors and photo management
applications. We do this to prevent Corel AfterShot Pro from
overwriting settings created by other applications and to circumvent
limitations inherent in the current XMP standard (such as only being
able to export the metadata from one version at a time, or the inability
to save different settings for a RAW file and a JPEG that were created
in camera as a RAW+JPEG pair).
Corel AfterShot Pro uses a similar, but slightly different filename to
r
e this enhanced XMP data. The XMP filename is created by simply
sto
adding ".xmp" to the end of the complete filename of the image file it
describes (while many other applications build the XMP filename by
first dropping the image file extension (like "jpg", "nef" or "cr2") before
adding "xmp"). So a Corel AfterShot Pro XMP file would look like
20 Corel AfterShot Pro 3
Page 29

img_0000.jpg.xmp while an XMP from other applications for the
same image would simply be img_0000.xmp.
Corel AfterShot Pro lets you create a standard XMP file that other
a
plications will read, but this limits the settings to those officially
p
supported by the XMP standard (one set of metadata per image file).
Shared XMP data
d
Other applications store image a
justments in sidecar XMP files, and
metadata added in other applications can be imported into Corel
AfterShot Pro. These include:
• Star ratings
• Color labels
• Flags (called 'Picks' or 'Selec
' in other applications)
ts
• Keywords and categories
• IPTC and EXIF data
Likewise, applying any of these settings to images in Corel AfterShot
Pro will write this data back to the XMP file for
pplications allow you sync settings from XMP files with the settings
a
those images. Many
they hold in their internal databases. After the sync process is
complete, adjustments made in Corel AfterShot Pro appear in those
applications as well.
For more information, see “Organizing imag
es” on page 103.
XMP data exclusive to Corel AfterShot Pro
in
Settings from image editing tools with
Corel AfterShot Pro and other
applications are also stored within XMP files; however, these settings
are not shared amongst applications from different manufacturers.
This is due to the technical differences in implementing various image
adjustment tools. These differences in how the various tools are
implemented give each application its own image quality
Welcome 21
Page 30

characteristics, and prohibit image adjustment settings from being
shared between applications.
Using Corel AfterShot Pro in no way limits
t you can do with your
wha
images or which applications you can use to edit or manage your
digital photographic files.
How metadata is processed when you import files
s m
Corel AfterShot Pro reads and collect
etadata embedded in image
files, in Corel AfterShot Pro XMP files and standard XMP files. The
process and order of collecting metadata from these various sources is
shown below.
1.If a Corel AfterShot Pro XMP file exists, metadata is
read from this file
and no other metadata is imported.
2.If no Corel AfterShot Pro XMP file is found, me
tadata is re
ad from
Standard XMP files.
3.If XMP content is embedded in the image file, this is read
next and is
added to any previously found XMP data, but common fields found in
any other source are ignored.
Understanding the Library
Your Library is where you store one or more catalogs of photos. It is a
key part of the asset management system. It lets you access the master
files (original photos) as well as all the versions that you create. You can
read photo metadata, and search and browse for photos based on the
associated metadata.
Review the information in th
is section, and when you're ready to start
importing, see Importing images.
22 Corel AfterShot Pro 3
Page 31

The Corel AfterShot Pro Library and catalogs
If you choose to use Corel AfterShot Pro's asset management features,
you will start
by importing images into a catalog. This catalog is where
data and metadata for your photos will be stored. The Library consists
of one or more catalogs, which store data such as:
• Links to original master
files (path information and file
information)
• Metadata for image searching and browsing
• Image adjustment settings, and a complete editing history
• Previews and thumbnails
• Catalog-specific settings
Asset management is optional
Although importing your photos to the Library is recommended, it is
not required. Yo
u can still view and edit photos and use the RAW file
conversion features without adding files to your Library. How? You
simply click the File System tab and navigate to the photos in the
Directory View.
When would I not want to import photos?
Here are some examples of cases where you may choose not to import
ot
os:
ph
• If you simply want to see what photos are on a memory card or
her storage device. For example, if you want to grab a few RAW
ot
files from your friend's memory card, you can use the File System
tab to find and view the photos. You can then copy only the
photos that you want to your computer and import those photos.
• If you already have an asset management application and don't
want to
replace it. For example, perhaps you have third-party
software that copies and builds an image folder structure.
Welcome 23
Page 32

• If you have many photos that you need to import and you simply
want to get started quickly.
Features available after importing photos to the Library
After you import your photos to a catalog in your Library, you have full
cess to the following features:
ac
• Browsing multiple folders — select multiple folders and view a
the thumbnails in the folders and su
bfolders in one flat view.
• Full editing history — an editing log is maintained for every
ange that you make to photos and versions over time. If you do
ch
not import your photos, the edit log is maintained only for the
current session (the log is cleared when you exit the application).
• Image search — find images by searching for filename, EXIF
, IPTC
or other metadata.
• Metadata browsing — browse through your catalog using EXIF,
TC or other metadata.
IP
• Image stacks — group versions from one or many master files
together into stacks.
• Offline image browsing — find and manage images that are
s
ored on offline media like CDs, DVDs or external hard drives.
t
• Initial image settings — Corel AfterShot Pro stores the first set of
adjustm
ents found for every image when you import. This lets you
quickly revert to these settings at any time. The Initial Settings
might be the same as the Default Settings, or they might be
fferent because they include any edits or adjustments made in
di
Corel AfterShot Pro before importing.
ll
Understanding the export process
Exporting takes the previews that you see in Corel AfterShot Pro and
creates new image files that you can print, share on the web, or use in
other applications. Since Corel AfterShot Pro is a non-destructive
24 Corel AfterShot Pro 3
Page 33

image editor, the image adjustments and optimizations you create in
Corel AfterShot Pro are only accessible to other applications when
exported to standard file formats, such as JPEG and TIFF.
A batch lets you export one or more images and lets you customize the
outp
ut. For example, you can rename the files as they are processed
and change the file type. There are two main types of batch
operations:
• File Output batches — convert versions to a ne
w image file that
can be accessed by any other application.
• Copy Output batches — lets you copy the master files. This
option lets you copy or move files from one location to another.
You can also perform many of the same actions as you can with
File Output batches.
For more information about exporting, see “Exporting images” on
page 139.
File Output batches
put presets to convert
Corel AfterShot Pro comes with several batc
h out
the versions you create to standard file formats. You can customize any
of these batches.
Examples of batch output presets:
• JPEG Full Size: JPEG Image type, 90% image quality Same Pixel
Dim
ensions as the master file
Converts to sRGB colorspace. Ideal for printing an
d general
output.
• JPEG Proof: JPEG Image type, 80% image quality.
Half Height,
Half Width of the master file
Converts to sRGB colorspace, ideal for sharing
on the Web
• 16-bit TIFF: TIFF Image type, with 16 bits-per-pixel color data.
Same Pixel Dimensions as the master file.
Welcome 25
Page 34

Ideal when exporting images for editing in other applications
(must support 16-bit images)
• 8-bit TIFF: TIFF Image type, with 8 bits-per-pixel color da
ta. Same
Pixel Dimensions as the master file.
Ideal for exporting images so you can use them in other
applications
that do not support 16-bit images
Copy Output batches
A Copy batch does just that — it copies the master versions added to
the b
atch to a predefined location or locations, optionally renaming
the destination files. A Copy batch will copy all sidecar files that
accompany the images added to the batch, ensuring that XMP and
other sidecar files are kept together with the original files.
Copy batches are great for automating backups and for downloading
images from camera
memory cards.
System requirements
*Corel AfterShot Pro 3 is 64-bit
Windows
• Windows 10, Windows 8.1, Windows 8, Windows 7 with latest
service pack (64-bit editions)
• 64-bit Intel or AMD processor (multi-core processor
recommended)
• 2 GB of RAM (4 GB recommended for HDR)
• 400 MB of available h
• 1024x768 resolution with 16-bit color display (1280 x 768
resolution with 24 bit or higher color display recommended)
• Internet connection required for online help and program updates
ard-disk space required
26 Corel AfterShot Pro 3
Page 35

Macintosh
• Mac OSX 10.9 or later (64-bit edition)
• All Intel Macs model are supported
• 2 GB of RAM
• 250 MB of available h
ard-disk space required
• 1024 x 768 resolution with 16-bit color display
• Internet connection required for online help and program updates
Linux
• Fedora19 or Ubuntu 14.04 or later (64-bit distributions)
• 64-bit Intel or AMD processor (multi-core processor
rec
o
mmended)
• 2 GB of RAM
• 250 MB of available hard disk space required
• 1024 x 768 resolution with 16-bit color
• Internet connection required for online help and program updates
• Dependencies: Glib 2.4, KDE or GNOME recommended (full list of
de
ndencies in RPM & DEB packages)
pe
• Enable desktop compositing and fr
eedesktop.org-compliant
window manager (KDE, Gnome, and others) recommended
• 64-bit distributions require 32-bit compatibility libraries (ia32-libs)
Supported cameras and file formats
RAW files from a wide array of digital cameras are supported as well as
JPEG and TIFF files. Examples of RAW formats include 3FR, ARW, CR2,
C R W , D C R, D N G , ER F, K 25, K D C, M E F, M O S , NE F, N RW, O RF, P E F, RAF,
RW2, SR2, SRF, X3F.
For a the latest list of supported cameras, visit www.aftershotpro.com.
Welcome 27
Page 36

About image size
In film photography, understanding the size of an image was simple —
it was simply the size of the print. With digital photography, things are
a little more complicated. There are at least three different aspects to
the size of a digital photograph:
• File Size — typically measured in megabytes (MB), this measures
to the amou
image file.
• Pixel Size — measured in pixels or megapixels, this is meas
the number of individual pixels or colored dots that comprise the
image.
• Print Size — measured inches, millimeters, or other physical
of measure. Any time a measure of length, like inches or
centimeters, is used to describe a digital image, they are referring
to Print Size.
Every digital photograph from a given camera will start out with the
same Pixel Size, which will be something like 6000x4000 pixels,
exact
about 24 megapixels and corresponds to the number of photo sites
or
or pixels your camera's sensor has. However, the File Size for different
photos from the same camera will vary. This is based on image content
and is due to compression techniques used to make the file as small as
possible. Generally speaking, a higher megapixel camera will produce
larger files.
nt of disk or memory card space consumed by the
ures
units
Print size is determined by two things: Pixel Size and how many pixels
to print in a
given physical size, commonly called DPI or dots per inch
or PPI, pixels per inch. For example, the 6000x4000 pixel image from
the example above, when printed at 300 DPI will be approximately 20
inches by 13.3 inches (6000 pixels / 300 pixels per inch = 20 inches).
Changing only the DPI in no way affects the file size on the photo or
28 Corel AfterShot Pro 3
Page 37

the pixel size, it only changes the Print Size. For example, changing that
same image to 600 DPI, which would yield a 10 inch by 6.6 inch print.
DPI and Print Size only matt
r when printing an photo; DPI is irrelevant
e
to images on screen, in email, or otherwise viewed, edited or used on
a computer. Pixel Size alone determines how much information or
"quality" in stored in the image file.
Cropping and resizing
Cropping an image is used to recompose the shot to include only
hange the Aspect Ratio — the
portions of the original image, or to
c
height relative to the width — of the photo. If you have several images
from the same camera that you want to print the same size, some after
cropping and some without cropping, then the DPI of those images
must be different.
Resizing allows you to make the Pixel Size larger or smaller than the
original image. To continue the example from above, suppose you
cropped a portion of the image from the center of the frame, say 1500
by 1200 pixels. A "Full Size" output image from this cropped image
would be 1500 by 1200 pixels — much smaller than your original
image. You could print this image at 10 inches by 8 inches — but that
would be at 150 DPI (passable, but lower print quality). If you wanted
to make an image in Corel AfterShot Pro that had the same pixel
dimensions as the original file, you would need to upscale — or stretch
the image. Upscaling does not add information or quality to the photo,
it is not generally recommended because it will not print significantly
better results than before the image was upscaled.
ab
Note: For more information
out cropping, see “Cropping” on
page 88.
Welcome 29
Page 38

When DPI or Print Size matters
If you print from within Corel AfterShot Pro, then DPI and Print
Size will
be handled for you automatically by our Print Output system. If your
images are only shown on computer screens, in email or in other
electronic forms, then DPI and Print Size are meaningless.
DPI and Print Size only matter when
you output images from Corel
AfterShot Pro to be printed by someone else.
30 Corel AfterShot Pro 3
Page 39

Learning how to use Corel AfterShot Pro
You can learn how to use AfterShot Pro in various ways: by accessing
the Help or user guide PDF, by exploring videos, or by engaging with
the Corel AfterShot Pro community.
This section presents the following topics:
• Using the Help system
• Corel AfterShot Pro User Guide PDF
• Learning with video tutorials
• Using Web-based resources
Using the Help system
The Help that is available from within the program is the most
comprehensive source of information for Corel PaintShop Pro. The
lp system provides two ways to find information. You can choose a
He
topic from the Contents page, or use the Search page to search for
specific words and phrases. You can also print topics from the Help.
To use the Help system
1 Do one of the following:
• Click Help Help topics.
• Press F1.
2 In the Help window, click one of the following tabs:
• Contents — lets you browse through topics in the Help
• Search — lets you search the full text of
word or phrase (no quotation marks required). For example, if
the Help for a particular
Learning how to use Corel AfterShot Pro 31
Page 40

you are looking for information about a specific tool or
command, you can type the name of the tool or command,
such as Backlighting, to display a list of relevant topics.
Corel AfterShot Pro User Guide PDF
You c a n dow n loa d the Corel AfterShot Pro User Guide PDF to your
computer or tablet, or you can print the pages you want. You can find
the PDF on the Learning pa
ge.
Learning with video tutorials
The Corel Discovery Center (English only) lets you find and view a
range of videos that help you learn about the application and
photogr
You can also find video links within some topics in the online Help and
by visiting www.youtube.com/corelaftershotpro.
aphy.
Using Web-based resources
You can access a number of Web pages dedicated to customer support
and communities. You can find resources such as downloads, tutorials,
tips, newsletters, newsgroups, and other online resources. For a full list
of Web-based learning resources, see Learning page for Corel
AfterShot Pro.
32 Corel AfterShot Pro 3
Page 41

Here are a few resources to get you started:
• Corel Support — this link takes you to the Customer Support
We
b page
• AfterShot Community forum
• Facebook page for Corel AfterShot Pro
Learning how to use Corel AfterShot Pro 33
Page 42

34 Corel AfterShot Pro 3
Page 43

Library and catalogs
Your Library is where you store one or more catalogs of photos. It is a
key part of the asset management system. A catalog is a collection of
photos and their associated image data. In essence, a catalog is a
database that can be managed within Corel AfterShot Pro.
In this section, you’ll learn about
out the Library
• Ab
• About catalogs
• Importing images
• Managing your Library
• Portable catalogs
About the Library
Your Library is where you store one or more catalogs of photos. It is a
key part of the asset management system. It lets you access the master
files (original photos) as well as all the versions that you create.
f
A catalog is a collection o
essence, a catalog is a database that can be managed within Corel
AfterShot Pro. Catalogs contain master files, thumbnails and preview
images, image setting
preferences.
photos and their associated image data. In
s
, image adjustments, and catalog-specific
The Library can be accessed from the Browse panel. The Library page
contains the Catalogs section
Library and catalogs 35
which lists all the folders and photos that
Page 44

you have cataloged by importing. For more information about
importing to the Library, see “Importing images” on page 37.
The Library page in the Browse panel contains the Search box,
the Catalog section, and the Metadata Browser.
About catalogs
When images are first imported into a Corel AfterShot Pro catalog, the
initial settings used for that image are taken from a Corel AfterShot Pro
XMP file if one exists. If no Corel AfterShot Pro XMP file is found,
metadata settings (keywords, rating, labels, IPTC or XMP tags) are read
from standard XMP files, or the image file itself.
Catalog versus XMP
f
After images have been imported into a Corel A
terShot Pro catalog,
changes to any image or metadata settings are stored within the Corel
AfterShot Pro catalog. The changes can be written back to the
AfterShot Pro XMP files manually by selecting the thumbnails for the
images you want, right-clicking one of the thumbnails, and selecting
36 Corel AfterShot Pro 3
Page 45

XMP > Write AfterShot XMP files. Alternately, you may choose to
have Corel AfterShot Pro always keep the XMP files up to date. You can
do so in the General preferences by enabling the Allow automatic
AfterShot .xmp creatio
n for photos in Catalogs check box.
Multiple catalogs
Most people can easily work with one cata
log. All photos are imported
to the default catalog, and you can easily search and filter to find the
photos your want in the catalog. However, if you take photos for
different reasons, professional versus personal for example, you can
create separate catalogs. Corel AfterShot Pro lets you build, open, and
work with many catalogs from your Library simultaneously. This allows
you to group, backup, and manage sets of files as catalogs, while
preserving the ability to browse, search, and access any image in any
open catalog. For more information about creating catalogs, see
“Managing catalogs” on page 42.
Importing images
When you import images into Corel AfterShot Pro, they are added to
a catalog. You can choose to import an entire folder, a folder and all
the subfolders it contains, or you can selectively import one or more
files within a folder.
Importing is a process that you control. If you add a new folder or
subfolder to your computer, you must import the new folders if you
want to add them to your Library. If you have added several subfolders
or individual images to an existing folder structure, you can reimport
from the root folder to ensure that you catch all the new items —
duplicate catalog entries are not created if you import a photo from
the same source location more than once.
Library and catalogs 37
Page 46

To im por t a f ol der
1 Do one of the following
• Click File > Import Photos from Folder. In the dialog box,
navigate to the folder you want and click the Select Folder
button.
• In the Browse panel, click the File System tab, and in the
Directory View, right-click the folder you want, and choose
Import Folder from the context menu.
2 In the Import Photos dialog box, confirm that the Source Folder
button displays the name of your folder.
To include subfolders, enable the Include images from
subfolders check box.
3 Confirm that the Import into Catalog button displays the name
of the catalog you want to use. If you want to create a new
catalog, click the button.
4 (Optional) Enable the Apply Import Settings check box and enter
any keywords that you want to apply to all the photos within the
folder. You can also apply presets in the same way.
5 Click Begin Import.
Note: All the photos in the folder are
catalog, click the Library ta b, an d nav igat e to y our f olders in the
Catalogs section. Note that the files are not copied when they
ataloged — they are referenced from their original
are c
location.
Tip: If you don't want to import all the photos in a folder, you
can open the folder, and in the Thumbnail panel, select the
thumbnails for the photos that you want to import. Click File >
Import Selected Files, and choose the import settings you
want in the
Import Photos dialog box.
cataloged. To check your
38 Corel AfterShot Pro 3
Page 47

Managing your Library
Your Library consists of catalogs and the files and versions that each
catalog contains. You can move, copy, rename, and delete one or more
files or versions at a time to get organized. You can also manage your
Library by creating more than one catalog, and control which catalogs
are accessible by opening or closing catalogs.
For more information about versions, see “Versions” on page 103.
Moving and copying versions
You can move or copy versions to a new location.
d all
Note: When you move or copy a version, the master file a
related versions are copied or moved.
To move or copy versions
• Do one of the following:
• To move a version, drag the thumbnail from the Thumbnail
panel to the folder of your choice in the Browse panel.
• To copy a version, hold Ctrl or Command while dragging the
thumbnail from the T
choice in the Browse panel.
Renaming versions
You can choose to rename your versions by using renaming formats if
y
u want to rename several versions at one time with a consistent
o
format.
humbnail panel to the folder of your
n
Library and catalogs 39
Page 48

The Rename Versions dialog box has the following controls and
features:
• Format — choose from a list of existing formats.
• New Name — lets you enter a renaming format. F
o
r example, if
you use [jobname] or [jobseq] in the New Name box, you can
enter a job name in the Job Name. The sequence [jobseq] format
remembe
rs the last number used in any previous renaming for this
job name, and will continue numbering where it left off.
• Next [rseq] — if you include [rseq] in the New Name box, that
text will be replaced with a unique, incrementing sequence
number that will start ov
er the next time you rename versions.
This control allows you to set the number.
• Reset [jobseq] — restart the numbering for the job name
sequence selected.
• Rename all Versions derived from Master Versions — enable
t
check box to number the master versions sequentially and any
his
related versions with the same name (adds "_v1", "_v2" etc to each
version). If you do not check this option, each version is given a
unique name.
40 Corel AfterShot Pro 3
Page 49

For more information about how to use renaming formats, see
“Renaming formats” on page 193.
To rename one or more versions
1 Select the thumbnails for the versions that you want to rename.
2 Press F2 or right-click and select Version > Rename Version.
3 Edit the New Name field, using text or renaming formats like
[date]. Or, select an existing renaming format from the Format
drop
-down list.
The Preview updates as you edit the New Name field to show you
the results of the renaming format.
Deleting versions
You can delete a master version (which represents the original photo,
or master file
delete a master version versus other types of versions.
• Deleting a master version: When you delete a master version, all
associated versions are also deleted.
moved to your computer's Recycle Bin. Review any messages that
appear to confirm the action.
• Deleting non-master versions: When you delete versions which
are not master versions, there is no impact to the original master
file — the version thumbnail and associated data is removed from
the sidecar XMP file.
) at any time, but different things happen when you
The origina
l master files are
Note: When Multi-Image View is enabled, only the single active
version is remov
ed, not the entire selection.
To delete a master file or version
• •Select the thumbnails of the master versions that you want to
delete and do one of the following:
• Press Delete.
Library and catalogs 41
Page 50

• Right-click a thumbnail and choose Version > Remove Version.
If you have selected a master version, a messa
ge appears to warn
you that the original file for the master version will be moved to
the Recycle Bin.
Managing catalogs
You can create one or more catalogs in your Library. Although you may
choose to use one catalog for simplicity, using multiple catalogs lets
you create logical groups so you can search, browse, edit, store, and
backup specific groups of images at a time without needing to access
or open the rest of your Library.
You can create a new catalog at any time. You can open or close
a
talogs. When you close a catalog, it does not display in the Library.
c
cces s the Library, click the Library tab on the Browse panel.
To a
To create a new catalog
1 Right-click inside the Catalogs section of the Library, and select
Catalog > New Catalog, or click File > New Catalog from the
menu.
2 In the Create and Choose New Catalog Folder dialog box,
choose an empty folder or create a folder.
3 Click Select Folder.
The new catalog appears in the Catalogs section.
To ope n an exi sti ng ca ta log
• Right-click inside the Catalogs section of the Library, and select
Catalog > Open Catalog, or choose File > Open Catalog from
the menu.
42 Corel AfterShot Pro 3
Page 51

To close a catalog
•In the Catalogs section of the Library, right-click the catalog that
you want to close, and choose Catalog > Close Catalog.
Portable catalogs
Individual catalogs for Corel AfterShot Pro can be used in only one
session at a time, but they can be accessed from a fast (local) network
from multiple Corel AfterShot Pro applications. If the master files are
accessed by two machines differently (mapped as different network
drives on Windows, or mounted differently on Linux or Mac) then you'll
need to edit the Catalog Preferences to select the proper root folder.
xample, assume that you access master files stored on a local hard
For e
drive D: on your main desktop computer and store the AfterShot
Catalog on that drive also, but have a second computer that accesses
the same catalog and master files from the main desktop computer. On
this second machine, the D: drive is mapped as X:. If you imported
images into a Corel AfterShot Pro catalog on the main desktop
computer and then opened that same catalog on the second
computer, Corel AfterShot Pro would look for those master files on the
second computer's D: drive instead of on X:.
ca
To solve this, you can create movable
that is shared by the two machines, and set the location of the
movable catalog path differently to account for the different ways
these two machines access the same catalogs and master files.
talog paths inside the catalog
To create a moveable path
1 On the main computer, click the Library tab and right-click the
catalog into which you have imported files from a shared location
(if your catalog is open, you'll see a letter that represents the
network drive your catalog is mapped to).
2 In the context menu, click Set Movable Paths.
Library and catalogs 43
Page 52

3 In the Set Moveable Catalog Paths dialog box, click Add.
4 In the Select a Local Directory dialog box, choose the drive that
holds the imported images that you want to share across the
network. Try to stay as close to the root of the directory as possible
5 Click Select Folder to set this drive as a moveable catalog path.
This does not affect how Corel AfterShot Pro accesses master files
on this first machine, but it prepares the catalog for updating on
the second machine. Click the Add Note button to capture path
in
formation related to where the folder is stored on the drive that
you selected.
6 Close Corel AfterShot Pro on the first machine. Now you can copy
your catalog to another computer.
7 Map the catalog drive of the main computer as a network drive.
8 On the second computer, open Corel AfterShot Pro.
9 Click File > Open Catalog, and import your catalog.
10 In the Library, right-click the catalog and choose Set Moveable
Paths from the context menu.
11 Click Set, and navigate to the drive where the cataloged files are
referenced.
12 Click Select Folder, verify the paths in the Set Moveable Paths
dialog box, and click OK.
Note: it is not necessary to set a movable catalog path before
importing images, nor before opening the catalog on a second
computer as long as you remember the original file locations.
44 Corel AfterShot Pro 3
Page 53

File System mode
File System mode lets you access and edit uncataloged photos. It is a
quick way to access any supported image file on your computer,
without needing to import images into a catalog. It's a good way to
access photos that you may not keep, but when you don't import
photos, you'll miss out on some features that are only possible when
working on images in a Corel AfterShot Pro catalog. If you start
working with photos in File System mode, you have the option of
importing the photos to a Library catalog later.
For more information about File System mode, see “Understanding
the Library” on page 22.
In this section, you’ll learn about
ge settings in File System mode
• Ima
Image settings in File System mode
Since the File System mode does not maintain a persistent catalog, the
image adjustment and metadata settings are written to a Corel
AfterShot Pro XMP file after each adjustment. Each time you browse to
a new folder, Corel AfterShot Pro will scan the folder, removing any files
from Corel AfterShot Pro that have been deleted from your computer,
adding any new images found, and refreshing the settings for all
existing files with the latest settings found in the XMP files. This
ensures that what you see in Corel AfterShot Pro in File System Mode
matches exactly what is saved on your computer. This also means that
File System mode 45
Page 54

the edit history (as seen in the History palette) is reset between each
session.
Note: If you're editing in File System mode and Library mode,
it can c
ause issues — edits to photos may not be visible if you
edit the same file in both File System mode and Library mode
(the informat
ion is written to the file in a different way).
Therefore, it is recommended that after you import a file into a
Library catalog, you always access
the file from the Library.
46 Corel AfterShot Pro 3
Page 55

Editing photos
Editing photos in AfterShot Pro can be a as quick and simple or as
detailed and precise as you like. All your editing is completely nondestructive, so you can experiment with confidence.
In this section, you’ll learn about
• A
bout non-destructive editing
• About adjustment tools
• Standard tools
• Histogram
• Basic Adjustments
• Presets
• Color tools
• Tone tools
• Detail tools
• Metadata tools
• Plugins
• Selective editing
• Retouching with Heal, Clone, or Blemish Remover
• Removing red eye
• Cropping
• Straightening
• Working with Presets
• Copying and pasting settings
• Undoing changes
Editing photos 47
Page 56

• About default settings
• Using the History palette
• Editing photos in an external image editor
About non-destructive editing
The image editor in Corel AfterShot Pro is completely non-destructive,
so you are free to experiment and edit your images as much as you
want, knowing that you can always revert to the original version. All
the edits that you make and metadata that you add is stored either in
a sidecar XMP file, within a Corel AfterShot Pro catalog, or both.
To view or use your image adjustments in other applications, you need
to export th
see Exporting images.
e image. For more information about exporting your files,
The original file is always protected. The master version is
based on the original file, but you can create as many versions
as you like.
Because your original file is always protected (as a master file), when
you edit a photo, your edits are viewable within Corel AfterShot Pro on
a representation of the master file called a master version. You can
48 Corel AfterShot Pro 3
Page 57

create as many additional versions as you like. When you create a
version, the application does not need to make a copy of the master
file, the information is efficiently stored in the XMP file or catalog, so
you can create as many versions as you like without taking up much
storage space.
The application automatically saves each edit that you make
to a
photo, so your editing workflow between photos is smooth. A
complete history is kept for all the photos that you have imported into
your Library, so you undo or redo changes at any time. Note, if you are
working on photos that have not been added to the Library, the edit
history is only retained for the current editing session. For more
information, see “Using the History palette” on page 97.
About adjustment tools
Most editing tools and controls can be found in the Tools panel. When
you click the Standard tab, you can access the Basic Adjustments
se
ction, which contains the most common adjustment controls. Other
tabs, such as Color, Tone, Detail, and Metadata, let you access
d
ditional tools and more advanced controls and options. For
a
example, the Basic Adjustments section includes Fill Light. Fill Light
also appears in the Exposure section of the To ne page. In the
Exposure section, there is an additional control, Fill Range, that lets
you fine-tune the Fill Light adjustment. Adjusting Fill Light in one
s
place will update the Fill Light setting in all section
different views of the same control.
The image below shows , and some com
on controls. The Tools panel
m
can be resized, sections can be pinned, and you can choose to hide or
show the panel. There are different ways to adjust the controls in the
Tools panel. You can also reset controls to their original setting and
hide or show the results of a setting.
— these are just
Editing photos 49
Page 58

The Basic Adjustments section of the Tools panel
Why are some tools and controls not available?
Some tools and controls are not available under the following
conditions:
50 Corel AfterShot Pro 3
Page 59

• The file that you are trying to edit is not available (for example, the
files are stored on an external drive that is not currently connected
to the computer)
• If you have a layer or selection and the tool or control can be
applied only to entire images
The tool is not compatible with the file format. F
following tools can be applied only to RAW files:
• Custom White Balance (Te mp and Tint sliders)
• White Balance Presets (Sunny, Cloudy, Incandescent, etc...)
or example, the
To resize the Tools panel
• Position your pointer along the left edge of the panel, and drag
when your pointer changes to the resizing arrows.
To pin a section of a panel
• Display the section you want, and click the Pin icon pin in the
upper-right corner. To unpin the section, click the icon again.
A pinned section always displays, regardless of which page is
active.
To hi de the To ols pa ne l
• Click the Toggle Right Panel button at the top of the panel.
To ad jus t a s etti ng
•Do one of the following:
• Drag the slider
• Double-click the corres
a new value
Editing photos 51
nding number for the setting and type
po
Page 60

• Using a mouse with a wheel, position your pointer over the
control name or slider, and roll the mouse wheel to adjust the
setting
To reset a slider to its original setting
• Double-click the slider or control name.
To hide or show the results of a setting
• In the Tools panel, mark or unmark the check box to the left of the
adjustment tool.
Standard tools
When you click the Standard tab on the Tools panel, you can access
some of the most commonly used image editing tools. Grouping these
frequently used adjustments together in one place means that you can
perform basic edits quickly without switching between tabs. The
controls are divided into three sections: Histogram, Basic
ju
stments, and Presets.
Ad
Histogram
A histogram is a visual representation of the data that makes up your
image. The left side represents the darker areas in your image, the right
side represents the highlights, and the height of the colored curves
shows you how many pixels of a given value are found in your image.
52 Corel AfterShot Pro 3
Page 61

Basic Adjustments
This section holds the most commonly used image adjustment
controls. Many photographers will likely find most of the controls they
need in this section.
AutoLevel
AutoLevel examines the tonal range of your image and sets the black
and white points to be at points such that a fixed percent of the image
will be pure black and pure white. There are two edit boxes in
AutoLevel: the left box sets the percentage of the image to be set to
pure blac
white.
Perfectly Clear
Perfectly Clear, powered by Athentech Technologies Inc., is a simple
way to quickly optimize your images. Perfectly Clear is award-winning
tech
every pixel while maintaining true color and zero clipping. Perfectly
Clear also removes abnormal tint and restores faded photos. It also
uses medical imaging tech
There are three settings within Perfectly Clear that control how much
tint adjustment is performed when Perfectly Clear is enabled:
• Tint Max — applies the full range of tin
• Tint Min — limits the tint correction, allowing some tint change
• Tint Off — tint correction is turned off. All other aspects of
k and the right box sets the percentage to be set to pure
nology that automatically optimizes the lighting for each and
nology to improve contrast and sharpen.
correction
t
to oc
cur, but preserving some of the original tint
P
rfectly Clear are still applied. Use this setting to preserve the
e
color of your original image.
Editing photos 53
Page 62

White Balance
For RAW images, you can select among several preset white balance
settings, such as As Shot, Click White, and Custom Kelvin.
Different light sources have different characteristics or warmth that
af
how your camera captures images. White Balance lets you
fects
adjust the overa
reproduced in your photos. You can select a White Balance preset,
such as
Sunny, Shady, Tungsten, or Flash, or you can use the Click
White tool (on RAW
object in your image (something that should appear as a neutral gray)
which will adjust all the colors in your image to make the point that
you clicked neutrally colored.
To set white balance with the Click White tool
1 In the White Balance section of the Basic Adjustments page,
click the Enable the Click White tool button
2 In the Preview panel, experiment by clicking a neutral area of your
photo. The ideal place to click is on a neutral grey that is not
overexposed (pure white) or underexposed (pure black) on the
image you want to adjust. Clicking different spots will result in
different corrections.
3 To fine-tune the white balance, adjust this with the Tem p slider.
ll color in the image, ensuring that colors are accurately
, JPEG, or TIFF files) to se
lect a neutral colored
or press I.
Straighten
Straighten rotates your image to level a horizon or otherwise
straighten your image. For more information, see “Straightening” on
page 89.
54 Corel AfterShot Pro 3
Page 63

Exposure
Exposure performs an overall exposure correction, either brightening
or darkening all portions of your image.
Highlights
Highlights recovers detail from apparently overexposed portions of the
image. For more information, see“Tone tools” on page 63.
Fill Light
Fill Light brightens shadows and the darker portions of the image
without overexposing highlights, and with minimal effect on
midtones.
Blacks
Blacks controls the black point in the image. Values lower than zero
remove black from the image; values higher than zero darken the
image. The Histogram section displays the changes in the image.
Saturation
Saturation adjusts the intensity of the colors in the image. High
saturation settings boost colors and provide rich, vivid color. Low
saturation settings produce pastel and more muted colors. Setting
Saturation to zero produces a pure monochrome
image.
, black-and-white
Vibrance
Vibrance is a version of saturation that performs a more gentle
correction to skin and other image areas that are already richly
saturated.
Editing photos 55
Page 64

Hue
Hue changes the colors in an image, rotating the "color circle" by the
amount indicated by the slider. For example, if the Hue slider is set to
60, then 60 is added to the original hues in your
become cyan, blues become magenta, and reds become yellow.
image, so greens
Contrast
Increasing Contrast makes the dark areas in the image darker, and the
bright areas brighter.
Sharpening
Sharpening an image makes the high detail portions of the image
stand out more by making the edge details more pronounced.
Note: Fine detail control tools like Sharpening should be
applied and evaluated while
image, either in the Preview panel or by using the Magnifier.
looking at a 100% Zoom of the
RAW Noise
RAW Noise reduces noise in RAW files only.
Keywords
The bottom of the Basic Adjustments section includes a Keywords
area that shows the keywords for all selected versions. When you have
multiple versions selected, the following color coding is used:
• red — the keywords apply only to some of the selected versions
56 Corel AfterShot Pro 3
Page 65

• green — the keywords apply only to the active version
• no color — the keywords apply to all selected versions
Presets
Presets are a great way to help speed up your workflow. You can save
your favorite adjustments to presets, create keyword presets, or
combine a wide range of photo editing in a preset that can be applied
with one click.
For more information, see “Working with Presets” on page 90.
Color tools
The Color tab in the Tools panel lets you access tools focused on color
control. The controls are organized into five sections: Curves, Color
Correction, Color Balance, White Balance, and Color Management.
Curves
The Curves section is an intelligent combination of standard Curves
and Levels tools found in many image editing programs.
Editing photos 57
Page 66

The Curves section includes the following controls:
• Apply Curves — enables or disables Curves.
• RGB drop-down — allows selecting of individua
l color channels,
or the combined RGB mode.
• Before/After drop-down — switches the display from showing
the histog
ram before curve adjustments are applied and after
adjustments are applied
• Left White Arrow — sets the input 255 (white) point. Dragging
h
this arrow down shifts t
e histogram left, making the image
darker.
• Bottom White Arrow — sets the output 255 (white) point.
r
agging this arrow to the left brightens your image, but it can
D
clip highlight details.
• Left Black Arrow — sets the input 0 (black) point. Dragging this
arrow do
wn shifts the histogram to the left, making the image
darker.
58 Corel AfterShot Pro 3
Page 67

• Bottom Black Arrow — sets the output 0 (black) point. Dragging
this arrow to the right deepens the shadows, and can clip shadow
detail.
• Bottom Grey Arrow — sets the output 128 (gray) point.
Drag
ging this arrow to the right shifts the midtones to higher
values, brightening the image; dragging the arrow to the left
darkens the image.
• Click inside the Curve tool — click inside the curve tool itself to
or adjust the curve. You can set multiple points and drag to
set
fine-tune your tone control.
• AutoContrast — click this button to set the output white and
lack
points based on image content. It uses the AutoLevel values
b
(highlight and shadow) to perf
orm a one-time adjustment to
increase contrast. The main difference between this tool and
AutoLevel is that the output white and blac
k values can be more
easily adjusted than the AutoLevel values.
• Black Point tool
click a tool, then click the image in the Preview pane
, Gray Point tool , White Point tool —
l to set the
black, gray, or white point to the values of the pixel that you click.
• Reset All
and Reset Current — Reset All restores the
curve values to a flat curve. Reset Current resets the current RGB
nel only.
chan
Color Correction
The Color Correction section of the Color page in the Tools panel lets
you adjust your image selectively based on colors that you sample from
your image or colors that you set in the Color Picker. The colors you
select are stored in color wells. The first six color wells (top row) are
preset to the primary and secondary colors. The second set of color
wells (bottom row) can be set to any color you choose.
Editing photos 59
Page 68

To pick a color as the starting point for a color correction
1 In the Tools panel, click the Color tab, and open the Color
Correction section.
2 Click any adjustable Color Well that isn't assigned a color
(white wells in the second row).
3 Click the Color Picker that appears next to the Hue slider and
click anywhere within your photo to select a color that will be
used for colo
r adjustment.
After your starting color is selected, you can adjust the Hue,
Saturation, or Luminance of that color within your image.
4 Adjust Range to control the color tolerance. A small range adjusts
only colors very close to your selected color; a higher range adjusts
a larger color range in your image.
60 Corel AfterShot Pro 3
Page 69

In this example, Selective Color was used to sample the dress.
The Hue was adjusted to change the color of the dress.
Tip: You can also assign a new color to a color well by clicking
the color well that displays to the left of the Color Picker
. This opens a color selector window where you can pick a
color as your adjustment color.
Color Balance
This section in the Tools panel lets you precisely balance the colors in
your image. You can use the following controls:
• Cyan/Red, Magenta/Green and Yellow/Blue — shifts the color
along the color axis.
turation — adjusts the intensity of the colors in the image.
• Sa
High saturation settings boost colors and provide rich, vivid color.
Low saturation settings produce pastel and more muted colors.
• Vibrance — applies a gentle version of Saturation th
oversaturation of skin colors and image areas that are already
richly saturated.
Editing photos 61
at avoids the
Page 70

• Hue — changes the colors in an image, rotating the color wheel
by the amount indicated on the slider. For example, if the Hue
slider is set to 60, this va
lue is added to the original hues in your
image, so greens become cyan, blues become magenta, and reds
become yellow.
•HSL/HSV — choose between correcting images in HSL (Hue /
Saturation / Luminance) and HSV (Hue / Saturation / Value) color
spaces.
White Balance
White Balance provides several preset white balance settings, such as
As Shot, Click White, and Custom Kelvin.
Different light sources have different characteristics or warmth that
eff
ts how objects appear to you camera. White Balance lets you
ec
adjust the overa
reproduced in your photos. You can select a White Balance preset,
such as Sunny, Shady, Tungsten, or Flash, or you can use Click White
to select a neutral colored object in your image (something that should
appear as a neutral gray) which adjusts all the colors in your image to
make the point that you clicked neutrally colored.
ll color in the image, ensuring that colors are accurately
To set white balance with the Click White tool
1 In the White Balance section of the Basic Adjustments page,
click the Enable the Click-White tool button or press I.
62 Corel AfterShot Pro 3
Page 71

2 In the Preview panel, experiment by clicking a neutral area of your
photo. The ideal place to click is on a neutral grey that is not
overexposed (pure white) or underexposed (pure black) on the
image you want to adjust. Clicking different spots will result in
different corrections.
3 To fine-tune the white balance, adjust the Tem p slider.
Color Management
This tool controls the color management mode applied to the active
version.
• Color Mgmt — enables color management when set to an ICC
profile. Switching
manageme
this to None-Linear still applies color
nt, but leaves the image in a linear color space.
• Custom Input Profile — advanced users can choose to create an
input profile fr
om the linear data associated with a camera profile.
For more information, see “About color management” on page 211.
Tone to ol s
The Tone tab on the Tools panel lets you access controls that let you
fine-tune image tone. All the tools are organized in the Exposure
ction.
se
Exposure
The Exposure section combines all the tonal adjustments into a single
area. Many of the same controls can be accessed by clicking the
Standard tab.
Editing photos 63
Page 72

• AutoLevel — examines the tonal range of your image and sets the
black and white points to be at points such that a fixed
percentage of the image will be pure black and pure white. There
are two edit boxes in AutoLevel: the left box sets the percentage
of the image to be set to pure black and the right box sets the
percentage to be set to pure white.
• Blacks — controls the black point in th
e image. Values lower than
zero remove black from the image; values higher than zero darken
the image.
ss o
• Exposure — adjusts the overall brightne
r tone of the image
• Highlights — recovers highlight details and color from
over
exposed portions of your image.
• HR Range — controls how much of the image is ad
usted by
j
Highlights. Lower numbers recover detail and color from only the
lightest areas; higher numbers expand the recovery to a broader
range of light areas.
• Fill Light — recovers shadow details by selectively brightening
only the darkest portions of your image
64 Corel AfterShot Pro 3
Page 73

• Fill Range — controls how much of the image is adjusted by Fill
Light. A small range adjusts only the darkest image areas; a large
number brightens more of the midtones.
• Contrast — controls the difference between the lightest and
darkest areas
of an image. Increasing the contrast makes the dark
areas in the image darker and the bright areas brighter.
• Enable Local Contrast — enable the check box to control
regiona
l contrast to improve overall image clarity or emphasize
texture. Tonal changes are applied according to the values set for
Strength (amount) and Radius (size of areas sampled).
Local Contast was applied (right) to emphasize texture in the
original image (left).
Detail tools
The Detail tab on the Tools panel lets you access controls that let you
sharpen, blur, adjust noise, apply lens corrections or distortions, and
add effects, such as vignette or color inversion.
Sharpening
The Sharpening section lets you adjust how sharp or how soft the
details are in your image. Amount adjusts the overall sharpness, while
Sensitivity limits what portions of your image are sharpened.
Editing photos 65
Page 74

A high Sensitivity value results in less of your image being sharpened.
If sharpening your image makes noise or highly detailed areas too
distracting or too sharp, then try raising the Sensitivity value.
Note: Fine-detailed control tools, like Sharpening, should be
applied and evaluated while looking at the image at the 100%
zoom level, either in the Preview panel or with the Magnifier.
RAW Noise
RAW Noise is an image improvement process that you can use very
early in the image editing workflow to provide the highest quality final
images. The feature can be applied only to RAW files.
• Raw Impulse Noise Removal — enables the automatic detection
e
moval of impulse noise (single black, white, or colored
and r
pixels).
• Raw Noise — reduces noise. You can control the strength of the
ois
e reduction.
n
• Threshold — sets the level of sensitivity for noise detection in the
image.
Note: Applying RAW Noise enables RAW Impulse Noise
Removal, but you can apply RAW Impulse Noise Removal
without en
abling RAW Noise.
66 Corel AfterShot Pro 3
Page 75

Perfectly Clear Noise Removal
Perfectly Clear Noise Removal uses Athentec Imaging Noise Removal
to improve images by reducing noise, a graininess caused by color or
luminance-related artifacts, without losing image detail. Noise occurs
for a number of reasons, including low-lighting or limitations of the
camera's sensors. Perfectly Clear Noise Removal includes the
following controls:
• Enable Noise Removal — toggles noise removal on or off.
• Preset — lets you choose automatic noise reduction based on
some common noise-reduction options.
• Strength — lets you set how much noise reduction is applied (0-
100).
• Detail — lets you control how much detail is preserved (0
-10).
Lens Correction
Lens correction fixes lens distortion. While zoom lenses with a large
range of focal lengths show the greatest lens distortion, even fixedfocal length, or "prime" lenses, can cause some types of distortion. The
following types of lens distortion can quickly and easily be corrected in
Corel AfterShot Pro: Barrel and Pin Cushion distortion, Chromatic
Aberration, and Vignetting.
Editing photos 67
Page 76

Barrel and Pin Cushion distortion is commonly referred to simply as lens
distortion. This is caused from nonuniform magnification of the image
from the outside of the image (perimeter) to the center. Barrel
distortion refers to a rounded effect in an image caused by diminished
lens magnification towards the edges. Pin cushion distortion refers to
a pinched or narrowed appearance at the sides of an image. Each lens
has its own Barrel and Pin Cushion characteristics, and by analyzing a
set of images from a lens at all focal lengths, this distortion can be
removed. Corel AfterShot Pro includes profiles for several hundred lens
and camera combinations.
i
Chromatic Aberration distortion (known as CA d
stortion) is a result
of the nonuniform bending of light as it passes through a lens. The
result is a color fringe (often appears purple) and uneven colors around
edge details in high contrast scenes, such as branches of a tree
silhouetted against a bright sky. Zoom lenses, particularly at their
68 Corel AfterShot Pro 3
Page 77

widest and longest focal lengths, exhibit the most severe distortion. CA
distortion can be removed by adjusting the data for the colors that
show the most distortion.
Vignetting is the darkening of corners of an imag
e due to light fall-off,
and can be caused by optics (the lens itself), the sensor (many sensors
are less sensitive to light that hits the sensor at an angle), or from other
causes like a filter or lens hood that shades the corners of an image.
Vignetting can be corrected by brightening the corners of an image. In
some cases, photographers chose to add a vignette effect to their
photos to draw focus to the central subject. You can use Corel
AfterShot Pro to remove an unwanted vignette or add a vignette.
When you add a vignette, it is always performed on the cropped
portion of the image, while correcting vignette is applied to the entire
original frame.
Add a vignette
The Lens Correction section contains the following common controls:
• Enable correction — toggles Lens Correction on or off.
• Resize image — enable to automatically scal
e the image to fill the
image frame. Do not enable if you want to fill the empty sections
of your image manually.
rre
• Edit — lets you edit the currently selected lens co
ction profile
• Load — lets you open a saved lens correction profile (XML file)
Editing photos 69
Page 78

• Save — lets you save your changes to the current profile and save
a copy as an XML file that can be shared with other users.
• Reset — removes all changes made to the p
ofile during the
r
current session
The Database tab i s used when you want to corr ect you r images based
mera and lens profiles built into Corel AfterShot Pro.
on ca
The top section controls Barrel and Pin Cushion distortion, and
contains two tabs: Database and Manual.
• Manufacturer, Model, Lens — these drop-down menus show
wha
camera and lens Corel AfterShot Pro assumes your image
t
was taken with. Some cameras and lenses include data in the
image file that allows the application to determine exactly what
camera and lens was used, but other times the application
"guesses" the closest option based on the data available. You can
change incorrect guesses by selecting the correct manufacturer,
camera model, and lens in the lists. These determine which Lens
Distortion profile to use when removing distortion.
• Focal Length — shows the focal length setting for the lens a
t the
time the image was taken. You can set the focal length manually
if the image file doesn't include this information.
• Reload EXIF — click this button to have Corel AfterShot Pro re-
re
ad the EXIF data from the selected image, guess the camera and
lens type, and select the appropriate entries in the drop-downs.
The Manual tab lets you manually enter correction parameters instead
of
using correction parameters from profiles built into the application.
This is useful for lenses that are not yet in the lens correction database.
You can save a lens correction that you create as an XML file and share
it with the AfterShot community. You can load saved lens corrections
and edit existing profiles in the Manual tab.
70 Corel AfterShot Pro 3
Page 79

If you want more information about lens correction parameters in
general, and how to determine them, you can visit the following thirdparty site: http://wiki.panotools.org/Lens_correction_model.
The Chromatic Aberration section contains the following controls:
• Chromatic Aberration Correction — toggles Chromatic
Aberration Correction on or off. This control is independent of
othe
r types of lens correction.
• R / C — controls the shift of colors alon
• B / Y — controls the shift of colors alon
axis.
The Vignette Correction section contains the following:
• Enable vignette correction — toggles Vignette control on or off.
This control is independent of other types of lens correction.
• Strength — controls how light (positive or right) or dark (n
or left) the correction will be.
• Radius — controls how far into the image the correction should
extend.
g the Red/Cyan color axis.
g the Blue/Yellow color
egative
Mirror and Invert
This simple tool allows you to:
• Mirror your image (from left to right).
• Invert the colors (like a film negative)
when working with scanned negatives.
This option can be useful
.
Metadata tools
The Metadata tab contains tools that let you view and edit the
me tadata associa te d with your images. Th is metadata i nc ludes camera
data, EXIF and IPTC data, as well as information that you add to your
files, such as keywords, star ratings, and captions. The controls are
Editing photos 71
Page 80

organized into three sections: Metadata, Keywords, and Keyword
Sets.
Metadata
Th is tool shows EX IF and I PTC meta data assigned to the A ct ive Version ,
and allows you to add, remove or edit the IPTC data from all selected
images.
You can select different metadata sets from the drop-down list at the
top of the Metadata section, which changes the type
is shown. Some metadata is read-only, like Shutter Speed and ISO
Rating, while other metadata is editable, like Caption, Rating, and
Date.
of metadata that
Keywords
This section shows all keywords assigned to the active version and all
selected versions. You can add and remove keywords from all selected
images.
72 Corel AfterShot Pro 3
Page 81

Note: Adding or removing keywords from the Keywords
section affects all selected images, while the keywords
displayed in the section reflect only the active version.
Keyword Sets
This section provides a fast and easy way to assign multiple keywords
to you photos. You can group similar keywords together in a set and
show that set in the Keyword Sets section.
For more information about Metadata tools, see the following topics:
•Working with metadata
•Effective use of keywords
•Working with keywords and keyword sets
•Finding photos by using metadata
Plugins
The Plugin tab lets you access installed plugins, including plugins
developed by third-party developers. These unique image adjustment
tools are designed to work directly within Corel AfterShot Pro. The
plugins are totally non-destructive, like all of Corel AfterShot Pro's built-
Editing photos 73
Page 82

in image adjustment tools, and are compatible with Corel AfterShot
Pro's selective editing tools.
As you install other plugins, additional tools appear on the Plugins tab.
Ad
nal tabs are created automatically as you install more plugins.
ditio
For more information about plugins available for Corel AfterShot Pro,
visit www.aftershotpro.com/plugins.
Before and after showing the original photo (left) and the
results from the Black-and-White plugin (right).
Installing and updating plugins
The easiest way for Windows and Mac OS users to install a plugin is
from
the Plugin Manager available from the Get More tab. For Linux
users, and to ge
t general information about plugins, visit
www.aftershotpro.com/plugins.
74 Corel AfterShot Pro 3
Page 83

Plugins are distributed as Corel AfterShot Pro .bzplug files — a single
file that contains all the files and information necessary for the plugin
to run.
To install a plugin from the Plugin Manager
1 On the tools panel, click the Get More tab.
2 Open the Plugin Manager section
3 To the right of the content that you want to install, click the
download button.
By default, the download buttons display Install, Free, or a price.
4 Follow any instructions for downloading or purchasing the
content.
The content is installed. You might need to restart your application
to activate some types of content.
To manually install a plugin (outside the Plugin Manager)
• Do one of the following:
• Double-click a Corel AfterShot Pro plugin bundle (which ends
with the .bzplug file extension).
• Drag and drop a .bzplug bundle into the Brow
• Click File > Install Plugin and choose the .bzplug bundle that
you want to install.
Note: Corel AfterShot Pro checks to make sure the plugin you
ar
e trying to install supports your version of Corel AfterShot Pro
and your computer type. In some cases, an updated version of
the plugin will be installed. You must restart Corel AfterShot Pro
to complete the installation process. You can restart
immediately after installing or updating a plugin, or you can
restart later.
se panel.
Editing photos 75
Page 84

Corel AfterShot Pro Black & White Plugin
Corel AfterShot Pro includes the Black & White Plugin which lets you
choose from a variety of color mixing options and use an innovative
spot color tool that restores one or two colors to your black and white
image.
The original photo (left), black and white version (center), and
spot color version (right)
This plugin includes the following controls:
• Enable Black & White — turns the effect on or off.
• Channel Mixer drop-down list — lets you choose from several
c
olor mixe
• First Spot Color and Second Spot Color tabs — sets the spot
colo
• Enable — turns the spot color effect on or off.
• Hue — specifies the hue to be restored. You can also click the
Color Well
• Fuzziness — sets the range for the restoration based on how
close
s used to determine the black and white value.
r restoration optio
ns.
to choose a color.
the colors are to the selected hue.
76 Corel AfterShot Pro 3
Page 85

Selective editing
Selective Editing lets you isolate adjustments or edits to a specified
area of a photo. For example, you can select and lighten an area that
you want to highlight in a photo, or select an area that you want to
edit by using Heal, Clone, or Blemish Remover. For more information
t Heal, Clone, and Blemish Remover, see “Retouching with Heal,
abou
Clone, or Blemish Remover” on page 84.
Selective Editing has three main steps:
1 Create a layer — See “To create an adjustment layer” on page 80.
2 Select one or more areas to edit by creating regions — See “To
create a region” on page 81.
3 Apply adjustments — See “To adjust a layer” on page 82.
Review the information below to learn about layers, regions, and
adjustments that can be used with selective editing.
Layers
Layers are collections of regions and adjustments. A layer can contain
a single region and adjustment, or it can contain many regions and
adjustments. All regions in a single layer will have the same
adjustments applied. For example, if you want to brighten several faces
in a photo, you can create circle regions over each face, and then
adjust the Fill Light setting for the layer, thereby brightening the
hadows for all the selected faces at one time. You can apply other
s
adjustments to the layer as well, but at the point where you don't want
the adjustments to apply to all the selected regions, or you want to
adjust a new region, you must create a new layer and select one or
more regions that you want to adjust.
Editing photos 77
Page 86

The upper area of the Layers palette contains the main commands for
creating and managing layers, including the Region tools. You can add,
delete, duplicate, invert, and rename layers. You can also copy and
paste layers — the selected areas and layer settings are copied.
The Name list on the Layers palette shows all the layers associated with
the current version of the photo. You can choose a layer to view the
selected regions in the Preview panel. You can also choose which layers
and regions to show or hide.
The lower area of the Layers palette is context-sensitive. It displays
gs that you can use to control and fine-tune the active tool.
settin
Regions
Regions are selected areas of a photo that you create by using one of
the Region tools:
78 Corel AfterShot Pro 3
Page 87

• Circle Region tool — creates a circular region.
• Polygon Region tool — creates a polygon region (triangle,
square, rectangle...). The enclosed shape is determined by clicking
the image to se
• Curve Region tool
enclosed shape is determined by clicking
t points which are connected by straight lines.
— creates an irregular curvy shape. The
the image to set points
which are connected by curved lines.
• Brush Region tool
— creates a freehand shape. Brushstrokes
determine the selected region. You can create the entire region
with a brus
h, or use a brush to add to a region. For example, you
can use the Polygon Region tool to select a large area of a
background and then use the Brush Region tool to add small
brushstrokes around the borders of the background to ensure that
you have complete coverage.
Regions have two areas: the main area and the fe
ather area. The main
area is the portion within the solid lines of a region, and this is where
the full effect of editing applies. Along the edge of the main area is the
feather area. This is the transition area where the selected area blends
with the background — from 100% at the inside edge, to 0% at the
outer edge of the dashed line.
To have a smooth, gentle fade between a region and the rest of the
image, use a large feather size. To make sharp, crisp regions that affect
only the selected area inside a region, use a very small feather size.
The main part of the region is enclosed by a solid black line.
The feather area is enclosed by a dashed white line.
Editing photos 79
Page 88

Regions can also be inverted, so that the edits applied to the layer
containing a region will apply to the portion of the image that is
outside the selected area.
Adjusting regions
After you have created a layer with one or more regions that you want
to edit, you can use controls in the Tools panel to apply adjustments.
Some adjustments and editing tools are designed to work on the entire
image and cannot
tools affect the entire image:
•Image Rotation
• Straightening
• Lens Distortion Correction
• Color Management
• AutoLevels
• All Metadata settings (keywords, ratings, labels, IPT
o create an adjustment layer
T
1 In the upper-right corner of the application window, click the
Open Layer Manager button .
2 In the Layers palette, click +Adjust button.
be applied to a layer. The following adjustments and
C data, etc)
A new layer appears in the Name list, below Main Layer.
To set layer opacity
•In the Layers palette, click a layer name, and adjust the Opacity
slider at the bottom of the palette.
To rena me a lay er
•In the Layers palette, double-click a layer name in the Name list,
and ty
pe a name.
80 Corel AfterShot Pro 3
Page 89

Tip: You can name your layer according to the type of
adjustment you want to make. Later, if you want to make the
same adjustment to another region, it will be easy to choose
the existing layer and add a region.
To duplicate a layer
•In the Layers palette, click the layer that you want to duplicate
and click the Duplicate button
.
To hide or show a layer or region
•In the Layers palette, click the box to the left of a
layer or region
name in Name list.
A check mark appears in the box when the layer or region is
visible
. The box is empty when the layer or region is hidden.
To delete a layer or region
1 In the Layers palette, click the name of the layer or region that
you want to delete.
2 Click the Delete button at the top of the Layers palette.
To crea te a reg ion
1 In the Layers palette, create or select a layer to which you want to
add a region.
2 Click one of the following Region tools:
• Circle Region
— In the Preview panel, click the image to set
the position of the circle. At the bottom of the Layers palette,
adjust the Size and Feather settings.
• Polygon Region — In the Preview panel, click the image to
set each point of your shape (the points are connected by
straight lines). Double-click to complete the p
olygon. At the
bottom of the Layers palette, adjust the Feather settings.
Editing photos 81
Page 90

• Curve Region — In the Preview panel, click the image to set
each point of your shape (the points are connected by curved
lines). Double-click to comple
te the shape. At the bottom of the
Layers palette, adjust the Feather settings.
• Brush Region
— In the Layers palette, enable the Show
Strokes check box. Adjust the Size and Intensity settings for
rush, and drag in the Preview panel to apply your
your b
brushstrokes. When you are finished, you can disable the Show
St
rokes chec
betwee
k box. To fine-tune your brushstrokes, toggle
n the Erase Brush and Normal Brush mode. If
you want to change the color of your brushstrokes, click the
Color well and select a color.
To invert a layer
•In the Layers palette, click a
layer name in the Name list and click
the Invert button .
The outline for the main area of a region changes from black to white
when you invert
.
To adjust a layer
•In the Layers palette, click a layer name in the Name list, and in
the T
ools panel, adjust the settings you want.
For information about which adjustme
nts can be applied, see
“Adjusting regions” on page 80.
Editing regions
Editing regions is just as easy as creating regions. You can edit a region
by adding, deleting, or moving points on polygon and curved shapes.
You can also move a region, adjust the size, or adjust the feathering.
82 Corel AfterShot Pro 3
Page 91

To add a point to a polygon or curved region
1 In the Layers palette, click a region name in the Name list.
2 Hold down the Shift key down and in the Preview panel, position
your pointer over the region outline where you want to add a
point.
3 When a red circle appears at the correct position, click to add a
point.
To delete a point from a polygon or curved region
1 In the Layers palette, click a region name in the Name list.
2 Hold down the Alt key down (or Alt+Shift on some Linux
systems) and in the Preview panel, position your pointer over the
point that you want to remove.
3 When a red circle appears on the point, click to delete the point.
To move a point on a polygon or curved region
1 In the Layers palette, click a region name in the Name list.
2 In the Preview panel, position your pointer over the point that you
want to move.
3 When a red circle appears on the point, drag the point to a new
location.
To m ove a re gion
1 In the Layers palette, click a region name in the Name list.
2 In the Preview panel, position your pointer over the region.
3 Drag the region to a new location.
To resize a region
• In the Preview panel, position your
inter over a region and roll
po
your mouse wheel to make it larger or smaller.
Editing photos 83
Page 92

Blending layers
Blending allows you to "cut out" sections of a region by creating new
regions below the initial region and setting Blending to Subtractive.
Th
is will subtract the lower regions from any areas where they overlap
with higher regions. A Subtractive region that does not overlap with
Additive regions above it will have no effect. Yo
u can check layer order
by looking at the Name list in the Layers palette.
To use a Subtractive layer when blending layers
1 In the Layers palette, click the name of the layer that you want to
change to Subtractive or create a new layer.
2 Choose a Region tool, and from the Blending drop-down list,
choose Subtractive.
3 Create a region that protects lower regions from the Additive
layers above it.
Retouching with Heal, Clone, or Blemish Remover
Heal, Clone, and Blemish Remover let you remove small, distracting
elements from your photos. They use layers and Region tools in a
similar way to selective editing.
• Heal mode is best used for small blemishes in smooth, low deta
areas, such as a small blemish on skin, or a small bird in the sky. It
is limited only to circular regions created with the Circle tool, and
unlike cloning, it does not require that you to set a source.
• Clone mode is the process of copying a pa
rt of an image in order
to cover up a distracting or unwanted feature in the picture.
Cloning takes image content from a source region and places it in
the selected area.
• Blemish mode combines smart healing with cloning. Because you
can use the Circle, Polygon, or Curve Region tools and choose a
e, Blemish mode is more versatile than Heal. The source area
sourc
il
84 Corel AfterShot Pro 3
Page 93

you choose is analyzed along with the selected area to produce
more seamless coverage. You can activate Blemish mode by
choosin
g the Blemish Remover tool on the AfterShot toolbar.
Each version can have only one Heal/Clone/Blemish layer. Copying and
pasting a Heal/Clone/Blemish layer replaces any existing Heal/Clone/
Blemish layer.
Switch between Heal, Clone, and Blemish
You can use the Circle tool in Heal, Clone, or Blemish mode. To switch
twee
n these modes, simply choose Heal, Clone, or Blemish from
be
the Mode drop-down list in the Layers palette. The control is visible
aft
er you select an area, and only the modes available for the region
type created are available in the drop-list.
To remove a spot with Heal
1 Click the Open Layer Manager button
2 In the Layers palette, click the +Heal/Clone button.
3 Click the Circle Region tool, and in the Preview panel, click the
spot that you want to remove.
4 In the lower-left corner of the Layers palette, choose Heal from
the
Mode drop-down menu.
If you want to adjust the size of the circle or how the edges of the
blend, drag the Size or Feather sliders at the bottom of the
circle
Layers palette.
Editing photos 85
Page 94

The Heal mode was used to remove a small white spot from
a flower
To cover or copy image areas by cloning
1 In the Layers palette, choose an existing Heal/Clone/Blemish layer
or click the +Heal/Clone button to create a Heal/Clone/Blemish
layer.
2 Click a Region tool.
3 Select the portion of your image that you want to clone out. This
is the destination area for the cloning.
For information about using regions tools, see “To create a
region” on page 81.
4 Ensure the Mode is set to Clone.
5 After you finish creating your destination region, a source region
is automatically created (outlined in red). Click and drag the
source region to position it over the image content that you want
to copy.
Tip: When cloning, you can click the Swap Source button at
th
ottom of the Layers palette to swap the source region
e b
with the destination region. This is useful when you want to
86 Corel AfterShot Pro 3
Page 95

duplicate content in an image instead of using cloning to
remove image content.
To remove an unwanted area with the Blemish Remover
1 On the AfterShot toolbar, choose a Region tool from the drop-list.
The Brush Region tool is the only option that is not available for
the Blemish Remover.
2 Click the Blemish Remover tool .
3 Select the portion of your image that you want to remove.
4 After you finish creating your destination region, a source region
is automatically created (outlined in red). Click and drag the
source region to position it over the image content that you want
to use as a source.
5 In the Layers palette, ensure the Mode is set to Blemish.
6 Adjust the Feather and Size slider to blend the edges of the
selection and cover the area.
Editing photos 87
Page 96

Removing red eye
When light from the camera’s flash reflects off the retina of a person's
eye, a red-eye effect is captured in the photo. You can remove the red
eye effect with the Red Eye tool.
To remove red eye
1 In the AfterShot Pro toolbar, click the Red-eye Removal tool .
A circle appears in the Preview panel.
2 Drag the circle to the eye area.
3 Adjust the size of the circle to match the size of the red eye by
using the Size slider in the popup.
4 Click the mouse button to remove the red from the eye.
Cropping
Cropping lets you recompose your photo, remove unwanted edge
areas, or change the aspect ratio to match a print output. For
information about preferences related to cropping, see “Crop
preferences” on page 189.
88 Corel AfterShot Pro 3
Page 97

To crop a photo
1 Click the Crop tool crop on the AfterShot Pro toolbar or press C.
2 In the Cropping palette, do one of the following:
• Choose a preset from the crop preset drop-down menu.
• Choose Aspect or Pixels from the Crop mode drop-down
menu, and type values in the Height an
3 Drag the edges of the cropping grid that appears in the Preview
panel to adjust the crop area.
4 Click inside the cropping grid to reposition the crop area.
5 In the Cropping palette, click Done.
You can also
d Width boxes.
Automatically maximize
crop reg
ion to the edges of the
the
Click the Fit button.
photo
Display or hide the cropping
grid
Switch the orientation of the
cropping grid
Lock the aspect ratio of the
cropping grid
Add a crop preset to the preset
drop-down list
Click the Enable Crop check
box.
Click the Switch height and
width button .
Click the Lock button .
In the Cropping palette, enter the
Aspect or Pixel values you want,
and click the Add button .
Tip: You can use the scroll wheel on a mouse to resize the
cropping grid.
Straightening
Straightening lets you correct tilted horizons or apply a creative tilt to
your photos.
Editing photos 89
Page 98

To straighten a photo
1 Select the Straighten tool from the AfterShot Pro toolbar or
press S.
2 Drag in the Preview panel to draw a horizontal or vertical line that
you want to use as a reference for straightening the photo.
3 Release the mouse button to apply the changes.
The Straighten tool lets you choose a reference point
(emphasized above by a red line) for straightening
Note: When you straighten a photo, the photo is not cropped
automatically, so you will see white areas along the edges of
the photo.
Working with Presets
Using presets is a great way to speed up your workflow. You can save
your favorite adjustments to presets, create keyword presets, or
combine a range of photo editing in a preset that can be applied with
one click.
Presets are saved as XMP files in the Corel AfterSho
t Pro user folder on
your computer:
C [a main drive]:\Users\[User name]\AppData\Local\Corel\AfterShot
Pro\Presets
90 Corel AfterShot Pro 3
Page 99

This makes it easy to copy presets from one computer to another, or to
share presets with others.
You can also import Presets by clicking the Get More tab and installing
th
resets you want. For more information, “Updating and extending
e p
the application” on page 219.
Applying and managing presets
Applying a preset essentially applies all the commands and informat
ion
to the selected files. All the actions appear in the History palette,
making it easy to remove any settings
that cause an undesired effect.
Many presets can be applied to an image, and each subsequent preset
re
es the settings of previous presets with the settings contained in
plac
the last preset.
Corel AfterShot Pro includes quite a few presets, but you are
enco
uraged to create your own presets.
Managing presets
You can manage your presets. When you open the Manage mode, you
create preset folders and move, rename, delete, and view preset
can
settings. Corel AfterShot Pro includes several default presets. You can
Editing photos 91
Page 100

create as many additional folders as you need to categorize and
organize your photos. You can also choose which presets display in the
My Favorites list (the drop-down list on the Presets section title bar).
To apply a preset
1 In the Thumbnail panel, select the image or images that you want
to edit.
2 In the Tools panel, click the Standard tab.
3 In the Presets section, click a preset in the list. Presets are applied
to all selected images, except when in Multi-Image View mode.
To create a preset
1 Edit an image, using all the commands and settings that you want
to save to the preset.
2 In the Tools panel, click the Standard tab.
3 In the Presets section, click the Add Preset button .
4 In the Save Presets dialog box, pick a name for the settings, and
choose which settings you want to save.
5 Click OK to save the preset. The preset name appears in the preset
list immediately.
To access the Manage mode for presets
1 In the Tools panel, click the Standard tab, and open the Presets
section.
2 Click the Manage button in the lower right corner of the section.
To add or remove a preset to the My Favorites list
•In the Show in Menu column, mark a check box to display the
corresponding preset in the My Favorites drop-down list; unmark
the check box to remove the preset from the list.
92 Corel AfterShot Pro 3
 Loading...