

Page 1

0
p
KP-1
Installation and O
External Keypad
eration Manual
Part Number MN/KP10.IOM Revision 1
Page 2

Page 3

Comtech EF Data is an ISO 9001
Registered Company.
KP-10
External Keypad
Installation and Operation Manual
Part Number MN/KP10.IOM
REVISION 1
March 19, 2002
Copyright © Comtech EF Data, 2001. All rights reserved. Printed in the USA.
Comtech EF Data, 2114 West 7th Street, Tempe, Arizona 85281 USA, (480) 333-2200, FAX: (480) 333-2161.
Page 4

CUSTOMER SUPPORT
Contact the Comtech EF Data Customer Support Department for:
! Product support or training
! Information on upgrading or returning a product
! Reporting comments or suggestions concerning manuals
Contact Customer Support using any of the following methods:
Mail: Comtech EF Data
Email: service@comtechefdata.com
Customer Support Department
2114 West 7th Street
Tempe, Arizona 85281 USA
Phone: (480) 333-2200 (Main Comtech EF Data Number)
(480) 333-4357 (Customer Support Desk)
Fax: (480) 333-2161
Internet: www.comtechefdata.com
To return a Comtech EF Data product (in-warranty and out-of-warranty) for repair or
replacement:
1. Request a Return Material Authorization (RMA) number from the Comtech
EF Data Customer Support Department.
2. Be prepared to supply the Customer Support representative with the model
number, serial number, and a description of the problem.
3. To ensure that the product is not damaged during shipping, pack the product
in its original shipping carton/packaging.
4. Ship the product back to Comtech EF Data. (Shipping charges should be
prepaid.)
For more information regarding the warranty policies, see Warranty Policy, p. v.
Page 5

Table of Contents
Customer Support.........................................................................................................................ii
CHAPTER 1. INTRODUCTION....................................................................................1
1.1 Purpose and Function............................................................................................................. 2
1.1.1 Compatible Equipment ......................................................................................................2
1.1.2 Description......................................................................................................................... 3
CHAPTER 2. CONFIGURATION.................................................................................5
2.1 Connecting and Supplying Power......................................................................................... 7
2.2 Using the Keypad..................................................................................................................11
2.2.1 Function Keys..................................................................................................................11
2.2.2 Character Keys................................................................................................................. 12
2.2.3 Numeric Keys .................................................................................................................. 12
2.2.4 Cursor Movement Keys...................................................................................................13
2.3 Configuring the KP-10 .........................................................................................................13
2.3.1 Version............................................................................................................................. 13
2.3.2 Contrast Control............................................................................................................... 13
2.3.3 Communication Mode Settings........................................................................................ 14
2.4 Entering Commands and Receiving Responses................................................................. 14
CHAPTER 3. OPERATION........................................................................................15
3.1 Message Structure................................................................................................................. 15
3.1.1 Character Format .............................................................................................................16
3.1.2 Start Character .................................................................................................................16
3.1.3 Device Addresses............................................................................................................. 16
3.1.4 Command Message Structure.......................................................................................... 17
3.1.5 Response Message Structure............................................................................................ 17
3.1.6 End Character................................................................................................................... 18
3.1.7 Negative Responses......................................................................................................... 18
i
Page 6

KP-10 External Keypad Revision 1
Preface MN/KP10.IOM
3.2 Single RFT Communications............................................................................................... 19
3.2.1 Keypad Variations for an RFT......................................................................................... 19
3.2.2 Single System Address .................................................................................................... 20
3.3 RSU Communications ..........................................................................................................21
3.3.1 KP-10 Keypad Variations for an RSU............................................................................. 21
3.3.2 Multiple Unit Addresses.................................................................................................. 23
Figures
Figure 1. KP-10 Elements........................................................................................................... 3
Figure 2. 9-Pin Connector Port on the KP-10 (Top View)........................................................ 8
Figure 3. RFT-500 External Connections.................................................................................. 9
Figure 4. RSU-503 External Connections ................................................................................10
Figure 5. Alternate Key Functions During Configuration........................................................ 11
Figure 6. Function Keys for use with an RFT ..........................................................................19
Figure 7. Function Keys for use with an RSU......................................................................... 21
Figure 8 CA/4873 ............................................................................................................... A–2
Figure 9 CA/5103 ................................................................................................................ A–3
Figure 10 CA/6158.................................................................................................................. A–4
Figure 11 CA/8075 .............................................................................................................. A–5
Figure 12 CA/8076 .............................................................................................................. A–6
Figure 13 C/A 8077 ............................................................................................................. A–7
Tables
Table 1. KP-10 Elements Descriptions....................................................................................... 4
Table 2 KP-10 Configurations for Comtech EF Data Transceivers and Redundancy Units.... 6
Table 3 KP-10 RS-232 Pinout .................................................................................................. 6
Table 4 KP-10 RS-485 Pinout .................................................................................................. 6
Table 5 KP-10 RS-422 Pinout .................................................................................................. 7
Table 6. KP-10 Function Keys.................................................................................................. 11
Table 7. Keys Changed on the KP-10....................................................................................... 12
Table 8. Device Addresses........................................................................................................ 16
Table 9. Descriptions of Function Keys used with an RFT..................................................... 19
Table 10. Descriptions of Function Keys used with an RSU ...................................................21
ii
Page 7
KP-10 External Keypad Revision 1
Preface MN/KP10.IOM
ABOUT THIS MANUAL
This manual provides installation and operation information for the Comtech EF Data
KP-10 External Keypad. This is a technical document intended for earth station
engineers, technicians, and operators responsible for the operation and maintenance of
the KP-10 External Keypad.
CONVENTIONS AND REFERENCES
CAUTIONS AND WARNINGS
Indicates information critical for proper equipment function.
IMPORTANT
Indicates a hazardous situation that, if not avoided, may result in minor or moderate
injury. CAUTION may also be used to indicate other unsafe practices or risks of
CAUTION
WARNING
property damage.
Indicates a potentially hazardous situation that, if not avoided, could result in
death or serious injury.
METRIC CONVERSION
Metric conversion information is located on the inside back cover of this manual. This
information is provided to assist the operator in cross-referencing English to Metric
conversions.
RECOMMENDED STANDARD DESIGNATIONS
Recommended Standard (RS) Designations have been superseded by the new designation
of the Electronic Industries Association (EIA). References to the old designations are
shown only when depicting actual text displayed on the screen of the unit (RS-232, RS485, etc.). All other references in the manual will be shown with the EIA designations
(EIA-232, EIA-485, etc.) only.
iii
Page 8

KP-10 External Keypad Revision 1
Preface MN/KP10.IOM
TRADEMARKS
All product names mentioned in this manual may be trademarks or registered trademarks
of their respective companies and are hereby acknowledged.
REPORTING COMMENTS OR SUGGESTIONS CONCERNING THIS MANUAL
Comments and suggestions regarding the content and design of this manual will be
appreciated. To submit comments, please contact the Comtech EF Data Customer
Support Department.
EMC COMPLIANCE
This is a Class A product. In a domestic environment, it may cause radio interference that
requires the user to take adequate protection measures.
EN55022 COMPLIANCE
This equipment meets the radio disturbance characteristic specifications for information
technology equipment as defined in EN55022.
EN50082-1 COMPLIANCE
This equipment meets the electromagnetic compatibility/g eneric immunity standard as
defined in EN50082-1.
FEDERAL COMMUNICATIONS COMMISSION (FCC)
This equipment has been tested and found to comply with the limits for a Class A digital
device, pursuant to Part 15 of the FCC rules. These limits are designed to provide
reasonable protection against harmful interference when the equipment is operated in a
commercial environment.
This equipment generates, uses, and can radiate radio frequency energy. If not installed
and used in accordance with the instruction manual, it may cause harmful interference to
radio communications. Operation of this equipment in a residential area is likely to cause
harmful interference; in which case, users are required to correct the interference at their
own expense.
Note: To ensure compliance, properly shielded cables for DATA I/O shall be used. More
specifically, these cables shall be shielded from end to end, ensuring a continuous shield.
iv
Page 9
KP-10 External Keypad Revision 1
Preface MN/KP10.IOM
SAFETY COMPLIANCE
EN 60950
Applicable testing is routinely performed as a condition of manufacturing on all units to
ensure compliance with safety requirements of EN60950.
This equipment meets the Safety of Information Technology Equipment specification as
defined in EN60950.
LOW VOLTAGE DIRECTIVE (LVD)
The following information is applicable for the European Low Voltage Directive
(EN60950):
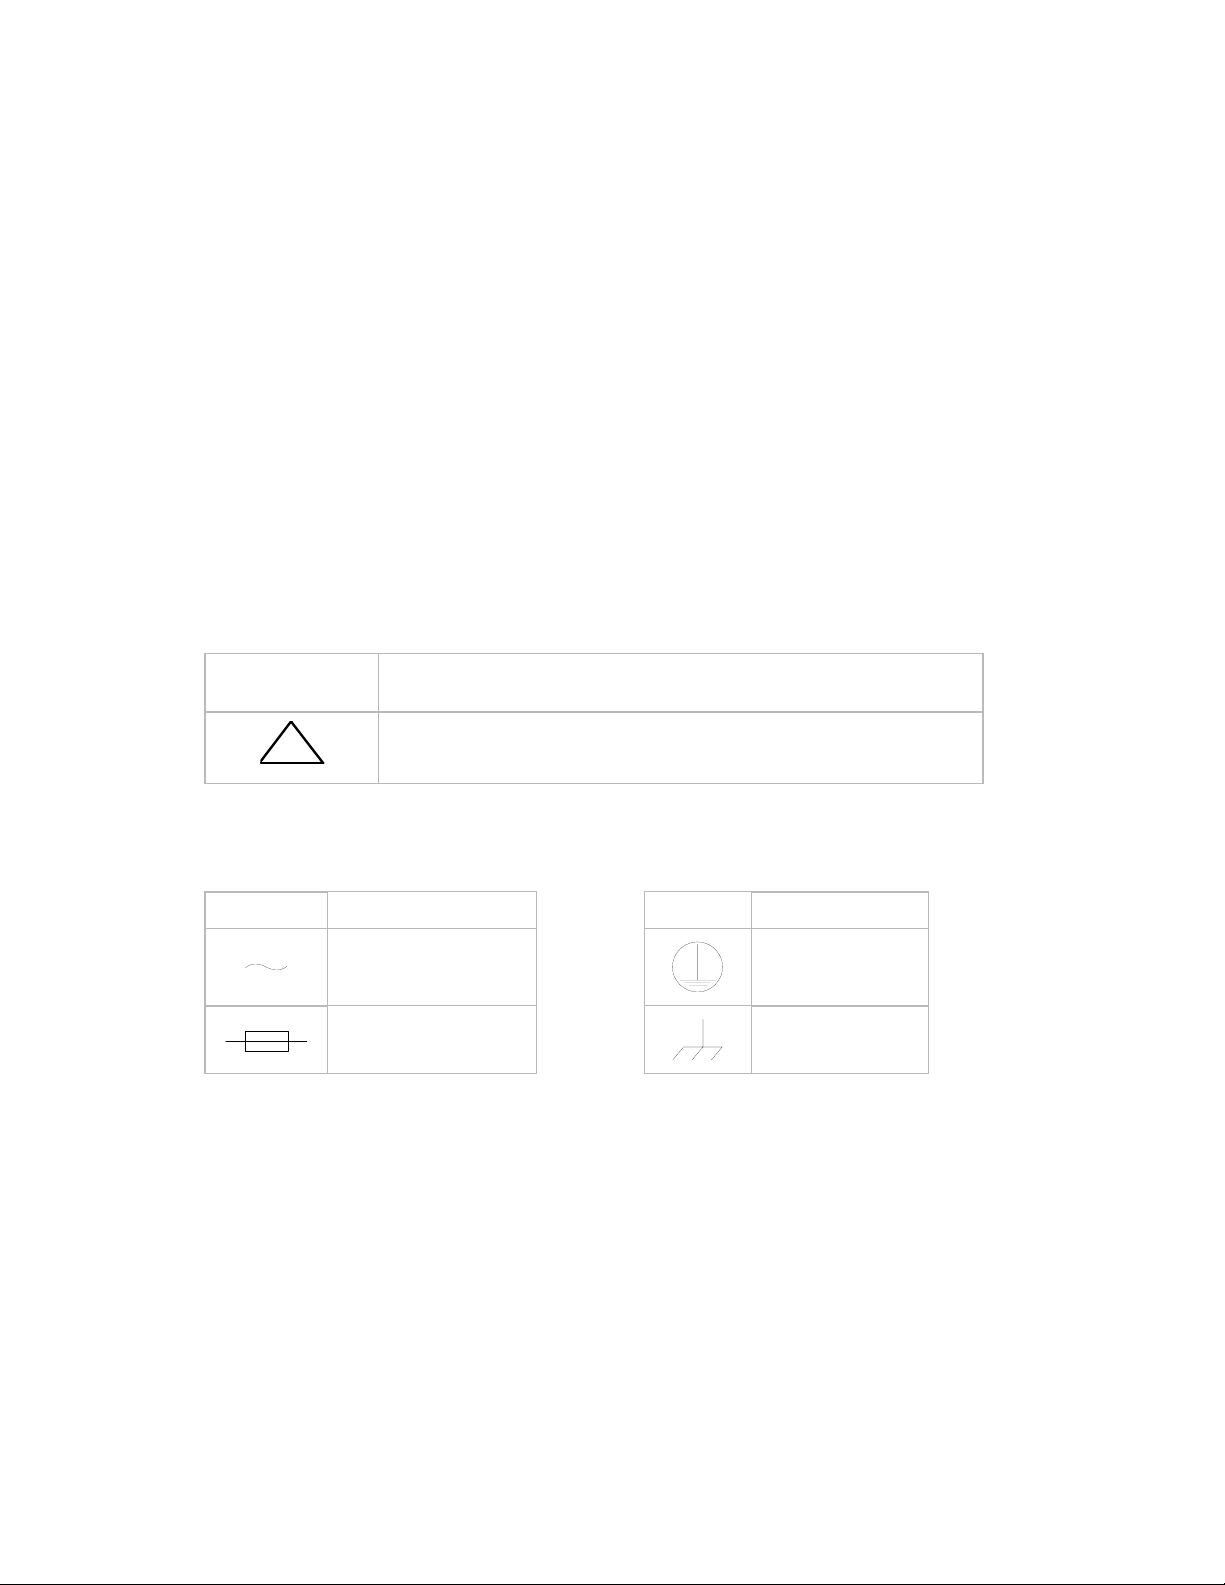
<HAR> Type of power cord required for use in the European Community.
!
International Symbols:
Symbol Definition Symbol Definition
Alternating Current.
Note: For additional symbols, refer to “Cautions” listed earlier in this preface.
WARRANTY POLICY
CAUTION: Double-pole/Neutral Fusing.
ACHTUNG: Zweipolige bzw. Neutralleiter-Sicherung.
Protective Earth.
Fuse.
Chassis Ground.
This Comtech EF Data product is warranted against defects in material and workmanship
for a period of two years from the date of shipment. During the warranty period, Comtech
EF Data will, at its option, repair or replace products that prove to be defective.
v
Page 10

KP-10 External Keypad Revision 1
Preface MN/KP10.IOM
For equipment under warranty, the customer is responsible for freight to Comtech EF
Data and all related custom, taxes, tariffs, insurance, etc. Comtech EF Data is responsible
for the freight charges only for return of the equipment from the factory to the customer.
Comtech EF Data will return the equipment by the same method (i.e., Air, Express,
Surface) as the equipment was sent to Comtech EF Data.
LIMITATIONS OF WARRANTY
The foregoing warranty shall not apply to defects resulting from improper installation or
maintenance, abuse, unauthorized modification, or operation outside of environmental
specifications for the product, or, for damages that occur due to improper repackaging of
equipment for return to Comtech EF Data.
No other warranty is expressed or implied. Comtech EF Data specifically disclaims the
implied warranties of merchantability and fitness for particular purpose.
EXCLUSIVE REMEDIES
The remedies provided herein are the buyer's sole and exclusive remedies. Comtech EF
Data shall not be liable for any direct, indirect, special, incidental, or consequential
damages, whether based on contract, tort, or any other legal theory.
DISCLAIMER
Comtech EF Data has reviewed this manual thoroughly in order that it will be an easy-touse guide to your equipment. All statements, technical information, and
recommendations in this manual and in any guides or related documents are believed
reliable, but the accuracy and completeness thereof are not guaranteed or warranted, and
they are not intended to be, nor should they be understood to be, representations or
warranties concerning the products described. Further, Comtech EF Data reserves the
right to make changes in the specifications of the products described in this manual at any
time without notice and without obligation to notify any person of such changes.
If you have any questions regarding the equipment or the information in this manual,
please contact the Comtech EF Data Customer Support Department.
vi
Page 11
Chapter 1. INTRODUCTION
KP-10 External Keypad
This chapter describes the Comtech EF Data KP-10, including :
! Purpose and function
! Compatible equipment
! Physical characteristics
1
Page 12

KP-10 External Keypad Revision 1
Operation MN/KP10.IOM
1.1 PURPOSE AND FUNCTION
The KP-10 is a handheld keypad that provides portable, external access for controlling
Comtech EF Data Transceivers and Redundancy Switch Units.
The KP-10 is typically used for the initial set up, occasional changes to the configurations
and routine maintenance status of RFT and KST satellite terminal systems. When the
KP-10 is used with a redundant system, it is typically connected to a Comtech EF Data
Redundancy Switch Unit, RJU, or a Redundancy Junction Unit, RJU.
Note: Permanent monitoring of RFTs is accomplished with a PC and the M&C System Monitor
Software . Information about the M&C System Monitor Software is found in the
installation and operation manuals for Comtech EF Data CST and KST terminals.
1.1.1 COMPATIBLE EQUIPMENT
The KP-10 works with the following Comtech EF Data products:
! RFT 500 ! RFT 505
! RFT 700 ! RFT 1200
! RFT 1225 ! KST2000A/B/L
! RJU2000 ! RSU-503
! RSU-503L
2
Page 13
KP-10 External Keypad Revision 1
Operation MN/KP10.IOM
1.1.2 DESCRIPTION
The KP-10 includes the following features:
! Communications are block mode (quasi half-duplex).
! Remote controls and status information are transferred via an RS-232C or an RS-485
serial communications link .
! Commands and data are transferred on the remote control communications link as
US ASCII -encoded character strings .
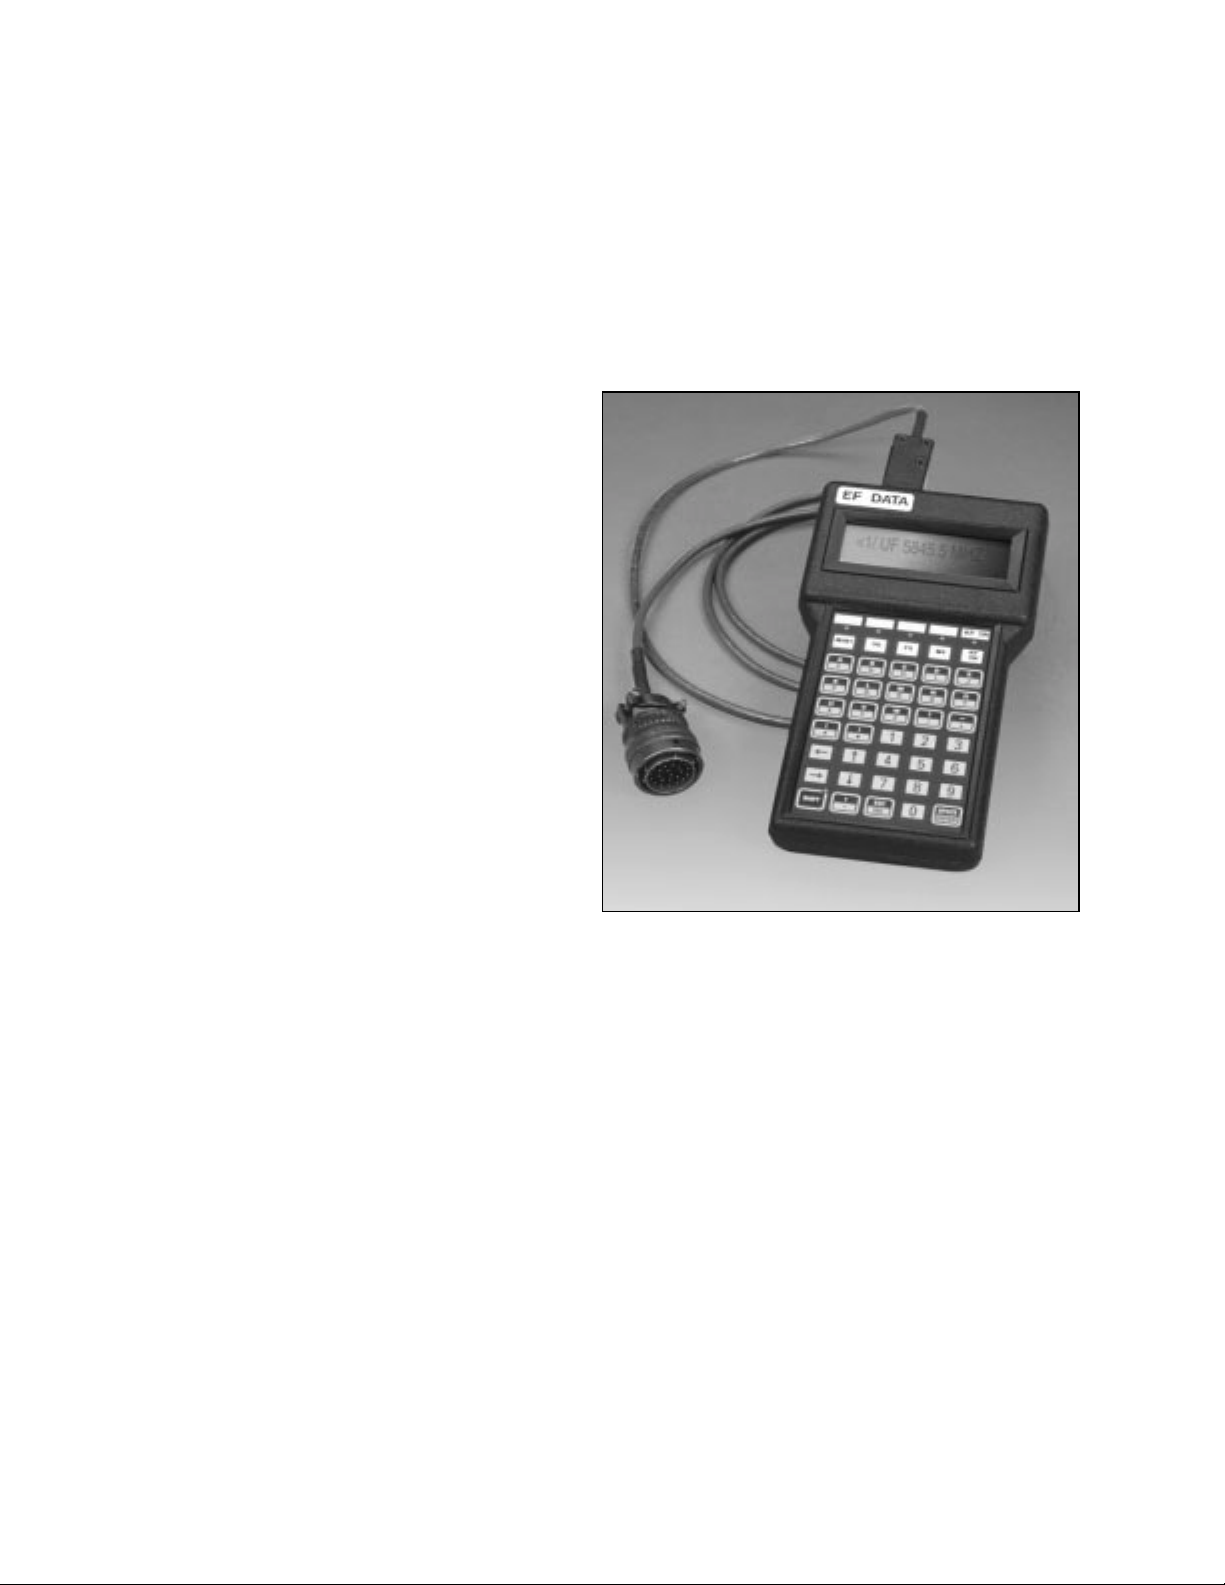
Figure 1 shows the elements of the KP-10:
SERIAL CABLE
DISPLAY
KEY LABELS
INDICATOR LEDS
FUNCTION KEYS
CHARACTER KEYS
NUMERIC KEYS
CURSOR MOVEMENT KEYS
ADDITIONAL FUNCTION KEYS
Figure 1. KP-10 Elements
3
Page 14

KP-10 External Keypad Revision 1
Operation MN/KP10.IOM
Table 1 describes the elements of the KP-10.
Table 1. KP-10 Elements Descriptions
Element Description
Display Screen The display screen is a monochrome, four-line
display screen featuring a user-controlled contrast
level.
Key Labels Blank, white key labels are located across the top
of the keypad, just under the display screen.
Indicator LEDs Indicator LED s above the function keys are used
to signal that the key is in use, or that there are
additional lines of a response message yet to be
displayed.
Keypad The keypad is a sealed-membrane type containing
alpha-numeric keys, cursor movement keys, and
specialized function keys.
Connector Port and Serial
Cable
The KP-10 connects to RFTs and RSUs using
either an RS-232C or an RS-485 serial
communications port and cable. The serial
connection type is an option selected when the
KP-10 is ordered.
4
Page 15

KP-10 External Keypad Revision 1
Operation MN/KP10.IOM
Chapter 2. CONFIGURATION
KP-10 Configurations 5 Connecting and Supplying Power 7 Using the Keypad 11 Configuring the KP-10 13 Entering Commands and Receiving Responses 14
2.1 KP-10 CONFIGURATIONS
The KP-10 is designed to operate with various RFT and KST Transceiver products. Additionally,
the KP-10 can communicate using various serial data communication interfaces, such as RS-232,
RS-485 and RS-422. Operation of the KP-10 with these products and data interfaces requires the
selection of the proper KP-10 terminal and interface cable. Refer to Table 1 for the proper KP-10
configurations. Please note that not all combinations of products and interfaces are possible.
5
Page 16

KP-10 External Keypad Revision 1
Operation MN/KP10.IOM
Table 2 KP-10 Configurations for Comtech EF Data Transceivers and Redundancy Units
Data Interface
Product RS232 RS485 RS422
RFT500, RFT505,
RFT700, RFT 1200,
RFT1225, RSU503,
RSU503L
KST2000
KST2000A, B, or L
RJU2000 N/A
Terminal: PP/QTERMIV-
Terminal: PP/QTERMIV-
Terminal: PP/QTERMIV-
KT/4856
Consisting of:
Cable: PL/4873
F079
KT/4856
Consisting of:
Cable: PL/4873
F079
KT/8078
Consisting of:
Cable: PL/8077-1
F079
KT/4856-1
Consisting of
Cable: PL/5103
Terminal:
PP/QTERMIV-F083
KT/4856-1
Consisting of:
Cable: PL/5103
Terminal:
PP/QTERMIV-F083
KT/8078-1
Consisting of
Cable: PL/8075-1
Terminal:
PP/QTERMIV-F083
KT/8078-1
Consisting of
Cable: PL/8075-1
Terminal:
PP/QTERMIV-F083
N/A
KT/4856-2
Consisting of:
Cable: PL/6158
Terminal:
PP/QTERMIV-F123
KT/8078-2
Consisting of:
Cable: PL/8076-1
Terminal:
PP/QTERMIV-F123
KT/8078-2
Consisting of:
Cable: PL/8076-1
Terminal:
PP/QTERMIV-F123
Tables 2, 3, and 4 show the pinouts on the KP-10 for the various data interfaces.
Table 3 KP-10 RS-232 Pinout
Pin Number Function I/O
2 RD/RX INPUT
3 TD/TX OUTPUT
5 GND POWER RETURN
9 +V POWER
Table 4 KP-10 RS-485 Pinout
in Number Function I/O
1 -RX/TX DATA I/O
2 +RX/TX DATA I/O
5 GND POWER RETURN
9 +V POWER
6
Page 17

KP-10 External Keypad Revision 1
Operation MN/KP10.IOM
Table 5 KP-10 RS-422 Pinout
Pin Number Function I/0
1 -RX INPUT
2 +RX INPUT
3 +TX OUTPUT
6 -TX OUTPUT
5 GND POWER RETURN
9 +V POWER
Cable diagrams for the various interface cables can be found in Appendix C.
2.2 CONNECTING AND SUPPLYING POWER
Note: The KP-10 is not weather resistant. Please treat the terminal with the same care afforded
a laptop computer.
Connecting the KP-10 is a matter of plugging the interface cable into both the KP-10 and
the unit being controlled.
Power for the KP-10 is supplied from the RF terminal or redundant unit
The connection is a 9-pin female D connector located on the top of the KP-10.
To connect the KP-10 and supply power:
Plug the 9-pin connector into the receptacle on the top of the KP-10 (Figure 2).
1
Plug the 26-pin connector into the remote receptacle on the RFT (Figure 3), or into the J16
2
Monitor and Control receptacle on the RSU (Figure 4).
7
Page 18

KP-10 External Keypad Revision 1
Operation MN/KP10.IOM
9-PIN C ONNEC TOR PO RT
Figure 2. 9-Pin Connector Port on the KP-10 (Top View)
8
Page 19

KP-10 External Keypad Revision 1
Operation MN/KP10.IOM
REMOTE
RECEPTACLE
Figure 3. RFT-500 External Connections
9
Page 20

KP-10 External Keypad Revision 1
Operation MN/KP10.IOM
REMOTE
RECEPTACLE
Figure 4. RSU-503 External Connections
During initial setup of a redundant system, connect the KP-10 to each component
directly. After initial setup, it is possible to connect the KP-10 to the RSU, and access
each component by selecting the individual component address.
Note: Connections for other RFTs and RSUs are similar. In case of a communication failure
with the KP-10, disconnect the cable and then reconnect it, to perform a reset.
10
Page 21

KP-10 External Keypad Revision 1
p
Operation MN/KP10.IOM
2.3 USING THE KEYPAD
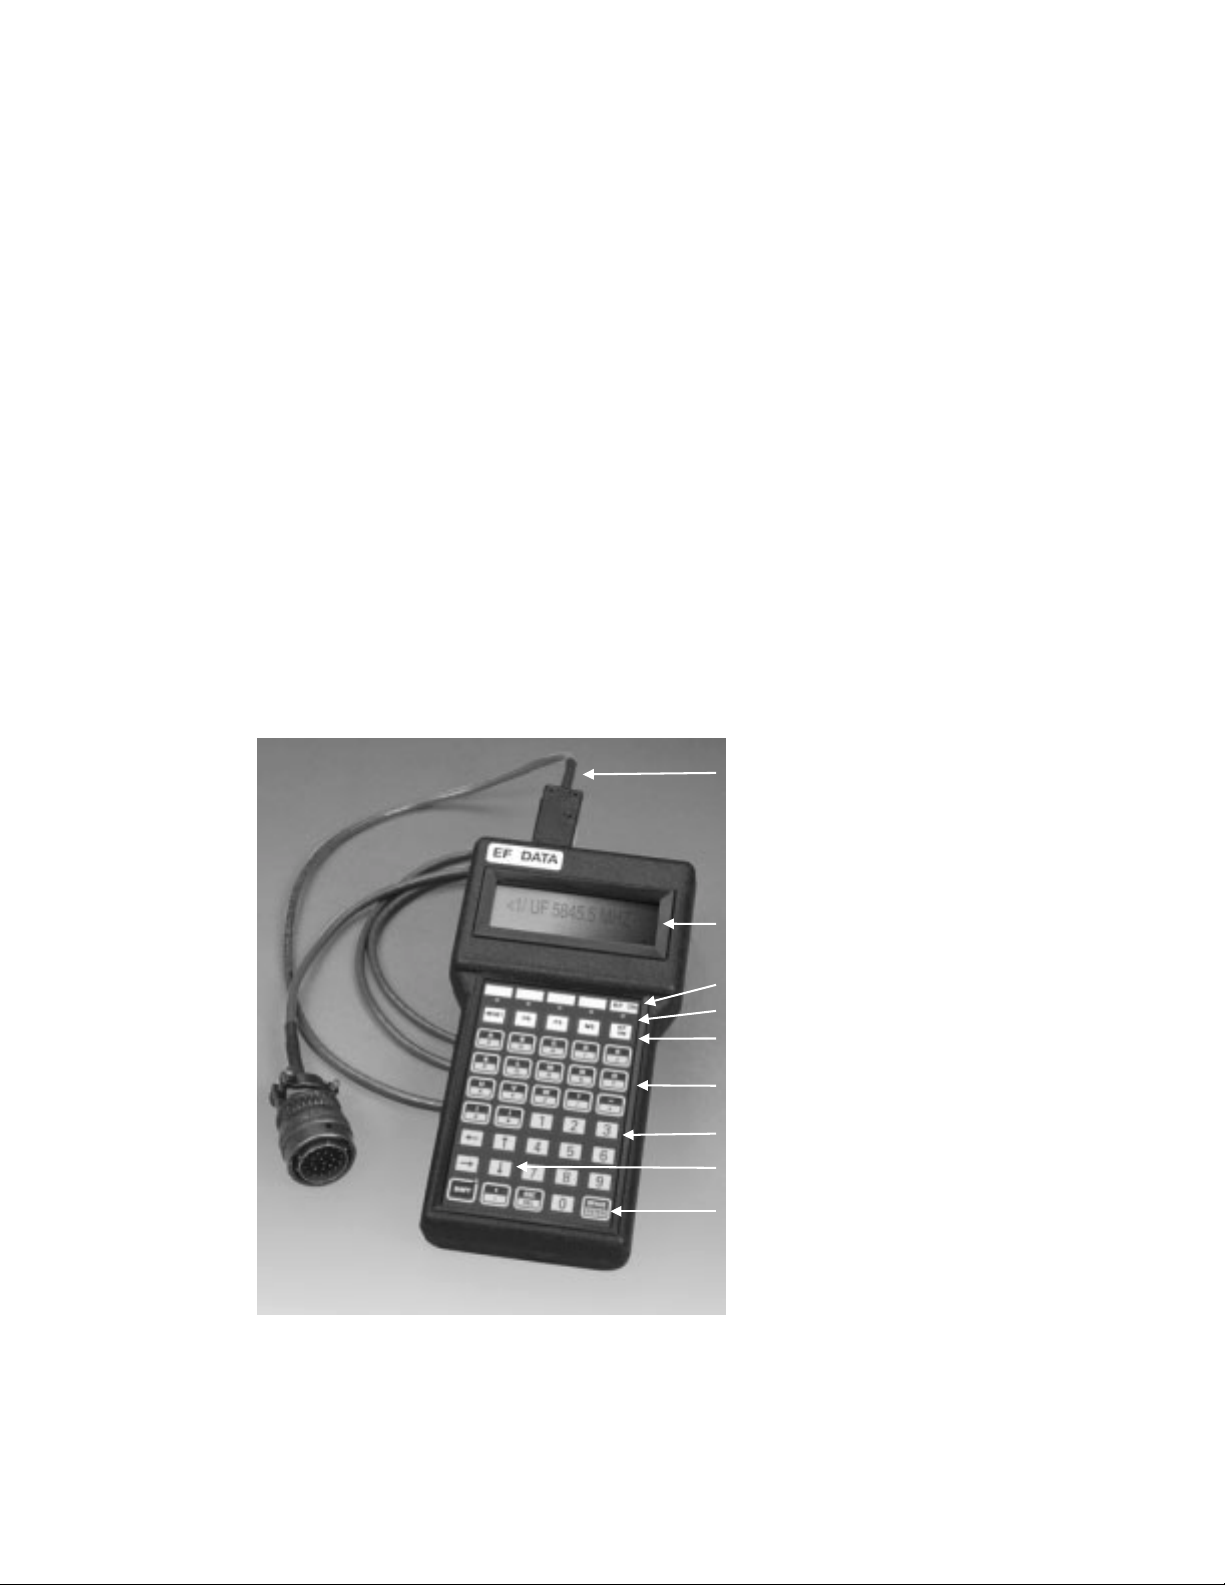
2.3.1 FUNCTION KEYS
White function keys are the first row of keys on the top of the keypad (Figure 5). [OS],
[FS], [MS], and [AS] are programmed to send specific, pre-set commands when pressed.
[RESET], [SHIFT], and [ENTER] perform other operational functions. The function keys
are described in Table 6.
Table 6. KP-10 Function Keys
Function Key Function Performed
[RESET] Press [RESET] to clear all messages and settings in the KP-10. Pressing
[RESET] is equivalent to turning the unit off, and then on.
[OS]
(Operating
Status)
[FS]
(Fault Status)
[MS]
(Maintenance
Status)
[AS]
(Switch Address)
[SHIFT] Press and hold [SHIFT] in combination with any two-part key to enter the
[ENTER] Press [ENTER] to send a command to the terminal.
Press [OS] to access and display the operating status of the selected RFT.
Press [FS] to access and display the fault status of the selected RFT.
Press [MS] to access and display the maintenance status of the selected
RFT.
Press [AS] to access and display the address of the selected RFT.
Note: [AS] was formerly [KP ON]. [KP ON] is now obsolete.
character depicted on top of the key.
Mode
Press
Scroll
Down
Scroll
U
Figure 5. Alternate Key Functions During Configuration
11
Page 22

KP-10 External Keypad Revision 1
Operation MN/KP10.IOM
Certain function keys perform alternate functions during the configuration process:
! [FS] serves as the [MODE] key
! [MS] serves as the [SCROLL UP] key
! [AS] serves as the [SCROLL DOWN] key
Table 7 shows keys used on permanent terminals that have been changed on the KP-10.
Table 7. Keys Changed on the KP-10
These keys on the permanent terminals: A re changed to these keys on the KP-10:
+
(Plus key)
-
(Minus key)
( and )
(Parentheses keys)
,
(Comma key)
(Spacebar key)
?
(Question mark key)
(Underscore key)
(Underscore key)
(Less than and greater than keys, respectively)
_
_
< and >
.
(Period key)
↵
(Enter key)
/
(Backslash key)
2.3.2 CHARACTER KEYS
Character keys, containing the letters of the alphabet, are located just under the command
keys. The character keys are two-part keys, containing two characters each. Simply press
the key to enter the character shown on the lower half of the key.
To enter a character on the upper half of a two-part key:
Press and hold [SHIFT]. The [SHIFT] indicator LED glows when [SHIFT] is engaged.
1
Press the character key.
2
2.3.3 NUMERIC KEYS
Numeric keys, containing the numerals 0 through 9, are located below and to the right of
the character keys. The numeric keys contain only one numeral each; therefore, entering
numerals does not require use of the [SHIFT] key. Press the key to enter the numeral
shown on the key.
12
Page 23

KP-10 External Keypad Revision 1
Operation MN/KP10.IOM
2.3.4 CURSOR MOVEMENT KEYS
Cursor keys, containing directional arrows, are located below and to the left of the
character keys. The cursor keys do not require use of the [SHIFT] key. Press the key to
move the display screen cursor in the direction indicated by the arrow on the key.
2.4 CONFIGURING THE KP-10
Access the default configuration settings using either of these two methods:
! While pressing any key, supply power to the external keypad.
or
! If power is already supplied, press [RESET] for a second.
The default configuration consists of several items:
! Version ! Contrast setting ! Baud rate ! Data format ! Serial mode
These items appear in a series of displays, each one accessed by pressing and releasing a
key.
After the default configuration has been completed, the KP-10 is ready for input.
2.4.1 VERSION
After power-on, the Version (v1.1) appears on the display screen.
2.4.2 CONTRAST CONTROL
Release the key pressed during power-on to display “CONTRAST” on the screen.
! DARKER — Press [SCROLL UP] to darken the display screen contrast.
! LIGHTER — Press [SCROLL DOWN] to lighten the display screen contrast.
Note: See Figure 5 for scroll key locations.
13
Page 24

KP-10 External Keypad Revision 1
Operation MN/KP10.IOM
2.4.3 COMMUNICATION MODE SETTINGS
Setting Description
Baud
Rate
Data
Format
Serial
Mode
Input
Ready
Press [MODE] and the default Baud rate of 9600 appears. Change the Baud rate by pressing
[SCROLL UP] or [SCROLL DOWN] to raise or lower the Baud rate.
Press [MODE] again, and the data format appears. Do not change the setting of “7e2”.
Press [MODE] a third time, and the serial mode “BLOCK” will appear. Do not change the
setting of “BLOCK”.
Press [MODE] again, and the cursor moves to the upper left corner of the screen, indicating
the terminal is ready to receive input.
Note: See Figure 5 for mode and scroll key locations.
2.5 ENTERING COMMANDS AND RECEIVING RESPONSES
Enter a command on the KP-10 keypad, then send it to the terminal by pressing
[ENTER]. The command sent and the corresponding response returned from the terminal
are both visible on the display screen.
To type a command:
Press firmly on each character key in sequence.
1
Verify the characters on the display screen. The message format must be valid (see Chapters
2
3 and 4 for information on valid message formats for single and redundant systems,
respectively).
Press [ENTER] to send the completed command to the terminal.
3
On occasion, the response received from the accessed device is too large to fit on the
display. When this happens, the indicator LED above [FS] or [RFS] flashes. The entire
response can be viewed by scrolling through it. After scrolling through the message,
press [ENTER], [RESET], [OS], [MS], or [AS] to turn off the flashing LED.
To scroll through a response:
Press the function key under the flashing LED.
1
Read the displayed section of the response.
2
If the LED is still on, press the function key again to see more of the message.
3
14
Page 25

KP-10 External Keypad Revision 1
Operation MN/KP10.IOM
Chapter 3. OPERATION
Message Structure 15 Single RFT Communications 19 RSU Communications 21
This chapter describes:
! How to operate the KP-10 with a single RFT
! How to operate the KP-10 with an RSU
! How to enter commands and read responses
! Message structure and device addresses
3.1 MESSAGE STRUCTURE
When typing commands or reading responses, it is important to understand the valid
message structure. An overview of valid message structure is presented here.
Messages on the KP-10 fall into the categories of commands and responses. Commands
are messages which the KP-10 transmits to the RFT, while responses are messages
returned by the RFT in response to a command.
To enter and send a command:
Type the command strings using the character and numeric keys.
1
Press [ENTER].
2
For details on specific commands and parameters, refer to the “Remote Control
Operation” section in the installation and operation manual for the appropriate Comtech
EF Data CST or KST system.
15
Page 26

KP-10 External Keypad Revision 1
Operation MN/KP10.IOM
3.1.1 CHARACTER FORMAT
The ASCII character format used requires 11 bits/character:
! 1 start bit
! 7 information bits
! 1 parity bit
! 2 stop bits
3.1.2 START CHARACTER
Each message on the remote link begins with a start character and ends with an end character
. The start and end characters are different for commands and responses.
The start characters are as follows:
! Commands: <
! Responses: >
3.1.3 DEVICE ADDRESSES
The device address is the address of the specific device that is designated to receive or
respond to a transmitted command.
(Note: Default is “7e2”.)
Table 8. Device Addresses
Valid Device Addresses
Length 1 to 3 characters
Range 1 to 255
When using the KP-10 external keypad, the global address “*” is used to create a string
output response displayed on the external keypad. This KP-10 global address causes the
accessed device to respond, regardless of its specific address.
Do not confuse the KP-10 global address (*) with the global address of zero referred to
in the M&C System Monitor Software User’s Guide. The zero global address causes
CAUTION
the accessed device to accept commands without responding.
16
Page 27

KP-10 External Keypad Revision 1
Operation MN/KP10.IOM
3.1.4 COMMAND MESSAGE STRUCTURE
The valid message structure varies according to whether the message is a command or a
response. The command message structure is as follows:
Example: <add/DCF_nnnn.n'cr']
Start
Character
< add/ DCF_nnnn.n 'cr']
Replace 'add' with the valid device address, or
Device
Address
use the KP-10 global address of '*' (for a
single-system RFT only).
Command and
Parameter
Command =
DCF_
Parameter =
nnnn.n
End
Character
carriage return
and end bracket
3.1.5 RESPONSE MESSAGE STRUCTURE
The response message structure is as follows:
Example: >add/DCF_nnnn.n'cr''lf']
Start
Character
> add/ DCF_nnnn.n'cr''lf' ]
'add' is replaced by the valid device
Device
Address
address, or the KP-10 global address of '*'
(for a single-system RFT only)
Command, Parameter and
Response
Command = DCF_
Parameter = nnnn.n
Response = 'lf'
End
Character
End bracket
Replace parameter markers (such as “add”) with appropriate values. For more
information about specific parameter values, refer to the “Remote Control Operation”
section in the installation and operation manual for the appropriate Comtech EF Data
CST or KST terminal system.
Note: “add” is a parameter marker that must be replaced with a valid 1 to 3 character device
address in the range of 1 through 255, or the KP-10 global address of “*”.
17
Page 28

KP-10 External Keypad Revision 1
Operation MN/KP10.IOM
Do not use any global address when accessing the RSU unit with the KP-10.
CAUTION
3.1.6 END CHARACTER
As stated previously, each message on the remote link begins with a start character and ends with an end character. The start and end characters are different for commands and responses.
The end characters are as follows:
! Commands “cr”] (carriage return and end bracket)
! Responses ] (end bracket)
3.1.7 NEGATIVE RESPONSES
If the terminal receives a message which does not match the established protocol or
cannot be implemented, a negative acknowledgment is sent in response.
Examples of negative responses include:
! >add/?ER1_PARITY ERROR'cr''lf']
(Error message for received parity errors.)
! >add/?ER2_INVALID PARAMETER'cr''lf']
(Error message for a recognized command which cannot be implemented or has
parameters which are out of range.)
! >add/?ER3_UNRECOGNIZABLE COMMAND'cr''lf']
(Error message for unrecognizable command or bad command syntax.)
! >add/?ER4_CONVERTER IN LOCK MODE'cr''lf']
(Controller in Lock mode, must go to Enable mode first.)
! >add/?ER5_NOT SUPPORTED BY HARDWARE'cr''lf']
(The command is a legal command, but is not supported by the current hardware
configuration.)
18
Page 29

KP-10 External Keypad Revision 1
A
Operation MN/KP10.IOM
3.2 SINGLE RFT COMMUNICATIONS
3.2.1 KEYPAD VARIATIONS FOR AN RFT
When the KP-10 is being used with a single-system RFT, the valid function keys are:
Scroll
RESET
OS
FS MS
S
Figure 6. Function Keys for use with an RFT
Table 9. Descriptions of Function Keys used with an RFT
Function Key Description
[RESET] Reset External Keypad
[OS] Switch Operation Status
[FS] Switch Fault Status
[MS] Switch Maintenance Status
[AS] Switch Address (see Note)
Note: The key labeled [KP ON] performs the
[AS] function.
Make sure the [SHIFT] indicator LED is OFF before using these keys.
CAUTION
19
Page 30

KP-10 External Keypad Revision 1
Operation MN/KP10.IOM
3.2.2 SINGLE SYSTEM ADDRESS
If the KP-10 is connected to a single RFT, the KP-10 global address of “*” is sufficient
for communicating with the terminal. There is no need to ascertain the actual address of
the RFT, in this case. A list of typical commands used with an RFT includes the
following:
<add/ 'UCF_'
<add/ 'DCF_'
<add/ 'RF_'
<add/ 'UCA_'
<add/ 'DCA_'
<add/ 'AS_'
<add/ 'BR_'
<add/ 'PS_'
<add/ 'RFJ_'
<add/ 'CLNA_'
<add/ 'FAN_'
<add/ 'LFE_'
<add/ 'SEL_'
<add/ 'PGM_'
<add/ 'CPGM_'
<add/ 'XFE_'
<add/ 'OS_'
<add/ 'FS_'
<add/ 'SF_'
<add/ 'MS_'
<add/ 'ET_'
<add/ 'LM_'
<add/ 'LPE_'
<add/ 'RSW_'
Note: Replace "add" with the address of the device being accessed.
20
Page 31

KP-10 External Keypad Revision 1
A
Operation MN/KP10.IOM
3.3 RSU COMMUNICATIONS
If the KP-10 is connected to a single RFT, the KP-10 global address of “*” is sufficient
for communicating with the terminal. There is no need to ascertain the actual address of
the RFT, in this case.
3.3.1 KP-10 KEYPAD VARIATIONS FOR AN RSU
When the KP-10 is being used with an RSU, the valid function keys are as follows:
Scroll
RESET
ROS
RFS RMS
SR
Figure 7. Function Keys for use with an RSU
Table 10. Descriptions of Function Keys used with an RSU
Function Key Description
[RESET] Reset External Keypad
[ROS] Redundancy Switch Operation Status
[RFS] Redundancy Switch Fault Status
[RMS] Redundancy Switch Maintenance Status
[ASR] Switch Address (See Note)
Note: The key labeled [KP ON] performs the
[ASR] function.
Make sure the [SHIFT] indicator LED is ON before using these keys.
CAUTION
21
Page 32

KP-10 External Keypad Revision 1
Operation MN/KP10.IOM
22
Page 33

KP-10 External Keypad Revision 1
Operation MN/KP10.IOM
3.3.2 MULTIPLE UNIT ADDRESSES
To communicate with each terminal via the RSU, the following format is used:
! <*/ASR_ (Meaning: RSU command - address 1)
In the previous example, the KP-10 is connected to an RSU. The global address
command was sent first, then AS was pressed to access the address for a specific terminal
before sending other commands.
In the following example, the address (2) of Terminal A follows “*”:
! <*2/FS_ (Meaning: Terminal A command - address 2)
Note: Always make sure the correct address of any terminal (other than address 1) follows “*”
in the command string.
A list of typical commands used with an RSU includes the following:
<add/ 'ASA_'
<add/ 'ASB_'
<add/ 'ASR_'
<add/ 'BR_'
<add/ 'PS_'
<add/ 'ULS_'
<add/ 'ULM_'
<add/ 'DLS_'
<add/ 'DLM_'
<add/ 'HWC_'
<add/ 'ROS_'
<add/ 'RFS_'
<add/ 'RSF_'
<add/ 'RMS_'
<add/ 'ET_'
<add/ 'POLL_'
<add/ 'LM_'
23
Page 34

KP-10 External Keypad Revision 1
Operation MN/KP10.IOM
24
Page 35

Appendix A.
CABLES
Figure 1 CA/4873 ................................ A–2
Figure 2 CA/5103 ................................ A–3
Figure 3 CA/6158 ................................ A–4
Figure 4 CA/8075 ................................ A–5
Figure 5 CA/8076 ................................ A–6
Figure 6 C/A 8077 ............................... A–7
A–1
Page 36

KP-10 External Keypad Revision 1
Operation MN/KP10.IOM
Figure 8 CA/4873
A–2
Page 37

KP-10 External Keypad Revision 1
Operation MN/KP10.IOM
REV.
OF
1
1
2
SHEET
CA/5103
DRAWING NO.
ASSY, CABLE, RS485 SERIAL
COMTECH EF DATA CORPORATION
LTR DESCRIPTION BY CHECKDATE APPRVL
7
4X
INK, COLOR BLACK, LOCATE APPROXIMATELY
IN .12 HIGH CHARACTERS, USIN G PERMANENT
APPLY PART NUMBER AND REVISION TO LABEL,
INSTALLING TERMINALS OR CONNECTORS USING
MANUFACTURERS INSTA LLATION PROCEDURE.
3
STRIP AND/OR TIN WIRES AS REQUIRED FOR
WHERE SHOWN.
NOTES: UNLESS OT HE RW ISE SPECIFIED:
4J515
CAGE CODESIZE
B
SCALE
FINISH
GND
SIGNAL
+12V
-RX/TX
+RX/TX
4
1
MATERIAL
DFTG
_
+
.
125
ANGLE
CHK
APVD
APVD
.
-
WIRE LIST
SEE TABLE A
2X
6
P1-1 P2-A
FROM TO
P1-9 P2-L
P1-2 P2-C
P1-5 P2-J
+-+
.
.XX
.XXX
UNLESS OTHERWISE SPECIFIED
TOL:
AND ARE AFTER COATING
SURFACE TEXTURE:
ALL DIMENSIONS ARE IN INCHES
DO NOT SCALE DRAWING
REMOVE BURRS AND SHARP
FLATNESS .005 INCH PER INCH
EDGES
6 FT
132 FT
LENGTH
2 2
1
APPLICATION
NEXT ASSY USED ON
TABLE A
PAR T #
CA/5103
CA/5103-1
P2 P1
COMTECH EF DATA PROPRIE TARY
PROPRIETARY DATA OF COMTECH EF DATA CORPORATION. NEITHER
THIS DOCUMENT AND THE INFORMATION DISCLOSED HEREIN ARE
THIS DOCUMENT NOR THE INFORMATION CONTAINED HEREIN SHALL
BE REPRODUCED, USED O R DISCLOSED TO OTHERS WIT HOUT THE
WRITTEN AUTHORIZATION OF COMTECH EF DATA CORPORATION.
A
THIRD ANGLE PROJECTION
Figure 9 CA/5103
A–3
Page 38

KP-10 External Keypad Revision 1
Operation MN/KP10.IOM
REV.
OF
SHEET 1
CA/6158
4J515
CAGE CODE DRA WING NO.
C
SCALE
SIZE
(P2)
USE HEAT SHRINK, ITEM 5, TO BUILD UP CABLE
DIAMETER SO THAT CLAMP OF P2, ITEM 1,
REPLACE SCREWS PROVIDED WITH HOOD,
CLAMPS TIGHTLY AROUND CABLE.
5
1
OF .25 INCH OF HEAT SHRINK, ITEM 7, OVER
EACH SOLDER JOINT. SEE DETAIL A.
STRIP AND/OR T IN WIRES AS REQUIRED FOR
INSTALLING TERMINALS OR CONNECTORS
USING MANUFACTURERS INSTALLATION
ALL WIRE TERMINATIONS SHALL HAVE A MINIMUM
ITEM 3, WITH SOCKET H EAD SCREWS, ITEM 8.
4
3
PROCEDURE.
APPLY PART NUMBER AND REVISION TO LABEL
IN .12 HIGH CHARACTERS, COLOR BLACK,
USING PERMANENT INK, LOCATE
APPROXIMATELY WHERE SHOWN.
NOTES: UNLESS OTHERWISE SPECIFIED
FINISH
MATERIAL
DFTG
APVD
CHK
1
2
.
ANGLE %%P
.XX %%p
UNLESS OTHERWISE SPECIFIED
TOL:
ALL DIMENSIONS ARE IN INCHES
AND ARE AFTER COATING
APVD
125
.
.XXX %%P
DO NOT SCALE DRAWING
SURFACE TEXTURE:
FLATNESS .005 INCH PER INCH.
REMOVE BURRS AND SHARP
EDGES
TABLE A
EFDATA PROPRIETARY
DOCUMENT NOR THE INFORMATION CONTAINED HEREIN SHALL
PROPRIETARY DATA OF EFDATA CORPORATION. NEITHER THIS
THIS DOCUMENT AND THE INFORMATION DISCLOSED HEREIN ARE
55
DIM A
132FT %%P4FT
72.00 %%P3.00
CA/6158
PART NO.
CA/6158-1
-RX
TO SIGNAL
N/C -
N/C -
WIRE LIST
P1-1 P2-A
FROM
P1-2 P2-D +RX
THE WRITTEN AUTHORIZATIO N OF EFDATA CORPORATION.
BE REPRODUCED, USED OR DISCL OSED TO OTHERS WITHOUT
P1-3 P2-C +TX
N/C -
P1-5 P2-J GND
P1-6 P2-B -TX
P1-7
P1-8
P1-4
P1-9 P2-L +12V
1
(P1)
4
6
2X
2
3
7
DETA IL
"D" CONNECTOR TERMINATIONS
1
3
8
4
2X
USED ON
APPLICATION
NEXT ASSY
Figure 10 CA/6158
A–4
Page 39

KP-10 External Keypad Revision 1
Operation MN/KP10.IOM
REV.
OF
1
SHEET
DRAWING NO.
USE HEAT SHRINK, ITEM 5, TO BUILD UP CABLE DIAMETER
SO THAT CLAMP OF P2, ITEM 1, CLAMPS TIGHTLY
4
ALL WIRE TERMINATIONS SHALL HAVE A MINIMUM OF
.25 INCH OF HEAT SHRINK, ITEM 7, OVER EACH SOLDER
JOINT. SEE DETAIL A.
STRIP AND/OR TIN WIRES AS REQUIRED FOR
INSTALLING TERMINALS OR CONNECTORS
USING MANUFACTURERS INSTALLATION
AROUND CABLE.
3
PROCEDURE.
APPLY PART NUMBER AND REVISION TO LABEL
IN .12 HIGH CHARACTERS , US I NG PE R M AN E NT
MARKING, COLOR BLACK, LOCATE
APPROXIMATELY WHERE SHOWN.
2.
1
NOTES: UNLESS OTHERWISE SPECIFIED
CA/8075
1RN38
CAGE CODESIZE
B
SCALE
LTR DESCRIPTION BY CHECKDATE A PPRVL
(P2)
FINISH
MATERIAL
_
.
1
DIM `A'
72.00 P3.00
132 FT P 4FTCA/8075- 2
TABLE A
CABLE NO.
CA/8075-1
PAIR
ITEM
X
444
X
4
4
4
SIGNAL
+12V
+RX/TX
-RX/TX
5
4
4
6
1
2
3
UNLESS OTHERWISE SPECIFIED
AND ARE AFTER COATING
ALL DIMENSIONS ARE IN INCHES
7
3
APVD
APVD
CHK
DFTG
+
ANGLE
-
+-+
.XX
TOL:
.
125
.
.XXX
SURFACE TEXTURE:
REMOVE BURRS AND SHARP
DO NOT SCALE DRAWING
FLATNESS .005 INCH PER INCH
EDGES
APPLICATION
NEXT ASSY USED ON
DET AIL A
TERMINATIONS
D-SUB CONNECTOR
COMTECH EF DATA PROPRIETAR Y
PROPRIETARY DATA OF COMTECH EF DATA CORPORATION. NEITHER
THIS DOCUMENT AND THE INFORMATION DISCLOSED HEREIN ARE
THIS DOCUMENT NOR THE INFORMATION CONTAINED HEREIN SHALL
BE REPRODUCED, USED OR DISCLOSED TO OTHERS WITHOUT THE
WRITTEN AUTHORIZATION OF COMTECH EF DATA CORPORATION.
P2-AP1-1
P2-S
DRAIN
WIRE LIST
P1-2 P2-C
FROM TO
DRAIN
P1-5
P1-9
P1-5 P2-J GND
P2-R
THIRD ANGLE PROJECTION
Figure 11 CA/8075
A–5
Page 40

KP-10 External Keypad Revision 1
Operation MN/KP10.IOM
REV.
OF
1
SHEET
CA/8076
DRAWING NO.
ALL WIRE TERMINATIONS SHALL HAVE A
MINIMUM OF .25 INCH O F HEAT SHRINK, ITEM 7,
OVER EACH SOLDER JOINT. SEE DETAIL A.
STRIP AND/OR TIN WIRES AS REQUIRED FOR
INSTALLING TERMINALS OR CONN ECTORS
USING MANUFACTURERS INSTALLATION
USE HEAT SHRINK, ITEM 5, TO BUILD UP CABLE
DIAMETER SO THAT CLAMP OF P2, ITEM 1,
CLAMPS TIGHTLY AROUND CABLE.
4
3
PROCEDURE.
APPLY PART NUMBER AND REVISION TO LABEL
IN .12 HIGH CHARACTERS, USING PERM ANENT
MARKIN G, COLOR BL A CK, LOCATE
APPROXIMATELY WHERE SHOWN.
2.
1
NOTES: UNLESS OTHERWISE SPECIFIED
1RN38
CAGE CODESIZE
B
SCALE
LTR DESCRIP TION BY CHECKDATE APPRVL
(P2)
DIM `A'
72.00%%P3.00
132 FT %%P 4FTCA/8076-2
DIM `A'
51
4
FINISH
MATERIAL
DFTG
_
+
.
125
ANGLE
-
+-+
.XX
.XXX
UNLESS OTHERWISE SPECIFIED
TOL:
AND ARE AFTER COATING
SURFACE TEXTURE:
ALL DIMENSIONS ARE IN INCHES
APVD
APVD.CHK
.
DO NOT SCALE DRAWING
REMOVE BURRS AND SHARP
FLATNESS .005 INCH PER INCH
EDGES
APPLICATION
NEXT ASSY USED ON
CABLE NO .
CA/8076-1
16 4
PAI R
ITEM
SIGNAL
X
444
-RXP2-BP1-1
X
X
4
4
4
8
(1)
-TX
GND
+12V
(P1)
2X
7
3
2
3
DETAIL A
TERMINATIONS
D-SUB CONNECTOR
P2-J
P2-T
P2-T
P2-S
WIRE LIST
P2-A
P1-3 P2-C +TX
P1-2 P2-D +RX
COMTECH EF DATA PROPRIETARY
PROPRIETARY DATA OF COMTECH EF DATA CORPORATION. NEITHER
THIS DOCUMENT AND THE INFORMATION DISCLOSED HEREIN ARE
THIS DOCUMENT NOR THE INFORMATION CONTAINED HEREIN SHALL
FROM TO
BE REPRODUCED, USED OR DI SCLOSED TO OTHERS WITHO UT THE
WRITTEN AUTHORIZATION OF COMTECH EF DATA CORPORATION.
P1-5
P1-6
P1-5
P2-J JUMPER
P1-9
DRAIN
DRAIN
THIRD ANGLE PROJECTION
Figure 12 CA/8076
A–6
Page 41

KP-10 External Keypad Revision 1
Operation MN/KP10.IOM
REV.
1OF
SHEET
DRAWING NO.
CA/8077
APPLY PART NUMBER AND REVISION TO LABEL
IN .12 HIGH CHARACTERS, US I NG PE R MANENT
MARKING, COLOR BLACK, LOCATE
ALL WIRE TERMINATIONS SHALL HAVE A
MINIMUM OF .25 INCH OF HE AT SHRINK, IT E M 7 ,
OVER EACH SOLDER JOINT. SEE DETAIL A.
STRIP AND/OR TIN WIRES AS REQUIRED FOR
INSTALLING TERMINALS OR CONNECTORS
USING MANUFACTURERS INS TALLATION
USE HEAT SHRINK, ITEM 5, TO BUILD UP CABL E
DIAMETER SO THAT CLAMP OF P2, ITEM 1,
CLAMPS TIGHTLY AROUND CAB LE.
4
3
PROCEDURE.
APPROXIMATELY WHERE SHOWN.
1
NOTES: UNLESS OTHERWISE SPECIFIED
1RN38
CAGE CODE
B
SIZE
SCALE
LTR DESCRIPTION BY CHECKDATE APPRVL
(P2)
MATERIAL
FINISH
APVD.CHK
DFTG
APVD
_
+
125
ANGLE
1
-
+-+
.
.XX
.XXX
UNLESS OTHERWISE SPECIFIED
TOL:
AND ARE AFTER COATING
SURFACE TEXTURE:
ALL DIMENSIONS ARE IN INCHES
REMOVE BURRS AND SHARP
EDGES
DO NOT SCALE DRAWING
FLATNESS .005 INCH PER INCH
DIM `A'
72.00%%P3.00
132 FT %%P 4FTCA/8077-2
TABLE A
CABLE NO.
CA/8077-1
PAIR
ITEM
X
444
X
4
4
4
PWR
TD/TX
RD/RX
SIGNAL
DIM `A'
APPLICATION
45
NEXT ASSY USED ON
6
14
2X
7
DETAIL A
TERMINATIONS
D-SUB CONNEC TOR
3
2
(1)
(P1)
3
P2-S
P2-GP1-3
WIRE LIST
COMTECH EF DATA PROPRIETARY
PROPRIETARY DATA OF COM T E CH EF DATA CORPORATION . NEIT HE R
THIS DOCUMENT AND THE INFORMATION DISCLOSED HEREIN ARE
FROM TO
THIS DOCUME NT NO R THE INFOR MATIO N CONTAINED HE REIN SHAL L
BE REPROD UC ED, USED OR DISCLOSED TO O T HE RS WI T H OUT T HE
WRITTEN AUT HORIZATIO N O F COMTECH EF D ATA CO RPORATION.
DRAIN
DRAIN
P1-5
P1-5 P2-J GND
P1-2 P2-E
P1-9
P2-R
THIRD ANGLE PROJECTION
Figure 13 C/A 8077
A–7
Page 42

KP-10 External Keypad Revision 1
Operation MN/KP10.IOM
A–8
Page 43

METRIC CONVERSIONS
Units of Length
Unit
1 centimeter — 0.3937 0.03281 0.01094
1 inch 2.540 — 0.08333 0.2778
1 foot 30.480 12.0 — 0.3333
1 yard 91.44 36.0 3.0 —
Centimeter
Inch
Foot
Yard
Mile
6.214 x 10
1.578 x 10
1.893 x 10
5.679 x 10
Meter
-6
-5
-4
-4
0.01 — —
0.254 — 25.4
0.3048 — —
0.9144 — —
Kilometer Millimeter
1 meter 100.0 39.37 3.281 1.094
1 mile
1 mm — 0.03937 — — — — — —
1 kilometer — — — — 0.621 — — —
1.609 x 10
5
6.336 x 10⁴ 5.280 x 10³ 1.760 x 10³
6.214 x 10
-4
—
— — —
1.609 x 10³
1.609 —
Temperature Conversions
Unit
32° Fahrenheit
212° Fahrenheit
-459.6° Fahrenheit
° Fahrenheit
—
—
—
° Centigrade
0
(water freezes)
100
(water boils)
273.1
(absolute 0)
Formulas
C = (F - 32) * 0.555
F = (C * 1.8) + 32
Units of Weight
Unit
1 gram — 0.03527 0.03215 0.002205 0.002679 0.001
Gram
Ounce
Avoirdupois
Ounce
Troy
Pound
Avoir.
Pound
Troy
Kilogram
1 oz. avoir. 28.35 — 0.9115 0.0625 0.07595 0.02835
1 oz. troy 31.10 1.097 — 0.06857 0.08333 0.03110
1 lb. avoir. 453.6 16.0 14.58 — 1.215 0.4536
1 lb. Troy 373.2 13.17 12.0 0.8229 — 0.3732
1 kilogram
1.0 x 10
3
35.27 32.15 2.205 2.679 —
Page 44

2114 WEST 7TH STREET TEMPE ARIZONA 85281 USA
480 • 333 • 2200 PHONE
480 • 333 • 2161
FAX
 Loading...