


Web Camera
Webbkamera
Webkamera
Web-kamera
Webcam
Art.no |
Model |
|
|
|
|
|
38-4754 |
106 |
|
|
|
|
Ver. 20130321 |
|
|
|
|
|
|
|
|
|
|
|
|
|
|
|
|
|
|
|
|
|
Svenska English
Norsk
Suomi
Deutsch
2

Webcam
Art.no 38-4754 |
Model 106 |
Please read the entire instruction manual before use and save it for future reference. We reserve the right for any errors in text or images and for making any necessary technical changes to this document. If you should have any questions concerning technical problems please contact our Customer Services.
Safety
•To avoid damaging the image sensor, do not point the camera directly at the sun.
•Do not expose the camera to oil, steam, dust or water.
•The camera is intended for indoor use only.
•Do not use strong detergents or solvents to clean the lens. Just use a soft cloth.
•The camera can become hot during long periods of use. Always turn the camera off when it is not in use.
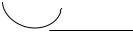
Description
|
|
|
3 |
1. |
Focus ring |
1 |
4 |
|
|||
2. |
Lens |
2 |
|
3. |
Shutter button |
|
4.USB cable
5.Base
6.Adjustable screen bracket
 5 6
5 6
English
3

English
Use with MSN, Skype or other similar programmes
When using MSN or Skype no extra drivers need be installed.
MSN |
a |
|
•Connect the web camera to an
available USB port. |
|
• Start MSN and log in. |
b |
•Click Display Menu (a), then
Tools (b) and Web Camera Settings (c).
•Input your desired settings.
•The camera will start automatically.
c
Skype
•Connect the web camera to an available USB port.
•Start Skype and log in.
•Go in under Tools > Alternatives> Audio Settings. Select USB-Microphone and click Save.
•Find the person you wish to contact on your contact list and click on the contact.
•Click on Video Call in the large window.
•The camera will start automatically.
4
Installing drivers
(if you are not using MSN or Skype)
Important: Connect the web camera to an available USB port before installing the software.
1.Exit all programmes before installing the drivers (especially any antivirus programmes).
2.Insert the installation CD into the computer’s CD-ROM drive.
Installation example using Windows XP
English
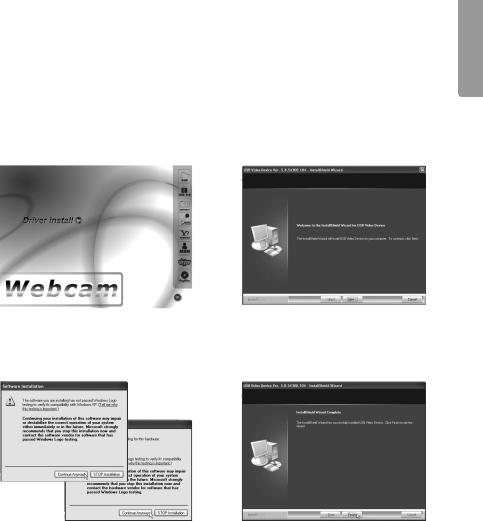
1.Open the installation files using Windows Explorer and double-click
Driver install.
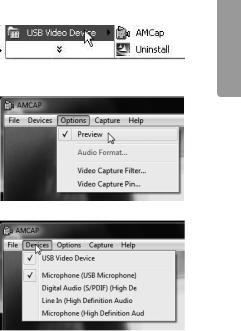
3.Two warning messages will be displayed, one after another.
Click on Continue Anyway for both messages to continue installation.
2.Installation will begin. Click on Next when prompted.
4.Click on Finish when
the installation is complete.
5

Installation example using Windows 7
English
1.The disc should start automatically and the start window should display on screen. Click on Driver install.
2.A warning message will be displayed. Click on Yes to continue.
3. Click on Next to continue installation.
4.Tick the box “Always trust software from SONIX…” Click on Install to accept installation.
5. Click on Finish when the installation is complete.
6
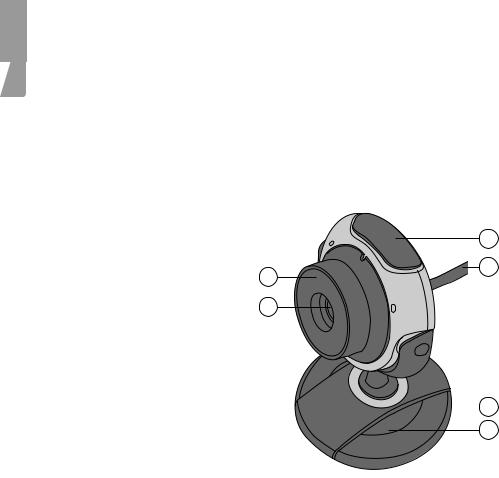
Operation
1.Double click the PMCap icon found under
Program > USB Video Device > AMCap in order to start the programme.
2.Activate Preview under “Options” to display images from the camera.
3.Activate the Microphone (USB Microphone) and the USB Video Device.
4.Aim the camera.
5.Adjust the focus using the camera’s focus ring (1).
Picture taking (snapshots/still-images)
1.Adjust the focus using the camera’s focus ring (1).
2.Press the shutter button (2) to take a picture.
3.The image will open automatically in a new window.
4.Select File/Save As to name the file and select the file format. Press Save to save the image.
5.Select Rotate Orientation to rotate the image, if needed.
English
7

English
Setup
The most essential settings can be found under Options:
•Audio Capture filter: Audio input settings.
•Video Capture filter: Video input settings.
•Video Capture Pin: Settings for video streaming, image sizing, frames per second, etc.
Troubleshooting guide
Description |
Problem |
Solution |
|
|
|
|
|
The computer cannot |
The drivers aren’t correctly |
Reinstall the drive routines. |
|
find the web camera, |
installed. |
|
|
or the programme |
|
|
|
The web camera is not |
Check your USB connection. |
||
doesn’t start. |
|||
properly connected. |
Restart your computer. |
||
|
|||
|
|
|
|
|
Preview is not selected. |
Select Preview under “Options”. |
|
|
|
|
|
The picture is too |
The image settings are not |
Adjust “Video Capture Filter” |
|
bright or too dark. |
properly set. |
settings”. |
|
|
|
|
|
Rolling horizontal |
The mains voltage fre- |
Select the proper Flicker |
|
parallel lines are |
quency isn’t properly set. |
frequency in the “Video |
|
seen. |
|
Capture Filter” settings. |
|
|
|
|
|
The colours displayed |
The image settings are too |
Adjust “Video Capture Filter” |
|
are not true. |
dark. |
settings. |
|
|
|
|
8

Disposal
This product should be disposed of in accordance with local regulations. If you are unsure how to proceed, contact your local authority.
Specifications
Picture sensor |
CMOS sensor |
Resolution |
1.3 megapixels (up to 3,200–2,400) |
Video mode |
RGB24/YUY2 |
Interface |
USB 2.0 |
Video capture |
640 x 480 at 30 frames per second |
|
1600 x 1200 at 10–15 frames per second |
SNR |
Better than 48 dB |
Dynamic range |
Better than 72 dB |
Focus |
From 3 cm to infinity |
White balance |
Automatic |
Lens |
High-quality lens |
Microphone |
Built-in |
Bracket |
Folding base bracket |
Still image file format |
.bmp and .jpg |
System requirements
Operating system |
Windows XP/Vista (32/64-bit) |
|
Windows 7 (32/64-bit) |
|
Windows 8 (32/64-bit) |
Processor |
1 GHz or greater |
Memory |
256 MB RAM or more |
English
9
Svenska
Webbkamera
Art.nr 38-4754 Modell 106
Läs igenom hela bruksanvisningen före användning och spara den sedan för framtida bruk. Vi reserverar oss för ev. textoch bildfel samt ändringar av tekniska data. Vid tekniska problem eller andra frågor, kontakta vår kundtjänst (se adressuppgifter på baksidan).
Säkerhet
•För att undvika skador på bildsensorn, rikta inte kameran mot direkt solljus.
•Utsätt inte kameran för olja, ånga, damm eller vatten.
•Kameran är avsedd för inomhusbruk.
•Använd inte starka rengöringsmedel eller lösningsmedel för att rengöra linsen. Använd en mjuk trasa.
•Kameran kan bli mycket varm om den används under långa perioder. Stäng av kameran när den inte används.
Beskrivning
|
|
|
3 |
1. |
Fokuseringsratt |
1 |
4 |
|
|||
2. |
Lins |
2 |
|
3. |
Slutarknapp |
|
4.USB-kabel
5.Fot
6.Utvikbart fäste för skärm
 5 6
5 6
10
Användning med MSN, Skype eller liknande applikationer
Vid användning tillsammans med MSN eller Skype behöver inga extra drivrutiner installeras.
MSN |
|
|
|
a |
|
1. |
Anslut webbkameran till en ledig |
|
|
|
|
|
|
|
|
||
|
USB-port. |
|
|
|
|
2. |
Starta MSN och logga in. |
|
|
|
b |
|
|
|
|||
3.Klicka på Visa Meny (a), sedan
Verktyg (b) och Inställningar för webbkamera (c).
4.Gör inställningarna.
5.Kameran startar automatiskt.
c
Skype
1.Anslut webbkameran till en ledig USB-port.
2.Starta Skype och logga in.
3.Gå in under Verktyg > Alternativ > Ljudinställningar. Välj USB-Microphone som mikrofon och klicka på Spara.
4.Hitta önskad kontakt i kontaktlistan, klicka på kontakten.
5.Klicka på Video Call i stora fönstret.
6.Kameran startar automatiskt.
Svenska
11

Svenska
Installera drivrutinerna
(om du inte använder MSN eller Skype)
Viktigt! Anslut webbkameran till en ledig USB-port innan du installerar mjukvaran.
1.Avsluta alla program du har igång innan du installerar drivrutinerna (gäller särskilt antivirusprogram).
2.Sätt CD-skivan i datorns CD-läsare.
Installationsexempel Windows XP
1.Öppna skivan i utforskaren och dubbelklicka på Driver install.
3.Två varningsrutor visas efter varandra. Klicka på Continue Anyway i båda för att fortsätta installationen.
2.Installationsprogrammet startar. Klicka på Next.
4.Klicka på Finish när installationen är klar.
12
 Loading...