

Clarion DBZ45 Owner's Manual
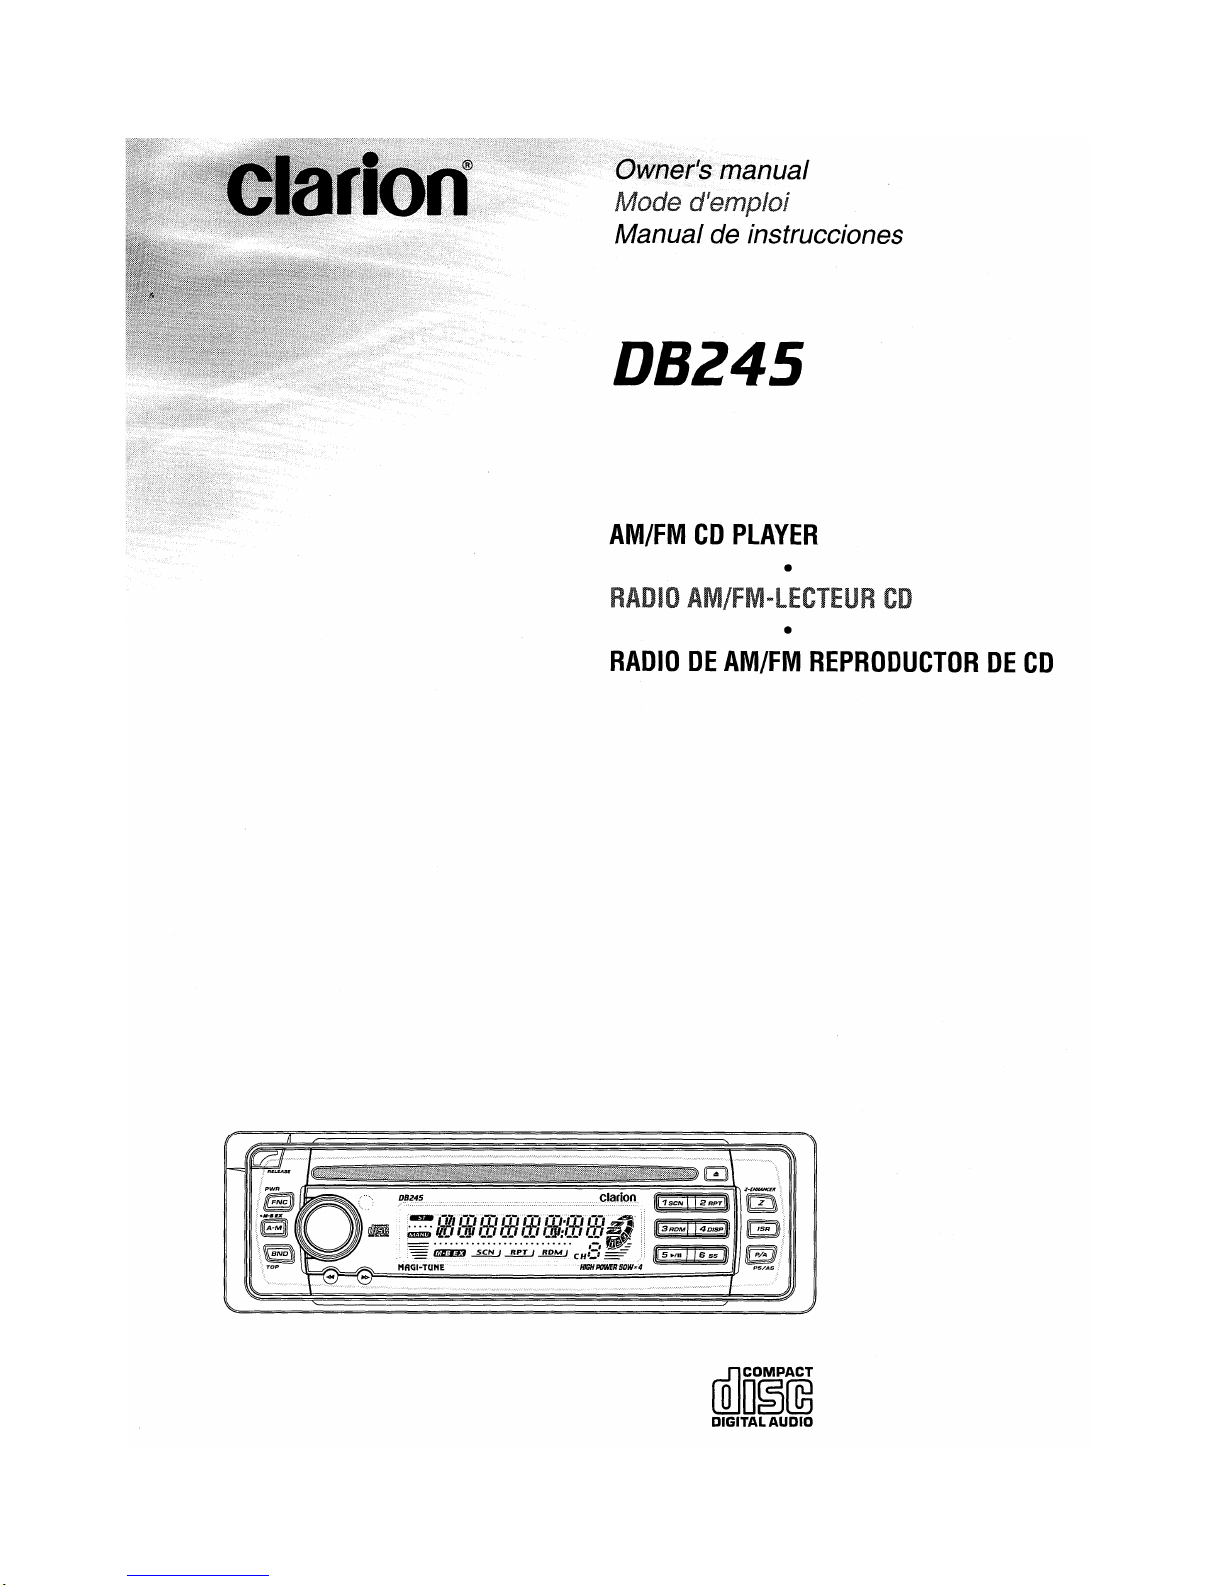
DBZ45
AM/FMCDPLAYER
•
•
RADIODEAM/FM
REPRODUCTORDECD
rnJDl~3@
DIGITAL
AUDIO

Contents
1. FEATURES 2
2. CONTROLS 3
Source Unit 3
Display 3
3. BUTTON TERMINOLOGY 4
Names of the Buttons and their Functions 4
4.
PRECAUTIONS 5
5. HANDLING COMPACT DISCS 6
6.
DCP (DETACHABLE CONTROL PANEL) 7
7.
REMOTE CONTROL 8
Function of Remote Control Unit Buttons 9
8. OPERATIONS 10
Basic Operations 10
Radio Mode Operations 12
CD Mode Operations 13
9.
TROUBLESHOOTING
10. ERROR DISPLAYS
11.
SPECIFICATIONS
15
16
17
• Visible Blue Negative LCD and White
•
Aluminum
• Rotary Volume
•
Z~Enhancer
• MAGNA BASS EX
• MfiGI-
Detachable Faceplate
for
Easy
Operation
with
3 Mode Sound
for
Dynamic
Selector
Bass
TUNE@FMReception System
• Seek/ Manual Up / Down Tuning
• 8-Times
• Preset Station Scan (PS),
2~Channel
•
• AM 1 Band,
• Repeat / Random Play
• 200W (50 W X
•IRRemote
Oversampling
RCA Line Level
FM3bands
4)
Maximum
Control
Included
Digital
Automatic
Output
each 6
/Intro
Power
Filter
channels
Music
Output
Illuminated
Buttons
Tuning
and
Dual1-Bit
Store
(AS)
D/A
Converters
total 24 channels, Preset
Scan
Be
suretounfold
Veuiilez
Cercioresededesplegar ydeleerlapagina
l!l§ployer
st 'JDilS
Memory
and
read
rfHererafa
Function
the
next
page
sulvania.
siguiente.
page.
~
08245
2
Note:
Be sure to unfold this page
Remarque:
Veuillez deployer cette pageetvous reterer
and
refer to the front diagrams as
aux
you
read each chapter.
schemas quand vous lisez chaque chapitre.
Nota: Cuando lea los capitulos, despliegue esta pagina y consulte los diagramas.
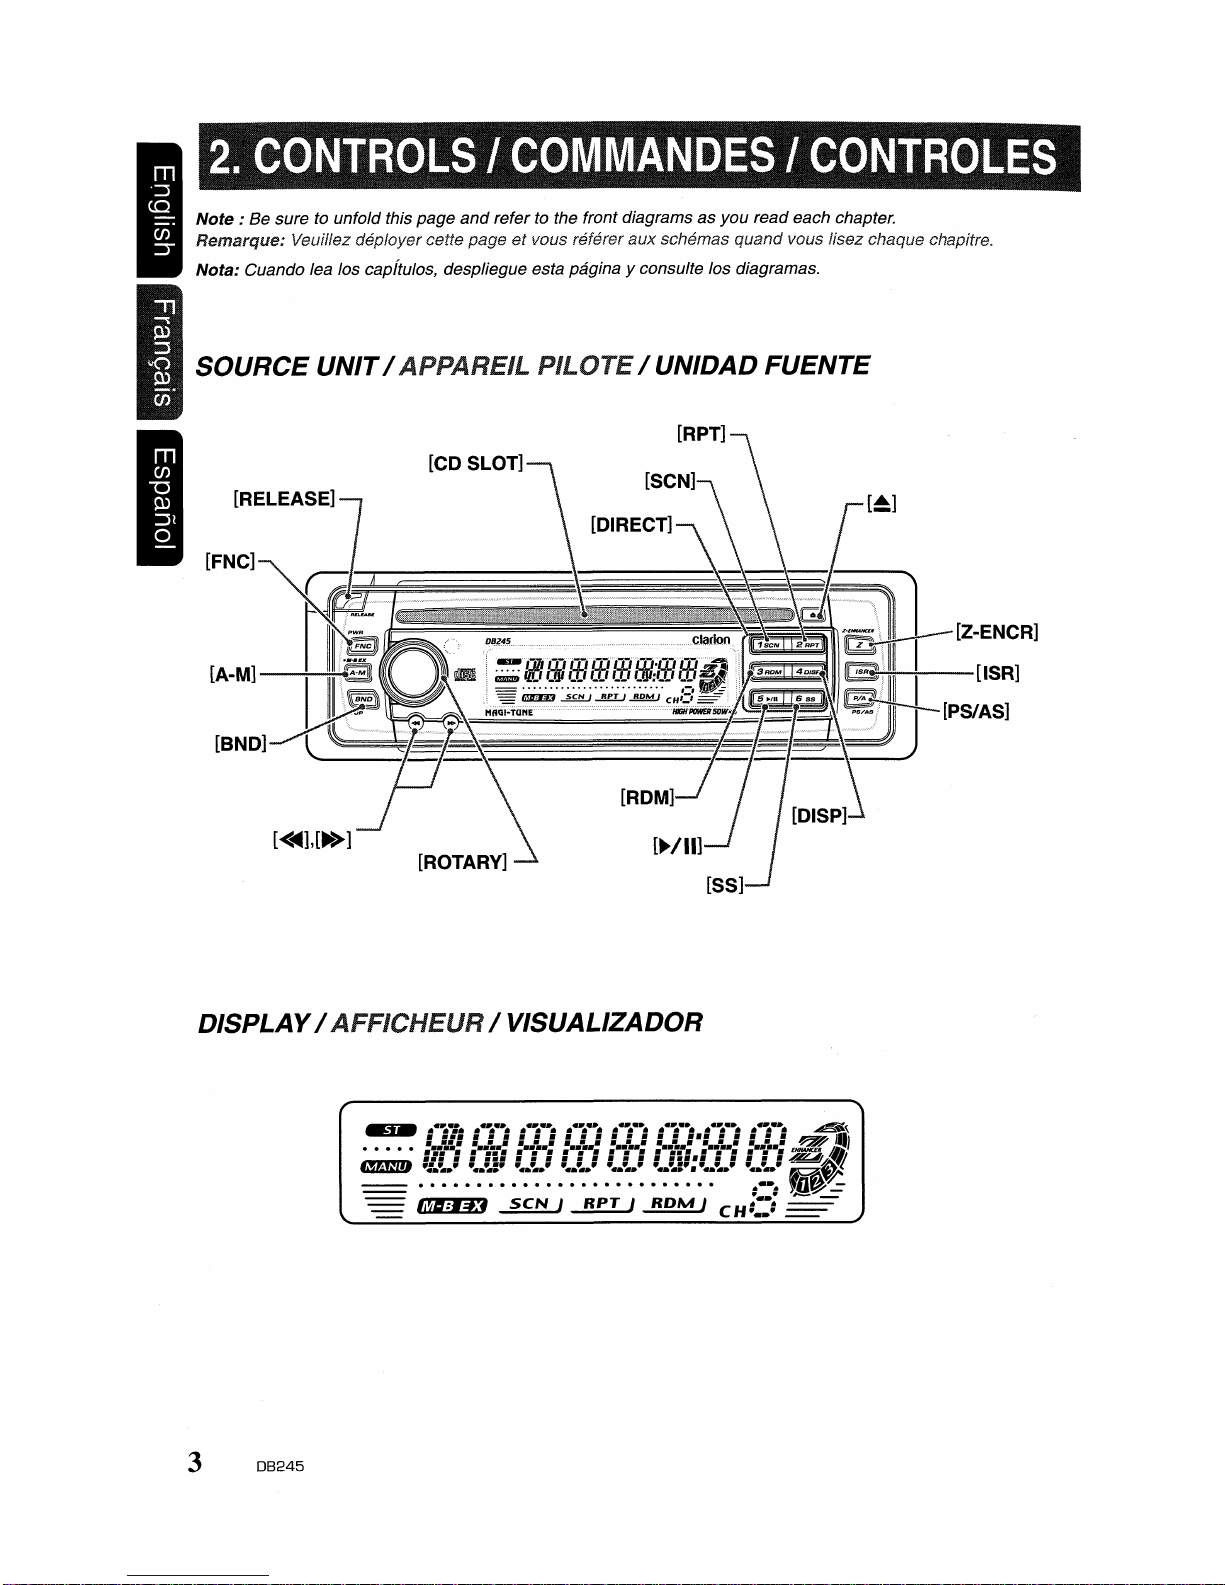
SOURCE
[FNC]
---;-~
[A-M]
[BND]
UNIT
/ APPAREIL PILOTE/ UNIDAD FUENTE
[CD SLOT]
[Z-ENCR]
[ROTARY]
DISPLAY/ AFFICHEUR/ VISUALIZADOR
~
• • • • •
smll1J
=
~
3
08245
...
~.:.
•..
~...
•..
~...
•..
~...
•..
~...
•..
~...
•..
~...
:
I::
: I : : I : : I : : I : : I
.':.
••• • • ••• • • • • • • • • • • ••••• • • • • •
":.~."
~:""~.""~.""~
IimD3
2.Q!J
.-.!£LJ...!!QMJ C
:.:
•• "~:•• "
•..
I : : I :
~."
H'::'
~...
~5.
~
JIll
ENHANCE/t
/Ii
~A~IJ
~
•• -
··.t~~
~'{
~
I
Note:
•Besure to
read
this chapter referring to the front diagrams of chapter
"2.
CONTROLS"onpage
Names of the Buttons and their Functions
3.
[RELEASE] button
• Press the [RELEASEl button to unlock the
DCP.
[Z-ENCR] button
• Use the button to select one of the three
types of sound characteristics already stored
in
memory. (Z-Enhancer)
[FNC] button
• Press the button to turn on the power.
Press and hold the button for 1 second or
longer to turn off the power.
• Switches the operation mode among radio
and CD mode.
[A-M] button
• Press and hold the button for 2 seconds or
longer to switch the
• Use the button to switch to the audio
(bass, treble, balance, fader)
[ROTARY] knob
• Adjust the volume by turning the knob clock-
or
wise
• Use the knob to perform various setting.
[CD SLOT]
• CD insertion slot.
[SCN] button
• Performs scan play for 10 seconds for each
track while in the CD mode.
[~]
• Ejects a CD when it is loaded into the unit.
[RPT] button
• Plays repeatedly whileinthe CD mode.
[ROM] button
• Performs random play whileinthe CD mode.
counterclockwise.
button
MAGNA
BASS EX on/off.
mode
[ISR] button
• Recalls ISR radio stationinmemory.
• Press and hold for 2 seconds
Stores current station into ISR memory (radio mode only).
[DIRECT] button
• Stores a station into memory or recall it di-
in
rectly while
[55]
button
• Press the
[BND] button pressed, to turn the screen
saver function on
[.-/11]
• Plays or pauses a CD whileinthe CD
[DI5P] button
• Press the
[PSI
• Performs preset scan while in the radio
[<
• Selects a station whileinthe radio
• Press and hold the button for 1 second or
[BND] button
• Switches the band, or seek tuning
• Plays a first track while in the CD mode.
button
mode.
[BN.D] button pressed, to switch the display
indication (Main display, clock display).
AS] button
mode. When the button is pressed and
held, auto store is performed.
....
],
[~>]
selects a track when listening to a CD.
longer to switches the fast-forward/fastbackward.
manual tuning whileinthe radio mode.
the radio mode.
[55]
button while keeping the
or
off.
[D1SP]
button while keeping the
button
or
longer:
mode
or
or
4
08245
1.
When the inside of the carisvery cold and the
player
heater, moisture may form
is
used soon after switching on the
on
the disc or the
optical parts of the player and proper playback
may not be possible.
disc, wipe it off with a soft cloth.
forms
on
the optical parts of the player, do not
If
moisture formsonthe
If
moisture
use the player for about one hour and the condensation will disappear naturallyto allow normal operation.
2.
Drivingonextremely bumpy roads which cause
severe vibration may cause the sound to skip.
3.
This
unit
usesaprecision
mechanism.
Eveninthe event that trouble arises, never
open the case,
disassemble
the unit,
lubricate the rotating parts.
or
This equipment has been tested
and
found to comply with the limits for a Class 8 digital device, pursuant
to
Part 15 of the FCC Rules.
These limits are designed to provide reasonable
protection against harmful interference
in
a resi-
dential installation.
This equipment generates, uses, and can radiate
radio frequency energy and, if not installed and
in
used
accordance with the instructions, may
cause harmful interference to radio communications. However, there is no guarantee that interference will not occur
in
a particular installation.
If this equipment does cause harmful interference
to
radio or television reception, which canbede-
termined by turning the equipment off and
is
encouraged to consult the dealer oranex-
user
on,
perienced radiolTV technician for help.
USE OF CONTROLS, ADJUSTMENTS, OR PERFORMANCE OF PROCEDURES OTHER THAN
THOSE SPECIFIED HEREIN, MAY RESULT
THE COMPACT DISC PLAYER SHOULD NOT
IN
HAZARDOUS RADIATION EXPOSURE.
BE
ADJUSTED OR REPAIRED
BY
ANYONE
EXCEPT PROPERLY QUALIFIED SERVICE PERSONNEL.
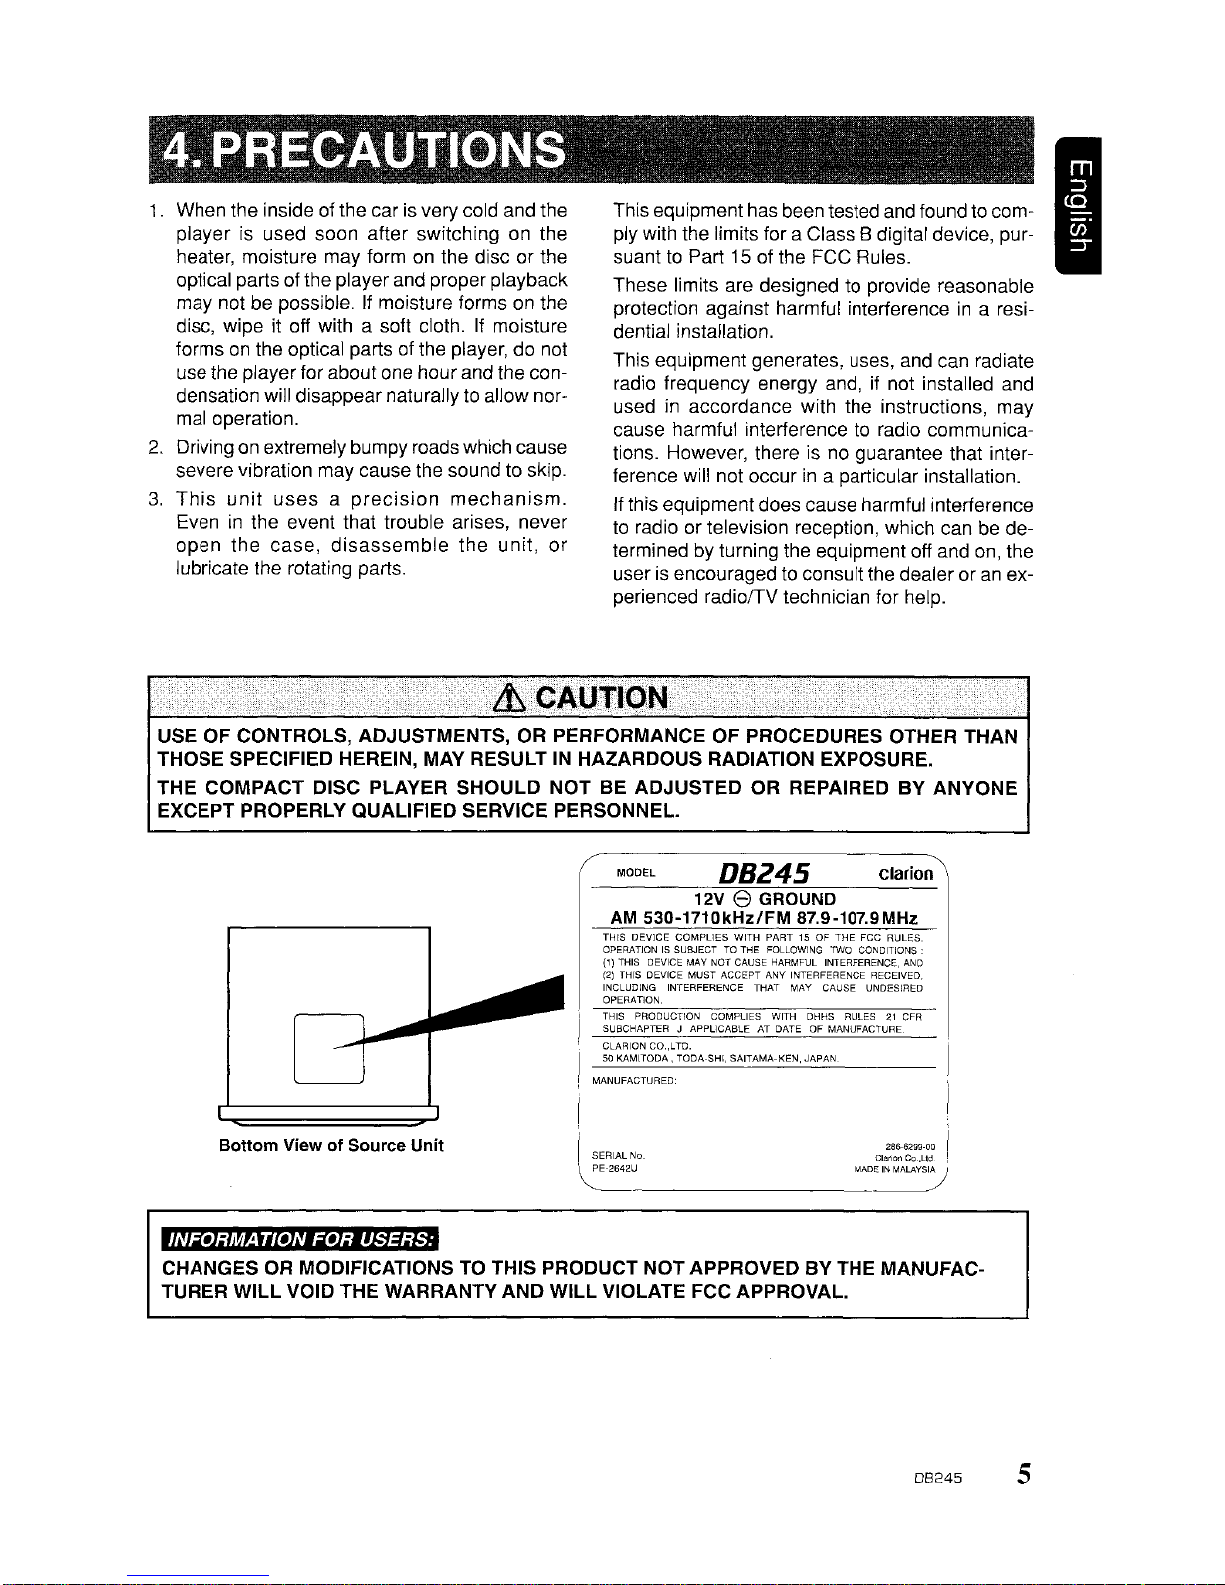
I
the
MODEL
AM
530-1710kHz/FM
THIS DEVICE
OPERATION
(1)
THIS
DEVICE MAY NOT CAUSE HARMFUL INTERFERENCE,
(2J
THIS DEVICE MUST ACCEPT ANY INTERFERENCE RECEIVED,
INCLUDING INTERFERENCE THAT MAY CAUSE UNDESIRED
OPERATION.
j
~~~c:"'~~~~C~IOANpp3z~:LL~E~T
CLARION CO.,LTD.
I 50 KAMITODA. TODA-SHI, SAITAMA-KEN, JAPAN
! MANUFACTURED:
D8245
12V e GROUND
COMPLIES
IS
WITH
SUBJECTTOTHE FOLLOWING TWO CONDITIONS'
87.9-107.9MHz
PART15OF
~I:~E
~Ht~A~~;;~TU~E
I
Bottom View of Source Unit
,
SERIAL
No. Clarion
I
'~U
'lw-cv,nfil-VJi-C'I1'-i#ill.i
CHANGES
TURER WILL VOID THE WARRANTY AND WILL VIOLATE FCC APPROVAL.
OR
MODIFICATIONSTOTHIS PRODUCT NOT APPROVED BY THE MANUFAC-
clarion
THE FCC RULES.
AND
CFR
266-6299-00
CO.,Ltd
M_ADEINMALAYSI~
08245
5
I
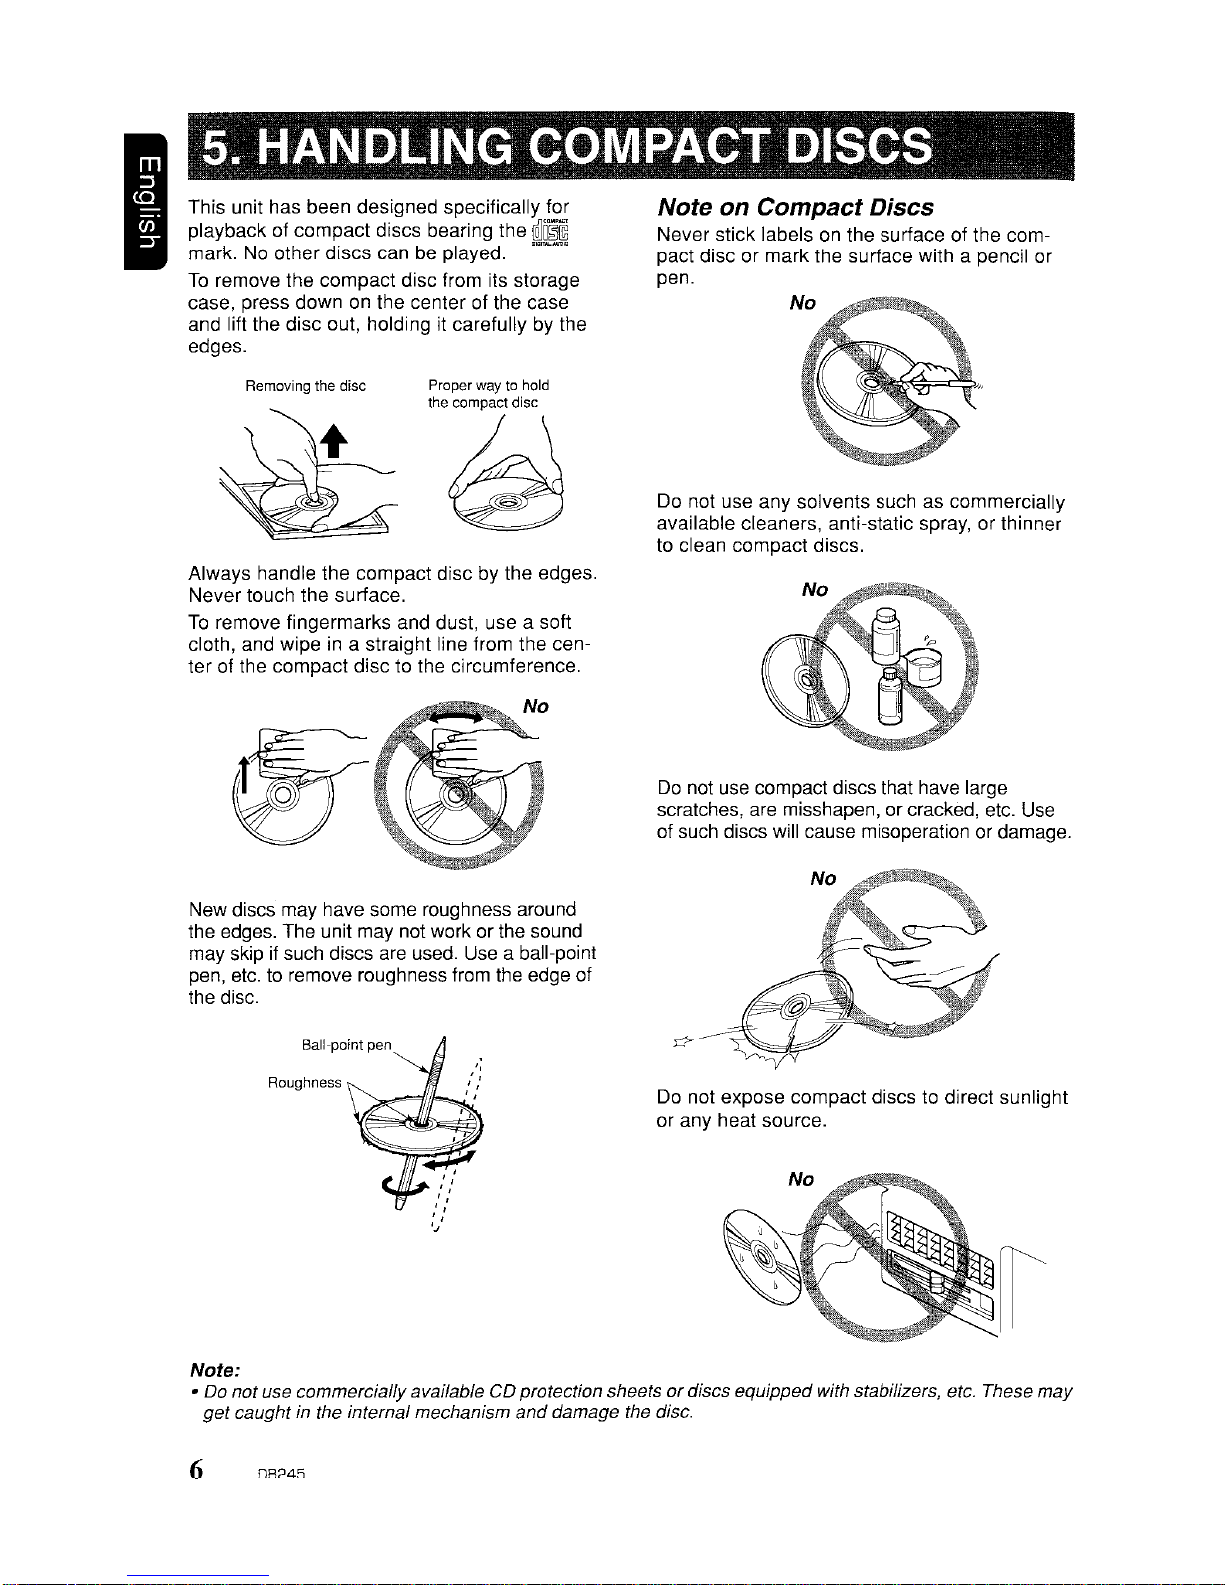
This unit has been designed specifically for
way
~O~~
.0
to
hold
...
""'"
playback of compact discs bearing the
mark.Noother discs canbeplayed.
To
remove the compact disc from its storage
on
case, press down
and lift the disc out, holding it carefully by the
edges.
Removing the disc
the center of the case
Proper
the compact disc
~
Always handle the compact disc by the edges.
Never touch the surface.
To
remove fingermarks and dust, use a soft
cloth, and wipe
ter of the compact disc
in
a straight line from the cen-
to
the circumference.
Note on Compact Discs
Never stick labelsonthe surface of the compact disc or mark the surface with a pencil or
pen.
Do not use any solvents such as commercially
available cleaners, anti-static spray, or thinner
to
clean compact discs.
New discs may have some roughness around
the edges. The unit may not work or the sound
may skip if such discs
etc.toremove roughness from the edge of
pen,
the disc.
Roughness
are
used. Use a ball-point
Do
not use compact discs that have large
scratches, are misshapen, or cracked,
of such discs will cause misoperation
Do
not expose compact discs to direct sunlight
or any heat source.
etc.
or
Use
damage.
Note:
• Do not use commerciaflyavailable CDprotection sheetsordiscs equipped with stabilizers, etc. These may
get
caught in the internal mechanism
6
08245
and
damage the disc.
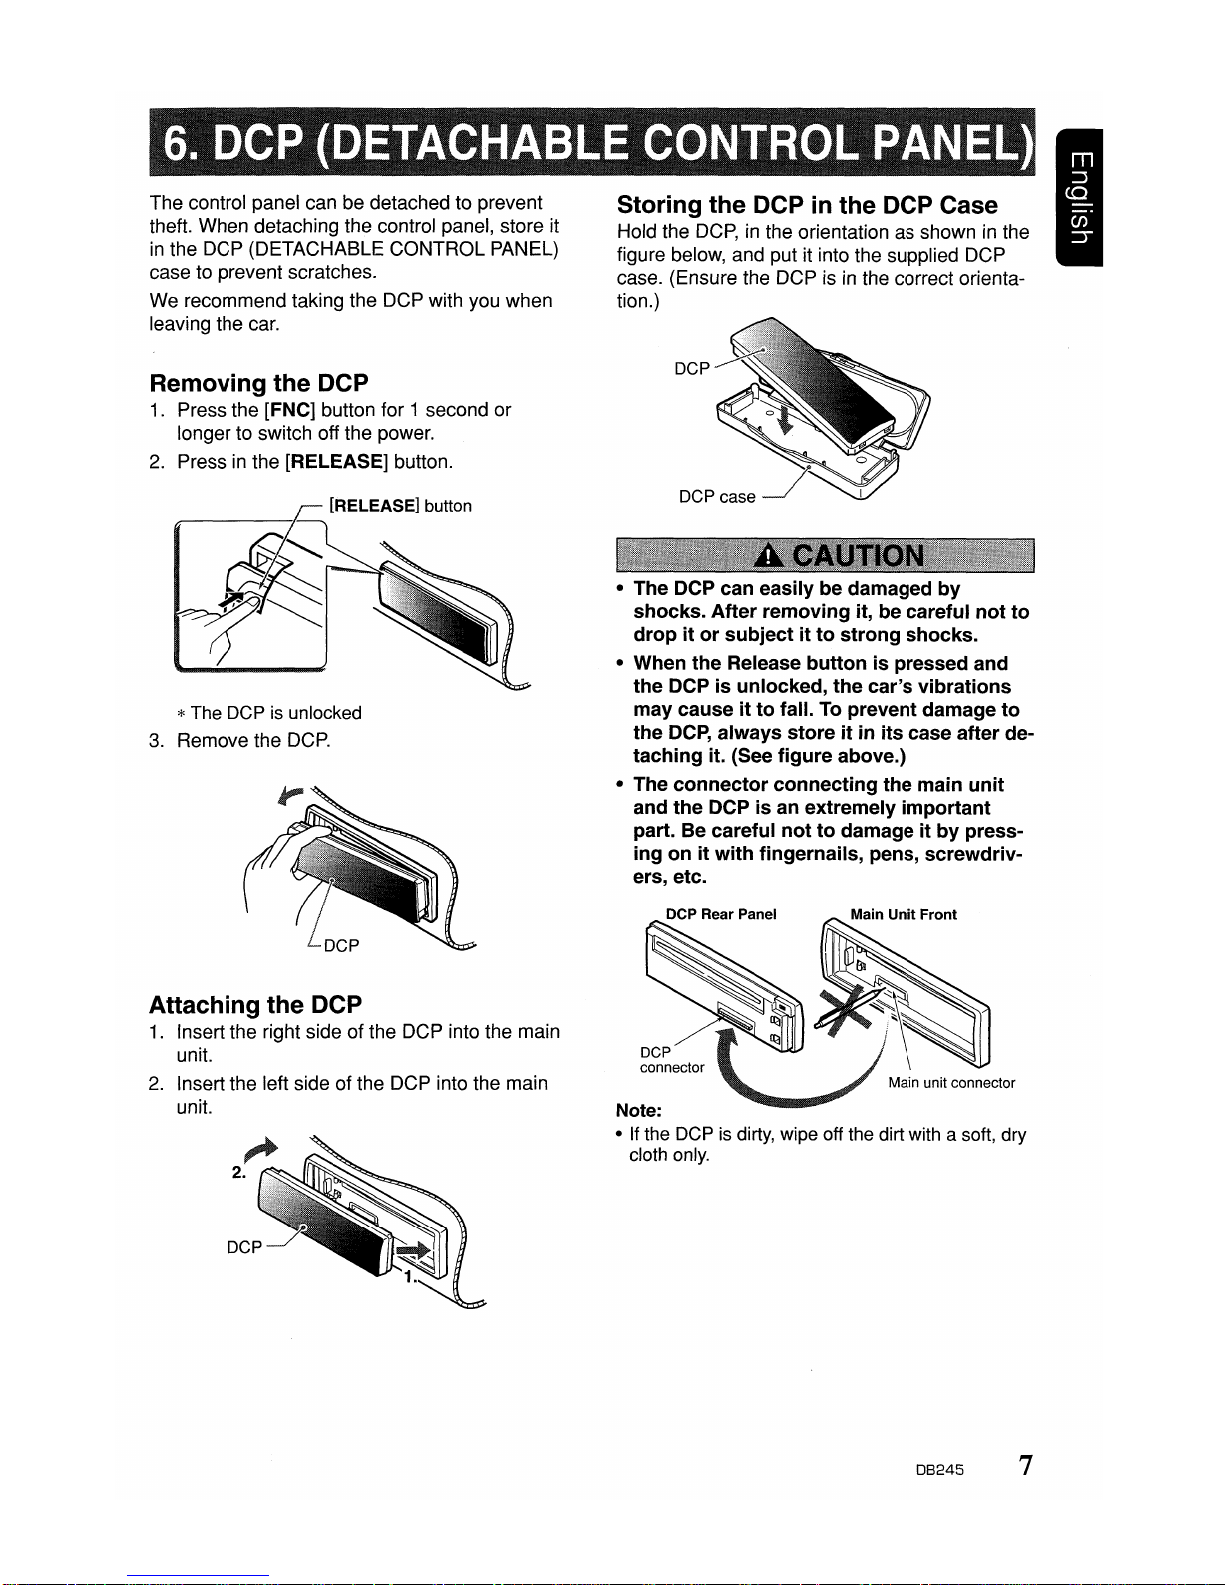
The control panel can be detached to prevent
theft. When detaching the control panel, store it
in
the DCP (DETACHABLE CONTROL PANEL)
case to prevent scratches.
We recommend taking the DCP with you when
leaving the car.
Storing
Hold the
figure below, and put it into the supplied DCP
case. (Ensure the DCP is
tion.)
the
DCPinthe
DCP,inthe orientation as showninthe
DCP Case
in
the correct orienta-
Removing
1.
Press the [FNC] button for 1 second or
longer to switch off the power.
2.
Pressinthe [RELEASE] button.
the
DCP
cfl:..
[I~ELEASEI
button
~~
*The DCP is unlocked
3.
Remove the
DCP.
• The DCP can easily be damaged
shocks.
dropitor
• When the Release
the DCPisunlocked,
may causeitto
the
taching it. (See figure above.)
• The
and
part. Be careful
ing onitwith
ers, etc.
After
removing it, be careful
subjectitto
fall.Toprevent damage
DCP,
always
connector
the
DCPisan extremely
DCP Rear Panel
storeitin
connecting
nottodamageitby
fingernails, pens, screwdriv-
strong
buttonispressed and
the
shocks.
car's
its
case after de-
the main
important
by
not
vibrations
unit
press-
to
to
Attaching
1.
Insert the right side of the DCP into the main
unit.
2.
Insert the left side of the DCP into the main
unit.
the
DCP
DCP
connector
Note:
• If the DCP is dirty, wipe off the dirt with a soft, dry
cloth only.
08245
7
 Loading...