

Citizen Eco-Drive Instruction Manual

INSTRUCTION MANUAL

Thank you for your purchase of this Citizen watch.
Before using the watch, read this instruction manual carefully to ensure
correct use.
After reading the manual, store it in a safe place for future reference.
Be sure to visit the Citizen website at http://www.citizenwatch-global.com/ .
Here you will find a variety of information such as electronic setting guides,
answers to frequently asked questions, Eco-Drive recharging information and
more.
To check the movement number
A case number—4 alphanumeric characters and 6 or
more alphanumeric characters—is engraved on the
case back. (Figure on the right)
The first 4 characters of the case number represent
the movement number of the watch. In the example
on the right, “
” is the movement number.
Engraving position example
The engraving position may
differ depending on watch
model.
1
Safety precautions — IMPORTANT
This manual contains instructions that should be strictly followed at all times
not only for optimal use, but to prevent any injuries to yourself, other persons or
property. We encourage you to read the entire booklet (especially, pages 66 to 79)
and understand the meaning of the following symbols:
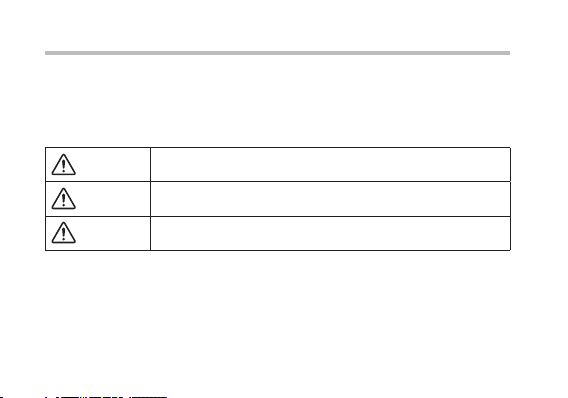
■ Safety advisories are categorized and depicted in this manual as follows:
DANGER
WARNING
CAUTION
2
Highly likely to cause death or serious injury
Can cause serious injury or death
Can or will cause minor or moderate injury or damage
Safety precautions
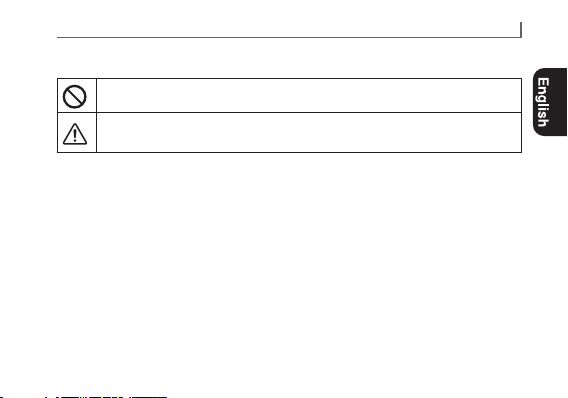
■ Important instructions are categorized and depicted in this manual as follows:
(Following symbols are examples of Pictograms.)
Warning (caution) symbol followed by prohibited matters.
Warning (caution) symbol followed by instructions that should be
followed or precautions that should be observed.
3
Features
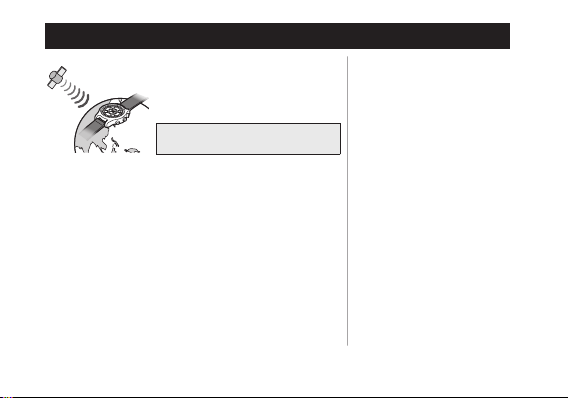
Satellite synchronized watch
Receives the time information sent
from the satellite and adjusts the time
and calendar on the watch.
* Location information is not
acquired.
Light-Level Indicator
Indicates current power generation
amount in 7 levels.
It can be used as a reference for
choosing a good charging place.
4
* “Eco-Drive” is an original technology of Citizen.
• Eco-Drive
Never needs a new battery.
This watch is fueled by light.
• World time
Indicates the time around the
world by choosing one of 40
time zones.
• ±5-second average monthly
accuracy
Keeps high accuracy without
time signal reception.
• Perpetual calendar
No need for monthly and
leap-year date correction until
February 28, 2100.

CONTENTS
Before using this watch .......
Band adjustment ...............
Protective stickers ..............
How to use a specially designed
crown/button ................
Component identification ...
Charging your watch ........
Checking the current power
reserve and power generation
amount .....................
Setting the world time ......
7
8
Switching daylight saving time
8
and standard time .........
Before receiving the satellite
9
time signal ...............
11
Receiving the satellite time
signal ....................
12
Reception methods of the
satellite time signal ..........
18
Checking the previous
reception result of the satellite
time signal ..................
Continued on the next page
24
30
32
37
37
42
5

CONTENTS
Checking and adjusting leap
second setting ............
Checking and adjusting the
rollover number setting ....
Adjusting the time and calendar
manually .................
Checking and correcting the
reference position .........
Troubleshooting ...........
6
Eco-Drive watch handling
precautions. . . . . . . . . . . . . . .
44
Water resistance ...........
47
Precautionary items and usage
limitations ...............
50
Specifications .............
54
58
66
70
73
80
Before using this watch
After unpacking, the following must be done before using the watch:
1
Checking the current power reserve (page 12)
2
Setting the world time (page 24)
3
Receiving the satellite time signal (page 32)
This watch has a rechargeable cell which is charged by
exposing the dial to light.
Expose the dial to direct sunlight regularly to charge the
watch.
For details of charging, see pages 12.
7

Before us ing this watc h
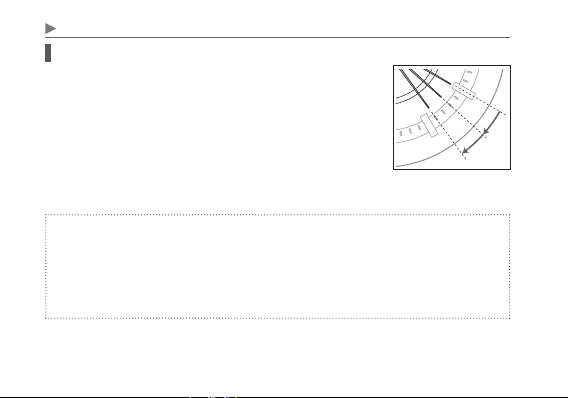
Band adjustment
We recommend seeking the assistance of an experienced watch technician
for sizing of your watch. If adjustment is not done correctly, the bracelet may
unexpectedly become detached leading to loss of your watch or injury.
Consult your nearest authorized Citizen service center. Other shops may charge
for, or may not provide, the service.
Protective stickers
Be sure to remove any protective stickers that may be on your watch (case back,
band, clasp, etc.). Otherwise, perspiration or moisture may enter the gaps between
the protective stickers and the parts, which may result in a skin rash and/or
corrosion of the metal parts.
8
Before us ing this watc h
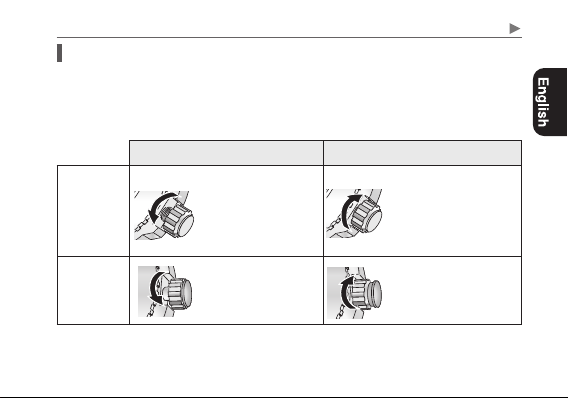
How to use a specially designed crown/button
Some models are equipped with a specially designed crown and/or push button to
prevent accidental operation.
Screw down crown/button
Unlock the crown/button prior to operate your watch.
Unlock Lock
Push the crown in to the
Screw down
crown
Screw down
push button
Rotate the crown
counterclockwise until
it releases from the case.
Rotate the locking screw
counterclockwise, and
loosen until it stops.
case. With gentle pressure
towards the case, rotate
the crown clockwise to
secure it to the case. Be
sure to tighten firmly.
Rotate the locking screw
clockwise, and tighten
fi rml y.
9
Before us ing this watc h
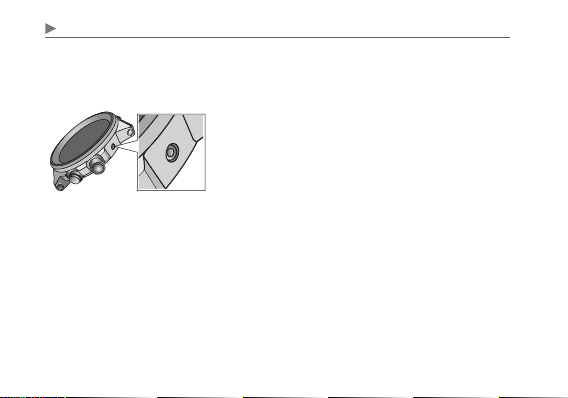
Recessed button
Press the button with a non-marring narrow-tipped object such as a wooden
toothpick.
• Metal objects may cause marring or scratching of
the button.
10
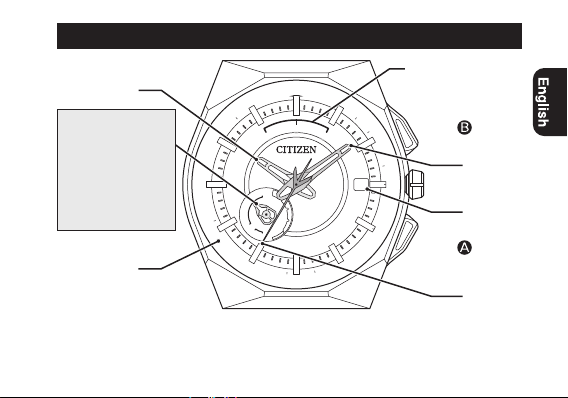
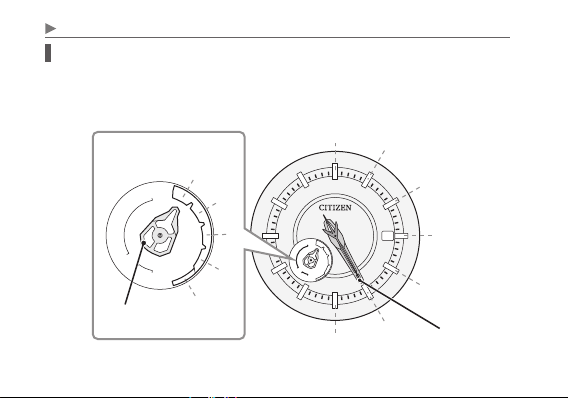
Component identification
Reception-in-
RX:
progress indication
Reception
+9.5
ADL
DXB
+4
7
+9
TYO
KHI
+5
DEL
+5.5
DAC
+6
+7
BKK
+8
BJS
OK/NO:
result indication
Button
Minute
hand
Crown
Date
indication
Button
Second
hand
Hour hand
Function hand
• Day indication
• Power reserve level
scale (5 levels)
• Daylight saving time
(
SMT ON/OFF
Place name/
time zone
)
SCL
−4
−5
NYC
−6
CHI
−7
DEN
LAX
−8
ANC
−9
−10
HNL
−11
MDY
LON
PAR
PDL
0
+1
ATH
−1
FEN
−2
RIO
−3
NO
S
F
T
W
T
M
S
SMT
ON
OFF
−12
+14
+2
RUH
+3
RX
OK
+10
+13
TBU
SYD
+11
+12
NOU
AKL
• The illustrations in this instruction manual may differ from the actual appearance
of your watch.
• A solar cell is under the dial.
11
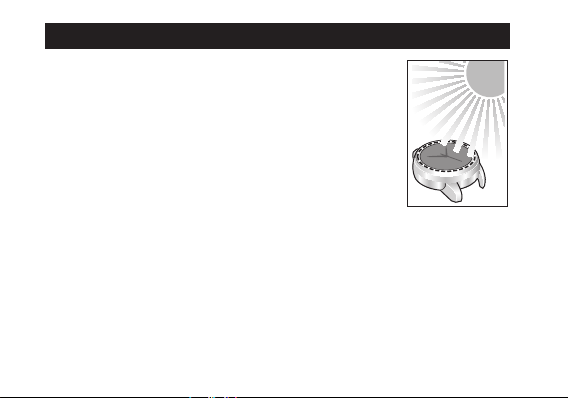
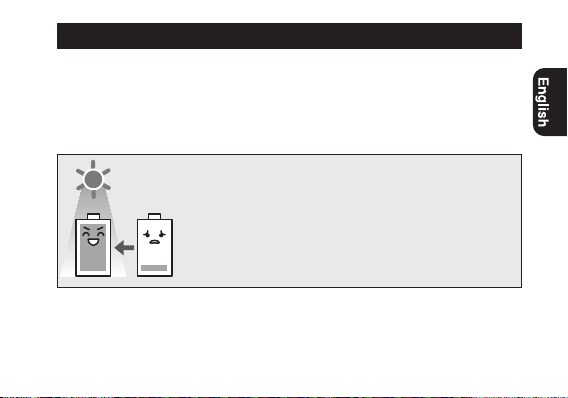
Charging your watch
This watch has a rechargeable cell which is charged by
exposing the dial to light, such as direct sunlight or fluorescent
lamps (refer to page 16 for charging guidelines).
For optimal performance, be sure to:
•
Put the watch in a location where the dial is exposed to bright
light such as by the window even when it is not used.
•
Expose its dial to direct sunlight for 5 or 6 hours at least
every half-a-month.
•
Avoid leaving it in dark places such as in a drawer for long
periods of time.
12

Chargi ng your watch
CAUTION
• This watch contains a large-capacity rechargeable cell for performing powerconsuming satellite signal reception. This large capacity cell takes more time to
charge than those found in other Eco-Drive watches.
• If the surrounding temperature falls below 0°C (32°F) or exceeds 40°C (104°F),
Charge suspension temperature detection function
the “
charging will not be possible.
• Do not charge the watch at a high temperature (about 60°C (140°F) or higher)
as doing so may cause movement malfunction.
• If the watch is obscured from light by long sleeves frequently, supplemental
charging may be needed to ensure continual operation.
• The watch stops charging automatically after finishing (overcharging prevention
function). The function prevents damage to performance of the watch and
rechargeable cell due to overcharging.
” will activate and
13
Chargi ng your watch
When the watch reaches a low charge state (insufficient charge warning
function)
When the power reserve becomes low, the second hand
moves once every two seconds. This is the insufficient charge
warning function. Be sure to fully charge your watch as
outlined on page 16.
• When the watch is sufficiently charged, the second hand
will move normally.
• If you do not charge the watch for 5 days or longer after the insufficient charge
warning movement has begun, the watch will be depleted of all power and stop.
CAUTION
•
If you do not charge the watch for 30 days after it has stopped, recharging will
not be possible (over discharge detection function).
Consult your nearest authorized Citizen service center if no hands start to move
even after charging a stopped watch for one day or more exposing to direct
sunlight.
14

Chargi ng your watch
During the insufficient charge warning state
The time and date is indicated correctly.
Operations below are available:
• Checking power generation amount
• Setting the world time
• Adjusting the time and calendar manually
You cannot execute operations other than above such as reception of satellite time
signals.
15

Chargi ng your watch
Charging time by environment
Below are the approximate charging times when exposing to light continuously.
Please use this table as a reference only.
Charging time (approx.)
Environment Illuminance (lx)
Outdoors (sunny)
Outdoors
(cloudy)
20 cm (8 inches)
away from a
fluorescent lamp
(30 W)
Interior lighting
•
Exposing to direct sunlight is recommended to charge your watch.
lamp or interior lighting does not have sufficient illumination to charge the
rechargeable cell efficiently.
16
100 000 3 minutes 5 hours 35 hours
To work for one day
10 000 25 minutes 50 hours 330 hours
3 000 1.5 hours 170 hours 1 120 hours
500 8 hours − −
To start working
normally when the
cell is discharged
To become fully
charged when the cell
is discharged
A fluorescent
Chargi ng your watch
Power save function
The hour, minute, and second hands stop automatically to save power as 3 days
passed after stopping power generation.
• The watch is still running internally to keep the time and calendar correctly even
after the power save function has activated.
• The power save function does not activate when the position of the crown is
.
or
• The power save status ends and the hands return to indicate the current time as
the watch is operated or the dial is exposed to light and power generation starts.
Duration without additional charging after charging the watch fully
About 2 years in normal use.
• When receiving satellite time signals every 6 days.
• With a power save function activated, the watch will run for about 7 years.
17
Chargi ng your watch
Checking the current power reserve and power generation amount
Always care about the current power reserve and charging environment of the
watch to be sure it is charged sufficiently.
Indication of power reserve
in level
4
S
F
T
W
T
M
S
SMT
ON
OFF
Function hand
3
1
0
18
2
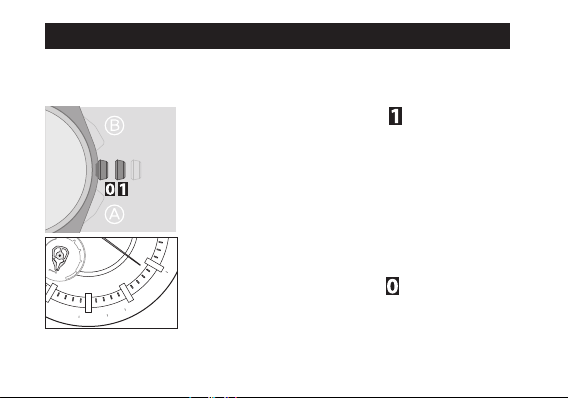
Indication of power generation
amount in level
0
1
S
F
T
W
T
M
S
SMT
ON
OFF
7
5
6
2
3
4
Hour, minute and
second hands
Chargi ng your watch
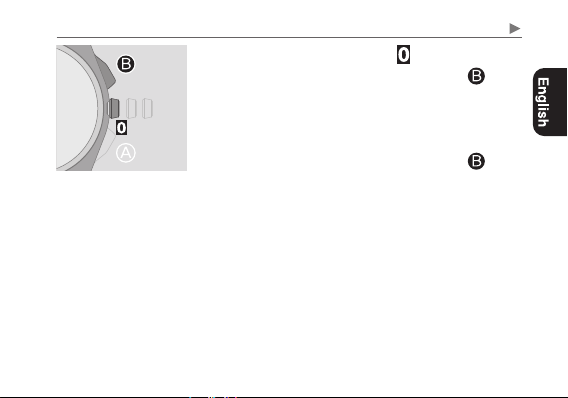
1
Push the crown in to position .
2
Press and release the upper right button .
The power reserve and power generation amount at the
moment of pressing the button are indicated in level.
Power reserve level
•
Level of power generation amount
•
3
Press and release the upper right button to
: page
20
: page
22
finish the procedure.
The hands returns to current time indication.
• They returns to current time indication automatically
in about 10 seconds.
19

Chargi ng your watch
S
SMT
ON
OFF
F
T
W
T
M
S
S
SMT
ON
OFF
F
T
W
T
M
S
S
SMT
ON
OFF
F
T
W
T
M
S
S
SMT
ON
OFF
F
T
W
T
M
S
S
SMT
ON
OFF
F
T
W
T
M
S
S
SMT
ON
OFF
F
T
W
T
M
S
S
SMT
ON
OFF
F
T
W
T
M
S
S
SMT
ON
OFF
F
T
W
T
M
S
S
SMT
ON
OFF
F
T
W
T
M
S
S
SMT
ON
OFF
F
T
W
T
M
S
Indication of power reserve in level
Level 4 3 2 1 0
Power reserve
level scale
S
F
T
W
T
M
S
SMT
ON
OFF
Duration
24 - 20 months 20 - 14 months 14 - 5 months
(approx.)
Meaning
Power reserve
is sufficient.
Power reserve is OK.
OK for normal use
S
F
T
W
T
M
S
SMT
ON
OFF
S
F
T
W
T
M
S
SMT
ON
OFF
20
S
F
T
W
T
M
S
SMT
ON
OFF
5 months -
5 days
Power reserve
is getting low.
Charge immediately.
S
F
T
W
T
M
S
SMT
ON
OFF
5 days or
shorter
Insufficient
charge warning
has started.

Chargi ng your watch
CAUTION
• At the level 0, the second hand starts to move once every two seconds
(insufficient charge warning function, page 14). Some functions become
unavailable while the function is activated. For details, see page 15.
• The level of power reserve is not indicated when temperature of the watch
is too high or too low (non-chargeable state). Check it again at a location of
suitable temperature.
21
Chargi ng your watch
W
T
M
S
7
S
SMT
ON
OFF
F
T
W
T
M
S
7
S
SMT
ON
OFF
F
T
W
T
M
S
7
S
SMT
ON
OFF
F
T
W
T
M
S
7
S
SMT
ON
OFF
F
T
W
T
M
S
7
ON
T
W
T
M
S
7
S
SMT
ON
OFF
F
T
W
T
M
S
7
S
SMT
ON
OFF
F
T
W
T
M
S
7
S
SMT
ON
OFF
F
T
W
T
M
S
7
S
SMT
ON
OFF
F
T
W
T
M
S
7
S
SMT
ON
OFF
F
T
W
T
M
S
7
S
SMT
ON
OFF
F
T
W
T
M
S
7
S
SMT
ON
OFF
F
T
W
T
M
S
7
S
SMT
ON
OFF
F
T
W
T
M
S
7
S
SMT
ON
OFF
F
T
W
T
M
S
7
S
SMT
ON
OFF
F
T
W
T
M
S
7
S
SMT
ON
OFF
F
T
W
T
M
S
7
S
SMT
ON
OFF
F
T
W
T
M
S
7
S
SMT
ON
OFF
F
T
W
T
M
S
7
S
SMT
ON
OFF
F
T
W
T
M
S
7
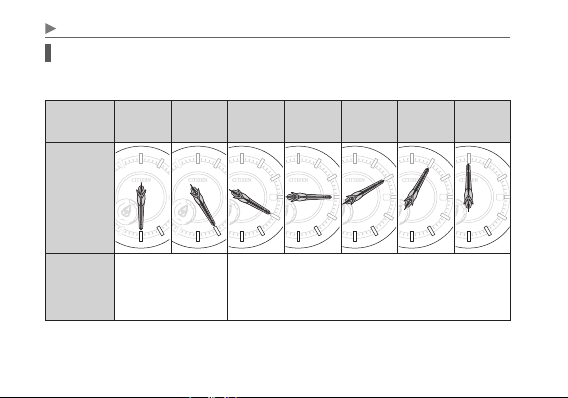
Indication of power generation amount in level
The level of power generation amount means power being generated by the solar
cell represented in 7 levels (0 - 6).
Level 6 5 4 3 2 1 0
Level scale
of power
generation
amount
S
F
T
SMT
ON
S
F
SMT
OFF
OFF
7
7
7
7
7
Sufficient power
generation for
Meaning
charging.
22
Charge in a brighter location where the level of power
generation amount reaches “5” or “6”.

Chargi ng your watch
CAUTION
• The level of power generation amount indicated is that of the moment you
engage this function. The level indication does not reflect any change in power
generation after engaging this function.
• The level may vary even under the same brightness due to the entry angle
of light to the dial of the watch or other elements. The level may also vary
depending on difference of models.
• The indication level “6” of power generation amount corresponds to generation
in cloudy outdoors (about 10 000 lx illuminance) or a brighter location.
• Use the level of power generation shown as general reference only.
23
Setting the world time
S
F
T
7
+14
+8
+7
BJS
BKK
This watch can indicate the time around the world according to which of 40 time
zones (offsets from UTC—Coordinated Universal Time) is chosen.
1
Pull the crown out to position .
The second hand indicates the current time zone and
the function hand indicates the daylight saving time
setting (page 30).
2
Rotate the crown to choose a time zone.
Time indication changes.
• See also “How to read indication of the world time
setting” on page 25 and “Table of time zones and
SMT
OFF
+9.5
+13
TBU
24
ADL
+10
SYD
+11
+12
NOU
AKL
representative areas” on page 26 for time zone
setting.
+9
TYO
3
Push the crown in to position to finish the
procedure.
The watch resumes normal operation.
 Loading...