

Page 1
A Division of Cisco Systems, Inc.
®
1
A Before you begin, make sure
B Connect one end of an Ether-
Connect the Router
that all of your hardware is
powered off, including the
Router, PCs, hubs, switches,
and cable or DSL modem.
net network cable to one of
the numbered ports on the
front of the Router. Connect
the other end to an Ethernet
port on a network device, e.g.,
a PC, print server, hub, or
switch.
Repeat this step to connect
more PCs or other network
devices to the Router.
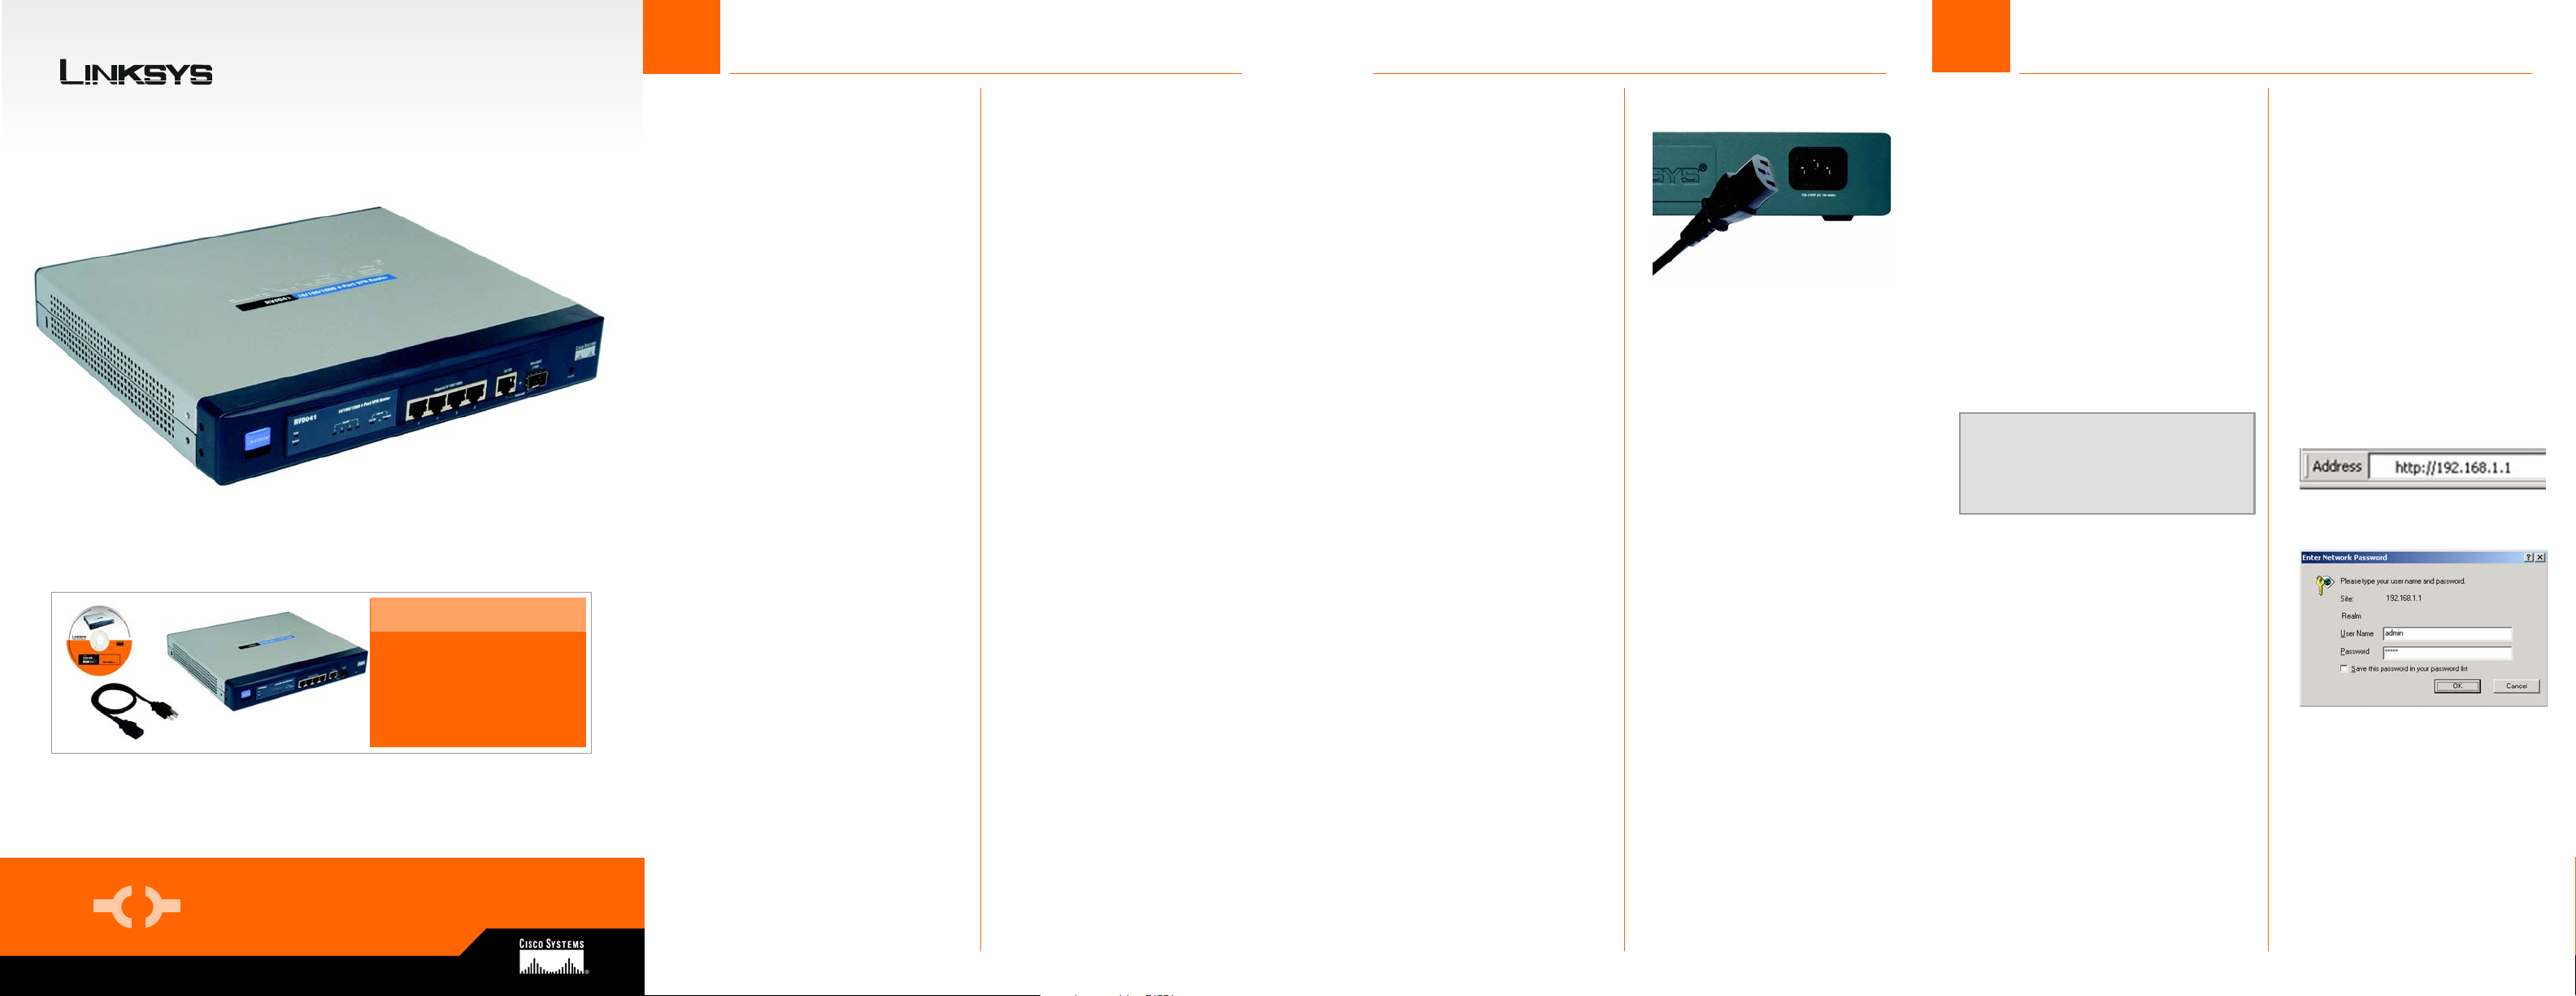
E Connect the included AC
power cable to the Router’s
Power port on the back of the
Router, as shown in Figure E,
and then plug the other end of
the power cable into an electrical outlet.
The System LED on the front
panel will light up as soon as
the power adapter is connected properly.
E
2
In Step 2, you will need the setup
instructions provided by your Internet Service Provider (ISP). If you do
not have this information, then contact your ISP before proceeding.
The instructions from your ISP tell you
how to set up your PC for Internet
access. Because you are now using
the Router to share Internet access
among several computers, you will
use the setup information to configure the Router instead of your PC.
NOTE:: Make sure your PC’s Ethernet
adapter is set to obtain an IP address
automatically. For more information,
refer to Windows Help.
Configure the Router
A
Model No.
Model No.
WIRED
RV0041
Package Contents
• 10/100/1000 4-Port VPN Router
•User Guide CD-ROM
• AC Power Cable
• Rack Mounting Kit
• Quick Installation
• Registration Card
Quick Installation
10/100/1000 4-Port
VPN Router
Quick Installation
C Connect your cable or DSL
modem’s Ethernet cable to
the Router’s Internet port.
D Power on the cable or DSL
modem and the other network
device if using one.
A Open your PC’s web browser.
Enter http://192.168.1.1 (the
Router’s default local IP
address) in the web browser’s
Address field. Then press the
Enter key.
B A screen will appear and ask
you for a User Name and Password. Enter admin (the default)
in the the User Name and Pass-
word fields. Then click the OK
button.
B
Page 2
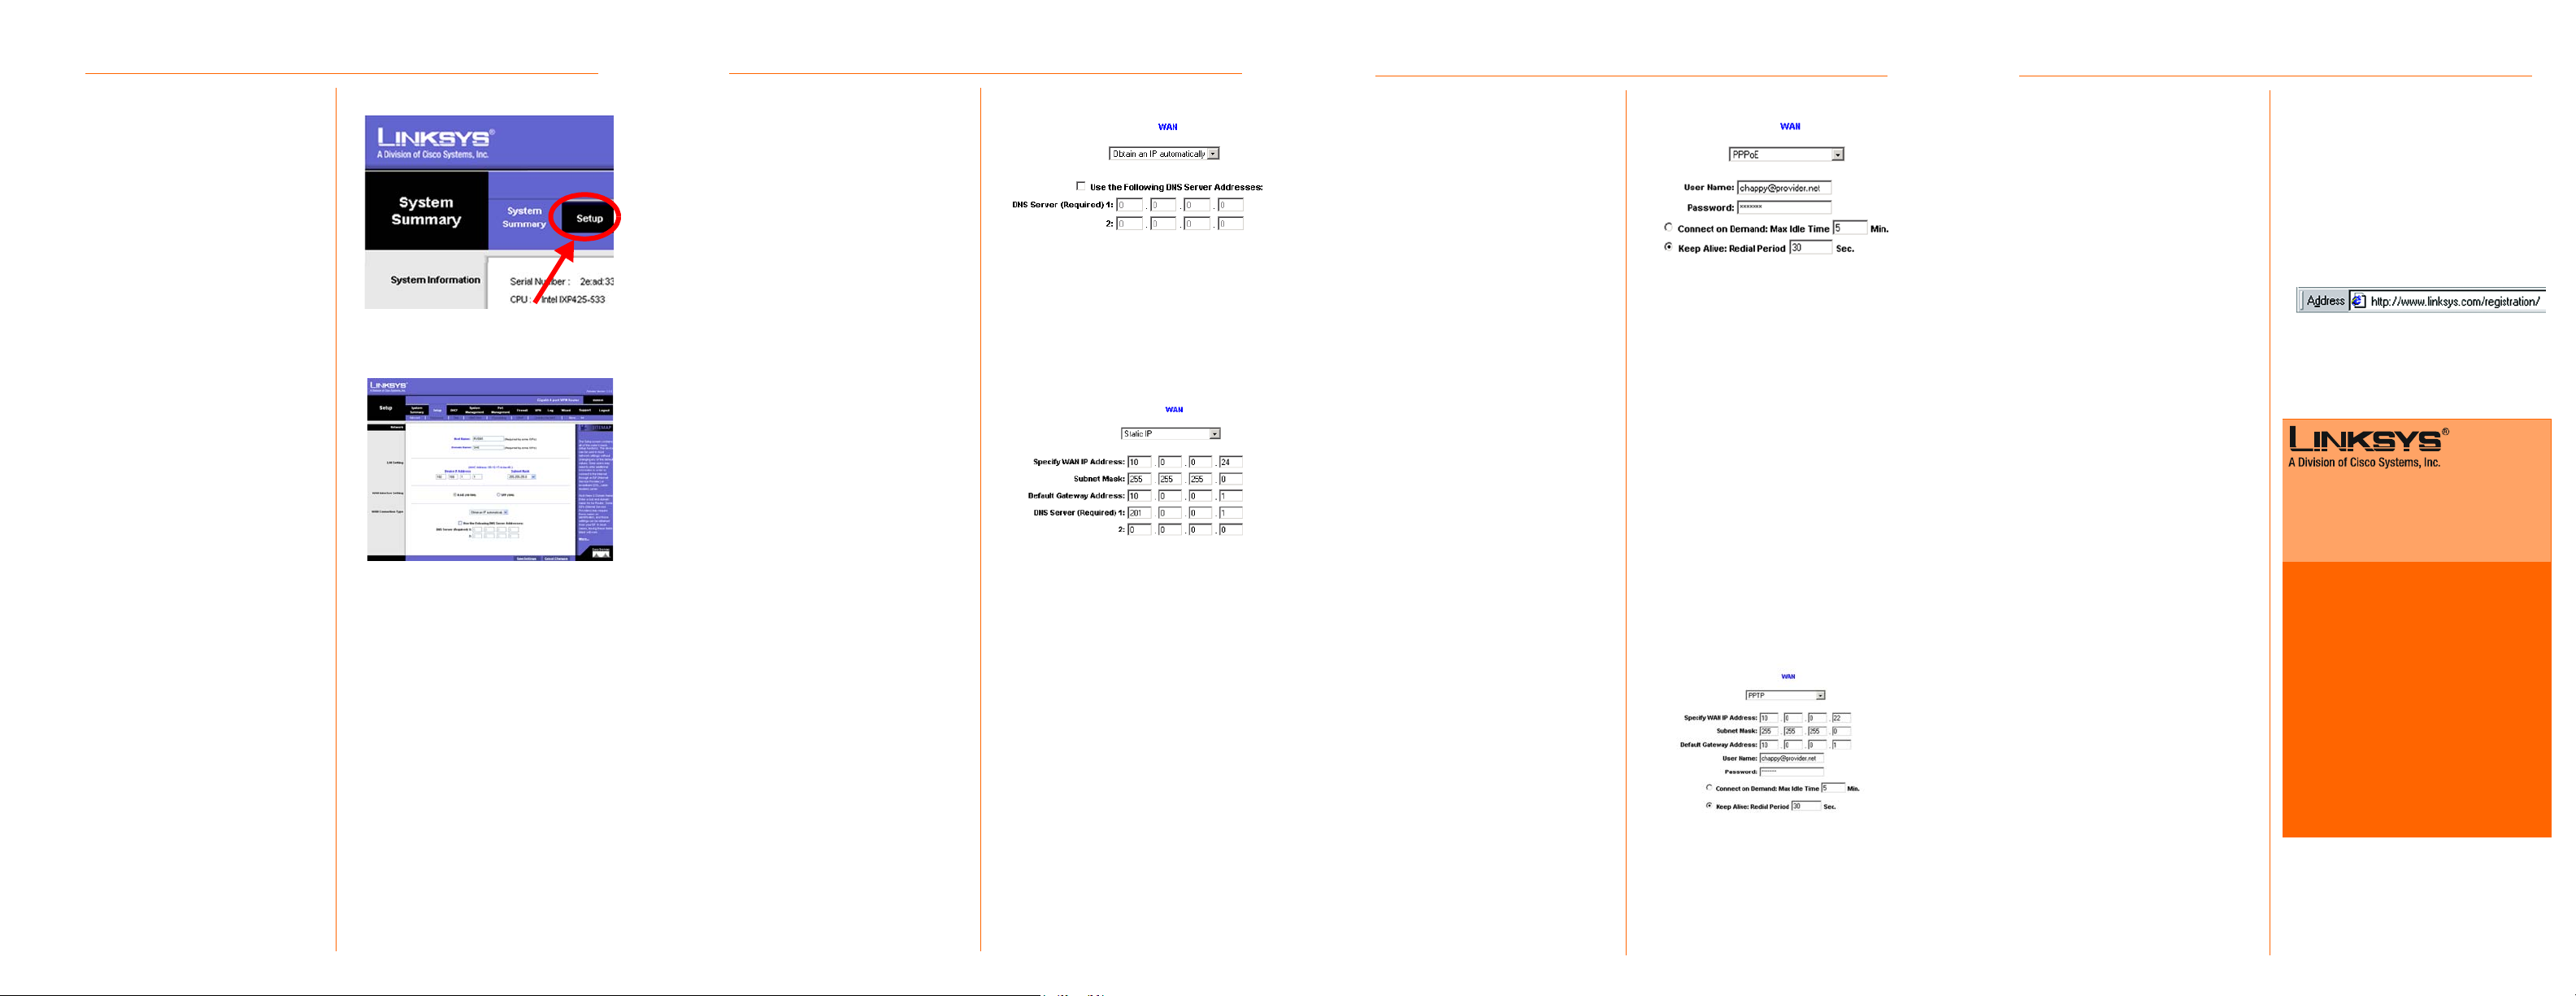
C The Router’s Web-based Utility
will appear with the System
Summary screen showing.
Click on the Setup tab, which is
the next tab over, then continue with the instruction,
below, to complete the Net-
work page.
D Depending on the setup infor-
mation from your ISP, you may
need to provide a host name
and domain name for the
Router. The Host Name and
Domain Name fields are usually left blank. If requested by
your ISP (usually cable ISPs),
complete these two fields.
E Choose the internet interface
you wish to use, the RJ45 or the
SFP. Only one of these ports
can be used at the same time.
F In the drop-down menu for the
WAN Connection Type setting
features four Internet connection types: obtain an IP automatically, Static IP, PPPoE, and
PPTP. Depending on which connection type you select, the
features available on the Net-
work page of the Setup screen
will differ. Proceed to the
instructions for the connection
type you are using.
C
D
1 Obtain an IP Automatically
a If your ISP says that you are
connecting through DHCP or a
dynamic IP address from your
ISP, then select Obtain an IP
automatically as the WAN
Connection Type. If you also
select Use the Following DNS
Server Addresses, enter a specific DNS Server IP Address.
b Click the Save Settings button,
and go to Step G.
2 Static IP
a If your ISP says that you are
connecting through a static or
fixed IP address from your ISP,
then select Static IP as the WAN
Connection Type.
b Enter the WAN IP Address, Sub-
net Mask Default Gateway
Address, and DNS Server provided by your ISP.
c In the DNS Server fields, enter
the DNS address(es) provided
by your ISP. You need to enter
at least one DNS address.
d Click the Save Settings button,
and go to Step G.
Obtain an IP
automatically
Static IP
3PPPoE
a If your ISP says that you are
connecting through PPPoE or if
you normally enter a user
name and password to access
the Internet, then select PPPoE
as the WAN Connection Type.
b Enter the User Name and Pass-
word provided by your ISP.
c If you select Connect on
Demand, the PPPoE connection will be disconnected if it
has been idle for a period
longer than the Max Idle Time
setting.
d If you select Keep Alive, the
Router will keep the connection alive by sending out a few
data packets at the Redial
Period, so your Internet service
thinks that the connection is still
active.
e Click the Save Settings button.
f Go to Step G.
4PPTP
PPTP is a service used in Europe and
Israel only. IF you are using a PPTP
connection, check with your ISP for
the necessary setup information.
When you are finished, go to Step G.
PPPoE
PPTP
G If you haven’t already done so,
click the Save Settings button.
Then, close the web browser.
H Power your cable or DSL
modem off and back on
again.
I Restart or power on your PCs so
they can obtain the Router’s
new settings.
J To test the Router’s settings,
open your web browser from
any computer. In the browser’s
Address field, enter
www.linksys.com/registration
and press the Enter key.
Congratulations! The installation of
the Router is complete.
J
For additional information or troubleshooting
help, refer to the User Guide on the Setup CDROM. You can also call or e-mail for further
support.
24-hour Technical Support
800-326-7114
(toll-free from US or Canada)
E-mail Support
support@linksys.com
Website
http://www.linksys.com or
http://support.linksys.com
RMA (Return Merchandise Authorization)
http://www.linksys.com/support
FTP Site
ftp://ftp.linksys.com
Sales Information
800-546-5797 (800-LINKSYS)
Linksys is a registered trademark or trademark of
Cisco Systems, Inc. and/or its affiliates in the U.S.
and certain other countries. Copyright © 2005
Cisco Systems, Inc. All rights reserved.
Model No.
RV0041-QI-50505 KL
 Loading...