


Network Setup Troubleshooting
Solución de problemas de conguración de red
ENGLISHESPAÑOL
Network Setup Troubleshooting
This manual mainly describes problems you may encounter when setting up a network, and the possible
causes and solutions.
Find a description related to your problem and follow the solution.
If you cannot nd a description for your problem or if you encounter a problem after setup, refer to the on-
screen manual: Basic Guide/Advanced Guide.
Screens are based on Windows 7 Home Premium and Mac OS X v.10.6.x.
Names of functions, etc. may differ from this manual depending on your network device (router, access
•
point, etc.) or application software.
Problems during Network Setup
Easy setup
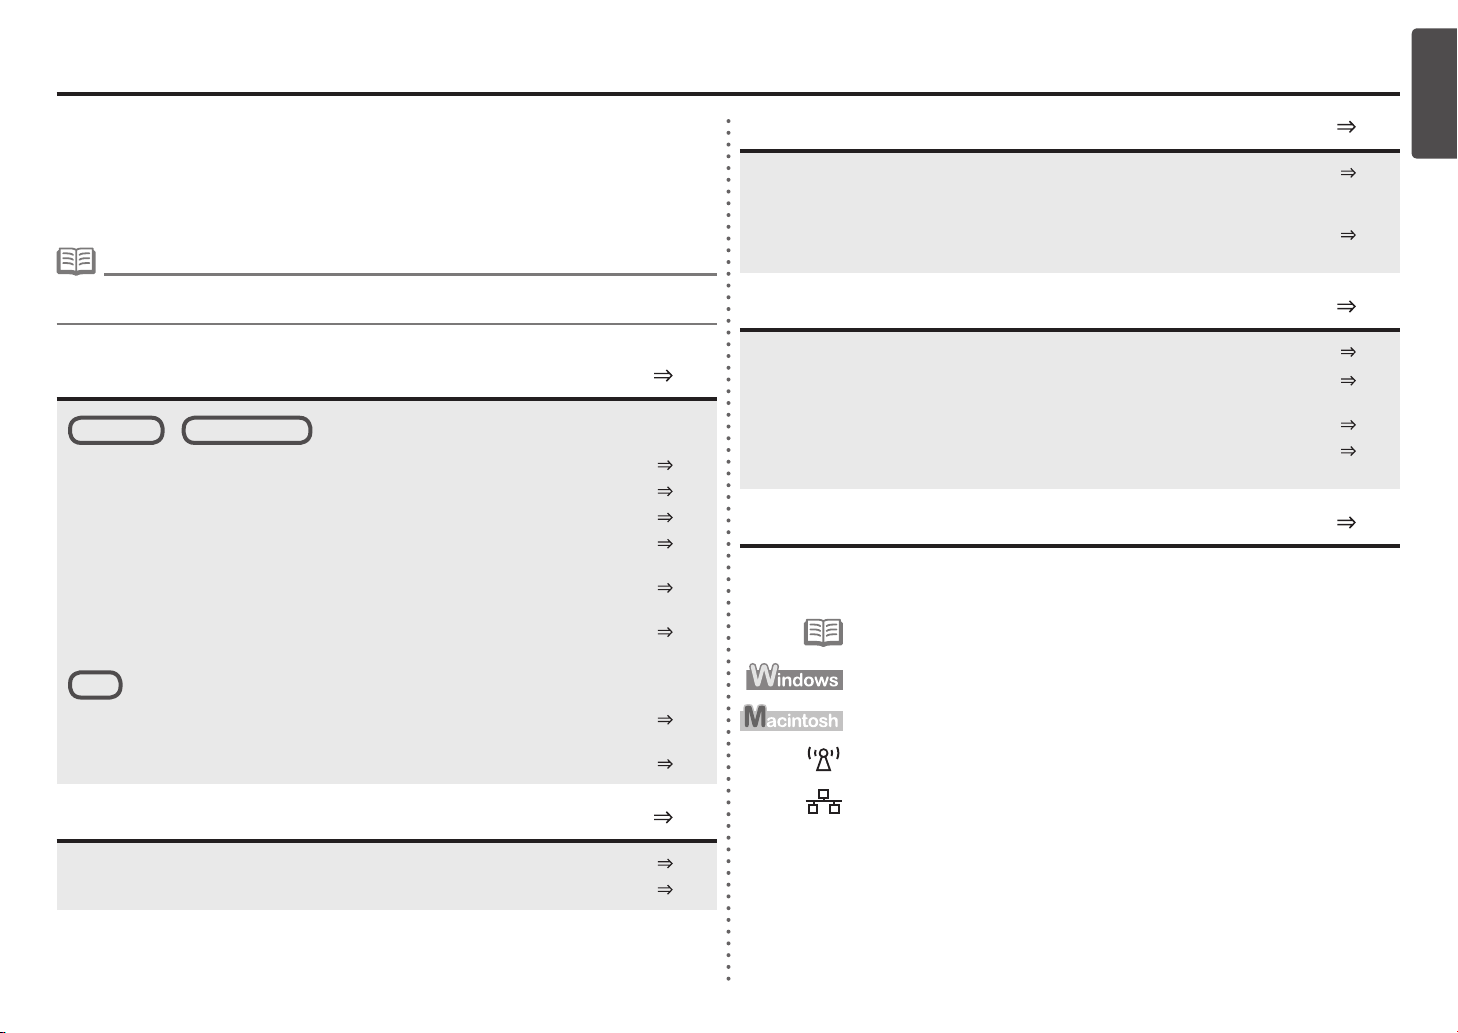
The Target Access Point is Not Displayed (Detected) P.2
Access point was not detected. is Displayed
Failed to connect to the access point. is Displayed
The directly entered access point was not detected. is Displayed
WPS
Cannot connect. Multiple access points are enabled. is Displayed
Advanced setup
P.2
P.3
P.3
P.4Multiple access points with the same name exist. is Displayed
P.5
P.6The device may not be able to connect to the network is Displayed
P.7
Other Troubleshooting Tips
Forgotten or Do Not Know the Access Point Name/Network Name (SSID), Security
Protocol (encryption standard), and Network Key
The Machine is Not Detected after the Network Environment is Changed
Reference Information
Character Entry P.10
Entering the Access Point's Wireless LAN Settings Directly on the Machine P.11
Specifying the Machine's IP Address (IPv4 only) P.13
Restoring the Machine's Default LAN Settings to Perform Setup Again P.14
P.10
P.10
P.10
P.10
Connection Checklist P.15
The following symbols are used in this manual.
Instructions as notes for operation or additional explanations.
Description for Windows users.
Description for Macintosh users.
ENGLISH
Connection failed. is Displayed
Problems during Software Installation
The Machine is Not Displayed (Detected)
P.7
P.7
P.7
P.8Check Printer Settings dialog box is Displayed
Description for wireless connection.
Description for wired connection.
1

Problems during Network Setup
Easy setup
Advanced setup
The Target Access Point is Not Displayed (Detected)
Check
Check 1
Make sure that you follow Check 1, 2, 3 and 4 of
"Connection Checklist" on page 15, then touch the left
FUNCTION button (A) on the machine to search for the
access point again.
Check 2
Turn off the access point, turn it back on, then
touch the left FUNCTION button (A) on the
machine to search for the access point again.
Check 3
Is SSID broadcast (connection via "ANY" SSID, etc.) disabled or is the stealth mode
enabled on the access point?
For details on how to check the settings of the access point, refer to the manual supplied with the
•
access point or contact its manufacturer.
A
Check 4
Is "WPA/WPA2 Enterprise" set as a security protocol (encryption standard) on the
access point?
"WPA/WPA2 Enterprise" is not supported on the machine.
Change the security protocol (encryption standard) for the access point, then congure
settings again.
For details on how to change the security protocol (encryption standard) for the access point,
•
refer to the manual supplied with the access point or contact its manufacturer.
For the procedure to congure settings of the machine, refer to "Wireless Setup Using Easy
•
Setup" in the printed manual: Getting Started.
Glossary
SSID•
An identier to identify the specic access point. Also called an access point name or a network name.
SSID broadcast•
An access point's periodic transmission of a signal revealing its SSID.
Stealth mode•
A function to prevent the SSID of the access point from appearing on other wireless devices.
MAC address•
A unique number assigned to each network device.
MAC address ltering•
A function to block access from unauthorized wireless devices by saving the MAC addresses of specic
wireless devices (computers, printers, etc.) to the access point beforehand.
Enable SSID broadcast (connection via "ANY" SSID, etc.) or disable the stealth mode,
then touch the left FUNCTION button (A) on the machine to search for the access point
again.
For details on how to change the settings of the access point, refer to the manual supplied with
•
the access point or contact its manufacturer.
To establish a connection without changing the access point settings, refer to "Entering
the Access Point's Wireless LAN Settings Directly on the Machine" on page 11.
2
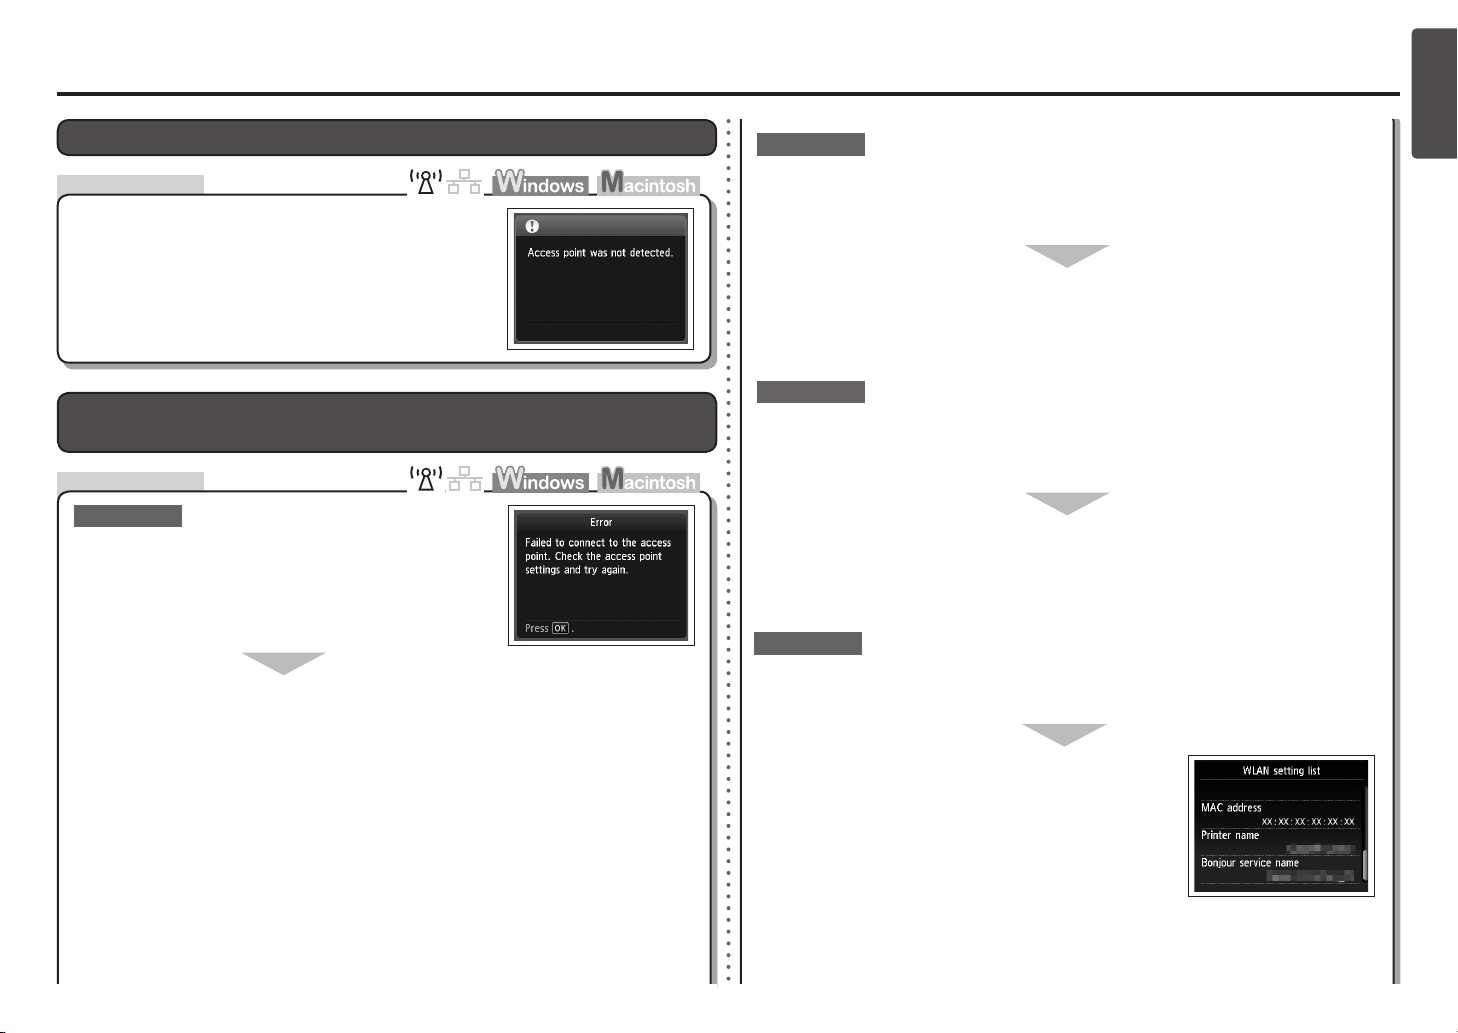
Access point was not detected. is Displayed
Check
The message appears when no access point is found.
Refer to "The Target Access Point is Not Displayed
(Detected)" on page 2.
Failed to connect to the access point. is Displayed
Check
Check 2
Make sure that the DHCP function of the access point is active.
For details on how to check the settings of the access point, refer to the manual supplied with the
•
access point or contact its manufacturer.
Enable the DHCP function of the access point, then congure settings again.
For details on how to change the settings of the access point, refer to the manual supplied with
•
the access point or contact its manufacturer.
Check 3
Are you using an access point that automatically creates WEP keys?
For details on the access point, refer to the manual supplied with the access point or contact its
•
manufacturer.
ENGLISH
Check 1
Is WEP key number 2, 3 or 4 of the access point in use?
For details on how to check the WEP key number of the access
•
point, refer to the manual supplied with the access point or
contact its manufacturer.
Set to use WEP key number 1 of the access point, or select a WEP key number by
entering wireless connection settings of the machine directly.
For details on how to change the WEP key number of the access point, refer to the manual
•
supplied with the access point or contact its manufacturer.
For details on how to select a WEP key number by entering wireless connection settings of the
•
machine directly, refer to "Entering the Access Point's Wireless LAN Settings Directly on the
Machine" on page 11.
Check the WEP key (hexadecimal) created automatically on the access point, then
enter it on the machine.
For details on how to check the WEP key of the access point, refer to the manual supplied with
•
the access point or contact its manufacturer.
Check 4
Is the MAC address ltering enabled on the access point?
For details on how to check the settings of the access point, refer to the manual supplied with the
•
access point or contact its manufacturer.
Set the access point to accept the MAC address of the
machine.
For details on how to change the settings of the access point,
•
refer to the manual supplied with the access point or contact its
manufacturer.
To check the MAC address of the machine, use the { or }
•
button to display Setup on the HOME screen and touch the
right FUNCTION button, then using the { } [ ] and OK
buttons, select Device settings > LAN settings > Conrm LAN
settings > WLAN setting list to check MAC address.
3
Check 5
Is TKIP set as an encryption standard when the access point is congured to
communicate using IEEE802.11n standard only?
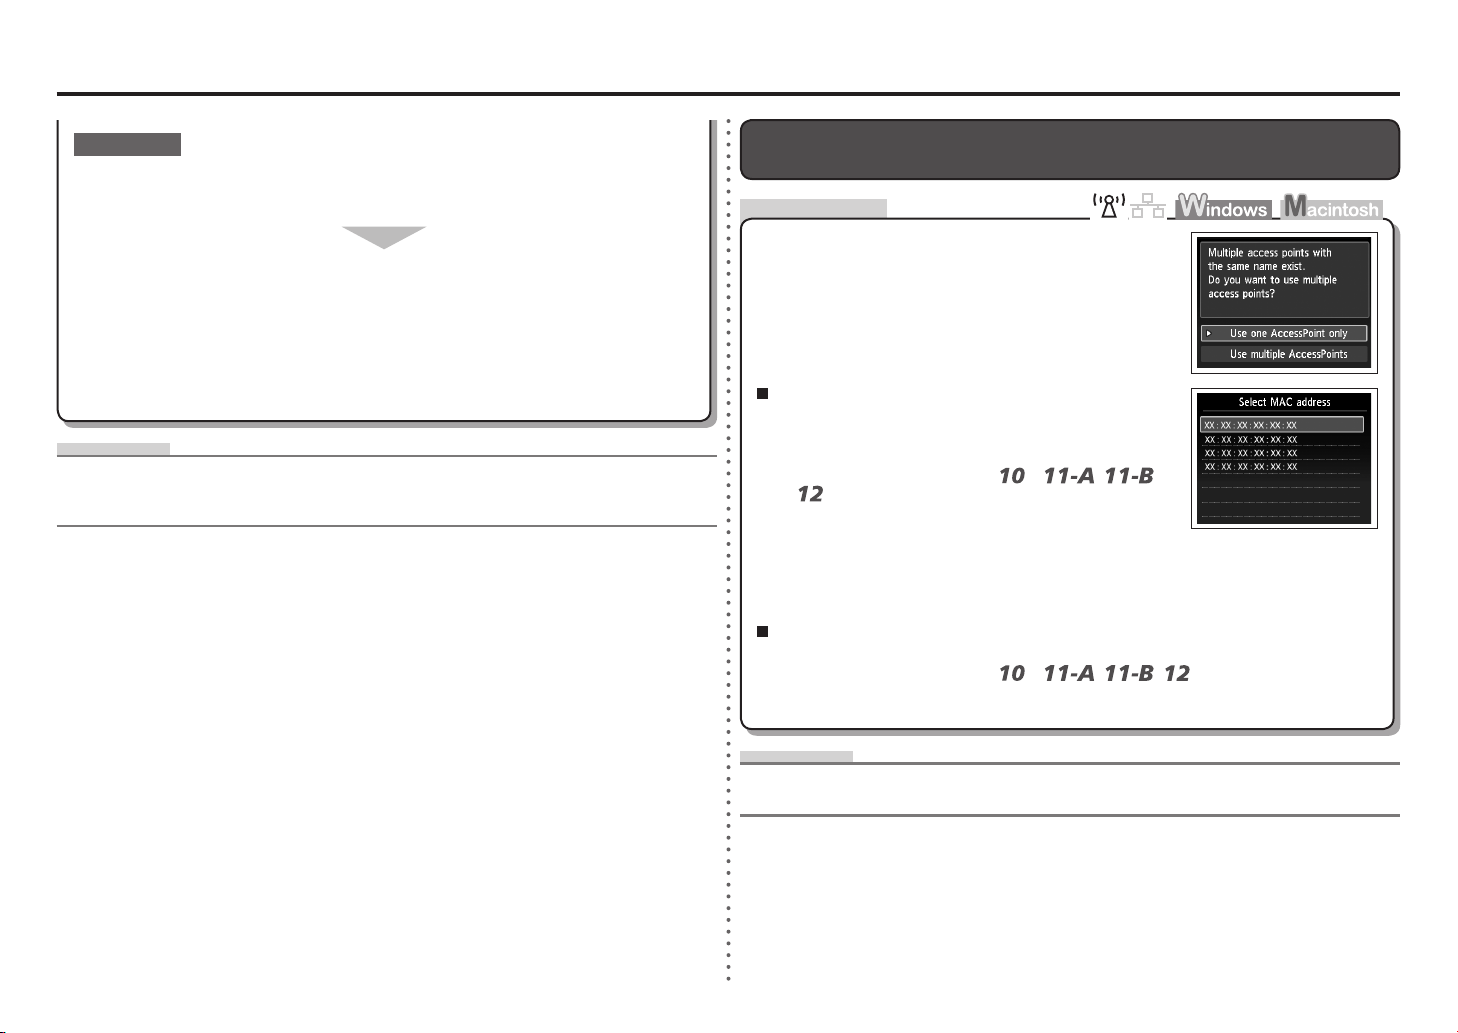
Multiple access points with the same name exist. is Displayed
Check
If the encryption standard of the access point is set to TKIP, IEEE802.11n cannot be
used as a communication standard.
Set the encryption standard to other than TKIP or set the communication standard to
other than IEEE802.11n, then congure wireless LAN settings again.
For details on how to change the settings of the access point, refer to the manual supplied with
•
the access point or contact its manufacturer.
Glossary
DHCP function•
A function to automatically assign required information (IP address, etc.) to computers, printers or other
devices connected to the network.
The message appears when multiple access points with
the same name are found.
When you have only one access point
Select Use one AccessPoint only, then select the MAC
address of the target access point.
For subsequent operations, go to
•
in "Entering the Access Point's Wireless LAN Settings
/
Directly on the Machine" on page 11.
For details on how to check the MAC address of the access
•
point, refer to the manual supplied with the access point or
contact its manufacturer.
When using multiple access points
or
/
Select Use multiple AccessPoints.
•
For subsequent operations, go to
Point's Wireless LAN Settings Directly on the Machine" on page 11.
Glossary
MAC address•
A unique number assigned to each network device.
or
/
/ in "Entering the Access
4
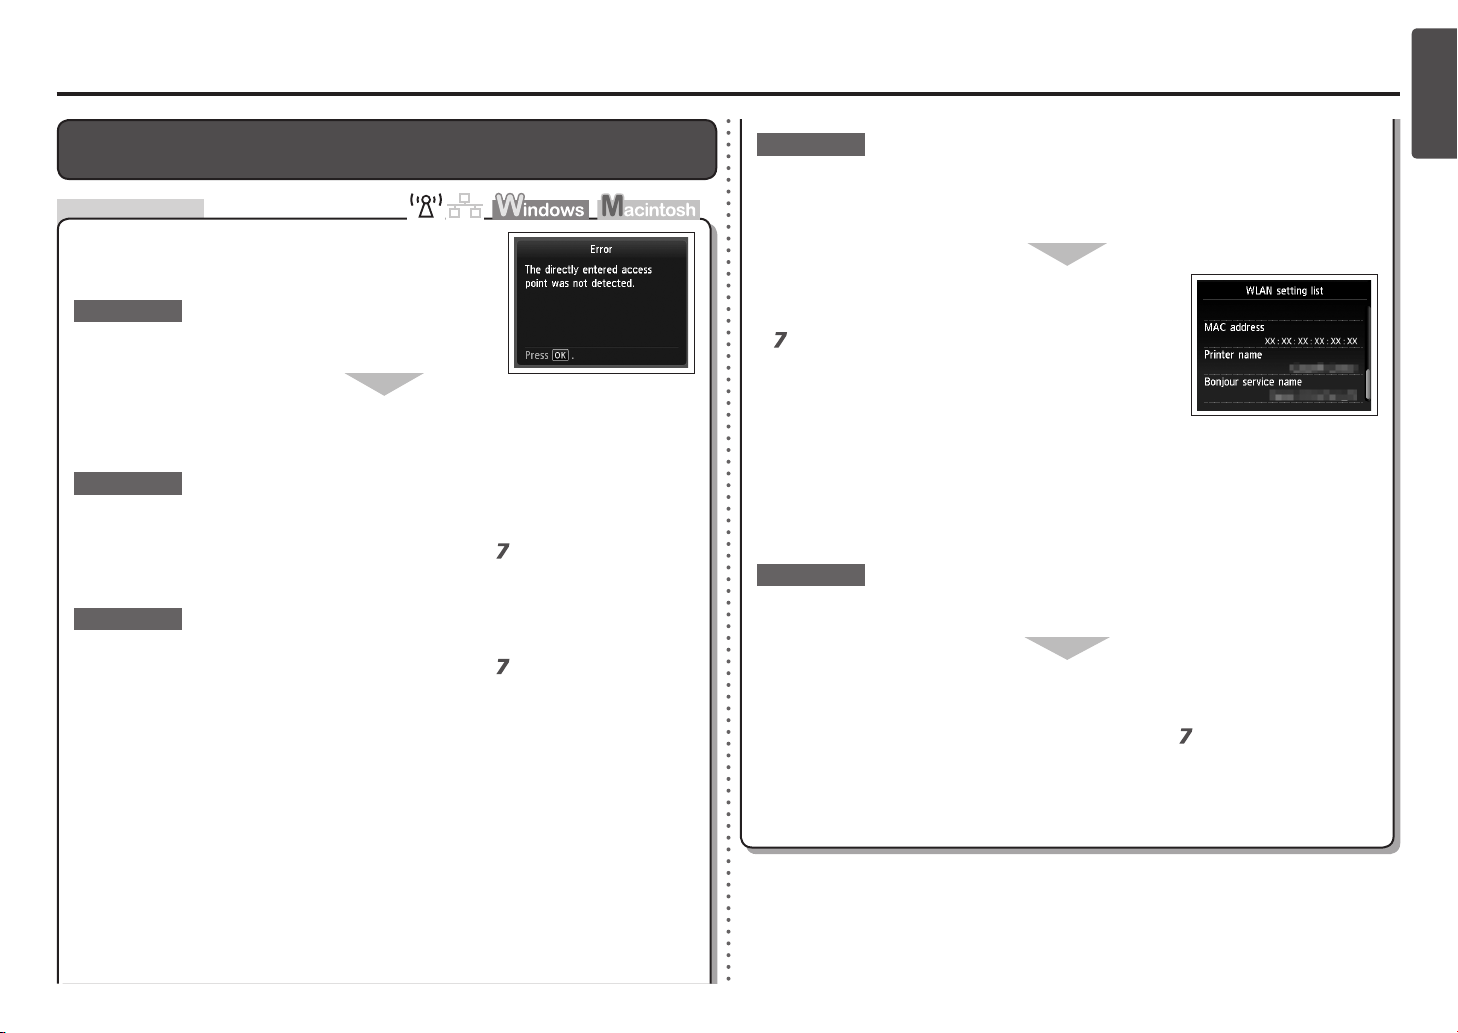
The directly entered access point was not detected. is Displayed
Check
The message appears when no access point is found by
the entered access point name/network name (SSID).
Check 1
Is the entered access point name/network name (SSID)
correct?
Touch the OK button to make sure that the entered access point name/network name
(SSID) is correct, then touch the OK button again.
Check 2
Make sure that you follow Check 1, 2, 3 and 4 of "Connection Checklist" on page 15.
After that, touch the OK button, then proceed with the setup from in "Entering the Access
•
Point's Wireless LAN Settings Directly on the Machine" on page 11.
Check 3
Turn off the access point, then turn it back on.
After that, touch the OK button, then proceed with the setup from in "Entering the Access
•
Point's Wireless LAN Settings Directly on the Machine" on page 11.
Check 4
Is the MAC address ltering enabled on the access point?
For details on how to check the settings of the access point, refer to the manual supplied with the
•
access point or contact its manufacturer.
Set the access point to accept the MAC address of the
machine.
•
After that, touch the OK button, then proceed with the setup from
in "Entering the Access Point's Wireless LAN Settings Directly
on the Machine" on page 11.
For details on how to change the settings of the access point,
•
refer to the manual supplied with the access point or contact its
manufacturer.
To check the MAC address of the machine, use the { or } button to display Setup on the
•
HOME screen and touch the right FUNCTION button, then using the { } [ ] and OK
buttons, select Device settings > LAN settings > Conrm LAN settings > WLAN setting list
to check MAC address.
Check 5
Is "WPA/WPA2 Enterprise" set as a security protocol (encryption standard) on the
access point?
"WPA/WPA2 Enterprise" is not supported on the machine.
Change the security protocol (encryption standard) for the access point, then congure
settings again.
After that, touch the OK button, then proceed with the setup from
•
Point's Wireless LAN Settings Directly on the Machine" on page 11.
in "Entering the Access
ENGLISH
For details on how to change the security protocol (encryption standard) for the access point,
•
refer to the manual supplied with the access point or contact its manufacturer.
5
Glossary
SSID•
An identier to identify the specic access point. Also called an access point name or a network name.
MAC address•
A unique number assigned to each network device.
MAC address ltering•
A function to block access from unauthorized wireless devices by saving the MAC addresses of specic
wireless devices (computers, printers, etc.) to the access point beforehand.
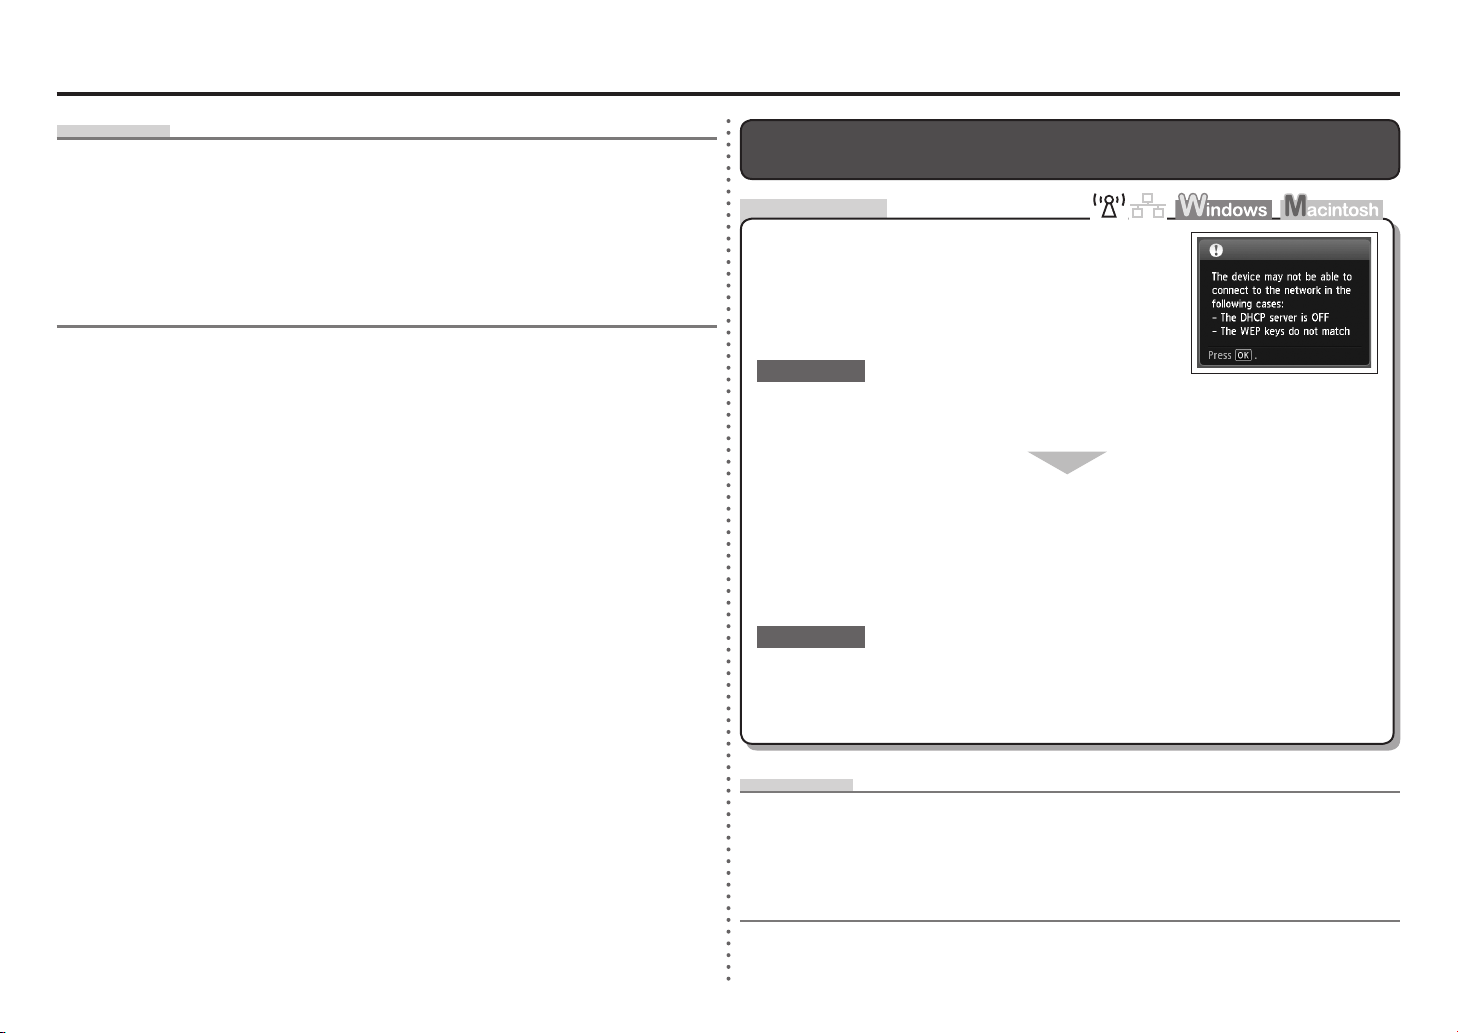
The device may not be able to connect to the network is Displayed
Check
The message appears when an IP address was not
obtained automatically after selecting "WEP" as the
security protocol for the access point due to inactive DHCP
function or incorrect network key.
Check 1
Make sure that the DHCP function of the access point is active.
For details on how to check the settings of the access point, refer to the manual supplied with the
•
access point or contact its manufacturer.
Enable the DHCP function of the access point or specify the IP address of the machine.
For details on how to change the settings of the access point, refer to the manual supplied with
•
the access point or contact its manufacturer.
For details on how to specify the IP address of the machine, refer to "Specifying the Machine's IP
•
Address (IPv4 only)" on page 13.
Check 2
If the DHCP function is active, the network key needs to be entered again. Perform
setup again by following the procedures in "Entering the Access Point's Wireless LAN
Settings Directly on the Machine" on page 11.
Glossary
IP address•
A numerical identication assigned to each computer or network device connected to a network.
DHCP function•
A function to automatically assign required information (IP address, etc.) to computers, printers or other
devices connected to the network.
6
WPS
Problems during Software Installation
ENGLISH
The Machine is Not Displayed (Detected)
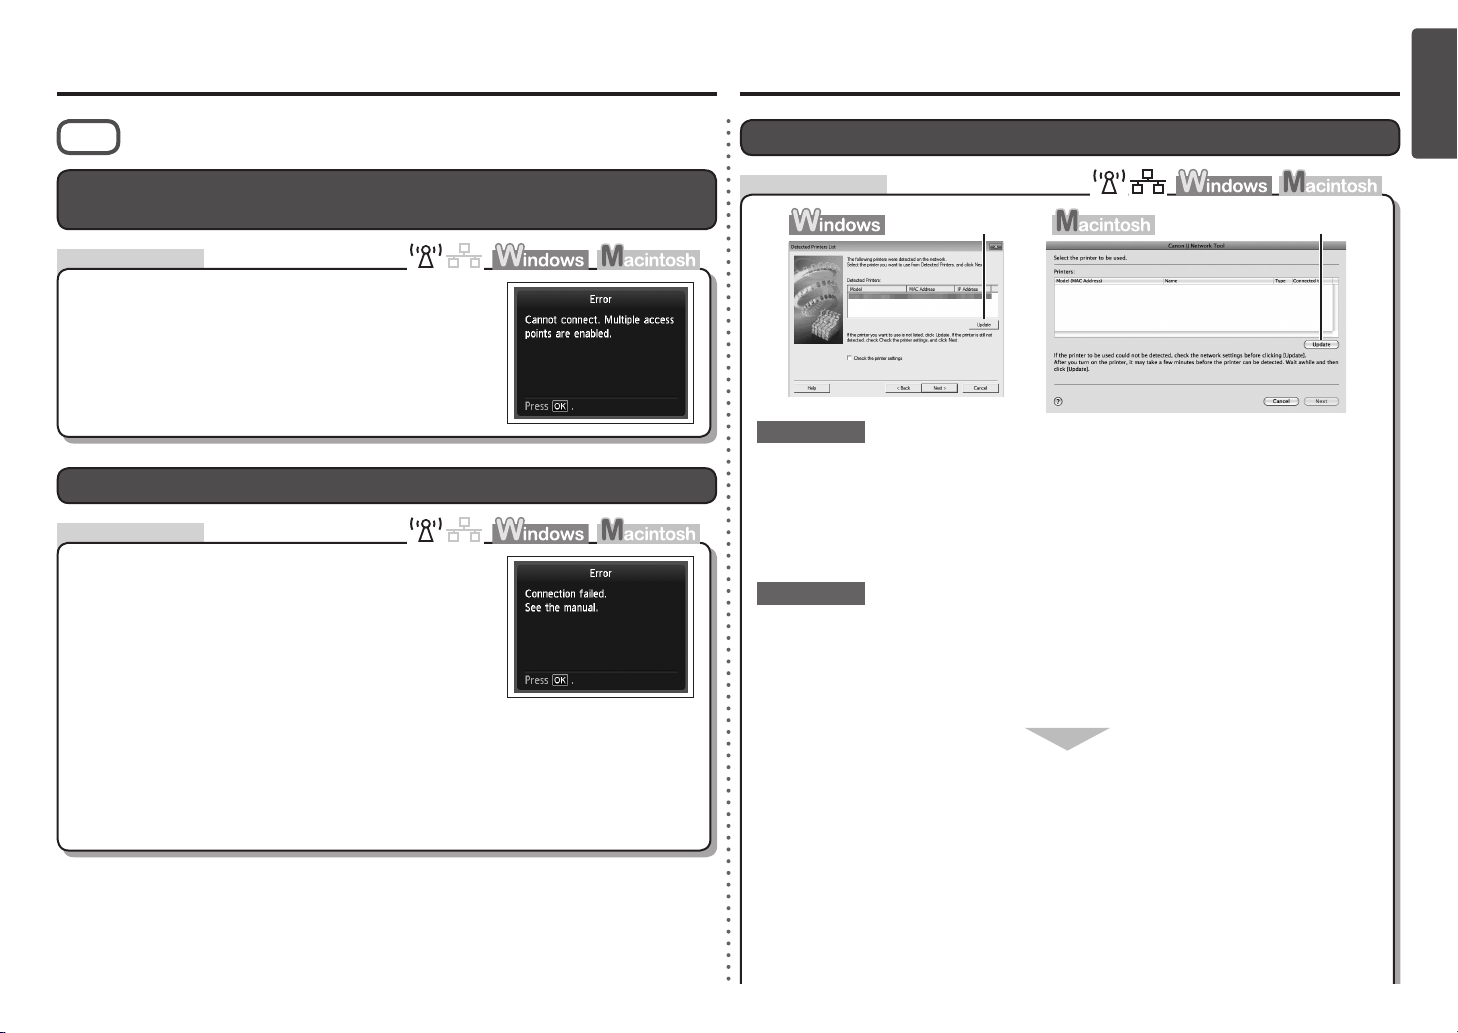
Cannot connect. Multiple access points are enabled. is Displayed
Action
The message appears when multiple access points are
detected.
Wait for a while, then congure the settings again.
Connection failed. is Displayed
Check
The message appears when an error occurs.
Check the access point settings, then congure WPS
settings again.
For details on how to check the settings of the access point,
•
refer to the manual supplied with the access point or contact its
manufacturer.
For the procedure to congure WPS settings of the machine,
•
refer to "Wireless Setup Using WPS (Wi-Fi Protected Setup)" in
the printed manual: Getting Started.
When using an access point that does not support WPS, congure settings manually. For the
•
procedure to congure settings of the machine manually, refer to "Wireless Setup Using Easy
Setup" in the printed manual: Getting Started.
Check
AA
Check 1
For a wireless connection, make sure that you follow Check 1, 2, 3, 4, 5 and 8 of
"Connection Checklist" on page 15, then click Update (A).
For a wired connection, make sure that you follow Check 1, 2, 6, 7 and 8 of
"Connection Checklist" on page 15, then click Update (A).
Check 2
Is the machine connected to a network?
To conrm the connection status, use the { or } button to display Setup on the HOME screen
•
and touch the right FUNCTION button, then using the { } [ ] and OK buttons, select
Device settings > LAN settings > Conrm LAN settings > WLAN setting list or LAN setting
list. Make sure that Connection is set to Active.
If the machine is not connected to a network, perform setup again by following the
procedures in "Wireless Setup" and onward or "Wired Setup" and onward in the printed
manual: Getting Started.
7
Check 3
Is the IP ltering feature enabled on the network device (router, access point, etc.)?
For details on how to check settings of the network device, refer to the manual supplied with the
•
network device or contact its manufacturer.
Set the network device to accept the IP address of the machine.
For details on how to change settings of the network device, refer to the manual supplied with the
•
network device or contact its manufacturer.
To check the IP address of the machine, use the { or } button to display Setup on the HOME
•
screen and touch the right FUNCTION button, then using the { } [ ] and OK buttons, select
Device settings > LAN settings > Conrm LAN settings > WLAN setting list or LAN setting
list to check IP address.
Check 4
When obtaining an IP address automatically, make sure that the DHCP function of the
network device (router, access point, etc.) is active.
For details on how to check settings of the network device, refer to the manual supplied with the
•
network device or contact its manufacturer.
Activate the DHCP function of the network device, then click Update (A).
For details on how to change settings of the network device, refer to the manual supplied with the
•
network device or contact its manufacturer.
Glossary
IP address•
A numerical identication assigned to each computer or network device connected to a network.
IP address ltering•
A function to allow or restrict access from network devices with specied IP addresses.
DHCP function•
A function to automatically assign required information (IP address, etc.) to computers, printers or other
devices connected to the network.
Privacy separator feature•
A function to prevent communication between multiple wireless devices (such as computers and
printers) connected to an access point.
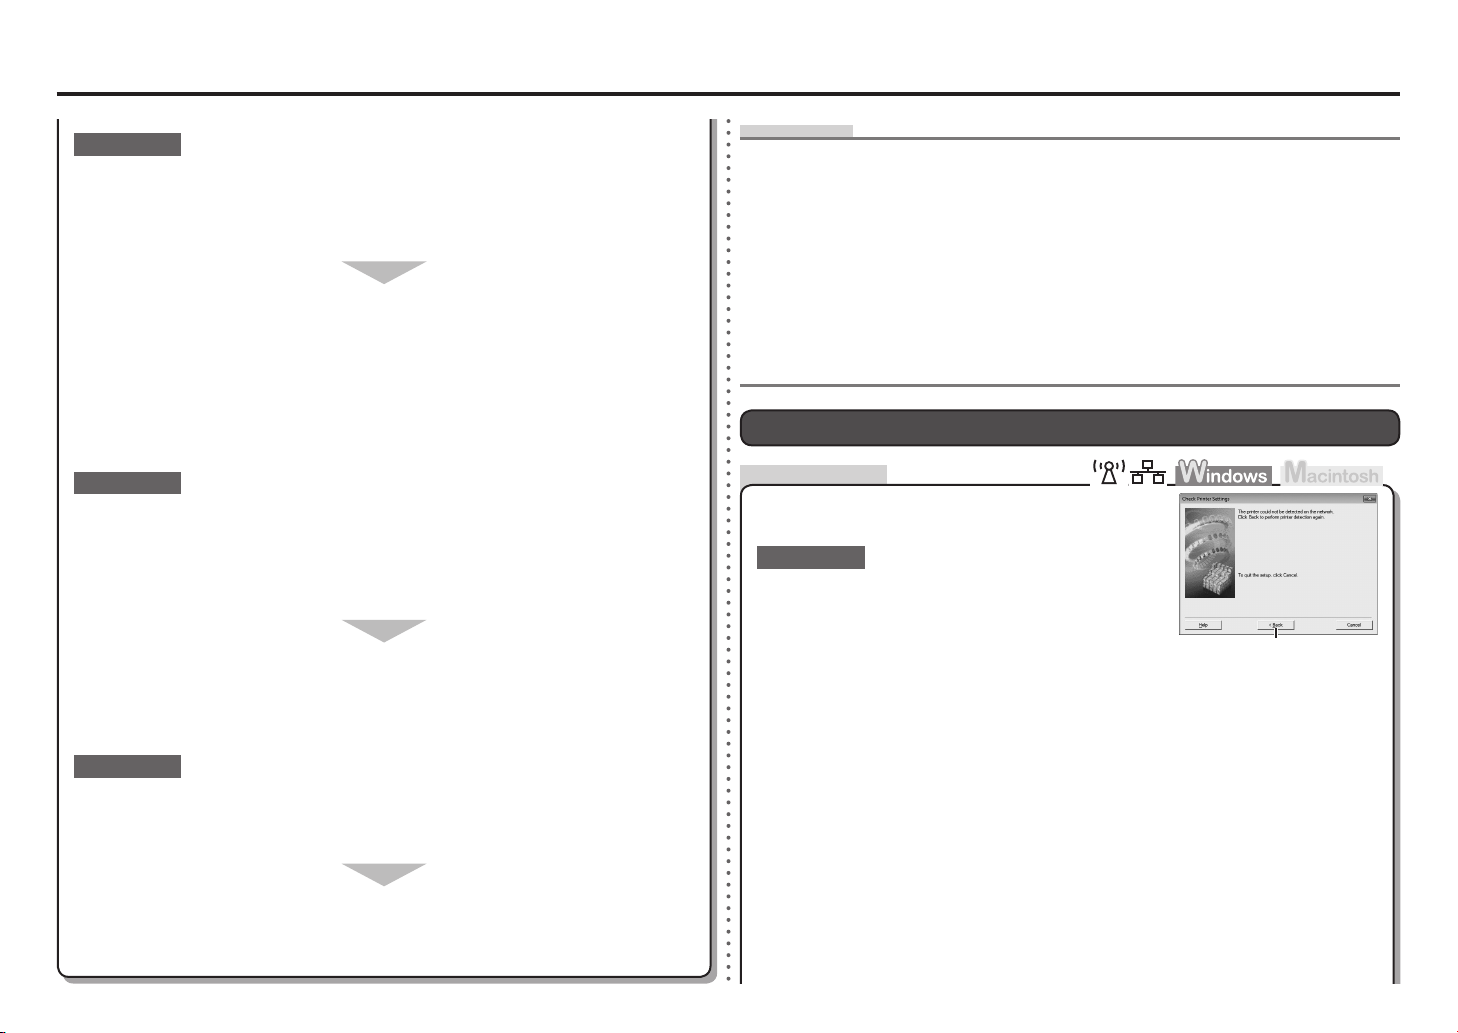
Check Printer Settings dialog box is Displayed
Check
The message appears when the machine cannot be
detected.
Check 1
For a wireless connection, make sure that you follow
Check 1, 2, 3, 4, 5 and 8 of "Connection Checklist" on
page 15, then click Back (A).
A
For a wired connection, make sure that you follow Check 1, 2, 6, 7 and 8 of
"Connection Checklist" on page 15, then click Back (A).
Proceed with the setup.
Check 5
(* Wireless connection only)
Is the privacy separator feature enabled on the access point?
For details on how to check the settings of the access point, refer to the manual supplied with the
•
access point or contact its manufacturer.
Disable the privacy separator feature.
For details on how to change the settings of the access point, refer to the manual supplied with
•
the access point or contact its manufacturer.
8
Check 2
Is the machine connected to a network?
To conrm the connection status, use the { or } button to display Setup on the HOME screen
•
and touch the right FUNCTION button, then using the { } [ ] and OK buttons, select
Device settings > LAN settings > Conrm LAN settings > WLAN setting list or LAN setting
list. Make sure that Connection is set to Active.
Check 4
When obtaining an IP address automatically, make sure that the DHCP function of the
network device (router, access point, etc.) is active.
For details on how to check settings of the network device, refer to the manual supplied with the
•
network device or contact its manufacturer.
ENGLISH
If the machine is not connected to a network, perform setup again by following the
procedures in "Wireless Setup" and onward or "Wired Setup" and onward in the printed
manual: Getting Started.
Check 3
Is the IP ltering feature enabled on the network device (router, access point, etc.)?
For details on how to check settings of the network device, refer to the manual supplied with the
•
network device or contact its manufacturer.
Set the network device to accept the IP address of the machine.
For details on how to change settings of the network device, refer to the manual supplied with the
•
network device or contact its manufacturer.
To check the IP address of the machine, use the { or } button to display Setup on the HOME
•
screen and touch the right FUNCTION button, then using the { } [ ] and OK buttons, select
Device settings > LAN settings > Conrm LAN settings > WLAN setting list or LAN setting
list to check IP address.
Activate the DHCP function of the network device, then click Back (A).
For details on how to change settings of the network device, refer to the manual supplied with the
•
network device or contact its manufacturer.
Check 5
(* Wireless connection only)
Is the privacy separator feature enabled on the access point?
For details on how to check the settings of the access point, refer to the manual supplied with the
•
access point or contact its manufacturer.
Disable the privacy separator feature.
For details on how to change the settings of the access point, refer to the manual supplied with
•
the access point or contact its manufacturer.
Glossary
IP address•
A numerical identication assigned to each computer or network device connected to a network.
IP address ltering•
A function to allow or restrict access from network devices with specied IP addresses.
DHCP function•
A function to automatically assign required information (IP address, etc.) to computers, printers or other
devices connected to the network.
Privacy separator feature•
A function to prevent communication between multiple wireless devices (such as computers and
printers) connected to an access point.
9
Other Troubleshooting Tips
Reference Information
Forgotten or Do Not Know the Access Point Name/Network Name
(SSID), Security Protocol (encryption standard), and Network Key
Check
Check the access point settings.
For details on how to check the settings of the access point, refer to the manual supplied with the
•
access point or contact its manufacturer.
The Machine is Not Detected after the Network Environment is
Changed
Check
Wait until the IP address is assigned to the computer. You may need to restart your
computer.
Search for the machine again after conrming a valid IP address is assigned to the computer.•
Glossary
IP address•
A numerical identication assigned to each computer or network device connected to a network.
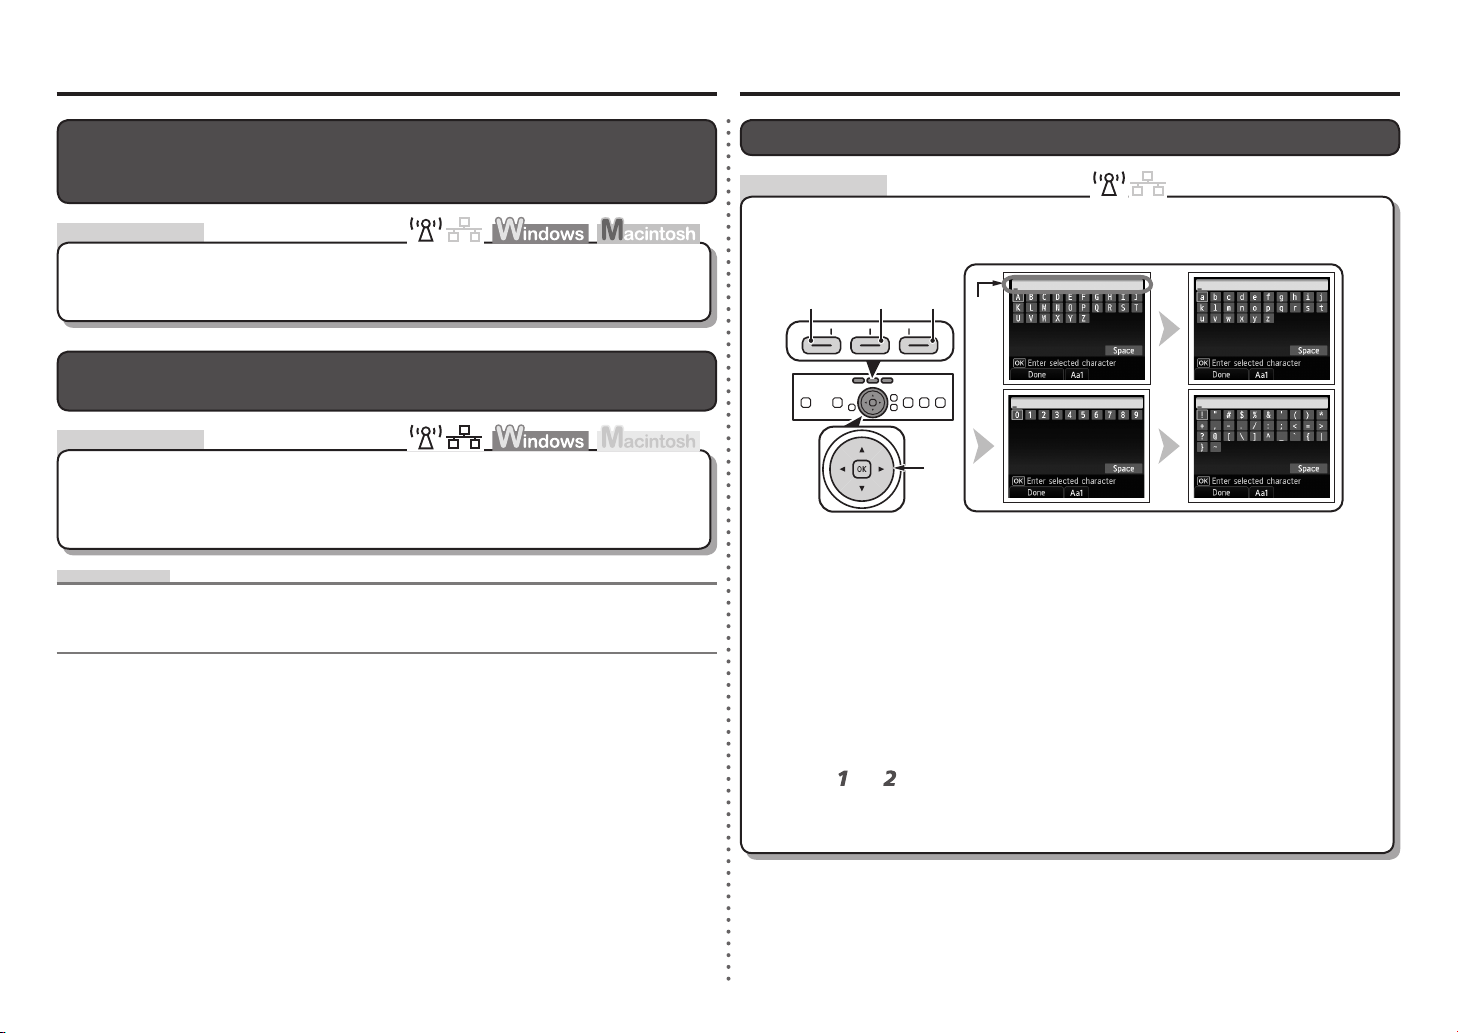
Character Entry
Action
This machine allows you to enter characters when an on-screen keyboard is displayed.
Follow the procedure below.
D E
When an on-screen keyboard shown above is displayed, touch the center
1
FUNCTION button (A) to switch to a keyboard having characters you want to use.
Four character sets are available: Upper-case alphabets, lower-case alphabets, numbers,
•
and symbols. Each time you touch the center FUNCTION button, an on-screen keyboard is
switched among them.
Select a character on the on-screen keyboard using the { } [ ] buttons (B),
2
then touch the OK button to enter it.
Entered characters are displayed on the upper section (C) of the on-screen keyboard.•
A
C
B
10
Repeat and to enter more characters.
3
After you enter all characters you need, touch the left FUNCTION button (D).
4
 Loading...