


Canon IXUS 310 HS, ELIPH 500 HS User Manual

CaHOH
_o_S_o,IXUS 310 HS
ELIF_H SO0 HS
Camera User Guide
Make sure you read this guide, including the "Safety
Precautions" section before using the camera.
Reading this guide will help ,. learn to use the camera
properly.
Store this guide use it in the future.
Getting More Out of Your
Camera
This chapter exp,ains how to shoot in TV and AV modes.
107
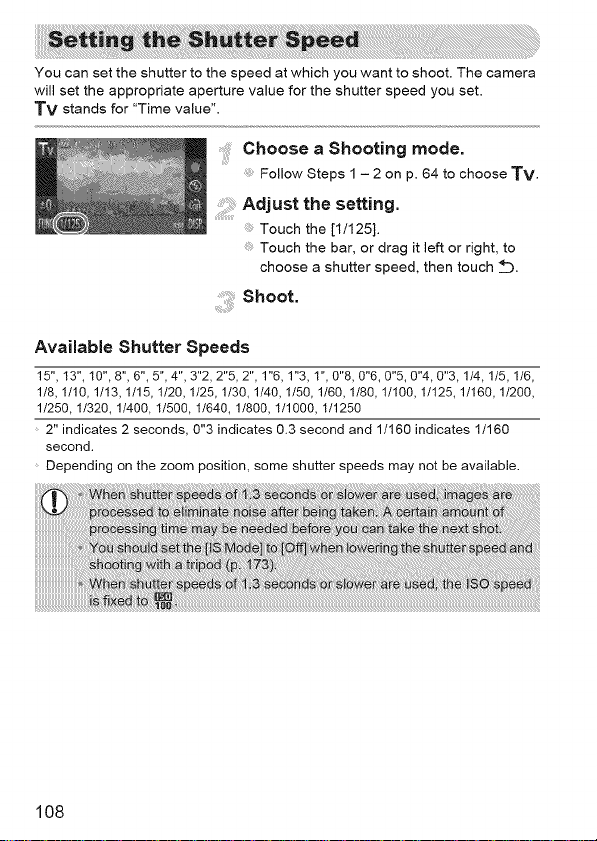
You can set the shutter to the speed at which you want to shoot. The camera
will set the appropriate aperture value for the shutter speed you set.
TV stands for "Time value".
.....Choose a Shooting mode.
Follow Steps 1 - 2 on p. 64 to choose TV.
Adjustthesetting.
Touch the [1/125].
Touch the bar, or drag it left or right, to
choose a shutter speed, then touch _Z).
shoot.
Available Shutter Speeds
15", 13", 10", 8", 6", 5",4",3"2,2"5,2", 1"6, 1"3, 1",0"8, 0"6, 0"5, 0"4, 0"3, 1/4, 1/5, 1/6,
1/8, 1/10, 1/13, 1/15, 1/20, 1/25, 1/30, 1/40, 1/50, 1/60, 1/80, 1/100, 1/125, 1/160, 1/200,
1/250, 1/320, 1/400, 1/500, 1/640, 1/800, 1/1000, 1/1250
2" indicates 2 seconds, 0"3 indicates 0.3 second and 1/160 indicates 1/160
second.
Depending on the zoom position, some shutter speeds may not be available.
108
Settingt.e Ape_t.reValueiiiiiiiiiii
If the aperture value appears in orange when the shutter button is pressed
halfway, the scene has exceeded the correct exposure limits. Adjust the shutter
speed until the aperture value appears in white (Safety shift can also be used
(p. 110)).
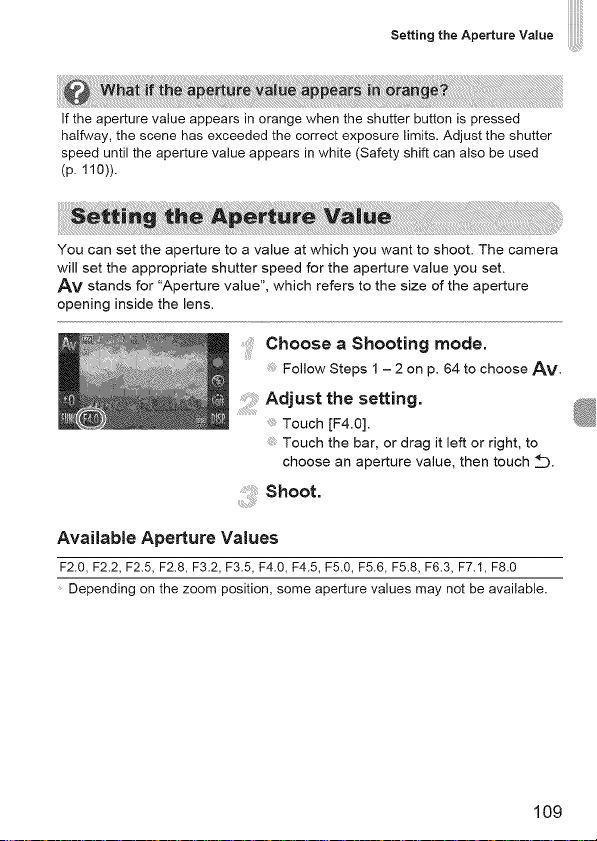
You can set the aperture to a value at which you want to shoot. The camera
will set the appropriate shutter speed for the aperture value you set.
AM stands for "Aperture value", which refers to the size of the aperture
opening inside the lens.
Choose a Shooting mode.
Follow Steps 1 - 2 on p. 64 to choose AM.
Adjustthesetting.
Touch [F4.0].
Touch the bar, or drag it left or right, to
choose an aperture value, then touch _Z).
; shoot.
Available Aperture Values
F2.0, F2.2, F2.5, F2.8, F3.2, F3.5, F4.0, F4.5, F5.0, F5.6, F5.8, F6.3, F7.1, F8.0
Depending on the zoom position, some aperture values may not be available.
iiiiiiiii_
iiiiiiiii_
iiiiiiiii_
iiiiiiiii_
109
Setting theApertureValue
If the shutter speed appears in orange when the shutter button is pressed halfway,
the scene has exceeded the correct exposure limits. Adjust the aperture value
until the shutter speed appears in white. Safety shift can also be used (see below).
In TV and AV, if you touch FUNC. or MENU side to display the 0 tab, and set
[Safety Shift] to [On], the shutter speed or aperture value is automatically adjusted
for the correct exposure when it cannot otherwise be obtained.
Safety Shift is disabled when the flash is enabled.
110
Using Various Functions for
Shooting Movies
This chapter serves as a more advanced version of the "Shooting
Movies" and "Viewing Movies" sections in Chapter 1, and explains how
to use various functions for shooting and viewing movies.
a _ ,,__i!!i:i%::_¸
This chapter assumes that you have set the mode switch to 0.
The latter half of the chapter explaining movie playback and editing
assumes that you have pressed the [] button to enter Playback mode.
111
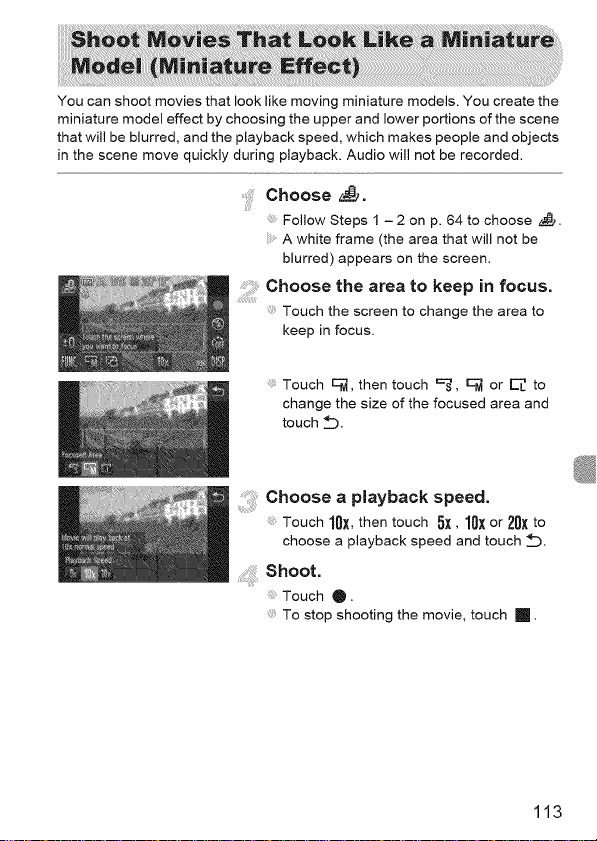
Just as with still images, you can let the camera select the best settings for
the scene or add various effects while shooting movies.
.....Choose a Shooting mode.
Follow Steps 1 - 2 on p. 64 to choose a
Shooting mode.
shoot.
Touch O.
' Depending on the Shooting mode or movie
image quality (p. 116) you choose, black
bars may appear on the sides of the
screen. These areas will not be recorded
when shooting.
To stop shooting the movie, touch Ill.
Miniature Effect p. 113
[] Monochrome p. 74
Super Vivid p. 68
F PosierE eoi p68
,4A Color Accent p. 72
_4} Beach p. 65
_[ Foliage p. 65
"_ Snow p. 66
_!.,_.'_Fireworks p. 66
Other Shooting Modes
You can shoot the following kinds of movies in _m, and _ modes.
_, iFrame Movie software .2 or devices.
Super Slow Shoot fast moving subjects and play them back in slow motion
_- Motion Movie (p. 114).
"1 VideotypeadvocatedbyApple.
*2 YoucanquicklyeditandsaveiFramemovieswithversion6.7.2or laterofZoomBrowserEXor
ImageBrowser.Ifyouareusingan earlierversionofthesoftware,downloadthelatestversionfromthe
Canonhomepage.Youcanchecktheversionof theincludedsoftwareonthetopof the CD-ROM(p.2).
Shoots movies that can be edited with iFrame .1 compatible
Recording pixels are fixed to _ (p. 116).
112
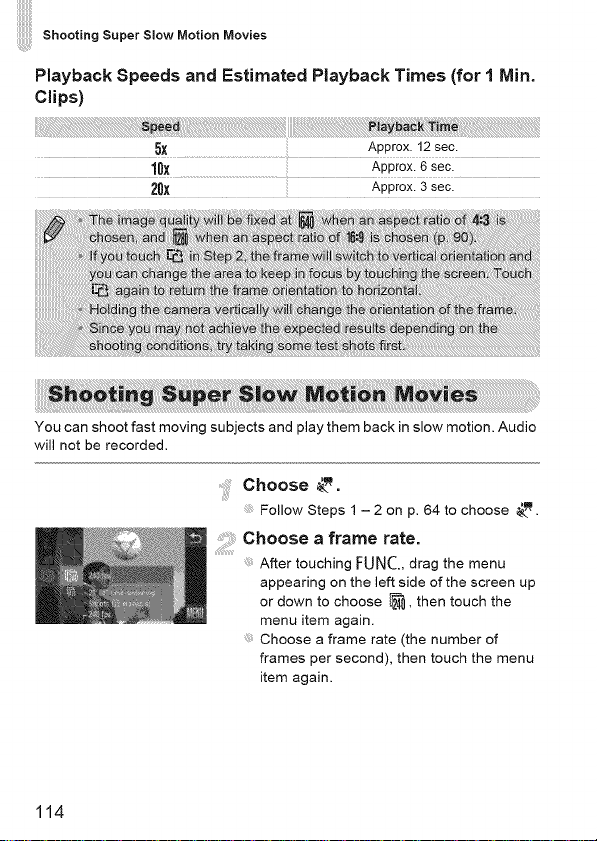
You can shoot movies that look like moving miniature models. You create the
miniature model effect by choosing the upper and lower portions of the scene
that will be blurred, and the playback speed, which makes people and objects
in the scene move quickly during playback. Audio will not be recorded.
Choose _.
Follow Steps 1 - 2 on p. 64 to choose _.
A white frame (the area that will not be
blurred) appears on the screen.
Choose the area to keep in focus.
Touch the screen to change the area to
keep in focus.
Touch 9, then touch 9, c-_ or E_ to
change the size of the focused area and
touch _.
Choose a playback speed.
Touch IOX, then touch 5]1, IOXor 2OXto
choose a playback speed and touch _.
:: shoot.
Touch • •
To stop shooting the movie, touch !!.
113
S.oot=ngS.perSNowMot=onMovies
Playback Speeds and Estimated Playback Times (for 1 Min.
Clips)
5X .... Approx. 12 se0.
IOX ..... App[ox. 6 se6.
20X .... Approx. 3 set.
You can shoot fast moving subjects and play them back in slow motion. Audio
will not be recorded.
Choose"_.
Follow Steps 1 - 2 on p. 64 to choose _'.
Choose a frame rate.
After touching FUNC., drag the menu
appearing on the left side of the screen up
or down to choose _, then touch the
menu item again.
Choose a frame rate (the number of
frames per second), then touch the menu
item again.
114

Shooting Super Slow Motion Movies
Shoot.
Touch 0.
The bar showing the shooting time will
appear. Maximum clip length is approx.
30 sec.
To stop shooting the movie, touch m.
Frame Rates and Playback Times (for 30 Sec. Clips)
240 fps .........................................................Approx: 4 m!n:
The movie will play back in slow motion when you follow Steps 1- 3 on p. 33.
You can use the included software to change the playback speed of movies shot
in _ mode. Refer to the Software Guide for details,
115
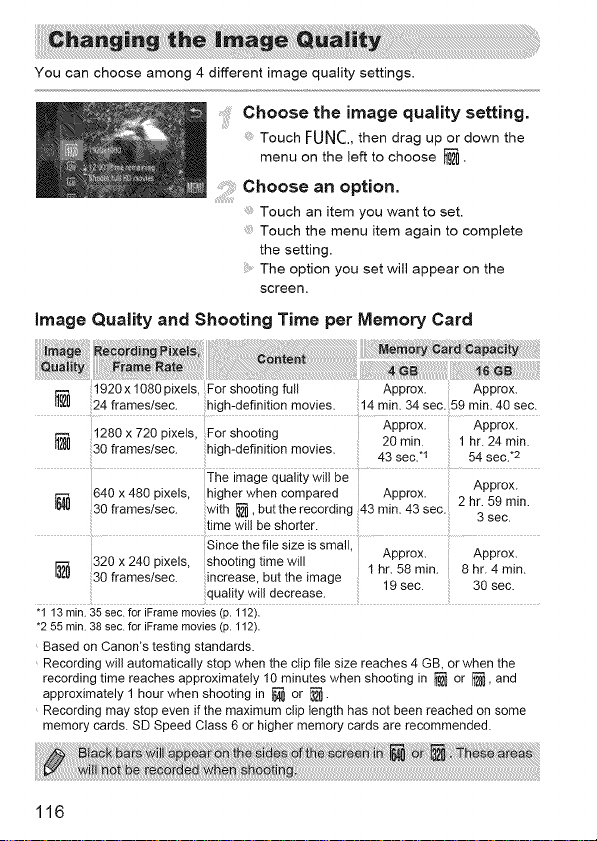
You can choose among 4 different image quality settings.
..... Choose the image quality setting.
Touch FUNC., then drag up or down the
menu on the left to choose _.
Chooseanoption.
Touch an item you want to set.
Touch the menu item again to complete
the setting.
The option you set will appear on the
screen,
image Quality and Shooting Time per Memory Card
1920 x1080 pixels, For shooting full Approx. Approx.
24 frameslsec, high-definition movies. 14 rain. 34 sec. 59 min. 40 sec.
1280 x 720 pixels, For shooting Approx. Approx.
30 frameslsec, high-definition movies. 20 min. 1 hr. 24 min.
640 x 480 pixels, higher when compared Approx.
30 frameslsec, with I_, but the recording 43 rain. 43 sec. 2 hr. 59 min.
320 x 240 pixels, shooting time will I hr. 58 min. 8 hr. 4 min.
[_ 30 frameslsec, increase, but the image 19sec. 30 sec.
"1 13 min.35 sec.for iFrememovies(p.112).
*2 55 min.38sec.for iFrememovies(p.112).
Based on Carton's testing standards.
Recording will automatically stop when the clip file size reaches 4 GB, or when the
recording time reaches approximately 10 minutes when shooting in _ or _, and
approximately 1 hour when shooting in _ or _.
Recording may stop even if the maximum clip length has not been reached on some
memory cards. SD Speed Class 6 or higher memory cards are recommended.
The image quality will be Approx.
time will be shorter.
Since the file size is small,
quality will decrease.
43 sec..1 54sec..2
3 sec.
Approx. Approx.
N N
116
The following functions can be used in the same way as for still images. Some
functions, however, may not be available or may not have an effect
depending on the Shooting mode.
Zooming in More Closely On Subjects
The sound of zoom operations will be recorded.
Using the Self-Timer (p. 58)
Using the Self-Timer to Prevent Camera Shake (p. 59)
Adjusting the White Balance (p. 86)
Changing the Tone of an image (My Colors) (p. 92)
Shooting with the AF Lock (p. 99)
Turning Off the AF Assist Beam (p. 171)
Displaying Grid Lines (p. 172)
Changing the IS-Mode Settings (p. 173)
Changing icon Order (icon Layout) (p. 174)
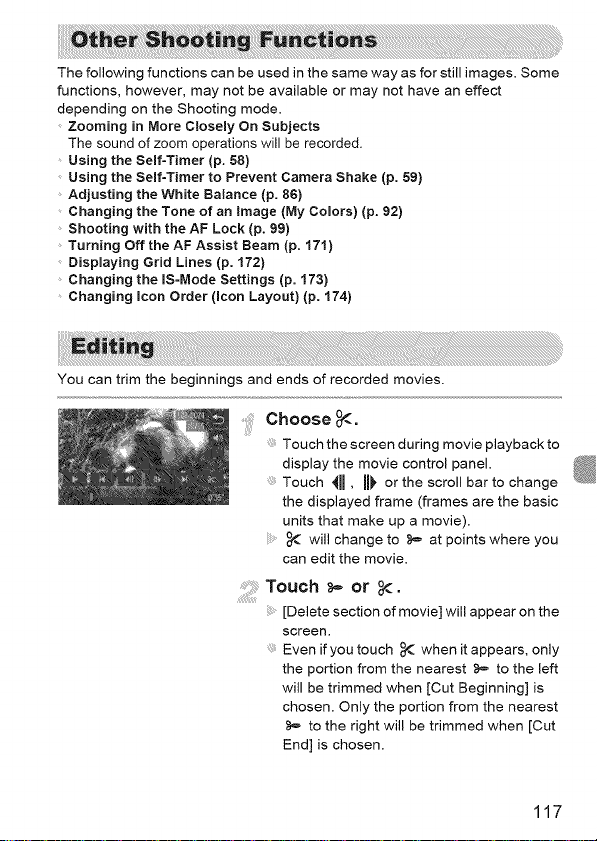
You can trim the beginnings and ends of recorded movies.
Choose _.
::!ii!ii!!ii!!ii¸
Touch the screen during movie playback to
display the movie control panel.
Touch 4[[ , [[_ or the scroll bar to change
the displayed frame (frames are the basic
units that make up a movie).
will change to _,, at points where you
can edit the movie.
Touch _, or _.
[Delete section of movie] will appear on the
screen.
Even ifyou touch _ when it appears, only
the portion from the nearest _ to the left
will be trimmed when [Cut Beginning] is
chosen. Only the portion from the nearest
to the right will be trimmed when [Cut
End] is chosen.
117
Editing
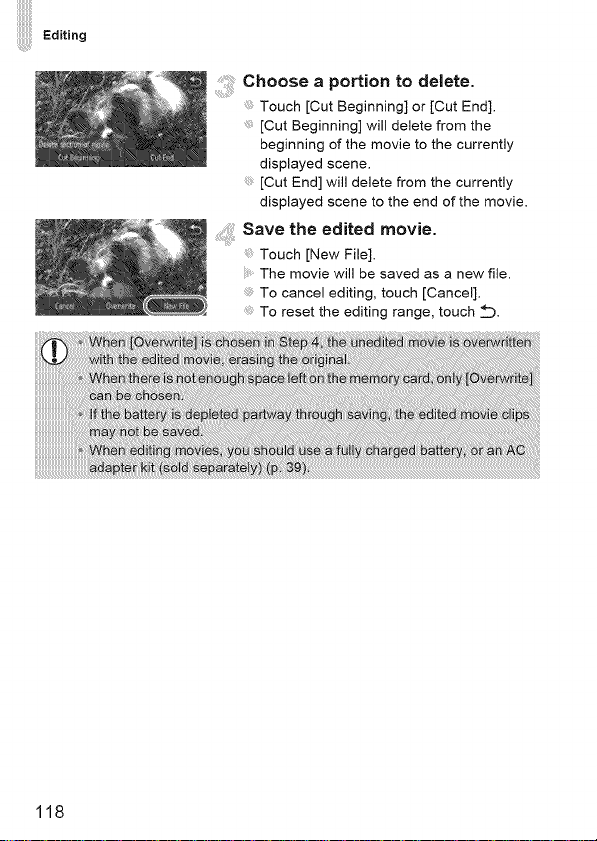
Choose a portion to delete.
Touch [Cut Beginning] or [Cut End].
[Cut Beginning] will delete from the
beginning of the movie to the currently
displayed scene.
[Cut End] will delete from the currently
displayed scene to the end of the movie.
Save the edited movie.
Touch [New File].
The movie will be saved as a new file.
To cancel editing, touch [Cancel].
To reset the editing range, touch _.
118
Using Various P|ayback and
Editing Functions
This chapter exp,ains various ways to p,ay back and edit images.
Press the [] button to enter Playback mode before operating the camera.
119
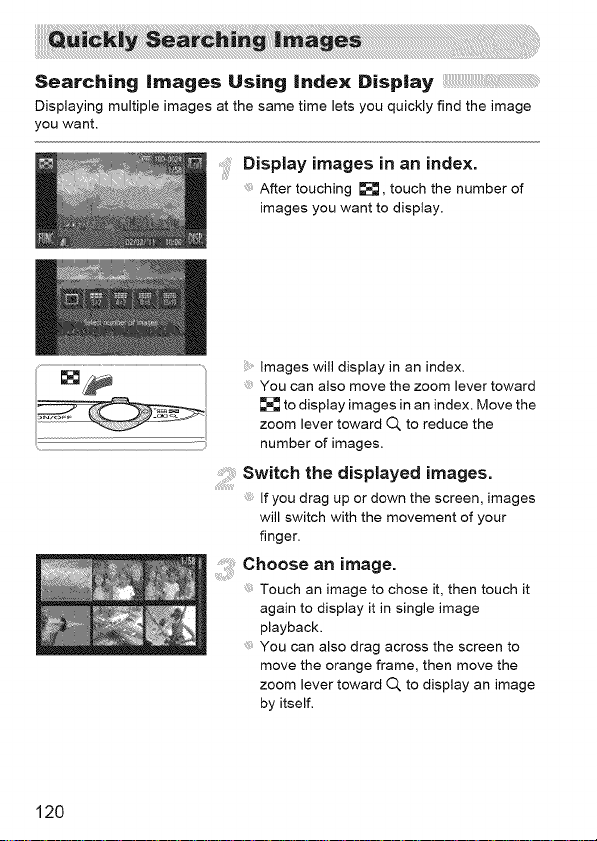
Searching images Using index Display
Displaying multiple images at the same time lets you quickly find the image
you want.
:: Display images in an index.
After touching _;;_, touch the number of
images you want to display.
Images will display in an index.
You can also move the zoom lever toward
to display images in an index. Move the
zoom lever toward O, to reduce the
number of images.
Switch the displayed images.
If you drag up or down the screen, images
will switch with the movement of your
finger.
..... Choose an image.
Touch an image to chose it, then touch it
again to display it in single image
playback.
You can also drag across the screen to
move the orange frame, then move the
zoom lever toward O, to display an image
by itself.
120
Quickly Searching images
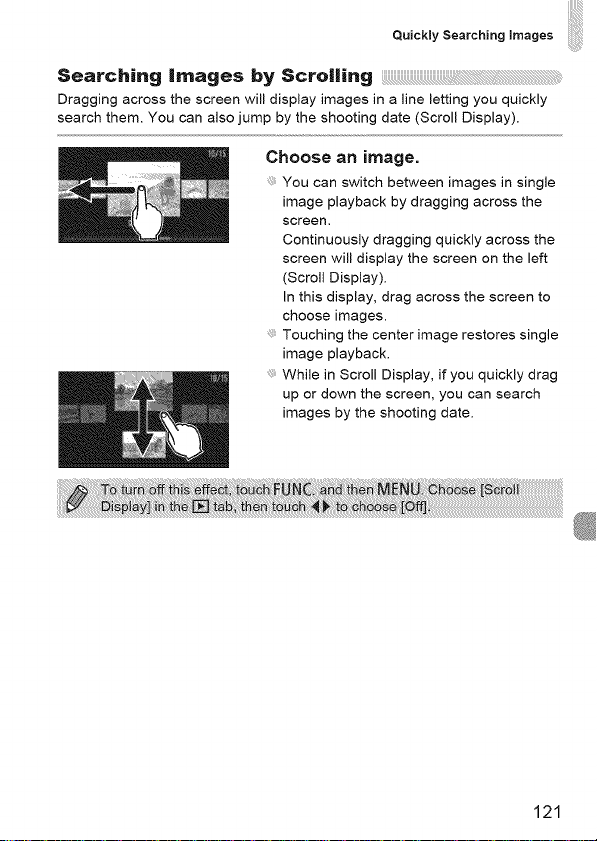
Searching |mages by Scrolling
Dragging across the screen will display images in a line letting you quickly
search them. You can also jump by the shooting date (Scroll Display).
Choose an image.
You can switch between images in single
image playback by dragging across the
screen.
Continuously dragging quickly across the
screen will display the screen on the left
(Scroll Display).
In this display, drag across the screen to
choose images.
Touching the center image restores single
image playback.
While in Scroll Display, if you quickly drag
up or down the screen, you can search
images by the shooting date.
121
QuickiySearching images
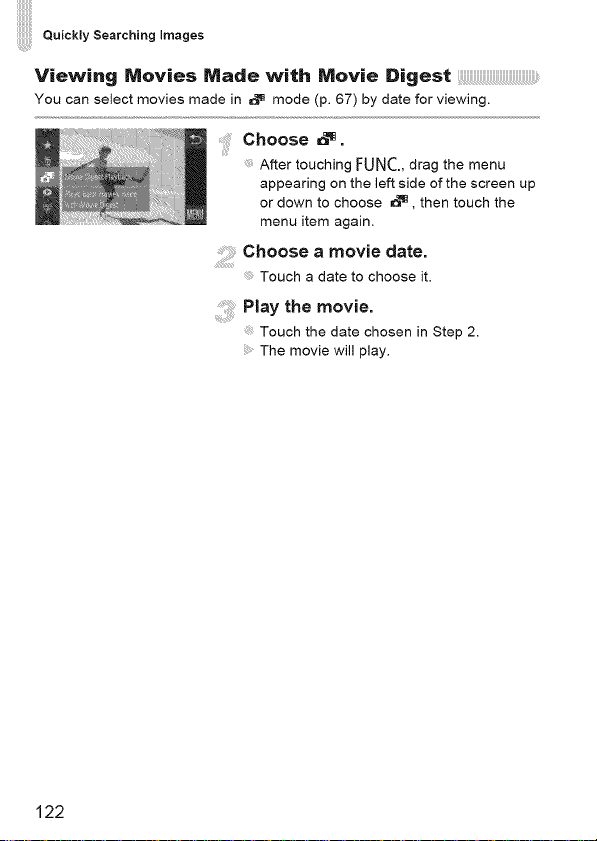
Viewing Movies Made with Movie Digest iiiiiiiiiiiiiiiiiiiiiiiiiiiiiiiiiiiiiiiiiiiiiiiiiiiii!!_!_
You can select movies made in ,_"_mode (p. 67) by date for viewing.
Choose _.
After touching FUNC., drag the menu
appearing on the left side of the screen up
or down to choose ,_, then touch the
menu item again.
: Choose a movie date.
Touch a date to choose it.
Play the movie.
Touch the date chosen in Step 2.
The movie will play.
122

When there are many images on the memory card, you can filter and display
them by a specified filter. You can also protect (p. 137) or delete (p. 139) all
images at once while filtered.
Choose _?.
Touch FUNC.,then drag up or down the
menu to the left to choose _Y.
Chooseafi ter.
Touch an item you want to set.
If you drag up or down the menu on the
right, other items will appear.
Touch the item you chose again to
complete the setting.
.......View the filtered images.
Touch the desired filter, then touch it again
(except for _r ).
Filtered playback starts and a yellow frame
appears.
If you drag across the screen, only the
chosen target images will display.
If you choose _ in Step 2, filtered
playback will be canceled.
Search filters
-_ Favorites Displays the images tagged as favorites (p. 141)
(_ Shot Date Displays the images shot on a specified date
_ My Category Displays the images of a specified category (p. 143)
%, Still image/Movie Displays still images, movies or movies made in o_ mode.
Filters that do not have any corresponding images cannot be chosen.
123
viewingSlideshows
In filtered playback (Step 3), you can view filtered images with "Quickly Searching
Images" (p. 120), "Viewing Slideshows" (p. 124), and "Magnifying Images"
(p. 127). You can process all filtered images at once while performing operations
in "Protecting Images" (p. 137), "Erasing Images" (p. 139), or "Printing from the
Print List (DPOF)" (p. 159), by choosing all of the filtered images.
However, if you change the category (p. 143), or edit an image and save it as a
new image (p. 145), a message will appear, and filtered playback will cancel.
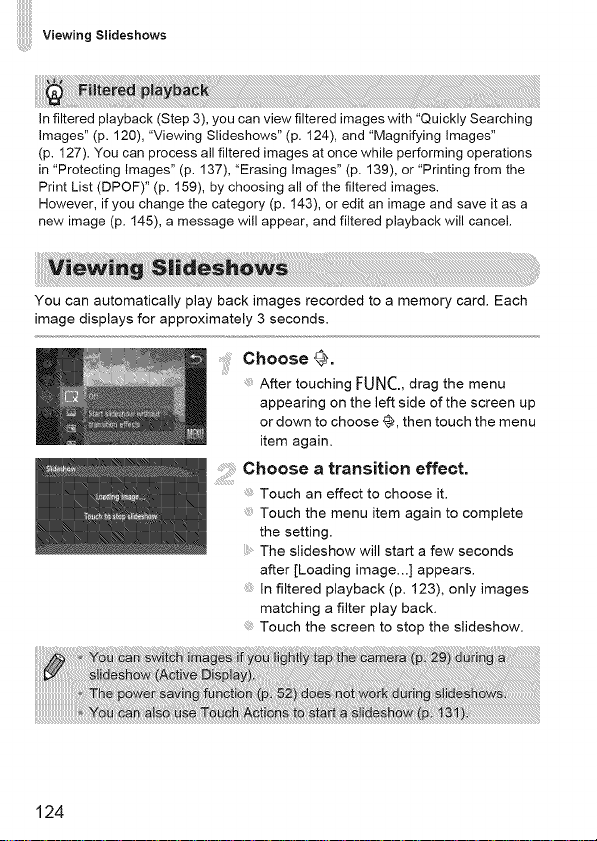
You can automatically play back images recorded to a memory card. Each
image displays for approximately 3 seconds.
.....Choose _.
After touching FUNC., drag the menu
appearing on the left side of the screen up
or down to choose @, then touch the menu
item again.
Choose a transition effect.
Touch an effect to choose it.
Touch the menu item again to complete
the setting.
The slideshow will start a few seconds
after [Loading image...] appears.
In filtered playback (p. 123), only images
matching a filter play back.
Touch the screen to stop the siideshow.
124
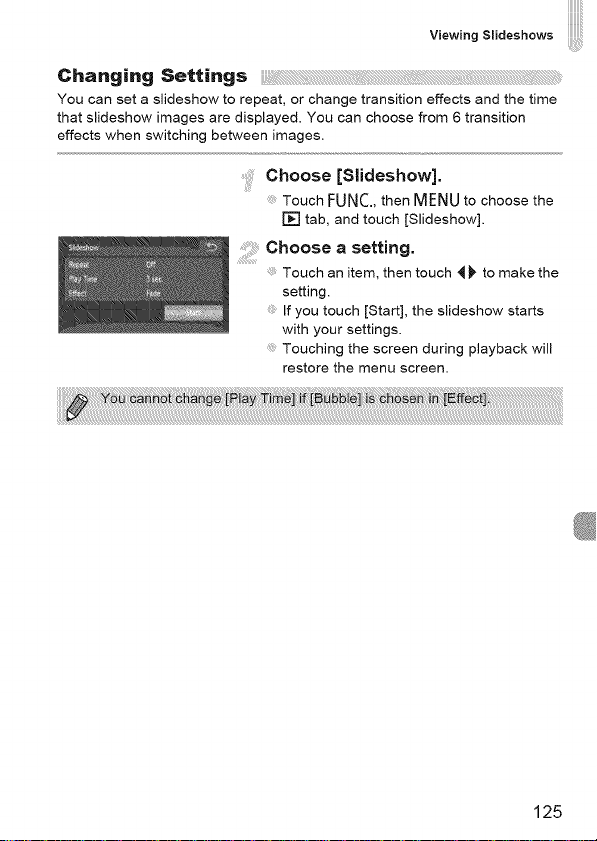
Changing Settings
You can set a slideshow to repeat, or change transition effects and the time
that slideshow images are displayed. You can choose from 6 transition
effects when switching between images.
Choose [Slideshow].
Touch FUNC.,then MENU to choose the
[] tab, and touch [Slideshow].
Chooseasetti.g.
Touch an item, then touch _)' to make the
setting.
If you touch [Start], the slideshow starts
with your settings.
Touching the screen during playback will
restore the menu screen.
iiiiiiiii_
iiiiiiiii_
iiiiiiiii_
iiiiiiiii_
125
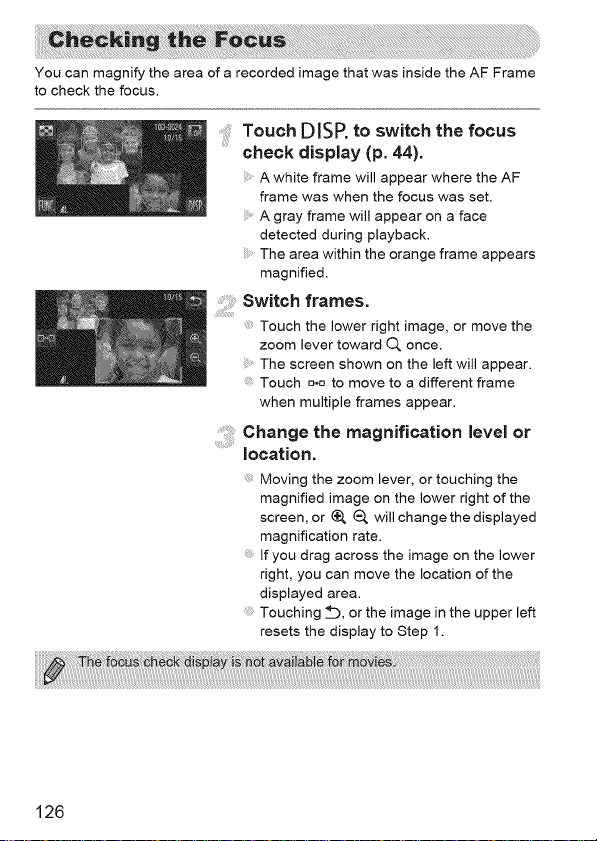
You can magnify the area of a recorded image that was inside the AF Frame
to check the focus.
.....Touch DISR to switch the focus
check display (p. 44).
A white frame will appear where the AF
frame was when the focus was set.
A gray frame will appear on a face
detected during playback.
The area within the orange frame appears
magnified.
Switch frames.
Touch the lower right image, or move the
zoom lever toward O, once.
The screen shown on the left will appear.
Touch u,,= to move to a different frame
when multiple frames appear.
Change the magnification level or
location.
Moving the zoom lever, or touching the
magnified image on the lower right of the
screen, or _, _ will change the displayed
magnification rate.
If you drag across the image on the lower
right, you can move the location of the
displayed area.
Touching _, or the image in the upper left
resets the display to Step 1.
126
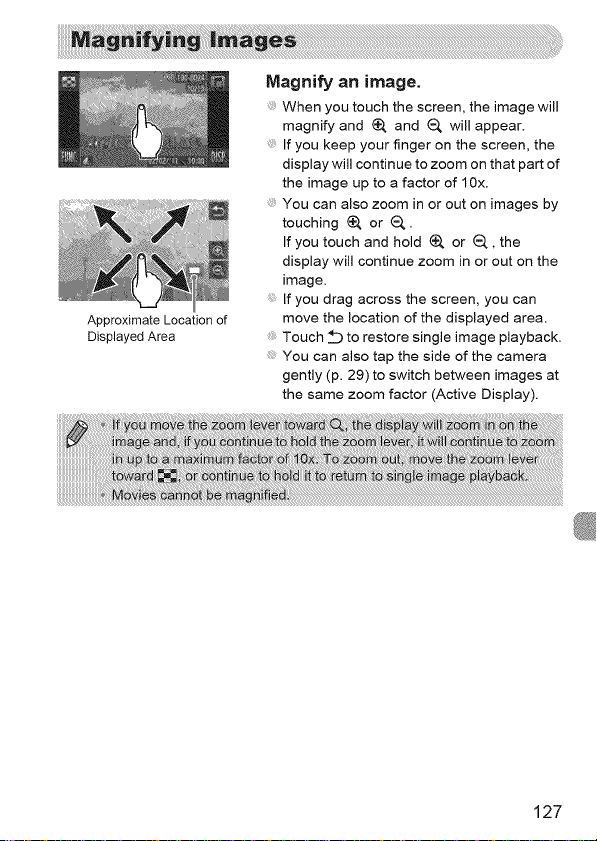
Approximate Location of
Displayed Area
Magnify an image.
When you touch the screen, the image will
magnify and _). and (_ will appear.
If you keep your finger on the screen, the
display will continue to zoom on that part of
the image up to a factor of 1Ox.
You can also zoom in or out on images by
touching _). or (_.
If you touch and hold (_ or _, the
display will continue zoom in or out on the
image.
If you drag across the screen, you can
move the location of the displayed area.
Touch _ to restore single image playback.
You can also tap the side of the camera
gently (p. 29) to switch between images at
the same zoom factor (Active Display).
127
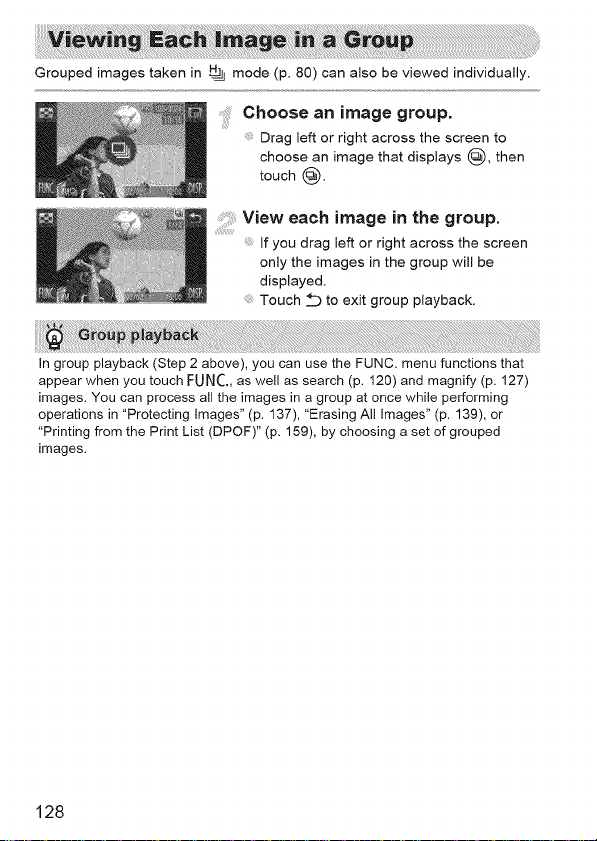
Grouped images taken in _ mode (p. 80) can also be viewed individually.
.....Choose an image group.
Drag left or right across the screen to
choose an image that displays _), then
touch @.
View each image in the group.
If you drag left or right across the screen
only the images in the group wi[[ be
displayed.
Touch _Z)to exit group playback.
[n group playback (Step 2 above), you can use the FUNC. menu functions that
appear when you touch FUNC., as well as search (p. 120) and magnify (p. 127)
images. You can process all the images in a group at once while performing
operations in "Protecting Images" (p. 137), "Erasing All Images" (p. 139), or
"Printing from the Print List (DPOF)" (p. 159), by choosing a set of grouped
images.
128
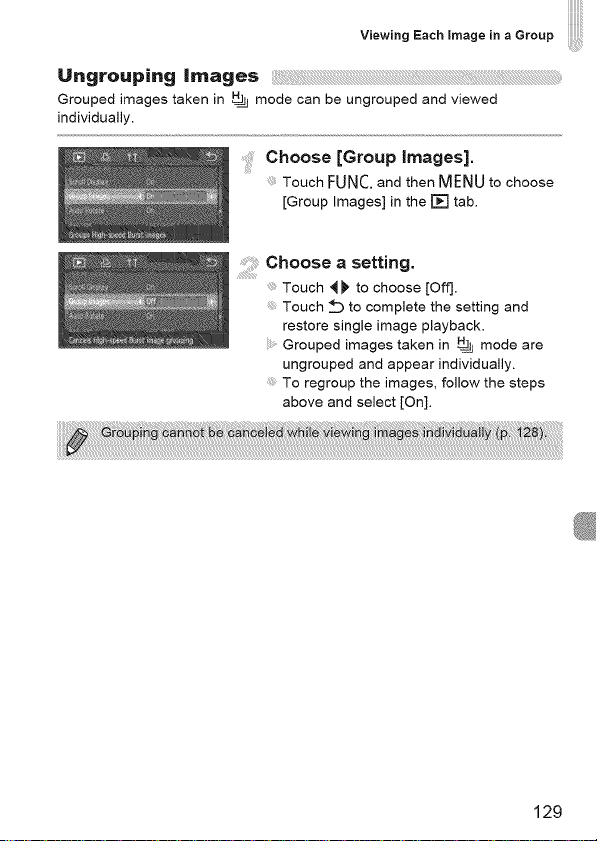
U.groupJng Images
Grouped images taken in _j mode can be ungrouped and viewed
individually.
Choose [Group images].
Touch FUNC,and then MENUto choose
[Group Images] in the [] tab.
Chooseasetti.g.
Touch _ )' to choose [Off].
Touch _Z) to complete the setting and
restore single image playback.
Grouped images taken in _ mode are
ungrouped and appear individually.
To regroup the images, follow the steps
above and select [On].
iiiiiiiii_
iiiiiiiii_
iiiiiiiii_
iiiiiiiii_
129
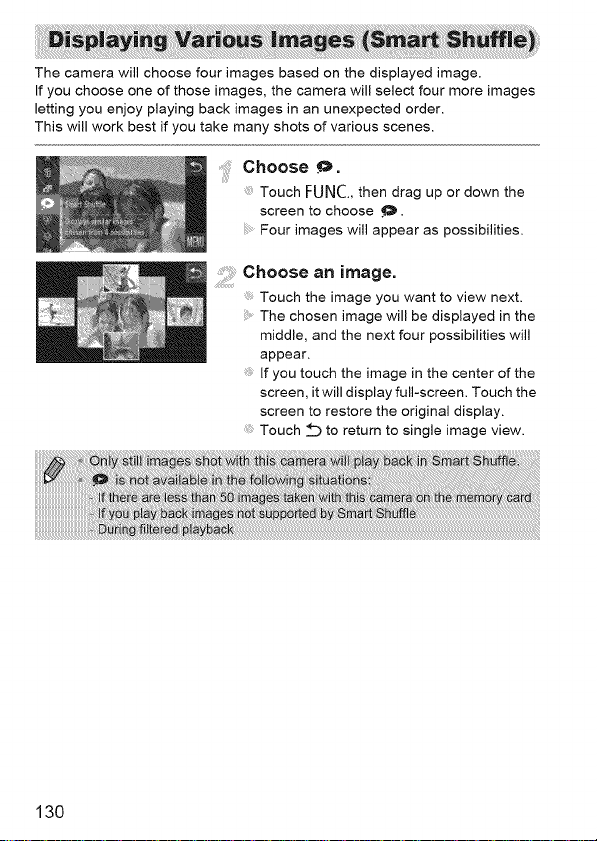
The camera will choose four images based on the displayed image.
If you choose one of those images, the camera will select four more images
letting you enjoy playing back images in an unexpected order.
This will work best if you take many shots of various scenes.
.....Chooseo.
Touch FUNC.,then drag up or down the
screen to choose _.
Four images will appear as possibilities.
Choose an image.
Touch the image you want to view next.
The chosen image will be displayed in the
middle, and the next four possibilities will
appear.
If you touch the image in the center of the
screen, itwill display full-screen. Touch the
screen to restore the original display.
Touch ::_ to return to single image view.
130
You can choose from 3 transition effects when switching between images in
single image playback.
Choose [Transition].
Touch FUNC.and then MENUto choose
[Transition] inthe [] tab, then touch 4 _' to
choose an effect.
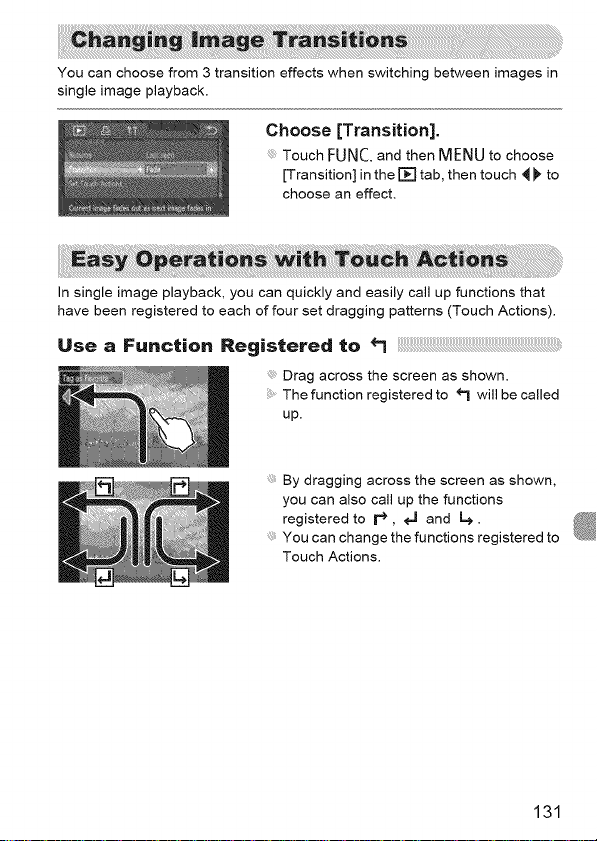
In single image playback, you can quickly and easily call up functions that
have been registered to each of four set dragging patterns (Touch Actions).
Use a Function Registered to
Drag across the screen as shown.
The function registered to _ will be called
up.
By dragging across the screen as shown,
you can also call up the functions
registered to r _, _ and L_.
You can change the functions registered to
Touch Actions.
131
Easy Operations with Touch Actions
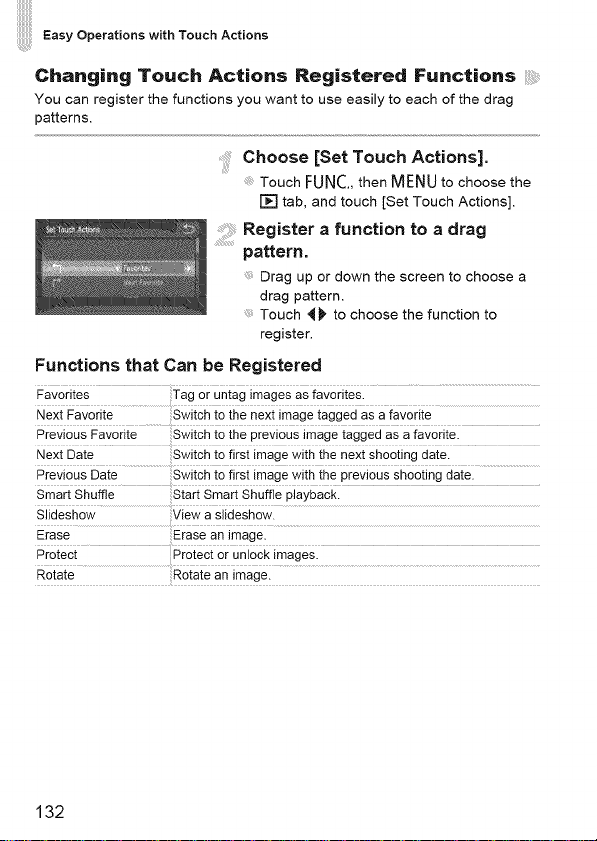
Changing Touch Actions Registered Functions ii!!;!_iii:i_ii,'_,
You can register the functions you want to use easily to each of the drag
patterns.
Choose [Set Touch Actions].
Touch FUNC.,then MENU to choose the
F¢] tab, and touch [Set Touch Actions].
Register a function to a drag
pattern.
Drag up or down the screen to choose a
drag pattern.
Touch 4_ to choose the function to
register.
Functions that Can be Registered
Favorites Tag or untag images as favorites.
NexiFavoriie Swiichioihenextimageiaggedasafavoiiie
Previous Favorite Switch to the previous image tagged as a favorite.
Next Date Switch to first image with the next shooting date.
Previous Date Switch io first image with {he previous shosting daiel
Slideshow View a slideshow.
Erase Erase an image.
Protect Protect or unlock images.
132
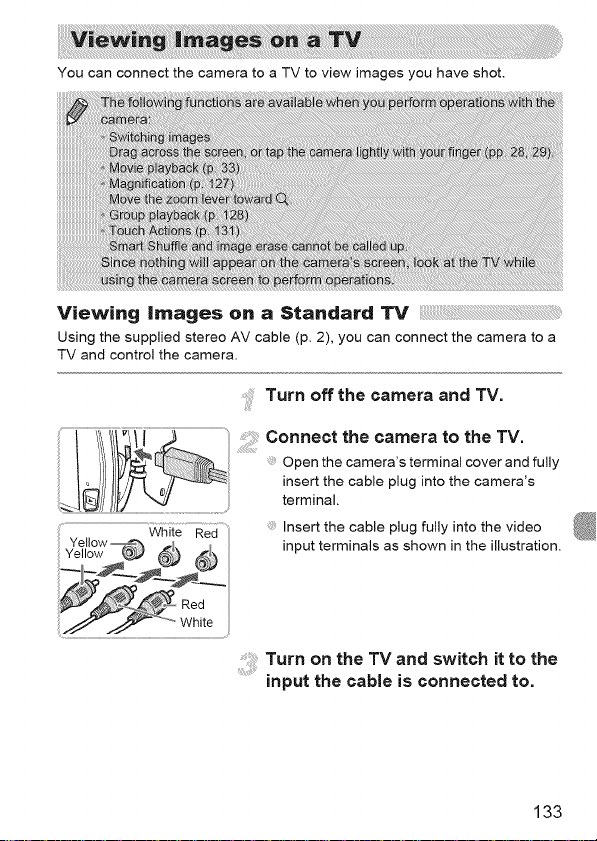
You can connect the camera to a TV to view images you have shot.
Viewing images on a Standard TV
Using the supplied stereo AV cable (p. 2), you can connect the camera to a
TV and control the camera.
Turn off the camera and TV.
Connect the camera to the TV.
Open the camera's terminal cover and fully
insert the cable plug into the camera's
terminal.
Yellow _ _
Red
Insert the cable plug fully into the video
input terminals as shown in the illustration.
............................
Turn on the TV and switch it to the
input the cable is connected to.
133
Viewing images on aTV
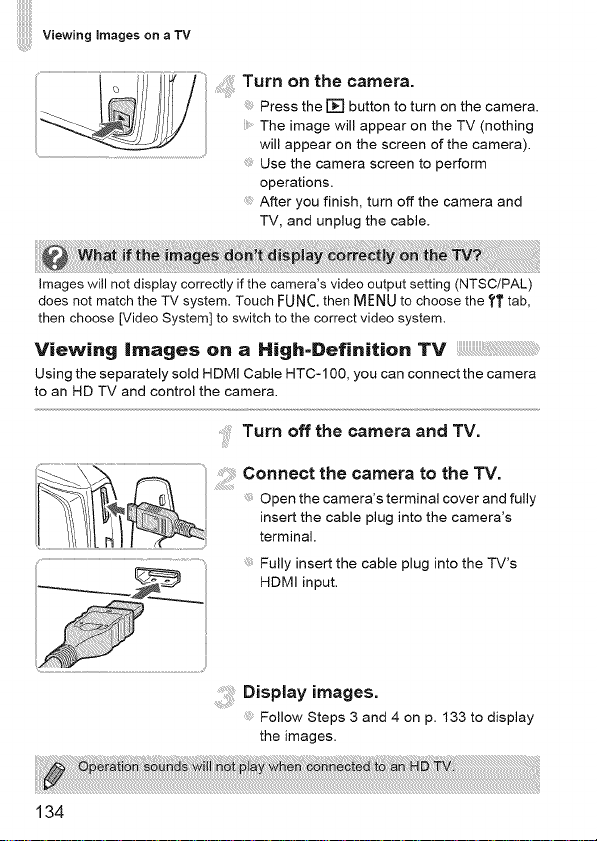
Turn on the camera.
Press the [] button to turn on the camera.
The image will appear on the TV (nothing
will appear on the screen of the camera).
Use the camera screen to perform
operations.
After you finish, turn off the camera and
TV, and unplug the cable.
Images will not display correctly if the camera's video output setting (NTSC/PAL)
does not match the TV system. Touch FUNC. then MENU to choose the ?T tab,
then choose [Video System] to switch to the correct video system.
Viewing images on a High=Definition TV
Using the separately sold HDMI Cable HTC-100, you can connect the camera
to an HD TV and control the camera.
: Turn off the camera and TV.
Connect the camera to the TV.
Open the camera's terminal cover and fully
insert the cable plug into the camera's
terminal.
Fully insert the cable plug into the TV's
HDMI input.
134
Display images.
Follow Steps 3 and 4 on p. 133 to display
the images.
Wo ,ng,m g son TVi :!i:!iiiii!iii! ii!! !i i i'
Using a TV Remote to Control the Camera
When you connect the camera to an HDMI CEC compatible TV, you can use
the TV's remote control to operate the camera and p_ay back images or view
slideshows.
You may need to make settings on some TVs. For details, refer to the user
guide supplied with the TV.
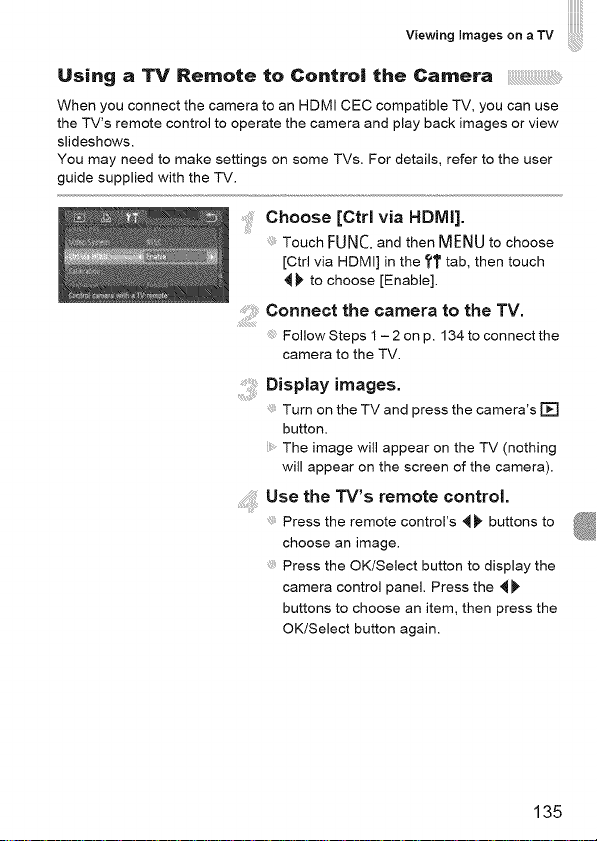
Choose [Ctrl via HDMI].
iiii!i iJy
Touch FUNC.and then MENUto choose
[Ctrl via HDMI] in the ?_l'tab, then touch
4)' to choose [Enable].
Connect the camera to the TV.
FollowSteps 1 - 2 on p. 134 to connectthe
camera to the TV.
Display images.
Turn on the TV and press the camera's []
button.
The image will appear on the TV (nothing
will appear on the screen of the camera).
Use the TV's remote control.
Press the remote control's '_ _ buttons to
choose an image.
Press the OK/Select button to display the
camera control panel. Press the 4)'
buttons to choose an item, then press the
OK/Select button again.
135
 Loading...