

Canon H12295 Facsimile Manual
Facsimile Guide


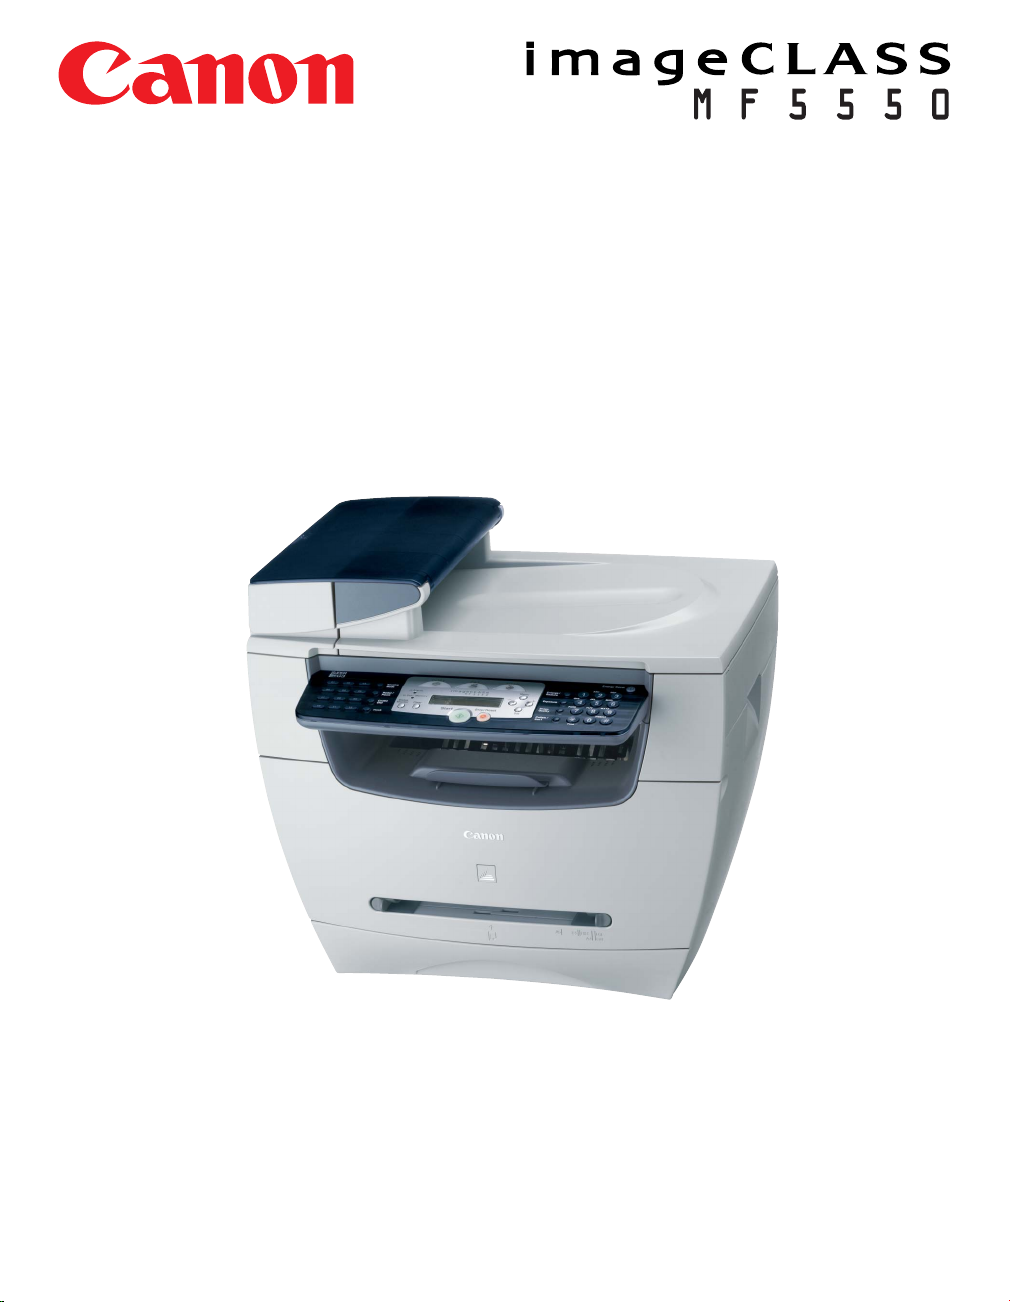
imageCLASS MF5550
Facsimile Guide
Manuals for the Machine
The manuals for this machine are divided as follows. Please refer to them for detailed information.
Depending on the system configuration and product purchased, some manuals may not be needed.
The guides with this symbol are printed manuals.
Setting Up the Machine
•
Software Installation
•
•
Copying, Printing Instructions
•
Troubleshooting
•
Fax Instructions
Troubleshooting
•
•
Software Installation and Instructions
•
Troubleshooting
The guide with this symbol is a PDF manual included on the
accompanying CD-ROM.
CD-ROM
To view the PDF manual format, Adobe Reader/Adobe Acrobat
Reader are necessary. If Adobe Reader/Adobe Acrobat Reader
are not installed on your system, please download them from the
Adobe Systems home-page.
Set-Up Sheet
Basic Guide
Facsimile Guide
(This Manual)
Software Guide
CD-ROM
The machine illustration on the cover may differ slightly from your machine.

How This Manual Is Organized
Chapter 1
Chapter 2
Chapter 3
Chapter 4
Chapter 5
Chapter 6
Chapter 7
Chapter 8
Chapter 9
Introduction
Registering Information in Your Machine
Speed Dialing
Sending Faxes
Receiving Faxes
Reports and Lists
Troubleshooting
Machine Settings
Appendix
Includes the specifications of the machine and the index.
Considerable effort has been made to ensure that this manual is free of inaccuracies and omissions. However, as we are constantly improving our
products, if you need an exact specification, please contact Canon.

Contents
Preface . . . . . . . . . . . . . . . . . . . . . . . . . . . . . . . . . . . . . . . . . . . . . . . . . . . . . . . . viii
How to Use This Manual . . . . . . . . . . . . . . . . . . . . . . . . . . . . . . . . . . . . . . . . . . viii
Symbols Used in This Manual . . . . . . . . . . . . . . . . . . . . . . . . . . . . . . . . . . . . . viii
Keys Used in This Manual . . . . . . . . . . . . . . . . . . . . . . . . . . . . . . . . . . . . . . . . viii
Legal Notices . . . . . . . . . . . . . . . . . . . . . . . . . . . . . . . . . . . . . . . . . . . . . . . . . . . . .ix
Users in the U.S.A.. . . . . . . . . . . . . . . . . . . . . . . . . . . . . . . . . . . . . . . . . . . . . . . ix
Pre-installation Requirements for Canon Facsimile Equipment . . . . . . . . . .ix
Connection of the Equipment. . . . . . . . . . . . . . . . . . . . . . . . . . . . . . . . . . . . x
In Case of Equipment Malfunction . . . . . . . . . . . . . . . . . . . . . . . . . . . . . . . . x
Rights of the Telephone Company . . . . . . . . . . . . . . . . . . . . . . . . . . . . . . . . x
FCC Notice . . . . . . . . . . . . . . . . . . . . . . . . . . . . . . . . . . . . . . . . . . . . . . . . . . x
Users in Canada . . . . . . . . . . . . . . . . . . . . . . . . . . . . . . . . . . . . . . . . . . . . . . . xii
Pre-installation Requirements for Canon Facsimile Equipment . . . . . . . . . xii
Notice . . . . . . . . . . . . . . . . . . . . . . . . . . . . . . . . . . . . . . . . . . . . . . . . . . . . . xiii
Super G3 . . . . . . . . . . . . . . . . . . . . . . . . . . . . . . . . . . . . . . . . . . . . . . . . . . . . . xiv
Tr ademarks. . . . . . . . . . . . . . . . . . . . . . . . . . . . . . . . . . . . . . . . . . . . . . . . . . . . xiv
Copyright . . . . . . . . . . . . . . . . . . . . . . . . . . . . . . . . . . . . . . . . . . . . . . . . . . . . . xv
Disclaimers. . . . . . . . . . . . . . . . . . . . . . . . . . . . . . . . . . . . . . . . . . . . . . . . . . . . xv
Chapter 1 Introduction
Customer Support . . . . . . . . . . . . . . . . . . . . . . . . . . . . . . . . . . . . . . . . . . . . . . . 1-1
Operation Panel . . . . . . . . . . . . . . . . . . . . . . . . . . . . . . . . . . . . . . . . . . . . . . . . . 1-2
Standby Display . . . . . . . . . . . . . . . . . . . . . . . . . . . . . . . . . . . . . . . . . . . . . . . . . 1-4
Chapter 2 Registering Information in Your Machine
Guidelines for Entering Numbers, Letters, and Symbols. . . . . . . . . . . . . . . . 2-1
Registering Sender Information . . . . . . . . . . . . . . . . . . . . . . . . . . . . . . . . . . . . 2-3
Entering the Date and Time . . . . . . . . . . . . . . . . . . . . . . . . . . . . . . . . . . . . . . 2-4
Registering Your Fax/Telephone Number and Name . . . . . . . . . . . . . . . . . . . 2-4
Setting the Telephone Line Type. . . . . . . . . . . . . . . . . . . . . . . . . . . . . . . . . . . . 2-6
iv

Chapter 3 Speed Dialing
Speed Dialing Methods . . . . . . . . . . . . . . . . . . . . . . . . . . . . . . . . . . . . . . . . . . . .3-1
Registering One-Touch Speed Dialing . . . . . . . . . . . . . . . . . . . . . . . . . . . . . . .3-2
Changing or Deleting an Entry. . . . . . . . . . . . . . . . . . . . . . . . . . . . . . . . . . . . . 3-3
Registering Coded Speed Dialing . . . . . . . . . . . . . . . . . . . . . . . . . . . . . . . . . . .3-4
Changing or Deleting an Entry. . . . . . . . . . . . . . . . . . . . . . . . . . . . . . . . . . . . . 3-5
Registering Group Dialing . . . . . . . . . . . . . . . . . . . . . . . . . . . . . . . . . . . . . . . . .3-6
Changing or Deleting an Entry. . . . . . . . . . . . . . . . . . . . . . . . . . . . . . . . . . . . . 3-8
Printing Speed Dialing Lists. . . . . . . . . . . . . . . . . . . . . . . . . . . . . . . . . . . . . . . .3-9
Chapter 4 Sending Faxes
Sending Methods. . . . . . . . . . . . . . . . . . . . . . . . . . . . . . . . . . . . . . . . . . . . . . . . . 4-1
Memory Sending . . . . . . . . . . . . . . . . . . . . . . . . . . . . . . . . . . . . . . . . . . . . . . . 4-1
Manual Sending. . . . . . . . . . . . . . . . . . . . . . . . . . . . . . . . . . . . . . . . . . . . . . . .4-3
Improving Faxed Images. . . . . . . . . . . . . . . . . . . . . . . . . . . . . . . . . . . . . . . . . . . 4-5
Adjusting the Image Quality (Fax Resolution) . . . . . . . . . . . . . . . . . . . . . . . . .4-5
Adjusting the Exposure (Scan Density) . . . . . . . . . . . . . . . . . . . . . . . . . . . . . .4-6
Dialing Methods. . . . . . . . . . . . . . . . . . . . . . . . . . . . . . . . . . . . . . . . . . . . . . . . . .4-7
Regular Dialing . . . . . . . . . . . . . . . . . . . . . . . . . . . . . . . . . . . . . . . . . . . . . . . .4-7
One-Touch Speed Dialing . . . . . . . . . . . . . . . . . . . . . . . . . . . . . . . . . . . . . . . . 4-8
Coded Speed Dialing. . . . . . . . . . . . . . . . . . . . . . . . . . . . . . . . . . . . . . . . . . . .4-8
Group Dialing. . . . . . . . . . . . . . . . . . . . . . . . . . . . . . . . . . . . . . . . . . . . . . . . . .4-9
Redialing a Busy Number . . . . . . . . . . . . . . . . . . . . . . . . . . . . . . . . . . . . . . . . .4-10
Manual Redialing . . . . . . . . . . . . . . . . . . . . . . . . . . . . . . . . . . . . . . . . . . . . . . 4-10
Automatic Redialing. . . . . . . . . . . . . . . . . . . . . . . . . . . . . . . . . . . . . . . . . . . .4-10
Customizing Automatic Redialing Settings . . . . . . . . . . . . . . . . . . . . . . .4-10
Sending the Same Document to Several Recipients
(Sequential Broadcasting) . . . . . . . . . . . . . . . . . . . . . . . . . . . . . . . . . . . . . . . .4-12
Dialing an Overseas Number (With Pauses). . . . . . . . . . . . . . . . . . . . . . . . . .4-14
v

Chapter 5 Receiving Faxes
Setting the Receive Mode . . . . . . . . . . . . . . . . . . . . . . . . . . . . . . . . . . . . . . . . . 5-1
Receiving Faxes Automatically: FAX ONLY MODE . . . . . . . . . . . . . . . . . . . . 5-2
Receiving Faxes Manually: MANUAL MODE . . . . . . . . . . . . . . . . . . . . . . . . . 5-3
Receiving When an Answering Machine Is Connected:
ANS. MACHINE MODE . . . . . . . . . . . . . . . . . . . . . . . . . . . . . . . . . . . . . . . . . 5-3
Adjusting the Answering Machine . . . . . . . . . . . . . . . . . . . . . . . . . . . . . . 5-4
Receiving with a DRPD (Distinctive Ring Pattern Detection) Service:
DRPD . . . . . . . . . . . . . . . . . . . . . . . . . . . . . . . . . . . . . . . . . . . . . . . . . . . . . . . 5-4
Setting the Ring Pattern . . . . . . . . . . . . . . . . . . . . . . . . . . . . . . . . . . . . . . 5-5
Receiving Faxes While Performing Other Tasks . . . . . . . . . . . . . . . . . . . . . . . 5-6
Receiving Faxes in the Memory When a Problem Occurs . . . . . . . . . . . . . . . 5-7
Canceling Receiving . . . . . . . . . . . . . . . . . . . . . . . . . . . . . . . . . . . . . . . . . . . . . 5-8
Chapter 6 Reports and Lists
Summary of Reports and Lists. . . . . . . . . . . . . . . . . . . . . . . . . . . . . . . . . . . . . 6-1
ACTIVITY REPORT. . . . . . . . . . . . . . . . . . . . . . . . . . . . . . . . . . . . . . . . . . . . . . . 6-2
Printing the ACTIVITY REPORT . . . . . . . . . . . . . . . . . . . . . . . . . . . . . . . . . . 6-2
Adjusting the ACTIVITY REPORT Setting . . . . . . . . . . . . . . . . . . . . . . . . . . . 6-3
Adjusting the TX REPORT Setting . . . . . . . . . . . . . . . . . . . . . . . . . . . . . . . . . . 6-4
Adjusting the RX REPORT Setting. . . . . . . . . . . . . . . . . . . . . . . . . . . . . . . . . . 6-6
Printing the USER DATA LIST. . . . . . . . . . . . . . . . . . . . . . . . . . . . . . . . . . . . . . 6-8
Chapter 7 Troubleshooting
LCD Messages . . . . . . . . . . . . . . . . . . . . . . . . . . . . . . . . . . . . . . . . . . . . . . . . . . 7-1
Error Codes . . . . . . . . . . . . . . . . . . . . . . . . . . . . . . . . . . . . . . . . . . . . . . . . . . . . 7-4
Faxing Problems . . . . . . . . . . . . . . . . . . . . . . . . . . . . . . . . . . . . . . . . . . . . . . . . 7-5
Sending Problems . . . . . . . . . . . . . . . . . . . . . . . . . . . . . . . . . . . . . . . . . . . . . 7-5
Receiving Problems . . . . . . . . . . . . . . . . . . . . . . . . . . . . . . . . . . . . . . . . . . . . 7-7
Telephone Problems . . . . . . . . . . . . . . . . . . . . . . . . . . . . . . . . . . . . . . . . . . . . 7-11
If a Power Cut Occurs . . . . . . . . . . . . . . . . . . . . . . . . . . . . . . . . . . . . . . . . . . . 7-12
If You Cannot Solve the Problem . . . . . . . . . . . . . . . . . . . . . . . . . . . . . . . . . . 7-13
Chapter 8 Machine Settings
Accessing the Machine Settings . . . . . . . . . . . . . . . . . . . . . . . . . . . . . . . . . . . 8-1
Menu Descriptions. . . . . . . . . . . . . . . . . . . . . . . . . . . . . . . . . . . . . . . . . . . . . . . 8-3
COMMON SETTINGS . . . . . . . . . . . . . . . . . . . . . . . . . . . . . . . . . . . . . . . . . . 8-3
COPY SETTINGS . . . . . . . . . . . . . . . . . . . . . . . . . . . . . . . . . . . . . . . . . . . . . 8-4
FAX SETTINGS . . . . . . . . . . . . . . . . . . . . . . . . . . . . . . . . . . . . . . . . . . . . . . . 8-4
REPORTS & LISTS . . . . . . . . . . . . . . . . . . . . . . . . . . . . . . . . . . . . . . . . . . . . 8-8
vi

Chapter 9 Appendix
Specifications . . . . . . . . . . . . . . . . . . . . . . . . . . . . . . . . . . . . . . . . . . . . . . . . . . . 9-1
Facsimile . . . . . . . . . . . . . . . . . . . . . . . . . . . . . . . . . . . . . . . . . . . . . . . . . . . . . 9-1
Telephone . . . . . . . . . . . . . . . . . . . . . . . . . . . . . . . . . . . . . . . . . . . . . . . . . . . .9-2
Index . . . . . . . . . . . . . . . . . . . . . . . . . . . . . . . . . . . . . . . . . . . . . . . . . . . . . . . . . . . 9-3
vii

Preface
Thank you for purchasing the Canon imageCLASS MF5550. Please read this manual
thoroughly before operating the machine in order to familiarize yourself with its capabilities,
and to make the most of its many functions. After reading this manual, store it in a safe place
for future reference.
How to Use This Manual
Symbols Used in This Manual
The following symbols are used in this manual to explain procedures, restrictions,
handling precautions, and instructions that should be observed for safety.
WARNING
CAUTION
IMPORTANT
NOTE
Indicates a warning concerning operations that may lead to death or
injury to persons if not performed correctly. In order to use the machine
safely, always pay attention to these warnings.
Indicates a caution concerning operations that may lead to injury to
persons, or damage to property if not performed correctly. In order to
use the machine safely, always pay attention to these cautions.
Indicates operational requirements and restrictions. Be sure to read
these items carefully in order to operate the machine correctly, and to
avoid damage to the machine.
Indicates a clarification of an operation, or contains additional
explanations for a procedure. Reading these notes is highly
recommended.
Keys Used in This Manual
The following symbols and key names are a few examples of how keys to be
pressed are expressed in this manual. The operation panel keys on the machine
are indicated within brackets.
Start
Press [Start].
viii
Image
Quality
Press [Image Quality].

Legal Notices
Users in the U.S.A.
Pre-installation Requirements for Canon Facsimile Equipment
A. Location
Supply a suitable table, cabinet, or desk. For the machine's dimensions and weight,
see Chapter 11, "Appendix," in the Basic Guide .
B. Order Information
1. Only a single line, touch-tone or rotary telephone set is to be used.
2. Order an RJ11-C modular jack (USOC code), which should be installed by the
telephone company. If the RJ11-C jack is not present, installation cannot occur.
3. Order a normal business line from your telephone company's business
representative. The line should be a regular voice grade line or the equivalent.
Use one line per machine.
DDD (DIRECT DISTANCE DIAL) LINE
-or-
IDDD (INTERNATIONAL DIRECT DISTANCE DIAL) LINE IF YOU COMMUNICATE
OVERSEAS
NOTE
Canon recommends an individual line following industry standards, e.g., the 2,500
(Touch Tone) or 500 (Rotary/Pulse Dial) telephones. A dedicated extension off a PBX
unit without "Call Waiting" can be used with the imageCLASS MF5550. Key telephone
systems are not recommended because they send non-standard signals to individual
telephones for ringing and special codes, which may cause a fax error.
C. Power Requirements
This equipment should be connected to a standard 120-volt AC, three-wire
grounded outlet only. Do not connect this machine to an outlet or power line shared
with other appliances that cause "electrical noise." Air conditioners, electric
typewriters, copiers, and machines of this sort generate electrical noise which often
interferes with communications equipment and the sending and receiving of
documents.
ix

Connection of the Equipment
This equipment complies with Part 68 of the FCC rules and the requirements
adopted by the ACTA. On the rear panel of this equipment is a label that contains,
among other information, a product identifier in the format US:AAAEQ##TXXXX. If
requested, this number must be provided to the telephone company.
The REN is used to determine the number of devices that may be connected to a
telephone line. Excessive RENs on a telephone line may result in the devices not
ringing in response to an incoming call. In most but not all areas, the sum of RENs
should not exceed five (5.0). To be certain of the number of devices that may be
connected to a line, as determined by the total RENs, contact the local telephone
company. The REN for this product is part of the product identifier that has the
format US:AAAEQ##TXXXX. The digits represented by ## are the REN without a
decimal point (e.g., 03 is a REN of 0.3).
This equipment may not be used on coin service provided by the telephone
company. Connection to party lines is subjected to state tariffs.
In Case of Equipment Malfunction
Should any malfunction occur which cannot be corrected by the procedures
described in this guide, disconnect the equipment from the telephone line and
unplug the power cord. The telephone line should not be reconnected or the power
cord plugged in until the problem is completely resolved. Users should contact
Canon Authorized Service Facilities for servicing of equipment. Information
regarding Canon Authorized Service Facility locations can be obtained by calling
the Canon Customer Care Center (1-800-423-2366).
Rights of the Telephone Company
Should the equipment cause harm to the telephone network, the telephone
company may temporarily disconnect service. The telephone company also retains
the right to make changes in facilities and services which may affect the operation
of this equipment. When such changes are necessary, the telephone company is
required to give adequate prior notice to the user.
FCC Notice
imageCLASS MF5550: Facsimile Transceiver, Model H12295
This device complies with Part 15 of the FCC Rules.
Operation is subject to the following two conditions:
(1) This device may not cause harmful interference,
and
(2) this device must accept an interference received, including interference that
may cause undesired operation.
x

NOTE
This equipment has been tested and found to comply with the limits for a class B digital
device, pursuant to Part 15 of the FCC Rules. These limits are designed to provide
reasonable protection against harmful interference in a residential installation. This
equipment generates, uses and can radiate radio frequency energy and, if not installed
and used in accordance with the instructions, may cause harmful interference to radio
communications. However, there is no guarantee that interference will not occur in a
particular installation. If this equipment does cause harmful interference to radio or
television reception, which can be determined by turning the equipment off and on, the
user is encouraged to try to correct the interference by one or more of the following
measures:
- Reorient or relocate the receiving antenna.
- Increase the separation between the equipment and receiver.
- Connect the equipment into an outlet on a circuit different from that to which the
receiver is connected.
- Consult the dealer or an experienced radio/TV technician for help.
Use of shielded cable is required to comply with class B limits in Subpart B of Part
15 of the FCC Rules.
Do not make any changes or modifications to the equipment unless otherwise
specified in this manual. If such changes or modifications should be made, you
could be required to stop operation of the equipment.
Canon U.S.A. Inc.
One Canon Plaza, Lake Success, NY 11042, U.S.A.
TEL No. (516) 328-5600
The Telephone Consumer Protection Act of 1991 makes it unlawful for any person
to use a computer or other electronic device to send any message via a telephone
fax machine unless such message clearly contains in a margin at the top or bottom
of each transmitted page or on the first page of the transmission, the date and time
it is sent and an identification of the business or other entity, or other individual
sending the message and the telephone number of the sending machine or such
business, other entity, or individual.
Once you have registered this information into your machine, it will be printed on
each transmitted page. Follow the instructions of "Registering Sender Information,"
on p. 2-3.
xi

Users in Canada
Pre-installation Requirements for Canon Facsimile Equipment
A. Location
Supply a suitable table, cabinet, or desk. For the machine's dimensions and weight,
see Chapter 11, "Appendix," in the Basic Guide .
B. Order Information
1. Provide only a single-line to touch-tone or rotary telephone set terminated with a
standard 4-pin modular phone plug. (Touch-tone is recommended if available in
your area.)
2. Order an RJ11-C modular jack (USOC code), which should be installed by the
telephone company. If the RJ11-C jack is not present, installation cannot occur.
3. Order a normal business line from your telephone company's business
representative. The line should be a regular voice grade line or equivalent. Use
one line per machine.
DDD (DIRECT DISTANCE DIAL) LINE
-or-
IDDD (INTERNATIONAL DIRECT DISTANCE DIAL) LINE IF YOU COMMUNICATE
OVERSEAS
NOTE
Canon recommends an individual line following industry standards [e.g., the 2,500 (touch
tone) or 500 (rotary/pulse dial) telephones]. A dedicated extension off a PBX unit without
"Camp On" signals is also permissible with your imageCLASS MF5550. Key telephone
systems are not recommended because they send non-standard signals to individual
telephones for ringing and special codes, which may cause a fax error.
C. Power Requirements
The power outlet should be a three-prong grounded receptacle (Single or Duplex).
It should be independent from copiers, heaters, air conditioners or any electric
equipment that is thermostatically controlled. The rated value is 120 volts and 15
amperes. The RJ11-C modular jack should be relatively close to the power outlet to
facilitate installation.
xii

Notice
This equipment meets the applicable Industry Canada Terminal Equipment
Technical Specifications. This is confirmed by the registration number. The
abbreviation, IC, before the registration number signifies that registration was
performed based on a Declaration of Conformity indicating that Industry Canada
technical specifications were met. It does not imply that Industry Canada approved
the equipment.
Cet appareil est conforme aux Spécifications techniques des équipements
terminaux de l'Industrie du Canada. Ceci est confirmé par le numéro
d'enregistrement. L'abréviation IC précédant le numéro d'enregistrement signifie
que l'enregistrement a été effectué sur la base de la Déclaration de conformité
indiquant que le produit est conforme aux spécifications techniques du Canada.
Ceci n'implique pas que le produit ait été approuvé par l'industrie du Canada.
Before installing this equipment, users should ensure that it is permissible to be
connected to the facilities of the local telecommunications company. The equipment
must also be installed using an acceptable method of connection. The customer
should be aware that compliance with the above conditions may not prevent
degradation of service in some situations.
Repairs to certified equipment should be coordinated by a representative
designated by the supplier. Any repairs or alterations made by the user to this
equipment, or equipment malfunctions, may give the telecommunications company
cause to request the user to disconnect the equipment.
Users should ensure for their own protection that the electrical ground connections
of the power utility, telephone lines and internal metallic water pipe system, if
present, are connected together. This precaution may be particularly important in
rural areas.
CAUTION
Users should not attempt to make such connections themselves, but should
contact the appropriate electric inspection authority, or electrician, as
appropriate.
IMPORTANT
•
This Class B digital apparatus meets all requirements of the Canadian
Interference-Causing Equipment Regulations.
Cet appareil numérique de la classe B respecte toutes les exigences du Règlement sur
•
le matériel brouilleur du Canada.
xiii

The Ringer Equivalence Number (REN) for this terminal equipment is 0.3. The REN
assigned to each terminal equipment provides an indication of the maximum
number of terminals allowed to be connected to a telephone interface. The
termination on an interface may consist of any combination of devices subject only
to the requirement that the sum of the Ringer Equivalence Numbers of all the
devices does not exceed five.
Le Nombre d'équivalence Ringer (REN) de cet appareil terminal est 0.3. Le REN
attribué à chaque équipement terminal fournit une indication sur le nombre
maximum de terminaux pouvant être connectés sur une interface téléphonique. La
terminaison sur une interface peut consister en n'importe quelle combinaison
d'appareils, à la condition seulement que la somme des Nombres d'équivalence
Ringer de tous les appareils ne soit pas supérieure à 5.
CANON CANADA INC.
1-800-OK-CANON
24 HOURS A DAY, SEVEN DAYS A WEEK
http://www.canon.ca
Super G3
Super G3 is a phrase used to describe the new generation of
fax machines that use ITU-T V.34 standard 33.6 Kbps*
modems. Super G3 High Speed Fax machines allow
transmission time of approximately 3 seconds* per page
which results in reduced telephone line charges.
Trademarks
Canon, the Canon logo, and imageCLASS are trademarks of Canon Inc.
Other product and company names herein may be the trademarks of their
respective owners.
xiv
* Approximately 3 seconds per page fax transmission time
based on ITU-T No. 1 Chart (Standard Mode) at 33.6 Kbps
modem speed. The Public Switched Telephone Network
(PSTN) currently supports 28.8 Kbps modem speeds or
lower, depending on telephone line conditions.

Copyright
Copyright 2003 by Canon Inc. All rights reserved.
No part of this publication may be reproduced or transmitted in any form or by any
means, electronic or mechanical, including photocopying and recording, or by any
information storage or retrieval system without the prior written permission of
Canon Inc.
Disclaimers
The information in this manual is subject to change without notice.
CANON INC. MAKES NO WARRANTY OF ANY KIND WITH REGARD TO THIS
MATERIAL, EITHER EXPRESS OR IMPLIED, EXCEPT AS PROVIDED HEREIN,
INCLUDING WITHOUT LIMITATION, THEREOF, WARRANTIES AS TO
MARKETABILITY, MERCHANTABILITY, FITNESS FOR A PARTICULAR
PURPOSE OF USE OR AGAINST INFRINGEMENT OF ANY PATENT. CANON
INC. SHALL NOT BE LIABLE FOR ANY DIRECT, INCIDENTAL, OR
CONSEQUENTIAL DAMAGES OF ANY NATURE, OR LOSSES OR EXPENSES
RESULTING FROM THE USE OF THIS MATERIAL.
xv

xvi

Introduction
CHAPTER
This chapter describes the operation panel and the standby display used for the fax function of
the machine.
Customer Support
The machine is designed with the latest technology to provide trouble-free
operation. If you encounter a problem with the machine's operation, try to solve it by
using the information in Chapter 7, "Troubleshooting." If you cannot solve the
problem or if you think the machine needs servicing, contact Canon Authorized
Service Facilities or the Canon Customer Care Center.
1
Customer Support
1-1

Operation Panel
bc de f gh i ja
1
Introduction
aaaaOne-Touch Speed Dialing keys
bbbbPause key
ccccReceive Mode key
ddddIn Use indicator
This section describes keys used when sending and receiving faxes, and setting
the Menu.
For keys not described here, see Chapter 1, "Introduction," in the Basic Guide.
Status
Monitor
COPY
Alarm
In Use
Clear
Start
01 02 03
04
05
07
08
10
11 12
Receive
Mode
Pause
06
Redial
09
Coded
Dial
lkmnopqrs
Dial fax/telephone numbers registered under
one-touch speed dialing keys.
Enters pauses between digits when dialing or
registering the numbers.
Selects the receive mode.
Lights green when a fax is being received or sent,
or the extension phone is off the hook. Flashes
green when the reservation of fax transmission is
set, or a fax is received into the memory.
Stop/Reset
SCAN
Menu
Enlarge /
Reduce
Exposure
Image
Quality
Set
Collate
FAX
eeeeAlarm indicator
Flashes red when the machine has a problem
such as a paper jam. (The error message is
displayed in the LCD.)
ffffFAX key
Switches the standby display to the Fax mode.
ggggMenu key
Customizes the way the machine operates.
hhhh (–), (+) keys
Scroll through the selections so you can see
other settings.
iiiiExposure key
Adjusts the fax exposure.
PQRS
GHI
1
4
7
Energy Saver
ABC
23
JKL
5
TUV
8
0
t
DEF
MNO
WXYZ
SYMBOLS
6
9
1-2
Operation Panel

jjjjEnergy Saver key
Sets or cancels the energy saver mode manually.
The key lights green when the energy saver
mode is set, and goes off when the mode is
canceled.
kkkkRedial key
Redials the previous number dialed manually with
the numeric keys.
llllCoded Dial key
Press [Coded Dial], followed by a two-digit code
to dial fax/telephone number registered for coded
speed dialing.
mmmmStatus Monitor key
Checks the status of print and fax jobs.
nnnnClear key
Clears an entry in the LCD.
ooooLCD
Displays messages and prompts during
operation. Also displays selections, text, and
numbers when specifying settings.
ppppStart key
Starts sending or receiving faxes.
qqqqStop/Reset key
Cancels sending or receiving faxes and other
operations, and turns to the standby display in the
LCD.
rrrrSet key
Determines the contents you set or register.
ssssImage Quality key
Adjusts the quality of fax image.
ttttNumeric keys
Enter numbers when dialing or registering fax/
telephone numbers, etc. Also, enter characters
when registering names.
1
Introduction
Operation Panel
1-3
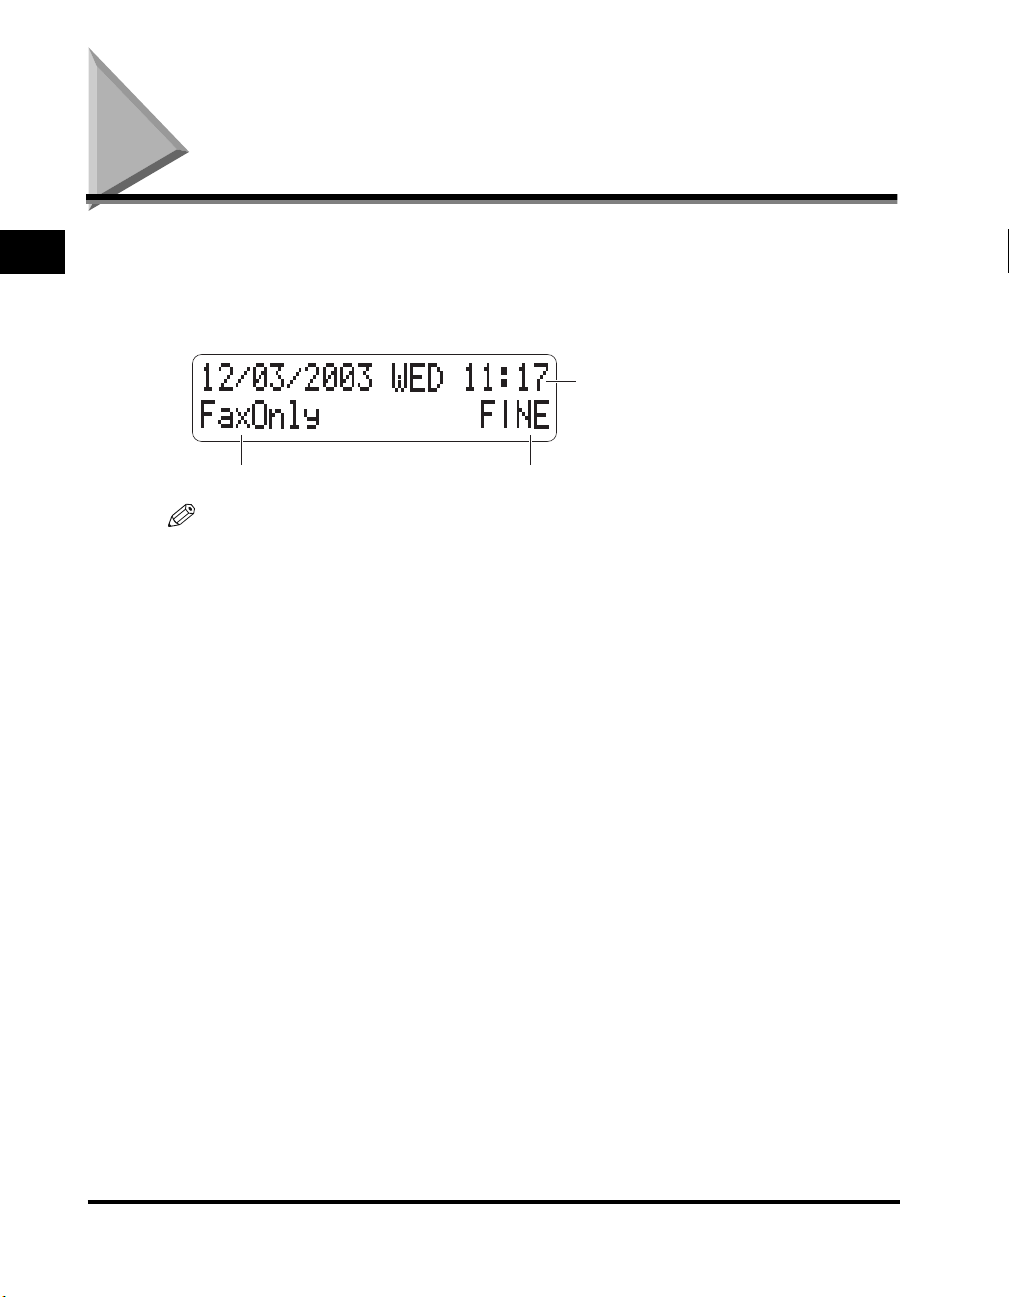
Standby Display
1
Introduction
The standby display differs depending on which mode is selected.
The standby display in the Fax mode is as follows:
■ Fax Mode
Date & time
Receive mode Image quality
NOTE
For the standby display in the Copy mode and the Scan mode, see Chapter 1,
"Introduction," in the Basic Guide.
1-4
Standby Display

Registering Information
in Your Machine
This chapter explains how to register the information necessary for sending and receiving
faxes.
2
CHAPTER
Guidelines for Entering Numbers, Letters, and Symbols
Follow this procedure when you come to a step that requires you to enter a name or
number.
1
Press [ ] to switch to the letter mode (:A) or the number mode
(:1).
You can see what mode you are in by the character indicated on the top right corner of
the LCD.
:A
_
Guidelines for Entering Numbers, Letters, and Symbols
2-1
2
Use the numeric keys to enter the character.
Press the key repeatedly until the character you want appears.
2
Registering Information in Your Machine
Key
[1]
[2] ABCabc 2
[3] DEFdef 3
[4] GHIghi 4
[5] JKLjkl 5
[6] MNOmno 6
[7]
[8]
[9]
[0] 0
[#]
%&+()[]{}<>
1
@.-_/
PQRSpqrs
TUVtuv
WXYZwxyz
-/ #!”,;:^’-=/|’?$a #+
7
8
9
Number ModeLetter Mode
● To enter two characters that are under the same key:
❑ Press the numeric key ➞ [] ➞ press the same numeric key again.
For example, to enter <DD> you would press [3] ➞ [] ➞ [3].
● To enter a space:
❑ Press [ ] twice.
● To delete a character:
2-2
❑ Press [ ].
● To delete an entire entry:
❑ Press [Clear].
Guidelines for Entering Numbers, Letters, and Symbols
Registering Sender Information
In the United States, FCC rules governing the use of facsimile equipment state that
your fax/telephone number, personal name or company name, and date and time of
transmission must be printed on every facsimile transmission.
The machine has been designed to print this information at the top of every fax you
send.
You must therefore register this information in the machine before using it.
Below is an example of how your sender information will print on a fax sent from the
machine:
12/03/2003 15:33 FAX 1234567 YOUR NAME 001
Date and time
of transmission
Your fax/telephone
number.
THE SLEREXE COMPANY LIMITED
SAPORS LANE•BOOLE•DORSET•BH25 8ER
2
TELEPHONE BOOLE (945 13) 51617 – FAX 1234567
Our Ref. 350/PJC/EAC
Your name Page number
NOTE
You can set the sender information to print inside or outside the image area. (See <3. TTI
POSITION> of "Menu Descriptions," on p. 8-5.)
Registering Sender Information
Registering Information in Your Machine
2-3
Entering the Date and Time
2
Registering Information in Your Machine
NOTE
You can print the USER DATA LIST to check the current setting. (See "Printing the USER
DATA LIST," on p. 6-8.)
Follow this procedure to enter the date and time:
1
Press [Menu].
2
Press [ ] or [ ] to select <COMMON SETTINGS> ➞ press [Set].
3
Press [ ] or [ ] to select <SYSTEM SETTINGS> ➞ press [Set].
4
Press [ ] or [ ] to select <DATE/TIME SETTING> ➞ press [Set]
twice.
5
Use the numeric keys to enter the date (month/day/year) and time
(in 24-hour format) ➞ press [Set].
Ex:
DATE/TIME SETTING
12/03/2003 15:10
Enter only the last two digits of the year.
12/03/2003 WED 15:10
➞
FaxOnly FINE
Registering Your Fax/Telephone Number and Name
NOTE
You can print the USER DATA LIST to check the sender information you have registered.
(See "Printing the USER DATA LIST," on p. 6-8.)
Follow this procedure to register your fax/telephone number and name:
1
Press [Menu].
2-4
Registering Sender Information
2
Press [ ] or [ ] to select <FAX SETTINGS> ➞ press [Set].
3
Press [ ] or [ ] to select <USER SETTINGS> ➞ press [Set].
4
Press [ ] or [ ] to select <USER TEL NUMBER> ➞ press [Set].
5
Use the numeric keys to enter your fax/telephone number (max. 20
digits, including spaces) ➞ press [Set].
Ex:
1.USER TEL NUMBER
TEL=123xxxxxxx
To enter a plus sign (+) before the number, press [#] repeatedly until it appears.
For details on how to enter or delete numbers, see "Guidelines for Entering Numbers,
Letters, and Symbols," on p. 2-1.
6
Press [ ] or [ ] to select <UNIT NAME> ➞ press [Set].
7
Use the numeric keys to enter your name (max. 24 characters,
including spaces) ➞ press [Set].
Ex:
:A
Canon
USER SETTINGS
➞
1.USER TEL NUMBER
USER SETTINGS
➞
2.UNIT NAME
2
Registering Information in Your Machine
For details on how to enter or delete characters, see "Guidelines for Entering
Numbers, Letters, and Symbols," on p. 2-1.
8
Press [Stop/Reset] to return to the standby display.
Registering Sender Information
2-5
Setting the Telephone Line Type
Before using the machine, make sure you have set the correct telephone line type
for your telephone line. If you are unsure of your telephone line type, contact your
telephone company.
2
Registering Information in Your Machine
NOTE
You can print the USER DATA LIST to check the current setting. (See "Printing the USER
DATA LIST," on p. 6-8.)
Follow this procedure to set the telephone line type:
1
Press [Menu].
2
Press [ ] or [ ] to select <FAX SETTINGS> ➞ press [Set].
3
Press [ ] or [ ] to select <USER SETTINGS> ➞ press [Set].
4
Press [ ] or [ ] to select <TEL LINE TYPE> ➞ press [Set].
2-6
5
Press [ ] or [ ] to select the telephone line type ➞ press [Set].
Ex:
TEL LINE TYPE
TOUCH TONE
You can select from the following:
- <TOUCH TONE> for tone dialing
- <ROTARY PULSE> for pulse dialing
6
Press [Stop/Reset] to return to the standby display.
Setting the Telephone Line Type
USER SETTINGS
➞
4.TEL LINE TYPE

Speed Dialing
CHAPTER
This chapter explains how to simplify the dialing process by assigning the recipient names and
their fax/telephone numbers to only one or two keys. You can also print out the list of recipients
registered for speed dialing.
Speed Dialing Methods
Speed dialing allows you to dial fax/telephone numbers by simply pressing one or a
few keys.
The following speed dialing methods are available:
■ One-Touch Speed Dialing
Register a fax/telephone number for one-touch speed dialing (see "Registering
One-Touch Speed Dialing," on p. 3-2), then to dial the number, simply press the one-touch
speed dialing key assigned to that number.
3
■ Coded Speed Dialing
Register a fax/telephone number for coded speed dialing (see "Registering Coded Speed
Dialing," on p. 3-4), then to dial the number, simply press [Coded Dial] ➞ enter the
two-digit code assigned to that number.
■ Group Dialing
Register a group of fax/telephone numbers for group dialing (see "Registering Group
Dialing," on p. 3-6), then to send a document to all numbers in that group, simply press the
one-touch speed dialing key assigned to that group.
Speed Dialing Methods
3-1

Registering One-Touch Speed Dialing
Before you can use one-touch speed dialing (see "One-Touch Speed Dialing," on p.
4-8), you need to register the recipients' fax/telephone numbers. You can register
up to 12 one-touch speed dialing keys, which can include group dialing numbers.
NOTE
•
When the machine starts receiving a fax or redialing, registering recipients will be
3
Speed Dialing
automatically canceled.
•
You can also register multiple fax/telephone numbers in each one-touch speed dialing
key. (See "Registering Group Dialing," on p. 3-6.)
Follow this procedure:
1
Press [Menu].
2
Press [ ] or [ ] to select <FAX SETTINGS> ➞ press [Set] three
times.
3
Press [ ] or [ ] to select a one-touch speed dialing key (01 to 12)
➞ press [Set] twice.
3-2
You can also select a key by pressing the one-touch speed dialing key.
4
Use the numeric keys to enter the fax/telephone number you want
to register (max. 32 digits, including spaces and pauses) ➞ press
[Set] twice.
Ex:
TEL NUMBER ENTRY
TEL=905xxxxxxx
For details on how to enter or delete numbers, see "Guidelines for Entering Numbers,
Letters, and Symbols," on p. 2-1.
Registering One-Touch Speed Dialing
:A
➞
 Loading...