

Page 1

User’s Guide
ScanGear Toolbox CS
for Windows
for CanoScan Color Image Scanners
1
Page 2

Table of Contents
About ScanGear Toolbox CS ........................................................................... 4
Installing ScanGear Toolbox CS ....................................................................... 5
System Requirements ................................................................................. 5
Installing/Uninstalling ................................................................................. 5
Starting and Closing ScanGear Toolbox CS ..................................................... 8
Starting ...................................................................................................... 8
Closing..................................................................................................... 11
Preparations for Using ScanGear Toolbox CS ................................................. 12
Default Settings for the ScanGear Toolbox CS Toolbar .............................. 12
Linkable Drivers and Programs.................................................................. 13
Faxing.................................................................................................. 13
Mail ..................................................................................................... 13
Copying............................................................................................... 14
Custom Buttons 1-3 ............................................................................ 14
Tab Settings ............................................................................................. 15
Fax Setting Tab .................................................................................... 15
Mail Setting Tab ................................................................................... 16
Copy Setting Tab ................................................................................. 17
Save Setting Tab .................................................................................. 18
Custom 1-3 Setting Tab ....................................................................... 19
Default Settings on the Prefs Tab .............................................................. 20
2
Page 3

Selecting the Film Adapter Unit ........................................................... 21
Using ScanGear Toolbox CS .......................................................................... 22
Sending Faxes .......................................................................................... 24
Sending Mail ............................................................................................ 24
Copying ................................................................................................... 25
Saving ...................................................................................................... 27
Custom Functions 1-3 .............................................................................. 27
Using ScanGear Toolbox CS without Displaying a Toolbar ............................ 29
ScanGear Toolbox CS Settings Categories/ Settings Chart ............................. 31
Appendix
Setting the Start Button on the Scanner ................................................... 33
Index ............................................................................................................ 35
Regarding screen shots
In this manual, most screen shots are taken with Windows 98. When you use other Windows, different screens may
appear from this manual.
Trademarks
Microsoft and Windows are trademarks or registered trademarks of Microsoft Corporation in the United States and
other countries.
Other names and products listed in this publication are the trademarks or registered trademarks of the respective
companies.
3
Page 4

About ScanGear Toolbox CS
ScanGear Toolbox CS is a stand-alone utility program that provides a simple
way to use a scanner to scan and send images to fax programs or copy them
directly to printers without running a TWAIN-compliant program.
ScanGear Toolbox CS can also scan an image, automatically start a program
and send the scanned image to that program with the click of a single button.
When you use a scanner with the start button in front of the scanner, the
button launches ScanGear Toolbox CS on your computer, providing added
convenience.
When you use a Film Adapter Unit, please refer to P.21 regarding
its settings and usage.
4
Page 5

Installing ScanGear Toolbox CS
System Requirements
The system requirements for ScanGear Toolbox CS are the following;
OS: Windows 95, Windows 98, Windows NT Workstation 4.0,
Windows 2000 Professional
Installing/Uninstalling
The descriptions here for the installation are those with using the CanoScan
Setup CD-ROM bundled with the scanner.
When you obtain the ScanGear Toolbox CS through the download service,
refer to the documents with the service.
With Windows NT Workstation 4.0 and Windows 2000 Professional,
ensure that you log on as an Administrator to install/uninstall the
software.
Before installing ScanGear Toolbox CS, the TWAIN driver and the
printer driver are reccommended to install.
5
Page 6

Installing
As described in the Getting Started Guide provided with the
scanner, if ScanGear Toolbox CS 2.2 is already installed, the
following procedures below are not required.
1. Place the CanoScan Setup Utility CD-ROM in the drive.
2. Click the [Install the Software] button in the CD-ROM’s menu window.
3. The Install window will display. Ensure that a check mark appears to the
left of ScanGear Toolbox CS 2.2. If there is no check mark, click to insert
one.
4. Click the [Start Installation] button. Follow the on-screen instructions to
proceed with the installation. After installation, ScanGear Toolbox CS 2.2
will automatically be added to the Windows Start menu.
6
Page 7
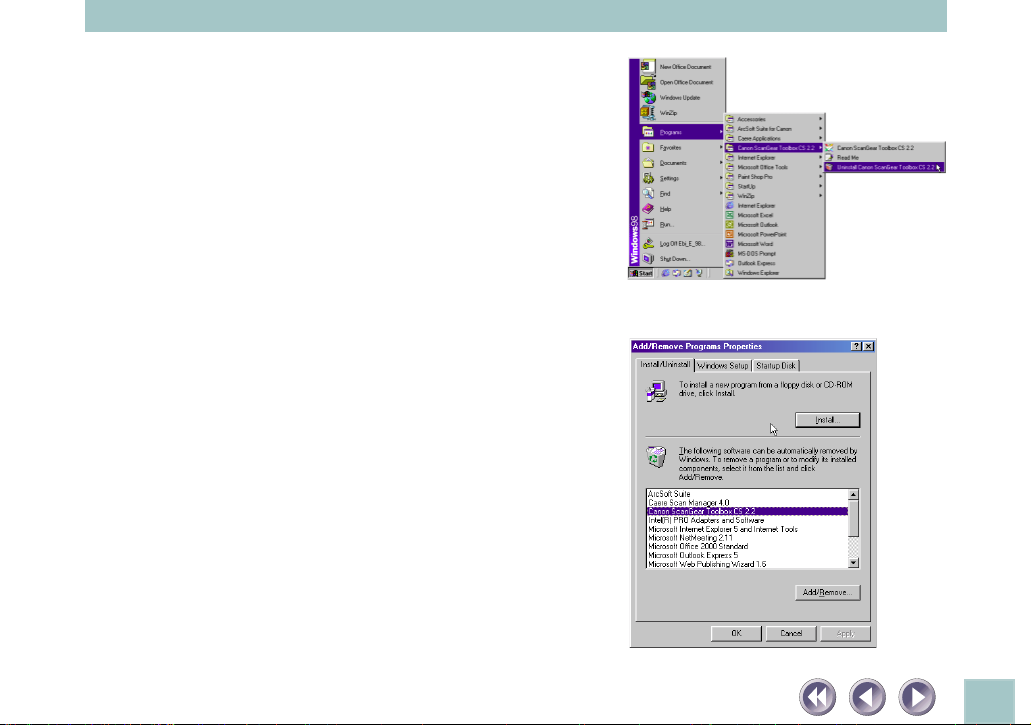
Uninstalling
Uninstalling from the start menu
Click the Windows [Start] button on the
taskbar and select [Programs], [Canon
ScanGear Toolbox CS 2.2] and [Uninstall
Canon ScanGear Toolbox CS 2.2] to uninstall
the software.
Uninstalling with Add/Remove Programs Properties
1. Click the Windows [Start] button on the
taskbar and select [Settings], [Control
Panel] to open the Control Panel.
2. Select Add/Remove Programs.
3. Select [Canon ScanGear Toolbox CS 2.2]
from the list and click the [Add/Remove]
button (Windows 98 and so on) or
[Change/Remove] button (Windows
2000). Follow the on-screen instructions
to complete the procedure.
7
Page 8
Starting and Closing ScanGear Toolbox CS
Starting
Launching from the Start Button
Press the start button on the front of the scanner. ScanGear Toolbox CS will
run on the computer (This method is valid if the setting, described in P.29,
“When Scanner Push Button pressed” is set to “Show Toolbox”).
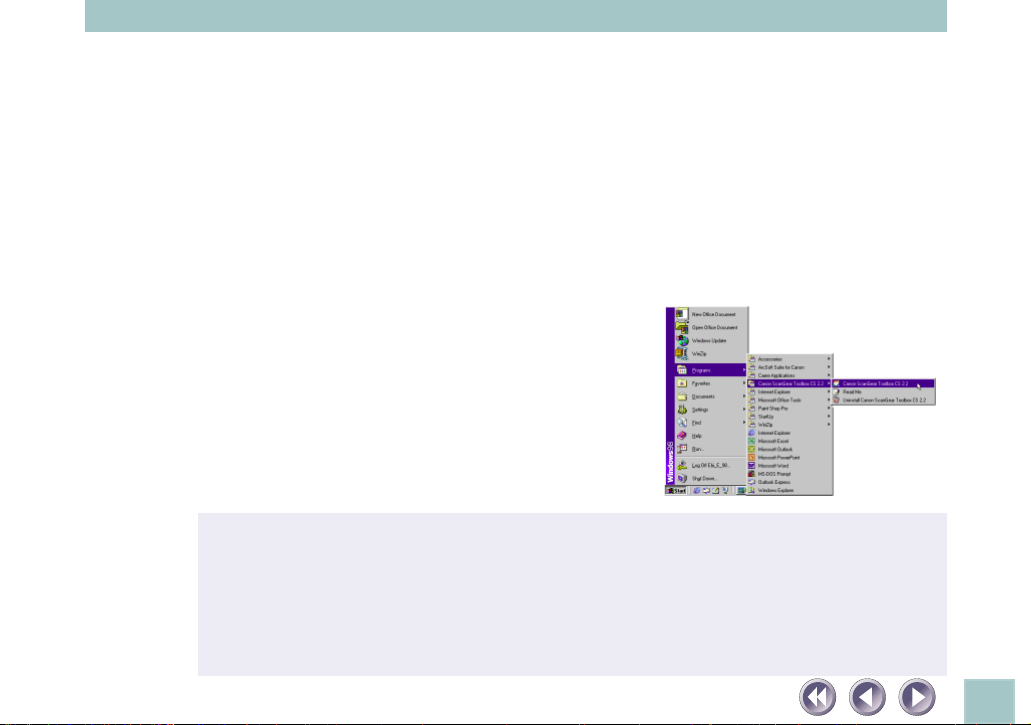
Manual Launch from the Start Menu
Click the Windows [Start] button on the
taskbar and select [Programs], [Canon
ScanGear Toolbox CS 2.2] and [Canon
ScanGear Toolbox CS 2.2].
The ScanGear Toolbox CS toolbar (p. 9) will display no matter
which of the above methods is used to start the program. The
ScanGear Toolbox CS shortcut button will also display beside the
clock display on the Windows taskbar.
To launch the scanner without the start button, start ScanGear
Toolbox CS manually.
8
Page 9
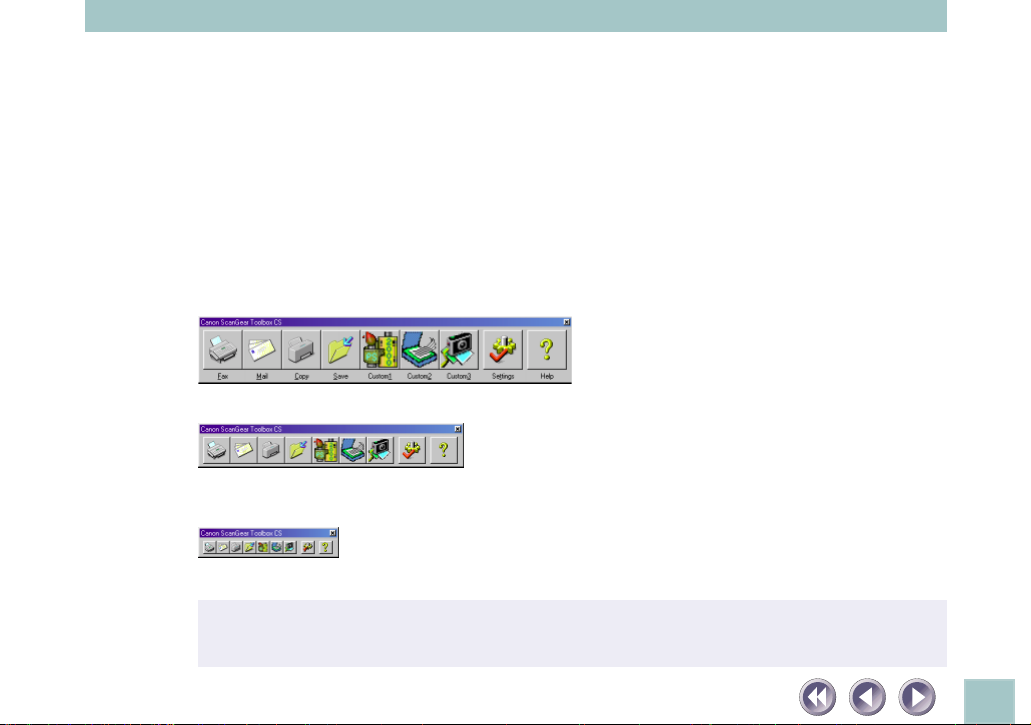
Using the ScanGear Toolbox CS Toolbar
The ScanGear Toolbox CS toolbar displays when the program is launched. The
fax, mail, copy and save buttons are standard items. When you make
installations using CanoScan Setup Utility, the application softwares installed
simultaneously are automatically registered to the ScanGear Toolbox CS
toolbar. The example below also includes customized buttons for ArcSoft
PhotoStudio 2000, Caere OmniPage Pro and ArcSoft PhotoBase. You can perform
a variety of procedures in a single step simply by clicking one of these buttons.
Toolbar - Large
Toolbar - Medium
Toolbar - Small
You can change the size of the Toolbar with Prefs. Tab settings
(P20).
9
Page 10
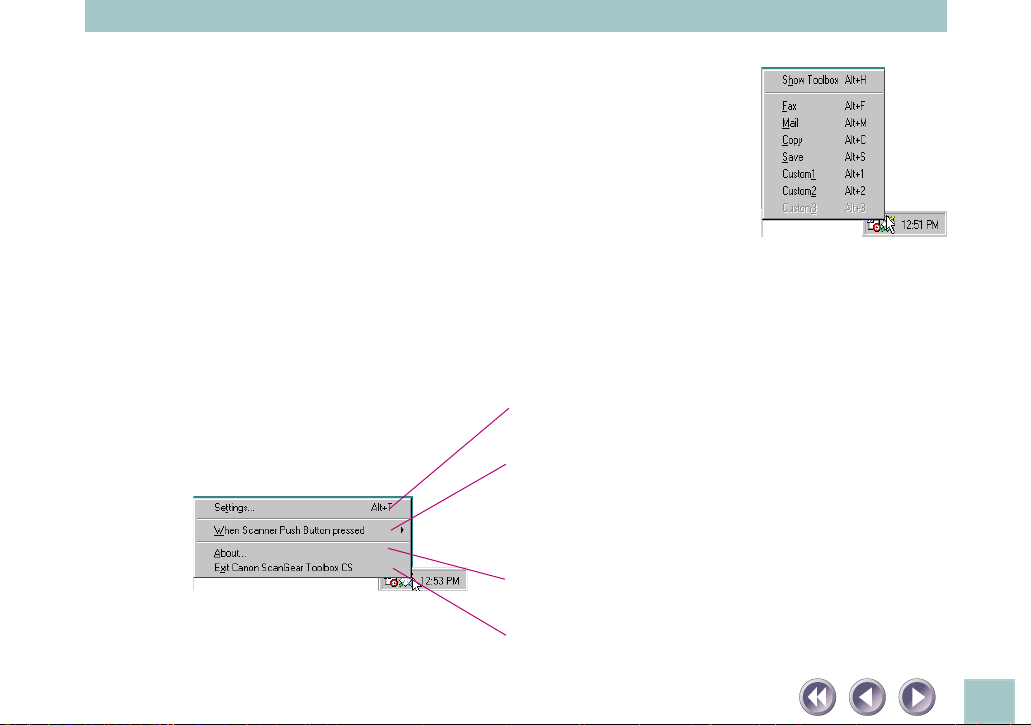
Using the Shortcut Button
1. Left-Click on Shortcut Button
Left-clicking the shortcut button presents the pop-up
menu shown here. Click on any item to start the associated function.
2. Double Left-Click on Shortcut Button
Double-clicking the shortcut button with the left mouse
button shows the ScanGear Toolbox CS toolbar on the desktop.
3. Right-Click on Shortcut Button
Right-clicking the shortcut button presents the pop-up menu shown here.
Click here to display the Prefs tab, which can be used to
adjust the startup settings for ScanGear Toolbox CS.
Click here to set which function is activated when the
start button on a CanoScan is pressed. This function is
valid with a scanner with the start button. The
available options are Show Toolbox, Fax, Mail, Copy,
Save and Custom 1 - 3.
Click here to display ScanGear Toolbox CS version
information.
Click here to close ScanGear Toolbox CS.
10
Page 11
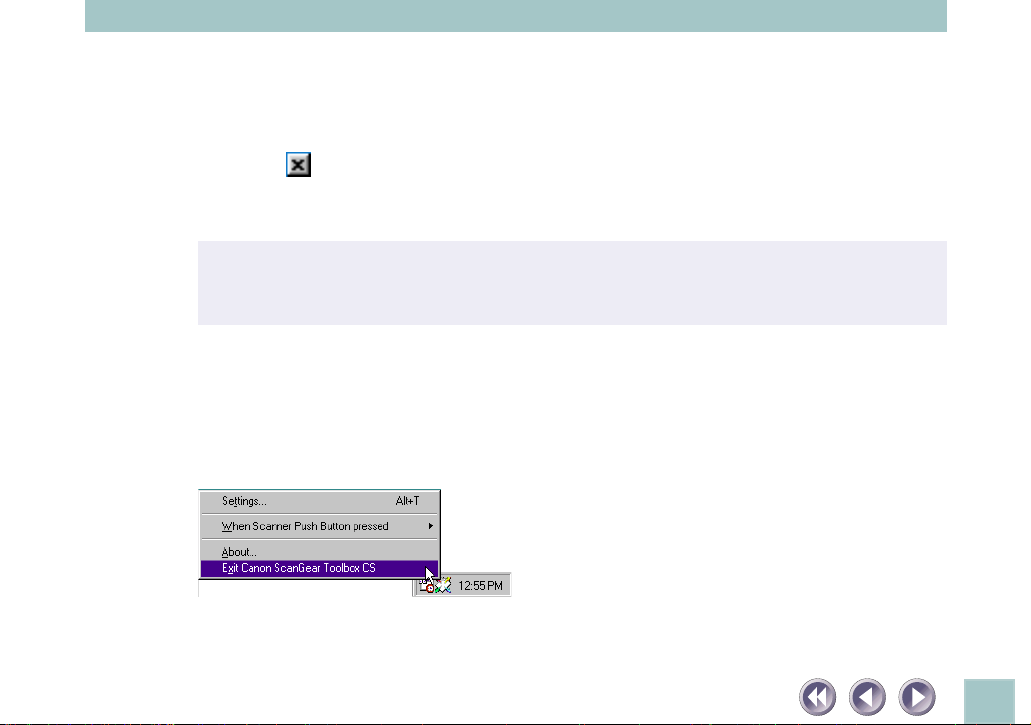
Closing
Closing the Toolbar
Click the
toolbar will close.
ScanGear Toolbox CS continues to run even after the toolbar is
closed by the above method.
Closing ScanGear Toolbox CS
Right-click the shortcut icon on the Windows taskbar and select [Exit ScanGear
Toolbox] from the pop-up menu. ScanGear Toolbox CS will close. The toolbar
will also close at the same time if it was displayed.
close box at the upper right of the toolbar to close it. Only the
11
Page 12

Preparations for Using ScanGear Toolbox CS
Default Settings for the ScanGear Toolbox CS Toolbar
Fax
Scans the image and
sends it to the Fax
software.
Mail
Scans the image
and attaches it to
the mail message.
The conditions to make buttons visible as above and to use the function are as
following;
Fax: a fax modem is connected to the PC and a fax software is installed.
Mail: an MAPI (p.13) compatible mail software is installed.
Copy: a printer is connected to the PC and an appropriate driver is installed.
Custom(1-3): When all the software programs are installed using the
CanoScan Setup Utility CD-ROM, the bundled application software will be
registered.
Copy
Scans the image
and outputs it to
the printer.
Save
Scans the image
and saves it as a
file.
Custom(1-3)
Scans the image and
sends it to the
application software.
Help
Displays the
Help.
Settings
Displays the
Preferences dialog.
12
Page 13

Linkable Drivers and Programs
The drivers and programs linked to the fax, copy and mail buttons can be
changed. In addition, the three custom buttons can be linked to other drivers
or programs, which must meet the following criteria.
Faxing
The fax button can be linked to printer drivers and faxing softwares such as
Microsoft Outlook 98 or Microsoft Outlook 2000.
Mail
Mail programs must be MAPI compatible to be linked to ScanGear Toolbox CS.
This button can be linked to mailing softwares such as Microsoft Outlook or
Microsoft Exchange.
MAPI(Messaing Application Programming Interface) is the industry
standard interface for e-mail programs.
13
Page 14

Copying
The copy button can be linked to printer drivers that appear in the [Printers]
folder, found by clicking the Windows [Start] button and selecting [Settings]
and [Printers]. If two or more printers are connected to your computer,
ScanGear Toolbox CS can switch between them. Both local and network
printers can be linked to ScanGear Toolbox CS.
Custom Buttons 1-3
TWAIN-compatible programs can be linked to the three customizable buttons
in ScanGear Toolbox CS. With this feature, an image can be scanned, the
program started and the scanned image loaded into the program with a single
click of a button.
When you make installations using CanoScan Setup Utility, the
application softwares installed simultaneously are automatically
registered to the ScanGear Toolbox CS toolbar (Custom 1 to 3).
The Image Types which can be transferred to the linked drivers
and programs are only Color(24-bit), Grayscale(8-bit) and Black
and White(1-bit). Color(36-bit / 42-bit) and Grayscale(12-bit / 14-
bit) are not supported.
14
Page 15

Tab Settings
Clicking the [Settings] button opens the Canon ScanGear Toolbox CS Settings
window, which features a tab for each button. These tabs are used to specify
the button settings, such as the driver or program to which it is linked. The
tabs can also be used to adjust settings for scanned images.
Fax Settings Tab
The short-cut [Alt]+[F] displays this tab.
• Show this button on Toolbar
Place a check in this box to display the button for this
function on the ScanGear Toolbox CS toolbar.
• Button links
Click the arrow of the [Link to:] list box. Select [System
default] to register the printer driver “Set as Default”
for your computer.
• Save images
Place a check in this box to save the scanned image to
a file in addition to sending it to the fax driver. The
save folder, and root filename and numbering options
can be set when a check is present in this box.
• Settings for Easy Acquire
Place a check in the box to turn Easy Acquire on. And
specify the settings (image type, image quality, paper
size (scan area)) used when Easy Acquire is turned on
from the lists. Custom Setting is performed for the
paper size. See ScanGear Toolbox CS Settings
Categories/Settings Chart (p. 31) for a list of the
options for these settings.
15
Page 16

Mail Settings Tab
• Show this button on Toolbar
Place a check in this box to display the button for this
function on the ScanGear Toolbox CS toolbar.
• Button links
Click the arrow of the [Link to:] list box and select
[System default] to register the default MAPI mail
program for your computer.
• Application can open multiple images
Place a check in this box if the application can open
more than two images. When an ADF is equipped, the
application opens more than two images at a time.
When no ADF is equipped, this check is invalid.
• Save images
Place a check in this box to save the scanned image to
a file in addition to sending it to the mail program.
The save folder, root filename and numbering
options, and file format can be set when a check is
present in this box.
The short-cut [Alt]+[M] displays this tab.
• Settings for Easy Acquire
Place a check in the box to turn Easy Acquire on. And
specify the settings (image type, image quality, paper
size (scan area)) used when Easy Acquire is turned on
from the lists. Custom Setting is performed for the
paper size. See ScanGear Toolbox CS Settings
Categories/Settings Chart (p. 31) for a list of the
options for these settings.
16
Page 17

Copy Settings Tab
The short-cut [Alt]+[C] displays this tab.
• Multiple copies
Place a check in this box to specify the number of
copies when copying.
• Show this button on Toolbar
Place a check in this box to display the button for this
function on the ScanGear Toolbox CS toolbar.
• Button links
Click the arrow of the [Link to:] list box. Select [System
default] to register the printer driver “Set as Default”
for your computer.
• Settings for Easy Acquire
Place a check in the box to turn Easy Acquire on. And
specify the settings (image type, image quality, paper
size (scan area)) used when Easy Acquire is turned on
from the lists. Custom Setting is performed for the
paper size. See ScanGear Toolbox CS Settings
Categories/Settings Chart (p. 31) for a list of the
options for these settings.
17
Page 18

Save Settings Tab
The short-cut [Alt]+[S] displays this tab.
• Show this button on Toolbar
Place a check in this box to display the button for this
function on the ScanGear Toolbox CS toolbar.
• Image file
The save folder, root filename and numbering
options, and file format can be set in this section.
• Settings for Easy Acquire
Place a check in the box to turn Easy Acquire on. And
specify the settings (image type, image quality, paper
size (scan area)) used when Easy Acquire is turned on
from the lists. Custom Setting is performed for the
paper size. See ScanGear Toolbox CS Settings
Categories/Settings Chart (p. 31) for a list of the
options for these settings.
18
Page 19

Custom (1, 2, 3) Settings Tab
• Show this button on Toolbar
Place a check in this box to display the button for this
function on the ScanGear Toolbox CS toolbar.
• Button links
Click the [Set] button to register an application
program, which is selected with the next dialog, to a
custom button.
• Application can open multiple images
Place a check in this box if the application can open
more than two images. When an ADF is equipped, the
application opens more than two images at a time.
When no ADF is equipped, this check is invalid.
• Save images
Place a check in this box to save the scanned image to
a file in addition to sending it to the registered
program. The save folder, root filename and numbering options, and file format can be set when a check is
present in this box.
• Settings for Easy Acquire
The short-cut [Alt]+[1(/2/3)] displays
Custom1(/2/3) tab respectively.
Place a check in the box to turn Easy Acquire on. And
specify the settings (image type, image quality, paper
size (scan area)) used when Easy Acquire is turned on
from the lists. Custom Setting is performed for the
paper size. See ScanGear Toolbox CS Settings Categories/Settings Chart (p. 31) for a list of the options for
these settings.
When registering an OCR program that does not support color data, set the [Image
type:] setting in the Settings for Easy Acquire section to [Black and White].
19
Page 20

Default Settings on the Prefs Tab
The Prefs tab can be used to adjust settings that affect all ScanGear Toolbox CS
functions, no matter which tab or button is selected.
The short-cut [Alt]+[T] displays this tab.
• Image source
Click the arrow on the image source list box to specify
which scanner you will use if two or more scanners are
connected to your computer.
• Scan from
Click the arrow on the “scan from” list box to specify
the optional device when Automatic Document
Feeder (ADF) is equipped.
• When Scanner Push Button pressed
The option selected in this list box determines what
happens when the push button on the scanner is
pressed. This function is valid with a scanner with the
start button. The available options are Show Toolbox,
Fax, Mail, Copy, Save and Custom 1-3.
• Toolbar always on top
Place a check in this box to have the toolbar display
on top of other windows on the desktop. Remove it
to turn this function off.
• Load on Windows Startup
Place a check in this box to have ScanGear Toolbox CS
automatically start when Windows is run. Remove it
to turn this function off.
• Button size
Place a check in one of the [Large], [Medium] or
[Small] box to control the relative size of the toolbar
as it appears on the desktop.
20
Page 21

Selecting the Film Adapter Unit
The Scan from setting in the Prefs. tab cannot be used to select the Film
Adapter Unit as an image source. Follow the procedure below to select the
Film Adapter Unit for use with your system.
1. For [Scan from] in the Prefs. tab, select [Platen].
2. Click the [Easy Scan] check box off.
3. Start ScanGear Toolbox CS and click the button such as Copy or Custom to
open the TWAIN driver display. For any setting other than when [Show
Toolbox] is selected under [When Scanner Push Button pressed], you open
the TWAIN driver display by pressing the Start button on the front of the
scanner.
4. In the TWAIN driver, select the Film Adapter Unit for the image source. If
you are using ScanGear CS, click the Scanner tab (the tab with the name
of the Scanner) and select the image source on the Scanner sheet in the
Advanced Mode. You can select the image source also in the Simple
Mode.
5. Use the TWAIN driver to execute previewing or scanning images.
21
Page 22

Using ScanGear Toolbox CS
Using ScanGear Toolbox CS is as easy as clicking the appropriate button on the
toolbar or selecting the appropriate option from the shortcut button pop-up
menus.
ScanGear Toolbox CS can only be closed by right-clicking the
shortcut button and selecting [Exit ScanGear Toolbox] from the
pop-up menu.
When a scan is initiated, the image is loaded into the registered driver or
program. The TWAIN driver such as ScanGear CS or CanoCraft CS can be
automatically launched at this point, allowing the image to be previewed and
adjusted, depending on whether Easy Acquire has been turned on or off in the
setting tab of each function.
Scanning with Easy Acquire On
When Easy Acquire is on, the registered program is launched directly and the
TWAIN driver is not launched at all. Whenever a toolbar button is clicked (or
shortcut button pop-up menu option selected), the final scan of the image is
initiated, the progress dialog displays and the functions of the button are
carried out as specified in the tab.
22
Page 23

Progress Dialog
The progress dialog shows the selected settings while
the progress bar at the bottom shows how far the
scan has progressed. If the [Cancel] button on this
dialog is pressed, the scan stops and the remainder of
the function is canceled. If the [Change Settings]
button on this dialog is pressed, the scan stops, the
remainder of the function is canceled, and Prefs. tab
will appear.
Scanning with Easy Acquire Off
When Easy Acquire is off, the TWAIN driver is first launched to allow a preview
scan and adjustments. After the TWAIN driver is used to complete the final
scan, the registered driver or program is launched and the scanned image is
loaded into it.
23
Page 24

Sending Faxes
Sending Faxes When Easy Acquire is On
1. Click the [Fax] button. The scan will initiate and display the progress
dialog.
2. The scanned image will be sent to the registered fax program.
Sending Faxes When Easy Acquire is Off
1. Click the [Fax] button. The TWAIN driver’s control panel will display.
2. Click the [Preview] button, check the preview image and adjust as
required.
3. Click the [Scan] button. The scanned image will be sent to the fax program
and prepared for transmission.
Sending Mail
Sending Mail When Easy Acquire is On
1. Click the [Mail] button. The scan will initiate and display the progress
dialog.
24
Page 25

Copying
2. When the scan is complete, a new message window is opened in the mail
program and the scanned image is included as an attachment. The
message is ready to send after you specify the address and subject.
Sending Mail When Easy Acquire is Off
1. Click the [Mail] button. The TWAIN driver’s control panel will display.
2. Click the [Preview] button, check the preview image and adjust as
required.
3. Click the [Scan] button. When the scan is complete, a new message
window is opened in the mail program and the scanned image is included
as an attachment. The message is ready to send after you specify the
address and subject.
Copying When Easy Acquire is On
1. Click the [Copy] button. When [Multiple Copies] is on, the following dialog
appears. Specify the number of copies to print and click [OK]. The scan will
initiate and display the progress dialog.
25
Page 26

2. When the scan is complete, it will print out on the registered printer.
Copying When Easy Acquire is Off
1. Click the [Copy] button. When [Multiple Copies] is on, the following dialog
appears. Specify the number of copies to print and click [OK].
TheTWAIN driver’s main panel will display.
2. Click the [Preview] button, check the preview image and adjust as required.
3. Click the [Scan] button. When the scan is complete, it will print out on the
registered printer.
26
Page 27

Saving
Saving When Easy Acquire is On
1. Click the [Save] button. The scan will initiate and display the progress
dialog.
2. When the scan is complete, the image will be saved with the root name
and numbering system specified in the Prefs tab.
Saving When Easy Acquire is Off
1. Click the [Save] button. The TWAIN driver’s control panel will display.
2. Click the [Preview] button, check the preview image and adjust as
required.
3. Click the [Scan] button. When the scan is complete, the image will be
saved with the root name and numbering system specified in the Prefs tab.
Custom Functions 1-3
When Easy Acquire is On
1. Click the [Custom 1 (2 or 3)] button. The scan will initiate and display the
progress dialog.
2. When the scan is complete, the program registered with the button will
launch and display the scanned image.
27
Page 28

When Easy Acquire is Off
1. Click the [Custom 1 (2 or 3)] button. The TWAIN driver’s control panel will
display.
2. Click the [Preview] button, check the preview image and adjust as re-
quired.
3. Click the [Scan] button. When the scan is complete, the program
registered with the button will launch and display the scanned image.
28
Page 29

Using ScanGear Toolbox CS without Displaying a Toolbar
You can set the ScanGear Toolbox CS to launch a function of the ScanGear
Toolbox CS, such as Copy or Fax immediately without displaying a toolbar, by
pressing the start button in front of the scanner.
The function described here is not valid with a scanner which does
not have the start button.
In the item “When Scanner Push Button pressed” from the pop-up menu
displayed by right-clicking the short-cut icon or in the Prefs. tab, specify which
function will launch by pressing the start button on the scanner.
Set here
29
Page 30

You can specify a function from Show Toolbox/Fax/Mail/Copy/Save/Custom1 (2, 3).
When [Show Toolbox] is specified, the toolbar appears when you press the
start button.
Otherwise, the specified function will launch immediately when you press the
start button
30
Page 31

ScanGear Toolbox CS Settings Categories/ Settings Chart
xaFxaF
xaFxaFliaMliaM
xaF
ipd001dradnatS
ytilauQegamIytilauQegamI
ytilauQegamIytilauQegamI
ytilauQegamI
)noituloseR(
,57,001,003,002,081,051
ipd002eniF
liaMliaM
liaM
0021,027,006,004,063ipd
epyTegamIepyTegamI
epyTegamIepyTegamI
epyTegamI
eziSrepaPeziSrepaP
eziSrepaPeziSrepaP
eziSrepaP
eliFtuptuOeliFtuptuO
eliFtuptuOeliFtuptuO
eliFtuptuO
stamroF
roftinUroftinU
roftinUroftinU
roftinU
aerAgninnacS
etihWdnakcalB821dlohserhTtib1
retteL,5B,4A5A,4A)tiartroP(5A,,)epacsdnaL(
Tdegga)fit.*(tamroFeliFegamI
hcni,retemillimlexip,hcni,retemillim
tib42roloC
tib8elacsyarG
,evitucexE,retteL,5BnemetatSt
)tiartroP(nemetatS,(t)epacsdnaL,
motsuC,draCssenisuB
)pmb.*(pamtiBswodniW
)gpj.*(egamIGEPJ
)xcp.*(egamIhsurBtniaPCP
)gnp.*(scihparGkrowteNelbatroP
31
Page 32

ypoCypoC
ypoCypoC3-1motsuC/evaS3-1motsuC/evaS
ypoC
3-1motsuC/evaS3-1motsuC/evaS
3-1motsuC/evaS
ytilauQegamIytilauQegamI
ytilauQegamIytilauQegamI
ytilauQegamI
)noituloseR(
epyTegamIepyTegamI
epyTegamIepyTegamI
epyTegamI
eziSrepaPeziSrepaP
eziSrepaPeziSrepaP
eziSrepaP
eliFtuptuOeliFtuptuO
eliFtuptuOeliFtuptuO
eliFtuptuO
stamroF
roftinUroftinU
roftinUroftinU
roftinU
aerAgninnacS
tfarDelacsyarG,W&B/57roloC(
)051dooG,)003/051(/003(hgiH,
hgihrepuS,)006ipd)0021/006(
tib42roloC
tib8elacsyarG
etihWdnakcalB821dlohserhTtib1
5A,4A)tiartroP(5A,)epacsdnaL(tnemetatS,evitucexE,retteL,5B,
)tiartroP(tnemetatS,)epacsdnaL(motsuC,draCssenisuB,
)gpj.*(egamIGEPJ
Tdegga)fit.*(tamroFeliFegamI
hcni,retemillimlexip,hcni,retemillim
,003,002,081,051,001,57
0021,027,006,004,063ipd
)pmb.*(pamtiBswodniW
)xcp.*(egamIhsurBtniaPCP
)gnp.*(scihparGkrowteNelbatroP
32
Page 33

Appendix
Setting the Start Button on the Scanner
The description here is valid if you use the scanner with the start
button in the Windows 98 or Windows 2000 environment.
When you install WDM/STI compliant TWAIN driver on Windows 98, the icon
[Scanners and Cameras] will appear in the [Control Panel] (With Windows
2000, this icon always appears).
With this icon, you can specify the application software to launch immediately
by pressing the start button. You may specify the software other than
ScanGear Toolbox CS.
1. Open the [Scanner and Cameras] icon in [Start]-[Settings]-
[Control Panel].
2. Select the Canon Scanner you are using in the [Devices] tab, and click
[Properties].
33
Page 34

3. Open the [Events] tab.
4. Confirm that [Canon Push Button] is set in
[Scanner events], then check the unique
launching software with the start button
from the [Send to this application] list box.
0. When ScanGear Toolbox CS is installed, it
appears in this box.
5. Close the [Control Panel].
34
Page 35

Index
Closing .................................................. 11
Copying ................................................ 25
Copy Setting Tab ................................... 17
Custom 1-3 Setting Tab ......................... 19
Custom Function 1-3 ............................. 27
Fax Setting Tab ...................................... 15
Installing .................................................. 5
Launching from the Start Button ............. 8
Linkable Drivers and Programs ............... 13
Mail Setting Tab ..................................... 16
Manual Launch from the Start Menu ....... 8
MAPI ..................................................... 13
OCR program ........................................ 19
Prefs Tab ................................................ 20
Save Setting Tab .................................... 18
Saving ................................................... 27
Scanners and Cameras icon .................. 33
Sending Faxes ........................................ 24
Sending Mail ......................................... 24
Setting the Start Button on the Scanner. 33
Settings Categories/Chart ...................... 31
Shortcut Button ..................................... 10
Starting ................................................... 8
System Requirements .............................. 5
Toolbar .................................................... 9
without Displaying a Toolbar ............ 29
Default Settings for the Toolbar........ 12
Uninstalling ............................................. 7
35
Page 36

I-OE-041AA Copyright © 2000 CANON INC. All Rights Reserved
 Loading...