

Page 1
Page 2
Canon
Datelux
INSTRUCTIONS
Page 3

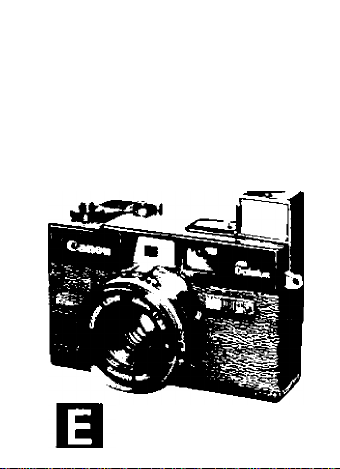
Congratulations on choosing the Canon Datelux. This
camera has many excellent features, such as a built-in
flash and a date imprinting system which will make
photography very enjoyable. Please read these instruc
tions carefully before taking pictures in order to
understand the functions of the camera and how to
make best use of them.
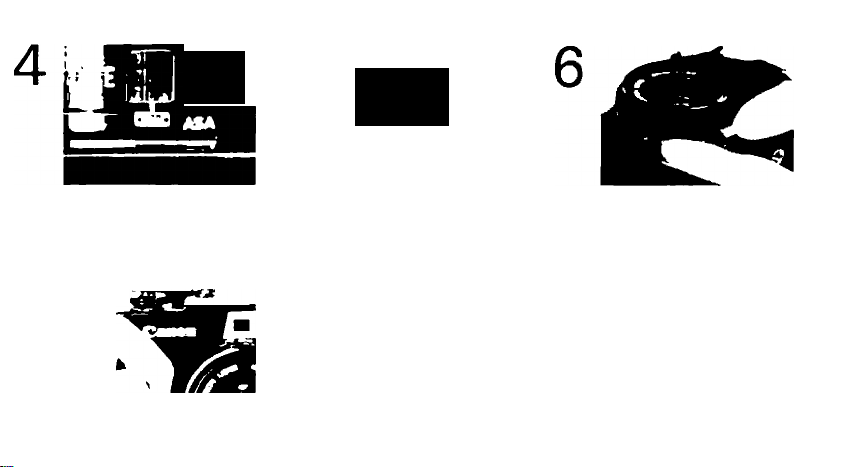
Page 4
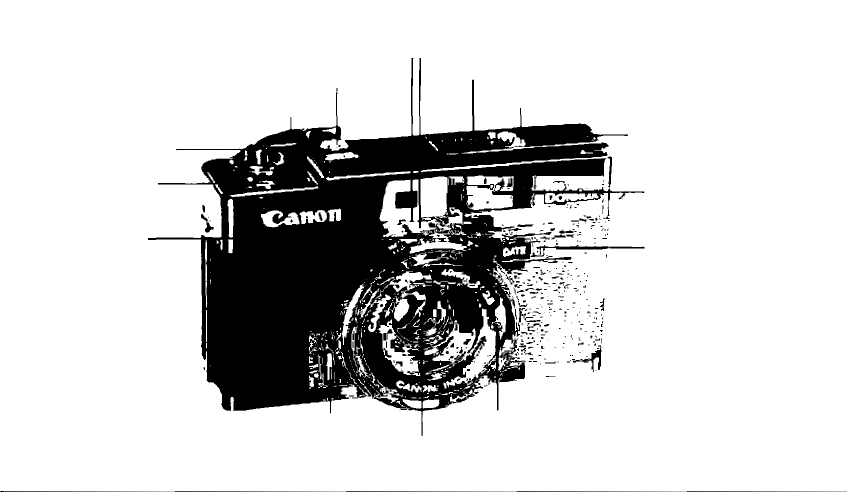
Shutter Button
ASA Film Speed Indication Window
Battery Check Button
Film Advance Lever
Date Indication Window
Film Rewind Crank
Film Transport Indication Mark
Built-in Flash
Frame Counter
Distance Scale
Focusing Ring
Self-timer Lever
Viewfinder Window
Date Switch
Light Measuring Window
Lens
Page 5

Contents
Steps for Taking Pictures................................6
Battery Loading...............................................8
Battery Check................................................11
Film Loading.................................................12
Film Winding.................................................15
ASA Film Speed Setting
Date Setting..................................................17
AE Photography............................................20
Viewfinder Information
Flash Photography........................................23
Film Rewinding
Self-timer Photography
Holding the Camera
Neckstrap and Camera Case
Use of the Filters...........................................32
Care of the Camera.......................................33
Accessories...................................................35
.............................................
...............................
..................................
.................................
......................................
.......................
16
22
26
28
30
31
Page 6

Specifications
Lens: Canon Lens 40mm f/2.8, 5 elements in 4
groups
Focusing: Double image coupled rangefinder
Distance Scale: 0.8 1 1.5 2 5 ^ (m)
Shutter: Programmed AE shutter
Exposure Meter Coupling Range: EV 9 - 17 (ASA
100, f/2.8 with 1/60 sec. -f/20 with 1/320sec.)
Film Speed: ASA 25 . . 50 . . 100 . . 200 . . 400
Filter Compensation: Automatic
Viewfinder: Bright frame, parallax correction marks,
double image rangefinder, date indication (when
the date switch is on and film winding is com
pleted, it lights at the first stroke of the shutter
release.), aperture scale, over- and underexpo
sure warning marks and battery check zone
Film Winding: By rotating the 130° single stroke
winding levef
Film Loading: Multi-slit spool mechanism
Back Cover Opening: With the back cover opening
button
Frame Counter: Additive type, automatically reset
3 5 7 15 (ft.)
02X40) (64)(e0) (l25)(ieo) (ZSO)020)
Page 7

by opening the back cover
Built-in Electronic Flash: The CAT (Canon Auto
Tuning) system which can meter the proper ex-
P5 posure according to the distance of the subject
and charged voltage.
Battery for Flash: One alkaline manganese penlight
(size AA) battery. Ni-Cd battery is also usable
Guide Number: 14 (ml at ASA 100, 23 (ft.) at
ASA 25; with a new battery, 30 seconds after
the pilot lamp lights up
Flash Coverage Angle: Covers up to the angle of a
40mm lens
Flashing Intervals: With a new alkaline manganese
battery, it takes less than 8 seconds from one
flash to the next pilot lamp lighting.
Number of Flashes: With a new alkaline manganese
penlight battery, more than 120 times every 30
seconds
Color Temperature: Balanced for daylight, com
pensated by the exclusive green dispersion panel
Flash Duration: Shorter than 1/1000 second
Pilot Lamp: Located to the left of the viewfinder
Page 8

on the back of the body
Date Imprinting Mechanism; The date is set by
rotating the dials on the lens barrel while
pressing the date lock release button at the
bottom of the lens barrel.
Date Indication: Year; 77 - 87, 0 - 9, D *
Month; 0- 12, □*
Day; 0-31,
* No imprinting
Date Switch: ON/OFF switch on the front of the
body
Power Source; Two PX-625 type 1.35V mercury
batteries
Size: 122 x 75 x 61mm (4-13/16" x 2-15/16" x
2-3/8")
Weight: 540g (1 lb. 3 ozs.) with batteries
Subject to change without notice.
Page 9

Steps for Taking Pictures
1
PJ
Load the batteries.
(P. 8)
Switch the date switch
on. (P.17)
8
Page 10
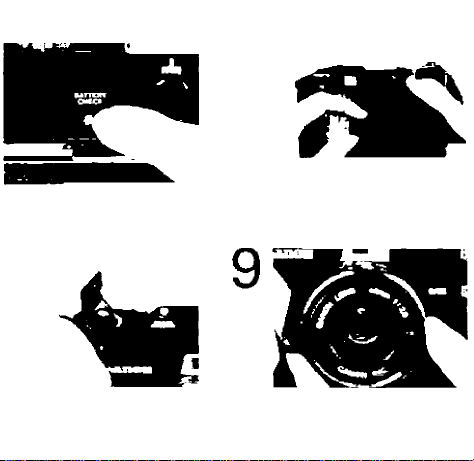
Check the batteries.
(P. 11)
Load the film.
(P. 12)
Advance the film.
(P. 15)
Focus and compose.
(P. 20)
Page 11
YEAR
MONTH
DAY
(rT
Set the ASA film speed.
(P. 16)
V
Press the shutter button
gently. (P. 20)
Take off the lens cap. Set the date.
(P. 17)
® If the meter needle in the viewfinder
II
|5E
¿J
points within the overexposure mark
....................................................use an ND filter.
(Dif the meter needle in the viewfinder
points within the underexposure mark
..........................
switch to flash photography.
..................
...............
Page 12

Battery Loading
(Camera Battery)
This camera uses two PX-625 type (1.35V) mercury
batteries for metering and date imprinting. Have
new batteries of the same brand ready.
Hool< the groove of the mercury battery com
partment cover with your fingernail, and press
in the direction of the arrow to open it.
1
Place the batteries on the ribbon inside the
battery compartment.
• Be sure not to mistake polarity. If the batteries
are in wrong polarity, the shutter button will be
locked and the meter needle will not rise to the
battery check zone.
Page 13
Page 14
Page 15

■ j Press the cover closed.
• Be careful not to leave fingerprints or perspira
tion on the batteries. It may cause bad contact or
corrosion that damages the electric contact of the
camera body. Make sure to wipe them well before
use.
(Flash Battery)
One alkaline manganese penlight (size AA) battery
is used. Have a new battery ready.
Hook the groove of the flash battery compart
ment cover with your fingernail and press in
I
the direction of the arrow to open it.
Page 16

Insert the battery following the direction
indicated in the battery compartment. Be sure
2
not to install the battery in wrong direction.
Press the cover closed.
• In cold weather, we recommend Ni-Cd battery
for flash battery.
10
Page 17

о
Page 18

yu
(T
□
Battery Check Zone
IE
II
B
rClU
4
2i
Page 19

Battery Check
Look into the viewfinder while pressing the battery
check button. If the meter needle points within
the battery check zone, the voltage is sufficient. If
the needle points below the check zone, voltage is
not sufficient and the mercury battery must be
replaced. Be sure to replace two batteries of the
same brand at the same time.
• Press the battery check button firmly. The meter
needle may drop to the underexposure mark once
and then pop back up to the battery check zone.
• When the batteries are exhausted, the camera
sets an improper exposure or the shutter button is
automatically locked. Make sure to check the
batteries before photographing.
11
Page 20

Film Loading
The back cover opens when you press the back
cover opening button firmly in the direction
I
of the arrow.
I Raise the film rewind crank and pull it up.
12
Page 21

Page 22

Film Cartridge Compartment
Take-up spool
Page 23

) Insert the film cartridge into the film compartI ment and press down the film rewind crank.
Film Cartridge
Pull out the film tip and insert it in one of the
' slits of the take-up spool to the second perfora
tion.
13
Page 24

Checking the perforations of film engaged in
the teeth of the film transport sprocket, wind
5
the film advance lever until the film is wound once
around the spool.
Make sure the film cartridge is placed properly,
^ then close the back cover.
' Turn the film rewind crank gently in the direc
tion of the arrow to take up the film's slack.
14
Page 25

ff /
-I
I
Page 26

Page 27

Film Winding
After inserting the film and closing the back cover,
wind the film advance lever continuously until it
stops moving. When it stops moving, the frame
counter will indicate 1, which means that the first
frame is in position.
• When the film is wound correctly, the red lines
of film advance indicator on the film rewind crank
shaft will rotate at the same time of film winding.
If the red lines do not move, take the film out of
the camera and load it again correctly.
15
Page 28

ASA Film Speed Setting
Set the ASA film speed setting lever to the proper
position by looking through the ASA indication
window. The correct ASA film speed is indicated
on the film box.
16
Page 29

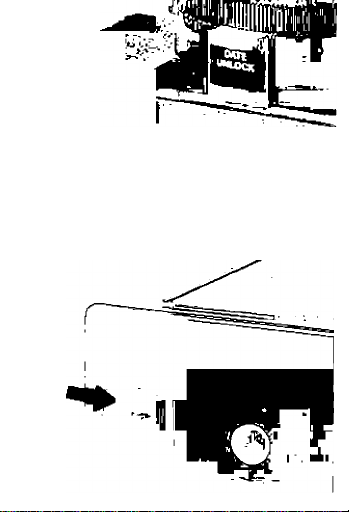
Date Setting
While pressing the date unlock button, set the
date by turning the dials for year, month and
1
day located on the lens barrel. You can see the
date set through the date indication window.
• If you remove your finger from the date unlock
button, the date dials will not move.
Set the date switch to “ON'
17
Page 30

While looking into the viewfinder, press the
shutter button halfway. The date set to be
3
imprinted is indicated on the bottom center of the
viewfinder.
• If the film winding is not completed or if the
shutter button is locked by underexposure, the date
will not be indicated in the viewfinder.
• The date will be imprinted horizontally with the
year, month and day in that order at the lower
right of the picture frame.
• Be sure that a dark part of the subject lies on
the date imprinted area so that the date will be
imprinted clearly.
• If a part of the date is not wanted, set the dial
for the unwanted information to □ mark. If no
imprinting is wanted, set the date switch on the
front panel to "OFF".
• Because the date will be imprinted after the
shutter release, keep pressing the shutter button
until the date indication disappears.
18
Page 31

(г
(Г
□
77 10 23
Page 32

Page 33

mm
DAY
MONTH
YEAR
19
Page 34

AE Photografihy
Compose the picture while looking into the
viewfinder. The outer yellow frame lines
1
indicate the picture area which will appear on the
film.
• When taking pictures at a distance closer than
1m, compose the picture with a slight bias to the
lower right, using the parallax correction marks.
Focus by turning the focusing ring to coincide
the two images of the subject in the center
2
square.
Check if the meter needle points within the
proper exposure range.
Hold the camera firmly and press the shutter
button gently in order to avoid camera shake
4
which causes blurred pictures.
20
Page 35

yu
Page 36

21
Page 37

Viewfinder Information
If the meter needle lies within the correct exposure
range, the camera is ready for AE photography. If
it points to the overexposure mark, use an ND filter.
If it points to the underexposure mark, switch to
flash photography.
• There is a safety mechanism in this camera that
locks the shutter button automatically when the
meter needle points to the underexposure mark.
22
Page 38

Parallax Correction Overexposure Mark
Mark
Batterv Check Zone
Rangefinder
liT
r
Viewfinder
Frame
uu
Date I ndication
Apertu re"
Scale
n
111 23
Meter Needle
Underexposure Mark
_|5B
'T
;28
Page 39

Page 40

Flash Photography
When the meter needle in the viewfinder points to
the underexposure mark, switch to flash photog
raphy.
When the flash switch located on the back of
the body is pushed in the direction of the
I
arrow, the built-in flash pops up out of the camera.
When the pilot lamp lights up, flash photog
raphy is possible.
2
• The meter needle in the viewfinder moves from
the underexposure mark to the correct exposure
range. You can also check that flash photography
is ready by looking into the viewfinder.
• If you press the shutter button before the pilot
lamp lights up, a proper exposure will not be
obtained.
As in AE photography, focus through the
viewfinder and check the meter needle. Then
3
press the shutter button.
23
Page 41

To change back to regular AE photography,
simply press the flash down into the camera.
4
• If the subject is too far away, the meter needle
points to the underexposure mark and shutter
button is locked.
• When using high speed film and the subject is
too close, the meter needle points to the over
exposure mark. Move a bit farther away from the
subject.
• When not using the flash, be sure to press it down.
If the flash is left "ON", the battery will be ex
hausted.
• The flash can also be used as daylight fill-in flash.
For example the subject against a window or in the
shade of a tree or in the evening, the flash will be
effective for lightening up the back-lit or shaded
subject.
24
Page 42

I
P»
i
ti
f
Page 43

25
Page 44

Film Rewinding
When the film reaches the end, press the film
rewind button in.
1
Raise the film rewind crank and turn it in the
direction of the arrow. When it begins to turn
2
loosely, the film rewinding is completed.
26
Page 45

AM
ОаШих
Page 46

æ !^ ч
Z
Page 47

Press the back cover opening lever firmly in the
direction of the arrow, and open the back
3
cover.
Pull the film rewind crank up and remove the
•film cartridge.
27
Page 48

Self-timer Photography
Turn the film advance lever.
1
I Turn the self-timer lever in the direction of the
, arrow until it stops.
28
Page 49

Page 50

I
Page 51

Press down the shutter button until it is locked.
Check to see if the self-timer lever is moving.
• Do not stand in front of the camera when press
ing the shutter button. Your body will prevent the
light measuring window from metering correct
exposure. Be sure to press the shutter button while
looking into the viewfinder.
• Self-timer cancellation after setting the lever is
possilbe by returning the lever, only before the
shutter is pressed.
29
Page 52

Holding the Camera
Hold the camera firmly with both hands.
1
Press one elbow firmly against your body while
, holding the camera horizontally or vertically.
Press the shutter button gently with your
fingertip.
• If the shutter button is pressed too hard, it
may cause blur.
30
Page 53

Page 54

t
Page 55

Neckstrap and Camera Case
Attach the neckstrap by threading it through the
rings with both ends of the strap facing each other.
Adjust the neckstrap to the desired length as shown
in the picture.
• The front and rear part of the camera case are
not separable.
31
Page 56

Use of Filtere
The light measuring window is located on the lens
assembly. When a filter is used, the window
measures light after it has passed through the filter,
so exposure correction is not necessary in normal
AE photography.
• In flash photography do not use filters except
UV type filter.
32
Page 57

oooo
oooo
Page 58

Care of the Camera
Remove both the mercury and penlight
batteries when the camera is not in use.
1
If the camera is left with the batteries inside
for a long time, leakage can cause damage to
the electric contacts of the camera.
Sand or dust on the camera must be
cleaned with a blower or wiped off with
2
a soft cloth. Select a dry place with normal
temperature to store the camera.
Do not leave the camera for a long time
in high temperatures or in hot places such
3
as the trunk or rear window of cars. The
heat would damage the camera.
When you use the camera on a rainy day
or at the beach, be carefull to protect
4
the camera from moisture. If the camera
Page 59

gets wet, press the flash in and wipe the
camera with a dry cloth.
When the camera is out of order, do not
repair it yourself because of dangers from
5
the high voltage electronic circuit. Please
take it to a Canon Service Station for repair.
If the camera has not been used for a
long time, be sure to test the metering
6
and flashing.
In cold weather the date imprinting
mechanism may not function correctly,
7
so warm the battery before using.
33
Page 60

Back Cover
Opening Button
Flash Battery
Compartment Cover
Pilot Lamp Viewfinder Eyepiece
Flash Switch
Tripod Socket
ASA Film Speed Setting Lever
Date Unlock Button
Month Dial
Year Dial
Back Cover
Film Rewind
^ Button
Mercury Battery
Compartment Cover
Day Dial
34
Page 61

Accessories
48mm filters, various kinds
Y1, Y3, 01. G1, R1. UV, CCA4, CCA8,
CCA12, CCB4, CCB8, CCB12, Shylight, ND4, ND8
1
О Canonet Hood 5
35
Page 62

Canon
-CANON U^.S.A.J^INC. HÈAD OFFICE^ no^o’u'-A
CANON U.S.A. INC MANHATTAN office
■-,00 T-,.r<I Avci-^je NevV vor. N Y 10016 USA
CANON U.S.A., INC. ATLANTA SERVICE STATION
CANON U.S.A., INC. CHICAGO 0^^
CANON U.S.A., INC. LOS ANGELES OFFICE^^^^^
CANON U.SA., INC. LOS ANGELES SEfl^VlCE^ STATION
CANON U S.A., INC. SAN FRANCISCO |EH^VICE^STATION
CANON U.S.A., INC. Hawaii OFFICE ^
-CANON OPTICS & BUSINESS MACHINES CANADA, LTO
HEAD OFFICE
32^5 America.-I Oi-'ve V iss.ssaug.i Omsr.o L4V 1'■ 4 Canada
CANON OPTICS & BUSINESS MACHINES CANADA, LTO
MONTREAL OFFICE
30TC aau Sir.
CANON OPTICS & BUSINESS MACHINES CANADA, LTD
VANCOUVER OFFICE
5900A, No 2 Roafl RiChmona BC V7C4H9 Canada
-CANON AMSTERDAM N.V.
GeDooY, 70, Scnichoi Oosi Holland
-CANON LATIN AMERICA, INC, SALES DEPARTMENT
CANON LATIN AMERICA, INC. REpPAiH SERVICE center
-CANON INC, HONG KONG BRANCH
PUB. IE01-046B
1277N2
Page 63

PRINTED IN JAPAN
. jfi
 Loading...