

Page 1
English
Français
Deutsch
Italiano
Instruction Book
GO DC 78
Condenser Tumble Dryer
®
40004982.qxd 23/06/2007 18:50 Page 1
Page 2
English. . . . . . . . . . . . . . . . . . . . . . . . . . . . . . . . . . . . . . . . . . . . . 2
Français . . . . . . . . . . . . . . . . . . . . . . . . . . . . . . . . . . . . . . . . . . . 20
Deutsch . . . . . . . . . . . . . . . . . . . . . . . . . . . . . . . . . . . . . . . . . . . 38
Italiano . . . . . . . . . . . . . . . . . . . . . . . . . . . . . . . . . . . . . . . . . . . 56
Introduction . . . . . . . . . . . . . . . . . . . . . . . . . . . . . . . . . . . . . . . . . . . . . . . 3
Delivery information . . . . . . . . . . . . . . . . . . . . . . . . . . . . . . . . . . . . . . . . . . . . . 3
Unpacking the Product . . . . . . . . . . . . . . . . . . . . . . . . . . . . . . . . . . . 3
Safety reminders . . . . . . . . . . . . . . . . . . . . . . . . . . . . . . . . . . . . . . . . . . 4
Installation . . . . . . . . . . . . . . . . . . . . . . . . . . . . . . . . . . . . . . . . . . . . . . . . . . . . . 4
Use . . . . . . . . . . . . . . . . . . . . . . . . . . . . . . . . . . . . . . . . . . . . . . . . . . . . . . . . . . . 4
The Laundry . . . . . . . . . . . . . . . . . . . . . . . . . . . . . . . . . . . . . . . . . . . . . . . . . . . . 4
Environmental Issues . . . . . . . . . . . . . . . . . . . . . . . . . . . . . . . . . . . . . . . . . . . . . 5
GIAS Service . . . . . . . . . . . . . . . . . . . . . . . . . . . . . . . . . . . . . . . . . . . . . . . . . . . . 5
Installation. . . . . . . . . . . . . . . . . . . . . . . . . . . . . . . . . . . . . . . . . . . . . . . . . 6
Electrical requirements . . . . . . . . . . . . . . . . . . . . . . . . . . . . . . . . . . . . . . . . . . . 6
Adjusting the feet . . . . . . . . . . . . . . . . . . . . . . . . . . . . . . . . . . . . . . . . . . . . . . . 6
Ventilation. . . . . . . . . . . . . . . . . . . . . . . . . . . . . . . . . . . . . . . . . . . . . . . . . 7
Preparing the load . . . . . . . . . . . . . . . . . . . . . . . . . . . . . . . . . . . . . . . . 8
Clothes preparation . . . . . . . . . . . . . . . . . . . . . . . . . . . . . . . . . . . . . . . . . . . . . . 8
Sorting the load. . . . . . . . . . . . . . . . . . . . . . . . . . . . . . . . . . . . . . . . . . . . . . . . . 9
Drying advice. . . . . . . . . . . . . . . . . . . . . . . . . . . . . . . . . . . . . . . . . . . . . 10
Do not tumble dry . . . . . . . . . . . . . . . . . . . . . . . . . . . . . . . . . . . . . . . . . . . . . . 10
Energy saving. . . . . . . . . . . . . . . . . . . . . . . . . . . . . . . . . . . . . . . . . . . . . . . . . . 10
Drying guide . . . . . . . . . . . . . . . . . . . . . . . . . . . . . . . . . . . . . . . . . . . . . . . . . . 10
Controls and indicators . . . . . . . . . . . . . . . . . . . . . . . . . . . . . . . . . 11
Door and Filter . . . . . . . . . . . . . . . . . . . . . . . . . . . . . . . . . . . . . . . . . . . 12
Opening the door . . . . . . . . . . . . . . . . . . . . . . . . . . . . . . . . . . . . . . . . . . . . . . 12
Filter. . . . . . . . . . . . . . . . . . . . . . . . . . . . . . . . . . . . . . . . . . . . . . . . . . . . . . . . . 12
Filter care indicator . . . . . . . . . . . . . . . . . . . . . . . . . . . . . . . . . . . . . . . . . . . . . 12
Water container . . . . . . . . . . . . . . . . . . . . . . . . . . . . . . . . . . . . . . . . . . 13
To remove the container . . . . . . . . . . . . . . . . . . . . . . . . . . . . . . . . . . . . . . . . . 13
Condenser . . . . . . . . . . . . . . . . . . . . . . . . . . . . . . . . . . . . . . . . . . . . . . . . 14
To remove the condenser . . . . . . . . . . . . . . . . . . . . . . . . . . . . . . . . . . . . . . . . 14
Selecting the Programme . . . . . . . . . . . . . . . . . . . . . . . . . . . . . . . 15
Operation . . . . . . . . . . . . . . . . . . . . . . . . . . . . . . . . . . . . . . . . . . . . . . . . . 16
Cancelling and resetting the programme . . . . . . . . . . . . . . . . . . . . . . . . . . . . 16
Start Delay Function . . . . . . . . . . . . . . . . . . . . . . . . . . . . . . . . . . . . . . . . . . . . 16
Cleaning and Routine Maintenance. . . . . . . . . . . . . . . . . . . . 17
Cleaning the dryer . . . . . . . . . . . . . . . . . . . . . . . . . . . . . . . . . . . . . . . . . . . . . . 17
Technical specifications . . . . . . . . . . . . . . . . . . . . . . . . . . . . . . . . . . . . . . . . . . 17
Troubleshooting. . . . . . . . . . . . . . . . . . . . . . . . . . . . . . . . . . . . . . . . . . 18
Customer Service. . . . . . . . . . . . . . . . . . . . . . . . . . . . . . . . . . . . . . . . . 19
Spares. . . . . . . . . . . . . . . . . . . . . . . . . . . . . . . . . . . . . . . . . . . . . . . . . . . . . . . . 19
GIAS Service . . . . . . . . . . . . . . . . . . . . . . . . . . . . . . . . . . . . . . . . . . . . . . . . . . . 19
2
40004982.qxd 23/06/2007 18:50 Page 2
Page 3
Introduction
Please read and follow these instructions
carefully and operate the machine accordingly.
This booklet provides important guidelines for
safe use, installation, maintenance and some
useful advice for best results when using your
machine.
Keep all documentation in a safe place for future
reference or for any future owners
Delivery information
Please check that the following items are
delivered with the appliance:
● Instruction manual
● Guarantee card
● Energy label
● Discharge hose kit
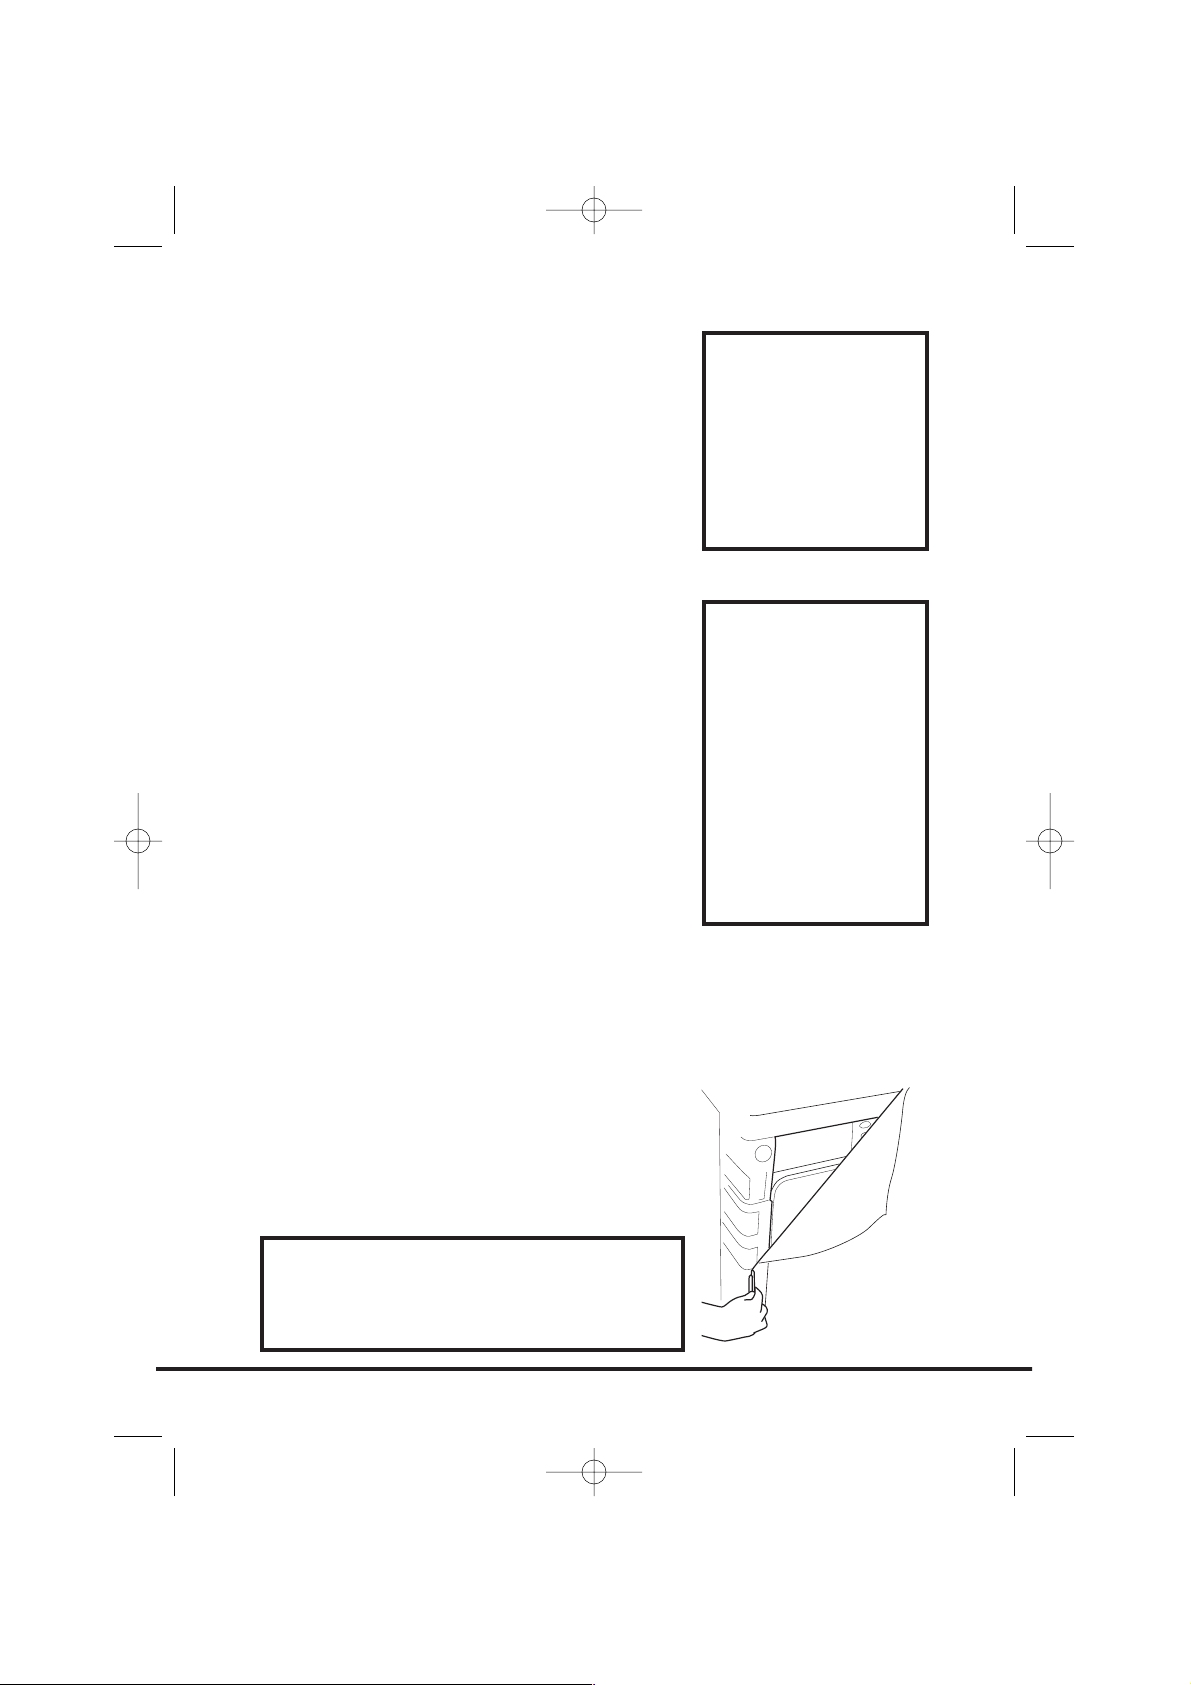
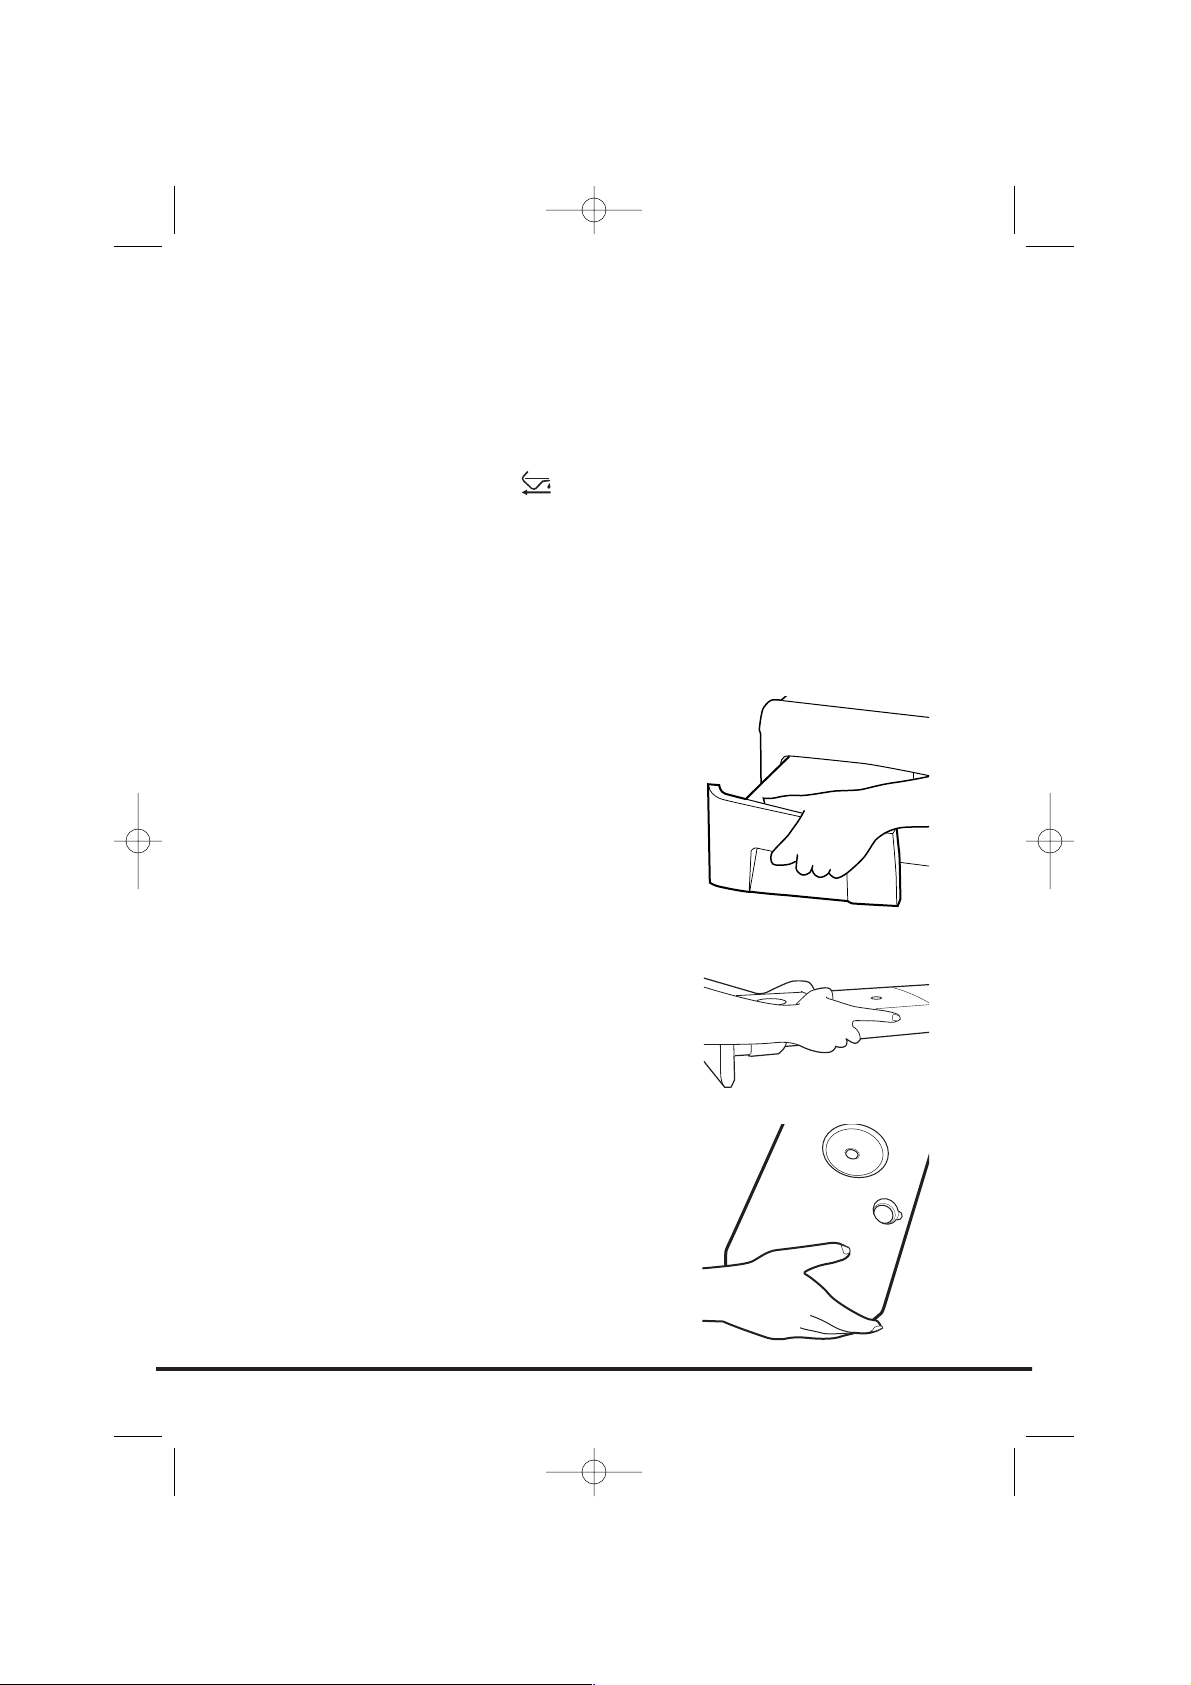
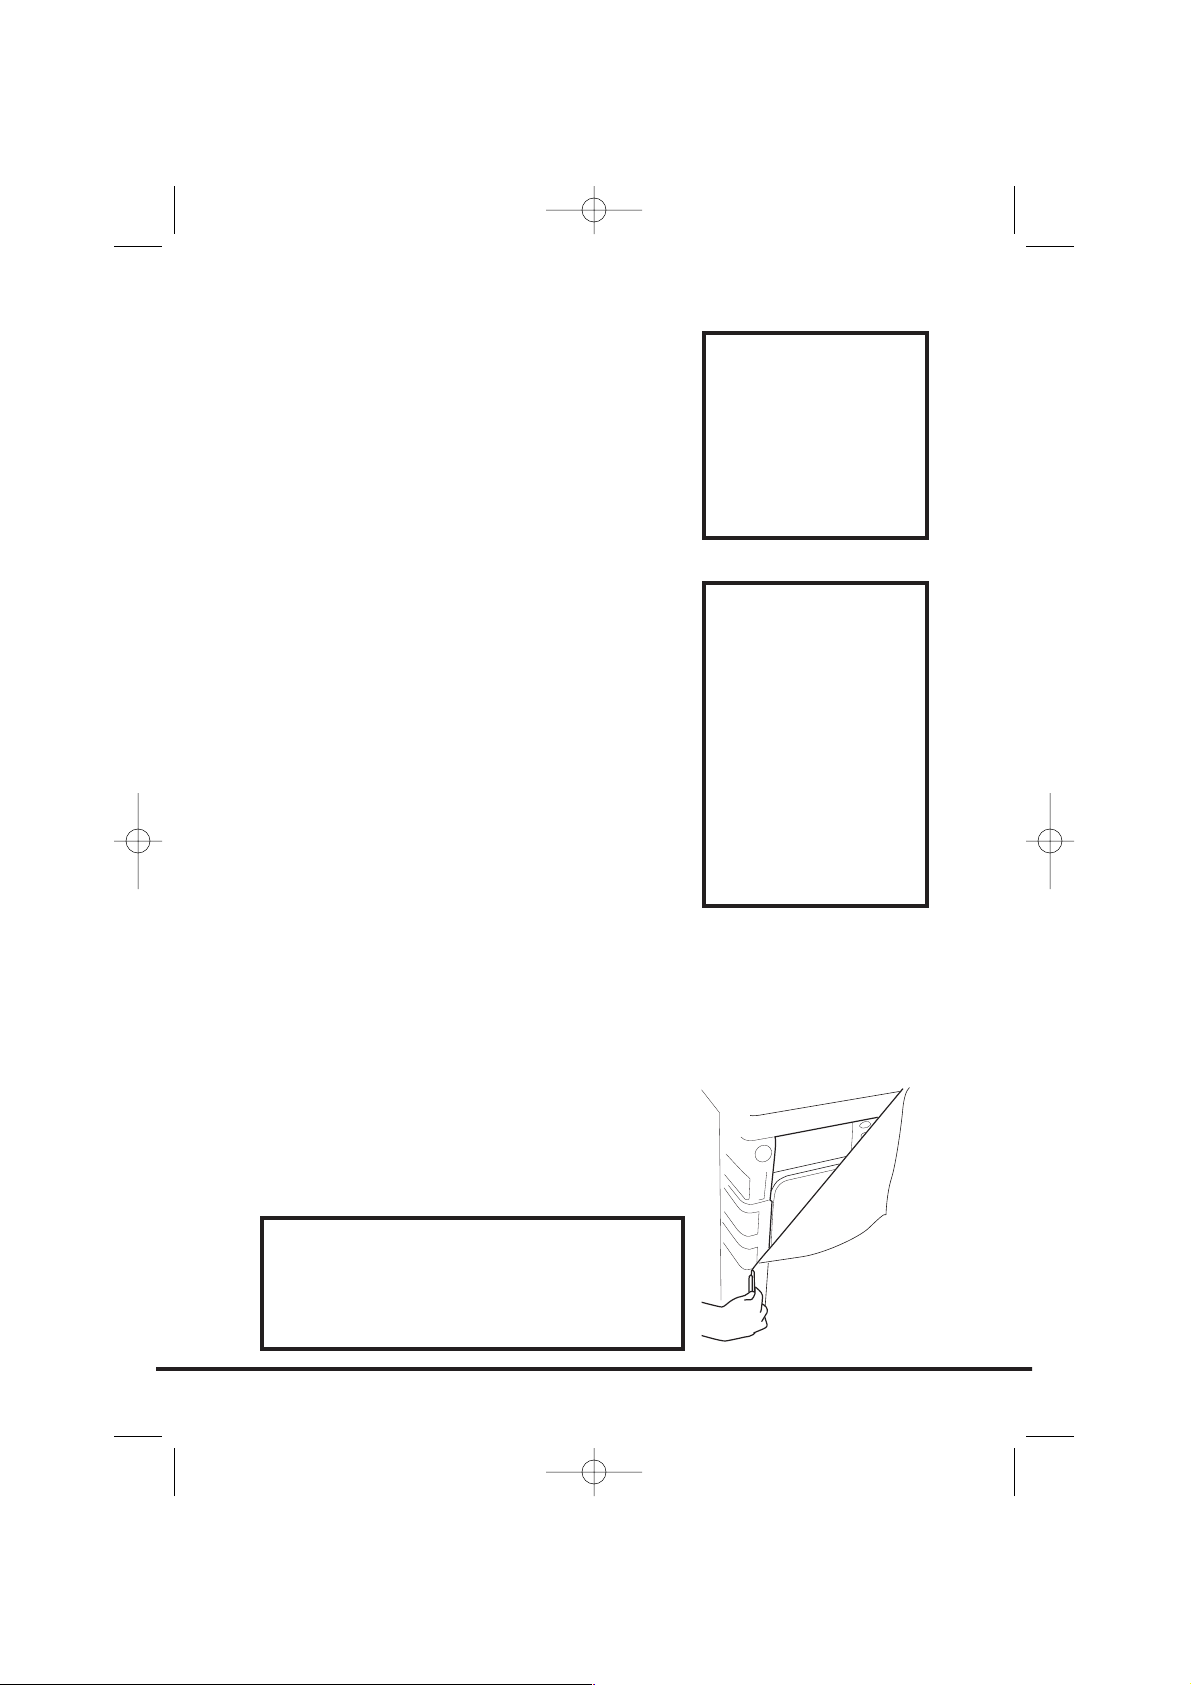
Remove the machine from its packaging close to
the final location of the machine.
1. Cut carefully around the base of the
packaging and up one corner.
2. Remove the polythene sleeve and lift the
dryer off the polystyrene base.
3
Check that no
damage has
occurred to the
machine during
transit. If it has,
call for service by
GIAS.
Failure to comply
with the above
can compromise
the safety of the
appliance. You
may be charged
for a service call
if a problem with
your machine is
caused by
misuse.
Unpacking the product
Dispose of the packaging safely. Make
sure it is out of the reach of children,
it is a potential source of danger.
40004982.qxd 23/06/2007 18:50 Page 3
Page 4
Safety reminders
Installation
● Check that the product has no visible signs of damage before use. If damaged do
not use and please call GIAS Service.
● Do not use adapters, multiple connectors and/or extensions.
● Never install the dryer against curtains and be sure to prevent items from falling
or collecting behind the dryer.
● The appliance must not be installed behind a lockable door, a sliding door or a
door with a hinge on the opposite side to that of tumble dryer.
Use
● This appliance is not intended for use by persons (including children) with
reduced physical, sensory or mental capabilities, or lack of experience and
knowledge, unless they have been given supervision or instruction concerning
use of the appliance by a person responsible for their safety.
● Children should be supervised to ensure that they do not play with the appliance.
● WARNING Misuse of a tumble dryer may create a fire hazard.
● This machine is solely for domestic use, i.e. to dry household textiles and garments.
● This machine should only be used for its intended purpose as described in this
manual. Ensure that the instructions for installation and use are fully understood
before operating the appliance.
● Do not touch the appliance when hands or feet are damp or wet.
● Do not lean on the door when loading the machine or use the door to lift or
move the machine.
● Do not allow children to play with the machine or its controls.
● WARNING Do not use the product if the fluff filter is not in position or is
damaged; fluff could be ignited.
● WARNING Where the hot surface symbol is located the temperature rise
during operation of the tumble dryer may be in excess of 60 degrees C.
● Remove the plug from the electricity supply. Always remove the plug before
cleaning the appliance.
● Do not continue to use this machine if it appears to be faulty.
● Lint and fluff must not be allowed to collect on the floor around the outside of
the machine.
● The drum inside may be very hot. Always allow the dryer to complete the cool
down period before removing the laundry.
The Laundry
● Do not dry unwashed items in the tumble dryer.
● WARNING Do not tumble dry fabrics treated with dry cleaning fluids.
● WARNING Foam rubber materials can, under certain circumstances, when heated
become ignited by spontaneous combustion. Items such as foam rubber (latex
foam), shower caps, waterproof textiles, rubber backed articles and clothes or
pillows fitted with foam rubber pads MUST NOT be dried in the tumble dryer.
● Always refer to the laundry care labels for directions on suitability for drying.
4
40004982.qxd 23/06/2007 18:50 Page 4
Page 5
● Clothes should be spin dried or thoroughly wrung before they are put into the
tumble dryer. Clothes that are dripping wet should NOT be put into the dryer.
● Lighters and matches must not be left in pockets and NEVER use flammable
liquids near the machine.
● Glass fibre curtains should NEVER be put in this machine. Skin irritation may
occur if other garments are contaminated with the glass fibres.
● Items that have been soiled with substances such as cooking oil, acetone, alcohol,
petrol, kerosene, spot removers, turpentine, waxes and wax removers should be
washed in hot water with an extra amount of detergent before being dried in
the tumble dryer.
● Fabric softeners, or similar products, should be used as specified by the fabric
softener instructions.
Environmental Issues
● All packaging materials used are environmentally-friendly and recyclable. Please
help dispose of the packaging via environmentally-friendly means. Your local
council will be able to give you details of current means of disposal.
● To ensure safety when disposing of an old tumble dryer disconnect the mains
plug from the socket, cut the mains power cable and destroy this together with
the plug. To prevent children shutting themselves in the machine break the door
hinges or the door lock.
GIAS Service
● To ensure the continued safe and efficient operation of this appliance we
recommend that any servicing or repairs are only carried out by an authorised
GIAS Service engineer.
European directive 2002/96/EC
This appliance is marked according to the European directive 2002/96/EC on Waste
Electrical and Electronic Equipment (WEEE).
By ensuring this product is disposed of correctly, you will help
prevent potential negative consequences for the environment
and human health, which could otherwise be caused by
inappropriate waste handling of this product.
The symbol on the product indicates that this product may
not be treated as household waste. Instead it shall be
handed over to the applicable collection point for the
recycling of electrical and electronic equipment
Disposal must be carried out in accordance with local
environmental regulations for waste disposal.
For more detailed information about treatment, recovery
and recycling of this product, please contact your local city
office, your household waste disposal service or the shop
where you purchased the product.
5
If the appliance is not running properly or breaks down,
switch it off and disconnect the plug from the socket.
Consult GIAS Service for possible repair.
40004982.qxd 23/06/2007 18:51 Page 5
Page 6
Electrical requirements
Tumble dryers are supplied to operate at a voltage
of 230V, 50 Hz. Check that the supply circuit is rated
to at least 10A.
Electricity can be extremely dangerous.
This appliance must be earthed.
The socket outlet and the plug on the appliance
must be of the same type.
Do not use multiple adapters and/or extension
leads.
The plug should be accessible for disconnection
after the appliance has been installed.
The wires in the mains lead are coloured in
accordance with the following codes:
Blue NEUTRAL
Brown LIVE
Green and Yellow EARTH
CE Appliance complies with European Directive
89/336/EEC, 73/23/EEC and subsequent amendments.
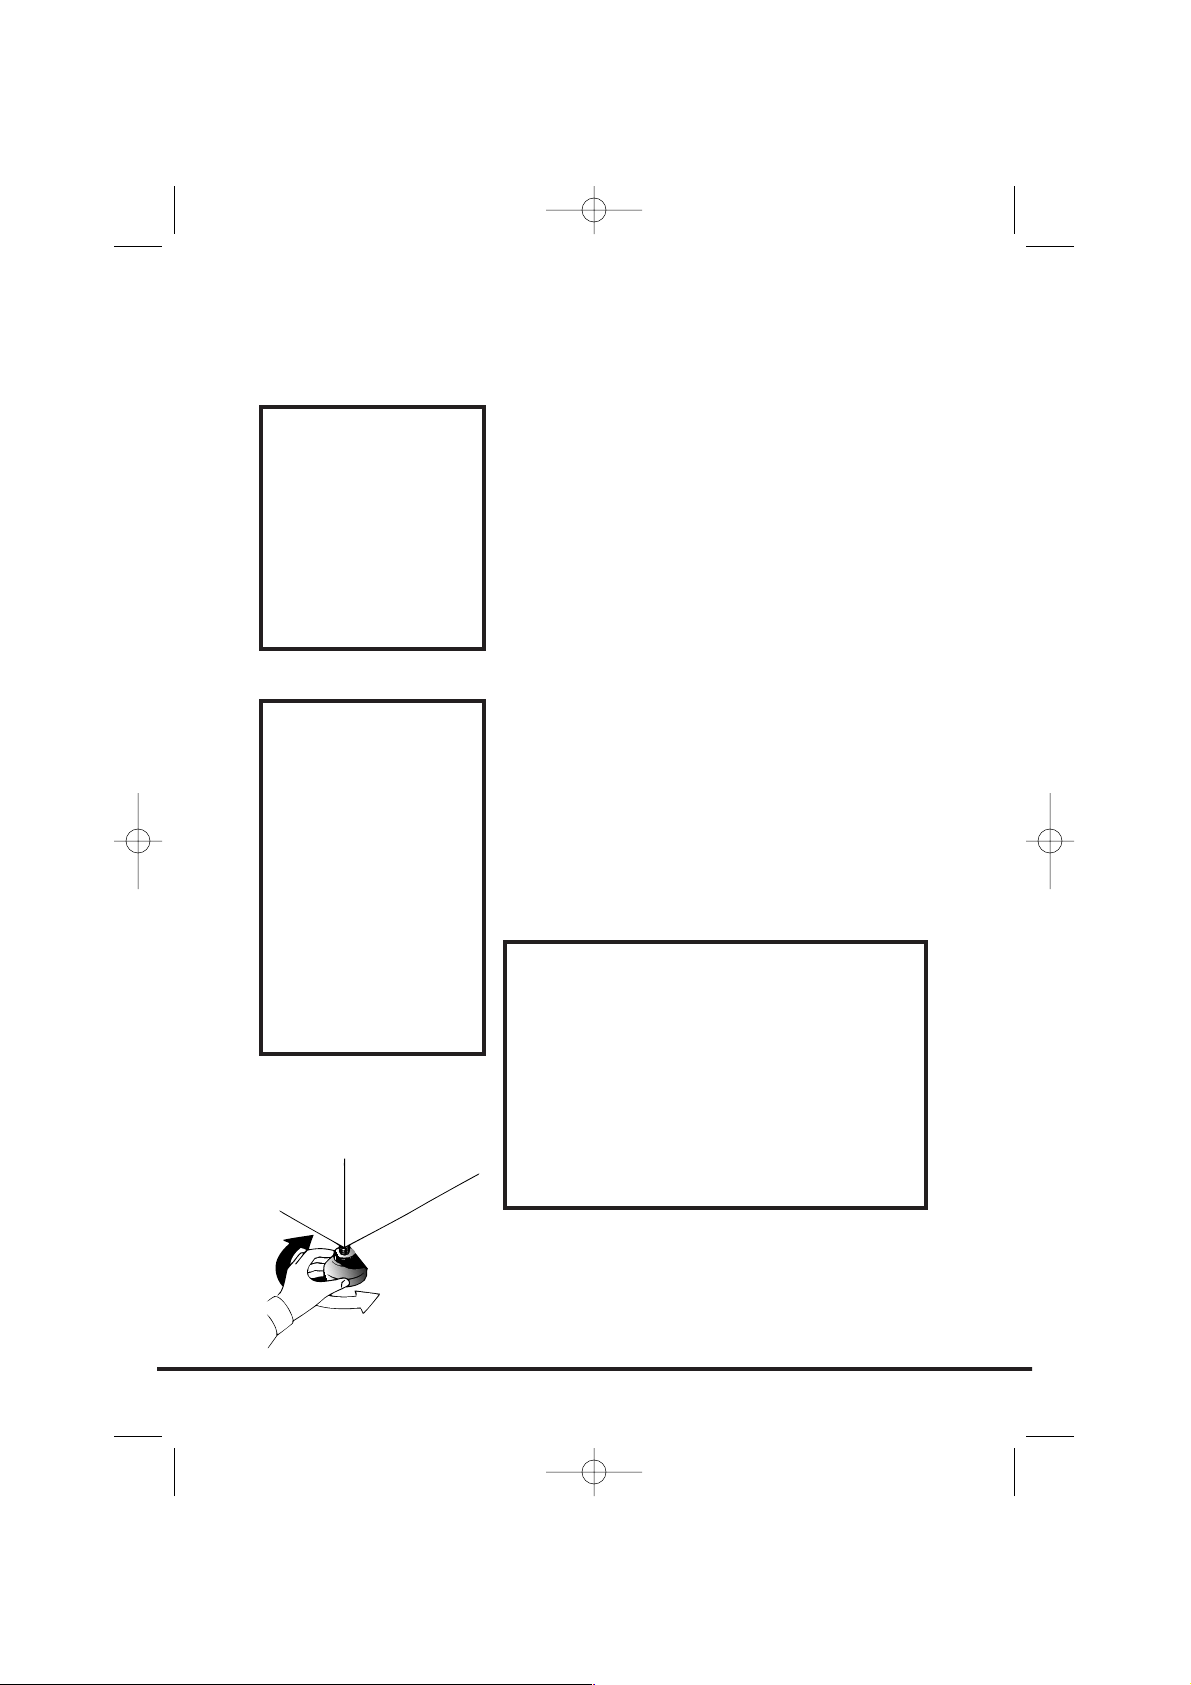
Adjusting the feet
Once the machine is in place the feet should be
adjusted to ensure that the machine is level.
Adjust the four feet to ensure the machine is firm
and level.
6
You may be
charged for a
service call if a
problem with
your machine is
caused by
incorrect
installation.
If the mains cord
on this appliance
is damaged, it
must be replaced
by a special cord
which is ONLY
obtainable from
the spares
service. It must
be installed by a
competent
person.
Installation
Do not plug the machine in and switch
it on at the mains until the installation
is completed.
For your safety, this dryer must be
correctly installed.
If there is any doubt about
installation, call GIAS Service for
advice.
40004982.qxd 23/06/2007 18:51 Page 6
Page 7
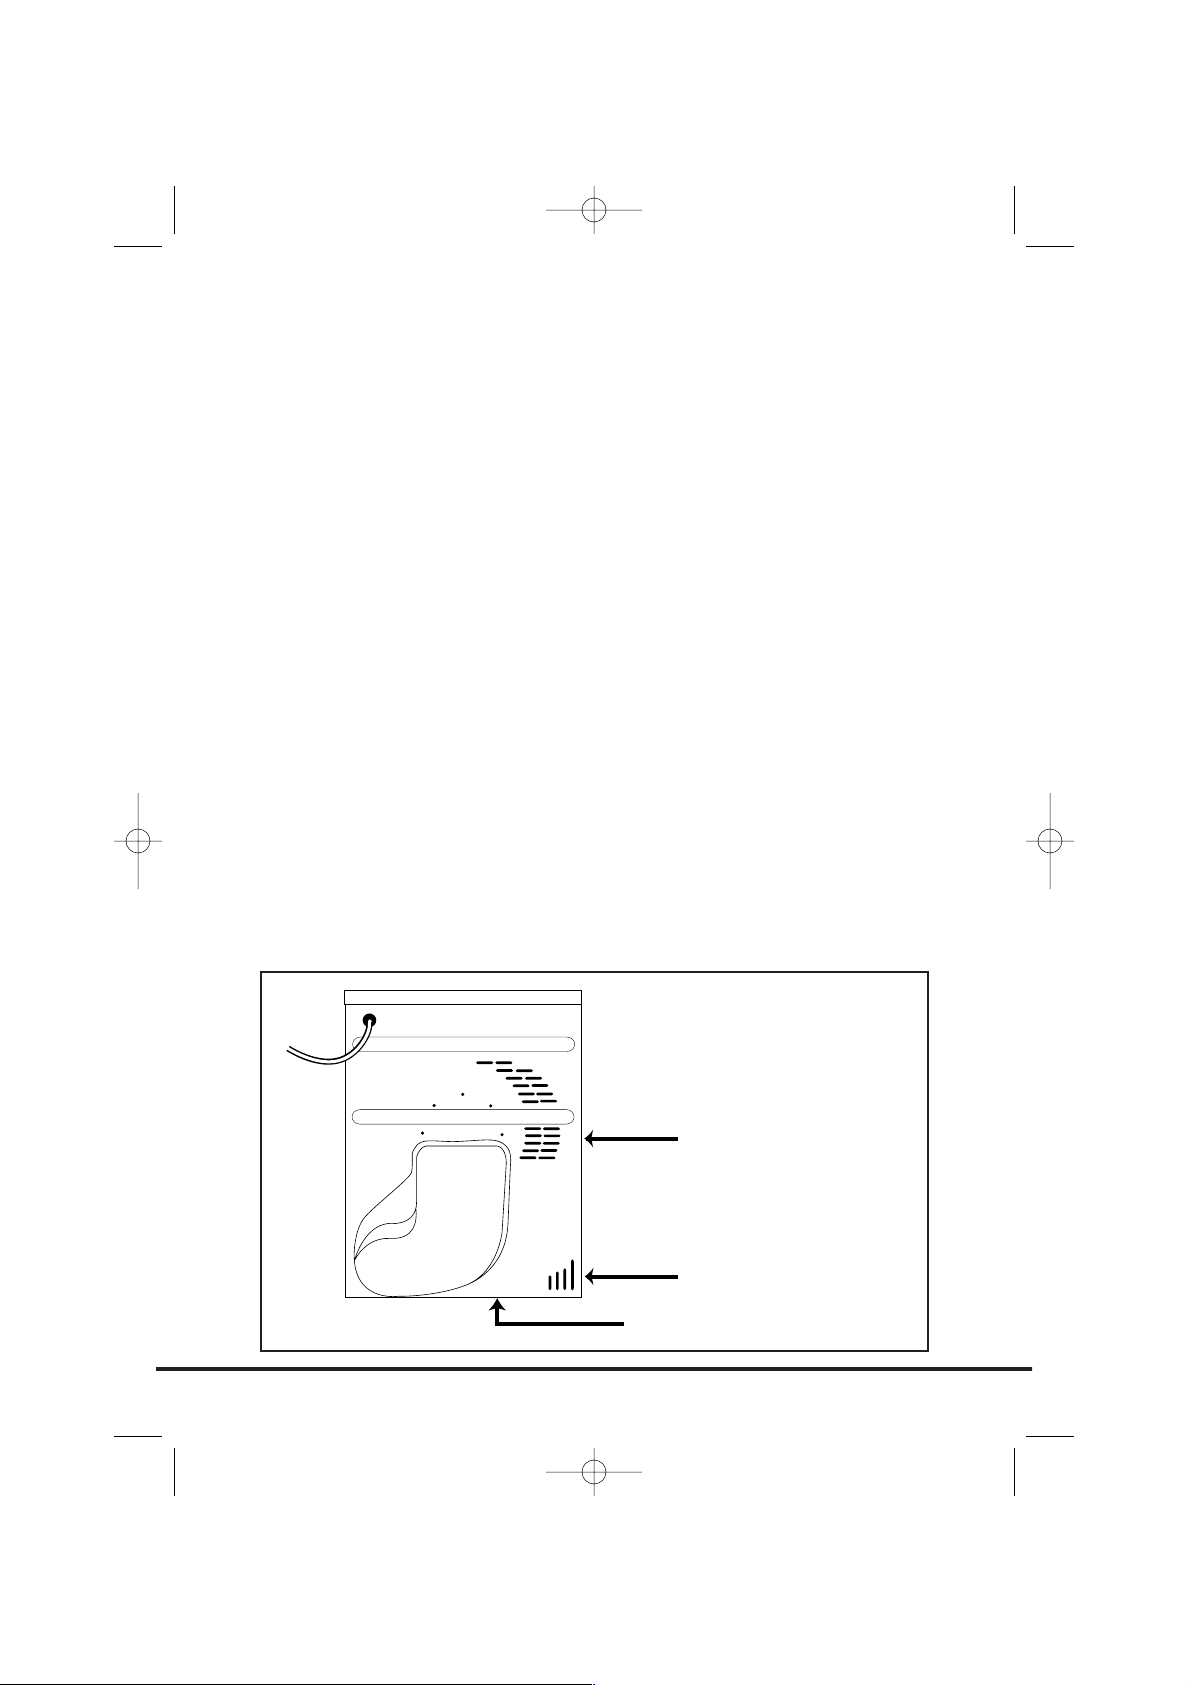
Adequate ventilation must be provided in the
room where the tumble dryer is located to
prevent gases from appliances burning other
fuels, including open fires, being drawn into the
room during operation of the tumble dryer.
● Exhaust air must not be discharged into a
flue which is used for exhausting fumes
from appliances burning gas or other fuels.
● Check regularly that the air flowing through
the dryer is not restricted.
● Check the fluff filter after use, and clean, if
necessary.
● The inlet and outlets should be kept free
from obstructions. To ensure adequate
ventilation the space between the bottom
of the machine and the floor must not be
obstructed. There should be a gap of at
least 12mm between the machine and any
obstructions.
● Prevent items from falling or collecting
behind the dryer as these may obstruct the
air inlet and outlet.
● NEVER install the dryer up against curtains.
7
Ventilation
AIR OUTLETS
AIR OUTLETS IN THE BASE
AIR INLET VENTS
40004982.qxd 23/06/2007 18:51 Page 7
Page 8
Before using the tumble dryer for the first time:
● Please read this instruction book thoroughly.
● Remove all items packed inside the drum.
● Wipe the inside of the drum and door with
a damp cloth to remove any dust which may
have settled in transit.
Clothes preparation
Make sure that the laundry you are going to dry
is suitable for drying in a tumble dryer, as shown
by the care symbols on each item.
Check that all fastenings are closed and that
pockets are empty. Turn the articles inside out.
Place clothes loosely in the drum to make sure
that they don't get tangled.
Maximum drying weight
● Cottons Max. 8 kg
● Synthetics Max. 4 kg
8
Preparing the load
Do not overload
the drum, large
items when wet
can exceed the
maximum
admissible
clothes load
(for example:
sleeping bags,
duvets).
40004982.qxd 23/06/2007 18:51 Page 8
Page 9
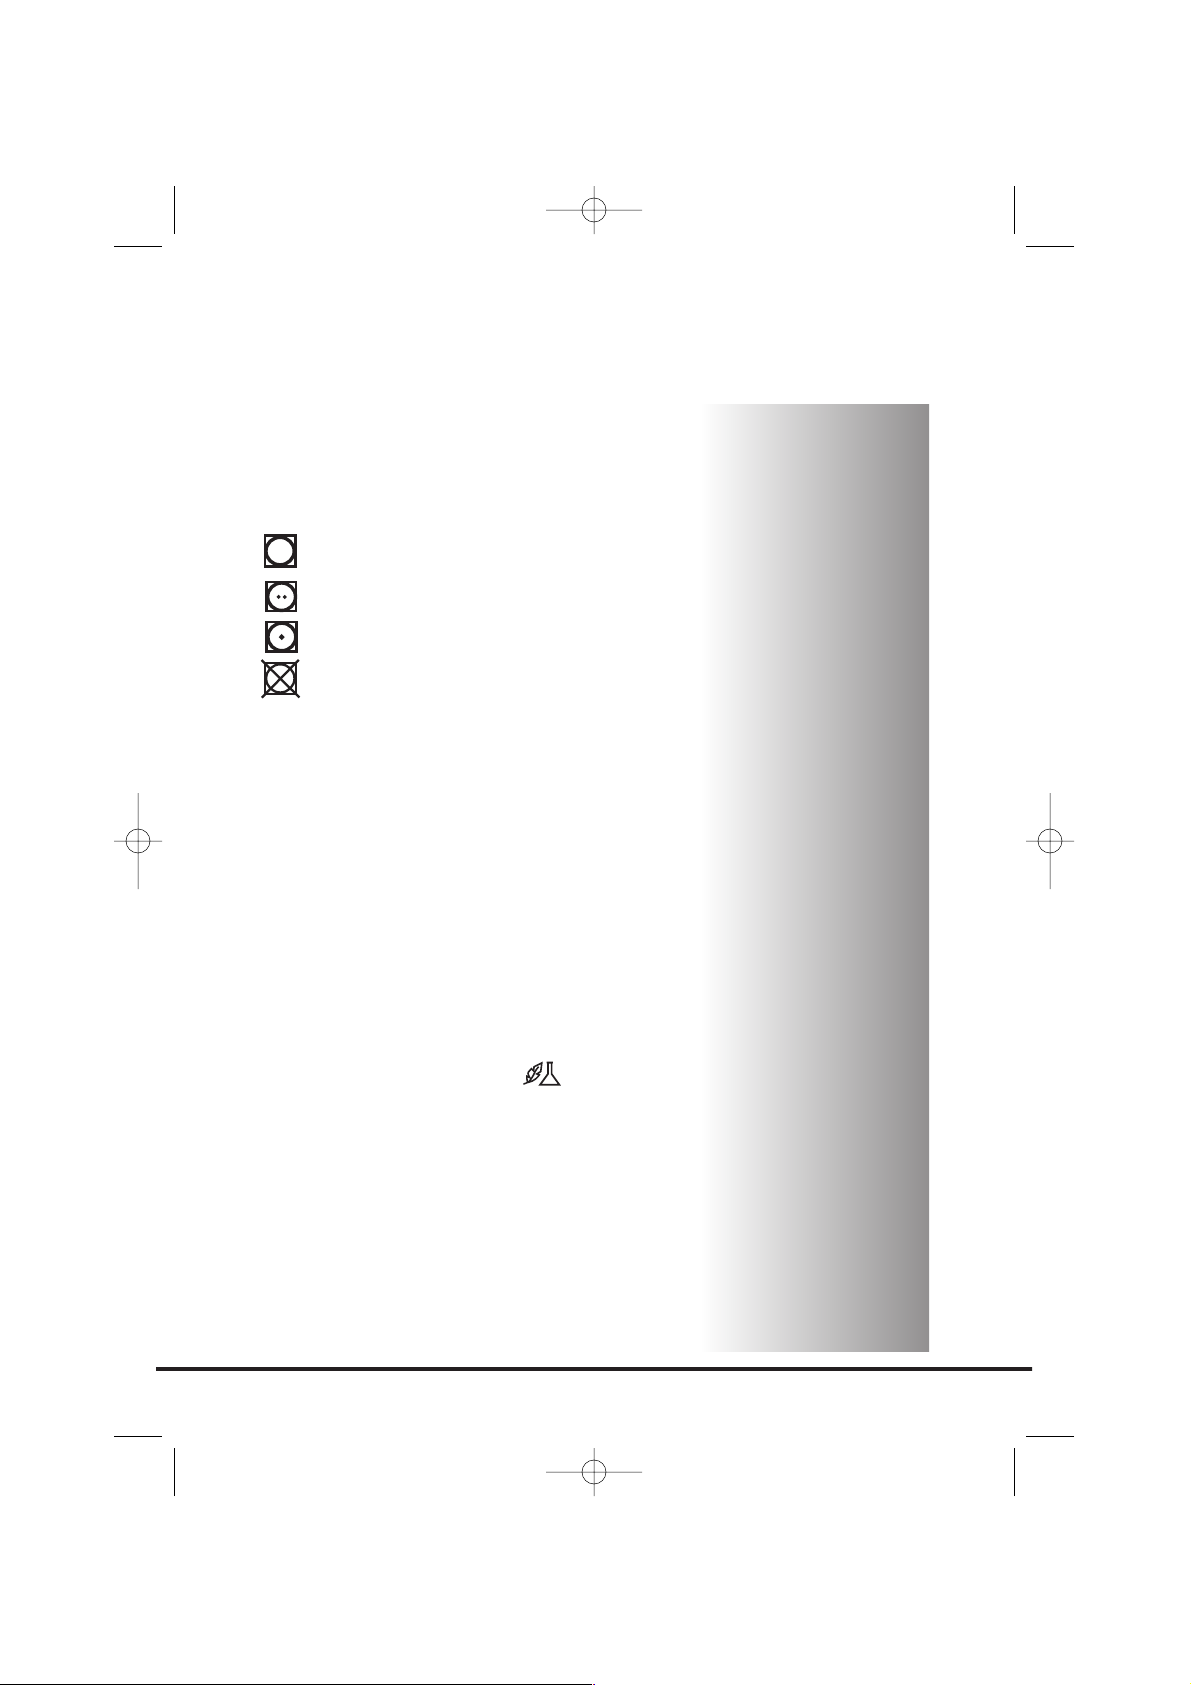
Sort the load as follows:
● By care symbols
These can be found on the collar or inside
seam:
Suitable for tumble drying.
Tumble drying at high temperature.
Tumble drying at low temperature only.
Do not tumble dry.
If the item does not have a care label it
must be assumed that it is not suitable
for tumble drying.
● By amount and thickness
Whenever the load is bigger than the dryer
capacity, separate clothes according to
thickness (e.g. towels from thin underwear).
● By type of fabric
Cottons/linen: Towels, cotton jersey, bed and
table linen.
Synthetics: Blouses, shirts, overalls, etc.
made of polyester or polyamid, as well as
for cotton/synthetic mixes.
● By drying level
Sort into: iron dry, cupboard dry, etc. For
delicate articles press the button to
select low drying temperature.
9
40004982.qxd 23/06/2007 18:51 Page 9
Page 10
Do not tumble dry:
Silk, delicate fabrics, nylon stockings, delicate
embroidery, fabrics with metallic decorations,
garments with PVC or leather trimmings, training
shoes, bulky items such as sleeping bags, etc.
Energy saving
Only put into the tumble dryer laundry which has
been thoroughly wrung or spin-dried. The drier
the laundry the shorter the drying time thus
saving electricity.
ALWAYS
● Try to dry the maximum weight of laundry,
this will save time and electricity.
● Check that the filter is clean before every
drying cycle.
NEVER
● Exceed the maximum weight, this will waste
time and electricity.
● Put dripping wet items into the tumble
dryer, this may damage the appliance.
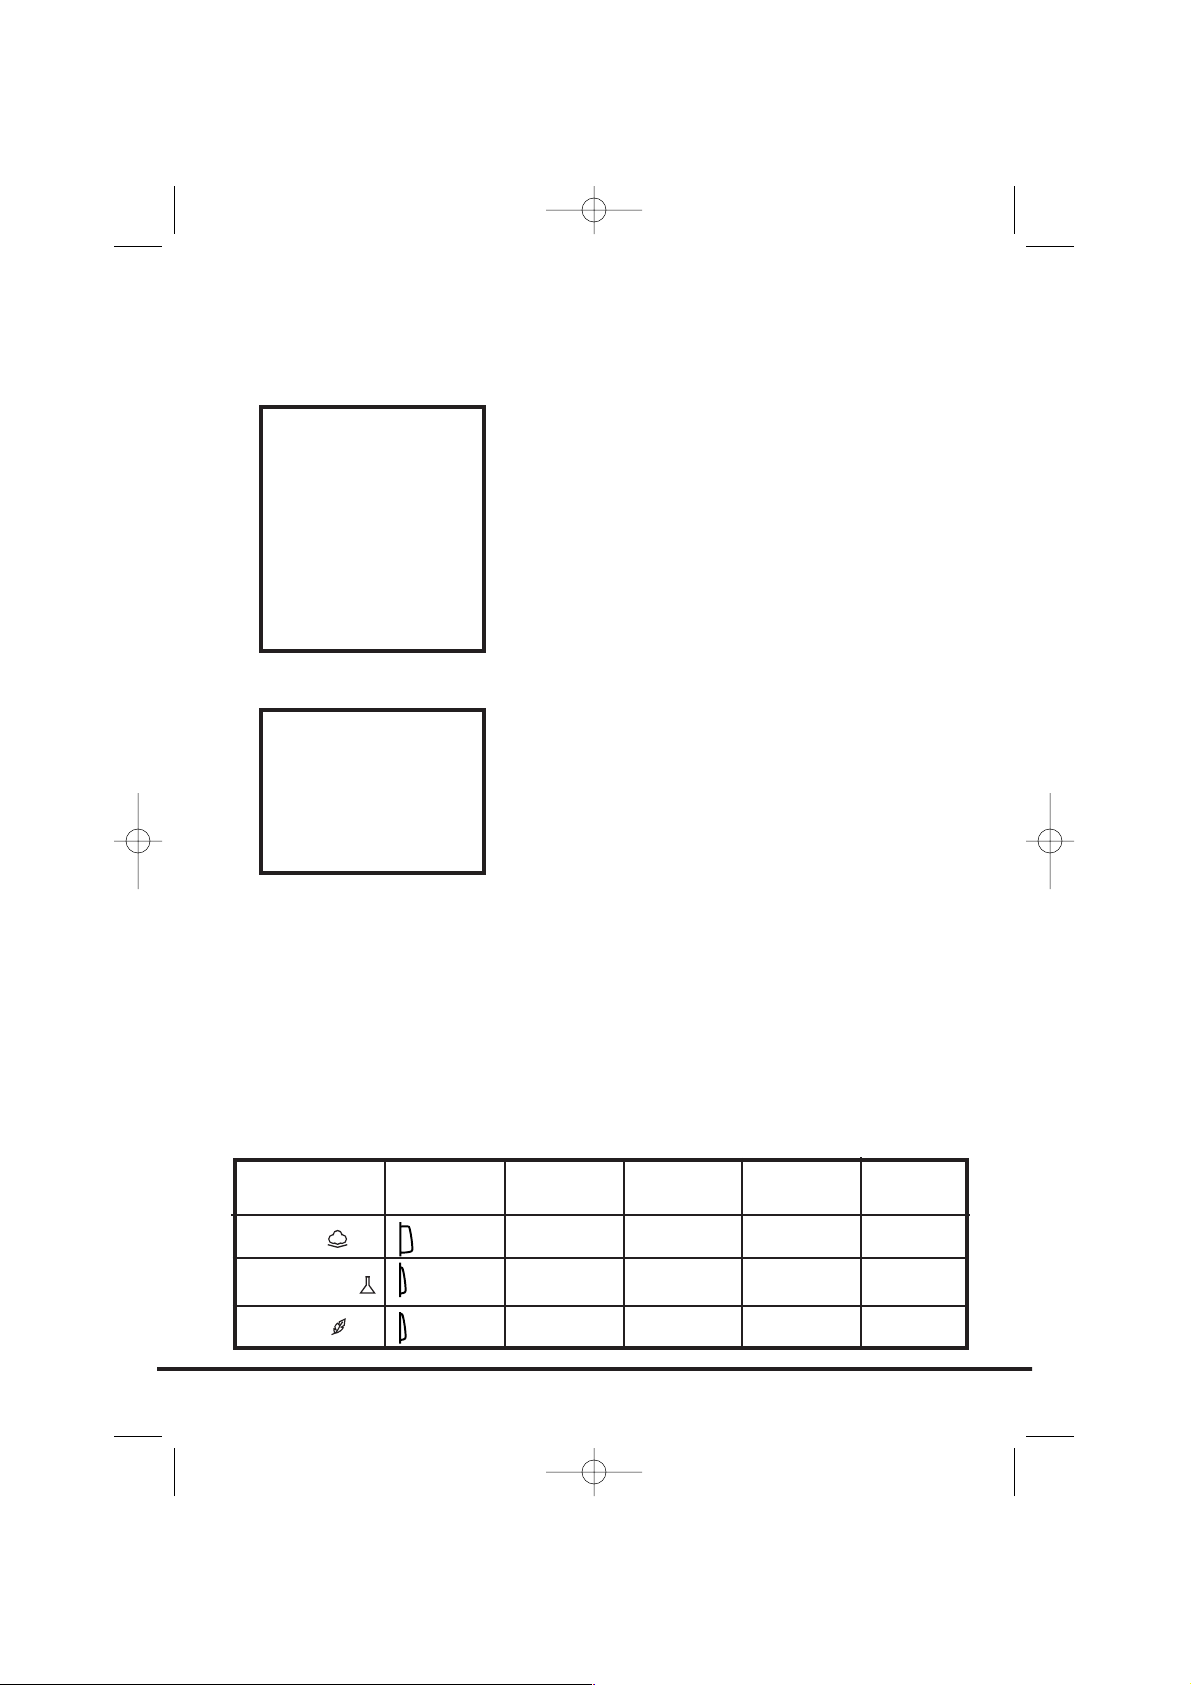
Drying guide
The table shows approximate drying times,
depending on the type of fabric and dampness of
the clothes.
10
Drying advice
IMPORTANT: Do
not dry articles
which have been
treated with a
dry cleaning fluid
or rubber clothes
(danger of fire or
explosion).
During the last
15 minutes the
load is always
tumbled in cool
air.
Fabric
COTTON
SYNTHETICS
ACRYLIC
HEAT
SETTING
HIGH
LOW
LOW
INDICATOR
LIGHT
OFF
ON
ON
HEAVY
LOAD
140-165 min
–
–
MEDIUM
LOAD
70-80 min
70-80 min
50-65 min
LIGHT
LOAD
50-65 min
40-55 min
30-40 min
40004982.qxd 23/06/2007 18:51 Page 10
Page 11
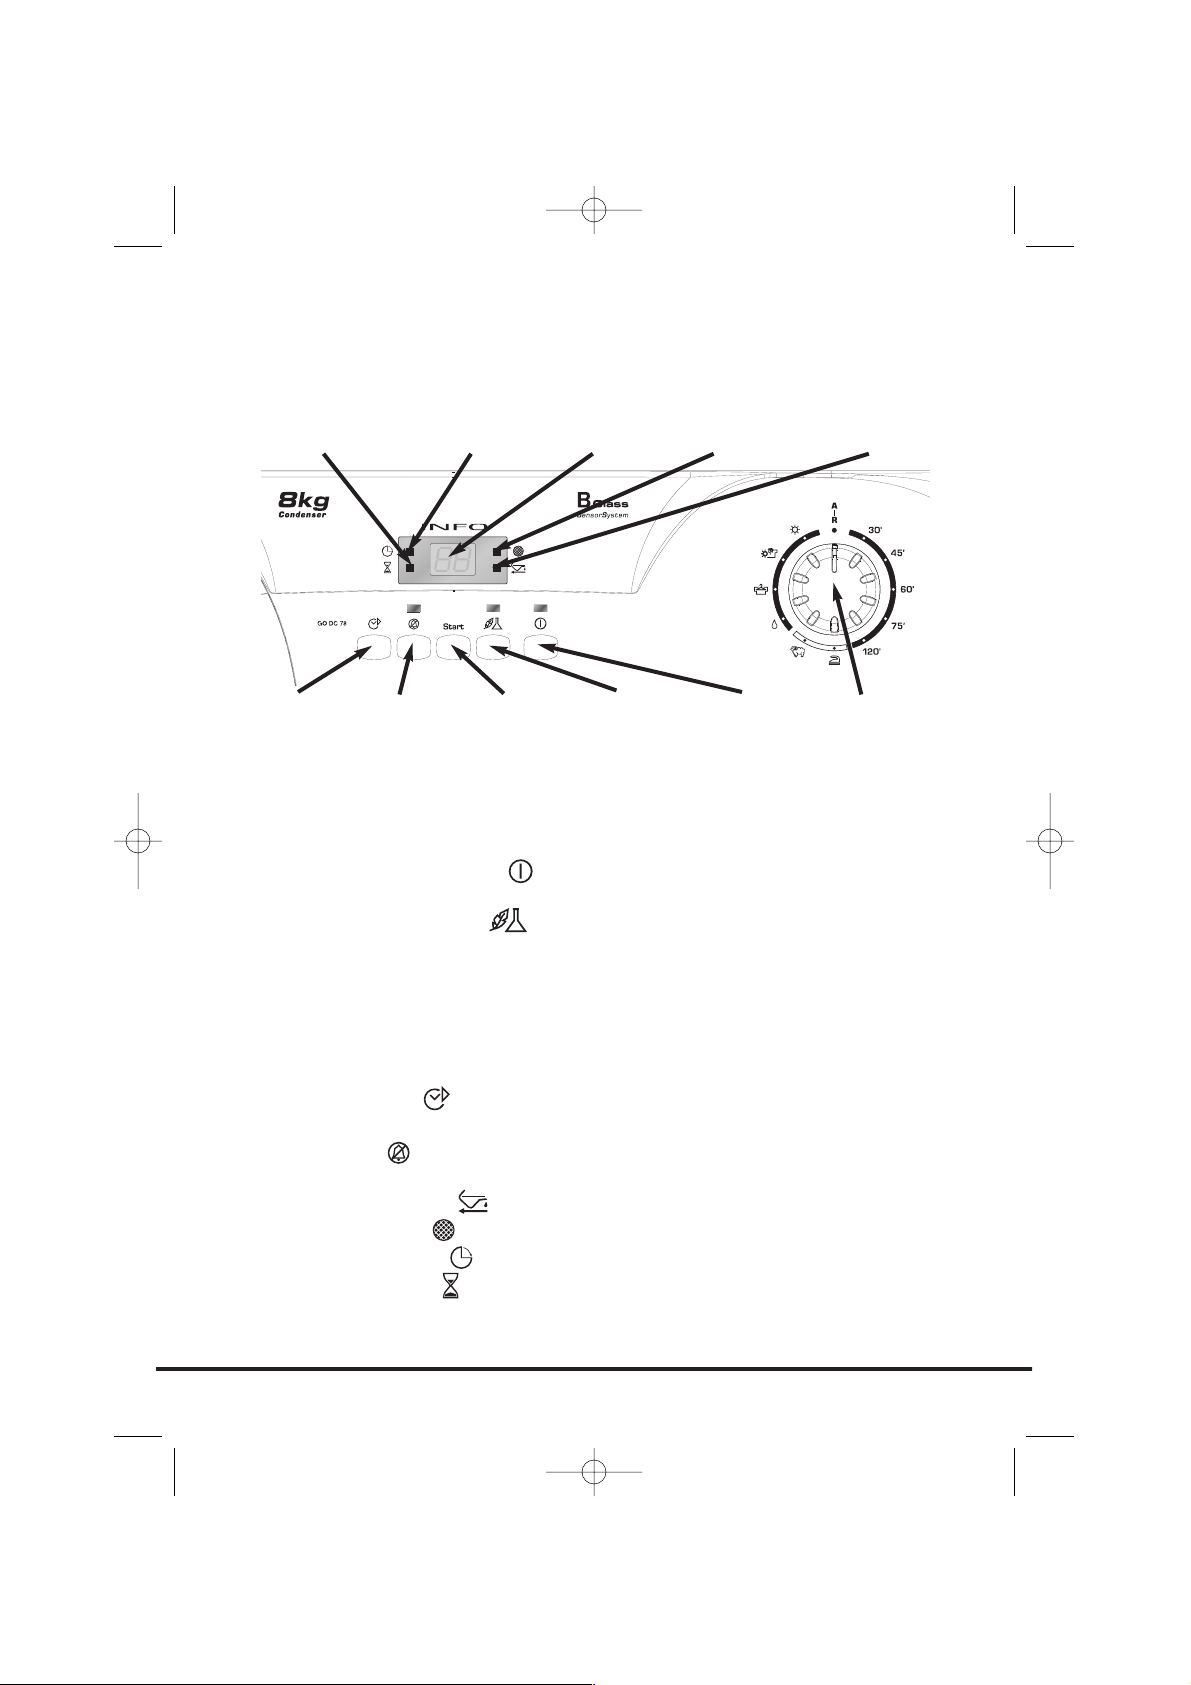
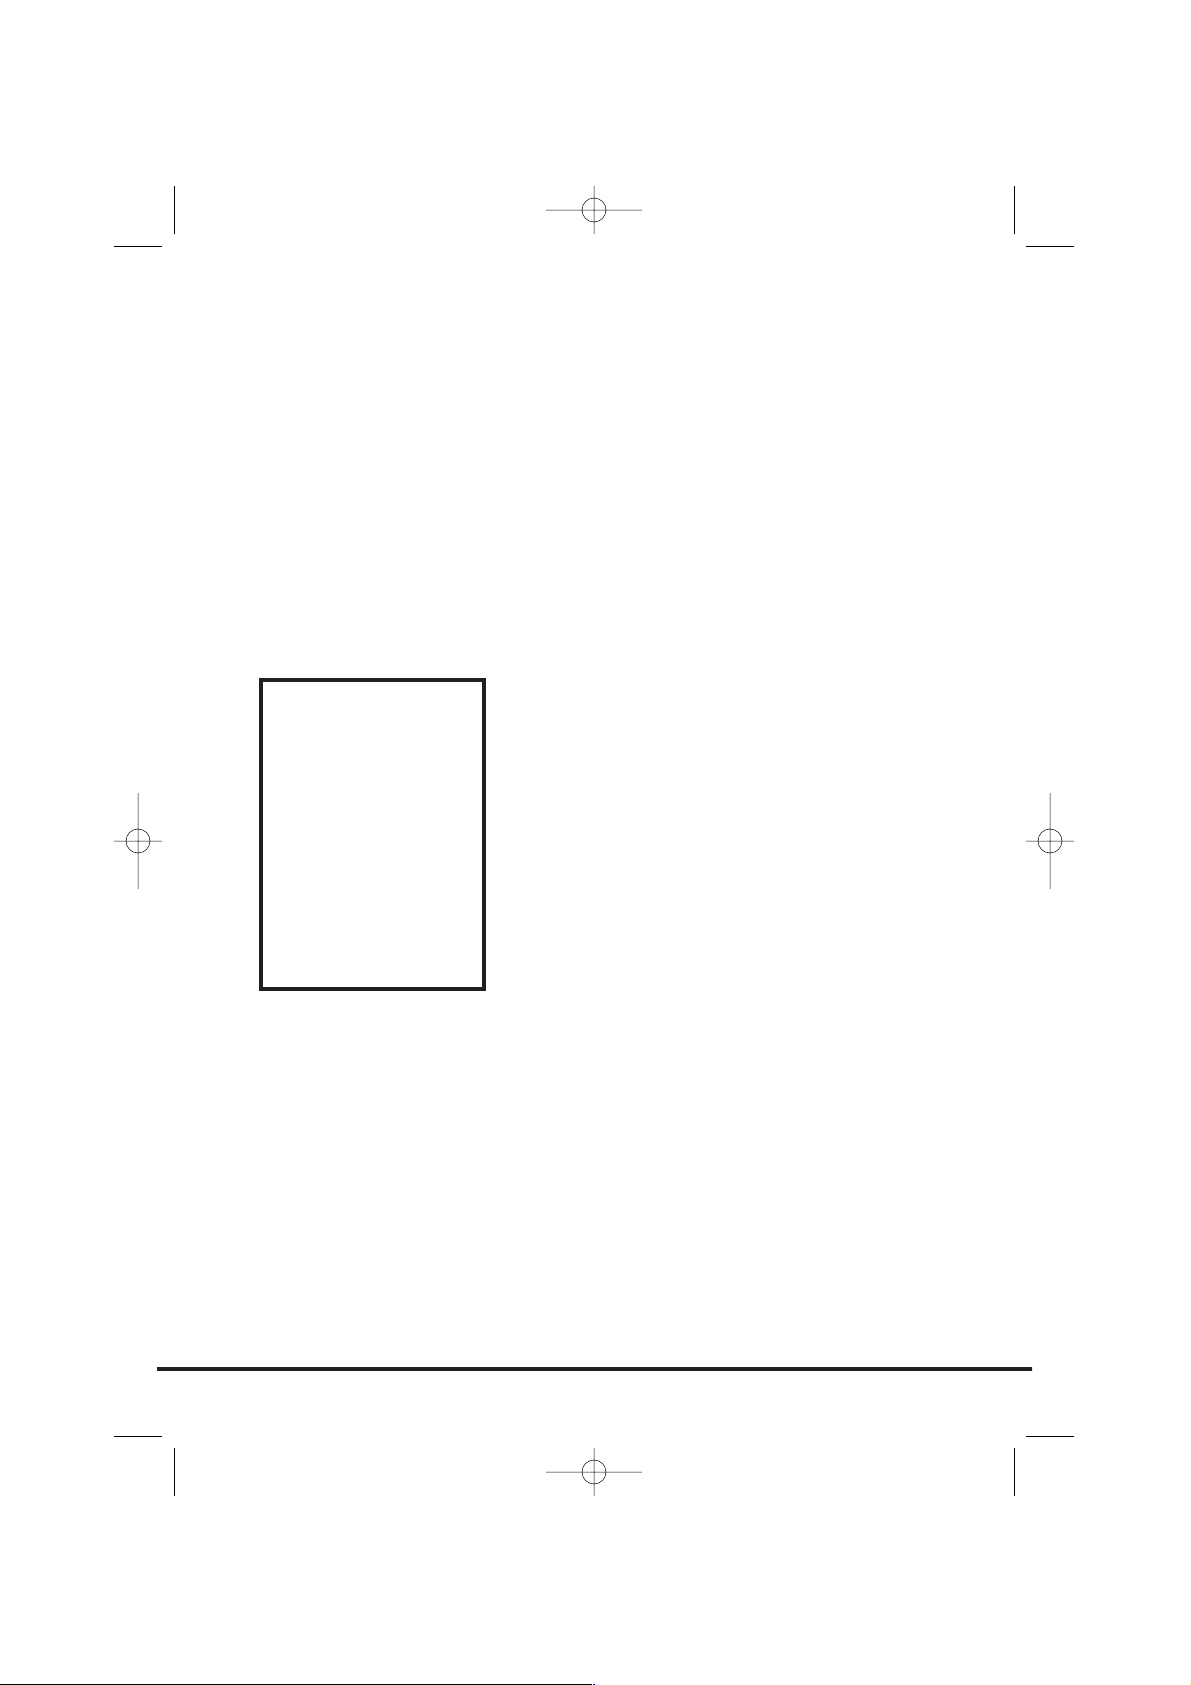
Control panel and indicator lights
Programme Selector – Select the required programme.
On/Off button and indicator – Press to switch on, the indicator will light.
The display will show the selected programme (see Programme Guide).
Acrylics/Synthetics button – Press to reduce the heat level for delicate
items, the indicator above the button will light up. To change the heat setting
the programme must be reset.
Low Heat - Indicator light ON
High Heat - Indicator light OFF
Start button – Press Start to commence the selected drying programme. Press
for 5 seconds to cancel/reset the programme.
Delay Start button – Allows the user to delay the start of the drying cycle
(see details of Operation on page 16).
Buzzer button – The buzzer is active in normal operation. To cancel the
buzzer press the button and the indicator will light up.
Empty Water indicator – Lights when the water container tray is full.
Filter Care indicator – Lights when the filter needs cleaning.
Time to End indicator – Lights when the program starts.
Start Delay indicator – Light flashes when the program starts.
Digital Display – The two digit display indicates the selected programme, the
Start Delay and the Time to End of the programme.
11
Controls and indicators
ACRYLICS/
SYNTHETICS
BUTTON
ON/OFF
BUTTON
BUZZER
BUTTON
FILTER CARE
INDICATOR
EMPTY WATER
INDICATOR
PROGRAMME
SELECTOR
START
BUTTON
DELAY
START
BUTTON
TIME TO END
INDICATOR
DIGITAL
DISPLAY
START DELAY
INDICATOR
40004982.qxd 23/06/2007 18:51 Page 11
Page 12
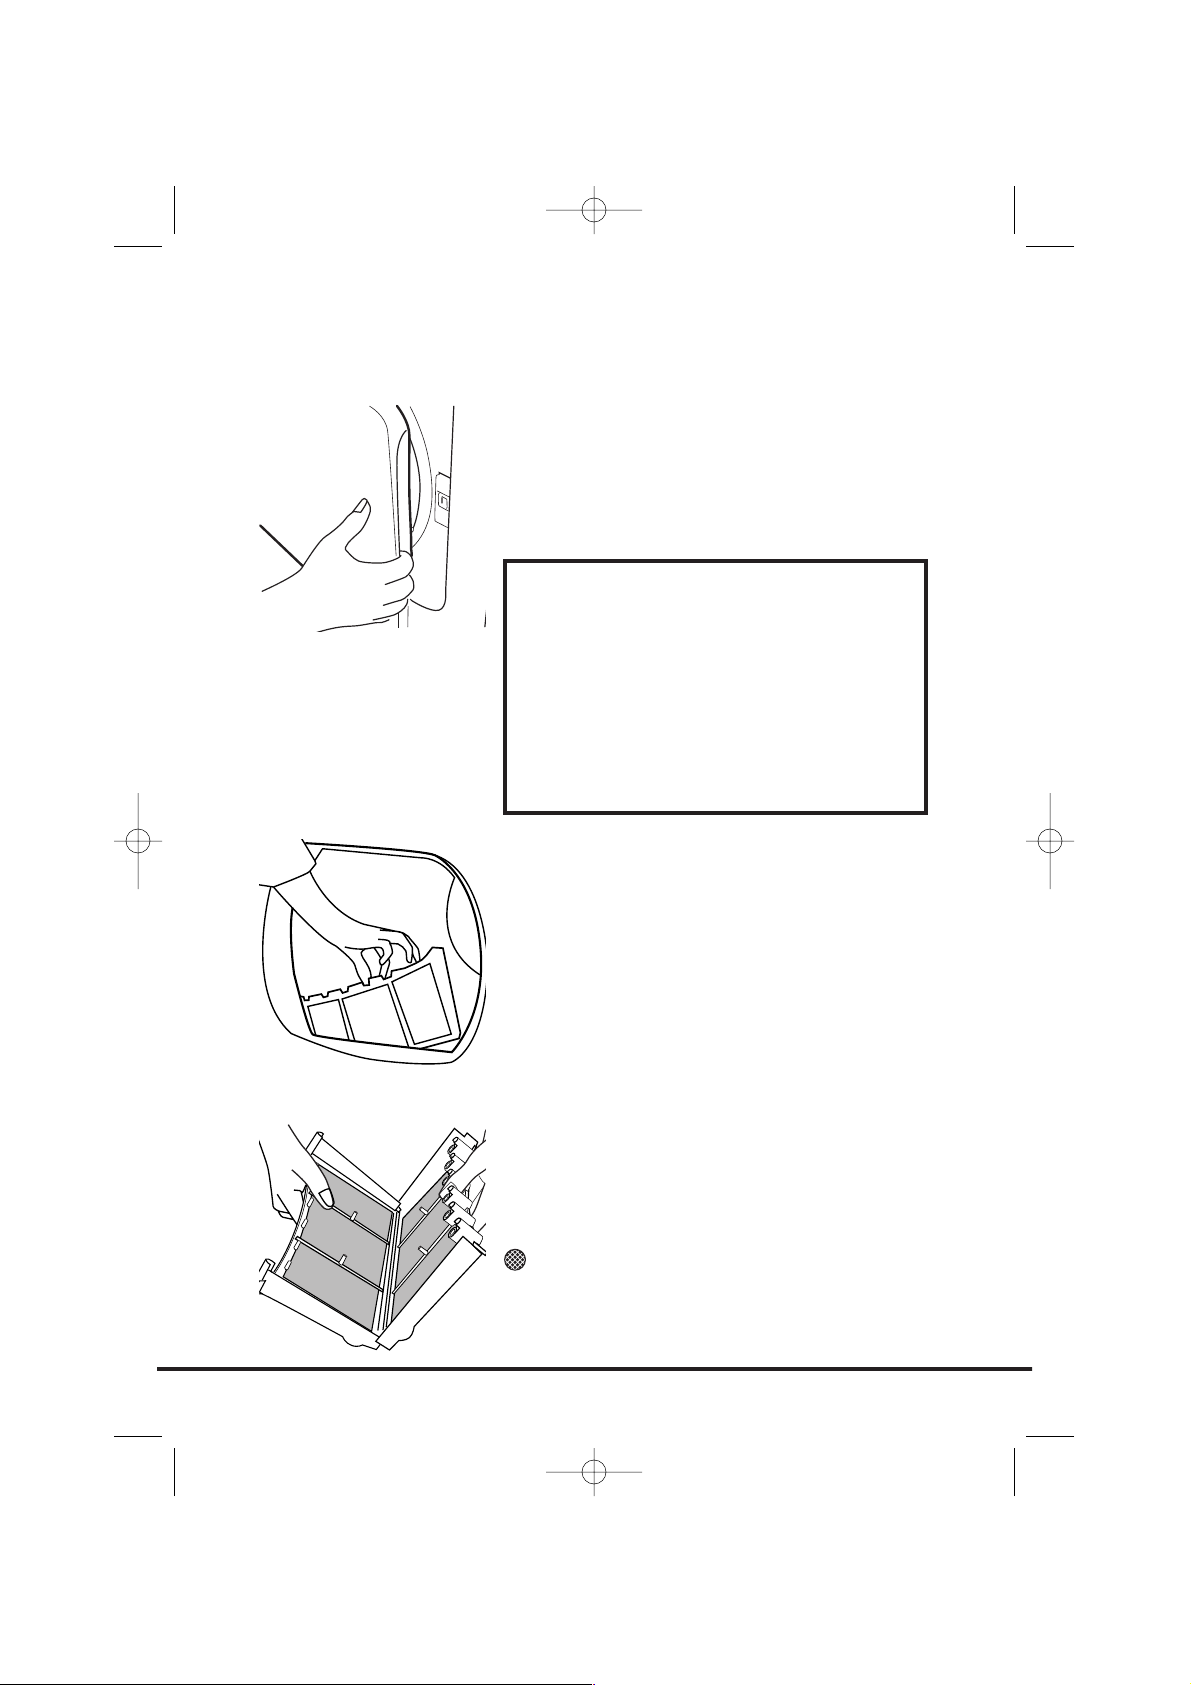
Opening the door
Pull on handle to open the door.
To restart the dryer, close the door and press
Start.
Filter
IMPORTANT: To maintain the efficiency of the
dryer check that the fluff filter is clean before
each drying cycle.
1. Pull the filter upwards.
2. Open filter as shown.
3. Gently remove lint using a soft brush or
your fingertips.
4. Snap the filter together and push back into
place.
Filter Care Indicator
lights when the filter needs cleaning.
If the laundry is not drying check that the filter is
not clogged.
12
Door and Filter
WARNING!
When the tumble dryer is in use the
drum and door may be VERY HOT.
Never stop a tumble dryer before
the end of the drying cycle unless
all items are quickly removed and
spread out so that the heat is
dissipated.
40004982.qxd 23/06/2007 18:51 Page 12
Page 13
The water removed from the laundry during the
drying cycle is collected in a container at the
bottom of the dryer.
When the container is full the indicator on
the control panel will light, and the container
MUST be emptied. However, we recommend that
the container is emptied after each drying cycle.
NOTE: Very little water will collect during the
first few cycles of a new machine as an internal
reservoir is filled first.
To remove the container
1. Gently pull out the tray until it is completely
removed. Support the tray with both hands.
When it is full the water container will
weigh about 4kg.
2. Tilt the water container to empty the water
out through the rear hole. When empty
slide the water container back into position.
PUSH FIRMLY INTO PLACE.
NOTE: If you have the option of drainage near
the dryer it is possible to use the discharge kit to
provide a permanent drain for the water
collected by the dryer. This will remove the need
to empty the water tray. All the information for
assembly of the kit is contained in the kit
envelope.
13
Water Container
40004982.qxd 23/06/2007 18:51 Page 13
Page 14
Important: Always switch off and remove the
plug from the electricity supply before cleaning
the condenser.
To maintain the efficiency of the dryer regularly
check that the condenser is clean.
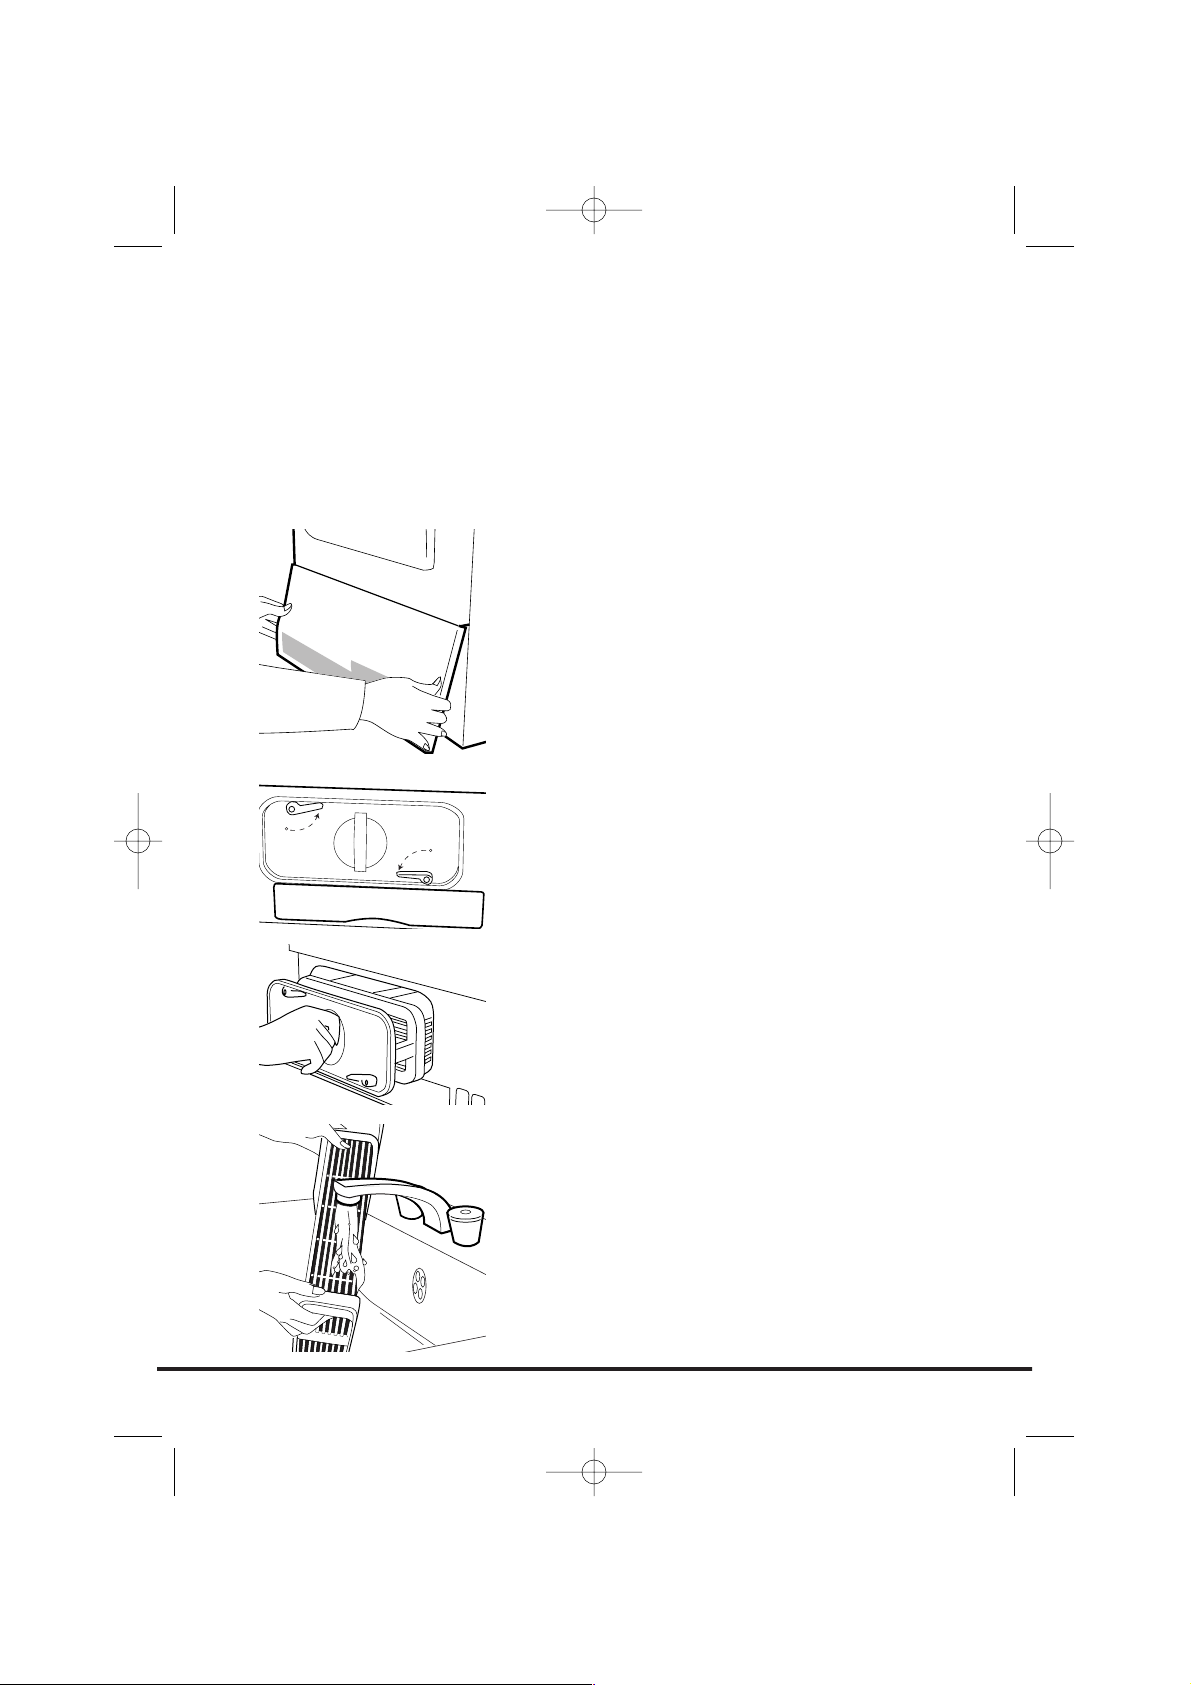
To remove the
condenser
1. Gently pull the bottom of the kickplate so
that it unclips from the dryer. The top
section can then be unhinged allowing the
kickplate to be completely removed.
2. Turn the two locking levers anti-clockwise
and pull out the condenser.
3. Pull out the condenser unit.
4. Gently remove any dust or fluff with a cloth,
then wash the unit by holding it under a
running tap turning it so that water flows
between the plates, to remove any dust or
fluff.
5. Refit the condenser ensuring it is in the
correct way (as indicated by the arrow) and
pushed firmly into place. Lock the two levers
by turning them clockwise.
6. Refit the kickplate.
14
Condenser
40004982.qxd 23/06/2007 18:51 Page 14
Page 15
Note: The sensor may not detect a small load of small
articles. For small loads and separate items or pre-dried
fabrics with low moisture content, use the timed
programmes. Set the programme between 30 and
75 minutes depending on the load size and dryness
required, and select high or low heat depending upon
the fabric type.
If the sensor does not detect the item the dryer will only
operate for 10 minutes before going into cooldown.
If the load is too large or too wet to tumble dry the dryer
will automatically go into cooldown after 180 minutes.
15
Selecting the Programme
The Sensor Dry machine gives many options for drying the laundry to suit all
circumstances.
The table below lists the programmes and the function of each programme.
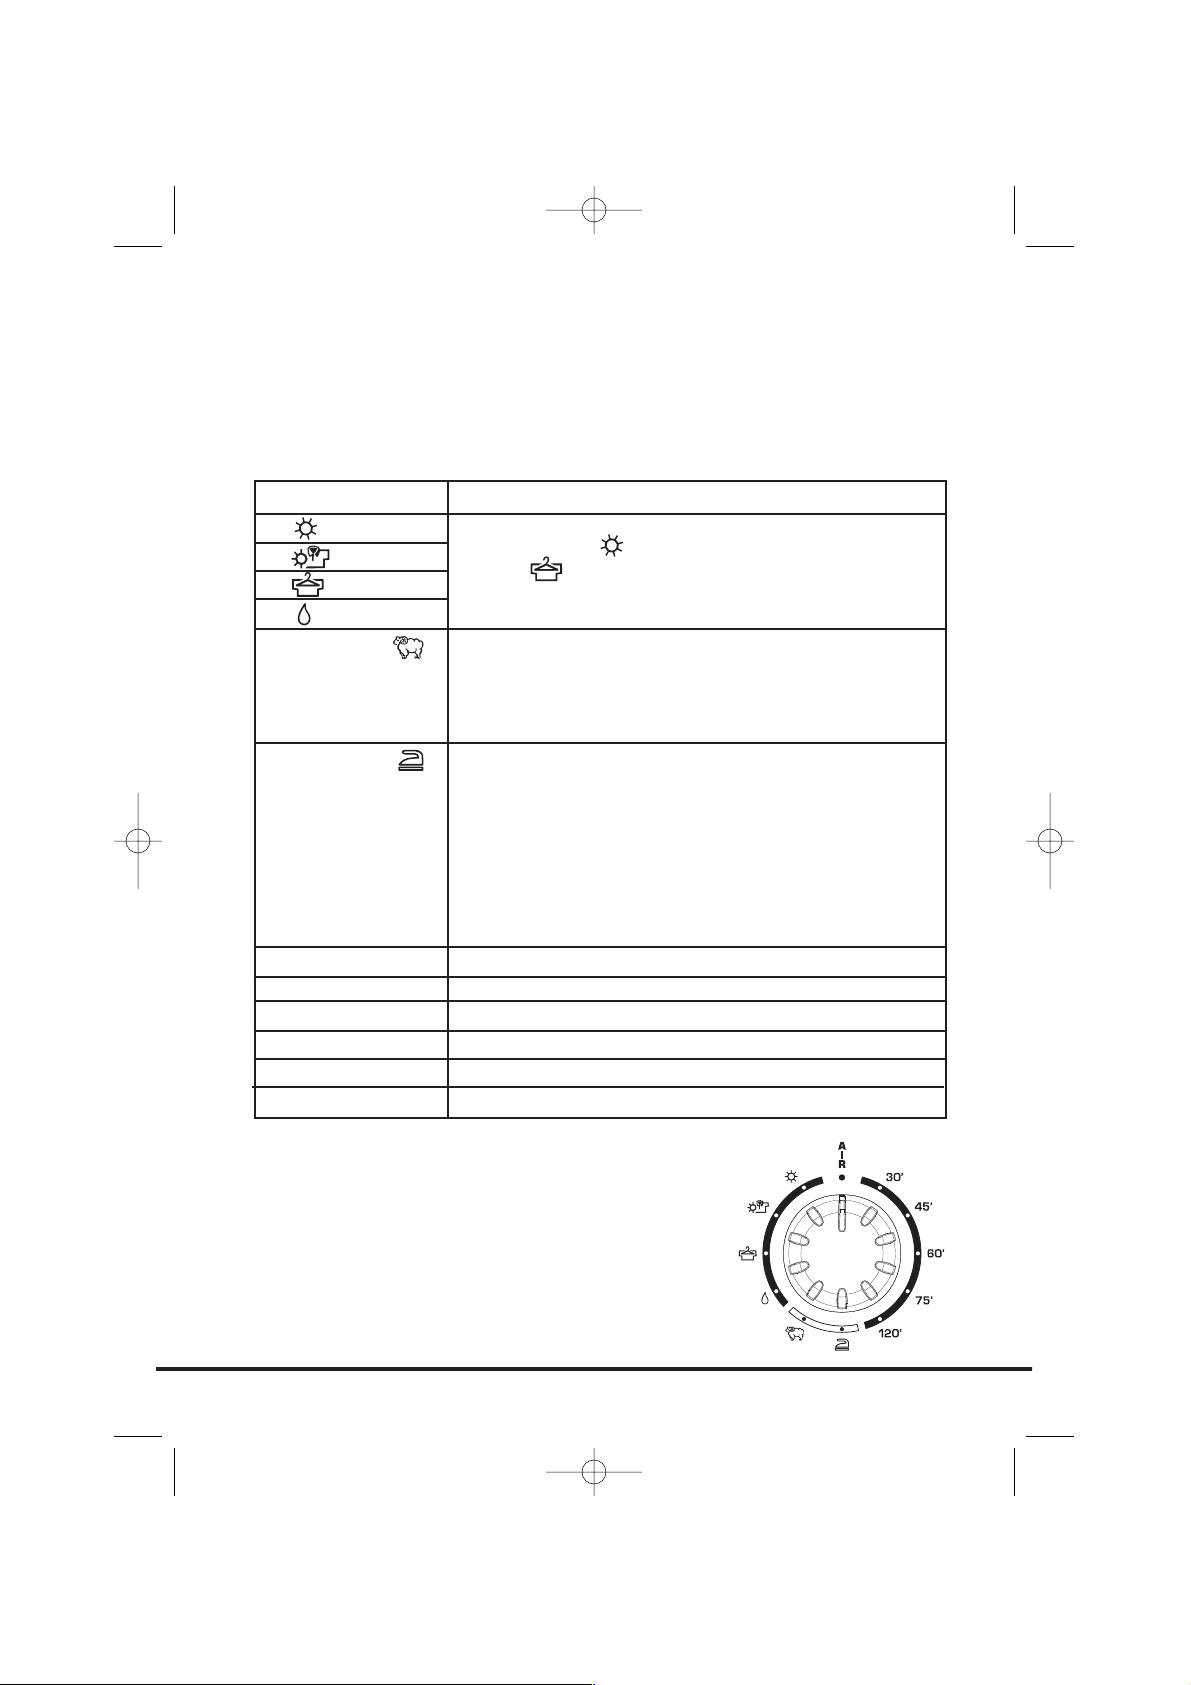
Programme
Wool
Fast Iron
120'
75'
60'
45'
30'
AIR
Description
Select the degree of dryness that you require.
This ranges from for bath towels and bathrobes,
through for items that will be put away without
ironing, to the programme that leaves the laundry
suitable for ironing.
A gentle programme specially created to get woollens
softer after air-drying.
This delicate warm air cycle, lasting 12 minutes, can also
be used to get woollens 'refreshed' after being stored in
the wardrobe.
The Fast Iron programme provides a conditioning and
anticrease function. The dryer will heat the load for
9 minutes followed by a 3 minute cool down period and
is especially good for garments which may have been left
for some time prior to ironing, in a linen basket for
example. Garments may also become stiffened when
dried outside on a washing line or inside on radiators.
The Fast Iron process relaxes the creases in the fabric
making ironing quicker and easier.
120 minutes of drying
75 minutes of drying
60 minutes of drying
45 minutes of drying
30 minutes of drying
Tumbling of laundry in cool air for 30 minutes
40004982.qxd 23/06/2007 18:51 Page 15
Page 16
1. Open the door and load the drum with laundry. Ensure that garments do
not hinder closure of the door.
2. Gently close the door pushing it slowly until you hear the door 'click' shut.
3. Press the button to switch on the dryer. The indicator will light up and
the programme number will be indicated.
4. Turn the Programme Selector dial to select the required drying program
(see Programme Guide).
5. If drying synthetics, acrylics or delicate items, press the button to
reduce the heat level.
The light above the push button will light up when the machine is in low
heat setting. To deselect this status the machine must be reset.
6. Press the Start button. The dryer will start automatically and the
indicator will be continuously lit. The time to the end of the program will
be shown on the display.
7. The display will show the drying progress in terms of time remaining, the
indicator will remain lit.
8. If the door is opened during the programme to check the laundry, it is
necessary to press Start to recommence drying after the door has been
closed.
9. When the 15' indicator is lit the machine will enter the cool down phase,
the clothes will be tumbled in cool air allowing the load to cool down.
10. When the programme is complete the Display will show 0'min. and the
buzzer will sound for 10 seconds.
11. Following the completion of the cycle the drum will rotate intermittently to
minimise creasing, the buzzer will also sound. This will continue until the
machine is reset or switched OFF.
Cancelling and resetting the programme
To cancel a programme press the Start button for 5 seconds. The machine will
indicate that it has been reset by the display flashing.
Delay Start Function
The function allows the user to delay the start of the drying cycle by up to
23 hours.
When the function is first selected the display will show a delay of 1 hour,
subsequent presses of the button will increase the delay by 1 hour to a maximum
of 23 hours.
16
Operation
40004982.qxd 23/06/2007 18:51 Page 16
Page 17
To commence the programme press Start and the
display will indicate the hours remaining on the
time delay and will complete the drying cycle at
the end of this time.
Note: If Start is not pressed within 5 seconds the
Delay Start will cancel automatically.
Cleaning the dryer
● Clean the filter and empty the water
container after every drying cycle.
● Regularly clean the condenser.
● After each period of use, wipe the inside of
the drum and leave the door open for a
while to allow circulation of air to dry it.
● Wipe the outside of the machine and the
door with a soft cloth.
● DO NOT use abrasive pads or cleaning
agents.
● To prevent the door sticking or the build up
of fluff periodically clean the inner door and
gasket with a damp cloth.
Technical specifications
Drum capacity 115 litres
Maximum load 8 kg
Height 85cm
Width 60cm
Depth 60cm
Energy Label Band B
17
IMPORTANT
Always switch
off and remove
the plug from
the electricity
supply before
cleaning this
appliance.
For electrical data
refer to the
rating label on
the front of the
dryer cabinet
(with the door
open).
Cleaning and Routine
Maintenance
WARNING!
The drum, door
and load may be
very hot.
40004982.qxd 23/06/2007 18:51 Page 17
Page 18
What might be the cause of...
Defects you can remedy yourself
Before calling GIAS Service for technical advice please run through the
following checklist. A charge will be made if the machine is found to be
working or has been installed incorrectly or used incorrectly. If the problem
persists after completing the recommended checks, please call GIAS Service,
they may be able to assist you over the telephone.
Drying time is too long/clothes are not dry enough…
● Have you selected the correct drying time/programme?
● Were the clothes too wet? Were the clothes thoroughly wrung or spin-
dried?
● Does the filter need cleaning?
● Does the condenser need cleaning?
● Is the dryer overloaded?
● Are the inlets, outlets and base of the dryer free from obstructions?
● Has the option been selected from a previous cycle?
The dryer does not operate…
● Is there a working electricity supply to the dryer? Check using another
appliance such as a table lamp.
● Is the plug properly connected to the mains supply?
● Is there a power failure?
● Has the fuse blown?
● Is the door fully closed?
● Is the dryer switched on, both at the mains supply and at the machine?
● Has the drying time or the programme been selected?
● Has the machine been switched on again after opening the door?
● Has the dryer stopped operating because the water tray is full and needs
emptying?
The dryer is noisy…
● Switch off the dryer and contact GIAS Service for advice.
The Indicator is on…
● Does the filter need cleaning?
● Does the condenser need cleaning?
The Indicator is on…
● Does the water container need emptying?
18
Troubleshooting
40004982.qxd 23/06/2007 18:51 Page 18
Page 19
Should there still be a problem with your dryer
after completing all the recommended checks,
please call GIAS Service for advice. They may be
able to assist you over the telephone or arrange a
suitable appointment for an engineer to call
under the terms of your guarantee. However, a
charge may be made if any of the following
applies to your machine:
● Is found to be in working order.
● Has not been installed in accordance with
the installation instructions.
● Has been used incorrectly.
Spares
Always use genuine spares, available direct from
GIAS Service.
GIAS Service
For service and repairs call your local GIAS
Service engineer.
The manufacturer declines all responsibility in the
event of any printing mistakes in this booklet.
The manufacturer also reserves the right to make
appropriate modifications to its products without
changing the essential characteristics.
19
Customer Service
40004982.qxd 23/06/2007 18:51 Page 19
Page 20

Introduction . . . . . . . . . . . . . . . . . . . . . . . . . . . . . . . . . . . . . . . . . . . . . . 21
Informations sur la livraison . . . . . . . . . . . . . . . . . . . . . . . . . . . . . . . . . . . . . . 21
Déballage du produit . . . . . . . . . . . . . . . . . . . . . . . . . . . . . . . . . . . . 21
Rappels de sécurité . . . . . . . . . . . . . . . . . . . . . . . . . . . . . . . . . . . . . . 22
Installation . . . . . . . . . . . . . . . . . . . . . . . . . . . . . . . . . . . . . . . . . . . . . . . . . . . . 22
Utilisation. . . . . . . . . . . . . . . . . . . . . . . . . . . . . . . . . . . . . . . . . . . . . . . . . . . . . 22
Le linge . . . . . . . . . . . . . . . . . . . . . . . . . . . . . . . . . . . . . . . . . . . . . . . . . . . . . . 22
Protection de l’environnement . . . . . . . . . . . . . . . . . . . . . . . . . . . . . . . . . . . . 23
Service GIAS . . . . . . . . . . . . . . . . . . . . . . . . . . . . . . . . . . . . . . . . . . . . . . . . . . . 23
Installation. . . . . . . . . . . . . . . . . . . . . . . . . . . . . . . . . . . . . . . . . . . . . . . . 24
Besoins électriques. . . . . . . . . . . . . . . . . . . . . . . . . . . . . . . . . . . . . . . . . . . . . . 24
Ajustement des pieds. . . . . . . . . . . . . . . . . . . . . . . . . . . . . . . . . . . . . . . . . . . . 24
Ventilation. . . . . . . . . . . . . . . . . . . . . . . . . . . . . . . . . . . . . . . . . . . . . . . . 25
Préparation de la charge . . . . . . . . . . . . . . . . . . . . . . . . . . . . . . . . 26
Préparation des vêtements . . . . . . . . . . . . . . . . . . . . . . . . . . . . . . . . . . . . . . . 26
Tri de la charge . . . . . . . . . . . . . . . . . . . . . . . . . . . . . . . . . . . . . . . . . . . . . . . . 27
Conseils de séchage. . . . . . . . . . . . . . . . . . . . . . . . . . . . . . . . . . . . . . 28
Ne séchez pas en machine . . . . . . . . . . . . . . . . . . . . . . . . . . . . . . . . . . . . . . . . 28
Économies d’énergie . . . . . . . . . . . . . . . . . . . . . . . . . . . . . . . . . . . . . . . . . . . . 28
Guide de séchage. . . . . . . . . . . . . . . . . . . . . . . . . . . . . . . . . . . . . . . . . . . . . . . 28
Commandes et indicateurs . . . . . . . . . . . . . . . . . . . . . . . . . . . . . 29
Porte et filtre . . . . . . . . . . . . . . . . . . . . . . . . . . . . . . . . . . . . . . . . . . . . . 30
Ouverture de la porte . . . . . . . . . . . . . . . . . . . . . . . . . . . . . . . . . . . . . . . . . . . 30
Filtre. . . . . . . . . . . . . . . . . . . . . . . . . . . . . . . . . . . . . . . . . . . . . . . . . . . . . . . . . 30
Indicateur Entretien Filtre . . . . . . . . . . . . . . . . . . . . . . . . . . . . . . . . . . . . . . . . 30
Réservoir d’eau. . . . . . . . . . . . . . . . . . . . . . . . . . . . . . . . . . . . . . . . . . . 31
Pour retirer le réservoir . . . . . . . . . . . . . . . . . . . . . . . . . . . . . . . . . . . . . . . . . . 31
Condenseur . . . . . . . . . . . . . . . . . . . . . . . . . . . . . . . . . . . . . . . . . . . . . . . 32
Pour retirer le condenseur . . . . . . . . . . . . . . . . . . . . . . . . . . . . . . . . . . . . . . . . 32
Sélection du programme . . . . . . . . . . . . . . . . . . . . . . . . . . . . . . . . 33
Fonctionnement . . . . . . . . . . . . . . . . . . . . . . . . . . . . . . . . . . . . . . . . . 34
Annulation et réinitialisation du programme . . . . . . . . . . . . . . . . . . . . . . . . . 34
Fonction Départ Différé. . . . . . . . . . . . . . . . . . . . . . . . . . . . . . . . . . . . . . . . . . 34
Nettoyage et Entretien de Routine . . . . . . . . . . . . . . . . . . . . 35
Nettoyage du sèche-linge . . . . . . . . . . . . . . . . . . . . . . . . . . . . . . . . . . . . . . . . 35
Spécifications techniques. . . . . . . . . . . . . . . . . . . . . . . . . . . . . . . . . . . . . . . . . 35
Dépistage de pannes . . . . . . . . . . . . . . . . . . . . . . . . . . . . . . . . . . . . 36
Service clientèle . . . . . . . . . . . . . . . . . . . . . . . . . . . . . . . . . . . . . . . . . . 37
Pièces de rechange. . . . . . . . . . . . . . . . . . . . . . . . . . . . . . . . . . . . . . . . . . . . . . 37
Service GIAS . . . . . . . . . . . . . . . . . . . . . . . . . . . . . . . . . . . . . . . . . . . . . . . . . . . 37
20
40004982Fre.qxd 23/06/2007 19:06 Page 20
Page 21
Introduction
Veuillez lire et suivre ces instructions avec soin et
utiliser la machine en conséquence. Ce livret
contient des instructions importantes sur la
sécurité d’utilisation, l’installation et l’entretien
de la machine, ainsi que des conseils
utiles pour
obtenir les meilleurs résultats possibles lors de son
utilisation.
Conservez toute la documentation dans un endroit sûr
pour pouvoir vous y reporter à une date ultérieure ou la
transmettre aux prochains propriétaires
Informations sur la
livraison
Vérifiez que les articles suivants ont bien été livrés avec
l’appareil :
● Manuel d’utilisation
● Carte de garantie
● Étiquette d’énergie
● Kit tuyau d’évacuation
Retirez la machine de l’emballage, à proximité de son
emplacement définitif.
1. Coupez délicatement autour de la base de
l’emballage en remontant vers l’angle supérieur.
2. Retirer le manchon en polyéthylène et sortez le
sèche-linge de la base en polystyrène.
21
Vérifiez que la
machine ne s’est
pas détériorée en
transit. Si c’est le
cas, contactez GIAS
pour une opération
de dépannage.
Le non-respect de
ces instructions
peut compromettre
la sécurité de votre
appareil. Un appel
de service peut
vous être facturé si
la défaillance de
votre appareil est
causée par une
mauvaise
utilisation.
Déballage du produit
Mettez l’emballage au rebut en toute
sécurité. Conservez hors de portée des
enfants car il représente une source de
danger potentielle.
40004982Fre.qxd 23/06/2007 19:06 Page 21
Page 22
Rappels de sécurité
Installation
● Vérifiez que la machine ne présente aucun signe visible de détérioration avant de l’utiliser. En
cas de détérioration, assurez-vous de ne pas l’utiliser et de contacter le service GIAS.
● N’utilisez pas d’adaptateurs, de multi-prises et/ou de rallonges.
● Veillez à ne pas installer le sèche-linge contre des rideaux et assurez-vous que rien ne pourra
tomber ou s’accumuler derrière le sèche-linge.
● Cet appareil ne doit pas être installé derrière une porte verrouillable, une porte coulissante
ou une porté munie de gonds placée en face de la porte du sèche-linge.
Utilisation
● Cet appareil ne doit pas être utilisé par des personnes (notamment des enfants) jouissant de
capacités mentales, sensorielles ou physiques réduites ou d’un manque d’expérience ou de
connaissances, sauf si elles sont surveillées ou ont reçu des instructions concernant l’utilisation
de cet appareil par une personne responsable de leur sécurité.
● Les enfants doivent être surveillés afin de s’assurer qu’ils ne s’amusent pas avec l’appareil.
● ATTENTION La mauvaise utilisation d’un sèche-linge risque de causer un d’incendie.
● Cette machine est conçue uniquement pour usage domestique, à savoir pour sécher le linge
domestique et les vêtements.
● Cette machine ne doit être utilisée que pour l’emploi auquel elle est destinée et qui est décrit
dans ce manuel. Assurez-vous d’avoir bien compris les instructions d’installation et
d’utilisation avant de faire fonctionner la machine.
● Ne touchez pas la machine si vous avez les mains ou les pieds mouillés ou humides.
● Ne vous appuyez pas sur la porte lorsque vous chargez la machine et n’utilisez pas la porte
pour soulever ou déplacer la machine.
● Ne laissez pas des enfants jouer avec la machine ou avec ses commandes.
● ATTENTION N’utilisez pas cette machine si le filtre à peluches n’est pas en place ou s’il est
endommagé ; les peluches risquent en effet de s’allumer.
● ATTENTION L’augmentation de température pendant le fonctionnement du sèche-linge peut
être supérieure à 60°C là où se trouve le symbole de surface chaude .
● Débranchez du courant de secteur. Retirez toujours la prise avant de nettoyer la machine.
● Cessez d’utiliser la machine si elle semble défectueuse.
● Veillez à ce que les peluches ne puissent pas s’accumuler sur le sol, à l’extérieur de la machine.
● Il se peut que l’intérieur du tambour soit très chaud. Veillez à ce que le sèche-linge termine
son cycle de refroidissement avant d’en sortir le linge.
Le linge
● Ne séchez pas des vêtements non lavés dans le sèche-linge.
● ATTENTION NE séchez PAS les tissus qui ont été traités avec des liquides de nettoyage à sec.
● ATTENTION Quand elles sont chauffées, les mousses alvéolaires peuvent dans certains cas
brûler par combustion spontanée. Les articles tels que le caoutchouc mousse (mousse de
latex), les bonnets de douche, le textile imperméable, les articles caoutchoutés et les
vêtements ou coussins rembourrés de caoutchouc mousse NE DOIVENT PAS être séchés dans le
sèche-linge.
● Reportez-vous toujours aux étiquettes d’entretien du linge pour vérifier le mode de séchage
recommandé.
22
40004982Fre.qxd 23/06/2007 19:06 Page 22
Page 23
● Les vêtements doivent être essorés en machine ou à la main avant d’être placés dans le
sèche-linge. Les vêtements qui dégoulinent NE DOIVENT PAS être mis dans le sèche-linge.
● Enlevez les briquets et les allumettes des poches et veillez à ne JAMAIS utiliser de liquides
inflammables à proximité de la machine.
● Les rideaux en fibres de verre ne doivent JAMAIS être placés dans cette machine. La
contamination d’autres vêtements par les fibres de verre peut entraîner des irritations de la
peau.
● Les articles qui ont été souillés par des substances telles que huile de cuisson, acétone,
alcool, pétrole, kérosène, produit anti-taches, térébenthine, cire et décapant pour cire
doivent être lavés à l’eau chaude avec une quantité supplémentaire de détergent avant
d’être séchés dans le sèche-linge.
● Les agents adoucissants, et autres produits similaires, doivent être utilisés conformément
aux instructions fournies par le fabricant du produit.
Protection de l’environnement
● Tous les matériaux de conditionnement utilisés sont écologiques et recyclables. Veuillez les
éliminer de manière écologique. Votre municipalité pourra vous donner le détail exact des
méthodes d’élimination en vigueur.
● Pour assurer la sécurité lors de l’élimination d’un vieux sèche-linge, veuillez débrancher la
fiche du courant de secteur, couper le câble d’alimentation et le détruire avec la fiche. Pour
empêcher que les enfants ne s’enferment dans la machine, cassez les charnières de la porte
ou son dispositif de verrouillage.
Service GIAS
● Pour veiller au fonctionnement efficace et sans risque de cet appareil, nous vous
recommandons de faire exclusivement appel à un technicien GIAS agréé pour son entretien
ou sa réparation éventuelle.
Directive européenne 2002/96/CE
Cet appareil est commercialisé en accord avec la directive européenne 2002/96/CE sur les déchets
des équipements électriques et électroniques (DEEE).
En vous assurant que ce produit est correctement recyclé, vous
participez à la prévention des conséquences négatives sur
l’environnement et la santé publique qui pourrait être causé par une
mise au rebut inappropriée de ce produit.
Le symbole sur ce produit indique qu’il ne doit pas être traité comme
un déchet ménager. Il doit être rapporté jusqu’à un point de recyclage
des déchets électriques et électroniques.
La collecte de ce produit doit se faire en accord avec les
réglementations environnementales concernant la mise au rebut de ce
type de déchets.
Pour plus d’information au sujet du traitement, de la collecte et du
recyclage de ce produit, merci de contacter votre mairie, votre centre
de traitement des déchets ou le magasin où vous avez acheté ce produit.
23
Si l’appareil ne fonctionne pas correctement ou s’il tombe en
panne, mettez-le à l’arrêt et débranchez-le du courant de secteur.
Consultez le service GIAS pour prévoir une éventuelle réparation.
40004982Fre.qxd 23/06/2007 19:06 Page 23
Page 24

Besoins électriques
Les sèche-linges sont prévues pour une tension de 230 V,
50 Hz. Vérifiez que la tension nominale du circuit
d’alimentation est réglée sur 10 A minimum.
L’électricité peut être extrêmement dangereuse.
Cet appareil doit être mis à la terre.
La prise de courant et la fiche de la machine doivent
être du même type.
N’utilisez pas de multi-prises et/ou de rallonges.
La fiche doit être accessible pour débrancher l’appareil
une fois qu’il a été installé.
Les fils du câble de secteur sont colorés en fonction des
codes suivants :
Bleu NEUTRE
Marron SOUS TENSION
Vert et jaune TERRE
La machine est conforme aux directives européennes
89/336/EEC, 73/23/EEC et à leurs modifications
ultérieures.
Ajustement des pieds
Lorsque la machine est en place, les pieds doivent être
ajustés pour mettre la machine de niveau.
Ajustez les quatre pieds pour stabiliser la machine et la
mettre de niveau.
24
Un appel de
service peut vous
être facturé si la
défaillance de
votre appareil est
causée par une
installation
incorrecte.
Si le cordon
électrique de cet
appareil est
endommagé, il doit
être remplacé par
un cordon spécial
qui est
UNIQUEMENT
disponible auprès
du service des
pièces de rechange.
Il doit être installé
par une personne
compétente.
Installation
Ne branchez pas l’appareil et ne mettez
pas en marche l’interrupteur de secteur
tant que l’installation n’est pas terminée.
Par mesure de sécurité, veillez à installer
ce sèche-linge correctement.
En cas de doute concernant son
installation, veuillez demander conseil à
GIAS Service.
40004982Fre.qxd 23/06/2007 19:06 Page 24
Page 25

La pièce où se trouve le sèche-linge doit avoir une
ventilation adéquate de manière à ce que les gaz des
appareils qui brûlent d’autres combustibles, y compris
les cheminées, ne soient pas attirés dans la pièce
pendant que le sèche-linge est en marche.
● L’air d’échappement ne doit pas être évacué par
un conduit qui est également utilisé pour évacuer
les fumées d’échappement d’appareils qui brûlent
du gaz ou d’autres combustibles.
● Vérifiez régulièrement que l’air peut circuler
librement autour du sèche-linge.
● Vérifiez le filtre à peluches après usage, et
nettoyez-le le cas échéant.
● Les entrées et sorties doivent être libres
d’obstructions. Pour veiller à une ventilation
adéquate, l’espace entre le bas de la machine et
le sol ne doit pas être obstrué. Il doit y avoir un
espace d’au moins 12 mm entre la machine et
d’éventuelles obstructions.
● Veillez à ce que rien ne puisse tomber ou
s’accumuler entre les côtés et l’arrière du sèchelinge, afin de ne pas obstruer l’entrée et la sortie
d’air.
● N’installez JAMAIS le sèche-linge contre des
rideaux.
25
Ventilation
PRISES D’AIR
PRISES D’AIR DANS LA BASE
ENTREES D’AIR
40004982Fre.qxd 23/06/2007 19:06 Page 25
Page 26

Avant d’utiliser le sèche-linge pour la première fois :
● Veuillez lire ce manuel d’instruction en détail.
● Retirez tous les articles qui se trouvent à
l’intérieur du tambour.
● Essuyez l’intérieur du tambour et de la porte avec
un chiffon humide pour éliminer la poussière
éventuelle qui aurait pu s’y infiltrer en transit.
Préparation des
vêtements
Vérifiez sur les étiquettes comportant les symboles
d’entretien que le linge que vous souhaitez sécher
convient au séchage en machine.
Vérifiez que toutes les fermetures sont fermées et que
les poches sont vides. Mettez les articles à l’envers.
Placez les vêtements en vrac dans le tambour en veillant
à ce qu’ils ne s’emmêlent pas les uns avec les autres.
Poids de séchage
maximum
● Coton, 8 kg maxi
● Synthétiques, 4 kg maxi
26
Préparation de la charge
Ne surchargez pas
le tambour ;
lorsqu’ils sont
mouillés, les
grands articles
peuvent dépasser
le poids de
maximum
admissible
(ex : sacs de
couchage,
couettes).
40004982Fre.qxd 23/06/2007 19:06 Page 26
Page 27

Triez la charge comme
suit :
● Par symbole de soin d’entretien
Vous les trouverez sur le col ou la couture
intérieure :
Convient pour séchage en machine.
Séchage à haute température.
Séchage à basse température uniquement.
Ne séchez pas en machine.
Si le vêtement ne comporte aucune étiquette
de conseils de lavage, considérez qu’il ne
convient pas pour le séchage en machine.
● Par quantité et épaisseur
Lorsque la charge est plus importante que la
capacité du sèche-linge, séparez les vêtements
selon leur épaisseur (ex : les serviettes des sousvêtements fins).
● Par type de tissu
Coton/toile de lin : Serviettes, jersey en coton,
linge de lit ou de table.
Synthétiques : Chemisiers, chemises, blouses etc.
en polyester ou polyamide, ainsi que pour les
mélanges de coton/synthétique.
● Par degré de séchage
Triez selon : sec pour repassage, sec pour
rangement, etc. Pour les articles délicats, appuyez
sur le bouton pour sélectionner une
température de séchage basse.
27
40004982Fre.qxd 23/06/2007 19:06 Page 27
Page 28

Ne séchez pas en
machine :
La soie, les tissus délicats, les bas de nylon, les broderies
délicates, les tissus ayant des décorations métalliques,
les vêtements avec des bordures en PVC ou en cuir, les
chaussures de sport, les articles volumineux comme les
sacs de couchage, etc.
Économies d’énergie
Ne mettez que du linge essoré en machine ou à la main
dans le sèche-linge. Plus le linge est sec, plus le temps
de séchage sera court, ce qui économisera de l’énergie.
TOUJOURS
● Essayez de sécher le poids de linge maximum,
pour économiser du temps et de l’électricité.
● Vérifiez que le filtre est propre avant chaque cycle
de séchage.
JAMAIS
● Ne dépassez pas le poids maximum pour ne pas
gaspiller du temps ou de l’électricité.
● Ne mettez pas d’articles dégoulinant d’eau dans
le sèche-linge pour ne pas endommager l’appareil
Guide de séchage
Ce tableau indique les temps de séchage approximatifs,
selon le type de tissu et le degré d’humidité des
vêtements.
28
Conseils de séchage
IMPORTANT : Ne
séchez pas les
articles qui ont été
traités avec un
liquide de
nettoyage à sec ou
les vêtements en
caoutchouc (risque
d’incendie ou
d’explosion).
Pendant les
15 dernières
minutes, la charge
est toujours séchée
dans de l’air froid.
Tissus
COTON
SYNTHÉTIQUES
ACRYLIQUE
PUISSANCE DE
SÉCHAGE
HAUT
BAS
BAS
TEMOIN
LUMINEUX
ARRET
MARCHE
MARCHE
PLEINE
CHARGE
140-165 min
–
–
CHARGE
MOYENNE
70-80 min
70-80 min
50-65 min
PETITE
CHARGE
50-65 min
40-55 min
30-40 min
40004982Fre.qxd 23/06/2007 19:07 Page 28
Page 29

Panneau de commande et témoins indicateurs
Sélecteur de programmes – sélectionnez le programme requis.
Bouton et indicateur Marche/Arrêt – appuyez pour mettre en marche ; l’indicateur
s’allume. L’afficheur indique le programme sélectionné (consultez le guide de
programmation).
Bouton acryliques/synthétiques – appuyez pour réduire la température pour les
articles délicats ; l’indicateur situé au-dessus du bouton s’allume. Pour modifier le réglage
de la température, le programme doit être réinitialisé.
Basse température - témoin lumineux allumé
Haute température - témoin lumineux éteint
Bouton – appuyez sur Start Start pour lancer le programme de séchage sélectionné.
Appuyez pendant 5 secondes pour annuler/réinitialiser le programme.
Bouton Départ Différé – permet à l’utilisateur de différer le démarrage du cycle de
séchage (voir les détails de fonctionnement en page 34).
Bouton alarme – l’alarme est active en fonctionnement normal. Pour désactiver
l’alarme, appuyez sur le bouton. L’indicateur s’allume.
Indicateur Vider eau – s’allume lorsque le réservoir d’eau est plein.
Indicateur d’entretien du filtre – s’allume lorsqu’il est nécessaire de nettoyer le filtre.
Indicateur Temps restant – s’allume lorsque le programme démarre.
Indicateur Départ Différé – clignote lorsque le programme démarre.
Afficheur numérique – l’afficheur à deux chiffres indique le programme sélectionné, la
temporisation et le temps restant du programme.
29
Commandes et indicateurs
BOUTON CHOIX
TEXTILE
BOUTON
MARCHE/ARRET
BOUTON
DE DEPART
DIFFERE
INDICATEUR
ENTRETIEN FILTRE
INDICATEUR
VIDER EAU
SELECTEUR DE
PROGRAMMES
BOUTON
START
(MARCHE)
BOUTON
ALARME
INDICATEUR
TEMPS RESTANT
AFFICHEUR
NUMERIQUE
INDICATEUR
DEPART DIFFERE
40004982Fre.qxd 23/06/2007 19:07 Page 29
Page 30

Ouverture de la porte
Tirez sur la poignée pour ouvrir la porte.
Pour remettre le sèche-linge en marche, fermez la porte
et appuyez Start.
Filtre
IMPORTANT : Pour assurer l’efficacité du sèche-linge,
vérifiez que le filtre à peluches est propre avant chaque
cycle de séchage.
1. Tirez le filtre vers le haut.
2. Ouvrez le filtre, comme illustré.
3. Retirez doucement les peluches à l’aide d’une
brosse douce ou du bout des doigts.
4. Réenclenchez le filtre et poussez-le en place.
Indicateur Entretien
Filtre
s’allume lorsqu’il faut nettoyer le filtre.
Si le linge ne sèche pas, vérifiez que le filtre n’est pas
colmaté.
30
Porte et filtre
ATTENTION !
Lorsque le seche-linge est en cours
d’utilisation, il se peut que le tambour
et la porte soient TRES CHAUDS.
N’arrêtez jamais le sèche-linge avant la
fin du cycle de séchage sauf si tous les
articles sont rapidement retirés et
étendus de façon à dissiper la chaleur.
40004982Fre.qxd 23/06/2007 19:07 Page 30
Page 31

L’eau récupérée du linge pendant le cycle de séchage
est recueillie dans un bac situé en bas du sèche-linge.
Quand le réservoir est plein, l’indicateur s’allume
sur le panneau de commande et le réservoir DOIT
ABSOLUMENT être vidé. Cependant, nous
recommandons de vider le réservoir après chaque cycle
de séchage.
NOTE : Il n’y a que très peu d’eau qui est récupéré
pendant les premiers cycles d’une nouvelle machine, car
le réservoir intérieur est rempli en premier.
Pour retirer le réservoir
1. Tirez doucement le réservoir jusqu’à l’extraire
complètement. Tenez-le fermement à deux mains.
Lorsque le réservoir est plein, il pèse environ 4 kg.
2. Inclinez le réservoir d’eau pour vidanger l’eau par
le trou arrière. Une fois vidé, remettez le réservoir
d’eau dans sa position d’origine. POUSSEZ-LE
FERMEMENT EN PLACE.
NOTE : Si vous disposez d’une bouche d’évacuation
proche du sèche-linge, il est possible d’installer le kit
d’évacuation de façon permanente pour vidanger l’eau
accumulée dans le sèche-linge. Il n’y aura ainsi plus
besoin de vider le réservoir d’eau. Toutes les
informations d’assemblage du kit sont fournies avec
celui-ci.
31
Réservoir d’eau
40004982Fre.qxd 23/06/2007 19:07 Page 31
Page 32

Important : Coupez toujours le courant et débranchez la
prise avant de nettoyer le condenseur.
Pour maintenir l’efficacité du sèche-linge, vérifiez
régulièrement la propreté du condenseur.
Pour retirer le
condenseur
1. Tirez doucement le bas de la plaque de protection
pour la décrocher du sèche-linge. La section
supérieure peut être ôtée de ses charnières pour
permettre le retrait total de la plaque de
protection.
2. Tournez les deux leviers de blocage dans le sens
contraire des aiguilles d’une montre et retirez le
condenseur.
3. Tirez l’ensemble du condenseur vers l’extérieur.
4. Retirez doucement la poussière ou les peluches
avec un chiffon, puis lavez-le en le tenant sous un
robinet d’eau pour que l’eau coule entre les
plaques afin d’enlever la poussière ou les peluches
éventuelles.
5. Remettez correctement le condenseur en place
(en suivant la flèche) en le poussant fermement.
Bloquez les deux leviers en position en les
tournant dans le sens des aiguilles d’une montre.
6. Remettez la plaque de protection en place.
32
Condenseur
40004982Fre.qxd 23/06/2007 19:07 Page 32
Page 33

Note : Il se peut que le capteur ne détecte pas les petites charges
de petits articles. Pour les petites charges et les articles individuels
ou les tissus pré-séchés ayant une faible teneur en humidité,
utilisez les programmes à durée déterminée. Réglez le
programme entre 30 et 75 minutes selon la taille de la charge et
le degré de séchage voulu, et sélectionnez une température
haute ou basse selon le type de tissu.
Si le capteur ne détecte pas l’article, le sèche-linge ne
fonctionnera que pendant 10 minutes avant de se mettre en
mode refroidissement.
Si la charge est trop importante ou trop mouillée, le sèche-linge
se met automatiquement en mode refroidissement après 185 min.
33
Sélection du programme
La machine Sensor Dry propose diverses options de séchage du linge répondant à tous
les besoins.
Le tableau ci-après répertorie les programmes et leurs fonctions correspondantes.
Programme
Laine
Repassage
rapide
120'
75'
60'
45'
30'
AIR
Description
Sélectionnez le degré de séchage souhaité.
Celui-ci s'étend de pour le linge de bain et les peignoirs,
à pour les articles qui seront rangés sans être repassés, et
comprend également le programme séchant le linge qui sera
repassé.
Un programme délicat spécialement créé pour rendre les lainages
plus doux après le séchage à l’air.
Ce cycle délicat à l’air chaud, d’une durée de 12 minutes, permet
aussi de “rafraîchir” les lainages rangés depuis un certain temps dans
votre armoire.
Le programme Repassage rapide comporte une fonction
assouplissant et antifroissement. Le sèche-linge chauffera la charge
pendant 9 minutes et le refroidira ensuite pendant 3 minutes, ce qui
est particulièrement utile pour les vêtements qui ont été laissés
pendant un certain temps avant le repassage, dans le sac à linge par
exemple. Les vêtements peuvent également raidir lorsqu’ils sont
séchés en plein air sur une corde à linge ou à l’intérieur sur des
radiateurs. Le processus de Repassage rapide détend les froissements
du tissu pour rendre le repassage plus rapide et plus facile.
120 minutes de séchage
75 minutes de séchage
60 minutes de séchage
45 minutes de séchage
30 minutes de séchage
Séchage de linge dans de l'air froid pendant 30 minutes
40004982Fre.qxd 24/06/2007 13:15 Page 33
Page 34

1. Ouvrez la porte et chargez le sèche-linge de linge. Vérifiez qu’aucun vêtement
n’entrave la fermeture de la porte.
2. Fermez doucement la porte en la poussant lentement jusqu’à ce que vous entendiez
un déclic.
3. Appuyez sur le bouton pour mettre le sèche-linge en marche. L’indicateur
s’allume et le numéro de programme s’affiche.
4. Tournez le sélecteur de programme pour choisir le programme de séchage requis
(consultez le guide de programmation).
5. Pour sécher des articles délicats, synthétiques ou en acrylique, appuyez sur le bouton
pour diminuer la température.
Le témoin lumineux situé au-dessus du bouton s’allume lorsque la machine est en
mode basse température. Pour désactiver ce mode, la machine doit être réinitialisée.
6. Appuyez sur le bouton Start. Le sèche-linge démarre automatiquement et
l’indicateur reste allumé de façon continue. Le temps restant du programme
s’affiche.
7. L’afficheur indique l’avancement du séchage en termes de temps restant, et
l’indicateur reste allumé.
8. Si vous ouvrez la porte pendant le cycle de séchage pour vérifier le linge, il est
nécessaire d’appuyer sur Start pour recommencer le séchage une fois la porte
refermée.
9. Lorsque l’indicateur 15' s’allume, la machine se met en mode refroidissement et les
articles sont séchés dans de l’air froid.
10. Lorsque le programme est terminé, l’afficheur indique 0 et l’alarme sonne pendant
10 secondes.
11. À la fin du cycle, le tambour continuera à tourner de manière intermittente pour
minimiser les froissements et l’avertisseur retentira également. Cette opération se
poursuit jusqu’à ce que la machine soit réinitialisée ou éteinte.
Annulation et réinitialisation du
programme
Pour annuler un programme, appuyez sur le bouton Start pendant 5 secondes. La machine
indiquera qu’elle a été réinitialisée par le clignotement de l’écran d’affichage.
Fonction de Départ Différé
La fonction de permet à l’utilisateur de programmer le démarrage du cycle de séchage
dans un délai allant jusqu’à 23 heures.
Lorsque cette fonction est sélectionnée pour la première fois, l’afficheur indique un délai
d’une heure. Il convient d’appuyer plusieurs fois sur le bouton pour repousser
successivement le démarrage d’une heure, et ce jusqu’à 23 heures maximum.
34
Fonctionnement
40004982Fre.qxd 23/06/2007 19:07 Page 34
Page 35

Pour démarrer le programme, appuyez sur Start.
L’afficheur indique le temps restant en heures jusqu’au
démarrage et le cycle de séchage débutera à l’issue de
ce délai.
Note : Si vous n’appuyez pas sur le bouton Start dans les
5 secondes, la temporisation est automatiquement
annulée.
Nettoyage du sèche-linge
● Nettoyez le filtre et videz le réservoir d’eau après
chaque cycle de séchage.
● Nettoyez le condenseur à intervalles réguliers.
● Après chaque période d’utilisation, essuyez
l’intérieur du tambour et laissez la porte ouverte
pendant un moment pour qu’il puisse sécher
grâce à la circulation d’air.
● Essuyez l’extérieur de la machine et la porte avec
un chiffon doux.
● N’utilisez PAS de tampons ou d’agents de
nettoyage abrasifs.
● Pour empêcher que la porte n’adhère ou que les
peluches ne s’accumulent, nettoyez régulièrement
la surface intérieure et le joint de la porte avec un
chiffon humide.
Spécifications
techniques
Capacité du tambour 115 litres
Charge maximale 8 kg
Hauteur 85 cm
Largeur 60 cm
Profondeur 60 cm
Étiquette d’énergie B
35
IMPORTANT
Coupez toujours le
courant et
débranchez la fiche
de l’alimentation
électrique avant de
nettoyer cet
appareil.
Pour les données
électriques,
veuillez consulter
l’étiquette des
valeurs nominales
qui se trouve à
l’avant de l’armoire
du sèche-linge
(avec la porte
ouverte).
Nettoyage et entretien de
routine
ATTENTION !
Il est possible que
le tambour, la
porte et la charge
soient très chauds.
40004982Fre.qxd 23/06/2007 19:07 Page 35
Page 36

Qu’est-ce qui peut être à l’origine de...
Défauts que vous pouvez rectifier vous-même
Avant d’appeler le service GIAS pour obtenir des conseils, veuillez suivre la liste des
vérifications ci-dessous. L’intervention sera facturée si la machine fonctionne
correctement ou si elle a été installée ou utilisée de manière incorrecte. Si le problème
persiste alors que vous avez terminé les vérifications recommandées, veuillez appeler le
service GIAS qui pourra peut-être vous aider par téléphone.
La période de séchage est trop longue/les vêtements
ne sont pas suffisamment secs…
● Avez-vous sélectionné le temps de séchage/le programme qui convient ?
● Les vêtements étaient-ils trop mouillés ? Les vêtements avaient-ils été
adéquatement essorés en machine ou à la main ?
● Le filtre doit-il être nettoyé ?
● Faut-il nettoyer le condenseur ?
● Le sèche-linge est-il surchargé ?
● Les entrées, sorties et la base du sèche-linge sont-elles libres d’obstructions ?
● Avez-vous sélectionné le bouton au cours d’un cycle précédent ?
Le sèche-linge ne fonctionne pas…
● Le sèche-linge est-il branché sur une alimentation électrique adéquate ? Vérifiez à
l’aide d’un autre appareil, par exemple une lampe de chevet.
● La fiche est-elle bien branchée sur l’alimentation de secteur ?
● Y a-t-il une panne de courant ?
● Le fusible a-t-il sauté ?
● La porte est-elle bien fermée ?
● Le sèche-linge est-il en position de marche, au niveau du courant de secteur et de
la machine ?
● La période de séchage ou le programme a-t-il été sélectionné ?
● La machine a-t-elle été remise en marche après l’ouverture de la porte ?
● Le sèche-linge s’est-il arrêté parce que le réservoir d’eau est plein et qu’il faut le
vider ?
Le sèche-linge est bruyant…
● Arrêtez le sèche-linge et contactez le service GIAS pour obtenir des conseils.
L’indicateur est allumé…
● Le filtre doit-il être nettoyé ?
● Faut-il nettoyer le condenseur ?
L’indicateur est allumé…
● Le réservoir d’eau doit-il être vidé ?
36
Dépistage de pannes
40004982Fre.qxd 23/06/2007 19:07 Page 36
Page 37

En cas de problème après avoir effectué toutes les
inspections recommandées, veuillez contacter le Service.
Il pourra vous aider par téléphone ou organiser la visite
d’un technicien, en vertu des conditions de votre
garantie. Cependant, vous serez facturé dans l’un des
cas suivants :
● Si la machine est en bon état de marche.
● Si la machine n’a pas été installée conformément
aux instructions d’installation.
● Si la machine a été utilisée incorrectement.
Pièces de rechange
Utilisez toujours des pièces de rechange de Hoover,
disponibles auprès du service GIAS.
Service GIAS
Pour les entretiens et les réparations, contactez votre
technicien local du service GIAS.
Le constructeur décline toute responsabilité en cas
d’erreurs d’impression dans le présent document. Le
constructeur se réserve le droit d’apporter les
modifications nécessaires à ses produits sans en changer
les caractéristiques de base.
37
Service clientèle
40004982Fre.qxd 23/06/2007 19:07 Page 37
Page 38

Einführung. . . . . . . . . . . . . . . . . . . . . . . . . . . . . . . . . . . . . . . . . . . . . . . . 39
Lieferinformationen. . . . . . . . . . . . . . . . . . . . . . . . . . . . . . . . . . . . . . . . . . . . . 39
Auspacken des Produkts . . . . . . . . . . . . . . . . . . . . . . . . . . . . . . . . 39
Sicherheitshinweise. . . . . . . . . . . . . . . . . . . . . . . . . . . . . . . . . . . . . . 40
Installation . . . . . . . . . . . . . . . . . . . . . . . . . . . . . . . . . . . . . . . . . . . . . . . . . . . . 40
Gebrauch . . . . . . . . . . . . . . . . . . . . . . . . . . . . . . . . . . . . . . . . . . . . . . . . . . . . . 40
Die Wäsche . . . . . . . . . . . . . . . . . . . . . . . . . . . . . . . . . . . . . . . . . . . . . . . . . . . 40
Umweltschutz . . . . . . . . . . . . . . . . . . . . . . . . . . . . . . . . . . . . . . . . . . . . . . . . . 41
GIAS-Service . . . . . . . . . . . . . . . . . . . . . . . . . . . . . . . . . . . . . . . . . . . . . . . . . . . 41
Installation. . . . . . . . . . . . . . . . . . . . . . . . . . . . . . . . . . . . . . . . . . . . . . . . 42
Elektro-Anschluss . . . . . . . . . . . . . . . . . . . . . . . . . . . . . . . . . . . . . . . . . . . . . . . 42
Einstellen der Füße . . . . . . . . . . . . . . . . . . . . . . . . . . . . . . . . . . . . . . . . . . . . . 42
Entlüftung . . . . . . . . . . . . . . . . . . . . . . . . . . . . . . . . . . . . . . . . . . . . . . . . 43
Vorbereitung der Füllung . . . . . . . . . . . . . . . . . . . . . . . . . . . . . . . 44
Vorbereitung der Textilien . . . . . . . . . . . . . . . . . . . . . . . . . . . . . . . . . . . . . . . 44
Sortierung der Füllung . . . . . . . . . . . . . . . . . . . . . . . . . . . . . . . . . . . . . . . . . . 45
Tipps zum Trocknen. . . . . . . . . . . . . . . . . . . . . . . . . . . . . . . . . . . . . . 46
Nicht für den Trockner geeignet . . . . . . . . . . . . . . . . . . . . . . . . . . . . . . . . . . 46
Energiesparen . . . . . . . . . . . . . . . . . . . . . . . . . . . . . . . . . . . . . . . . . . . . . . . . . 46
Trocknungswerte . . . . . . . . . . . . . . . . . . . . . . . . . . . . . . . . . . . . . . . . . . . . . . . 46
Schalterblende und Anzeigen . . . . . . . . . . . . . . . . . . . . . . . . . . 47
Tür und Sieb . . . . . . . . . . . . . . . . . . . . . . . . . . . . . . . . . . . . . . . . . . . . . . 48
Öffnen der Tür. . . . . . . . . . . . . . . . . . . . . . . . . . . . . . . . . . . . . . . . . . . . . . . . . 48
Sieb . . . . . . . . . . . . . . . . . . . . . . . . . . . . . . . . . . . . . . . . . . . . . . . . . . . . . . . . . 48
Flusensieb-Anzeige . . . . . . . . . . . . . . . . . . . . . . . . . . . . . . . . . . . . . . . . . . . . . 48
Kondenswasser-Behälter. . . . . . . . . . . . . . . . . . . . . . . . . . . . . . . . 49
Um den Behälter herauszunehmen . . . . . . . . . . . . . . . . . . . . . . . . . . . . . . . . . 49
Kondensator. . . . . . . . . . . . . . . . . . . . . . . . . . . . . . . . . . . . . . . . . . . . . . 50
Entfernen des Kondensators . . . . . . . . . . . . . . . . . . . . . . . . . . . . . . . . . . . . . . 50
Auswählen des Programms . . . . . . . . . . . . . . . . . . . . . . . . . . . . . 51
Betrieb . . . . . . . . . . . . . . . . . . . . . . . . . . . . . . . . . . . . . . . . . . . . . . . . . . . . 52
Abbrechen und Zurücksetzen des Programms . . . . . . . . . . . . . . . . . . . . . . . . 52
Startverzögerungsfunktion . . . . . . . . . . . . . . . . . . . . . . . . . . . . . . . . . . . . . . . 52
Reinigung und Routinewartungen . . . . . . . . . . . . . . . . . . . . . 53
Reinigung des Trockners . . . . . . . . . . . . . . . . . . . . . . . . . . . . . . . . . . . . . . . . . 53
Technische Daten . . . . . . . . . . . . . . . . . . . . . . . . . . . . . . . . . . . . . . . . . . . . . . . 53
Fehlersuche . . . . . . . . . . . . . . . . . . . . . . . . . . . . . . . . . . . . . . . . . . . . . . . 54
Kundendienst. . . . . . . . . . . . . . . . . . . . . . . . . . . . . . . . . . . . . . . . . . . . . 55
Ersatzteile . . . . . . . . . . . . . . . . . . . . . . . . . . . . . . . . . . . . . . . . . . . . . . . . . . . . 55
GIAS-Service . . . . . . . . . . . . . . . . . . . . . . . . . . . . . . . . . . . . . . . . . . . . . . . . . . . 55
38
40004982Ger.qxd 23/06/2007 19:35 Page 38
Page 39

Einführung
Bitte lesen Sie diese Anleitung sorgfältig durch und
richten Sie sich bei der Bedienung der Waschmaschine
an die Anleitung. Dieses Handbuch enthält wichtige
Hinweise für die sichere Installation, Anwendung und
Wartung sowie einige nützliche Hinweise für optimale
Ergebnisse beim Gebrauch Ihrer Maschine.
Heben Sie diese Dokumentation an einem sicheren Ort
auf, um jederzeit wieder darauf zurückgreifen zu
können bzw. um sie an zukünftige Besitzer weitergeben
zu können
Lieferinformationen
Zum Lieferumfang Ihrer Waschmaschine gehören
folgende Dokumentation und Zusatzteile:
● Bedienungsanleitung
● Garantieschein
● Energieeffizienzklasse
● Ablaufschlauchbausatz
Entfernen Sie die Verpackung der Maschine dicht an
dem Platz, wo sie aufgestellt werden soll.
1. Schneiden Sie sie sorgfältig rund um den Boden
der Verpackung und an einer Ecke nach oben auf.
2. Entfernen Sie die Polyethylenhülle und heben Sie
den Trockner von der Polystyrenplatte.
39
Kontrollieren Sie, ob
die Maschine durch
den Transport
beschädigt wurde.
Falls dies der Fall ist,
wenden Sie sich an
den GIAS-Service.
Die Sicherheit des
Geräts kann
beeinträchtigt
werden, wenn Sie
sich nicht an diese
Sicherheitshinweise
halten. Falls ein
Problem mit Ihrer
Maschine durch
Zweckentfremdung
verursacht wird,
müssen Sie
Reparaturarbeiten
möglicherweise
selbst bezahlen.
Auspacken des Produkts
Entsorgen Sie die Verpackung
ordnungsgemäß. Achten Sie darauf, dass
sie nicht in die Hände von Kindern
gelangt, da sie eine potentielle
Gefahrenquelle darstellt.
40004982Ger.qxd 23/06/2007 19:35 Page 39
Page 40

Sicherheitshinweise
Installation
● Überprüfen Sie vor dem Gebrauch, ob das Produkt sichtbare Schäden aufweist.
Verwenden Sie es nicht, wenn es beschädigt ist, und wenden Sie sich an den GIAS-Service.
● Verwenden Sie keine Adapter, Mehrfachsteckdosen und/oder Verlängerungskabel.
● Stellen Sie den Trockner nie in der Nähe von Vorhängen auf. Achten Sie darauf, dass
keine Gegenstände hinter den Trockner fallen oder sich dort ansammeln können.
● Das Gerät darf nicht hinter einer verschließbaren Tür, einer Schiebetür oder einer Tür mit
Scharnier an der dem Trockner entgegengesetzten Seite installiert werden.
Gebrauch
● Dieses Gerät ist nicht für den Gebrauch durch Personen mit eingeschränkten
körperlichen, sensorischen oder mentalen Fähigkeiten oder mangelnder Erfahrung und
Wissen (beispielsweise Kindern) gedacht, außer diese werden beaufsichtigt oder wurden
über die Verwendung des Geräts von einer Person unterrichtet, die für ihre Sicherheit
verantwortlich ist.
● Kinder sollten beaufsichtigt werden, um sicherzustellen, dass sie nicht mit dem Gerät
spielen.
● WARNUNG Zweckentfremdung des Trockners kann zu Brandgefahr führen
● Diese Maschine dient als Haushaltsgerät ausschließlich zum Trocknen von
Haushaltstextilien und Kleidungsstücken.
● Verwenden Sie dieses Gerät nur für die vorgesehenen Zwecke gemäß der Anleitung.
Lesen Sie die Gebrauchsanleitung sorgfältig durch, bevor Sie das Gerät in Betrieb
nehmen.
● Berühren Sie das Gerät nicht mit feuchten oder nassen Händen oder Füßen.
● Lehnen Sie sich nicht gegen die Tür, wenn Sie die Maschine beladen, und fassen Sie die
Maschine nicht an der Tür, wenn Sie sie hochheben oder verschieben.
● Lassen Sie Kinder nicht mit der Maschine oder den Schaltern spielen.
● WARNUNG Verwenden Sie das Produkt nicht, wenn das Flusensieb nicht richtig
eingebaut oder beschädigt ist; Flusen könnten Feuer fangen.
● WARNUNG An der Stelle, an der sich das Symbol für heiße Flächen befindet , kann die
Temperatur während des Trocknerbetriebs auf über 60°C steigen.
● Ziehen Sie den Stecker aus der Steckdose! Ziehen Sie vor dem Reinigen des Geräts immer
den Stecker heraus!
● Verwenden Sie die Maschine bei vermuteten Störungen nicht weiter.
● Fusseln und Flusen dürfen sich nicht auf dem Fußboden im Bereich um die Maschine
ansammeln.
● Die Trommel in dem Gerät kann sehr heiß werden. Lassen Sie den Trockner stets
vollständig bis zum Ende der Abkühlphase laufen, bevor Sie die Wäsche herausnehmen.
Die Wäsche
● Trocknen Sie keine ungewaschenen Gegenstände im Trockner.
● WARNUNG AUF KEINEN FALL Stoffe in der Maschine trocknen, die mit chemischen
Reinigungsmitteln behandelt wurden.
● WARNUNG Wenn Schaumgummimaterialien heiß werden, können sie sich unter
bestimmten Bedingungen plötzlich entzünden. Gegenstände wie Schaumgummi
(Latexschaumstoff), Duschhauben, wasserabweisende Textilien, mit Gummi verstärkte
Produkte sowie Kleidungsstücke oder Kissen mit Schaumstoffpolster sind für den
Wäschetrockner NICHT GEEIGNET.
40
40004982Ger.qxd 23/06/2007 19:35 Page 40
Page 41

● Sehen Sie immer auf den Pflegeetiketten nach, ob das Material für das Trocknen
geeignet ist.
● Textilien vor dem Einfüllen in den Trockner erst schleudern oder gründlich auswringen.
Füllen Sie KEINE tropfnassen Textilien in den Trockner.
● Feuerzeuge und Streichhölzer unbedingt aus den Taschen entfernen und AUF KEINEN
FALL mit feuergefährlichen Flüssigkeiten in der Nähe der Maschine hantieren.
● KEINE Vorhänge aus Glasfasermaterial in die Maschine füllen. Kommen andere
Textilien mit Glasfasern in Berührung, so kann dies zu Hautreizungen führen.
● Gegenstände, die mit Substanzen wie Speiseöl, Azeton, Alkohol, Benzin, Kerosin,
Fleckenentferner, Terpentin, Wachsen und Wachsentferner getränkt sind, sollten mit
einer zusätzlichen Menge Waschpulver in heißem Wasser gewaschen werden, bevor sie
im Trockner getrocknet werden.
● Weichspüler oder ähnliche Produkte sollten wie in der Gebrauchanleitung des
Weichspülers angegeben verwendet werden.
Umweltschutz
● Das gesamte Verpackungsmaterial besteht aus umweltfreundlichen,
wiederverwertbaren Materialien. Bitte helfen Sie mit, diese umweltfreundlich zu
entsorgen. Ihre Stadtverwaltung kann Sie über Entsorgungsmöglichkeiten informieren.
● Ziehen Sie den Stecker aus der Steckdose, zerschneiden Sie das Netzkabel und werfen
Sie Netzkabel und Netzstecker getrennt in den Müll, bevor Sie Ihren alten Trockner
entsorgen. Zerstören Sie Scharniere und die Türverriegelung, damit sich Kinder nicht
versehentlich in der Waschmaschine einsperren können.
GIAS-Service
● Um einen sicheren und einwandfreien Betrieb dieses Geräts zu gewährleisten,
empfehlen wir, alle Wartungs- und Reparaturarbeiten nur von einem zugelassenen
GIAS-Kundendiensttechniker durchführen zu lassen.
Europäische Vorschrift 2002/96/EC
Dieses Elektrohaushaltsgerät ist entsprechend der EU-Richtlinie 2002/96/CE über Elektro- und
Elektronik-Altgeräte (WEEE) gekennzeichnet.
Bitte sorgen Sie dafür, dass das Gerät ordnungsgemäß entsorgt
wird, damit mögliche negative Auswirkungen auf Umwelt und
Gesundheit vermieden werden, die bei einer unsachgemäßen
Entsorgung des Altgerätes entstehen könnten.
Das Symbol auf dem Produkt bedeutet, dass dieses Gerät nicht in
den normalen Hausmüll gehört, sondern den jeweiligen
kommunalen Rücknahmesystemen für Elektro- und ElektronikAltgeräte übergeben werden muss.
Die Entsorgung muss im Einklang mit den geltenden
Umweltrichtlinien für die Abfallentsorgung erfolgen.
Für nähere Informationen über Entsorgung und Recycling dieses
Produktes wenden Sie sich bitte an Ihre kommunalen
Einrichtungen (Umweltamt) oder an die
Abfallentsorgungsgesellschaft Ihrer Stadt bzw. an Ihren Händler.
41
Falls das Gerät nicht richtig funktioniert oder ausfällt, schalten Sie
es aus und ziehen Sie den Stecker aus der Steckdose. Wenden Sie
sich an den GIAS-Service.
40004982Ger.qxd 23/06/2007 19:36 Page 41
Page 42

Elektro-Anschluss
Dieser Trockner ist für eine Netzspannung von 230 V und
50 Hz ausgelegt. Stellen Sie sicher, dass der Stromkreis
eine Nennleistung von 10 A hat.
Strom kann lebensgefährlich sein.
Dieses Gerät muss an eine geerdete Steckdose mit
Schutzkontakt angeschlossen werden.
Die Steckdose und der Stecker am Gerät müssen vom
selben Typ sein.
Verwenden Sie keine Mehrfachstecker und/oder
Verlängerungskabel.
Der Stecker sollte so angebracht werden, dass er nach der
Installation des Geräts leicht aus der Steckdose zu ziehen
ist.
Die Drähte im Netzanschlusskabel sind farblich gemäß
folgender Codes unterschieden:
Blau NEUTRAL
Braun STROMFÜHREND
Grün und Gelb ERDE
Das Gerät stimmt mit den Bestimmungen der
Europäischen Vorschrift 89/336/EEC, 73/23/EEC sowie deren
Nachfolgebestimmungen überein.
Einstellen der Füße
Sobald sich die Maschine am endgültigen Ort befindet,
sollten die Füße so eingestellt werden, dass die Maschine
eben steht.
Stellen Sie die vier Füße so ein, dass die Maschine sicher
und eben steht.
42
Falls ein Problem
mit Ihrer Maschine
durch falsche
Installation
verursacht wird,
müssen Sie
Reparaturarbeiten
möglicherweise
selbst bezahlen.
Sollte das
Netzanschlusskabel
an diesem Gerät
beschädigt sein,
muss es durch ein
spezielles Kabel
ersetzt werden, das
NUR beim
Ersatzteilservice
erhältlich ist. Es
muss von einer
fachkundigen
Person installiert
werden.
Installation
Schließen Sie die Maschine erst an und
drücken Sie die Einschalttaste erst, wenn
die Installation abgeschlossen ist.
Zu Ihrer eigenen Sicherheit muss der
Trockner richtig installiert werden.
Sollten Sie bezüglich der Installation
Fragen haben, wenden Sie sich an den
GIAS-Service.
40004982Ger.qxd 23/06/2007 19:36 Page 42
Page 43

In dem Raum, in dem sich der Trockner befindet, muss eine
ausreichende Entlüftung vorhanden sein, um zu verhindern,
dass Gase aus der Verbrennung anderer Brennstoffe, zum
Beispiel offene Feuer, während des Trocknerbetriebs in den
Raum gesogen werden.
● Die Abluft darf nicht in einen Kaminschacht geleitet
werden, der für das Ableiten von Rauch aus der
Verbrennung von Gas oder anderen Brennstoffen
verwendet wird.
● Prüfen Sie regelmäßig die reibungslose Luftzirkulation
im Trockner.
● Überprüfen Sie nach Gebrauch das Flusensieb und
reinigen Sie es, wenn es erforderlich ist!
● Die Ansaug- und Abluftanschlüsse dürfen nicht
zugestellt werden. Um eine richtige Abluft zu
gewährleisten, muss die Fläche zwischen dem Boden
der Maschine und dem Fußboden frei bleiben. Zwischen
der Maschine und anderen Gegenständen sollte ein
Abstand von mindestens 12 cm eingehalten werden .
● Achten Sie darauf, dass keine Gegenstände zwischen
beiden Seitenteilen und der Rückseite des Trockners
herunterfallen und sich dort ansammeln, da hierdurch
die Ansaug- und Abluftanschlüsse blockiert werden
können.
● Der Trockner darf AUF KEINEN FALL in der
unmittelbaren Nähe von Vorhängen aufgestellt werden.
43
Entlüftung
ABLUFTANSCHLÜSSE
ABLUFTANSCHLÜSSE IM SOCKEL
LUFTANSAUGÖFFNUNG
40004982Ger.qxd 23/06/2007 19:36 Page 43
Page 44

Bevor Sie den Trockner das erste Mal benutzen:
● Lesen Sie die Gebrauchsanleitung bitte sorgfältig
durch!
● Entfernen Sie alle in der Trommel befindlichen
Gegenstände!
● Wischen Sie die Innenseiten der Trommel und Tür
mit einem feuchten Tuch aus, um den beim
Transport eventuell dort angesammelten Staub zu
entfernen.
Vorbereitung der
Textilien
Vergewissern Sie sich anhand der
Pflegeanleitungssymbole in jedem Wäschestück, dass
die Wäsche, die Sie trocknen wollen, für eine Trocknung
im Trockner geeignet ist.
Überprüfen Sie, ob alle Verschlüsse zu und die Taschen
entleert sind. Wenden Sie die Innenseiten der Textilien
nach außen. Füllen Sie die Kleidungsstücke locker in die
Trommel, so dass diese sich nicht verheddern.
Maximales
Fassungsvermögen
(Trockengewicht)
● Baumwolle max. 8 kg
● Synthetische Stoffe max. 4 kg
44
Vorbereitung der Füllung
Überladen Sie die
Trommel nicht,
große Teile
können, wenn sie
nass sind, die
maximal zulässige
Wäscheladung
überschreiten
(zum Beispiel
Schlafsäcke,
Bettdecken).
40004982Ger.qxd 23/06/2007 19:36 Page 44
Page 45

Sortieren Sie die Füllung
folgendermaßen:
● Anhand der Pflegeanleitungssymbole
Diese finden Sie am Kragen oder der
Sauminnenseite:
Für Trockner geeignet.
Im Trockner bei hoher Temperatur.
Im Trockner nur bei geringer Temperatur.
Nicht für den Trockner geeignet.
Falls ein Wäschestück keine Pflegeanleitung
hat, muss angenommen werden, dass es nicht
für das Trocknen im Trockner geeignet ist.
● Nach Menge und Volumen
Ist die Füllmenge größer als das
Fassungsvermögen des Trockners, sortieren Sie die
Wäsche nach Stoffdicke (trennen Sie z.B.
Handtücher von dünner Unterwäsche).
● Nach Stoffart
Baumwolle/Leinen: Handtücher, Baumwolljersey,
Bett- und Tischwäsche.
Textilien aus Kunstfaser: Blusen, Hemden,
Overalls, usw. aus Polyester oder Polyamid und
auch Baumwoll/Synthetikgemische.
● Nach Trocknungsgrad
Sortieren Sie nach: Bügelfeucht, Schranktrocken,
usw. Für empfindliche Textilien drücken Sie zur
Wahl einer niedrigeren Trocknungstemperatur die
Taste .
45
40004982Ger.qxd 23/06/2007 19:36 Page 45
Page 46

Nicht für den Trockner
geeignet:
Seide, empfindliche Stoffe, Nylonstrümpfe, gewirkte
Textilien, Stoffe mit Metall-Dekor, Kleidungsstücke mit
PVC- oder Lederbesatz, Trainingsschuhe, voluminöse
Wäschestücke wie Schlafsäcke usw.
Energiesparen
Füllen Sie nur gründlich ausgewrungene oder
geschleuderte Wäsche in den Trockner. Je trockener die
Wäsche, desto kürzer ist die Trocknungszeit, was sich
energiesparend auswirkt.
IMMER
● Es ist wirtschaftlicher, IMMER die maximale
Füllmenge zu trocknen.
● Kontrollieren Sie IMMER vor jedem
Trocknungsvorgang, ob das Sieb sauber ist.
NIE
● Überschreiten Sie NIE die maximale Füllmenge,
denn dies ist zeitaufwendig und
Energieverschwendung.
● Füllen Sie AUF KEINEN FALL tropfnasse
Kleidungsstücke in den Wäschetrockner; dies kann
zu Schäden am Gerät führen.
Trocknungswerte
In der Tabelle sind die ungefähren Trocknungszeiten, je
nach Stoffart und Feuchtigkeitsgehalt der Textilien,
aufgeführt.
46
Tipps zum Trocknen
WICHTIG:
Kleidungsstücke,
die mit einem
chemischen
Reinigungsmittel
behandelt worden
sind, oder
Gummibekleidung
dürfen nicht im
Wäschetrockner
getrocknet werden
(Brand- oder
Explosionsgefahr).
Während der
letzten 15 Minuten
des Programms
wird die Wäsche
im kalten
Luftstrom
abgekühlt.
Fasern
BAUMWOLLE
KUNSTFASER
ACRYL
TEMPERATUR-
STUFE
HOCH
NIEDRIG
NIEDRIG
ANZEIGE
LAMPE
AUS
EIN
EIN
VOLLE
BELADUNG
140-165 Min
–
–
MITTLERE
BELADUNG
70-80 Min
70-80 Min
50-65 Min
GERINGE
BELADUNG
50-65 Min
40-55 Min
30-40 Min
40004982Ger.qxd 23/06/2007 19:36 Page 46
Page 47

Schalterblende: Kontroll- und Lichtanzeige
Programmwähler – Für die Wahl des gewünschten Programms.
Taste An/Aus – zum Anstellen drücken, die Anzeige leuchtet auf. Das Display zeigt
das ausgewählte Programm (siehe Abschnitt “Waschprogramme”).
Taste Acryl/Synthetikwäsche – drücken Sie die Taste, um eine niedrigere
Temperatur für empfindliche Textilien einzustellen. Die Anzeige über der Taste leuchtet
auf. Um die Temperaturstufe zu ändern, muss das Programm zurückgesetzt werden.
Niedrige Temperatur - Anzeigelampe EIN
Hohe Temperatur - Anzeigelampe AUS
Start-Taste – Drücken Sie Start, um das ausgewählte Trocknerprogramm zu starten.
Drücken Sie die Taste 5 Sekunden lang, um das Programm abzubrechen/zurückzusetzen.
Startverzögerungstaste – Taste zur Verzögerung des Beginns des
Trocknungsvorgangs (siehe Abschnitt “Betrieb” auf Seite 52).
Akustiksignaltaste – Das Akustiksignal ist bei normalem Betrieb aktiv. Um das
Akustiksignal abzubrechen, drücken Sie die Taste und die Anzeige leuchtet auf.
Kondenswasser leeren-Anzeige – Leuchtet auf, wenn der Kondenswasser-Behälter
voll ist.
Flusensieb-Anzeige – Die Anzeige leuchtet auf, wenn das Sieb gesäubert werden
muss.
Restzeitanzeige – Leuchtet auf, wenn das Programm beginnt.
Startverzögerungsanzeige – Lampe blinkt, wenn das Programm beginnt.
Digitaldisplay – Das zweistellige Digitaldisplay zeigt das ausgewählte Programm, die
Startverzögerung und die Restzeit des Programms an.
47
Schalterblende und Anzeigen
TASTE
ACRYL/SYNTHETIK-
WÄSCHE
AN/AUS
BETÄTIGEN
START-
VERZÖGERUNGS-
TASTE
FLUSENSIEB-
ANZEIGE
KONDENSWASSER
LEEREN-ANZEIGE
PROGRAMM-
WÄHLER
START-
TASTE
AKUSTIK-
SIGNAL-
TASTE
RESTZEIT-
ANZEIGE
DIGITAL-
DISPLAY
STARTVERZÖGERUNGS-
ANZEIGE
40004982Ger.qxd 23/06/2007 19:36 Page 47
Page 48

Öffnen der Tür
Ziehen Sie am Griff, um die Tür zu öffnen.
Um den Trocknungsvorgang wieder in Gang zu setzen,
schließen Sie die Tür und drücken Start.
Sieb
WICHTIG: Damit der Wäschetrockner immer optimale
Leistung erbringen kann, überprüfen Sie vor jedem
Trocknungsvorgang, ob das Flusensieb sauber ist.
1. Ziehen Sie das Sieb nach oben.
2. Öffnen Sie das Sieb wie auf der Abbildung.
3. Entfernen Sie die Flusen sanft mit einer weichen
Bürste oder den Fingerspitzen.
4. Klappen Sie das Sieb zusammen und setzen Sie es
wieder an seinen Platz ein.
Flusensieb-Anzeige
leuchtet auf, wenn das Sieb gesäubert werden
muss.
Wenn die Wäsche nicht trocknet, kontrollieren Sie, ob
das Sieb verstopft ist.
48
Tür und Sieb
WARNUNG!
Während des Trocknungsvorgangs
können Trommel und Tür SEHR HEISS
werden. Stoppen Sie den Trockner nie
vor Ende des Trocknungsvorgangs,
außer alle Gegenstände werden schnell
herausgenommen und ausgebreitet, so
dass die Wärme abgeleitet wird.
40004982Ger.qxd 23/06/2007 19:36 Page 48
Page 49

Das während des Trocknungsvorgangs aus der Wäsche
entzogene Wasser wird in einem Behälter unten im
Trockner gesammelt.
Wenn der Behälter voll ist, leuchtet die Anzeige
auf der Bedienfläche auf. Dann MUSS der Behälter
geleert werden. Wir empfehlen jedoch, den Behälter
nach jedem Trockengang zu leeren.
HINWEIS: Während der ersten wenigen
Trocknungszyklen eines neuen Trockners sammelt sich
sehr wenig Wasser an, da zunächst ein in der Maschine
befindliches Reservoir gefüllt wird.
Um den Behälter
herauszunehmen
1. Ziehen Sie den Behälter vorsichtig heraus, bis er
vollständig entfernt ist. Halten Sie den Behälter
mit beiden Händen. Im gefüllten Zustand wiegt
der Kondenswasser-Behälter rund 4 kg.
2. Kippen Sie den Wasserbehälter, um das Wasser
aus dem hinteren Loch zu entleeren. Wenn der
Wasserbehälter leer ist, schieben Sie ihn wieder
zurück in seine Position. SCHIEBEN SIE IN FEST AN
SEINEN PLATZ.
HINWEIS: Wenn Sie einen Ablauf in der Nähe des
Trockners haben, können Sie den Ablaufbausatz
verwenden, um einen ständigen Ablauf für das vom
Trockner gesammelte Wasser einzurichten. Sie müssen
dann den Wasserbehälter nicht mehr ausleeren. Alle
Informationen für das Zusammenbauen des Bausatzes
sind im dazugehörigen Umschlag enthalten.
49
Kondenswasser-Behälter
40004982Ger.qxd 23/06/2007 19:36 Page 49
Page 50

Wichtig: Immer das Gerät ausschalten und den Stecker
aus der Steckdose ziehen, bevor der Kondensator
gereinigt wird.
Damit der Trockner immer optimale Leistung erbringen
kann, überprüfen Sie regelmäßig, ob der Kondensator
sauber ist.
Entfernen des
Kondensators
1. Ziehen Sie vorsichtig am Boden der
Wartungsklappe, bis diese sich aus der
Schnappvorrichtung des Trockners herauslöst. Der
obere Teil kann dann herausgehängt und die
Wartungsklappe vollständig entfernt werden.
2. Drehen Sie die zwei Verschlusshebel gegen den
Uhrzeigersinn und ziehen Sie den Kondensator
heraus
3. Ziehen Sie das Kondensator-Teil heraus.
4. Entfernen Sie etwaigen Staub oder Flusen
vorsichtig mit einem Tuch, reinigen Sie das Teil
danach unter laufendem Wasser, wobei Sie es so
drehen, dass das Wasser zur Entfernung von Staub
und Flusen zwischen die Platten laufen kann.
5. Passen Sie den Kondensator wieder richtig ein
(wie durch den Pfeil angegeben) und stellen Sie
sicher, dass er fest an seinen Platz gedrückt wird.
Schließen Sie die zwei Verschlusshebel durch eine
Drehung im Uhrzeigersinn.
6. Setzen Sie die Wartungsklappe wieder ein.
50
Kondensator
40004982Ger.qxd 23/06/2007 19:36 Page 50
Page 51

Hinweis: Es kann sein, dass der Sensor eine kleine Wäschemenge
nicht erfassen kann. Benutzen Sie für kleine Wäschemengen,
Einzelteile oder speziell vorbehandelte Textilien mit einem
geringen Feuchtigkeitsgehalt die Zeitprogramme. Stellen Sie je
nach Wäschemenge und gewünschtem Trockenheitsgrad das
Programm zwischen 30 und 75 Minuten ein, und wählen Sie je
nach Art der Textilien eine hohe oder eine geringe Temperatur.
Wenn der Sensor die Wäsche nicht erkennt, arbeitet der Trockner
nur 10 Minuten lang, bevor er die Abkühlphase beginnt.
Bei zu großer oder zu nasser Füllung startet der Trockner
automatisch nach 185 Minuten mit der Abkühlphase.
51
Auswählen des Programms
Der Sensortrockner liefert Ihnen viele Möglichkeiten für das Trocknen der Wäsche.
In der folgenden Tabelle sind die Programme und die Funktionen der einzelnen
Programme aufgeführt.
Programm
Wolle
Schnellbügeln
120'
75'
60'
45'
30'
AIR
Beschreibung
Wählen Sie den gewünschten Trockenheitsgrad.
Diese reichen von für Badehandtücher und Bademäntel über
für Textilien, die nicht gebügelt werden, bis zum
Programm, das die Wäsche bis zur richtigen Bügelfeuchte
trocknet.
Ein sanftes Programm, speziell geschaffen um Wollwäsche nach
dem Lufttrocknen weicher zu machen.
Dieses leichte Warmluftprogramm dauert 12 Minuten und kann
auch dazu verwendet werden, Wollwäsche nach dem
Aufbewahren im Schrank ‘aufzufrischen’.
Das Schnellbügel-Programm hat eine Form- und Knitterschutzfunktion.
Der Trockner erhitzt die Füllung für die Dauer von 9 Minuten, worauf
eine Abkühlphase von 3 Minuten folgt, was insbesondere für
Kleidungsstücke von Vorteil ist, die normalerweise einige Zeit vor dem
Bügeln, z.B. in einem Wäschekorb, abgelegt werden. Kleidungsstücke
können auch hart werden, wenn sie draußen an der Luft auf einer
Wäscheleine oder in der Wohnung über Heizungen getrocknet werden.
Das ‘Schnellbügeln’-Verfahren lockert die Liegefalten im Stoff, wodurch
er sich schneller und leichter bügeln lässt.
120 Minuten Trocknen
75 Minuten Trocknen
60 Minuten Trocknen
45 Minuten Trocknen
30 Minuten Trocknen
Schleudern der Wäsche im kalten Luftstrom 30 Minuten lang
40004982Ger.qxd 24/06/2007 13:17 Page 51
Page 52

1. Öffnen Sie die Tür, und füllen Sie die Wäsche in die Trommel. Achten Sie darauf,
dass keine Kleidungsstücke von der Tür eingeklemmt werden.
2. Die Tür mit einem sanften Druck schließen, bis Sie ein ‘Klick’-Geräusch hören.
3. Drücken Sie die Taste zum Anstellen des Trockners. Die Anzeigelampe leuchtet
auf und die Programmnummer wird angezeigt.
4. Drehen Sie den Programmwählschalter, um das gewünschte Trocknerprogramm
auszuwählen (siehe Abschnitt “Waschprogramme”).
5. Betätigen Sie zur Trocknung empfindlicher Textilien die Taste für die
Einstellung einer geringeren Temperatur.
Die Lampe über der Drucktaste leuchtet auf, wenn die Maschine auf niedrige
Temperatur eingestellt ist. Um die Auswahl dieses Status aufzuheben, muss die
Maschine zurückgesetzt werden.
6. Drücken Sie die Taste Start. Der Trockner startet automatisch und die Anzeige
leuchtet auf. Die Zeitdauer bis zum Ende des Programms wird auf dem Display
angezeigt.
7. Das Display zeigt den Fortschritt als Restzeit; die -Anzeige leuchtet weiterhin.
8. Wenn die Tür während des Programms geöffnet wird, um die Wäsche zu
überprüfen, müssen Sie Start drücken, um nach dem Schließen der Tür den
Trocknungsvorgang fortzusetzen.
9. Wenn das Display 15' anzeigt, beginnt das Gerät mit der Abkühlphase; die
Kleidung wird zum Abkühlen im kalten Luftstrom geschleudert..
10. Wenn das Programm beendet ist, zeigt das Display 0' Min. und das Akustiksignal
ertönt 10 Sekunden lang.
11. Nach Beendigung des Trockenvorgangs dreht sich die Trommel in regelmäßigen
Abständen weiter, um ein Knittern der Textilien zu minimieren, außerdem ertönt
ein Signalton. Dies stoppt erst, wenn die Maschine zurückgesetzt oder
ausgeschaltet wird.
Abbrechen und Zurücksetzen des
Programms
Um ein Programm abzubrechen, drücken Sie die Taste 5 Start Sekunden lang. Die
Maschine zeigt an, dass sie zurückgesetzt wurde, wenn das Display blinkt.
Startverzögerungsfunktion
Mit der -funktion können Sie den Beginn des Trocknungsvorgangs um bis zu
23 Stunden verzögern.
Wenn die Funktion erstmalig ausgewählt wird, zeigt das Display eine Verzögerung von
1 Stunde; durch Drücken der Taste wird die Verzögerungszeit jeweils um eine Stunde bis
zu einem Maximalwert von 23 Stunden erhöht.
52
Betrieb
40004982Ger.qxd 23/06/2007 19:36 Page 52
Page 53

Drücken Sie Start, um das Programm zu beginnen, u
und das Display zeigt die verbleibenden Stunden der
Zeitverzögerung und führt den Trocknungsvorgang am
Ende dieses Zeitraums durch.
Hinweis: Wenn Start nicht innerhalb von 5 Sekunden
gedrückt wird, wird die Startverzögerung automatisch
abgebrochen.
Reinigung des Trockners
● Reinigen Sie nach jedem Trocknungsvorgang das
Flusensieb und leeren Sie den KondenswasserBehälter.
● Der Kondensator muss regelmäßig gereinigt
werden.
● Wischen Sie nach jeder Anwendungsphase die
Innenseite der Trommel aus und lassen Sie die Tür
einige Zeit offen stehen, damit sie durch die
Luftzirkulation getrocknet wird.
● Reinigen Sie die Außenseite der Maschine und der
Tür mit einem weichen Tuch.
● AUF KEINEN FALL Scheuerschwämme oder
Scheuermittel benutzen.
● Um ein Verkleben der Tür oder ein Ansammeln
von Flusen zu vermeiden, sollten Sie die Innentür
und die Türdichtung regelmäßig mit einem
feuchten Tuch reinigen.
Technische Daten
Trommelinhalt 115 Liter
Maximales Fassungsvermögen 8 kg
Höhe 85 cm
Breite 60 cm
Tiefe 60 cm
Energieeffizienzklasse B
53
WICHTIG
Schalten Sie immer
das Gerät aus und
ziehen Sie den
Stecker aus der
Steckdose, bevor
das Gerät gereinigt
wird.
Die elektrischen
Daten befinden
sich auf dem
Betriebstypenschild
an der Vorderseite
des Trockners (bei
offener Tür).
Reinigung und
Routinewartungen
WARNUNG!
Trommel, Tür und
die Wäsche selbst
können sehr heiß
sein.
40004982Ger.qxd 23/06/2007 19:36 Page 53
Page 54

Mögliche Gründe für...
Fehler, die Sie selbst beheben können
Prüfen Sie alle Punkte in der folgenden Checkliste, bevor Sie sich an den GIAS-Service
wenden. Sollte die Waschmaschine funktionstüchtig sein oder unsachgemäß installiert
oder verwendet worden sein, wird Ihnen der Besuch des Kundendiensttechnikers in
Rechnung gestellt. Wenn das Problem weiterhin besteht, nachdem Sie die Checkliste
durchgegangen sind, wenden Sie sich bitte an den GIAS-Service, der Ihnen evtl.
telefonisch weiterhelfen kann.
Die Trocknungszeit ist zu lang/die Textilien sind nicht
trocken genug…
● Haben Sie die richtige Trocknungszeit/das richtige Programm gewählt?
● Waren die Textilien zu nass? Wurden die Textilien sorgfältig ausgewrungen oder
geschleudert?
● Muss das Sieb gereinigt werden?
● Muss der Kondensator gereinigt werden?
● Ist der Trockner überladen?
● Sind die Luftansaug- und Abluftanschlüsse sowie die Fläche unter dem Sockel des
Trockners frei?
● Ist die Taste noch von einem früher gewählten Programm gedrückt?
Der Trockner funktioniert nicht…
● Ist der elektrische Netzanschluss für den Trockner in Ordnung? Kontrollieren Sie
diesen mit einem anderen Gerät, wie z.B. einer Tischlampe.
● Befindet sich der Stecker korrekt in der Steckdose?
● Gibt es einen Stromausfall?
● Ist die Sicherung herausgesprungen?
● Ist die Tür richtig geschlossen?
● Ist der Trockner sowohl am Netzanschluss als auch an der Maschine angestellt?
● Ist die Trocknungszeit oder das Programm gewählt worden?
● Ist die Maschine nach dem Türöffnen wieder angestellt worden?
● Hat der Trockner den Betrieb eingestellt, weil der Kondenswasser-Behälter voll ist
und entleert werden muss?
Der Trockner ist zu laut…
● Schalten Sie den Trockner aus und wenden Sie sich an den GIAS-Service.
Die Anzeige leuchtet…
● Muss das Sieb gereinigt werden?
● Muss der Kondensator gereinigt werden?
Die Anzeige leuchtet…
● Muss der Kondenswasser-Behälter geleert werden?
54
Fehlersuche
40004982Ger.qxd 23/06/2007 19:36 Page 54
Page 55

Sollten trotz obengenannter Kontrollen weiterhin
Störungen bei Ihrem Trockner auftreten, wenden Sie
sich bitte an den GIAS-Service, der Sie beraten kann. Der
Kundendienst kann Sie möglicherweise telefonisch
beraten oder mit Ihnen einen geeigneten Termin für
einem Techniker im Rahmen der Garantie vereinbaren.
Ihnen wird jedoch eventuell eine Gebühr berechnet,
wenn sich herausstellt, dass Ihre Maschine:
● funktionsfähig ist.
● nicht gemäß der Installationsanweisung installiert
worden ist.
● unsachgemäß benutzt wurde.
Ersatzteile
Verwenden Sie immer Original-Ersatzteile, die Sie direkt
beim GIAS-Service erhalten.
GIAS-Service
Wenden Sie sich für Wartungs- und Reparaturarbeiten
an Ihren GIAS-Servicetechniker.
Der Hersteller übernimmt keine Verantwortung für
etwaige Druckfehler in dieser Bedienungsanleitung. Der
Hersteller behält sich das Recht vor, seine Produkte ggf.
anzupassen, ohne wesentliche Eigenschaften zu
verändern.
55
Kundendienst
40004982Ger.qxd 23/06/2007 19:36 Page 55
Page 56

Introduzione. . . . . . . . . . . . . . . . . . . . . . . . . . . . . . . . . . . . . . . . . . . . . . 57
Informazioni sulla consegna . . . . . . . . . . . . . . . . . . . . . . . . . . . . . . . . . . . . . . 57
Estrazione del prodotto dall’imballaggio. . . . . . . . . . . . . . 57
Consigli di sicurezza . . . . . . . . . . . . . . . . . . . . . . . . . . . . . . . . . . . . . 58
Installazione. . . . . . . . . . . . . . . . . . . . . . . . . . . . . . . . . . . . . . . . . . . . . . . . . . . 58
Utilizzo. . . . . . . . . . . . . . . . . . . . . . . . . . . . . . . . . . . . . . . . . . . . . . . . . . . . . . . 58
La biancheria . . . . . . . . . . . . . . . . . . . . . . . . . . . . . . . . . . . . . . . . . . . . . . . . . . 58
Tutela dell’ambiente . . . . . . . . . . . . . . . . . . . . . . . . . . . . . . . . . . . . . . . . . . . . 59
Servizio GIAS . . . . . . . . . . . . . . . . . . . . . . . . . . . . . . . . . . . . . . . . . . . . . . . . . . 59
Installazione . . . . . . . . . . . . . . . . . . . . . . . . . . . . . . . . . . . . . . . . . . . . . . 60
Requisiti elettrici . . . . . . . . . . . . . . . . . . . . . . . . . . . . . . . . . . . . . . . . . . . . . . . 60
Regolazione dei piedini . . . . . . . . . . . . . . . . . . . . . . . . . . . . . . . . . . . . . . . . . 60
Ventilazione . . . . . . . . . . . . . . . . . . . . . . . . . . . . . . . . . . . . . . . . . . . . . . 61
Preparazione della biancheria . . . . . . . . . . . . . . . . . . . . . . . . . 62
Preparazione dei capi . . . . . . . . . . . . . . . . . . . . . . . . . . . . . . . . . . . . . . . . . . . 62
Selezione della biancheria . . . . . . . . . . . . . . . . . . . . . . . . . . . . . . . . . . . . . . . . 63
Consigli per l’asciugatura . . . . . . . . . . . . . . . . . . . . . . . . . . . . . . . 64
Evitare di asciugare . . . . . . . . . . . . . . . . . . . . . . . . . . . . . . . . . . . . . . . . . . . . . 64
Risparmio energia . . . . . . . . . . . . . . . . . . . . . . . . . . . . . . . . . . . . . . . . . . . . . . 64
Guida ad una corretta asciugatura . . . . . . . . . . . . . . . . . . . . . . . . . . . . . . . . . 64
Comandi e spie di segnalazione . . . . . . . . . . . . . . . . . . . . . . . 65
Portellone e filtro . . . . . . . . . . . . . . . . . . . . . . . . . . . . . . . . . . . . . . . . 66
Apertura del portellone. . . . . . . . . . . . . . . . . . . . . . . . . . . . . . . . . . . . . . . . . . 66
Filtro. . . . . . . . . . . . . . . . . . . . . . . . . . . . . . . . . . . . . . . . . . . . . . . . . . . . . . . . . 66
Spia di pulizia filtro . . . . . . . . . . . . . . . . . . . . . . . . . . . . . . . . . . . . . . . . . . . . . 66
Vaschetta dell’acqua. . . . . . . . . . . . . . . . . . . . . . . . . . . . . . . . . . . . . 67
Per togliere la vaschetta . . . . . . . . . . . . . . . . . . . . . . . . . . . . . . . . . . . . . . . . . 67
Condensatore. . . . . . . . . . . . . . . . . . . . . . . . . . . . . . . . . . . . . . . . . . . . . 68
Per togliere il condensatore. . . . . . . . . . . . . . . . . . . . . . . . . . . . . . . . . . . . . . . 68
Selezione del programma . . . . . . . . . . . . . . . . . . . . . . . . . . . . . . . 69
Funzionamento. . . . . . . . . . . . . . . . . . . . . . . . . . . . . . . . . . . . . . . . . . . 70
Annullamento e azzeramento del programma . . . . . . . . . . . . . . . . . . . . . . . . 70
Funzione Partenza ritardata . . . . . . . . . . . . . . . . . . . . . . . . . . . . . . . . . . . . . . 70
Pulizia e manutenzione ordinaria . . . . . . . . . . . . . . . . . . . . . . 71
Pulizia dell’asciugatrice . . . . . . . . . . . . . . . . . . . . . . . . . . . . . . . . . . . . . . . . . . 71
Specifiche tecniche. . . . . . . . . . . . . . . . . . . . . . . . . . . . . . . . . . . . . . . . . . . . . . 71
Ricerca guasti. . . . . . . . . . . . . . . . . . . . . . . . . . . . . . . . . . . . . . . . . . . . . 71
Servizio Assistenza Clienti . . . . . . . . . . . . . . . . . . . . . . . . . . . . . . 72
56
40004982Ita.qxd 23/06/2007 19:48 Page 56
Page 57

Introduzione
Leggere attentamente le istruzioni per un corretto
funzionamento della macchina. Questo opuscolo
fornisce importanti linee guida per una manutenzione,
un uso e un’installazione sicuri. Esso contiene inoltre
utili consigli che consentiranno di sfruttare al meglio le
potenzialità di questa macchina.
Conservare la documentazione in un luogo sicuro per
eventuali riferimenti o per futuri proprietari
Informazioni sulla
consegna
Controllare che al momento della consegna la macchina
sia dotata dei seguenti componenti:
● Libretto di istruzioni
● Certificato di garanzia
● Etichetta efficienza energetica
● Kit tubo di scarico
Estrarre la macchina dall’imballaggio vicino al punto
previsto per l’installazione.
1. Con cautela, eseguire un taglio lungo il perimetro
della base dell’imballaggio e un altro verso l’alto,
in corrispondenza di un angolo.
2. Togliere la fascia in politene e sollevare
l’asciugatrice togliendola dalla base di polistirolo.
57
Verificare che
durante il trasporto
la macchina non
abbia subito danni.
In caso contrario,
rivolgersi al Centro
Assistenza GIAS.
La mancata osservanza
di tale procedura
potrebbe
compromettere la
sicurezza
dell’apparecchio. La
chiamata può essere
soggetta a pagamento
se le cause di
malfunzionamento
della macchina sono
attribuibili a un uso
improprio.
Estrazione del
prodotto dall’imballaggio
Smaltire l’imballaggio in maniera sicura.
Accertarsi che sia fuori dalla portata dei
bambini, in quanto fonte potenziale di rischio.
40004982Ita.qxd 23/06/2007 19:48 Page 57
Page 58

Consigli di sicurezza
Installazione
● Prima dell’uso, controllare che il prodotto non presenti segni visibili di danni. Non usare in
caso di danni e contattare il Servizio Assistenza GIAS.
● Non utilizzare adattatori, connettori multipli e/o prolunghe.
● Non installare l’asciugatrice vicino ai tendaggi e rimuovere tempestivamente eventuali oggetti
caduti dietro la macchina.
● L’apparecchio non deve essere installato dietro una porta che può essere chiusa a chiave, una
porta scorrevole o una porta i cui cardini siano sul lato opposto rispetto a quelli
dell’asciugatrice.
Utilizzo
● Questo apparecchio non è destinato all’uso da parte di persone (inclusi i bambini) con
capacità fisiche, sensorie o mentali ridotte, o con una mancanza di esperienza e conoscenza, a
meno che esse non abbiano ricevuto supervisione o istruzione sull’uso dell’apparecchio da
parte di una persona responsabile della loro sicurezza.
● I bambini dovrebbero essere controllati per garantire che essi non giochino con l’apparecchio.
● ATTENZIONE L’uso improprio dell’asciugatrice può provocare rischio di incendio.
● Questa macchina è prevista unicamente per uso domestico, ovvero per l’asciugatura di capi e
indumenti per la casa.
● La macchina qui descritta deve essere utilizzata esclusivamente per lo scopo al quale è
destinata secondo quanto illustrato nel presente libretto. Prima di attivare la macchina,
accertarsi di avere letto attentamente e compreso le istruzioni d’uso e di installazione.
● Non toccare l’asciugatrice con mani o piedi umidi o bagnati.
● Non appoggiarsi al portellone per caricare la macchina; non utilizzare il portellone per
sollevare o spostare la macchina.
● Non consentire ai bambini di giocare con la macchina o con i suoi comandi.
● ATTENZIONE Non utilizzare il prodotto se il filtro antifilacce non è correttamente posizionato
o risulta danneggiato; il filtro non è ignifugo.
● ATTENZIONE Se è esposto il simbolo indicante il riscaldamento della superficie , quando
l’asciugatrice è in funzione la temperatura può essere superiore a 60 gradi C.
● Staccare la spina dalla presa elettrica. Prima di pulire la macchina, staccare sempre la spina.
● Se si presume che la macchina sia guasta, non continuare ad usarla.
● Evitare che sul pavimento attorno alla macchina si raccolgano filacce e pelucchi.
● Dopo il ciclo di asciugatura, l’interno del cestello può essere molto caldo. Prima di estrarre la
biancheria è pertanto opportuno lasciar raffreddare completamente la macchina.
La biancheria
● Non asciugare capi non lavati nell’asciugatrice.
● ATTENZIONE Evitare di asciugare articoli trattati con prodotti di pulizia a secco.
● ATTENZIONE In determinate circostanze, i materiali in gomma possono essere soggetti ad
autocombustione se riscaldati. Articoli in gommapiuma (lattice), cuffie da doccia, tessuti
impermeabili, articoli in caucciù e vestiti o cuscini imbottiti con gommapiuma NON VANNO
asciugati nell'asciugatrice.
● Leggere attentamente le etichette con le istruzioni di lavaggio per conoscere le caratteristiche
dell’asciugatura idonea.
● Gli indumenti devono essere introdotti nell’asciugatrice solo dopo essere stati
opportunamente centrifugati in lavatrice o strizzati a mano. EVITARE di caricare nel cestello
indumenti ancora gocciolanti.
58
40004982Ita.qxd 23/06/2007 19:48 Page 58
Page 59

● Controllare accuratamente che nelle tasche degli indumenti da asciugare non siano presenti
accendini o fiammiferi ed EVITARE ASSOLUTAMENTE l’uso di prodotti infiammabili in
prossimità della macchina.
● Evitare ASSOLUTAMENTE di asciugare tende in fibra di vetro. La contaminazione dei capi
con le fibre di vetro può infatti dar luogo a fenomeni d’irritazione cutanea.
● I capi che sono stati macchiati con sostanze come olio da cucina, acetone, alcol, petrolio,
cherosene, smacchiatori, acquaragia, cere e sostanze per rimuovere le cere dovrebbero
essere lavati in acqua calda con una quantità extra di detergente prima di essere asciugati
nell’asciugatrice.
● Gli ammorbidenti o prodotti simili dovrebbero essere utilizzati come specificato nelle
rispettive istruzioni.
Tutela dell’ambiente
● Tutti i materiali utilizzati per l’imballaggio sono ecologici e riciclabili. Smaltite l’imballaggio
con metodi ecologici. Presso il comune di residenza si potranno reperire ulteriori
informazioni sui metodi di smaltimento.
● Per garantire la sicurezza al momento dello smaltimento di una asciugatrice, scollegare la
spina dell’alimentazione dalla presa, tagliare il cavo dell’alimentazione di rete e
distruggerlo insieme alla spina. Per evitare che i bambini possano rimanere intrappolati
all’interno della lavatrice, rompere i cardini o la chiusura dell’oblò.
Servizio GIAS
● Ai fini della durata e del buon funzionamento della macchina, per gli eventuali interventi
di assistenza o riparazione consigliamo di rivolgersi esclusivamente al servizio assistenza
autorizzato GIAS.
Direttiva europea 2002/96/CE
Questo elettrodomestico è marcato conformemente alla Direttiva Europea 2002/96/CE sui rifiuti da
apparecchiature elettriche ed elettroniche (WEEE).
Assicurandovi che questo prodotto sia smaltito correttamente, aiuterete ad evitare possibili
conseguenze negative all’ambiente e alla salute delle persone, che potrebbero verificarsi a causa
d’un errato trattamento di questo prodotto giunto a fine vita.
Il simbolo sul prodotto indica che questo apparecchio non può essere
trattato come un normale rifiuto domestico; dovrà invece essere
consegnato al punto più vicino di raccolta per il riciclo delle
apparecchiature elettriche ed elettroniche.
Lo smaltimento deve essere effettuato in accordo con le regole
ambientali vigenti per lo smaltimento dei rifiuti.
Per informazioni più dettagliate sul trattamento, recupero e riciclo di
questo prodotto, per favore contattare l’ufficio pubblico di
competenza (del dipartimento ecologia e ambiente), o il vostro
servizio di raccolta rifiuti a domicilio, o il negozio dove avete
acquistato il prodotto.
59
Nel caso in cui la macchina non funzioni correttamente o sia fuori
uso, spegnere e staccare la spina dalla presa. Per la riparazione,
rivolgersi al Centro Assistenza GIAS.
40004982Ita.qxd 23/06/2007 19:49 Page 59
Page 60

Requisiti elettrici
Le asciugatrici sono state progettate per funzionare ad
una tensione di 230V, 50 Hz. Controllare che il circuito
dell’alimentazione sia idoneo per valori di corrente di
almeno 10A.
L’elettricità può essere estremamente pericolosa.
L’apparecchio deve essere opportunamente collegato a
terra.
La presa e la spina dell’apparecchio devono essere dello
stesso tipo.
Non utilizzare adattatori multipli e/o prolunghe.
Una volta completata l’installazione, la spina deve
risultare accessibile e facilmente scollegabile.
I fili dell’impianto elettrico sono dei seguenti colori:
Blu NEUTRO
Marrone SOTTO TENSIONE
Verde e giallo TERRA
L’apparecchio con marchio CE è conforme alle direttive
europee 89/336/CEE, 73/23/CEE e successive modifiche.
Regolazione dei piedini
Una volta posizionata la macchina, si dovrebbe procedere
alla regolazione dei piedini, per garantire una perfetta
messa in bolla.
Regolare i quattro piedini per garantire che la macchina
sia stabile e in bolla.
60
La chiamata può
essere soggetta a
pagamento, se le
cause di
malfunzionamento
della macchina
sono attribuibili a
un’installazione
non corretta.
Nel caso risulti
danneggiato, il
cavo di
alimentazione
dell’apparecchio
dev’essere
prontamente
sostituito con
apposito cavo
reperibile
ESCLUSIVAMENTE
presso il servizio di
ricambi.
L’installazione deve
essere effettuata
da persone
competenti.
Installazione
Non inserire la spina nella presa e non
accendere la macchina finché
l’installazione non sarà stata completata.
Ai fini della sicurezza personale è
essenziale che l’asciugatrice venga
installata correttamente.
In caso di dubbi sull’installazione,
rivolgersi al Servizio Assistenza GIAS.
40004982Ita.qxd 23/06/2007 19:49 Page 60
Page 61

Accertarsi che nel locale scelto per l’installazione vi sia
un ricambio d’aria sufficiente, onde evitare che i gas
provenienti da apparecchiature funzionanti con altri
combustibili, comprese fiamme libere, siano aspirati nel
locale dove l’asciugatrice è in funzione.
● Non scaricare l’aria nella canna fumaria utilizzata
per lo scarico di fumi provenienti da attrezzature
funzionanti a gas o altri combustibili.
● Controllare periodicamente che attorno
all’asciugatrice vi sia una buona circolazione
d’aria, senza impedimenti di sorta.
● Dopo l’uso ispezionare il filtro antifilacce e, se
necessario, pulirlo.
● Verificare costantemente che presa e sfiati non
siano ostruiti. Per assicurare un’idonea
ventilazione è essenziale che lo spazio tra il fondo
macchina e il pavimento non sia ostruito. Tra la
macchina ed eventuali ostacoli si dovrebbe
lasciare uno spazio di almeno 12mm.
● Rimuovere tempestivamente eventuali oggetti
caduti dietro/sotto la macchina in quanto
potrebbero ostruire le prese e gli sfiati dell’aria.
● EVITARE ASSOLUTAMENTE d’installare la
macchina contro tendaggi.
61
Ventilazione
SFIATI ARIA
SFIATI ARIA NELLA BASE
PRESE ARIA
40004982Ita.qxd 23/06/2007 19:49 Page 61
Page 62

Prima di utilizzare l’asciugatrice per la prima volta:
● Leggere attentamente il presente libretto
d’istruzioni.
● Togliere tutti gli articoli presenti all’interno del
cestello.
● Pulire l’interno del cestello e il portellone con un
panno umido in modo da eliminare l’eventuale
polvere depositata durante il trasporto.
Preparazione dei capi
Verificare che la biancheria da asciugare sia idonea per
l’asciugatura meccanica, come indicato dai simboli
sull’etichetta di lavaggio dei vari articoli.
Controllare che le chiusure siano chiuse e le tasche
vuote. Girare i capi con il rovescio all’esterno. Introdurre
i capi nel cestello uno ad uno, in modo che non si
aggroviglino.
Peso massimo di
asciugatura
● Capi in cotone Max. 8 kg
● Capi sintetici Max. 4 kg
62
Preparazione della biancheria
Non sovraccaricare
il cestello, in
quanto i capi
ingombranti, a
caldo, possono
superare il carico
massimo
consentito.
(per esempio sacchi
a pelo e piumoni)
40004982Ita.qxd 23/06/2007 19:49 Page 62
Page 63

Selezionare la biancheria
nel modo seguente:
● In base ai simboli delle etichette di lavaggio
Le etichette di lavaggio sono apposte sul collo o
sulle cuciture interne:
Articolo idoneo per l’asciugatura meccanica.
Asciugatura ad alta temperatura.
Solo asciugatura a bassa temperatura.
Articolo non idoneo all’asciugatura
meccanica.
Se il capo è sprovvisto di etichetta di
lavaggio, si deve presumere che non sia
idoneo all’asciugatura meccanica.
● In base al quantitativo ed alla pesantezza
Se il carico è superiore alla capacità della
macchina, separare i capi in base alla pesantezza
(p. es., separare gli asciugamani dalla biancheria
leggera).
● In base al tipo di tessuto
Articoli di cotone/lino: Asciugamani, jersey di
cotone, biancheria da tavola/letto.
Articoli sintetici: Camicette, camicie, tute ecc. in
poliestere o poliammide e misti cotone/sintetici.
● In base al grado di asciugatura
Selezionare tra: capi asciutti da stirare, capi pronti
da riporre ecc. Per i capi delicati premere il
pulsante , impostando una temperatura di
asciugatura ridotta.
63
40004982Ita.qxd 23/06/2007 19:49 Page 63
Page 64

Evitare di asciugare:
Seta, tessuti delicati, calze di nylon, ricami delicati, tessuti
con decorazioni metalliche, indumenti con guarnizioni in
PVC o in pelle, scarpe da ginnastica, articoli pesanti come
sacchi a pelo ecc.
Risparmio energia
Introdurre nell’asciugatrice solo biancheria accuratamente
strizzata a mano o centrifugata a macchina. Quanto più
asciutta è la biancheria, tanto più rapido è il tempo
richiesto per l’asciugatura, con conseguente risparmio di
consumo elettrico.
COSA FARE SEMPRE
● Cercare sempre di far lavorare la macchina a pieno
carico di biancheria: si risparmia tempo ed elettricità.
● Prima di ogni ciclo di asciugatura verificare SEMPRE
che il filtro sia pulito.
COSA NON FARE MAI
● Non superare mai il peso massimo: si perde tempo e
si consuma più elettricità.
● Evitare di caricare capi ancora gocciolanti: si rischia di
rovinare la macchina.
Guida ad una corretta
asciugatura
In tabella sono riportati i tempi di asciugatura indicativi in
funzione del tipo di tessuto e del grado di umidità dei capi.
64
Consigli per l’asciugatura
IMPORTANTE:
Evitare di asciugare
articoli
preventivamente
trattati con
prodotti di pulizia
a secco o capi in
gomma (pericolo
d’incendio o
esplosione).
Nel corso degli
ultimi 15 minuti, il
carico viene
sempre asciugato
con aria fredda.
Tessuto
COTONE
SINTETICI
ACRILICI
SELEZIONE
TEMPERATURA
ELEVATA
BASSA
BASSA
SPIA DI
SEGNALAZIONE
OFF
ON
ON
CARICO
PESANTE
140-165 min
–
–
CARICO
MEDIO
70-80 min
70-80 min
50-65 min
CARICO
LEGGERO
50-65 min
40-55 min
30-40 min
40004982Ita.qxd 23/06/2007 19:49 Page 64
Page 65

Pannello di comando e spie luminose
Selettore dei programmi – Consente di selezionare il programma desiderato.
Tasto e spia On/Off – Premere questi tasti per attivarli, la spia si illumina. Sul display
comparirà il programma selezionato (si veda Guida ai programmi).
Tasto Acrilici/Sintetici – Premere questo tasto per ridurre la temperatura nel caso
di capi delicati. Si accenderà la spia sopra il relativo tasto. Per modificare la regolazione
della temperatura, occorre azzerare il programma.
Bassa temperatura – Spia accesa
Alta temperatura – Spia spenta
Tasto Start (Avvio) – Per dare inizio al programma di asciugatura selezionato, premere il
tasto Start. Per annullare/azzerare il programma, tenere premuto per 5 secondi.
Tasto Partenza ritardata – Consente all’utente di ritardare la partenza del ciclo di
asciugatura (si vedano i dettagli sul funzionamento a pagina 70).
Tasto cicalino – Il cicalino durante il normale funzionamento è attivo. Per disattivare
il cicalino, premere il tasto. Si accenderà la relativa spia.
Spia ‘Elimina acqua’ – Si accende quando la vaschetta dell’acqua è piena.
La spia di segnalazione pulizia filtro – Si accende quando il filtro deve essere pulito.
Spia Fine programma – Si accende quando si avvia il programma.
Spia Partenza ritardata – La spia lampeggia quando si avvia il programma.
Display digitale – Sul display a due cifre compare il programma selezionato, nonché le
indicazioni relative a Partenza ritardata e Fine programma del programma selezionato.
65
Comandi e spie di segnalazione
PULSANTE
ACRILICI/SINTETICI
IL PULSANTE
ON/OFF
PULSANTE
PARTENZA
RITARDATA
SPIA DI PULIZIA
FILTRO
SPIA ELIMINA
ACQUA
SELETTORE DEI
PROGRAMMI
PULSANT
E AVVIO
PULSANTE
CICALINO
SPIA FINE
PROGRAMMA
DISPLAY
DIGITALE
SPIA PARTENZA
RITARDATA
40004982Ita.qxd 23/06/2007 19:49 Page 65
Page 66

Apertura del portellone
Tirare la maniglia per aprire lo sportello.
Per avviare la macchina, richiudere il portellone e
premere il tasto Start (Avvio).
Filtro
IMPORTANTE: Ai fini della massima efficacia della
macchina, prima di ogni ciclo di asciugatura è essenziale
verificare la pulizia del filtro antifilacce.
1. Tirare il filtro verso l’alto.
2. Aprire il filtro come illustrato.
3. Rimuovere delicatamente le filacce con la punta
delle dita o aiutandosi con uno spazzolino
morbido.
4. Richiudere il filtro e reinserirlo in sede.
Spia di pulizia filtro
si accende segnalando la necessità di pulire il filtro.
Se la biancheria non si asciuga verificare che il filtro
non sia intasato.
66
Portellone e filtro
AVVERTENZA!
Si ricorda che quando la macchina è in
funzione il cestello e il portellone
possono essere MOLTO CALDI. Non
arrestare mai l’asciugatrice prima della
fine del ciclo di asciugatura a meno che
tutti i capi in essa contenuti non
vengano rimossi rapidamente e stesi in
modo da dissipare il calore.
40004982Ita.qxd 23/06/2007 19:49 Page 66
Page 67

L’acqua eliminata dalla biancheria durante il ciclo di
asciugatura viene raccolta in una vaschetta posta in
fondo alla macchina.
Quando la vaschetta è piena si accende la spia sul
pannello dei comandi, segnalando che si DEVE vuotare
la vaschetta. Tuttavia, si consiglia di svuotare la
vaschetta dopo ogni ciclo di asciugatura.
NOTA: Nei primi cicli, quando la macchina è nuova, si
raccoglie poca acqua in quanto si riempie prima il
serbatoio interno.
Per togliere la vaschetta
1. Estrarre con delicatezza la vaschetta, finché non
viene completamente rimossa. Sostenere la
vaschetta con entrambe le mani. Da piena, la
vaschetta dell’acqua pesa circa 4 kg.
2. Inclinare la vaschetta facendo defluire l’acqua dal
foro posteriore. Quando è vuota, far scivolare di
nuovo la vaschetta nell’apposita sede. SPINGERE
CON DECISIONE IN SEDE.
NOTA: se c’è uno scarico vicino all’asciugatrice, si può
usare l’apposito kit per far scaricare costantemente
l’acqua raccolta dalla macchina. Così facendo si eviterà
di svuotare la vaschetta dell’acqua. Tutte le informazioni
per il montaggio sono all’interno della confezione del
kit di scarico.
67
Vaschetta dell’acqua
40004982Ita.qxd 23/06/2007 19:49 Page 67
Page 68

Importante: Prima di procedere alla pulizia del
condensatore, disattivare sempre l’apparecchio e
staccare la spina dalla presa elettrica.
Ai fini delle prestazione dell’apparecchio, è opportuno
verificare regolarmente lo stato di pulizia del
condensatore.
Per togliere il
condensatore
1. Tirare delicatamente la parte inferiore dello
zoccolo, che si sgancia dalla macchina. A questo
punto si può sbloccare la parte superiore ed
estrarre completamente lo zoccolo.
2. Agire sulle due leve di bloccaggio in senso
antiorario e estrarre il condensatore.
3. Estrarre il modulo condensatore.
4. Servendosi di un panno, eliminare delicatamente
polvere e filacce, poi lavare il modulo tenendolo
sotto l’acqua corrente e facendolo girare in modo
che l’acqua circoli tra le piastre fino a perfetta
eliminazione delle impurità.
5. Rimontare il condensatore rispettando il verso
giusto (come indicato dalla freccia) e accertandosi
che sia perfettamente inserito in sede. Bloccare le
due leve ruotandole in senso orario.
6. Rimontare lo zoccolo.
68
Condensatore
40004982Ita.qxd 23/06/2007 19:49 Page 68
Page 69

Nota: Il sensore potrebbe non essere in grado di individuare un
carico ridotto di articoli di piccole dimensioni. Per carichi ridotti e
articoli separati o per tessuti pre-asciugati leggermente umidi,
selezionare i programmi a tempo. Impostare il tempo del
programma tra 30 e 75 minuti in base alla quantità del carico e al
grado di asciugatura richiesto. Successivamente, selezionare la
temperatura alta o bassa in base al tipo di tessuto.
Se il sensore non rileva la presenza del capo, l’asciugatrice funziona
solo per 10 minuti, prima di passare alla fase di raffreddamento.
Se il carico è troppo abbondante o troppo bagnato per essere
asciugato, l’asciugatrice passa automaticamente alla fase di
raffreddamento dopo 185 minuti.
69
Selezione del programma
La macchina, dotata di sensore di asciugatura, offre opzioni di asciugatura in grado di
rispondere alle più svariate esigenze.
Nella tabella che segue viene riportato un elenco dei programmi con la relativa funzione.
Programma
Lana
Stiro facile
120'
75'
60'
45'
30'
AIR
Descrizione
Selezionare il grado di asciugatura desiderato.
Le possibilità disponibili comprendono l'opzione , ideale per
asciugamani e accappatoi, l'opzione , per capi che non è
necessario stirare, e il programma che lascia la biancheria pronta per
la stiratura.
Un programma delicato creato appositamente per ottenere capi in
lana più soffici dopo l’asciugatura ad aria.
Questo ciclo delicato con aria calda, della durata di 12 minuti, si può
utilizzare anche per “rinfrescare” i capi in lana dopo averli tenuti in
guardaroba.
Il programma Stiro facile assicura una funzione di trattamento
antipiega. La macchina effettua un ciclo di riscaldamento della
biancheria per 9 minuti, seguito da 3 minuti di raffreddamento. Si
tratta di una funzione particolarmente utile quando si prevede di
riporre la biancheria (ad esempio, nel cesto della biancheria) per un
certo periodo di tempo prima della stiratura. I capi possono ‘seccarsi’
eccessivamente anche quando vengono fatti asciugare all’aperto sul
filo o vengono posti su radiatori. Il ciclo di Stiro facile attenua le
pieghe sul tessuto rendendo più facile e più rapida la stiratura.
120 minuti di asciugatura
75 minuti di asciugatura
60 minuti di asciugatura
45 minuti di asciugatura
30 minuti di asciugatura
Asciugatura della biancheria con aria fredda per 30 minuti
40004982Ita.qxd 24/06/2007 13:13 Page 69
Page 70

1. Aprire il portellone e caricare la biancheria nel cestello. Verificare che i capi non
impediscano la chiusura del portellone.
2. Chiudere delicatamente il portellone spingendolo lentamente fino ad avvertirne lo
scatto di chiusura.
3. Premere il tasto per attivare l’asciugatrice. La spia si accenderà e comparirà sul
display il numero del programma.
4. Ruotare il selettore dei programmi selezionando il programma di asciugatura
desiderato (si veda Guida ai programmi).
5. Per ridurre il grado di calore con capi delicati, sintetici o acrilici, premere il tasto
La spia sopra il tasto si accende quando è impostata la funzione bassa temperatura.
Per annullare la selezione di tale funzione, è necessario azzerare la macchina.
6. Premere il pulsante di Start (Avvio). L’asciugatrice partirà automaticamente e la
spia resterà accesa. Il tempo restante prima della fine del programma
comparirà sul display.
7. Sul display comparirà lo stato di avanzamento dell’asciugatura, ossia il tempo
restante prima della fine del programma, e la spia resterà accesa.
8. Se si apre il portellone per controllare la biancheria mentre il programma è in
funzione, per riattivare l’operazione di asciugatura è necessario chiudere il
portellone e premere nuovamente il tasto Start.
9. Quando si accende la spia 15', la macchina entra nella fase di raffreddamento. In
questa fase, i capi vengono asciugati con aria fredda e il carico può così raffreddarsi.
10. Terminato il programma, sul display comparirà l’indicazione 0'min. e a questo punto
il cicalino emetterà un segnale per 10 secondi.
11. Al termine del programma, il cestello ruota a intervalli per un effetto antipiega e il
segnalatore acustico suona. Fino a quando l’apparecchio verrà riazzerato o spento.
Annullamento e azzeramento del
programma
Per annullare un programma, tenere premuto il tasto Start per 5 secondi. La macchina
indicherà l’avvenuto azzeramento del programma tramite il lampeggiare del display.
Funzione Partenza Differita
La funzione consente all’utente di ritardare la partenza del ciclo di asciugatura di un
massimo di 23 ore.
Agendo la prima volta sul tasto di questa funzione, comparirà sul display un ritardo di
1 ora. A ogni successiva pressione del tasto, si aggiungerà un ulteriore ritardo di 1 ora,
fino a raggiungere un ritardo massimo di 23 ore.
Per avviare il programma, premere il tasto Start. Sul display compariranno le ore che
mancano all’inizio del ciclo di asciugatura, che partirà
unicamente trascorso tale tempo.
Nota: se non si preme il tasto Start entro 5 secondi, la
funzione Partenza ritardata verrà automaticamente
annullata.
70
Funzionamento
AVVERTENZA!
Il cestello, il
portellone e il
carico possono
essere molto caldi.
40004982Ita.qxd 23/06/2007 19:49 Page 70
Page 71

Pulizia dell’asciugatrice
● Si consiglia di pulire il filtro e di svuotare la
vaschetta dell’acqua dopo ogni ciclo di
asciugatura.
● Pulire regolarmente il condensatore.
● Dopo l’uso, pulire l’interno del cestello e lasciare
aperto il portellone per un certo periodo di
tempo in modo che circoli aria e si asciughi.
● Pulire l’esterno della macchina e il portellone con
un panno morbido.
● NON usare spugnette abrasive né prodotti di
pulizia.
● Per evitare che il portellone resti ‘incollato’ o che
si accumulino filacce, pulire regolarmente il
portellone interno e le guarnizioni con un panno
umido.
Specifiche tecniche
Capacità del cestello 115 litri
Carico massimo 8 kg
Altezza 85 cm
Larghezza 60 cm
Profondità 60 cm
Efficienza Energetica B
71
IMPORTANTE
Prima di procedere
alla pulizia,
disattivare sempre
la macchina e
staccare la spina
dalla presa a muro.
Per i dati elettrici
vedere la targhetta
dei dati posta sul
davanti del mobile
della macchina
(con portellone
aperto).
Pulizia e manutenzione
ordinaria
Ricerca guasti
Quale può essere la causa...
Problemi che può risolvere l’utente
Prima di rivolgersi al Centro Assistenza GIAS, consultare la seguente checklist. La
chiamata verrà addebitata all’utente nel caso in cui risulti che la macchina funziona o è
stata installata o utilizzata in maniera errata. Se il problema persiste anche dopo aver
eseguito i controlli consigliati, rivolgersi al servizio di assistenza GIAS che sarà a
disposizione per suggerire eventuali soluzioni per telefono.
40004982Ita.qxd 23/06/2007 19:49 Page 71
Page 72

Tempo di asciugatura eccessivamente lungo/capi non
sufficientemente asciutti…
● Il programma/tempo di asciugatura selezionato è corretto?
● I capi sono stati introdotti eccessivamente bagnati? Si è provveduto a strizzare o
centrifugare adeguatamente i capi prima d’introdurli nella macchina?
● Si deve pulire il filtro?
● Si deve pulire il condensatore?
● L’asciugatrice è stata caricata eccessivamente?
● Vi sono ostruzioni a livello delle prese, degli sfiati e della base dell’asciugatrice?
● Il tasto è stato selezionato da un ciclo precedente?
L’asciugatrice non funziona…
● L’alimentazione elettrica cui è collegata la macchina è attiva? Controllare
provando con un altro apparecchio (ad esempio, lampada da tavolo).
● La spina di alimentazione è stata collegata correttamente all’alimentazione
elettrica?
● Manca la corrente?
● Fusibile bruciato?
● Il portellone è stato chiuso perfettamente?
● La macchina è stata opportunamente attivata (sia collegata all’alimentazione sia
attivata localmente)?
● È stato selezionato il tempo o il programma di asciugatura?
● La macchina è stata riattivata dopo aver aperto il portellone?
● La macchina ha smesso di funzionare perché la vaschetta dell’acqua è piena e deve
essere svuotata?
L’asciugatrice fa molto rumore…
● Spegnere l’asciugatrice e rivolgersi al Servizio Assistenza GIAS.
La spia di segnalazione è accesa…
● Si deve pulire il filtro?
● Si deve pulire il condensatore?
La spia di segnalazione è accesa…
● Si deve svuotare la vaschetta dell’acqua?
CERTIFICATO DI GARANZIA CONVENZIONALE: cosa fare?
Il Suo prodotto è garantito, alle condizioni e nei termini riportati sul certificato inserito nel
prodotto ed in base alle previsioni del decreto legislativo 24/02, nonché del decreto
legislativo 6 settembre 2005, n. 206, per un periodo di 24 mesi decorrenti dalla data di
consegna del bene.
Così come riportato nei testi dei Decreti Legislativi citati, il certificato di garanzia dovrà
72
Servizio Assistenza Clienti
40004982Ita.qxd 23/06/2007 19:49 Page 72
Page 73

essere da Lei conservato, debitamente
compilato, per essere mostrato al Servizio
Assistenza Tecnica Autorizzato, in caso di
necessità, unitamente ad un documento
fiscalmente valido rilasciato dal rivenditore al
momento dell'acquisto (bolla di consegna,
fattura, scontrino fiscale, altro) sul quale
siano indicati il nominativo del rivenditore, la
data di consegna, gli estremi identificativi del
prodotto ed il prezzo di cessione.
Resta pure inteso che, salvo prova contraria,
poiché si presume che i difetti di conformità
che si manifestano entro sei mesi dalla
consegna del bene esistessero già a tale data,
a meno che tale ipotesi sia incompatibile con
la natura del bene o con la natura del difetto
di conformità, il Servizio di Assistenza Tecnica
Autorizzato Gias, verificato il diritto
all'intervento, lo effettuerà senza addebitare
il diritto fisso di intervento a domicilio, la
manodopera ed i ricambi. Per contro, nel
successivo periodo di diciotto mesi di vigenza
della garanzia, sarà invece onere del
consumatore che intenda fruire dei rimedi
accordati dalla garanzia stessa provare
l'esistenza del difetto di conformità del bene
sin dal momento della consegna; nel caso in
cui il consumatore non fosse in grado di
fornire detta prova, non potranno essere
applicate le condizioni di garanzia previste e
pertanto il Servizio di Assistenza Tecnica
Autorizzato Gias effettuerà l'intervento
addebitando al consumatore tutti i costi
relativi.
ESTENSIONE DELLA GARANZIA
FINO A 5 ANNI - (CANDYSICURPIU):
come?
Le ricordiamo inoltre che sullo stesso
certificato di garanzia convenzionale Lei
troverà le informazioni ed i documenti
necessari per prolungare la garanzia
dell'apparecchio sino a 5 anni e così, in caso
di guasto, non pagare il diritto fisso di
intervento a domicilio, la manodopera ed i
ricambi.
Per qualsiasi informazione necessitasse, La
preghiamo rivolgersi al numero telefonico
del Servizio Clienti 0392086811.
ANOMALIE E MALFUNZIONAMENTI:
a chi rivolgersi ?
Per qualsiasi necessità il centro assistenza
autorizzato è a Sua completa disposizione
per fornirLe i chiarimenti necessari;
comunque qualora il Suo prodotto presenti
anomalie o mal funzionamenti, prima di
rivolgersi al Servizio Assistenza Autorizzato,
consigliamo vivamente di effettuare i
controlli indicati a pag. 72.
UN SOLO NUMERO TELEFONICO
PER OTTENERE ASSISTENZA.
Qualora il problema dovesse persistere,
componendo il "Numero Utile" sotto
indicato, sarà messo in contatto direttamente
con il Servizio Assistenza Tecnica Autorizzato
che opera nella Sua zona di residenza.
Attenzione, la chiamata è a pagamento; il
costo verrà comunicato, tramite messaggio
vocale, dal Servizio clienti dell'operatore
telefonico utilizzato. Dettagli sono presenti
sul sito internet www.candy.it.
MATRICOLA DEL PRODOTTO. Dove
si trova?
E' indispensabile che comunichi al Servizio
Assistenza Tecnica Autorizzato la sigla del
prodotto ed il numero di matricola (16
caratteri che iniziano con la cifra 3) che
troverà sul certificato di garanzia oppure
sulla targa matricola posta sul frontale della
asciugabiancheria (zona porta, fig.1, pag.
66). In questo modo Lei potrà contribuire ad
evitare trasferte inutili del tecnico,
risparmiando oltretutto i relativi costi.
73
40004982Ita.qxd 23/06/2007 19:49 Page 73
Page 74

Page 75

Page 76

40004982
40004982.qxd 23/06/2007 18:51 Page 20
 Loading...