


Thank you for purchasing the
RMD602BT
MP3/USB/SD/MMC Player,
with FM/MW Tuner
Operating Instructions

Safety Precautions
Thank you for purchasing this product. Please read through these operating instructions so you will know how to operate your model properly. After you have finished reading the instructions, keep this manual in a safe place for future reference.
Only connect the unit to a 12-volt power supply with negative grounding.
Never install this unit where the operation & condition for safety driving is restrained.
Never use the video display function in the front when driving to prevent the violation of laws & regulations and also to reduce the risk of traffic accident except using for rear view video camera.
To ensure safe driving, please adjust the volume to a safe & comfort level in case of emergency situations.
Never expose this unit, amplifier, and speakers to moisture or water for preventing electric sparks or fires.
Please don't change the fuse on the power cord without professional guidance, using improper fuse may cause damage to this unit or even cause fire.
Please power off this unit at once and send it back to the after-sales service center or the dealer/distributor you purchased from if one of the following symptoms is found:
(a). No audio output;
(b). No image output;
(c). Water or other obstacle enters the unit;
(d). Smoking;
(e). Peculiar smell.
To provide a clear demonstration and an alternative for easy understanding of the operation of this unit, graphic illustration was used. However, this illustration is not necessary printed as the actual image found on the unit.
1

Contents |
|
Safety Precautions ......................................... |
1 |
Contents ......................................................... |
2 |
Features ......................................................... |
3 |
Panel Controls................................................ |
4 |
Remote Controls ............................................ |
5 |
Basic Operations............................................ |
6 |
Rotary Knob Menu ...................................... |
7-9 |
Radio Mode.................................................. |
10 |
USB/SD/MMC/MP3 Playback ................. |
11-15 |
Bluetooth Mode ....................................... |
15-17 |
Device Connections ................................ |
18-20 |
Installation Guide..................................... |
20-22 |
Anti-Theft System........................................ |
22 |
Troubleshooting............................................ |
23 |
Specifications ............................................... |
24 |
2

Features
WMA and MP3 Compatibility
It is possible to playback WMA and MP3 files.
About WMA
The unit can playback WMA data.
Windows Media and the Windows logo are trade marks or registered trademarks of Microsoft Corporation in the United States and/or other countries.
This unit may not operate correctly depending on the application used to encode WMA files.
About MP3
Supply of this product only conveys a license for private, non-commercial use and does not convey a license nor imply any right to use this product in any commercial (i.e.revenuegenerating) realtime broadcasting (terrestrial, satellite, cable and/or any other media), broad-casting/streaming via internet, intranets and/or other networks or in other electronic content distribution systems, such as payaudio or audio-on-dem and applications. An independent license for such use is required. For details, please visit http://www. mp3licensing.com.
Press the  button to open the panel.
Button Operation Explanations
Some frequent operations 1) Move cursor
 Note:
Note:
In Setting mode, the VOL knob has the same function as the  /
/  button to select setting items.
2) Confirm
3

Panel Controls
Power on/off: Press  to turn on/off the unit.
/ |
/ |
|
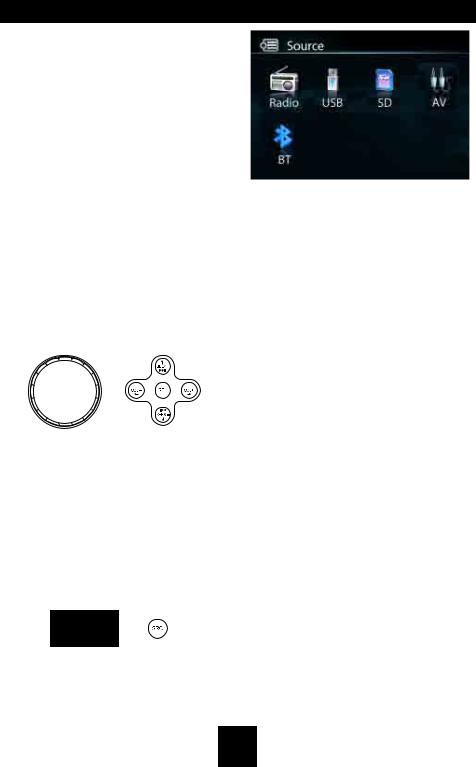
1.- Short press to select playing mode:
•Radio
•USB (when USB inserted)
•SD (when SD/MMC inserted)
•AV (front audio & video input. External peripheral devices can be connected with
the unit.)
-Long press to return to main source menu when in any mode, then use navigate button to select the desired mode, and press OK button to confirm.
2.Cancel source select menu and return to previous menu
3.- Press to navigate up among option items (in MP3/WMA mode)
-Play the previous preset radio station (in Radio mode)
4.- Press to navigate down among option items (in MP3/WMA mode)
-Play the next preset radio station (in Radio mode)
5.- Power on/off (press and hold more than 2 seconds)
-Mute
6.3 inch TFT display
7.SD card slot
8.USB port
9.- Rotate the knob to adjust volume level
-Press to select audio/video Setting, and rotate the knob to adjust level.
-Press more than 2 seconds to Setting menu.
10.Panel open
11.- Play/Pause (in MP3/WMA modes)
-Band switch: FM1-FM2-FM3-MW1-MW2 (in Radio mode)
-Dial/Receive call (press briefly, in BT mode)
12.- Preset scan (press briefly, in Radio mode)
-Auto preset (press more than 2 seconds, in Radio mode)
-Stop (in MP3/WMA mode)
-Terminate call (in BT mode)
13.- Search the previous station manually, and each press to seek step by step (press briefly, in Radio mode).
-Search the previous station automatically (press more than 2 seconds, in Radio mode).
-Press to search the previous track or chapter (in MP3/WMA mode).
-Fast backward by 2, 4, 8, 20 step (press more than 2 seconds, in MP3/WMA mode).
-Press to navigate left among option items
14.- Search the next station manually, and each press to seek step by step (press briefly, in Radio mode).
-Search the next station automatically (press more than 2 seconds, in Radio mode).
-Search the next track or chapter (in MP3 / WMA mode).
-Fast forward by 2, 4, 8, 20 step (press more than 2 seconds,in MP3/WMA mode).
-Press to navigate right among option items
15.- Confirm operation
-Stop auto seeking (in Radio mode).
16.Remote sensor
17.AV in
4

Remote Controls
Press  to turn on/off the unit.
Remote Control Operating Range
The remote control can operate within a distance of 3~5m.
Replacing the lithium battery
When the range of operation of the card remote control becomes short or no function, replace the lithium battery with a new one. Make sure the battery polarity replacement is correct.
1.Pull out the battery holder while pressing the stopper.
2.Insert the button-type lithium battery with the (+) mark facing upward. Insert the battery holder into the remote control.
(CR 2025)
1.Power on/off
2.Setup
3.Menu cursor
4.Enter
5.Program
6.Digit area
7.Select Audio/Video Setting, then rotate the knob to adjust level.
8.Volume
9.- Radio tune
-Track skip/seek
10.Source switch
11.- Zoom
-Terminate call (in BT mode)
12.Repeat
13.Repeat A-B
14.Stop/Return
15.Play/Pause
16.Goto search
17.- OSD: On screen display
-AMS: Search and store stations automatically
18.- DISP: Display time/clock (Video mode)
-ESC: Return to previous menu
19.- Video system PAL/NTSC/AUTO
-Radio band (in Radio mode)
-Dial/Receive call (in BT mode)
20.Mute
1 |
2 |
Warning
•Store the battery where children cannot reach. If a child accidentally swallows the battery, consult a doctor immediately.
•Do not recharge, short, disassemble or heat the battery or dispose it in a fire.
•Do not leave the battery with other metallic materials. Otherwise, the battery may start to give off heat, crack or catch fire.
•When throwing away or saving the battery, wrap it in tape and insulate.
5
Basic Operations
Turn on/off the Power
1.Press  to turn on the unit.
The unit goes back to the last status after power on.
2.Press  more than two secnonds to power off.
Mute
Press the  button to cut the sound.
 Note:
Note:
•Doing the operation above again or adjusting volume will release muting.
•Mute icon appears on the TFT during muting.
Adjust the Volume
Rotate the knob on the panel or press VOL +/- on the remote control to increase or decrease the volume.
The adjustable range of volume is 0 to 39.
Playing Source Selection
Method 1
Short press the SRC button on the panel or remote control to cycle through all the available sources.
Method 2
In any mode, long press the SRC button on the panel or remote control to enter main source menu, then use navigate button to select the desired mode, and press OK to confirm.
 Note:
Note:
•When some devices are not ready, they cannot be selected.
•You should stop switching when the playing source you desired has been selected and wait for some seconds, the unit will auto enter the playing source mode you have selected.
When Parking Brake Applied
1.If 'PRK SW' cable is connected to hand brake switch, the video display of the TFT monitor will be controlled by driving status, system setup and input video sources.
2.When the car is moving ahead, if the video file is played, the screen appears
“WARNING: Engage Parking Brake to View Video”. The above warning screen will prevent the driver watching images. The passengers at the rear seats can watch normally.
When Reverse Driving
If the rear view video camera is connected, the unit automatically switches to CAMERA source during reverse driving. The unit returns to the original work mode after the reverse driving is done.
6
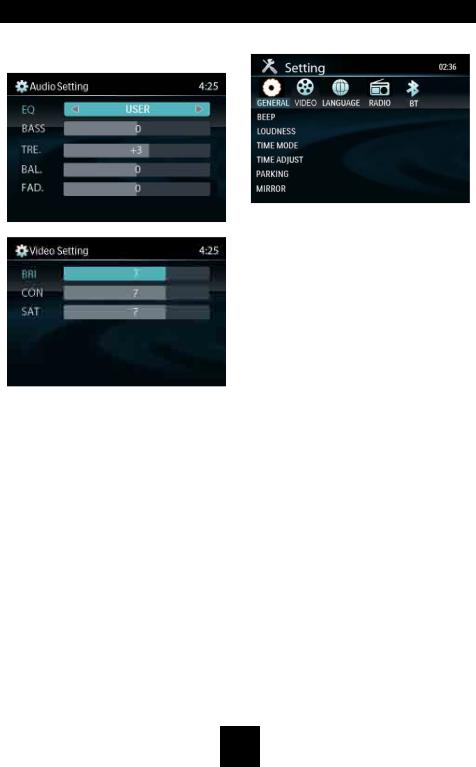
Rotary Knob Menu
1.Rotate the knob to adjust volume level.
2.Short press to access the Audio & Video Setting menu.
.
.
.
Each press the knob to change the AUDIO mode: EQ/Bass/Treble/Balance/Fader, and rotate the knob to adjust level.
Each press the knob to change the VIDEO mode: Bright/Contrast/Saturation, and rotate the knob to adjust level.
EQ: USER/FLAT/POP/ROCK/CLASSIC/ JAZZ
The Equalizer function applies preset sound effects to the unit’s audio output signal. Turn the rotary encoder to select from the following equalizer options: USER, FLAT, POPULAR, ROCK, CLASSIC, JAZZ. With the equalizer function activated, if bass or treble is adjusted, the EQ Mode will revert to “USER”. When the equalizer function is activated, the most recently selected bass/treble levels cannot be adjusted. When the equalizer function is not active, the unit will return to the most recently selected bass and treble levels.
3. Press the knob more than 2 seconds to enter Setting mode, then Use 
 ,
,  /
/  and OK key to select setting items.
General Setting
BEEP: ON/ OFF
The beep tone feature allows the selection of an audible beep tone to be heard each time the menu is accessed.
LOUDNESS: ON/OFF
When listening to music at low volumes, this feature will selectively boost certain bass and treble frequencies.
TIME MODE
12 HOUR MODE: the clock displays in the type of 12 hours such as 11:18 AM.
24 HOUR MODE: the clock displays in the type of 24 hours such as 20:18.
TIME ADJUST
Press  /
/  or
or  /
/  key to set hour and minute.
Each time you press  /
/  to select one segment of the clock display:
Hour-Minute
As you select segments of the clock display the segment selected will be highlighted. Then you can press  /
/  to put a clock right.
PARKING: ON/OFF (optional)
When it is in Parking “On” mode, if you play the video file, the screen will show “WARNING: Engage Parking Brake to View Video”.
MIRROR: ON/OFF
This option allows for selection of a mirror image view when a rear view backup camera
(sold separately) is connected to the CAMERA
IN input on the back of the radio. Turn the rotary encoder to select “On” or “Off”.
7
 Loading...