

Page 1

5 Putting into operation
This chapter describes how the instrument is installed and gives instructions on initial startup.
NOTE
Inspect the instrument for damages during unpacking. If necessary, prepare a status report immediately to inform the postal company, railway company or transportation company.
Keep the original packaging for future transportation.
5.1 Installation site
Place the instrument on a stable, horizontal plane and consider the maximum product dimensions.
Perform the distillations under vacuum with the Rotavapor placed under a fume hood. If this is not
possible due to shortage of space, mount the protective shield (optional accessory) and lead the
exhaust gas from the pump into the fume hood.
5 Putting into operation
5.2 Electrical connections
ATTENTION
Make sure that the voltage on the socket corresponds to the voltage given on the type plate of the
instrument.
Always connect the instrument to an earthed socket. External connections and extension cables
must be provided with an earthed conductor lead (3-pole couplings, cable or plug equipment) as the
mains lead has a molded plug, thus avoiding risks due to inadvertent defective wiring.
Make sure that no electric sparks form in the instrument or its surroundings as they might damage
the instrument.
5.3 Commissioning the heating bath
Place the bath on the base plate of the Rotavapor.
If you need to adjust the position of the bath, lift
it up slightly at the right-hand side and pull or
push it to the desired position.
Fig. 5.1: Moving the heating bath
32 R-210/215 Operation Manual, Version F
Page 2
5 Putting into operation
Saving energy
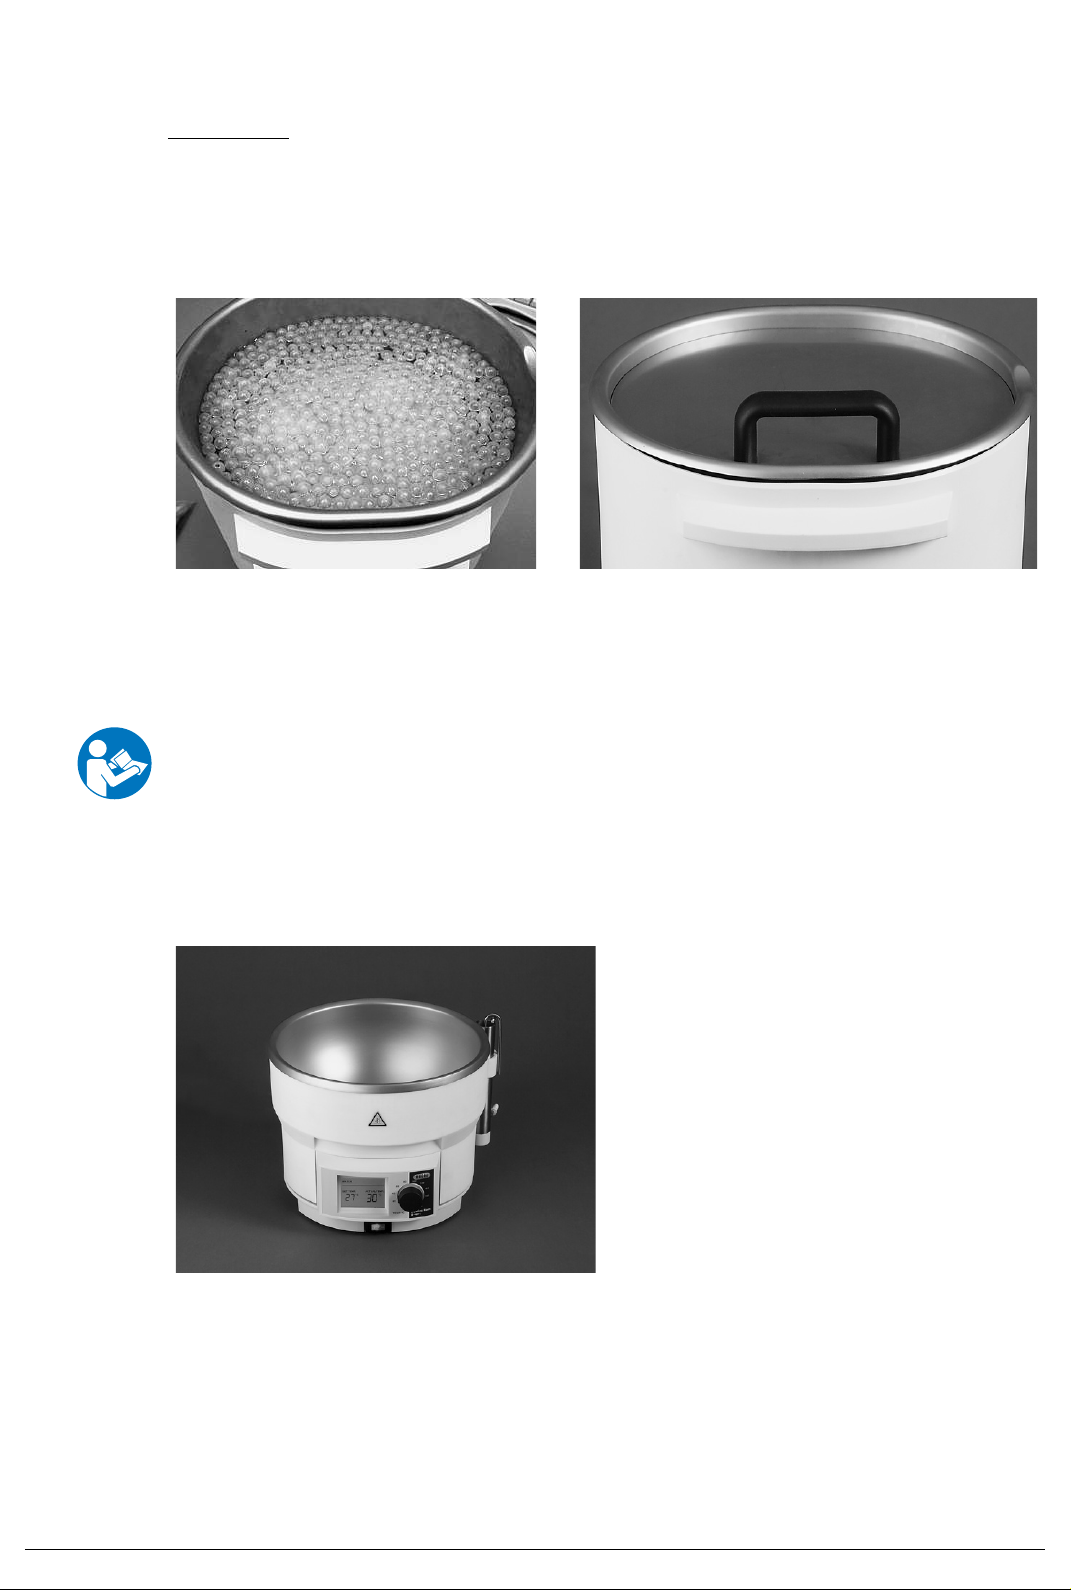
For heating baths there are various ways to save energy. By using floating balls in the water bath,
evaporation of water is reduced. As a result, the bath heating has to switch on less often. This
measure helps to save up to 50 % of energy. At the same time approximately 70 % less water is used.
Additionally, a cover is available to put over the heating bath during operation which also saves energy
between distillations.
Fig. 5.2: Floating balls in the heating bath medium and cover for heating bath
NOTE
Turn on the heating bath about 10 –15 minutes before starting the distillation, since the bath has a
certain warm-up time. Turn off the heating bath after a distillation.
ATTENTION
As soon as the power plug is connected and the mains switch is turned on, the bath starts heating if
the actual temperature is below the set temperature. For this reason, make sure that there is always
heating medium in the bath to prevent instrument damage.
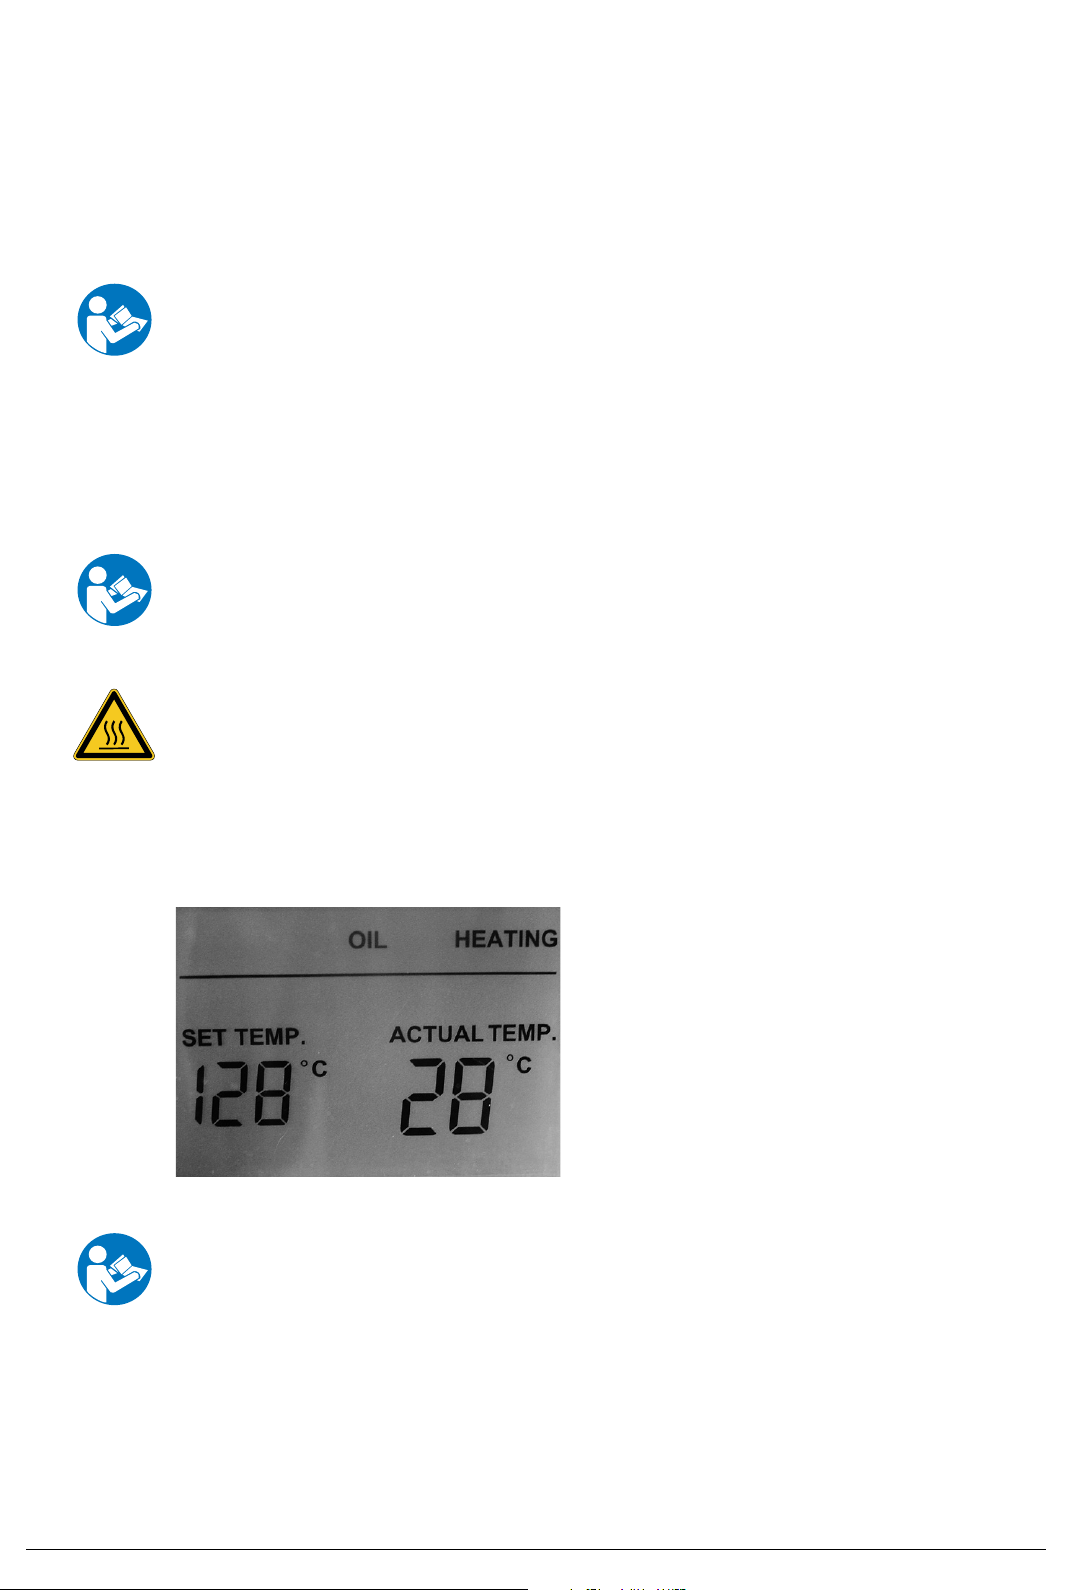
5.3.1 Heating Bath B-495
The Heating Bath B-495 is delivered with the bath replenishment mounted, see figure below.
Fig. 5.3: Heating Bath B-495 with water replenishment on the right-hand side
The function and water flux of the Heating Bath B-495 can be seen from the figure below.
33 R-210/215 Operation Manual, Version F
Page 3
6 Operation
This chapter explains the operating elements and possible operating modes. It gives instructions on
how to operate the Rotavapor properly and safely.
ATTENTION
Check the glassware for damages prior to each operation and use only glassware in perfect condition. Glassware with cracks, stars or other damages can break during operation.
6.1 Settings at the heating bath
6.1.1 Setting the heating bath temperature
ATTENTION
As soon as the power plug is connected and the mains switch is turned on, the bath starts heating if
the actual temperature is below the set temperature. For this reason, make sure that there is always
heating medium in the bath to prevent heating bath damage.
6 Operation
WARNING
The heating bath can reach temperatures up to 180 °C. To avoid burns, consider the following:
• Never remove a rotating flask from the bath because splashing oil can result in burns.
• Make sure that no liquid can overflow from the bath when the evaporating flask is submerged.
• Install the protective shield (optional accessory) only to a cold heating bath.
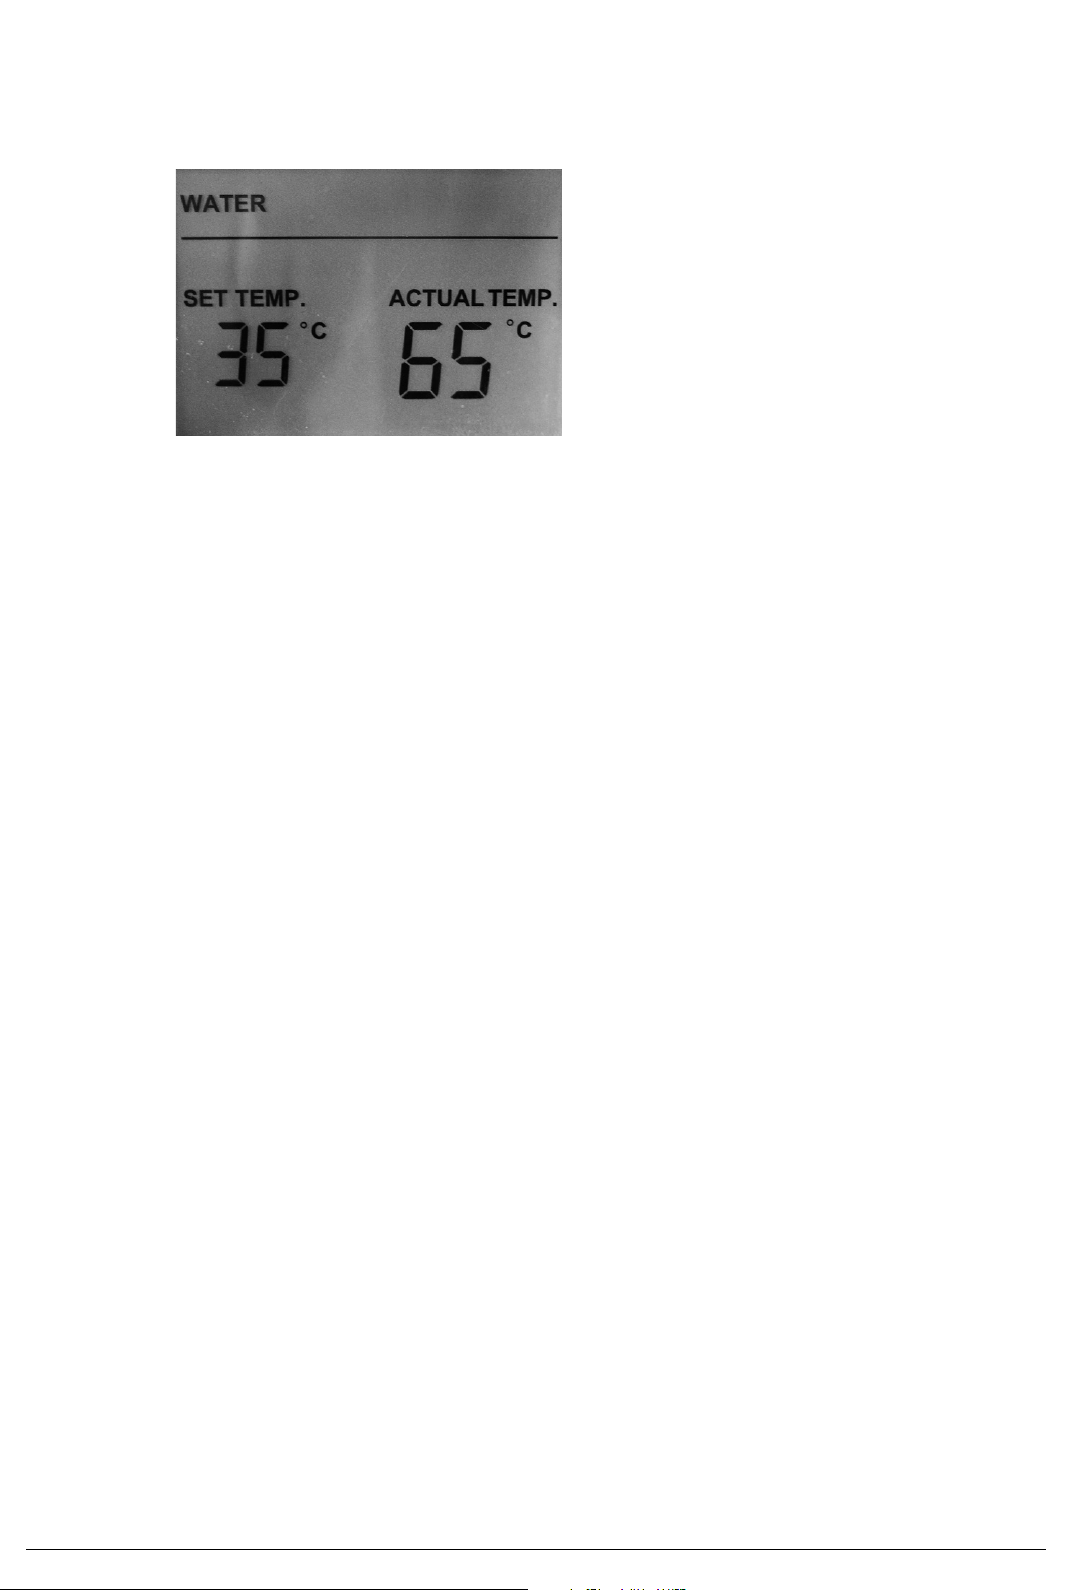
6.1.2 Switching the B-491 from water bath mode to oil bath mode
To switch the heating bath from water bath mode
to oil bath mode, proceed as follows:
• Switch off the heating bath.
• Turn the adjusting knob to any position except
for 0 °C or 180 °C.
• Switch on the heating bath.
• As soon as the temperature is indicated on the
display, turn the knob to the 180 °C position
within 3 seconds. The indication “OIL” will now
appear on the display.
Fig. 6.1: Display in oil bath mode
ATTENTION
In the oil bath mode, always operate the bath with oil as the heating medium as water might start
boiling and evaporating which would lead to a heating bath damage.
After the oil bath has been standing opened for a prolonged period, condensation water can accumulate at the bottom. When the bath is used again, it must be heated above 100 °C with rotating
flask to drive the water out.
NOTE
A setting up to 180 °C is only possible in oil bath mode.
42 R-210/215 Operation Manual, Version F
Page 4
6.1.3 Switching the B-491 from oil bath mode to water bath mode
To switch the heating bath from oil bath mode to
water bath mode, proceed as follows:
• Switch off the heating bath.
• Turn the adjusting knob to any position except
for 0 °C or 180 °C.
• Switch on the heating bath.
• As soon as the temperature is indicated on
the display, turn the knob to the 0 °C position
within 3 seconds. The indication “WATER” will
now appear on the display.
Fig. 6.2: Display in water bath mode
NOTE
In water bath mode, the heating bath can be operated with both water or oil.
A setting up to 95 °C is possible in water bath mode.
6 Operation
6.1.4 Selecting the set temperature
With this setting you can ensure, that the heating bath temperature cannot be changed during the
distillation process.
To carry out the setting, proceed as follows:
• Switch off the heating bath.
• Turn the adjusting knob to the 180 °C/95 °C (max) position.
• Switch on the heating bath. The set temperature setting flashes in the display.
• Turn the knob within 10 seconds to the desired set temperature, e.g. 60 °C and wait until the set
temperature setting stops flashing.
This temperature is now kept whenever the heating bath is switched on and cannot be changed with
the adjusting knob anymore.
6.1.5 Changing/switching off the set temperature
To change or switch off the set temperature, proceed as follows:
• Switch off the heating bath.
• Turn the adjusting knob to the 0 °C (min) position.
• Switch on the heating bath. The set temperature setting is now deleted and the temperature can
be selected via the knob again.
43 R-210/215 Operation Manual, Version F
 Loading...