

Page 1
EC Declaration of Conformity
We: Marconi Interactive Systems
Of: Carr Lane, Chorley, Lancashire, PR7 3JP UK
Declare that model number: Contour 50
Equipment: Coin payphone for customer: British Telecom
Network connection type: PSTN Class 1.2
is (are) in conformity with the requirements of the R&TTE directive.
Directive 1999/5/EC of the European Parliament and of the Council
9 March 1999
Compliance is achieved by conformity to the following:
EN60950: 1992 (Generic Safety)
EN55022: 1998 (EMC Generic Emissions)
EN55024: 1998 (EMC Generic Immunity)
Authorised by
Colin McArdle
V.P. Product Development (on behalf of MIS)
Date of issue 15 June 2001
APPROVED
for connection
to the telecommunications
systems specified in
the instructions for
use subject to
the conditions set out
in them.
The Payphone Contour 50
conforms with European Directive
R & TTE 1999/5/EC
Offices worldwide
The telecommunications services described in this publication
are subject to availability and may be modified from time to time.
Services and equipment are provided subject to British
Telecommunications plc’s respective standard conditions of contract.
Nothing in this publication forms part of any contract.
© British Telecommunications plc 2001
Registered office: 81 Newgate Street, London EC1A 7AJ
Registered in England No. 1800000
Produced by BT Payphones
Designed by Enterprise IDU
Printed in the UK
PHME 38049/9.2001
1
Page 2
br
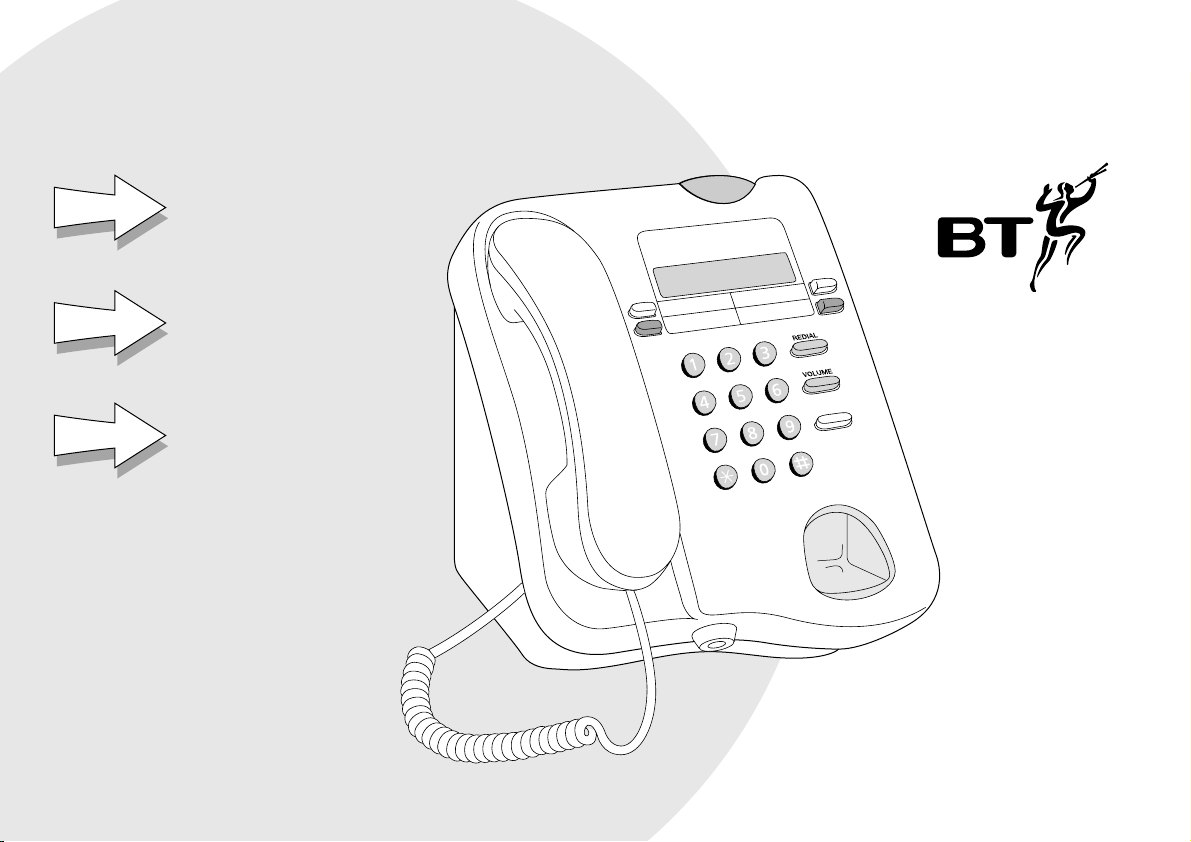
BT Contour 50
User guide
Page 3

Contents
Everyday features
Making and answering calls
Making a normal payphone call . . . . . . . . .4
To redial the last number you dialled . .5
Making a call using a Memory button .5
Making an Owner call using your PIN . . . .6
Making an Owner call using
your cash box key . . . . . . . . . . . . . . . . . . . .6
Answering calls . . . . . . . . . . . . . . . . . . . . .7
Money
Emptying the cash box . . . . . . . . . . . . . . .8
Checking the total money taken using
your PIN . . . . . . . . . . . . . . . . . . . . . . . . . . .9
Checking the total money taken using
the cash box key . . . . . . . . . . . . . . . . . . . . .9
Extra features
How to get started . . . . . . . . . . . . . . . . . .11
Barring
Barring certain outgoing calls . . . . . . . . .12
Barring calls made with fake coins
or tokens . . . . . . . . . . . . . . . . . . . . . . . . .13
Barring incoming calls . . . . . . . . . . . . . . .14
Setting the ringer switch . . . . . . . . . . . . .15
Barring old coins from being used . . . . . .16
Call handling
Withholding your number . . . . . . . . . . . .17
Setting the identification tone . . . . . . . .18
Setting the Operator tone . . . . . . . . . . . .19
Setting the privacy feature . . . . . . . . . . .20
Setting an automatic switchboard code .21
Setting a manual switchboard code . . . .22
Removing a switchboard code . . . . . . . .23
Charging
Setting call charges . . . . . . . . . . . . . . . . .24
Setting the minimum fee . . . . . . . . . . . . .25
Programming new coins or tokens . . . . .26
Programming exception codes . . . . . . . .27
Cancelling exception codes . . . . . . . . . . .28
Charging for calls to Directory Enquiries 28
Payphone settings
Setting the payment timer . . . . . . . . . . .29
Programming the Memory buttons . . . .30
Setting the time and day . . . . . . . . . . . . .32
Changing your PIN . . . . . . . . . . . . . . . . .33
Setting the dialling mode . . . . . . . . . . . .33
Troubleshooting . . . . . . . . . . . . .34
Technical information . . . . . . . .38
Index . . . . . . . . . . . . . . . . . . . . . . . . . .39
Important information
Make a note of your BT Contour 50
Payphone serial number which is
printed on the bottom of your phone
Your cash box key number
If you need any help, please visit our
website at www.bt.com/payphones
If you need to contact us, please send
an email with your query to
product.help.payphones@bt.com
or call the Payphone Helpdesk free on
0800 25 25 41 and we will be pleased
to help you. Lines are open Monday to
Saturday, 8am to 6pm.
If you need replacement cash box
keys, please call the Tetrel Key
Helpdesk free on 0800 373 085.
If you would like to speak to our Sales
Team, please call the Payphone Sales
Desk free on 0800 11 55 11. Lines
are open Monday to Friday, 8am to
6pm and Saturday from 9am to 2pm.
2
Page 4

Everyday features
These are the most common features and functions,
which you will probably use most often. For any other
features, see the Extra features section on page 10.
Making and answering calls
These instructions will tell you how to use the
payphone for making and answering normal calls,
and for making Owner calls.
If you want to make an Owner call – where you don’t
have to put in any cash and the calls you make are
charged to your normal phone bill – you will find the
instructions on page 6.
Money
These instructions will tell you how to empty the cash
box, find out the amount of money the payphone has
taken, and reset the counter to £0.00.
• page 4
• page 8
3
Page 5

Everyday
features:
Making and
answering calls
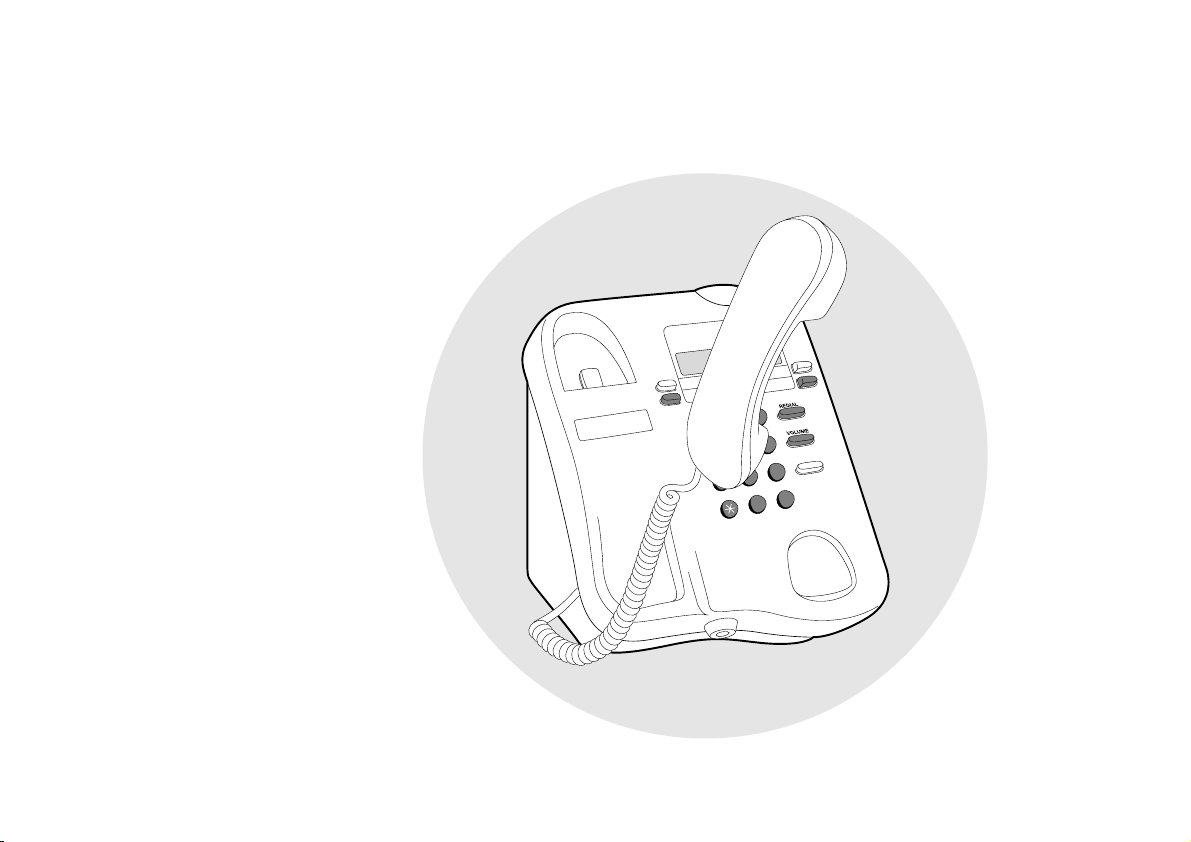
Making a normal payphone call
Before you make a normal payphone call, make sure
you have enough cash ready. Put in the money as
soon as your call is answered or the call will be
disconnected.
3
2
1
6
5
4
9
8
7
H
0
1 Lift the handset
The display will show
PLEASE DIAL
2 Dial the number
The display will show the number as you dial it.
3 Wait for your call to be answered
4 As soon as your call is answered,
put your money in
You will need to insert coins to at least the value shown on
the display.
The payphone will accept 10p, 20p, 50p and £1 coins,
and any other coins or tokens you program it to accept
(see page 26 for instructions).
5 As you talk, keep an eye on the display
The display will show how much money you have left.
20 seconds before the money runs out, the display will
flash and you will hear a series of beeps. You can add more
money at any time during the call, but remember that the
payphone does not return any unused coins.
4
Page 6
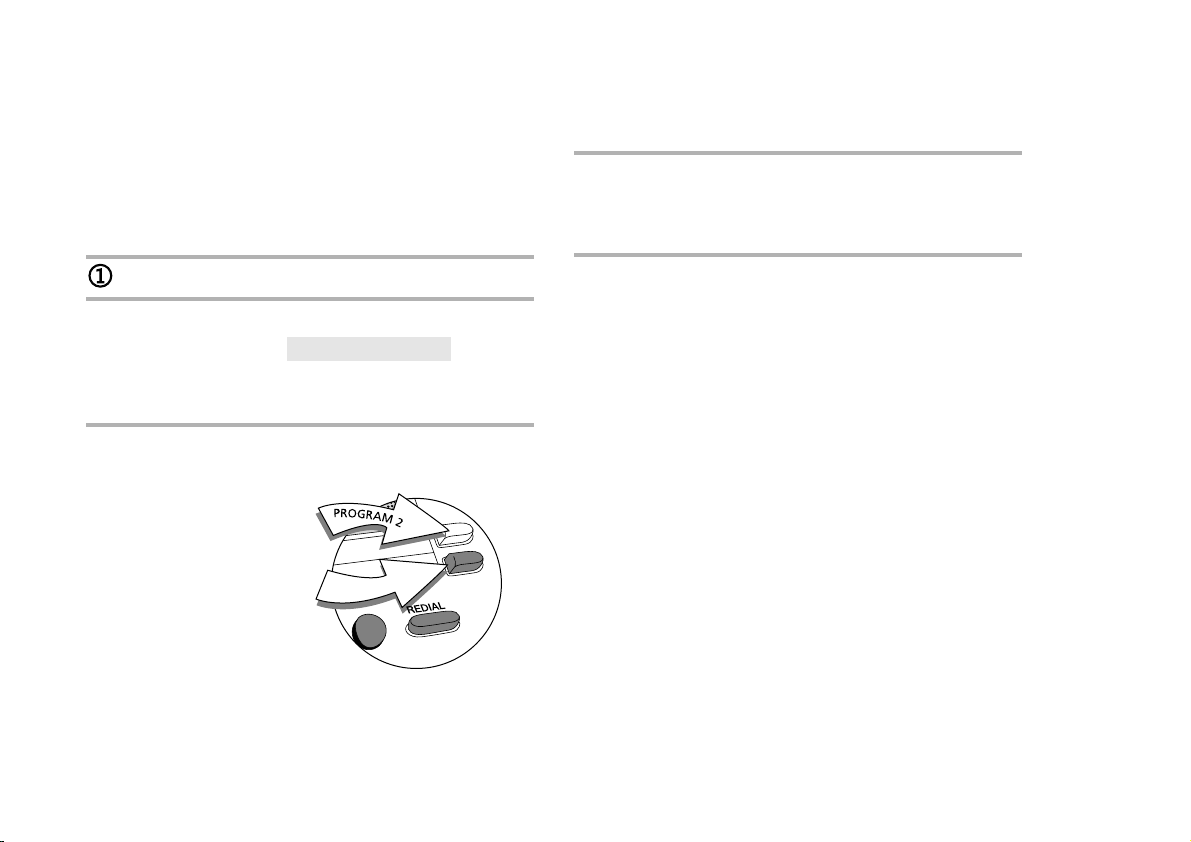
To redial the last number you dialled,
2
3
5
6
8
9
don’t hang up
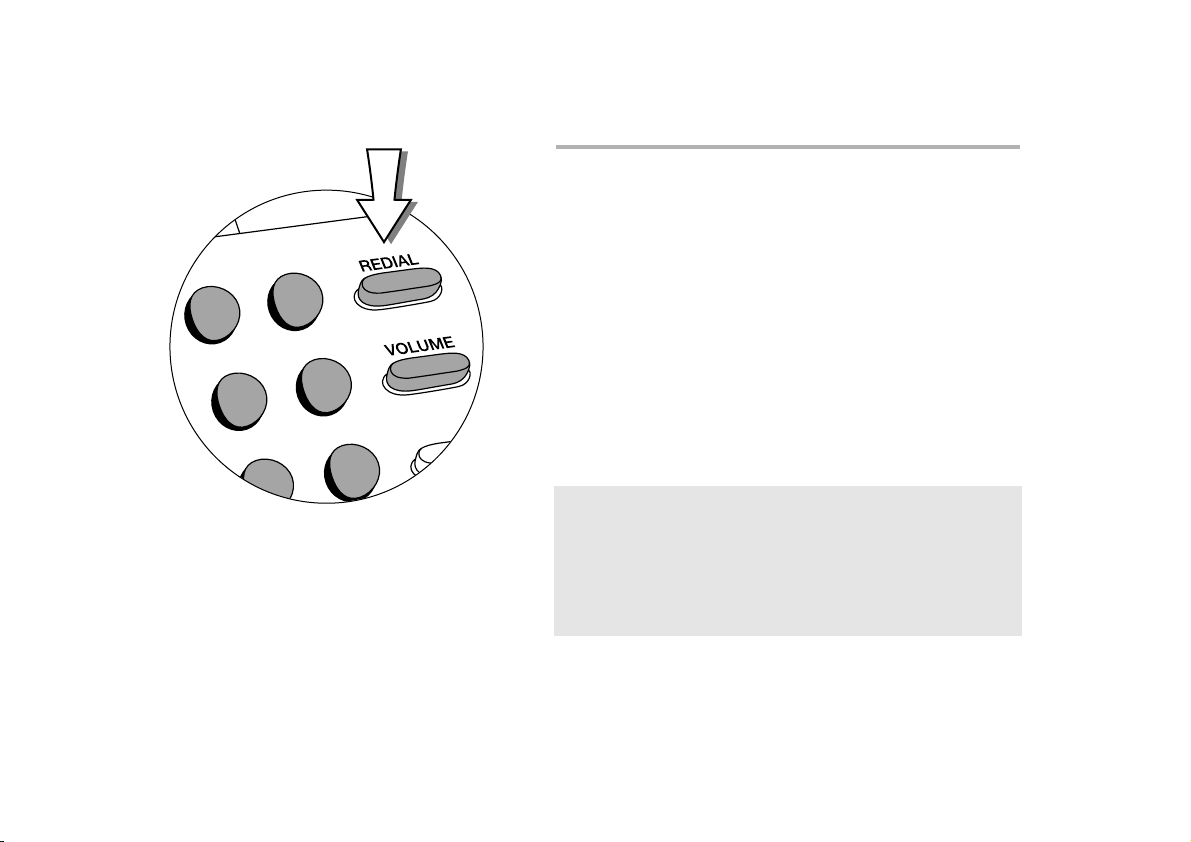
– Press REDIAL when you hear the engaged tone.
To call a pre-programmed memory number, you will
need to lift the handset and press the appropriate
Memory button.
Wait for your call to be answered. As soon as your call is
answered, put your money in.
Everyday
features:
Making and
answering calls
5
Page 7
3
5
6
8
9
Everyday
features:
Making and
answering calls
Making an Owner call
using your PIN
Making an Owner call
using your cash box key
This feature
can be
activated by
following the
instructions
and using
either your PIN
or the cash box
key.
It is best to use
your PIN for
the features
where you
have a choice
of methods, as
it is easier and
more secure.
1 Lift the handset
2 Press S
The display will show
pin
3 Enter your PIN
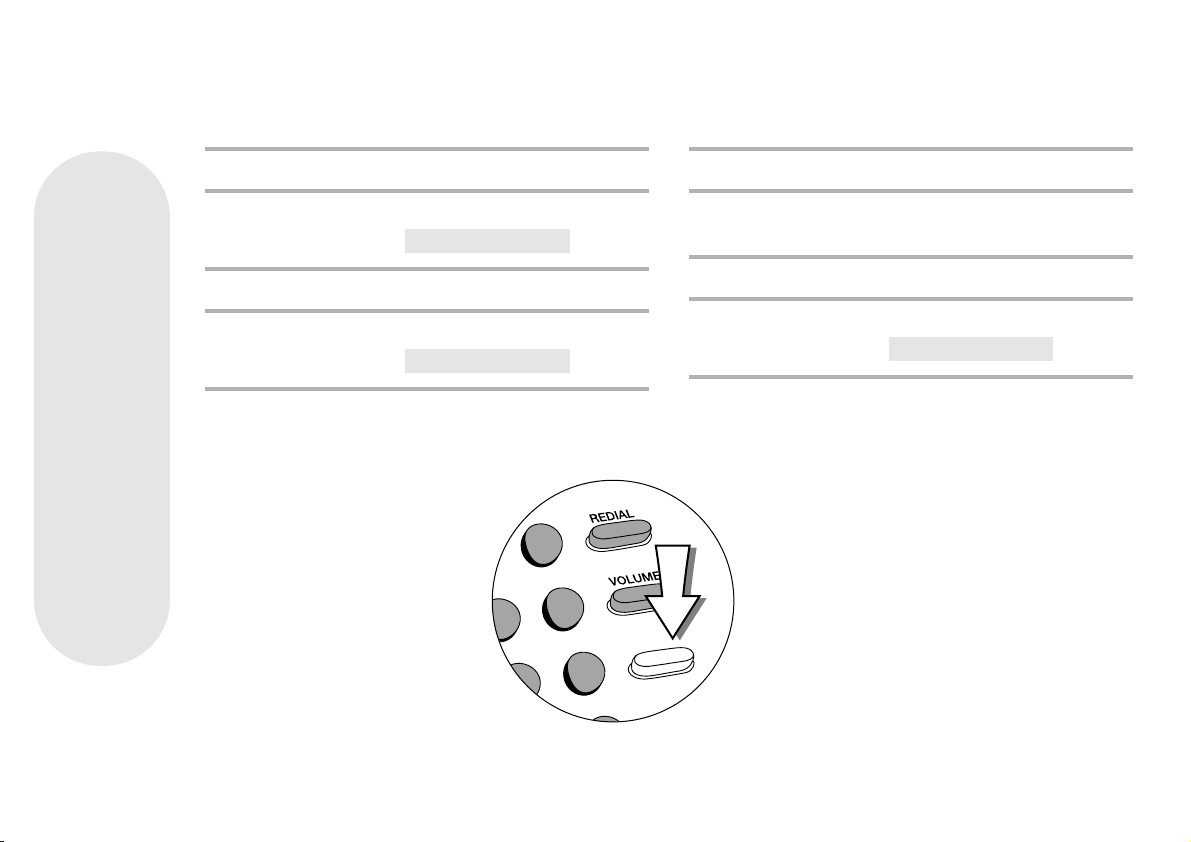
4 Press the white button below the volume button
The display will show
owner call
5 Dial the number – you do not need to put any
money in when your call is answered
When you have finished your calls, hang up.
The payphone will then be ready to make
normal payphone calls.
1 Lift the handset
2 Unlock the cash box and leave the key in
the lock
3 Press the white button below the volume button
4 Lock the cash box and remove the key
The display will show
owner call
5 Dial the number – you do not need to put any
money in when your call is answered
When you have finished your calls, hang up.
The payphone will then be ready to make normal
payphone calls.
6
Page 8
Answering calls
When your payphone rings, you just need to lift
the handset to answer the call.
The caller will hear a series of beeps which will let
them know they are calling a payphone.
1
4
7
3
2
5
8
0
br
Everyday
features:
Making and
answering calls
6
9
H
7
Page 9
Everyday
features:
Money
Emptying the cash box
You will need the cash box key
1 Lift the handset and rest it on the table or floor
2 Unlock the cash box and lift the cover
3 Empty the cash box tray
4 Replace the tray and lock the cash box
You should check that you have locked the cash box
securely by trying to lift the cover.
8
Page 10
Checking the total money
1
2
3
4
5
6
9
taken using your PIN
Checking the total money taken
using the cash box key
Everyday
features:
Money
1 Lift the handset
2 Press S
The display will show
pin
3 Enter your PIN
4 Press S66
The display will show
money
5 Press H to see how much money the payphone
has taken since it was last reset
6 Press H again to see how much money the
payphone has taken
since it was first
used.
You will need the cash box key
1 Lift the handset
2 Unlock the cash box and leave the key in
the lock
3 Press S66
The display will show
If it does not, hang up,
lift the handset and try entering S66 again.
money
4 Press H to see how much money the payphone
has taken since it was last reset.
After the last step of either method, you can
reset the amount to £0.00
Press 0, then H.
The display will flash once to confirm that you have
reset it to £0.00.
This feature
can be
activated by
following the
instructions
and using
either your PIN
or the cash box
key.
It is best to use
your PIN for
the features
where you
have a choice
of methods, as
it is easier and
more secure.
9
Page 11

10
Extra features
You can use these features to personalise your
BT Contour 50 Payphone for your precise needs.
Type of feature Features Page
Barring Barring certain outgoing calls 12
Barring calls made with fake coins or tokens 13
Barring incoming calls 14
Setting the ringer switch 15
Barring old coins from being used 16
Call handling Withholding your number 17
Setting the identification tone 18
Setting the Operator tone 19
Setting the privacy feature 20
Setting an automatic switchboard code 21
Setting a manual switchboard code 22
Removing a switchboard code 23
Charging Setting call charges 24
Setting the minimum fee 25
Programming new coins or tokens 26
Programming exception codes 27
Cancelling exception codes 28
Charging for calls to Directory Enquiries 28
Payphone settings Setting the payment timer 29
Programming the Memory buttons 30
Setting the time and day 32
Changing your PIN 33
Setting the dialling mode 33
Page 12

How to get started
4
5
6
7
8
9
0
H
V
O
L
U
M
E
b
r
Extra features:
How to get started
You will need to use these instructions to
start the programming mode when you
want to change any of the extra features.
Once you have started the programming
mode, you can change as many features as
you like as long as you don’t hang up. If you
hang up before you have finished
programming, you will find a diagram to
remind you how to start the programming
mode in the left margin of every other page.
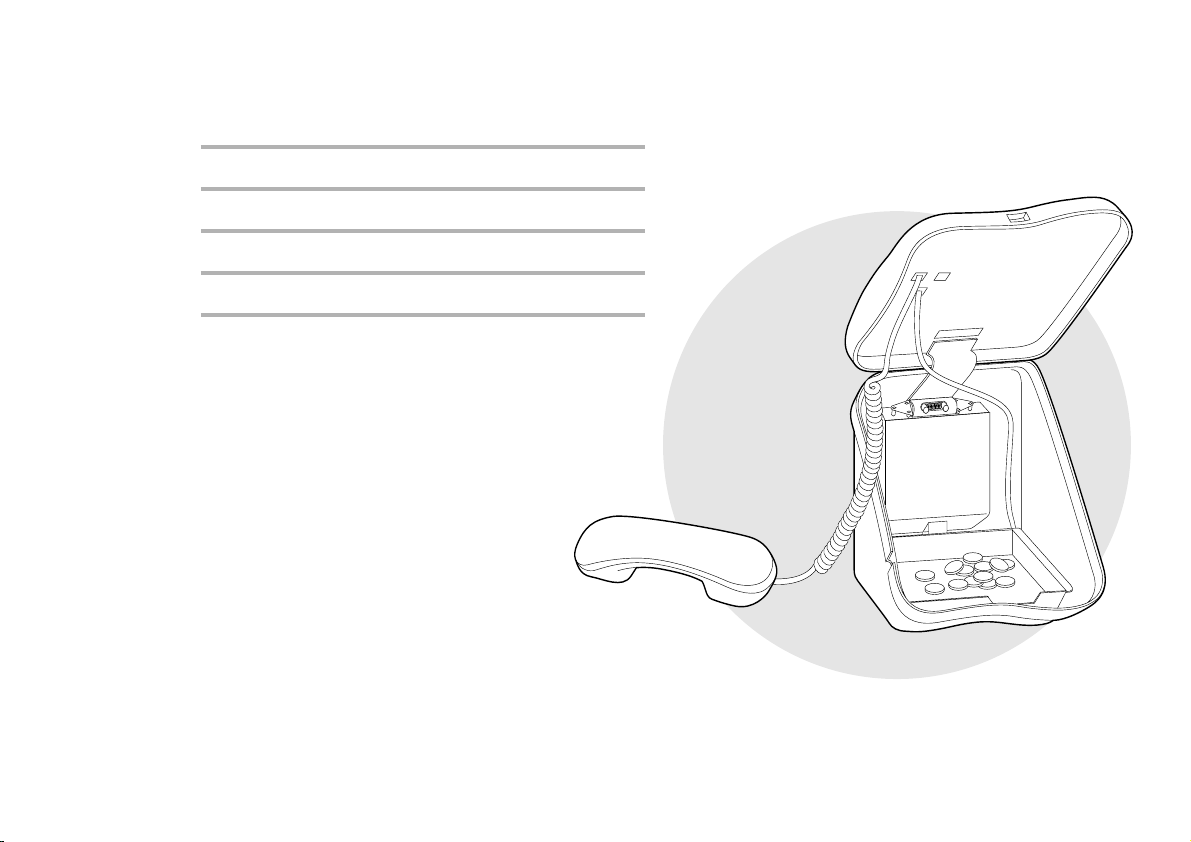
You will need the cash box key
1 Lift the handset
2 Unlock the cash box
and leave the key in
the lock
The display will show
PIN
3 Enter your PIN
4 Press H
The display will show
If it still shows PIN, the PIN was incorrect
- try entering it again. If you enter the wrong PIN more
than once, reset your payphone using the instructions on
page 34. The PIN will go back to 2802. Remember to
change it again using the instructions on page 33.
Money
5 Choose the feature you want to program and
follow the instructions on the following pages.
11
Page 13

4
5
6
7
8
9
0
H
V
O
L
U
M
E
b
r
1
2
3
H
1
4
5
6
7
8
9
0
H
V
O
L
U
M
E
b
r
1
2
3
H
Extra features:
Barring
Barring certain outgoing calls
Start
Start
programming
12
You can choose to prevent calls being made from
your payphone to certain types of numbers.
If a new phone code is launched and your payphone shows
BARRED when you dial the new code, it is because the
payphone does not recognise the code. You will need to
program the new code in as an exception code, using the
instructions on page 27.
If the payphone says a number is barred when it shouldn’t be,
contact the Helpdesk. For contact details, see page 2.
For information about the types of calls you can bar
and the settings on your payphone when you first
get it, see the table on the right.
Start programming, if you haven’t already
2 Press S22H
The display will show
free ✓
4 Press Program 2
to bar or allow calls
The display will show
the call type and whether
it is barred or unbarred,
eg
premium ✓
to confirm the setting you
have chosen
5 Press H
The display will flash once to confirm the barred and
unbarred numbers have been set.
6 Repeat steps 3 and 4 until you have finished
7 Program another feature or lock the cash box,
remove the key and replace the handset.
3 Press Memory 1
to choose the type
of call you want to
bar or allow, and
keep pressing it to
scroll through the
choices
Page 14
Barring calls made with fake coins
or tokens
Extra features:
Barring
Call type barred ✗ types of calls barred
unbarred ✓
FREE ✓ Calls that are normally free,
eg 0800 and 0500 numbers
OPERATOR ✗ Calls to the Operator on 100
and 151
DIR ENQ ✓ Calls to Directory Enquiries on
192 or 153
WORLD ✓ Calls to any other countries
ASIA ✓ Calls to Australia, New Zealand,
Singapore and Hong Kong
AMERICA ✓ Calls to America, Canada and
the Caribbean
EUROPE ✓ Calls to Europe
EIRE ✓ Calls to the Republic of Ireland
on numbers beginning with
00353
PREMIUM ✗ Calls to information services,
eg numbers beginning with 090
MOBILE ✓ Calls to mobile phones
NATIONAL ✓ Calls outside your local area,
eg numbers beginning with
01 and 02
LOCAL ✓ Calls to local phone numbers
and local rate numbers,
eg numbers beginning with
2 to 9, and 0845 numbers
If you’re having a problem with people using fake
coins or tokens, known as slugs, you can program
your payphone to reject them.
Start programming, if you haven’t already
2 Press S86H
The display will show
token a 1
3 Press HH
The display will show
slug
4 Insert the slug 8 times
The display will show
slug ok
5 Program another feature or lock the cash box,
remove the key and replace the handset.
13
Page 15

4
5
6
7
8
9
0
H
V
O
L
U
M
E
b
r
1
2
3
H
4
5
6
7
8
9
0
H
V
O
L
U
M
E
b
r
1
2
3
H
Extra features:
Barring
Barring incoming calls
Start
Start
programming
programming
14
You can stop your payphone accepting any
incoming calls.
Start programming, if you haven’t already
2 Press S46H
The display will show
ANSWER ✗
4 Press H
The display will show
if incoming calls are allowed
or
if incoming calls are barred.
SET RINGER SWITCH ON
SET RINGER SWITCH Off
if incoming calls are barred
or
ANSWER ✓
if incoming calls are allowed.
5 If you have barred incoming calls, switch the
ringer volume to Off – see next page for details
If you leave the ringer volume on High or Low, the
payphone will ring every time someone calls even if you
3 Press Program 2
to change the setting
have barred incoming calls, but you will not be able to
answer.
6 Program another feature or lock the cash box,
remove the key and replace the handset.
Page 16

Setting the ringer switch
You can switch the ringer off or switch the volume
between high and low.
You will need the cash box key
1 Unlock the cash box and lift the cover
2 Switch the ringer to the volume you
want – you can choose high, low or off
3 Close the cover and lock the cash box.
Extra features:
Barring
HIGH LOW OFF
15
Page 17

4
5
6
7
8
9
0
H
V
O
L
U
M
E
b
r
1
2
3
H
1
Extra features:
Barring
Barring old coins from being used
Start
programming
16
You can stop a coin from being used to make calls,
for instance if the design changes or it is withdrawn
from circulation.
4 Press Program 2
to stop the coin
being used
Start programming, if you haven’t already
2 Press S26H
The display will show
to show that 10p coins are allowed.
3 Press Memory 1
to choose the coin
you want to bar
coin 1op ✓
The display will show
coin 1op ✗
to show that the coin is barred.
5 Press H
The display will flash once to confirm the coin has
been barred.
6 Repeat steps 3 to 5 until you have finished
7 Program another feature or lock the cash box,
remove the key and replace the handset.
Page 18

Withholding your number
Extra features:
Call handling
If your payphone is not on a payphone line, it may
display your number to people you are calling.
You can withhold your number to stop it from being
available for people to call the payphone back.
This service is not available on payphone lines.
Start programming, if you haven’t already
2 Press S23H
The display will show
if your number is withheld
or
if your number is not withheld.
withheld ✓
withheld ✗
3 Press Program 2
to change the setting
4 Press H
The display will flash once to confirm this service is set.
5 Program another feature or lock the cash box,
remove the key and replace the handset.
17
Page 19

4
5
6
7
8
9
0
H
V
O
L
U
M
E
b
r
1
2
3
H
Extra features:
Call handling
Setting the identification tone
Start
programming
18
Callers to your payphone will hear a tone to tell them
that they are calling a payphone. BT Operators will
recognise this tone and will not connect reverse
charge calls. You can choose to turn this tone off,
3 Press Program 2
to change the
setting
although BT recommend that you leave it on.
Start programming, if you haven’t already
2 Press S43H
The display will show
if the tone is on
or
if the tone is off.
PID tone ✓
PID tone ✗
4 Press H
The display will flash once to confirm the setting has
been changed.
5 Program another feature or lock the cash box,
remove the key and replace the handset.
Page 20

Setting the Operator tone
Extra features:
Call handling
When anyone dials 100 from the payphone, the
Operator will hear a tone which tells them that the
call is from a payphone so they won’t directly
connect or transfer calls for the caller. You can
choose to turn this tone off, although BT
recommend that you leave it on.
Start programming, if you haven’t already
2 Press S67H
The display will show
if the tone is on
or
if the tone is off.
op tone ✓
op tone ✗
3 Press Program 2
to change the setting
4 Press H
The display will flash once to confirm the Operator tone
has been changed.
5 Program another feature or lock the cash box,
remove the key and replace the handset.
19
Page 21

4
5
6
7
8
9
0
H
V
O
L
U
M
E
b
r
1
2
3
H
Extra features:
Call handling
Setting the privacy feature
Start
programming
20
If you have another phone connected to the same
line as your payphone, you can transfer calls
between them, but this also means that it’s possible
3 Press Program 2
to change the setting
for calls made on one phone to be overheard on the
other.
If you don’t want to transfer calls and you would
prefer that people can’t overhear calls on the
payphone, switch the privacy feature on. The factory
setting for the privacy feature is off.
If you want to transfer calls to the payphone, make sure the
payphone handset is lifted before you put down the handset
on the other phone.
Start programming, if you haven’t already
4 Press H
The display will flash once to confirm the privacy feature
is set.
5 Program another feature or lock the cash box,
remove the key and replace the handset.
2 Press S77H
The display will show
if privacy is on
or
if privacy is off.
Private ✓
Private ✗
Page 22

Setting an automatic switchboard
3
M
E
M
O
R
Y
2
code
Extra features:
Call handling
If your payphone is connected to an internal
switchboard, you can choose whether the payphone
will dial an access code such as 9 for an outside line,
or whether callers will have to dial it themselves.
If callers have to manually dial a code between 2 and 9 for an
outside line, the payphone will charge the call at local rates.
For more information, contact the Helpdesk. For contact
details, see page 2.
Start programming, if you haven’t already
2 Press S72H
The display will show
Pbx code --
3 Enter the code
4 Press H
The display will show
automatic
5 Press H
The display will show
This is the length of time the payphone waits to get an
outside line before it dials the phone number.
pause 3.5
6 To change the length of the pause, you can
– increase the pause by
pressing Program 2
– decrease the pause by
pressing Memory 2.
7 Press H
The display will show
and the code number
you programmed to confirm your choice.
PBX code
8 Program another feature or lock the cash box,
remove the key and replace the handset.
21
Page 23

4
5
6
7
8
9
0
H
V
O
L
U
M
E
b
r
1
2
3
H
Extra features:
1
Call handling
Setting a manual switchboard code
Start
programming
22
Start programming, if you haven’t already
2 Press S72H
The display will show
PBX code --
3 Enter the code
4 Press H
The display will show
automatic
6 Press H
The display will show
extension -
7 Press the first digit of your extension numbers
This will tell the payphone which extensions it may call.
8 Press H
The display will show
PBX code
with the code number
5 Press Memory 1
you programmed to confirm your choice.
9 Program another feature or lock the cash box,
remove the key and replace the handset.
The display will show
This is the length of time the payphone waits to get an
outside line before it dials the phone number.
user keyed
Page 24

Removing a switchboard code
Start programming, if you haven’t already
2 Press S72H
The display will show
with the number you
programmed.
3 Press REDIAL
The display will show
4 Press H
The display will show
5 Program another feature or lock the cash box,
remove the key and replace the handset.
PBX code
PBX code --
PBX
Extra features:
Call handling
23
Page 25

4
5
6
7
8
9
0
H
V
O
L
U
M
E
b
r
1
2
3
H
Extra features:
3
M
E
M
O
R
Y
2
Charging
Setting call charges
Start
programming
24
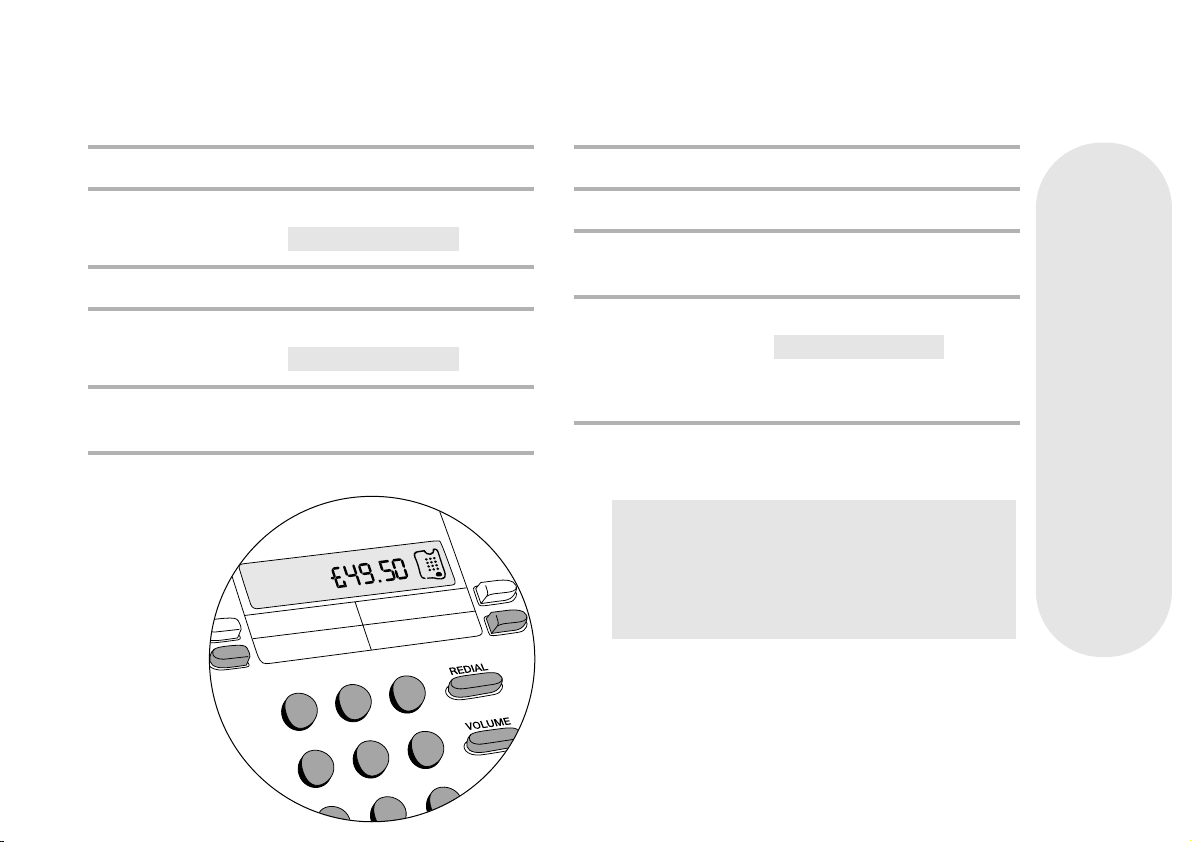
You can choose which rate your payphone will charge
calls at. The rate decides the number of seconds
callers get for 10p. It is first set to charge rate 100,
but you can choose any rate from 20 to 500. The
table on the right shows how many seconds callers
will get for 10p at some example charge rates.
Start programming, if you haven’t already
2 Press S24H
The display will show the current charge rate.
To change the charge rate, you can
– increase the charge
rate by pressing
Program 2
– decrease the charge
rate by pressing
Memory 2
– enter a charge rate
using the number keys.
3 Press H
The display will flash once to confirm the setting.
4 Write the new charges on your payphone notice
5 Program another feature or lock the cash box,
remove the key and replace the handset.
Type of call Number of seconds callers get for 10p at
some example charge rates
Band Rate 75 100 150 200
Local Daytime 73.3 55.0 36.7 27.5
Cheap 73.3 55.0 36.7 27.5
Weekend 73.3 55.0 36.7 27.5
National Daytime 73.3 55.0 36.7 27.5
Cheap 73.3 55.0 36.7 27.5
Weekend 73.3 55.0 36.7 27.5
Mobile Daytime 10.7 8.0 5.3 4.0
Cheap 16.0 12.0 8.0 6.0
Weekend 16.0 12.0 8.0 6.0
Premium Daytime 8.0 6.0 4.0 3.0
Cheap 9.3 7.0 4.7 3.5
Weekend 9.3 7.0 4.7 3.5
Eire Daytime 10.7 8.0 5.3 4.0
Cheap 14.7 11.0 7.3 5.5
Weekend 14.7 11.0 7.3 5.5
Europe Daytime 8.0 6.0 4.0 3.0
Cheap 8.0 6.0 4.0 3.0
Weekend 8.0 6.0 4.0 3.0
America Daytime 10.7 8.0 5.3 4.0
Cheap 10.7 8.0 5.3 4.0
Weekend 10.7 8.0 5.3 4.0
Asia Daytime 8.0 6.0 4.0 3.0
Cheap 8.0 6.0 4.0 3.0
Weekend 8.0 6.0 4.0 3.0
World Daytime 2.7 2.0 1.3 1.0
Cheap 2.7 2.0 1.3 1.0
Weekend 2.7 2.0 1.3 1.0
Page 26

Setting the minimum fee
3
M
E
M
O
R
Y
2
Extra features:
Charging
You can choose how much callers will need to put
into the payphone to start their call. The minimum
fee will automatically adjust to reflect the time and
day of the call, and the distance of the call.
Start programming, if you haven’t already
4 Press H
The display will flash once to confirm the minimum
fee is set.
5 Program another feature or lock the cash box,
remove the key and replace the handset.
2 Press S64H
The display will show the current minimum fee.
3 To change the minimum fee, you can
– increase the fee by
pressing Program 2
– decrease the fee by
pressing Memory 2.
25
Page 27

4
5
6
7
8
9
0
H
V
O
L
U
M
E
b
r
1
2
3
H
Extra features:
3
M
E
M
O
R
Y
2
Charging
Programming new coins or tokens
Start
programming
26
You can program your payphone to recognise and
accept new coins or tokens. For example, if you want
the payphone to accept tokens from a games
machine, you can decide how much they will be
worth and the payphone will accept them. The
instructions below will ask you to insert eight of the
new coins or tokens. It is better to use eight different
4 Continue to insert coins or tokens until the
display shows
If the display shows
the new coin or token is too similar to an existing coin
and can’t be used.
token a £0.00
error
ones rather than the same one eight times, so that
the payphone recognises the slight differences in the
coins or tokens.
If the new coin or token is too similar to an existing
coin, the payphone will not be able to accept it.
Start programming, if you haven’t already
2 Press S86H
The display will show
token a 1
5 To set the value of the coin or token you can
– increase the value by
pressing Program 2
– decrease the value by
pressing Memory 2
– enter a value using the
number keys.
6 Press H
3 Insert the first coin or token
The display will show
token a 2
If you would like to program another coin or token
repeat steps 3 to 6.
7 Program another feature or lock the cash box,
remove the key and replace the handset.
Page 28

Programming exception codes
1
3
Extra features:
Charging
Your payphone uses the first few digits of any number
dialled to determine the charge rate for the call.
You can program exceptions to the normal settings.
For instance, you could set a certain rate for
international calls.
Start programming, if you haven’t already
2 Press S39H
The display will show
If you have previously
entered exception codes,
press Program 2 or
Memory 2 to move
through the list.
-----------
M
O
E
M
2
Y
R
3 Enter the number
You can enter up to 6 digits.
4 Press H
The display will show
barred
5 Press Memory 1
to move through
the different call
charge types
The different call charge types are: BARRED, FREE, FEE
£0.50, DIR ENQ, WORLD, ASIA, AMERICA, EUROPE,
EIRE, PREMIUM, MOBILE, NATIONAL AND LOCAL.
If you want to charge a fixed fee for a type of call,
regardless of the length, go to FEE £0.50 and use
Program 2 to increase the value or Memory 2 to decrease
the value. If you choose this option, the caller will only
have to put in the fixed fee – the payphone will not ask for
more money no matter how long the call is.
6 Press H
The display will show
If you would like to program another exception code,
repeat steps 3 to 6.
-----------
7 Program another feature or lock the cash box,
remove the key and replace the handset.
27
Page 29

4
5
6
7
8
9
0
H
V
O
L
U
M
E
b
r
1
2
3
H
Extra features:
3
M
E
M
O
R
Y
2
3
M
E
M
O
R
Y
2
Charging
Cancelling exception codes Charging for calls to Directory
Enquiries
Start
programming
28
You can cancel any of the exception codes you have
previously set.
Your payphone is set to charge 50p for a call to
Directory Enquiries. If you would like to, you can
alter this charge.
Start programming, if you haven’t already
Start programming, if you haven’t already
2 Press S39H
The display will show any
exception codes you have
previously set.
Press Program 2 to scroll up
through them and Memory 2
to scroll down through them.
3 Press REDIAL when you come to the exception
code you want to cancel
2 Press S37H
The display will show
FEE £0.00
3 To alter the fee for a call to Directory Enquiries,
you can
– increase the fee by
pressing Program 2
– decrease the fee by
pressing Memory 2
4 Press H
The display will flash once to confirm the code is
cancelled.
4 Press H
5 Program another feature or lock the cash box,
remove the key and replace the handset.
The display will flash once to confirm the fee is set.
5 Program another feature or lock the cash box,
remove the key and replace the handset.
Page 30
Setting the payment timer
3
M
E
M
O
R
Y
2
Extra features:
Payphone settings
You can adjust the length of time callers have to put
money in before the payphone disconnects them.
The factory setting is 39 seconds after you have
finished dialling.
Start programming, if you haven’t already
4 Press H
The display will flash once to confirm the length of time
has been set.
5 Program another feature or lock the cash box,
remove the key and replace the handset.
2 Press S78H
The display will show
to show the factory
setting of 39 seconds.
Timeout 39
3 To change the length of time, you can
– increase the time by
pressing Memory 3
– decrease the time by
pressing Memory 4
– enter a time using the
number keys.
29
Page 31

4
5
6
7
8
9
0
H
V
O
L
U
M
E
b
r
1
2
3
H
Extra features:
3
M
E
M
O
R
Y
2
1
Payphone settings
Programming the Memory buttons
Start
programming
30
You can program two memory numbers, such as a
local taxi firm, into the payphone. The caller just has
to press a Memory button to dial the number.
Start programming, if you haven’t already
5 Press Memory 1 to
change the call band,
and keep pressing it to
scroll through the
choices - it doesn’t
2 Press S63H
The display will show
enter tel
3 Enter the phone number you want to program
You can enter up to 22 digits. If you make a mistake,
press REDIAL
H and start again. If callers need to dial a
code for an outside line, remember to include the code
for an outside line before the number you program.
4 Press the Memory button you want to program
the number into
The display will show the type of call band
the payphone will use for calls to this number,
for instance
local
matter if you have
programmed a phone
number into the
Memory 1 button,
you can still use it to
select a call band
To set a fixed fee, press
Memory 1 until the display
shows FEE £0.50 and use
Program 2 to increase the
value or Memory 2 to
decrease the value. If you
choose this option, the caller
will only have to put in the
fixed fee – the payphone will
not ask for more money, no
matter how long the call is.
6 Press H
The display will show
enter tel
Page 32

Extra features:
3
Payphone settings
7 Repeat steps 3 to 6 until you have programmed
all the Memory buttons you want
If you want to offer
callers a choice of
display languages,
don’t program a phone
number into Memory 2.
2
Y
R
M
O
E
M
8 Lift up the cash box cover
9 Push the display release lever to release the
display cover
The lever is under the sticker marked DISPLAY RELEASE.
Press the part of the lever under the D of the sticker – you
will need to press quite hard. The front of the display cover
will come out slightly. It is best to slide something flat
under this corner and gently lever the display cover out.
10 Write the name of the business or service in the
space on the card
11 Replace the card and press the display cover into
place until it clicks
12 Program another feature or lock the cash box,
remove the key and replace the handset.
31
Page 33

4
5
6
7
8
9
0
H
V
O
L
U
M
E
b
r
1
2
3
H
Extra features:
3
M
E
M
O
R
Y
2
3
M
E
M
O
R
Y
2
Payphone settings
Setting the time and day
Start
programming
32
Your payphone uses the time and the day to set call
charges, so it is important that it is set correctly.
You will need to change the time on your payphone
when the clocks go forward in spring and back in
autumn.
Start programming, if you haven’t already
4 Press H
5 Press S32H
The display will show the current day.
6 Check the day is correct. To change the day,
you can
2 Press S84H
The display will show
and the current time.
Time
– move the day forward
by pressing Program 2
– move the day backward
by pressing Memory 2.
3 Check the time is correct (the payphone uses the
24 hour clock). To change the time, you can
– move the time forward
by pressing Program 2
– move the time backward
by pressing Memory 2
– enter the current time using
the number keys.
7 Press H
8 Program another feature or lock the cash box,
remove the key and replace the handset.
Page 34

Changing your PIN Setting the dialling mode
Extra features:
Payphone settings
You can change your PIN to one that’s easier to
remember. Remember to change your PIN straight
away if you think someone might have found out
what it is. You will need your old PIN to enter the
programming mode, so if you have forgotten it or
can’t find it, reset your payphone using the
instructions on page 34. This will return the PIN to
the default setting of 2802. You should then change
this default PIN to one you have chosen.
Start programming, if you haven’t already
2 Press S74H
The display will show
set to - - - -
3 Enter your new PIN
If you make a mistake, finish entering a number then
enter your new PIN again.
4 Press H
The display will flash once to confirm your new PIN is set.
5 Program another feature or lock the cash box,
remove the key and replace the handset.
The normal setting is TouchTone™ dialling. If the
dialling tone doesn’t go away when you dial a
number, switch to Pulse dialling and try again.
Start programming, if you haven’t already
2 Press S34H
The display will show the current dialling mode.
3 Press Program 2
to change the
dialling mode
4 Press H
The display will flash once to confirm the dialling
mode is set.
5 Program another feature or lock the cash box,
remove the key and replace the handset.
33
Page 35

34
Troubleshooting
Use this section to help you try and solve any problems you may have with your payphone.
If you should
there is no dialling tone check that the payphone is still plugged into the socket.
your payphone does not ring check:
■ that the ringer switch is on – see page 15
■ that you have not barred incoming calls
■ that you don’t have too many phones connected to the line
there is nothing on the display check that the payphone is still plugged into the socket.
If it is plugged in, try resetting your payphone:
When you reset your payphone, the PIN will return to the default 2802. You will
need to change it to one you have chosen, using the instructions on page 33.
1 Unplug the payphone lead from the phone socket
2 Lift the handset
3 Unlock the cash box and lift the cover
4 Press the reset button
The button is just above the hinge and is marked by a label. You will
need a matchstick or a similar object to press it.
5 Close the cover and lock the cash box
6 Replace the handset
7 Plug the payphone lead back into the phone socket
8 Check the payphone still shows the correct time and day
– see page 32.
Page 36

If you should
the display shows ‘PIN’ check you have locked the cash box and removed the key.
the display shows ‘EMERGENCY’ check:
■ that the cash box is not full
■ that the coin slot is not jammed.
a coin has become jammed try sharply tapping the side of the payphone, or gently shaking it.
Once you have dislodged the coin, you will have to reset your
payphone – see page 34.
the display shows ‘BARRED’ check that the payphone allows the type of calls you are trying to
make – see page 12. If the payphone is programmed correctly but
still shows BARRED, contact the Helpdesk. For contact details,
see page 2.
Troubleshooting
35
Page 37

Troubleshooting
If you should
the payphone won’t take coins check:
■ that the cash box is not full
■ that the coin slot is not jammed
If this doesn’t work, try resetting your payphone – see page 34.
you forget your new PIN reset your payphone using the instructions on page 34. Once you
have done that, do not forget to replace the default PIN with one
you have chosen.
you forget the payphone’s original PIN reset your payphone using the instructions on page 34. Once you
have done that, do not forget to replace the default PIN with one
you have chosen.
you lose the cash box keys call the Tetrel Key Helpline on 0800 373 085. You will need the
key number or the serial number of your payphone. These numbers
should be written on page 2. If you did not write the numbers down,
you will find the serial number on the bottom of the payphone.
There is a charge for replacing cash box keys.
36
Page 38

If you should
the dialling tone won’t go away try setting the dialling mode to the other option (pulse or tone)
– see page 33. If you find that you have to set it to ‘pulse’
to make the dialling tone go away when you are dialling, contact
the Helpdesk. For contact details, see page 2.
you get a message when you are check whether you have programmed your payphone to withhold
dialling saying ‘This service is not your phone number – see page 17. If you have a payphone line,
available. Please contact BT.’ this service is not available and should be switched off.
the previous solutions don’t work try resetting your payphone using the instructions on page 34.
you have a problem not covered in please contact us the Helpdesk – for contact details, see page 2.
this section
Troubleshooting
37
Page 39

Technical
38
Protecting against vandalism
and theft
Your Payphone Contour 50 is designed
for use in constantly supervised and
sheltered sites. It is not recommended for
locations where there is any risk of
vandalism or theft.
Connecting to the BT Network
The Payphone Contour 50 is approved:
■ to provide a public payphone service
■ for multi-frequency (tone) and loop
disconnect (pulse) dialling
■ for inductive coupling to appropriate
hearing aids
■ for Call barring
■ for use with compatible:
– PBXs
– PABXs
– key systems
– dealerboards
– key and lamp units
– automatic call distributors which
provide a BS6312 compatible port
and meet the requirements for
simple phones. Your supplier will
be able to provide you with a list of
compatible apparatus.
Maintaining your Payphone
Contour 50
Keep the Payphone clean and make sure
that the coin slots are always free of
obstructions.
Do not polish the keypad.
Requirements for payphone
notices
OFTEL Regulations require you to display
a payphone notice which gives the
following information:
■ details of limitations of access to the
100 Operator service
■ what happens to unused coins
■ the minimum payment to make a call
■ the method of payment
■ the full postal address of the location
of the payphone
■ the person who should be contacted
about caller complaints
■ how calls are charged
■ an indication that 999 and 112 calls
are free
■ a warning that calls may be overheard
where other extensions are connected
to the same line.
VAT liability
If you are registered for VAT, you will
be required by HM Customs and Excise
to account for the VAT on the cash you
collect in your Payphone Contour 50.
Liability for calls
You must pay all the BT call charges.
Calls are charged at standard BT rates.
You can set the rate that you charge
for calls made from your Payphone
Contour 50.
You might want to use the money you
collect to contribute to the call charges
and rental charges.
BT Chargecard calls
Calls made with a BT Chargecard which is
charged to your Payphone Contour 50’s
phone number will be charged on your
phone bill in the normal way. You will not
be charged for calls made with other BT
Chargecards.
Page 40

Index
Barring
calls made with
fake coins . . . . . . . . . . . . .13
incoming calls . . . . . . . . .14
outgoing calls . . . . . . . . . .12
Calls
answering . . . . . . . . . . . . . .7
barring . . . . . . . . . . . .12-14
making . . . . . . . . . . . . . . . .4
making another call . . . . . .5
making Memory calls . . . . .5
Owner calls . . . . . . . . . . . . .6
redialling . . . . . . . . . . . . . .5
without coins . . . . . . . . . . .6
Cash box key . . . . . . . . . .2, 36
Cash box tray
emptying . . . . . . . . . . . . . .8
Charges
rates . . . . . . . . . . . . . . . . .24
setting . . . . . . . . . . . . . . .24
Coins
jammed . . . . . . . . . . . . . .35
programming new . . . . . .26
barring . . . . . . . . . . . . . . .16
when to put in . . . . . . . . . .4
Day
changing . . . . . . . . . . . . .32
Dialling mode
setting . . . . . . . . . . . . . . .33
Dialling tone, no . . . . . . . . .34
Directory Enquiries . . . . . . .28
Display
problems with . . . . . . . . .35
Display cover
removing . . . . . . . . . . . . .31
Exception codes
programming . . . . . . . . . .27
cancelling . . . . . . . . . . . . .28
Helpdesk contact details . . . .2
Identification tone
setting . . . . . . . . . . . . . . .18
Key
lost . . . . . . . . . . . . . . . . . .36
Memory buttons
programming . . . . . . . . . .30
using . . . . . . . . . . . . . . . . . .5
Minimum fee
setting . . . . . . . . . . . . . . .25
Money
checking . . . . . . . . . . . . . . .9
resetting . . . . . . . . . . . . . . .9
Operator tone
setting . . . . . . . . . . . . . . .19
Owner calls . . . . . . . . . . . . . .6
PBX
see Switchboard
Payment timer
setting . . . . . . . . . . . . . . .29
PIN
changing . . . . . . . . . . . . .33
Privacy
setting . . . . . . . . . . . . . . .20
Programming . . . . . . . . . . .11
Reset button . . . . . . . . . . . .34
Resetting . . . . . . . . . . . . . . .34
Ringer switch . . . . . . . . . . . .15
Serial number . . . . . . . . . . . . .2
Slugs
barring . . . . . . . . . . . . . . .13
Switchboard
removing a code . . . . . . .23
setting an automatic
code . . . . . . . . . . . . . . . . .21
setting a manual code . . .22
Time
changing . . . . . . . . . . . . .32
Tokens
programming new . . . . . .26
programming fake . . . . . .13
Withholding your number . .17
39
 Loading...