

Brother XL-3510 Owner's Manual

Pacesetter
Embroidery
Lettering Software
Instruction Manual

ii Pacesetter Embroidery Lettering Software
Instruction Manual
Copyright
© Copyright 2009 Pulse Microsystems Ltd. All rights reserved.
This instruction manual and software are copyrighted by the
developer of the software, Pulse Microsystems Ltd. All rights
reserved. US Patent Nos. 5 270 939; 5 343 401; 5 430 658; 5
506 784; 5 510 994; 5 541 847; 5 668 730; 5 771 173; 5 809
921; 6 196 146; 6 216 618; 6 390 005; 6 968 255. European
Patent Nos. 0545773. Other patents pending.
Information in this document is subject to change without
notice.
The software described in this document is furnished under a
license agreement and/or nondisclosure agreement. The
software may be used or copied only in accordance with the
terms of those agreements. No part of this publication and the
software may be copied, photocopied, reproduced, translated,
or reduced to any electronic medium or machine-readable form
without the manufacturer’s written permission.
Commercial or industrial use of trademark and copyrighted
works (For example, books, paintings, drawings, photos,
fanciful characters, and so forth) owned by other companies or
persons, for creation of embroidery patterns without permission
is illegal and may result in either criminal or civil liability.
Microsoft and Windows® XP/Vista and Word are registered
trademarks of Microsoft Corporation. All other product names
are copyrighted and registered trademarks or trademarks of
their respective holders. All computer and software names
identified by TM or tm are trademarks of their respective
manufacturers.

Table of Contents
Learning about the Workspace...........................................5
Parts of the Workspace ...................................................................6
Title Bar....................................................................................6
Pacesetter Button........................................... ..........................7
Quick Access Toolbar...............................................................8
Toolbar and Ribbon Buttons ............................................................8
Pacesetter Menu Tools.............................................................8
Extra Tools................................................................................9
Ribbon Tools.............................................................................9
The View Tab..........................................................................12
Simulator ................................................................................12
Status Line..............................................................................14
Color Palette...........................................................................14
Using Scrollbars ...................................................... ...............15
Correcting Mistakes................................................................15
Setting up your Workspace Environment ......................................16
Changing Machine Format Properties....................................17
Adjusting the View of the Workspace............................................18
Magnifying and Reducing the View........................................18
Hiding the Properties Panel Automatically .............................19
Viewing Different Parts of the Workspace (Panning)..............20
Taking Measurements.................................... ... .....................21
Displaying the Hoop ...................................... ................................21
Viewing and Hiding the Hoop.................................................22
Selecting a Hoop....................................................................22
Available Hoops............................. ..................................... ... .23
Getting Help................................................... ... .............................24
Opening the Help ...................................................................24
Using the Contents............................................... ... .. .............25
Using the Index ........................................ .. ...........................25
Using Search............................................. .. ...........................25
Saving Favorite Help Topics...................................................26
Printing Help topics ................................................................27
1

2 Pacesetter Embroidery Lettering Software
Instruction Manual
Creating Lettering...............................................................29
Creating Lettering..........................................................................30
Normal Text Tool.....................................................................30
Circle Text Tool...................... ... ... .................................... .......31
Creating Monograms..............................................................32
Text Frames - an Overview.................................................. ..........33
Adjusting Size of a Text Segment...........................................33
Adjusting the Width of Text.....................................................34
Adjusting the Corners of Text Segments................................34
Using the Envelope Handles..................................................35
Rotating Text................................................ ...........................35
Adjusting the Slant of Text......................................................36
Adjusting the Size of Text in the Circle Frame........................37
Adjusting Text Width in the Circle Frame................................38
Changing the Diameter of the Circle Frame...........................39
Working with Individual Letters......................................................39
Adjusting the Space between Letters (Kerning).....................40
Moving Individual Letters........................................................40
Resizing Individual Letters......................................................41
Rotating Individual Letters.................................................. ... .41
Working with Color.........................................................................42
Changing the Color of a Text Segment...................................42
Creating Multi-color Text Segments .......................................42
Text Properties ...................................................................45
The Properties Panel.....................................................................46
Adjusting Text Properties...............................................................46
Changing the Text ..................................................................46
Changing the Font of Existing Text Segment.........................47
Displaying a Font’s Available Characters...............................48
Changing the Height of Lettering............................................49
Changing Font Spacing..........................................................50
Width Percentage................................... ... .............................50
Changing the Slant Setting.....................................................51
Applying an Envelope.............................................................51
Properties Specific to Particular Text Frames.........................52
Changing Properties with the Context Menu (Right-click)......54
Adjusting Fill Settings....................................................................56
Choosing a Fill Pattern...........................................................56
Fill Density Setting..................................................................57

Underlay Properties.......................................................................58
Selecting the Underlay Type ..................................................59
Specifying the Underlay Density.............................................59
Specifying the Underlay Stitch Length....................................60
Changing the Inset Distance..................................................60
Displaying Special Characters................................................61
Editing Designs ..................................................................67
Creating New Designs...................................................................68
Opening and Closing Designs............................... ... ... ..................69
Choosing the Default Recipe..................................................70
Saving a Design ........................................................................ ... .71
Selecting and Moving Parts of a Design........................................72
The Select Tool.......................................................................72
Copying, Cutting, and Pasting Design Components ..............73
Aligning Items in the Design Horizontally and Vertically.........74
Moving Parts of a Design Manually........................................75
Nudging Design Components.................................................75
Deleting Design Components.................................................76
Rotating Design Components.................................................76
Working with the Color Palette ......................................................77
Selecting a Thread Chart .......................................................77
Changing a Thread Color.......................................................77
Merging Design Files................................................ ... ..................78
Printing Designs ...................................... ... ...................................80
Previewing a Design before Printing ......................................80
Printing Design Worksheets...................................................81
Changing the Print Settings....................................................82
3
Glossary .............................................................................85
Index....................................................................................91

4 Pacesetter Embroidery Lettering Software
Instruction Manual

CHAPTER 1:
Learning about the
Workspace
Before you start using the software, we recommend that you
understand the Pacesetter Embroidery Lettering Software
design workspace and learn a few of the basic components
outlined in this section.
Topics covered in this chapter:
• Setting up the design workspace environment.
• Showing a hoop in the workspace, and choosing the size of
hoop to be displayed
• Using the Pacesetter Embroidery Lettering Software help.
6 Pacesetter Embroidery Lettering Software
Instruction Manual
Parts of the Workspace
The Pacesetter Embroidery Lettering Software workspace
contains a number of different areas which have dist inct
functions. The sections that follow give an overview of what
each of these areas does, and the kinds of information about
the design that they contain.
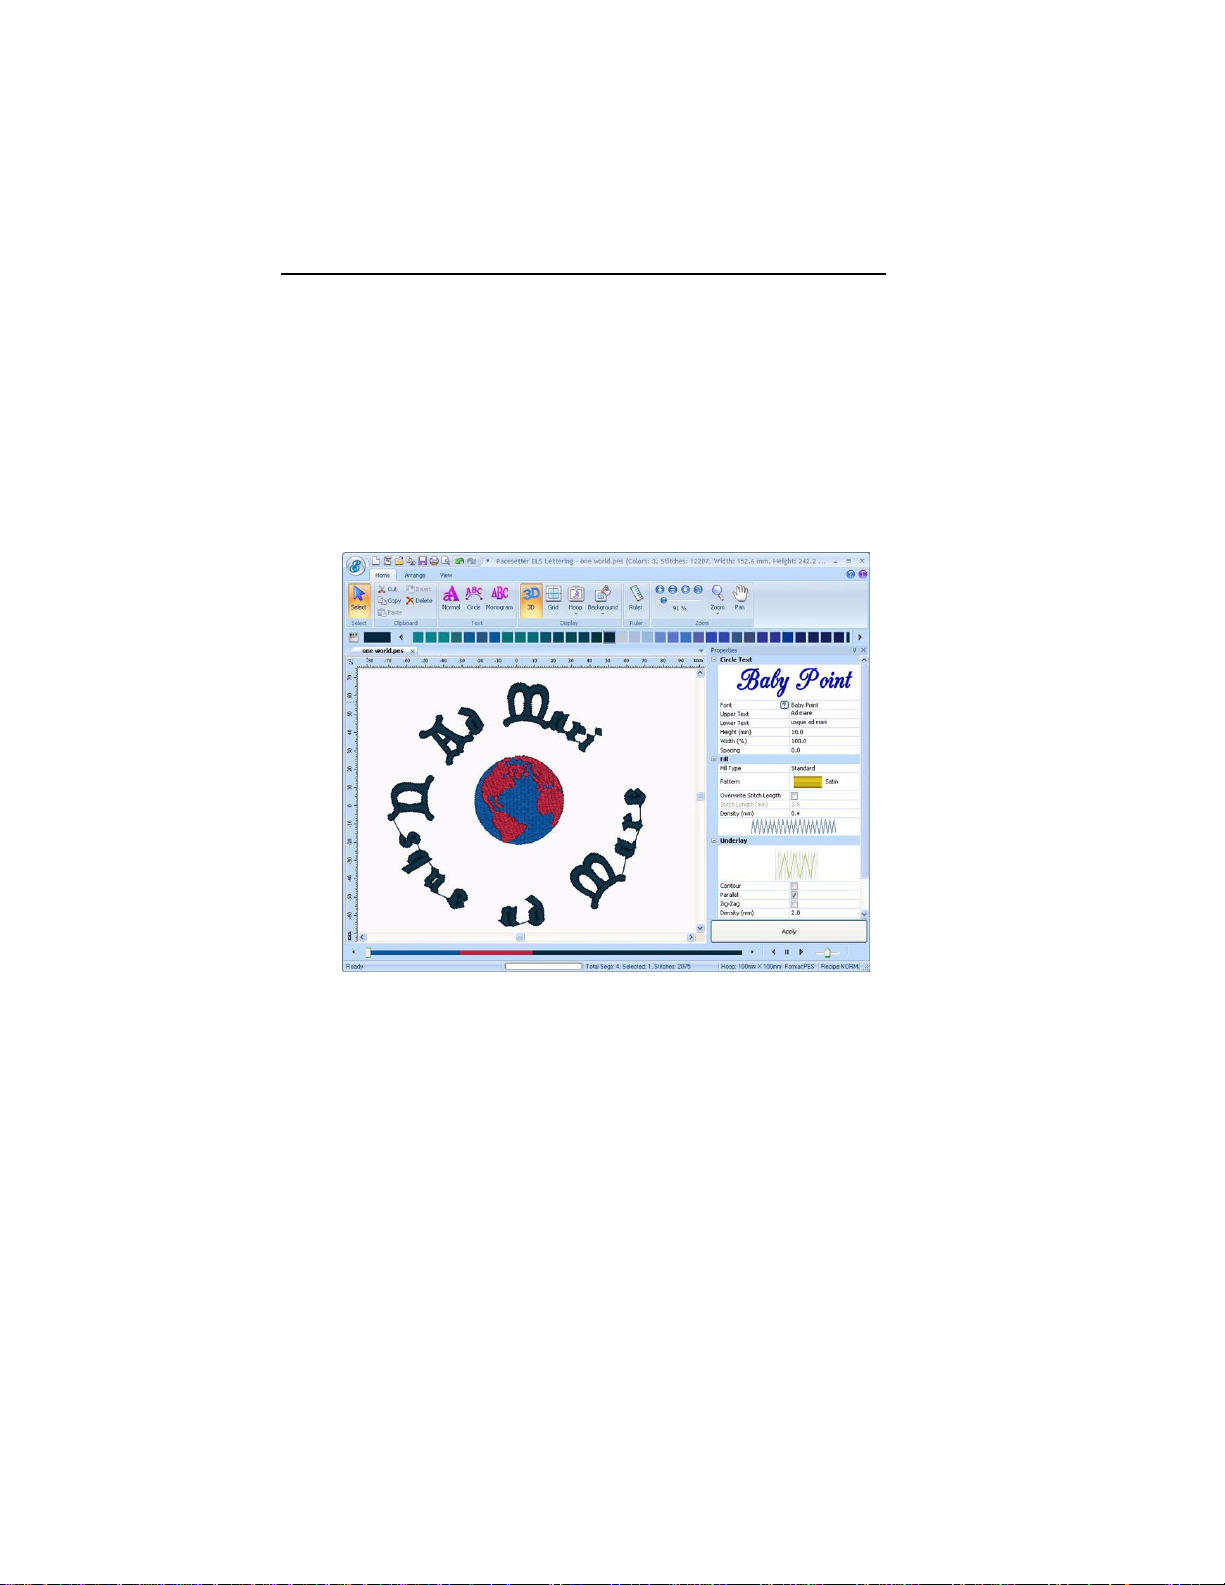
Title Bar
The Title Bar appears at the top of the Pacesetter Embroidery
Lettering Software design window. The Title bar displays
information about the design that is open in the workspace: its
name, the number of stitches and colors in the design, and the
overall width and height.
Learning about the Workspace 7
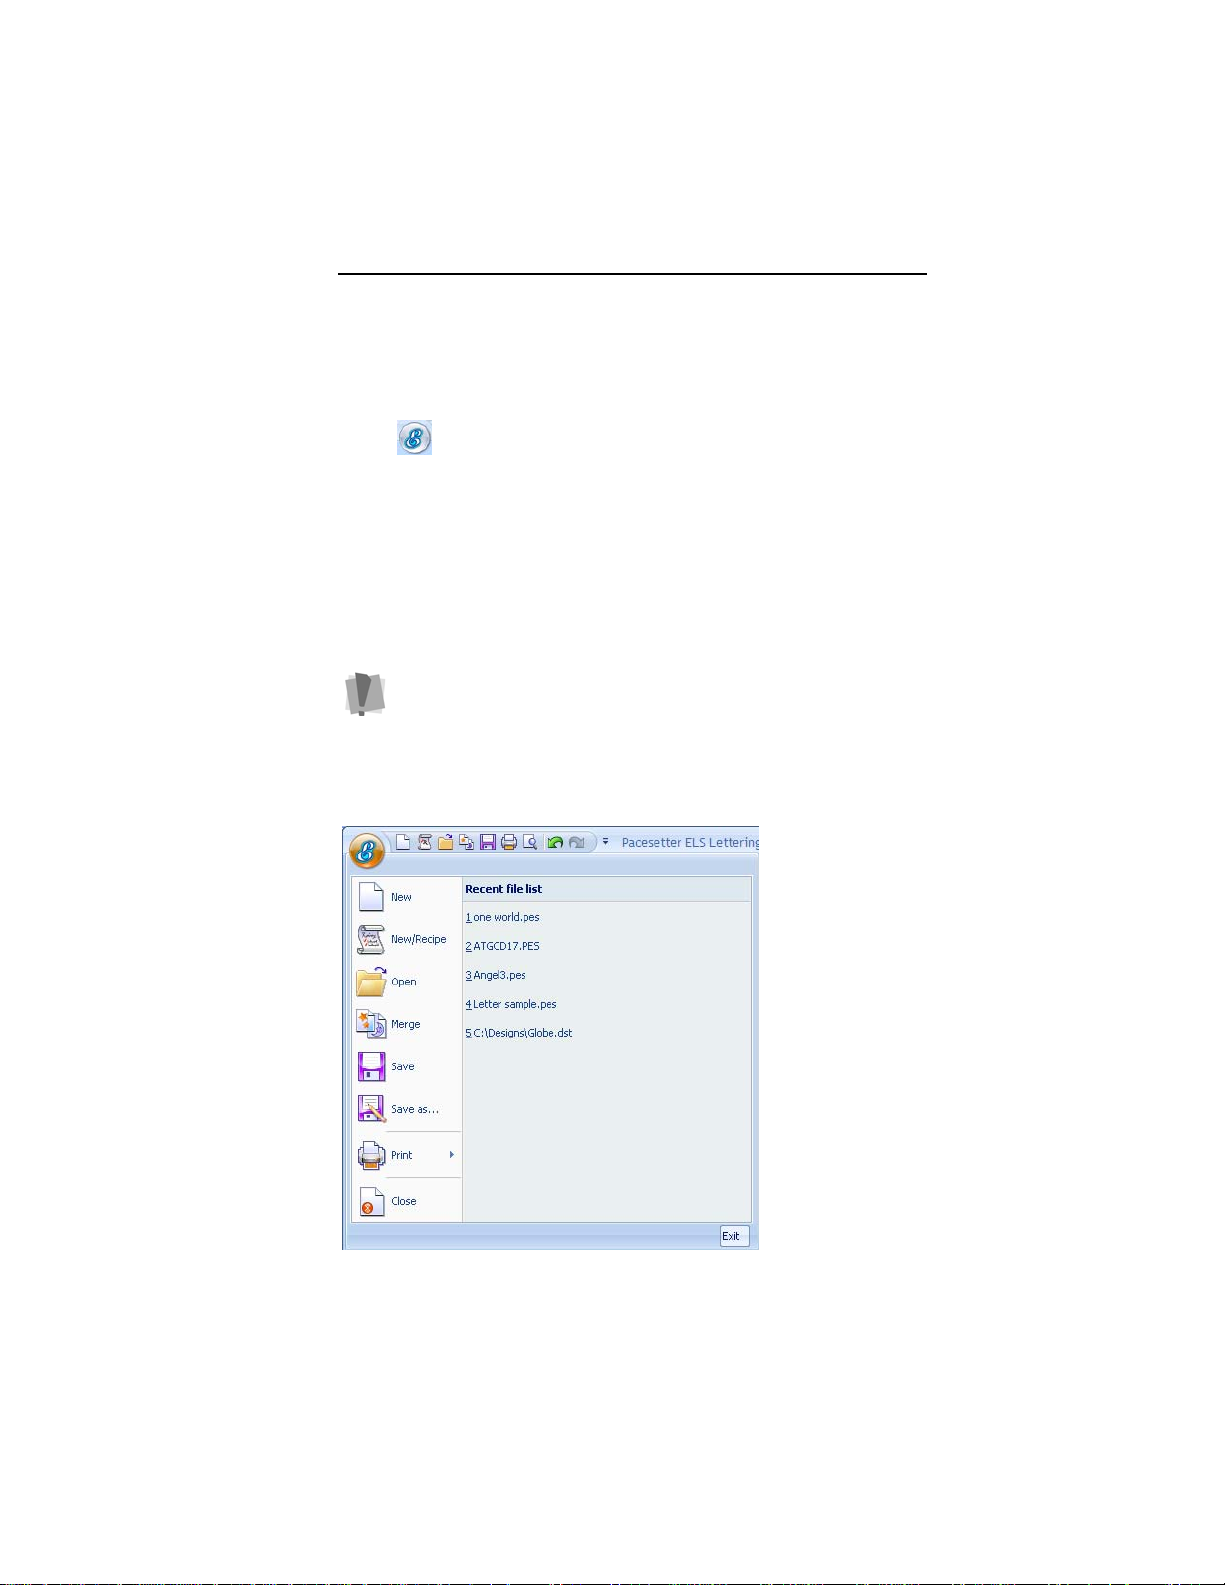
Pacesetter Button
At the top left-hand corner of the window is the Pacesetter
Button . Clicking on the Pacesetter Button to gives you
access to a menu of useful tools, such as New, Save, Print, and
several others. For a complete list of the tools available on this
menu, and a summary of their functions, see “Pacesetter Menu
Tools” in the next section.
When you open the Pacesetter Menu, you will also see
displayed a list of recent files that you have been using. Just
double-click on the file name to open it.
Note that only one embroidery file can be open at a time in
Pacesetter Embroidery Lettering Software. So, if you have a file
open in the Workspace al ready, the prog ram will hav e to close it
in order to open the new one.
However, before it closes the current design, you will be
prompted by a dialog asking if you want to save your changes.
Tools available on the Pacesetter Menu.
8 Pacesetter Embroidery Lettering Software
Instruction Manual
Quick Access Toolbar
The Quick Access Toolbar is located right along the top of your
workspace, to the left of the Title Bar. This toolbar contains tool
buttons that you will commonly use, such as Open, Save, and
Print.
The following default tools are included on the Quick Access
toolbar: New, New/Recipe, Open, Merge, Save, Print Preview,
Direct Print, Undo, and Redo.
Toolbar and Ribbon Buttons
You can access the tools available in Pacesetter Embroidery
Lettering Software through the Pacesetter Button and the
various toolbars. The tables below show the buttons, grouped
by location (i.e. whether they are on the Quick Access Bar, or
on one of the tabs on the ribbon). A brief description of what
the button does is also included. Note that within each tab,
some buttons are grouped together by function.
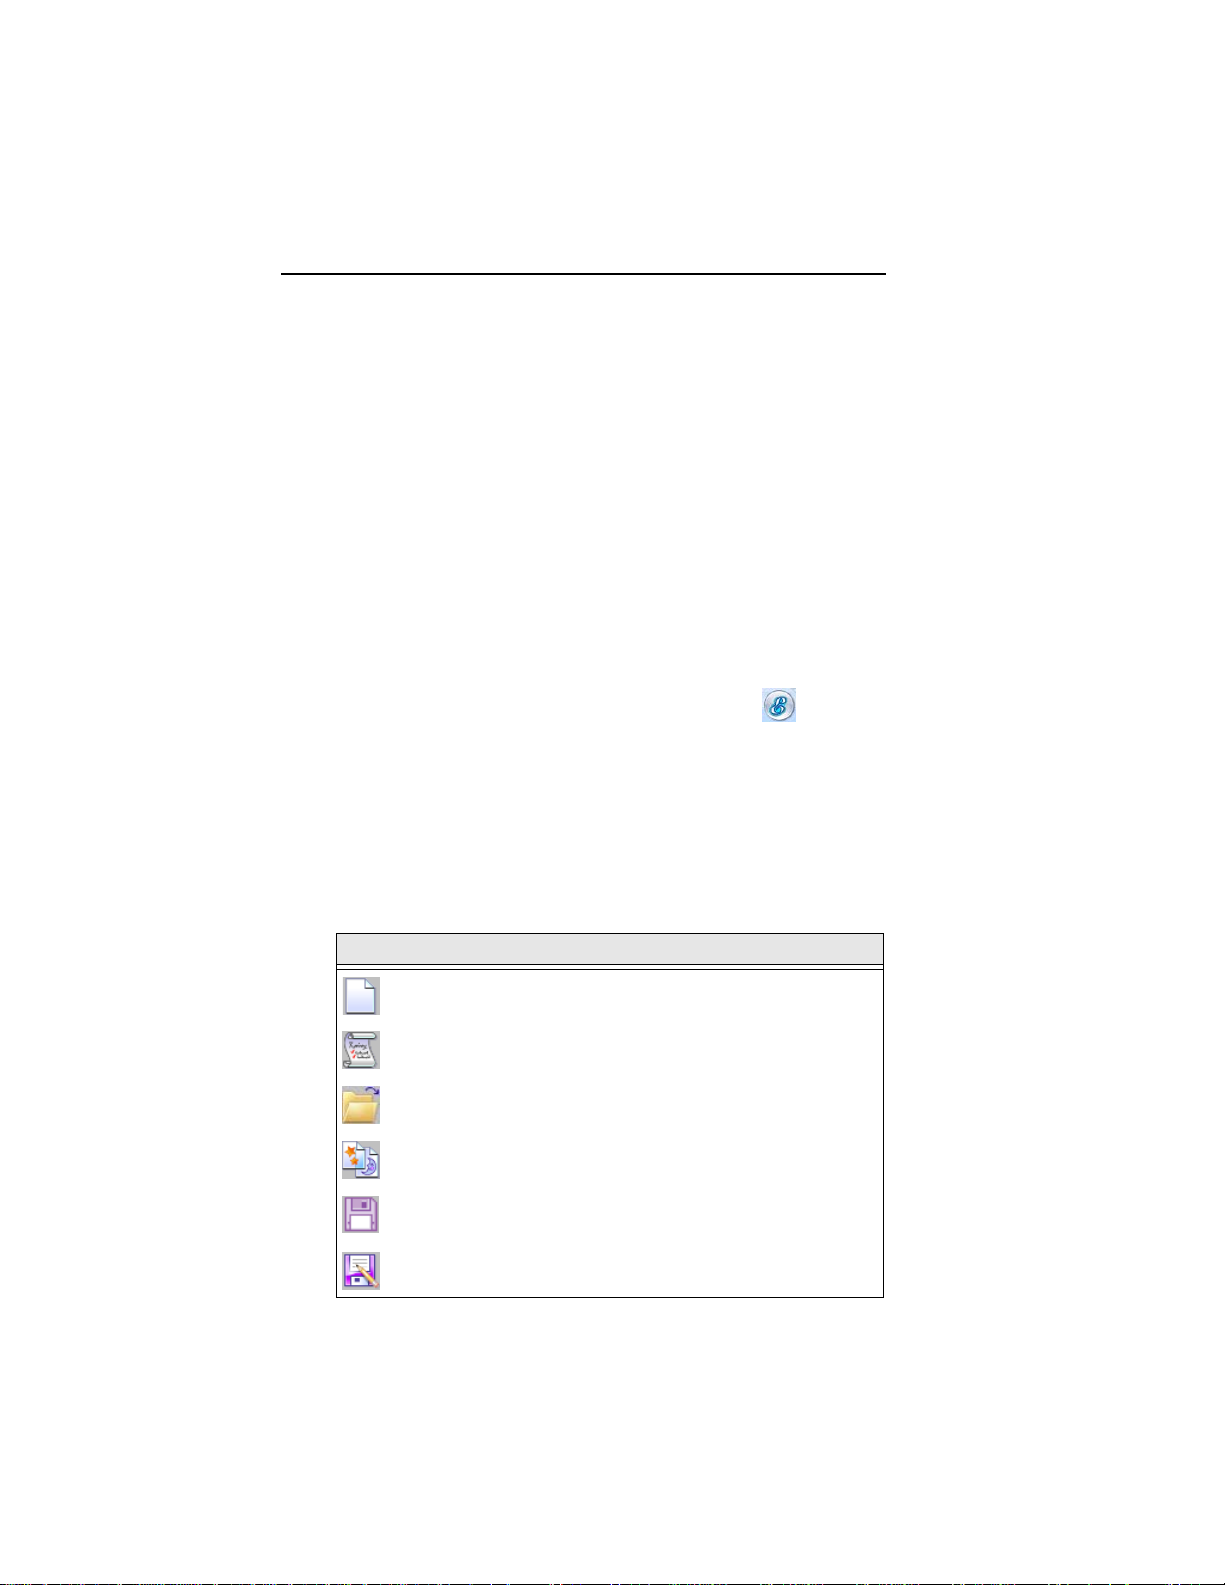
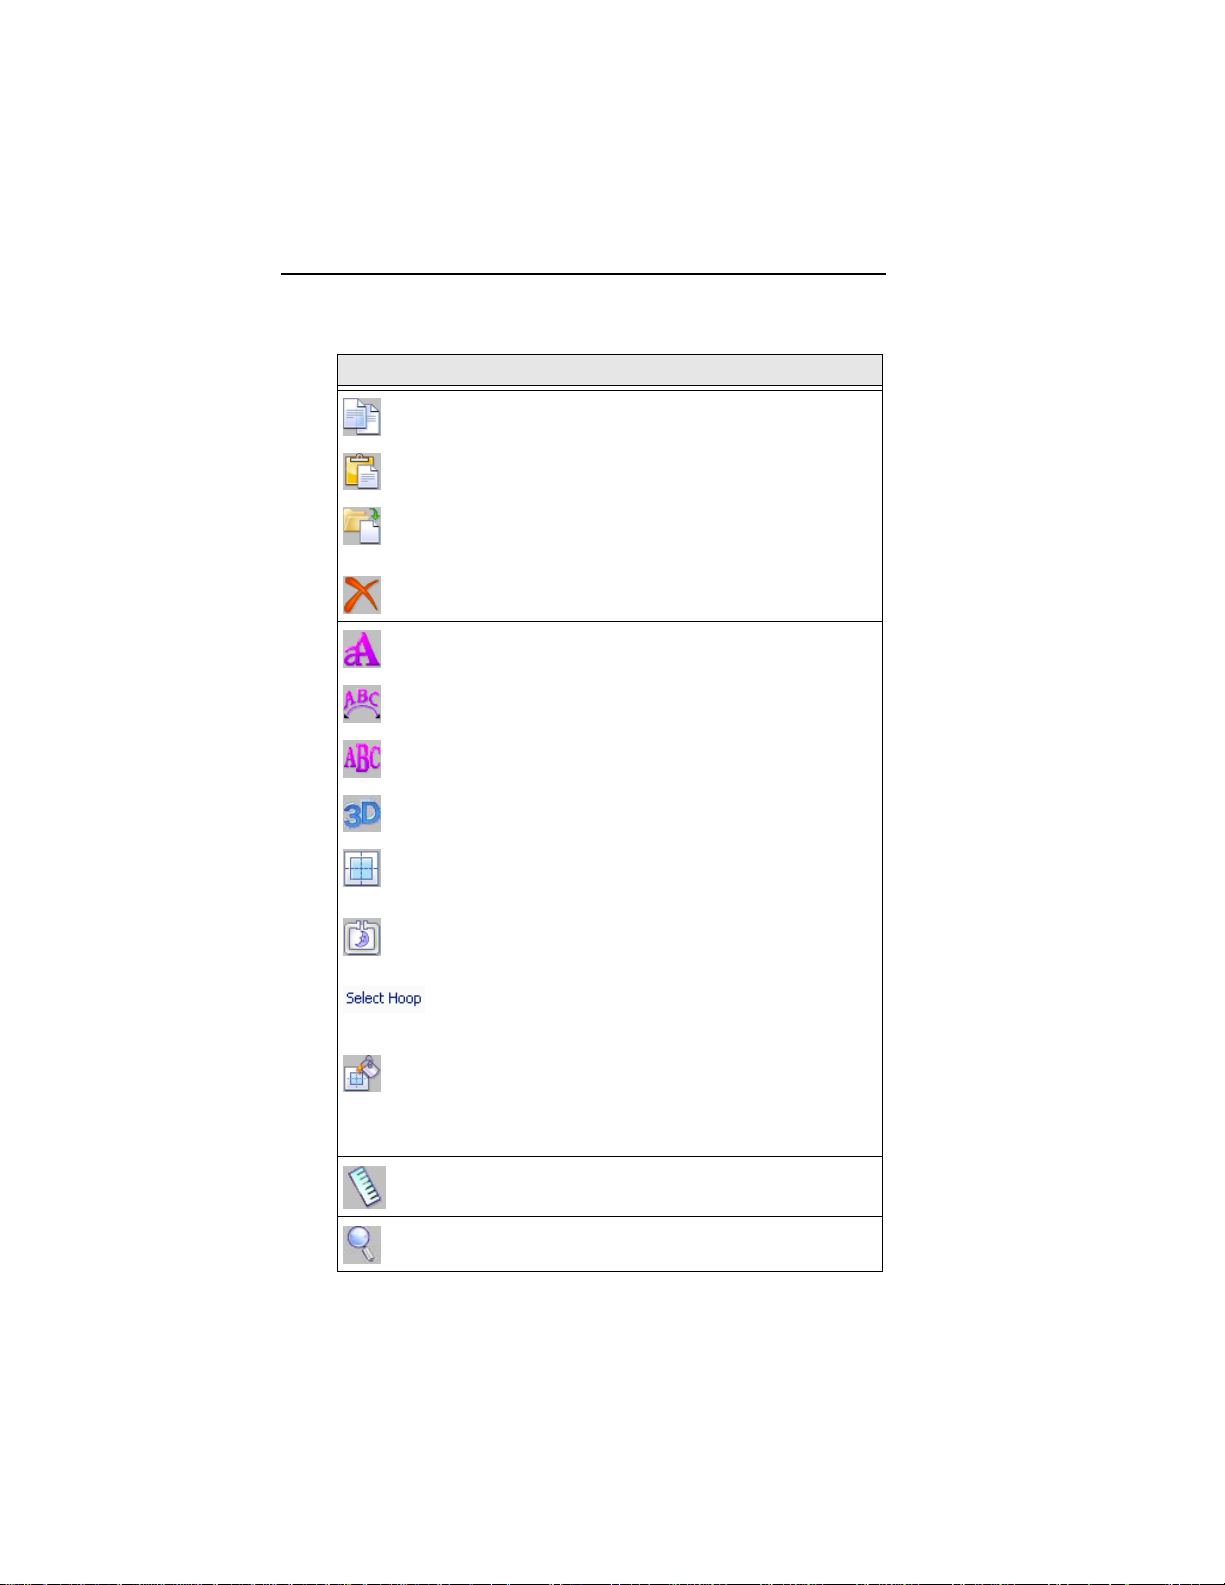
Pacesetter Menu Tools
Tool What it means
New: Creates a new untitled design.
New/Recipe: Opens a new page and allows you to choose a
new recipe and machine format.
Open: Opens an existing design file.
Merge: Opens the Merge Design dialog, which you can use to
import existing stitch or outline files into the current design
Save: Saves the current design.
Save As: Opens the Save As dialog, allowing you to choose
the destination and file type to save it as.
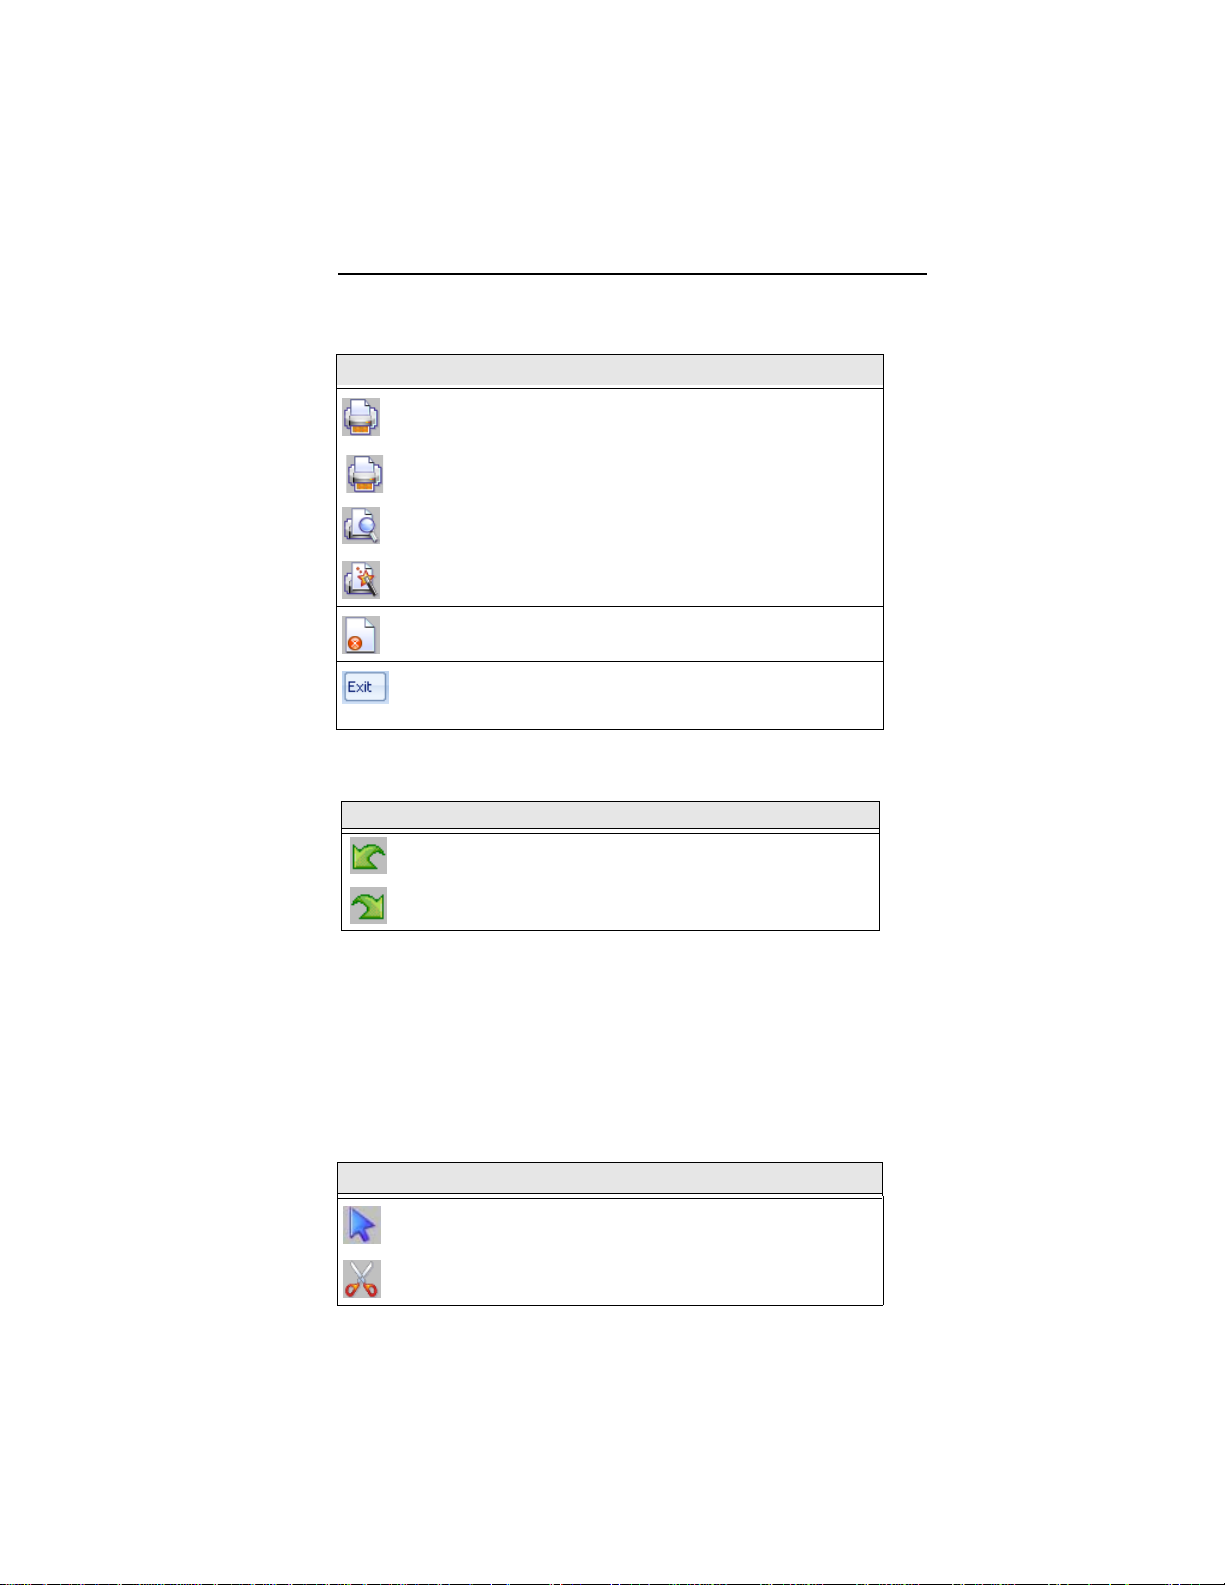
Tool What it means
Print: Opens the printer dialog on your computer, allowing you
to choose your printer and adjust the printer’s properties.
Direct Print: Print s a copy of the design worksheet, bypassing
the printer dialog.
Print Preview: Opens the print preview window, which in turn
will let you print the current design.
Print Setup: Opens the print preview window, which in turn
will let you print the current design.
Close: Closes the file that you are currently working on.
Exit: Closes all open files and shuts down Pacesetter
Embroidery Lettering Software; you will be prompted to save
any open files.
Extra Tools
Tool What it means
Undo: Reverses your last action.
Learning about the Workspace 9
Redo: Reverses the action of the Undo command.
Ribbon Tools
The Ribbon appears below the Title Bar. The Ribbon has three
tabs, the Home tab, the Arrange tab, and the View tab. Clicking
on the tabs displays all the buttons for the functions that are
under that tab.
Tools on the Home Tab
Tool What it means
Select: Selects objects in the design window.
Cut : Cuts the selection and copies it to the clipboard.
10 Pacesetter Embroidery Lettering Software
Instruction Manual
Tool What it means
Copy: Copies the selection to the clipboard.
Paste: Pastes the clipboard contents into the design, at
the end of the design sequence.
Insert: Pastes a copy of the clipboard selection into the
sewing sequence immediately following the selected
segment.
Delete: Removes the selected segment.
Text: Creates lettering placed along a straight baseline.
Circle Frame: Creates lettering based on a circular
baseline.
Monogram Frame: Creates three-letter monogram text.
3D: Realistically renders your design onscreen.
Grid: Displays a background grid, which helps with
alignment. This grid can be used for the alignment of
items on the display.
Hoop: Displays the hoop as it fits relative to the
embroidery. Clicking this button a second time will turn
the view of the hoop off.
Select Hoop: Accessed via the drop-down menu from
the Hoop tool. Opens up the Select Hoop window, in
which you can choose a new hoop.
Background: Two options are available from this button,
Select Color or Select Fabric. Depending on which one
you choose, a dialog box will open in which you select
either the color, or the fabric pattern, that appears in the
background of the active design window.
Ruler: Measures the distance between any two points in
a design.
Zoom: Magnifies the design to fit a rectangle drawn by
the user with the mouse pointer.
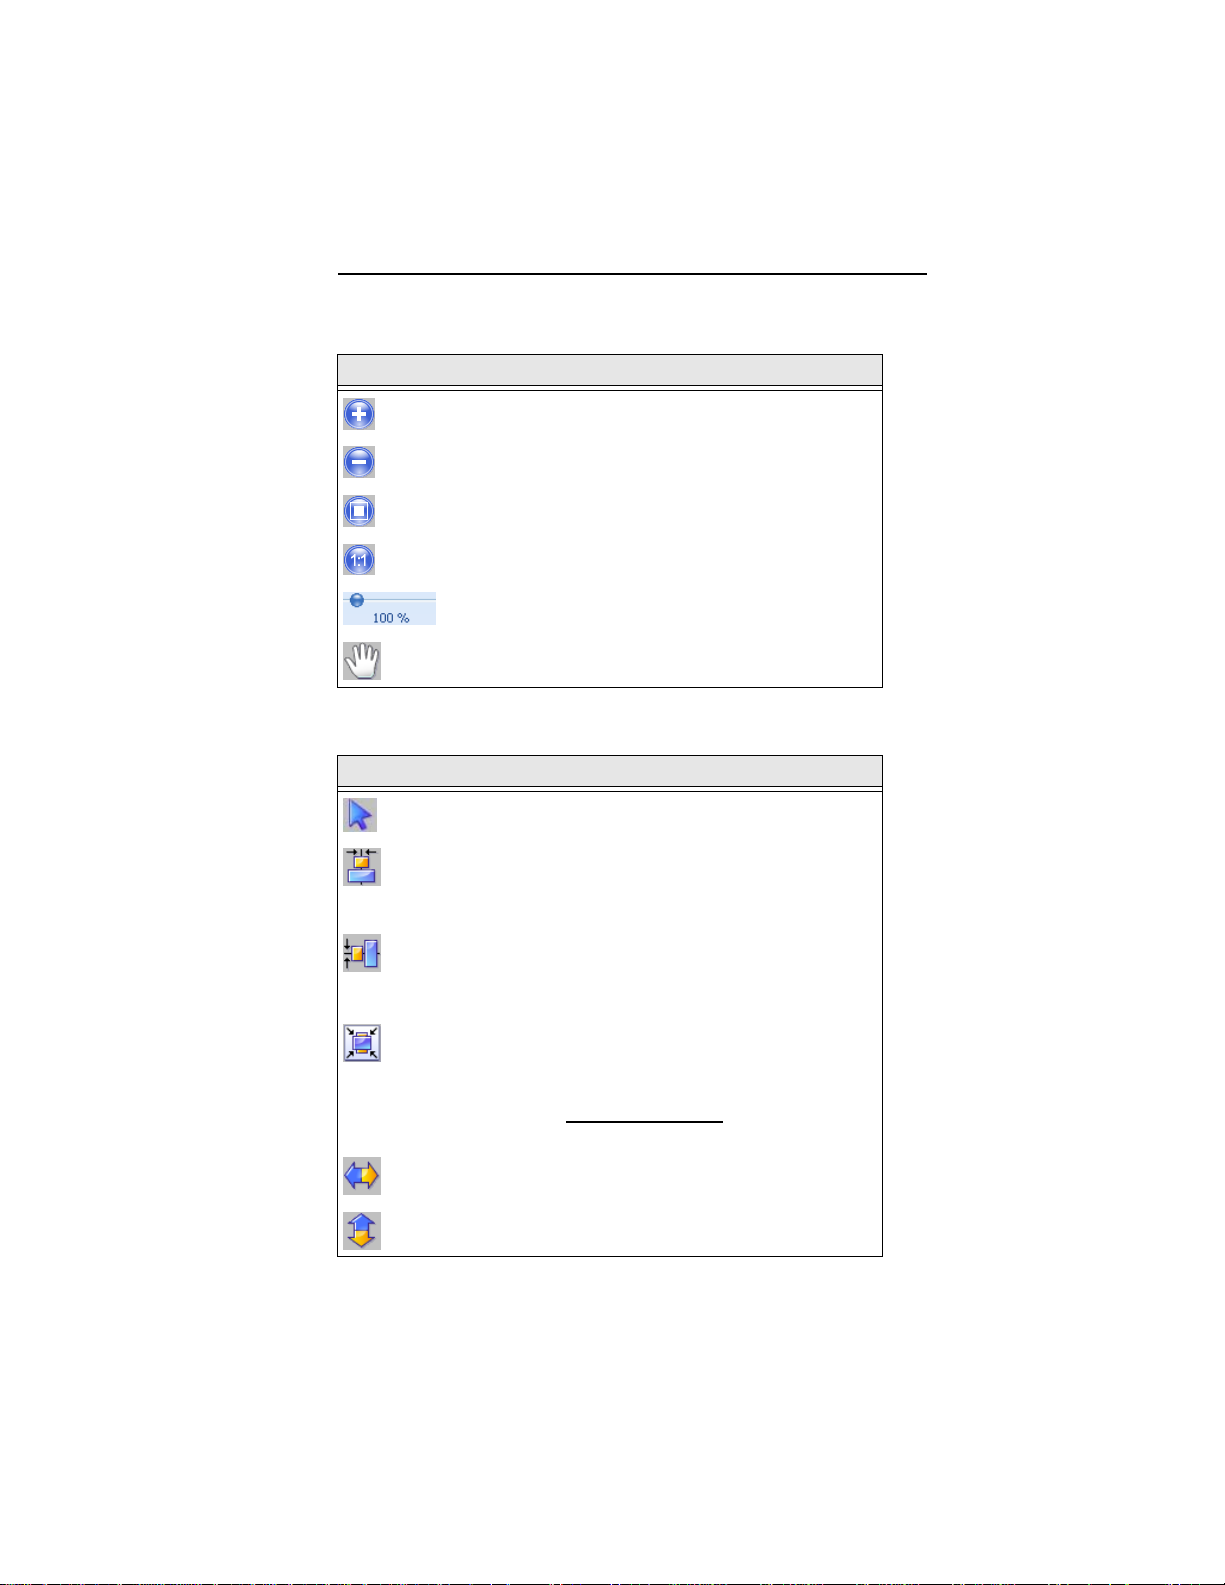
Tool What it means
Zoom in: Magnifies the view of the design by a fixed
amount.
Zoom out: Shrinks the view of the design by a fixed
amount.
Fit to Window: Displays the entire design and loaded
images in the window.
Back to 1:1: Returns design to original size.
Slider: Drag the slider to choose a specific level of
magnification; displays percentage of original size.
Pan: Allows you to move the design around in the
workspace window by clicking and dragging.
Tools on the Arrange Tab
Tool What it means
Select: Selects objects in the design window.
Horizontal Center: Takes all selected objects and centers
them in the selection box. The objects are moved so that they
are centered left-to-right with each other, but they are not
moved up or down.
Vertical Center: Takes all selected objects and centers them
in the selection box. The objects are moved so that they are
centered top-to-bottom with each other, but they are not
moved left or right.
Center: Centers one or more selected objects proportionally
within the current hoop.
If more than one object is selected, the entire group is moved
together to the center of the hoop; the objects selected remain
in the same position relative to each othe
being centered.
Flip Horizontal: Flips one or more selected objects
horizontally.
Flip Vertical: Flips one or more selected objects vertically.
Learning about the Workspace 11
r as they had before

12 Pacesetter Embroidery Lettering Software
Instruction Manual
The View Tab
The controls on the View tab allow you to change what appears
on your workspace; which panels are displayed,and so on. The
areas found on this tab are Windows and Program Preferences.
Windows
In the windows area, check the box to show the corresponding
window or panel, and uncheck it to hide that window or panel.
• Palette. Shows/hides the thread palette.
• Properties. Shows/hides the properties panel.
• Simulator. Shows/hides the sewing simulator.
• Status. Shows/hides the status bar.
Program Preferences
Click on the Program Preferences button to open a dialog
in which you can set the default machine settings, change the
units of measure, and choose settings for the workspace grid.
For more information on this dialog, see “Setting up your
Workspace Environment”
Simulator
The Simulator makes it easy to see on-screen how your design
will sew out. You can use the Simulator to eliminate potential
sewing problems.
When you select Simulator from the View tab of the Ribbon, the
Simulator (scrollbar slider and the sewing simulator) will appear
at the bottom of the design space. The Simulator controls which
parts of the design are drawn in the design window.
You can also open and close the Simulator by pressing Ctrl + R.
Learning about the Workspace 13
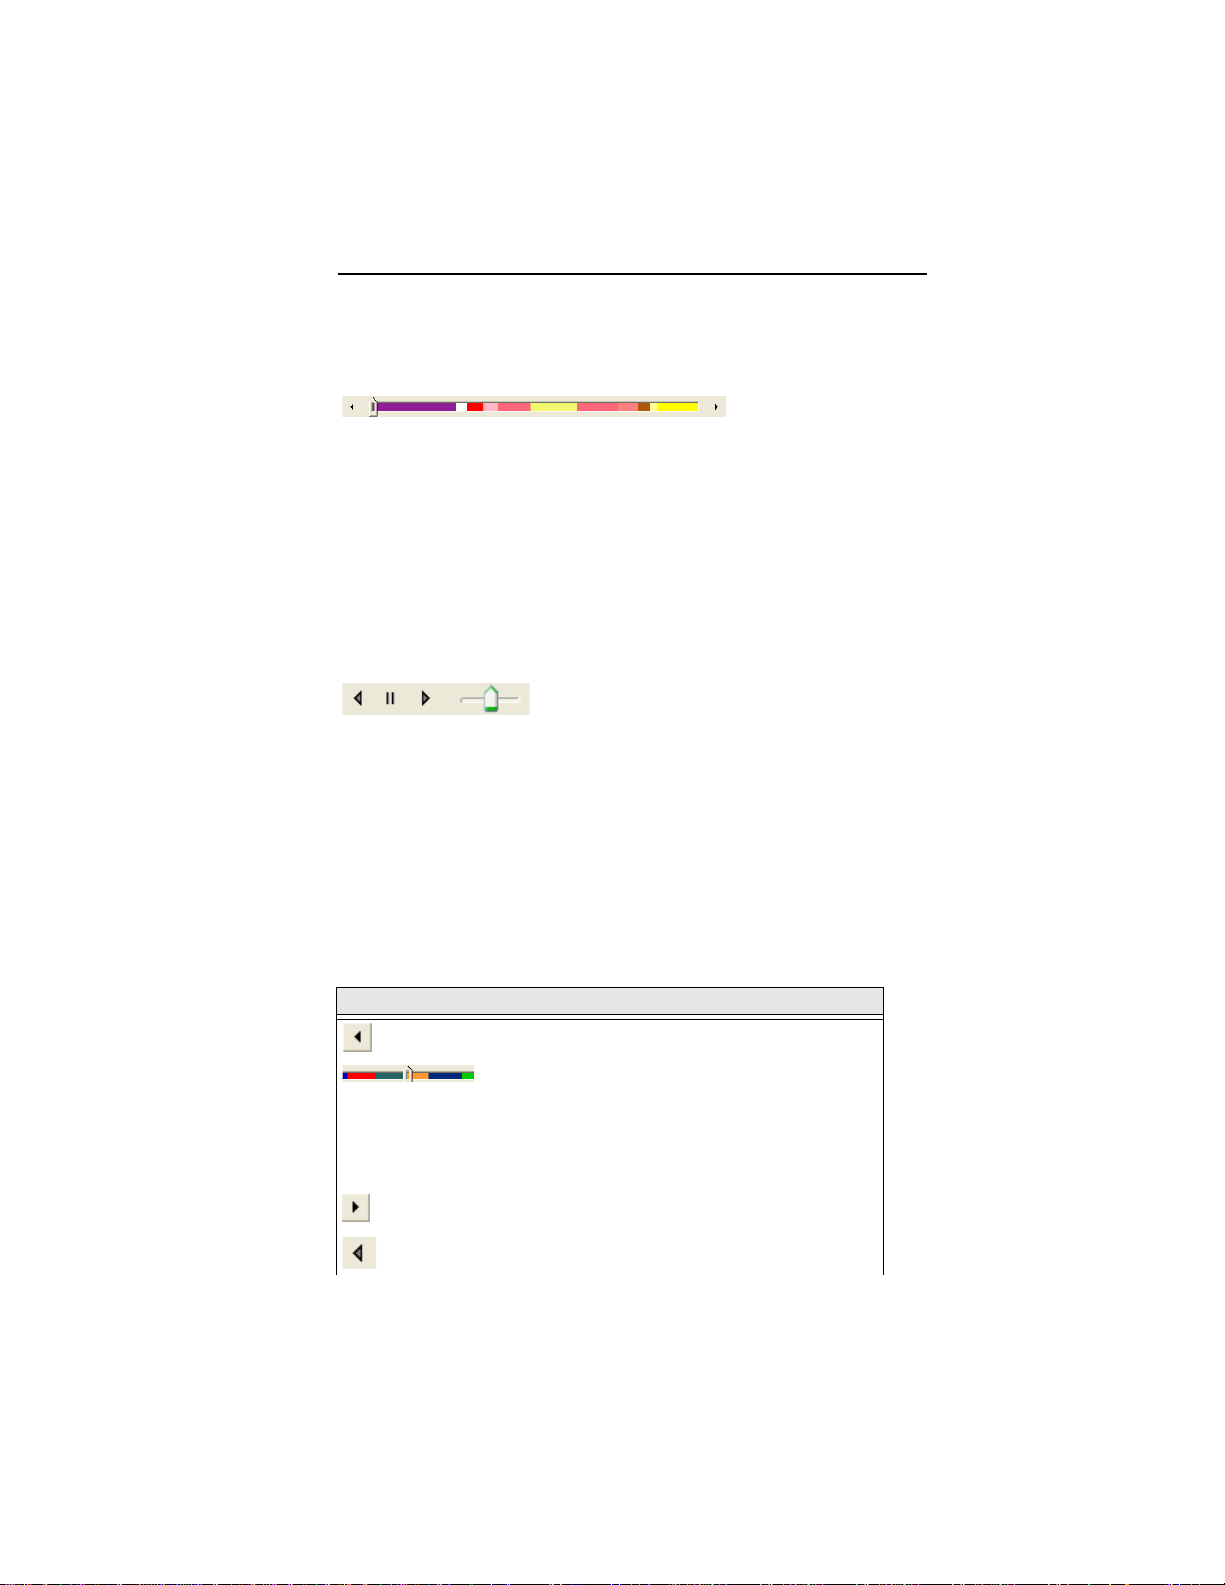
Scrollbar Slider
The length of the scrollbar slider represents all of the stitches in
the opened design. You can move the scrollbar slider by
dragging it to see a design as it will look sewn to a particular
point. The color display within the scrollbar indicates the thread
color that will be sewn when the scrollbar slider is positioned
over it. Clicking on the arrows at the ends of the scrollbar will
advance or retrace the design position by one stitch.
Sewing Simulator
The sewing simulator allows you to watch your design draw on
a stitch-by-stitch basis, simulating the sewing action of your
machine. The Simulator controls include pause, stop, sew
forward and sew backwards. You can push various control
buttons and slide the speed control to vary the rate of sewing.
Using the Simulator
The following table explains how to use the Simulator in more
detail:
Tools What is does
Previous Stitch: Move backward in the design by
one stitch.
Scrollbar slider: Drag the scrollbar slider to
advance the design to a specific position. When the
scrollbar slider is positioned over a color, you will
see the specified thread color being sewn in the
design. The entire length of the scrollbar slider
represents the entire design.
Next Stitch: Move forward in the design by one
stitch.
Simulate Sewing (backward): Move backward
through the design.
14 Pacesetter Embroidery Lettering Software
Instruction Manual
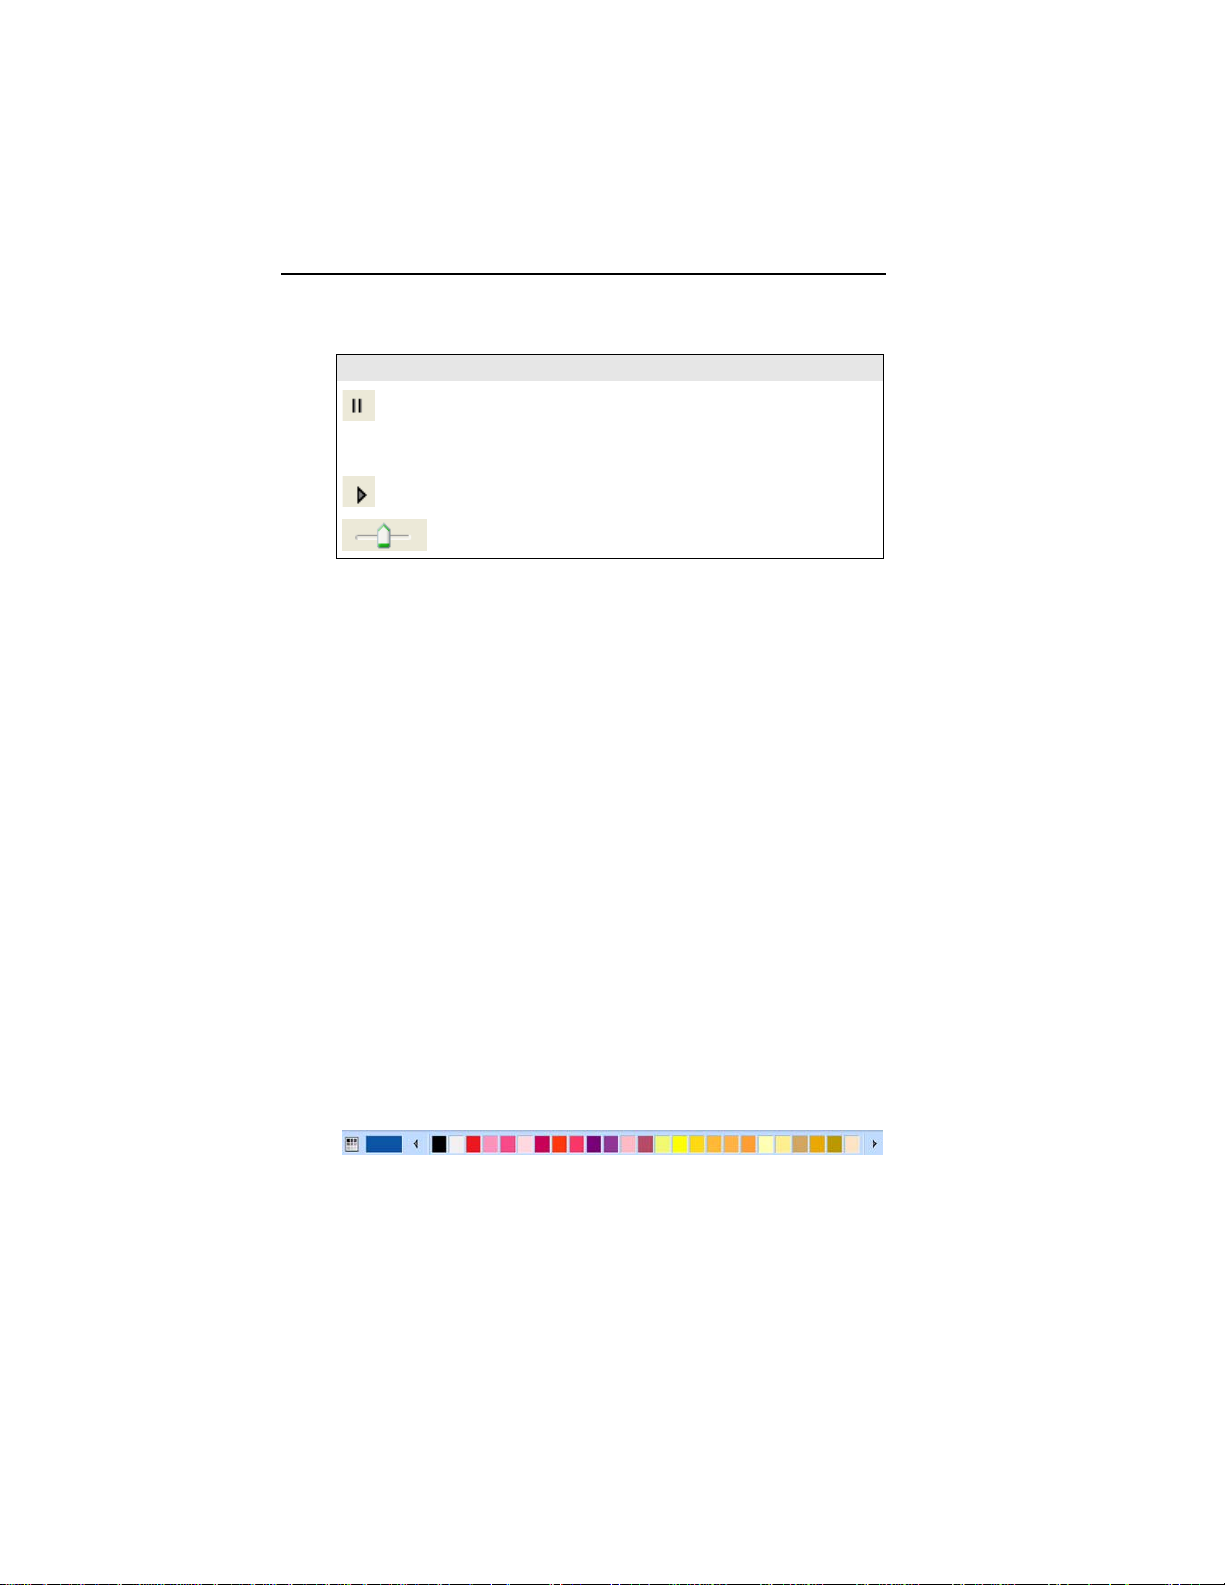
Tools What is does
Pause/Stop: Pause or stop the design while
drawing. When you play or resume sewing your
design, stitching will continue from the location of
the last stitch.
Simulate Sewing: Move forward through the
design.
Speed: Slide the speed control to vary the rate of
sewing.
Status Line
The Status Line appears at the bottom of the Pacesetter
Embroidery Lettering Software window. To show or hide the
Status Line, go to the Windows area of the View Tab and check
or uncheck Status.
As you move the mouse over different sections of the workspace, this indicator will tell you what that area or button does.
You will also find specific design information in other areas of
the status bar; it shows the total number of segments in the
design, the number of segments currently selected, the machine
format, the recipe used by the current design, the number of
stitches in the selected design components and the hoop being
used.
Color Palette
The thread colors for the design are shown in the Color Palette
located along the top edge of the workspace. To show the Color
Palette (if it is not already displayed), go to the Windows area of
the View tab and check the Palette box.
The color palette in Pacesetter Embroidery Lettering Software.
For more information on the color palette, see “Changing
Thread Colors” in the “Working with Designs” section of this
manual.
Learning about the Workspace 15
Using Scrollbars
Scrollbars are tools in the workspace that enable you to move
easily around within the displayed design. There are two
scrollbars, one for moving the view vertically, and one for
moving it horizontally.
How to use the scrollbars:
• To pan left/right, or up/down, click and drag the track button
.
• Click on the small arrows at each end of the scrollbar to
move the design view incr ementally.
• Click in the track of the scrollbar, to move the workspace
view by one whole screen
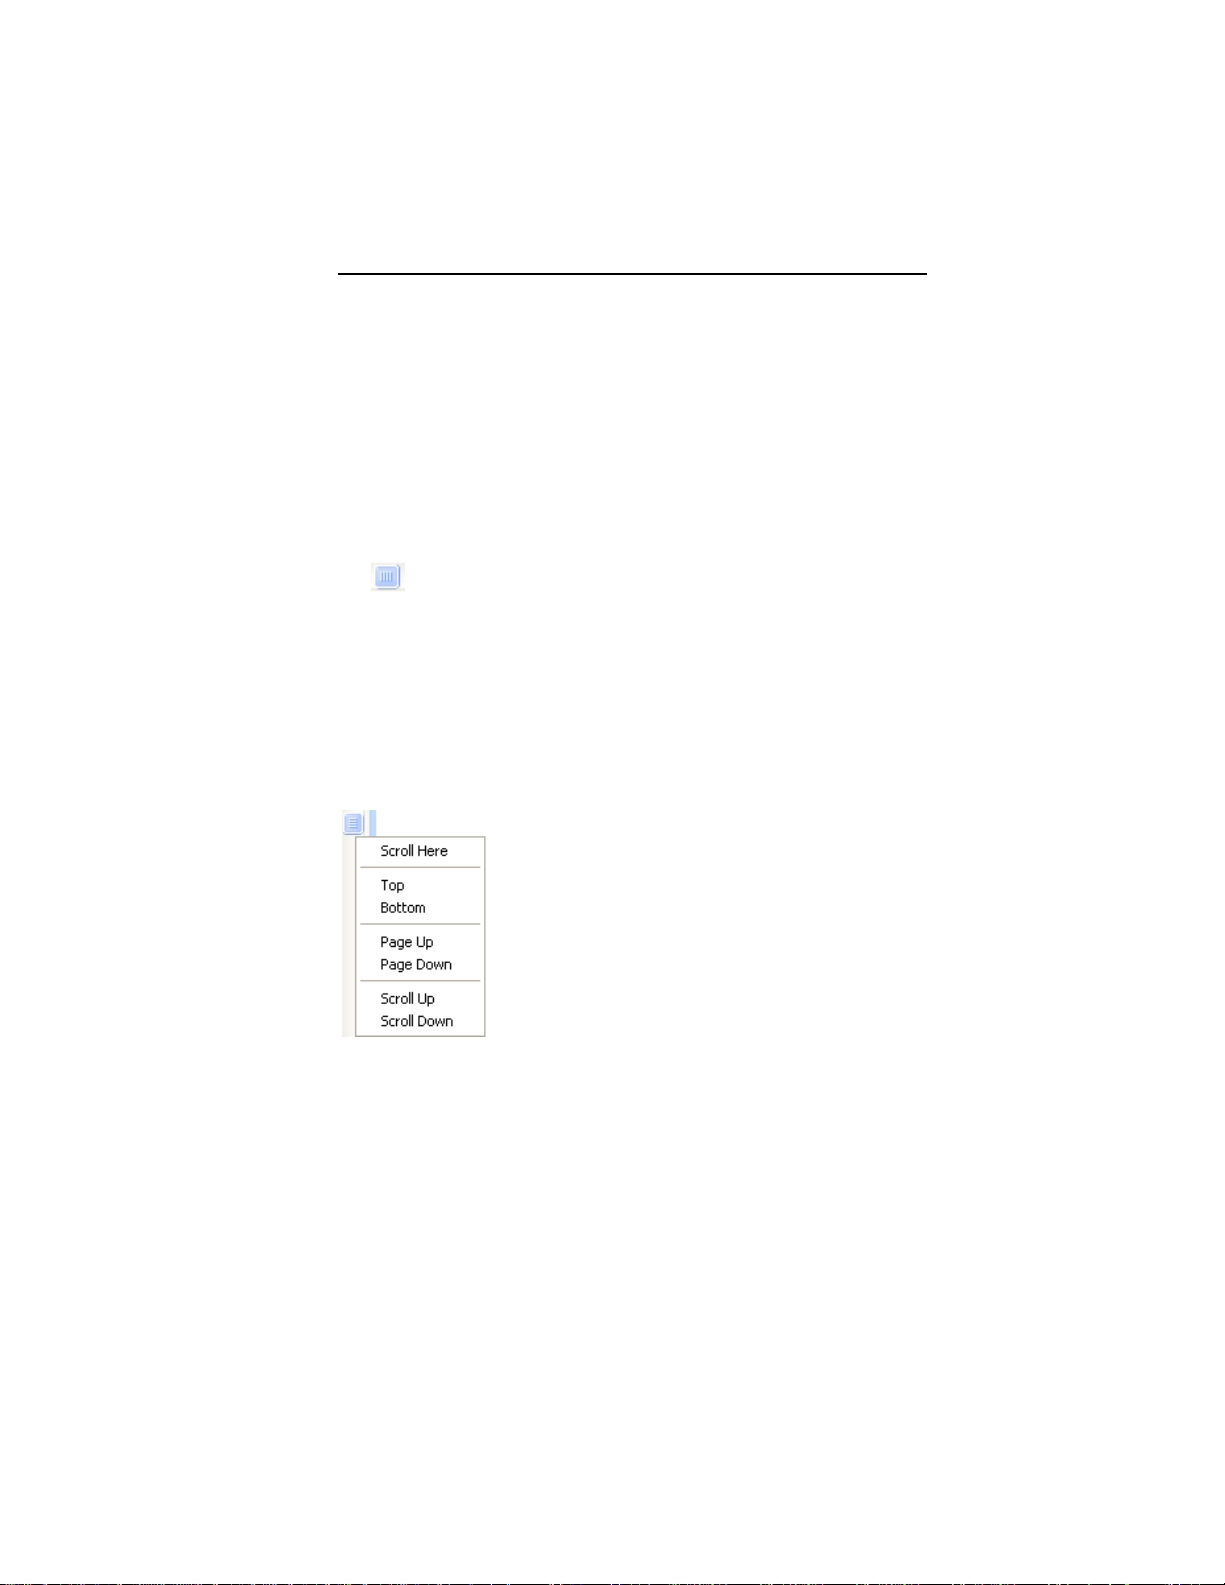
You can also right-click the scrollbar to display a pop-up menu
of scroll actions. The pop-up menu gives you the following
options:
Correcting Mistakes
Undo and Redo are two significant features that allow you to
correct mistakes. If you make a mistake and change your mind
about an action you just made, Undo reverses the action. Redo
puts back the change. If Undo or Redo are grayed out, you
cannot Undo or Redo.

16 Pacesetter Embroidery Lettering Software
Instruction Manual
To use Undo:
• Do one of the following:
On the Quick Access toolbar click the Undo tool.
Press Ctrl+Z on your keyboard.
To use Redo:
• Do one of the following:
From the Quick Access toolbar, click the Redo tool.
Press Ctrl+Y on your keyboard.
Setting up your Workspace
Environment
Pacesetter Embroidery Lettering Software allows you to set up
your design workspace environment for all opened design files.
You can predetermine the units of measurement you want to
use for your designs.
The following sections describe the units of measurement that
can be used for designs opened in Pacesetter Embroidery
Lettering Software.
Metric
The dimensions in Pacesetter Embroidery Lettering Software
can be displayed in metric values. This is the default setting,
which will appear each time you run Pacesetter Embroidery
Lettering Software. It is generally preferable for embroiderers to
use the metric values because many of the manufacturers of
embroidery machines and designs use metric values.

Learning about the Workspace 17
English vs. Metric
Pacesetter Embroidery Lettering Software displays inch
measurements in tenths of inches. If you think in inches, then
you can to set the software to use the inch system. Open the
Preferences dialog and click on the Environment tab, and sele ct
English from the Units list.
To set up your workspace environment:
1 On the View tab of the Ribbon, select the Preferences
button.
You see the Preferences dialog box.
2 Click the Environment tab.
3 From the Units list, select the units of measurement you
want used for your designs: Metric or English.
4 Click OK.
Changing Machine Format
Properties
All designs in Pacesetter Embroidery Lettering Software have a
machine format. Machine formats have their own profile settings
that determine how embroidery information will be interpreted
when you save design files.
When you create a new design file, you can select the machine
format for the specific design. The selected machine format can
change how the design file is read. When you set machine
format properties in the Preferences dialog, all new designs will
use these machine format properties as the default settings.
If you open a design with the New/Recipe command, you can
select the recipe for the new design ins the New Page dialog.
This will override whichever recipe is set as the default in the
Preferences dialog.
Changing machine format properties after a design file has
been opened will not change the machine format of the
embroidery designs in that design.

18 Pacesetter Embroidery Lettering Software
Instruction Manual
To change machine format properties:
1 On the View tab of the Ribbon, select the Preferences
button.
You see the Program Preferences dialog box.
2 Click the Formats tab.
3 From the Machine format list, select the machine format that
you want applied to new design files.
4 Click OK.
Adjusting the View of the
Workspace
Magnifying and Reducing the View
Use Zoom to magnify or reduce parts of your design. With Zoom
you can either left-click to enlarge your design or right-click to
make your design smaller.
When you select Zoom, the cursor changes to a small
magnifying glass . To use the Zoom tool, do one of the
following:
• To zoom in on the spot where the mouse is currently
pointing, left-click.
• To zoom out again, right-click.
• To zoom in on a particular area, left-click and drag; the
display will expand to show only the area that you have
dragged over.
To use the Zoom Tool:
1 On the Ribbon, select the Home tab.
2 In the Zoom toolbar, click on the Zoom tool.
The pointer becomes a magnifying glass.
3 Do either of the following:
Left-click to make your design larger.

Learning about the Workspace 19
Right-click that area to make your design smaller.
To zoom-in on a specific area:
1 On the Ribbon, select the Home tab.
2 In the Zoom toolbar, click on the Zoom tool.
The pointer becomes a magnifying glass.
3 Click and hold your mouse button and drag it to form a
flexible box around the area you want to see in detail.
4 Do one of the following steps:
T o increase the zoom, co ntinue clicking and dragging the
flexible box.
From the Zoom toolbar, click on the down arrow under
the Zoom icon, and use the Zoom tool settings to zoom
back out.
Additional options on the Zoom Toolbar:
When you click on the down arrow underneath the Zoom Tool,
you will see an option menu. You can choose from any of the
following options on this menu:
• Zoom In to make your design larger.
• Zoom Out to make your design smaller.
• To Fit to make the whole design the size of the design
window.
• To Selection to zoom to the size of the currently selected
embroidery segment, or set of embroidery segments if more
than one is selected.
•1:1 to see the design at the actual size.
Hiding the Properties Panel
Automatically
To increase the amount of space for your design window, you
can set the Properties panel to the Auto hide mode. When Auto
hide is on, the panel will only be visible while the mouse is over
it; as soon as you remove the mouse, the panel will collapse to
a narrow sidebar.

20 Pacesetter Embroidery Lettering Software
Instruction Manual
To turn on Auto hide for these panels, click on the small pushpin icon at the top-right of the panel. When the panel is in
Auto hide mode, the small push-pin will be on its side, like this:
. Now, whenever you move the mouse to another part of the
screen, the panel will be hidden.
To turn Auto hide off, click on the icon again.
Viewing Different Parts of the
Workspace (Panning)
Sometimes you may want to work at a high level of
magnification, and some part of the garment or embroidery
you’re working on will not show up in the workspace.You can
move to parts of your design that go beyond the window’s
borders. In these situations, you can use keyboard arrows or
the pan tool to change your view of the project.
Panning using the keyboard:
• Use the key to move up.
• Use the key to move down.
• Use the key to move left.
• Use the key to move right.
Using the Pan Tool
Use the Pan tool to move the view of the design around in
the workspace by clicking and dragging. While you are using
the Pan tool, you will still be able to see the design in the
window. Note that the pan tool does not actually move parts of
the design around, just your view
You can right-click to switch back to whichever tool you were
using before you selected the Pan tool.
of them..

Learning about the Workspace 21
Taking Measurements
The Ruler tool lets you measure the distance between any
two points in your design workspace. When you measure from
one point to another, the distance is displayed in the status line
located at the bottom of the window. The status line shows the
horizontal and vertical distances the Ruler tool travels from the
x and y axes, the angle measured, and the total distances.
The ruler measurements are calculated in the units you set
under the Units tab of the Preferences dialog.
To measure Designs:
1 On the Ribbon, select the Home tab.
2 Click on the Ruler tool.
Your pointer changes to a ruler when in the Design
Workspace.
3 Click and drag your mouse until you are finished measuring
the item.
4 Let go of your mouse when you are finished measuring.
5 Look in the status line at the bottom of the workspace to see
the measurement.
6 Right-click to set the end point of your measurement.
The measurement is now displayed in the status bar.
Displaying the Hoop
Viewing the hoop or frame on the screen lets you ensure that
your design fits properly when you run it on the machine. The
hoop serves as a guide to help size and position your design in
the design window. Pacesetter Embroidery Lettering Software
comes with many pre-loaded hoop sizes.

22 Pacesetter Embroidery Lettering Software
Instruction Manual
Viewing and Hiding the Hoop
Use the Hoop tool to show and hide the hoop in the display
window. Just click on the Hoop tool to show the hoop (if it is not
currently shown) and click it again to hide the hoop.
The hoop’s dimensions are determined by your settings under
the Hoops dialog in Pacesetter
Software
Using the Hoop tool may effect the magnification level of your
design. For example, if you are zoomed i n on the design, clicking
the Hoop tool will cause the view to zoom out enough to fit the
entire hoop into the workspace.
.
Embroidery Lettering
Selecting a Hoop
You can select one of the pre-loaded hoops using the Hoops
dialog. You will notice that you can select hoops from different
file types in this dialog. This is useful when you want to make
sure that your design will fit for more than one kind of
embroidery machine.
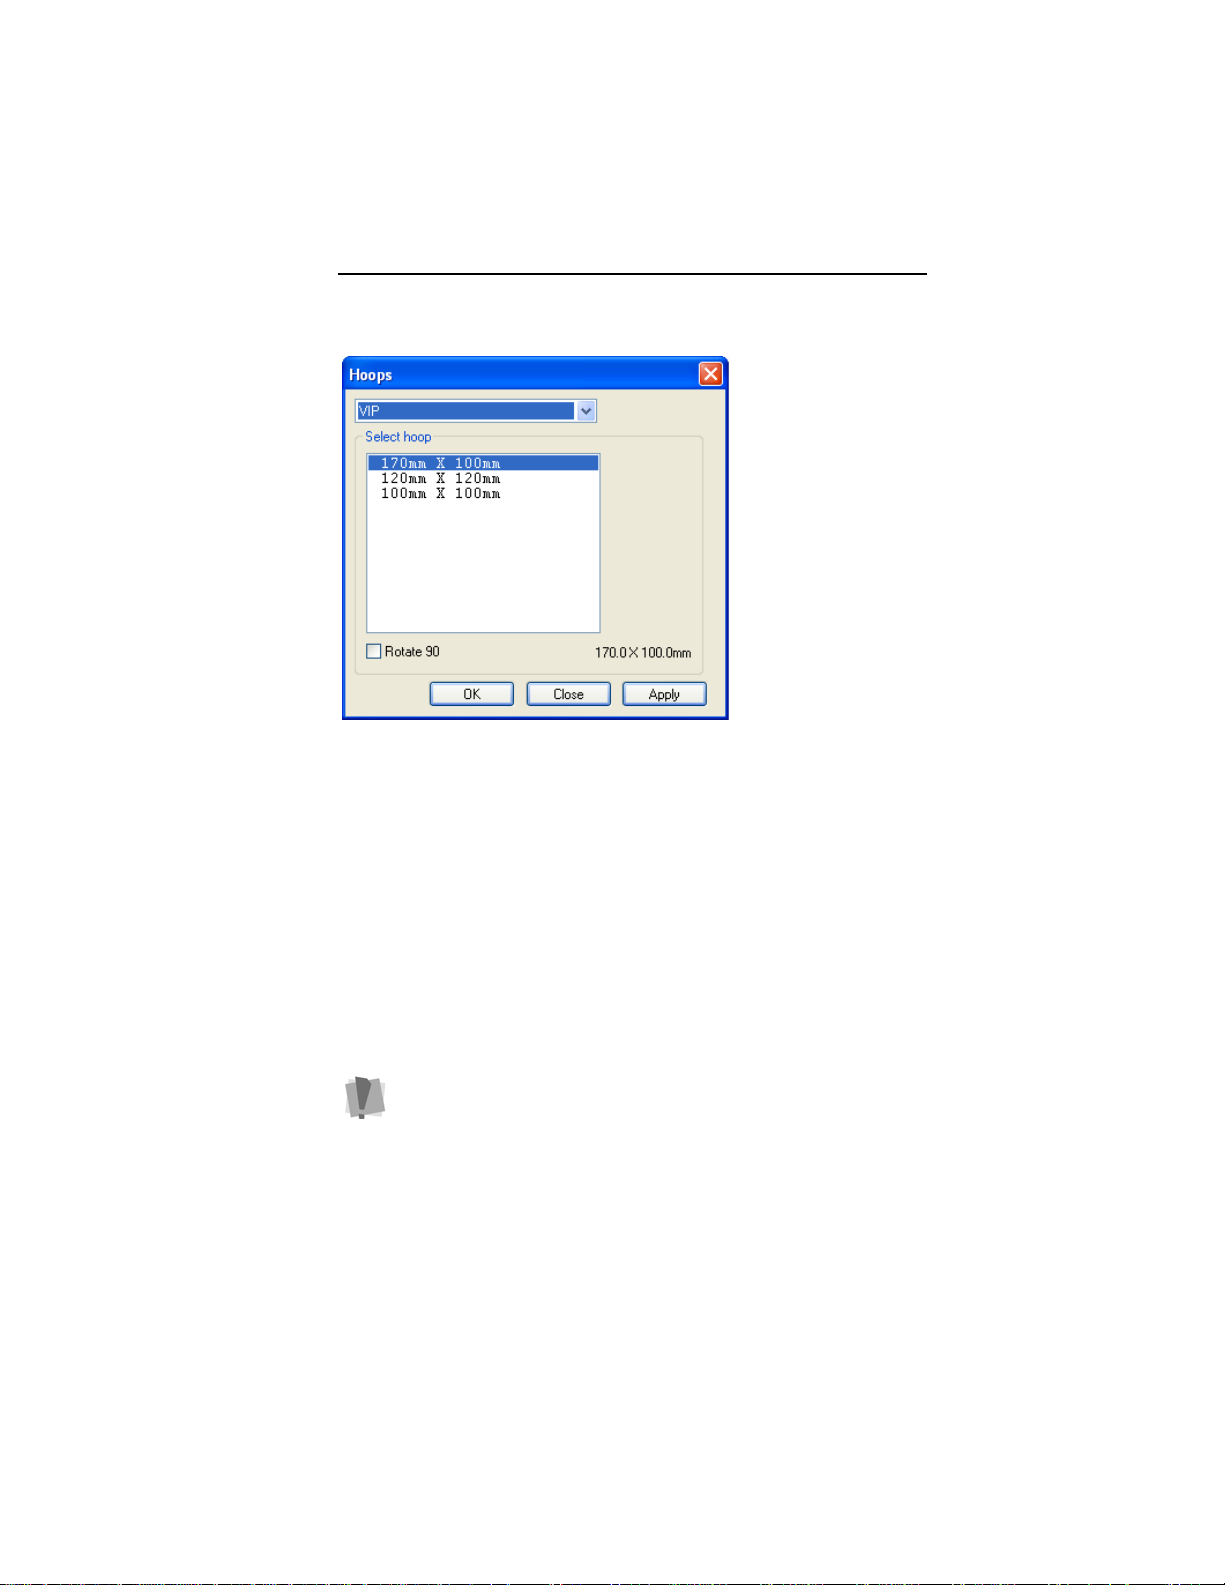
To select a hoop using the Hoops dialog:
1 On the Home Tab click the down arrow under the Hoop tool.
2 From the menu that appears, click on Select Hoop.
You see the Hoops dialog.
Learning about the Workspace 23
3 Select the machine format from the Format drop-down list.
4 From the list of Hoops, choose a hoop size appropriate for
your design.
5 If needed, check the “Rotate by 90º” box to make the hoop fit
your design better.
6 Click OK.
Available Hoops
Pacesetter Embroidery Lettering software comes with a number
different sizes of hoops pre-loaded. The hoop sizes available for
each file type are listed in the following table.
Important: The maximum size of the design that you can save,
in any given file format, is limited by the largest hoop ava ilable
in that format.
For example, if you are saving as VIP, the largest design you
will be able to save is 170mm × 100mm.
If you try to save a file that is larger than the largest hoop, you
will be given an error message.
24 Pacesetter Embroidery Lettering Software
Instruction Manual
Format Available Sizes (mm)
DST 130 × 180
EXP 130 × 180
HUS 100 × 100, 80 × 80
JEF 126 × 110
PCS 120 × 115, 80 × 80
PES 130 × 180, 100 × 180, 100 × 100, 60 × 40, 60 × 20
SEW 122×88, 80×70, 50×50
SHV 100 × 100, 40 × 40
VP3 & VIP 170×100, 120 × 120, 100 × 100
XXX 114 × 114, 112 × 80, 55 × 55
Getting Help
The Pacesetter Embroidery Lettering Software Help is a quick
way to find answers to your questions and see step-by-step
instructions. Because a large number of topics exists, the Help
allows you to search for topics in various ways. You can search
using the table of contents, the index or a database of
keywords. You can also save the topics you visit most often.
The help is also available in document form (PDF).To view or
print the instruction manua l as a PD F, insert your Installation
CD and select View Instruction Manual from the options.
Opening the Help
To open the Help:
1 Double-click the Pacesetter Embroidery Lettering Software
icon on your desktop.
You see the blank design workspace.
2 Click the Help tool.
You see the Help.

Learning about the Workspace 25
Using the Contents
The Help has a table of contents, with a list of book icons. Each
book contains a series of related topics.
To use the Contents:
1 Click the Help tool.
You see the Help.
2 Double-click the book you want to open.
3 Click the topic you want to see.
You see the topic in the right pane.
Using the Index
The Help index is similar to the index in a book.
To use the Index:
1 Click the Help tool.
You see the Help.
2 In the box, enter the word or words you want to search for.
In the list, you see the topics that most closely match your
query.
3 Click the term you want to learn more about.
If there is more than one topic for the keyword, you see a
menu.
4 Click the topic you want to see.
You see the topic in the right window pane.
Using Search
The Search tab lets you search using keywords or phrases in a
database of all the words found in the Pacesetter Embroidery
Lettering Software Help.

26 Pacesetter Embroidery Lettering Software
Instruction Manual
To use Search:
1 Click the Help tool.
You see the Help.
2 Select the Search tab.
3 In the ”Keyword” box, enter the word or phrase that you are
searching for.
4 Click the List Topics button.
In the list below, you see the topics that contain the words
you searched for.
5 Click the topic you want to view, and then click Display.
You see the topic in the right window pane.
Saving Favorite Help Topics
The Favorites tab lets you save the topics that you visit most
often and want to access quickly.
To save your favorite topics:
1 Click the Help tool.
You see the Help.
2 Double-click the book you want to open.
3 Click the topic you want to save as your favorite.
You see the topic in the right window pane.
4 Click the Favorites tab.
You see the selected topic in the Current topic area.
5 To add the selected topic to your favorites list, click Add.
You see the selected topic appear in the Topics area.
6 To display your favorite topic, do one of the following:
In the Topics area, select the favorite topic you want to
display and click Display.
In the Topics area, double-click the favorite topic you
want to display.
You see the topic in the right window pane.
7 To remove one of your favorite topics, do the following:

Learning about the Workspace 27
In the Topics area, select the favorite topic you want to
remove and click Remove.
Printing Help topics
You can print any of the topics in the Help.
To print topics:
1 Click the Help tool.
2 Click the topic you want to print.
The topic will appear in the Help window.
3 Click Print.
You see the Print Topics dialog box.
4 Select one of the following print options:
Print the selected topic
Print the selected heading and all subtopics
5 Click OK.
You see the Print dialog box.
6 Change any of the print settings, if necessary, and click OK.
The topic will be sent to your printer.
 Loading...