


Network User’s Guide
This Network User's Guide provides useful information of wired and
wireless network settings using your Brother printer. You can also find
supported protocol information and detailed troubleshooting tips.
To download the latest manual, please visit the Brother Solutions
Center at (http://solutions.brother.com/
latest drivers and utilities for your printer, read FAQs and
troubleshooting tips or learn about special printing solutions from the
Brother Solutions Center.
). You can also download the
Version D
ENG
Applicable models
This User’s Guide applies to the following models.
QL-580N/710W/720NW/1060N
Definitions of notes
We use the following icons throughout this User’s Guide:
Important
Note
Important indicates a potentially hazardous situation which, if not avoided,
may result in damage to property or loss of product functionality.
Notes tell you how you should respond to a situation that may arise or give
tips about how the operation works with other features.
Compilation and publication notice
Under the supervision of Brother Industries, Ltd., this manual has been compiled and published, covering the
latest product’s descriptions and specifications.
The contents of this manual and the specifications of this product are subject to change without notice.
Brother reserves the right to make changes without notice in the specifications and materials contained
herein and shall not be responsible for any damages (including consequential) caused by reliance on the
materials presented, including but not limited to typographical and other errors relating to the publication.
©2012 Brother industries, Ltd. All rights reserved.
IMPORTANT NOTE
This product is approved for use in the country of purchase only. Do not use this product outside the
country of purchase as it may violate the wireless telecommunication and power regulations of that
country.
Windows
In addition, Windows
Windows Vista
Windows
Windows Server
In addition, Windows Server
Edition.
Windows Server
Server
®
XP in this document represents Windows® XP Professional and Windows® XP Home Edition.
®
XP in this document does not represent Windows® XP x64 Edition.
®
in this document represents all editions of Windows Vista®.
®
7 in this document represents all editions of Windows® 7.
®
2003 in this document represents Windows Server® 2003, Windows Server® 2003 R2.
®
2003 in this document does not represent Windows Server® 2003 x64
®
2008 in this document represents all editions of Windows Server® 2008 and Windows
®
2008 R2.
Not all models are available in all countries.
i

Brother Numbers
For technical and operational assistance, you must call the country where you purchased the machine. Calls
must be made from within that country.
In USA 1-877-BROTHER
In Canada 1-877-BROTHER
In Europe Visit http://www.brother.com
If you have any comments or suggestions, write to us at:
In Canada Brother International Corporation (Canada), Ltd.
- Marketing Dept.
1 rue Hotel de Ville, Dollard-des-Ormeaux, Quebec, H9B 3H6 Canada
In Europe European Product & Service Support
1 Tame Street, Audenshaw, Manchester M34 5JE, UK
Service center locations (Canada)
For the location of a Brother authorized service center, call 1-877-BROTHER.
Additional contacts
Brother Global Web Site: http://www.brother.com
For Frequently Asked Questions (FAQs), Product Support and Technical Questions, and Driver Updates and
Utilities: http://solutions.brother.com
(In USA Only) For Brother Accessories & Supplies: http://www.brothermall.com
for contact information on your local Brother office.
ii

Table of Contents
1 Introduction 1
Network features........................................................................................................................................1
2 Changing your printer’s network settings 2
Changing your printer’s network settings (IP address, Subnet mask and Gateway).................................2
Using the BRAdmin Light utility ...........................................................................................................2
Other Management Utilities .......................................................................................................................5
Web Based Management (web browser) ............................................................................................5
BRAdmin Professional utility (Windows
3 Configuring your machine for a wireless network 6
Overview....................................................................................................................................................6
Confirm your network environment............................................................................................................7
Connected to a computer with a WLAN access point/router in the network (Infrastructure mode) .....7
Connected to a wireless capable computer without a WLAN access point/router in the network
(Ad-hoc mode).................................................................................................................................8
Wireless configuration temporarily using a USB cable
(Recommended for Windows
One-push configuration using Wi-Fi Protected Setup™..........................................................................10
®
and Macintosh users)............................................................................9
®
) ...........................................................................................5
4 Printing the Printer Set-up Information 11
Printing the Printer Set-up Information ....................................................................................................11
5 Web Based Management 13
Overview..................................................................................................................................................13
Configuring the printer settings using Web Based Management (web browser).....................................14
6 Troubleshooting 15
Overview..................................................................................................................................................15
A Appendix A 19
Supported protocols and security features ..............................................................................................19
iii

B Appendix B 20
Types of network connections and protocols...........................................................................................20
Types of network connections ...........................................................................................................20
Protocols............................................................................................................................................22
Configuring your printer for a network .....................................................................................................24
IP addresses, subnet masks and gateways ......................................................................................24
Wireless network terms and concepts.....................................................................................................26
Specifying your network ....................................................................................................................26
Security terms....................................................................................................................................26
Other ways to set the IP address (for advanced users and administrators) ............................................29
Using DHCP to configure the IP address ..........................................................................................29
Using RARP to configure the IP address ..........................................................................................29
Using BOOTP to configure the IP address........................................................................................30
Using APIPA to configure the IP address..........................................................................................30
Using ARP to configure the IP address .............................................................................................31
C Appendix C 32
Network Setting Tool (QL-710W/720NW only, Windows® only)..............................................................32
Overview..................................................................................................................................................32
Using the Network Setting Tool...............................................................................................................32
Starting the Network Setting Tool......................................................................................................32
Changing the Communication Settings .............................................................................................34
Applying Setting Changes to Multiple Printers ..................................................................................35
Menu Bar ...........................................................................................................................................36
Connected Printer’s Status................................................................................................................38
Network Settings ...............................................................................................................................39
DIndex 43
iv
1
Note
Introduction 1
Network features 1
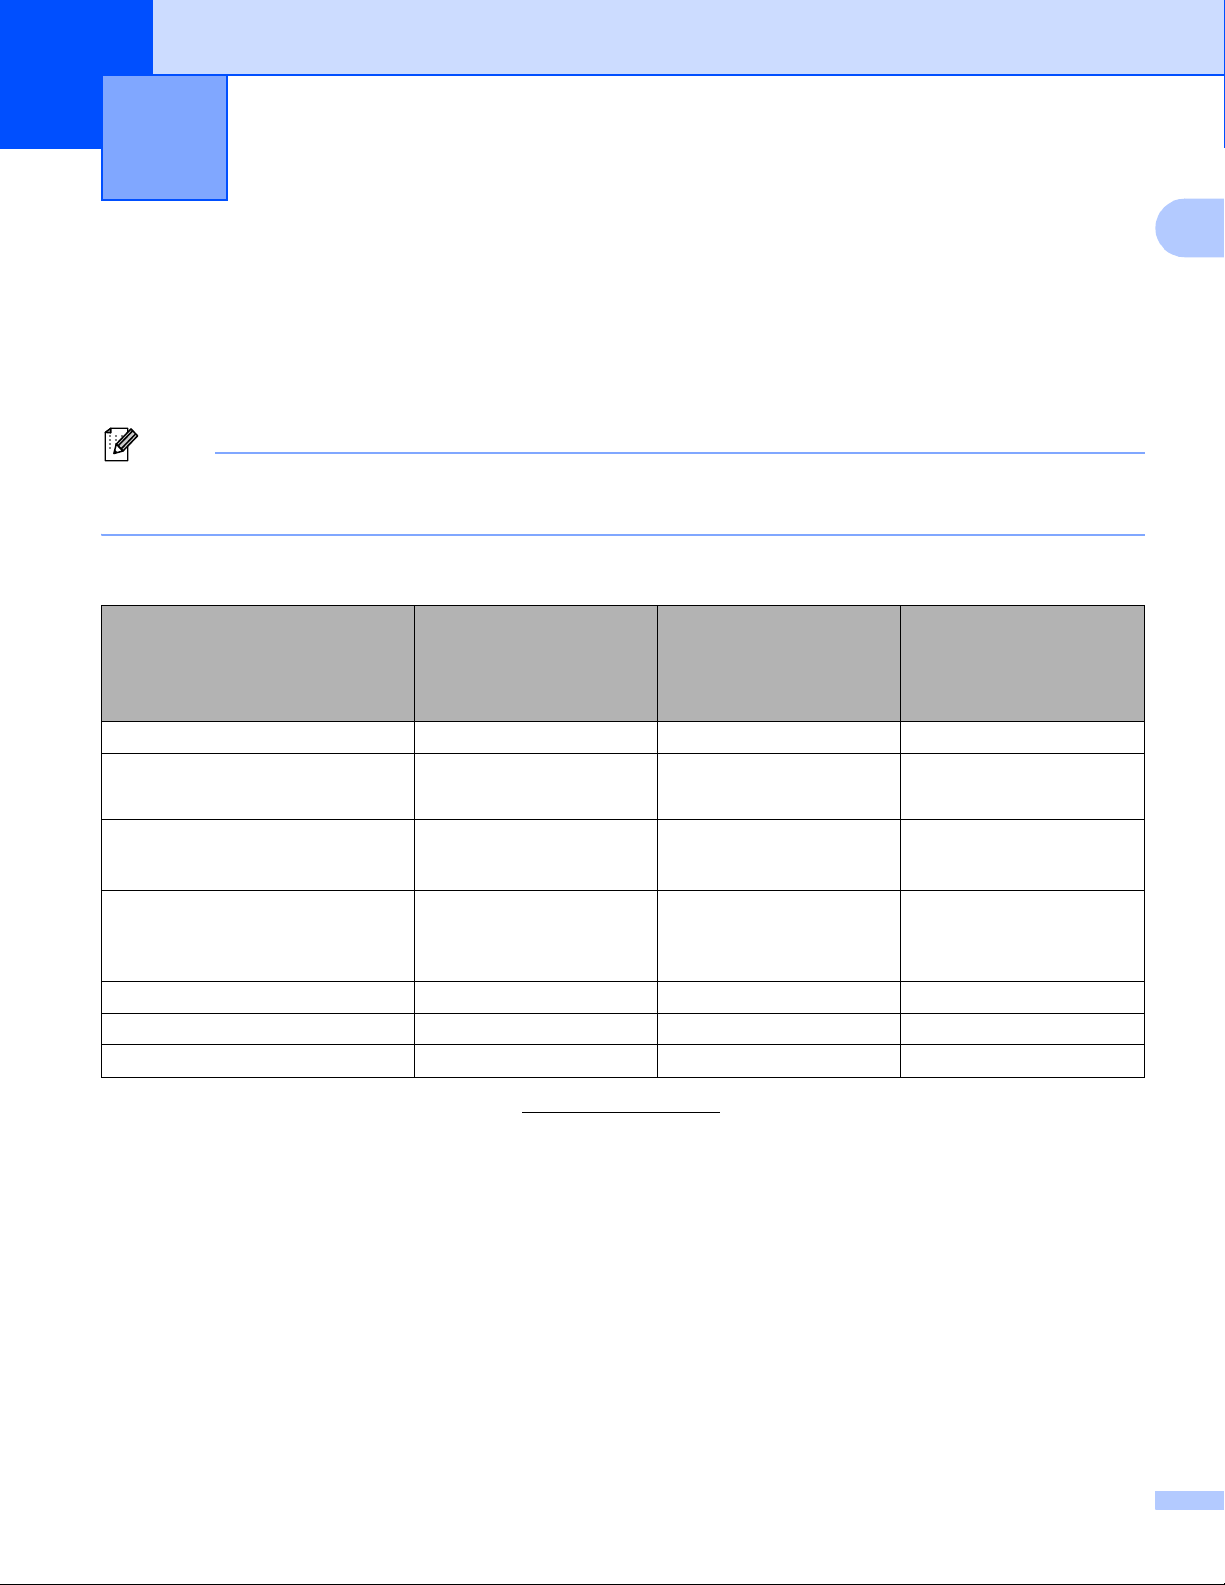
Your Brother printer can be shared on a 10/100 MB wired1 or IEEE 802.11b/g/n wireless network using the
internal network print server. The print server supports various functions and methods of connection
depending on the operating system you are running on a network supporting TCP/IP. The following chart
shows what network features and connections are supported by each operating system.
Although the Brother machine can be used in both a wired1 and wireless network, only one connection
method can be used at a time.
1
A wired network interface is available on the QL-580N/720NW/1060N.
1
Operating Systems
Printing rrr
BRAdmin Light
See page 2.
BRAdmin Professional
See page 5.
Web Based Management
(web browser)
See page 13.
Status Monitor rr
Driver Deployment Wizard rr
Network Setting Tool rr
1
BRAdmin Professional is available as a download from http://solutions.brother.com/.
1
Windows® XP
Windows Vista
Windows®7
rrr
rr
rrr
Windows Server®
®
2003/2008
Mac OS X 10.5.8 - 10.7
1

2
Note
Changing your printer’s network settings 2
Changing your printer’s network settings (IP address, Subnet mask and Gateway)
Using the BRAdmin Light utility 2
The BRAdmin Light utility is designed for initial setup of Brother network connected devices. It can also
search for Brother products in a TCP/IP environment, show the status and configure basic network settings,
such as the IP address.
Installing BRAdmin Light 2
2
2
Windows
®
a Please make sure that your printer is on.
b Turn on your computer. Close any running applications before installing.
c Insert the supplied CD-ROM into your CD-ROM drive. The opening screen will appear automatically.
If the model name screen appears, choose your printer. If the language screen appears, choose your
language.
d The CD-ROM main menu will appear. Click Network Utility.
e Click BRAdmin Light and follow the on-screen instructions.
Macintosh
Insert the supplied CD-ROM into your CD-ROM drive, and then use BRAdmin Light.jar in the Utilities
folder on the CD-ROM. To run the software from your Macintosh, copy BRAdmin Light.jar and the
BRAdminLightHelp folder to the desired location on your computer, and then run the copy of the
software.
• You can download the latest Brother BRAdmin Light version from http://solutions.brother.com/.
• If you require more advanced printer management, use the latest Brother BRAdmin Professional utility that
is available as a download from http://solutions.brother.com/
users.
. This utility is only available for Windows®
• If you are using firewall, anti-spyware, or antivirus software, temporarily disable them. Once you are sure
that you can print, enable them again.
• The node name appears in the current BRAdmin Light window. The default node name of the print server
in the printer is “BRNxxxxxxxxxxxx” or “BRWxxxxxxxxxxxx”. (“xxxxxxxxxxxx” is based on your printer’s
MAC Address / Ethernet Address.)
• The default password for Brother print servers is access.
2
Changing your printer’s network settings
Note
Setting the IP address, Subnet Mask and Gateway using BRAdmin Light 2
a Start the BRAdmin Light utility.
Windows
Click Start / All Programs / Brother / BRAdmin Light / BRAdmin Light.
Macintosh
Start the utility by double-clicking one of the following files.
• CD-ROM / Utilities / BRAdmin Light.jar
• BRAdmin Light.jar installed at the desired location on the Macintosh
®
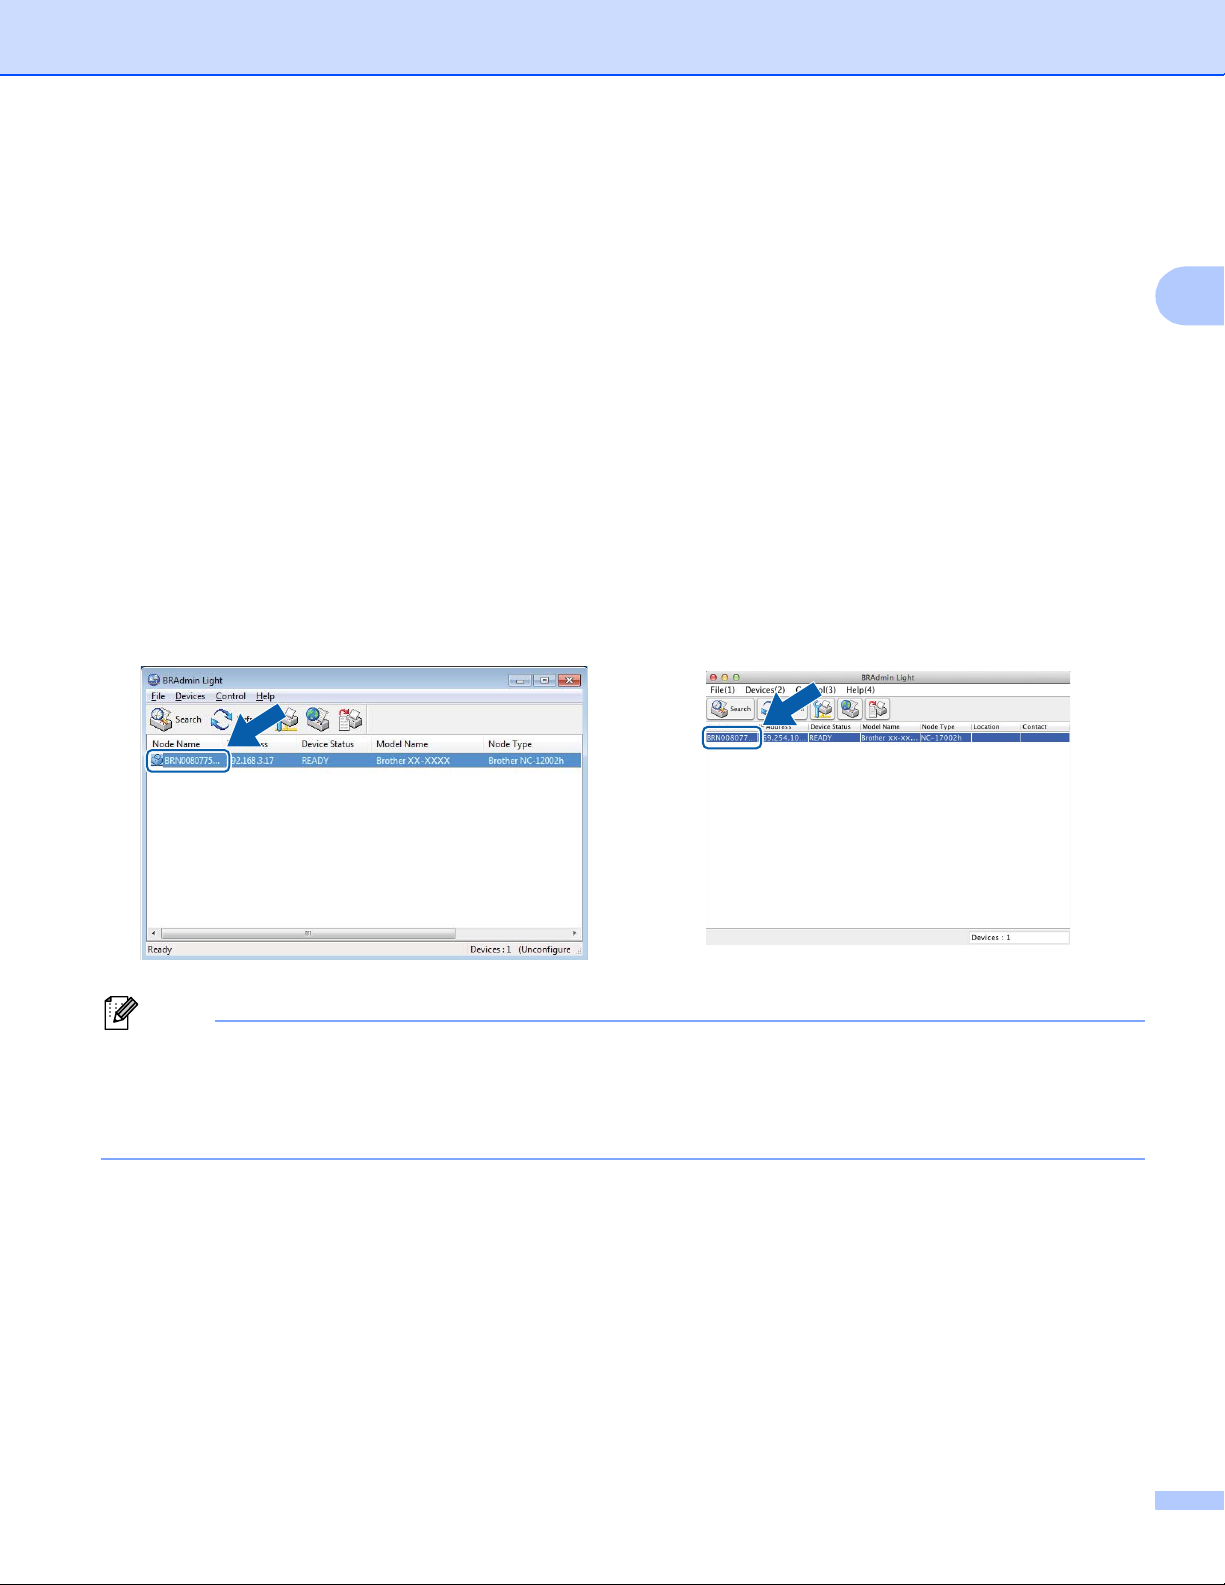
b BRAdmin Light will search for new devices automatically.
c Double-click the unconfigured device.
2
Windows
®
Macintosh
• If you don’t use a DHCP/BOOTP/RARP server, the device will appear as Unconfigured in the BRAdmin
Light utility screen.
• You can find the node name and MAC Address by printing the Printer Settings. (See Printing the Printer
Set-up Information uu page 11.)
3

Changing your printer’s network settings
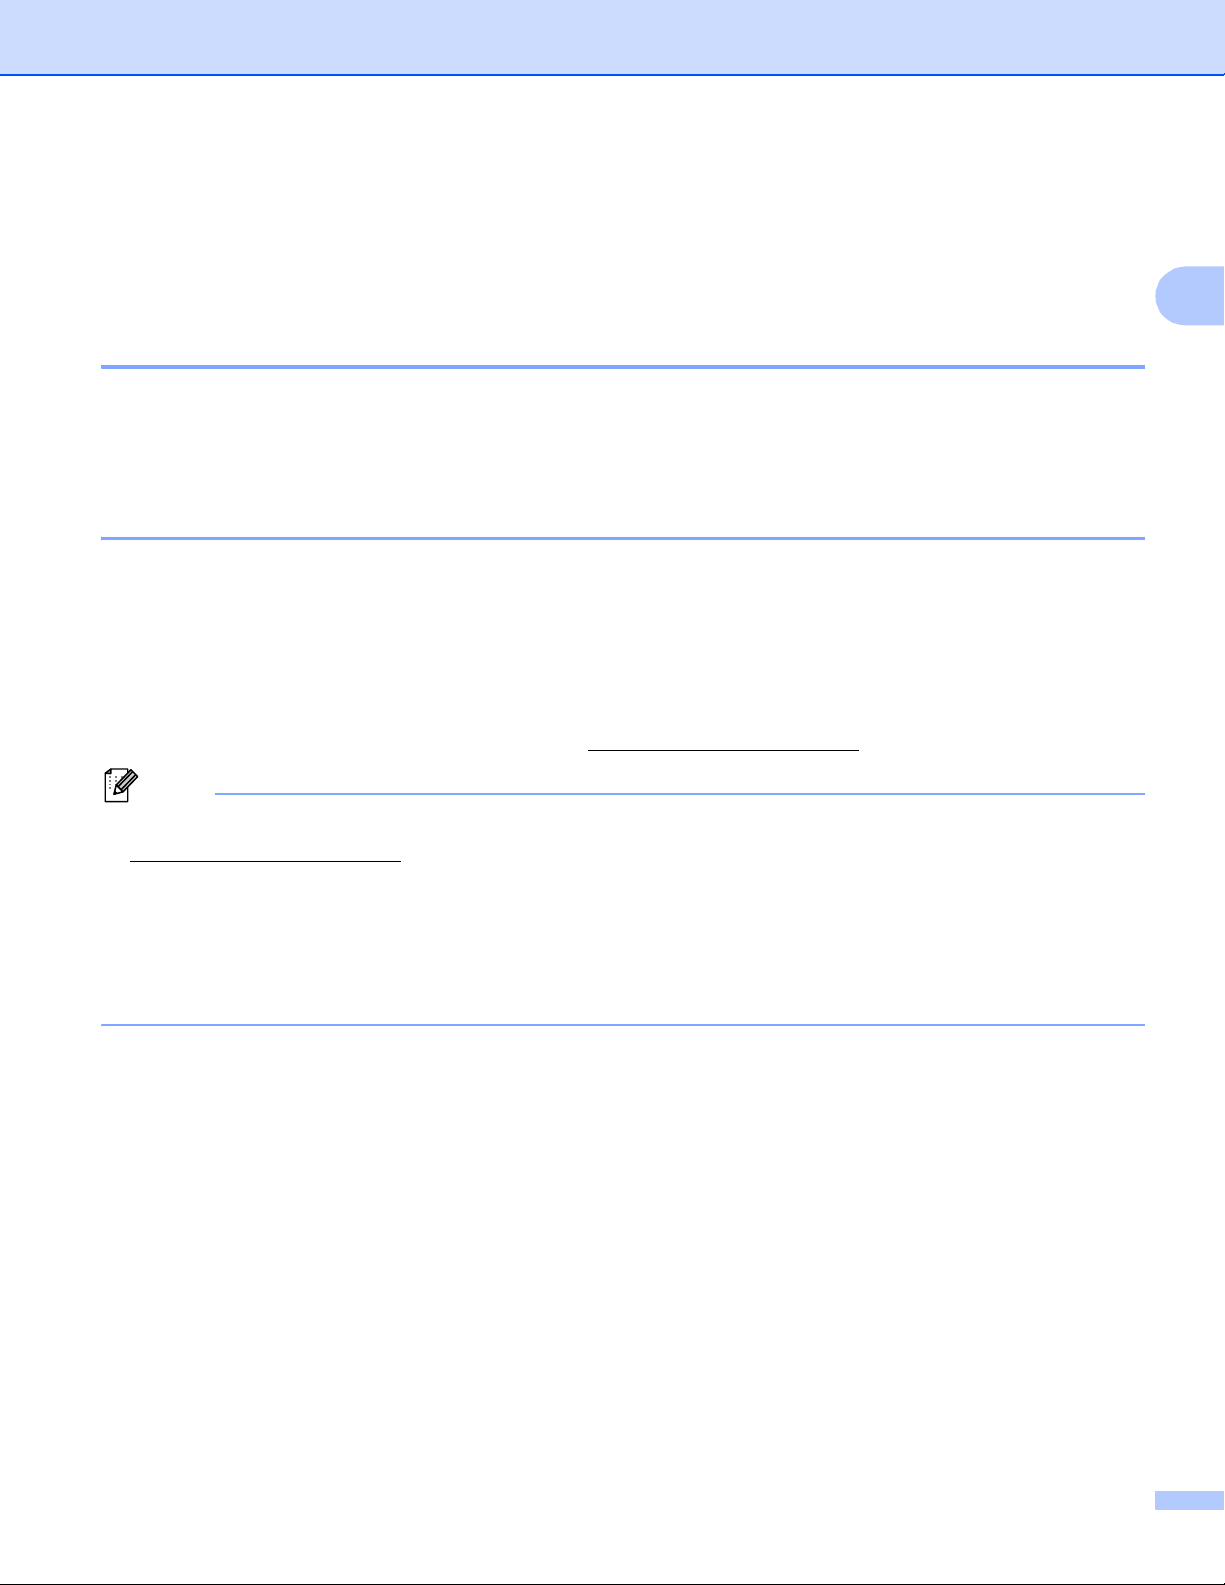
d Choose STATIC from Boot Method. Enter the IP Address, Subnet Mask and Gateway (if needed) of
your print server.
Windows
®
Macintosh
e Click OK.
f With the correctly programmed IP address, you will see the Brother print server in the device list.
2
4
Changing your printer’s network settings
Note
Other Management Utilities 2
Your Brother printer can be used with the following management utilities in addition to the BRAdmin Light
utility. You can change your network settings using these utilities.
Web Based Management (web browser) 2
A standard web browser can be used to change your print server settings using the HTTP (Hyper Text
Transfer Protocol). (See Configuring the printer settings using Web Based Management (web browser)
uu page 14.)
BRAdmin Professional utility (Windows®) 2
BRAdmin Professional is a utility for a more advanced management of network connected Brother devices.
This utility can search for Brother products on your network and show the device status from an easy to read
Explorer style window that changes color to represent the status of each device. You can configure network
®
and device settings along with the ability to update device firmware from a Windows
BRAdmin Professional can also log activity of Brother devices on your network and export the log data in an
HTML, CSV, TXT or SQL format.
computer on your LAN.
2
For more information and downloading, visit us at http://solutions.brother.com/
• Please use the latest version of the BRAdmin Professional utility that is available as a download from
http://solutions.brother.com/
• If you are using firewall, anti-spyware, or antivirus software, temporarily disable them. Once you are sure
that you can print, enable them again.
• The node name appears in the current BRAdmin Professional window. The default node name is
“BRNxxxxxxxxxxxx” or “BRWxxxxxxxxxxxx”. (“xxxxxxxxxxxx” is based on your printer’s MAC Address /
Ethernet Address.)
. This utility is only available for Windows® users.
.
5

Note
Configuring your machine for a wireless
3
network
Overview 3
To connect your machine to your wireless network, you need to follow the steps in the Quick Setup Guide.
®
Configuration using the CD-ROM installer and a USB cable is the recommended method for Windows
Macintosh users. By using this method, you can easily connect your machine to your wireless network.
For additional wireless configuration methods please read this chapter for more details on how to configure
the wireless network settings. For information on TCP/IP settings, see Changing your printer’s network
settings (IP address, Subnet mask and Gateway) uu page 2.
• To achieve optimum results with normal everyday document printing, use the Brother printer as close to
the WLAN access point/router as possible with minimal obstructions. Large objects and walls between the
two devices as well as interference from other electronic devices can affect the data transfer speed of your
documents.
Due to these factors, wireless may not be the best method of connection for all types of documents and
applications. You can use USB for the fastest throughput speed.
• Before configuring wireless settings, you will need to know your SSID and Network Key.
1
• Although the Brother machine can be used in both a wired
method can be used at a time.
1
A wired network interface is available on the QL-580N/720NW/1060N.
and wireless network, only one connection
and
3
3
6
Configuring your machine for a wireless network
Confirm your network environment 3
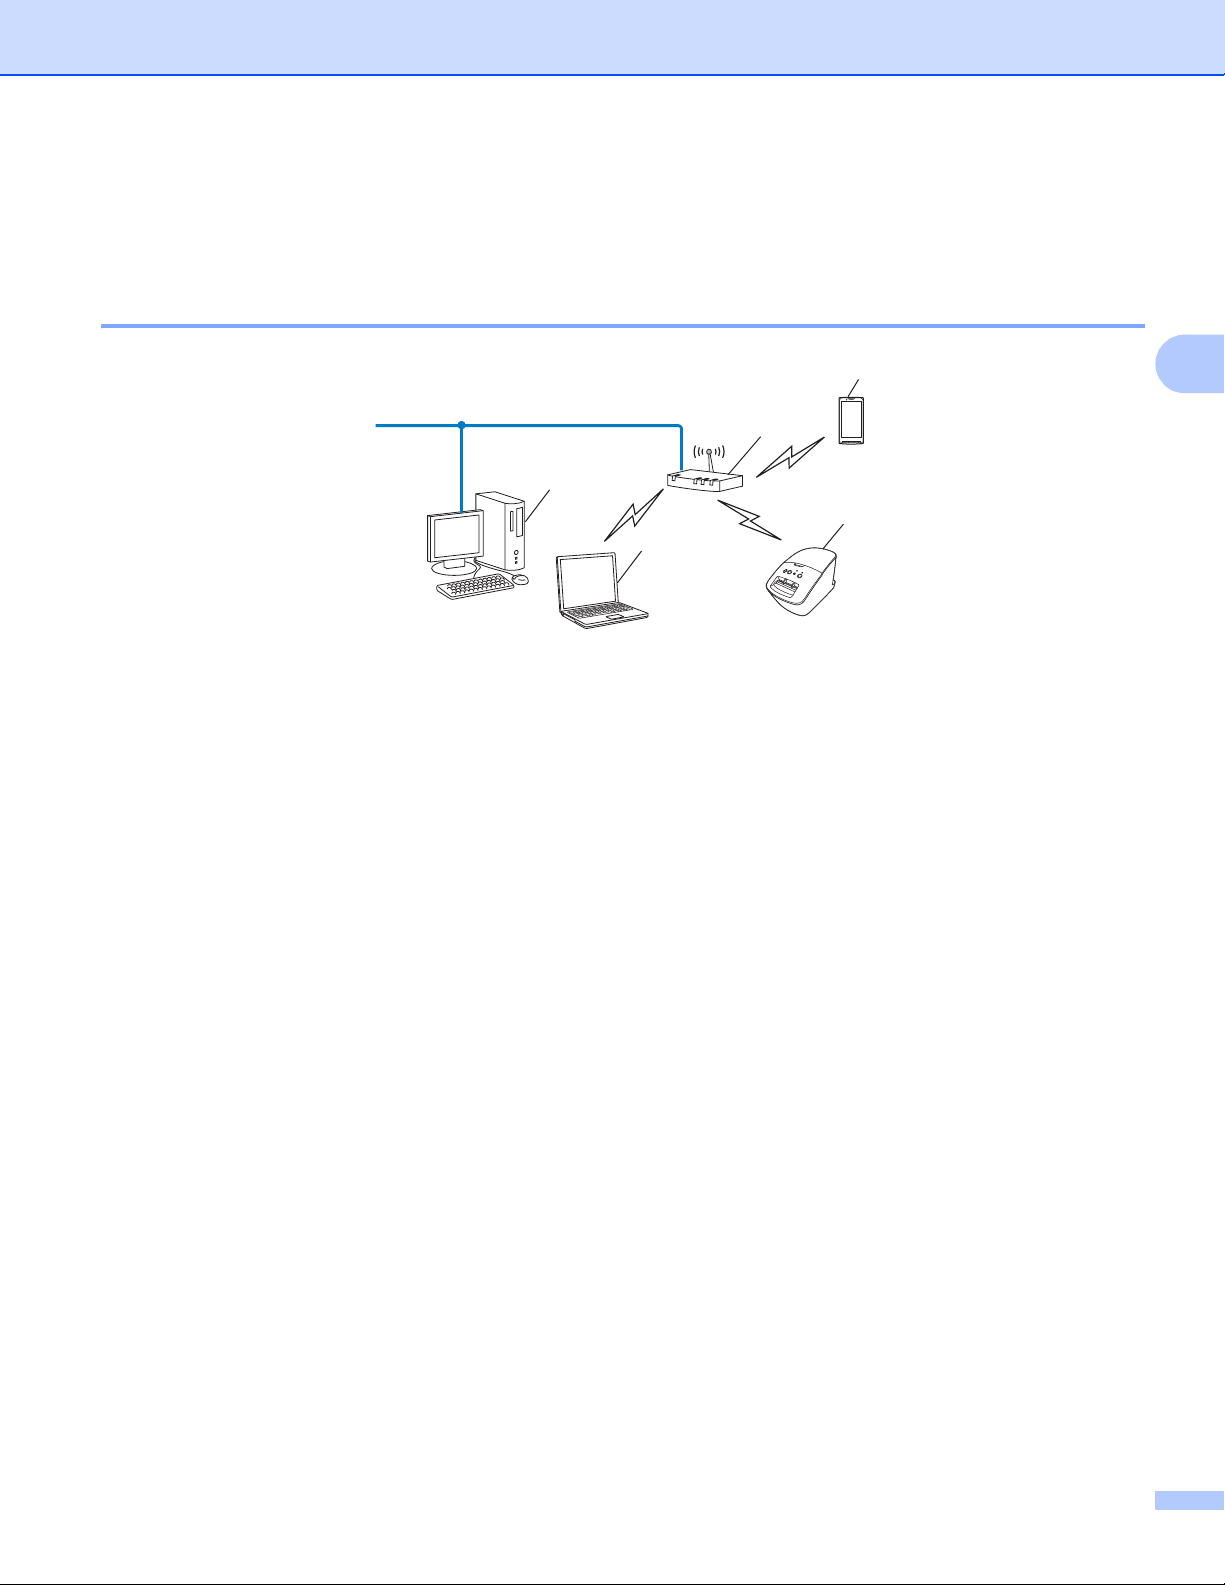
Connected to a computer with a WLAN access point/router in the network (Infrastructure mode) 3
5
1
4
3
3
1 WLAN access point/router
1
If your computer supports Intel® My WiFi Technology (Intel® MWT), you can use your computer as a Wi-Fi Protected Setup™ supported
access point.
1
2
2 Wireless network printer (your printer)
3 Wireless capable computer connected to the WLAN access point/router
4 Wired computer (which is not wireless capable) connected to the WLAN access point/router with
an Ethernet cable
5 Smartphone
Install method 3
The following instructions will offer the methods for installing your Brother printer in a wireless network
environment. Choose the method you prefer for your environment.
Wireless configuration temporarily using a USB cable (Recommended for Windows
users)
See Wireless configuration temporarily using a USB cable (Recommended for Windows
users) uu page 9.
®
and Macintosh
®
and Macintosh
One push wireless configuration using WPS
See One-push configuration using Wi-Fi Protected Setup™ uu page 10.
7
Configuring your machine for a wireless network
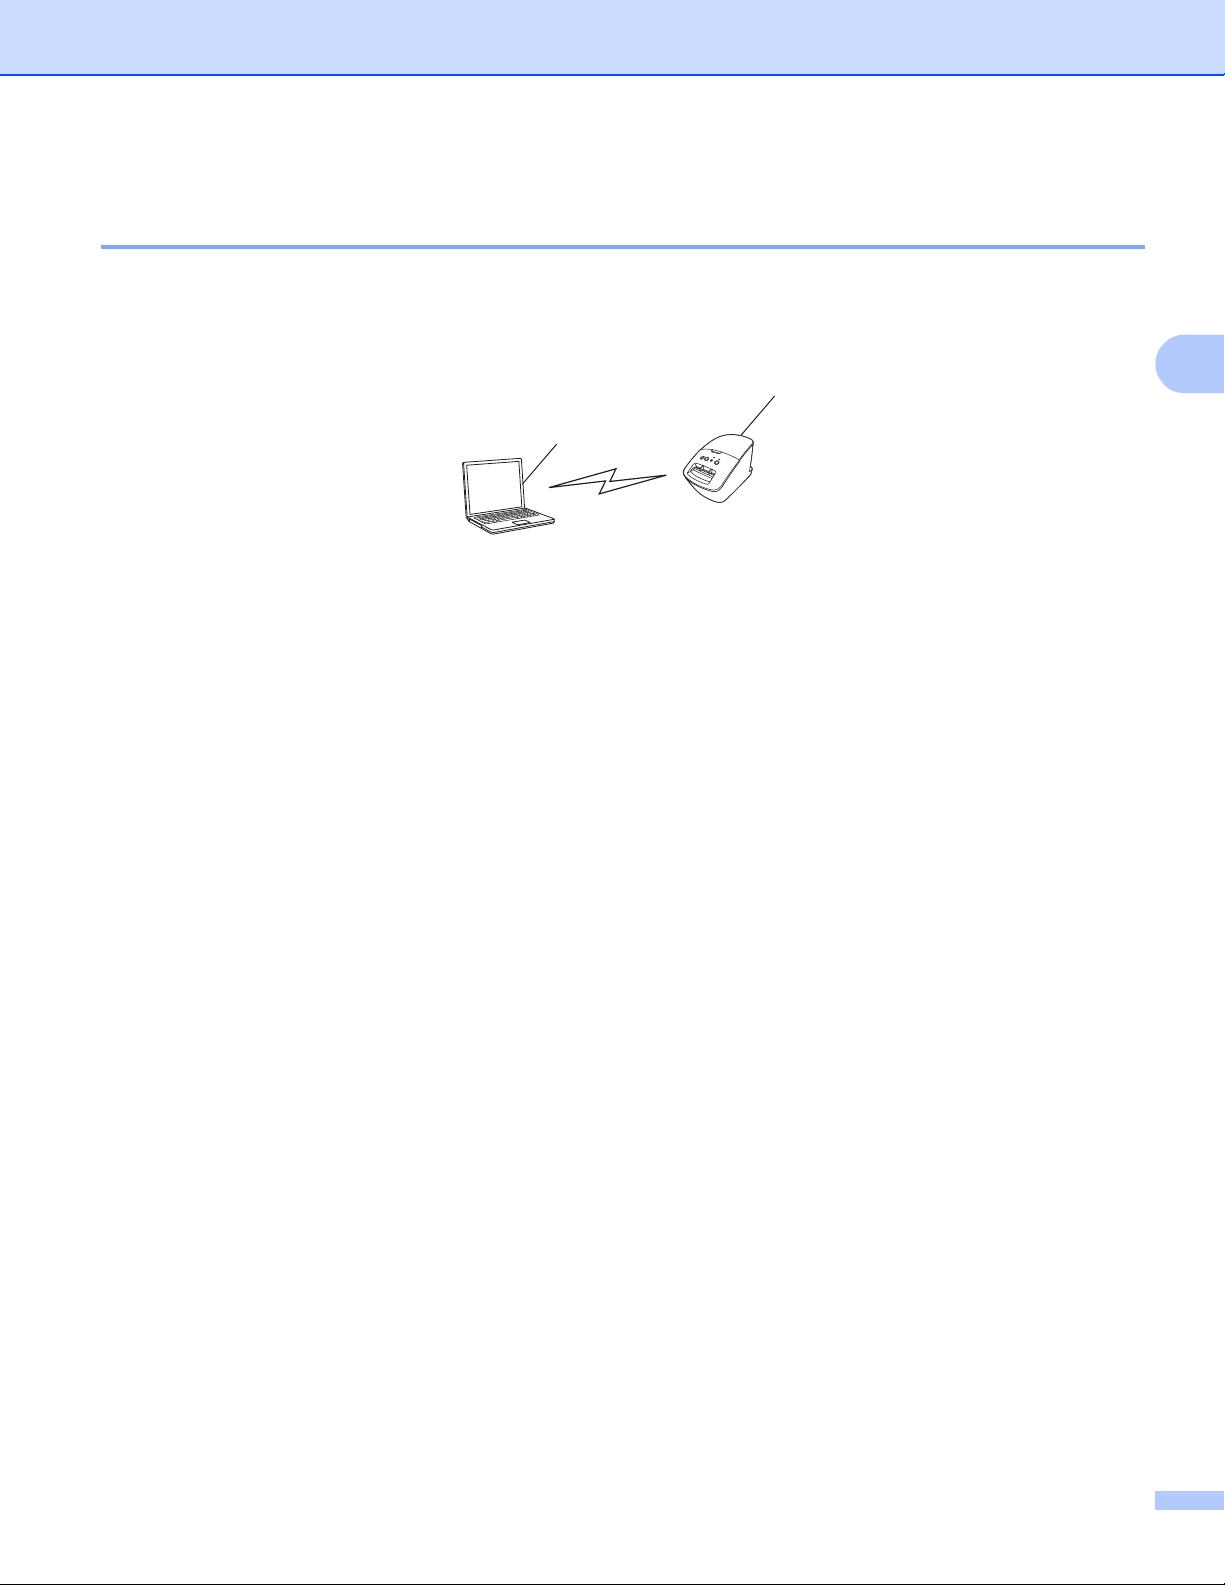
Connected to a wireless capable computer without a WLAN access point/router in the network (Ad-hoc mode) 3
This type of network does not have a central WLAN access point/router. Each wireless client communicates
directly with each other. When the Brother wireless printer (your printer) is part of this network, it receives all
print jobs directly from the computer sending the print data.
1
2
1 Wireless network printer (your printer)
2 Wireless capable computer
We cannot guarantee wireless network connection with Windows Server
Ad-hoc is only supported by 802.11b.
®
products in Ad-hoc mode.
3
8
Configuring your machine for a wireless network
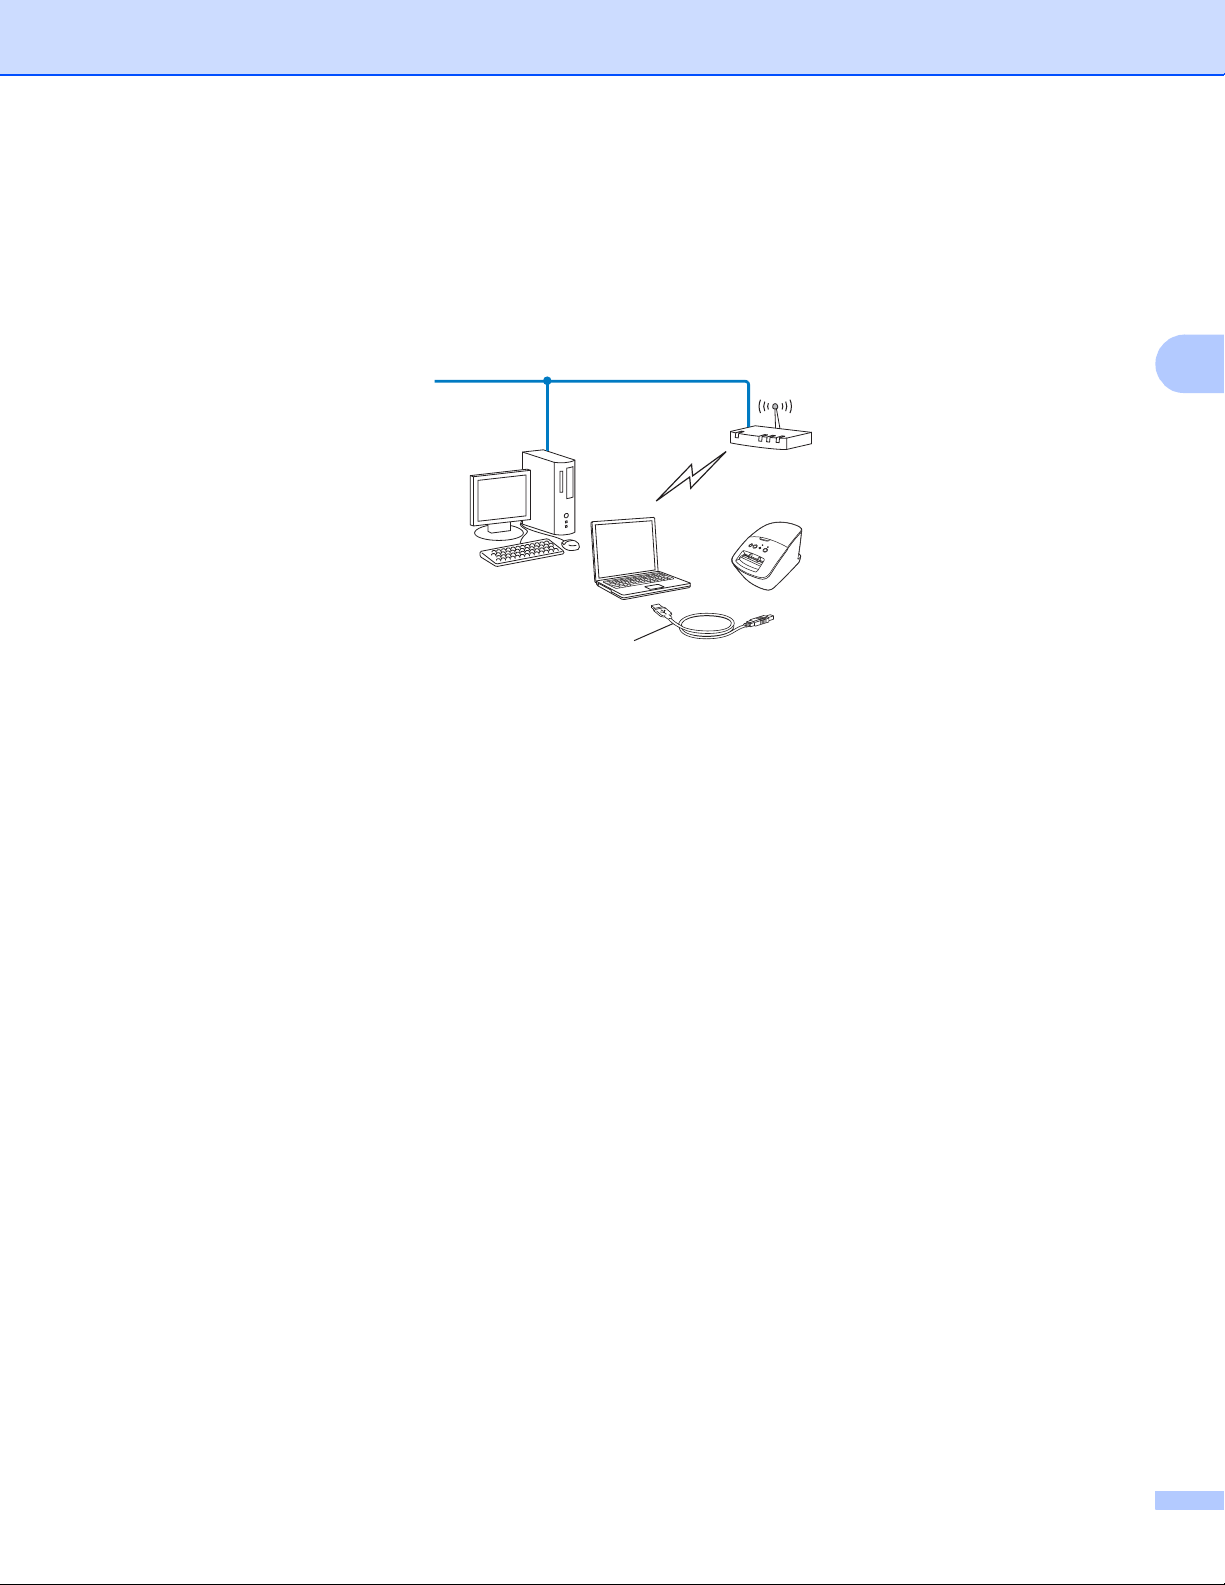
Wireless configuration temporarily using a USB cable (Recommended for Windows® and Macintosh users) 3
It is recommended that you use a PC or Mac wirelessly connected to your network for this method.
You can remotely configure the printer from the computer on the network using a USB cable (A)
A
1
You can configure the wireless settings of the printer using a USB cable temporarily connected to a wired or wireless computer.
1
.
3
See the installation procedure in the Quick Setup Guide.
9
Configuring your machine for a wireless network
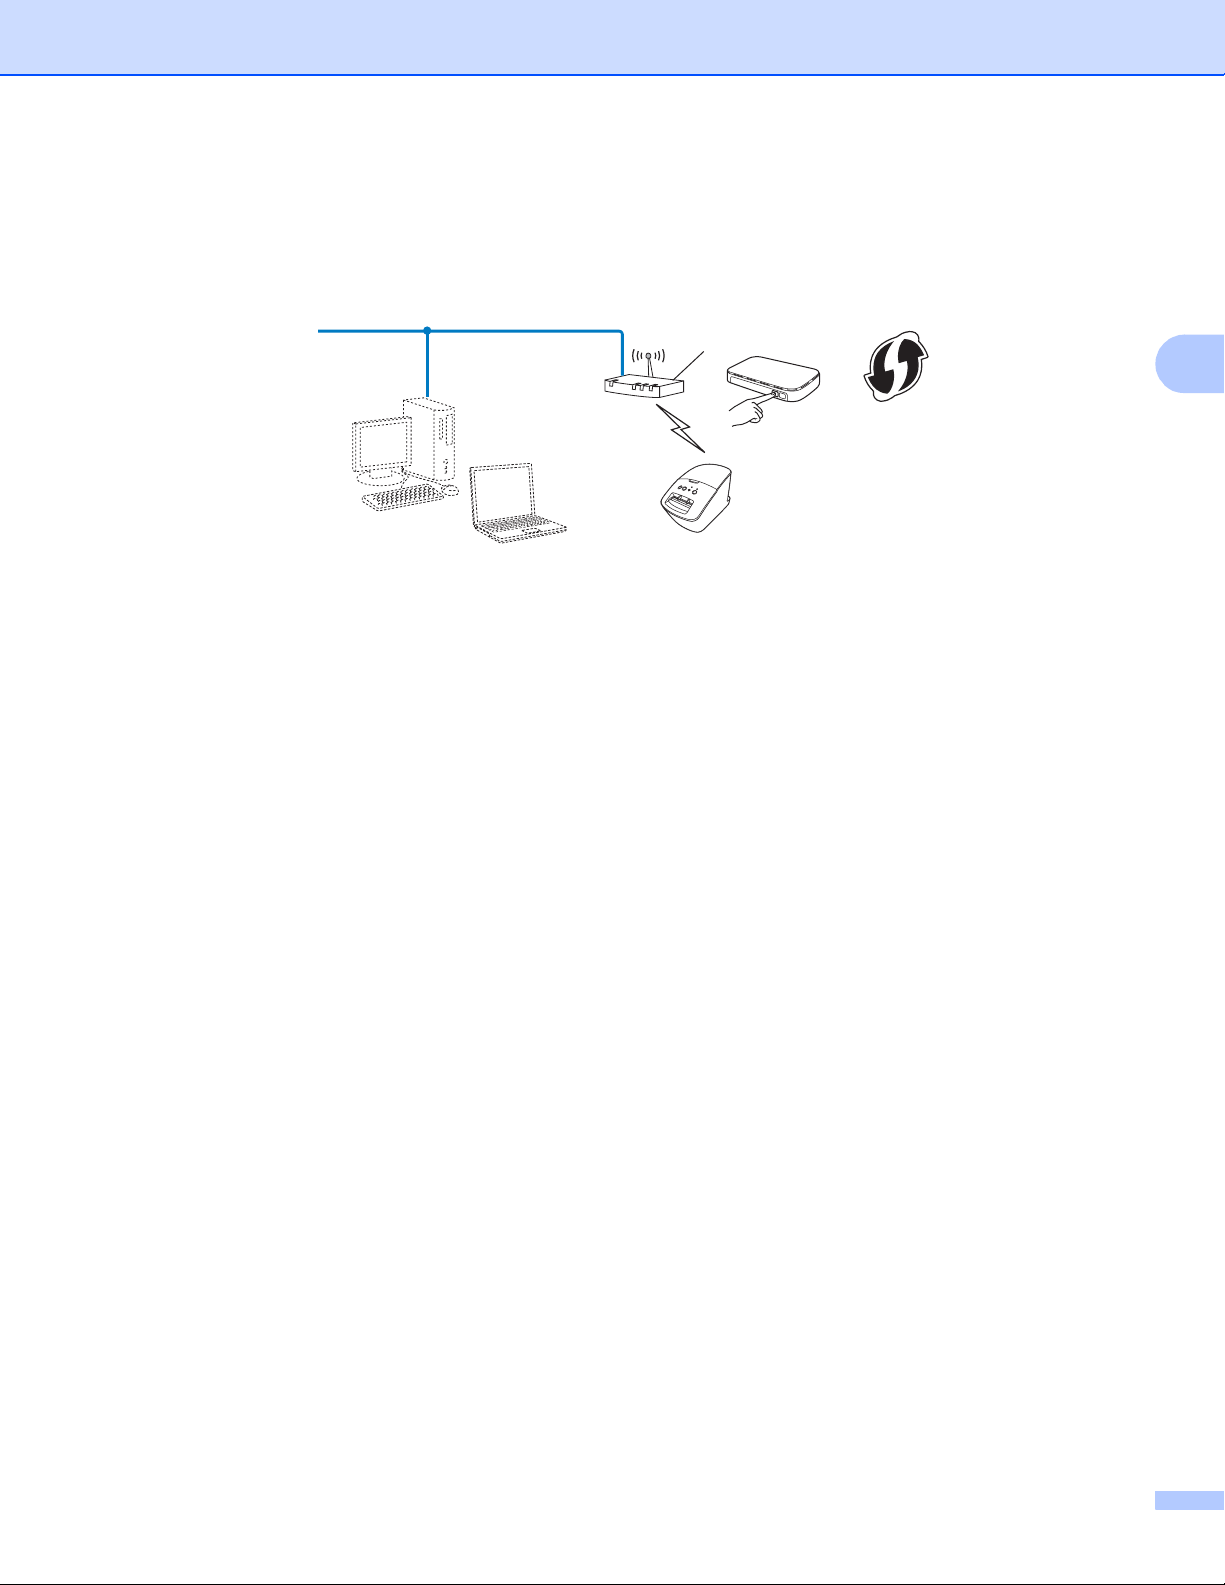
One-push configuration using Wi-Fi Protected Setup™ 3
You can use WPS to configure your wireless network settings easily if your WLAN access point/router (A)
1
supports Wi-Fi Protected Setup™ (PBC
1
Push Button Configuration
See the installation procedure in the Quick Setup Guide.
).
A
3
10

4
Note
Printing the Printer Set-up Information 4
Printing the Printer Set-up Information 4
The Printer Settings Page prints a report listing the network settings. You can print the Printer Settings Page
using the Cut button of the printer. The following details/items can be printed:
Program version
Printer usage history
Missing dot test pattern
Utility setting information
List of templates
Network setting information
®
Wi-Fi
• You can use the utility to set in advance which items will be printed.
Refer to the “QL Utility” chapter in the User’s Guide. Specify the parameters printed with “Printer
Information Output Settings”.
• The node name appears in the Printer Settings. The default node name is “BRNxxxxxxxxxxxx” or
“BRWxxxxxxxxxxxx”. (“xxxxxxxxxxxx” is based on your printer’s MAC Address / Ethernet Address.)
setting information
a Make sure that the DK roll is set and the front cover is closed.
To print the Printer Settings Page, we recommend to use 4" (102 mm) DK roll for QL-1060N, and
2.4" (62 mm) DK roll for QL-580N/710W/720NW.
b Turn on the printer.
4
c Press and hold the Cut button for more than one second.
11

Printing the Printer Set-up Information
Note
• To reset the network settings and turn APIPA ON
QL-580N/1060N:
Press the ON/OFF button to switch the machine OFF. Then, hold down the ON/OFF button for two
seconds. Continue holding down the ON/OFF button, and press the Cut button twice. All the network
settings will be reset.
QL-710W/720NW:
Press and hold the Cut button while holding down the ON/OFF button when the machine is turned off.
When the Wi-Fi lamp starts flashing and the Status lamp lights orange, press the Cut button twice while
continuing to hold down the ON/OFF button. All the network settings will be reset.
• To reset the network settings and turn APIPA OFF
QL-580N/1060N:
Press the ON/OFF button to switch the machine OFF. Then, hold down the ON/OFF button for two
seconds. Continue holding down the ON/OFF button, and press the Cut button four times. All the network
settings will be reset.
QL-710W/720NW:
Press and hold the Cut button while holding down the ON/OFF button when the machine is turned off.
When the Wi-Fi lamp starts flashing and the Status lamp lights orange, press the Cut button four times
while continuing to hold down the ON/OFF button. All the network settings will be reset.
4
12

5
Note
Web Based Management 5
Overview 5
You can use a standard web browser to manage a printer on your network using HTTP. When using Web
Based Management, the following are possible:
Display printer status information
Change network settings such as TCP/IP information
Display software version information of the printer and print server
Change network and printer configuration details
We recommend Microsoft® Internet Explorer®7.0/8.0 or Firefox®3.6 for Windows®, Safari® 5.0 or later or
®
Firefox
in whichever browser you use.
In order to use Web Based Management, your network must use TCP/IP, and the printer and computer must
have a valid IP address.
6.0 or later for Macintosh. Please also make sure that JavaScript and cookies are always enabled
5
13

Web Based Management
Note
Configuring the printer settings using Web Based Management (web browser) 5
A standard web browser can be used to change your print server settings using the HTTP (Hyper Text
Transfer Protocol).
a Type http://printer_ip_address/ into your browser. (Where printer_ip_address is the IP
address or the print server name.)
For example:
http://192.168.1.2/ (if the printer’s IP address is 192.168.1.2.).
If you have edited the hosts file on your computer or are using a Domain Name System, you can also enter
the DNS name of the print server. As the print server supports TCP/IP and NetBIOS, you can also enter
the NetBIOS name of the print server. The NetBIOS name can be seen on the printer settings page. The
NetBIOS name assigned is the first 15 characters of the node name and by default it will appear as
“BRNxxxxxxxxxxxx” where “xxxxxxxxxxxx” is the Ethernet address.
b Click Network Configuration.
5
c Enter a user name and a password. The User Name is admin and the default Password is access.
d Click OK.
e You can now change the print server settings.
14

6
Troubleshooting 6
Overview 6
This chapter explains how to resolve typical network problems you may encounter when using your Brother
printer. If, after reading this chapter, you are unable to resolve your problem, please visit the Brother Solutions
Center at: http://solutions.brother.com/
Make sure that the following items are configured before reading this chapter.
First check the following:
The power cord is connected properly and the Brother printer is turned on.
The access point (for wireless), router or hub is turned on and its link light is blinking.
All protective packaging has been removed from the machine.
The front and back covers are fully closed.
The roll is inserted properly in the roll compartment.
(For wired networks) A network cable is securely connected to the Brother printer and the router or hub.
I cannot complete the wireless network setup configuration.
.
6
Question Interface Solution
Are your security settings
(SSID/Network Key)
correct?
Are you using MAC address
filtering?
Is your WLAN access
point/router in stealth
mode? (not broadcasting
the SSID)
I have checked and tried all
of the above, but still cannot
complete the wireless
configuration. Is there
anything else I can do?
Is your Brother printer
properly connected to the
WLAN access point/router?
wireless Reconfirm and choose the correct security settings.
• The manufacturer's name or model no. of the WLAN access
point/router may be used as the default security settings.
• See the instructions supplied with your WLAN access point/router for
information on how to find the security settings.
• Ask the manufacturer of your WLAN access point/router or ask your
Internet provider or network administrator.
wireless Confirm that the MAC address of the Brother printer is allowed in the filter.
You can find the MAC address from the Network Setting Tool. See the
User’s Guide for more details about the Network Setting Tool.
wireless You should enter the correct SSID name during the installation or when
using the Network Setting tool.
Check the SSID name in the instructions supplied with your WLAN
access point/router and reconfigure the wireless network setup.
wireless Use the Network Setting Tool.
wireless
If the Wi-Fi
is blinking, the network is not connected properly, and the wireless network
setup must be reconfigured.
®
lamp is lit, the network is properly connected. If the Wi-Fi® lamp
15

Troubleshooting
The Brother printer is not found on the network during the QL-710W/720NW installation.
Question Interface Solution
Are you using security
software?
Is your Brother printer
placed too far from the
WLAN access point/router?
Are there any obstructions
(walls or furniture, for
example) between your
printer and the WLAN
access point/router?
Is there a wireless
computer, Bluetooth
supported device,
microwave oven or digital
cordless phone near the
Brother printer or the WLAN
access point/router?
wired/
wireless
wireless Place your Brother printer within about 3.3 feet (1 meter) from the WLAN
wireless Move your Brother printer to an obstruction-free area, or closer to the WLAN
wireless Move all the devices away from Brother printer or WLAN access
Confirm your settings in the installer dialog.
Allow access when the security software alert message appears during
the QL-710W/720NW installation.
access point/router when you configure the wireless network settings.
access point/router.
point/router.
6
The Brother printer cannot print over the network.
The Brother printer is not found on the network even after successful installation.
Question Interface Solution
Are you using security
software?
Is your Brother printer
assigned with an available
IP address?
wired/
wireless
wired/
wireless
See I'm using security software. uu page 17.
Confirm the IP address and the Subnet Mask.
Verify that both the IP addresses and Subnet Masks of your computer
and the Brother printer are correct and located on the same network.
For more information on how to verify the IP address and the Subnet
Mask, ask the network administrator.
(Windows
Confirm your IP address, Subnet Mask and other network settings with
the Network Setting Tool.
See Using the Network Setting Tool uu page 32.
®
)
16

Troubleshooting
The Brother printer cannot print over the network.
The Brother printer is not found on the network even after successful installation. (continued)
Question Interface Solution
Did your previous printing
job fail?
wired/
wireless
If the failed printing job is still in your computer’s print queue, delete it.
Double-click your printer icon in the following folder and then choose
Cancel All Documents in the Printer menu:
(Windows
®
XP)
Start and then Printers and Faxes.
®
(Windows Vista
)
, Control Panel, Hardware and Sound and then Printers.
(Windows
Printers and Faxes.
Are you connecting the
Brother printer to the
network wirelessly?
wireless Print the Printer settings. (For how to print, see Printing the Printer Set-
up Information uu page 11.)
See The Brother printer is not found on the network during the
QL-710W/720NW installation. uu page 16.
I have checked and tried all
the above, however the
wired/
wireless
Uninstall the QL-710W/720NW printer driver and reinstall it.
Brother printer does not
print. Is there anything else I
can do?
I'm using security software.
Question Interface Solution
Did you choose to accept
the security alert dialog
during the standard
installation or BRAdmin
Light installation or when
using the printing features?
I want to know the
necessary port number for
the security software
settings.
wired/
wireless
wired/
wireless
If you did not choose to accept the security alert dialog, the firewall function
of your security software may be rejecting access. Some security software
might block access without showing a security alert dialog. To allow access,
see the instructions of your security software or ask the manufacturer.
The following port numbers are used for Brother network features:
BRAdmin Light i Port number 161 / Protocol UDP
For details on how to open the port, see the instructions of the security
software or ask the manufacturer.
®
7)
, Devices and Printers and select your printer from
6
17

Troubleshooting
I want to check that my network devices are working properly.
Question Interface Solution
Is your Brother printer,
access point/router or
network hub turned on?
Where can I find the Brother
printer’s network settings,
such as IP address?
Can you ping the Brother
printer from your computer?
wired/
wireless
wired/
wireless
wired/
wireless
Make sure you have confirmed all instructions in Make sure that the
following items are configured before reading this chapter. uu page 15.
Print the Printer settings. (For how to print, see Printing the Printer Set-up
Information uu page 11.)
Ping the Brother printer from your computer using the IP address or the node
name.
Successful i Your Brother printer is working correctly and connected to
the same network as your computer.
Unsuccessful i Your Brother printer is not connected to the same
network as your computer.
(Windows
Ask the network administrator and use the Network Setting Tool.
(Macintosh)
®
)
6
Is the Brother printer
connected to the wireless
network?
Confirm the IP address and the Subnet Mask are set correctly. See
Confirm the IP address and the Subnet Mask. uu page 16.
wireless Print the Printer Settings to confirm the state of the wireless connection. (For
how to print, see Printing the Printer Set-up Information uu page 11.)
18

A
Appendix A A
Supported protocols and security features A
Interface Ethernet 10BASE-T/100BASE-TX
Wireless IEEE 802.11b/g/n (Infrastructure Mode)
IEEE 802.11b (Ad-hoc Mode)
Network
(common)
Network
(Security)
Protocol (IPv4) ARP, RARP, BOOTP, DHCP, APIPA (Auto IP), WINS/NetBIOS name
resolution, DNS Resolver, mDNS, LLMNR responder, LPR/LPD,
Custom Raw Port/Port9100, FTP Server, TFTP server, SNMPv1/v2c,
ICMP
Wireless SSID (32 chr), WEP 64/128 bit, WPA-PSK (TKIP/AES), WPA2-PSK
(AES), LEAP, EAP-FAST
A
19

B
TCP/IPTCP/IP
In this section, you will find basic information about advanced network features of the Brother printer along
with general networking and common terms.
The supported protocols and the network features differ depending on the model you are using.
Appendix B B
Types of network connections and protocols B
Types of network connections B
Wired network connection example B
Peer-to-Peer printing using TCP/IP B
In a Peer-to-Peer environment, each computer directly sends and receives data to each device. There is no
central server controlling file access or printer sharing.
Network printer
(your printer)
1 Router
In a smaller network of 2 or 3 computers, we recommend the Peer-to-Peer printing method as it is easier
to configure than the Network Shared printing method. See Network Shared printing uu page 21.
Each computer must use the TCP/IP Protocol.
The Brother printer needs an appropriate IP address configuration.
If you are using a router, the Gateway address must be configured on the computers and the Brother
printer.
B
20

Appendix B
Network Shared printing B
In a Network Shared environment, each computer sends data via a centrally controlled computer. This type
of computer is often called a “Server” or a “Print Server”. Its job is to control the printing of all print jobs.
Network printer
(your printer)
1 Client computer
2 Also known as “Server” or “Print server”
3 TCP/IP or USB
In a larger network, we recommend a Network Shared printing environment.
The “server” or the “print server” must use the TCP/IP print protocol.
The Brother printer needs to have an appropriate IP address configuration unless the printer is connected
via the USB or the serial interface at the server.
B
21

Appendix B
Note
Note
Protocols B
TCP/IP protocols and functions B
Protocols are the standardized sets of rules for transmitting data on a network. Protocols allow users to gain
access to network connected resources.
The print server used on the Brother printer supports the TCP/IP (Transmission Control Protocol/Internet
Protocol) protocol.
TCP/IP is the most popular set of protocols used for communication such as Internet and E-mail. This protocol
®
can be used in almost all operating systems such as Windows
The following TCP/IP protocols are available on the Brother printer.
• You can configure the protocol settings by using the HTTP interface (web browser). (See Configuring the
printer settings using Web Based Management (web browser) uu page 14.)
• To find what protocols your Brother printer supports, see Supported protocols and security features
uu page 19.
DHCP/BOOTP/RARP B
, Windows Server®, Mac OS X and Linux®.
B
By using the DHCP/BOOTP/RARP protocols, the IP address can be automatically configured.
To use the DHCP/BOOTP/RARP protocols, please contact your network administrator.
APIPA B
If you do not assign an IP address manually (using the BRAdmin software) or automatically (using a
DHCP/BOOTP/RARP server), the Automatic Private IP Addressing (APIPA) protocol will automatically
assign an IP address from the range 169.254.1.0 to 169.254.254.255.
ARP
Address Resolution Protocol performs mapping of an IP address to a MAC address in a TCP/IP network.
DNS client B
The Brother print server supports the Domain Name System (DNS) client function. This function allows the
print server to communicate with other devices by using its DNS name.
NetBIOS name resolution
Network Basic Input/Output System name resolution enables you to obtain the IP address of the other device
using its NetBIOS name during the network connection.
B
B
WINS
Windows® Internet Name Service is a service providing information for NetBIOS name resolution, by
consolidating an IP address and a NetBIOS name that is on the local network.
B
22

Appendix B
LPR/LPD B
Commonly used printing protocols on a TCP/IP network.
Custom Raw Port (Default is Port 9100)
Another commonly used printing protocol on a TCP/IP network. It enables interactive data transmission.
mDNS B
mDNS allows the Brother print server to automatically configure itself to work on a Mac OS X Simple Network
Configured system.
SNMP B
The Simple Network Management Protocol (SNMP) is used to manage network devices including computers,
routers and Brother network ready printers. The Brother print server supports SNMPv1 and SNMPv2.
LLMNR B
The Link-Local Multicast Name Resolution protocol (LLMNR) resolves the names of neighboring computers
if the network does not have a Domain Name System (DNS) server. The LLMNR Responder function works
in both the IPv4 or IPv6 environment when using an operating system that has the LLMNR Sender function
®
such as Windows Vista
and Windows®7.
B
B
23

Appendix B
Note
Configuring your printer for a network B
IP addresses, subnet masks and gateways B
To use the printer in a networked TCP/IP environment, you need to configure its IP address and subnet mask.
The IP address you assign to the print server must be on the same logical network as your host computers.
If it is not, you must properly configure the subnet mask and the gateway address.
IP address B
An IP address is a series of numbers that identifies each device connected to a network. An IP address
consists of four numbers separated by dots. Each number is between 0 and 255.
Example: In a small network, you would normally change the final number.
• 192.168.1.1
• 192.168.1.2
• 192.168.1.3
How the IP address is assigned to your print server: B
If you have a DHCP/BOOTP/RARP server on your network the print server will automatically obtain its IP
address from that server.
On smaller networks, the DHCP server may also be the router.
For more information on DHCP, BOOTP and RARP, see:
Using DHCP to configure the IP address uu page 29.
Using BOOTP to configure the IP address uu page 30.
Using RARP to configure the IP address uu page 29.
If you do not have a DHCP/BOOTP/RARP server, the Automatic Private IP Addressing (APIPA) protocol will
automatically assign an IP address from the range 169.254.1.0 to 169.254.254.255. For more information on
APIPA, see Using APIPA to configure the IP address uu page 30.
B
24

Appendix B
Subnet mask B
Subnet masks restrict network communication.
Example: Computer 1 can talk to Computer 2
•Computer 1
IP Address: 192.168.1.2
Subnet Mask: 255.255.255.0
•Computer 2
IP Address: 192.168.1.3
Subnet Mask: 255.255.255.0
Where the 0 is in the Subnet mask, there is no limit to communication at this part of the address. What this
means in the above example is, we can communicate with any device that has an IP address that begins with
192.168.1.x. (where x is a number between 0 and 255).
Gateway (and router) B
A gateway is a network point that acts as an entrance to another network and sends data transmitted via the
network to an exact destination. The router knows where to direct data that arrives at the gateway. If a
destination is located on an external network, the router transmits data to the external network. If your network
communicates with other networks, you may need to configure the Gateway IP address. If you do not know
the Gateway IP address then contact your Network Administrator.
B
25

Appendix B
Wireless network terms and concepts B
Specifying your network B
SSID (Service Set Identifier) and channels B
You need to configure the SSID and a channel to specify the wireless network you want to connect to.
SSID
Each wireless network has its own unique network name which is technically referred to as an SSID or
ESSID (Extended Service Set Identifier). The SSID is a 32-byte or less value and is assigned to the access
point. The wireless network devices you want to associate to the wireless network should match the
access point. The access point and wireless network devices regularly send wireless packets (referred to
as beacons) containing the SSID information. When your wireless network device receives a beacon, you
can identify wireless networks within range of your device.
Channels
Wireless networks use channels. Each wireless channel is on a different frequency. There are up to 14
different channels that can be used when using a wireless network. However, in many countries the
number of channels available are restricted.
B
Security terms B
Authentication and encryption B
Most wireless networks use some kind of security settings. These security settings define the authentication
(how the device identifies itself to the network) and encryption (how the data is encrypted as it is sent on the
network). If you do not correctly specify these options when you are configuring your Brother wireless
printer, it will not be able to connect to the wireless network. Therefore care must be taken when
configuring these options.
Authentication and Encryption methods for a personal wireless network B
A personal wireless network is a small network, for example using your printer in a wireless network at home,
without IEEE 802.1x support.
26

Appendix B
Authentication methods B
Open system
Wireless devices are allowed to access the network without any authentication.
Shared key
A secret pre-determined key is shared by all devices that will access the wireless network.
The Brother wireless printer uses a WEP key as the pre-determined key.
WPA-PSK
Enables a Wi-Fi Protected Access Pre-shared key (WPA-PSK), which enables the Brother wireless printer
to associate with access points using TKIP or AES for WPA-PSK.
WPA2-PSK
Enables a Wi-Fi Protected Access Pre-shared key (WPA2-PSK), which enables the Brother wireless
printer to associate with access points using AES for WPA2-PSK (WPA-Personal).
WPA-PSK/WPA2-PSK
Enables a Wi-Fi Protected Access Pre-shared key (WPA-PSK/WPA2-PSK), which enables the Brother
wireless printer to associate with access points using TKIP for WPA-PSK, or AES for WPA-PSK and
WPA2-PSK (WPA-Personal).
B
Encryption methods
None
No encryption method is used.
WEP
When using WEP (Wired Equivalent Privacy), the data is transmitted and received with a secure key.
TKIP
TKIP (Temporal Key Integrity Protocol) provides per-packet key mixing, a message integrity check and
rekeying mechanism.
AES
®
AES (Advanced Encryption Standard) is the Wi-Fi
authorized strong encryption standard.
B
27

Appendix B
Network key B
Open system/Shared key with WEP
This key is a 64-bit or 128-bit value that must be entered in an ASCII or hexadecimal format.
• 64 (40) bit ASCII:
Uses 5 text characters. e.g. “WSLAN” (this is case sensitive)
• 64 (40) bit hexadecimal:
Uses 10 digits of hexadecimal data. e.g. “71f2234aba”
• 128 (104) bit ASCII:
Uses 13 text characters. e.g. “Wirelesscomms” (this is case sensitive)
• 128 (104) bit hexadecimal:
Uses 26 digits of hexadecimal data. e.g. “71f2234ab56cd709e5412aa2ba”
WPA-PSK/WPA2-PSK and TKIP or AES
Uses a Pre-Shared Key (PSK) that is 8 or more characters in length, up to a maximum of 63 characters.
B
28

Appendix B
Note
Other ways to set the IP address (for advanced users and administrators) B
Using DHCP to configure the IP address B
The Dynamic Host Configuration Protocol (DHCP) is one of several automated mechanisms for IP address
allocation. If you have a DHCP server on your network, the print server will automatically obtain its IP address
from the DHCP server and register its name with any RFC 1001 and 1002-compliant dynamic name services.
If you do not want your print server configured via DHCP, BOOTP or RARP, you must set the Boot Method
to static so that the print server has a static IP address. This will prevent the print server from trying to
obtain an IP address from any of these systems. To change the Boot Method, use the BRAdmin
applications, or Web Based Management (web browser).
Using RARP to configure the IP address B
The Brother print server’s IP address can be configured using the Reverse ARP (RARP) facility on your host
computer. This is done by editing the /etc/ethers file (if this file does not exist, you can create it) with an
entry similar to the following:
00:80:77:31:01:07 BRN008077310107 (or BRW008077310107 for a wireless network)
Where the first entry is the MAC Address (Ethernet Address) of the print server and the second entry is the
name of the print server (the name must be the same as the one you put in the /etc/hosts file).
If the RARP daemon is not already running, start it (depending on the system the command can be rarpd,
rarpd -a, in.rarpd -a or something else; type man rarpd or refer to your system documentation for
additional information).
The Brother print server will get the IP address from the RARP daemon when the printer is powered on.
B
29

Appendix B
Note
Using BOOTP to configure the IP address B
BOOTP is an alternative to RARP that has the advantage of allowing configuration of the subnet mask and
gateway. In order to use BOOTP to configure the IP address make sure that BOOTP is installed and running
on your host computer (it should appear in the /etc/services file on your host as a real service; type
man bootpd or refer to your system documentation for information). BOOTP is usually started up via the
/etc/inetd.conf file, so you may need to enable it by removing the “#” in front of the bootp entry in that
file. For example, a typical bootp entry in the /etc/inetd.conf file would be:
#bootp dgram udp wait /usr/etc/bootpd bootpd -i
Depending on the system, this entry might be called “bootps” instead of “bootp”.
In order to enable BOOTP, simply use an editor to delete the “#” (if there is no “#”, then BOOTP is already
enabled). Then edit the BOOTP configuration file (usually /etc/bootptab) and enter the name, network
type (1 for Ethernet), MAC Address (Ethernet Address) and the IP address, subnet mask and gateway of
the print server. Unfortunately, the exact format for doing this is not standardized, so you will need to refer
to your system documentation to determine how to enter this information. Some examples of typical
/etc/bootptab entries include: (“BRN” below is “BRW” for a wireless network.)
BRN310107 1 00:80:77:31:01:07 192.168.1.2
and:
BRN310107:ht=ethernet:ha=008077310107:\ip=192.168.1.2:
Certain BOOTP host software implementations will not respond to BOOTP requests if you have not included
a download filename in the configuration file. If this is the case, simply create a null file on the host and specify
the name of this file and its path in the configuration file.
As with RARP, the print server will load its IP address from the BOOTP server when the printer is powered on.
Using APIPA to configure the IP address B
The Brother print server supports the Automatic Private IP Addressing (APIPA) protocol. With APIPA, DHCP
clients automatically configure an IP address and subnet mask when a DHCP server is not available. The
device chooses it's own IP address in the range 169.254.1.0 through to 169.254.254.255. The subnet mask
is automatically set to 255.255.0.0 and the gateway address is set to 0.0.0.0.
By default, the APIPA protocol is enabled. If you want to disable the APIPA protocol, you can disable it using
BRAdmin Light or Web Based Management (web browser).
B
30

Appendix B
Note
Using ARP to configure the IP address B
If you are unable to use the BRAdmin application and your network does not use a DHCP server, you can
®
also use the ARP command. The ARP command is available on Windows
installed. To use ARP enter the following command at the command prompt:
arp -s ipaddress ethernetaddress
ping ipaddress
Where ethernetaddress is the MAC Address (Ethernet Address) of the print server and ipaddress is
the IP address of the print server. For example:
®
Windows
Windows
systems
®
systems require the dash “-” character between each digit of the MAC Address (Ethernet
Address).
arp -s 192.168.1.2 00-80-77-31-01-07
ping 192.168.1.2
systems that have TCP/IP
You must be on the same Ethernet segment (that is, there cannot be a router between the print server and
operating system) to use the arp -s command.
If there is a router, you may use BOOTP or other methods described in this chapter to enter the IP address.
If your administrator has configured the system to deliver IP addresses using BOOTP, DHCP or RARP
your Brother print server can receive an IP address from any one of these IP address allocation systems.
In which case, you will not need to use the ARP command. The ARP command only works once. For
security reasons, once you have successfully configured the IP address of a Brother print server using the
ARP command, you cannot use the ARP command again to change the address. The print server will
ignore any attempts to do this. If you wish to change the IP address again, use a Web Based Management
(web browser), TELNET (using the SET IP ADDRESS command) or factory reset the print server (which
will then allow you to use the ARP command again).
B
31

C
Note
Appendix C C
Network Setting Tool (QL-710W/720NW only, Windows® only)C
Overview C
The Network Setting Tool is a computer program used for changing network settings via USB.
By using the Network Setting Tool, you can not only change the network settings for one printer, you can
easily apply the same settings to multiple printers.
The Network Setting Tool is installed with other software such as the printer driver.
Operating Environment C
Windows® XP SP3 or later (x86 editions only)
Windows Vista
®
Windows® 7
Windows Server
Windows Server
The Network Setting Tool can change the settings for certain Brother printer models only.
®
2003
®
2008
Using the Network Setting Tool C
Starting the Network Setting Tool C
a Connect the printer whose settings will be changed to the computer via USB.
b Click Start - All Programs - Brother - Label & Mobile Printer - Printer Setting Tool.
c Select the printer connected in a.
d Click the Network Setting Tool button.
The main window is displayed.
C
32

Appendix C
Main Window C
Exact screen contents depend on your printer model.
1
2
3
4
6
5
7
8
1 Menu Bar
Select the commands contained in each menu from the list.
2Printer
Select the printer to configure.
If only one printer is connected, only that printer is displayed and it is not necessary to select a printer.
3 Wired Node Name/Wireless Node Name
Displays the node name. Node names can be edited.
4 Applicable Settings
Displays setting items. Select the item that you want to configure.
The selected settings that are displayed can be applied to the printer, saved or exported.
5 Settings Display/Change Area
Displays the selected item’s current setting. Change the settings as necessary using the drop-down list
box, direct entry, or other methods.
C
6 Save Command Settings
Saves network settings in PJL command format. The file extension is “.bin”.
By sending these commands to printers via USB, network settings for printers can be configured in the
same way as when settings are made using the Network Setting Tool (uuUser’s Guide: Mass Storage).
7 Apply
Applies the settings to the printer.
By pressing this button you can apply all the settings set on multiple windows at once.
8Exit
Exits the Network Setting Tool.
If you close the Network Setting Tool without clicking Apply after changing settings, the settings will not be
applied.
33

Appendix C
Note
Changing the Communication Settings C
a Make sure that the computer with the Network Setting Tool installed is connected via USB to the printer
that you want to configure.
b Start the Network Setting Tool. Confirm that the printer that you want to configure is displayed in Printer.
If another printer is displayed, select the desired printer from the Printer drop-down list box.
If only one printer is connected, only that printer is displayed and it is not necessary to select a printer.
c From Network Settings of Applicable Settings, click the items that will be changed.
For QL-720NW
From the pull-down list, select Wired, Wireless or Wired/Wireless.
The categories under Applicable Settings change according to the selected setting.
The selected settings that are displayed can be applied to the printer, saved or exported.
d In the settings display/change area, select the desired setting from the pull-down list, or enter a value.
e When you have changed all the desired settings, click the Apply button and then the Exit button.
The settings are applied to the printer.
C
34

Appendix C
Note
Note
Applying Setting Changes to Multiple Printers C
a After following the steps in Changing the Communication Settings above, disconnect the printer from the
computer, and connect the second printer to the computer.
b Select the newly connected printer from the Printer combo box.
If the Automatically detects the connected printer, and retrieves the current settings. check box on
the Option Settings screen is selected, the connected printer is automatically selected.
See Automatically detects the connected printer, and retrieves the current settings. uu page 38.
c Click the Apply button.
The same settings that were applied to the first printer are applied to the second printer.
d Repeat steps a - c for all the printers that you want to change the settings for.
If the IP address is set to STATIC, the printer’s IP address will also be changed to the same address as the
first printer.
Change the IP address as necessary.
To save the configured settings as a file, click File - Export...
The exported configuration can be applied to the Network Settings using the Network Setting Tool.
C
35

Appendix C
6
7
8
9
1
2
3
4
5
Menu Bar C
1 Apply Settings to the Printer
Applies the settings to the printer; functions the same way as the Apply button in the main window. See
Apply uu page 33.
2 Save Command Settings
Saves network settings in PJL command format. The file extension is “.bin”.
By sending these commands to printers via USB, network settings for printers can be configured in the
same way as when settings are made using the Network Setting Tool (uuUser’s Guide: Mass Storage).
The following information is not saved in the command settings file.
• Node name
• IP address, subnet mask, gateway address (when the IP address is set to STATIC).
These command settings are only intended to be used to apply printer settings. Saved commands cannot
be imported to the Network Setting Tool.
Saved command files contain authentication keys and passwords. Take necessary measures to protect
saved command files such as by saving command files in locations that other users cannot access.
Do not send the command file to a printer whose model was not specified when the command file was
exported.
C
36

Appendix C
Note
Note
Note
3 Import
Import from the current computer wireless settings
Imports the settings from the computer.
• Only Personal Security Authentication settings (open system, Shared Key and WPA/WPA2-PSK) can be
imported. Enterprise Security Authentication settings (such as LEAP or EAP-FAST), WPA2-PSK TKIP
cannot be imported.
• If multiple wireless LANs are enabled for the computer used, the first wireless settings (Only Personal
Security Authentication settings) detected are considered to be the import data.
• Only settings values (SSID, authentication method, encryption method, and authentication key) from the
Network Settings - Wireless Settings screen of Applicable Settings can be imported.
Select a Profile to import
Imports settings that were exported as a profile.
Click this option and select a profile by clicking the Browse... button. Your selected settings will be
displayed in the settings display/change area.
• All settings, such as wireless settings or TCP/IP settings, can be saved. However, node names cannot be
imported.
• Only profiles that are compatible with the selected printer can be imported.
• If the imported profile's IP address is set to STATIC, change the IP address of the imported profile as
necessary so that it does not duplicate the IP address of an existing printer on the network.
4 Export
Saves the settings in a text file.
Exported files are not encrypted.
Because exported files may contain authentication keys and passwords, take necessary measures to protect
exported files by saving exported files to arbitrary locations which other users cannot access.
5 Restore to Default Network Settings
Returns network settings to the factory default settings.
6 Automatically restart the printer after use.
When this check box is selected, printers automatically restart after network settings are applied.
When this check box is cleared, printers must be manually restarted.
When configuring multiple printers, you can reduce the time required to change settings by clearing this
check box. Note that in this case we recommend selecting this check box when configuring the first printer
so that you can confirm that each setting is operating as intended.
C
37

Appendix C
Note
7 Automatically detects the connected printer, and retrieves the current settings.
When this check box is selected and a printer is connected to the computer, the printer is automatically
detected and the printer's current settings are displayed in the Current Network Status area (see
Current Network Status uu page 38).
When the model of the connected printer is different from that of the printer shown in the Printer combo
box, the available settings on all editing screens change to match the connected printer.
8 Display Help
Displays the help file.
9 About...
Displays version information.
Connected Printer’s Status C
1
1 Current Network Status
Displays network status on the right side of the screen in the settings display/change area.
Click the Refresh button to update the view.
C
38

Appendix C
2
1
3
QL-710W QL-720NW
1
Network Settings C
1 WLAN on Power On/Network Settings on Power On
®
Selects whether Wi-Fi
or wired LAN communication is enabled when the printer is turned on.
Select either: (QL-710W) On by Default, Off by Default or Keep Current State.
(QL-720NW) Wireless LAN by Default, Wired LAN by Default or Keep Current State.
2 Wireless Usage
Enables and disables wireless communication.
3 Selected Interface
Selects whether a wired or wireless interface is to be used.
C
39

Appendix C
TCP/IP C
1
2
3
4
1 Boot Method
Select either: STATIC, AUTO, BOOTP, DHCP, RARP.
2 IP Address/Subnet Mask/Gateway
Set the various values.
You can only enter settings when the IP address setting is set to STATIC.
3 DNS Server Method
Select either STATIC or AUTO.
4 Primary DNS Server IP Address/Secondary DNS Server IP Address
You can only enter settings when the DNS server setting is set to STATIC.
C
40

Appendix C
Wireless Settings C
1
2
3
4
5
6
7
8
1 Communication Mode
Select either Ad-hoc or Infrastructure
2 SSID (Network Name)
Click the Search... button to display the SSID selections on a separate screen.
3 Channel
Selections can be made from the displayed selections.
4 Authentication Method/Encryption Mode
Authentication methods and encryption methods are supported as shown below in Communication Mode
and Authentication/Encryption Methods.
5WEPKey
A WEP key can only be set when WEP is selected as the encryption method.
6 Passphrase
A passphrase (PSK) can only be set when WPA-PSK, WPA2-PSK or WPA-PSK/WPA2-PSK is selected
as the authentication method.
7 User ID/Password
User ID/Password can only be set when LEAP or FAST is selected for the authentication method.
8 Display the key and password on-screen
If this setting is checked, keys and passwords are displayed in plain text (non-encrypted text).
C
41

Appendix C
Communication Mode and Authentication/Encryption Methods C
When the Communication Mode is Ad hoc
Authentication Method Encryption Mode
Open System None
WEP
When the Communication Mode is Infrastructure
Authentication Method Encryption Mode
Open System None
WEP
Shared Key WEP
WPA-PSK TKIP
AES
WPA2-PSK AES
WPA/WPA2-PSK TKIP
AES
LEAP CKIP
EAP-FAST/NONE TKIP
AES
EAP-FAST/MS-CHAPv2 TKIP
AES
EAP-FAST/GTC TKIP
AES
C
To select higher level security settings:
To access FAST server certificate verification, settings cannot be made from the Network Setting Tool. After
the printer has been configured to connect to the network, you can select the settings by accessing the printer
from a web browser.
42

D
Index
A
Ad-hoc mode ............................................................... 8
AES
........................................................................... 27
APIPA
.................................................................22, 30
ARP
.....................................................................22, 31
Authentication
........................................................... 27
B
BOOTP ...............................................................22, 30
BRAdmin Light
BRAdmin Professional
Brother Solutions Center
........................................................1, 2
............................................1, 5
.........................................2, 5
C
Channels ................................................................... 26
Custom Raw Port
......................................................23
D
DHCP ..................................................................22, 29
DNS client
Driver Deployment Wizard
................................................................. 22
.......................................... 1
E
Encryption ................................................................. 27
H
Hyper Text Transfer Protocol ...................................... 5
I
N
NetBIOS name resolution .........................................22
Network Key
Network shared printing
.............................................................. 28
............................................21
O
Open system ............................................................. 27
Operating systems
...................................................... 1
P
PBC ........................................................................... 10
Peer-to-Peer
Port 9100
Protocol
.............................................................20
.................................................................. 23
..................................................................... 22
R
RARP ..................................................................22, 29
RFC 1001
..................................................................29
S
Shared key ................................................................ 27
SNMP
........................................................................ 23
SSID
..........................................................................26
Status Monitor
Subnet mask
............................................................. 1
............................................................. 25
T
TCP/IP ...................................................................... 22
TKIP
.......................................................................... 27
D
Infrastructure mode .....................................................7
IP address
................................................................. 24
L
LLMNR ......................................................................23
LPR/LPD
...................................................................23
M
MAC Address ............................................... 29, 30, 31
mDNS
....................................................................... 23
W
Web Based Management (web browser) ................1, 5
WEP
.......................................................................... 27
Wi-Fi Protected Setup™
WINS
......................................................................... 22
Wireless network
WPA-PSK/WPA2-PSK
...................................................6, 26
........................................... 10
..............................................27
43
 Loading...