

Page 1
Page 2

WARNING
WARNUNG
AVERTISSEMENT WAARSCHUWING
AVVERTENZA
AVISO
ВНИМАНИЕ!
The embroidery patterns contained in this product are for personal non-commercial use only. No license is granted for any
commercial use of these patterns and any such use is strictly prohibited.
Die Stickmuster in diesem Produkt sind ausschließlich für die private, nicht kommerzielle Verwendung bestimmt. Jegliche
kommerzielle Verwendung dieser Muster ist nicht lizenziert und ausdrücklich untersagt.
Les motifs de broderie contenus dans ce produit sont exclusivement destinés à une utilisation personnelle non commerciale.
Aucune licence n’est accordée en vue d’une utilisation commerciale de ces motifs de broderie, et toute utilisation commerciale
est strictement interdite.
De borduurpatronen in dit product zijn uitsluitend bedoeld voor niet-commercieel privégebruik. Er wordt geen toestemming
verleend voor commercieel gebruik van deze patronen. Dergelijk gebruik is ten strengste verboden.
I ricami inclusi in questo prodotto sono destinati esclusivamente all’uso personale e non commerciale. Non è concessa alcuna
licenza a fini commerciali per questi ricami e ogni uso in tal senso è severamente proibito.
Los patrones de bordado incluidos en este producto son exclusivamente para uso personal no comercial. No se concede licencia
para uso comercial de estos patrones y dicho uso queda estrictamente prohibido.
Дизайны для вышивания, содержащиеся в данном продукте, предназначены только для личного некоммерческого
использования. Не предоставляется никакая лицензия на коммерческое использование данных дизайнов, и любое подобное
использование строго запрещается.
Refer to the operation manual for detailed instruction.
Also, there are differences in the keys and screens depending on the display language. In this guide, English screens are used for
basic explanations.
Einzelheiten hierzu entnehmen Sie bitte der Bedienungsanleitung.
Je nachdem, welche Sprache für die Anzeige gewählt wurde, ergeben sich im Hinblick auf die Tasten und Bildschirme eventuell
Unterschiede. Die grundlegende Bedienung wird in dieser Anleitung am Beispiel von Bildschirmen mit englischem Text erklärt.
Pour les instructions détaillées, reportez-vous au manuel d’instructions.
Par ailleurs, il y a des différences au niveau des touches et des écrans en fonction de la langue d’affichage.
Dans ce guide, les explications de base utilisent les écrans en anglais.
Zie de bedieningshandleiding voor gedetailleerde instructies.
Er zijn verschillen in de toetsen en schermen afhankelijk van de ingestelde taal. In de beschrijving in deze handleiding worden de
Engelse termen als voorbeeld gebruikt.
Fare riferimento al manuale d’istruzioni per le istruzioni dettagliate.
Inoltre, i tasti e le schermate variano a seconda della lingua di visualizzazione. La presente guida utilizza le schermate in inglese
per le spiegazioni di base.
Consulte el manual de instrucciones para ver más detalles.
Además, dependiendo del idioma visualizado algunos botones y pantallas podrán ser diferentes.
En esta guía, para las explicaciones básicas se emplean pantallas en inglés.
Подробная информация: см. в “Руководстве пользователя”.
Внешний вид кнопок и экранов может различаться в зависимости от языка. В данном руководстве в качестве иллюстраций
используются англоязычные экраны.
Page 3
Selecting Disney characters Wahl von Disney-Motiven
Sélection des personnages Disney Disney-personages selecteren
Selezione dei personaggi Disney Selecctionando a Disney
Выбор персонажа Disney
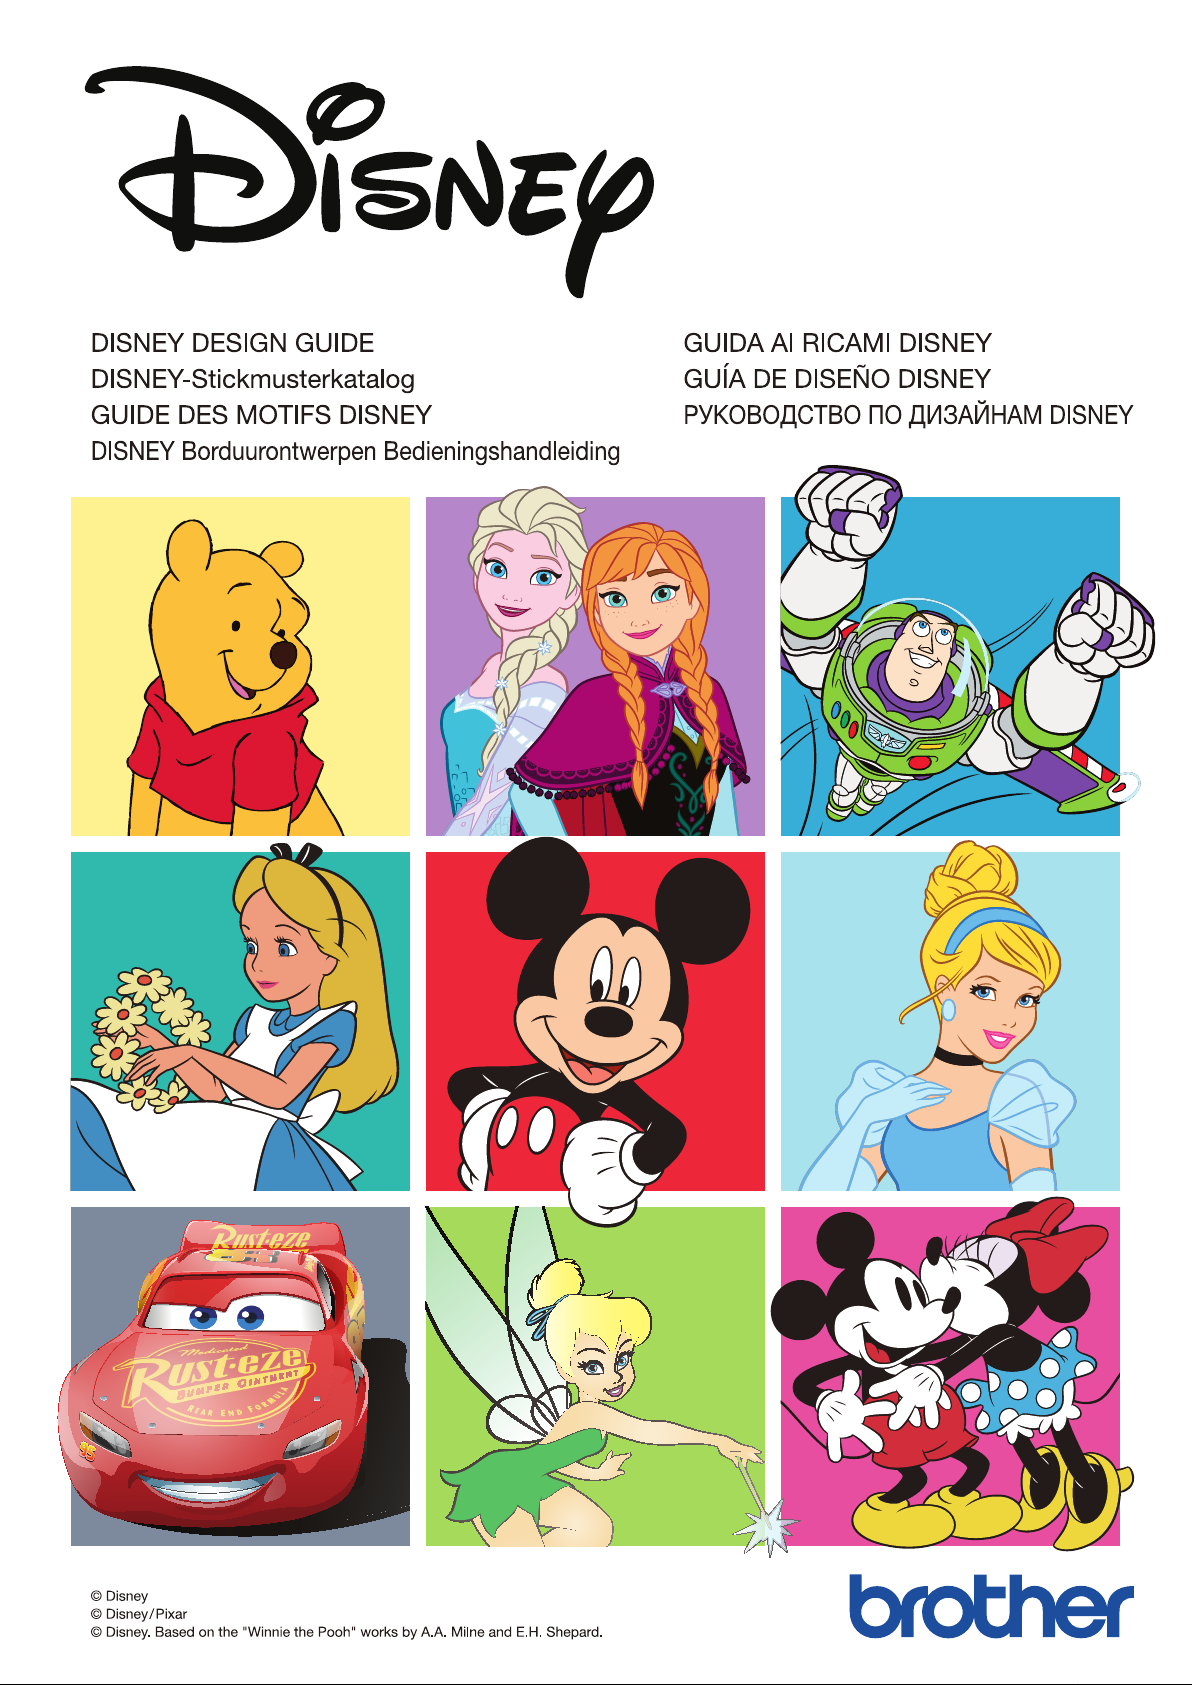
Turn o the power and make preparations for embroidery.
Schalten Sie die Maschine aus und führen Sie die Vorbereitungen zum Sticken
1
aus.
Mettez la machine hors tension et effectuez les préparatifs pour la broderie.
Zet de machine uit en voer de voorbereidingen uit om te gaan borduren.
Spegnere la macchina ed eseguire le operazioni preliminari al ricamo.
Apague la alimentación y prepárese para bordar.
Выключите питание и подготовьте все необходимое для вышивания.
Please see the machine’s operation manual.
•
Siehe Bedienungsanleitung der Maschine.
•
Reportez-vous au manuel d’instructions de la machine.
•
Raadpleeg de bedieningshandleiding van de machine.
•
Vedere il manuale di istruzioni della macchina.
•
Consulte el manual de instrucciones de la máquina.
•
Подробная информация приведена в “Руководстве пользователя” для вашей
•
машины.
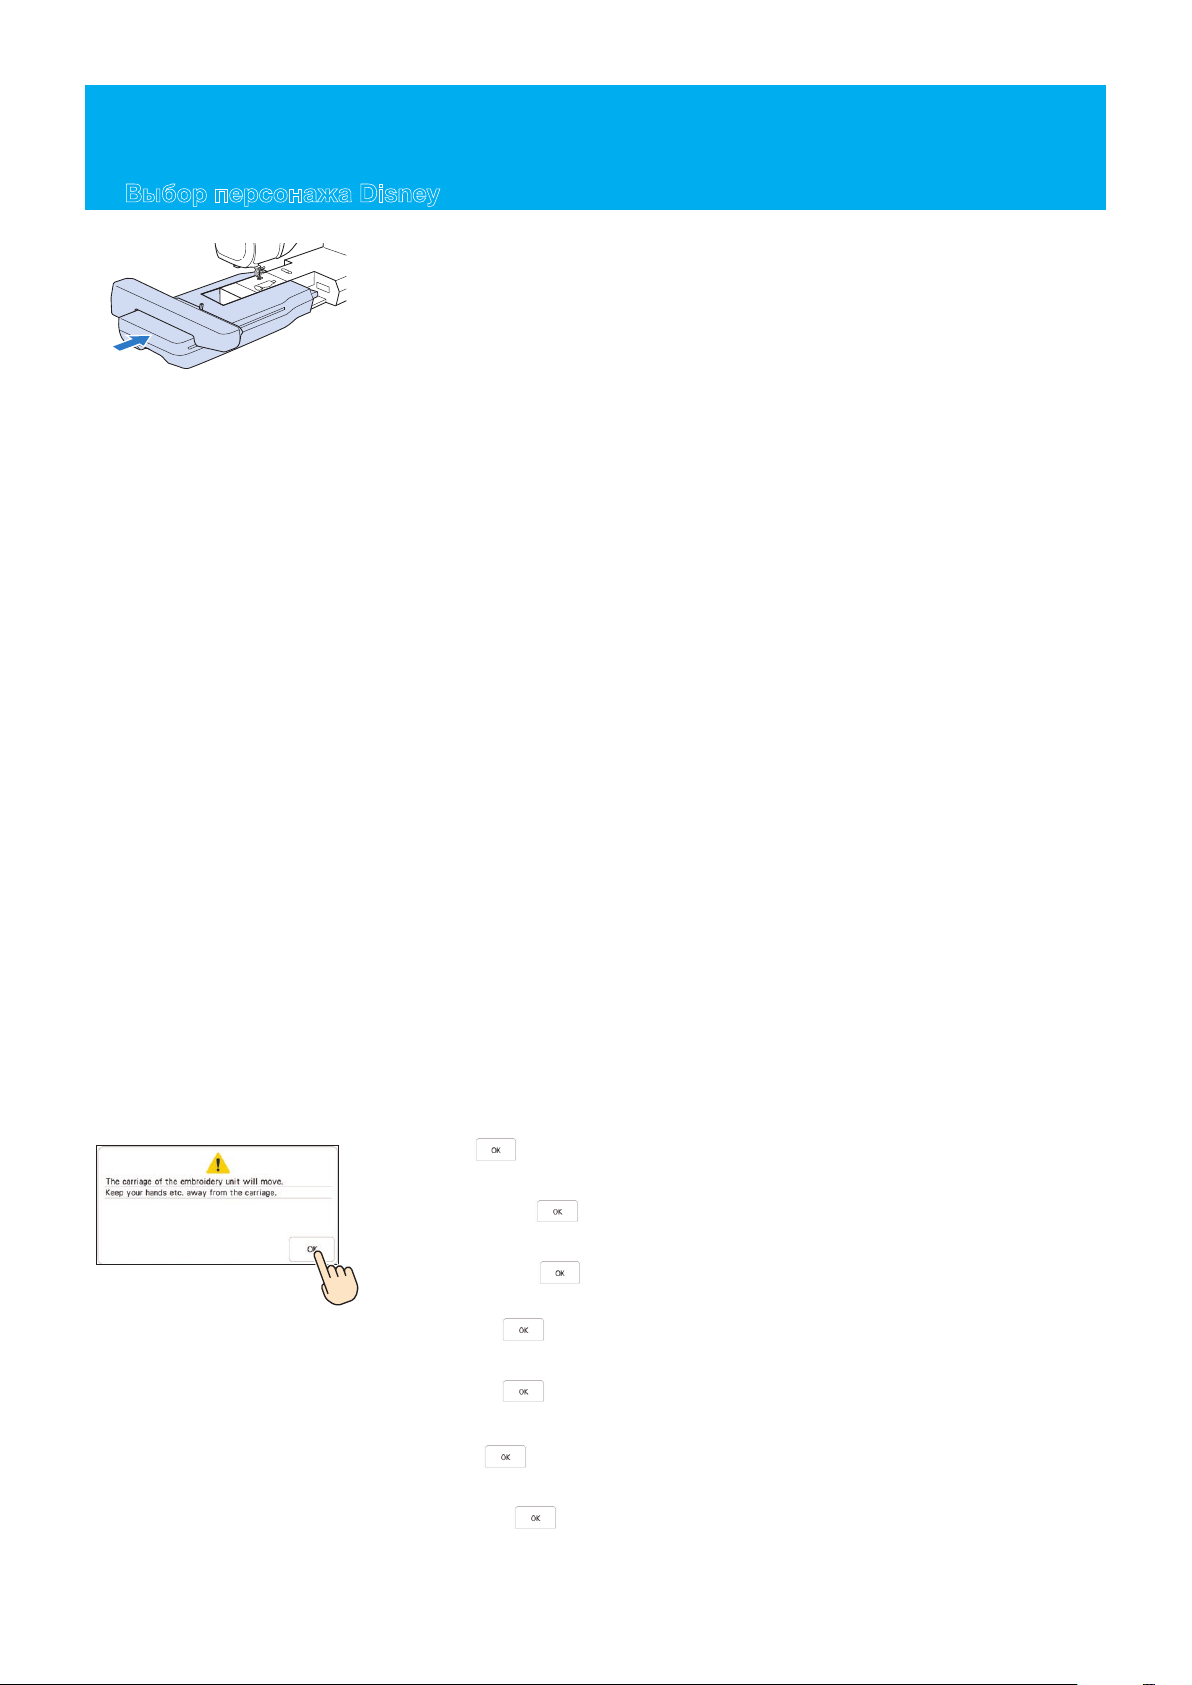
Turn on the power switch. When the opening screen appears, touch the screen.
The screen at left will be displayed.
2
Schalten Sie die Maschine ein. Wenn der Begrüßungsbildschirm angezeigt wird,
berühren Sie den Bildschirm. Der Bildschirm links wird angezeigt.
Mettez l’interrupteur d’alimentation en position de marche. Lorsque l’écran
initial s’affiche, touchez-le. L’écran de gauche s’affiche.
Zet de machine aan. Raak het scherm aan wanneer het beginscherm wordt
weergegeven. Het scherm links wordt weergegeven.
Accendere l’interruttore di alimentazione. Quando viene visualizzata la
schermata di apertura, toccare lo schermo. Verrà visualizzata la schermata
illustrata a sinistra.
Encienda la máquina. Cuando se muestre la pantalla inicial, toque la pantalla.
Se exhibirá la pantalla a la izquierda.
Включите кнопку питания. Когда появится начальный экран, прикоснитесь
к экрану. Открывается окно, показанное слева.
Press . The carriage of the embroidery unit will move to the initial setting
position.
3
Drücken Sie
die Anfangseinstellung.
Appuyez sur
réglage initial.
. Der Wagen der Stickeinheit bewegt sich in die Position für
. Le chariot de l’unité de broderie se place à la position du
Druk op
eerste instellingspositie.
Premere
impostazione iniziale.
Toque
ajuste inicial.
Нажмите
первоначальной настройки.
. De borduurarm van de borduureenheid verplaatst zich naar de
. Il braccio dell’unità per ricamare si sposterà nella posizione di
. El carro de la unidad de bordado se moverá a la posición de
. Каретка вышивального модуля перемещается в положение
1
Page 4
2
4
When the home page is displayed, press ■.
Drücken Sie im Startbildschirm auf
■
Quand la page d’accueil est affichée, appuyez sur
■
Wanneer de startpagina wordt weergegeven, drukt u op
■
Quando è visualizzata la pagina iniziale, premere
■
Cuando se muestre la página de inicio, pulse
■
Когда отобразится главная страница, нажмите
■
.
.
.
.
.
.
2
1
43
5
6
7
If the pattern type selection screen is displayed, press
■
Drücken Sie auf
■
angezeigt wird.
Si l'écran de sélection des types de motifs s'affiche, appuyez sur
■
Als het scherm met het patronenoverzicht wordt weergegeven, drukt u op
■
.
Se è visualizzata la schermata di selezione tipo di ricamo, premere
■
Si se muestra la pantalla de selección del tipo de costura, pulse
■
Если открылся экран выбора типа рисунка, нажмите
■
The Disney category screen will be displayed. Select the type of pattern.
Der Bildschirm der Disney-Kategorien wird angezeigt. Wählen Sie die Art des
5
Musters.
L’écran de la catégorie Disney s’affiche. Sélectionnez le type de motif.
Het scherm met Disney-categorieën wordt weergegeven. Selecteer het type patroon.
Verrà visualizzata la schermata della categoria Disney. Selezionare il tipo di ricamo.
Se visualizará la pantalla de categoría Disney. Seleccione el tipo de patrón.
, wenn der Auswahlbildschirm für die Art des Musters
.
.
.
.
.
Открывается экран с категориями персонажей Disney. Выберите тип
рисунка.
1
Modern / Modern / Moderne / Modern / Moderno / Moderno / Современные
2
Vintage / Vintage / Classique / Retro / Vintage / Clásico / Винтажные
3
Pooh and friends / Pooh und Freunde / Winnie et ses amis / Winnie de Poeh en zijn
vrienden / Pooh e i suoi amici / Pooh y sus amigos / Винни-Пух и его друзья
4
Princesses / Prinzessinnen / Princesses / Prinsessen / Principesse / Princesas /
Принцессы
5
Film property / Filmeigenschaften / Propriété du film / Filmeigendom / Proprietà film
/ Propiedad de la película / Персонажи фильмов
6
Disney
7
• Pixar / Disney• Pixar / Disney• Pixar / Disney• Pixar / Disney• Pixar /
Disney
• Pixar / Disney• Pixar
Utility embroidery patterns / Nutzstich-Stickmuster / Motifs de broderie courants /
Borduursteken / Ricami utili / Patrones de bordado de utilidad / Основные строчки
для вышивания
Page 5
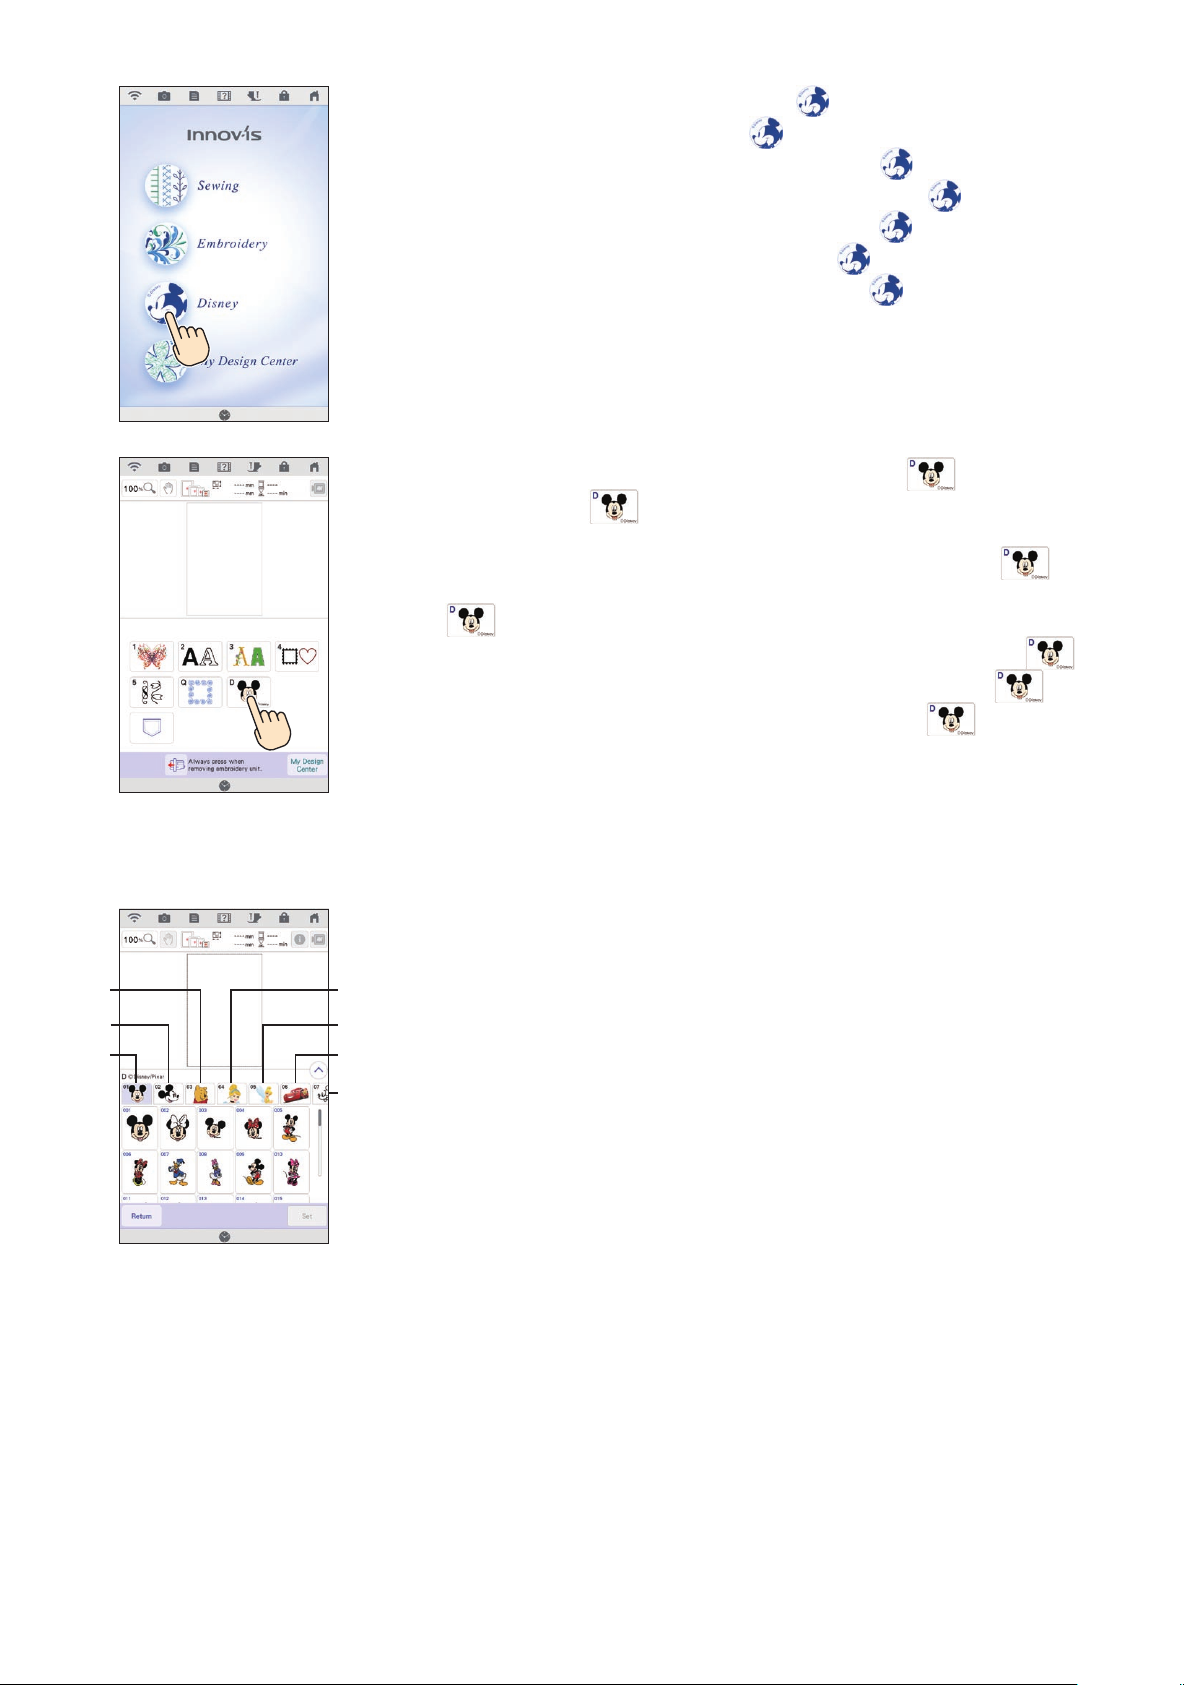
3
6
Press .
Drücken Sie
.
Appuyez sur
Druk op
Premere
Toque
Нажмите
Select the desired pattern, press .
Wählen Sie das gewünschte Muster aus und drücken Sie
7
Sélectionnez le motif désiré, appuyez sur
Selecteer het gewenste patroon en druk op
Selezionare il ricamo desiderato, premere
Seleccione el patrón deseado y pulse
Выберите нужный рисунок и нажмите
.
.
.
.
.
(Einstellen).
.
.
.
.
.
After making the selection, press .
Drücken Sie nach der Auswahl
8
Après avoir eectué la sélection, appuyez sur
Bepaal uw keuze en druk op
Dopo aver eseguito la selezione, premere
Después de realizar la selección, toque
Для подтверждения выбора нажмите
The sewing screen will be displayed.
Der Nähbildschirm wird angezeigt.
9
L’écran de broderie s’ache.
Het borduurscherm wordt weergegeven.
Verrà visualizzata la schermata di cucitura.
Se exhibirá la pantalla de bordado.
Откроется экран вышивания.
.
.
.
.
.
.
© Disney/Pixar
© Disney. Based on the "Winnie the Pooh" works by A.A. Milne and E.H. Shepard.
Page 6
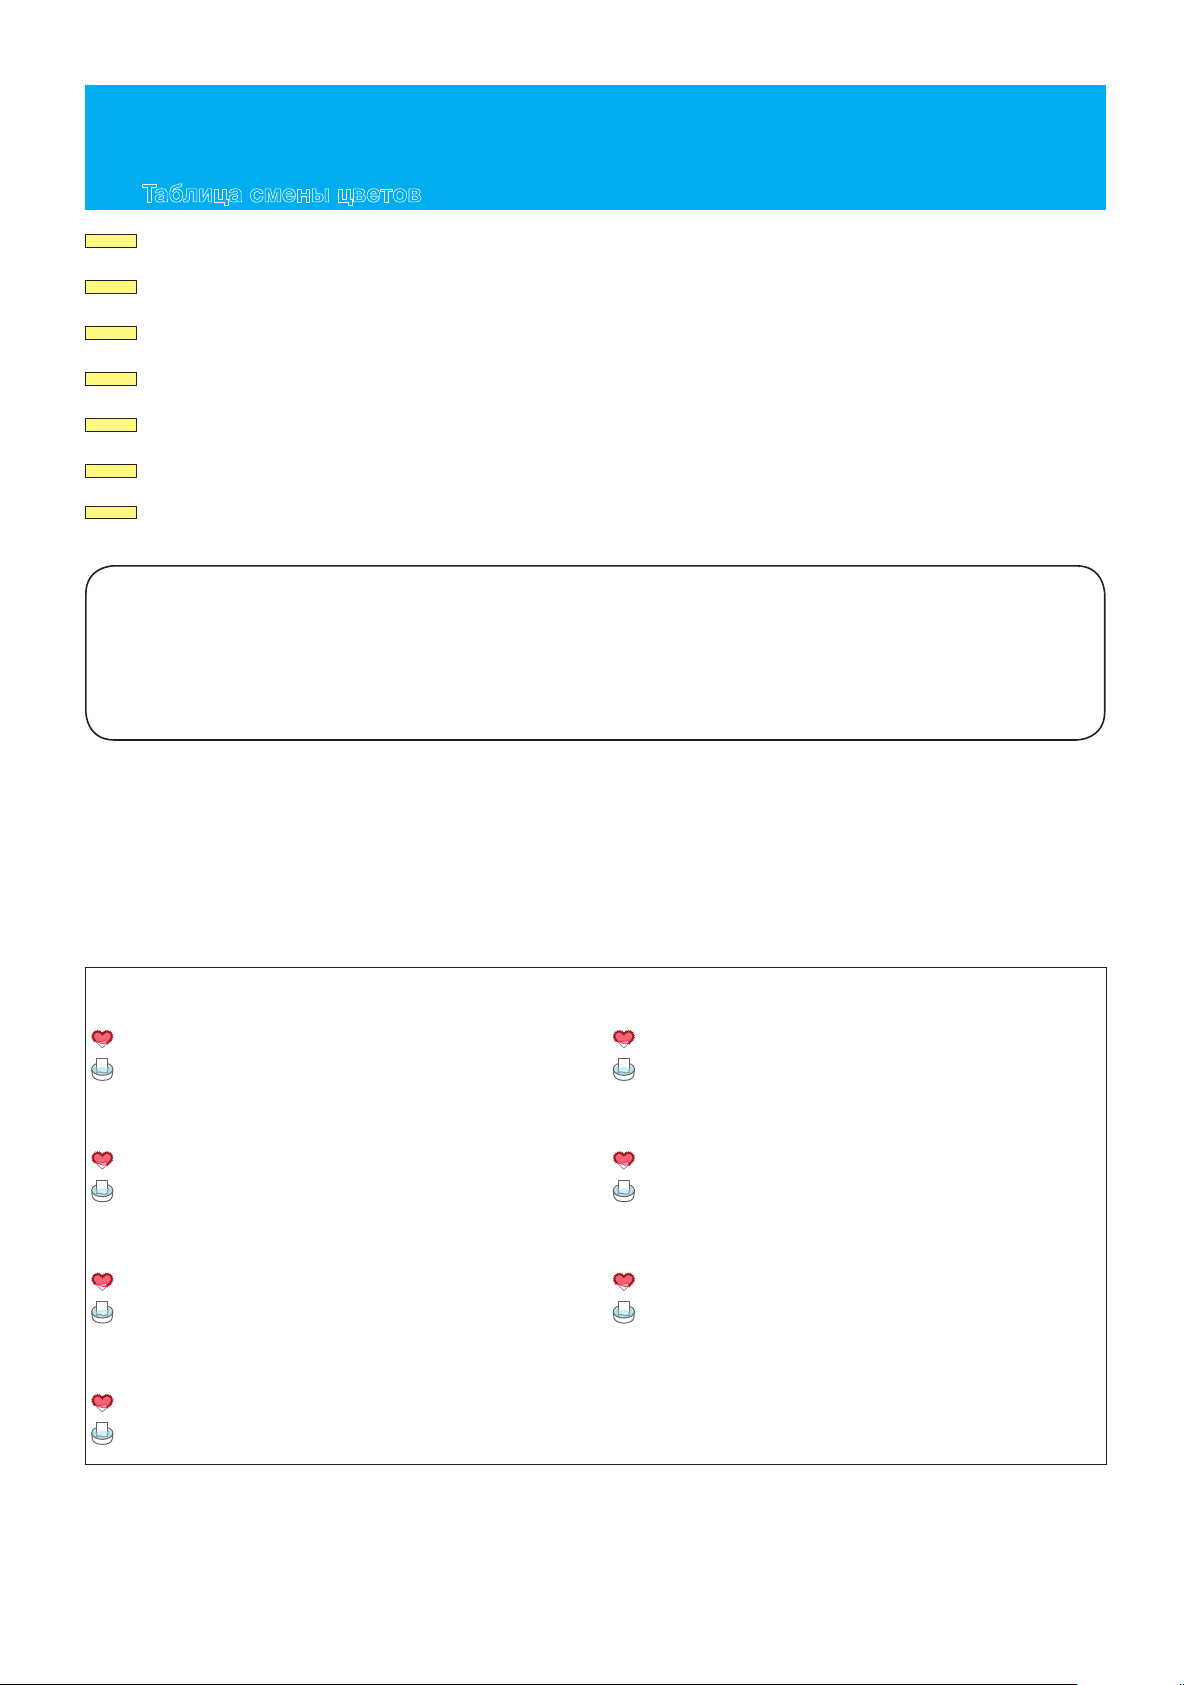
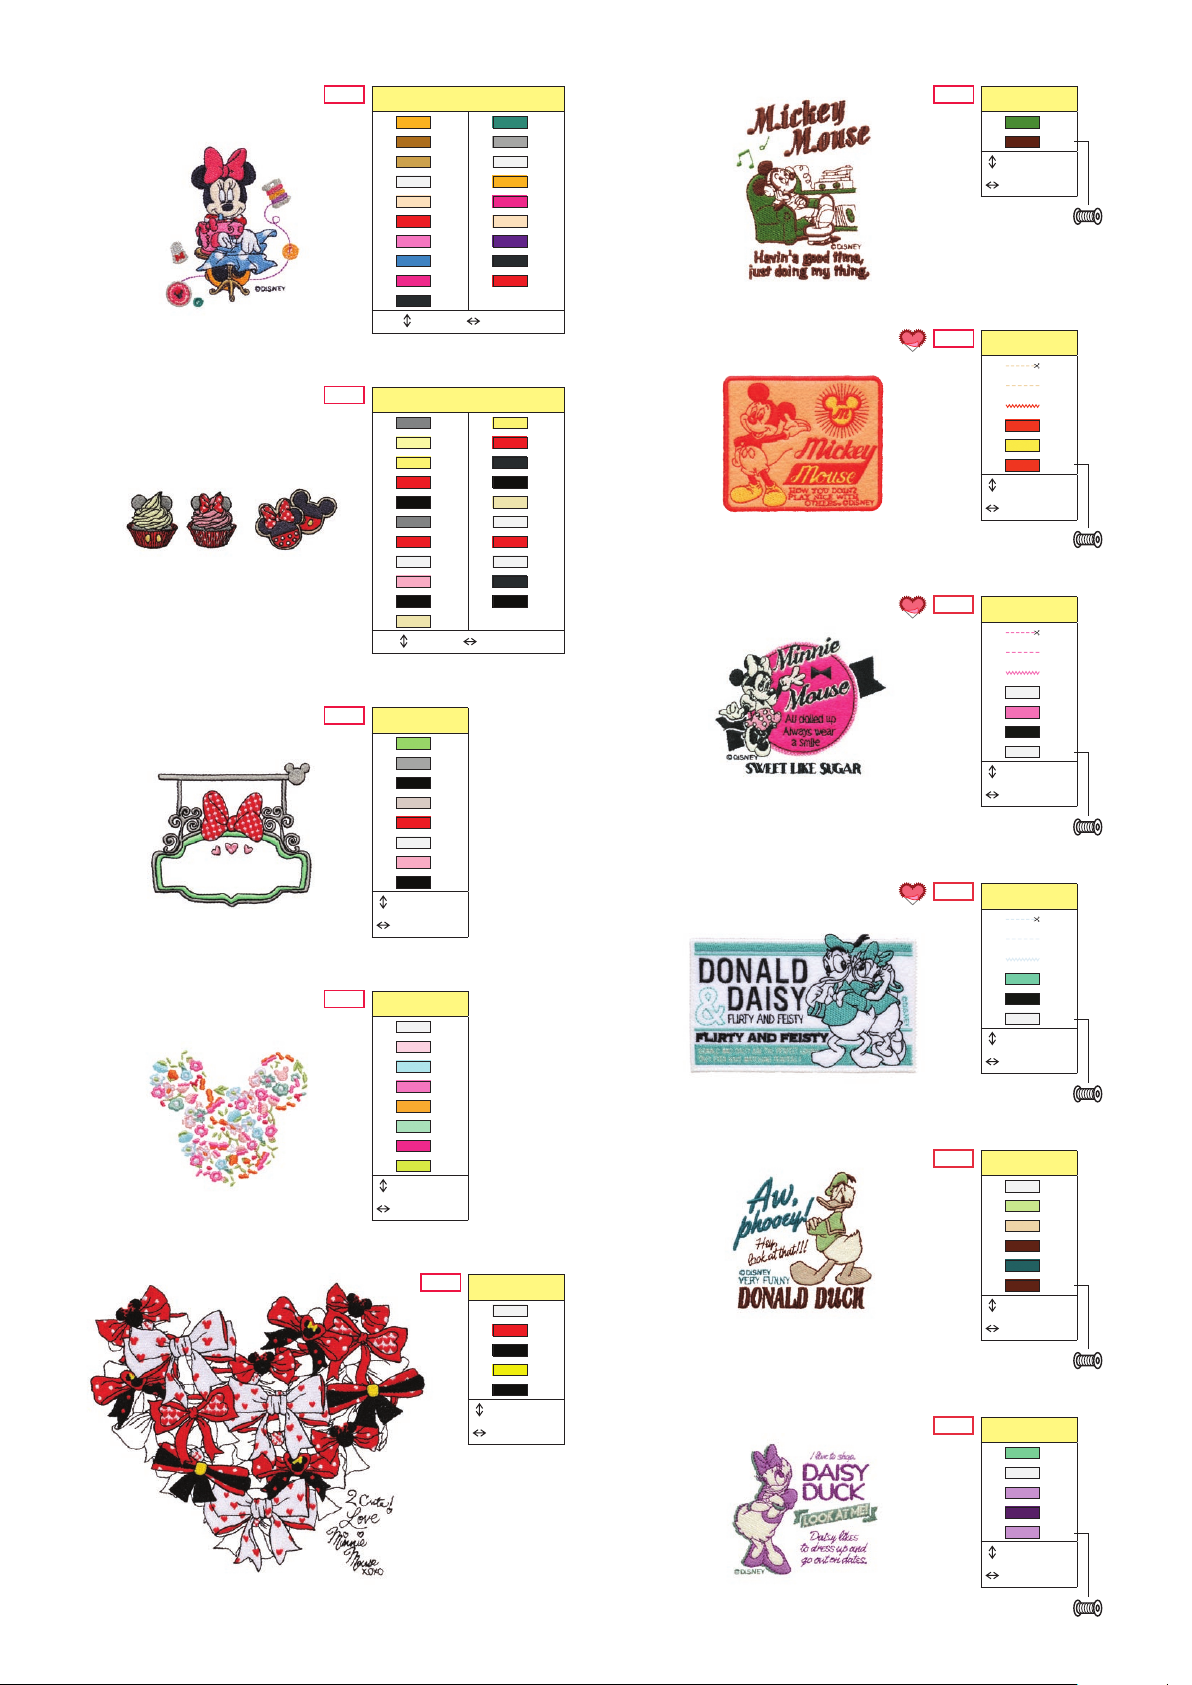
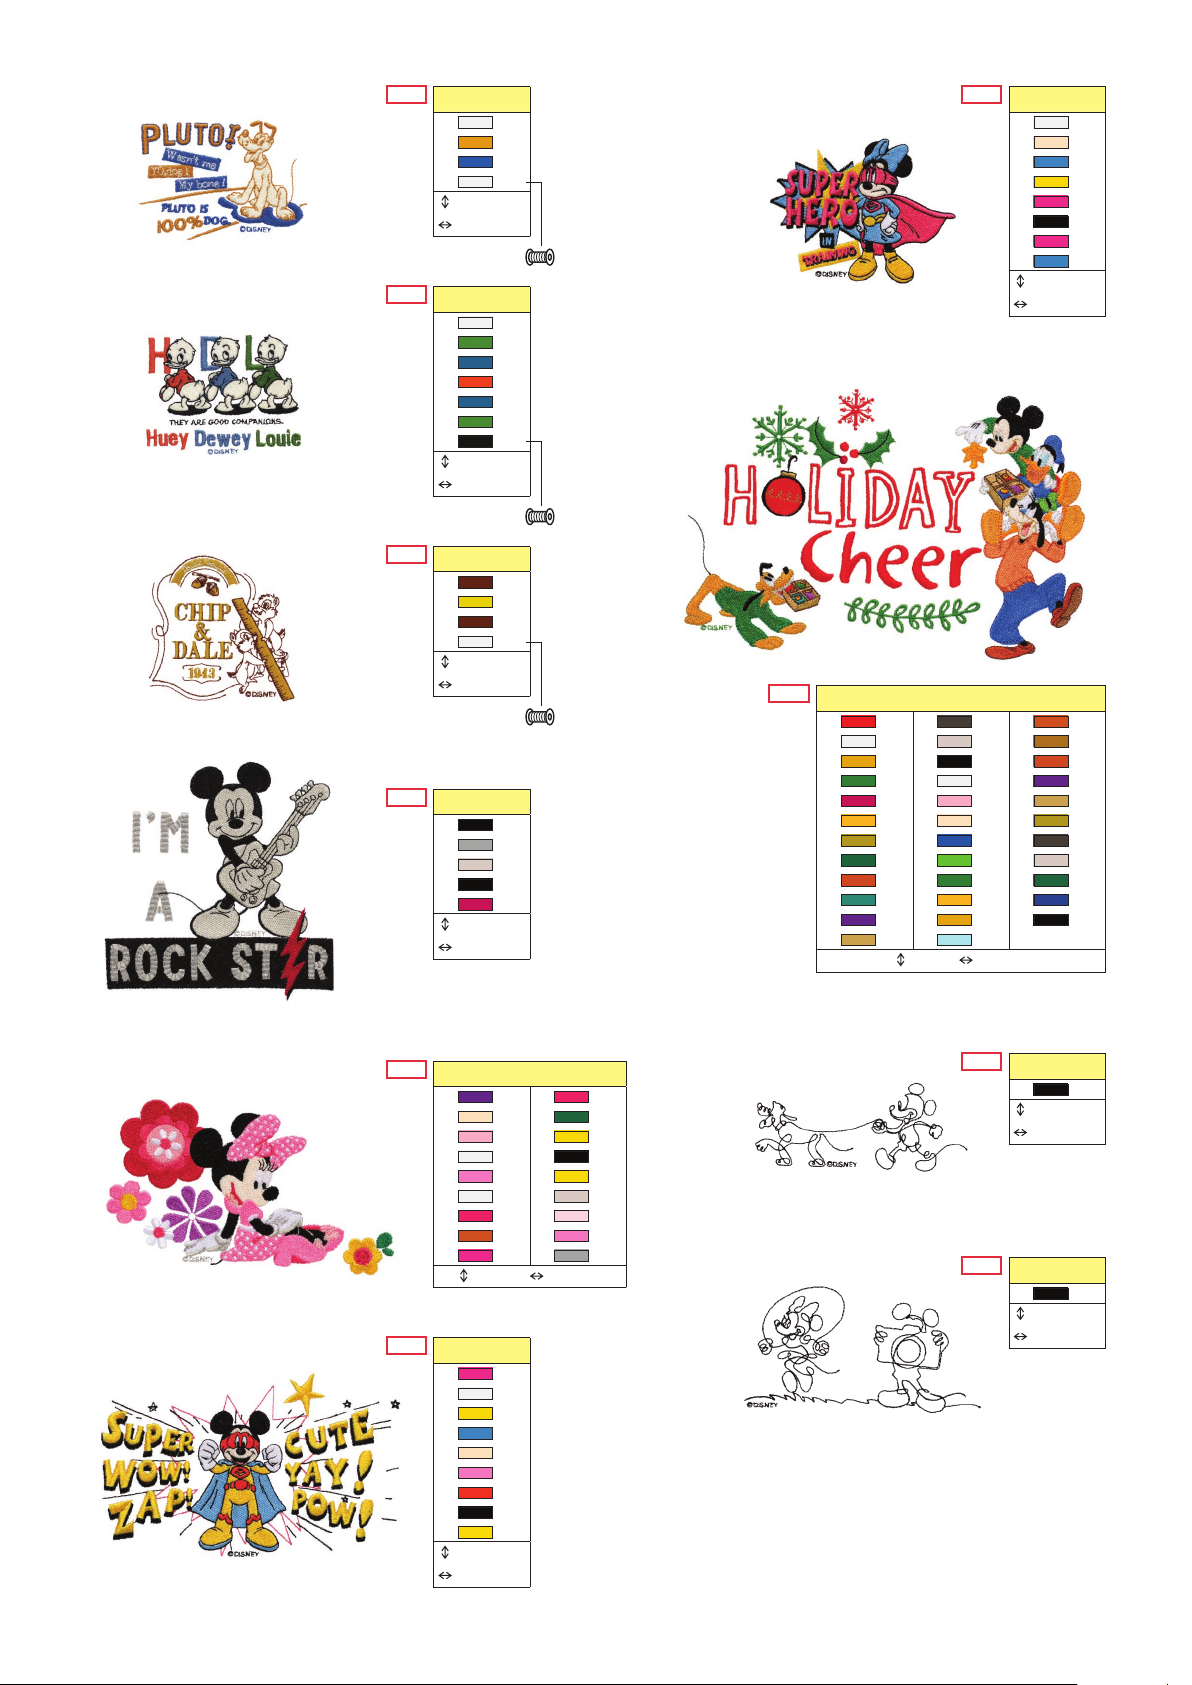
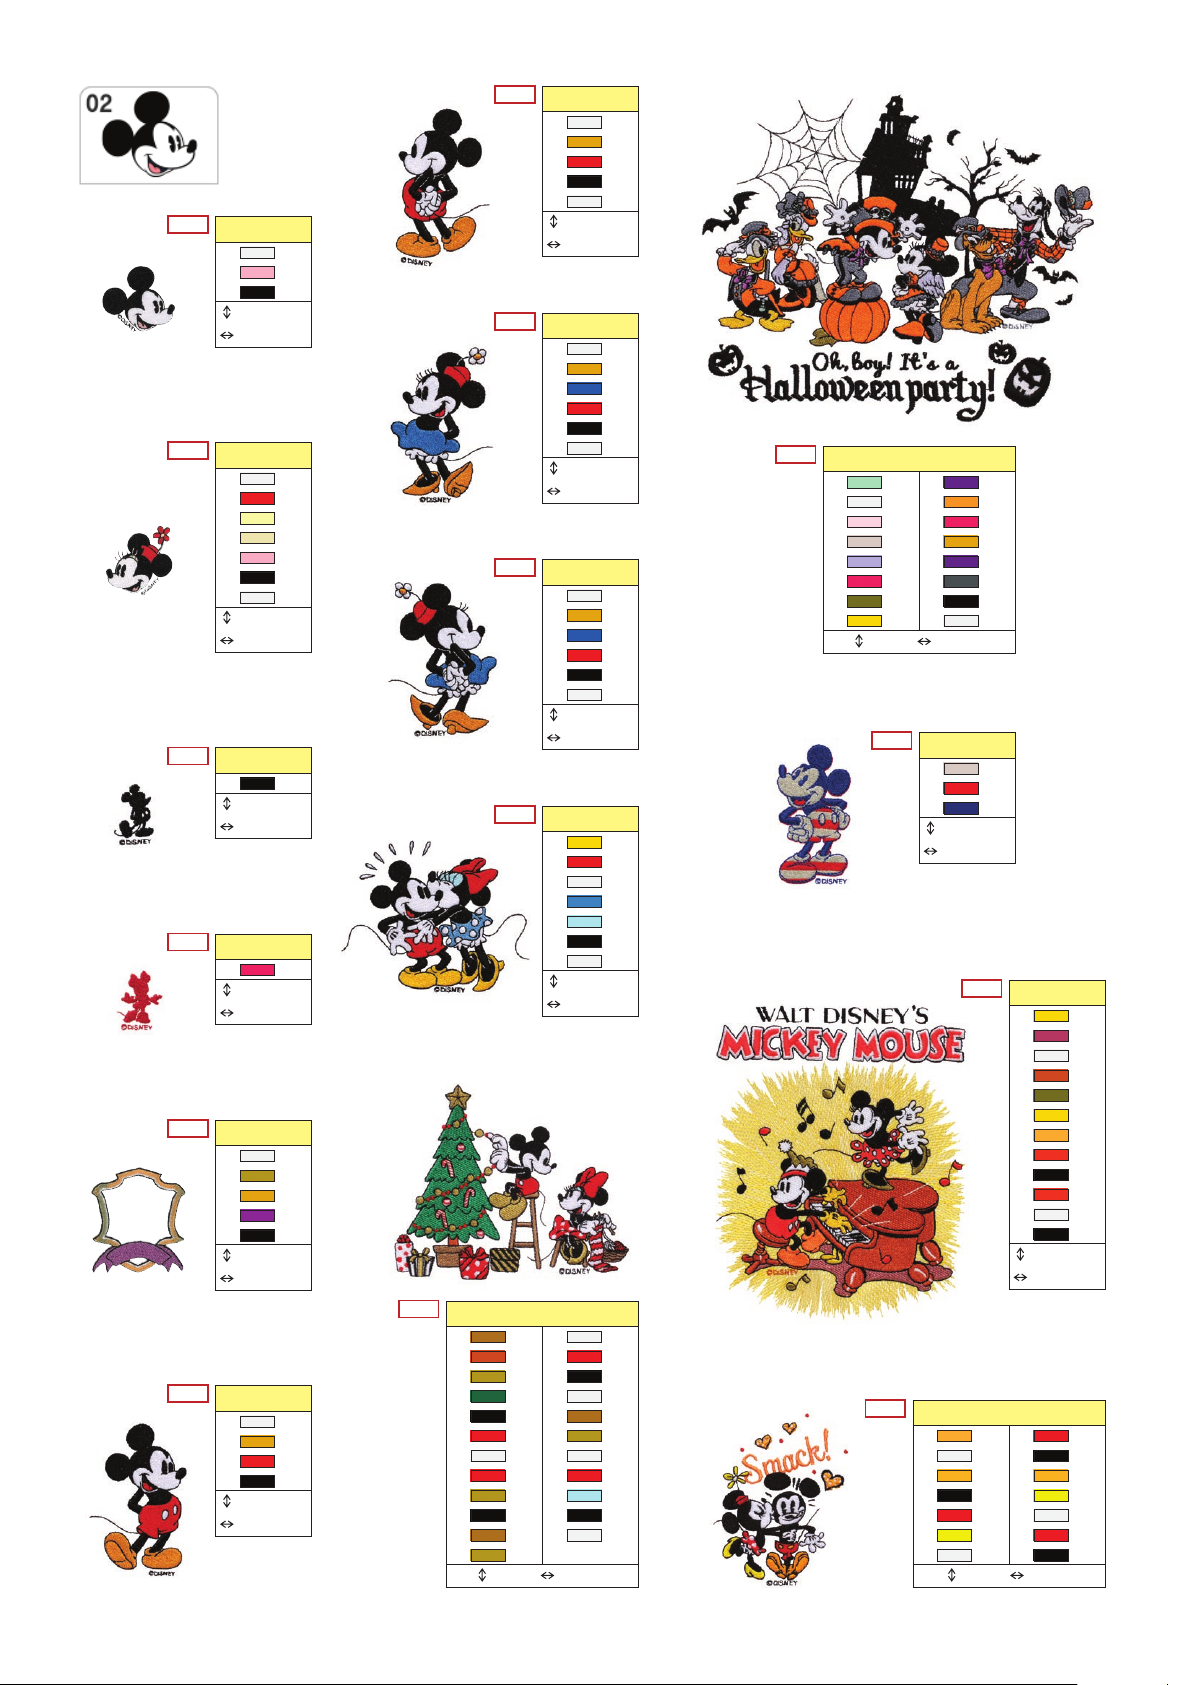
Color Change Table Farbtabelle
Tableau des changements de couleur
Tabel voor kleurwisseling
Tabella cambi colore Tabla de cambio de color
Таблица смены цветов
The figures in shaded areas indicate the estimated time needed for the pattern to be embroidered. They do not include the time required to
change and automatically trim threads.
Die Zahlen in den schattierten Bereichen geben die geschätzte Stickdauer für das Muster an. Sie enthalten nicht die Zeit, die zum
Wechseln und zum automatischen Abschneiden der Fäden benötigt wird.
Les chiffres contenus dans les zones grisées indiquent le temps estimé nécessaire pour broder le motif. Ils ne prennent pas en compte le
temps nécessaire pour changer et couper automatiquement les fils.
De getallen in de getinte vakken geven de geschatte borduurtijd aan voor het patroon. Deze tijd is exclusief de benodigde tijd voor
garenwisseling en automatisch draadknippen.
I numeri nelle aree ombreggiate indicano il tempo stimato necessario per eseguire il ricamo. Non includono il tempo necessario per
cambiare e tagliare automaticamente i fili.
Los números sombreados indican el tiempo estimado necesario para bordar el patrón. No incluye el tiempo necesario para cambiar y cortar
automáticamente los hilos.
Значения в затененных полях означают приблизительное время, необходимое для вышивания рисунка. Сюда не включается время,
необходимое на смену и автоматическую обрезку нитей.
Refer to the operation manual for details on how to embroider the pattern.
Weitere Hinweise zum Sticken von Mustern finden Sie in der Bedienungsanleitung.
Reportez-vous au manuel d’instructions pour les détails quant à la méthode pour broder le motif.
Raadpleeg de bedieningshandleiding voor gedetailleerde uitleg over het borduren van patronen.
Per i dettagli su come realizzare il ricamo, consultare il manuale di istruzioni.
Consulte el manual de instrucciones por detalles sobre como bordar el patrón.
Инструкции по вышиванию рисунка приведены в “Руководстве пользователя” машины.
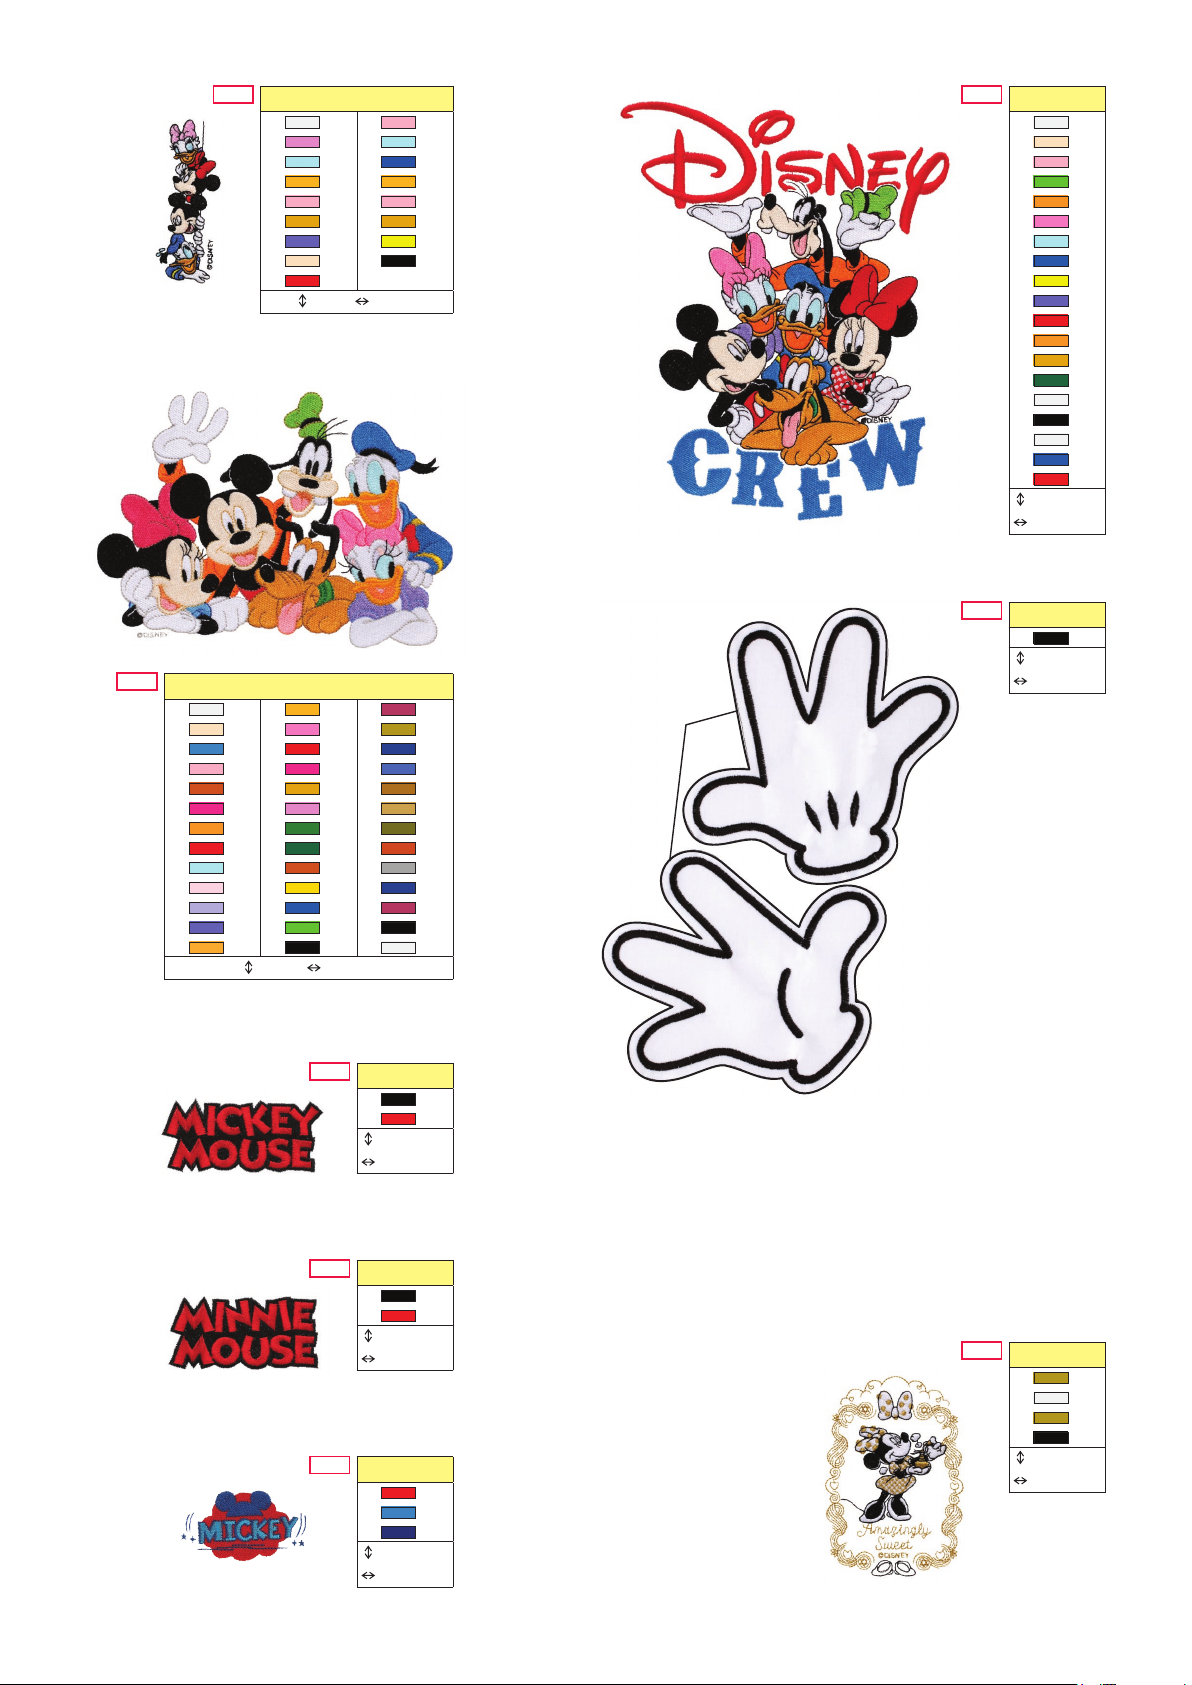
Note: The Disney character patterns built into this unit cannot be resized or flipped.
Hinweis: Die internen Disney-Motive dieser Maschine können nicht in ihrer Größe verändert oder gespiegelt werden.
Remarque : les motifs des personnages de Disney intégrés dans ce produit ne peuvent être ni redimensionnés ni orientés différemment.
Opmerking: De ingebouwde patronen voor Disney-personages kunnen niet worden vergroot/verkleind of worden gespiegeld.
Nota: I ricami dei personaggi Disney incorporati in questa unità non possono essere ridimensionati né capovolti.
Nota: Los diseños de personajes de Disney incorporados en esta unidad no podrán ser cambiados de tamaño ni darles la vuelta.
Примечание. Рисунки с изображениями персонажей Disney, встроенные в этот модуль, нельзя масштабировать или зеркально
переворачивать.
The designated embroidery time in this guide is an estimated time only.
(●) Patterns marked with ● have been rotated. Check your design placement
prior to embroidering.
Refer to the operation manual for the embroidery machine for details on
how to embroider appliqués.
Embroidering on water-soluble sheets without any fabric.
For details, refer to page 36.
La durée de broderie indiquée dans ce guide est uniquement une estimation.
(●) Les motifs signalés par ● ont été pivotés. Vérifiez l’emplacement de votre
motif avant de commencer à broder.
Reportez-vous au manuel d’instructions de la machine à broder pour plus
d’informations sur la broderie des appliqués.
Broderie sur des feuilles hydrosolubles sans aucun tissu.
Pour plus de détails, consultez la page 36.
Il tempo di ricamo indicato in questa guida è solo una stima.
I ricami contrassegnati dal simbolo ● appaiono ruotati. Prima di procedere a
(●)
ricamare, verificare la posizione del ricamo.
Consultare il manuale di istruzioni della macchina per ricamare per i
dettagli relativi al ricamo in appliqué.
Ricamo su pellicole solubili in acqua senza alcun tessuto.
Per i dettagli, fare riferimento a pagina 36.
В настоящем руководстве указано приблизительное время вышивания.
(●) Дизайны, отмеченные знаком ●, повернуты. Проверьте расположение
дизайна перед началом вышивания.
Инструкции по вышиванию аппликаций приведены в “Руководстве
пользователя” машины.
Вышивание на водорастворимом стабилизаторе без материала.
Подробнее см. на стр. 36.
Die in diesem Stickmuster-Katalog angegebene Stickdauer ist nur ein Schätzwert.
(●) Muster, die mit ● gekennzeichnet sind, wurden gedreht. Überprüfen Sie die
Platzierung Ihres Designs, bevor Sie mit Sticken beginnen.
Weitere Hinweise zum Sticken von Applikationen finden Sie in der
Bedienungsanleitung der Stickmaschine.
Sticken auf wasserlöslicher Folie ohne Stoff.
Weitere Informationen finden Sie auf Seite 36.
De aangegeven borduurtijd deze handleiding is slechts een schatting.
(●) Patronen die zijn gemarkeerd met ● zijn geroteerd. Controleer de plaats van
uw ontwerp voordat u gaat borduren.
Raadpleeg de bedieningshandleiding bij de borduurmachine voor
gedetailleerde uitleg over het borduren van applicaties.
Borduren op wateroplosbaar papier zonder textiel.
Raadpleeg pagina 36 voor meer bijzonderheden.
El tiempo de bordado indicado en esta guía es solo orientativo.
(●) Los patrones marcados con ● se han girado. Compruebe la colocación del
diseño antes de bordar.
Consulte el manual de instrucciones de la máquina de bordar si desea más
información sobre cómo bordar apliques.
Bordado en láminas solubles en agua sin ninguna tela.
Para más detalles, consulte la página 36.
4
Page 7
No.1
Order to embroider
Stickreihenfolge
Séquence de broderie
Borduurvolgorde
Sequenza dei cambi colore
del ricamo
Orden para el bordador
Порядок вышивания
Embroidery size
Größe der Stickerei
Taille de la broderie
Afmeting borduurmotief
Dimensioni del ricamo
Tecla de tamaño
Размер вышивки
123 min
1 (001)
(307)
2
(800)
3
(079)
4
(900)
5
274.4 mm
265.0 mm
Time required for embroidering
Stickdauer
Durée estimée requise pour broder
Tijd benodigd voor het borduren
Tempo di ricamo necessario
Tiempo requerido para el bordado
Время, необходимое для
вышивания
Embroidery thread color number
Stickgarn-Farbnummer
Numéro de couleur du fil de broderie
Kleurnummer borduurgaren
Numero del colore del filo da ricamo
Número de color del hilo de bordado
Номер цвета нити для вышивания
Embroidery thread color
Stickgarnfarbe
Couleur du fil de broderie
Kleur borduurgaren
Colore filo ricamo
Color del hilo de bordado
Цвет нити для вышивания
No.2
116 min
1 (086)
(800)
2
(079)
3
(307)
4
(086)
5
(900)
6
(001)
7
(900)
8
303.8 mm
258.1 mm
No.3
No.4
8 min
1 (307)
(001)
2
(800)
3
(079)
4
(900)
5
57.5 mm
55.2 mm
12 min
1 (307)
(001)
2
(800)
3
(079)
4
(900)
5
65.5 mm
54.6 mm
No.5
107 min
1 (208)
2
3
4
5
6
7
8
9
10
11
325.5 mm
228.9 mm
© Disney
(900)
(001)
(800)
(900)
(001)
(307)
(800)
(079)
(001)
(900)
5
Page 8
6
No.6
111 min
1 (205)
(208)
2
(900)
3
(001)
4
(800)
5
(900)
6
(001)
7
(800)
8
(900)
9
10
11
12
13
14
15
(307)
(001)
(800)
(079)
(900)
(001)
320.8 mm
166.4 mm
No.9
No.10
16 min
1 (214)
(208)
2
(001)
3
(307)
4
(800)
5
(079)
6
(900)
7
(001)
8
103.0 mm
79.1 mm
18 min
1 (001)
(086)
2
(307)
3
(800)
4
(079)
5
(900)
6
(001)
7
108.0 mm
68.8 mm
No.14
No.15
22 min
1 (001)
(800)
2
(079)
3
(307)
4
(513)
5
(209)
6
(405)
7
(058)
8
(900)
9
149.2 mm
108.8 mm
9 min
1 (208)
(001)
2
(800)
3
(900)
4
(001)
5
(307)
6
(900)
7
(001)
8
72.8 mm
43.7 mm
No.7
No.8
51 min
1 (208)
(001)
2
(900)
3
(001)
4
(405)
5
(205)
6
(800)
7
(900)
8
(001)
9
10
11
12
13
14
15
(017)
(214)
(208)
(079)
(405)
(900)
204.0 mm
147.2 mm
40 min
1 (001)
(208)
2
(079)
3
(085)
4
(900)
5
(001)
6
(607)
7
(542)
8
(900)
9
10
11
12
13
14
15
16
17
(001)
(017)
(001)
(079)
(214)
(208)
(085)
(900)
213.6 mm
92.3 mm
No.11
No.12
No.13
14 min
1 (017)
(001)
2
(079)
3
(214)
4
(205)
5
(208)
6
(405)
7
(800)
8
(900)
9
99.2 mm
79.1 mm
11 min
1 (017)
(001)
2
(612)
3
(208)
4
(085)
5
(900)
6
99.3 mm
67.1 mm
12 min
1 (800)
(079)
2
(001)
3
(507)
4
(214)
5
(900)
6
99.3 mm
102.6 mm
No.16
No.17
No.18
10 min
1 (205)
(208)
2
(800)
3
(001)
4
(900)
5
(001)
6
(800)
7
(001)
8
(307)
9
10
11
(079)
(900)
76.8 mm
42.7 mm
17 min
1 (208)
(001)
2
(307)
3
(800)
4
(900)
5
(001)
6
(205)
7
(800)
8
(001)
9
10
11
12
(307)
(900)
(001)
70.6 mm
108.6 mm
26 min
1 (208)
(205)
2
(001)
3
(800)
4
(307)
5
(900)
6
(001)
7
89.5 mm
107.0 mm
Page 9
7
No.19
1 (001) 10 (079)
(810) 11 (017)
2
(017) 12 (405)
3
(208) 13 (208)
4
(079) 14 (079)
5
(214) 15 (214)
6
(607) 16 (205)
7
(307) 17 (900)
8
(800)
9
95.8 mm 35.9 mm
11 min
No.24
92 min
1 (001)
(307)
2
(079)
3
(513)
4
(209)
5
(085)
6
(017)
7
(420)
8
(205)
9
10
11
12
13
14
15
16
17
18
19
(607)
(800)
(209)
(214)
(507)
(001)
(900)
(001)
(420)
(800)
250.8 mm
192.6 mm
No.20
1 (001) 14 (208) 27 (333)
2
3
4
5
6
7
8
9
10
11
12
13
86 min
(307) 15 (085) 28 (328)
(019) 16 (800) 29 (406)
(079) 17 (086) 30 (070)
(337) 18 (214) 31 (323)
(086) 19 (810) 32 (348)
(209) 20 (515) 33 (330)
(800) 21 (507) 34 (339)
(017) 22 (337) 35 (005)
(124) 23 (206) 36 (406)
(804) 24 (420) 37 (333)
(607) 25 (513) 38 (900)
(126) 26 (900) 39 (001)
151.8 mm 209.0 mm
No.21
No.22
No.23
13 min
1 (900)
(800)
2
44.3 mm
93.9 mm
13 min
1 (900)
(800)
2
44.0 mm
86.6 mm
8 min
1 (800)
(019)
2
(007)
3
41.8 mm
73.5 mm
Cutting lines
Schnittlinien
Lignes de découpe
Snijlijnen
Linee di taglio
Líneas de corte
Линии вырезания
●
Cut along the cutting lines and sew the two pieces together to make a glove.
●
Schneiden Sie entlang der Schnittlinien und nähen Sie beide Teile zusammen, um einen
Handschuh zu erhalten.
●
Découpez le long des lignes de découpe et cousez les deux pièces ensemble afin de réaliser
un gant.
●
Knip langs de snijlijnen en naai de twee stukken aan elkaar om een handschoen te maken.
●
Tagliare lungo le linee di taglio e cucire insieme i due pezzi per realizzare un guanto.
●
Corte a lo largo de las líneas de corte y una las dos piezas cosiéndolas para crear un guante.
●
Вырежьте вдоль линий вырезания и сшейте обе детали, чтобы получилась перчатка.
No.25
No.26
16 min
1 (900)
288.7 mm
207.1 mm
15 min
1 (328)
(001)
2
(328)
3
(900)
4
117.9 mm
81.9 mm
© Disney
Page 10
8
No.27
Country
Country
Country
Country
Country
Country
1 (208) 11 (534)
(323) 12 (005)
2
(348) 13 (001)
3
(001) 14 (208)
4
(307) 15 (086)
5
(800) 16 (307)
6
(085) 17 (613)
7
(019) 18 (707)
8
(086) 19 (800)
9
10
(707)
94.6 mm 77.8 mm
No.28
1 (817) 12 (812)
(010) 13 (800)
2
(812) 14 (707)
3
(800) 15 (900)
4
(900) 16 (843)
5
(817) 17 (001)
6
(800) 18 (800)
7
(001) 19 (001)
8
(079) 20 (707)
9
10
11
No.29
No.30
(900) 21 (900)
(843)
36.4 mm 125.3 mm
14 min
1 (502)
(005)
2
(900)
3
(399)
4
(800)
5
(001)
6
(079)
7
(900)
8
85.5 mm
93.9 mm
19 min
1 (001)
(124)
2
(017)
3
(085)
4
(126)
5
(542)
6
(086)
7
(027)
8
80.8 mm
93.0 mm
No.31
19 min
15 min
1 (001)
2
3
4
5
77 min
174.1 mm
197.3 mm
(800)
(900)
(205)
(900)
No.32
No.33
No.34
No.35
No.36
No.37
14 min
1 (446)
(255)
2
106.6 mm
79.9 mm
14 min
1 (012)
(012)
2
(148)
3
(148)
4
(334)
5
(148)
6
79.1 mm
93.7 mm
16 min
1 (152)
(152)
2
(152)
3
(000)
4
(152)
5
(747)
6
(000)
7
79.6 mm
99.3 mm
20 min
1 (150)
(150)
2
(150)
3
(505)
4
(747)
5
(000)
6
80.9 mm
132.0 mm
12 min
1 (000)
(442)
2
(012)
3
(255)
4
(057)
5
(255)
6
79.2 mm
80.8 mm
13 min
1 (483)
(000)
2
(623)
3
(625)
4
(623)
5
75.6 mm
85.5 mm
Page 11
9
No.38
Country
Country
Country
No.39
13 min
1 (000)
(354)
2
(575)
3
(000)
4
70.0 mm
98.6 mm
16 min
1 (000)
(446)
2
(586)
3
(264)
4
(586)
5
(446)
6
(747)
7
70.2 mm
90.3 mm
No.44
26 min
1 (001)
(307)
2
(019)
3
(206)
4
(086)
5
(900)
6
(086)
7
(019)
8
84.1 mm
109.2 mm
No.40
No.41
9 min
1 (255)
2
3
4
85.4 mm
84.7 mm
37 min
1 (900)
2
3
4
5
139.6 mm
134.1 mm
No.42
1 (613) 10 (807)
2
3
4
5
6
7
8
9
101.8 mm 171.5 mm
No.43
35 min
1 (086)
2
3
4
5
6
7
8
9
108.3 mm
176.0 mm
(404)
(255)
(000)
(005)
(399)
(900)
(107)
42 min
(307) 11 (507)
(079) 12 (206)
(001) 13 (900)
(085) 14 (206)
(001) 15 (399)
(807) 16 (124)
(337) 17 (085)
(086) 18 (005)
(001)
(206)
(019)
(307)
(085)
(030)
(900)
(206)
No.45
1 (800) 13 (058) 25 (337)
2
3
4
5
6
7
8
9
10
11
12
60 min
(001) 14 (399) 26 (323)
(214) 15 (900) 27 (339)
(515) 16 (001) 28 (613)
(107) 17 (079) 29 (348)
(208) 18 (307) 30 (328)
(328) 19 (405) 31 (058)
(507) 20 (513) 32 (399)
(339) 21 (515) 33 (507)
(534) 22 (208) 34 (406)
(613) 23 (214) 35 (900)
(348) 24 (017)
156.7 mm 235.5 mm
No.46
No.47
2 min
1 (900)
51.7 mm
126.9 mm
3 min
1 (900)
73.1 mm
139.7 mm
© Disney
Page 12
10
No.1
No.2
No.3
No.4
No.5
No.6
4 min
1 (001)
(079)
2
(900)
3
38.8 mm
39.0 mm
4 min
1 (001)
(800)
2
(010)
3
(843)
4
(079)
5
(900)
6
(001)
7
40.8 mm
36.4 mm
2 min
1 (900)
34.7 mm
22.6 mm
2 min
1 (807)
34.8 mm
26.4 mm
6 min
1 (001)
(328)
2
(214)
3
(620)
4
(900)
5
61.8 mm
55.7 mm
10 min
1 (001)
(214)
2
(800)
3
(900)
4
88.9 mm
56.3 mm
No.7
No.8
No.9
No.10
No.11
1 (323) 13 (001)
(339) 14 (800)
2
(328) 15 (900)
3
(507) 16 (001)
4
(900) 17 (323)
5
(800) 18 (328)
6
(001) 19 (001)
7
(800) 20 (800)
8
(328) 21 (017)
9
10
11
12
(900) 22 (900)
(323) 23 (001)
(328)
114.1 mm 136.0 mm
1 (001)
2
3
4
5
1 (001)
2
3
4
5
6
1 (001)
2
3
4
5
6
1 (206)
2
3
4
5
6
7
35 min
10 min
92.3 mm
54.6 mm
11 min
90.7 mm
59.7 mm
12 min
90.6 mm
63.3 mm
21 min
87.8 mm
110.1 mm
(214)
(800)
(900)
(001)
(214)
(420)
(800)
(900)
(001)
(214)
(420)
(800)
(900)
(001)
(800)
(001)
(019)
(017)
(900)
(001)
No.12
1 (542) 9 (613)
(001) 10 (209)
2
(124) 11 (807)
3
(399) 12 (214)
4
(804) 13 (613)
5
(807) 14 (704)
6
(330) 15 (900)
7
(206) 16 (001)
8
191.2 mm 228.2 mm
No.13
No.15
85 min
11 min
1 (399)
(800)
2
(007)
3
80.9 mm
43.5 mm
No.14
65 min
1 (206)
2
3
4
5
6
7
8
9
10
11
12
16 min
1 (126) 8 (800)
(001) 9 (900)
2
(208) 10 (208)
3
(900) 11 (205)
4
(800) 12 (001)
5
(205) 13 (800)
6
(001) 14 (900)
7
100.9 mm 80.1 mm
(333)
(001)
(339)
(330)
(206)
(126)
(030)
(900)
(030)
(001)
(900)
183.7 mm
146.1 mm
Page 13

11
No.16
18 min
1 (001)
(208)
2
(405)
3
(086)
4
(800)
5
(900)
6
126.1 mm
99.5 mm
No.22
60 min
1 (800)
(900)
2
286.4 mm
268.0 mm
No.17
18 min
1 (001)
(208)
2
(086)
3
(800)
4
(515)
5
(405)
6
(900)
7
103.2 mm
89.0 mm
No.18
No.19
8 min
1 (208)
(800)
2
(005)
3
(405)
4
(900)
5
30.2 mm
189.1 mm
37 min
1 (900)
(001)
2
(800)
3
(208)
4
(405)
5
(900)
6
119.4 mm
138.0 mm
No.23
7 min
1 (900)
200.9 mm
201.0 mm
No.20
No.21
9 min
1 (800)
(513)
2
(420)
3
(001)
4
(005)
5
93.4 mm
93.5 mm
11 min
1 (007)
(030)
2
(007)
3
(030)
4
48.0 mm
198.2 mm
No.24
1 min
1 (704)
111.6 mm
38.4 mm
© Disney
Page 14

12
No.1
51 min
1 (214)
(800)
2
(900)
3
(214)
4
(058)
5
(079)
6
(900)
7
213.6 mm
147.6 mm
No.6
No.7
17 min
1 (001)
(307)
2
(005)
3
(086)
4
(620)
5
(612)
6
(070)
7
(900)
8
78.2 mm
79.3 mm
15 min
1 (214)
(800)
2
(124)
3
(810)
4
(086)
5
(058)
6
(323)
7
(900)
8
89.0 mm
58.1 mm
No.2
No.3
No.4
No.5
10 min
1 (214)
(800)
2
(810)
3
(607)
4
(208)
5
(017)
6
(058)
7
(900)
8
85.7 mm
59.6 mm
9 min
1 (214)
(800)
2
(323)
3
(058)
4
(900)
5
77.5 mm
54.6 mm
3 min
1 (085)
(124)
2
(086)
3
(900)
4
58.9 mm
27.9 mm
12 min
1 (010)
(124)
2
(209)
3
(900)
4
85.7 mm
57.3 mm
No.8
No.9
No.10
1 (010) 10 (214)
(209) 11 (800)
2
(620) 12 (058)
3
(058) 13 (612)
4
(333) 14 (124)
5
(001) 15 (086)
6
(804) 16 (900)
7
(070) 17 (005)
8
(620)
9
95.8 mm 92.9 mm
1 (001)
2
3
4
5
6
7
8
9
10
1 (010)
2
3
4
5
6
7
8
9
10
11
12
13
14
15
16
25 min
27 min
(017)
(070)
(843)
(620)
(707)
(810)
(124)
(086)
(900)
83.5 mm
112.0 mm
29 min
(030)
(612)
(085)
(019)
(812)
(017)
(810)
(507)
(513)
(086)
(333)
(058)
(086)
(502)
(900)
135.5 mm
92.7 mm
Page 15

13
No.14
1 (214) 9 (086) 17 (900)
2
3
4
5
6
7
8
27 min
(800) 10 (900) 18 (328)
(323) 11 (001) 19 (323)
(900) 12 (800) 20 (001)
(085) 13 (534) 21 (328)
(124) 14 (507) 22 (800)
(001) 15 (339) 23 (900)
(800) 16 (328)
112.4 mm 91.8 mm
No.11
1 (010) 10 (017)
2
3
4
5
6
7
8
9
No.12
1 (001) 11 (107) 21 (507)
2
3
4
5
6
7
8
9
10
55 min
(843) 11 (070)
(810) 12 (800)
(005) 13 (086)
(348) 14 (058)
(124) 15 (333)
(214) 16 (707)
(030) 17 (620)
(001) 18 (900)
132.9 mm 189.1 mm
61 min
(612) 12 (058) 22 (323)
(307) 13 (513) 23 (058)
(085) 14 (205) 24 (339)
(124) 15 (030) 25 (800)
(086) 16 (420) 26 (107)
(010) 17 (339) 27 (405)
(620) 18 (900) 28 (010)
(070) 19 (214) 29 (900)
(209) 20 (070)
125.7 mm 229.4 mm
No.15
No.16
32 min
1 (214)
(214)
2
(001)
3
(800)
4
(001)
5
(900)
6
(209)
7
271.5 mm
178.4 mm
19 min
1 (323)
(208)
2
(800)
3
(010)
4
(209)
5
(079)
6
(900)
7
126.0 mm
98.8 mm
No.13
1 (017) 10 (085) 19 (206)
2
3
4
5
6
7
8
9
41 min
(001) 11 (214) 20 (323)
(019) 12 (900) 21 (124)
(900) 13 (323) 22 (085)
(323) 14 (010) 23 (001)
(206) 15 (124) 24 (420)
(800) 16 (214) 25 (323)
(001) 17 (001)
(420) 18 (420)
123.6 mm 143.0 mm
No.17
8 min
1 (079)
2
91.3 mm
79.6 mm
© Disney. Based on the "Winnie the Pooh" works by A.A. Milne and E.H. Shepard.
(323)
Page 16

14
No.18
Country
46 min
1 (001)
(399)
2
(843)
3
(010)
4
(502)
5
(323)
6
(017)
7
(206)
8
(307)
9
10
11
12
13
14
15
(337)
(323)
(030)
(348)
(307)
(079)
134.9 mm
156.6 mm
No.1
1 (019) 11 (001)
(420) 12 (214)
2
(017) 13 (328)
3
(307) 14 (019)
4
(001) 15 (707)
5
(086) 16 (323)
6
(208) 17 (010)
7
(017) 18 (017)
8
(019) 19 (001)
9
10
(420)
167.7 mm 107.2 mm
39 min
No.19
20 min
1 (000)
(442)
2
(444)
3
(473)
4
(446)
5
(012)
6
(025)
7
(370)
8
(354)
9
10
11
12
13
14
15
(025)
(483)
(149)
(745)
(747)
(255)
86.0 mm
77.3 mm
No.2
No.3
28 min
1 (001)
(307)
2
(208)
3
(323)
4
(348)
5
(807)
6
(019)
7
(405)
8
(900)
9
10
(001)
149.7 mm
92.1 mm
34 min
1 (001)
(307)
2
(086)
3
(214)
4
(208)
5
(085)
6
(058)
7
(348)
8
(900)
9
164.5 mm
108.2 mm
No.4
40 min
1 (001)
(307)
2
(085)
3
(328)
4
(323)
5
(010)
6
(843)
7
(612)
8
(620)
9
10
11
12
13
(812)
(348)
(900)
(001)
162.9 mm
126.1 mm
Page 17

15
No.5
No.6
No.7
No.8
28 min
1 (502)
(534)
2
(415)
3
(001)
4
(307)
5
(542)
6
(030)
7
(058)
8
(607)
9
(337)
10
(534)
11
(900)
12
(406)
13
137.8 mm
126.6 mm
33 min
1 (208)
(307)
2
(607)
3
(613)
4
(001)
5
(399)
6
(208)
7
(323)
8
(124)
9
(079)
10
(612)
11
(614)
12
(085)
13
(348)
14
(001)
15
(509)
16
(900)
17
(348)
18
146.9 mm
110.7 mm
9 min
1 (328)
179.6 mm
181.5 mm
3 min
1 (328)
58.3 mm
44.8 mm
No.9
No.10
No.11
No.12
11 min
1 (001)
(307)
2
(086)
3
(208)
4
(019)
5
(348)
6
(900)
7
(017)
8
(420)
9
10
11
(348)
(019)
82.2 mm
49.0 mm
12 min
1 (001)
(307)
2
(205)
3
(214)
4
(800)
5
(515)
6
(900)
7
(005)
8
(019)
9
10
11
12
13
14
15
16
(086)
(337)
(405)
(348)
(214)
(900)
(405)
78.8 mm
41.5 mm
17 min
1 (208)
(205)
2
(001)
3
(307)
4
(810)
5
(086)
6
(085)
7
(214)
8
(208)
9
10
11
12
13
14
15
16
17
(205)
(323)
(405)
(328)
(005)
(900)
(507)
(086)
80.4 mm
65.2 mm
13 min
1 (001)
(307)
2
(010)
3
(328)
4
(206)
5
(086)
6
(812)
7
(328)
8
(900)
9
10
11
12
13
(323)
(001)
(507)
(085)
79.7 mm
51.6 mm
No.13
No.14
No.15
No.16
16 min
1 (001)
(307)
2
(030)
3
(607)
4
(614)
5
(307)
6
(534)
7
(542)
8
(017)
9
10
11
12
13
14
15
(415)
(086)
(534)
(900)
(337)
(323)
78.2 mm
67.6 mm
13 min
1 (001)
(348)
2
(900)
3
(086)
4
(542)
5
(534)
6
(214)
7
(339)
8
(900)
9
10
(001)
75.5 mm
60.3 mm
13 min
1 (001)
(513)
2
(307)
3
(206)
4
(323)
5
(124)
6
(607)
7
(810)
8
(612)
9
10
11
12
13
(613)
(001)
(085)
(614)
80.7 mm
49.4 mm
11 min
1 (001)
(339)
2
(323)
3
(542)
4
(333)
5
(620)
6
(900)
7
(058)
8
(502)
9
10
11
12
13
14
(085)
(027)
(542)
(900)
(415)
80.2 mm
55.2 mm
© Disney
© Disney. Based on the "Winnie the Pooh" works by A.A. Milne and E.H. Shepard.
Page 18

16
No.17
7 min
1 (323)
95.7 mm
88.7 mm
No.22
52 min
1 (001)
(534)
2
(900)
3
(001)
4
152.1 mm
114.2 mm
No.18
No.19
No.20
No.21
13 min
1 (019)
177.0 mm
112.6 mm
19 min
1 (810)
138.9 mm
141.8 mm
47 min
1 (001)
(030)
2
(001)
3
(030)
4
(900)
5
(030)
6
(001)
7
123.3 mm
125.8 mm
53 min
1 (001)
(206)
2
(900)
3
(206)
4
(001)
5
(900)
6
(001)
7
135.4 mm
113.9 mm
No.23
No.24
40 min
1 (030)
(001)
2
(900)
3
(001)
4
(900)
5
(001)
6
(900)
7
154.3 mm
118.9 mm
36 min
1 (810)
(900)
2
(307)
3
(030)
4
(502)
5
(202)
6
(810)
7
(017)
8
(001)
9
10
11
12
13
(900)
(202)
(900)
(086)
156.4 mm
122.9 mm
No.25
215 min
1 (001)
(900)
2
(005)
3
(019)
4
(405)
5
(007)
6
(001)
7
(509)
8
(507)
9
10
11
12
13
14
15
16
17
18
19
20
21
22
(513)
(515)
(085)
(086)
(800)
(030)
(124)
(206)
(209)
(027)
(399)
(070)
(017)
325.8 mm
262.7 mm
Page 19

17
No.26
114 min
1 (348)
(085)
2
(348)
3
(209)
4
(107)
5
(812)
6
(086)
7
(001)
8
(085)
9
10
11
12
13
14
15
16
17
18
19
20
21
22
23
24
25
26
(107)
(812)
(348)
(086)
(085)
(209)
(107)
(209)
(085)
(209)
(085)
(001)
(348)
(209)
(812)
(107)
(085)
354.9 mm
225.9 mm
No.29
69 min
1 (001)
(001)
2
(001)
3
(399)
4
(399)
5
291.4 mm
147.6 mm
No.27
No.28
64 min
1 (001)
(001)
2
(001)
3
(399)
4
(399)
5
(001)
6
(399)
7
(399)
8
161.1 mm
197.0 mm
114 min
1 (001)
(001)
2
(399)
3
(001)
4
(399)
5
(001)
6
(399)
7
(399)
8
286.7 mm
232.8 mm
No.30
43 min
1 (001)
(001)
2
(001)
3
(001)
4
(001)
5
172.9 mm
202.4 mm
No.31
1 (086) 7 (086)
(019) 8 (810)
2
(420) 9 (086)
3
(017) 10 (810)
4
(086) 11 (086)
5
(810)
6
161.4 mm 190.2 mm
83 min
© Disney
Page 20

18
No.1
88 min
1 (001)
(124)
2
(017)
3
(208)
4
(086)
5
(070)
6
(534)
7
(900)
8
283.9 mm
194.4 mm
No.5
No.6
18 min
1 (124)
(620)
2
(079)
3
(202)
4
(001)
5
(900)
6
94.8 mm
76.1 mm
26 min
1 (333)
(542)
2
(333)
3
(058)
4
127.8 mm
178.0 mm
No.2
No.3
No.4
17 min
1 (001)
2
3
4
5
6
7
8
9
94.6 mm
74.9 mm
23 min
1 (542)
2
3
4
5
6
7
8
9
10
11
116.0 mm
92.2 mm
33 min
1 (900)
2
3
4
5
6
7
8
9
175.7 mm
113.9 mm
(307)
(206)
(019)
(010)
(900)
(209)
(086)
(001)
(206)
(001)
(399)
(307)
(124)
(214)
(017)
(019)
(900)
(800)
(001)
(019)
(307)
(206)
(086)
(079)
(900)
(001)
No.7
1 (542) 17 (086)
2
3
4
5
6
7
8
9
10
11
12
13
14
15
16
No.8
1 (804)
2
3
4
5
6
7
8
9
10
11
12
104 min
(027) 18 (348)
(399) 19 (337)
(001) 20 (085)
(399) 21 (086)
(206) 22 (534)
(307) 23 (810)
(214) 24 (333)
(800) 25 (800)
(017) 26 (812)
(019) 27 (534)
(124) 28 (001)
(900) 29 (542)
(542) 30 (612)
(079) 31 (704)
(030)
230.3 mm 178.8 mm
18 min
(019)
(017)
(001)
(019)
(812)
(307)
(804)
(001)
(348)
(900)
(333)
95.3 mm
85.5 mm
Page 21

19
No.9
1 (307) 10 (812)
(348) 11 (348)
2
(804) 12 (900)
3
(019) 13 (030)
4
(017) 14 (019)
5
(019) 15 (017)
6
(001) 16 (019)
7
(019) 17 (804)
8
(307) 18 (001)
9
154.6 mm 126.1 mm
24 min
No.13
1 (001) 13 (613)
(307) 14 (620)
2
(804) 15 (337)
3
(019) 16 (339)
4
(420) 17 (019)
5
(812) 18 (869)
6
(399) 19 (001)
7
(017) 20 (348)
8
(900) 21 (333)
9
10
11
12
(323) 22 (804)
(405) 23 (900)
(534)
151.4 mm 143.6 mm
38 min
No.10
No.11
1 (405) 16 (001)
(613) 17 (019)
2
(869) 18 (307)
3
(107) 19 (348)
4
(534) 20 (323)
5
(620) 21 (337)
6
(017) 22 (107)
7
(900) 23 (869)
8
(328) 24 (804)
9
10
11
12
13
14
15
(869) 25 (607)
(307) 26 (348)
(348) 27 (339)
(019) 28 (900)
(804) 29 (030)
(534)
145.4 mm 61.4 mm
No.12
1 (804) 13 (001)
(399) 14 (019)
2
(001) 15 (307)
3
(019) 16 (804)
4
(307) 17 (869)
5
(019) 18 (107)
6
(804) 19 (337)
7
(017) 20 (900)
8
(812) 21 (333)
9
10
11
12
(348) 22 (804)
(900) 23 (001)
(333)
92.0 mm 92.0 mm
1 (001)
2
3
4
5
6
7
8
9
10
11
12
13
14
25 min
20 min
35 min
152.3 mm
156.7 mm
(307)
(804)
(019)
(420)
(017)
(019)
(812)
(399)
(307)
(348)
(900)
(333)
(001)
No.14
No.15
No.16
8 min
1 (001)
(017)
2
(019)
3
(704)
4
(900)
5
(001)
6
(017)
7
(420)
8
(019)
9
10
11
12
13
(900)
(126)
(337)
(058)
81.8 mm
35.1 mm
9 min
1 (001)
(126)
2
(817)
3
(900)
4
(058)
5
(017)
6
93.9 mm
39.8 mm
7 min
1 (001)
(017)
2
(019)
3
(126)
4
(337)
5
(704)
6
(900)
7
(058)
8
(515)
9
10
11
(612)
(620)
60.7 mm
52.6 mm
No.17
No.18
No.19
13 min
1 (001)
(058)
2
(817)
3
(704)
4
(817)
5
(126)
6
(337)
7
(900)
8
74.2 mm
79.7 mm
16 min
1 (017)
(001)
2
(058)
3
(126)
4
(337)
5
(817)
6
(420)
7
(406)
8
(019)
9
10
11
12
13
(607)
(534)
(001)
(900)
108.5 mm
85.0 mm
16 min
1 (017)
(017)
2
(420)
3
(420)
4
(001)
5
(534)
6
(307)
7
(804)
8
(812)
9
10
11
12
13
14
15
16
17
(348)
(399)
(333)
(017)
(019)
(900)
(001)
(420)
74.1 mm
87.0 mm
© Disney
Page 22

20
No.20
1 (405) 14 (804)
(405) 15 (333)
2
(620) 16 (337)
3
(620) 17 (339)
4
(707) 18 (810)
5
(017) 19 (612)
6
(534) 20 (534)
7
(001) 21 (019)
8
(307) 22 (900)
9
10
11
12
13
(323) 23 (807)
(804) 24 (707)
(620) 25 (001)
(869)
92.0 mm 94.8 mm
22 min
No.24
No.25
2 min
1 (086)
39.8 mm
25.5 mm
26 min
1 (001)
(502)
2
(007)
3
143.9 mm
166.4 mm
No.21
1 (001) 15 (339)
(017) 16 (869)
2
(307) 17 (348)
3
(804) 18 (333)
4
(812) 19 (900)
5
(019) 20 (001)
6
(420) 21 (810)
7
(399) 22 (542)
8
(337) 23 (612)
9
10
11
12
13
14
No.22
10
11
12
(900) 24 (534)
(405) 25 (804)
(323) 26 (017)
(534) 27 (019)
(620)
256.2 mm 199.8 mm
10 min
1 (001)
(019)
2
(001)
3
(513)
4
(307)
5
(206)
6
(509)
7
(085)
8
(017)
9
(513)
(817)
(017)
90.9 mm
69.5 mm
74 min
No.26
No.27
27 min
1 (017)
(085)
2
(513)
3
(086)
4
185.8 mm
146.0 mm
7 min
1 (613)
(607)
2
(513)
3
70.7 mm
75.7 mm
No.23
1 (001) 12 (348)
(017) 13 (513)
2
(085) 14 (807)
3
(086) 15 (001)
4
(807) 16 (399)
5
(214) 17 (323)
6
(328) 18 (206)
7
(323) 19 (348)
8
(307) 20 (019)
9
10
11
(812) 21 (900)
(027)
118.3 mm 70.6 mm
20 min
No.28
8 min
1 (613)
(607)
2
(513)
3
97.2 mm
70.6 mm
Page 23

21
No.29
92 min
1 (001)
(214)
2
(328)
3
(001)
4
(900)
5
243.5 mm
194.7 mm
No.32
13 min
1 (019)
(001)
2
(079)
3
(017)
4
(405)
5
(205)
6
(339)
7
(707)
8
(307)
9
10
11
12
13
14
15
16
(079)
(323)
(339)
(205)
(900)
(058)
(001)
68.9 mm
87.0 mm
No.30
No.31
1 (019) 17 (019) 33 (323)
2
3
4
5
6
7
8
9
10
11
12
13
14
15
16
20 min
(208) 18 (323) 34 (513)
(058) 19 (001) 35 (010)
(070) 20 (010) 36 (502)
(010) 21 (001) 37 (001)
(001) 22 (005) 38 (214)
(339) 23 (704) 39 (339)
(058) 24 (027) 40 (058)
(323) 25 (339) 41 (612)
(027) 26 (019) 42 (058)
(900) 27 (010) 43 (208)
(027) 28 (058) 44 (010)
(058) 29 (124) 45 (323)
(208) 30 (019) 46 (019)
(209) 31 (058) 47 (124)
(124) 32 (208)
38.1 mm 175.7 mm
9 min
1 (515)
(513)
2
(058)
3
(214)
4
(001)
5
(307)
6
(030)
7
(339)
8
(507)
9
10
(900)
103.0 mm
44.0 mm
No.33
No.34
No.35
7 min
1 (017)
(079)
2
(086)
3
(001)
4
(085)
5
(900)
6
64.7 mm
50.8 mm
8 min
1 (019)
(007)
2
(420)
3
(612)
4
(010)
5
(107)
6
(030)
7
(900)
8
63.0 mm
55.7 mm
19 min
1 (307)
(126)
2
(513)
3
(843)
4
(079)
5
(005)
6
(339)
7
(707)
8
(323)
9
10
11
12
13
14
15
16
17
18
19
(817)
(086)
(405)
(019)
(405)
(406)
(704)
(058)
(704)
(900)
95.7 mm
78.5 mm
© Disney
Page 24

22
No.36
1 (001) 17 (900)
2
3
4
5
6
7
8
9
10
11
12
13
14
15
16
◆
Designs using the Print and Stitch function
◆
Designs, die die Funktion Drucken und Sticken verwenden
◆
Motifs utilisant la fonction Imprimer et broder
◆
Ontwerpen met de functie Printen en Borduren
◆
Ricami che utilizzano la funzione Stampa & Ricama
◆
Diseños con la función Imprimir y coser
◆
Дизайны, созданные при помощи функции “Печать и вышивка”
55 min
(812) 18 (001)
(214) 19 (010)
(337) 20 (027)
(339) 21 (001)
(058) 22 (027)
(001) 23 (509)
(517) 24 (339)
(001) 25 (817)
(079) 26 (509)
(339) 27 (513)
(307) 28 (086)
(399) 29 (124)
(005) 30 (339)
(017) 31 (323)
(079) 32 (058)
222.0 mm 178.9 mm
Innovative designs can be created by adding a background to embroidery. For details on using this function, refer to the Operation
Manual.
Sie können innovative Designs erstellen, indem Sie der Stickerei einen Hintergrund hinzufügen. Weitere Informationen zur
Verwendung dieser Funktion finden Sie in der Bedienungsanleitung.
De nouveaux motifs peuvent être créés en ajoutant un arrière-plan à la broderie. Pour de plus amples renseignements sur l'utilisation
de cette fonction, reportez-vous au manuel d’instructions.
U kunt innovatieve ontwerpen maken door borduurwerk te voorzien van een achtergrond. Raadpleeg de Bedieningshandleiding voor
meer bijzonderheden over het gebruik van deze functie.
È possibile creare disegni innovativi aggiungendo uno sfondo al ricamo. Per i dettagli sull'utilizzo di questa funzione, fare riferimento
al Manuale di istruzioni.
Pueden crearse diseños innovadores aplicando un fondo al bordado. Para obtener más información sobre cómo utilizar esta
función, consulte el manual de instrucciones.
Оригинальные дизайны можно создать путем добавления фона к вышивке. Подробнее об использовании этой функции см.
в "Руководстве пользователя".
Background image
Hintergrundbild
Image d'arrière-plan
Achtergrondafbeelding
Immagine di sfondo
Imagen de fondo
Изображение фона
Embroidery pattern
Stickmuster
Motif de broderie
Borduurpatroon
Ricamo
Patrón de bordado
Рисунок вышивания
Page 25

23
No.2
No.3
No.4
No.1
18 min
1 (001)
(005)
2
(030)
3
(800)
4
(420)
5
(205)
6
(209)
7
(900)
8
(001)
9
10
11
12
(005)
(900)
(205)
35.8 mm
107.1 mm
49 min
1 (001)
(058)
2
(704)
3
(513)
4
(337)
5
(339)
6
(704)
7
(900)
8
(513)
9
10
11
(058)
(704)
121.5 mm
129.8 mm
25 min
1 (001)
(058)
2
(843)
3
(513)
4
(704)
5
(900)
6
(337)
7
(030)
8
(339)
9
10
11
12
13
(704)
(058)
(704)
(900)
68.0 mm
86.5 mm
46 min
1 (005)
(001)
2
(900)
3
(420)
4
(030)
5
(800)
6
(704)
7
(707)
8
(205)
9
10
11
12
13
14
(214)
(208)
(214)
(900)
(001)
103.9 mm
190.6 mm
No.5
No.6
15 min
1 (900)
2
3
4
5
6
7
8
9
10
11
12
43.4 mm
95.2 mm
33 min
1 (001)
2
3
4
5
6
7
8
9
10
11
12
13
14
15
16
58.9 mm
126.9 mm
(001)
(507)
(509)
(005)
(707)
(333)
(030)
(800)
(205)
(704)
(817)
(399)
(005)
(817)
(030)
(800)
(205)
(214)
(208)
(502)
(900)
(005)
(420)
(124)
(502)
(900)
No.7
1 (001) 9 (206)
(399) 10 (208)
2
(005) 11 (214)
3
(704) 12 (420)
4
(323) 13 (900)
5
(030) 14 (001)
6
(800) 15 (030)
7
(205)
8
86.0 mm 173.5 mm
No.8
1 (001) 11 (800)
(005) 12 (206)
2
(126) 13 (208)
3
(017) 14 (214)
4
(817) 15 (900)
5
(704) 16 (005)
6
(707) 17 (001)
7
(900) 18 (005)
8
(019) 19 (704)
9
10
No.9
(030)
65.5 mm 174.5 mm
9 min
1 (800)
(001)
2
(900)
3
61.7 mm
70.7 mm
50 min
45 min
© Disney
© Disney/Pixar
Page 26

24
No.10
71 min
1 (900)
(005)
2
(001)
3
(900)
4
(420)
5
(030)
6
(800)
7
(704)
8
(707)
9
10
11
12
13
14
(205)
(208)
(214)
(900)
(001)
195.4 mm
239.6 mm
No.14
18 min
1 (001)
(307)
2
(208)
3
(800)
4
(420)
5
(339)
6
(214)
7
(323)
8
(005)
9
10
11
12
13
14
(513)
(614)
(900)
(017)
(323)
95.4 mm
56.9 mm
No.11
No.12
20 min
1 (001)
(307)
2
(208)
3
(800)
4
(405)
5
(339)
6
(214)
7
(058)
8
(214)
9
10
(900)
115.3 mm
103.7 mm
17 min
1 (005)
(001)
2
(800)
3
(513)
4
(613)
5
(307)
6
(208)
7
(900)
8
(017)
9
10
11
12
13
14
(019)
(507)
(800)
(208)
(900)
106.2 mm
66.9 mm
No.15
No.16
19 min
1 (542)
(534)
2
(001)
3
(415)
4
111.1 mm
109.7 mm
12 min
1 (001)
(519)
2
(513)
3
(612)
4
(420)
5
(406)
6
(900)
7
(208)
8
(214)
9
37.2 mm
88.1 mm
No.13
53 min
1 (613)
(005)
2
(001)
3
(800)
4
(513)
5
(019)
6
(307)
7
(017)
8
(900)
9
10
11
12
13
14
15
(017)
(507)
(019)
(323)
(208)
(900)
173.5 mm
187.8 mm
No.17
59 min
1 (027)
(513)
2
(415)
3
150.2 mm
267.8 mm
Page 27

25
No.18
No.19
No.20
No.21
74 min
1 (001)
(027)
2
(107)
3
(415)
4
(001)
5
(415)
6
200.4 mm
175.1 mm
10 min
1 (001)
(517)
2
(513)
3
(001)
4
69.9 mm
67.6 mm
39 min
1 (206)
(542)
2
(502)
3
(001)
4
(534)
5
(607)
6
(900)
7
(019)
8
(001)
9
121.3 mm
134.9 mm
19 min
1 (001)
(900)
2
(405)
3
(817)
4
(019)
5
(843)
6
(513)
7
(534)
8
(612)
9
(900)
10
(005)
11
(086)
12
(399)
13
(005)
14
77.2 mm
59.5 mm
No.23
No.24
No.25
1 (214) 9 (513)
(900) 10 (707)
2
(707) 11 (208)
3
(005) 12 (001)
4
(704) 13 (900)
5
(800) 14 (707)
6
(707) 15 (019)
7
(058)
8
75.9 mm 68.5 mm
1 (534)
2
3
4
5
6
7
8
9
10
11
12
13
14
15
16
1 (513)
2
3
4
14 min
15 min
(509)
(001)
(209)
(339)
(900)
(001)
(405)
(406)
(086)
(900)
(206)
(007)
(019)
(214)
(323)
79.5 mm
82.1 mm
24 min
(214)
(420)
(001)
130.1 mm
162.8 mm
No.22
17 min
1 (420)
(001)
2
(209)
3
(337)
4
(208)
5
(007)
6
(005)
7
(339)
8
(900)
9
75.3 mm
87.6 mm
© Disney/Pixar
Page 28

◆
Utility embroidery patterns
◆
Borduursteken
◆
Основные строчки для вышивания
◆
Nutzstich-Stickmuster
◆
Punti decorativi ricamati
◆
Motifs de broderie courants
◆
Patrones de bordado de utilidad
1 min
1 (900)
No.1
No.2
33.0 mm
11.0 mm
33.0 mm
11.0 mm
No.3
No.4
110.5 mm
17.9 mm
No.5
No.6
36.5 mm
16.6 mm
67.0 mm
12.9 mm
No.7
No.8
92.8 mm
31.9 mm
73.0 mm
19.8 mm
No.9
54.0 mm
19.9 mm
No.10
59.0 mm
19.9 mm
111.4 mm
13.0 mm
◆
Character/Decorative Stitches
◆
Letter/decoratieve steken
◆
Алфавиты/декоративные строчки
◆
Buchstaben/Dekorative Stiche
◆
Punti decorativi/caratteri alfabetici
◆
Caractères/points décoratifs
◆
Puntadas de letras/decorativas
26
Page 29

Creative Idea Kreative Idee
Idée créative
Creatieve ideeën
Idea creativa Idea creativa
Совет
You can make 3D combination motifs using water-soluble sheets without any fabric. For details, refer to page 36.
Sie können 3D-Kombinationsmotive erstellen, indem Sie wasserlösliche Folien ohne Sto verwenden. Weitere Informationen dazu, siehe Seite 36.
Vous pouvez créer des motifs de combinaison 3D à l'aide de feuilles solubles sans utiliser de tissu. Pour de plus amples détails, reportez-vous à la
section page 36.
U kunt 3D-borduurontwerpen maken met in water oplosbaar materiaal zonder gebruik van stof en/of textiel. Voor meer informatie, zie pagina 36.
È possibile creare motivi tridimensionali combinati utilizzando fogli idrosolubili senza alcun tessuto. Per i dettagli fare riferimento a pagina 36.
Puede crear motivos de combinación 3D utilizando láminas solubles en agua sin ningún tipo de tejido. Para obtener más información, consulte la
página 36.
Можно делать комбинированные 3D узоры, используя водорастворимые листы без ткани. Подробнее см. в разделе с. 36.
No.31
No.21
© Disney
27
Page 30

28
Use the Embroidery Edit function on your new machine to easily combine designs! Be creative, add your name to design. Don’t forget to put your
initials and the date on the next quilt that you make!
Nutzen Sie die Funktion zum Bearbeiten der Stickerei auf Ihrer neuen Maschine und kombinieren Sie ganz einfach mehrere Designs. Seien Sie
kreativ und fügen Sie Ihren Namen zum Design hinzu. Vergessen Sie nicht Ihre Initialen und das Datum auf den nächsten Quilt zu sticken, den Sie
erstellen!
Utilisez la fonction d'Edition de la broderie de votre nouvelle machine pour combiner des motifs en toute simplicité ! Laissez libre cours à votre
créativité, ajoutez votre nom au motif. N'oubliez pas d'apposer vos initiales et la date sur votre prochain Quilt (courtepointe) !
Gebruik de functie Borduurbewerking op uw nieuwe machine om ontwerpen gemakkelijk te kunnen combineren! Wees creatief en geef uw naam
aan het ontwerp. Voorzie uw quilt van uw initialen en de datum; ook op iedere nieuwe quilt die u maakt!
Sulla tua nuova macchina utilizza la funzione di modifica per combinare facilmente più ricami! Sii creativo aggiungendo il tuo nome al ricamo.
Non dimenticare di siglare con le tue iniziali e la data il prossimo progetto quiltato che farai!
¡Con la función Edición de bordados de su nueva máquina podrá combinar diseños fácilmente! Desarrolle su creatividad y añada su nombre a los
diseños. ¡No olvide poner sus iniciales y la fecha en el siguiente edredón que cosa!
Используйте функцию редактирования вышивки на вашей машине, чтобы с легкостью комбинировать дизайны! Проявляйте творчество и
подписывайте свои дизайны. Не забудьте добавить свои инициалы и дату в ваш новый дизайн для квилтинга!
No.46
No.3 + No.5 No.4 + No.5
No.23 + No.24
Page 31

29
No.17No.9 - No.16
No.1+No.7
No.4+No.7
No.2+No.7+No.8
No.5+No.7+No.8
No.3+No.7+No.8
No.6+No.7
© Disney
Page 32

30
No.27
through
Nr. 27
bis
Les motifs
No.30
are three-dimensional patterns made by sewing appliqués on water-soluble stabilizer.
Nr. 30
sind dreidimensionale Muster, die durch das Nähen von Applikationen auf wasserlösliche Stickfolie entstanden sind.
nº 27
nº 30
à
sont des motifs tridimensionnels créés en cousant des appliqués sur un renfort de broderie soluble.
De patronen 27 tot en met 30 zijn driedimensionale patronen, die worden gemaakt in water oplosbaar verstevigingsmateriaal (zonder stof).
n. 27
Dal
N.º 27
Del
Рисунки с
al
al
№ 27
n. 30
sono disegni tridimensionali realizzati cucendo applicazioni sullo stabilizzatore idrosolubile.
N.º 30
son patrones tridimensionales creados cosiendo apliques sobre un estabilizador soluble en agua.
№ 30
по
представляют собой объемные рисунки, созданные путем нашивания аппликаций на водорастворимый
стабилизатор.
No.27
A: Piecing
A: Zusammenfügen
A: Assemblage
A: In elkaar zetten
A: Impuntura
Stabilizer
Stickfolie
Renfort
Versteviging
Stabilizzatore
Estabilizador
Стабилизатор
Felt
Filz
Feutre
Vilt
Feltro
Fieltro
Фетр
A: Remiendos
A:
Сшивание двух полотен материала
B: Embroidering &
appliqué sewing
B: Sticken und Nähen der
Applikation
B: Broderie et couture
d'appliqué
B: Borduren & applicaties
naaien
B: Cucitura di ricami e
applicazioni
B: Bordado y costura de
apliques
B: Вышивание и
пришивание аппликации
C: Finishing
C: Fertigstellen
C: Finition
C: Afwerking
C: Finitura
C: Acabado
C: Окончательная отделка
Two sheets of non-woven watersoluble stabilizer
Zwei wasserlösliche, nicht gewebte Stickfolien
Position
Positionieren
Position
Positie
Posizione
Posición
Положение
Appliqué stitch
Applikationsstich
Point d'appliqué
Applicatiesteek
Punto applicazione
Puntada para aplique
Строчка для пришивания
аппликаций
1
◄
2
◄
Deux feuilles de renfort de
broderie soluble non tissé
Twee vellen niet-geweven, in water
oplosbare versteviging
Due fogli di stabilizzatore idrosolubile non tessuto
Dos láminas de estabilizador
soluble en agua no tejido
Два листа нетканого
водорастворимого стабилизатора
3
►
4
►
If the water-soluble stabilizer sheet is not large enough,
sew sheets together.
Wenn die wasserlösliche Stickfolie nicht groß genug ist,
können Sie mehrere Folien aneinander nähen.
Si la feuille de renfort de broderie soluble n'est pas assez
grande, cousez deux feuilles ensemble.
Als het vel in water oplosbare versteviging niet groot
genoeg is, naait u twee vellen aan elkaar.
Se il foglio di stabilizzatore idrosolubile non è
sucientemente largo, cucire insieme i fogli.
Si la lámina del estabilizador soluble en agua no es lo
bastante grande, cosa las láminas
entre sí para unirlas.
Если листы водорастворимого
стабилизатора недостаточно
большие, сшейте листы вместе.
Glue pieces together with a low-moisture adhesive (glue
stick, etc.).
Kleben Sie die Teile mit einem Klebsto mit geringer
Feuchtigkeit (Klebestift usw.) zusammen.
Collez les pièces ensemble avec un adhésif à faible
humidité (bâton de colle, etc.).
Lijm de stukken aan elkaar met een lijm met een laag
vochtgehalte (plakstift, enz.).
Incollare insieme i pezzi con un adesivo a basso tenore di
umidità (colla stick, ecc.)
Encole las piezas entre sí con un adhesivo de bajo nivel de
humedad (barra de pegamento, etc.).
Склейте детали вместе нежидким клеем (клеевым
карандашом и т. п.).
Gently rinse in lukewarm water, leaving some adhesive, and
then towel dry. Lay flat, reshape, and then allow to air dry.
Spülen Sie das Teil vorsichtig in lauwarmem Wasser, lösen
Sie dabei einen Teil des Klebstos ab und trocknen Sie es
dann mit einem Tuch ab. Legen Sie es flach aus, ziehen Sie
es wieder in Form und lassen Sie es an der Luft trocknen.
Rincez délicatement dans de l'eau tiède, en laissant de
l'adhésif, puis séchez avec une serviette. Étalez à plat,
remettez en forme et laissez sécher à l'air libre.
Spoel het werk voorzichtig uit met lauw water, waarbij er wat lijm
kan achterblijven, en dep het droog met een handdoek. Leg het
werk plat neer, trek het in vorm en laat het drogen.
Sciacquare delicatamente in acqua tiepida, lasciando un
po' di adesivo, quindi tamponare con un asciugamano.
Distendere, rimodellare e lasciare asciugare all'aria.
Enjuague ligeramente la prenda en agua tibia, dejando un poco de
adhesivo, y luego séquela con una toalla. Colóquela en posición
horizontal, vuelva a darle forma y déjela secar al aire libre.
Аккуратно промойте в теплой воде, оставьте небольшое
количество клея и промокните полотенцем. Разложите на ровной
поверхности, придайте форму и дайте высохнуть на воздухе.
►
Use a seam ripper to cut holes at the areas indicated by , and then
33
insert the part indicated by the matching green number.
Schneiden Sie mit einem Pfeiltrenner Löcher in die mit
gekennzeichneten Bereiche und stecken Sie dann den Teil mit der
passenden grünen Nummer hinein.
Utilisez un découseur pour découper des trous dans les zones indiquées
par
, puis insérez la pièce indiquée par le numéro vert correspondant.
Maak met een tornmesje openingen op de plekken die zijn
aangegeven met een
aangegeven met het bijbehorende groene nummer.
Con un taglia asole praticare i fori nelle aree indicate da
inserire la parte indicata dal numero verde corrispondente.
Utilice un abreojales para cortar orificios en las zonas indicadas con ,
y luego inserte la parte indicada por el número verde correspondiente.
При помощи вспарывателя для петель прорежьте отверстия
в местах, обозначенных знаком
обозначенную соответствующим зеленым номером.
en plaats vervolgens het deel dat is
, и вставьте в них деталь,
, quindi
Page 33

31
No.29No.28 No.30
A
B
A A
B B
C C
►
◄
C
7
◄
8
►
4
◄
5
◄
6
◄
1
3
42
►
►
No.29
No.28No.27
4
9
5
:
6
7
8
9
:
►
◄
© Disney
Page 34

32
Embroidering appliqués Sticken von Applikationen
Broderie d’appliqués Applicaties borduren
Ricamo di applicazioni Apliques bordados
Вышивание аппликаций
Example: No.33 on page 8
Beispiel: Nr. 33 auf Seite 8
Exemple : Nº 33, page 8
Voorbeeld: patroon 33 op
pagina 8
Esempio: N.33 a pagina 8
Ejemplo: N.º 33 en la página 8
Пример: № 33 на стр. 8
If pattern No.2 on page 5, No.33 - No.35 on page 8, No.15 on page 13, No.19 on page 19, or No.20
on page 20 is selected, the following images appear. These are explained in steps 1 through 3.
(Other patterns are sewn in the same way.)
Wenn Muster Nr. 2 auf Seite 5, Nr. 33 bis Nr. 35 auf Seite 8, Nr. 15 auf Seite 13, Nr. 19 auf Seite 19
oder Nr. 20 auf Seite 20 ausgewählt sind, werden folgende Bilder angezeigt. Diese werden in den
Schritten 1 bis 3 beschrieben. (Andere Muster werden auf die gleiche Weise genäht.)
Si le motif nº 2 de la page 5, nº 33 - nº 35 de la page 8, nº 15 de la page 13, nº 19 de la page 19 ou
nº 20 de la page 20 est sélectionné, les images suivantes apparaissent. Elles sont expliquées dans les
étapes 1 à 3. (D'autres motifs sont cousus de la même manière.)
Als u de patroon 2 op pagina 5, patronen 33 - 35 op pagina 8, patroon 15 op pagina 13, patroon
19 op pagina 19 of patroon 20 op pagina 20 selecteert, verschijnen de afbeeldingen als hieronder
weergegeven. Deze patronen worden uitgelegd in de stappen 1 tot en met 3. (De overige patronen
worden op dezelfde manier genaaid.)
Se sono selezionati i ricami N. 2 a pagina 5, N. 33 - N. 35 a pagina 8, N. 15 a pagina 13, N. 19 a
pagina 19 o N. 20 a pagina 20, sono visualizzate le immagini seguenti. Sono spiegate dai passaggi da 1
a 3. (Altri ricami vengono cuciti nello stesso modo.)
Si se selecciona el patrón N.º 2 de la página 5, el N.º 33 - N.º 35 de la página 8, el N.º 15 de la página
13, el N.º 19 de la página 19 o el N.º 20 de la página 20, se muestran las siguientes imágenes. Estos se
explican en los pasos 1 a 3. (Otros patrones se cosen de la misma forma).
Если выбран рисунок № 2 на стр. 5, № 33 или 35 на стр. 8, № 15 на стр. 13, № 19 на стр. 19 или
№ 20 на стр. 20, появляются следующие изображения. Соответствующие объяснения приведены
в пунктах с 1 по 3. (Другие рисунки вышиваются аналогичным образом.)
1
Appliqué Material
Material
Pièce d’appliqué
Applicatiemateriaal
Materiale applicazione
Material del aplique
Материал аппликации
2
Appliqué Position
Position der Applikation
Position d’appliqué
Applicatiepositie
Posizione applicazione
Posición del aplique
Расположение аппликации
3
Appliqué
Applikation
Appliqué
Applicatie
Applicazione
Aplique
Аппликация
Page 35

33
1
Make the appliqué
Erstellen der Applikation
Créer l'appliqué
Een applicatie maken
Eseguire l'applicazione
Come hacer una aplicación.
Создайте аппликацию
Attach a stabilizer to the reverse side of the appliqué material.
1
Appliqué material (Cotton, felt etc.)
2
Stabilizer
1
2
Befestigen Sie eine Stickfolie auf die Rückseite des Materials.
1
Material (Baumwolle, Filz usw.)
2
Stickfolie
Fixer un stabilisateur à l'envers du tissu d'appliqué.
1
Préparer les pièces pour l'appliqué (coton, feutre, etc.)
2
Stabilisateur
Bevestig een versteviging aan de achterkant van de applicatiestof.
1
Applicatiemateriaal (katoen, vilt, enz.)
Versteviging
2
Applicare uno stabilizzatore sul rovescio del materiale applicazione.
1
Materiale applicazione (cotone, feltro, ecc.)
2
Stabilizzatore
Coloque un estabilizador del lado de atrás del material del aplique.
1
Material del aplique (Algodón, fieltro, etc.)
2
Entretela
Прикрепите стабилизатор к обратной стороне материала аппликации.
1
Материал аппликации (хлопчатобумажная ткань, фетр и т. п.)
2
Стабилизатор
Place the appliqué material into the embroidery frame, and then press the START/STOP switch. The
machine will sew around the outline of the appliqué pieces and will then stop.
Legen Sie das Material in den Stickrahmen und drücken Sie dann die Start/Stopp-Taste. Die Maschine
näht entlang der Umrisse der Applikationsteile und stoppt dann.
Placer le tissu d'appliqué dans le cadre de broderie, puis appuyer sur l'interrupteur MARCHE/ARRÊT. La
machine eectuera la couture autour du contour de la pièce d'appliqué, puis s'arrêtera.
Plaats het applicatiemateriaal in het borduurraam en druk vervolgens op de Start/Stop-toets. De machine
naait rond de omtrek van de applicatiedelen en stopt vervolgens.
Posizionare il materiale applicazione nel telaio per ricamo e premere l'interruttore START/STOP. La
macchina cucirà intorno al contorno dei pezzi applicazione e si fermerà.
Ubique el material del aplique dentro del bastidor de bordado, y luego presione el interruptor comienzo/
parada. La máquina coserá alrededor del borde del aplique y luego se parará.
Поместите материал аппликации в пяльцы и нажмите на переключатель "Пуск/Стоп". Машина
прошивает аппликацию по контуру, а затем останавливается.
Remove the appliqué material from the embroidery frame, and then cut carefully along the seam. After
cutting, remove all of the seam thread carefully.
Entnehmen Sie das Material aus dem Stickrahmen und schneiden Sie dann vorsichtig entlang der Naht.
Entfernen Sie nach dem Schneiden vorsichtig das gesamte Garn.
Retirer le tissu d'appliqué du cadre de broderie, puis couper soigneusement le long de la couture. Après
avoir coupé, retirer soigneusement tous les points.
Verwijder het applicatiemateriaal uit het borduurraam en knip de overtollige stof zorgvuldig weg langs
de naad. Verwijder na het knippen alle draden en rafels.
Rimuovere il materiale applicazione dal telaio per ricamo e tagliare attentamente lungo la cucitura.
Dopo il taglio, rimuovere con attenzione tutto il filo della cucitura.
Quite el material del aplique del bastidor de bordado, y luego corte cuidadosamente a lo largo de la
costura.Después de cortar, quite cuidadosamente todo el hilo de la costura.
Снимите материал аппликации с пялец и аккуратно вырежьте аппликацию вдоль шва. После
вырезания аппликации осторожно удалите всю нить шва.
© Disney
Page 36

34
2
Place the base material into the embroidery frame and sew around the appliqué position.
Legen Sie das Grundmaterial in den Stickrahmen und nähen Sie um die Position der Applikation.
Placer le tissu de base dans le cadre de broderie, puis coudre autour de la position de l'appliqué.
Plaats het basismateriaal in het borduurraam en naai rond de plaats van de applicatie.
Posizionare il materiale di base nel telaio per ricamo e cucire intorno alla posizione applicazione.
Ubique el material de base en el bastidor de bordado y cosa alrededor de la posición del aplique.
Поместите материал основы в пяльцы и прошейте по контуру расположения аппликации.
Place the base fabric into the embroidery fame.
Legen Sie den Grundsto in den Stickrahmen.
Placer le tissu de base dans le cadre de boderie.
Plaats de basisstof in het borduurraam.
Posizionare il tessuto di base nel telaio per ricamo.
Colocar el tejido de base en el marco de bordado.
Закрепите ткань основы в пяльцах.
Press the START/STOP switch. The machine will sew around the position of the appliqué and will then stop.
Drücken Sie die Start/Stopp-Taste. Die Maschine näht entlang der Position der Applikation und stoppt dann.
Appuyer sur l'interrupteur MARCHE/ARRÊT. La machine eectuera la couture autour de la position de
l'appliqué, puis s'arrêtera.
Druk op de Start/Stop-toets. De machine naait rond de plaats van de applicatie en stopt vervolgens.
Premere l'interruttore START/STOP. La macchina cucirà intorno alla posizione dell'applicazione e si
fermerà.
Presione el interruptor comienzo/parada. La máquina comenzará a coser alrededor de la posición del
aplique y luego se detendrá.
Нажмите на переключатель "Пуск/Стоп". Машина прошивает строчку вокруг позиции аппликации, а
затем останавливается.
3
Attach the appliqué to the base fabric with glue to complete the appliqué.
Befestigen Sie die Applikation mit Klebsto auf dem Grundsto, um die Applikation fertigzustellen.
Fixer l'appliqué sur le tissu de base avec de la colle pour achever l'appliqué.
Bevestig met lijm de applicatie op de basisstof om de applicatie af te maken.
Applicare l'applicazione al tessuto di fondo con con colla per completare l'applicazione.
Pegar el tejido de base a la aplicación con adhesivo de forma de completar la aplicación.
Приклейте клеем аппликацию к ткани основы, чтобы завершить создание аппликации.
Apply a thin layer of adhesive to the back of the appliqué pattern and attach it to the base fabric so that it
follows the seam of the outline.
Tragen Sie eine dünne Schicht Klebsto auf die Rückseite des Applikationsmusters und befestigen Sie es auf
dem Grundsto, sodass es auf die Umrissnaht passt.
Appliquer une fine couche d'adhésif au dos du motif d'appliqué et fixer celui-ci sur le tissu de base de
façon qu'il suive la couture du contour.
Breng een dunne laag lijm aan op de achterkant van het applicatiepatroon en bevestig het op de basisstof,
waarbij u de naad van de omtrek aanhoudt.
Applicare un adesivo sul retro del tessuto per l'applicazione e applicarla sul tessuto di base in modo che
combaci con la cucitura fatta precedentemente.
Aplicar una fina capa de adhesivo en la parte de atrás de la aplicación y colocarla en el tejido de base de
forma que siga la costura del borde.
Нанесите тонкий слой клея на обратную сторону вырезанной аппликации и приклейте ее, совместив
со швом контура.
Press the START/STOP switch. The appliqué will then be completed.
Drücken Sie die Start/Stopp-Taste. Die Applikation wird dann fertiggestellt.
Appuyer sur l'interrupteur MARCHE/ARRÊT. L'appliqué sera alors terminé.
Druk op de Start/Stop-toets. De applicatie is nu voltooid.
Premere l'interruttore START/STOP. L'applicazione sarà completata.
Presione el interruptor comienzo/parada. Se terminará el aplique.
Нажмите на переключатель "Пуск/Стоп". Теперь создание аппликации завершено.
Page 37

35
Embroider the rest of the pattern.
Sticken Sie den Rest des Musters.
4
Broder le reste du motif.
Borduur de rest van het patroon.
Ricamare il resto del ricamo.
Borde el resto del diseño.
Вышейте остальную часть рисунка.
COMPLETED
FERTIGGESTELLT
TERMINÉ
VOLTOOID
COMPLETATO
COMPLETADO
РАБОТА ЗАВЕРШЕНА
Creating beautiful appliqués
After the appliqué is complete, place 1 or 2 sheets of stabilizer material over the area before sewing the
•
remainder of the embroidery. However, if the pattern has an outline, remove the stabilizer material before
sewing the outline.
Change over the upper thread and then carry out the rest of the embroidering.
Erstellen schöner Applikationen Legen
Legen Sie nach dem Fertigstellen der Applikation 1 oder 2 Stickfolien über den Bereich, bevor Sie den Rest der
•
Stickerei nähen. Entfernen Sie jedoch bei Mustern mit Umrissen die Stickfolie, bevor Sie den Umriss nähen.
Wechseln Sie den Oberfaden und sticken Sie dann den Rest.
Création de beaux appliqués
Une fois l’appliqué terminé, placer 1 ou 2 feuilles de stabilisateur sur la zone avant de broder le reste de la
•
broderie. Toutefois, si le motif dispose d’un contour, retirer le stabilisateur avant de coudre le contour.
Changer le fil supérieur puis eectuer le reste de la broderie.
Prachtige applicaties maken
Wanneer de applicatie is voltooid, legt u er 1 of 2 vellen versteviging overheen, voordat u de rest van het
•
borduurwerk naait. Als het patroon echter een omtrek heeft, verwijdert u de versteviging,voordat u de omtrek
naait.
Ga over op de bovendraad en voer vervolgens de rest van het borduurwerk uit.
Creazione di meravigliose applicazioni
Al termine dell’applicazione, posizionare 1 o 2 fogli di materiale stabilizzatore sull’area prima di cucire il
•
resto del ricamo. Tuttavia, se il ricamo ha un contorno, rimuovere il materiale stabilizzatore prima di cucire il
contorno.
Cambiare il filo superiore ed eseguire il resto del ricamo.
Creación de apliques preciosos
Una vez realizado el aplique, coloque 1 ó 2 hojas de material estabilizador sobre el área antes de coser el
•
resto del bordado. No obstante, si el diseño tiene un borde, quite el material estabilizador antes de coser
dicho borde.
Cambie el hilo superior y luego realice el resto del bordado.
Создание красивых аппликаций
Когда аппликация будет готова, перед выполнением оставшейся части вышивки наложите на этот
•
участок 1 или 2 листа стабилизатора. Но, если в рисунке имеется контур, удалите стабилизатор перед
вышиванием контура.
Смените верхнюю нить и выполните оставшиеся операции вышивания.
Some glue may get onto the presser foot, needle and needle plate at this time. Finish embroidering the appliqué pattern and
*
then clean away the glue.
Es gelangt hierbei möglicherweise Klebstoff auf den Nähfuß, die Nadel und die Stichplatte. Stellen Sie das Sticken des
*
Applikationsmusters fertig und entfernen Sie dann die Klebstoffrückstände.
Il se peut que de la colle entre en contact avec le pied presseur, l’aiguille et la plaque à aiguille à ce moment. Terminer de
*
broder le motif d’appliqué, puis éliminer les résidus de colle.
Er kan nu wat lijm op de persvoet, naald en steekplaat komen. Borduur het applicatiepatroon af en verwijder de lijmresten
*
zorgvuldig.
A questo punto della colla potrebbe cadere sul piedino premistoffa, sull’ago e sulla placca ago. Terminare il ricamo
*
dell’applicazione ed eliminare la colla.
El prensatelas, la aguja y la placa de aguja se pueden ensuciar con adhesivo. Luego de bordar el patrón del adhesivo limpie
*
los restos de adhesivo.
При выполнении этой процедуры какое-то количество клея может попасть на прижимную лапку, иглу и игольную
*
пластину. Завершите вышивание рисунка аппликации и удалите попавший на эти детали клей.
© Disney
Page 38

You can make a 3D motif for a pattern with the mark by
embroidering on a water-soluble embroidery sheet and dissolve it
using water.
Note:
Use the same color of the thread in the bobbin and on top for the designs.•
We recommend using optional water-soluble stabilizer sheets.•
Use two layers of non-woven water-soluble stabilizer sheets.•
Place the pattern at the center of the embroidery frame, and embroidery it.•
Remember to check that you have enough upper thread and lower thread for the •
design. If the thread breaks during embroidery, back up at least 10 stitches before
starting again.
If your embroidery machine has a speed reduction feature, select the lowest speed.•
When dissolving the water-soluble stabilizer sheets, cut off the unnecessary portions •
and wash the embroidered piece in warm water until it no longer feels slippery. After
the final rinse, dry the motif until slightly damp, shape by hand and place it between
two pieces of cloth, then press with an iron to help maintain the shape.
Sie können ein 3D-Motiv für ein Muster mit der -Markierung
herstellen, indem Sie auf eine wasserlösliche Stickschablone sticken
und diese mit Wasser auflösen.
Hinweis:
Verwenden Sie für die Muster einen Faden derselben Farbe in der Spule und oben.•
Wir empfehlen, optionale wasserlösliche Stickfolien zu verwenden.•
Verwenden Sie zwei Lagen nicht gewebter, wasserlöslicher Stickfolie.•
Positionieren Sie das Muster in die Mitte des Stickrahmens und sticken sie es.•
Achten Sie darauf, dass ausreichend Ober- und Unterfaden für das Muster •
vorhanden ist. Sollte der Faden beim Sticken reißen oder ausgehen, gehen Sie zum
Weitersticken mindestens 10 Stiche zurück.
Falls Ihre Stickmaschine eine Geschwindigkeitsregelung hat, wählen Sie die •
langsamste Stufe.
Zum Auflösen der wasserlöslichen Stickfolie schneiden Sie nicht benötigte Teile der •
Folie ab und waschen Sie die Stickarbeit in warmem Wasser aus, bis sie sich nicht
mehr schlüpfrig anfühlt. Lassen Sie das Motiv nach dem letzten Waschvorgang
trocknen, bis es nur noch leicht feucht ist, formen Sie es von Hand, legen Sie es
zwischen zwei Tuchstücke und pressen Sie es mit einem Bügeleisen, um die Form zu
fixieren.
Vous pouvez réaliser un gabarit 3D pour un motif avec la marque
en brodant sur une feuille de broderie soluble dans l’eau et en la
dissolvant avec de l’eau.
Remarque:
Utilisez la même couleur de fil dans la bobine et sur le dessus pour les motifs.•
Nous recommandons d’utiliser des feuilles de renfort de broderie soluble •
DISPONIBLES EN OPTION.
Superposez deux feuilles de renfort de broderie hydrosolubles non tissées.•
Placez le motif au centre du cadre de broderie, puis brodez.•
Assurez-vous de bien vérifier que vous avez assez de fil supérieur et de fil inférieur •
pour le motif. Si le fil casse au cours de la broderie, consolidez au moins 10 points
avant de recommencer.
Si votre machine à broder est équipée d’une fonction de réduction de la vitesse, •
veuillez choisir la vitesse la plus lente.
Lorsque vous dissolvez des feuilles de renfort de broderie soluble, coupez les parties •
inutiles et lavez le tissu brodé dans de l’eau chaude jusqu’à ce qu’il ne soit plus
glissant. Une fois bien rincé, faites sécher jusqu’à ce que la pièce soit légèrement
humide avant de lui donner sa forme à la main. Puis, placez-la entre deux morceaux
de tissu, et posez un fer à repasser dessus pour maintenir la forme.
È possibile creare un motivo 3D per un ricamo contrassegnato da
eseguendo il ricamo su un foglio per ricamo idrosolubile che verrà
successivamente sciolto con acqua.
Nota:
Per la parte superiore dei ricami usare lo stesso colore utilizzato nella spolina.•
Si consiglia di utilizzare i fogli di stabilizzatore idrosolubile opzionali.•
Utilizzare due strati di fogli di stabilizzatore non tessuto idrosolubile.•
Posizionare il ricamo al centro del telaio per ricamo ed eseguirlo.•
Ricordarsi di controllare di avere a disposizione filo superiore e inferiore a sufficienza •
per il ricamo. Se il filo si spezza durante il ricamo, tornare indietro di almeno 10 punti
prima di ricominciare.
Se la propria macchina da cucire dispone della funzione di regolazione della velocità •
occorre selezionare la più bassa.
Quando si sciolgono i fogli di stabilizzatore idrosolubile, rimuovere le parti non •
necessarie e risciacquare il ricamo in acqua calda finché smette di essere scivoloso.
Dopo il risciacquo finale, asciugare il motivo finché risulta leggermente umido,
modellarlo a mano e metterlo tra due pezzi di stoffa; in seguito, schiacciare il motivo
con un ferro da stiro per fargli mantenere la forma.
U kunt een 3D-project maken van borduurpatronen met het symbool
door te borduren op een ‘in wateroplosbaar verstevigingsmateriaal’
en het geborduurde patroon naderhand met water uit te spoelen.
Opmerking:
Gebruik dezelfde kleur draad in de spoel en aan de bovenkant voor elk ontwerp.•
We adviseren om gebruik te maken van ‘in water oplosbaar verstevigingsmateriaal’ •
(optioneel verkrijgbaar).
Gebruik twee lagen van het niet-geweven, in water oplosbare verstevigingsmateriaal.•
Plaats het patroon in het midden van het borduurraam en borduur het geheel.•
Controleer of u voldoende boven- en onderdraad hebt voor het ontwerp. Indien de •
draad breekt tijdens het borduren, ga dan minstens 10 steken terug voordat u weer
opnieuw begint.
Als uw borduurmachine een functie voor snelheidsreductie heeft, kies dan de laagst •
mogelijke snelheid.
Verwijder onnodige delen bij het oplossen van het in water oplosbare •
verstevigingsmateriaal. Spoel het borduurwerk uit in warm water tot het niet meer glad
aanvoelt. Laat na de laatste spoelbeurt het motief drogen tot het licht vochtig is, breng
het met de hand in vorm, plaats het tussen twee stukken stof en pers het vervolgens
met een strijkijzer om de vorm te behouden.
Puede hacer un motivo 3D para un patrón con la marca bordando
en una hoja de bordado soluble en agua y disolviéndolo en agua.
Nota:
Usar el mismo color del hilo en la bobina y en la parte superior para los diseños.•
Recomendamos utilizar las láminas de estabilizador soluble en agua opcionales.•
Utilice dos capas de láminas de estabilizador solubles en agua no tejidas.•
Coloque el patrón en el centro del bastidor de bordado, y bórdelo.•
No se olvide de comprobar que tiene hilo superior e inferior suficiente para el diseño. •
Si el hilo se rompe durante el bordado, vuelva atrás 10 puntadas por lo menos antes
de comenzar de nuevo.
Si su máquina de bordar posee función de reducción de velocidad, seleccione la •
velocidad más baja.
Cuando disuelva las láminas de estabilizador soluble en agua, corte las partes •
innecesarias y limpie la pieza bordada en agua caliente hasta que ya no quede
resbaladiza. Después del último enjuague, seque el ornamento hasta que esté
ligeramente húmedo, dele forma manualmente y colóquelo entre dos piezas de tela;
a continuación, presione con una plancha para ayudar a mantener la forma.
36
Если рядом с рисунком стоит значок , его можно использовать
для создания 3D вышивки. Для этого вышейте рисунок на листе
водорастворимого стабилизатора и растворите его в воде.
Примечание.
Используйте нить одного цвета в шпульке и на лицевой стороне рисунка.•
Рекомендуется использовать листы водорастворимого стабилизатора •
(приобретаются отдельно).
Используйте листы нетканого водорастворимого стабилизатора, проложенные в •
два слоя.
Расположите рисунок по центру пялец и вышейте его.•
Не забудьте проверить, что верхней и нижней нити достаточно для вышивания •
дизайна. Если нить порвалась во время вышивания, перед продолжением
вышивания вернитесь как минимум на 10 стежков назад.
Если на вышивальной машине имеется функция снижения скорости, выберите •
самую низкую скорость.
Перед тем как растворять листы водорастворимого стабилизатора, обрежьте •
ненужные части листа. Промывайте вышивку теплой водой до тех пор, пока
она не перестанет быть скользкой на ощупь. После окончательной промывки
высушите вышивку так, чтобы она оставалась немного влажной. Затем придайте
вышивке форму рукой, положите ее между двумя слоями ткани и проутюжьте
для придания формы.
Page 39

Page 40

English
German
Spanish
Russian
882-W30
XG1628-001
French
Dutch
Italian
 Loading...