

Bosch MUM52.. AU, MUM56.. AU Operating Instructions Manual
en Operating instructions
MUM52.. AU
MUM56.. AU

2 Robert Bosch Hausgeräte GmbH
Contents
For your safety . . . . . . . . . . . . . . . . . . . . . . 2
Overview . . . . . . . . . . . . . . . . . . . . . . . . . . 3
Operating the appliance . . . . . . . . . . . . . . . 4
Cleaning and servicing . . . . . . . . . . . . . . . . 7
Storage . . . . . . . . . . . . . . . . . . . . . . . . . . . 7
Troubleshooting . . . . . . . . . . . . . . . . . . . . . 8
Application examples . . . . . . . . . . . . . . . . . 8
Disposal . . . . . . . . . . . . . . . . . . . . . . . . . . . 9
Warranty conditions . . . . . . . . . . . . . . . . . . 9
Optional accessories . . . . . . . . . . . . . . . . . 10
This appliance is designed for processing
normal household quantities in the home or
similar quantities in non-industrial applications.
Non-industrial applications include e.g. use in
employee kitchens in shops, offices, agricultural
and other commercial businesses, as well as
use by guests in boarding houses, small hotels
and similar dwellings.
Use the appliance for processing normal quantities of food for domestic use. Do not exceed the
stipulated maximum quantities.
Please read the operating instructions carefully
and keep them in a safe place. If the instructions
for correct use of the appliance are not
observed, the manufacturer’s liability for any
resulting damage will be excluded.
If passing on the appliance to a third party,
always include the operating instructions.
The operating instructions describe several
models, see also overview of models (
Fig.
).
The appliance is maintenance-free.
For your safety
General safety instructions
oблв=зС=ЙдЙЕнкбЕ=лЬзЕв>
Connect and operate the appliance only in
accordance with the specifications on the rating
plate. Only use indoors.
Do not use the appliance if the power cord
and/or appliance are damaged.
Keep children away from the appliance.
Do not allow persons (also children) with
restricted physical sensory perception or mental
abilities or with lack of experience and
knowledge to operate the appliance unless
they are supervised or have been instructed
in the use of the appliance by somebody who
is responsible for their safety.
Always pull out the mains plug after using
the appliance, before cleaning the appliance,
before leaving the room or if a fault occurs.
Do not leave the running appliance unattended.
Do not place the power cord over sharp edges
or hot surfaces. To prevent injury, a damaged
power cord must be replaced by the manufacturer or his customer service or a similarly
qualified person. Only our customer service may
repair the appliance.
Safety instructions for this appliance
Keep hands clear of rotating parts.
For reasons of safety the appliance may only
be operated when unused drives have been
covered with drive guards (6, 9).
Do not adjust the swivel arm while the appliance
is switched on. Wait until the drive has come
to a standstill.
Do not immerse the base unit in water or clean
under running water.
Use the appliance with original accessories only.
When using the accessories, follow the
enclosed operating instructions.
Use only one tool or accessory at any one time.
Use only the rotary switch to switch the
appliance on or off.
Safety systems
Start lock-out
See “Operating positions” table.
The appliance can be switched on in
pos. 1 and
3
only:
– when the bowl (11) has been inserted and
turned until it locks into place and
– the blender drive cover has been attached
(9).
Restart lock-out
If the power is interrupted, the appliance
remains switched on but the motor does not
start running again when the power is restored.
To switch the appliance on again, turn the rotary
switch to
0/off
, then switch on.
en
`зеЦк~нмд~нбзел=зе=нЬЙ=ймкЕЬ~лЙ=зС=узмк=
еЙп=_lp`e=~ййдб~еЕЙK
fе=ЗзбеЦ=лзI=узм=Ь~оЙ=зйнЙЗ=Сзк=~=гзЗЙкеI=
ЬбЦЬJим~дбну=ЗзгЙлнбЕ=~ййдб~еЕЙK
vзм=Е~е=СбеЗ=СмкнЬЙк=беСзкг~нбзе=~Дзмн=змк=
йкзЗмЕнл=зе=змк=пЙД=й~ЦЙK
Important information
Do not change tool/accessory until the drive is
at a standstill – when the appliance is switched
off, the drive continues running briefly.

Robert Bosch Hausgeräte GmbH 3
Overload protection
If the motor switches itself off while the
appliance is being used, the overload protection
feature has been activated. A possible cause
may be that too much food was processed
at one time.
If a safety system is activated, see
“Troubleshooting”.
Explanation of the symbols on the
appliance or accessory
Follow the instructions in the
instructions for use.
Caution! Rotating blades.
Caution! Rotating tools! Do not put
fingers in the feed tube.
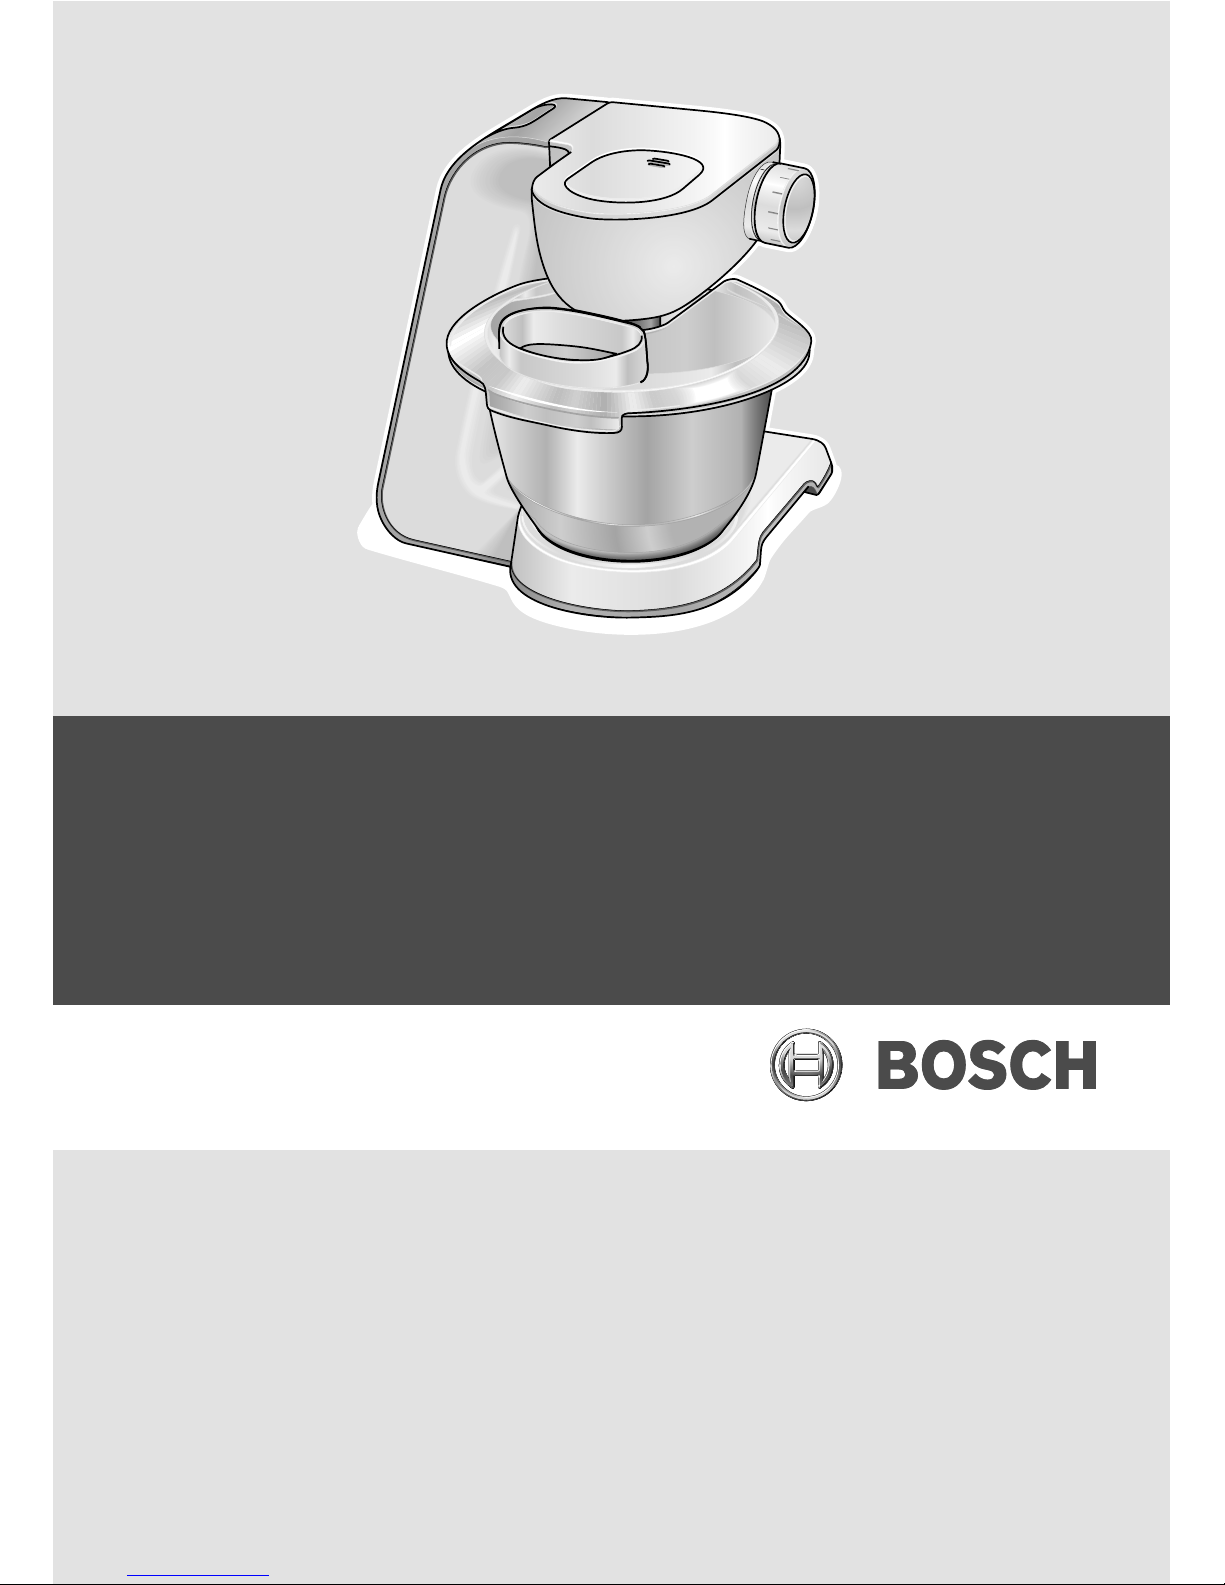
Overview
Please fold out the illustrated pages. Fig.
Base unit
1
Release button
2
Swivel arm
“Easy Armlift” function to support
the upward movement of the arm
(see “Work positions”).
3
Rotary switch
When the appliance has been switched
off (position
0/off
), the appliance runs
automatically to the optimum position
for changing the tools.
MUM52..:
0/off
= Stop
M
= Pulse switch at maximum speed, grip
switch for required blending duration.
Settings
1–4
, Operating speed:
1
= low speed – slow,
4
= high speed – fast.
MUM54../MUM56..:
0/off
= Stop
M
= Pulse switch at maximum speed, grip
switch for required blending duration.
Settings
1–7
, Operating speed:
1
= low speed – slow,
7
= high speed – fast.
4
On/Off display (MUM54../56..)
Is lit while the appliance is operating (rotary
switch on M or
1–7
).
Flashes if
the appliance has been operated
incorrectly, the electronic fuse has tripped or
the appliance is defective
– see section
entitled “Troubleshooting”.
5
Drive for
– continuous-feed shredder and
– citrus press
(special accessory *)
.
When not in use, attach the drive cover.
6
Drive cover
To remove the drive cover, press on the rear
area and remove cover.
7
Drive for tools (stirrer, whisk, kneading
hook) and mincer
(special accessory *
)
8
Drive for blender
(special accessory *
)
When not in use, attach the blender drive
cover.
9
Blender drive cover
10
Cord store
MUM52../MUM54..: Stow the cord in the
cord store.
MUM56..: Automatic cord winder
Bowl with accessories
11
Stainless steel stirring bowl
12
Lid
Tools
13
Stirrer
14
Whisk
15
Kneading hook with dough deflector
16
Accessories bag
For storage of the tools and cutting discs.
Continuous-feed shredder
17
Pusher
18
Cover with filling shaft
19
Cutting discs
19a
Reversible slicing disc – thick/thin
19b
Reversible shredding disc – coarse/fine
19c
Grating disc – medium-fine
20
Drive shaft
21
Housing with outlet opening
Blender *
22
Blender jug
23
Lid
24
Funnel
*
If an accessory is not included in the product
package, it can be purchased via the trade or
customer service.
en
4 Robert Bosch Hausgeräte GmbH
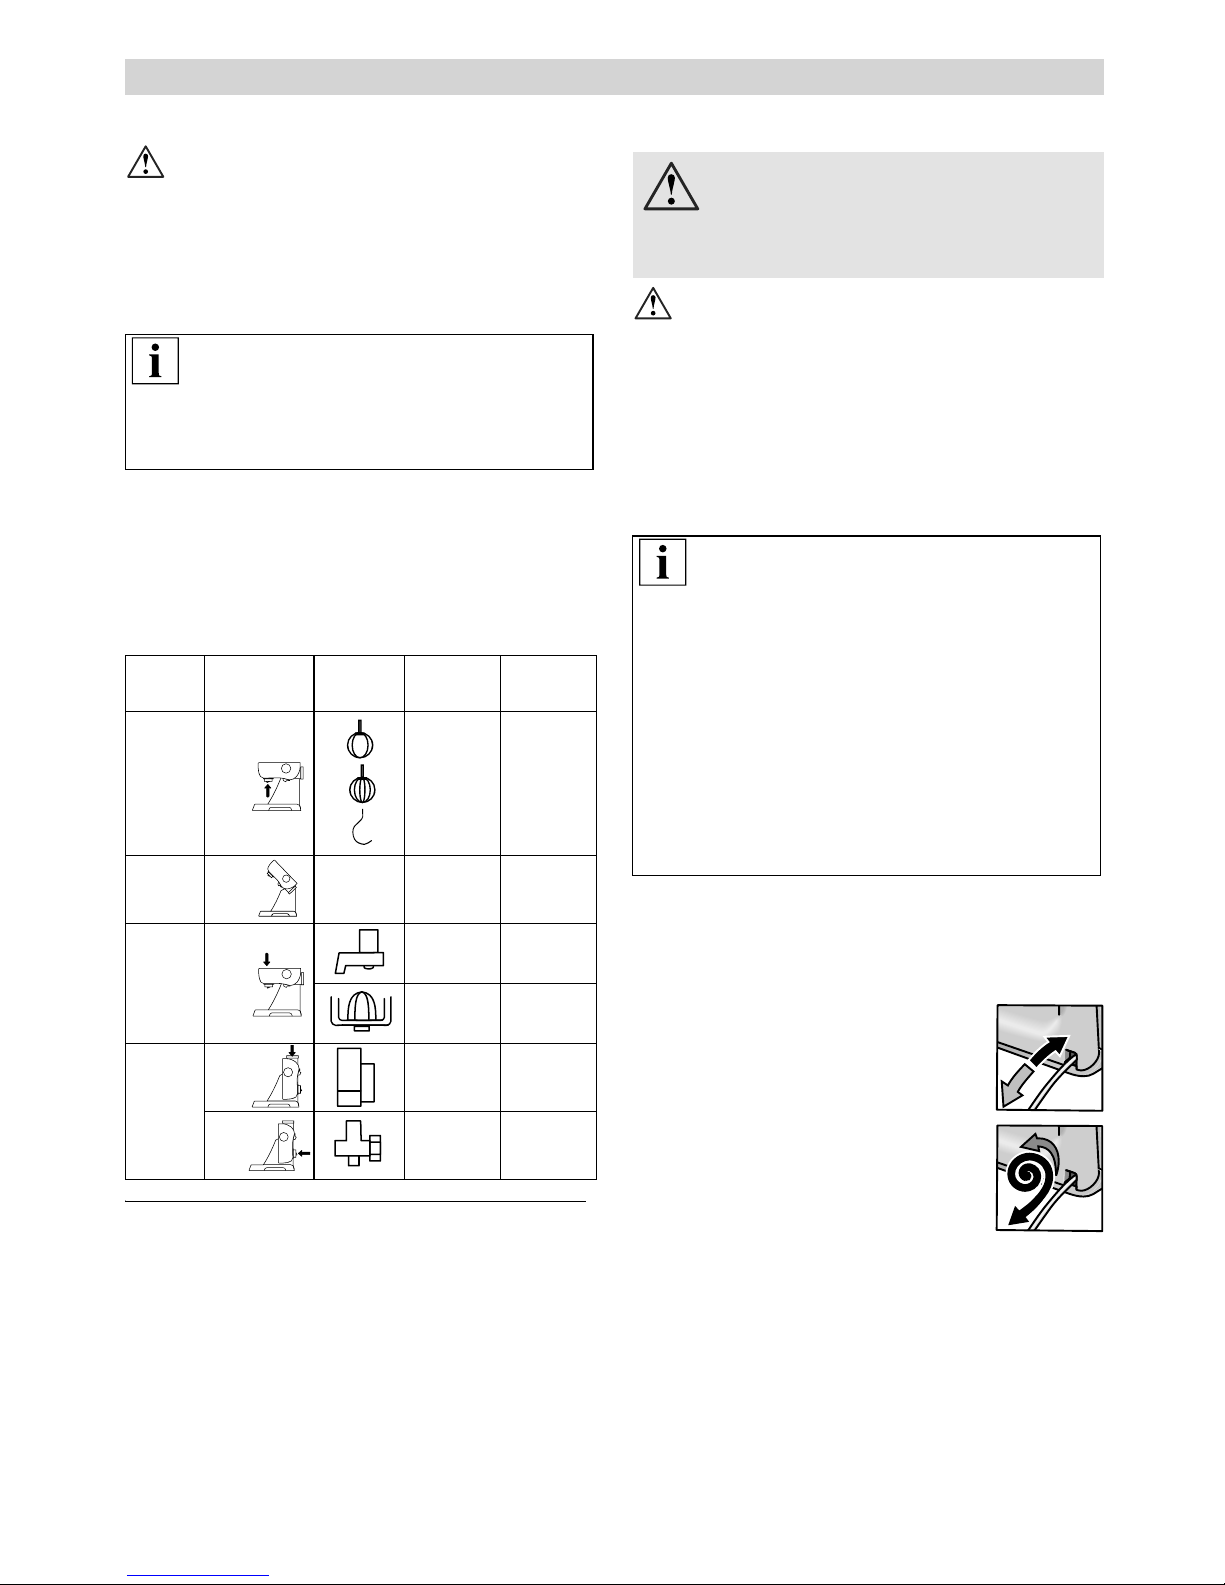
Operating positions Fig.
^ннЙенбзе>
_ЙСзкЙ=зйЙк~нбеЦ=нЬЙ=~ййдб~еЕЙI=~нн~ЕЬ=нЬЙ=нзздL
~ЕЕЙллзку= нз=нЬЙ=ЕзккЙЕн=ЗкбоЙ=~еЗ=б е=нЬЙ=ЕзккЙЕн=
йзлбнбзе=~еЗ=йд~ЕЙ=бе=нЬЙ=зйЙк~нбеЦ=йзлбнбзе=
~ЕЕзкЗбеЦ=нз=нЬбл=н~ДдЙK
qЬЙ=лпбоЙд=~кг=гмлн=ДЙ=ЙеЦ~ЦЙЗ=бе=ЙоЙку=
зйЙк~нбеЦ=йзлбнбзеK
Selecting the operating position:
Press the Release button and move
the swivel arm.
Support movement with your hand.
Move the swivel arm until it engages
in the required position.
*
Insert/remove whisk, stirrer or kneading
hook.
Add large quantities of ingredients.
Operating the appliance
^ннЙенбзе>
aз=езн=зйЙк~нЙ=нЬЙ=~ййдб~еЕЙ=пбнЬзмн=~е=
~ЕЕЙллзкуLнззд=бе=нЬЙ=зйЙк~нбеЦ=йзлбнбзеK
aз=езн=зйЙк~нЙ=нЬЙ=~ййдб~еЕЙ=ЙгйнуK=
aз=езн=ЙсйзлЙ=~ййдб~еЕЙ=зк=~ЕЕЙллзкбЙл=нз=ЬЙ~н=
лзмкЕЙлK=m~кнл=~кЙ=езн=гбЕкзп~оЙJл~СЙK
Before operating the appliance and
accessories for the first time, clean
thoroughly; see “Cleaning and servicing”.
Preparation
Place the base unit on a smooth, clean
surface.
Pull out the power cord (
Fig.
).
MUM52../MUM54..
Cord store:
Pull out cable to the required
length.
MUM56..
Automatic cord winder:
Pull out the cord in one go to the
required length (max. 100 cm)
and slowly release; the cord is
locked.
Reducing the cord length:
Pull gently on the cord and allow it to roll
up to the required length. Then gently pull
the cord again and slowly release; the cable
is locked.
en
Note
The swivel arm features an
“Easy Armlift”
function which supports the upwards
movement of the swivel arm.
Position Drive
MUM52.. MUM54..
MUM56..
1
7
1
–4
1–4
1–2
1
–7
1–7
1–3
2
7
*
––
3
5
2
–4
3
–7
2
–4
3
–7
4
83
–4
5
–7
73
–4
5
–7
oблв=зС=беамку>
aз=езн=белЙкн=г~бел=йдмЦ=менбд=~дд=йкЙй~к~нбзел=
Сзк=пзквбеЦ=пбнЬ=нЬЙ=~ййдб~еЕЙ=~кЙ=ЕзгйдЙнЙK
Important information
In these instructions for use the recommended
reference values for the operating speed refer
to appliances with a 7-setting rotary switch.
For appliances with a 4-setting rotary switch
you can find the values in brackets after
the values for a 7-setting rotary switch.
These instructions for use contain a sticker with
reference values for the operating speed of the
appliance when using the tools or accessories.
We recommend attaching this sticker to the
appliance (
Fig.
).
Robert Bosch Hausgeräte GmbH 5
t~кебеЦ>
aз=езн=нпблн=нЬЙ=ЕзкЗ=пЬЙе=белЙкнбеЦ=бнK=
fС=нЬЙ=~ййдб~еЕЙ=СЙ~нмкЙл=~е=~мнзг~нбЕ=ЕзкЗ=
пбеЗЙкI=Зз=езн=белЙкн=нЬЙ=ЕзкЗ=г~ем~ддуK=
fС нЬЙ ЕзкЗ=а~глI=ймдд=змн=нЬЙ=ЕзкЗ=~дд=нЬЙ=п~у=
~еЗ нЬЙе=~ддзп=бн=нз=пбеЗ=мйK
Insert the mains plug.
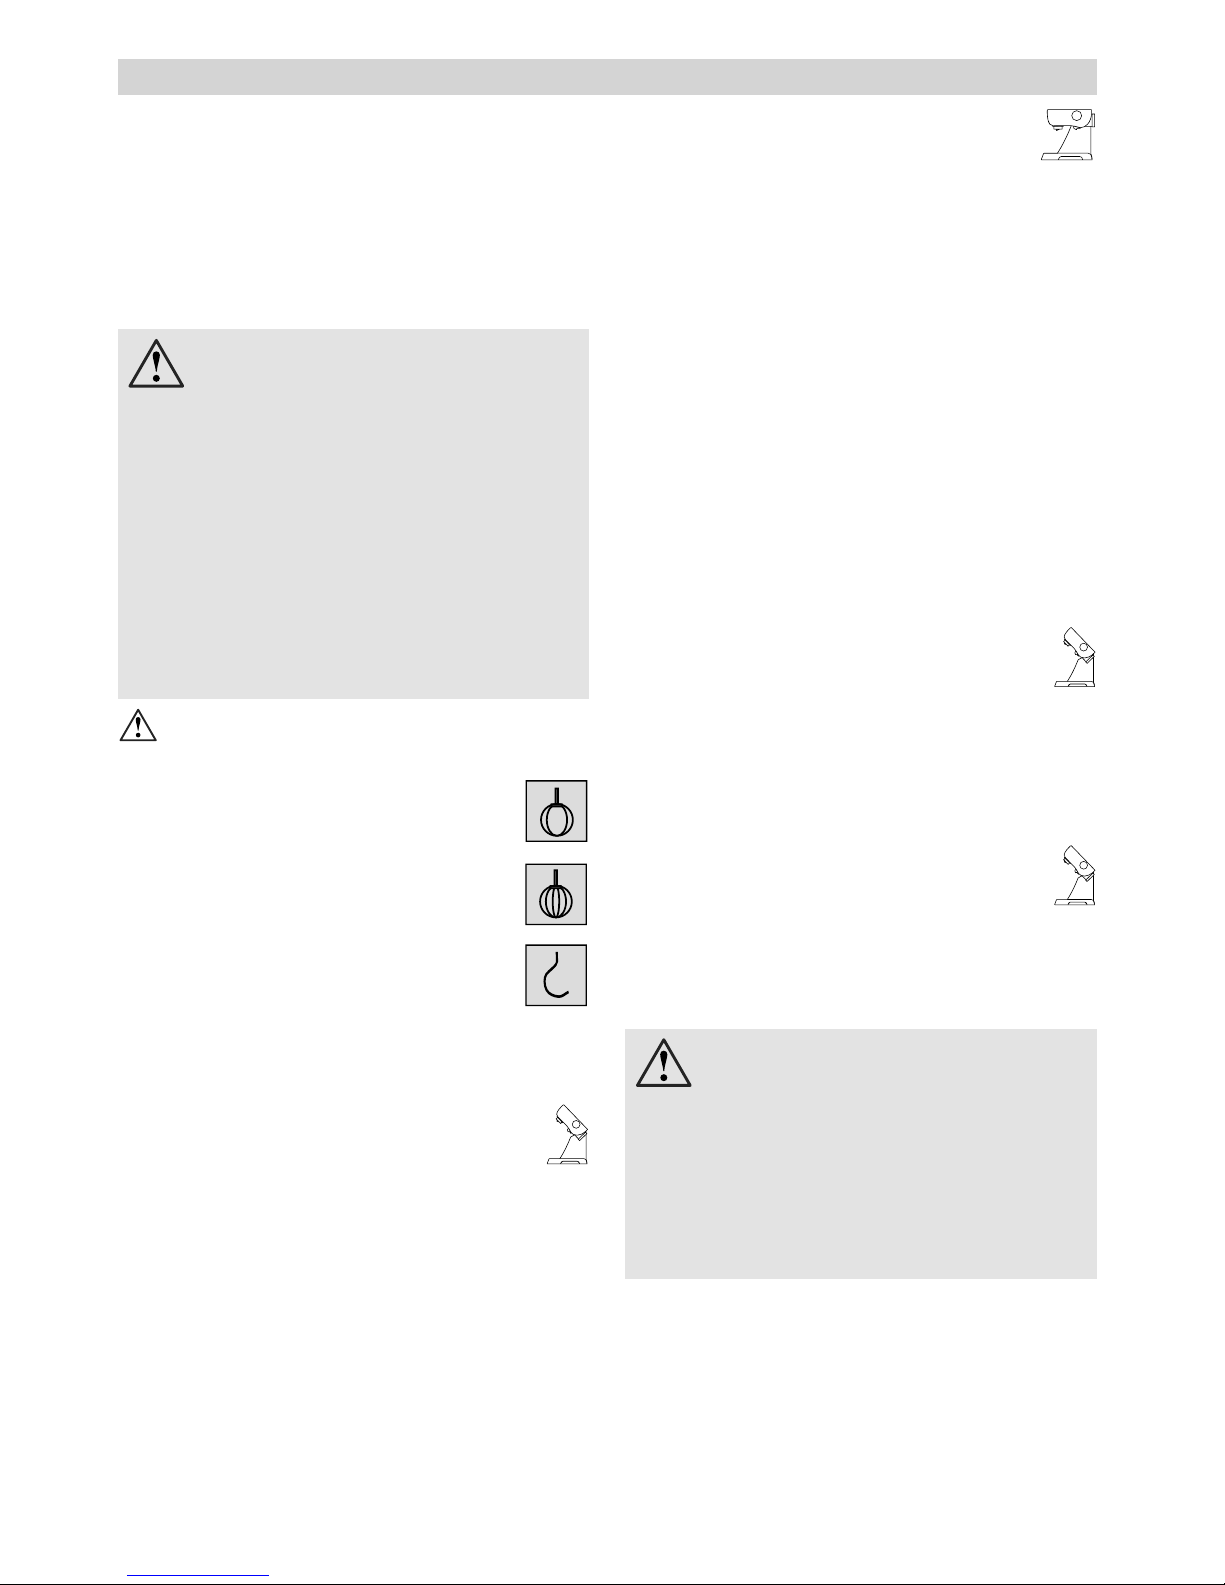
Bowl and tools
^ннЙенбзе>
rëÉ=Äçïä=ïáíÜ=íÜáë=~ééäá~åÅÉ=çåäóK
Stirrer (13)
for stirring dough, e.g. cake mixture
Whisk (14)
for whisking egg whites, cream and light
dough, e.g. sponge mixture
Kneading hook (15)
for kneading heavy dough and mixing-in
ingredients that ought not be cut
(e.g. raisins and chocolate chips)
Working with the bowl
and the tools Fig.
Press the Release button and move the
swivel arm to position
2
.
Insert the bowl:
– Tilt the bowl forwards and then set
it down,
– turn anti-clockwise until it locks into
place.
Depending on the processing task, insert the
stirrer, whisk or kneading hook until it locks
into position.
Note:
If using the kneading hook, rotate the dough
deflector until the kneading hook can lock
into position (
Fig. –4b
).
Put the ingredients to be processed into
the bowl.
Press the Release button and move
the swivel arm to position
1
.
Attach the cover.
Set the rotary switch to the desired setting.
Our recommendation:
– Stirrer:
first stir in at setting 1 (1), then select setting
7 (4)
– Whisk:
setting 7 (4), mix in at setting 1 (1)
– Kneading hook:
first stir in at setting 1 (1), knead at
setting 3 (2)
Adding more ingredients
Switch off the appliance with the rotary
switch.
Add more ingredients through the feed tube
in the cover.
çê
Remove lid.
Press the Release button and move
the swivel arm to position
2
.
Add ingredients.
After using the appliance
Switch off the appliance with the rotary
switch.
Pull out the mains plug.
Remove lid.
Press the Release button and move
the swivel arm to position
2
.
Take the tool out of the drive.
Remove the bowl.
Clean all parts, see “Cleaning and servicing”.
Continuous-feed shredder
t~кебеЦ>
qЬЙ=ЕзенбемзмлJСЙЙЗ=лЬкЙЗЗЙк=гмлн=
ДЙ Езг йдЙнЙду=~ллЙгДдЙЗ=Д ЙСзкЙ=млЙK=
kЙоЙк ~ллЙгДдЙ=нЬЙ=ЕзенбемзмлJСЙЙЗ=
лЬкЙЗЗЙк зе=нЬЙ=Д~лЙ=мебнK
lйЙк~нЙ=нЬЙ=ЕзенбемзмлJСЙЙЗ=лЬкЙЗЗЙк=
бе нЬЙ беЗбЕ~нЙЗ=зйЙк~нбеЦ=йзлбнбзе=зедуK
en
oблв=зС=беамку=Скзг=кзн~нбеЦ=нзздл
tЬбдЙ=нЬЙ=~ййдб~еЕЙ=бл=зйЙк~нбеЦI=вЙЙй=СбеЦЙкл=
ЕдЙ~к=зС=нЬЙ=гбсбеЦ=ДзпдK=^нн~ЕЬ=нЬЙ=ЕзоЙк=ENOF=
ДЙСзкЙ=зйЙк~нбеЦ=нЬЙ=~ййдб~еЕЙ>
aз=езн=ЕЬ~еЦЙ=нзздл=менбд=нЬЙ=ЗкбоЙ=Ь~л=ЕзгЙ=
нз=~=лн~еЗлнбдд=У=пЬЙе=нЬЙ=~ййдб~еЕЙ=бл=
лпбнЕЬЙЗ=зССI=нЬЙ=ЗкбоЙ=ЕзенбемЙл=кмеебеЦ=
ДкбЙСду=~еЗ=лнзйл=бе=нЬЙ=нззд=ЕЬ~еЦЙ=йзлбнбзеK=
aз=езн=гзоЙ=нЬЙ=лпбоЙд=~кг=менбд=нЬЙ=нззд=Ь~л=
ЕзгЙ=нз=~=лн~еЗлнбддK
cзк=кЙ~лзел=зС=л~СЙну=нЬЙ=~ййдб~еЕЙ=г~у=зеду=
ДЙ=зйЙк~нЙЗ=пЬЙе=мемлЙЗ=ЗкбоЙл=Ь~оЙ=ДЙЙе=
ЕзоЙкЙЗ=пбнЬ=ЗкбоЙ=Цм~кЗл=ESI=VFK
oблв=зС=беамку
aз=езн=Цкбй=нЬЙ=лЬ~кй=Дд~ЗЙл=зк=ЙЗЦЙл=
зС нЬЙ ЕмннбеЦ=ЗблЕлK=q~вЙ=ЬздЗ=зС=ЕмннбеЦ=
ЗблЕл Ду=нЬЙ=ЙЗЦЙ=зедуK
_ЙСзкЙ=~нн~ЕЬбеЦLкЙгзобеЦ=нЬЙ=ЕзенбемзмлJ
СЙЙЗ=лЬкЙЗЗЙкI=п~бн=менбд=нЬЙ=ЗкбоЙ=Ь~л=ЕзгЙ=
нз ~=лн~еЗлнбдд=~еЗ=ймдд=змн=нЬЙ=г~бел=йдмЦK
aç=åçí=êÉ~ÅÜ=áåíç=íÜÉ=ÑÉÉÇ=íìÄÉK
6 Robert Bosch Hausgeräte GmbH
Predetermined breaking point Fig.
The built-in predetermined breaking point
protects the drive of the appliance. If an overload
occurs, the drive shaft of the continuous-feed
shredder breaks. However, the drive shaft can
easily be replaced.
A new drive shaft with driver is available from
customer service.
Reversible slicing disc – thick/thin
for slicing fruit and vegetables.
Process at setting 5 (3).
Designation on the reversible slicing disc:
“1” for the thick slicing side
“3” for the thin slicing side
t~кебеЦ>
qЬЙ=кЙоЙклбДдЙ=лдбЕбеЦ=ЗблЕ=бл=е зн=лмбн~ ДдЙ=Сзк=
лдбЕбеЦ=Ь~кЗ=ЕЬЙЙлЙI=ДкЙ~ЗI=кзддл=зк=ЕЬзЕзд~нЙK=
pдбЕЙ=ДзбдЙЗI=п~су=йзн~нзЙл=зеду=пЬЙе=нЬЙу=~кЙ=
ЕздЗK
Reversible shredding disc –
coarse/fine
for shredding vegetables, fruit cheese, except
for hard cheese (e.g. Parmesan).
Processing at setting 3 (2) or 4 (3).
Designation on the reversible shredding disc:
“2” for the coarse shredding side
“4” for the fine shredding side
t~кебеЦ>
qЬЙ=кЙоЙклбДдЙ=лЬкЙЗЗбеЦ=З блЕ=б л=езн=лм бн~Дд Й=
Сзк лЬкЙЗЗбеЦ=емнлK=pЬкЙЗ=лзСн=ЕЬЙЙлЙ=пбнЬ=нЬЙ=
Ез~клЙ=лбЗЙ=зеду=~н=лЙннбеЦ=T=EQFK
Grating disc – medium-fine
for grating raw potatoes, hard cheese
(e.g. Parmesan), cooled chocolate and nuts.
Process at setting 7 (4).
t~кебеЦ>
qЬЙ=Цк~нбеЦ=ЗблЕ=бл=езн=лмбн~ДдЙ=Сзк=Цк~нбеЦ=лзСн=
ЕЬЙЙлЙ=~еЗ=ЕЬЙЙлЙ=лдбЕЙлK
Working with the continuous-feed
shredder Fig.
Press the Release button and move
the swivel arm to position
2
.
Insert the bowl:
– Tilt the bowl forwards and then set
it down.
– Turn anti-clockwise until it locks
into place.
Press the Release button and move
the swivel arm to position
3
.
Remove drive cover from the drive
of the continuous-feed shredder.
Hold drive shaft with the predetermined
breaking point face down with one hand
underneath.
Attach required slicing or shredding disc.
In the case of reversible discs, ensure that
the required side is face up.
Grip drive shaft at the upper end and insert
into the housing.
Attach the cover (note mark) and turn all
the way in a clockwise direction.
Place continuous-feed shredder on the drive
and turn all the way in a clockwise direction.
Turn rotary switch to recommended setting.
Put food to be processed in the feed tube
and push down with the pusher.
t~кебеЦ>
mкЙоЙен=нЬЙ=Емн=беЦкЙЗбЙенл=Скзг=ДмбдЗбеЦ=мй=
бе нЬЙ=змндЙн=зйЙебеЦK
Tip:
To ensure evenly cut ingredients, process
slender ingredients in bunches.
Note:
If the food to be processed sticks in
the continuous-feed shredder, switch food
processor off, pull out mains plug, wait until the
drive comes to a standstill, remove cover from
the continuous-feed shredder and empty feed
tube.
After using the appliance
Switch off the appliance with the rotary
switch.
Rotate the continuous-feed shredder in an
anti-clockwise direction and remove.
Rotate the lid in an anti-clockwise direction
and remove.
Remove drive shaft together with disc.
To do this, press finger from below against
the drive shaft (
Fig.
).
Clean parts.
Blender
en
oблв=зС=беамку=Скзг=лЬ~кй=Дд~ЗЙлL
кзн~нбеЦ=ЗкбоЙ >
kЙоЙк=йд~ЕЙ=СбеЦЙкл=бе=нЬЙ=~нн~ЕЬЙЗ=ДдЙеЗЙк>=
aз=езн=кЙгзоЙL~нн~ЕЬ=нЬЙ=ДдЙеЗЙк=менбд=нЬЙ=
ЗкбоЙ=бл=~н=~=лн~еЗлнбдд>=lйЙк~нЙ=нЬЙ=~ллЙгДдЙЗ=
ДдЙеЗЙк=зеду=~еЗ=пбнЬ=нЬЙ=дбЗ=~нн~ЕЬЙЗK
oблв=зС=лЕ~дЗбеЦ>
fС=йкзЕЙллбеЦ=Ьзн=дбимбЗлI=лнЙ~г=ЙлЕ~йЙл=
нЬкзмЦЬ=нЬЙ=СмееЙд=бе=нЬЙ=дбЗK=^ЗЗ=~=г~сK=MKR=
дбнкЙл=зС=Ьзн=зк=СкзнЬбеЦ=дбимбЗK
 Loading...