

Page 1

Mini Blender
MMBM4...GB MMBM7...GB
Register your
new device on
MyBosch now and
get free benefits:
bosch-home.com/
welcome
[en] Instruction manual
[ms] Arahan pengendalian
[zf] 使用說明書
[zh] 使用说明书
[ar]
Mini blender 3
Pengadun mudah alih 10
便攜攪拌機 17
便携搅拌机 22
33
Page 2

Page 3

Intended use
en
Intended use
Read and follow the instruction manual carefully and keep for
later reference! Enclose these instructions when you give this
appliance to someone else.
If the instructions for correct use of the appliance are not observed,
the manufacturer’s liability for any resulting damage will be excluded.
This appliance is intended for domestic use only. Use the appliance
only for processing normal amounts of food and for normal amounts of
time for domestic use.
This appliance is suitable for mixing liquid or semi-solid food, for
cutting or chopping raw fruit and vegetables, for puréeing food and
for chopping deep-frozen food (such as fruit) or crushing ice cubes.
The appliance should not be used for processing other substances or
objects.
This appliance can be used by persons with reduced physical,
sensory or mental capabilities or lack of experience and/or knowledge
if they have been given supervision or instruction concerning use of
the appliance in a safe way and if they understand the hazards
involved. Keep children away from the appliance and connecting
cable and do not allow them to use the appliance. Do not let children
play with the appliance. Cleaning and user maintenance must not be
performed by children.
Safety instructions
W Risk of electric shock and fire!
Only use the appliance indoors at room temperature and up to
2000 m above sea level. Connect and operate the appliance only in
accordance with the specifications on the rating plate. Do not use the
appliance if the power cord and/or appliance are damaged. Only our
customer service may repair the appliance, e.g. by replacing a
damaged power cord, in order to avoid hazards. The power cord must
not come into contact with hot parts or be pulled across sharp edges.
Do not place the appliance or its accessories on or near hot surfaces
such as hobs.
Never immerse the base unit in water or place it in the dishwasher.
Do not steam-clean the appliance. Do not use the appliance with
damp hands.
After each use, whenever the appliance is unsupervised, prior to
assembly, prior to disassembly, prior to cleaning and in the event of
an error, the appliance must always be disconnected from the mains.
3
Page 4

en Safety instructions
W Risk of injury!
Never leave the appliance unattended while it is switched on! Do
not operate the appliance at idle speed. Never leave the appliance
switched on for longer than is necessary for processing the
ingredients. Immediately after using the appliance, wait for it to stop.
When the appliance has been switched off, the blade continues
running for a short time. Before replacing accessories or additional
parts which move during operation, the appliance must be switched
off and disconnected from the power supply. Never place fingers
in the attached blender jug. Only use the appliance when it is
fully assembled! Use the appliance only with genuine parts and
accessories. Never process food that is hotter than 50°C in the
plastic blender jug. Care should be taken when handling the sharp
cutting blades, emptying the container and during cleaning.
W Risk of scalding!
When you process hot ingredients in the glass blender jug, steam
will escape through the filling opening in the lid. You should always
use one hand to hold the lid firmly in place while you work, but don’t
place your hand over the filling opening! Pour no more than
0.3 litres of hot or frothing liquid into the glass blender jug.
W Important!
The blender jugs are not suitable for use in the microwave.
It is essential to clean the appliance as described after each use
and if it has not been used for an extended period. X “Care and
daily cleaning” see page 7
Congratulations on the purchase of
your new Bosch appliance. You can find
further information about our products
on our website.
4
Contents
Intended use .............................................10
Safety instructions ....................................10
Overview...................................................12
Illuminated ring .........................................12
Blender jug ...............................................12
Before using for the first time....................13
Use ...........................................................13
Care and daily cleaning ............................14
Safety systems .........................................15
Troubleshooting ........................................15
Recipes.....................................................15
Disposal ....................................................16
Guarantee.................................................16
Page 5
Overview
en
Overview
X Fig. A
1 Base unit / Motor block
a Buttons to switch on
t = low mixing speed
u = high mixing speed
b Operation indicator (illuminated ring)*
c Drive
d Mains cable
2 Blade insert with mixing blade
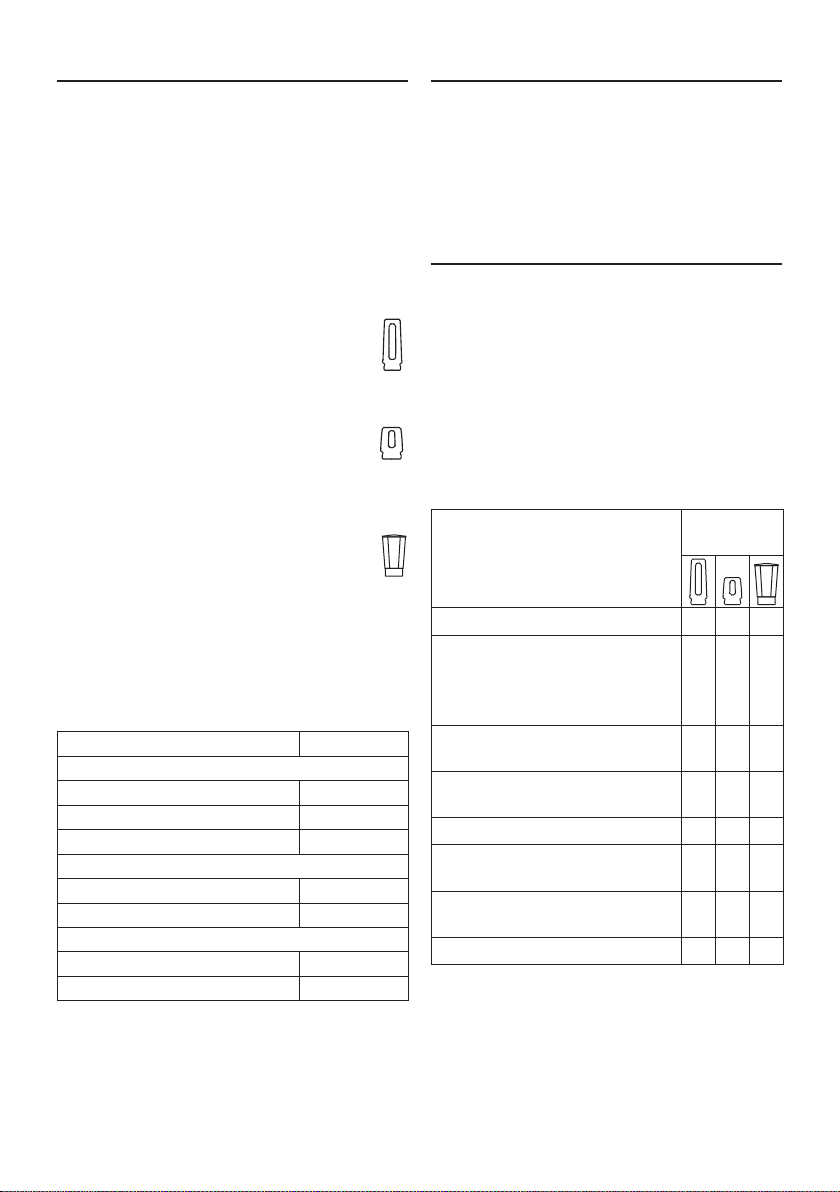
3 To-Go blender jug *
a Container made of Tritan
b Scale marked with “max” level
c Lid with opening for drinking
d Drinking cap
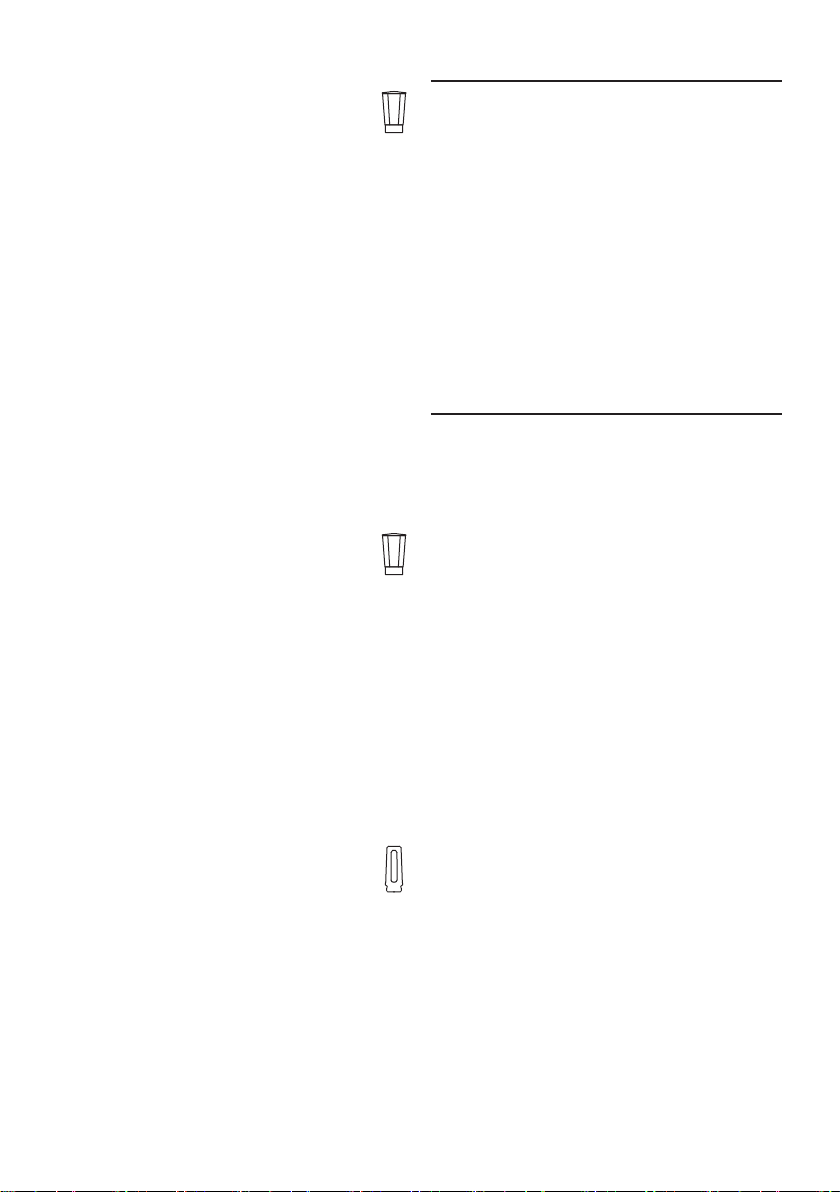
4 Chopper blender jug *
a Container made of Tritan
b Scale marked with “max” level
c Lid with opening for drinking
d Screw cap
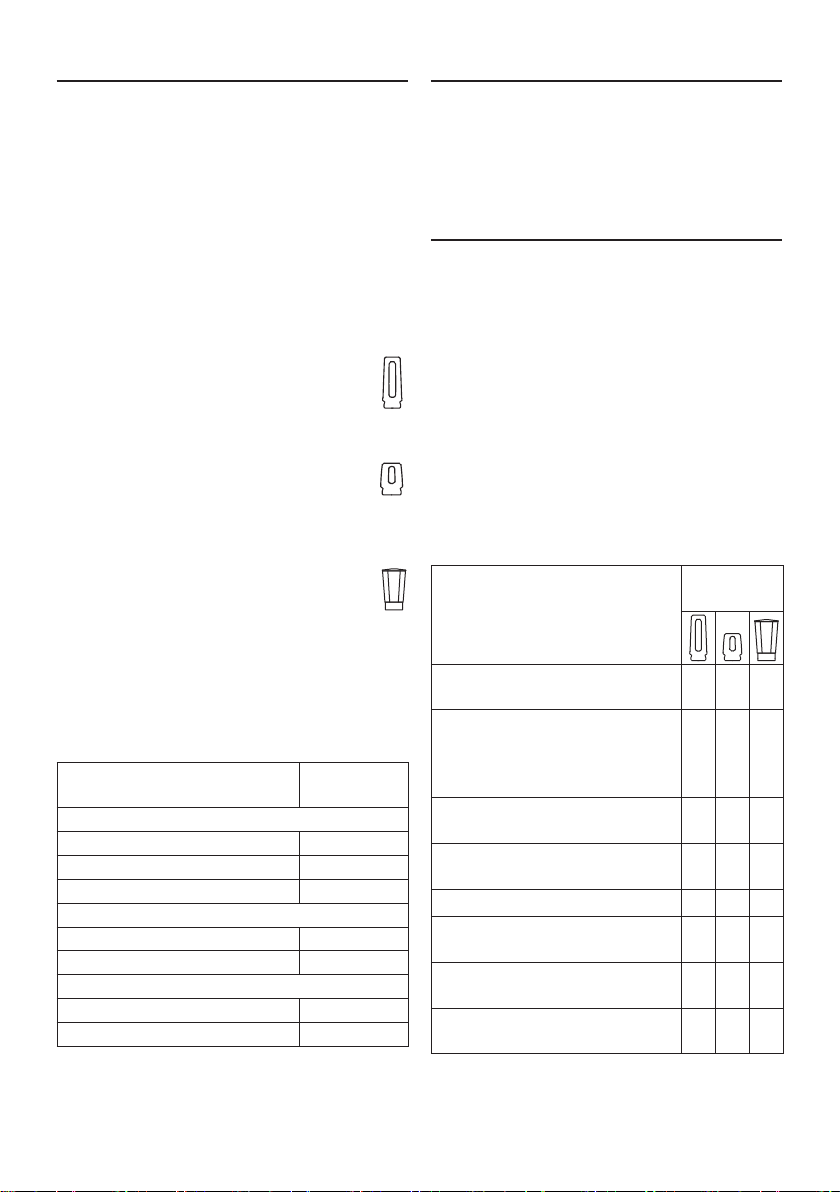
5 Glass blender jug *
a Container made of
ThermoSafe glass
b Lid with opening for filling
c Locking cap
* Depending on the model
If any of the accessories is not included with
the hand blender it can be ordered from
customer service:
Accessories Order no.
To-Go blender jug
Black 12012850
White 12012851
dark grey 12012853
Chopper blender jug
Black 12012855
White 12012857
Glass blender jug
Black 12012847
White 12012848
With the chopper blender jug you can use
the appliance at full power.
Note the maximum processing quantities
and times! X Fig. G
Illuminated ring
Depending on the model
The illuminated ring lights up when all the
parts have been correctly assembled and
the appliance is plugged in. The illuminated
ring remains lit up while the appliance is
in use.
Blender jug
Notes:
– The to-go blender jug and the chopper
blender jug are made of Tritan. Tritan
is an unbreakable plastic with no
discernable taste or smell.
– The glass blender jug is made of
heatproof ThermoSafe glass.
The blender jugs are suitable for different
purposes (depending on the model):
Application Blender
jug
Blending and frothing liquids
Cutting and chopping herbs,
raw fruit, vegetables, onions,
peanuts, nuts, parmesan and
chocolate
Crushing and blending ice
cubes and frozen fruit
Blending fruit juice and other
drinks
Preparing mayonnaise
Puréeing soups and sauces,
processing hot ingredients
Adding ingredients during the
mixing process
Use in the microwave
Important!
Note the maximum processing quantities
and times! X Fig. G
G G G
G G G
G G G
G G G
H H G
H H G
H H G
H H H
5
Page 6

en Before using for the rst time
Before using for the
first time
Before the new appliance can be used,
it must be fully unpacked, cleaned and
checked.
Caution!
Never operate a damaged appliance!
■ Remove the base unit and all accesso-
ries from the packaging.
■ Remove the packaging material that is
present.
■ Check that all the parts are present and
examine them for obvious damage.
X Fig. A
■ Thoroughly clean and dry all parts
before using for the first time. X “Care
and daily cleaning” see page 7
Use
W Risk of injury!
– Do not insert the mains plug until all
preparations for working with the appliance are complete and the required
attachments are assembled correctly
and connected to the base unit.
– Never process food that is hotter than
50°C in the plastic blender jug.
– Handle the blade insert with care, and
don’t put your hand between the blades.
X Fig. B
– Never put your hand in the blender jug
once it is in place, and always put the lid
on before using the appliance.
W Risk of scalding!
Pour no more than 0.3 litres of hot or frothing liquid into the glass blender jug.
■ Place the base unit on a stable and level
work surface.
■ Completely unwind the mains cable.
Using the to-go or chopper
blender jug
X Fig. C
1. Put the desired ingredients into the
blender jug.
2. Hold the blade insert by the plastic
ring and insert it – blade first – into
the blender jug. Turn the blade insert
anticlockwise until it audibly clicks
into place.
3. Turn the blender jug over.
4. Insert the blender jug into its recess on
the motor block and turn it clockwise
until it audibly clicks into place.
5. Plug the mains plug into the mains.
6. Hold the blender jug firmly with one
hand. Hold down the t or u button until
the mixture has reached the desired
consistency.
7. Release the button and wait until the
appliance comes to rest. Disconnect the
mains plug.
8. Turn the blender jug anti-clockwise and
then remove it.
9. Turn the blender jug over.
10. Turn the blade insert clockwise and then
remove it.
Caution!
Never set the blade insert down with the
blade underneath. This could damage
the blade and scratch your work surface.
X Fig. B
11. Close the jug with the lid.
12. To pour out or drink contents, undo screw
cap and remove, or lift up drinking cap.
Clean all the parts. X “Care and daily
cleaning” see page 7
6
Page 7

Care and daily cleaning
en
Working with the glass blender jug
X Fig. D
1. Hold the blade insert by the plastic
ring and insert it – blade first – into the
blender jug. Turn the blade insert anticlockwise until it audibly clicks into place.
2. Turn the blender jug over.
3. Insert the blender jug into its recess on
the motor block and turn it clockwise
until it audibly clicks into place.
4. Put the desired ingredients into the
blender jug.
5. Put the lid and locking cap in place.
6. Plug the mains plug into the mains.
7. Hold the lid firmly with one hand, but
don’t place your hand over the filling
opening. Hold down the t or u button
until the mixture has reached the
desired consistency.
8. Release the button and wait until the
appliance comes to rest. Disconnect the
mains plug.
9. Turn the blender jug anti-clockwise and
then remove it.
10. Remove the lid.
11. Pour the blended food into another
container.
12. Turn the blade insert clockwise and then
remove it.
Caution!
Never set the blade insert down with the
blade underneath. This could damage
the blade and scratch your work surface.
X Fig. B
Clean all the parts. X “Care and daily
cleaning” see page 7
Adding more ingredients
X Fig. E
1. Release the button and wait until the
appliance comes to rest.
2. Remove the locking cap or the entire lid.
3. Add the extra ingredients.
4. Replace the lid and the locking cap, and
again hold down the t or u button.
Note: you can remove the locking cap by
turning it anticlockwise.
Care and daily cleaning
The appliance and all the attachments
and accessories used must be thoroughly
cleaned after each use.
W Risk of electric shock!
– Unplug the appliance before cleaning it.
– Never immerse the base unit in liquids
and do not clean in the dishwasher.
– Do not use a steam cleaner.
W Risk of injury!
Do not touch the blender blades with your
bare hands.
Caution!
– Do not use any cleaning agents
containing alcohol or spirits.
– Do not use any sharp, pointed or metal
objects.
– Do not use abrasive cloths or cleaning
agents.
Notes:
– It is best to clean the parts immediately
after use. This will prevent residues from
drying on and possibly attacking the
plastic (e.g. essential oils in herbs).
– Pour a little water and washing-up liquid
into the empty blender jug and hold
down button u for a few seconds.
– The plastic parts may become dis-
coloured when you process certain ingredients, such as carrots, but this can be
removed with a few drops of cooking oil.
In Fig. F you will find a summary of how to
clean the individual parts.
Base unit
Wipe the outside of the base unit with a
soft, damp cloth and dry off.
Blade holder
Remove the seal before cleaning. Only clean
the blade holder with a brush under running
water. Don’t leave it soaking in water!
X Fig. H
7
Page 8

en Safety systems
Blender jugs and lids
You can clean the blender jugs and other
parts with a detergent solution and a
soft cloth or sponge, or put them in the
dishwasher.
Safety systems
Start lock-out and automatic
cut-out
The appliance can be switched on only if
the blender jug has been latched firmly into
place. The appliance will switch off automatically if the blender jug becomes detached
while it is running. X “Troubleshooting” see
page 8
Troubleshooting
W Risk of injury!
Before dealing with any faults, unplug the
mains plug.
Fault
Appliance fails to start up or switches
off while in use. The illuminated ring
( depending on the model) does not light up.
Possible cause
Blender jug is not correctly positioned or
has become detached.
Remedy
■ Release the button. Disconnect the
mains plug.
■ Position the blender jug correctly and
turn it until it latches audibly into place.
■ Plug the mains plug into the mains.
Press the t or u button again to test the
function.
Important note
If this does not resolve the problem, please
contact customer service. X You will find
their contact information at the end of these
operating instructions
Recipes
Notes:
– First mix the solid ingredients with
half the amount of liquid, then add the
remainder of the liquid.
– Use the appropriate blender jug for each
recipe.
– Note the maximum processing quanti-
ties and times! X Fig. G
Green smoothie
– 1 green apple (ca. 100 g)
– Juice of one lemon (ca. 20 g)
– 20 g kale
– 10 g celery
– 10 g coriander leaves
– 10 g linseed
– 1 g ground cinnamon
– 300 g cooled water
■ Cut apple, celery and kale into pieces.
■ Put a little of the water in the
blender jug.
■ Blend for 1 minute at speed u.
■ Add all the remaining ingredients to the
blender jug.
■ Blend for 1 minute at speed u.
Smoothie
– 1 banana (ca. 100 g)
– 4 g fresh red ginger
– 100 g yoghurt
– 30 g honey
– 100 ml milk
■ Peel the banana and ginger and cut into
pieces.
■ Place all the ingredients in the to-go
blender jug.
■ Blend for 1 minute at speed u.
Energy drink
– 240 g low fat milk
– ½ banana (ca. 50 g)
– 30 g sugar
– 20 g cocoa powder
■ Cut the banana into pieces and freeze
overnight.
■ Place all the ingredients in the
blender jug.
■ Blend for 1 minute at speed u.
8
Page 9
Disposal
J
Dispose of packaging in an environ-
electronic appliances (waste electrical
The guarantee conditions for this appliance
are as de ned by our representative in the
country in which it is sold. Details regarding
these conditions can be obtained from
the dealer from whom the appliance was
purchased. The bill of sale or receipt must
be produced when making any claim under
the terms of this guarantee.
Changes reserved.
en
Apples and peas
– 100 g frozen peas
– 100 g frozen soya beans
– 1 apple (ca. 100 g)
– 220 g apple juice
■ Peel and core the apple and cut it into
pieces.
■ Rinse the peas and soya beans under
running water.
■ Put the apple, peas and soya beans
into boiling water and let them stand for
3 minutes.
■ Rinse the cooked ingredients in a
sieve under running water and then
place them in iced water for a further
3 minutes to cool.
■ Placed the cooked ingredients and the
apple juice in the blender jug.
■ Blend the mixture at speed u until it is
thick and creamy.
Avocado cream
– 1 apple or pear (ca. 100 g)
– ½ avocado (ca. 70 g)
– 100 g water
■ Peel and core the apple or pear and cut
it into pieces.
■ Gently simmer the pieces in a little water
on a low heat until they are soft.
■ Peel the avocado, cut it into pieces and
remove the stone.
■ Placed the cooked ingredients and the
piece of avocado in the blender jug.
■ Blend the mixture at speed u until it is
thick and creamy.
Sportsman’s cocktail
– 150 g oranges
– 50 g lemon
– 1 tsp sugar or honey
– 125 ml apple juice
– 125 ml mineral water
■ Peel the oranges and lemons, cut into
pieces and remove the pips.
■ Place all the ingredients in the
blender jug.
■ Blend for 1 minute at speed t.
Disposal
mentally-friendly manner. This
appliance is labelled in accordance
with European Directive 2012/19/EU
concerning used electrical and
and electronic equipment – WEEE).
The guideline determines the framework for the return and recycling
of used appliances as applicable
throughout the EU. Please ask your
specialist retailer about current
disposal facilities.
Guarantee
9
Page 10

ms Pengendalian mengikut peraturan
Pengendalian mengikut peraturan
Baca arahan pengendalian dengan teliti, patuhinya dan simpan!
Sertakan arahan ini semasa penyerahan alat.
Ketidakpatuhan terhadap arahan bagi penggunaan perkakas dengan
betul akan mengecualikan pengeluar dari liabiliti kerosakan yang
berlaku. Mesin ini hanya sesuai untuk pengunaan persendirian rumah
tangga dan di sekitar rumah. Penggunaan perkakas untuk
memproses kuantiti makanan yang biasa untuk kegunaan domestik.
Perkakas ini sesuai untuk campur makanan cecair atau separa
pepejal, untuk kisar / cincang buah dan sayur mentah, untuk
memurikan makanan dan untuk kisar makanan beku (contohnya
buah) atau kiub ais. Perkakas ini tidak boleh digunakan untuk
memproses objek atau bahan yang lain.
Perkakas ini boleh digunakan oleh orang dengan kekurangan
keupayaan fizikal, deria atau metal, atau kekurangan pengalaman
dan/atau pengetahuan dibawah selian atau telah dilatih mengikut
keselamatan pengendalian peralatan ini dan memahami kesan
bahayanya. Kanak-kanak hendaklah dijauhkan daripada perkakas
dan kabel penyambungan serta tidak dibenarkan mengendalikan
perkakas ini. Kanak-kanak tidak dibenarkan bermain dengan
perkakas ini. Kanak-kanak tidak dibenarkan untuk mencuci atau
menyelenggara perkakas ini.
Arahan keselamatan
W Bahaya kejutan elektrik dan kebakaran!
Gunakan perkakas ini hanya di dalam bangunan pada suhu bilik dan
ketinggian sehingga 2000 m di atas paras laut. Sambung dan
kendalikan perkakas hanya mengikut spesifikasi pada plat kadaran.
Hanya kendalikan sekiranya tiada tanda kerosakkan pada perkakas
dan kord kuasa. Pembaikan pada peralatan, seperti menukar kabel
bekalan kuasa, hanya boleh dilakukan oleh khidmat pelanggan kami
bagi mengelakkan bahaya. Jangan biarkan kord kuasa bersentuhan
dengan bahagian panas atau menariknya di atas bahagian sisi yang
tajam. Jangan letak perkakas dan bahagiannya di atas atau
berdekatan dengan permukaan panas, seperti plat panas.
Jangan sesekali merendam unit asas ke dalam air atau mesin basuh
pinggan mangkuk. Jangan gunakan pembersih wap. Jangan
kendalikan perkakas dengan tangan yang basah. Peralatan ini
mestilah sentiasa dipisahkan dari punca kuasa selepas setiap
penggunaan, ketika tanpa penyeliaan, sebelum pemasangan,
penanggalan atau pembersihan dan kerosakan.
10
Page 11

Arahan keselamatan
ms
W Risiko kecederaan!
Sentiasa awasi perkakas semasa menggunakannya! Jangan
mengoperasi mesin dalam keadaan tanpa beban. Peralatan ini
mestilah sentiasa dipisahkan dari punca kuasa selepas setiap
penggunaan, ketika tanpa penyeliaan, sebelum pemasangan,
penanggalan atau pembersihan dan kerosakan. Selepas penggunaan
perkakas, tunggu sehingga pemacu berhenti sepenuhnya. Selepas
ditutup, pisau akan terus berjalan untuk masa yang pendek.
Sebelum menukar alat ganti atau tambah, yang bergerak semasa
pengendalian, perkakas mestilah dimatikan dan dipisahkan dari
punca kuasa. Jangan sesekali pegang di dalam bekas pengadun
yang telah dipasang. Hanya kerja dengan pengadun yang dipasang
dengan lengkap! Gunakan perkakas ini hanya dengan bahagian dan
alat ganti yang tulen. Jangan mengendalikan makanan yang panas
(>50°C) di dalam bekas pengadun sintetik. Berhati-hati semasa
mengendalikan pisau tajam, semasa mengosongkan bekas dan
semasa membersih.
W Bahaya kebakaran!
Semasa mengendalikan campuran panas dengan bekas pengadun
gelas, stim akan keluar melalui tuib suapan di tudung. Sentiasa
pegang tudung semasa kerja dengan satu tangan. Semasa itu,
jangan pegang bahagian atas tiub suapan! Masukkan maks. 0.3 liter
cecair panas dan berbuih ke dalam bekas pengadun gelas.
W Penting!
Bekas pengadun tidak sesuai digunakan di dalam ketuhar
gelombang mikro. Perkakas mestilah dibasuh seperti yang
dijelaskan selepas setiap penggunaan atau selepas tidak
menggunakannya untuk jangka waktu yang panjang. X “Penjagaan
dan pembersihan harian” lihat halaman 14
Tahniah atas pembelian perkakas Bosch
baru anda. Anda boleh mendapatkan
maklumat lanjut tentang produk kami di
halaman web kami.
11
Kandungan
Pengendalian mengikut peraturan............10
Arahan keselamatan.................................10
Sepintas lalu .............................................12
Gelang berlampu ......................................12
Bekas pengadun.......................................12
Sebelum penggunaan kali pertama .......... 13
Pengunaan ...............................................13
Penjagaan dan pembersihan harian.........14
Sistem keselamatan .................................15
Penyelesaian masalah .............................15
Resipi........................................................15
Arahan tentang pelupusan .......................16
Syarat-syarat waranti................................16
Page 12
ms Sepintas lalu
Sepintas lalu
X Rajah A
1 Unit asas / Blok enjin
a Butang-buka
t = kelajuan rendah
u = kelajuan tinggi
b Paparan pengendalian
(Gelang berlampu)*
c Pemacu
d Kord kuasa
2 Pengendalian bilah dengan bilah
campuran
3 Bekas pengadun To-Go
a Bekas daripada Tritan
b Skala dengan tanda “max”
c Tudung dengan lubang minum
d Penutup minuman
4 Bekas pengadun pengisar*
a Bekas daripada Tritan
b Skala dengan tanda “max”
c Tudung dengan lubang minum
d Penutup berputar
5 Bekas pengadun*
a Bekas daripada gelas
ThermoSafe
b Tudung dengan tiub suapan
c Penutup
* Bergantung kepada model
Jika aksesori tidak disertakan dalam
pakej produk, ia boleh dipesan melalui
perkhidmatan pelanggan:
Aksesori No.
tempahan
Bekas pengadun To-Go
hitam 12012850
putih 12012851
kelabu gelap 12012853
Bekas pengadun pengisar
hitam 12012855
putih 12012857
Bekas pengadun gelas
hitam 12012847
putih 12012848
Dengan bekas pengadun pengisar,
gunakan kuasa penuh perkakas ini. Beri
perhatian kepada kuantiti dan masa
pemprosesan yang maksimum! X Rajah G
12
Gelang berlampu
Bergantung kepada model:
Gelang berlampu menyala, jika semua
bahagian dipasang dengan betul dan
perkakas diplag masuk. Gelang berlampu
menyala juga semasa penggunaan.
Bekas pengadun
Arahan:
– Bekas pengadun To-Go dan bekas
pengadun pengisar adalah daripada
Tritan. Tritan adalah bahan sintetik
yang tidak boleh pecah, tiada rasa dan
tiada bau.Tritan adalah bahan sintetik
yang tidak boleh pecah, tiada rasa dan
tiada bau.
– Bekas pengadun gelas terdiri daripada
gelas ThermoSafe yang tahan haba.
Bekas pengadun (bergantung kepada
model) adalah sesuai untuk pengunaan
yang berbeza:
Pengunaan Bekas
pengadun
Campur dan berbuihkan
cecair
Kisar dan cincang herba,
buah mentah, sayur, bawang,
kacang tanah, kacang,
parmesan dan coklat
Kisar dan campur kiub ais dan
buah beku
Campur jus buah dan
minuman lain
Penyediaan mayones
Memurikan sup dan sos,
penyediaan bahan panas
Menambah lebih banyak
bahan semasa penyediaan
Pengunaan di dalam
ketuhar gelombang
Penting!
Beri perhatian kepada kuantiti dan masa
pemprosesan yang maksimum! X Rajah G
G G G
G G G
G G G
G G G
H H G
H H G
H H G
H H H
Page 13

Sebelum penggunaan kali pertama
ms
Sebelum penggunaan kali
pertama
Sebelum perkakas baru boleh digunakan,
perkakas ini mestilah dikeluarkan
sepenuhnya, dibersihkan dan diperiksa.
Perhatian!
Jangan kendalikan peralatan yang rosak!
■ Keluarkan unit asas dan semua
bahagian tambahan daripada
bungkusan.
■ Tanggalkan material bungkusan
yang ada.
■ Periksa kesempurnaan semua
bahagian.dan untuk kerosakan yang
boleh dilihat. X Rajah A
■ Sebelum penggunaan pertama
basuh semua bahagian dengan teliti
dan keringkan. X “Penjagaan dan
pembersihan harian” lihat halaman 14
Pengunaan
W Risiko kecederaan!
– Hanya pasangkan plag, jika semua
penyediaan untuk kerja dengen
perkakas dihabiskan dan bahagian yang
diperlukan dipasang dengan betul dan
disambung dengan unit asas.
– Jangan mengendalikan makanan
yang panas (>50°C) di dalam bekas
pengadun sintetik.
– Kendalikan bilah dengan berhati-hati
dan jangan masukkan tangan ke dalam
bilah pengadun. X Rajah B
– Jangan masukkan tangan ke dalam
bekas pengadun gelas dan sentiasa
kerja dengan tudung yang dipasang.
W Bahaya kebakaran!
Masukkan maks. 0.3 liter cecair panas dan
berbuih ke dalam bekas pengadun gelas.
■ Letakkan unit asas di atas kawasan
kerja yang mendatar dan stabil.
■ Buka gulungan kord kuasa sepenuhnya.
Kerja dengan bekas pengadun
To-Go atau bekas pengadun
pengisar
X Rajah C
1. Isi bekas pengadun dengan bahan yang
diingini.
2. Pasang penutup pemasangan bilah
di gelang sintetik dan letakkan bilah
pengadun ke dalam bekas pengadun.
Putar penutup pemasangan bilah
melawan arah jam, sehingga ia
berbunyi selak.
3. Putar bekas pengadun.
4. Letakkan bekas pengadun di dalam
lubang yang berkenaan pada blok enjin
dan putar mengikut arah jam sehingga
ia berbunyi selak.
5. Pasangkan plag.
6. Pegang bekas pengadun dengan satu
tangan. Tekan butang t atau u sehingga
kecairan yang diingini tercapai.
7. Lepaskan butang dan tunggu sehingga
perkakas berhenti. Cabutkan plag.
8. Putar bekas pengadun dalam arah lawan
jam dan tanggalkannya.
9. Putar bekas pengadun.
10. Putar penutup pemasangan bilah
mengikut arah jam dan tanggalkannya.
Perhatian!
Jangan letak penutup pemasangan bilah
dengan bilah ke bawah. Bilah boleh rosak
dan calar permukaan letak. X Rajah B
11. Tutup bekas dengan tudung.
12. Untuk menuang atau minum putarkan
dan keluarkan penutup berputar atau
buka penutup minuman.
Bersihkan semua bahagian. X “Penjagaan
dan pembersihan harian” lihat halaman 14
13
Page 14

ms Penjagaan dan pembersihan harian
Kerja dengan Bekas pengadun
gelas
X Rajah D
1. Pasang penutup pemasangan bilah
di gelang sintetik dan letakkan bilah
pengadun ke dalam bekas pengadun.
Putar penutup pemasangan bilah
melawan arah jam, sehingga ia berbunyi
selak.
2. Putar bekas pengadun.
3. Letakkan bekas pengadun di dalam
lubang yang berkenaan pada blok enjin
dan putar mengikut arah jam sehingga
ia berbunyi selak.
4. Isi bekas pengadun dengan bahan yang
diingini.
5. Letakkan tudung dan penutup.
6. Pasangkan plag.
7. Pegang tudung dengan satu tangan.
Jangan pegang bahagian atas
tiub suapan. Tekan butang t atau
u sehingga kecairan yang diingini
tercapai.
8. Lepaskan butang dan tunggu sehingga
perkakas berhenti. Cabutkan plag.
9. Putar bekas pengadun dalam arah lawan
jam dan tanggalkannya.
10. Tanggalkan tudung.
11. Salurkan bahan campuran.
12. Putar penutup pemasangan bilah
mengikut arah jam dan tanggalkannya.
Perhatian!
Jangan letak penutup pemasangan bilah
dengan bilah ke bawah. Bilah boleh rosak
dan calar permukaan letak. X Rajah B
Bersihkan semua bahagian. X “Penjagaan
dan pembersihan harian” lihat halaman 14
Menambah lebih banyak bahan
X Rajah E
1. Lepaskan butang dan tunggu sehingga
perkakas berhenti.
2. Buka penutup atau keseluruhan tudung.
3. Menambah lebih banyak bahan
4. Letak semula tudung dan penutup dan
tekan semula butang t atau u.
Tip: Tudung boleh dibuka dengan satu
putaran melawan arah jam.
Penjagaan dan pembersihan
harian
Perkakas dan bahagian yang digunakan
harus dibersihkan dengan teliti selepas
setiap pengunaan.
W Risiko kejutan elektrik!
– Cabut plag sebelum membasuh.
– Jangan sesekali merendam unit asas
ke dalam cecair dan jangan mencuci di
dalam mesin basuh pinggan mangkuk.
– Jangan gunakan pembersih stim.
W Risiko kecederaan!
Jangan gunakan alkohol atau agen
pembersih yang mengandungi spirit yang
melelas.
Perhatian!
– Jangan gunakan alkohol atau agen
pembersih yang mengandungi spirit
yang melelas.
– Jangan menggunakan objek tajam,
berbucu atau metal.
– Jangan gunakan kain atau agen
pembersih yang melelas.
Perhatian:
– Bersihkan bahagian pengadun dengan
serta-merta selepas penggunaan.
Sisa kering tidak akan serang bahan
sintetik(contohnya melalui minyak pati
dalam herba)
– Masukkan sedikit air dengan bahan cuci
ke dalam bekas pengadun dan tekan
butang u selama beberapa saat.
– Bagi penyediaan, contohnya, lobak
merah, bahagian plastik berubah
warna dengan saput merah, ini boleh
dihilangkan dengan beberapa titis
minyak masak.
Satu gambaran keseluruhan terletak dalam
Rajah F untuk cara setiap bahagian dicuci.
Unit asas
Lapkan unit asas dengan kain lembut,
lembab dan keringkan.
14
Page 15

Sistem keselamatan
ms
Pemegang bilah
Buka gasket sebelum dicuci. Cuci
pemegang bilah hanya dengan satu
berus di bawah air yang mengalir. Jangan
letakkannya ke dalam air! X Rajah H
Bekas pengadun dan tudung
Cuci bekas pengadun dan setiap alat
dengan air sabun dan kain lembut atau
span atau di dalam mesin basuh pinggan
mangkuk.
Sistem keselamatan
Fungi kunci /
Penutupan automatik
Perkakas ini hanya boleh dibuka dan
dikendalikan, jika bekas pengadun
diketatkan sehingga ke hujung.
Perkakas tutup secara automatik, jika
bekas pengadun menjadi longgar.
X “Penyelesaian masalah” lihat
halaman 15
Penyelesaian masalah
W Risiko kecederaan!
Tanggalkan plag untuk menyelesaikan
gangguan gangguan.
Gangguan
Perkakas tidak boleh mula atau mati ketika
penggunaan. Gelang berlampu (bergantung
kepada model) tidak menyala.
Sebab yang berkemungkinan
Bekas pengadun tidak dipasang dengan
betul atau menjadi longgar.
Pembaikan
■ Lepaskan butang. Cabutkan plag.
■ Letakkan bekas pengadun dengan
betul dan ketatkan sehingga ia
berbunyi selak.
■ Pasangkan plag. Tekan semula butang t
atau u untuk memeriksa kefungsian.
Arahan penting
Sekiranya gangguan tidak dapat
diselesaikan, sila hubungi khidmat
pelanggan kami. X Maklumat hubungan
pada hujung arahan
Resipi
Perhatian:
– Gaulkan ramuan keras dengan
setengah kuantiti cecair terlebih dahulu
dan kemudian masukkan lebihan cecair.
– Bergantung kepada resipi, pilih bekas
pengadun yang sesuai.
– Beri perhatian kepada kuantiti dan
masa pemprosesan yang maksimum!
X Rajah G
Smoothie hijau
– 1 epal hijau (lebih kurang. 100 g)
– Jus lemon (ca. 20 g)
– 20 g kubis daun
– 10 g Saderi
– 10 g Daun ketumbar
– 10 g Linsid
– 1 g kulit kayu manis terkisar
– 300 g air sejuk
■ Potong epal, saderi dan kubis daun ke
kepingan.
■ Masukkan sedikit air ke dalam bekas
pengadun.
■ Campur selama 1 minit dalam
kelajuan u.
■ Isi bekas pengadun dengan semua
bahan yang lain.
■ Campur selama 1 minit dalam
kelajuan u.
Smoothie
– 1 pisang (lebih kurang 100g)
– 4 g halia merah segar
– 100 g yogurt
– 30 g madu
– 100 ml susu
■ Kopek pisang dan halia dan potong ke
kepingan.
■ Isi bekas pengadun To-Go dengan
semua bahan.
■ Campur selama 1 minit dalam
kelajuan u.
15
Page 16

ms Arahan tentang pelupusan
J
Alat ini bersesuaian dengan garis
Syarat-syarat jaminan untuk perkakas ini
adalah seperti yang ditakrifkan oleh wakil
kami di negara tempat ia dijual.
Butir-butir tentang syarat-syarat ini boleh
didapati daripada wakil penjual tempat
perkakas dibeli.
Bil jualan atau resit mestilah ditunjukkan
apabila anda hendak membuat apa-apa
tuntutan di bawah terma-terma jaminan ini.
Tertakluk pada pindaan.
Minuman tenaga
– 240 g susu lemak rendah
– ½ pisang (ca.50 g)
– 30 g gula
– 20 g serbuk koko
■ Potong pisang secara kepingan dan
bekukannya selama satu malam.
■ Isi bekas pengadun dengan semua
bahan.
■ Campur selama 1 minit dalam
kelajuan u.
Epal dan kacang pea
– 100 g kacang pea yang beku
– 100 g kacang soya yang beku
– 1 epal (lebih kurang 100 g)
– 220 g jus epal
■ Kopek epal, keluarkan bijinya dan
potong ke kepingan.
■ Cuci kacang pea dan kacang soya
dengan penapis di bawah air yang
mengalir.
■ Rendam epal, kacang pea dan kacang
soya dalam air yang mendidih selama
3 minit.
■ Cuci bahan yang dimasak di bawah air
yang mengalir dan sejukkannya dengan
air beku selama 3 minit.
■ Isi bekas pengadun dengan bahan yang
dimasak dan jus epal.
■ Campur dengan kelajuan u, sehingga ia
tebal dan bak krim.
Avokado-Creme
– 1 epal atau 1 pear
(lebih kurang 100 g)
– ½ Avokado (lebih kurang 70 g)
– 100 g air
■ Kopek epal atau pear, potong ke
kepingan dan keluarkan benihnya.
■ Masak kepingan dengan sedikit air
dengan api kecil sehingga ia lembut.
■ Kopek avakado, potong ke kepingan
dan keluarkan benihnya.
■ Isi bekas pengadun dengan bahan yang
dimasak dan kepingan avakado.
■ Campur dengan kelajuan u, sehingga ia
tebal dan bak krim.
Sportsman’s cocktail
– 150 g oren
– 50 g lemon
– 1 sudu kecil gula atau madu
– 125 ml jus epal
– 125 ml air mineral
■ Kopek oren dan lemon, potong ke
kepingan dan keluarkan benihnya.
■ Isi bekas pengadun dengan semua
bahan.
■ Campur selama 1 minit dalam
kelajuan t.
Arahan tentang pelupusan
panduan Eropa 2012/19/EU tentang
alat-alat tua elektrik dan elektronik
(waste electrical and electronic
equipment - WEEE).
Garis panduan tersebut memberi
rangka rujukan yang berlaku di
seluruh Eropa untuk penerimaan
balik dan penggunaan alat-alat tua.
Sila bertanya wakil penjual anda
atau pihak berkuasa tempatan
anda tentang cara-cara pelupusan
semasa.
Syarat-syarat waranti
16
Page 17

zf
使用範圍
使用範圍
仔細閱讀並妥善保管本說明書,以備日後使用!將本機轉交給他人使用
時,請將本說明書一併轉交。
若不遵守本機器的正確使用規程,由此造成的任何損失,生產廠家不負
任何責任。
本機僅限於私人家庭及非商業環境中使用。本機僅適用於家庭所需的處
理量和處理時間。
本機適用於攪拌液體或半固體食品,搗碎/剁細生水果及蔬菜,將食物做
成醬及搗碎冷凍食品(例如水果)或冰塊。本機不得將其用於處理其他
物質或物體。
凡身體、感官或智力有缺陷之人士及缺乏相關經驗和╱或知識之人士,
應在負責安全使用機器人員的監督或指導下,瞭解使用機器可能帶來的
危險後,方能使用本機。請勿讓兒童靠近本機和電源線,且不得讓兒童操
作本機。請勿讓兒童玩耍本機。兒童不得對本機進行清潔和保養。
安全注意事項
W 電擊和火災危險!
僅限在室溫及海拔2000米以下的室內使用本機。僅可依據銘牌上的說
明連接和操作本機。電源線及本機必須完好無損方可使用。本機修理事
宜,如更換損壞的電源線,僅由本公司的客戶服務執行,才能避免危險發
生。電源線不能與高溫零件接觸,也不能拉動電源線的尖銳邊緣。請勿將
本機和配件置於高溫表面(例如電磁爐)上或其附近。
請勿將主機浸泡在水中,或放入洗碗機洗滌。請勿使用任何蒸汽清潔
機!請勿用潮濕的雙手操作本機。在每次使用之後、在沒有監督時、在組
裝、拆卸或清潔時,以及在出現故障時,必須將斷開機器的電源。
W 受傷危險!
請在操作過程中隨時監看本機!請勿空轉機器。建議處理完食材後立即
關機,勿讓其長時間處於開機狀態。直接使用完本機後,請等待驅動器完
全停止。在關機之後,刀片會繼續轉動一段時間。在更換運行中會移動的
配件或附加零件前,必須先關閉機器並斷開電源。切勿將手伸入到已安
放的攪拌杯中。攪拌機必須是在完全裝好的情況下,才可使用。本機僅限
與原廠零件和配件一同使用。請勿使用塑料攪拌杯加工熱食(>50°C)。
使用鋒利的刀具、排空容器和清潔時請小心。
W 燙傷的危險!
使用玻璃攪拌杯處理熱食時,蓋子上的加料口會有蒸汽逸出。在機器工
作的過程中,要用手將蓋子按緊。手不要伸到加料口的上方!最多只能將
0.3公升灼熱或起泡的液體倒入玻璃攪拌杯中。
W 重要!
攪拌杯不適用於微波爐。
將本機於每次使用後或長時間未使用重新使用前,務必按照說明進行
清 潔 。 X“維護和日常清潔”參見第20頁
17
Page 18

zf
內容
恭喜您購買了博世家用系列的新產品,您已經
選擇了一款新潮而一流的家用電器。如需更多
關於產品的詳細資訊,請瀏覽本公司網站。
內容
使用範圍.............................................. 17
安全注意事項........................................ 17
概覽..................................................... 18
發光環.................................................. 18
攪拌杯.................................................. 18
第一次使用前........................................ 19
使用..................................................... 19
維護和日常清潔.................................... 20
安全系統.............................................. 20
故障排除.............................................. 20
食譜..................................................... 20
棄置..................................................... 21
保證..................................................... 21
概覽
X 圖 A
1 主機 / 電機模塊
a 開始按鈕
t=低轉速
u=高轉速
b 運轉顯示(發光環)*
c 驅動器
d 電源線
2 配有攪拌刀片的刀片套件
3 隨行攪拌杯
a Tritan材質的容器
b 標有「最大值」的刻度
c 含飲用口的蓋子
d 直飲蓋
4 粉碎攪拌杯
a Tritan材質的容器
b 標有「最大值」的刻度
c 含飲用口的蓋子
d 旋轉蓋
5 玻璃攪拌杯*
a ThermoSafe玻璃材質的杯體
b 含加料口的蓋子
c 密封罩
* 依機型而定
若有配件未包含在供貨清單內,請向客戶服務
另行選購:
配件 訂購號
隨行攪拌杯
黑色 12012850
白色 12012851
深蓝色 12012853
粉碎攪拌杯
黑色 12012855
白色 12012857
玻璃攪拌杯
黑色 12012847
白色 12012848
使用粉碎攪拌杯時,需要利用本機的全部功
率。注意最大處理量和處理時間!X圖G
發光環
依機型而定
正確組裝所有部件,并接通本機電源之後,發
光環亮起。在使用期間發光環持續發亮。
攪拌杯
注意事項:
– 隨行攪拌杯和粉碎攪拌杯採用Tritan材
質。Tritan是一種防碎、無氣味、無異味的
合成材料。
– 玻璃攪拌杯採用耐熱ThermoSafe玻璃
製成。
攪拌杯適用於不同使用目的
(視不同機型而定):
使用目的 攪拌杯
攪拌液體和使液體發泡
切碎菜葉、生水果、蔬菜、洋蔥、花
生、堅果、杏仁和巧克力
切碎和混合冰塊和冰凍水果
混合果汁和其他飲品
製備蛋黃醬
烹煮汤羹和调味汁,加工熱配料
在加工期間續加配料
在微波爐中使用
G G G
G G G
G G G
G G G
H H G
H H G
H H G
H H H
18
Page 19

zf
第一次使用前
重要!
注意最大處理量和處理時間!X 圖 G
第一次使用前
使用新機前,請先將包裝完全拆開,清潔並檢
查機器是否完好未損壞。
注意!
絕對不能使用已損壞的機器!
■ 從包裝中取出主機和所有配件。
■ 去除包裝材料。
■ 檢查部件的完整性以及外部可見損壞。
X圖 A
■ 首次使用前,要先徹底清潔並乾燥所
有零件。X“維護和日常清潔”參見
第20頁
使用
W 受傷危險!
– 完成操作本機的所有準備工作,正確組裝
所需配件,并連接主機以後,再插上電源。
– 請勿使用塑料攪拌杯加工熱食(>50°C)。
– 謹慎操作刀片套件,勿將手伸入攪拌
杯。X 圖 B
– 切勿將手伸入到已安放的攪拌杯中,在裝
上蓋子之後再開機。
W 燙傷的危險!
最多只能將0.3公升灼熱或起泡的液體倒入
玻璃攪拌杯中。
■ 將主機放在穩定且水平的工作面上。
■ 將電源線完全拉出。
操作隨行或粉碎攪拌杯
X 圖 C
1. 將所需配料裝入攪拌杯。
2. 在塑料環上固定刀片套件,將攪拌刀片朝
前裝入攪拌杯。逆時針旋轉刀片套件,直至
咔噠一聲卡住。
3. 翻轉攪拌杯。
4. 將攪拌杯插入電機模塊的相應凹部,并順
時針旋轉,直至咔噠一聲卡住。
5. 插上電源插頭。
6. 用手按緊攪拌杯。長按t或u按鈕,直至
達到所需稠度。
7. 鬆開按鈕,等待機器停止。拔下電源插頭。
8. 逆時針旋轉並取下攪拌杯。
9. 翻轉攪拌杯。
10. 順時針旋轉並取下刀片套件。
19
注意!
勿將刀片朝下放置刀片套件。刀片可能會損壞
并刮劃工作面。X 圖 B
11. 使用蓋子封閉杯體。
12. 如需將處理好的飲品倒出,請轉開並取下
旋轉蓋,或可打開直飲蓋直接飲用。
清潔所有零件。X“維護和日常清潔”參見
第20頁
使用玻璃攪拌杯
X圖 D
1. 在塑料環上固定刀片套件,將攪拌刀片朝
前裝入攪拌杯。逆時針旋轉刀片套件,直至
咔噠一聲卡住。
2. 翻轉攪拌杯。
3. 將攪拌杯插入電機模塊的相應凹部,并順
時針旋轉,直至咔噠一聲卡住。
4. 將所需配料裝入攪拌杯。
5. 裝上蓋子和密封罩。
6. 插上電源插頭。
7. 用手按緊蓋子。手不要伸到加料口的上方。
長按t或u按鈕,直至達到所需稠度。
8. 鬆開按鈕,等待機器停止。拔下電源插頭。
9. 逆時針旋轉並取下攪拌杯。
10. 取下蓋子。
11. 使用另一容器盛放食材。
12. 順時針旋轉並取下刀片套件。
注意!
勿將刀片朝下放置刀片套件。刀片可能會損壞
并刮劃工作面。X 圖 B
清潔所有零件。X“維護和日常清潔”參見
第20頁
續加配料
X 圖 E
1. 鬆開按鈕,等待機器停止。
2. 取下密封罩或整個蓋子。
3. 續加配料。
4. 再次裝上蓋子和密封罩,并重新按下按鈕
t或u。
注意事項:通過逆時針旋轉可以取下密封罩。
Page 20

zf
維護和日常清潔
維護和日常清潔
在每次使用過後,需要徹底清潔機器和所使用
的部件。
W 電擊危險!
– 在清潔之前拔下電源插頭。
– 切勿將主機浸泡在液體中,也不要用洗碗
機洗滌。
– 請勿使用任何蒸汽清潔機。
W 受傷危險!
勿用裸手觸摸攪拌刀。
注意!
– 請勿使任何含酒精或苯的清潔劑。
– 不能使用尖銳、鋒利或金屬物體。
– 請勿使用摩擦型布或清潔劑。
提示:
– 在使用後最好立即清潔所有部件。此食品
殘渣不會變乾且黏住在配件上,也不會侵
蝕塑膠部分(例如調味料中的香精油)。
– 向清空的攪拌杯內加入一些水和清潔劑,
按下按鈕u數秒。
– 處理某些食材時,例如胡蘿蔔可能導致塑
膠零件變色,使用幾滴食用油即可清除這
類變色。
在圖 F中,您可以找到如何清潔單個零件的
概覽。
主機
請使用沾濕的軟布擦拭主機,並將其擦乾。
刀架
在清洗之前取下密封件。要用刷子在流水下清
洗刀架。請勿浸入水中!X圖H
攪拌杯和蓋子
可使用洗滌液和軟布或海綿清潔攪拌杯,或使
用洗碗機清潔。
安全系統
開機鎖 / 自動關機
只有在攪拌杯被旋緊到止動時,才能啟動和
操作機器。如果攪拌杯鬆脫,則機器自動停機。
X“故障排除”參見第20頁
故障排除
W 受傷危險!
故障排除前,應拔下電源插頭。
故障
機器不啟動,或在使用時自行關機。發光環(視
不同機型而定)不亮。
可能的原因
未正確組裝攪拌杯,或攪拌杯脫離。
故障排除
■ 鬆開按鈕。拔下電源插頭。
■ 正確組裝攪拌杯,并擰緊,直至咔噠一聲
卡住。
■ 插上電源插頭。重新按鈕按鈕t或u,測
試功能。
重要注意事項
若無法按上述步驟排除故障,請與客戶服務聯
絡 。 X聯繫數據參見本指導書末尾部分。
食譜
提示:
– 先向液體中混合一半數量的固體原料,之
後再添加其餘液體。
– 根據食譜選擇合適的攪拌杯。
– 注意最大處理量和處理時間!X圖 G
綠色冰沙
– 1顆青蘋果(約100公克)
– 檸檬汁(大約20克)
– 20克羽衣甘藍
– 10公克芹菜
– 10公克香菜
– 10公克亞麻子
– 1公克肉桂粉
– 300克經過冷卻的水
■ 將蘋果、芹菜及羽衣甘藍切成塊。
■ 將少量水放入攪拌杯中。
■ 以u档攪拌1分鐘。
■ 將所有剩餘配料裝入攪拌杯。
■ 以u档攪拌1分鐘。
20
Page 21

zf
J
本設備說明是根據歐洲電子及電氣舊
本電器的保修條款由銷售所在國家的代理商
來制訂。有關這些條款的詳細資訊,請向購買
電器的零售商洽詢。當根據保修條款進行任何
索賠時,必須出具銷售憑證或收據。
本公司保留隨時修改這些條款的權利。
棄置
冰沙
– 1根香蕉(約100公克)
– 4克新鮮紅姜
– 100克酸奶
– 30克蜂蜜
– 100毫升牛奶
■ 香蕉和紅姜去皮切塊。
■ 將所有配料裝入隨行攪拌杯。
■ 以u档攪拌1分鐘。
能量飲料
– 240公克低脂牛奶
– 半根香蕉(約50公克)
– 30公克糖
– 20公克可可粉
■ 將香蕉切成塊,將其過夜冷凍。
■ 將所有配料裝入攪拌杯。
■ 以u档攪拌1分鐘。
苹果豌豆
– 100公克冷凍豌豆
– 100公克冷凍黃豆
– 1顆蘋果(約100公克)
– 220克蘋果汁
■ 將蘋果去皮、去籽後切成小塊。
■ 将豌豆和黄豆装入筛子,并在流水下清洗
干净。
■ 將蘋果、豌豆及黃豆加入到已經滾開的水
中,燜3分钟。
■ 將燜好的配料裝入篩子,在清水下清洗乾
淨,並在冰水中繼續冷卻3分鐘。
■ 将燜好的配料和苹果汁装入搅拌杯。
■ 以u档攪拌,直至所有配料粘稠並呈糊
状。
酪梨酱
– 1顆蘋果或梨子(約100公克)
– 半顆酪梨(約70公克)
– 100克水
■ 将苹果或梨削皮,切成塊,並去核。
■ 水果块加少许水,小火煨煮,直至变软。
■ 將酪梨去皮、切成小块、去核。
■ 将煮好的配料和酪梨块装入搅拌杯。
■ 以u档攪拌,直至所有配料粘稠並呈糊
状。
運動員雞尾酒
– 150克橘子
– 50克檸檬汁
– 1茶勺糖或蜂蜜
– 125ml苹果汁
– 125ml矿泉水
■ 將橘子及檸檬削皮,切成塊,並去核。
■ 將所有配料裝入攪拌杯。
■ 以t档攪拌1分鐘。
棄置
設備準則2012/19/EU(廢棄電子及電
氣設備WEEE)。
此準則提供於歐盟成員對舊設備之報
廢或使用標準。
保證
21
Page 22

zh
按照规程的使用
按照规程的使用
仔细阅读使用说明书,并保存本说明书以备以后使用!机器转让给他人
使用时,请将本说明书一并转让。
若不遵守本机器正确使用的规程,生产厂家将对由此而造成的损失不负
任何责任。
本设备规定只可用于私人家庭和家用环境。本机器仅限于家庭所需的加
工量和加工时间。本机器适用于搅拌液体或半固体食品,捣碎/剁细生水
果和蔬菜,将食物做成酱和捣碎冷冻食品(例如水果)或冰块。不得将机
器用于加工其他物质或物体。凡身体、感官或智力有缺陷的人士以及缺
乏相关经验和知识的人士,应在负责安全使用机器人员的监督或指导
下,了解使用机器可能带来的危险后,方能使用本机器。请勿让儿童靠近
本机器和电源线,且不得让儿童操作本机器。严禁儿童将本机器用于嬉
戏。儿童不得对本机器进行清洁和保养。
安全须知
W 电击和火灾危险!
仅限在室温及海拔2000米以下的室内使用机器。仅可根据铭牌上的说
明连接和操作本机器。电线和机器必须完好无损方可使用。机器修理事
宜,如更换损坏的电源线,仅由我们的客户服务进行,才能避免危险发
生。电源线不能与高温零件接触,或者拉动电源线的尖锐边缘。请勿将机
器和附件置于高温表面(例如电炉)上或其附近。
请勿将主机浸泡在水中,或放入洗碗机洗涤。请勿使用蒸汽清洁器。请勿
用潮湿的双手操作本机器。必须在每次使用之后,在没有监督时,在组
装、拆卸或清洁时,以及在出现故障时,将机器与电源断开。
W 受伤危险!
请于操作过程中随时监看本机器!请勿空转机器。加工完食物后立即关
机,勿让其长时间处于开机状态。本机器直接使用完毕后,请等待驱动
器完全停止。在关机之后、刀片会继续转动一段时间。更换运行中会移
动的附件或附加零部件之前,应关机并与电源断开。切勿将手伸入到已
安放的搅拌杯中。仅在搅拌机完全装好的情况下才可以使用!本机器
仅限与原厂零件和附件一同使用。不得在塑料搅拌杯中加工高温食物
(>50°C)。使用锋利的刀具、排空容器和清洁时请小心。
W 灼伤危险!
用玻璃搅拌杯加工高温搅拌食材时会从盖子的加料口冒出蒸汽。在机
器工作的过程中、要用手将盖子按紧。手不要伸到加料口的上方!最多只
能将0.3升灼热或起泡的液体倒入玻璃搅拌杯中。
W 重要!
搅拌杯不适用于微波炉。请于每次使用后或长时间未使用重新使用
之前,务必按照上述说明清洁本机器。X“维护和日常清洁”参见
第25页
22
Page 23

zh
内容
恭喜您购买了博世家用系列的新产品,您已经
选择了一款新潮而一流的家用电器。若您想了
解更多本公司产品的信息,请您登录官方网
站查询。
内容
按照规程的使用.................................... 22
安全须知.............................................. 22
产品概览.............................................. 23
光圈..................................................... 23
搅拌杯.................................................. 23
首次使用前........................................... 24
使用..................................................... 24
维护和日常清洁.................................... 25
安全系统.............................................. 25
故障排除.............................................. 25
食谱..................................................... 26
处置..................................................... 26
保修..................................................... 26
产品概览
X 图 A
1 主机 / 发动机缸体
a 开启键
t=低工作转速
u=高工作转速
b 工作指示灯(光圈)*
c 驱动器
d 电源线
2 带搅拌刀片的刀片插入件
3 To-Go-搅拌杯
a Tritan材质的容器
b 带“最大值”标记的刻度
c 带饮用口的盖子
d 直饮盖
4 切碎机-搅拌杯*
a Tritan材质的容器
b 带“最大值”标记的刻度
c 带饮用口的盖子
d 旋转盖
5 *玻璃搅拌杯*
a ThermoSafe玻璃材质的容器
b 带加料口的盖子
c 控漏罩
* 视机型而定
若有附件未包含在供货清单内,请向客户服务
另行选购:
附件 订购号
To-Go-搅拌杯
黑色 12012850
白色 12012851
深灰色 12012853
切碎机-搅拌杯
黑色 12012855
白色 12012857
玻璃搅拌杯
黑色 12012847
白色 12012848
如果是切碎机-搅拌机,您则可以使用机器的全
部功率。请注意最大加工量和加工时间!
X图G
光圈
视机型而定
如果正确组装了所有零件,并且已将机器插
入,则光圈发光。使用时光圈也会发光。
搅拌杯
注意事项:
– To-Go-搅拌杯和切碎机-搅拌机的材质均
为Tritan。Tritan是一种防碎、无味、无臭
的塑料。
– 玻璃搅拌杯的材质为耐高温的
ThermoSafe玻璃。
搅拌杯(视机型而定)适用于各种应用用途:
应用 搅拌杯
搅拌液体和使液体发泡
切碎药草、生水果、蔬菜、洋葱、花
生、果仁、巴马干酪和巧克力
切碎和搅拌冰块及
搅拌果汁和其他饮品
制备蛋黄酱
汤和调味汁的起酱,加工高温
配料
加工时续填配料
G G G
G G G
G G G
G G G
H H G
H H G
H H G
23
Page 24

zh
首次使用前
应用 搅拌杯
用于微波炉
重要!
请注意最大加工量和加工时间!X 图 G
H H H
首次使用前
使用新机器前,请先将包装完全拆开,清洁并
检查机器是否完好未损坏。
注意!
绝对不能运行损坏的机器!
■ 从包装中取出主机和所有附件。
■ 去除包装材料。
■ 检查所有零件是否完整以及是否有明显
损坏现象。X图A
■ 首次使用前,要先彻底清洁并干燥所
有部件。X“维护和日常清洁”参见
第25页
使用
W 受伤危险!
– 只有当所有使用机器的准备工作都就绪
了、所需的附件都正确进行了组装,并且
和主机建立了连接,这时候才可以插入电
源插头。
– 不得在塑料搅拌杯中加工高温食物
(>50°C)。
– 小心的拿起刀片插入件,注意不要将手探
入搅拌杯中。X图 B
– 切勿将手伸入到已安放的玻璃搅拌杯中,
机器只有在盖上盖子的情况下才可以进
行工作。
W 灼伤危险!
最多只能将0.3升灼热或起泡的液体倒入玻
璃搅拌杯中。
■ 将主机放置在稳定、水平的工作面上。
■ 将电源线整个拉出。
24
使用 To-Go- 或切碎机-搅拌杯进行
工作
X 图 C
1. 在搅拌杯中添加所需的配料。
2. 将塑料圈旁的刀片插入件按住,并和搅拌
刀片一起向前装入搅拌杯中。逆时针旋转
刀片插入件,直至其卡入并发出咔嗒声。
3. 翻转搅拌杯。
4. 将搅拌杯嵌入发动机缸体上相应的凹槽
中,并沿顺时针方向旋转,直至卡入并发出
咔嗒声。
5. 将电源插头插上。
6. 用手将搅拌杯按住。按住t或u键不放,
直至达到所需的稠度。
7. 松开按键,并等待机器停止。拔出电源插
头。
8. 按逆时针方向旋转搅拌杯,并将其取下。
9. 翻转搅拌杯。
10. 按顺时针方向旋转刀片插入件,并将其取
下。
注意!
放置刀片插入件的时候,切勿将刀片朝下。可
能会损坏刀片,并划伤搁板表面。X 图 B
11. 用盖子将搅拌杯封住。
12. 如需将处理好的饮品倒出,请转开并取下
旋转盖,或可打开直饮盖直接饮用。
清洁所有零部件。X“维护和日常清洁”参见
第25页
使用玻璃搅拌杯工作
X 图 D
1. 将塑料圈旁的刀片插入件按住,并和搅拌
刀片一起向前装入搅拌杯中。逆时针旋转
刀片插入件,直至其卡入并发出咔嗒声。
2. 翻转搅拌杯。
3. 将搅拌杯嵌入发动机缸体上相应的凹槽
中,并沿顺时针方向旋转,直至卡入并发出
咔嗒声。
4. 在搅拌杯中添加所需的配料。
5. 装上盖子和控漏罩。
6. 将电源插头插上。
7. 用手将盖子按住。手不要伸到加料口的上
方。按住t或u键不放,直至达到所需的
稠度。
8. 松开按键,并等待机器停止。拔出电源插
头。
9. 按逆时针方向旋转搅拌杯,并将其取下。
10. 取下盖子。
Page 25

zh
维护和日常清洁
11. 将搅拌食材倒入其他容器。
12. 按顺时针方向旋转刀片插入件,并将其取
下。
注意!
放置刀片插入件的时候,切勿将刀片朝下。可
能会损坏刀片,并划伤搁板表面。X 图 B
清洁所有零部件。X“维护和日常清洁”参见
第25页
续填配料
X 图 E
1. 松开按键,并等待机器停止。
2. 取下控漏罩或整个盖子。
3. 续填配料。
4. 重新装上盖子和控漏罩,并重新按下t或
u键。
注意事项:逆时针旋转控漏罩,并将其取下。
维护和日常清洁
每次使用后都必须对机器和用过的附件进行
彻底清洁。
W 有电击危险!
– 清洁前将电源插头拔出。
– 请勿将主机浸泡在液体中,也不要放入洗
碗机洗涤。
– 请勿使用任何蒸汽清洁机。
W 受伤危险!
不得赤手触摸搅拌刀片。
注意!
– 请勿使任何含酒精或苯的清洁剂。
– 不能使用尖锐、锋利或金属物体。
– 请勿使用摩擦型布或清洁剂。
注意事项:
– 在使用后最好立即清洁各部件。如此食品
残渣不会变干且粘住在配件上、也不会侵
蚀塑料部分(例如调味料中的香精油)。
– 在已经清空了的搅拌杯中放入洗涤剂和一
些水,并按下u键几秒。
– 加工某些食材时,例如加工胡萝卜时,塑
料部件可能会变色,此时只要涂抹几滴食
用油即可清除。
在图 F 中、对如何清洁各个部件作了概括地
介绍。
主机
请使用沾湿的软布擦拭主机,然后将其擦干。
刀架
清洁前取下密封件。刀架要用刷子在流水下清
洗。冲洗后不要留在水中!X图H
搅拌杯和盖子
可使用洗涤液和软布或海绵清洁搅拌杯和单
件,或者放在洗碗机中清洗。
安全系统
开机安全 / 自动关机
只有在搅拌杯被旋紧到止动时,才能启动和操
作机器。如果搅拌杯自行松脱,则机器会自动
关 机 。 X“故障排除”参见第25页
故障排除
W 受伤危险!
排除故障前,应拔出电源插头。
故障
机器不启动,或者在使用时自行关机。光圈(视
机型而定)不发光。
可能的原因
没有正确装上搅拌杯,或者搅拌杯自行松脱。
解决办法
■ 放开按键。拔出电源插头。
■ 正确装上并拧紧搅拌杯,直至其卡入并发
出咔嗒声。
■ 将电源插头插上。重新按下t或u 键 ,以
便对功能进行检查。
重要注意事项
若无法按上述步骤排除故障,请与客户服务联
系 。 X联系方式请参见说明书的末尾。
25
Page 26

zh
J
请以环保方式处置包装。
方式。
该设备的保修条款将由售出国的销售代表来
确定。您可向售出此设备的经销商详细了解
这些条款。
当根据保修条款进行任何索赔时、必须出具
销售凭证或收据。
如有更改、恕不另行通知。
食谱
食谱
注意事项:
– 先向液体中混和一半数量的固体佐料,之
后再添加其余液体。
– 根据视频选择合适的搅拌杯。
– 请注意最大加工量和加工时间!X图G
绿色冰沙
– 1个青苹果(约.100克)
– 柠檬汁(约.20克)
– 20克羽衣甘蓝
– 10克西芹
– 10克芫荽叶
– 10克亚麻子
– 1克肉桂粉
– 300克经过冷却的水
■ 将苹果、芹菜和羽衣甘蓝切成块。
■ 将少量水放入搅拌杯中。
■ 用u级搅拌1分钟。
■ 将所有剩下的配料倒入搅拌杯中。
■ 用u级搅拌1分钟。
冰沙
– 1根香蕉(约.100克)
– 4克新鲜红姜
– 100克酸奶
– 30克蜂蜜
– 100毫升牛奶
■ 将香蕉和姜去皮切成小块。
■ 将所有配料倒入To-Go-搅拌杯中。
■ 用u级搅拌1分钟。
能量饮料
– 240克低脂牛奶
– ½根香蕉(约.50克)
– 30克糖
– 20克可可粉
■ 将香蕉切成块、将其过夜冷冻。
■ 将所有配料倒入搅拌板中。
■ 用u级搅拌1分钟。
苹果和豌豆
– 100克冷冻豌豆
– 100克冷冻黄豆
– 1个苹果(约.100克)
– 220克苹果汁
■ 将苹果去皮、去核后切成小块。
■ 将豌豆和黄豆放入滤器中,并用流动水冲
洗。
■ 将苹果、豌豆和黄豆加入到已经烧开的水
中,并放3分钟。
■ 将熟配料放入滤器中,并用流动水冲洗,然
后在冰水中继续冷却3分钟。
■ 将熟的配料和苹果汁放入搅拌杯中。
■ 用u级搅拌,直至所有配料都稠厚和呈
奶油状。
鳄梨酱
– 1个苹果或者1梨子(约.100克)
– 半个鳄梨(约.70克)
– 100克水
■ 将苹果或者梨子去皮、切成小块并去核。
■ 将切块和少量的水用文火煨煮,直至软化。
■ 将鳄梨去皮、切成小块并去核。
■ 将熟的配料和鳄梨块放入搅拌杯中。
■ 用u级搅拌,直至所有配料都稠厚和呈
奶油状。
运动人士的鸡尾酒
– 150克橘子
– 50克柠檬
– 1小匙砂糖或蜂蜜
– 125毫升苹果汁
– 125毫升矿泉水
■ 将橘子和柠檬剥皮,切成块并去核。
■ 将所有配料倒入搅拌板中。
■ 用t级搅拌1分钟。
处置
对本设备根据有关电气和电子设备报
废的欧洲规定2012/19/EU
(wasteelectricalandelectronic
equipment—WEEE)进行标记。该
规定管理在欧洲范围内对报废设备的
回收和再生。
请 咨 询 专 业 零 售 商 ,了 解 可 用 的 处 置
保修
26
Page 27

7 – ar
J
ظﺎﻔﺣﻟا مﻋدﯾ بوﻠﺳﺄﺑ زﺎﮭﺟﻟا ةوﺑﻋ نﻣ صﻠﺧﺗ
(waste electrical and electronic equipment – WEEE).
ﺎﻧﻠﺛﻣﻣ لﺑﻗ نﻣ زﺎﮭﺟﻟا اذﮭﻟ نﺎﻣﺿﻟا طورﺷ دﯾدﺣﺗ مﺗﯾ
.زﺎﮭﺟﻟا ﻊﯾﺑ ﺎﮭﯾﻓ مﺗﯾ ﻲﺗﻟا ﺔﻟودﻟا ﻲﻓ
لﺑﻗ نﻣ طورﺷﻟا هذھ لﯾﺻﺎﻔﺗ ﻰﻠﻋ لوﺻﺣﻟا كﻧﻛﻣﯾ
رﺎﺿﺣإ ﻰﺟرﯾ .زﺎﮭﺟﻟا ﮫﻧﻣ تﯾرﺗﺷا يذﻟا عزوﻣﻟا
يأ كزﺎﮭﺟ بﺎﺻأ لﺎﺣ ﻲﻓ ءارﺷﻟا لﺎﺻﯾإ وأ ةروﺗﺎﻓ
.نﺎﻣﺿﻟا ﮫﯾطﻐﯾ ئرﺎط
.تﻼﯾدﻌﺗ ﺔﯾأ ءارﺟإ ﻲﻓ ﺎﻧﻘﺣﺑ ظﻔﺗﺣﻧ
زﺎﮭﺟﻟا نﻣ صﻠﺧﺗﻟا
ﻲﺿﺎﯾرﻟا لﺟرﻟا لﯾﺗﻛوﻛ
زﺎﮭﺟﻟا نﻣ صﻠﺧﺗﻟا
ﺔﻔﺻاوﻣﻠﻟ ﻖﺑﺎطﻣ زﺎﮭﺟﻟا اذھ .ﺔﺋﯾﺑﻟا ﻰﻠﻋ
ﺔﯾدﺎﺻﺗﻗﻻا ﺔﻋوﻣﺟﻣﻟا/19/2012 ﺔﯾﺑروﻷا
ﺔﯾﺋﺎﺑرﮭﻛﻟا ةزﮭﺟﻷﺎﺑ ﺔﺻﺎﺧﻟا ﺔﯾﺑروﻷا
ﺔﻣﯾدﻘﻟا ﺔﯾﻧورﺗﻛﻟﻹاو
دﻋاوﻘﻟ مﺎﻌﻟا رﺎطﻹا ددﺣﺗ ﺔﻔﺻاوﻣﻟا هذھو
ﻲﺑروﻷا دﺎﺣﺗﻻا لود ﻊﯾﻣﺟ ﻲﻓ يرﺳﺗ
ةدﺎﻋإو ﺔﻣﯾدﻘﻟا ةزﮭﺟﻷا ةدﺎﻌﺗﺳا صوﺻﺧﺑ
ﻲﻠﺣﻣﻟا مﻛﻋزوﻣ ةرﺎﺷﺗﺳﺎﺑ ﻲﻣوﻗ .ﺎﮭﻟﻼﻐﺗﺳا
صﻠﺧﺗﻠﻟ ﺎﯾﻟﺎﺣ ﺔﻌﺑﺗﻣﻟا ﺔﻣظﻧﻻا ثدﺣا ﺔﻓرﻌﻣﻟ
.ﺔﻣﯾدﻘﻟا ةزﮭﺟﻻا نﻣ
نﺎﻣﺿﻟا طورﺷ
.ﺔﯾوﻧﻷا نﻣ
ءﻻزﺎﺑﻟاو حﺎﻔﺗﻟا
–لﺎﻘﺗرﺑ مﺟ 150
–نوﻣﯾﻟ مﺟ 50
–لﺣﻧ لﺳﻋ وأ رﻛﺳ ﺔﻘﻌﻠﻣ 1
–حﺎﻔﺗ رﯾﺻﻋ لﻣ 125
–ﺔﯾﻧدﻌﻣ هﺎﯾﻣ لﻣ 125
■ صﻠﺧﺗو ﻊطﻗ ﻰﻟإ ﺎﮭﻌطﻗو نوﻣﯾﻠﻟاو لﺎﻘﺗرﺑﻟا ْرّﺷﻗ
■.طﻠﺧﻟا ءﺎﻋو ﻲﻓ تﺎﻓﺎﺿﻹا لﻛ ﻊﺿ
■.t ﺔﺟردﻟا ﻰﻠﻋ ةدﺣاو ﺔﻘﯾﻗد ةدﻣ طﻠﺧﻟا ﻲﻓ رﻣﺗﺳا
.طﯾﻠﺧﻟا ﺞﻣدﻧﯾﻟ ﻖﺋﺎﻗد 3 ةدﻣ كرﺗﯾو ﻲﻠﻐﯾ
ﻖﺋﺎﻗد 3 ةدﻣ ﺞﻠﺛﻣ ءﺎﻣ ﻲﻓ درﺑﯾ ﮫﻛرﺗاو يرﺎﺟﻟا
.ﺎًﯾﻣﯾرﻛو ﺎًﻔﯾﺛﻛ طﯾﻠﺧﻟا ماوﻗ
.ﺔﺑﺳﺎﻧﻣ ﻊطﻘﻟ
.يرﺎﺟﻟا ءﺎﻣﻟا
–ةدﻣﺟﻣ ءﻻزﺎﺑ بوﺑﺣ مﺟ 100
–ةدﻣﺟﻣ ﺎﯾوﺻ لوﻓ بوﺑﺣ مﺟ 100
–(مﺟ 100 ﻲﻟاوﺣ) رﺿﺧأ حﺎﻔﺗ ةرﻣﺛ 1
–حﺎﻔﺗ رﯾﺻﻋ مﺟ 220
■ ﺎﮭﻌﯾطﻘﺗو ﺎﮭﻧﻣ روزﺑﻟا ﺔﻟازإو ﺔﺣﺎﻔﺗﻟا رﯾﺷﻘﺗ مﺗﯾ
■ لﻔﺳأ لﺧﻧﻣ ﻲﻓ ﺎﯾوﺻﻟا لوﻓو ءﻻزﺎﺑﻟا فطﺷا
■ ءﺎﻣ ﻲﻓ ﺎﯾوﺻﻟا لوﻓو ءﻻزﺎﺑﻟاو حﺎﻔﺗﻟا ﻊﺿو مﺗﯾ
■ ءﺎﻣﻟا لﻔﺳأ لﺧﻧﻣ ﻲﻓ ﺔﯾﻠﻐﻣﻟا تﺎﻓﺎﺿﻹا فطﺷا
.ىرﺧأ
■ ءﺎﻋو ﻲﻓ حﺎﻔﺗﻟا رﯾﺻﻋو ﺔﯾﮭطﻣﻟا تﺎﻓﺎﺿﻹا ﻊﺿ
.طﻠﺧﻟا
■ ﺢﺑﺻﯾ نأ ﻰﻟإ u ﺔﺟردﻟا ﻰﻠﻋ طﻠﺧﻟا ﻲﻓ رﻣﺗﺳا
ودﺎﻛوﻓﻷا ﺔﻣﯾرﻛ
– صﺎﺟإ ةرﻣﺛ 1 وأ حﺎﻔﺗ ةرﻣﺛ 1
(مﺟ 100 ﻲﻟاوﺣ)
–(مﺟ 70 ﻲﻟاوﺣ) ودﺎﻛوﻓأ ةرﻣﺛ ½
–ءﺎﻣ مﺟ 100
■ صﻠﺧﺗو ﻊطﻗ ﻲﻓ ىرﺛﻣﻛﻟا وأ ﺔﺣﺎﻔﺗﻟا ﻊﯾطﻘﺗﺑ مﻗ
.ىوﻧﻟا نﻣ
■ ﺎﮭﯾﮭطﺑ مﻗو ءﺎﻣﻟا نﻣ ﺔﻠﯾﻠﻗ ﺔﯾﻣﻛ ﻲﻓ ﻊطﻘﻟا ﻊﻘﻧا
.ﺔﯾرط ﺢﺑﺻﺗ نأ ﻰﻟإ رﺎﻧﻟا ﻰﻠﻋ
■.ةاوﻧﻟا نﻣ صﻠﺧﺗو ﻊطﻗ ﻲﻓ ودﺎﻛوﻓﻷا ﻊﯾطﻘﺗﺑ مﻗ
■ ﻲﻓ ودﺎﻛوﻓﻷا ﻊطﻗو ﺔﯾﮭطﻣﻟا تﺎﻓﺎﺿﻹا ﻊﺿ
.طﻠﺧﻟا ءﺎﻋو
■ ﺢﺑﺻﯾ نأ ﻰﻟإ u ﺔﺟردﻟا ﻰﻠﻋ طﻠﺧﻟا ﻲﻓ رﻣﺗﺳا
.ﺎًﯾﻣﯾرﻛو ﺎًﻔﯾﺛﻛ طﯾﻠﺧﻟا ماوﻗ
27
Page 28

ar – 6
لﺎطﻋﻷا ﺔﻟازﻹ ةدﻋﺎﺳﻣ تﺎﻣﯾﻠﻌﺗ
رﺿﺧأ ﻲﺛوﻣﺳ
.ةرﯾﻐﺻ ﻊطﻗ ﻰﻟإ
.u ﺔﺟردﻟا
.u ﺔﺟردﻟا
ﻲﺛوﻣﺳ
.u ﺔﺟردﻟا
ﺔﻗﺎطﻟا بورﺷﻣ
.لﯾﻠﻟا رادﻣ ﻰﻠﻋ
لﺎطﻋﻷا ﺔﻟازﻹ ةدﻋﺎﺳﻣ تﺎﻣﯾﻠﻌﺗ
–(ﺎًﺑﯾرﻘﺗ مﺟ 100) رﺿﺧأ حﺎﻔﺗ ةرﻣﺛ 1
–(ﺎًﺑﯾرﻘﺗ مﺟ 20) ةدﺣاو ﺔﻧوﻣﯾﻟ رﯾﺻﻋ
زﺎﮭﺟﻟا سﺑﺎﻗ جارﺧإ بﺟﯾ لﻠﺧﻟا ﺔﻟازإ ﻲﻓ عورﺷﻟا لﺑﻗ
–رﺿﺧأ بﻧرﻛ مﺟ 20
–سﻓرﻛ نﺎﻘﯾﺳ مﺟ 10
–ةرﺑزﻛ قرو مﺟ 10
.مادﺧﺗﺳﻻا ءﺎﻧﺛأ لﻣﻌﻟا نﻋ فﻗوﺗﯾ وأ لﻣﻌﯾ ﻻ زﺎﮭﺟﻟا
–نﺎﺗﻛ رذﺑ مﺟ 10
–ﺔﻧوﺣطﻣ ﺔﻓرﻗ مﺟ 1
–درﺎﺑ ءﺎﻣ مﺟ 300
■ رﺿﺧﻷا بﻧرﻛﻟاو سﻓرﻛﻟا نﺎﻘﯾﺳو حﺎﻔﺗﻟا ْﻊّطﻗ
■.طﻠﺧﻟا ءﺎﻋو ﻲﻓ ءﺎﻣﻟا نﻣ ًﻼﯾﻠﻗ ﻊﺿ
■ ﻰﻠﻋ ةدﺣاو ﺔﻘﯾﻗد ةدﻣ طﻠﺧﻟا ﻲﻓ رﻣﺗﺳا
■.طﻠﺧﻟا ءﺎﻋو ﻲﻓ ىرﺧﻷا تﺎﻓﺎﺿﻹا لﻛ ﻊﺿ
■ ﻰﻠﻋ ةدﺣاو ﺔﻘﯾﻗد ةدﻣ طﻠﺧﻟا ﻲﻓ رﻣﺗﺳا
–(مﺟ 100 ﻲﻟاوﺣ) ةزوﻣ 1
ﺔﯾﺎﮭﻧ ﻲﻓ لﺎﺻﺗﻻا تﺎﻧﺎﯾﺑ Y .ءﻼﻣﻌﻟا ﺔﻣدﺧ زﻛرﻣﺑ
–جزﺎط رﻣﺣأ لﯾﺑﺟﻧز مﺟ 4
–يدﺎﺑز مﺟ 100
–لﺣﻧ لﺳﻋ مﺟ 30
–نﺑﻟ رﺗﻠﯾﻠﻠﻣ 100
■.ةرﯾﻐﺻ ﻊطﻗ ﻰﻟإ ﺎﮭﻌطﻗو لﯾﺑﺟﻧزﻟاو زوﻣﻟا ْرّﺷﻗ
■.To-Go طﻠﺧﻟا ءﺎﻋو ﻲﻓ تﺎﻓﺎﺿﻹا لﻛ ﻊﺿ
ﺔﯾﻘﺑﺗﻣﻟا لﺋﺎﺳﻟا ﺔﯾﻣﻛ فﺎﺿُﺗ مﺛ ،ًﻻوأ لﺋاوﺳﻟا نﻣ
■ ﻰﻠﻋ ةدﺣاو ﺔﻘﯾﻗد ةدﻣ طﻠﺧﻟا ﻲﻓ رﻣﺗﺳا
–مﺳدﻟا لﯾﻠﻗ بﯾﻠﺣ مﺟ 240
–(مﺟ 50 ﻲﻟاوﺣ) ةزوﻣ ½
–رﻛﺳ مﺟ 30
–وﺎﻛﺎﻛ قوﺣﺳﻣ مﺟ 20
■ ﺎھدﯾﻣﺟﺗ مﺗﯾو ﺔﺑﺳﺎﻧﻣ ﻊطﻘﻟ زوﻣﻟا ةرﻣﺛ ﻊﯾطﻘﺗ مﺗﯾ
■.طﻠﺧﻟا ءﺎﻋو ﻲﻓ تﺎﻓﺎﺿﻹا لﻛ ﻊﺿ
■.u ﺔﺟردﻟا ﻰﻠﻋ ةدﺣاو ﺔﻘﯾﻗد ةدﻣ طﻠﺧﻟا ﻲﻓ رﻣﺗﺳا
.ءﻲﺿﺗ ﻻ (زارطﻟا بﺳﺣﺑ) ﺔﺋﯾﺿﻣﻟا ﺔﻘﻠﺣﻟا
.لﺣﻧا ﮫﻧأ وأ ﺢﯾﺣﺻ لﻛﺷﺑ بﻛرﻣ رﯾﻏ طﻠﺧﻟا ءﺎﻋو
.ﻲﻔﯾظوﻟا ءادﻷا صﺣﻔﻟ اًددﺟﻣ u وأ t
كﻠﺿﻓ نﻣ لﺻﺗﺎﻓ ،لطﻌﻟا ﻰﻠﻋ بﻠﻐﺗﻟا رذﻌﺗ اذإ
.ءﺎﺑرﮭﻛﻟﺎﺑ ﺔﯾذﻐﺗﻟا سﺑﻘﻣ نﻣ
:لﻣﺗﺣﻣﻟا بﺑﺳﻟﻼﻣﺗﺣﻣﻟا بﺑﺳﻟا
.عوﻣﺳﻣ توﺻﺑ تﺑﺛﯾ نأ ﻰﻟإ
دادﻋﻹا ﺔﻧﻣزأو ﺎھدادﻋإ نﻛﻣﻣﻟا
G ةروﺻ Y !ىوﺻﻘﻟا
W !ﺔﺑﺎﺻﻹا رطﺧ ﻰﻟإ ﮫﺑﺗﻧا
لطﻌﻟا
فرﺻﺗﻟا ﺔﯾﻔﯾﻛ
■.ﻲﺋﺎﺑرﮭﻛﻟا سﺑﺎﻘﻟا عزﻧا .رزﻟا كرﺗا
■ ﮫﻧارود مﻛﺣأو ﺢﯾﺣﺻ لﻛﺷﺑ طﻠﺧﻟا ءﺎﻋو بﻛر
■ رزﻟا ﻰﻠﻋ طﻐﺿا .سﺑﻘﻣﻟا ﻲﻓ زﺎﮭﺟﻟا سﺑﺎﻗ لﺧدأ
ﺔﻣﺎھ ﺔظوﺣﻠﻣ
لﯾﻟدﻟا
تﺎﻔﺻو
:تادﺎﺷرإ
– ﺔﯾﻣﻛﻟا فﺻﻧ ﺔﻓﺎﺿإ ﻊﻣ ﺔﺑﻠﺻﻟا تﺎﻧوﻛﻣﻟا طَﻠﺧُﺗ
.دﻌﺑ ﺎﻣﯾﻓ
–.بﺳﺎﻧﻣﻟا طﻠﺧﻟا ءﺎﻋو رﺗﺧا ﺔﻔﺻوﻟا بﺳﺣﺑ
– ىوﺻﻘﻟا تﺎﯾﻣﻛﻟا ةﺎﻋارﻣ ﻰﻠﻋ صرﺣا
28
Page 29

5 – ar
ﻲﻣوﯾﻟا فﯾظﻧﺗﻟاو ﺔﯾﺎﻧﻌﻟا
:تادﺎﺷرإ
– دﻌﺑ روﻔﻟا ﻰﻠﻋ فﯾظﻧﺗﻟا ءارﺟإ لﺿﻓﻷا نﻣ
فﺎﻔﺟ نود لوﺣﯾ اذھ .مادﺧﺗﺳﻻا نﻣ ءﺎﮭﺗﻧﻻا
نﻣ ﺔﻋوﻧﺻﻣﻟا ءازﺟﻷا ضرﻌﺗ نودو تﺎﻔﻠﺧﻣﻟا
لﻌﻔﺑ لﺎﺛﻣﻟا لﯾﺑﺳ ﻰﻠﻋ) ررﺿﻠﻟ ﺔﯾﻋﺎﻧطﺻا نﺋادﻟ
.(تارﺎﮭﺑﻟا ﻲﻓ ةدوﺟوﻣﻟا ﺔﯾرﯾﺛﻷا توﯾزﻟا
– ﻲﻓ تﺎﻔظﻧﻣﻟا دﺣأ ﻊﻣ ءﺎﻣﻟا نﻣ لﯾﻠﻘﻟا ﻊﺿو مﺗﯾ
ناوﺛﻟ u رزﻟا ﻰﻠﻋ طﻐﺿاو غرﻔﻣﻟا طﻠﺧﻟا ءﺎﻋو
.ﺔﻠﯾﻠﻗ
– ﻲﻓ تارﯾﻐﺗ ثدﺣﯾ رزﺟﻟا ﻊﻣ ًﻼﺛﻣ لﻣﺎﻌﺗﻟا دﻧﻋ
نﻛﻣﯾ تارﯾﻐﺗﻟا هذھ ،ﺔﯾﻛﯾﺗﺳﻼﺑﻟا ءازﺟﻷا نوﻟ
.مﺎﻌطﻟا تﯾز تارطﻗ ضﻌﺑ مادﺧﺗﺳﺎﺑ ﺎﮭﺗﻟازإ
ﺔﯾﻔﯾﻛ مﻛﻟ ﺢﺿوﺗ ﺔﻣﺎﻋ ةرظﻧ نودﺟﺗ F ةروﺻﻟا ﻲﻓ
.ﺔﯾدرﻔﻟا ءازﺟﻷا فﯾظﻧﺗ
ﻲﺳﯾﺋرﻟا زﺎﮭﺟﻟا
مﺛ ﺔﺑطر ﺔﻣﻋﺎﻧ شﺎﻣﻗ ﺔﻌطﻘﺑ ﻲﺳﺎﺳﻷا زﺎﮭﺟﻟا ﺢﺳﻣا
.ﺎﮭﻔﻔﺟ
نﯾﻛﺳﻟا لﻣﺎﺣ
نﯾﻛﺳﻟا لﻣﺎﺣ .فﯾظﻧﺗﻟا لﺑﻗ مﺎﻛﺣﻹا رﺻﻧﻋ عزﻧا
روﺑﻧﺻﻟا نﻣ بﺎﺳﻧﻣ ءﺎﻣ تﺣﺗ ﻻإ ﮫﻔﯾظﻧﺗ مﺗﯾ ﻻأ بﺟﯾ
!ءﺎﻣﻟا ﻲﻓ ﮫﻛرﺗ مدﻋ بﺟﯾ .ةﺎﺷرﻓ مادﺧﺗﺳﺎﺑ
H ةروﺻﻟا Y
ءﺎطﻐﺑ طﻠﺧﻟا ءﺎﻋو
نوﺑﺎﺻﻟاو ءﺎﻣﻟﺎﺑ رﺎﯾﻐﻟا ﻊطﻗو طﻠﺧﻟا ءﺎﻋو ْفظﻧ
.ﻲﻧاوﻷا ﺔﻟﺎﺳﻏ ﻲﻓ وأ ﺔﺟﻧﻔﺳإ وأ ﺔﻣﻋﺎﻧ شﺎﻣﻗ ﺔﻌطﻗو
ﺔﻣﻼﺳﻟاو نﺎﻣﻷا ﺔﻣظﻧأ
ءﺎﻔطﻹا ﺔﯾﻟآ /ﺊطﺎﺧﻟا لﯾﻐﺷﺗﻟا دﺿ نﯾﻣﺄﺗﻟا
ﮫﻟﺎﻣﻌﺗﺳاو ﮫﻠﯾﻐﺷﺗ لﺎﻣﻋإ نﻛﻣﻣﻟا نﻣ نوﻛﯾ ﻻ زﺎﮭﺟﻟا
نوﻛﯾو ﮫﻌﺿوﻣ ﻲﻓ ﺎﺗﺑﺛﻣ طﻠﺧﻟا ءﺎﻋو نوﻛﯾ ﺎﻣدﻧﻋ ﻻإ
.فﺎﻘﯾﻹا ردﺻﻣ ﻰﻟإ لوﺻوﻟا ﻰﺗﺣ ﮫﺗرادإ مﺗ دﻓ
اذإ ﺎﻣ ﺔﻟﺎﺣ ﻲﻓ لﯾﻐﺷﺗﻟا نﻋ ﺎﯾﻛﯾﺗﺎﻣوﺗوأ فﻓوﺗﯾ زﺎﮭﺟﻟا
تﺎﻣﯾﻠﻌﺗ» Y .طﻠﺧﻟا ءﺎﻋو لﺣﻧاو لﻣﻌﻟا ءﺎﻧﺛأ ثدﺣ
ar-6 ﺔﺣﻔﺻ رظﻧا «لﺎطﻋﻷا ﺔﻟازﻹ ةدﻋﺎﺳﻣ
!مﺎھ ﮫﯾﺑﻧﺗ
.لﻔﺳأ ﻰﻟإ نﯾﻛﺳﻟا ﻊﻣ طﻠﺧﻟا نﯾﻛﺳ ﻊﺿوﺑ ﺎًﻘﻠطﻣ مﻘﺗ ﻻ
ظﻔﺣﻟا ﻊﺿوﻣ ضرﻌﺗﯾو ررﺿﺗﯾ نأ نﻛﻣﯾ نﯾﻛﺳﻟا
B ةروﺻﻟا Y .شدﺧﻠﻟ
فﯾظﻧﺗﻟاو ﺔﯾﺎﻧﻌﻟا» Y .ءازﺟﻷا لﻛ فﯾظﻧﺗﺑ مﻗ
ar-5 ﺔﺣﻔﺻ رظﻧا «ﻲﻣوﯾﻟا
تﺎﻧوﻛﻣﻟا ﺔﻓﺎﺿإ
E ةروﺻﻟا Y
.1 .زﺎﮭﺟﻟا فﻗوﺗﯾ نأ ﻰﻟإ رظﺗﻧاو رزﻟا ررﺣ
.2 .لﻣﺎﻛﻟا ءﺎطﻐﻟا وأ ﻖﻠﻐﻟا ءﺎطﻏ ﻊﻠﺧا
.3 .تﺎﻧوﻛﻣﻟا ﺔﻓﺎﺿإ
.4 اًددﺟﻣ طﻐﺿاو ﻖﻠﻐﻟا ءﺎطﻏو ءﺎطﻐﻟا بﯾﻛرﺗ دﻋأ
.u وأ t رزﻟا ﻰﻠﻋ
ﻲﻓ ﮫﺗرادﺈﺑ ﻖﻠﻐﻟا ءﺎطﻏ ﻊﻠﺧ مﺗﯾ نأ نﻛﻣﯾ :ﺔظوﺣﻠﻣ
.ﺔﻋﺎﺳﻟا برﺎﻘﻋ هﺎﺟﺗا سﻛﻋ
ﻲﻣوﯾﻟا فﯾظﻧﺗﻟاو ﺔﯾﺎﻧﻌﻟا
تﺎﻘﺣﻠﻣﻟاو تاودﻷا ﻊﯾﻣﺟو زﺎﮭﺟﻟا فﯾظﻧﺗ بﺟﯾ
.اًدﯾﺟ مادﺧﺗﺳا لﻛ دﻌﺑ ﺔﻣدﺧﺗﺳﻣﻟا
W !ﻲﺋﺎﺑرﮭﻛﻟا ﻖﻌﺻﻟا رطﺧ
–.ﻲﺋﺎﺑرﮭﻛﻟا سﺑﺎﻘﻟا لﺻﻓا فﯾظﻧﺗﻟا لﺑﻗ
– ﻻو ﺔﻠﺋﺎﺳ ةدﺎﻣ ﻲﻓ ﻲﺳﺎﺳﻷا زﺎﮭﺟﻟا رﻣﻐﺗ نأ َكﺎﯾإ
.قﺎﺑطﻷا لﺳﻏ ﺔﻧﯾﻛﺎﻣ ﻲﻓ ﺎﮭﻔظﻧﺗ نأ
–.رﺎﺧﺑﻟﺎﺑ فﯾظﻧﺗ زﺎﮭﺟ يأ مادﺧﺗﺳا مدﻋ بﺟﯾ
W !ﺔﺑﺎﺻﻹا رطﺧ ﻰﻟإ ﮫﺑﺗﻧا
.ﺔﯾرﺎﻌﻟا يدﯾﻷﺎﺑ ﺎًﻘﻠطﻣ طﻠﺧﻟا نﯾﻛﺳ سﻣﻠﺗ ﻻ
!مﺎھ ﮫﯾﺑﻧﺗ
– ﻲﻓ لوﺣﻛﻟا ﻰﻠﻋ يوﺗﺣﺗ ﻲﺗﻟا تﺎﻔظﻧﻣﻟا مدﺧﺗﺳﺗ ﻻ
.ﺔﻧﯾﻛﺎﻣﻟا فﯾظﻧﺗ
– ﻲﻓ ﺔﺑﺑدﻣ وأ ةدﺎﺣ ﺔﯾﻧدﻌﻣ ضارﻏأ يأ مدﺧﺗﺳﺗ ﻻ
.فﯾظﻧﺗﻟا
–.ةرﻔﻧﺳ تﺎﻔظﻧﻣ وأ ﺦﻠﺟ شﺎﻣﻗ يأ مدﺧﺗﺳﺗ ﻻ
29
Page 30

ar – 4
مادﺧﺗﺳﻻا
.ﮫﻌﻠﺧﺑ مﻗ مﺛ
!مﺎھ ﮫﯾﺑﻧﺗ
.لﻔﺳأ ﻰﻟإ نﯾﻛﺳﻟا ﻊﻣ طﻠﺧﻟا نﯾﻛﺳ ﻊﺿوﺑ ﺎًﻘﻠطﻣ مﻘﺗ ﻻ
ظﻔﺣﻟا ﻊﺿوﻣ ضرﻌﺗﯾو ررﺿﺗﯾ نأ نﻛﻣﯾ نﯾﻛﺳﻟا
B ةروﺻﻟا Y .شدﺧﻠﻟ
.تﺎﺑورﺷﻣﻟا ةدادﺳ درﻔﺑ مﻗ وأ ﺎﮭﻌﻠﺧاو ةراودﻟا
فﯾظﻧﺗﻟاو ﺔﯾﺎﻧﻌﻟا» Y .ءازﺟﻷا لﻛ فﯾظﻧﺗﺑ مﻗ
ar-5 ﺔﺣﻔﺻ رظﻧا «ﻲﻣوﯾﻟا
ﻲﺟﺎﺟزﻟا طﻠﺧﻟا ءﺎﻋو مادﺧﺗﺳا
D ةروﺻﻟا Y
كﻟذ دﻌﺑ .طﻠﺧﻟا ءﺎﻋو ﻲﻓ ﺎًﻣﺎﻣأ طﻠﺧﻟا نﯾﻛﺳ ﻊﻣ
ﺔﻋﺎﺳﻟا برﺎﻘﻋ هﺎﺟﺗا سﻛﻋ ﻲﻓ نﯾﻛﺳﻟا تﺑﺛﻣ فﻟ
.عوﻣﺳﻣ توﺻﺑ تﺑﺛﯾ نأ ﻰﻟإ
برﺎﻘﻋ هﺎﺟﺗا ﻲﻓ ﮫﺗرادإ ﻲﻓ رﻣﺗﺳاو كرﺣﻣﻟا
.عوﻣﺳﻣ توﺻﺑ تﺑﺛﯾ نأ ﻰﻟإ ﺔﻋﺎﺳﻟا
ﺔﻓﺎﺿإ ﺔﺣﺗﻓ قوﻓ دﯾﻟا ﻊﺿو مدﻋ ةﺎﻋارﻣ
مدﻋ ةﺎﻋارﻣ بﺟﯾ كﻟذﺑ مﺎﯾﻘﻟا دﻧﻋ !تﺎﻧوﻛﻣﻟا
ظﻔﺗﺣا !تﺎﻧوﻛﻣﻟا ﺔﻓﺎﺿإ ﺔﺣﺗﻓ قوﻓ دﯾﻟا ﻊﺿو
ﻰﻟإ لوﺻوﻟا مﺗﯾ نأ ﻰﻟإ ﺎًطوﻐﺿﻣ u وأ t رزﻟﺎﺑ
.بوﻏرﻣﻟا ماوﻘﻟا
.ﻲﺋﺎﺑرﮭﻛﻟا سﺑﺎﻘﻟا
.زﺎﮭﺟﻟا نﻋ ﮫﻠﺻﻓا مﺛ ﺔﻋﺎﺳﻟا برﺎﻘﻋ
.ﮫﻌﻠﺧﺑ مﻗ مﺛ
.10 ﺔﻋﺎﺳﻟا برﺎﻘﻋ نارود هﺎﺟﺗا ﻲﻓ طﻠﺧﻟا نﯾﻛﺳ ردأ
مادﺧﺗﺳﻻا
لﻌﻔﻟﺎﺑ ءﺎﮭﺗﻧﻻا مﺗ دﻗ نوﻛﯾ نأ دﻌﺑ ﻻإ ءﺎﺑرﮭﻛﻟﺎﺑ
،لﻣﻌﻟا ﻲﻓ ءدﺑﻠﻟ ﺔﻣزﻼﻟا تادادﻋﻹا ﻊﯾﻣﺟ نﻣ
ﺢﯾﺣﺻﻟا ﻊﺿوﻟا ﻲﻓ ﺔﺑوﻠطﻣﻟا ةادﻷا بﯾﻛرﺗ دﻌﺑو
.11 .ءﺎطﻐﻟﺎﺑ ءﺎﻋوﻟا ﻖﻠﻏ مﻛﺣأ
.12 ةدادﺳﻟا ةرادﺈﺑ مﻘﻓ برﺷﻟا وأ بﺻﻟا ضرﻐﻟ
.ﻲﺳﯾﺋرﻟا زﺎﮭﺟﻟﺎﺑ ﺎﮭﻠﯾﺻوﺗو
.ﻲﻛﯾﺗﺳﻼﺑﻟا
B ةروﺻﻟا Y .طﻠﺧﻟا نﯾﻛﺳ لﺧاد
.بﻛرﻣ ءﺎطﻐﻟاو ﺎًﻣﺋاد لﻣﺎﻌﺗو بﻛرﻣﻟا
.1 ﮫﺑﻛرو ﺔﯾﻛﯾﺗﺳﻼﺑﻟا ﺔﻘﻠﺣﻟا ﻰﻠﻋ نﯾﻛﺳﻟا تﺑﺛﻣ تﺑﺛ
وأ ﺔﻧﺧﺎﺳ لﺋاوﺳﺑ ﻲﺟﺎﺟزﻟا طﻼﺧﻟا ءﺎﻋو ﺔﺋﺑﻌﺗ دﻧﻋ
ﻎﻟﺎﺑﻟا ىوﺻﻘﻟا ﺔﯾﻣﻛﻟا زوﺎﺟﺗ مدﻋ بﺟﯾ ةوﻏرﻠﻟ ﺔﻧوﻛﻣ
.رﺗﻟ 0.3 ﺎھردﻗ
.2 .طﻠﺧﻟا ءﺎﻋو بﻠﻗ مﺗﯾ
.3 ﺔﻠﺗﻛﺑ ﺔﯾﻧﻌﻣﻟا تاوﺟﻔﻟا ﻲﻓ طﻠﺧﻟا ءﺎﻋو بﻛر
ﺔﻋﺎطﻘﻟﺎﺑ وأ To-Go طﻠﺧﻟا ءﺎﻋو ﻊﻣ لﻣﺎﻌﺗﻟا
.4 .طﻠﺧﻟا ءﺎﻋو ﻲﻓ ﺎﮭﺑ بوﻏرﻣﻟا تﺎﻓﺎﺿﻹا ﻊﺿ
.5 .ﻖﻠﻐﻟا ءﺎطﻏو ءﺎطﻐﻟا بﻛر
C ةروﺻﻟا Y
.6 .سﺑﻘﻣﻟا ﻲﻓ زﺎﮭﺟﻟا سﺑﺎﻗ لﺧدأ
.7 بﺟﯾ كﻟذﺑ مﺎﯾﻘﻟا دﻧﻋ .دﯾﻟا ةوﻘﺑ ءﺎطﻐﻟا تﺑﺛ
كﻟذ دﻌﺑ .طﻠﺧﻟا ءﺎﻋو ﻲﻓ ﺎًﻣﺎﻣأ طﻠﺧﻟا نﯾﻛﺳ ﻊﻣ
ﺔﻋﺎﺳﻟا برﺎﻘﻋ هﺎﺟﺗا سﻛﻋ ﻲﻓ نﯾﻛﺳﻟا تﺑﺛﻣ فﻟ
.عوﻣﺳﻣ توﺻﺑ تﺑﺛﯾ نأ ﻰﻟإ
برﺎﻘﻋ هﺎﺟﺗا ﻲﻓ ﮫﺗرادإ ﻲﻓ رﻣﺗﺳاو كرﺣﻣﻟا
.8 عزﻧا .زﺎﮭﺟﻟا فﻗوﺗﯾ نأ ﻰﻟإ رظﺗﻧاو رزﻟا ررﺣ
.عوﻣﺳﻣ توﺻﺑ تﺑﺛﯾ نأ ﻰﻟإ ﺔﻋﺎﺳﻟا
.9 نارودﻟ سﻛﺎﻌﻣﻟا هﺎﺟﺗﻻا ﻲﻓ طﻼﺧﻟا ءﺎﻋو ردأ
ماوﻘﻟا ﻰﻟإ لوﺻوﻟا مﺗﯾ نأ ﻰﻟإ ﺎًطوﻐﺿﻣ u
.10 .ءﺎطﻐﻟا جارﺧإ
.11 .ﺔطوﻠﺧﻣﻟا ةدﺎﻣﻟا ءلﻣ رﯾﻏ
.12 ﺔﻋﺎﺳﻟا برﺎﻘﻋ نارود هﺎﺟﺗا ﻲﻓ طﻠﺧﻟا نﯾﻛﺳ ردأ
.بوﻏرﻣﻟا
.ﻲﺋﺎﺑرﮭﻛﻟا سﺑﺎﻘﻟا
.زﺎﮭﺟﻟا نﻋ ﮫﻠﺻﻓا مﺛ ﺔﻋﺎﺳﻟا برﺎﻘﻋ
W !ﺔﺑﺎﺻﻹا رطﺧ ﻰﻟإ ﮫﺑﺗﻧا
– ﺔﯾذﻐﺗﻟا سﺑﻘﻣ ﻲﻓ زﺎﮭﺟﻟا سﺑﺎﻗ لﺎﺧدإ مدﻋ بﺟﯾ
– طﻼﺧﻟا ءﺎﻋو ﻲﻓ (م 50<) ﺔﻧﺧﺎﺳ ﺔﯾذﻏأ ﻊﺿﺗ ﻻ
– ﻰﻟإ كدﯾ دﻣﺗ ﻻو نﯾﻛﺳﻟا تﺑﺛﻣ ﻊﻣ صرﺣﺑ لﻣﺎﻌﺗ
– ﻲﺟﺎﺟزﻟا طﻠﺧﻟا ءﺎﻋو ﻲﻓ كدﯾ دﻣﺑ ﺎًﻘﻠطﻣ مﻘﺗ ﻻ
W !قورﺣﺑ ﺔﺑﺎﺻﻹا رطﺧ
■ ﻲﻘﻓأ لﯾﻐﺷﺗ ﺢطﺳ ﻰﻠﻋ ﻲﺳﯾﺋرﻟا زﺎﮭﺟﻟا ﻊﺿ
.تﺑﺎﺛ
■ .لﻣﺎﻛﻟﺎﺑ ءﺎﺑرﮭﻛﻟا لﺑﺎﻛ درﻓا
.1 .طﻠﺧﻟا ءﺎﻋو ﻲﻓ ﺎﮭﺑ بوﻏرﻣﻟا تﺎﻓﺎﺿﻹا ﻊﺿ
.2 ﮫﺑﻛرو ﺔﯾﻛﯾﺗﺳﻼﺑﻟا ﺔﻘﻠﺣﻟا ﻰﻠﻋ نﯾﻛﺳﻟا تﺑﺛﻣ تﺑﺛ
.3 .طﻠﺧﻟا ءﺎﻋو بﻠﻗ مﺗﯾ
.4 ﺔﻠﺗﻛﺑ ﺔﯾﻧﻌﻣﻟا تاوﺟﻔﻟا ﻲﻓ طﻠﺧﻟا ءﺎﻋو بﻛر
.5 .سﺑﻘﻣﻟا ﻲﻓ زﺎﮭﺟﻟا سﺑﺎﻗ لﺧدأ
.6 وأ t رزﻟﺎﺑ ظﻔﺗﺣا .دﯾﻟا ةوﻘﺑ طﻠﺧﻟا ءﺎﻋو تﺑﺛ
.7 عزﻧا .زﺎﮭﺟﻟا فﻗوﺗﯾ نأ ﻰﻟإ رظﺗﻧاو رزﻟا ررﺣ
.8 نارودﻟ سﻛﺎﻌﻣﻟا هﺎﺟﺗﻻا ﻲﻓ طﻼﺧﻟا ءﺎﻋو ردأ
.9 .طﻠﺧﻟا ءﺎﻋو بﻠﻗ مﺗﯾ
30
Page 31

3 – ar
ﺔﺋﯾﺿﻣﻟا ﺔﻘﻠﺣﻟا
تﺎﻘﯾﺑطﺗﻠﻟ ﺔﻣﻣﺻﻣ (زارطﻟا بﺳﺣﺑ) طﻠﺧﻟا ﺔﯾﻋوأ
:ﺔﻔﻠﺗﺧﻣﻟا
طﻼﺧﻟا ءﺎﻋو مادﺧﺗﺳﻻا
G G G
G G G
G G G
G G G
H H G
H H G
H H G
H H H
نﻛﻣﻣﻟا ىوﺻﻘﻟا تﺎﯾﻣﻛﻟا ةﺎﻋارﻣ ﻰﻠﻋ صرﺣا
G ةروﺻ Y !ىوﺻﻘﻟا دادﻋﻹا ﺔﻧﻣزأو ﺎھدادﻋإ
ﺔﯾﻏرﺗو طﻠﺧ،لﺋاوﺳﻟا ﺔﯾﻏرﺗو طﻠﺧ
لﺋاوﺳﻟا
بﺎﺷﻋﻷا تاورﺿﺧﻟا مرﻓو تﯾﺗﻔﺗ
لﺻﺑﻟاو تاورﺿﺧﻟاو ﺔﺋﯾﻧﻟا ﮫﻛاوﻔﻟاو
نﺑﺟو تارﺳﻛﻣﻟاو ﻲﻧادوﺳﻟا لوﻔﻟاو
ﺔﺗﻻوﻛوﺷﻟاو نازﯾﻣرﺎﺑﻟا
ﮫﻛاوﻓو ﺞﻠﺛ تﺎﺑﻌﻛﻣ طﻠﺧو تﯾﺗﻔﺗ
ةدﻣﺟﻣ
تﺎﺑورﺷﻣﻟاو ﮫﻛاوﻔﻟا رﺋﺎﺻﻋ طﻠﺧ
ىرﺧﻷا
زﯾﻧوﯾﺎﻣﻟا دادﻋإ
صوﺻﻟاو ءﺎﺳﺣﻠﻟ ﮫﯾروﺑ لﻣﻋ
ﺔﻧﺧﺎﺳﻟا تﺎﻓﺎﺿﻹا ﺔﺟﻟﺎﻌﻣو
لﻣﻌﻟا ءﺎﻧﺛأ تﺎﻓﺎﺿﻹا ءلﻣ لﻣﻛﺗﺳا
فﯾوورﻛﯾﺎﻣﻟا ﻲﻓ مادﺧﺗﺳﻻا
ةرﻣ لوﻷ مادﺧﺗﺳﻻا لﺑﻗ
ﮫﺗﺎﯾوﺗﺣﻣ جارﺧإ بﺟﯾ ،دﯾدﺟﻟا زﺎﮭﺟﻟا مادﺧﺗﺳا لﺑﻗ
.ﺎﮭﺻﺣﻓ مﺛ ﺎﮭﻔﯾظﻧﺗو لﻣﺎﻛﻟﺎﺑ
!مﺎھ ﮫﯾﺑﻧﺗ
!اًررﺿﺗﻣ اًزﺎﮭﺟ لﻐﺷﺗ نأ َكﺎﯾإ
.ةوﺑﻌﻟا
A ةروﺻﻟا Y .ﺔظوﺣﻠﻣ
رظﻧا «ﻲﻣوﯾﻟا فﯾظﻧﺗﻟاو ﺔﯾﺎﻧﻌﻟا» Y .ﻲﻟوﻷا
ar-5 ﺔﺣﻔﺻ
ﺔﻋوﻣﺟﻣ لﺧاد اًدوﺟوﻣ تﺎﻧوﻛﻣﻟا دﺣأ نﻛﯾ مﻟ اذإ
نﻛﯾ مﻟ اذإ:ءﻼﻣﻌﻟا ﺔﻣدﺧ لﺑﻗ نﻣ ﮫﺑﻠط كﻧﻛﻣﯾ ،دﯾروﺗﻟا
كﻧﻛﻣﯾ ،دﯾروﺗﻟا ﺔﻋوﻣﺟﻣ لﺧاد اًدوﺟوﻣ تﺎﻧوﻛﻣﻟا دﺣأ
:ءﻼﻣﻌﻟا ﺔﻣدﺧ لﺑﻗ نﻣ ﮫﺑﻠط
بﻠطﻟا مﻗر تﺎﯾﻟﺎﻣﻛﻟا
To-Go طﻼﺧﻟا ءﺎﻋو
12012850 دوﺳأ
12012851 ضﯾﺑأ
12012853 نﻛاد يدﺎﻣر
ﺔﻋﺎطﻘﻟﺎﺑ طﻼﺧﻟا ءﺎﻋو
12012855 دوﺳأ
12012857 ضﯾﺑأ
ﻲﺟﺎﺟزﻟا طﻠﺧﻟا ءﺎﻋو
12012847 دوﺳأ
12012848 ضﯾﺑأ
ةدﺎﻔﺗﺳﻻا كﻧﻛﻣﯾ ﺔﻋﺎطﻘﻟﺎﺑ طﻼﺧﻟا ءﺎﻋو ﺔطﺳاوﺑ
ةﺎﻋارﻣ ﻰﻠﻋ صرﺣا .زﺎﮭﺟﻠﻟ لﻣﺎﻛﻟا ءادﻷا نﻣ
دادﻋﻹا ﺔﻧﻣزأو ﺎھدادﻋإ نﻛﻣﻣﻟا ىوﺻﻘﻟا تﺎﯾﻣﻛﻟا
G ةروﺻ Y !ىوﺻﻘﻟا
ﺔﺋﯾﺿﻣﻟا ﺔﻘﻠﺣﻟا
!مﺎھ
■ نﻣ تﺎﯾﻟﺎﻣﻛﻟا ءازﺟأو ﻲﺳﯾﺋرﻟا زﺎﮭﺟﻟا جرﺧأ
■.ةدوﺟوﻣﻟا فﯾﻠﻐﺗﻟا ةدﺎﻣ ْعزﻧا
■ رارﺿأ دوﺟو نﻣو ءازﺟﻷا ﻊﯾﻣﺟ لﺎﻣﺗﻛا نﻣ دﻛﺄﺗ
■ مادﺧﺗﺳﻻا لﺑﻗ اًدﯾﺟ ﺎﮭﻔﻔﺟ مﺛ ءازﺟﻷا ﻊﯾﻣﺟ فظﻧ
ءازﺟﻷا لﻛ بﯾﻛرﺗ مﺗ ﺎﻣ اذإ ﺔﺋﯾﺿﻣﻟا ﺔﻘﻠﺣﻟا ءﻲﺿﺗ
ﺔﻘﻠﺣﻟا ءﻲﺿﺗ .زﺎﮭﺟﻟا لﯾﺻوﺗ مﺗو ﺢﯾﺣﺻ لﻛﺷﺑ
.مادﺧﺗﺳﻻا ءﺎﻧﺛأ ﺎًﺿﯾأ ﺔﺋﯾﺿﻣﻟا
كﯾﺗﺳﻼﺑ وھ نﺎﺗﯾرﺗﻟا .نﺎﺗﯾرﺗﻟا نﻣ ﺔﻋوﻧﺻﻣ
وأ قاذﻣﻟا ﻰﻠﻋ رﯾﺛﺄﺗ ﮫﻟ سﯾﻟو رﺳﻛﻟا دﺿ نﻣؤﻣ
.ﺔﯾرارﺣﻟا تارﯾﺛﺄﺗﻠﻟ موﺎﻘﻣو ﺎًﯾرارﺣ
زارطﻟا بﺳﺣ ﻰﻠﻋ
طﻼﺧﻟا ءﺎﻋو
:تادﺎﺷرإ
– ﺔﻋﺎطﻘﻟﺎﺑ طﻠﺧﻟا ءﺎﻋو To Go طﻠﺧﻟا ءﺎﻋو
.ﺔﺣﺋارﻟا
– نﻣآ جﺎﺟز نﻣ عوﻧﺻﻣ ﻲﺟﺎﺟزﻟا طﻠﺧﻟا ءﺎﻋو
31
Page 32

ar – 2
نﺎﻣﻷا تادﺎﺷرإ
ﺔﯾﻠﺻﻷا تﺎﯾﻟﺎﻣﻛﻟاو ءازﺟﻷا ﻻإ لﻣﻌﺗﺳﺗ ﻻ .بﯾﻛرﺗﻟا لﻣﺎﻛ ﻊﺿو ﻲﻓ وھو ﻻإ طﻼﺧﻟﺎﺑ لﻣﻌﺗ ﻻ
دﻧﻋ ﺎًﺻﯾرﺣ نﻛ .ﻲﻛﯾﺗﺳﻼﺑﻟا طﻼﺧﻟا ءﺎﻋو ﻲﻓ (م 50<) ﺔﻧﺧﺎﺳ ﺔﯾذﻏأ ﻊﺿﺗ ﻻ .زﺎﮭﺟﻟا لﯾﻐﺷﺗﻟ
.فﯾظﻧﺗﻟا دﻧﻋ كﻟذﻛو ءﺎﻋوﻟا غارﻓإ دﻧﻋو ةدﺎﺣﻟا نﯾﻛﺎﻛﺳﻟا ﻊﻣ لﻣﺎﻌﺗﻟا
W !قورﺣﺑ ﺔﺑﺎﺻﻹا رطﺧ
ءلﻣﻟا لﺎﻣﻛﺗﺳا ﺔﺣﺗﻓ نﻣ ةرﺧﺑأ جرﺧﺗ ﻲﺟﺎﺟزﻟا طﻼﺧﻟا ءﺎﻋو ﻲﻓ نﺧﺎﺳ طﯾﻠﺧ رﯾﺿﺣﺗ ءﺎﻧﺛأ
مﺎﯾﻘﻟا دﻧﻋ .مﺎﻛﺣﺈﺑ نﯾدﯾﻟا ىدﺣﺈﺑ ءﺎطﻌﻟﺎﺑ كﺎﺳﻣﻹا ﺎﻣﺋاد بﺟﯾ لﻣﻌﻟا ءﺎﻧﺛأ ﻲﻓ .ءﺎطﻐﻟﺎﺑ ةدوﺟوﻣﻟا
ﻲﺟﺎﺟزﻟا طﻼﺧﻟا ءﺎﻋو ﺔﺋﺑﻌﺗ دﻧﻋ !تﺎﻧوﻛﻣﻟا ﺔﻓﺎﺿإ ﺔﺣﺗﻓ قوﻓ دﯾﻟا ﻊﺿو مدﻋ ةﺎﻋارﻣ بﺟﯾ كﻟذﺑ
.رﺗﻟ 0.3 ﺎھردﻗ ﻎﻟﺎﺑﻟا ىوﺻﻘﻟا ﺔﯾﻣﻛﻟا زوﺎﺟﺗ مدﻋ بﺟﯾ ةوﻏرﻠﻟ ﺔﻧوﻛﻣ وأ ﺔﻧﺧﺎﺳ لﺋاوﺳﺑ
W !مﺎھ
لﻛ دﻌﺑ اًدﯾﺟ زﺎﮭﺟﻟا فﯾظﻧﺗ بﺟﯾ .فﯾوورﻛﯾﺎﻣﻟا نرﻓ ﻲﻓ مادﺧﺗﺳﻼﻟ ﺔﺻﺻﺧﻣ رﯾﻏ طﻠﺧﻟا ءﺎﻋو
ar-5 ﺔﺣﻔﺻ رظﻧا «ﻲﻣوﯾﻟا فﯾظﻧﺗﻟاو ﺔﯾﺎﻧﻌﻟا» Y .مادﺧﺗﺳﻻا مدﻋ ةرﺗﻓ لوط دﻌﺑ وأ ﮫﻟ مادﺧﺗﺳا
ﺔﻣﺎﻋ ةرظﻧ
A ةروﺻﻟا Y
ضﻔﺧﻧﻣ لﻣﻋ تﺎﻔﻟ ددﻋ = t
لﺎﻋ لﻣﻋ تﺎﻔﻟ ددﻋ = u
«max»
زارطﻟا بﺳﺣ ﻰﻠﻋ *
زﺎﮭﺟﻟا اذﮭﻟ مﻛﺋارﺷ ﻰﻠﻋ ﻲﻧﺎﮭﺗﻟا قدﺻﺄﺑ مﻛﻟ مدﻘﺗﻧ
نﻣ دﯾزﻣﻟا نودﺟﺗو .Bosch ﺔﻛرﺎﻣ نﻣ دﯾدﺟﻟا
صﺎﺧﻟا تﻧرﺗﻧﻹا ﻊﻗوﻣ ﻲﻓ ﺎﻧﺗﺎﺟﺗﻧﻣ لوﺣ تﺎﻣوﻠﻌﻣﻟا
1 كرﺣﻣﻟا ﺔﻠﺗﻛ / ﻲﺳﯾﺋرﻟا زﺎﮭﺟﻟا
a لﯾﻐﺷﺗﻟا رارزأ
.ﺎﻧﺑ
تﺎﯾوﺗﺣﻣﻟا
b *(ﺔﺋﯾﺿﻣ ﺔﻘﻠﺣ) لﯾﻐﺷﺗﻟا رﺷؤﻣ
c ةرادإ ةدﺣو
d ءﺎﺑرﮭﻛﻟا لﺑﺎﻛ
a نﺎﺗﯾرﺗﻟا نﻣ ءﺎﻋو
b ﻰﺻﻗﻷا دﺣﻟا ﺔﻣﻼﻋ ﮫﯾﻠﻋ ﺞﯾردﺗ
c برﺷ ﺔﺣﺗﻔﺑ ءﺎطﻏ
d تﺎﺑورﺷﻣﻟا ةدادﺳ
a نﺎﺗﯾرﺗﻟا نﻣ ءﺎﻋو
b «max» ﻰﺻﻗﻷا دﺣﻟا ﺔﻣﻼﻋ ﮫﯾﻠﻋ ﺞﯾردﺗ
c برﺷ ﺔﺣﺗﻔﺑ ءﺎطﻏ
d ةراود ةدادﺳ
a ﺎًﯾرارﺣ نﻣﻵا جﺎﺟز نﻣ عوﻧﺻﻣ ءﺎﻋو
b ءلﻣ لﺎﻣﻛﺗﺳا ﺔﺣﺗﻔﺑ ءﺎطﻏ
c ﻖﻠﻐﻟا ةدادﺳ
ar-1 .....................تﺎﻣﯾﻠﻌﺗﻠﻟ ﻖﺑﺎطﻣﻟا لﺎﻣﻌﺗﺳﻻا
ar-1 ................................... نﺎﻣﻷا تادﺎﺷرإ
ar-2 .........................................ﺔﻣﺎﻋ ةرظﻧ
ar-3 .................................... ﺔﺋﯾﺿﻣﻟا ﺔﻘﻠﺣﻟا
2 نﺣط نﯾﻛﺳ ﻊﻣ نﯾﻛﺳ تﺑﺛﻣ
ar-3 ...................................... طﻼﺧﻟا ءﺎﻋو
3 * To-Go طﻼﺧﻟا ءﺎﻋو
ar-3 .......................... ةرﻣ لوﻷ مادﺧﺗﺳﻻا لﺑﻗ
ar-4 .......................................... مادﺧﺗﺳﻻا
ar-5 ..........................ﻲﻣوﯾﻟا فﯾظﻧﺗﻟاو ﺔﯾﺎﻧﻌﻟا
ar-5 ............................ﺔﻣﻼﺳﻟاو نﺎﻣﻷا ﺔﻣظﻧأ
ar-6 .................لﺎطﻋﻷا ﺔﻟازﻹ ةدﻋﺎﺳﻣ تﺎﻣﯾﻠﻌﺗ
ar-6 ............................................تﺎﻔﺻو
4 * ﺔﻋﺎطﻘﻟﺎﺑ طﻼﺧﻟا ءﺎﻋو
ar-7 ............................... زﺎﮭﺟﻟا نﻣ صﻠﺧﺗﻟا
ar-7 ....................................نﺎﻣﺿﻟا طورﺷ
5 * ﻲﺟﺎﺟزﻟا طﻠﺧﻟا ءﺎﻋو
32
Page 33

1 – ar
تﺎﻣﯾﻠﻌﺗﻠﻟ ﻖﺑﺎطﻣﻟا لﺎﻣﻌﺗﺳﻻا
تﺎﻣﯾﻠﻌﺗﻠﻟ ﻖﺑﺎطﻣﻟا لﺎﻣﻌﺗﺳﻻا
زﺎﮭﺟﻟا لﻘﻧ دﻧﻋ !ﺎﮭﯾﻠﻋ ظﺎﻔﺣﻟا مﺛ كﻟذ ﻰﻠﻋ ًءﺎﻧﺑ فرﺻﺗﻟاو ،ﺔﯾﺎﻧﻌﺑ تادﺎﺷرﻹا هذھ ُةءارﻗ ﻰَﺟرُﯾ
.ﮫﻌﻣ لﯾﻟدﻟا اذھ قﺎﻓرإ بﺟﯾ رﯾﻐﻠﻟ
ﺞﺗﻧﻣ لﻣﺣﺗ مدﻋ ﮫﯾﻠﻋ بﺗرﺗﯾ زﺎﮭﺟﻠﻟ ﺢﯾﺣﺻﻟا مادﺧﺗﺳﻻﺎﺑ ﺔﺻﺎﺧﻟا تﺎﻣﯾﻠﻌﺗﻟا ﻖﯾﺑطﺗﺑ مازﺗﻟﻻا مدﻋ
.كﻟذ ءارﺟ نﻣ ﺔﺟﺗﺎﻧﻟا رارﺿﻷا نﻋ ﺔﯾﻟوﺋﺳﻣ يﻷ زﺎﮭﺟﻟا
تﺎﯾﻣﻛﻟا ﺔﺟﻟﺎﻌﻣﻟ ﻻإ زﺎﮭﺟﻟا مادﺧﺗﺳا مدﻋ بﺟﯾ .طﻘﻓ ﻲﻟزﻧﻣﻟا مادﺧﺗﺳﻼﻟ صﺻﺧﻣ زﺎﮭﺟﻟا اذھ
.ﺔﯾﻟزﻧﻣﻟا ضارﻏﻷا ﻲﻓ ةدﺎﺗﻌﻣﻟا لﯾﻐﺷﺗﻟا تارﺗﻔﻟو
رﺎﺿﺧﻟاو ﮫﻛاوﻔﻟا ﻊﯾطﻘﺗ/نﺣطﻟو ،ﺔﺑﻠﺻﻟا ﮫﺑﺷ وأ ﺔﻠﺋﺎﺳﻟا ﺔﯾﺋاذﻐﻟا داوﻣﻟا طﻠﺧﻟ بﺳﺎﻧﻣ زﺎﮭﺟﻟا اذھ
ﻻ .ﺞﻠﺛﻟا تﺎﺑﻌﻛﻣ وأ (ﻼﺛﻣ ﺔﮭﻛﺎﻔﻟﺎﻛ) ةدﻣﺟﻣﻟا ﺔﻣﻌطﻷا ﻊﯾطﻘﺗو ،ﺔﻣﻌطﻷا عاوﻧأ سرﮭﻟو ،ﺊﯾﻧﻟا
.ىرﺧأ رﺻﺎﻧﻋ وأ مﺎﺳﺟأ وأ ءﺎﯾﺷأ يأ ﺔﺟﻟﺎﻌﻣ ﻲﻓ زﺎﮭﺟﻟا مادﺧﺗﺳﺎﺑ ﺢﻣﺳﯾ
وأ ﺔﯾﻧﺎﻣﺳﺟﻟا تاردﻘﻟا ﻲﻓ صﻘﻧ نﻣ نوﻧﺎﻌﯾ نﯾذﻟا صﺎﺧﺷﻷا لَﺑِﻗ نﻣ زﺎﮭﺟﻟا اذھ مادﺧﺗﺳﺎﺑ ﺢﻣﺳُﯾ
مﮭﺗﺑﻗارﻣ مﺗﯾ نأ ﺔطﯾرﺷ ﺔﻓرﻌﻣﻟا وأ ةرﺑﺧﻟا ﻲﻓ روﺻﻗ مﮭﯾدﻟ نﯾذﻟا صﺎﺧﺷﻷا وأ ﺔﯾﻠﻘﻌﻟا وأ ﺔﯾﺳﺣﻟا
ﺎﻣأ .كﻟذﺑ ﺔطﺑﺗرﻣﻟا رﺎطﺧﻸﻟ مﮭﻛاردإ نﻣ دﻛﺄﺗﻟا ﻊﻣ زﺎﮭﺟﻠﻟ نﻣﻵا مادﺧﺗﺳﻻا ﺔﯾﻔﯾﻛ ﻰﻟإ مﮭﮭﯾﺟوﺗ وأ
ﻻ .زﺎﮭﺟﻟا لﯾﻐﺷﺗﺑ مﮭﻟ ﺢَﻣﺳُﯾ ﻻو ،ﺔﯾﺋﺎﺑرﮭﻛﻟا ﮫﺗﻼﯾﺻوﺗ نﻋو زﺎﮭﺟﻟا نﻋ مھدﺎﻌﺑإ بﺟﯾﻓ لﺎﻔطﻷا
.لﺎﻔطﻷا ﺎﮭﺑ موﻘﯾ نﺄﺑ ﺢﻣﺳﯾ ﻻ لﻣﻌﺗﺳﻣﻟا ﺔﻧﺎﯾﺻو فﯾظﻧﺗﻟا لﺎﻣﻋأ .زﺎﮭﺟﻟﺎﺑ ثﺑﻌﻟا لﺎﻔطﻸﻟ زوﺟﯾ
نﺎﻣﻷا تادﺎﺷرإ
W !ﻖﯾرﺣﻟا رطﺧو ﻲﺋﺎﺑرﮭﻛﻟا ﻖﻌﺻﻟا رطﺧ
نﻣ لﻗأ عﺎﻔﺗرا ﻰﻠﻋو ،ﺔﻓرﻐﻟا ةرارﺣ ﺔﺟرد ﻲﻓو ﺔﯾﻠﺧادﻟا نﻛﺎﻣﻷا ﻲﻓ ىوﺳ زﺎﮭﺟﻟا مدﺧﺗﺳﺗ ﻻ
طﻘﻓ ﻲﺋﺎﺑرﮭﻛﻟا رﺎﯾﺗﻟﺎﺑ زﺎﮭﺟﻟا لﯾﻐﺷﺗو لﯾﺻوﺗ يرﺟﯾ .رﺣﺑﻟا ﺢطﺳ ىوﺗﺳﻣ قوﻓ رﺗﻣ 2000
نﻛﺗ مﻟ اذإ طﻘﻓ زﺎﮭﺟﻟا مادﺧﺗﺳا يرﺟﯾ ﺎﻣﻛ .ﺔﯾﻧﻔﻟا تﺎﻔﺻاوﻣﻟا ﺔﺣوﻟ ﻰﻠﻋ ﺔﺣﺿوﻣﻟا تﺎﻧﺎﯾﺑﻠﻟ ًﺎﻘﺑط
تﺎﺣﻼﺻإ ءارﺟﺈﺑ ﺢَﻣﺳُﯾ ﻻ .ﮫﺑ صﺎﺧﻟا ﻲﺋﺎﺑرﮭﻛﻟا لﯾﺻوﺗﻟا كﻠﺳﺑ وأ ﮫﺑ تﻘﺣﻟ دﻗ ٌرارﺿأ كﺎﻧھ
صﺎﺧﻟا ءﻼﻣﻌﻟا ﺔﻣدﺧ زﻛرﻣ لَﺑِﻗ نﻣ ﻻإ ،فﻟﺎﺗﻟا ﻲﺋﺎﺑرﮭﻛﻟا لﯾﺻوﺗﻟا كﻠﺳ لادﺑﺗﺳﺎﻛ ،زﺎﮭﺟﻟا ﻰﻠﻋ
ﺔﻧﺧﺎﺳ ءازﺟأ ﻊﻣ سﻣﻼﺗﯾ ﻲﺋﺎﺑرﮭﻛﻟا لﯾﺻوﺗﻟا كﻠﺳ لﻌﺟﺗ ﻻ .رطﺎﺧﻣﻟا بﻧﺟﺗ لﺟأ نﻣ كﻟذو ،ﺎﻧﺑ
لﺛﻣ ،ﮫﻧﻣ برﻘﻟﺎﺑ وأ نﺧﺎﺳ ﺢطﺳ ﻰﻠﻋ تﺎﯾﻟﺎﻣﻛﻟاو زﺎﮭﺟﻟا ﻊﺿﺗ ﻻ .ةدﺎﺣ فاوﺣ ﻰﻠﻋ ﮫﺑﺣﺳﺗ ﻻو
ﻻ .قﺎﺑطﻷا لﺳﻏ ﺔﻟآ ﻲﻓ ﮫﻌﺿﺗ ﻻو ،هﺎﯾﻣﻟا ﻲﻓ اًدﺑأ ﻲﺳﺎﺳﻷا زﺎﮭﺟﻟا رﻣﻐﺗ ﻻ .دﻗوﻣﻟا ﺔﺣﯾﻔﺻ
.نﺎﺗﻠﺗﺑﻣ كادﯾو زﺎﮭﺟﻟا لﻣﻌﺗﺳﺗ ﻻ .رﺎﺧﺑﻟﺎﺑ فﯾظﻧﺗﻟا زﺎﮭﺟ مدﺧﺗﺳﺗ
لﺑﻗ وأ ،فارﺷﻹا مادﻌﻧا ﺔﻟﺎﺣ ﻲﻓ ،مادﺧﺗﺳا لﻛ دﻌﺑ ﺎًﻣود ﺔﻗﺎطﻟا ردﺻﻣ نﻣ زﺎﮭﺟﻟا لﺻﻓ بﺟﯾ
.زﺎﮭﺟﻟا ﻰﻠﻋ ءﺎطﺧأ روﮭظ ﺔﻟﺎﺣ ﻲﻓ وأ ،فﯾظﻧﺗﻟا وأ ،كﯾﻛﻔﺗﻟا وأ ،ﻊﯾﻣﺟﺗﻟا
W !ﺔﺑﺎﺻﻹا رطﺧ ﻰﻟإ ﮫﺑﺗﻧا
ﺎًﻘﻠطﻣ مﻘﺗ ﻻ .طﯾﻠﺧ دوﺟو نود ﮫﻠﯾﻐﺷﺗﺑ مﻘﺗ ﻻ !ﮫﻠﯾﻐﺷﺗ ءﺎﻧﺛأ ﺎًﻣﺋاد زﺎﮭﺟﻟا ﺔﺑﻗارﻣ ﻰﻠﻋ صرﺣا
زﺎﮭﺟﻠﻟ رﺷﺎﺑﻣﻟا مادﺧﺗﺳﻻا دﻌﺑ .ﺔﯾﺋاذﻐﻟا داوﻣﻟا ﻊﻧُﺻﻟ مزﻻ وھ ﺎﻣﻣ لوطأ ةدﻣﻟ اًرﺋاد زﺎﮭﺟﻟا كرﺗﺑ
ﻲﻓ نﯾﻛﺳﻟا رﻣﺗﺳﺗ زﺎﮭﺟﻟا نﻋ ﻲﺋﺎﺑرﮭﻛﻟا رﺎﯾﺗﻟا لﺻﻓ دﻌﺑ .ةرادﻹا ةدﺣو فﻘﺗ نأ ﻰﻟإ رظﺗﻧا
مزﻠﯾ لﯾﻐﺷﺗﻟا ءﺎﻧﺛأ ﺎﮭﻛﯾرﺣﺗ مﺗﯾ ﺔﯾﻓﺎﺿإ ءازﺟأ وأ ﺔﯾﻠﯾﻣﻛﺗ تﺎﻘﺣﻠﻣ رﯾﯾﻐﺗ لﺑﻗ .ةرﯾﺻﻗ ًةرﺗﻓ نارودﻟا
لﺎﺣ يﺄﺑ مﺎﯾﻘﻟا مدﻋ بﺟﯾ .ﻲﺋﺎﺑرﮭﻛﻟا رﺎﯾﺗﻟﺎﺑ ﺔﯾذﻐﺗﻟا ﺔﻛﺑﺷ نﻋ ﮫﻠﺻﻓو زﺎﮭﺟﻟا لﯾﻐﺷﺗ فﺎﻘﯾإ ﺎﻣﺋاد
.زﺎﮭﺟﻟا ﻰﻠﻋ ﺎًﺑﻛرﻣ نوﻛﯾ ﺎﻣدﻧﻋ طﻼﺧﻟا ءﺎﻋو ﻲﻓ دﯾﻟا لﺎﺧدﺈﺑ لاوﺣﻷا نﻣ
33
Page 34

Kundendienst – Customer Service
DE Deutschland, Germany
BSH Hausgeräte Service GmbH
Zentralwerkstatt für kleine Hausgeräte
Trautskirchener Strasse 6-8
90431 Nürnberg
Online Auftragsstatus, Filterbeutel-
Kongurator und viele weitere Infos
unter: www.bosch-home.com
Reparaturservice, Ersatzteile &
Zubehör, Produkt-Informationen:
Tel.: 0911 70 440 040
mailto:cp-servicecenter@bshg.com
Wir sind an 365 Tagen rund um die Uhr
erreichbar.
AE United Arab Emirates,
BSH Home Appliances FZE
Round About 13,
Plot Nr MO-0532A
Jebel Ali Free Zone – Dubai
Tel.: 04 881 4401
mailto:service.uae@bshg.com
www.bosch-home.com/ae
AL Republika e Shqiperise,
Albania
ELEKTRO-SERVIS sh.p.k
Rr. Shkelqim Fusha, Selite,
Pallati “Matrix Konstruksion”,
Kati 0 dhe +1
1023 Tirane
Tel.: 4 2278 130, -131
Fax: 4 2278 130
mailto:info@elektro-servis.com
EXPERT SERVIS
Rruga e Kavajes,
Kulla B Nr 223/1 Kati I
1023 Tirane
Tel.: 4 480 6061
Tel.: 4 227 4941
Fax: 4 227 0448
Cel: +355 069 60 45555
mailto:info@expert-servis.al
AT Österreich, Austria
BSH Hausgeräte Gesellschaft mbH
Werkskundendienst für Hausgeräte
Quellenstrasse 2a
1100 Wien
Online Reparaturannahme,
Ersatzteile und Zubehör und viele
weitere Infos unter:
www.bosch-home.at
Reparaturservice, Ersatzteile & Zubehör,
Produktinformationen
Tel.: 0810 550 511
mailto:vie-stoerungsannahme@ bshg.com
Wir sind an 365 Tagen rund um die Uhr für
Sie erreichbar.
AU Australia
BSH Home Appliances Pty. Ltd.
Gate 1, 1555 Centre Road
Clayton, Victoria 3168
Tel.: 1300 369 744*
Fax: 1300 306 818
mailto:aftersales.au@bshg.com
www.bosch-home.com.au
* Mo-Fr: 24 hours
06/18
BA Bosna i Hercegovina,
“HIGH” d.o.o.
Gradačačka 29b
71000 Sarajevo
Tel./Fax: 033 21 35 13
mailto:centralniservis@yahoo.com
BE Belgique, België, Belgium
BSH Home Appliances S.A. – N.V.
Avenue du Laerbeek 74
Laarbeeklaan 74
1090 Bruxelles – Brussel
Tel.: 02 475 70 01
mailto:bru-repairs@bshg.com
www.bosch-home.be
BG Bulgaria
BSH Domakinski Uredi Bulgaria EOOD
Business center FPI, oor 5,
Cherni vrah Blvd. 51B
1407 Soa
Tel.: 0700 208 17
mailto:informacia.servis-bg@bshg.com
www.bosch-home.bg
BH Bahrain,
Khalaifat Est.
P.O. Box 5111
Manama
Tel.: 01 7400 553
mailto:service@khalaifat.com
BY Belarus,Беларусь
OOO “БСХ Бытовая техника”
тел.: 495 737 2961
mailto:mok-kdhl@bshg.com
CH Schweiz, Suisse,
BSH Hausgeräte AG
Bosch Hausgeräte Service
Fahrweidstrasse 80
8954 Geroldswil
Reparaturservice, Ersatzteile & Zubehör,
Produktinformationen
Tel.: 0848 888 200
mailto:ch-service@bshg.com
mailto:ch-spareparts@bshg.com
www.bosch-home.ch
CY Cyprus,Κύπρος
BSH Ikiakes Syskeves-Service
39, Arh. Makaariou III Str.
2407 Egomi/Nikosia (Lefkosia)
Tel.: 7777 8007
Fax: 022 658 128
mailto:bsh.service.cyprus@
cytanet.com.cy
CZ ČeskáRepublika,CzechRepublic
BSH domácí spotřebiče s.r.o.
Firemní servis domácích spotřebičů
Radlická 350/107c
158 00 Praha 5
Tel.: 0251 095 546
www.bosch-home.com/cz
DK Danmark, Denmark
BSH Hvidevarer A/S
Telegrafvej 4
2750 Ballerup
Tel.: 44 89 80 18
mailto:BSH-Service.dk@bshg.com
www.bosch-home.dk
Bosnia-Herzegovina
Svizzera, Switzerland
EE Eesti, Estonia
SIMSON OÜ
Türi tn.5
11313 Tallinn
Tel.: 0627 8730
Fax: 0627 8733
mailto:servicenet@servicenet.ee
www.simson.ee
Renerki Kaubanduse OÜ
Tammsaare tee 134B (Euronicsi kaupluses)
12918 Tallinn
Tel.: 0651 2222
Fax: 0516 7171
mailto:klienditeenindus@renerk.ee
www.renerk.ee
Eliser OÜ
Mustamäe tee 24
10621 Tallinn
Tel.: 0665 0090
mailto:hooldus@eliser.ee
www.kodumasinate-remont.ee
ES España, Spain
BSH Electrodomésticos España S.A.
Servicio Ocial del Fabricante
Parque Empresarial PLAZA,
C/ Manfredonia, 6
50197 Zaragoza
Tel.: 976 305 713
Fax: 976 578 425
mailto:CAU-Bosch@bshg.com
www.bosch-home.es
FI Suomi, Finland
BSH Kodinkoneet Oy
Itälahdenkatu 18 A, PL 123
00201 Helsinki
Tel.: 0207 510 705
mailto:Bosch-Service-FI@bshg.com
www.bosch-home.
Soittajahinta on kiinteästä verkosta ja
matkapuhelimesta 8,35 snt/puh + 16,69 snt/min.
FR France
BSH Electroménager S.A.S.
50 rue Ardoin – CS 50037
93406 SAINT-OUEN cedex
Service interventions à domicile:
01 40 10 11 00
Service Consommateurs:
0 892 698 010
0,40 €
/ min
mailto:soa-bosch-conso@bshg.com
Service Pièces Détachées et
Accessoires:
0 892 698 009
0,40 €
/ min
www.bosch-home.fr
GB Great Britain
BSH Home Appliances Ltd.
Grand Union House
Old Wolverton Road
Wolverton
Milton Keynes MK12 5PT
To arrange an engineer visit, to order
spare parts and accessories or for
product advice please visit
www.bosch-home.co.uk
or call Tel.: 0344 892 8979*
* Calls are charged at the basic rate, please
check with your telephone service provider
for exact charges.
Page 35

GR Greece,Ελλάς
BSH Ikiakes Siskeves A.B.E.
Central Branch Service
17 km E.O. Athinon-Lamias & Potamou 20
14564 Kisia
Tηλέφωνο: 181 82
Tηλέφωνο: 210 427 77 01
mailto:nkf-CustomerService@bshg.com
www.bosch-home.gr
HK Hong Kong,
BSH Home Appliances Limited
Unit 1 & 2, 3rd Floor,
North Block, Skyway House,
3 Sham Mong Road
Tai Kok Tsui, Kowloon
Hong Kong
Tel.: 2626 9655 (HK)
Toll free 0800 863 (Macao)
Fax: 2565 6681
mailto:bosch.hk.service@bshg.com
www.bosch-home.com.hk
HR Hrvatska, Croatia
BSH kućanski uređaji d.o.o.
Ulica grada Vukovara 269F
10000 Zagreb
Tel.: 01 5520 888
Fax: 01 6403 603
mailto:informacije.servis-hr@bshg.com
www.bosch-home.com/hr
HU Magyarország,Hungary
BSH Háztartási Készülék Kereskedelm Kft.
Árpád fejedelem útja 26-28
1023 Budapest
Call Center: +06 80 200 201
mailto:BSH-szerviz@bshg.com
www.bosch-home.com/hu
IE Republic of Ireland
BSH Home Appliances Ltd.
M50 Business Park
Ballymount Road Upper
Walkinstown
Dublin 12
To arrange an engineer visit, to order
spare parts and accessories or for
product advice please call
Tel.: 01450 2655*
www.bosch-home.ie
* Calls are charged at the basic rate, please
check with your telephone service provider
for exact charges
IL Israel
C/S/B/ Home Appliance Ltd.
1, Hamasger St.
North Industrial Park
Lod, 7129801
Tel.: 08 9777 222
Fax: 08 9777 245
mailto:csb-serv@csb-ltd.co.il
www.bosch-home.co.il
IN India,Bhārat,
BSH Household Appliances Mfg. Pvt. Ltd.
Arena House, Main Bldg, 2nd Floor,
Plot No. 103, Road No. 12,
MIDC, Andheri East
Mumbai 400 093
Toll Free 1800 266 1880*
www.bosch-home.com/in
* Mo-Sa: 8.00am to 8.00pm
(exclude public holidays)
06/18
IS Iceland
Smith & Norland hf.
Noatuni 4
105 Reykjavik
Tel.: 0520 3000
Fax: 0520 3011
www.sminor.is
IT Italia, Italy
BSH Elettrodomestici S.p.A.
Via. M. Nizzoli 1
20147 Milano (MI)
Tel.: 02 412 678 100
mailto:info.it@bosch-home.com
www.bosch-home.com/it
KZ Kazakhstan,Қазақстан
IP Anackiy A.N. PTN-Service
Kuyshi Dina str.23/1 N3
Astana
Tel.: 717 236 64 55
mailto:ptnservice@mail.ru
Technodom Service
Utegen Batira Str. 73
480096 Almaty
Tel.: 727 258 85 44
mailto:lsr@technodom.kz
www.technodom.kz
Kombitechnocentr
Zhambyl st. 117
480096 Almaty
Tel.: 727 338 45 55
mailto:cts_pavel@bk.ru
www.cts.kz
TOO Evrika Service
Shimkent, Rıskulova 22.
Shimkent 160018
Tel.: 727 252 44 63 75
mailto:evrika_kz@mail.ru
www.evrika.com
AV SERVİCE
Abulhair hana Str. 51
Uralsk 090000
Tel.: 711 293 99 49
mailto:oastaev@avservice.kz
www.avservice.kz
LB Lebanon,
Teheni, Hana & Co.
Boulevard Dora 4043 Beyrouth
P.O. Box 90449
Jdeideh, 1202 2040
Tel.: 01 255 211
mailto:Info@Teheni-Hana.com
LT Lietuva, Lithuania
Senuku prekybos centras UAB
Jonavos g. 62
44192 Kaunas
Tel.: 037 212 146
Fax: 037 212 165
www.senukai.lt
UAB “AG Service”
R. Kalantos g. 32
52494 Kaunas
Tel.: 0700 556 55
Fax: 037 331 363
mailto:servisas@agservice.lt
www.agservice.lt
Baltic Continent Ltd.
Lukšio g. 23
09132 Vilnius
Tel.: 870 055 595
Fax: 052 741 722
mailto:info@balticcontinent.lt
www.balticcontinent.lt
UAB Emtoservis
Savanorių pr. 1 (Centrinė būstinė)
03116 Vilnius
Tel.: 870 044 724
Fax: 052 737 368
mailto:svc@emtoservis.lt
www.emtoservis.lt
LU Luxembourg
BSH électroménagers S.A.
13-15, ZI Breedeweues
1259 Senningerberg
Tel.: 26 349 811
Fax: 26 349 315
Reparaturen: lux-repair@bshg.com
Ersatzteile: lux-spare@bshg.com
www.bosch-home.com/lu
LV Latvija, Latvia
SIA “General Serviss”
Buļļu iela 70c
1067 Riga
Tel.: 067 42 52 32
mailto:info@serviscentrs.lv
www.serviscentrs.lv
BALTIJAS SERVISS
Brivibas gatve 201
1039 Riga
Tel.: 067 07 05 20; -36
Fax: 067 07 05 24
mailto:info@baltijasserviss.lv
www.baltijasserviss.lv
Sia Elektronika-Serviss
Tadaiķu iela 4
1004 Riga
Tel.: 067 71 70 60
Fax: 067 60 12 35
mailto:serviss@elektronika.lv
www.elektronika.lv
MD Moldova
S.R.L. “Rialto-Studio”
ул. Щусева 98
2012 Кишинев
тел./ факс: 022 23 81 80
mailto:bosch-md@mail.ru
ME Crna Gora, Montenegro
Elektronika komerc
Oktobarske revolucije 129
81000 Podgorica
Tel./Fax: 020 674 631
Mobil: 069 324 812
mailto:ekobosch.servis@t-com.me
MK Macedonia,Makeдoния
GORENEC
Jane Sandanski 69 lok. 3
1000 Skopje
Tel.: 02 2454 600
Mobil: 070 233 689
mailto:gorenec@yahoo.com
MT Malta
Oxford House Ltd.
Notabile Road
Mriehel BKR 14
Tel.: 021 442 334
Fax: 021 488 656
www.oxfordhouse.com.mt
Page 36

MV Raajjeyge Jumhooriyyaa,
台湾
Maledives
Lintel Investments
Ma. Maadheli, Majeedhee Magu
Malé
Tel.: 0331 0742
mailto:mohamed.zuhuree@
lintel.com.mv
NL Nederlande, Netherlands
BSH Huishoudapparaten B.V.
Taurusavenue 36
2132 LS Hoofddorp
Storingsmelding:
Tel.: 088 424 4010
Fax: 088 424 4845
mailto:bosch-contactcenter@
bshg.com
Onderdelenverkoop:
Tel.: 088 424 4010
Fax: 088 424 4801
mailto:bosch-onderdelen@bshg.com
www.bosch-home.nl
NO Norge, Norway
BSH Husholdningsapparater A/S
Grensesvingen 9
0661 Oslo
Tel.: 22 66 05 54
Tel.: 22 66 06 00
mailto:Bosch-Service-NO@bshg.com
www.bosch-home.no
NZ New Zealand
BSH Home Appliances Ltd.
Unit F 2, 4 Orbit Drive
Mairangi Bay
Auckland 0632
Tel.: 0800 245 700*
Fax: 0800 256 535
mailto:aftersales.nz@bshg.com
www.bosch-home.co.nz
* Mo-Fr: 8.30 am to 5.00 pm
(exclude public holidays)
PL Polska, Poland
BSH Sprzęt Gospodarstwa
Domowego sp. z o.o.
Al. Jerozolimskie 183
02-222 Warszawa
Centrala Serwisu
Tel.: 801 191 534
Fax: 022 572 7709
mailto:Serwis.Fabryczny@bshg.com
www.bosch-home.pl
PT Portugal
BSHP Electrodomésticos,
Sociedade Unipessoal, Lda.
Rua Alto do Montijo, nº 15
2790-012 Carnaxide
Tel.: 214 250 730
Fax: 214 250 701
mailto:bosch.electrodomesticos.pt@
bshg.com
www.bosch-home.pt
RO România, Romania
BSH Electrocasnice srl.
Sos. Bucuresti-Ploiesti,
nr. 19-21, sect.1
13682 Bucuresti
Tel.: 021 203 9748
Fax: 021 203 9733
mailto:service.romania@bshg.com
www.bosch-home.ro
RU Russia,Россия
ООО «БСХ Бытовые Приборы»
Сервис от производителя
Малая Калужская, 15
119071 Москва
Тел.: 8 (800) 200 29 61
mailto:mok-kdhl@bshg.com
www.bosch-home.com
SA Kingdom Saudi Arabia,
Abdul Latif Jameel Electronics
and Airconditioning Co. Ltd.
BOSCH Service centre,
Kilo 5 Old Makkah Road
(Next to Toyota), Jamiah Dist.
P.O.Box 7997
Jeddah 21472
Tel.: 800 127 9999
mailto:palakkaln@alj.com
www.aljelectronics.com.sa
SE Sverige, Sweden
BSH Home Appliances AB
Landsvägen 32
169 29 Solna
Tel.: 0771 19 70 00 local rate
Tel.: 0771 11 22 77 local rate
mailto:Bosch-Service-SE@bshg.com
www.bosch-home.se
SG Singapore,
BSH Home Appliances Pte. Ltd.
Block 4012, Ang Mo Kio Avenue 10
#01-01 Techplace 1
Singapore 569628
Tel.: 6751 5000*
Fax: 6751 5005
mailto:bshsgp.service@bshg.com
www.bosch-home.com.sg
* Mo-Fr: 8.30am to 7.00pm, Sa: 8.30am to 5.30pm
(exclude public holidays)
SI Slovenija, Slovenia
BSH Hišni aparati d.o.o.
Litostrojska 48
1000 Ljubljana
Tel.: 01 583 07 00
Fax: 01 583 08 89
mailto:informacije.servis@bshg.com
www.bosch-home.com/si
SK Slovensko, Slovakia
BSH domácí spotřebiče s.r.o.
Firemní servis domácích spotřebičů
Radlická 350/107c
158 00 Praha 5
Tel.: +421 244 452 041
mailto:opravy@bshg.com
www.bosch-home.com/sk
TH Thailand,
BSH Home Appliances Limited
Ital Thai Tower, 2034/31-39, 1st oor,
New Petchburi Road
Bangkapi, Huay Kwang
Bangkok, 10310
Tel.: 02 975 5353*
www.bosch-home.com/th
* Mo-Sa: 8.00am to 6.00pm
(exclude public holidays)
TR Türkiye, Turkey
BSH Ev Aletleri Sanayi
ve Ticaret A.S.
Fatih Sultan Mehmet Mahallesi
Balkan Caddesi No: 51
34771 Ümraniye, Istanbul
Tel.: 0 216 444 6333*
Fax: 0 216 528 9188*
mailto:careline.turkey@bshg.com
www.bosch-home.com/tr
* Çağrı merkezini sabit hatlardan
aramanın bedeli şehir içi ücretlendirme,
Cep telefonlarından ise kullanılan
tarifeye gore değişkenlik göstermektedir
TW Taiwan,
我們期盼您不斷的鼓勵與指導,
任何咨詢或服務需求,
歡迎洽詢客服專線
BSH Home Appliances Private Limited
台北市內湖區洲子街80號11樓
11F., No.80, Zhouzi St., Neihu Dist.
Taipei City 11493
Tel.: 0800 368 888
Fax: 02 2627 9788
mailto:bshtzn-service@bshg.com
www.bosch-home.com.tw
UA Ukraine,Україна
TOB “БСХ Побутова Техніка”
тел.: 044 490 2095
mailto:bsh-service.ua@bshg.com
www.bosch-home.com.ua
XK Kosovo
Service-General SH.P.K.
rr.Magjistralja Ferizaj Prishtine
70000 Ferizaj
Tel : 00381 (0) 290 330 723
Tel.: 00377 44 172 309
mailto:servicegeneral527@gmail.com
XS Srbija, Serbia
BSH Kućni aparati d.o.o.
Milutina Milankovića br. 9ž
11070 Novi Beograd
Tel.: 011 353 70 08
Fax: 011 205 23 89
mailto:informacije.servis-sr@
bshg.com
www.bosch-home.rs
ZA South Africa
BSH Home Appliances (Pty) Ltd.
15th Road Randjespark
Private Bag X36, Randjespark
1685 Midrand – Johannesburg
Tel.: 086 002 6724
Fax: 086 617 1780
mailto:applianceserviceza@bshg.com
www.bosch-home.com/za
06/18
Page 37

666
Page 38

Page 39

Page 40

Thank you for buying a
Bosch Home Appliance!
Register your new device on MyBosch now and profit directly from:
• Expert tips & tricks for your appliance
• Warranty extension options
• Discounts for accessories & spare-parts
• Digital manual and all appliance data at hand
• Easy access to Bosch Home Appliances Service
Free and easy registration – also on mobile phones:
www.bosch-home.com/welcome
Looking for help?
You´ll find it here.
Expert advice for your Bosch home appliances, need help with problems
or a repair from Bosch experts.
Find out everything about the many ways Bosch can support you:
www.bosch-home.com/service
Contact data of all countries are listed in the attached service directory.
Robert Bosch Hausgeräte GmbH
Carl-Wery-Straße 34
81739 München
GERMANY
www.bosch-home.com
*8001137632*
8001137632
(981015)
Page 41

1
2
d
b*
c
a
c
d
a
c
d
b
c
3*
4*
5*
b
b
a
a
A
B
Page 42

C
1. 2.
4.3.
8.
11.
12.
6.
7.
9.
5.
10.
Page 43

D
1. 2.
3.
4. 5.
9.
10.
12.
8.
6.
7.
11.
Page 44

OFF
1.
E
2. 4.3.
F
G H G G G
W H
G G G G
W H
H G G G
Page 45

G
G
G
G
G G
G
G G G
G G G
MAX
600 ml 180 s
200 ml 180 s
500 ml 180 s
120 s
300 ml 60 s
4 x 10 g
(40 g)
50 g
20 x 1 s
8-20 s
/ 10 s
ON
u
u
u
u
t / u
t
u
20-23°C
G G
G
50 g 2-5 x 1 s
30 g 20 s
150 g 5 s
u
u
u
Page 46

WARNING!
H
 Loading...