


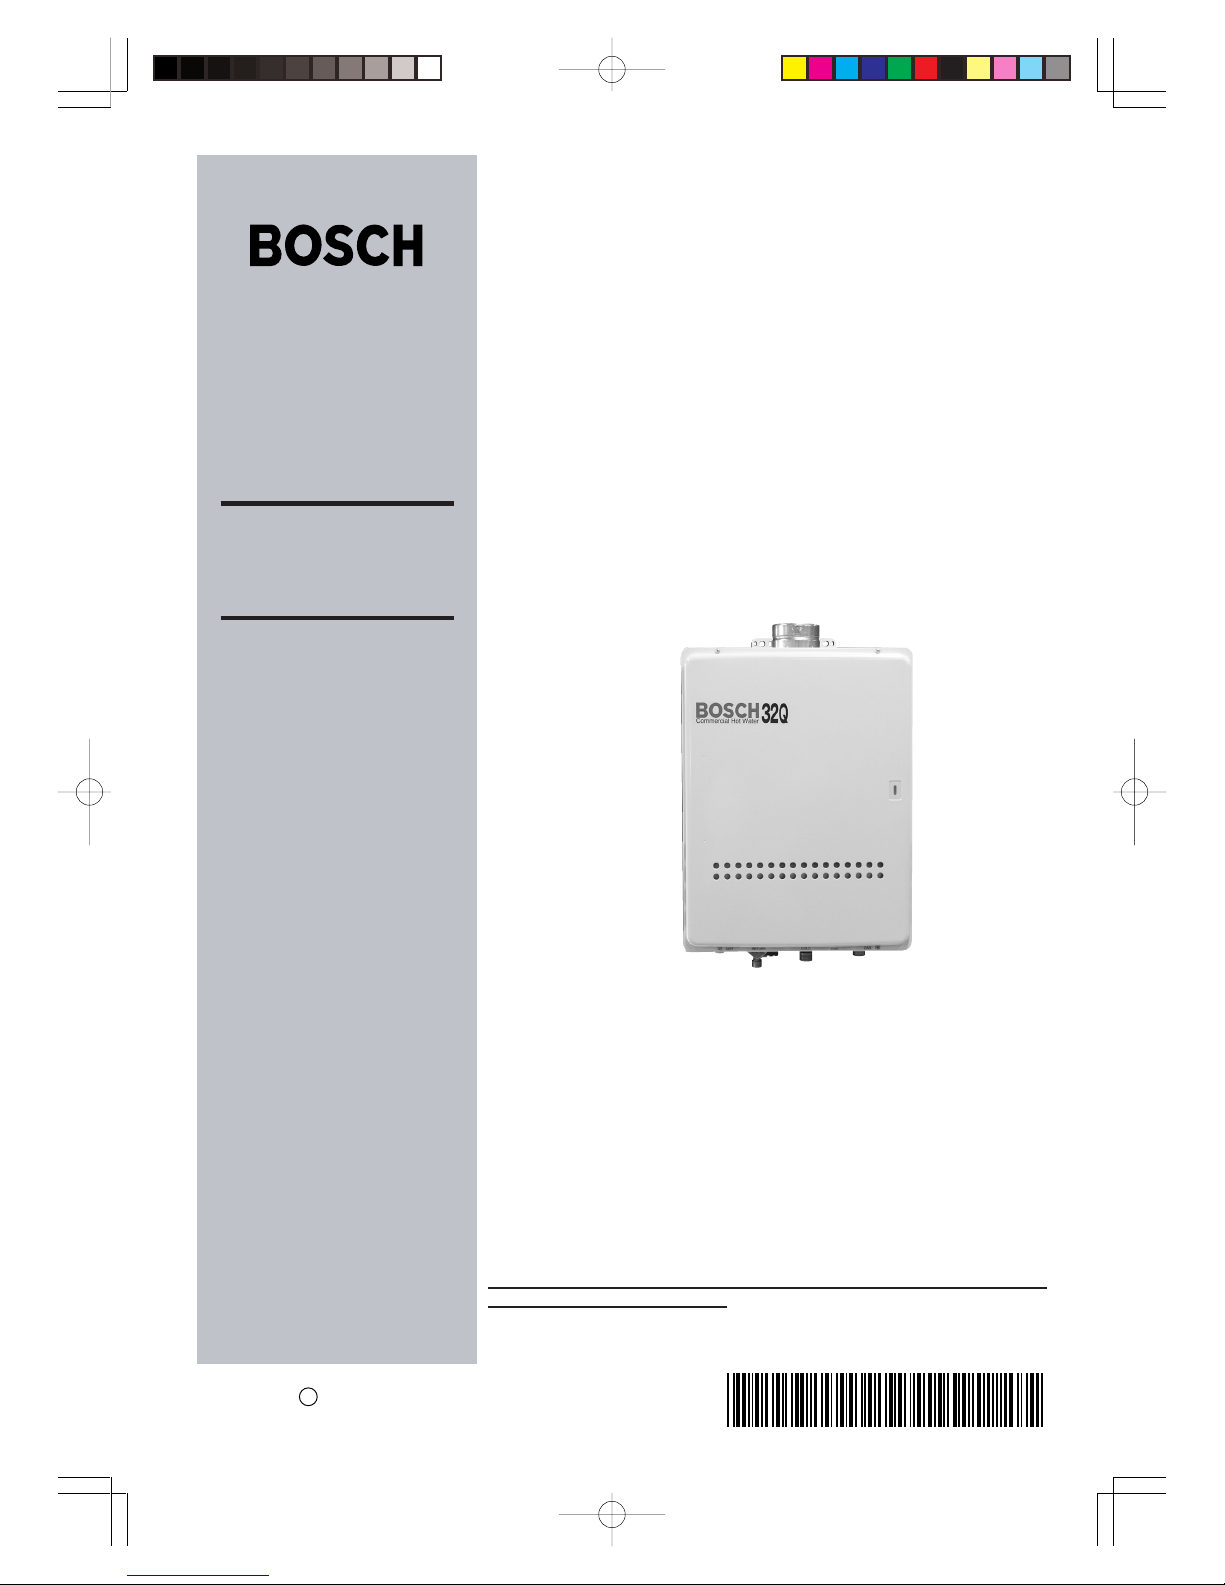
KM3211WH
*SAR8191T*
SAR8191
3
Rev. 10/11
Installation & Owner's Guide
Service Department: 1300 30 70 37
www.bosch.com.au
To be installed and serviced only
by an authorised person
This appliance is not suitable for
use as a pool heater
The "authorised installing person" is
responsible for:
appliance.
2. Ensure unit performs to the
specifications stated on the
3. Demonstrate operation of unit to
customer before leaving.
4.
customer
.
This appliance must be installed in accordance with the manufacturer's
installation instructions, AS 5601 (AS5601), NZ 5261, AS3500.4.2 and all
Local Water, Building and Gas fitting regulations.
Failure to install this appliance in accordance with these installation
instructions may void warranty
In the interest of continued product improvement, Bosch reserves the
right to alter these specifications
without notice.
1. Correct commissioning of this
rating label.
Hand these instructions to
32L Electronic
Internal / External Model
KM3211WH
KM3211WHQ

2
Contents
Contents ........................................................................................................ 2
Owner's Guide
Important Safety Information....................................................................... 3
General Parts
Main Unit.................................................................................................... 6
Names and Functions of Each Parts .......................................................... 7
Initial Operation ............................................................................................ 9
How to Use
When using RCM3211
Clock Adjustment .................................................................................... 10
Running Hot Water .................................................................................. 11
Setting Hot Water Temperature.............................................................. 12
Filling Up the Bath ................................................................................... 14
Circulation Operation .............................................................................. 15
Suspension of Circulation ...................................................................... 16
Timer Setting Period for Circulation ...................................................... 17
Other Setting Options ............................................................................. 20
Confirmation Beeper On/Off ................................................................... 22
When using RCS3211
Running Hot Water .................................................................................. 23
Setting Hot Water Temperature............................................................. 24
Confirmation Beeper On/Off ................................................................... 26
No remote controller case
Running Hot Water .................................................................................. 27
Preventing Damage from Freezing ............................................................ 28
When Unused for an Extended Period ...................................................... 29
Regular Maintenance................................................................................... 31
Troubleshooting .......................................................................................... 33
Follow-up Service ........................................................................................ 37
Specifications .............................................................................................. 38
External Outfitting ....................................................................................... 39
Combustion Unit and Gas Route ............................................................... 41
Hot-Water Feed Route ................................................................................. 43
Electronic Controller ................................................................................... 48
Remote Controller and Attached Set ......................................................... 50
Installation Guide......................................................................................... 52
1. Installation Examples............................................................................ 52
2. Quick Connect Multi System Installation ............................................ 53
3. Before Installation ................................................................................. 54
4. Choosing Installation Site ....................................................................54
5. Installation Clearances .........................................................................56
6. Installation.............................................................................................. 57
7. Vent Pipe Installation ............................................................................ 58
8. Gas Piping.............................................................................................. 61
9. Water Piping........................................................................................... 62
10. Plumbing Applications.......................................................................... 65
11. Electrical Wiring ....................................................................................66
12. Commissioning...................................................................................... 69
13. Dimensions ............................................................................................ 70
Remote Controller Installation Guide........................................................ 74
3
To prevent damage to property and injury to the user, the icons shown below will be used to warn of
varying levels of danger.
Every indication is critical to the safe operation of the water heater and must be understood and
observed.
Potential dangers from accidents during installation and use are divided into the following three
categories. Closely observe these warnings; they are critical to your safety.
Important Safety Information-1
Potential dangers from accidents during installation and use are divided into the following three
categories. Closely observe these warnings, they are critical to your safety.
Prohibited
Disconnect
Power
Ground
Be sure to do
• Failures and damage caused by erroneous work or work not as instructed in this manual are
not covered by the warranty.
• Check that the installation was done properly in accordance with this Installation Manual upon
completion.
Requests to Installers
• In order to use the water heater safely, read this installation manual carefully,
and follow the installation instructions.
Caution
WARNING: If the information in this manual is not followed exactly, a fire or explosion may
result causing property damage, personal injury or death.
This appliance must be installed in accordance with the manufactures installation instructions,
AG5601, AS3500.4.2, AS300 wiring regulations and all Local Building, Water and Gas Fitting.
Installation Guide
GAS WATER HEATER
KM3211WH (Indoor or Outdoor Installation)
KM3211WHQ (Indoor or Outdoor Installation / Instant hot water supply type)
Robert Bosch
(Australia) Pty. Ltd.
Warning
Caution
Danger
Danger of serious injury or even death as well as danger of fire when
the product is misused by ignoring this symbol.
Possibility of serious injury or even death as well as possibility of fire
when the product is misused by ignoring this symbol.
Possibility of bodily injury or damage to property when the product is
misused by ignoring this symbol.
Prohibited
Don’t
touch.
Don’t
disassemble
the equipment.
Don’t touch
with a wet
hand.
No flame.
High
Temperature.
Be sure
to do.
Ground.
Electric
Shock.
Other icons
4
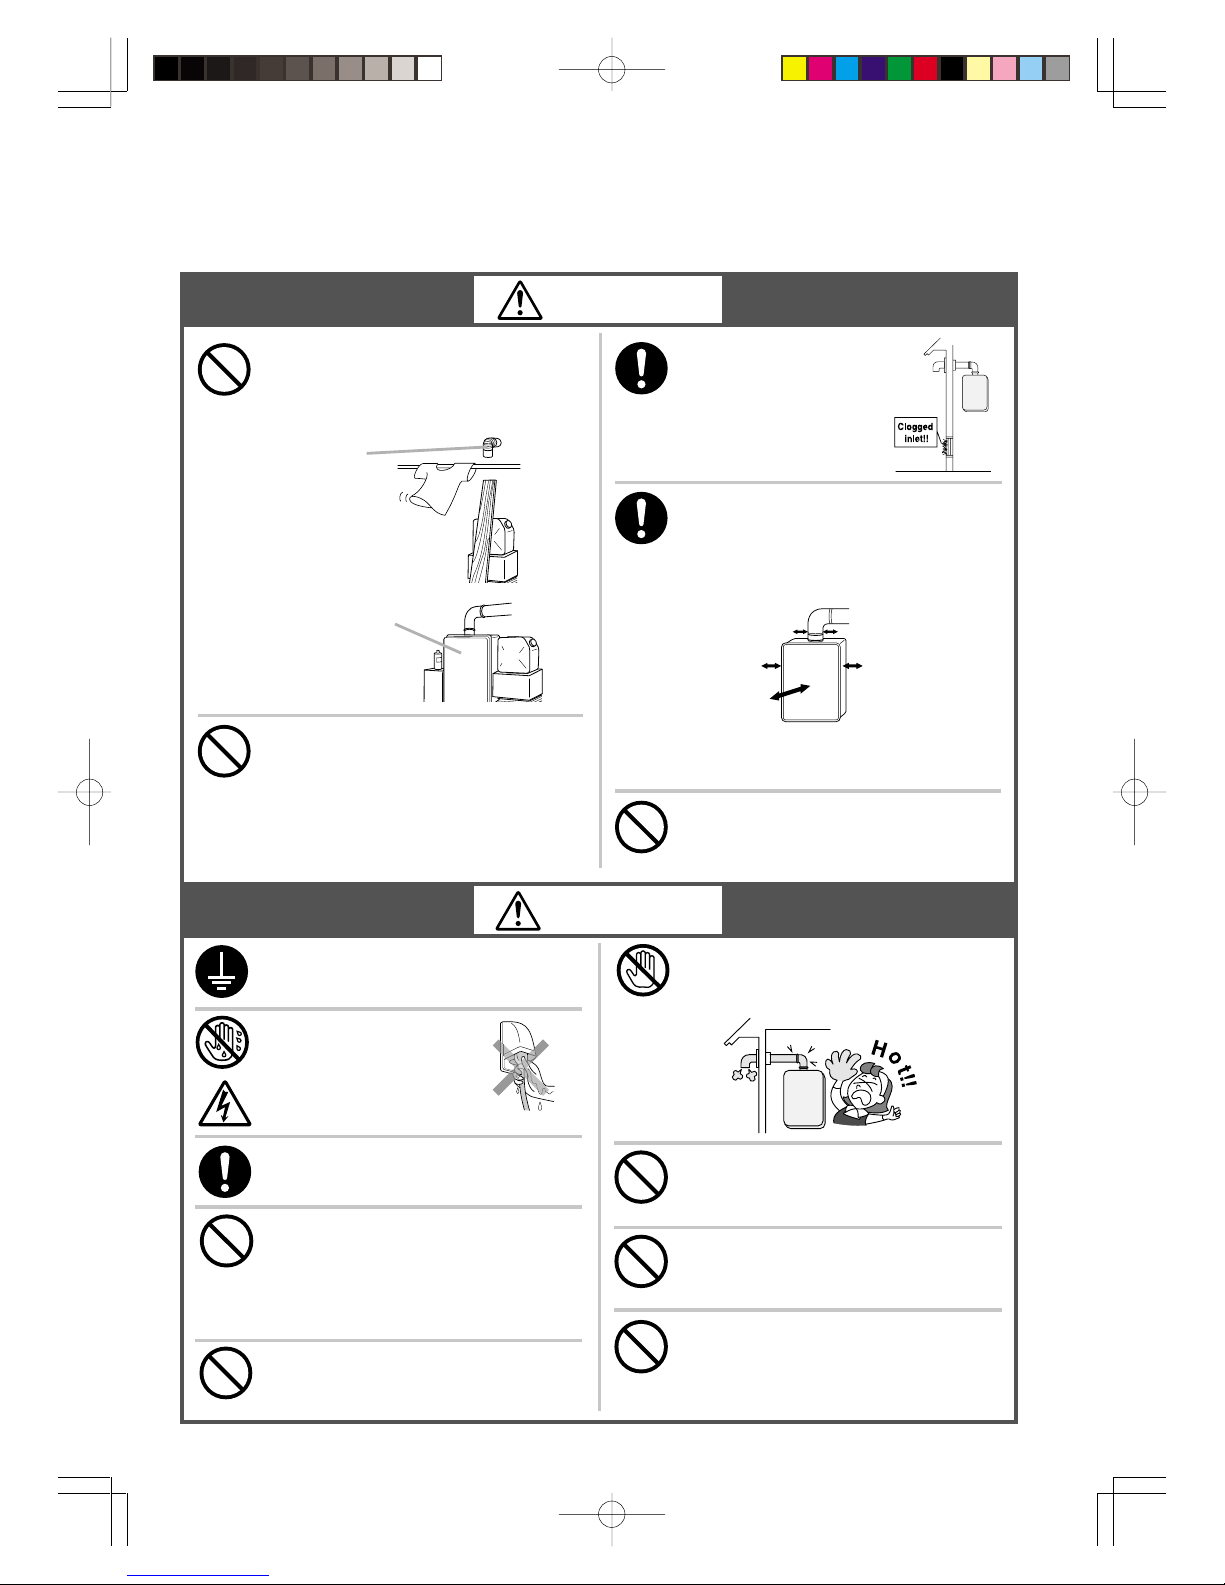
If you detect abnormal combustion
or abnormal odors:
1. Turn off the hot water supply
2. Turn off the power to the water
heater
3. Turn off gas and water at the
main
4. Consult the nearest Bosch Agent
This will prevent fire, electric shocks or
damage to the unit.
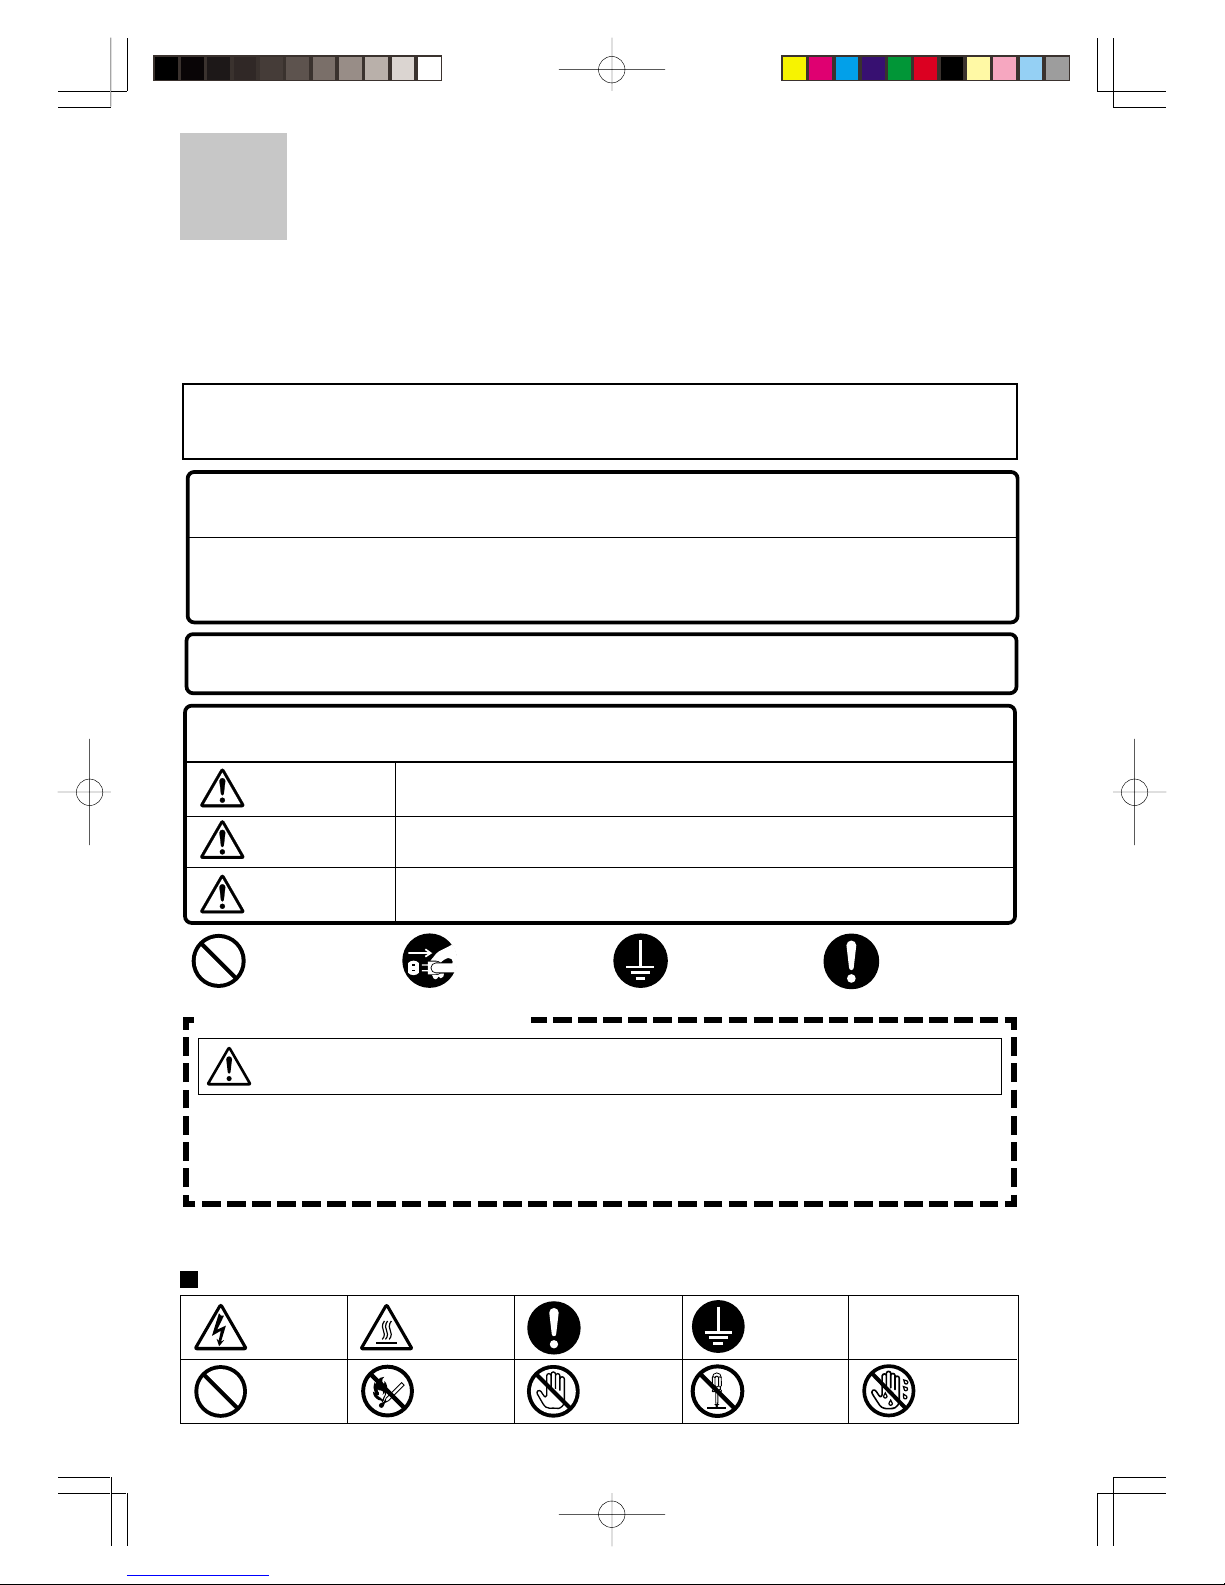
Check the temperature of the
running hot water before
entering the shower.
Check the temperature before
stepping into the bath tub.
Do not turn off the water heater or
change the water temperature while
someone is using the hot water.
Warning
Important Safety Information-2
Contact a qualified service
technician for any necessary
repairs, service or maintenance.
Do not allow small children to play
unsupervised in the bathroom.
Do not allow small children to
bathe unsupervised.
For Natural Gas
55.5 kW
NG
250 MJ/hr
135 W
MAX:900kPa
0.68 kPa
AC240V 50Hz
BOSCH
MODEL
GAS CONSUMPTION
HEAT OUTPUT
GAS TYPE
WATER PRESSURE
RATED POWER
ELECTRICAL RATING
32L/min RAISED 25 C
HOT WATER SUPPLY CAPACITY
GAS PRESSURE TEST POINT
KM3211WHQ
SERIAL NUMBER
AGA APPROVAL CERTIFICATION
NORITZ CORPORATION
XXXX.XX - XXXXXX
Be sure the gas/power supplied
matches the gas on the rating
plate.
5
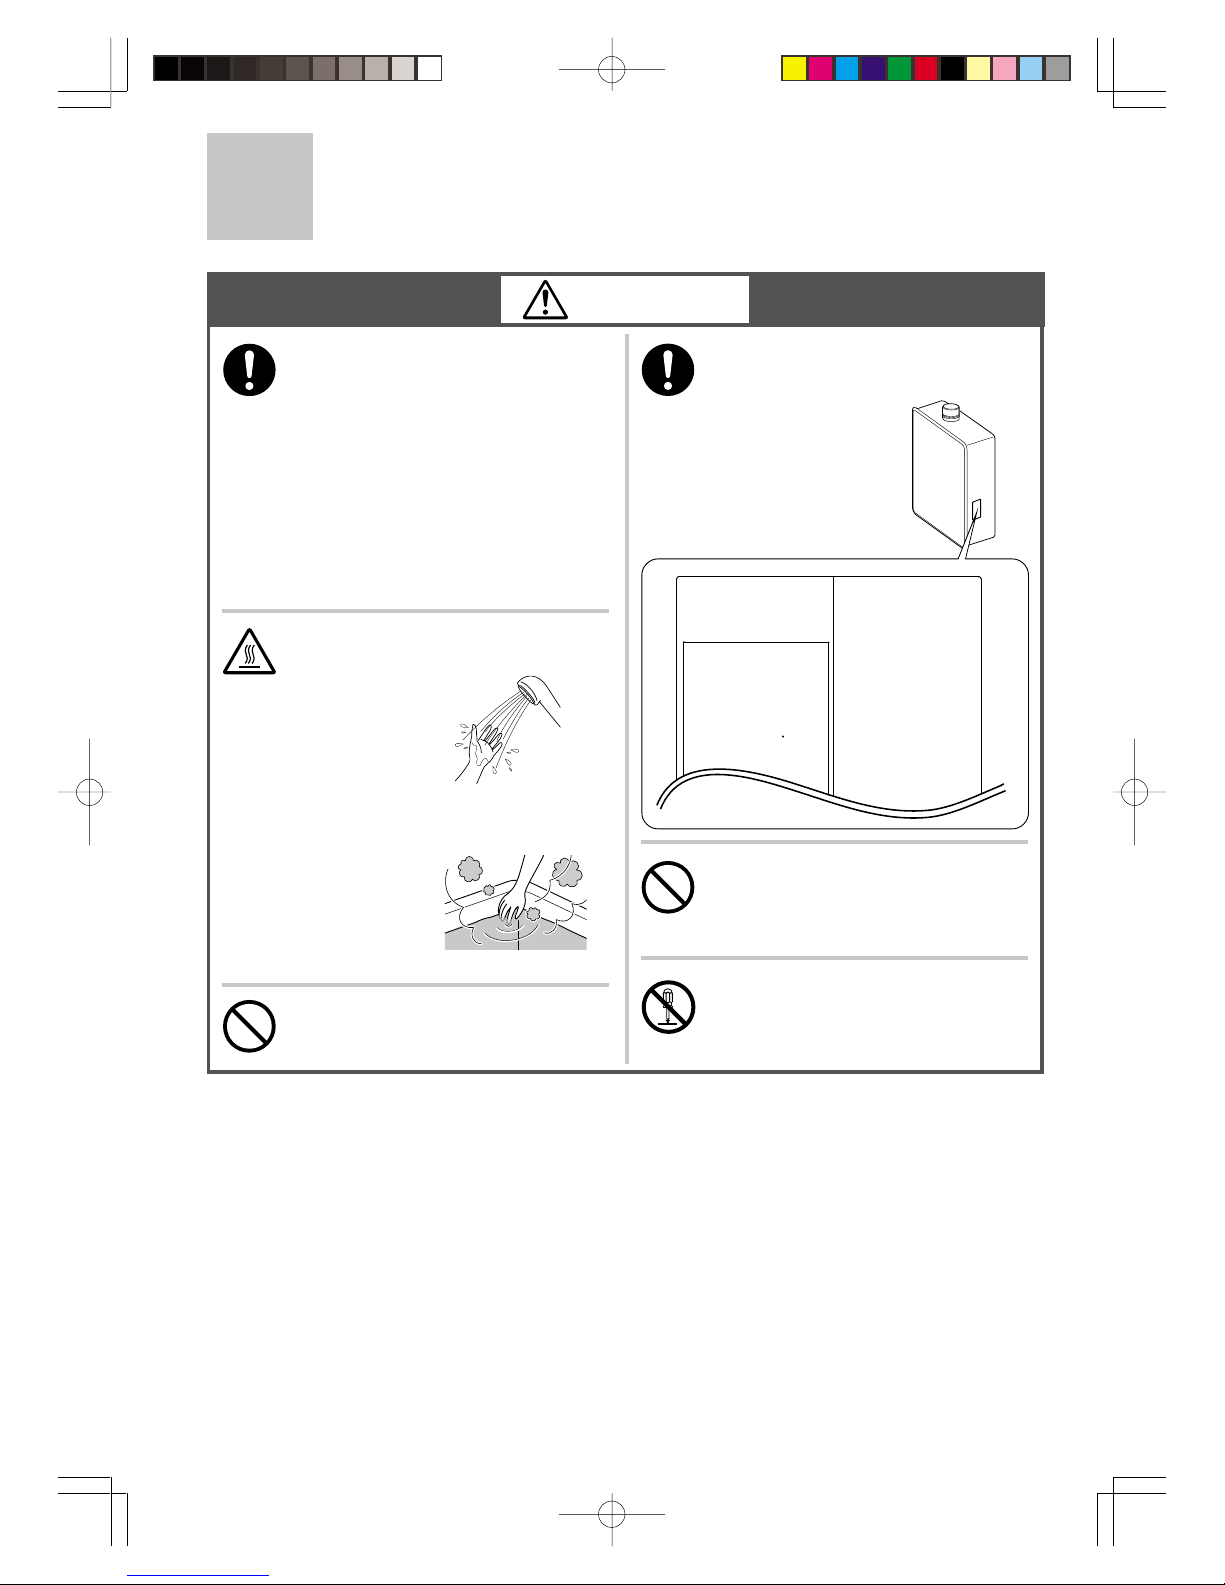
Leave the proper clearance between
the water heater and nearby objects
(trees, timber, boxes with flammable
materials etc.).
Do not place or use a spray can
near the heater or the exhaust vent
terminal.
Left side:
Min. 50mm
Right side:
Min. 50mm
Min. 75mm from
vent pipe
Do not place combustibles such as
laundry, newspapers, oils etc. near
the heater or the exhaust vent
terminal.
Exhaust vent
terminal (indoor
installation)
*
Indicates suggested clearances for
maintenance.
Front:
Sug. 600mm
*
Warning
[When installing indoors]
Where Applicable:
Check the air supply
vent for dust or
obstructions.
Do not use combustible chemicals
such as oil, gasoline, benzene etc.
in the vicinity of the heater or the
exhaust vent terminal.
Unit
Be sure to electrically ground the
unit.
Do not touch the power
cord with wet hands.
Keep power cord free of dust.
Do not use a broken or modified
power cord. Do not bind, bend or
stretch power cords.
Do not scratch, modify, or subject
them to impact or force.
Do not use the water heater for
other than its intended use.
Do not touch the exhaust vent pipe
during or immediately after
operation of the water heater.
Do not use hair spray or spray
detergent in the vicinity of the
heater.
Do not install in salons or other
locations where hair spray or other
aerosols will be used.
Do not install in locations where
excessive dust or debris will be
in the air.
Caution
6
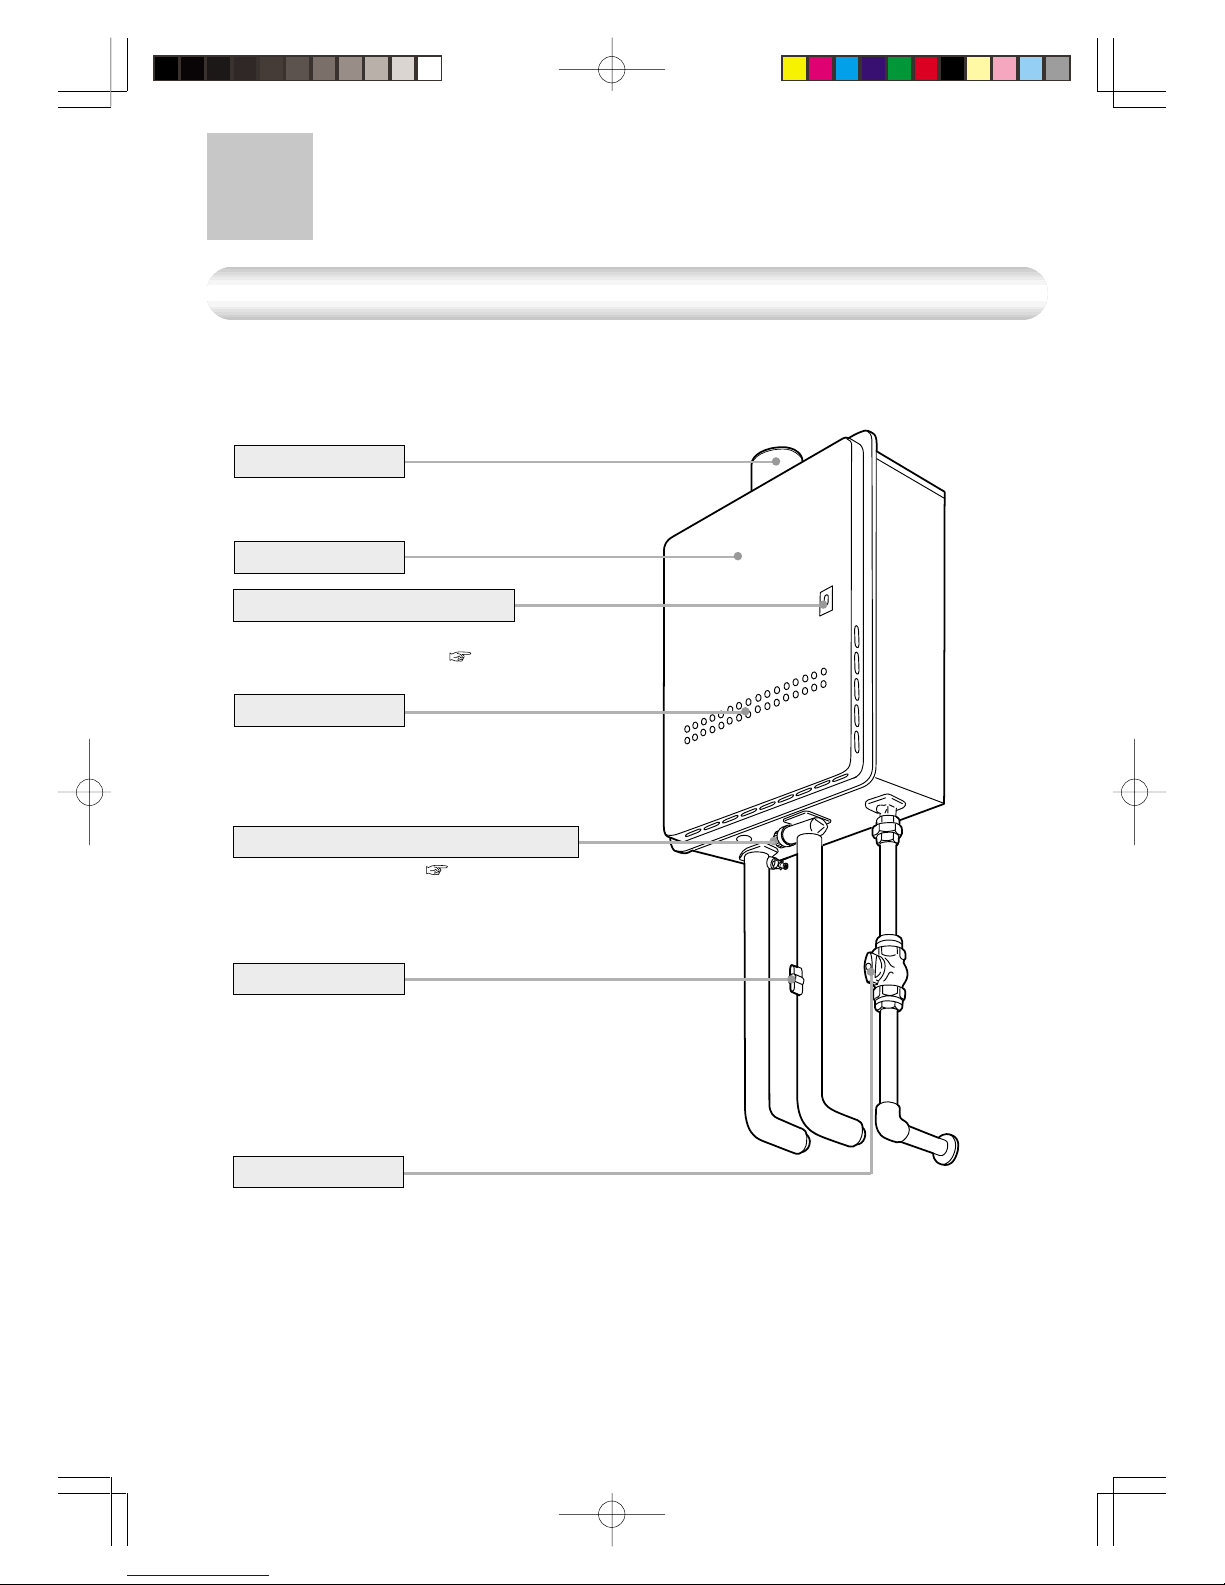
General Parts
Indoor or Outdoor Wall Mounted, Power Vented Model
* The above illustration shows an example of installation.
The exact installation configuration may be slightly different.
Main Unit
Flue Collar
Front Cover
Air Inlet
Water Supply Valve
Gas Supply Valve
Water Drain Valve (with Water Filter)
(Inside Water Inlet) ( P32)
Burner On Indicator
Lit during combustion.
Blinks to indicate a problem.
( P36)
(Eg.: KM3211WH)
KM3211WH, KM3211WHQ
* KM3211WH shown, pipe arrangement differs slightly on the KM3211WHQ model.
7
The illustration below shows the remote controller display. What is actually displayed depends
on how the water heater is set.
< Scroll display > to prevent the remote controller screen from burning out
( This page)
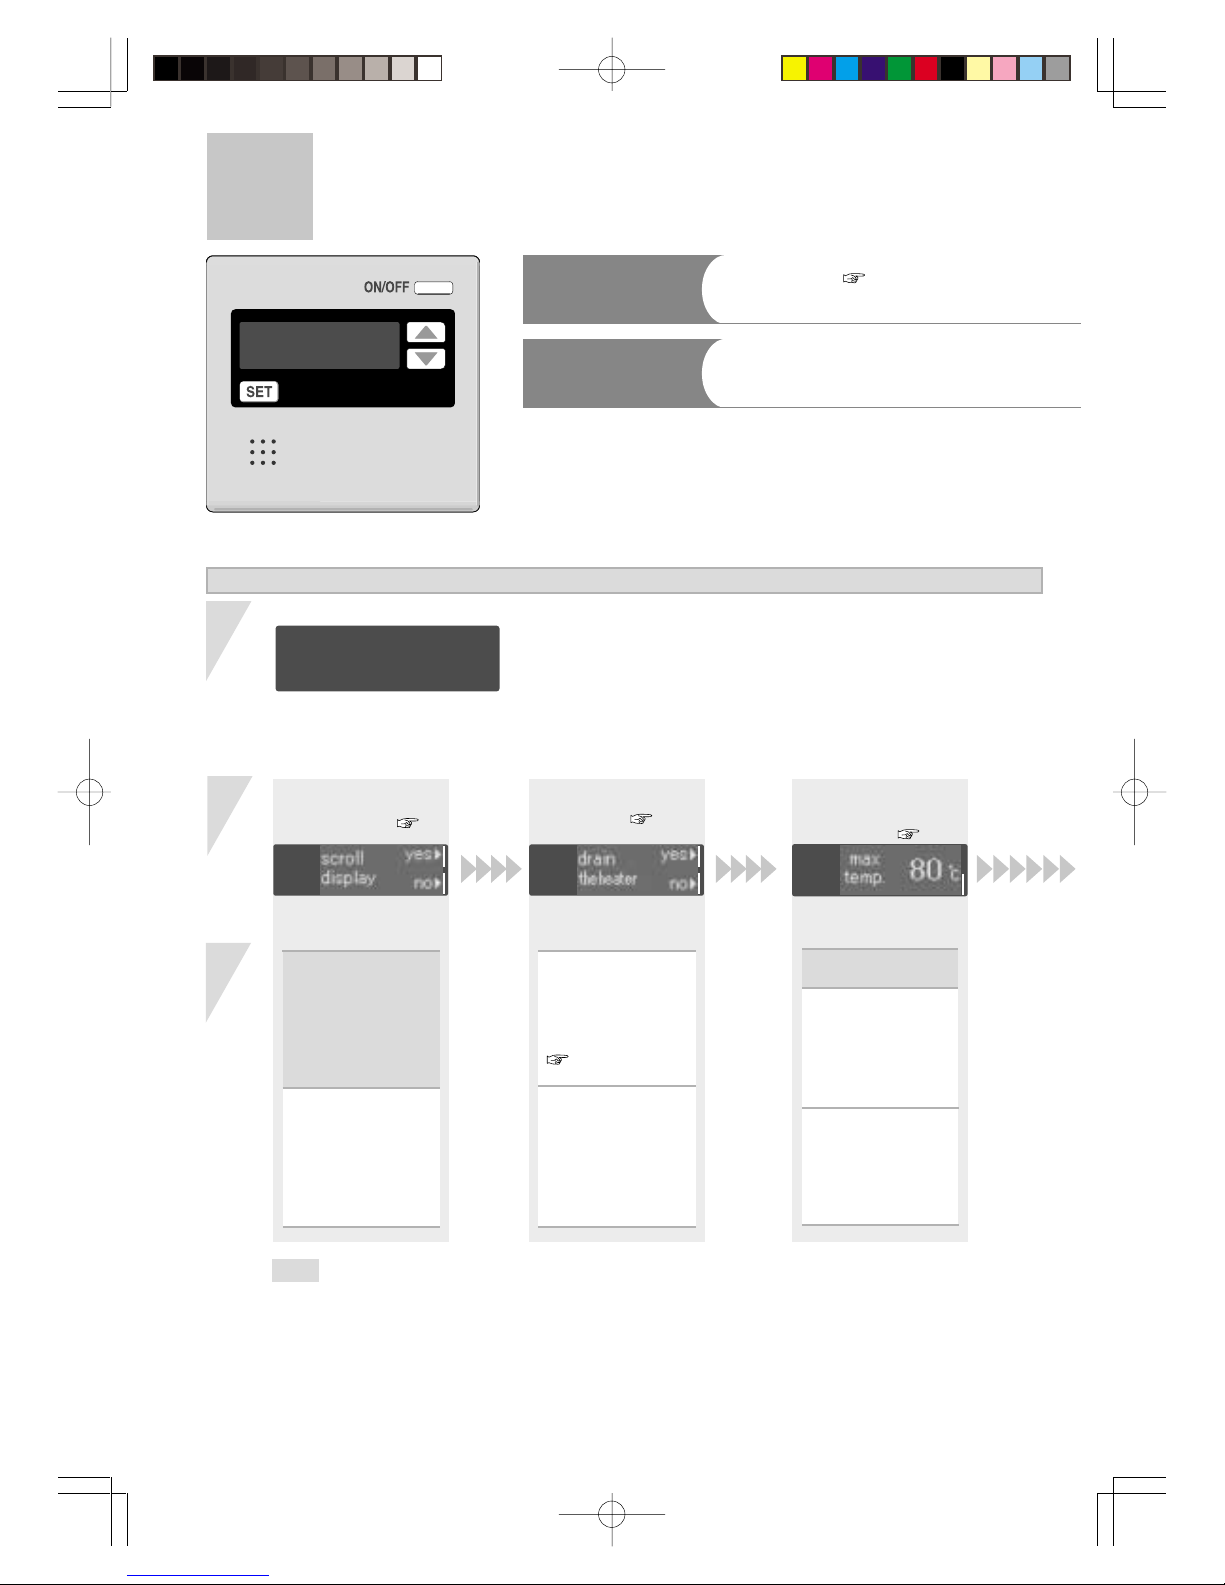
Names and Functions of Each Parts-1
Main Remote Controller (RCM3211) <Included/Optional>
Display
Set Button
For other settings.
Speaker
Power On/Off Button
For turning the heater on
and off.
Selection Button
• Used to adjust the
temperature. ( P12)
• Used for other settings.
• Details are memorized
upon adjustment or
setting.
Display
* In order to prevent the screen burning out, about 10 minutes
after any remote control operation, the screen display begins
to scroll sideways.
* As soon as the remote controller is used again, the scrolling
stops.
Current time (when the clock
is set) the hot water temperature scrolls sideways.
* This remote controller is basically used with KM3211WHQ.
When this is displayed, circulation
mode is on. ( P15 and 19)
Circulation mode Display
Timer Display for Hot W ater
Blinking:During circulation
Lit :
Circulation
timer
is set.
Blinking
:During setting
( P17 and 19)
for circulation
mode.
Timer Display
When the hot water temperature is set between 60
- 80°C, “hi-temp” blinks for
10 seconds.
High Temperature Display
(Eg.: 40°C)
Selection switches that can
be operated are indicated
by the bar display lighting
up or blinking.
Selection Bar Display
Temperature Setting
This is displayed when the
burner is on.
Burner On Display
(Eg.: 10:15)
Error Display
Error is displayed when
malfunction occurs.
( P36)
8
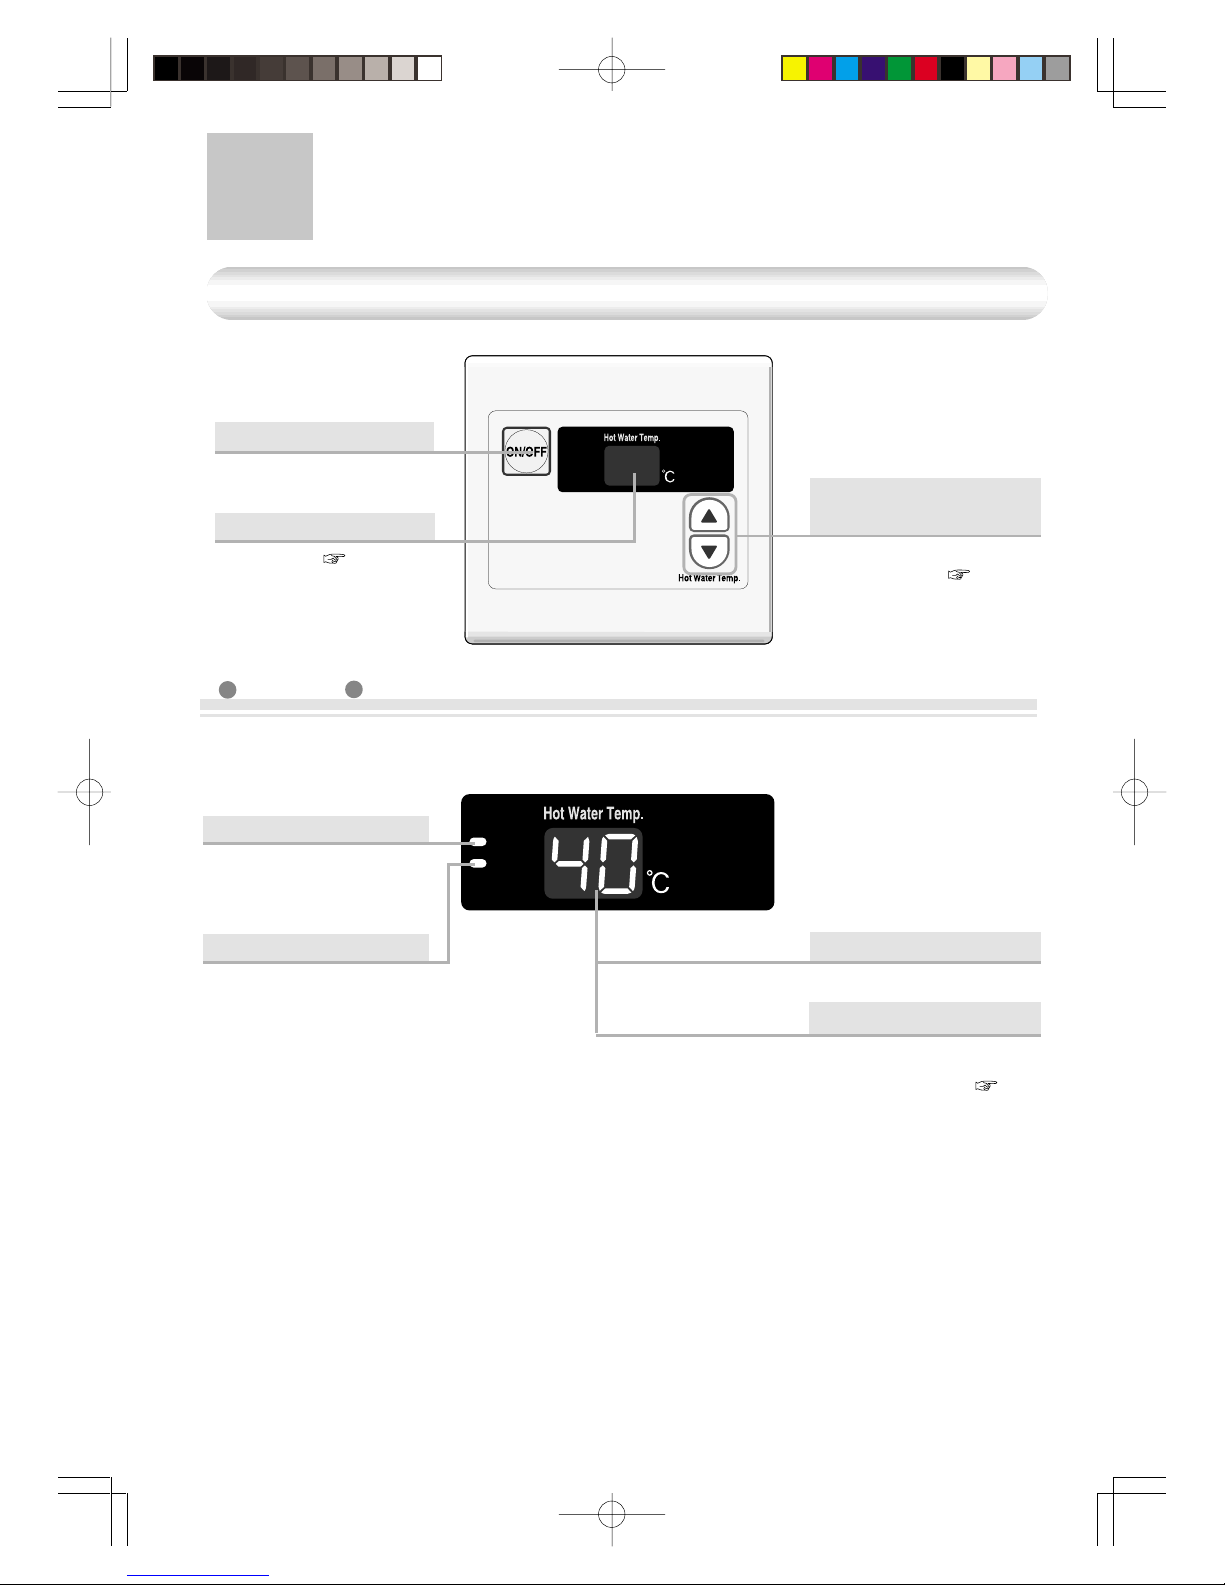
Names and Functions of Each Parts-2
Priority
Burner on
Priority
Burner on
Temperature Setting
Power On/Off Button
For turning the heater on
and off.
( This page)
Display
Temperature setting
Button
• Used to adjust the
temperature. ( P24)
The illustration below shows the remote controller display. What is actually displayed depends
on how the water heater is set.
(Eg.: 40°C)
Error Display
Error is displayed when a
malfunction occurs.
( P36)
When this indicator is lit,
the hot water temperature
can be set.
Priority Indicator
This is displayed during
burner on.
Burner On Indicator
Waterproof Sub Remote Controller (RCS3211) <Optional>
Display
9
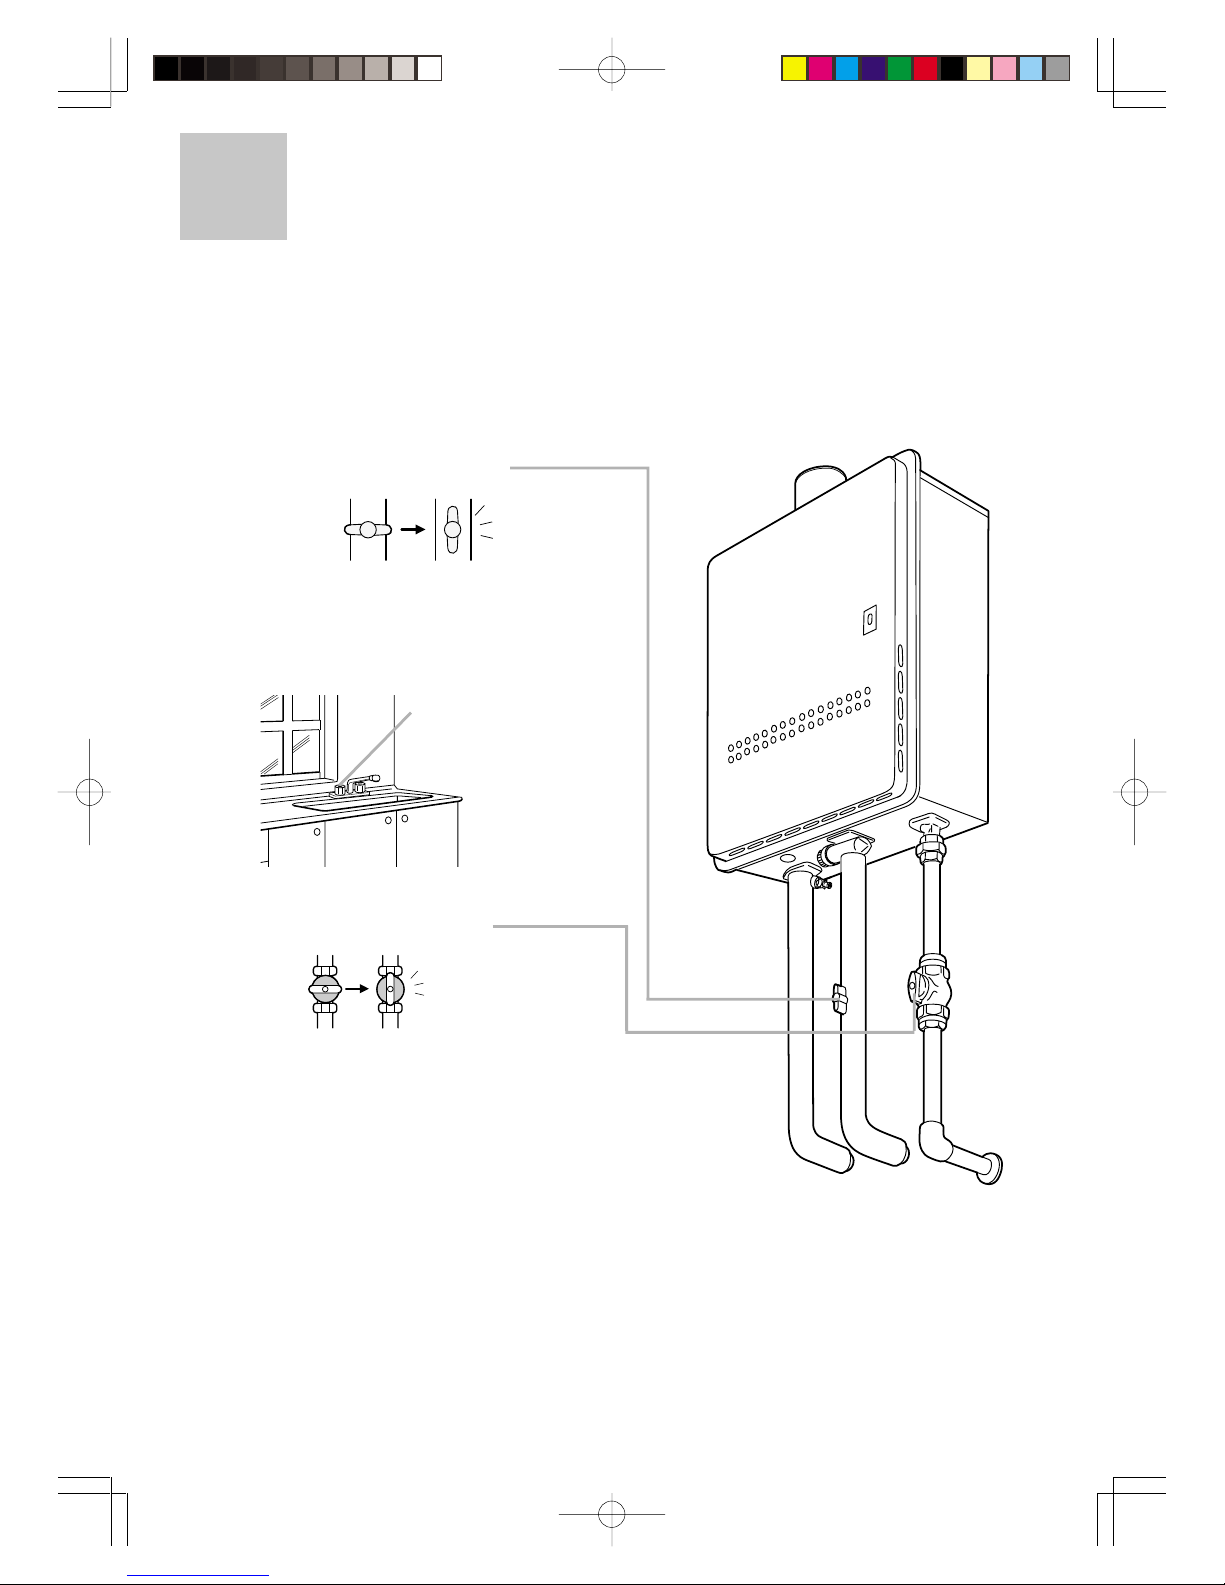
Initial Operation
Before the first use of your water heater, make the following preparations.
Follow steps 1 through 4.
1
Open the water supply valve.
Open a hot water fixture to confirm that
water is available, and then close the
fixture again.
3
Open the gas supply valve.
Hot water fixture
2
Turn on the power.
CLOSED
4
OPEN
(Eg.: KM3211WH)
10
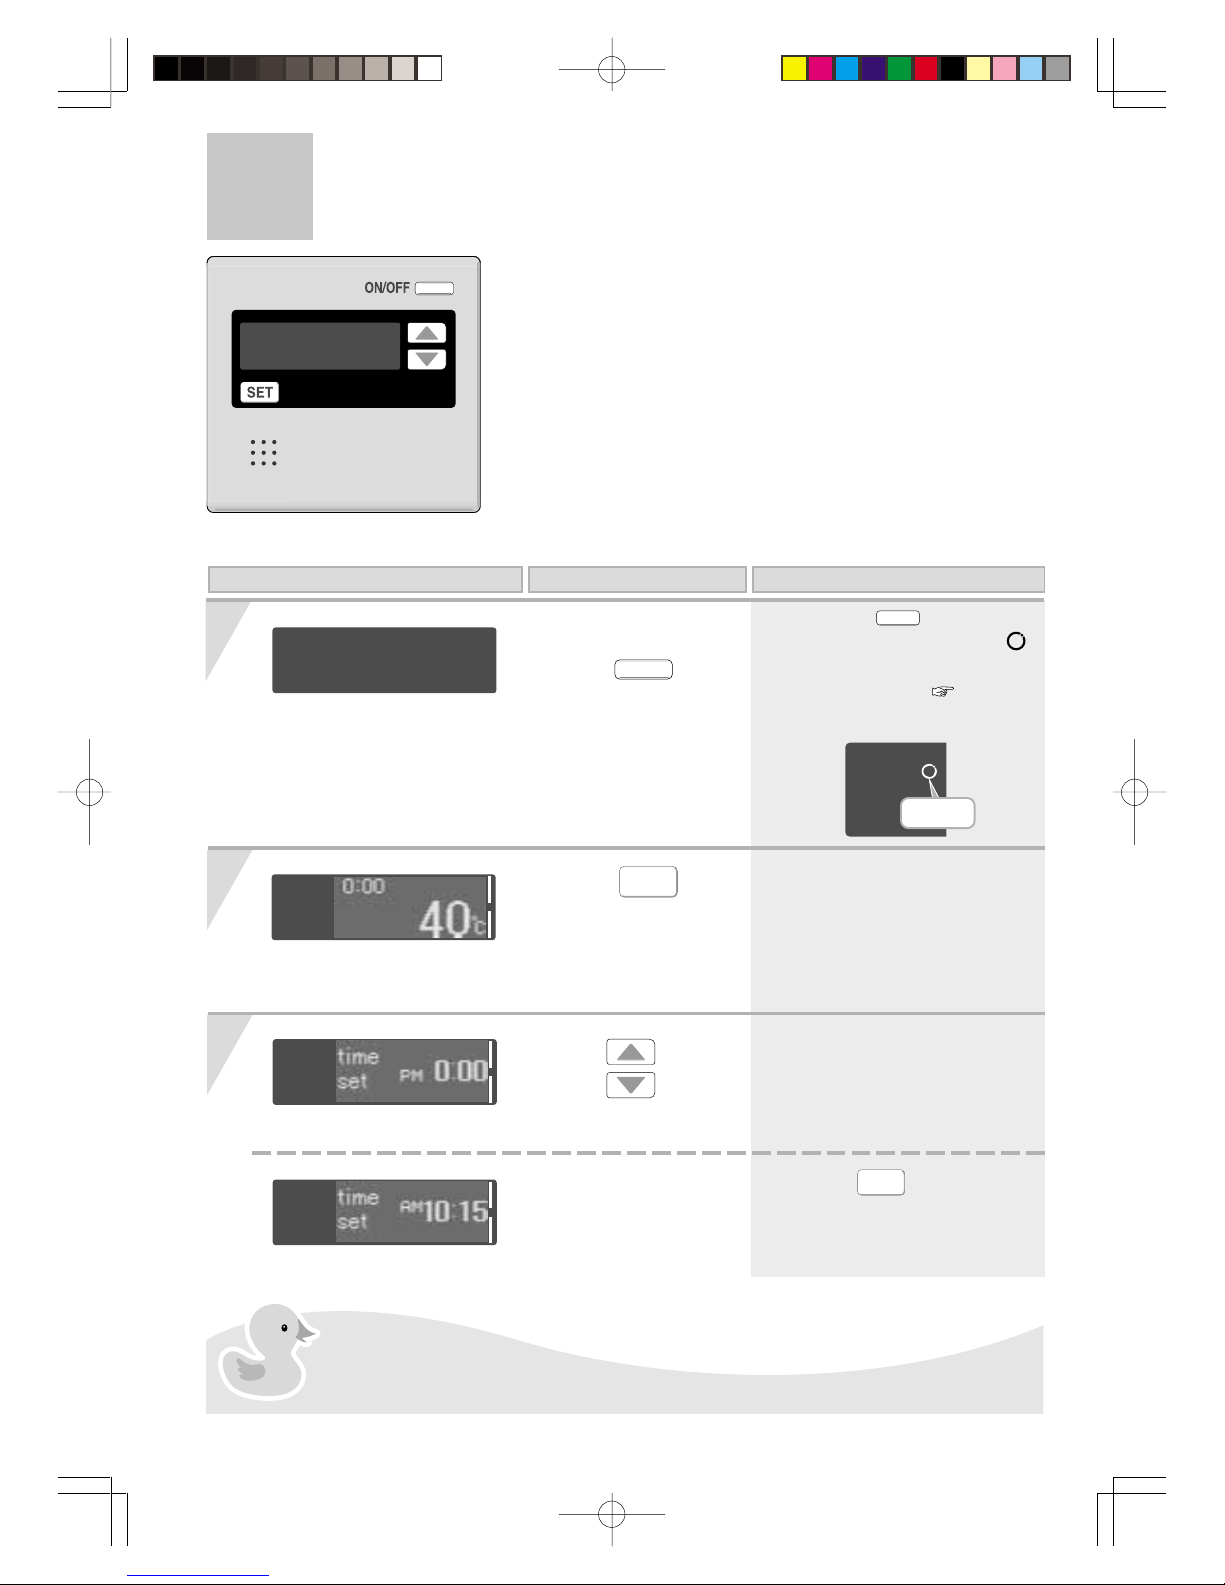
When using RCM3211
Clock Adjustment
Press the
ON/OFF
button to turn it
“On”.
1
On this Display Operation Description
Press the
SET
button to change the
display until “time
set” is shown.
2
Use the
buttons
to adjust the clock.
3
< Completion of setting >
* When the
SET
button is pressed,
or the console is left untouched for
about 20 seconds, the settings
screen ends.
(Eg.: AM 10:15)
* The time changes in 1-minute
increments with each press on the
button, and then in 10-minute
increments if the button is kept
pressed down.
(Eg.: 40°C)
In the event of a power cut or after disconnecting the power supply, when the
power is restored, the clock on the display screen shows “0:00”, so the clock
needs to be re-set.
< Display detail >
Blinking
* The
ON/OFF
is lit.
* When Circulation is on, the
symbol blinks and circulation mode
starts automatically. ( P15)
11
On this Display Operation Description
1
2
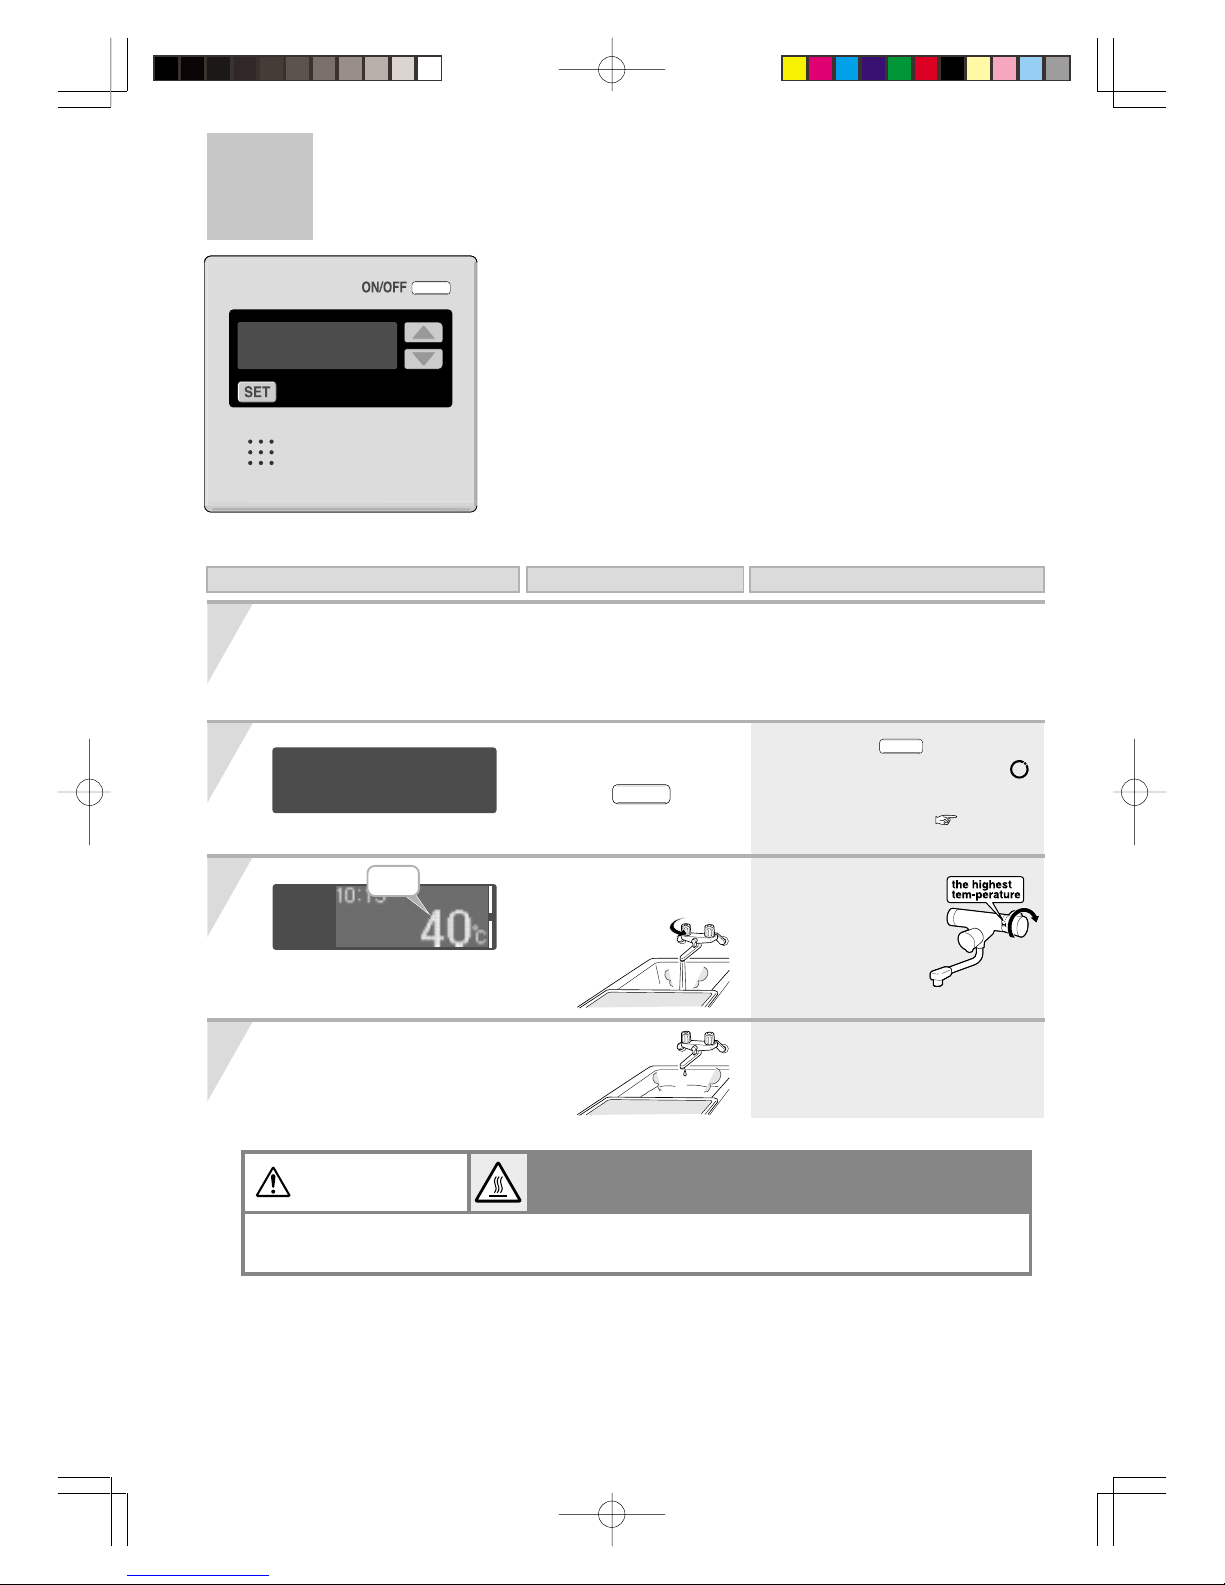
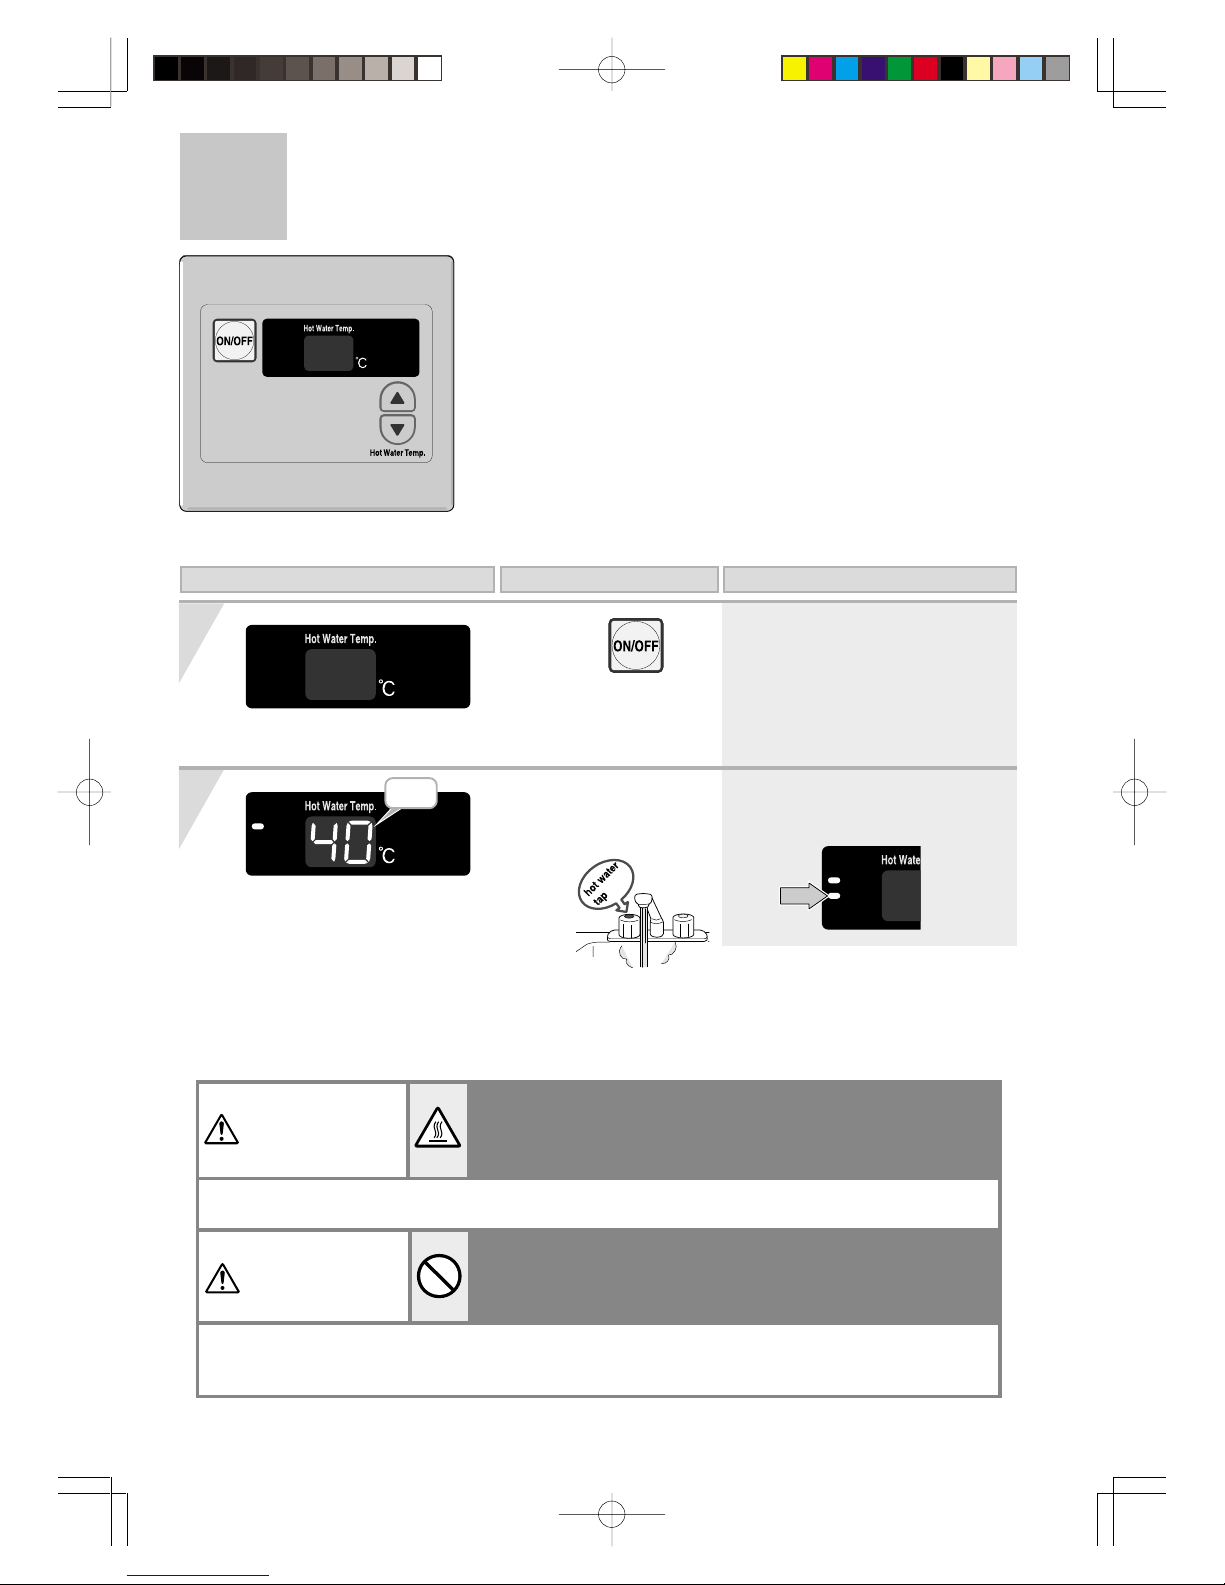
Running Hot Water
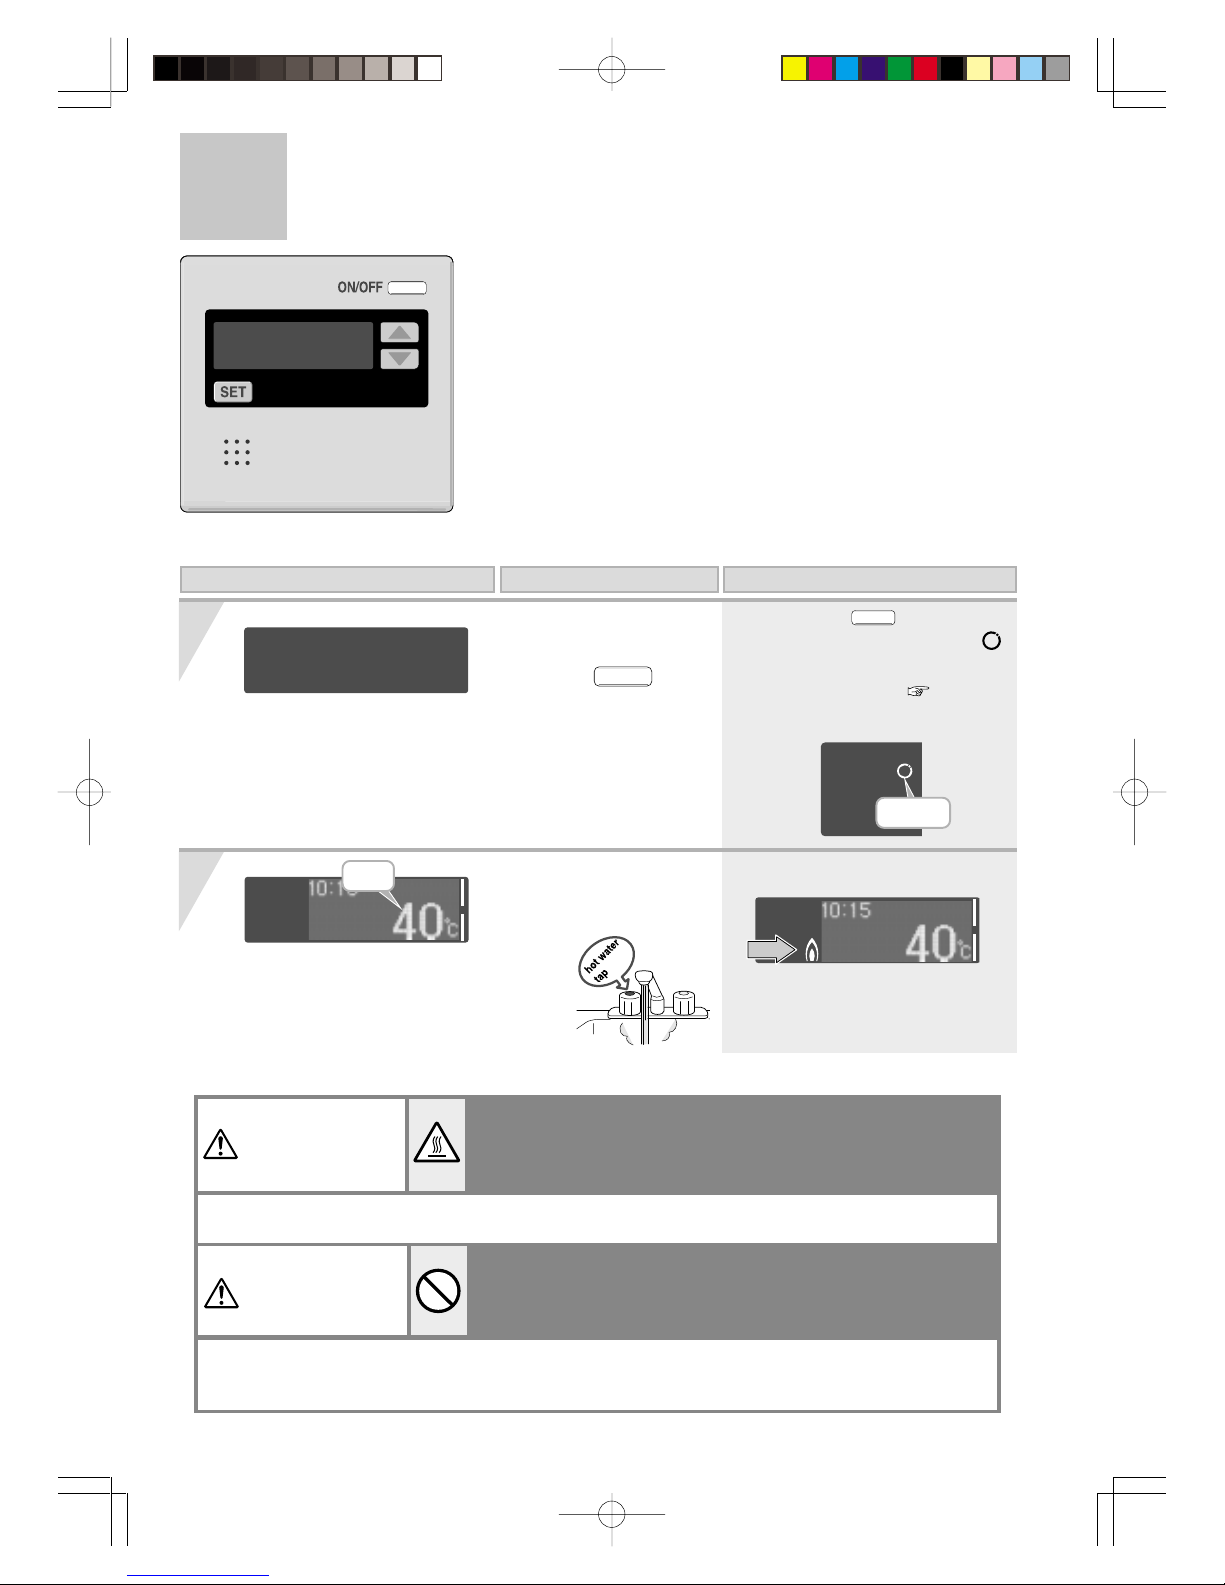
When using RCM3211
(Display example)
Check
Press the
ON/OFF
button to turn it
“On”.
* This is lit during combustion.
Turn on hot water.
Previous set temperature
(Eg.: 40°C)
Whenever using the hot water, such as when using the shower,
check the temperature shown on the remote controller first, and
then test the hot water temperature by hand.
Be especially careful if using hot water after previously using water at 60°C or above to prevent scalding.
While the shower is being used, no one other than the user
should change the temperature, the power switch must not be
turned “off”. (when using sub remote controller.)
WARNING
WARNING
This is to prevent scalding if the temperature rises. Conversely, if the temperature drops or the
power switch is turned “off”, the user may be upset when the water suddenly becomes much colder.
Here
< Display detail >
Blinking
* The
ON/OFF
is lit.
* When Circulation is on, the
symbol blinks and circulation mode
starts automatically. ( P15)
12
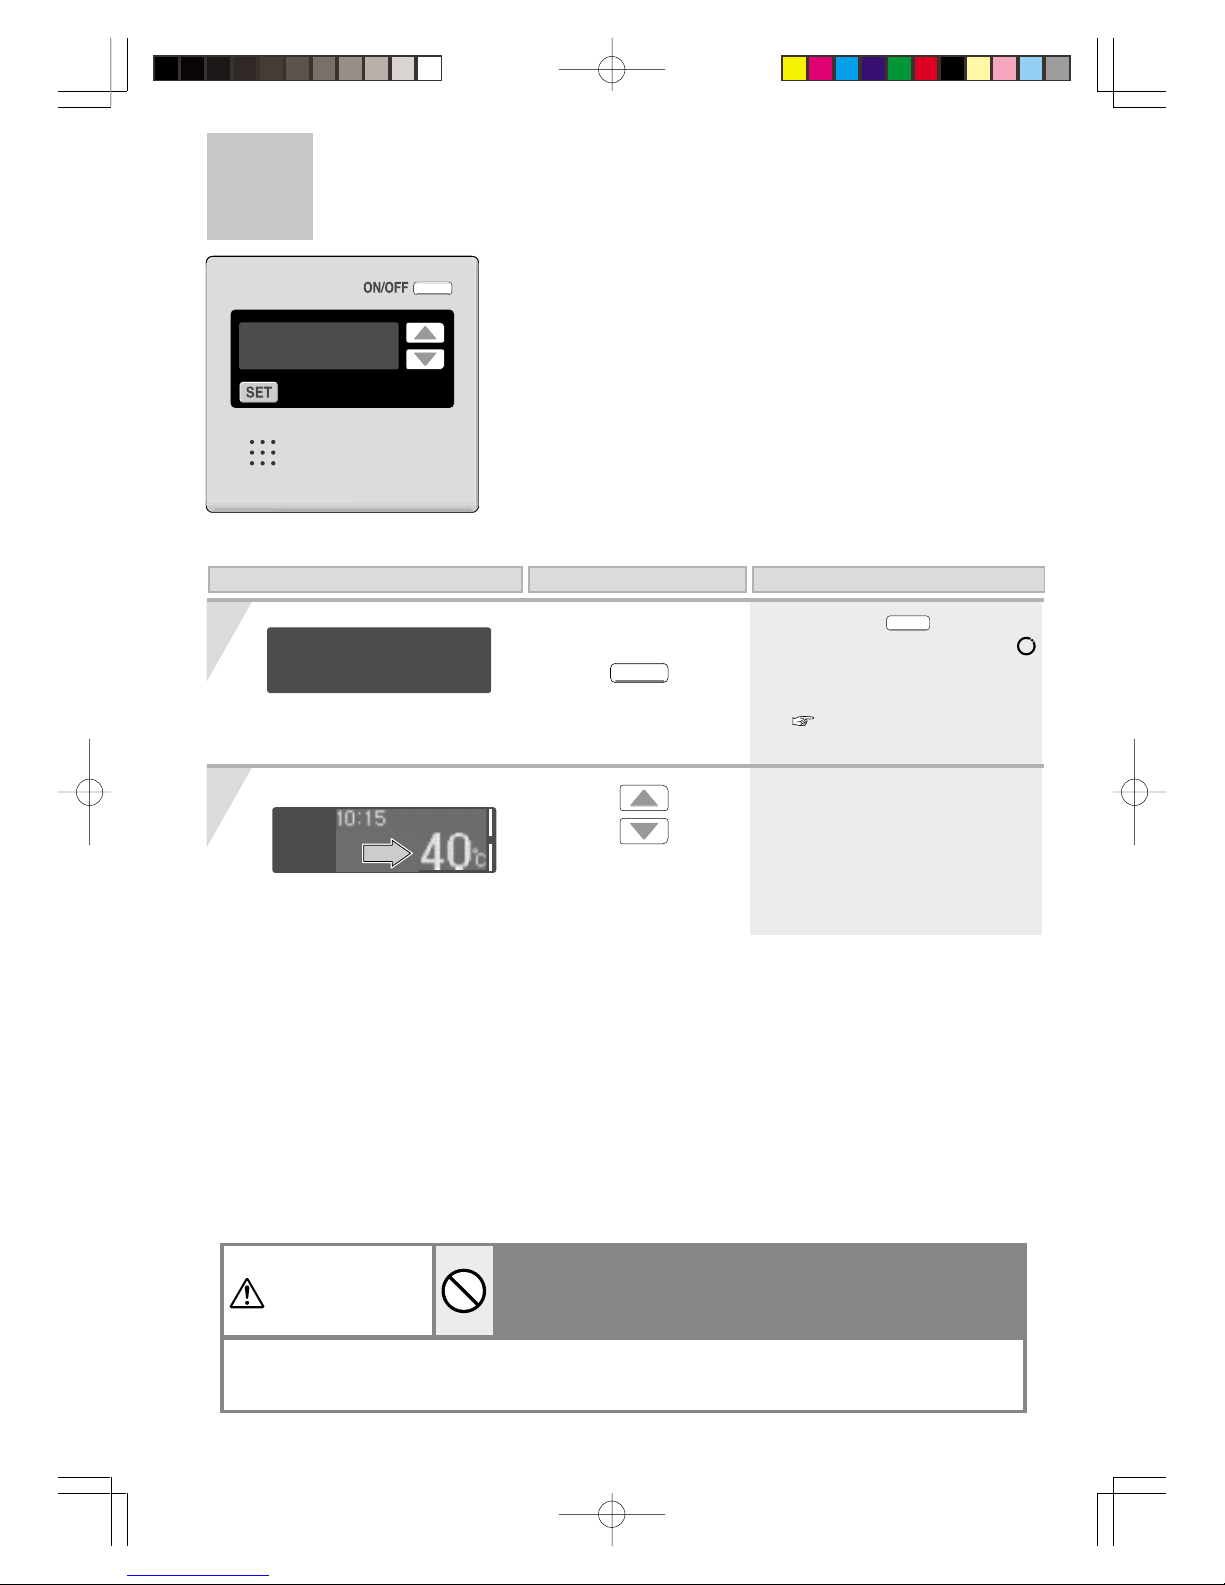
On this Display Operation Description
1
2
Setting Hot Water Temperature
Use the
buttons to adjust
the temperature.
(Eg.: 40°C)
Press the
ON/OFF
button to turn it
“On”.
When using RCM3211
While the shower is being used, no one other than the user
should change the temperature, the power switch must not be
turned “off”. (when using sub remote controller.)
WARNING
This is to prevent scalding if the temperature rises. Conversely, if the temperature drops or the
power switch is turned “off”, the user may be upset when the water suddenly becomes much colder.
Here
* The
ON/OFF
is lit.
* When Circulation is on, the
symbol blinks and circulation
mode starts automatically.
( P15)
13
• When a high temperature is set, the readout on the
right is shown.
• Please check the temperature displayed before using
any hot water.
Be especially careful using any hot water after any
previous setting of between 60 - 80°C.
• If the power switch on the remote controller is turned “on”, the
remote controller has priority in adjusting the temperature.
• When the temperature can be adjusted (console has priority), the
display screen is shown as per right.
• If the temperature cannot be adjusted, turn the power switch to
“off”, and then turn it “on” again.
Approximate hot water conditions
Washing
dishes, etc.
Shower, hot water supply, etc. Hot water supply, etc. High temperature
37 38 39 40 41 42 43 44 45 46 47 48 50 55 60 65 70 75 80
Set the maximum temperature to suit your own preference. ( P20 and 21)
• Hot water temperatures are approximations, and may differ from actual temperatures depending
on external factors, such as the season and length of piping involved.
• When low temperatures are set (for washing dishes, etc.), if the ambient water temperature is
already quite high, it may be difficult to ensure the resultant water temperature is as per the
setting.
• When the hot water temperature is adjusted using thermostat-controlled water mixing valves, set
the temperature on the remote controller to about 10°C higher than that required to ensure the
appropriate temperature.
When setting high temperatures (60 - 80°C);
(Eg.: 60°C)
Temperature
display flashes for
about 10 seconds
to indicate high
temperature.
Please switch to the priority setting if the temperature
cannot be adjusted (when an additional remote controller is attached).
(Eg.: 40°C)
Here
Here
Here
14
On this Display Operation Description
1
2
Press the
ON/OFF
button
to turn it “On”.
3
Filling Up the Bath
When using RCM3211
1. Insert the bathplug into the plughole.
Turn on hot water.
(Display example)
Check
When the bath is full,
turn off the taps.
* Please set to the
highest temperature
when using
thermostat controlled
water mixing valves.
WARNING
Check the bathwater temperature with your hand before getting into the bath.
To prevent scalding.
Preparation
* The
ON/OFF
is lit.
* When Circulation is on, the
symbol blinks and circulation mode
starts automatically. ( P15)
15
1
Press the
ON/OFF
button
to turn it “On”.
* Instant hot water operation means that water within the hot
water supply line is to be heated, and enables hot water to
be supplied instantly.
* If is not displayed on the remote controller, circulation is
not available.
* The symbol blinks and
circulation mode starts
automatically.
Previously set hot water
temperature (Eg.: 40°C)
* See Pages 12 - 13 for details on
how to adjust the temperature.
* When the temperature is set at
65°C or above, the temperature
of circulation water will be at
60°C.
Blinking
Check
Hot water temperatures are approximations, and may differ from actual temperatures
depending on external factors, such as the season and length of piping involved.
Circulation Operation
When using RCM3211 Display of on the remote controller
When reducing the temperature setting from very high during
instant hot water operation, be wary of the actual temperature.
To prevent scalding.
Even after the temperature is changed, very hot water remains within the pipe.
When “priority” is switched to the remote controller during circulation
Hot water circulates at the temperature set by the remote controller with priority right.
WARNING
WARNING
On this Display Operation Description

16
Press the
button until “off” is
blinking.
Press the
SET
button to change the
display to “pre-heat”.
(Eg.: 40°C)
< Completion of setting >
* When the
SET
button is pressed,
or the console is left untouched for
about 20 seconds, the settings
screen ends.
*
Circulation stops until the
ON/OFF
is turned “On”,
again or until the next timer
setting.
1
2
Suspension of Circulation
When using RCM3211
Unlit
Blinking
Blinking
* The symbol is no longer
displayed, circulation mode
stops.
Display of on the remote controller
On this Display Operation Description
When the hot water tank circulation system is used, do not
stop the circulation mode.
If you are unsure how to use such a system, please contact
the retailer.
17
1
2
3
4
Press the
ON/OFF
button
to turn it “On”.
Use the
button to select the
“cycle”.
Preparation
1. Check the temperature settings.
2. Check that the current time is correct.
An example of using hot water from
6:00 a.m. to 9:00 p.m. is described.
Press the
SET
button to change the
display to “pre-heat”.
When a timer period is set, circulation mode will automatically
turn on during that time.
Until the timer operation is canceled ( P19), circulation
operates during the same period every day.
Timer Setting Period for Circulation-1
When using a hot water storage tank circulation system,
do not set the timer for instant hot water operation.
If you are unsure how to use such a system, please contact
the retailer.
(Continued)
Press the button
until the is set to
“AM 6 - 7”.
* The
ON/OFF
is lit.
* The symbol blinks and
circulation mode starts
automatically.
When using RCM3211
Display of on the remote controller
Lamp on
On this Display Operation Description

18
Timer Setting Period for Circulation-2
5
< Completion of setting >
* When the
SET
button is pressed,
or the console is left untouched for
about 20 seconds, the settings
screen ends.
* If the clock is not adjusted, the
screen for clock adjustment will
be shown. ( P10)
* The setting details will show
the on/off run time of the
circulation pump.
Note; the circulation pump will
commence operation in
the next run time period.
Circulation starts
Circulation stops
* Circulation starts.
*
ON/OFF
automatically
switches “ON.”
* Circulation ends.
*
ON/OFF
will not be turned
“OFF” automatically.
(Continued)
When the operation switch is turned “Off”
*
About 1min. later the will not
be displayed, but it will have
the memory of the timer
setting.
Press the button
several times, until the
is set to “PM 8 - 9”.
* Circulation operates during the
period set by the .
On this Display Operation Description
When using RCM3211
Display of on the remote controller
Blinking
Lamp on
About 1min. later unlit
19
1
3
Use the button
to select “Cancel”.
Press the
SET
button to change the
display to “pre-heat”.
* The timer settings are
memorized even after being
cancelled.
Cancellation of timer operation (when instant hot water is regularly operated)
< Completion of
cancellation >
2
Use the
button to select the
“cycle”.
* “Cycle-on” is displayed
instantly.
Confirmation of timer setting
Follow procedures 1 - 2 of “Cancellation of
timer operation”, and check the timer setting
on the screen under procedure 3.
*
Pressing the
SET
button, or leaving
it unattended for about 20 seconds,
finalizes the confirmation screen.
Modification of the timer setting
Cancel the settings as per the following “Cancellation of
timer operation” procedure, and then re-set in accordance
with the procedure detailed on Pages 17 - 18.
Unlit
Here
On this Display Operation Description
20
[Scroll display]
( P7)
no
yes
Scroll display is
turned on.
Scroll display is
turned off.
1
2
= Initial setting < factory setting >
3
75°C
-
50°C
no
yes
Condition is suitable
for draining the unit.
( P29)
Stops draining
the unit.
48°C
-
40°C
(in 1°C increments)
80°C
Other Setting Options
When using RCM3211
[Draining the unit]
( P29)
[Maximum tempera-
ture setting]
( P13)
Switching
scroll display
Scroll display (
P7) can be switched
on = “yes” or off = “no” .
Draining the unit
This is set to drain the unit.
On this Display
(in 5°C increments)
21
q Press the
ON/OFF
button to “OFF”.
w Press the
SET
button
to show the settings
screen.
Press the
SET
button
to select the setting to be
modified.
(Setting changes each time the
button is pressed.)
Use the buttons to
modify the setting.
(Setting changes each time the
button is pressed.)
Power is switched
“Off” again.
< Completion of setting >
* When the
SET
button is
pressed, or the console is left
untouched for about 20
seconds, the settings screen
ends.
* Repeat procedures 2 - 3 again
to adjust other settings.
* This may not be displayed
depending on the
installation conditions.
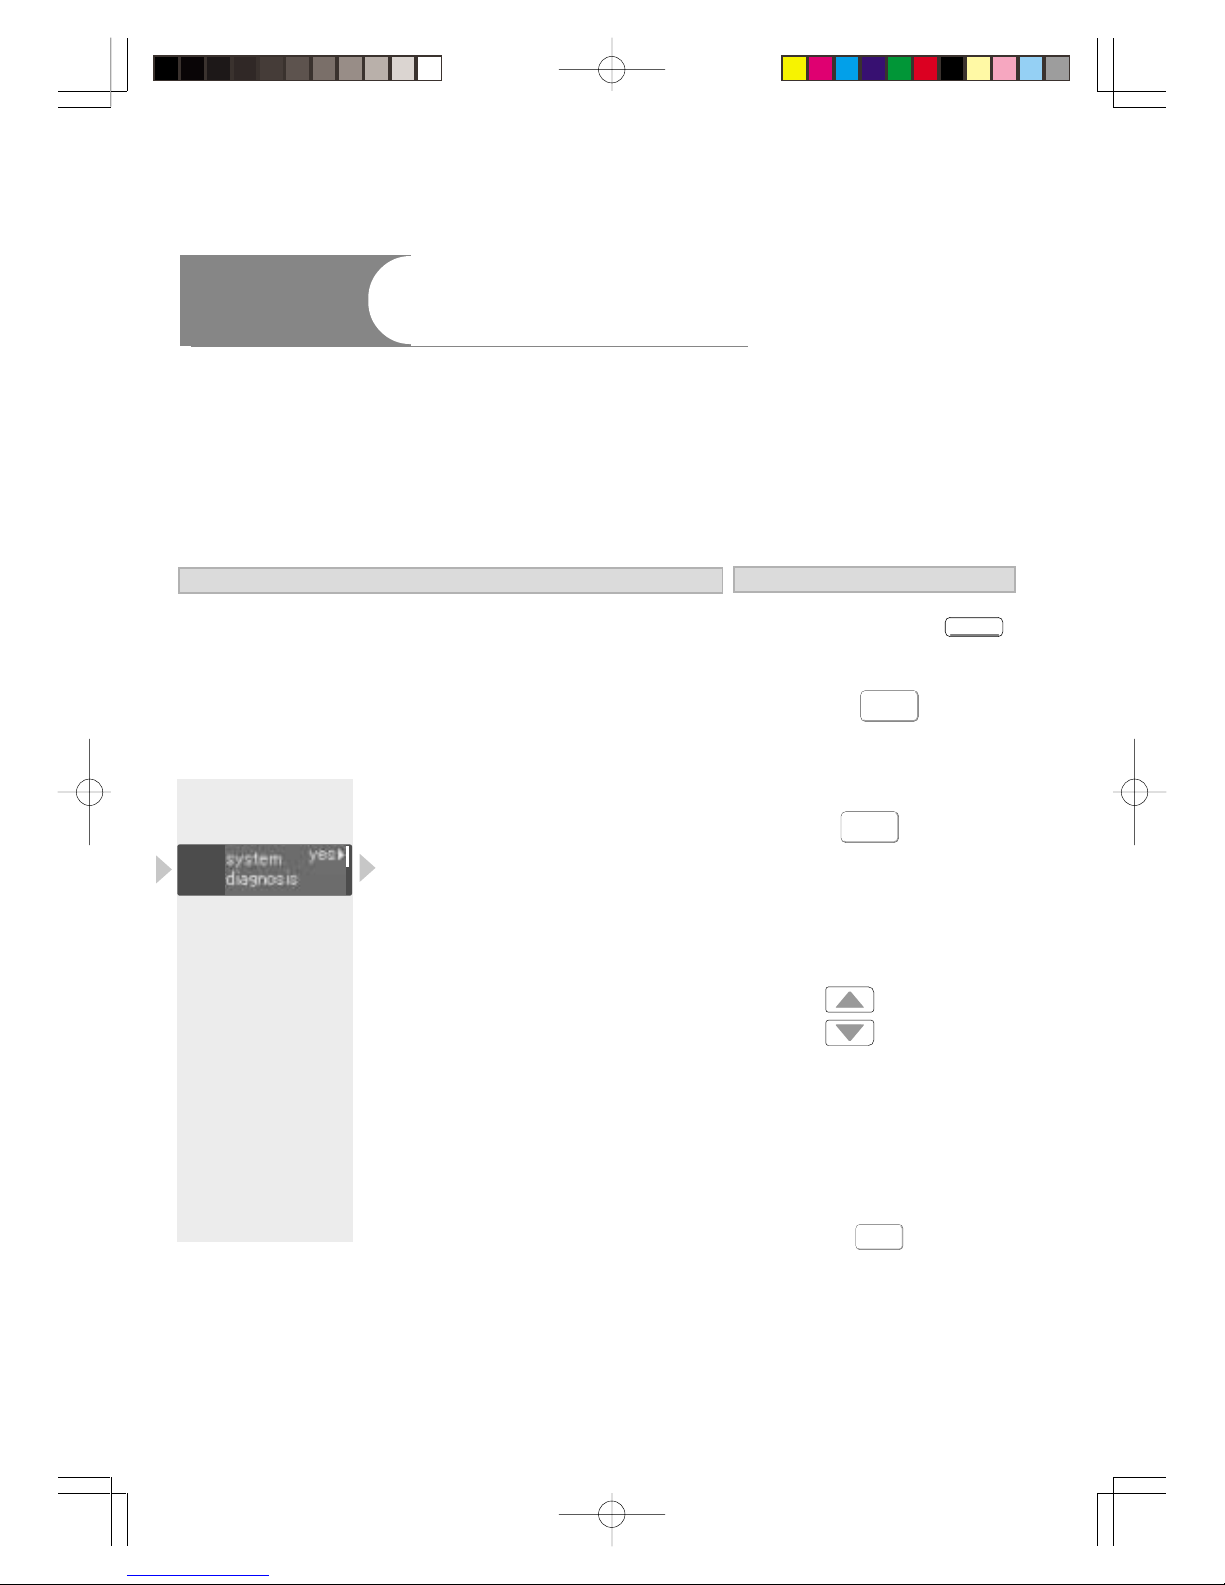
* This is only used for
installation and
maintenance
purposes, so please
do not touch.
Operation
On this Display
Modification of the
maximum temperature
setting
The maximum temperature setting can be
modified.
22
1
Confirmation Beeper On/Off
When using RCM3211
Operation Description
Press the
ON/OFF
button for about five
seconds.< Completion of setting >
* Setting is possible regardless
of whether the power switch is
ON/OFF.
The remote controller will emit a sound when any button is
pushed. This sound can be muted if it is desired.
* Initial factory setting is with sound.
23
Press the
button to turn it
“On”.
1
2
Turn on hot water.
Running Hot Water
When using RCS3211
< Display details >
* This is lit during combustion.
* Hot water supply temperature
is displayed.
Previous set temperature
(Eg.: 40°C)
Whenever using the hot water, such as when using the shower,
check the temperature shown on the remote controller first, and
then test the hot water temperature by hand.
Be especially careful if using hot water after previously using water at 60°C or above to prevent scalding.
While the shower is being used, no one other than the user
should change the temperature, the power switch must not be
turned “off”, when using sub remote controller.
WARNING
WARNING
This is to prevent scalding if the temperature rises. Conversely, if the temperature reduces or the
power switch is turned “off”, the user may be upset when the water suddenly becomes much colder.
Priority
Burner on
Priority
Burner on
Here
Priority
Burner on
Check
Priority
Burner on
On this Display Operation Description

24
Priority
Burner on
1
2
Use the
buttons to adjust the
temperature.
(Eg.: 40°C)
Press the
button to turn it
“On”.
* Hot water supply temperature
is displayed.
Priority
Burner on
Priority
Burner on
Setting Hot Water Temperture
When using RCS3211
On this Display Operation Description
While the shower is being used, no one other than the user
should change the temperature, the power switch must not be
turned “off”, when using sub remote controller.
WARNING
This is to prevent scalding if the temperature rises. Conversely, if the temperature reduces or the
power switch is turned “off”, the user may be upset when the water suddenly becomes much colder.
 Loading...