

Page 1
Navigation Radio CD
TravelPilot Rome NAV55E
E
TravelPilot
Operating and Installation Instructions
www.blaupunkt.com
Page 2

Contents
Contents
About these instructions ................3
For your safety ...............................3
Scope of delivery............................5
Device Overview .............................6
Controls ..........................................6
The most important display
symbols ........................................7
The basic functions ........................8
Theft protection ...........................8
Detaching/attaching the control
panel ............................................8
Switching the device on and off ..9
Entering the code number ...........9
Inserting a CD ............................10
Adjusting the volume .................11
Muting the device.......................11
Operation with car phone ..........11
Operating the settings menu .......12
Operation of the menu button ...12
Example of a menu operation ....12
Basic settings before the trip ......15
Adjusting sound and balance .....15
Adjusting the equalizer ..............17
Basic settings in the "System"
menu ..........................................18
Setting the basic settings of
the radio ....................................22
Setting the basic settings of
the navigation system ................24
While driving ................................26
Selecting an audio source ..........26
Playing music .............................29
Traffi c announcements ...............31
Operating the radio ......................35
Selecting the waveband/
memory bank .............................36
Tuning into a station ..................36
Scanning receivable stations
(SCAN) .......................................38
Storing stations ..........................39
Playing stored stations ...............40
Operating the CD/MP3 player ......40
Playing CDs ................................41
Selecting a track from a list........42
Scanning tracks (SCAN) .............44
Changing MP3 settings ...............44
Operating the navigation system ...46
The operating principle ..............46
Installing the navigation software ..47
The navigation display ................48
The three menus of the
navigation system .......................49
Starting the navigation system ...52
Overview of the destination entry .. 52
Entering an address....................54
Entering points of interest ..........58
Saving destinations ....................59
Deleting/renaming destinations .61
Calling a destination from the
memory ......................................62
Destination guidance ..................62
Route calculation ........................63
Displaying the calculated route ..67
Changing a route (Traffi c ahead) ..67
Specifying Route Options ...........68
Displaying the current position ..71
Installation instructions ...............72
For your safety ............................72
Connection assignments ............73
Connecting the device ................75
Installing the device ...................77
Entering the code number ..........78
Switching the speedometer
signal on/off ...............................79
Performing a sensor test ............79
Calibrating the device ...............79
Cleaning the device ....................81
Uninstalling the device ...............81
Warranty .......................................82
Specifi cations ...............................82
Glossary ........................................83
Index .............................................84
2
Page 3

For your safety
Blaupunkt stands for technical
know-how in mobile radio reception, for precise navigation systems
and fi rst-class sound. The blue dot
made its debut in 1923 as a seal
of quality that was assigned after
rigourous functional – and it still applies today. At that time as well as
today, the blue dot identifi es products of extraordinary quality.
About these
instructions
Please read these instructions and,
in particular, the chapter entitled
"For your safety" (next section) in
their entirety before using the device!
Additional documentation
CD changer instructions
•
Instructions for the optional
•
steering wheel remote control
For your safety
The device was manufactured according to the state of the art and
established safety guidelines. Even
so, dangers may occur if you do not
observe the safety information:
Read these instructions carefully
and completely before using the
device.
➜
Keep the instructions at a location so that they are always accessible to all users.
➜
Always pass on the device to
third parties together with these
instructions.
Use as directed
The device is designed for use in
automobiles. Special information
about the navigation of campers,
busses and trucks, such as altitude
limitations or maximum permissible
road load, is not included on the
navigation CD.
Navigation off the roads (offroad)
is not possible with the ROME
NAV55E.
If you are installing device
yourself
You may only install the device
yourself if you are experienced in
installing car sound systems and
navigation systems and are very familiar with the electrical system of
the vehicle.
3
Page 4

For your safety
Observe the following!
General
Do not open the device! The de-
•
vice contains a Class 1 laser that
emits invisible laser radiation
which can cause injuries to your
eyes. Accessing the inside of the
device voids the warranty.
Immediately remove the device
•
card from the packaging and
store it separate from the device
outside of the vehicle!
In operation
Operate the device only if traf-
•
fi c situation permits it! Stop at a
suitable location before entering
a new navigation destination or
changing basic settings!
Always listen at a moderate
•
volume so that you can always
acoustic warning signals (e.g. police)! This will also help to protect your hearing.
The navigation system outputs
•
turn-by-turn directions during
the destination guidance. Follow
them only if you do not violate
any traffi c regulations!
Carry the control panel with you
•
in the supplied bag whenever you
leave the vehicle.
Some CDs with copy protection
•
cannot be played.
•
Do not insert any mini CDs (8 cm
diameter) and shape CDs since
they destroy the drive!
Similar to printed material, the
•
digital map material on the navigation CD is no longer up to date
after some time. For this reason,
update your navigation CD as
soon as a new version is released
(see www.blaupunkt.com).
For cleaning
Clean the device with a dry or
•
slightly moistened cloth. Do not
use any solvents, cleaning agents
or cleansers and no cockpit spray
or care product for plastic materials.
For disposal
Return used devices to your local
•
collection site.
4
Page 5

Scope of delivery
1 Rome NAV55E
1 Cloth bag for the control panel
1 Navigation CD
1 GPS antenna
1 Device card with four-digit code
number
1 Operating instructions
1 Support frame
2 Disassembly bar
2 Connecting cables for speed-
ometer signal and reversing
signal
1 Guide pin
1 Screwdriver
2 Adhesive labels (security)
Scope of delivery
5
Page 6
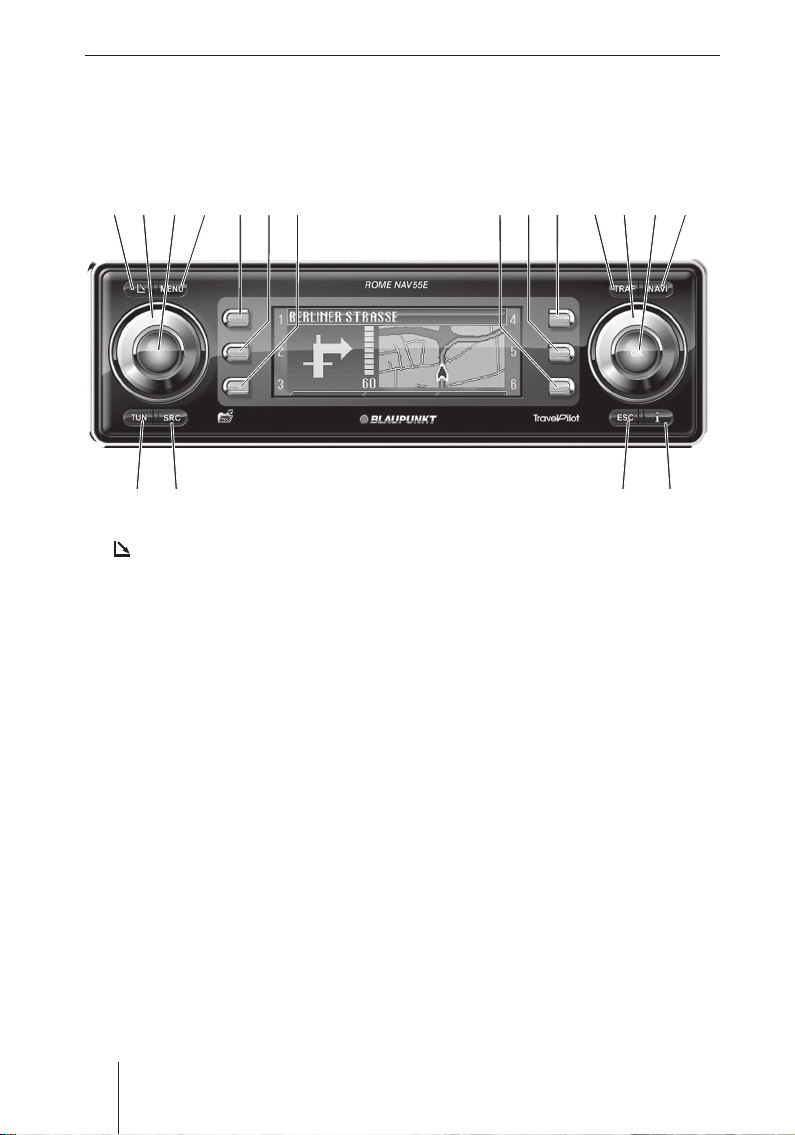
Device Overview
Device Overview
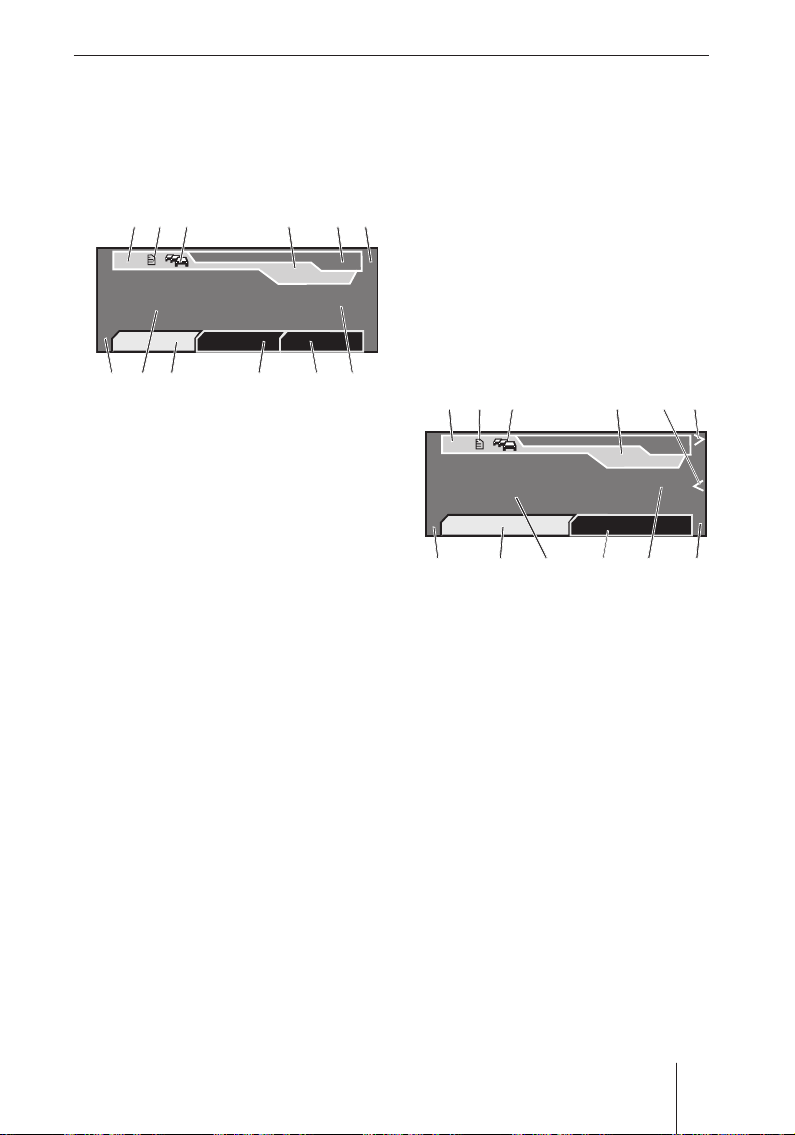
Controls
6 721 43 5 9
? @
1
button (Open)
Open the control panel and remove
the CD
2 Volume control
3 On/Off button
Short press: Switch on/mute traffi c
announcement/fading out the turnby-turn direction
Press long: Switch off
4 MENU button
Calling the settings menu
5 Function button 1
6 Function button 2
7 Function button 3
8 Function button 4
9 Function button 5
: Function button 6
Functions that are assigned to the
function buttons 5 to : are shown
on the display A
:
8
;<=>
A B
; TRAF button
Press short: Call up traffi c information settings
Press long: Display TMC messages
< Menu button
Select a menu item/character
= OK button
Press short: Confi rm selection
Press long: Start scan/station seek
tuning
> NAVI button
Press short: Switch to navigation
system
Press long: Call up route options
? TUN button
Press short: Switch to radio
Press repeatedly: Select the wave-
band (FM1, FM2, FMT, MW, LW)
Press long: Start Travelstore
6
Page 7
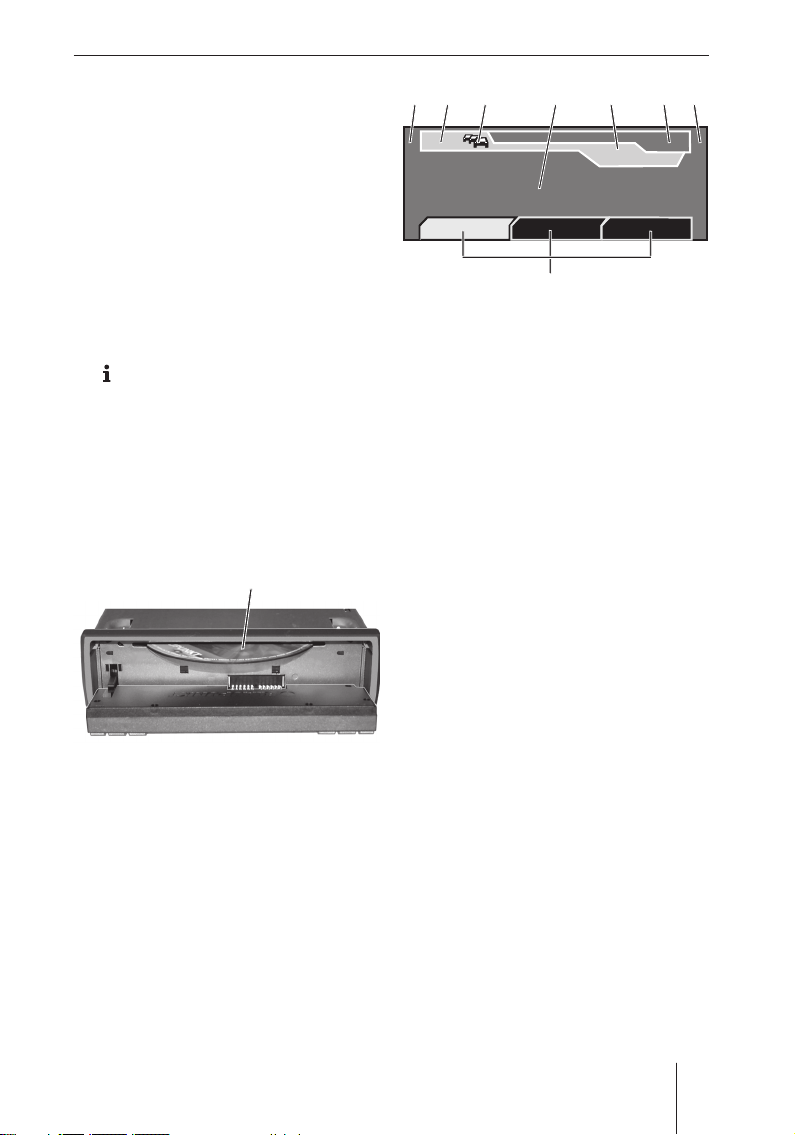
G
Device Overview
@ SRC button
Toggle between CD/MP3/WMA player and optional CD changer
A ESC button
Press short in the menu: Change to
the previous menu level
Press long in the menu: Change to
the top menu level
Text input: Delete last character
Navigation: Cancel destination guid-
ance
Scan: Cancel
Travelstore: Cancel
B
button (Info)
Display current location, dis play
complete list
Press short during destination
guidance: Show current location
and repeat last voice-prompted turnby-turn direction
Press long during destination guidance: Display route list
CC
B
A
1
2
3
C ED
TMC
BBC
Tune Band Options
16:13
F
FMT
92,8
A
The most important display
symbols
Functions assigned to the func-
A
tion buttons (5 to :).
You can also control the currently active audio source with the function
buttons (5 to :) if these functions
are not displayed.
B TMC symbol
C TA symbol
D Display area
E Time
F Current audio source
G Menus
4
5
6
C CD drive
7
Page 8
The basic functions
The basic functions
Theft protection
To provide protection against theft,
the device features
a four-digit code number (printed
•
on the device card)
•
a detachable control panel (see
below)
CAUTION!
Danger of theft!
Without the code number and the
control panel, the device is useless
to a thief.
Never keep the control panel and
➜
device card in the vehicle, not
even in a hidden place; instead,
carry the control panel with you
in its bag when you leave the vehicle!
Detaching/attaching the
control panel
You can detach the control panel to
protect against theft.
CAUTION!
Damage to the control
panel!
The control panel can be damaged
or malfunction if the following is not
observed:
Never drop the control panel.
➜
Transport it only in its supplied
➜
bag.
Never expose it to direct sunlight
➜
or another heat source.
➜
Never touch the contacts on the
rear side.
➜
If necessary, clean the contacts
with lint-free cloth moistened
with alcohol.
To detach the control panel:
➜
Press the
The control panel opens to the
front.
button 1.
CAUTION!
Danger of injuries!
If the control panel is open, it may
lead to personal injuries in case of
an accident.
➜
Close the control panel before
you start driving!
8
Note:
If the device is switched on and
a CD is in the drive, it is ejected
after 2 seconds. If you do not remove this CD, it is automatically
pulled in again after approx. 10
seconds. The device automatically switches off after approx.
30 seconds (Standby).
Page 9
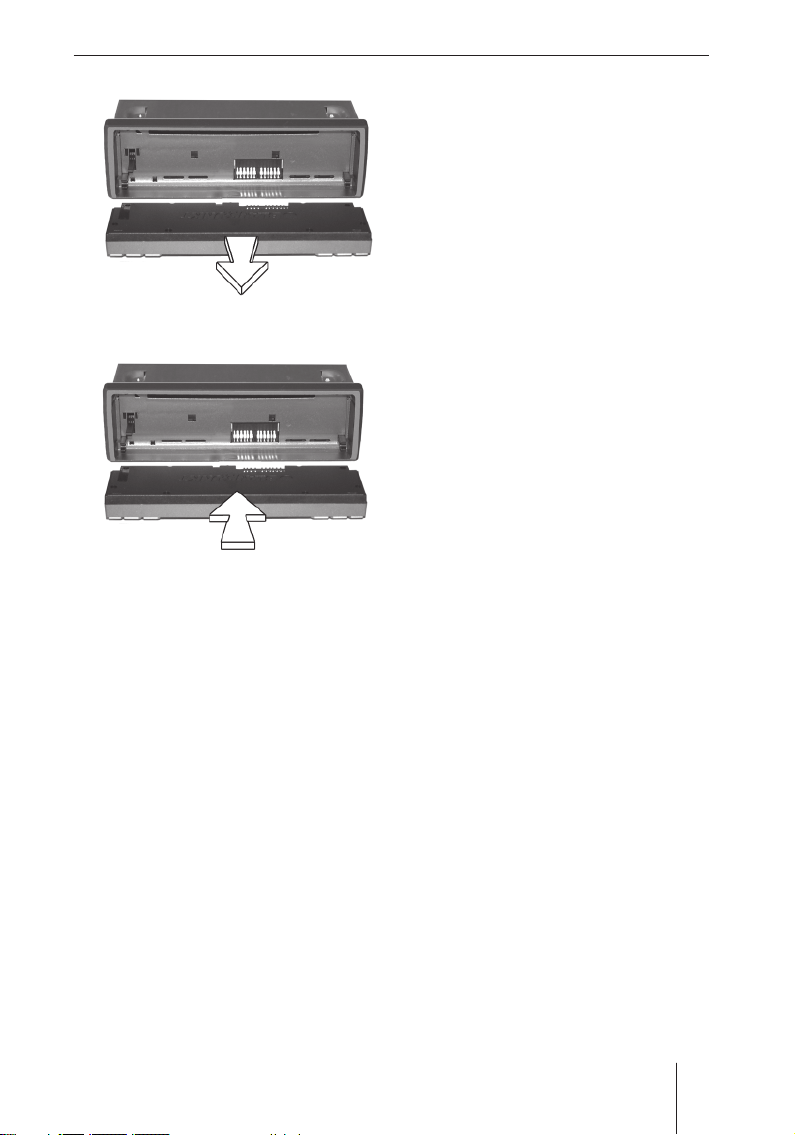
Pull the control panel straight
➜
out of its hinges.
To attach the control panel:
➜
Push the control panel into its
hinges from the front.
The control panel engages in the
hinges.
➜
Fold up the control panel.
The control panel engages. The
device can now be switched on.
Switching the device on and
off
To switch on the device:
➜
Press the On/Off button 3.
The device plays the previously
active audio source at the previously selected volume.
The basic functions
Notes:
You can limit the power-on vol-
•
ume to a maximum value (see
p. 18).
If you switch on the device
•
without fi rst switching on the
vehicle ignition, the device automatically switches off after
one hour to save the vehicle
battery.
To switch off the device:
➜
Hold the On/Off button 3
pressed until the display disappears.
The device remains in standby
mode for 30 minutes before completely switching itself off.
Note:
The device is automatically
switched off as soon as you
switch of the vehicle ignition. If
you switch on the ignition again,
it also automatically switches on
the device again.
Entering the code number
The code number is used for theft
protection. You must enter it if the
device was disconnected from the
battery power, e.g. after a repair
of the vehicle. The code number is
printed on the device card.
Note:
Memorise the code number or
take it with you before you use
the vehicle for a longer trip.
9
Page 10

The basic functions
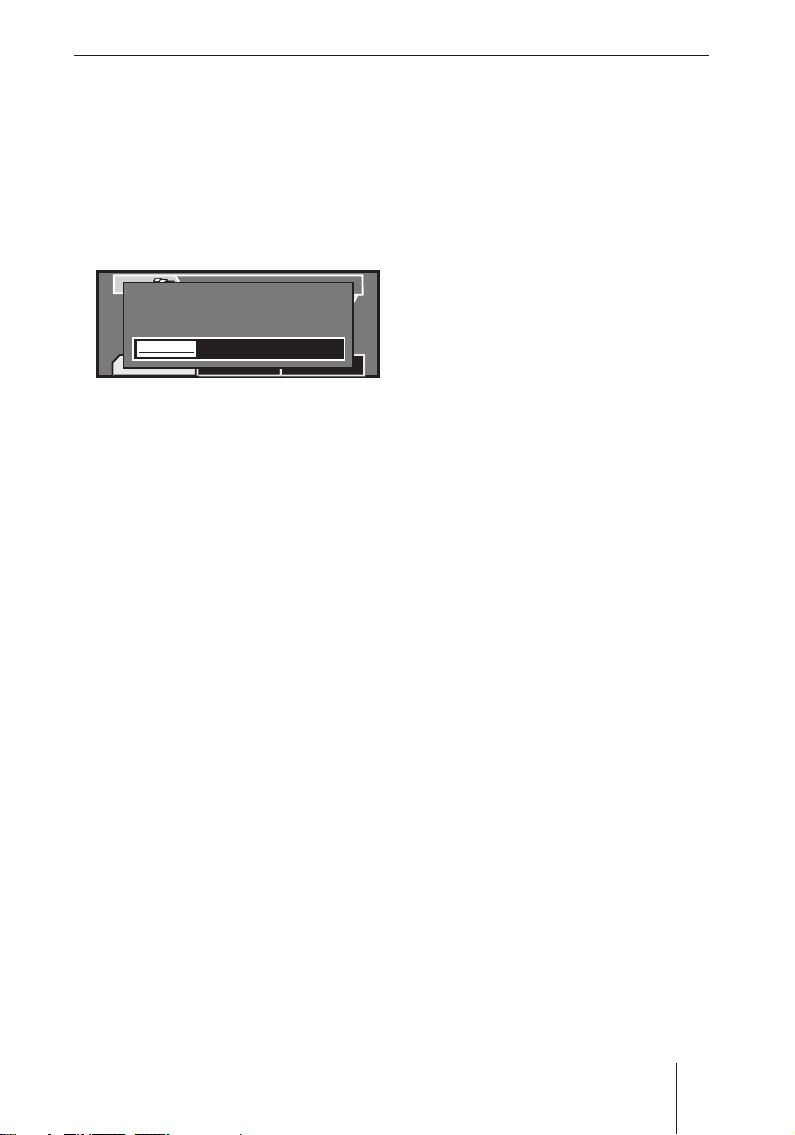
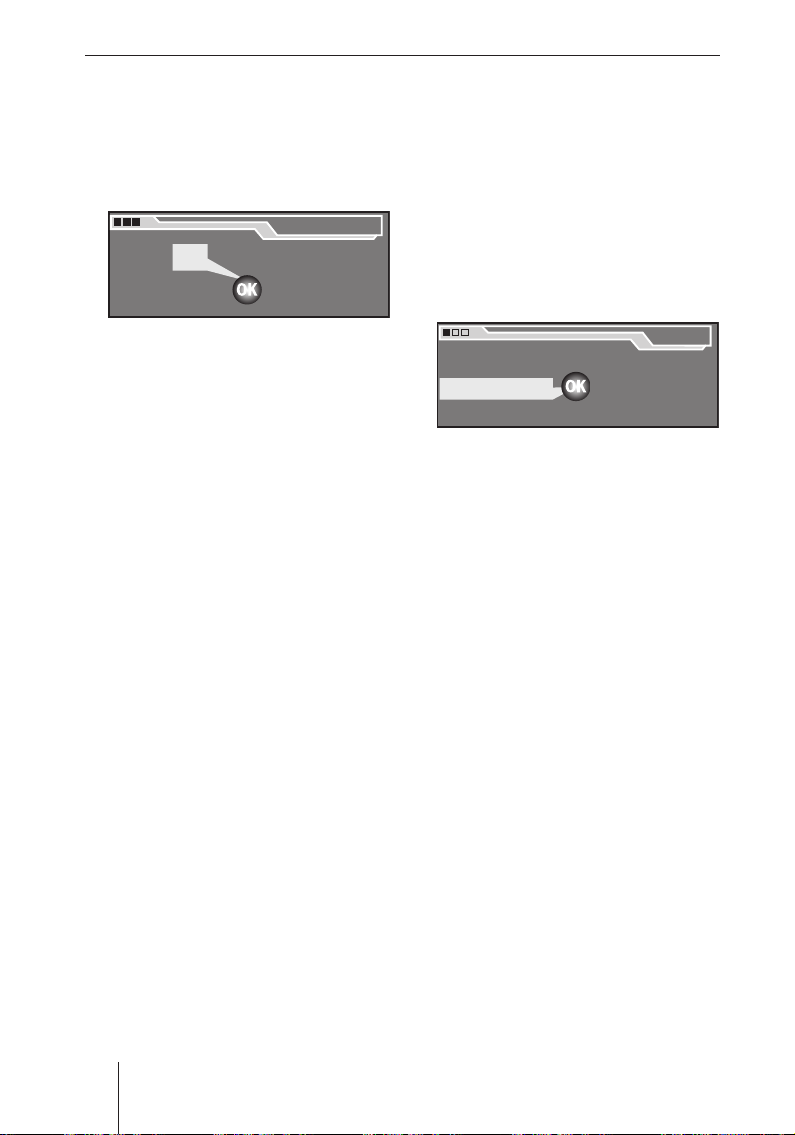
If the code entry appears on the
display, the fi rst digit is selected.
Code
Code
0 0000K
0 0000K
➜
Turn the menu button < until
the selected position shows the
correct number.
➜
Press the OK button = to con-
fi rm the number.
The next digit of the code number
is selected.
➜
Repeat the two steps for the
remaining digits of the code
number.
If you entered an incorrect number:
➜
Press the ESC BUTTON A.
The number entered last is de-
leted.
If the correct complete code number
is displayed:
➜
Press the OK button =.
The device is operational.
If you entered the wrong code
number
If you inadvertently entered and
confi rmed a wrong code number,
you can repeat the entry. To prevent
thieves from obtaining the code
number through trial-and-error, the
device is blocked for one hour after
the third incorrect entry. Leave the
device switched on during this time,
because if you switch off the device
during the waiting time, the waiting
time is reset and is once again one
hour long.
You can also deactivate the Code
query (see p. 21).
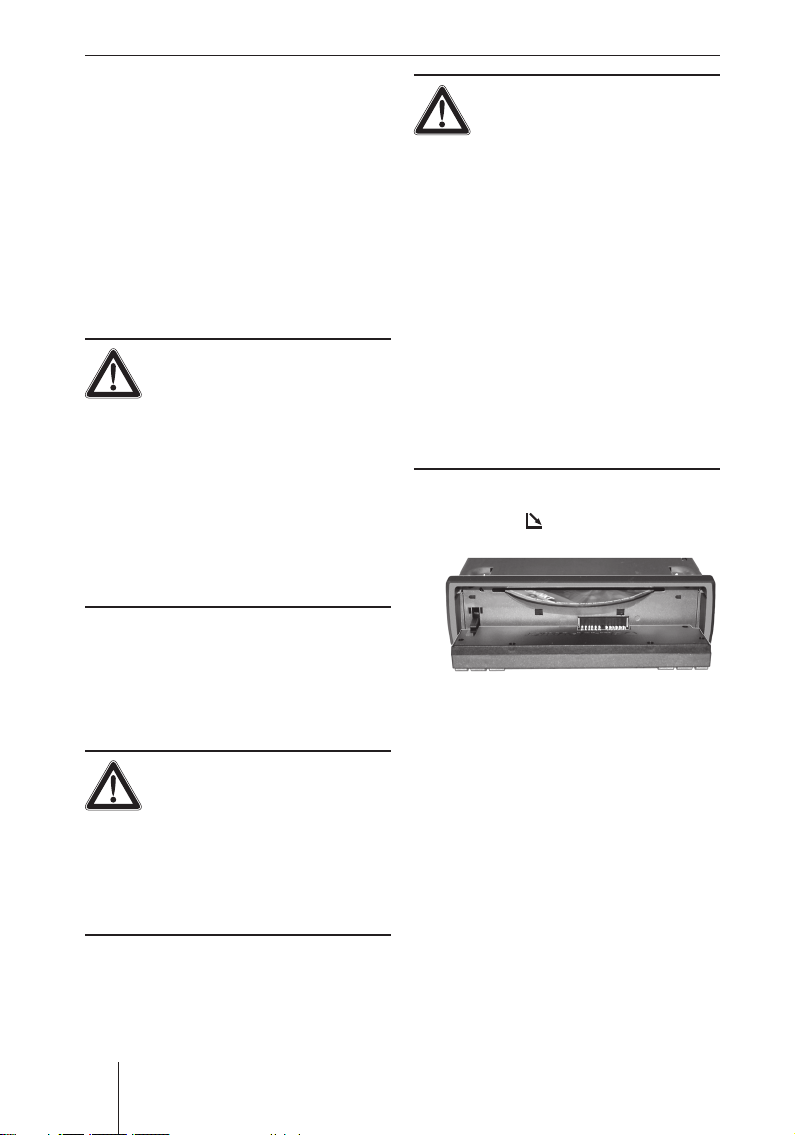
Inserting a CD
To insert the navigation CD or an
MP3, WMA or audio CD, the device
must be switched on:
➜
Press the
The control panel opens to the
front. If a CD is in the drive, it is
ejected. If you do not remove this
CD, it is automatically pulled in
again after approx. 10 seconds.
➜
Insert the CD with its printed side
uppermost into the CD drive C
until you feel some resistance.
The drive automatically draws in
the CD and checks it.
➜
Fold up the control panel.
The DVD starts playing. The cor-
responding menu displays.
Note:
The device remembers the track
and playing time of the audio or
MP3 or WMA-CD played last and
starts again at the same point
at which the playback was interrupted. This is extremely helpful
if the navigation CD had to be
briefl y inserted during the audio
playback.
button 1.
10
Page 11
The basic functions
Adjusting the volume
To change the volume of the currently playing source:
➜
Turn the volume control 2.
The volume changes. The current
volume is shown on the volume
display and stored.
TMC
TMC
1
1
2
2
NDR 2
NDR 2
3
3
Note:
The device handles the volume
of the different sources (music,
voice output or phone) independent of each other. You only control the volume of the currently
active audio source at any given
time. The volume of the other audio sources does not change.
Volume 4
Volume 4
Tune Band
Tune Band
16:13
16:13
Optionen
Optionen
FMT
FMT
92,8
92,8
4
4
5
5
6
6
Muting the device
You can mute the currently playing
audio source as follows:
➜
Briefly press the On/Off button 3.
MUTE briefl y appears on the display.
Diving recommendation announcements of the navigation
system can also be switched off
(see p. 24).
To cancel the mute function:
➜
Briefl y press the On/Off button
3 again or turn the volume control 2.
Operation with car phone
If the device is connected to a car
phone:
•
If the device is switched off, it automatically switches on when you
receive a call or make a call,
•
the phone symbol appears during
the phone call or the "PHONE"
text appears on the display during the destination guidance,
•
the audio source which is currently playing is muted as long as
you are making a phone call,
•
the voice of the person calling
you is played back via the loudspeakers of the vehicle,
•
the access to many menus (see p.
12) is blocked during the phone
call.
Note:
In each case, you only mute the
currently playing audio source
(music, traffi c announcement,
voice-prompted turn-by-turn direction or phone). As soon as you
activate a different audio source,
it is played back with the previously selected volume.
11
Page 12
Operating the settings menu
Operating the
settings menu
The settings menu allows you to adjust basic device functions, such as
sound, power-on volume or display
brightness and language, to your
specifi c needs.
This chapter provides information
about:
The buttons used for navigation
•
in the settings menu (see below),
An example to illustrate how to
•
reach a specifi c menu item (see
below),
The location of menu items in the
•
settings menu (see p. 13).
Operation of the menu
button
The menu button < together with
the OK button = is the central con-
trol unit of the device.
The MENU button 4 is used to
•
call up the settings menu.
Turning the menu button < to
•
the left or the right allows you
tom select menu items, characters or settings.
Use the OK button = to con-
•
fi rm the selection and reach new
menu levels and the menu items
which can be adjusted.
The OK button = is also used to
•
activate/deactivate the selected
menu item.
The ESC button A returns you to
•
the next higher menu level.
Example of a menu
operation
The following example (Changing
the reception sensitivity of the radio) shows how to operate the settings menu in general.
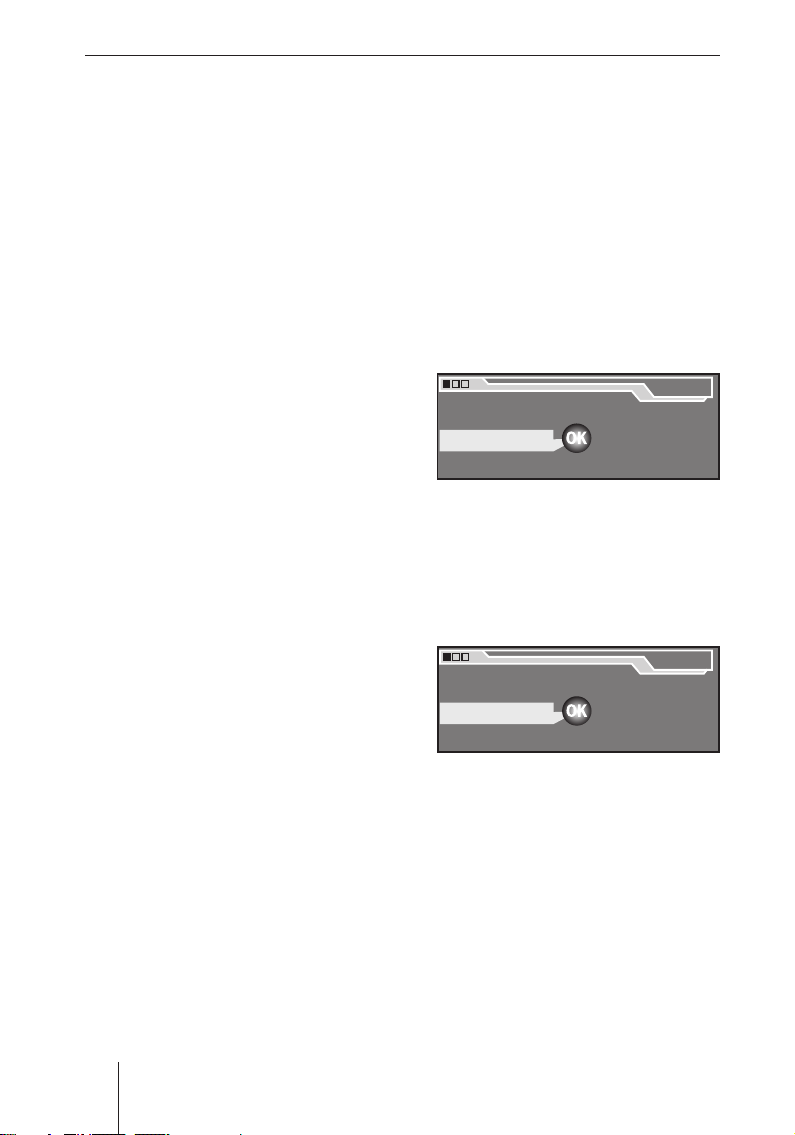
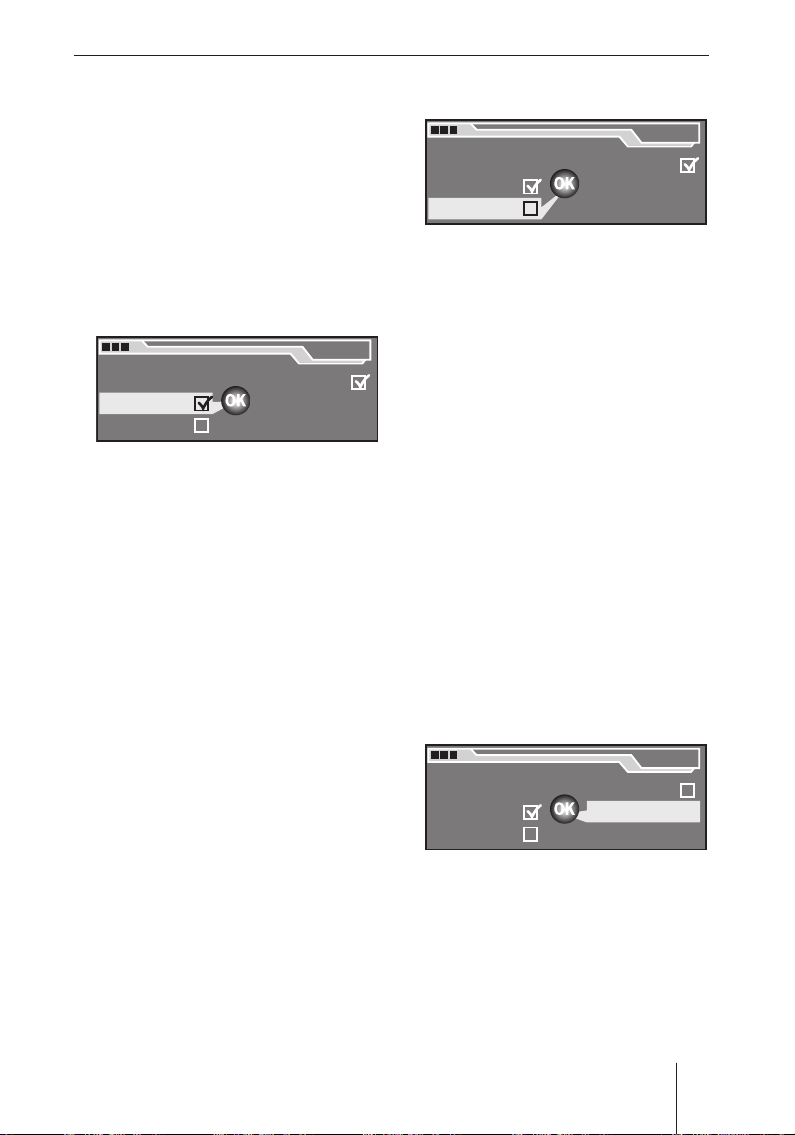
Calling the settings menu
➜
Press the MENU button 4.
The settings menu is displayed.
The fi rst menu item, "Navigation",
is highlighted
Navigation
Navigation
Tuner
Tuner
System
System
Selecting a menu item in the
settings menu
Turn the menu button < until
➜
the "Tun e r " menu item is highlighted.
Navigation
Navigation
Tuner
Tuner
System
System
Confi rming a selection
➜
Press the OK button = to con-
fi rm your selection.
Note
In some operating situations,
you cannot select certain menu
items. If you press the OK button
=, you will instead hear a warning beep.
.
Audio
Audio
Equalizer
Equalizer
Installation
Installation
Audio
Audio
Equalizer
Equalizer
Installation
Installation
Menu
Menu
Menu
Menu
12
Page 13
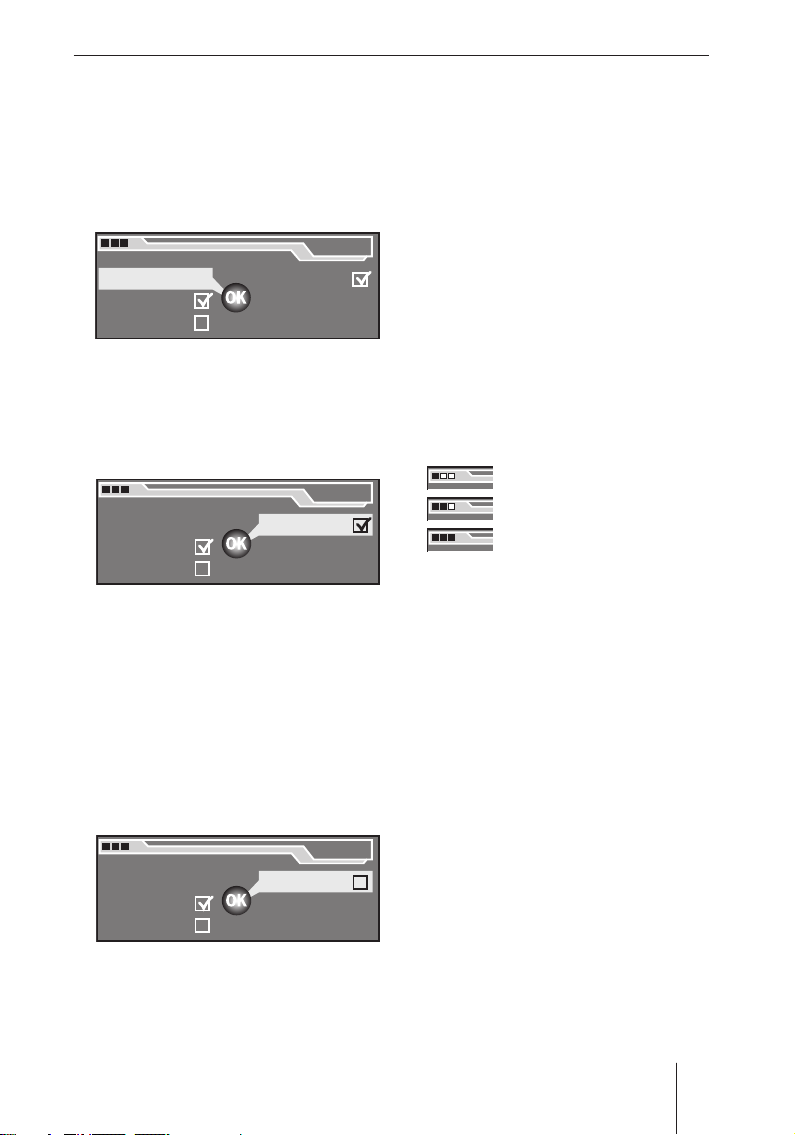
Operating the settings menu
The "Tuner " menu can be selected only if the radio is currently
set to an FM station.
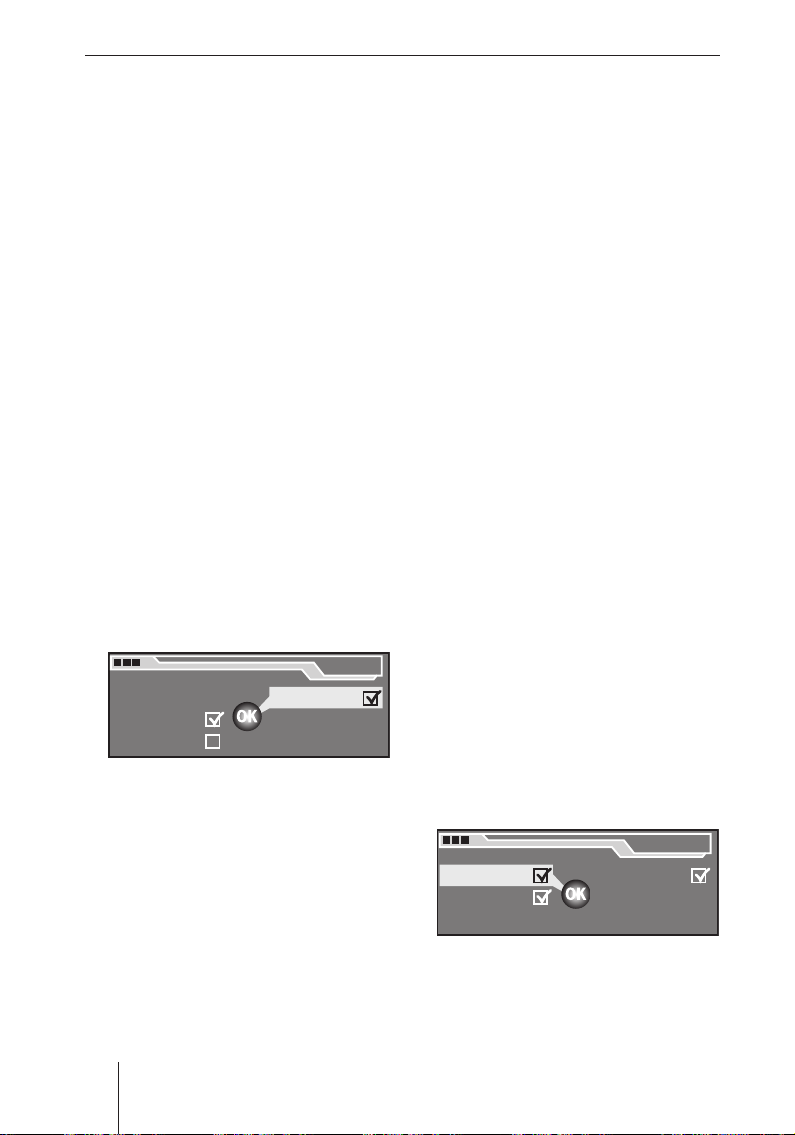
The "Tuner " menu is displayed.
The fi rst menu item, "RDS", is
highlighted.
Tun er
Tun er
RDS VAR
RDS VAR
Alternat. freq.
Alternat. freq.
Regional
Regional
Sensitivity
Sensitivity
HighCut 0
HighCut 0
Selecting a menu item
➜
Turn the menu button < until
the "Sensitivity" menu item is
highlighted.
Tun er
Tun er
RDS VAR
RDS VAR
Alternat. freq.
Alternat. freq.
Regional
Regional
Sensitivity
Sensitivity
HighCut 0
HighCut 0
Changing and saving the setting
of the menu item
➜
Press the OK button =.
The check mark behind "Sensitivity"
disappears. This reduces the reception sensitivity of the radio so
that the station seek tuning fi nds
only strong stations and ignores
weak, noise-degraded stations.
Exiting the settings menu
Press the ESC button A repeat-
➜
edly until the settings menu is
displayed.
If you briefl y press the ESC but-
ton A, you return to one higher
menu level. If you press on the
ESC button A for a longer time,
you are immediately returned
to the top level of the settings
menu.
Note:
The top left corner of the display
shows three boxes which display
the menu level on which the corresponding menu is located.
First menu level
All subsequent menu
levels
Last menu level
Overview of the settings menu
The following overview represents
the settings menu which is called
via the MENU button 4.
RDS VAR
RDS VAR
Alternat. freq.
Alternat. freq.
Regional
Regional
Sensitivity
Sensitivity
HighCut 0
HighCut 0
Tun er
Tun er
13
Page 14

Basic settings before the trip
Ç
Ç
Audio
Audio
Balance
Fader
Balance
Fader
Bass
Treble
Loudness
Bass
Treble
Loudness
7
7
MENU
MENU
Sub low
Low
Mid
Sub low
Low
Mid
Equalizer
Equalizer
Sub Low
Sub Low
Menu
Menu
Audio
Audio
Mid high
High
Mid high
High
-10
-10
Hz
Hz
32
32
Equalizer
Installation
Equalizer
Installation
GPS Sat: 8
Strength: 39
GPS Sat: 8
Strength: 39
Installation
Installation
Direction: Forward
Ignition: On
Speed Pulse: 5528
Direction: Forward
Ignition: On
Speed Pulse: 5528
Sensor test
Speedsignal
Sensor test
Speedsignal
Auto calib.
Manual calib.
Auto calib.
Manual calib.
200 metre
200 metre
Please drive
Please drive
Distance
Distance
200 metre
200 metre
Distance
Distance
200 metre
200 metre
with GPS reception
with GPS reception
Please drive 5-15km
Please drive 5-15km
14
Navigation
Navigation
Junction zoom
Junction zoom
Speech output
Speech output
TRAVEL
ARRIVAL
TRAVEL
ARRIVAL
Time Travel
Time Travel
TMC voice
TMC voice
12 05
12 05
Navigation
Tuner
System
Navigation
Tuner
System
System
On max.
Nav difference
Traffic min
Gala
On max.
Nav difference
Traffic min
Gala
System
Clock
Clock
Vol.settings
Vol.settings
Phone min.
Phone min.
012
012
Tun er
Tun er
Tun er
Tun er
Sensitivity
HighCut 0
Sensitivity
HighCut 0
RDS VAR
Alternat. freq.
Regional
RDS VAR
Alternat. freq.
Regional
FIX
FIX
VAR
VAR
FREQ
FREQ
Code
Code
Display
Language
Display
Language
On Off
On Off
CESKY, DANSK,
CESKY, DANSK,
Display off
Display off
DEUTSCH, ENGL.IMP,
ENGL. MET, ESPAÑOL,
FRANÇAIS, ITALIANO, NEDERLANDS,
DEUTSCH, ENGL.IMP,
ENGL. MET, ESPAÑOL,
FRANÇAIS, ITALIANO, NEDERLANDS,
Mode
(Day, Night, Auto)
Brightness day
Mode
(Day, Night, Auto)
Brightness day
E
E
NORSK, PORTUGUÊS, SUOMI,
SVENSKA, TÜRK
NORSK, PORTUGUÊS, SUOMI,
SVENSKA, TÜRK
Brightness night
Brightness night
Page 15
Basic settings before the trip
Basic settings before
the trip
DANGER!
Risk of an accident
through distraction from
traffi c!
If you change the settings while
driving, you may be distracted from
the traffi c and cause an accident.
Stop at a suitable location before
➜
changing the settings!
Adjusting sound and
balance
Sound and balance are adjusted in
the "Audio" menu.
If the device is muted, the muting
is automatically cancelled as soon
as you select a menu item in the
"Audio" menu.
Adjusting bass and treble
You can affect the sound with the
bass and treble setting.
Note:
The bass and treble settings of
the different sources (radio, CD
player, MP3/WMA player) are
independent of each other. You
only control the sound of the currently active source at any given time. The sound of the other
sources does not change.
During a traffi c announcement
or a telephone call, you cannot
change bass and treble.
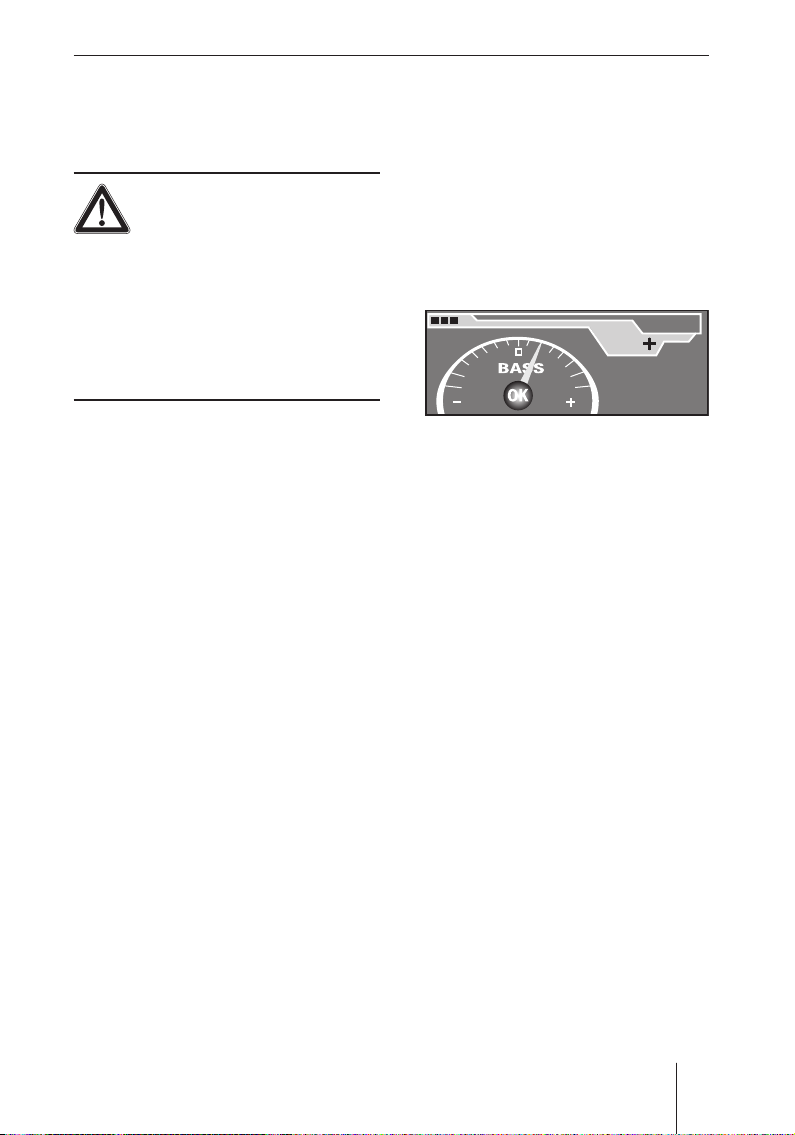
To change bass or treble:
➜
In the "Audio" menu, select and
confi rm the desired menu item
("Bass" or "Treble").
The corresponding sound control
is displayed.
Bass
Bass
2
2
77
77
➜
Change the sound by turning
the menu button < to the left
or right.
The sound changes. The sound
control illustrates the change.
➜
Press the OK button = to store
this sound or press the ESC but-
ton A to return to the previous
sound setting.
Adjusting the loudness
Loudness is a volume-dependent
automatic rise in bass which ensures that the sound also appears
natural at a low volume setting.
Note:
The loudness setting applies to
all sources. During a traffi c announcement or a telephone call,
you cannot change the loudness.
15
Page 16

Basic settings before the trip
To change the loudness:
➜
In the "Audio" menu, select and
confirm the "Loudness" menu
item.
The loudness control is displayed.
Loudn.
Loudn.
4
4
7
7
➜
Change the loudness by turning
the menu button < to the left
or right. Try out different loudness settings at high and low
volume until you fi nd the desired
sound.
At low loudness, the sound appears to have less bass at a low
volume than at a high volume. A
high loudness attempts to compensate for this effect.
➜
Press the OK button = to store
this sound or press the ESC but-
ton A to return to the previous
sound setting.
Adjusting the balance
The balance controls the volume distribution between left and right.
Note:
The balance setting applies to all
sources.
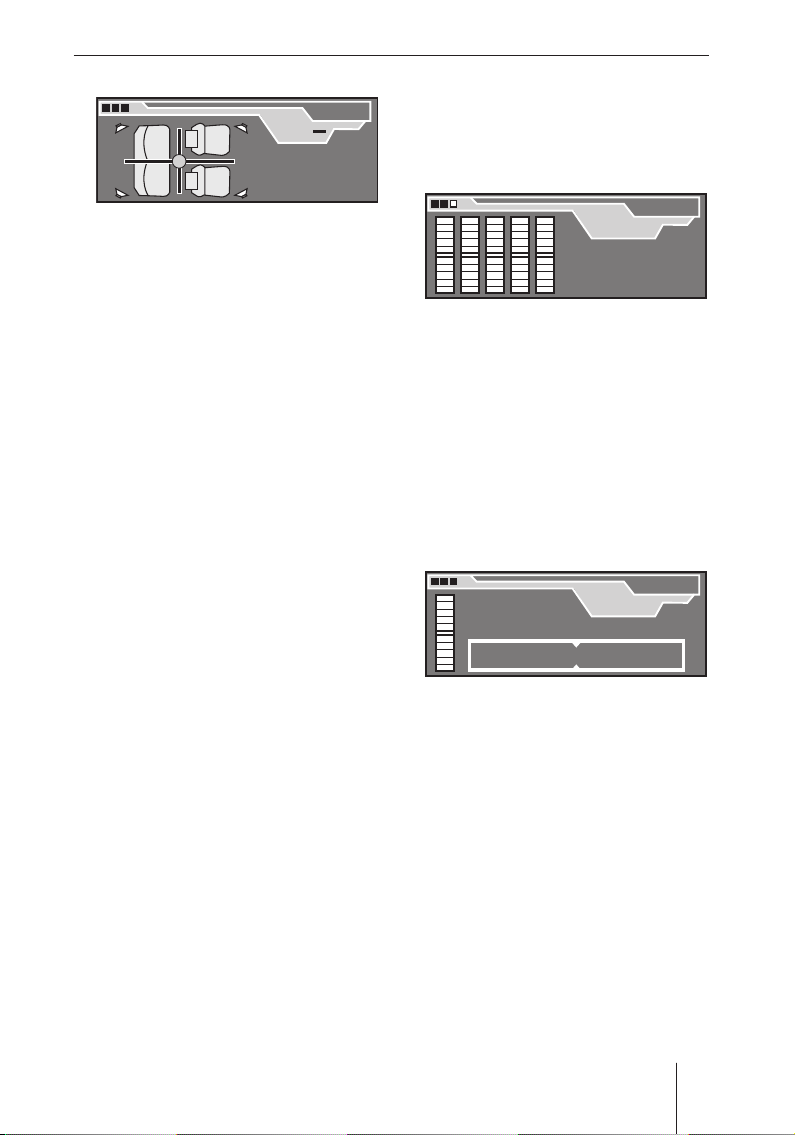
To change the balance:
➜
In the "Audio" menu, select and
confirm the "Balance" menu
item.
The volume distribution is displayed.
Balance
Balance
7
7
➜
Change the balance by turning
the menu button < to the left
or right.
The left-right volume distribution
changes. The display shows the
volume distribution.
➜
Press the OK button = to store
this balance setting or press the
ESC button A to return to the
previous balance setting.
Adjusting the fader
The fader controls the volume distribution between front and rear.
Note:
The fader setting applies to all
sources.
To change the fader:
➜
In the "Audio" menu, select and
confi rm the "Fader" menu item.
The volume distribution is displayed.
16
Page 17
Basic settings before the trip
Fader7Fader
7
Change the fader by turning the
➜
menu button < to the left or
right.
The front-rear volume distribution changes. The display shows
the volume distribution.
➜
Press the OK button = to store
this fader setting or press the
ESC button A to return to the
previous fader setting.
Adjusting the equalizer
Your device features a digital 5-band
equalizer. In each of the 5 frequency
bands, you can purposefully raise
or lower a single centre frequency. This allows you to adjust the
sound to your vehicle and remedy
problems, such as droning or poor
speech articulation.
Note:
The equalizer setting applies to
all sources.
The Equalizer is displayed.
Equalizer
Equalizer
Sub low
Sub low
32
Hz
32
Hz
First, select and confi rm the fre-
➜
quency band to be changed.
•
Sub Low: 32-50 Hz
•
Low: 63-250 Hz
•
Mid: 315-1250 Hz
•
Mid High: 1600-6300 Hz
•
High: 8000-12500 Hz
A centre frequency from the selected frequency band is displayed.
Equalizer
Equalizer
Sub low
Sub low
+ 0 40
+ 0 40
Hz
Hz
32 40 50
32 40 50
-10
-10
How to operate the equalizer
To change the equalizer settings:
➜
Insert a CD which you know very
well (see p. 10).
➜
Adjust the bass and treble, loudness, balance and fader to zero
(see p. 15).
➜
In the "Audio" menu, select and
confirm the "Equalizer" menu
item.
➜
Select the centre frequency to
be changed from the frequency
band.
•
Sub Low: 32, 40, 50 Hz
•
Low: 63, 80, 100, 125,
160, 200, 250 Hz
•
Mid: 315, 400, 500,
630, 800, 1000,
1250 Hz
17
Page 18

Basic settings before the trip
Mid High: 1600, 2000, 2500,
•
3200, 4000, 5000,
6300 Hz
High: 8000, 10000,
•
12500 Hz
The selected frequency band
and the corresponding setting
are displayed.
➜
Change the setting by turning
the menu button < to the left
or right. You can raise or lower
the selected frequency in ten increments.
The volume of the selected frequency is changed. The bar on
the left side of the display shows
the change.
➜
Press the OK button = to store
this equalizer setting or press the
ESC button A to return to the
previous equalizer setting.
As soon as you store this equalizer setting, the equalizer setting
of another centre frequency of
the same frequency band is automatically deleted because you
can change only a single centre
frequency for each frequency
band!
Which setting is the correct one?
First, change the settings of the
mid-frequencies, followed by those
for the treble and fi nally the bass.
Sound impression
or problem
1. Distorted bass,
droning,
uncomfortable
pressure
2. Very transparent,
aggressive sound,
no stereo effect
3. Muffl ed sound,
low transparency,
instruments do not
excel
4. Insuffi cient bass 50–100 approx.
Measure
FrequencyHzSetting
125–400 approx.
1000–
2500
8000–
12500
–4
approx.
–4 to –6
approx.
+4 to +6
+4 to +6
Basic settings in the
"System" menu
You define the following in the
"System" menu:
The volume control (see below),
•
the control of the display bright-
•
ness (see p. 20),
the language of the display texts
•
and the voice-prompted turn-byturn directions of the navigation
system (see p. 20),
whether the device queries the
•
code after being disconnected
from the battery power (see p.
21),
the time (see p. 21).
•
Adjusting the volume control
You perform the following volume
adjustments in the "Vol. settings"
menu:
Maximum switch-on volume (On
•
max.):
18
Page 19
Basic settings before the trip
When you switch on the device,
it plays at the previously selected
volume. However, if you adjusted
the volume before switch-off to
be higher than maximum poweron volume, the volume is automatically limited to the switchon volume when you switch it on
again.
Automatic low-volume switching
•
(Nav difference):
While the navigation system announces a turn-by-turn direction,
the volume of the currently playing audio source is reduced so
that you can clearly understand
the turn-by-turn direction. You
can adjust the volume decrease
from 0 (low decrease) to 6 (high
decrease).
Minimum volume for traffi c an-
•
nouncements (TA min.):
If the volume is set to a low value,
it is automatically raised to this
value during a traffi c announcement.
Minimum volume of car phone
•
(Phone min.):
In order to clearly understand a
phone call even if the volume is
set to very low, the volume of the
phone call is automatically raised
to this value.
•
Speed-dependent volume adjustment (Gala):
When you are driving faster,
the volume is automatically increased to compensate for the
driving noise. Under "Gala", you
can adjust how much the volume
will be adjusted. You can adjust
the volume increase from 0 (low
increase) to 9 (high increase).
Note:
You cannot change the volume
setting as long as you are receiving a traffi c announcement.
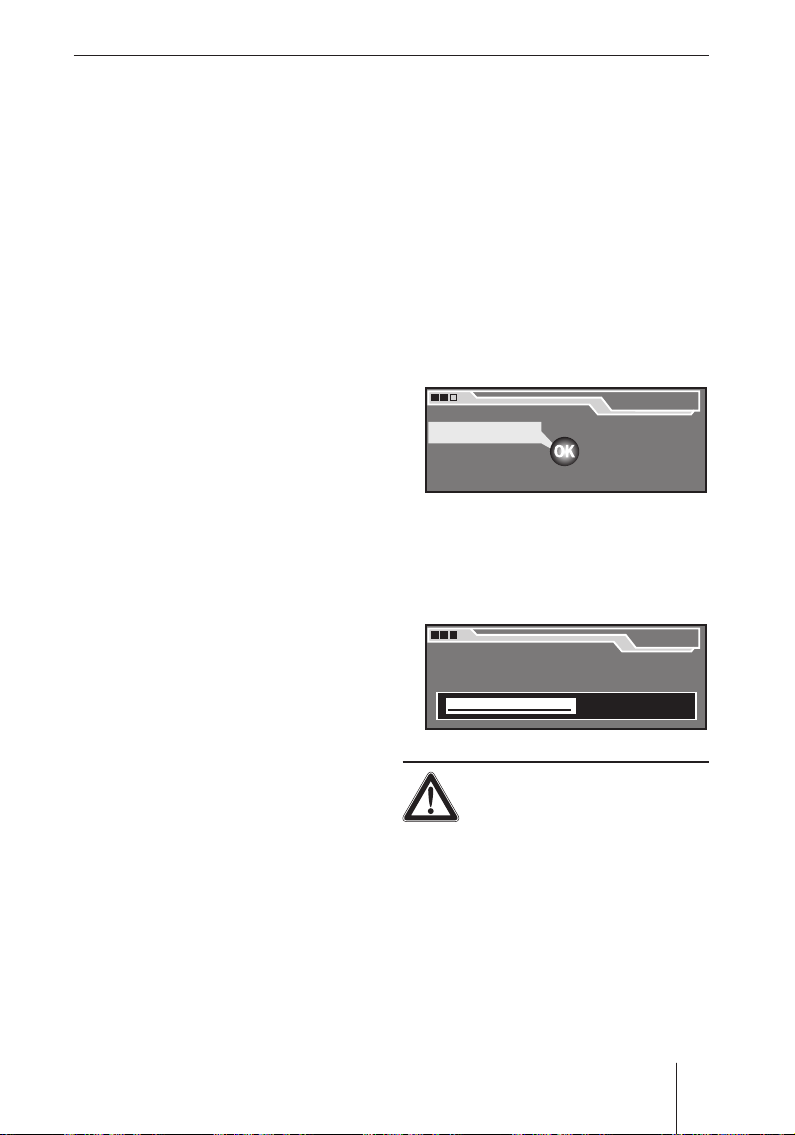
To change the volume settings:
➜
In the "System" menu, select and
confi rm the "Vol.settings" menu
item.
The volume menu appears.
Vol.settings
Vol.settings
On max
On max
Nav difference
Nav difference
TA min
TA min
➜
In the volume menu, select and
confi rm the desired menu item.
The corresponding volume control appears.
WARNING!
Risk of injuries from high
power-on volume!
If you adjust the switch-on volume
too high, the volume can be so high
when you switch on the device that
you may experience a hearing defect.
13
13
GALA
GALA
Phone min
Phone min
On max.
On max.
19
Page 20

Basic settings before the trip
Adjust the switch-on volume to
➜
a low value!
➜
Change the volume by turning
the menu button < to the left
or right and press the OK button =.
The currently playing source is
played with the selected volume.
The volume control displays the
volume.
Adjusting the control of the
display brightness
You adjust the following in the
"Display" menu:
•
Whether the display automatically switches off when you are
not operating the device (Display
off),
•
whether the display brightness
is automatically adjusted (Auto/
Day/Night mode),
•
the brightness with switched-off
headlights (Brightness day) ,
•
the brightness with switched-on
headlights (Brightness night ).
To adjust the setting of the display
brightness:
➜
In the "System" menu, select
and confi rm the "Display" menu
item.
The display menu appears.
Display
Display
Display off
Display off
Mode AUTO
Mode AUTO
Brightness day
Brightness day
Brightness night
Brightness night
Select and confi rm the desired
➜
menu item in the display menu
("Display off", "Mode", "Brightness
day" or "Brightness night").
The corresponding setting appears.
•
If you activate "Display off" with
the OK button =, the display
automatically switches off 10
seconds after the last push of
a button. To switch it back on
again, press any button.
•
If you select "Mode", you can
use the OK button = to select
among "Auto" (automatically
changing the brightness), "Day"
and "Night".
•
You use the menus "Brightness
day" and "Brightness night"
to adjust the desired display
brightness with headlights
switched on or off by using the
menu button <.
Note:
If your vehicle features a control
for instrument lighting, you can
also use it to toggle the display
brightness between "Brightness
day" and "Brightness night".
For the device to recognise that
the headlights are switched on,
the corresponding signal must be
connected.
Setting the Language
You adjust the following in the
"Language" menu:
•
The language of the texts on the
display,
20
Page 21
the language of the voice-prompt-
•
ed turn-by-turn directions of the
navigation system.
Note:
To change the language, the navigation CD must be in the drive.
Basic settings before the trip
On Off
On Off
Code
Code
To change the language:
➜
In the "System" menu, select and
confirm the "Language" menu
item.
The language menu appears.
Language
Language
DEUTSCH
DEUTSCH
ENGL. IMP
ENGL. IMP
ENGL. MET
ENGL. MET
ESPANOL
ESPANOL
➜
In the language menu, select and
confi rm the desired language.
The language is changed.
Note:
The voice output of the navigation system is dependent upon
the data on the navigation CD.
It is, therefore, possible that
the display texts appear in the
selected language, but the turnby-turn directions are spoken in
English.
Activating/deactivating the code
query
To protect against theft, the device
features a code query, which is activated/deactivated as follows:
➜
In the "System" menu, select and
confi rm the "Code" menu item.
The code menu appears.
CAUTION!
Danger of theft!
If you deactivate the code query, a
thief can put the stolen device into
operation.
You should avoid deactivating the
➜
code query!
➜
Select and confi rm the desired
menu item in the code menu and
enter the four-digit code number
(see p. 9).
•
On: After every disconnect
from battery power, the code
must be re-entered.
•
Off: After a disconnect from
battery power, the code does
not have to be re-entered.
Setting the clock
The local time is set in the "Clock"
menu.
Note:
The clock is automatically set using the GPS satellite signals. You
only have to the clock after installation and when changing to and
from daylight savings time.
21
Page 22
Basic settings before the trip
To set the clock:
➜
In the "System" menu, select and
confi rm the "Clock" menu item.
The clock menu appears. The
hours are highlighted.
Set time
Set time
12 05
12 05
➜
Change the hours by turning the
menu button < and press the
OK button =.
➜
Change the minutes by turning
the menu button < and press
the OK button =.
Setting the basic settings of
the radio
Your device features an RDS radio.
RDS means "Radio Data System".
The radio can receive data which
are transmitted without being heard
parallel to the music. This allows for
displaying the station name on the
display and automatically switching
ti an alternative frequency if your
vehicle is leaving the frequency
range of a station.
Basic settings and comfort functions of the radio are defi ned in the
"Tune r " menu.
Note:
Before you can change to the
"Tune r " menu, the radio must be
set to an FM station!
Displaying the station name
Some FM radio stations use the
RDS signal to transmit advertisement or other information instead
of the station name. You can defi ne
which of this information is shown
on the display as follows:
➜
In the settings menu, select and
confi rm the "Tu ner " menu item.
The "Tuner" menu appears.
Menu
Menu
Navigation
Navigation
Tuner
Tuner
System
System
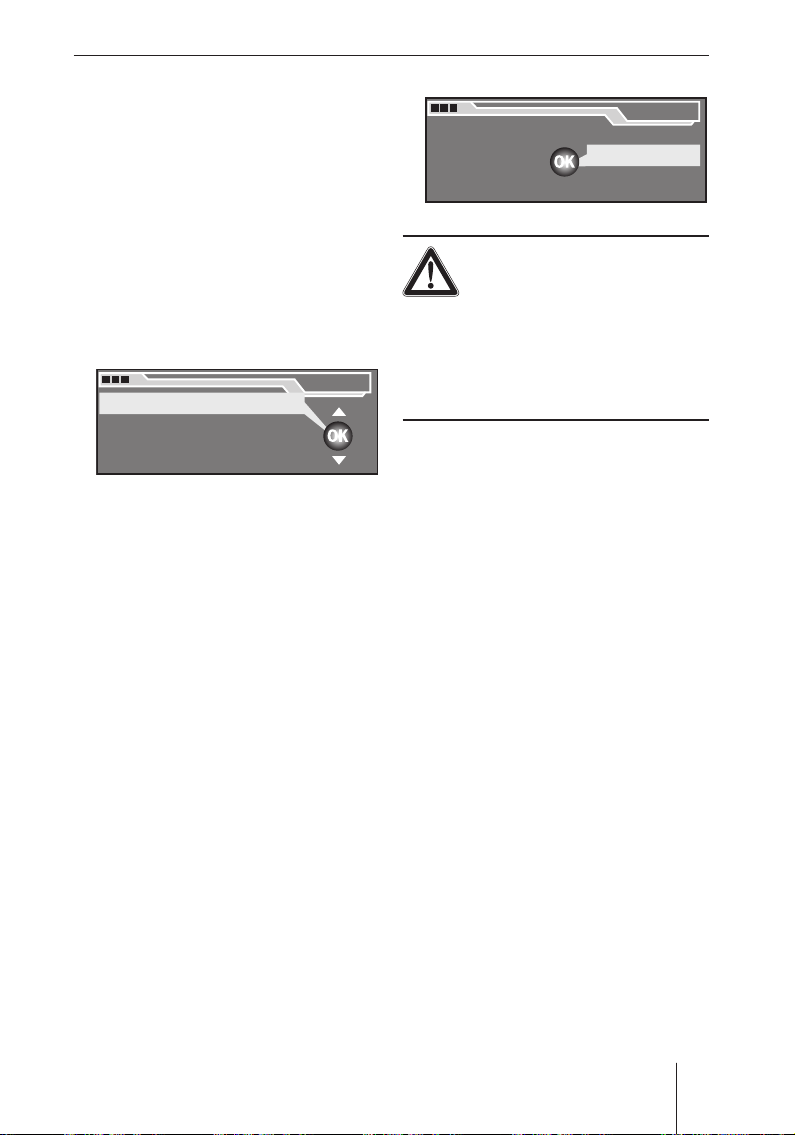
➜
In the "Tuner" menu, select the
Audio
Audio
Equalizer
Equalizer
Installation
Installation
"RDS" menu item.
Use the OK button = to tog-
gle the RDS functions between
"VAR", "FREQ" and "FIX".
•
"VAR": All information is displayed as soon as it is received,
including advertisement.
•
"FREQ": Neither station name
nor advertisement is displayed,
only the reception frequency.
•
"FIX": Only the information re-
ceived fi rst is displayed, which
can be the station name or advertisement or any other piece
of information.
22
Page 23
Basic settings before the trip
Enabling/disabling automatic
changing to alternative
frequencies (AF)
The radio can automatically tune to
the best receivable frequency of the
selected station.
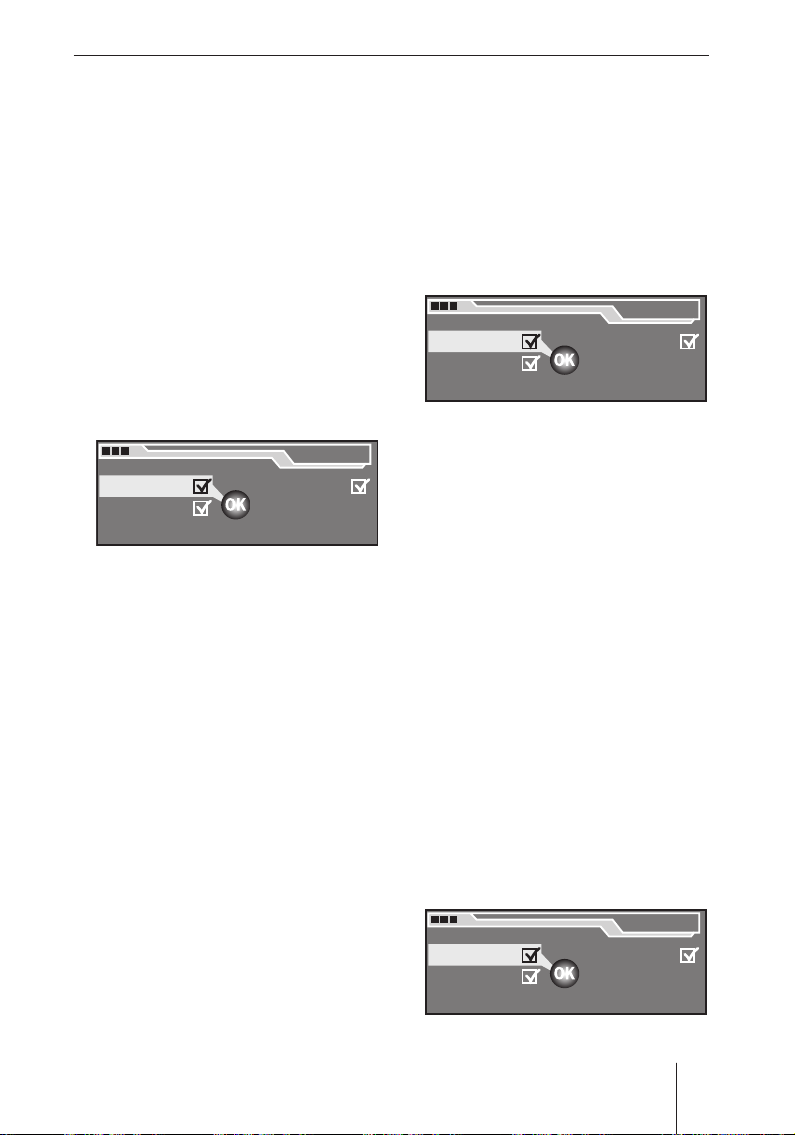
To activate/deactivate this function:
➜
In the settings menu, select and
confi rm the "Tu ner " menu item.
The "Tuner " menu appears.
Tun er
Tun er
RDS VAR
RDS VAR
Alternat. freq.
Alternat. freq.
Regional
Regional
➜
In the "Tuner " menu, select the
Sensitivity
Sensitivity
HighCut 0
HighCut 0
"Alternat. freq." menu item.
You can activate the automatic
selection of an alternative frequency (check mark) or deactivate it (no check mark) with the
OK button =.
Enable/disable automatic
changing to other regional
programmes
Some stations divide their programmes into regional programmes
with different contents at certain
times. You can use the Regional
function to prevent or allow the device from switching to alternative
frequencies that are transmitting a
different programme content.
➜
In the settings menu, select and
confi rm the "Tu ner " menu item.
The "Tuner " menu appears.
Tun er
Tun er
RDS VAR
RDS VAR
Alternat. freq.
Alternat. freq.
Regional
Regional
➜
In the menu of the tuner basic
Sensitivity
Sensitivity
HighCut 0
HighCut 0
settings, select the "Regional"
menu item.
Use the OK button = to prevent
the automatic switching to other regional programmes (check
mark) or allow it (no check
mark).
Activating/deactivating improved
reception (HighCut)
The HighCut function results in an
improved reception in case of weak
radio reception (FM only). If the reception is weak, the interference
level is automatically decreased.
The response sensitivity of the
HighCut function can be adjusted
as follows:
➜
In the settings menu, select and
confi rm the "Tu ner " menu item.
The "Tuner " menu appears.
Tun er
Tun er
RDS VAR
RDS VAR
Alternat. freq.
Alternat. freq.
Regional
Regional
➜
In the menu of the tuner basic
Sensitivity
Sensitivity
HighCut 0
HighCut 0
settings, select the "HighCut"
menu item.
23
Page 24
Basic settings before the trip
Use the OK button = to change
the response sensitivity of the
HighCut function between "0",
"1" and "2".
"0" means: The HighCut func-
•
tion is deactivated,
"1" means: The response sen-
•
sitivity is low.
"2" means: The response sen-
•
sitivity is high.
Changing the seek tuning
sensitivity
The seek tuning sensitivity determines whether the automatic station seek tuning locates only strong
stations or also weaker stations,
which may be degraded by a high
noise level.
To change the seek tuning sensitivity:
➜
In the settings menu, select and
confi rm the "Tu ner " menu item.
The "Tuner " menu appears.
Tun er
Tun er
RDS VAR
RDS VAR
Alternat. freq.
Alternat. freq.
Regional
Regional
➜
In the "Tuner " menu, select the
Sensitivity
Sensitivity
HighCut 0
HighCut 0
"Sensitivity" menu item.
Use the OK button = to select
the seek tuning sensitivity:
•
A check mark means that the
seek tuning also stops at weaker stations,
•
If no check mark is shown,
the seek tuning stops only at
strong stations.
Setting the basic settings of
the navigation system
You define the following in the
"Navigation" menu:
Whether the navigation system
•
announces turn-by-turn directions (see below),
whether the remaining travel
•
time or the estimated arrival time
is displayed during destination
guidance (see p. 25),
whether map details are shown
•
during destination guidance before you have to make a turn (see
p. 25),
whether TMC traffi c announce-
•
ments are also announced during inactive destination guidance
(see p. 25).
Activating/deactivating voice
output of the navigation system
The navigation system can announce
turn-by-turn directions during destination guidance (see p. 65). This
voice output can be activated or deactivated as follows:
➜
In the settings menu, select and
confi rm the "Navigation" menu
item.
The menu of the basic settings
of navigation appears.
Navigation
Navigation
Speech output
Speech output
TMC Language
TMC Language
➜
In the menu of the navigation basic settings, select the "Speech
output" menu item.
Junction zoom
Junction zoom
Time TRAVEL
Time TRAVEL
24
Page 25
Basic settings before the trip
You can activate the speech output (check mark) or deactivate
it (no check mark) with the OK
button =.
Adjusting the time display
During destination guidance, the remaining travel time or the estimated
arrival time can be displayed.
To toggle between the times:
➜
In the settings menu, select and
confi rm the "Navigation" menu
item.
The menu of the basic settings
of navigation appears.
Navigation
Navigation
Speech output
Speech output
TMC Language
TMC Language
➜
In the menu of the navigation
Junction zoom
Junction zoom
Time TRAVEL
Time TRAVEL
basic settings, select the "Time"
menu item.
Use the OK button = to toggle
between "Tra ve l " (remaining travel time) and "Arrival" (estimated
arrival time).
Activating/deactivating the
voice output of TMC traffi c
announcements
If you tuned into a TMC station,
the device receives TMC traffi c announcements (see p. 33). They are
analysed during the dynamic destination guidance so that you can
avoid traffi c jams and arrive at your
destination as quickly as possible
(see p. 70).
You can enable/disable the announcement of TMC traffic announcements as follows during inactive destination guidance:
➜
In the settings menu, select and
confi rm the "Navigation" menu
item.
The menu of the basic settings
of navigation appears.
Navigation
Navigation
Speech output
Speech output
TMC Language
TMC Language
➜
In the menu of the navigation
Junction zoom
Junction zoom
Time TRAVEL
Time TRAVEL
basic settings, select the "TMC
speech output" menu item.
You can activate the speech output (check mark) or deactivate
it (no check mark) with the OK
button =.
Switching the junction zoom
on/off
During the destination guidance,
the navigation system can display
map details for a time (junction
zoom).
To switch the junction zoom on or
off:
➜
In the settings menu, select and
confi rm the "Navigation" menu
item.
The menu of the basic settings
of navigation appears.
Navigation
Navigation
Speech output
Speech output
TMC Language
TMC Language
Junction zoom
Junction zoom
Time TRAVEL
Time TRAVEL
25
Page 26

While driving
In the menu of the navigation ba-
➜
sic settings, select the "Junction
zoom" menu item.
Navigation
Navigation
Speech output
Speech output
TMC Language
TMC Language
Junction zoom
Junction zoom
Time TRAVEL
Time TRAVEL
You can activate the junction
zoom (check mark) or deactivate
it (no check mark) with the OK
button =.
While driving
This chapter describes how to:
Select a certain audio source
•
(see below),
play music (radio, CD, MP3 or CD
•
changer, see p. 29),
putting through traffi c announce-
•
ments (TA) (see p. 31).
Selecting an audio source
You can select the following audio
sources:
With the TUN button ?:
the radio (see p.27).
•
With the SRC button @:
the CD player (see p. 27), if an
•
audio CD is in the drive,
the MP3/WMA player (see p. 28,
•
if an MP3 or WMA-CD is in the
drive,
a CD changer or a similar device,
•
if such a device is connected and
at least one CD is in the magazine
(see p. 28).
26
Note:
If a car phone is connected, it
is automatically put through as
soon as you make a phone call
(see p. 11).
Selecting the radio as audio
source
To select the radio as the audio
source:
➜
Press the TUN button ?.
Page 27
GF
GF
H
H
While driving
The previously selected radio station is played. The radio display
is shown.
The radio display
A
A
B C D
B C D
TMC
TMC
1
1
2
2
BBC
BBC
3
3
Tune Band Options
Tune Band Options
H
H
TMC symbol
A
Listen symbol
B
Traf fi c information symbol (TA)
C
Time
D
Memory bank
E
Memory location for radio sta-
F
16:13
16:13
J K
J K
E
E
FMT
FMT
92,8
92,8
L
L
F
F
4
4
5
5
6
6
tions
Station name
G
Tuning menu
H
Frequency band menu
I
K Option menu of the radio
L Reception frequency
To tune, store and call up radio stations, see p. 35.
Selecting the CD player, MP3
player or CD changer as audio
source
To select the CD/MP3 player or an
optional CD changer as the audio
source:
➜
Press the SRC button @.
The previously active audio source
is played, if a CD is inserted.
To change the audio source:
➜
Press the SRC button @ again.
The device toggles between the
installed CD/MP3 player and an
optional CD changer, if a CD is
inserted.
As soon as you switch on an audio
source, the playback of this audio
source continues at the point where
it was interrupted. The corresponding display is shown.
The CD display
B
B
A
A
TMC
TMC
MIX
MIX
G
G
A
TMC symbol
B
Listen symbol
C
Traf fi c information symbol (TA)
D
Time
E
"Reverse/Track backward"
C
C
Track 01/11
Track 01/11
Tracks Options
Tracks Options
J O
J O
D E F
D E F
CD
CD
14:01
14:01
00:22
00:22
PL
PL
symbol
F
"Forward/Track forward" symbol
G
"MIX" symbol
H
Tracks menu
I
Track info display
L Options menu of the CD player
O Playing time display
P "RPT" symbol
RPT
RPT
27
Page 28

N
N
While driving
The MP3 display
D
M
M
D
15:09
15:09
E
E
MP3
MP3
00:04
00:04
O P
O P
A
A
B C
B C
TMC
TMC
Bob Marley
Bob Marley
Jamin
Jamin
Browse Options
Browse Options
MIX
MIX
J
J
H K L
H K L
G
G
TMC symbol
A
Listen symbol
B
Traf fi c information symbol (TA)
C
Time
D
"Reverse/Track backward"
E
symbol
"Forward/Track forward" sym-
F
bol
"MIX" symbol
G
"Jump to next folder" symbol
H
"Jump to previous folder" sym-
I
bol
K ID3 track name or fi le name
L ID3 artist or folder name
M Browse menu
N Options menu of the MP3
player
O Playing time display
P "RPT" symbol
The CD changer display
F
F
B
A
A
CD 2
CD 2
MIX
RPT
RPT
MIX
G
G
TMC symbol
A
Listen symbol
B
Traf fi c information symbol (TA)
C
Time
D
"Reverse/Track backward"
E
C
C
TMC
TMC
Track 01/20
Track 01/20
Tracks CDs Options
Tracks CDs Options
J
J
H
H
L O
L O
K
K
D E F
D E F
14:39
14:39
B
symbol
"Forward/Track forward" sym-
F
bol
"MIX" symbol
G
"Jump to the next CD in the
H
changer magazine" symbol
"Jump to the previous CD in
I
the changer magazine" symbol
K Tracks menu
L CDs menu
M Options menu of the CD
changer
O Playing time display
P "RPT" symbol
To operate the CD/MP3 player, see
p. 40.
CDC
CDC
00:05
00:05
RPT
RPT
PM
PM
28
Page 29

While driving
Playing music
The music playback starts automatically as soon as you select an
audio source (see p. 26), provided
that a CD is inserted or a station
is tuned in.
Symbols are assigned to the function buttons 1 5 to 6 : which
are displayed on the left and right
side of the display. These function
buttons are used to initiate certain
functions, such as forward or reverse, even if the symbols are no
longer displayed (e.g. during the
destination entry of the navigation
system).
The following table provides an
overview of which function buttons can be used to execute the
most important operating steps of
the radio, CD/MP3/WMA player and
optional CD changer.
Notes about the table:
"Forward/Reverse" means:
The current CD or MP3 track is forwarded or reversed. You can listen
while forwarding/reversing.
"Track forward/backward" means:
The current or next track is played
again from the beginning.
To select and play tracks directly
from a list, see p. 42.
"Random playback" means:
CD
:01
00:22
MIX CD
tionen
If "MIX CD" is displayed, the tracks
on the current audio CD are played
in random order.
:01
RPT
MP3
00:22
MIX DIR
tionen
If "MIX DIR" is displayed, the tracks
from the same folder of the MP3-CD
are played in random order.
:01
RPT
MP3
00:22
MIX ALL
tionen
If "MIX ALL" is displayed, all the
tracks from all folders of the MP3CD are played in random order.
:01
RPT
CDC
00:22
MIX MAG
tionen
RPT
If "MIX MAG" is displayed, the tracks
from all CDs in the optional CD
changer are played in random order.
29
Page 30

While driving
What do you want
to do?
Forward
Reverse
Jump to the next
track
Jump to the previous
track
Change to the
previous CD/folder
Change to the next
CD/folder
Start/change/cancel
random playback
Built-in CD
player
> pressed Hold > pressed Hold > pressed
Hold
Hold
< pressed Hold < pressed Hold < pressed
Press short
Press short
MIX Press MIX 1 x:
> Press short > Press short >
< Press short < Press short <
_
_
Built-in MP3
player
∧∧
∨∨
Press MIX 1 x:
Folder is mixed
Press MIX 2 x: CD
is mixed
CD is mixed
Press MIX 2 x:
Magazine is mixed
Built-in
CD changer
Radio
_
_
_
_
_
_
_
Start/change/cancel
repeat mode
Play radio station
Store radio station
30
RPT Press 1 x:
Track is repeated
__ _
__ _
Press RPT 1 x:
Track is repeated
Press RPT 2 x:
Folder is repeated
Press RPT 1 x:
Track is repeated
Press RPT 2 x:
CD is repeated
_
Press
function
button
briefl y
Press
function
button long
Page 31

While driving
CD
:01
00:22
tionen
If "MIX" is not displayed, the random
playback is switched off. The tracks
are played in the order in which they
appear on the CD.
"Repeat mode" means:
You can switch among the following
repeat modes:
:01
RPT
CD
00:22
RPT TRK
tionen
If "RPT TRACK" is displayed, the
current track is repeated until you
cancel the repeat mode.
:01
RPT
CD
00:22
RPT CD
tionen
If "RPT CD" is displayed, the current
CD is repeated until you cancel the
repeat mode.
:01
RPT
MP3
00:22
RPT DIR
tionen
RPT
CD
:01
00:22
tionen
If "RPT" is not displayed, the repeat
mode is switched off. Nevertheless,
an audio or MP3/WMA-CD is repeated after it has been played once.
"Previous/next CD" means:
If you connected a CD changer, the
previous or next CD in the magazine
of the changer is played.
"Previous/next folder" means:
If you inserted an MP3-CD, the fi rst
track from the previous or next folder on the CD is played.
Additional options for infl uencing
the music playback can be found
•
in the chapter "Operating the radio"
(see p. 35),
•
in the chapter "Operating the
CD/MP3 player" (see p. 40).
RPT
Traffi c announcements
Your device can also fade in traffi c
announcements of radio stations
(TA) if you are currently listening to
a different audio source, provided
that the radio is tuned to a station
that broadcasts traffi c announcements.
If "RPT DIR" is displayed, all tracks
from the same MP3 folder are repeated until you cancel the repeat
mode.
31
Page 32

T
T
While driving
Your device is equipped with an
RDS-EON receiving unit. EON
means Enhanced Other Network.
In case of a traffi c announcement
(TA), this receiving unit can automatically switch over from a nontraffi c information station to a traffi c information station of the same
station chain. After the traffi c announcement, the device automatically switches back to the previously played programme.
In addition, your device can receive
TMC traffi c announcements which
are automatically analysed by the
navigation system during a dynamic
destination guidance. For this purpose, the radio must be tuned to a
station that broadcasts TMC traffi c
announcements.
TRAF
TRAF
Traffic
TA
TA
TMC auto
TMC auto
Traffic
TMC-messages
TMC-messages
Only available if the radio
Only available if the radio
is set to an FM station
is set to an FM station
Show list
Show list
of TMC
of TMC
messages
messages
Switching traffi c announcement
priority on/off
If you switch on the traffi c information priority, traffi c announcements (TA) are also faded in if you
have currently set a different audio
source. For this purpose, the radio
must be tuned to a traffi c information station. The currently playing
audio source is automatically faded
out for the duration of the traffi c
announcement.
To switch the traffi c announcement
priority on/off:
➜
Press the TRAF button ;.
the traffi c information menu ap-
pears.
Traffic
Traffic
TMC messages
TA
TA
TMC auto
TMC auto
➜
In the traffi c information menu,
TMC messages
select and confi rm the "TA " menu
item.
You can activate the traffi c information (check mark) or deactivate it (no check mark) with the
OK button =.
After exiting the traffi c information menu, the display shows the
TA symbol C, provided that the radio is tuned to a traffi c information
station.
C
C
FM
1
1
FM
If the TA symbol C does not fl ash,
the radio is also receiving a traffi c
information station if you are currently listening to a different audio
source. As soon as this traffi c information station broadcasts a traffi c
announcement, the currently playing audio source is automatically
faded out and you are listening to
the traffi c announcement.
32
Page 33

While driving
If the TA symbol C fl ashes, the ra-
dio does not receive any traffi c information station (e.g. because you
left the frequency range with your
vehicle). The radio then automatically searches for another traffi c
information station.
Note:
To change the volume of the
traffi c announcement, turn the
volume control during the traffi c announcement. To adjust the
minimum volume for traffi c announcements, see p. 18.
Cancelling the current traffi c
announcement
If you do not want to listen to the
current traffi c announcement, you
can cancel it as follows:
➜
Press the TRAF button ; or the
On/Off button 3 during the traffi c announcement.
The current traffi c announcement
is cancelled and the previously
playing audio source is played.
If you switched on the traffi c announcement priority (see p. 32),
it remains switched on.
Receiving TMC traffi c
announcements automatically
If you switch on automatic tuning
to TMC stations, it ensures that
the navigation system will always
receive the digital data during dynamic destination guidance. They
are required so that the navigation
system can incorporate traffi c obstructions and calculate an alternate route.
To switch automatic tuning to TMC
stations on/off:
➜
Press the TRAF button ?.
the traffi c information menu ap-
pears.
Traffic
Traffic
TMC messages
TA
TA
TMC auto
TMC auto
➜
In the traffi c information menu,
TMC messages
select and confirm the "TMC
auto" menu item.
You can activate the traffi c information (check mark) or deactivate it (no check mark) with the
OK button =.
The display shows the TMC symbol B, provided that the current
radio station broadcasts TMC
data.
B
B
TMC
TMC
14
14
FMT
FMT
If the TMC symbol does not fl ash,
the device receives a radio station that broadcasts TMC data. As
soon as you start a dynamic destination guidance, these data are
processed.
If a list symbol is displayed next to
the TMC symbol, TMC messages
have already been received and
stored. To display these messages,
see p. 34. These messages are automatically incorporated during the
dynamic destination guidance (see
p. 70).
33
Page 34

While driving
If the TMC symbol fl ashes, the device does not receive any TMC data
(e.g. because you left the frequency
range with your vehicle). Dynamic
destination guidance is not possible! The device automatically
searches for a radio station which
broadcasts TMC data. This search
may take some time since the entire
frequency band is being searched.
Radio reception is not possible during this search.
Showing TMC traffi c
announcements
Particularly urgent TMC messages
(alarm messages) are automatically shown on the display. To scroll
through this TMC message:
➜
Turn the menu button <.
To hide this TMC message:
➜
Press either the ESC button A
or the OK button =.
All received TMC messages are automatically stored in the list of the
TMC messages.
To display this list:
➜
Press the TRAF button ; for
2 seconds.
Or:
➜
Press the TRAF button ;.
the traffi c information menu ap-
pears.
Traffic
Traffic
TMC messages
TA
TA
TMC auto
TMC auto
In the traffi c information menu,
➜
TMC messages
select and confi rm the "TMC messages" menu item.
The list of received TMC messages appears.
The TMC messages are alphanumerically sorted with alarm messages
at the top. If no messages were received, a corresponding note appears.
To scroll through the list:
➜
Turn the menu button <.
The list is being scrolled. All mes-
sages are displayed on a single
line.
To display a TMC message on four
lines:
➜
Select the message with the
menu button < and press the
OK button =.
If a message is longer than 4 lines:
➜
Press the
button B.
You can now scroll through all the
lines of the TMC message.
To scroll through the message:
➜
Turn the menu button <.
To change back to the list of the TMC
messages:
➜
Press the ESC button A.
34
Page 35

Operating the radio
Note:
The device stores and processes
TMC messages that refer to a perimeter of approx. 100 km around
your vehicle.
Operating the radio
As soon as you select the radio as
the audio source (see p. 26), the
previously tuned in station is played
and the radio display is shown.
TMC
TMC
1
1
2
2
BBC
BBC
3
3
Tune Band Options
Tune Band Options
Details about the radio display can be
found under "Switching on the radio"
(see p. 26).
The three menus "Tune", "Band" and
"Options" allow you to do the fol-
lowing:
•
Setting the station (see p. 36)
•
Intro scanning of all receivable
stations (see p. 38)
•
Selecting wavebands and memory banks (see p. 36)
•
Storing stations (see p. 39)
•
Playing stored stations (see p.
40)
16:13
16:13
FMT
FMT
92,8
92,8
4
4
5
5
6
6
The "Radio" menu
Tune
Band
Options
FM1
FM2
FMT
Start scan
start / stop
Scan
BBC
I 92 I 93 I 94 I
MW
LW
Options
Start T-Store
start / stop
T-Store
Tune
Band
35
Page 36

Operating the radio
Selecting the waveband/
memory bank
The radio can receive the following
wavebands:
FM: 3 memory banks
•
(FM1, FM2, FMT)
MW: 1 memory bank
•
LW: 1 memory bank
•
To toggle among the memory banks
or wavebands:
➜
Press the TUN button ? repeat-
edly until the desired waveband
or the desired memory bank is
displayed.
FM2
FM2
FM1
TUN
TUN
Or:
➜
In the radio display, select the
"Band" menu.
➜
In the "Band" menu, confi rm and
select the waveband or the memory bank.
The selected waveband or the
selected memory bank E is displayed.
FM1
MWLW
MWLW
E
E
FMT
FMT
You can now do the following:
Searching for stations in this
•
waveband (see below),
calling up stored stations from
•
this memory bank (see p. 40),
storing stations on this memory
•
bank (see p. 39).
Tuning into a station
You can adjust stations either automatically (see below) or manually
(see p. 37).
Setting stations automatically
To perform an automatic station
seek tuning:
➜
While the radio display is shown,
press the OK button = for 2 sec-
onds.
Or:
➜
In the radio display, select the
"Tune " menu.
The tuning menu with frequency
band A, station name B and fre-
quency C is displayed.
B
B
Tune
Tune
BBC
BBC
I 92 I 93 I 94 I
I 92 I 93 I 94 I
TMC
TMC
14
14
The previously set station in this
waveband is played.
36
16:13
16:13
FMT
FMT
C
C
Note:
To initiate automatic station seek
tuning during a destination guidance, see p. 66.
A
A
Page 37

Operating the radio
To defi ne the direction of the station
seek tuning:
➜
Turn the menu button until one of
the arrows D is highlighted.
D
D
Tune
Tune
BBC
BBC
I 92 I 93 I 94 I
I 92 I 93 I 94 I
➜
Press the OK button 3.
The radio searches for the next
station in the current frequency
band in the selected direction.
The setting in the "Sensitivity"
menu (see p. 24) is taken into
account.
As soon as a station is located, the
seek tuning stops and the located
station is played. The station name
appears on the display after a few
seconds if the station broadcasts
RDS information and you activated
the display of station names (see
p. 22).
You can now store this station (see
p. 39) or restart the automatic station seek tuning.
Note:
If you hold the OK button 3
pressed, the automatic seek tuning skips any stations it locates
until you release the OK button 3 again.
Cancelling an automatic station
seek tuning
To cancel the automatic station
seek tuning:
➜
Press the ESC button A.
The automatic station seek tun-
ing stops. The previously played
station is played.
Setting stations manually
To set a station manually:
➜
In the radio display, select the
"Tune " menu.
The tuning menu with frequency
band A, station name B and fre-
quency C is displayed.
B
B
Tune
Tune
BBC
BBC
I 92 I 93 I 94 I
I 92 I 93 I 94 I
C
C
➜
Turn the menu button until the
frequency band A is highlighted
and press the OK button =.
The frequency band A is high-
lighted in red.
➜
Turn the menu button < to the
left or the right.
You are listening to the current
reception frequency.
As soon as a station has been located, it is played. The station name
appears on the display after a few
seconds if the station broadcasts
RDS information and you activated
A
A
37
Page 38

Operating the radio
the display of station names (see
p. 22).
You can now do the following:
Continue listening to the station
•
by pressing the OK button =. To
subsequently store this station,
see p. 39,
return to the previous station by
•
pressing the ESC button A,
search for additional stations by
•
turning the menu button < to
the left or right.
Scanning receivable
stations (SCAN)
You can sequentially scan all receivable stations for 10 seconds.
To start the SCAN:
➜
In the radio display, select the
"Options" menu.
The Options menu of the radios
is displayed.
Options
Options
Start scan
Start scan
➜
In the Options menu, select and
confi rm the "Start scan" menu
item.
The radio searches for stations in
the current frequency band. The
display shows "SCAN".
As soon as a station has been located, it is played for 10 seconds.
The station name appears on the
display after a few seconds if the
Start T-Store
Start T-Store
station broadcasts RDS information
and you activated the display of station names (see p. 22).
You can now do the following:
•
Store this station, see p. 39,
•
search for additional stations by
waiting for 10 seconds,
•
cancel the scan (see below).
After 10 seconds, the next station
is automatically searched for and
played.
Cancelling the SCAN and
continuing to listen to a station
After the entire frequency band has
been searched once and all stations
have been scanned and played,
the SCAN automatically stops and
the previously scanned station is
played.
If you want to cancel the scan
early:
➜
Press the ESC button A.
Or:
➜
In the Options menu of the radio, select and confi rm the "Stop
scan" menu item.
The scan process is stopped.
The previously scanned station
is played.
You can now store this station (see
p. 39) or restart the automatic station seek tuning (see p. 36).
38
Page 39

Operating the radio
Storing stations
You can store 6 stations in each
memory bank – either manually
(memory banks FM1, FM2, MW and
LW) or automatically (memory bank
FMT).
Storing stations manually
➜
Select the memory bank FM1 or
FM2 fi rst or one of the MW or LW
wavebands (see p. 36).
Note:
Do not use the FMT memory bank
because the stations in this memory bank are deleted whenever
stations are stored automatically
(see below).
➜
Tune into the desired station
(see p. 36).
➜
Press one of the function buttons 1 5 to 6 : for longer than
2 seconds.
A
A
B
B
1 BBC 4Virgin Radio
1 BBC 4Virgin Radio
2 BFBS 596.2
2 BFBS 596.2
3 Capital FM 689.7
3 Capital FM 689.7
The frequency or the station
name B appears next to the
function button A. The station
is assigned to the button you
press.
Note:
If the station name is too long, it
is abbreviated on the display.
Storing stations automatically
( Travelstore)
You can automatically store the six
FM stations offering the strongest
reception in the region in the FMT
memory bank.
➜
Press the TUN button ? for
longer than 2 seconds.
Or:
➜
In the radio display, select and
confi rm the "Options" menu.
TMC
TMC
1
1
2
2
BBC
BBC
3
3
Tune Band Options
Tune Band Options
The Options menu of the radios
is displayed.
Start scan
Start scan
➜
In the Options menu, select and
confi rm the "Start T-Store" menu
item.
The radio is searching for stations. "T-Sto re" appears on the
display. Every stored station is
played for approx. 3 seconds.
After the storing is completed,
the radio plays the station at
memory location 1 of the FMT
level. Stations that were previously stored in the FMT memory
bank are automatically deleted.
Start T-Store
Start T-Store
16:13
16:13
FMT
FMT
92,8
92,8
Options
Options
4
4
5
5
6
6
39
Page 40

Operating the CD/MP3 player
Cancelling automatic storing
( Travelstore)
To cancel automatic storing prematurely:
➜
Press the ESC button A.
Or:
➜
In the Options menu of the radio, select and confi rm the "Stop
T-Sto re" menu item.
Travelstore is cancelled. The radio plays the station in memory
location 1 of the FMT level.
Playing stored stations
To play a stored station:
Select the memory bank or the
➜
waveband (see p. 36).
➜
Press one of the function buttons
1 5 to 6 :.
The radio plays the station assigned to this function button.
The memory bank is displayed
for 3 seconds.
A
A
B
B
1 BBC 4Virgin Radio
1 BBC 4Virgin Radio
2 BFBS 596.2
2 BFBS 596.2
3 Capital FM 689.7
3 Capital FM 689.7
The frequency or the station
name B appears next to the
function button A.
Operating the CD/
MP3 player
Which CDs can be played?
CAUTION!
The use of mini or shape
CDs will damage the drive!
Mini CDs with a diameter of 8 cm
and Shape CDs damage the drive!
Insert only commercially avail-
➜
able CDs with a diameter of 12
cm in the CD drive!
The device can play the following
CD formats:
CD audio
•
CD-R
•
CD ROM with MP3 or WMA (only
•
without DRM copy protection)
Some CDs with copy protection
•
cannot be played.
Note:
The quality of self-burnt CDs
fl uctuates due to different CD
burner software, CD blanks and
burn speeds. For this reason, it
is possible that the device cannot
play some self-burnt CDs.
40
Page 41

Operating the CD/MP3 player
If you cannot play a CD-R:
Use CD-Rs from a different manu-
•
facturer or a different color,
burn CD-Rs at a lower speed.
•
What characteristics do MP3 CDs
have to have?
The device can only play and display MP3 CDs with the following
features:
The CD-ROM may contain only
•
MP3 fi les as well as folders, but
no other fi les, including no CD
audio fi les
CD format: ISO 9660 (Level 1 or
•
2) or Joliet
Bit rate: max. 320 kbit/s
•
File extension: must be ".MP3"
•
ID3 tags: Version 1 or 2
•
Folder: max. 252 per CD
•
Number of MP3 fi les: max. 255
•
per folder
File names:
•
No umlauts
•
No special characters
•
Up to 32 characters are
•
shown on the display
•
CD format: ISO 9660 (Level 1 or
2) or Joliet
•
Bit rate: max. 768 kbit/s
•
File extension: must be ".WMA"
•
DRM: Files with DRM (Digital
Rights Management, copy protection/playback restriction) cannot
be played! WMA fi les with DRM
offered by music providers for
download via the Internet cannot be played by the device. WMA
fi les which you create yourself,
e.g. from CD audio fi les, can be
played.
•
Folder: max. 252 per CD
•
Number of WMA fi les: max. 255
per folder
•
File names:
•
No umlauts
•
No special characters
•
Up to 32 characters are
shown on the display
Playing CDs
The CD playback starts automatically as soon as you insert a CD (see
p. 10) or select the CD player as
audio source (see p. 26).
What characteristics do WMA
fi les have to have?
The device can only play and display WMA CDs with the following
features:
The CD-ROM may contain only
•
WMA fi les as well as folders, but
no other fi les, including no CD
audio fi les
The advantage:
The device remembers the track
and playing time of the CD played
last and starts again at the same
point at which the playback was
interrupted.
41
Page 42

Operating the CD/MP3 player
How to use the function buttons
1 5 to 6 :
forward and reverse,
•
jump to the next/previous track,
•
change MP3 folders,
•
start the random playback,
•
repeat tracks,
•
can be found in the section "Playing
music" (see p. 29).
Quitting/interrupting CD playback
To quit or interrupt the CD playback:
➜
Select a different audio source
(e.g. the radio), see p. 26.
The CD stops playing. If you reselect the CD player as audio
source, the playback automatically continues at the point where it
was interrupted.
Or:
➜
Switch off the device (see p. 9).
The CD stops playing. The device
is switched off. If you reselect
the CD player as audio source,
the playback automatically continues at the point where it was
interrupted.
Or:
➜
Mute the device (see p. 11).
The CD stops playing. Traffi c an-
nouncements are automatically
faded in.
Selecting a track from a list
You can select CD tracks by jumping
to the previous or next track using
on the CD the function button 4 :
or 5 9 (see p. 29). You can also
select tracks from a list.
Selecting CD tracks from a list
(built-in CD player)
If you play an audio CD in the
built-in CD player, the CD display
is shown.
CD
CD
14:01
14:01
00:22
14:39
14:39
00:22
CDC
CDC
00:05
00:05
Track 01/11
Track 01/11
Tracks Options
Tracks Options
MIX
MIX
➜
In the CD display, select and confi rm the "Tr a c ks" menu.
The list of tracks is displayed.
➜
Select and confi rm the desired
track.
The playback of the selected
tracks starts.
Selecting CD tracks from a list
(optional CD changer)
If you play an audio CD in the optional CD changer, the CD changer
display is shown.
CD 2
CD 2
Track 01/20
Track 01/20
Tracks CDs Options
Tracks CDs Options
MIX
MIX
RPT
RPT
RPT
RPT
42
Page 43

Operating the CD/MP3 player
To select a track on the same CD:
➜
In the CD changer display, select
and confi rm the "Tr a cks" menu.
The list of tracks is displayed.
Tracks
Tracks
Track 01
Track 01
Track 02
Track 02
Track 03
Track 03
Track 04
Track 04
➜
Select and confi rm the desired
track.
The selected track is played.
To select a track on another CD in
the CD changer:
➜
In the CD changer display, select
and confi rm the "CDs" menu.
The list of CDs located in the CD
changer is displayed.
CDs
CDs
CD 1
CD 1
CD 2
CD 2
CD 3
CD 3
CD 4
CD 4
➜
Select and confi rm the desired
CD.
The CD changer changes the CD.
This process may take a few seconds. "Change CD" is shown on
the display. Next, the fi rst track
on the selected CD is played.
You can now select a different track
on this CD as described above.
Selecting MP3 tracks from an
MP3 list
If you play an MP3 CD, the MP3 display is shown.
MP3
MP3
15:09
Bob Marley
Bob Marley
Jamin
Jamin
Browse Options
Browse Options
MIX
MIX
15:09
00:04
00:04
To select a track:
➜
Select and confi rm the "Browse"
menu.
The MP3 list is displayed.
C
Ska
Ska
B
B
C
Browse
Browse
A
A
01 Jamin.mp3
01 Jamin.mp3
02 Survival.mp3
02 Survival.mp3
A
Up symbol
B
Folder symbol
C
Number and title of the track
To select a track from the MP3 list:
➜
Select and confi rm the desired
track.
The selected track is played.
➜
Select and confi rm the "Up" symbol A in the MP3 list or press the
ESC button A to select a track
from a different folder.
RPT
RPT
43
Page 44

Operating the CD/MP3 player
The content of the superior folder is displayed.
➜
Select and confi rm a folder B
in the MP3 list to change to this
folder.
The advantage:
If the name of a folder or MP3 fi le
is too long, it is abbreviated. You
can display the complete name
by pressing the
exit the Info display, press the
ESC button A.
button B. To
Scanning tracks ( SCAN)
To scan and play all tracks of a CD
or the current folder of an MP3 CD
for 10 seconds:
➜
Press the OK button = for long-
er than 2 seconds.
Or:
➜
Select and confi rm "Start scan"
menu item in the Options menu
of the CD player, CD changer or
MP3 player.
Options
Options
Start scan
Start scan
MP3
MP3
15:09
Scan
Scan
Bob Marley
Bob Marley
Jamin
Jamin
Browse Optionen
Browse Optionen
MIX
MIX
The Scan mode ends automatically
if you:
Press one of the function buttons
•
1 5 to 6 :,
•
change the audio source (see p.
26),
•
make a phone call with the car
phone (see p. 11),
•
remove the CD (see p. 10),
•
switch off the device (see p. 9).
To end the SCAN function manually:
➜
Press the ESC button A or select
and confi rm the "Stop scan" menu
item in the Options menu.
Stop scan
Stop scan
The previously scanned and
played track is played.
15:09
00:04
00:04
Options
Options
RPT
RPT
The tracks are sequentially
scanned and played for 10 seconds, starting with the next track.
The display shows "SCAN".
44
Changing MP3 settings
The settings you perform in the
Options menu of the MP3 player
include:
•
Whether ID3 tags are displayed,
•
whether the display shows scrolling text.
Page 45

Operating the CD/MP3 player
Displaying ID3 tags/fi le names
During the MP3 playback, the MP3
display shows either the name of
the MP3 fi le or the information from
ID3 tags.
Options
Options
MP3 info
MP3 info
Start scan
Start scan
ID3
ID3
Scroll
Scroll
To toggle between both displays:
➜
In the Options menu of the MP3
player, select the "ID3" menu
item.
Use the OK button = to toggle
the display:
•
The check mark means: If ID3
tags are featured on the MP3
CD, they are displayed.
•
If the box shows no check
mark, the name of the MP3 fi le
is always displayed.
Displaying scrolling text
During the MP3 playback, text is
displayed on the MP3 display. If this
text is too long for the display, it can
be displayed as scrolling text.
MP3
MP3
15:09
Bob Marley
Bob Marley
Jamin
Jamin
Browse Options
Browse Options
MIX
MIX
15:09
00:04
00:04
You can toggle as follows between
scrolling text and fi xed text display:
In the Options menu of the MP3
➜
player, select the "Scroll" menu
item.
Use the OK button = to toggle
the text display:
•
The check mark means: Text is
displayed as scrolling text.
•
If the box shows no check
mark, the text is not displayed
as scrolling text. Long texts are
abbreviated. To completely display abbreviated texts, see the
next section.
Displaying MP3 information
To completely display texts shown
abbreviated on the display:
➜
In the Options menu of the MP3
player, select the "MP3 info"
menu item.
Options
Options
MP3 info
MP3 info
Start scan
Start scan
ID3
ID3
Scroll
Scroll
The information is completely
displayed.
Bob
Bob
Marley
Marley
Don’t rock my
Don’t rock my
boat
boat
RPT
RPT
➜
Press the ESC button A to close
the Info display.
MP3
MP3
45
Page 46

Operating the navigation system
Operating the
navigation system
The operating principle
Entering a destination
You no longer need a street map to
fi nd a specifi c destination. Instead,
you enter your destination in the
navigation system using the text input (see p. 52).
Positioning
The current vehicle position is determined by means of GPS satellite
signals, the speedometer signal and
a gyroscope. The navigation system
compares these data with the digital map material on the navigation
CD and calculates the vehicle position as well as the route to the
destination.
For the navigation system to determine the current position, the
vehicle must be on a street which
is featured on the navigation CD
("digitised street") and the GPS antenna must receive suffi cient satellite signals.
Destination guidance
As soon as you start the destination
guidance (see p. 62), you hear voiceprompted turn-by-turn directions
(see p. 65) and the display shows
visual turn-by-turn directions (arrows, distance and time information,
see p. 64).
Dynamic route adaptation
While driving, the navigation system
can receive traffi c information from
TMC stations in the background
(see p. 33). If there should be a
traffi c jam on the route, you hear
an announcement and the navigation system automatically calculates
a new route – if it allows you to
reach your destination faster
If you do not follow the turn-by-turn
directions, e.g. because a street is
blocked or because the traffi c routing has changed, the navigation system automatically calculates a new
route (see p. 71).
The corridor function
If the navigation system calculated a route, it stores all the streets
leading to the destination and also
streets that lie in a corridor to the
left and the right of the route. These
data are illustrates by means of the
corridor status display (see L on
p. 48).
As long as you stay in this corridor,
e.g. while evading a traffi c jam, you
can remove the navigation CD from
the drive and play a CD.
If you leave the corridor while driving, you hear a request to reinsert
the navigation CD. If you do not insert the navigation CD, you hear a
corresponding note and no additional turn-by-turn directions follow.
46
Page 47

Operating the navigation system
The surroundings function
If no destination guidance is active,
the navigation system automatically
loads the digital map material of a
certain area surrounding the vehicle position into its memory. Within
this area, you can specify and navigate to destinations without having
to insert the navigation CD.
Installing the navigation
software
DANGER!
Risk of an accident
through distraction from
traffi c!
If you perform the following settings while driving, you may be distracted from the traffi c and cause
an accident.
➜
Perform the settings described
in this section only while the vehicle is standing!
Before you can use the navigation
system, you must install the navigation software as described below.
Note:
If you install the navigation software while a destination guidance is active, a confi rmation dialogue appears and asks whether
you really want to perform the
installation. If you perform the installation, the destination guidance is cancelled.
CAUTION!
Defective navigation CDs
are not operational!
If you insert a navigation CD without
"E" imprinted on it or a self-burnt
navigation CD, the navigation system does not work! The display permanently shows the text "Navigation
is being activated".
Use only the original navigation
➜
CDs for the ROME NAV55E with
the "E" imprint!
Ensure that the CD is not dam-
➜
aged.
To load the navigation software:
➜
Insert the original navigation CD
with the "E" imprint in the drive
(see p. 10).
The display shows "NAVI SW" and
a progress indicator. "Language is
being loaded" appears next. The
navigation software is automatically installed.
➜
Do not interrupt the installation
of the navigation software!
As soon as the installation is
complete, the displays shows
"Observe the road traffi c regula-
tions".
The navigation software remains
in the memory of the device until
the device is disconnected from
the power supply. The navigation
software must be reinstalled if the
device:
•
Is not switched on for 72 hours
since the device automatically
shuts down after this time to
spare the vehicle's battery,
47
Page 48

Operating the navigation system
is disconnected from the operat-
•
ing voltage.
Note:
Similar to a printed street map,
the map material is no longer up
to date after some time. This may
result in incorrect turn-by-turn
directions. For this reason, replace your navigation CD as soon
as a new version is available (see
www.blaupunkt.com).
The navigation display
To display the navigation display:
➜
Press the NAVI button >.
The navigation display appears.
Note:
The navigation software must be
loaded for the navigation display
to be displayed.
B
B
C D
A
A
1
1
2
2
3
3
F
F
A
Functions assigned to the func-
C D
TMC
TMC
SIR MATT BUSBY WAY
SIR MATT BUSBY WAY
Destn. Memory Options
Destn. Memory Options
H J K L
G
G
H J K L
tion buttons (5 to :)
B
TMC symbol
C
TA symbol
01:13
01:13
E
E
FM1
FM1
7
7
M N
M N
Time
D
Active audio source
E
Current vehicle position
F
If the navigation system cannot determine the position, "Position not
available" appears. If the vehicle is
not located on a road, longitude and
latitude appear (e.g. O 09°11’34’’
N 049°64’34’’).
G "Destination" menu
H "Memory" menu
J Wind rose (pointing north)
K "Options" menu of the navigation
system
L Corridor status display
M Satellite reception display
N Details of the audio source
Only visible if the navigation menus
G, H and K are not displayed.
Depending upon the active audio
source:
Radio: Name or frequency of the cur-
A
A
4
4
5
5
6
6
rent radio station
CD player: Number of the current
track
CD changer: Number of the current
CD and the track
MP3 player: Name of the current
MP3/WMA fi le or ID3 tag information.
After a short period of time, the
three menus G, H and K disappear
at the bottom of the display. To
display them again:
➜
Turn the menu button <.
Or:
➜
Press the OK button =.
The navigation menus appear.
48
Page 49

Operating the navigation system
The three menus of the
navigation system
The three menus "Destination",
"Memory" and "Options" are re-
quired to:
Enter a new destination for the
•
navigation (see p. 54),
•
call and edit stored destinations
(see p. 61),
•
block route areas ("Traffi c ahead",
see p. 67), display the calculated
route in detail ("Route list", see
p. 67) and defi ne the "Route op-
tions" (see p. 68).
To change to one of the three
menus "Destination", "Memory" or
"Options":
➜
Press the NAVI button >.
The navigation display appears.
TMC
TMC
1
1
SIR MATT BUSBY WAY
SIR MATT BUSBY WAY
2
2
3
3
Destn. Memory Options
Destn. Memory Options
01:13
01:13
FM1
FM1
4
4
5
5
7
7
6
6
The following illustrations provide
an overview of the most important
menu items.
Mark and confi rm the desired
➜
menu.
The menu is displayed.
Note:
The basic settings of the navigation system, such as language,
travel time/arrival time and junction zoom, are performed in the
menu of the basic settings (see
p. 24).
49
Page 50

i
i
i
i
i
Operating the navigation system
NAVI
Destination
Destination
CITY
STREET
TOWN CENTRE
POINTS OF INTEREST
COUNTRY
City
Street
Centre
Intersection
House number
Points of Interest
Country
City
ABCDEFGHIJKLMNOPQRSTUVWXYZ
0123456789_,./-
Street
ABCDEFGHIJKLMNOPQRSTUVWXYZ
0123456789_,./-
Town Centre
ABCDEFGHIJKLMNOPQRSTUVWXYZ
0123456789_,./-
Junction
ABCDEFGHIJKLMNOPQRSTUVWXYZ
0123456789_,./-
1...17
ABCDEFGHIJKLMNOPQRSTUVWXYZ
123456789_,./-
POSITION AREA
DESTINATION AREA
SUPRAREG.DESTS
List of countries
House number
Destination
A
Text input
List of
cities
Text input
A
List of
streets
Text input
A
List of parts
of cities
A
Text input
List of
intersections
Text input
1
List of house
numbers
List of points of
interest
(motorways exit,
motorways service area, ...)
Start destinat
guidance
Start destinat
guidance
Start destinat
guidance
Start destinat
guidance
Start destinat
guidance
Memory
50
Page 51

Destination
t
t
t
t
Memory
Last 10
Destinations
Waypoints
Last 10
Memory
Add
Modify
Set waypoint
M1 2PA Manchester, Sir Matt B
M1 3PA Manchester, Henry Gil
MJ Junction Manchester
Operating the navigation system
Last 10
List of last
10 destinations
Start destina
guidance
Options
Destinations
Waypoints
Add
Modify
Set waypoints
Traffic ahead
Route list
Traffic ahead
Route list
Route options
M1 2PA Manchester, Sir Matt B
M1 3PA Manchester, Henry Gil
MJ Junction Manchester
01.01.2005 09:41
01.01.2005 10:05
From last 10
From waypoint
Delete destn.
Clear memory
Last 10
Destinations
Waypoint
Store waypoints
Options
Route options
700 m, Sir Matt Busby Way
67 m, Henry G. Way
500 m, B1, Olven Way
Optimum
Fast
Short
Destinations
Waypoints
Add
New destn.
Modify
Rename destn.
Do you really want to delete the
selected entry?
Yes No
Traffic ahead
47,96 km
Route list
Route options
Dynamic
Enable
Adjust optimum
List of stored
destinations
Date and
time
Select
destinations
from the list
Rename stored
destinations
Text input
The current
vehicle position
is stored
Enter distance from
vehicle position to
end of traffic jam
Display calculated
route list
Motorway Seasonal
Ferry Tunnel
Tol l
20 / 80
Short
Fast
Start destina
guidance
Start destina
guidance
Start destina
guidance
51
Page 52

G
G
Operating the navigation system
Starting the navigation
system
To start the navigation system, the
navigation software must be installed (see p. 47).
➜
Press the NAVI button >.
The navigation display appears.
TMC
TMC
1
1
SIR MATT BUSBY WAY
SIR MATT BUSBY WAY
2
2
3
3
Destn. Memory Options
Destn. Memory Options
01:13
01:13
FM1
FM1
4
4
5
5
7
7
6
6
Overview of the destination
entry
You can either enter a new destination or call a stored destination
(see p. 62). If you enter a new destination, you can either enter a new
address (see p. 54) or a point of
interest (see p. 58).
This requires the text input (see the
next section).
Entering characters in the text
input
The text input appears if you have
to enter letters, numbers or special
characters.
B
A
A
Destinations
Destinations
ABCDEFGHIJKLMNOPQRSTUVWXYZ
ABCDEFGHIJKLMNOPQRSTUVWXYZ
0123456789_,./-
0123456789_,./-
B
A
A
Text fi eld
A
"Current character" fi eld
B
Character list
C
Special characters fi eld (see
D
p. 53)
Delete fi eld (see p. 54)
E
OK fi eld
F
List fi eld
G
Note:
The text input appears only if
you have to select from more
than four options (city names,
street names, etc.). If you have
to select from less than fi ve options, a list appears instead of it.
You can change to the list at any
time by selecting and confi rming
the List fi eld G.
To input the fi rst character:
The advantage:
Text may already be in the Text
fi eld A (in light-blue colour),
even if you have not yet entered
any text. For example, if you enter a city, the name of the previously entered city automatically
appears. If you want to adopt this
text in the Text fi eld A, press the
OK button = for longer than
2 seconds or select and confi rm
the OK fi eld F.
➜
Use the menu button < to select
the fi rst character from the character list C.
The marked character appears in
the "Current character" fi eld B.
52
C D E
C D E
F
F
Page 53

C
C
Operating the navigation system
Destinations
Destinations
ABCDEFGHIJKLMNOPQRSTUVWXYZ
ABCDEFGHIJKLMNOPQRSTUVWXYZ
0123456789_,./-
0123456789_,./-
Note:
If the desired character does not
appear in the character list C,
see below.
➜
Press the OK button = to con-
fi rm your selection.
The selected character appears
in the Text fi eld A (in yellow colour). The character list C shows
the characters in white which may
be possible as the next character.
Characters that are not possible
as the next character appear in
blue and cannot be selected.
The advantage:
For example, if you are entering
the name of a city and enter "K"
as the fi rst character, "X" is displayed in blue in the character
list C since the city directory on
the navigation CD does not contain any city starting with "KX".
➜
Use the menu button < to select
the next character and press the
OK button = again to confi rm
your selection.
➜
Perform this step repeatedly until
the desired name is completely
displayed or a list appears.
B
B
The advantage:
The navigation system attempts
to guess your entry by constantly
LLONDON
LLONDON
comparing your text input with
the data on the navigation CD.
This means that possible additional characters are automatically completed. If you want to
adopt this completion, use the
menu button < to select the OK
fi eld F and press the OK button = (or press the OK button =
for longer than 2 seconds).
If fewer than fi ve possibilities remain to complete your text, a list
is automatically displayed (e.g. city
list or street list).
MAAD
MAAD
MAAR
MAAR
MAAS
MAAS
MAASBRUCH
MAASBRUCH
You can also prematurely change
to this list by using the menu button < to select the List fi eld G and
press the OK button =.
➜
Mark and confi rm the desired entry in the list.
Entering special characters in the
text input
If you want to enter a special character, such as an umlaut or a letter
with an accent, and the desired special character is not displayed:
City
City
53
Page 54

C
C
E
E
Operating the navigation system
Destinations
Destinations
A
A
ABCDEFGHIJKLMNOPQRSTUVWXYZ
ABCDEFGHIJKLMNOPQRSTUVWXYZ
0123456789_,./-
0123456789_,./-
D
D
Use the menu button < to select
➜
the Special character fi eld D and
press the OK button =.
The bottom line of the character
list C displays additional special
characters.
➜
From the bottom line of the character list C, select the desired
special character and press the
OK button =.
➜
Use the menu button < to select
the Special character fi eld D again
and press the OK button =.
The bottom line of the character
list C displays the original special characters again.
Deleting characters from the text
input
To delete an incorrectly entered
character:
➜
Use the menu button < to select
the Delete fi eld D and press the
OK button =.
Destinations
Destinations
A
A
ABCDEFGHIJKLMNOPQRSTUVWXYZ
ABCDEFGHIJKLMNOPQRSTUVWXYZ
0123456789_,./-
0123456789_,./-
The character entered last is deleted. Automatic completions of
the name are deleted.
Or:
➜
Press the ESC button A.
Note:
If you press the ESC button A
for an extended period of time,
all characters are deleted.
Entering an address
To enter an address:
➜
Mark and confi rm the "Destination"
menu in the navigation display.
The "Destination" menu appears.
Destination
POINTS OF INTEREST
POINTS OF INTEREST
COUNTRY
COUNTRY
Note:
The "Destination" menu displays
different menu items, depending
upon which address information
you have already entered.
To enter the address, enter the following in sequence:
1.
the country in which your destination is located (required only if
you want to navigate to a different
country or if you enter a destination for the fi rst time, see p. 55),
2.
the name or postcode of the city in
which your destination is located
(see p. 55),
3.
the name of the street in which
your destination is located (see
p. 56) or a centre (see p. 56) or
a point of interest (see p. 57) in
the city,
Destination
54
Page 55

Operating the navigation system
either the house number or an
4.
intersection (see p. 58) where
your destination is located (not
mandatory).
Entering a country
You have to enter the country only
if it is not yet displayed in the
"Destination" menu.
To enter the country in which your
destination is located:
➜
In the "Destination" menu, mark
and confi rm the "Country" menu
item.
Destination
POINTS OF INTEREST
POINTS OF INTEREST
COUNTRY
COUNTRY
Destination
The country list appears.
➜
In the country list, mark and confi rm the country in which your
vehicle is located and press the
OK button =.
The "Destination" menu appears
again. Instead of the "Country" menu
item, the newly selected country is
displayed.
Destination
CITY
CITY
POINTS OF INTEREST
POINTS OF INTEREST
UNITED KINGDOM (GB)
UNITED KINGDOM (GB)
Destination
Entering a city
You must fi rst defi ne the city before
you can enter more detailed information, such as street and house
number. For this purpose, you can
enter either the name or the postcode of the city.
The advantage:
The postcode determines the
destination faster and uniquely.
To enter the city:
➜
In the "Destination" menu, mark
and confirm the "City" menu
item.
Destination
CITY
CITY
POINTS OF INTEREST
POINTS OF INTEREST
UNITED KINGDOM (GB)
UNITED KINGDOM (GB)
Destination
The text input appears.
➜
Enter the name or postcode of
the city in the text input (see p.
52).
CITY
CITY
ABCDEFGHIJKLMNOPQRSTUVWXYZ
ABCDEFGHIJKLMNOPQRSTUVWXYZ
0123456789_,./-
0123456789_,./-
The "Destination" menu appears
again. Instead of the "City" menu
item, the newly selected city is
displayed. The city entered remains until the next destination
entry. In addition, the menu items
"Street", "Centre" and "Point of in-
terest" now appear.
Note:
If you entered a city name which
exists several times, a list displays in which you have to specify
your selection. If the postcode
entered applies to several places,
you have to select the desired location from a list after entering
the postcode.
A
A
55
Page 56

Operating the navigation system
The destination entry via postcode
is only possible if the corresponding data exist on the navigation CD.
Postcodes and P.O. boxes cannot
be used in the destination entry.
You can now do the following:
Enter a street via the "Street"
•
menu item (see below), or
enter a city centre or a centre of
•
a part of a city via the "Centre"
menu item (see below), or
enter a point of interest in the
•
city via the "Point of interest"
menu item (see p. 57).
Entering a street
You can only enter the street after
you have entered the city (see p.
55).
To enter the street:
➜
In the "Destination" menu, mark
and confi rm the "Street" menu
item.
The text input appears.
➜
Enter the name of the street in
the text input (see p. 52).
STREET
STREET
A
A
ABCDEFGHIJKLMNOPQRSTUVWXYZ
ABCDEFGHIJKLMNOPQRSTUVWXYZ
0123456789_,./-
0123456789_,./-
The "Destination" menu appears again. It now shows the
menu items "House number",
"Intersection" and "Continue".
The advantage:
To simplify the search, a long
street name can occur several times in the street list, e.g.
"RAABE-WEG, WILHELM-" and
"WILHELM-RAABE-WEG".
Note:
If you entered a street name
which exists several times in the
destination city, a list displays in
which you have to select the desired street.
You can now do the following:
Enter a house number via the
•
"House number" menu item (see
p. 57), or
enter an intersection via the
•
"Intersection" menu item (see p.
58), or
start the destination guidance
•
immediately via the "Continue"
menu item (see p. 62).
Entering a centre/ centre of a part
of a city
You can only enter a city centre or
centre of a part of a city after you
have entered the city (see p. 55).
To enter a centre:
➜
In the "Destination" menu, mark
and confi rm the "Centre" menu
item.
56
Page 57

Operating the navigation system
The names of all parts of a city
are displayed in a list.
Note:
If the city was selected by entering the postcode, the list displays
only the centres in reference to
the postcode entered.
➜
Select the desired centre from
the list and press the OK but-
ton =.
The destination guidance starts
(see p. 62).
You can now do the following at any
time:
•
Change the route options (see
p. 68),
•
store the destination (see p. 59),
•
cancel the destination guidance
(see p. 66).
Entering a point of interest in the
destination city
You can only enter a point of interest in the destination city after you
have entered the city (see p. 55).
To enter a point of interest in the
destination city:
➜
In the "Destination" menu, mark
and confi rm the "Points of inter-
est" menu item.
The list of point of interest categories is displayed. The list
shows only those categories that
exist in the destination city.
➜
Select and confi rm the desired
category.
Example:
For example, if you are looking
for a hotel, select "Hotel".
The text input or a list appears.
➜
Enter the name of the point of interest in the text input (see p. 52)
or select the name of the point
of interest from the list.
Example:
For example, if you want to drive
to a certain hotel, select the
name of the hotel.
➜
Confi rm the desired destination
by pressing the OK button =.
The destination guidance starts
(see p. 62).
You can now do the following at any
time:
•
Change the route options (see
p. 68),
•
store the destination (see p. 59)
•
cancel the destination guidance
(see p. 66).
Entering a house number
You can only enter the house
number after you have entered the
street (see p. 56).
To enter the house number:
➜
In the "Destination" menu, mark
and confi rm the "House number"
menu item.
57
Page 58

Operating the navigation system
Destination
HOUSE NUMBER
HOUSE NUMBER
JUNCTION
JUNCTION
CONTINUE
CONTINUE
Destination
The text input or a list appears.
➜
Enter the house number in the
text input (see p. 52) or select
the house number from the list.
➜
Press the OK button =.
The destination guidance starts
(see p. 62).
You can now do the following at any
time:
•
Change the route options
(see p. 68),
•
store the destination (see p.
59),
•
cancel the destination guidance
(see p. 66).
Entering an intersection
You can only enter an intersection
after you have entered the street
(see p. 56).
To enter the intersection:
➜
In the "Destination" menu, mark
and confi rm the "Intersection"
menu item.
The text input or a list appears.
➜
Enter the intersection in the text
input (see p. 52) or select the
intersection from the list.
Note:
If an intersection occurs twice,
the direction is also displayed.
The destination guidance starts
(see p. 62).
You can now do the following at any
time:
Change the route options (see
•
p. 68),
store the destination (see p. 59)
•
cancel the destination guidance
•
(see p. 66).
Entering points of interest
Instead of an address, you can select points of interest, such as motorway connections, airports, ferries, fairs or fi lling stations. For this
purpose, you only need to know the
name of the desired point of interest.
You can select points of interest
from the following areas:
The entire area of the navigation
•
CD being used,
the surroundings of the vehicle
•
location (e.g. to fi nd the closest
fi lling station),
the surroundings of the previ-
•
ously entered destination (e.g.
to fi nd the hotel closest to the
destination).
To select a point of interest from
the entire area of the navigation CD
being used:
➜
Mark and confi rm the "Destination"
menu in the navigation display.
The "Destination" menu appears.
58
Page 59

Operating the navigation system
Destn.
POINTS OF INTEREST
POINTS OF INTEREST
COUNTRY
COUNTRY
Destn.
Note:
The "Destination" menu displays
different menu items, depending
upon which address information
you have already entered.
➜
In the "Destination" menu, select
and confi rm the "Points of inter-
est" menu item.
The point of interest areas
"Position area", "Destination area"
and "Suprareg. destinations" are
displayed.
Note:
The "Position area" menu item is
displayed only if the navigation
system can determine the current position. The "Destination
area" menu item is displayed only
if you enter a destination fi rst.
➜
In the "Destination" menu, select
and confi rm the area in which
you are looking for the point of
interest.
•
Under "Position area", you can
fi nd fi lling stations, hotels or
museums in the vicinity surrounding the vehicle position.
•
Under "Destination area", you
can fi nd points of interest in
the vicinity of the previously
entered destination.
•
Under "Suprareg. destinations",
you can fi nd points of interest
of a supraregional character,
such as motorway exits, air-
ports, ferries and border crossings.
The list of point of interest categories is displayed.
➜
Select and confi rm the desired
category.
The text input or a list appears.
Note:
If you are looking for a point of
interest in the position or destination area, this list also features the distance (straight line)
and the cardinal point to the respective point of interest and the
points of interest are sorted by
distance.
➜
Enter the name of the point of interest in the text input (see p. 52)
or select the name of the point
of interest from the list.
The destination guidance starts
(see p. 62).
You can now do the following at any
time:
•
Change the route options
(see p. 68),
•
store the destination (see below),
•
cancel the destination guidance
(see p. 66).
Saving destinations
You can save a destination which
you entered. This destination can
subsequently be called up at any
time to start a new destination guidance.
Three memories are available for
destinations:
•
"Last 10":
59
Page 60

Operating the navigation system
The last 10 destinations are automatically stored here in the
chronological order in which they
were entered.
If you entered more than 10 destinations, old destinations are
automatically deleted.
"Destinations":
•
Up to 24 destinations entered
are stored here in alphabetical
order.
If this memory is full, you must
manually delete destinations
from this memory before you can
store new destinations.
"Waypoints":
•
Up to 4 destinations, which you
enter via the "Set waypoint" menu
item, are stored here in chronological order. This function is
useful if you pass a special location which you want to revisit at
a later time.
If you entered more than 4 destinations, old destinations are
automatically deleted.
To save a destination:
➜
Mark and confi rm the "Memory"
menu in the navigation display.
The "Memory" menu appears.
Memory
Last 10
Destn.
Waypoint
Add
Modify
Set waypoint
In the "Memory" menu, mark and
➜
confi rm the "Add" menu item.
The "Add" menu appears.
To save a destination which you just
entered:
➜
In the "Add" menu, mark and
confi rm the "From last 10" menu
item.
The list of the last 10 destinations entered is displayed. The
destination which you entered
last is at the top.
Note:
If you have not entered any destination or deleted the "Last 10"
memory, "No destinations in mem-
ory!" appears.
➜
Mark and select the destination
to be saved in the list.
The destination is saved in the
"Destinations" memory.
Note:
If you already stored 24 destinations in the "Destinations" memory, "Memory full! Please delete a
destination." appears. To delete
a destination, see p. 61.
To save a set waypoint (current
vehicle position) as a destination:
➜
In the "Add" menu, mark and confi rm the "From waypoint" menu
item.
The list of waypoints entered is
displayed.
60
Page 61

Mark and select the waypoint to
➜
be saved as a destination in the
list.
The waypoint is saved as a destination.
To enter and save a new destination:
➜
In the "Add" menu, mark and
confi rm the "New destn." menu
item.
The destination entry starts (see
p. 54). As soon as the destination has been clearly entered, it
is automatically saved.
Deleting/renaming
destinations
You can edit saved destinations as
follows:
•
Deleting a saved destination,
•
deleting all destinations from one
of the three memories "Last 10",
"Destinations" or "Waypoints",
•
renaming saved destinations.
To edit saved destinations:
➜
Mark and confi rm the "Memory"
menu in the navigation display.
The "Memory" menu appears.
➜
In the "Memory" menu, mark and
confi rm the "Edit" menu item.
The "Edit" menu appears.
Operating the navigation system
To delete a saved destination from
one of the three memories "Last 10",
"Destinations" or "Waypoints":
➜
In the "Edit" menu, mark and
confi rm the "Delete destn." menu
item.
Modify
Delete destn.
Clear memory
Rename destn.
The three memories "Last 10",
"Destinations" or "Waypoints" ap-
pear.
➜
Mark and confi rm the memory
from which you want to delete a
destination.
The list of destinations saved
in the selected memory is displayed.
➜
Mark and confi rm the destination
to be deleted.
The confi rmation dialogue "Do
you really want to delete the select
entry from ...?" is displayed.
➜
Mark and confi rm "Yes" to delete
the destination from memory.
To delete all destinations from one
of the three memories "Last 10",
"Destinations" or "Waypoints":
➜
In the "Edit" menu, mark and confi rm the "Delete memory" menu
item.
Delete destn.
Clear memory
Modify
Rename destn.
61
Page 62

Operating the navigation system
The three memories "Last 10",
"Destinations" or "Waypoints" ap-
pear.
➜
Mark and confi rm the memory
from which you want to delete
all destinations.
The confirmation dialogue
"Delete memory completely?" is
displayed.
➜
Mark and confi rm "Yes" to delete
all destinations from the memory.
To rename saved destinations:
➜
In the "Edit" menu, mark and confi rm the "Rename destn." menu
item.
Modify
Delete destn.
Clear memory
Rename destn.
The list of destinations saved in
the "Destinations" memory is displayed.
➜
Mark and confi rm the destination
to be renamed.
The text input appears.
➜
Enter the desired name in the
text input (see p. 52).
The destination appears in the
list under its new name.
Note:
You can only rename destinations that are saved in the
"Destinations" memory.
Calling a destination from
the memory
Instead of entering a new destination, you can call a saved destination as follows:
➜
Mark and confi rm the "Memory"
menu in the navigation display.
The "Memory" menu appears.
Memory
Last 10
Destn.
Waypoint
➜
Mark and confi rm the memory
Add
Modify
Set waypoint
from which you want to call a destination ("Last 10", "Destinations"
or "Waypoints").
The list of destinations saved in the
selected memory is displayed.
➜
Mark and confi rm the desired
destination.
The destination guidance starts
(see below).
Destination guidance
After entering a destination, the
route is calculated (see p. 63).
Next, the destination guidance automatically starts with visual turnby-turn directions (see p. 64) and
with voice-prompted turn-by-turn
directions (see p. 65).
62
Page 63

K
Operating the navigation system
Destination
guidance is starting
Calculating route
Dynamic
Change Continue
TMC
1
2
SIR MATT BUSBY WAY
3
ESC
Do you really want to
cancel route guidance?
Yes
Short
10 sec.
16:13
km
FM1
2:37
137
BBC
Navigation
No
4
5
7
6
Route calculation
Change:
Set route options
Destination
You can perform the following at
any time during destination guidance:
Display the complete route (see
•
p. 67),
•
change the route, e.g. to avoid a
specifi c part of the route ("Tra f fi c
ahead", see p. 67),
•
change the route options, e.g.
to favour a fast or a short route
(see p. 68),
•
switch the "Dynamic" route options on/off to incorporate traffi c
obstructions (see p. 70),
•
cancel the destination guidance
(see p. 66).
Route calculation
When you start the destination
guidance, you hear: "Calculating
route" and the display shows the
overview of the route options for
approx. 10 seconds.
Calculating route
Dynamic
Short
Change Continue
To change the route options now:
➜
Mark and confi rm the "Change"
menu within 10 seconds.
The "Route options" menu appears (see p. 68).
If you do not want to change the
route options at this time:
➜
Wait approx. 10 seconds or select and confi rm the "Continue"
menu.
After the route calculation, the
route as well as a corridor to
the left and the right side of the
route is saved in the memory of
the navigation system. The completion of the corridor data is illustrated by the corridor status
display K, provided that the navi-
gation CD is in the drive.
TMC
1
Sir Matt Busby Way
2
3
Destn. Memory
If desired, you can remove the
navigation CD from the device as
soon as at least 2/3 of the corridor status display K is fi lled,
and play a CD.
01:13
FM1
4
5
7
6
63
Page 64

Operating the navigation system
Note:
If you leave the corridor while
driving, you hear a request to reinsert the navigation CD. If you
do not insert the navigation CD,
you hear a corresponding note
and no additional turn-by-turn
directions follow.
If the vehicle is located on a street
that is recognised by the software
("digitised street"), the destination
guidance starts via voice-prompted
and visual turn-by-turn directions.
DANGER!
Turn-by-turn directions can
deviate from the actual
traffi c routing!
Turn-by-turn directions that do no
correspond to the Highway Code
can lead to accidents.
Follow the turn-by-turn direc-
➜
tions only if you do not violate
any traffi c regulations!
Visual turn-by-turn directions
Visual turn-by-turn directions are
displayed while driving. If you are
to follow the course of the streets,
the following is displayed:
A B C D E A
TMC
1
2
SIR MATT BUSBY WAY
3
F G H J K L
A
Functions assigned to the func-
16:13
km
2:37
137
BBC
FM1
4
5
7
6
tion buttons (5 to :)
B
TMC symbol
C
TA symbol
D
Time
E
Corridor status display
Is displayed only if the navigation
CD is in the drive
Driving direction arrow
F
Shows the direction in which you
must drive
Name of currently driven street
G
Is displayed only as long as the
driving direction arrow points
straight ahead
Estimated arrival time or re-
H
maining travel time
(for toggling, see p. 24)
Current distance to destina-
I
tion in kilometres
K Active audio source
Station name or frequency, number
of track, name of MP3 fi le, etc.
L Number of currently received
GPS satellites
64
Page 65

Operating the navigation system
Before you have to turn, you hear
a voice-prompted turn-by-turn
direction and the following is
displayed:
A B C D
SIR MATT BUSBY WAY
1
2
3
A
Driving direction arrow
(shows the direction in which you
must turn shortly)
Name of the street to which
B
0,3
2:10
KM
122
BBC
4
5
5
6
you must turn
Symbolic display of the dis-
C
tance to the turning point
D
Display of the distance to the
turning point in kilometres
Shortly before you have to turn, the
junction zoom may be displayed,
provided that you switched on the
display in the menu (see p. 25):
A B C D E
SIR MATT BUSBY WAY
1
2
3
A
Driving direction arrow
(points to the direction in which
you must turn)
Name of the street to which
B
0,4
4
5
6
you must turn
Symbolic display of the dis-
C
tance to the turning point
Display of the distance to the
D
turning point in kilometres
Junction zoom
E
Red: Motorways
Orange: Major roads
Light blue/gray: Side streets
Dark blue: Route to be followed
Voice-prompted turn-by-turn
directions
In addition, the device provides
support with voice-prompted turnby-turn directions and announces
turns in due time. In the process, it
also announces the names of major
roads and motorways.
To repeat the last voice-prompted
turn-by-turn direction:
➜
Press the
button B.
Note:
You can also deactivate this voice
output (see p. 24).
If the wind rose is displayed
The wind rose generally points
north. In the following cases, the
wind rose displays instead the
straight line to the destination during a destination guidance, and no
additional turn-by-turn directions
follow:
•
The vehicle is not located on a
"digitised street".
•
You left the stored corridor.
•
You left the area stored on the
navigation CD.
➜
In these cases, follow the wind
rose symbol or reinsert the navigation CD.
65
Page 66

Operating the navigation system
As soon as you are once again
travelling on a "digitised street",
you receive voice-prompted and
visual turn-by-turn directions.
If you do not follow the turn-byturn directions
No problem: If you deviate from the
recommended route, the system automatically calculates a new route
from the current vehicle position to
the destination. You may be prompted to insert the navigation CD.
Changing the audio source during
destination guidance
During destination guidance, you
can control the active audio source
using the function buttons (cp. the
table on p. 30) without leaving the
destination guidance display.
If you want to exit the destination
guidance display and change to the
audio source:
➜
During destination guidance,
press the TUN button ? or the
SRC button @.
The destination guidance display
is hidden and the basic menu of
the selected audio source is displayed. The destination guidance
remains active, and you continue
to hear the voice-prompted turnby-turn directions.
Note:
For CD operation, you must remove the navigation CD and insert an audio, MP3 or WMA CD.
To change back to the destination
guidance display:
➜
Press the NAVI button >.
Searching for a radio station
during destination guidance
During destination guidance, you
can initiate the automatic station
seek tuning as follows:
➜
Press the OK button = for ap-
prox. 2 seconds.
The radio searches for the next
station in the current frequency
band in the forward direction.
In the process, the settings in
the menu "Tuner" (see p. 24),
for traffi c announcements (TA,
see p. 32) and for TMC traffi c
announcements (see p. 33) are
incorporated.
As soon as a station is located, the
automatic seek tuning stops and the
located station is played. The station name appears on the display
after a few seconds if the station
broadcasts RDS information and
you activated the display of station
names (see p. 22).
You can now store this station (see
p. 39) or restart the automatic station seek tuning.
Cancelling destination guidance
To cancel destination guidance:
➜
Press the ESC button A while
destination guidance is displayed.
The following confi rmation dialogue appears.
66
Page 67

Navigation
Do you really want to
cancel route guidance?
Yes
Select and confi rm "Yes" to can-
➜
No
cel the destination guidance.
The current position is shown on
the navigation display. You do not
receive any additional turn-byturn directions.
Operating the navigation system
The route list appears. The route
segments that remain to be driven
are displayed. If a route segment
features traffi c obstructions, this
section is identifi ed by a warning triangle. In addition, voice
output concerning the route are
repeated.
You can scroll through the route list
using the menu button <. You can
display abbreviated sections of the
route list in their entirety by pressing the
button B.
Displaying the calculated
route
You can display the complete calculated route as follows:
Note:
You can display the route only if
you entered a destination and
the route was calculated.
➜
Press the
prox. 2 seconds.
Or:
➜
Mark and confi rm the "Options"
menu in the navigation display.
The Options menu of the navigation system appears.
Traffic ahead
Route list
➜
In the "Options" menu, mark and
confi rm the "Route list" menu
item.
button B for ap-
Options
Route options
Changing a route (Traffi c
ahead)
The route is automatically adjusted
to the current traffi c situation provided that you activated "Dynamic"
in the "Route options" menu
(see p. 70).
If you want to manually change a
part of the route, e.g. because a
section is blocked, proceed as follows:
Note:
You can change the route only
if you entered a destination and
the route was calculated. You
can block only one section of the
route, not several.
➜
Mark and confi rm the "Options"
menu in the navigation display.
The Options menu of the navigation system appears.
Options
Traffic ahead
Route list
Route options
67
Page 68

Operating the navigation system
In the "Options" menu, mark and
➜
confi rm the "Traffi c ahead" menu
item.
The distance display appears.
Traffic ahead
47,96 km
➜
Use the menu button < to set
the length of the blocked distance, starting with the vehicle
position.
➜
Press the OK button =.
The route is recalculated so that
you evade the blocked section.
The navigation system saves this
blocked section until it is switched
off for longer than 30 minutes.
Before you can block a new route
section, you may have to release the
blocked section again as follows:
➜
In the "Options" menu, mark and
confi rm the "Traffi c ahead" menu
item again.
The confi rmation dialogue "Cancel
traffi c ahead?" is displayed.
Traffic ahead
Cancel traffic ahead?
Specifying Route Options
You can adjust the route type to
your requirements at any time – before as well as during the destination guidance. For this purpose, you
must change to the "Route options"
menu as follows:
➜
Press the NAVI button > for approx. 2 seconds.
Or:
➜
Mark and confi rm the "Options"
menu in the navigation display.
The Options menu of the navigation system appears.
Options
Traffic ahead
Route list
➜
In the "Options" menu, mark and
confi rm the "Route options" menu
item.
The "Route options" menu appears.
Optimum
Fast
Short
Route options
Route options
Dynamic
Enable
Adjust optimum
Yes
➜
Mark and confi rm "Yes" to re-
No
lease the blocked section of the
route.
68
Note:
The defi ned route options remain
active until you change them.
Page 69

Operating the navigation system
Defi ning the route type
To defi ne the route type:
Route options
Optimum
Fast
Short
In the "Route options" menu, mark
➜
Dynamic
Enable
Adjust optimum
and confi rm the desired menu
item.
•
If you select "Optimum", the
navigation system guides you
to your destination using a
time-optimised and distanceoptimised path, comparable to
a driver who knows the place.
You can defi ne the relationship
of a time-optimised to distanceoptimised route (see p. 70).
•
If you select "Fast", the navigation system guides you to the
destination using the fastest
way.
•
If you select "Short", the navigation system guides you to the
destination using the shortest
way.
•
If you select "Dynamic", the
navigation system includes the
current TMC traffi c announcements and changes the route if
it should bring you to your destination any faster (see p. 70).
•
If you select "Enable", you can
allow or disallow ferries, tunnels, toll roads or motorways
for the route calculation, provided that it does not result
in excessive detours (see below).
•
If you select "Adjust optimum",
you can defi ne the relationship
of a time-optimised to distanceoptimised route (see p. 70).
Note:
The route types "Fast", "Short"
and "Optimum" are mutually
exclusive. If one of these route
types is activated, the other two
are automatically deactivated.
Defi ning the type of road
To disable certain types of roads
from the route calculation:
To defi ne the route type:
➜
In the "Route options" menu, mark
and confi rm the "Enable" menu
item.
The "Enable" menu appears.
Enable
Motorway
Ferry
Toll
➜
Mark and confi rm the desired
Seasonal
Tunnel
type of road in the "Enable"
menu.
You can block the selected type
of road for the route calculation
(symbol crossed out in red) or
release it (symbol not crossed
out).
•
"Motorway": Here you can de-
fi ne whether motorways should
be used or avoided during destination guidance.
•
"Toll ": Here you can allow or
disallow toll roads for the destination guidance.
69
Page 70

Operating the navigation system
"Ferr y": Here you can allow or
•
disallow ferries.
"Seasonal": Here you can allow
•
or disallow roads which are
blocked in certain seasons,
such as Alpine passes.
"Tunnel": Here you can allow or
•
disallow tunnels.
Note:
If you exclude a certain type of
road from the route calculation
which would result in long detours, this setting is ignored during the route calculation.
Defi ning an optimum route
You can defi ne the optimum route
yourself by defi ning the relationship
of a time-optimised to distance-optimised route. The factory setting
is 60 (fast) to 40 (short).
To defi ne the optimum route:
➜
In the "Route options" menu, mark
and confi rm the "Adjust optimum"
menu item.
The relationship of a time-optimised to distance-optimised
route is illustrated by a bar.
➜
Change the relationship by turning the menu button <.
If a short route is more important, select 60/40 or higher; if
a fast route is more important,
select 40/60 or lower.
Note:
This setting is applied only if you
select the "Optimum" route option (see p. 68).
Switching the dynamic destination
guidance on/off
During a dynamic destination guidance, the navigation system analyses the TMC traffic announcements and incorporates them into
the route planning. The traffi c announcements are received from
radio stations broadcasting TMC
signals.
To switch the dynamic destination
guidance on/off:
➜
In the "Route options" menu, mark
and confi rm the "Dynamic" menu
item.
You can use the menu button to
activate the dynamic adaptation
of the route to the traffi c situation (check mark) or deactivate
it (no check mark).
If TMC traffi c announcements are
present that apply to the route,
the route is recalculated. You may
be required to insert the navigation CD if it is not located in the
CD drive.
In addition, the TMC symbol is
displayed B.
B
TMC
14
FMT
70
Page 71

C D E
Operating the navigation system
If a TMC station is received, the display shows the TMC symbol B. If no
TMC station is received, the TMC
symbol B fl ashes.
Note:
The dynamic destination guidance requires that a TMC station
is set during the entire destination guidance. If no TMC station
is set, the dynamic destination
guidance does not work. For this
reason, switch on the automatic
tuning to TMC stations (see p.
33).
Recalculating the route
As soon as the navigation system
receives a route-relevant TMC traffi c announcement, it automatically
checks whether you can reach your
destination faster using a different route. This recalculation is announced via voice output.
Whether the navigation system then
actually guides you to a new route
is dependent upon the information
received via TMC. If you are guided
through the traffi c obstruction despite the recalculation, you receive
an acoustic note that the route features traffi c obstructions.
Displaying the current
position
You can display the current vehicle
position at any time as follows:
➜
Press the
The Info display appears and the
previous voice-prompted turn-byturn direction as well as voice
information about the route are
button B.
repeated, provided that destination guidance is active.
A B
Info
SIR MATT BUSBY WAY
6
Destn. Info GPS info
Current street
A
Wind rose (pointing north)
B
"Destn. Info" menu
C
"GPS Info" menu
D
Number of currently received
E
GPS satellites
Displaying the current
geographical position
You can display the longitude and
latitude of the current vehicle position as follows:
➜
Press the
button B.
The Info display appears.
In the Info display, select and
➜
confi rm the "GPS Info" menu.
GPS info
Received sats: 7
Longitude: 48.794
Latitude: 9.004
Altitude: 385
The longitude and latitude of the
current vehicle position are displayed, as well as the altitude
above sea level and the number
of received GPS satellite signals.
71
Page 72

Installation instructions
Displaying the current destination
If the destination guidance is active,
you can display the current destination as follows:
➜
Press the
The Info display appears.
In the Info display, select and
➜
confi rm the "Destn. Info" menu.
The destination is displayed.
button B.
Installation
instructions
These installation instructions apply
to most types of vehicles. Your vehicle may differ depending upon the
model. In this case and for any other
questions, your Blaupunkt authorised dealer or our telephone hotline
will gladly provide assistance.
We assume no liability for damages
resulting from installation or connection errors or consequential
damages.
Note:
These installation instructions
assume that the negative pole of
the battery is connected to the
body of the vehicle.
For your safety
General
You may only install the device
•
yourself if you are experienced
in installing car sound systems
and navigation systems and are
very familiar with the electrical
system of the vehicle.
Operate the device only with a
•
battery voltage between 10.5
and 14.4 V!
72
Before the installation
Allow the device to become accli-
•
matised for several hours prior to
installation to prevent the formation of condensation inside the
housing!
Page 73

Read and observe the operating
•
instructions for your vehicle as
well as the operating instructions
for devices to be connected to
this device (e.g. antennas, loudspeakers, etc.)!
During the installation
•
Disconnect the negative pole of
the battery! Observe the safety
notes of the vehicle manufacturer.
•
Never connect vehicle connectors directly with the device!
Always use adapter cables!
•
Use positive and negative cables
with a minimum cross section of
1.5 mm
When you drill holes, ensure that
•
2
!
you do not damage any vehicle
components!
Installation instructions
Connection assignments
Overview of the connections
C-1 C-2 C-3
13
16
10
7
14
3
6
9
10
7
8
D
5
6
3
4
1
2
9
11
8
25
1234567
1234567
Chamber A
1 Gala/speedometer
2 Telephone mute (active low)
3 Reversing light signal
4 Continuous positive (terminal 30)
5 Automatic antenna
6 Illumination
7 Ignition (terminal 15)
8 Ground
19
15
18
12
14
17
20
8
8
C
B
A
Chamber B
1 Loudspeaker RR+
2 Loudspeaker RR-
3 Loudspeaker RF+
4 Loudspeaker RF-
5 Loudspeaker LF+
6 Loudspeaker LF-
7 Loudspeaker LR+
8 Loudspeaker LR-
73
Page 74

Installation instructions
Chamber C1
(Equaliser/Amplifi er)
1 Line out LR
2 Line out RR
3 Line out GND
4 Line out LF
5 Line out RF
6 +12 V switched*
Chamber C2
(car phone/optional IR remote control
RC 10)
7 Telephone IN+
8 Telephone IN-
9 Telephone mute (active low)
10 +12 V switched*
11 Remote control IN
12 Remote control GND
Chamber C3
13 CDC data IN
14 CDC data OUT
15 +12 V continuous positive
16 +12 V switched*
17 CDC data GND
18 CDC AF GND
19 CDC AF L
20 CDC AF R
* Sum. total 400 mA
Connections in chamber A
5
Relais
12V
A
7
KL. 15 +12 V
8 604 390 045
8
1
3
6
2
12
V
4
1 Speedometer signal
2 Telephone mute (active low)
3 Reversing light signal
4 Continuous positive connec-
tion
Terminal 30 battery +12 V.
Cable cross section min. 1.5 mm
Do not route the cable alongside
wire harnesses!
Connect the safety bracket for
shielding the positive cable and attach it to the positive pole of the
battery!
2
5 Control cable
(Power Antenna +)
Switched positive output for external components, such as a power
antenna.
Max. load <150 mA
.
74
Page 75

2
Installation instructions
CAUTION!
Do not connect the power cable
➜
to terminal 15 (switched positive) or terminal 30 (continuous
positive)!
6 Illumination connection
For vehicles with adjustable instrument lighting (positive controlled)
7 Positive connection switched via
ignition
CAUTION!
This connection must be con-
➜
nected as switched via ignition
(terminal 15, +12 V)!
8 Ground connection
Cable cross section min. 1.5 mm2.
Do not connect the ground wire to
the negative pole of the battery, but
to a suitable ground location, such
as a screw or plate of the body.
If the radio connection is protected
by a 10-A fuse:
CAUTION!
Risk of damage to the
device!
If you connect vehicle connectors
directly to the device, it may damage the device. This also applies to
pre-fabricated ISO connectors.
Use only vehicle-specifi c adapter
➜
cables from Blaupunkt.
➜
Connect the vehicle-specific
adapter cable 1 to the vehicle
connector 2 and to chamber
A 5 on the rear side of the device.
1
A
5
3
4
Connecting the device
Establishing the power
connection
➜
Check whether the radio connection of your vehicle is already
protected with a 10-A fuse at the
factory (see vehicle operating instructions or fuse box).
If the radio connection is not pro-
tected by a 10-A fuse:
➜
Connect the negative wire to the
negative pole of the battery.
➜
Connect the positive wire to the
positive pole of the battery via
a 10-A fl oating fuse so that the
10-A fl oating fuse is at a maximum distance of 30 cm from the
positive pole of the battery.
75
Page 76

2
Installation instructions
Do not lay the wires parallel to
➜
wire harnesses.
Connecting the loudspeakers
If passively pre-equipped with
4-ohm loudspeakers:
➜
Adapt the ISO connector 7 of
the vehicle to the plug assignment shown in the illustration
below.
➜
If required, connect an ISO
extension cable (order no.
7 607 647 093).
➜
Plug the connector into chamber B 6 of the device.
6
7
A
RF
RR
+
4 Ohm
-
R
L
+
LF
4 Ohm
+
4 Ohm
-
+
4 Ohm
-
If actively pre-equipped (separate
output stages):
➜
Connect the special adapter cables to chamber C1 according
to the manufacturer's instructions.
er cable (order no. 7 607 621 129)
from your specialist dealer.
The antenna installation and connection is described in the antenna
installation instructions.
➜
Insert the antenna connector
into the antenna socket 1 of the
device.
1
Connecting the GPS antenna
➜
Install the GPS antenna in the vehicle as described in the GPS antenna installation instructions.
➜
Insert the SMB connector 2 into
the corresponding socket of the
device.
Connecting the radio antenna
With pre-equipped vehicles, such as
VW, Seat or Audi, the supply voltage
for the antenna is supplied via the
antenna cable (see the operating
instructions of the vehicle). If the
original equipment radio of such a
vehicle is to be replaced by a commercial radio, you must obtain an
antenna feed separating fi lter (order no. 7 691 290 202) or the adapt-
76
Connecting the reversing light signal
➜
Route the cable from the reversing light to pin 3 3 of the connector in chamber A 5 so that +12 V
Page 77

2
Installation instructions
is applied to the connection if the
vehicle is in reverse gear.
➜
If the connection to the reversing
light is not possible, connect pin
3 to ground.
Note:
If you do not connect the reversing light signal, the device does
not detect a reverse travel. If the
GPS signal is missing, it may impact the accuracy of the navigation.
Connecting the speedometer
signal
You can navigate with or without
speedometer signal.
CAUTION!
Risk of damage!
Incorrect connections can damage
the device or the vehicle electronics.
➜
This connection should only be
performed by an authorised specialist workshop of the vehicle
manufacturer!
➜
Connect the vehicle-specific
speedometer signal connection
to pin 1 4 of the connector in
chamber A 5.
1
A
5
3
4
After installation, you must ac-
➜
tivate the "Speed signal" menu
item in the "Installation" menu
(see p. 79)!
Installing the device
Installing the bracket
Note:
The supplied bracket of the device
is intended for a DIN car sound
system cutout measuring 182 x
53 x 165 mm and an instrument
panel thickness of 1 – 20 mm in
the area of the tabs. For vehicles without DIN tray, you need
a vehicle-specifi c bracket for 50/
52-mm devices. Please contact
your specialised Blaupunkt dealer.
➜
Insert the bracket into the tray.
77
Page 78

Installation instructions
Bend over as many tabs as pos-
➜
sible using a screwdriver.
➜
Insert the device into the tray to
one-third of its length.
➜
Loosen the screw 1 above the
gyroscope 2 on the right side of
the device.
➜
Adjust the gyroscope with a hollow hexagon wrench so that the
marking is in the vertical position.
Note:
The maximum setting range is
between –10° and +30°.
➜
Retighten the screw 1.
Installing the device in the tray
➜
Ensure that all connectors are
correctly inserted and the lateral
latching tabs are engaged.
CAUTION!
Danger of damage, risk of
incorrect settings!
If you touch the controls on the
control panel while inserting the
device, they may be damaged.
The device could switch on and
subsequent entries are interpreted
as incorrect entries of the code. The
device is subsequently blocked.
➜
Touch the control panel only at
the edges while inserting it.
➜
Push the device into the tray until
it engages and is retained by the
lateral tabs.
The device should now be installed
in the following position:
Right/left: min. –5° /max. +5°
Front/rear: min. –10°/max. +30°
78
Entering the code number
If you switch on the device for the
fi rst time after its installation (see
p. 9), you must enter the code (see
p. 21).
Page 79

Installation instructions
Switching the speedometer
signal on/off
After you connected the speedometer signal, you must switch on the
analysis of the speedometer signal
as follows:
➜
In the "Installation" menu, select
and confi rm the "Speed signal"
menu item as described under
"Operating the menu" on p. 12.
Installation
Auto calib.
Manual calib.
Use the menu button < to switch
on the analysis of the speedometer signal (check mark) or switch
it off (no check mark).
•
Switch on the analysis of the
speedometer signal after you
connected the speedometer
signal.
•
Switch off the analysis of the
speedometer signal if you did
not connect the speedometer
signal.
Sensor test
Speedsignal
Performing a sensor test
To check whether the device is correctly connected:
➜
In the "Installation" menu, select
and confi rm the "Sensor test"
menu item as described under
"Operating the menu" on p. 12.
The sensor data are displayed.
Sensor test
GPS sat: 8 Strength: 41
Direction: Forward
Ignition: On
Speedsignal: 5528
GPS Sat (test of the GPS an-
•
tenna): If the GPS antenna is
connected, "OK" appears. If the
device receives GPS satellite
signals, their number and fi eld
strength are displayed. The GPS
antenna must be aligned so that
it receives at least 4 satellites
and the fi eld strength is greater
than 40.
•
Direction (test of the reversing
light signal): If you connected the
reversing signal, "Backward" must
appear if the vehicle is in reverse
gear, and "Forward" if the vehicle
is not in reverse gear.
•
Ignition (test of the positive igni-
tion connection): If you turn on
the vehicle ignition, "On" must
appear.
•
Speed signal (test of the speed-
ometer signal): If you connected the speedometer signal and
move the vehicle a little bit, the
speedometer signal pulses must
appear.
Calibrating the device
Before you use the navigation system for the fi rst time, you must calibrate it.
79
Page 80

Installation instructions
You can calibrate the navigation system either automatically
on a longer calibration trip (5 to
15 km) or manually on an exactly
measured distance (100 to 500 m)
(see below).
To calibrate the device:
➜
Switch on the vehicle ignition.
➜
Install the navigation software
(see p. 47).
➜
Keep the navigation CD in the
CD drive.
➜
In the Settings menu, select
and confirm the "Installation"
menu item as described under
"Operating the menu" on p. 12.
The "Installation" menu is displayed.
Installation
Auto calib.
Manual calib.
Sensor test
Speedsignal
Calibrating the navigation system
automatically
To calibrate the navigation system
automatically:
Auto calib.
Start
➜
In the "Installation" menu, select
and confirm the "Auto calib."
menu item.
➜
Follow the instructions on the
display.
Notes:
Drive the specifi ed route using
major or country roads. The specifi ed distance of the route to be
driven only represents an average
value. It can also be shorter or, in
case of detrimental conditions,
signifi cantly longer. The fi nal fi ne
calibration is not complete until
approx. 50 km.
A bar display appears during the
calibration travel. You can press
the ESC button A to exit the
menu. It does not cancel the calibration which continues to run
in the background. If you call up
the menu again, the bar display
shows the progress of the calibration.
After a successful calibration
travel, the display shows "The
system is now calibrated". The
navigation system is now operational.
➜
If the display shows "Calibration
unsuccessful", you must repeat
the calibration.
Calibrating the navigation system
manually
To calibrate the navigation system
manually:
➜
In the "Installation" menu, select
and confi rm the "Manual calib."
menu item.
80
Page 81

Installation instructions
Manual calib.
Distance
200 Metres
The distance for the calibration
travel is displayed.
➜
Change the distance of the calibration travel, if required, by
turning the menu button <.
Next, press the OK button =.
Note:
The distance must measure between 100 and 500 metres. The
adjusted distance must exactly
match the measured distance!
➜
Press the OK button = to star t
the manual calibration.
➜
Drive the specifi c distance which
you set on an exactly measured
route. Do not drive faster than
30 km/h.
➜
Press the OK button = to end
the manual calibration.
After a successful calibration
travel, the display shows "The
system is now calibrated". The
navigation system is now operational.
➜
If the display shows "Calibration
unsuccessful", you must repeat
the calibration.
Cancelling the calibration
If you want to cancel the calibration:
➜
Press the ESC button A.
The calibration continues in the
background.
Cleaning the device
➜
Clean the contacts of the control panel regularly using a soft
cloth moistened with cleaning
alcohol.
Uninstalling the device
➜
Disconnect the negative pole of
the battery. Observe the safety
notes of the vehicle manufacturer.
➜
Remove the control panel.
2
➜
Insert the brackets 2 on the left
and the right side in the openings
in the control panel and push
them in until the lateral springs
disengage with an audible click
sound.
➜
Pull out the device evenly using
both brackets.
➜
Remove the brackets and reattach the control panel.
➜
Press on the lateral tabs of the
individual connectors and disconnect all connectors.
81
Page 82

Warranty Specifi cations
Warranty
We provide a manufacturer's warranty for our products purchased
within the European Union. For
devices purchased outside the
European Union, the warranty terms
issued by our respective responsible domestic agency are valid.
The warranty terms can be called
up under www.blaupunkt.com or
requested directly from:
Blaupunkt GmbH
Hotline
Robert-Bosch-Str. 200
D-31139 Hildesheim
Specifi cations
Voltage supply
Operating voltage: 10.5–14.4 V
Current consumption
Operating: max. 10 A
Standby: typ. 550 mA
30 min. after switch-off:
typ. 12 mA
72 hours after switch-off:
< 2 mA
Amplifi er output power
Acc. to DIN 45324:
at 14.4 V 4 x 25 watt sine
Max. Power:
4 x 45 watt at 14.4 V
Preamplifi er output
(Preamp Out)
4 channels: 3 V
Input sensitivity
CD changer input: 2 V / 6 kΩ
Phone input: max. 4.8 V
eff. 3.8 V
82
Tuner
FM waveband:
87.5–108 MHz
MW waveband:
531–1602 kHz
LW waveband: 153–279 kHz
FM frequency range:
35–16000 Hz
CD player
Frequency range:
20–20000 Hz
Subject to technical changes!
Page 83

Glossary
Glossary
Digital equaliser
Digital sound control for adapting
the frequency response. An equaliser consists of several fi lters which
allow for improving the sound or adjusting it to personal preferences.
EON – Enhanced Other Network
In case of a traffi c announcement
(TA), the device switches over from
a non-traffi c information station to
a traffi c information station of the
same station chain. After the traffi c
announcement, the system switches back to the previously heard programme.
GPS – Global Positioning System
This system allows for a worldwide
positioning by means of 24 satellites orbiting the earth at elevations
of 20000 km and transmitting a precise time signal. At least 4 satellites must be received for an exact
positioning.
HighCut
HighCut results in an improved reception in case of weak radio reception (FM only). If the reception
is weak, the interference level is
automatically decreased.
Corridor function
If you enter a destination and the
navigation system calculates a
route, it not only saves the route,
but also a corridor to the left and
right side of this route. This allows
the navigation system during destination guidance to continue giving
turn-by-turn directions even if no
navigation CD is inserted.
Optimum route
Combination of fast and short
route. The relationship of the two
route components can be adjusted
(see "Setting the optimum route"
on p. 70).
TA – Traffi c Announcement
Spoken traffi c announcement on
the radio.
TMC – Traffi c Message Channel
RDS data service for area-based
traffi c announcements.
The navigation system can permanently receive digital, inaudible traffi c announcements free of charge by
means of a TMC station – provided
that the radio is set to a TMC station. During dynamic destination
guidance (see p. 70), these traffi c announcements are analysed
and the route is automatically adjusted.
Standby time
If you switch off the device, it remains in standby mode for 30
minutes. During this time, the device software remains in memory,
which increases the current consumption. After that time period,
the device completely switches off
to save power, and the memory is
deleted.
If you switch the device back on
during the standby time, it is operational again after a few seconds;
an active destination guidance is
continued.
83
Page 84

Index
If you switch the device back on after the standby time has expired,
it takes longer for the device to be
operational again
since the device software must be
reloaded.
Tr avels tore
Automatic searching and storing of
the six strongest radio stations received of the region (see p. 39).
Surroundings function
If no destination guidance is active,
the navigation system uses its free
memory to load digital map material surrounding the vehicle position
from the navigation CD.
If you enter a destination within this
area, the navigation system can access the data in the memory and
does not require the navigation CD.
If you enter a destination outside
of this area, you are requested to
insert the navigation CD.
Since the memory is required for
the route and the corridor following a route calculation, parts of the
stored surroundings are deleted
again from memory after a destination entry.
The device can only display and announce TMC traffi c announcements
that refer to the map material in the
memory.
Index
A
Adjusting bass 15
Adjusting the treble 15
Audio source
selecting 26, 66
B
Balance
adjust 16
Buttons
ESC button 10, 12
INFO button 71
MENU button 12
OK button 12
overview 6
C
Car phone 11
CD changer
SCAN 44
switch on 27
tracks menu 42
CD player
inserting a CD 10
operate 40
playable CDs 40
playing a CD 26, 41
SCAN 44
stopping a CD 42
switch on 27
Cleaning 4, 81
Clock
setting 21
Code
activating the query 21
deactivating the query 21
enter 9
Control panel
attaching 8
detaching 8
CONTROLS
buttons 6
Corridor function 46, 83
84
Page 85

Index
D
Destination guidance
cancel 66
displaying estimated arrival time 25
displaying remaining travel time 25
displaying the junction zoom 25
dynamic 70
wind rose 65
Device card 4
Display
adjust automatically to light
conditions 20
brightness day 20
brightness night 20
setting the Language 20
switch off 20
Disposal 4
E
EON 83
Equaliser 83
Equalizer 17
F
Fader
adjust 16
G
GPS 83
H
HICUT 23, 83
I
Installation test 79
J
Junction zoom 25
L
Loudness 15
M
Menu
operate 12
overview 13
MP3 player
browse menu 43
displaying ID3 tags 45
displaying MP3 fi le names 45
operate 40
playable MP3 CDs 41
playing an MP3-CD 26
SCAN 44
switching scrolling text on/off 45
switch on 27
Muting (Mute) 11
cancel 11
N
Navigation system
activating voice output 24
basic settings in the menu 24
calibrating automatically 80
calibrating manually 80
deleting saved destinations 61
display 48
displaying the current position 71
displaying the list 52
entering a destination address 54
entering a destination centre of a
part of a city 56
entering a destination city 55
entering a destination country 55
entering a destination from memory 62
entering a destination house
number 57
entering a destination
intersection 58
entering a destination postcode 55
entering a destination street 56
entering a point of interest 57
entering special characters 53
entering text 52
entering the destination: overview 52
installing the software 47
menu 49
operating principle 46
renaming saved destinations 61
saving destinations 59
start 52
85
Page 86

Index
R
Radio
alternative frequencies 22
basic settings in the menu 22
cancelling an automatic station seek
tuning 37
changing the seek tuning sensitivity 24
displaying the station name 22
improved reception (HICUT) 23
limit reception to regional stations 23
quitting Travelstore 40
scanning stations 38
selecting stored stations 40
selecting the memory bank (FM1,
FM2, FMT) 36
selecting the waveband (FM, MW,
LW) 36
setting the TMC station
automatically 33
starting an automatic station seek
tuning 36
starting Travelstore 39
storing stations 38
storing stations automatically 39
tuning into a station 36
Route
change automatically for
traffi c jams 70
changing manually 67
defi ning an optimum 70
display 67
dynamic 46
enable/disable ferries 69
enable/disable major roads 69
enable/disable motorways 69
enable/disable seasonally blocked
routes 69
enable/disable toll roads 69
enable/disable tunnels 69
optimum 83
options 68
recalculate 66, 71
S
Safety 3
SCAN 44
Sensortest 79
Sound
adjust 15
equalizer 17
loudness 15
Speedometer signal 79
Standby 83
Station seek tuning
automatically 36
cancel 37
manually 37
Surroundings function 47, 84
Switch-off 9
Switch-on 9
T
Text
delete 54
enter 52
Theft protection 8
TMC 83
TMC symbol
does not fl ash 33
fl ashes 34
Traffi c announcements 31
cancel 33
fade in automatically 32
receiving TMC automatically 33
showing TMC 34
Travelstore 39, 84
Turn-by-turn directions
not following 66
voice-prompted 65
V
Volume
change 11
front-rear distribution 16
left-right distribution 16
limiting during switch-on 18
minimum for car phone 19
minimum for traffi c announcements 19
muting 11
reduce automatically during turn-byturn directions 19
volume menu 19
86
Page 87

Country: Phone: Fax:
Germany (D) 0180-5000225 05121-49 4002
Austria (A) 01-610 39 0 01-610 39 391
Belgium (B) 02-525 5444 02-525 5263
Denmark (DK) 44-898 360 44-898 644
Finland (FIN) 09-435 991 09-435 99236
France (F) 01-4010 7007 01-4010 7320
Great Britain (GB) 01-89583 8880 01-89583 8394
Greece (GR) 210 94 27 337 210 94 12 711
Ireland (IRL) 01-46 66 700 01-46 66 706
Italy (I) 02-369 62331 02-369 62464
Luxembourg (L) 40 4078 40 2085
Netherlands (NL) 0800 400 1010 0800 400 1040
Norway (N) 66-817 000 66-817 157
Portugal (P) 2185 00144 2185 00165
Spain (E) 902 52 77 70 91 410 4078
Sweden (S) 08-7501850 08-7501810
Switzerland (CH) 01-8471644 01-8471650
Czech. Rep. (CZ) 02-6130 0446 02-6130 0514
Hungary (H) 76 511 803 76 511 809
Poland (PL) 0800-118922 022-8771260
Turkey (TR) 0212-335 06 71 0212-346 00 40
http://www.blaupunkt.com
Robert-Bosch-Straße 200, D-31139 Hildesheim
Blaupunkt GmbH,
Printed in Germany
Page 88

At a glance!
TravelPilot Rome NAV55E
Open the control panel and remove the CD
Tur n: volume control
Press short: Switch on/mute traffi c announcement/fading out
the turn-by-turn direction
Press long: Switch off
Calling the settings menu
MENU
Function buttons 1-6 (the functions assigned to these function
buttons are shown on the display)
Press short: Call up traffi c information settings
TRAF
Press long: Display TMC messages
Turn: Select menu item/character
OK button
OK
Press short: Confi rm selection
Press long: Start scan/station seek tuning
Press short: Switch to navigation system
NAVI
Press long: Call up route options
Press short: Switch to radio
TUNE
Press repeatedly: Select the waveband (FM1, FM2,
FMT, MW, LW)
Press long: Start Travelstore
Toggle between CD/MP3/WMA player and optional
SRC
CD changer
Press short in the menu: Change to the previous menu level
ESC
Press long in the menu: Change to the top menu level
Text input: Delete last character
Navigation: Cancel destination guidance
Scan: Cancel
Travelstore: Cancel
Display current location, display complete list
Press short during destination guidance: Show current location
and repeat previous voice-prompted turn-by-turn direction
Press long during destination guidance: Display route list
10/05 CM-AS/SCS1 (GB) 8 622 404 701
 Loading...