

Blaupunkt SA 2700 Quick Start Manual
FIRST TIME SETUP PROCEDURE – QUICK START GUIDE
You probably want to get started installing your system, but before you do, you’ll need to set up the
Control Panel for rst time use. This Quick Start Guide will guide you through the process. We promise it
won’t take much time as long as you follow this guide step-by-step.
You’ll also want to visit www.blaupunkt.com/us and download the “Set Up and Use Manual” found on the
SA 2700 product page in the “Download” section. It contains additional, detailed information.
Powering Up and Battery Activation
SLIDE RIGHT TO REMOVE
ON/OFF
BUTTON
SLIDE LEFT TO REPLACE
+
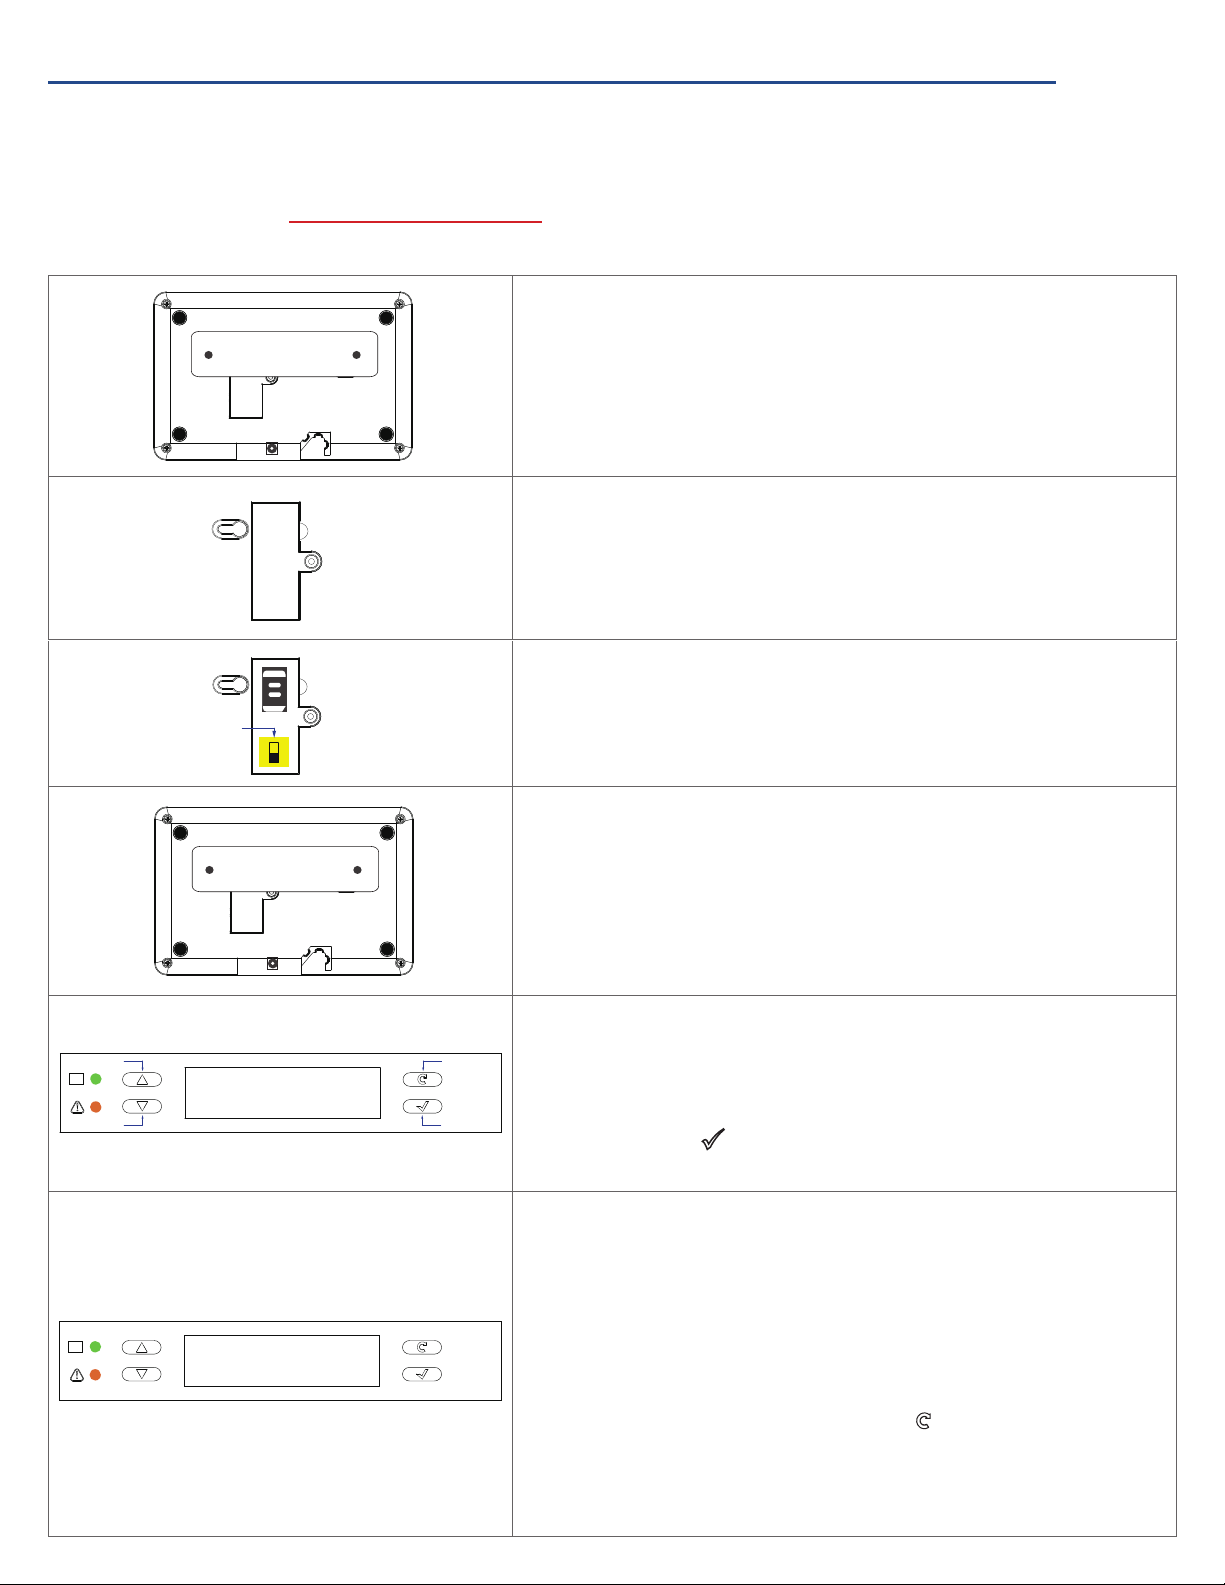
1. Connect the AC power supply to the Control Panel
2. Locate the mounting plate on the rear of the Control
Panel and remove it by sliding it to the right until you hear
a click.
+
3. The mounting plate can now easily be removed.
1. Once you’ve removed the back plate locate the
battery switch cover.
2. Using a small phillips head screwdriver, remove the screw.
3. Pull the battery switch cover o to access the battery
compartment.
1. Locate the battery switch and slide it upward to the
“ON” position. This will activate the built-in battery
charging system included in the Control Panel. The
battery will provide backup power to the Control Panel
should the system lose power.
Reassemble the Control Panel
1. Slide the mounting plate back into its original position by
positioning the posts over the open holes located on the
back of the Control Panel. Slide the mounting plate to
the le until you hear a click. This will depress the tamper
+
switch that’s located on the inside of the right-hand hole
and allow you to complete this procedure.
3 Steps Easy Setup Process
UP
**
DOWN
3
steps easy
setup
(OK?)
BACKSPACE
OK
1. The power indicator on the front of the Control Panel
will light up green and the LCD Panel will display the
following message: “3 steps easy set up (OK?)”.
2. Press the OK ( ) button to continue to the rst step in the
procedure.
Step 1 – Setting Up The Date and Time
1. The Control Panel will now display the following message:
“Set Date/Time (OK?)”
2. Press the “OK” button to begin the date and time setup
**
Set Date/Time
(OK?)
procedure.
3. Use the up r and down s buttons to select each
number you want to enter. If you make a mistake you
can press the backspace button“ ” to re-enter data.
Press “OK” each time the screen displays “(OK?).
4. When you are nished press “OK” to continue to the next
step.
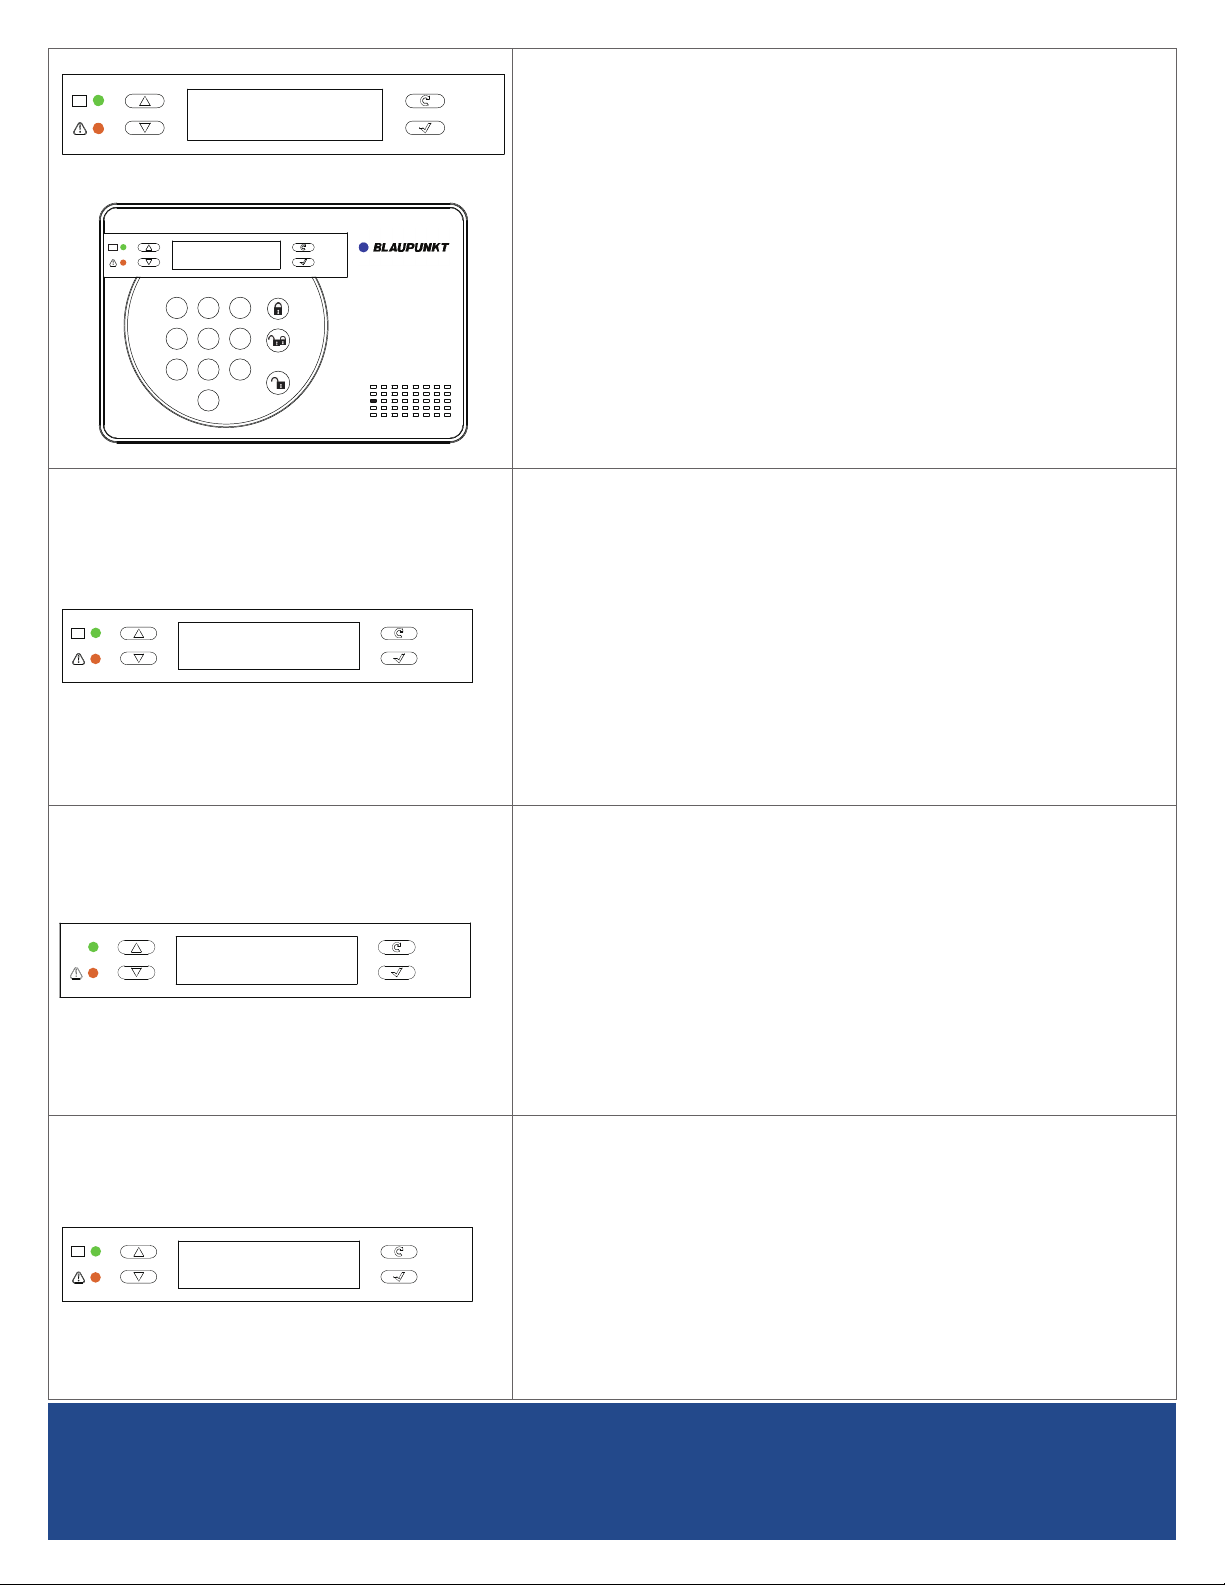
Step 2 – Setting Up First Telephone Number Alert
**
Set Phone num
1
for alert
(OK?)
1. When the alarm has been activated the system will go
through a dialing procedure that begins by calling the
rst number on a list of numbers that you program into
the Control Panel. You will now set up the rst number on
that list.
**
2. The Control Panel will display the following message: “Set
1 Phone num for alert (OK?)”. Press “OK” to continue.
1 2abc 3def
4ghi
5jkl
8tuv 9wxyz
7pqrs
0
6mno
3. Use the numerical keypad to enter in your rst telephone
alert number. Make sure and add the area code if you live
in an area that requires it for dialing local numbers.
4. Press “OK” when you have nished entering the entire
telephone number to continue to the last step in the First
Time Set Up Procedure.
Step 3 – Setting Up First PIN Code
1. A 4-digit PIN code is used to access the User Menu, and
Arm/Home/Disarm the system. The system can store
up to four (4) dierent PIN codes. You will need to set
up the rst 4-digit PIN code to nish the First Time Set Up
**
Set pin code
••••
Procedure.
2. The Control Panel will display the following message: “Set
pin code ****”.
3. Use the numerical keypad to enter in your rst PIN code.
4. Press “OK” when you have nished entering your rst PIN code.
The First Time Set Up Procedure is now complete.
Exit Setup – Repeat Setup
1. The Control Panel will now display the following message:
“Exit Setup Repeat Setup”.
2. If you‘ve completed all steps in the First Time Setup
**
Exit Setup
Repeat Setup
Procedure use the up r and down s buttons to select “Exit
Setup” and press the“OK” button.
3. If you have not nished entering the required information
or the procedure was interrupted, select “Repeat
Setup” and press “OK” to return to the beginning of the
procedure and reenter your information.
Last Step – Set Up and Use Manual
1. If you‘ve completed all steps in the First Time Setup
Procedure select “Exit Setup” and press “OK”.
**
Mount Devices,
see manual
2. You will now see the following message: “Mount Devices,
see manual”. This message is prompting you to open the
“Set Up and Use Manual” and begin the next steps of the
installation process.
3. Leave the Control Panel in this state and open the “Set
Up and Use Manual” to page 6.
A Quick Word About Monitoring Your System Via Your Cell Phone
Your SA 2700 is capable of controlling and monitoring the status of your system via cell phone. To enable
this function, you must purchase a SIM Card from AT&T Mobile or T-Mobile and install it into the control
panel. Additional information on SIM cards can be found on page 9 of the “Set Up and Use Guide”.
 Loading...