

Page 1
CAR MULTIMEDIA
OSAKA 760
Osaka 760
Page 2
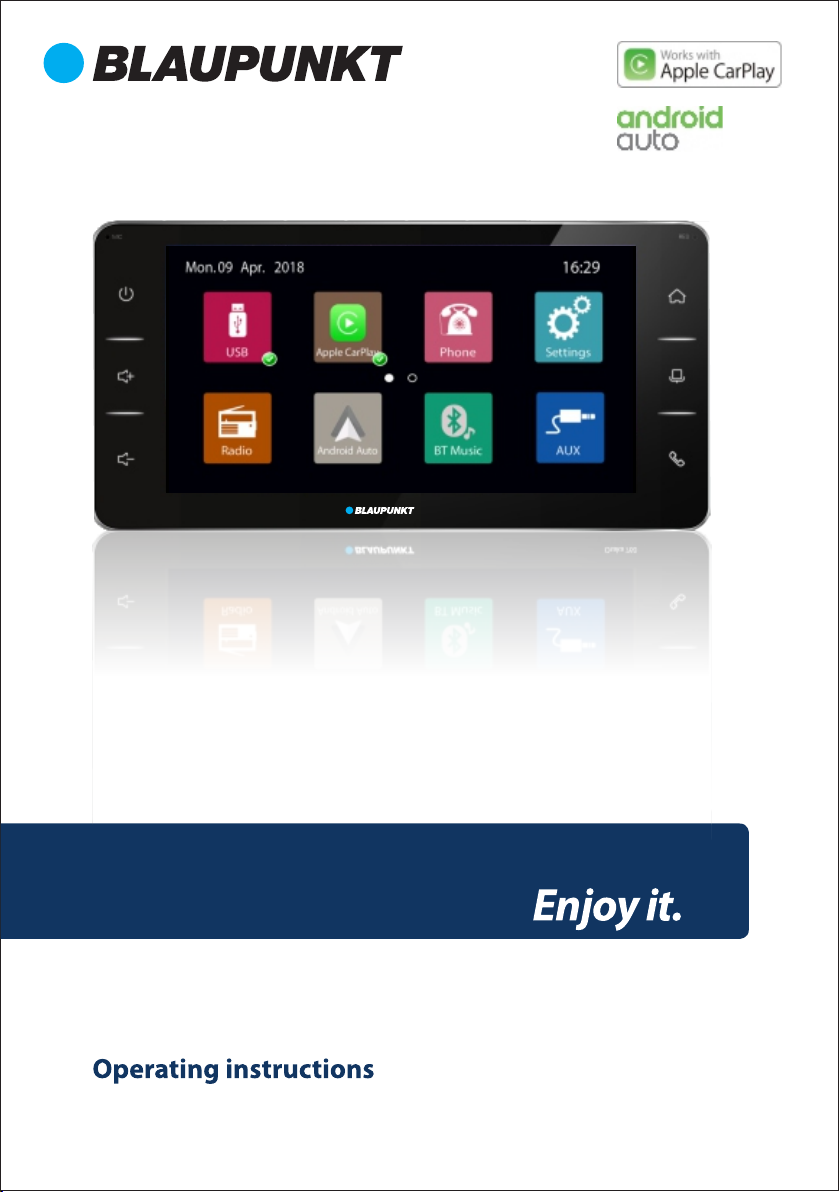
Panel Introduction
Osaka 760 features a Brilliant 6.75" capacitive display with a high-end tuner with Apple Car
Play & Android Auto.
Osaka 760
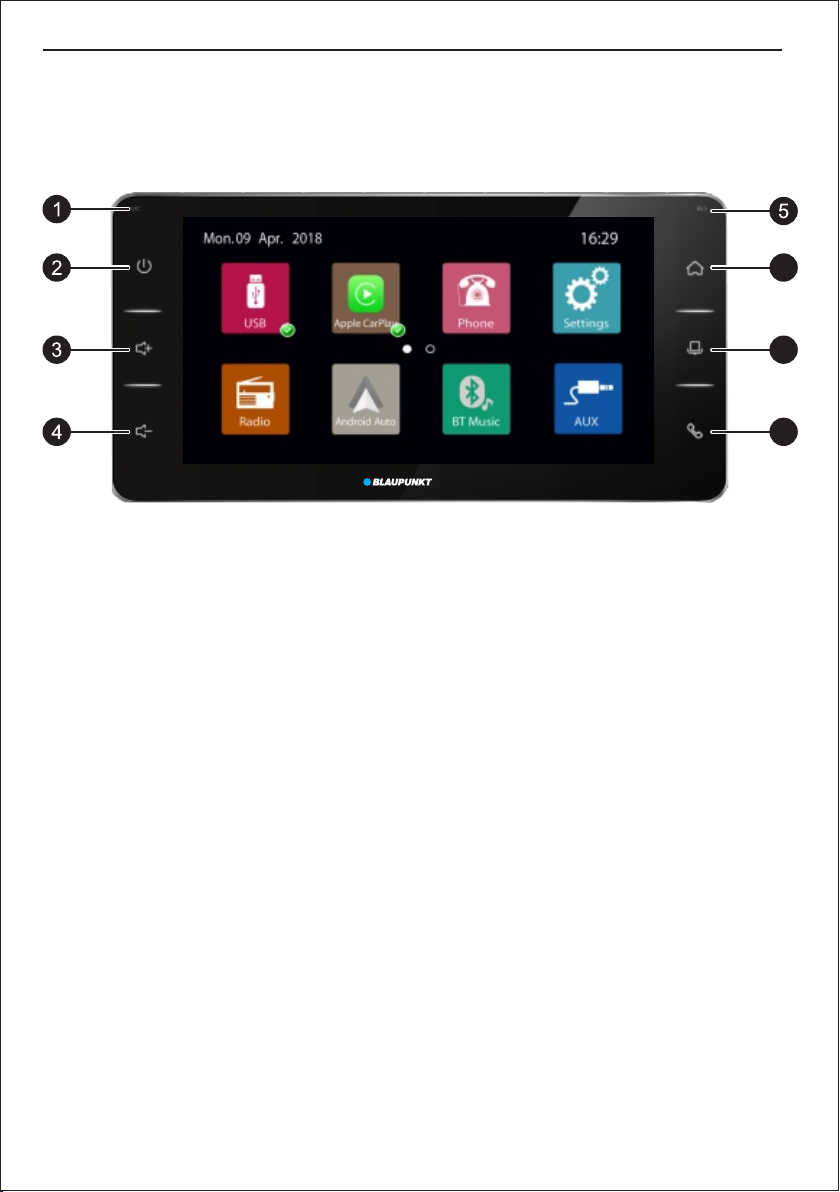
1. Internal microphone
2. In any state, touch this button to power on/off the device
3. Touch this button to increase audio volume
4. Touch this button to decrease audio volume
5. Reset
6. Home page.
7. Enable SIRI / OK Google - Press this button to activate voice command
8. Phone BT
6
7
8
Page 3

Controls – Remote control | Contents
Contents
Safety notes 04
Symbols used 04
General Warning 04
Road safety 04
Instructions to read this User Manual 05
Declaration of conformity 05
Cleaning the unit 05
Disposal notes 05
Placing the device in operation 06
Switching on/off 06
Switch on/off via vehicle Ignition 06
Main menu 06
Volume 06
Main interface 06
Radio Function 06
Radio function operation 06
Setting the reception area 07
Tuning Into a station 07
Scanning stations 07
Favorite 07
Select FM / AM band 07
FM Memory Bank 07
AM Memory Bank 08
Tune and Seek 08
Auto Seek and Store stations 08
Select memory bank 08
Audio settings 08
Equalizer settings 08
Audio distribution (fader/balance) 09
DSP 09
Phone Feature 09
Making a call via Bluetooth 09
Dialling 10
Make and Answer a call 10
View Call History 10
View Phone Book 10
BT Music 11
Bluetooth Music Function 11
USB Music Function 11
Apple CarPlay 12
Phone 13
Messages 13
Music 13
Other Apps 13
Android Auto 14
Google maps 14
Make and receive phone calls 15
AUX in 15
General Settings 16
Time Zone settings 16
Date settings 16
Time settings 16
12hrs or 24 hrs mode 16
Android Auto launch 17
Restore Factory settings 17
Audio settings 17
Display settings 17
Bluetooth settings 17
Radio settings 18
RDS settings 18
Useful information 19
Warranty 19
Service 19
USB Support Files 20
Connection Diagram 22
FCC information 23
03
Page 4

Safety notes
Safety notes
The car audio system is manufactured according to
recommended and established safety guidelines in a
state of the art facility. Even so, dangers may occur if
you do not observe the safety notes in their instruction
manual.
These instructions are intended to familiarise you with
the most important functions. A detailed explanation
can also be found on the website under the URL:
https://www.blaupunkt.com/in
Ÿ For best results, please read the user manual
carefully and completely before using the car audio
system.
Ÿ Always keep the user manual accessible to all users.
Ÿ Always handover the car audio system to any third
party along with these instructions.
Ÿ In addition, observe the instructions of the devices
used in combination with this car audio system.
Symbols used
Below are the symbols used in this user manual, please
go through them carefully:
CAUTION:
Warns about possibilities of any injuries that
might occur.
LOUD VOLUME:
Warns about high volume
ü Identies a sequencing step
Ÿ Identies a listing
General Warning
To avoid any injury or damage to yourself, your car and
others, please make sure to do as following. Observe
the following note to protect yourself against injuries:
Ÿ Do not modify or open the device. Do not do any
unauthorised modication to the device. In case you
need any assistance, please visit the nearest services
centre. The device should be open by an authorised
person only.
Ÿ Use as Directed: this car audio system is intended
for installation and operation in a vehicle with 12V
vehicle system voltage. Observe the output limits of
the device. Only an authorised specialist should
perform repairs if necessary.
Ÿ Use your device in such a way that you can always
safely control your vehicle. In case of doubt, stop
at a suitable location and operate your device while
the vehicle is parked. As the driver, you must not use
the applications that will distract you from traffic
(depending on the scope of functions of the device,
e.g. viewing videos, searching for a destination)
(Navigation equipped radios & other downloaded
application)
Ÿ Follow driving recommendations during the
route guidance only if you are not violating any
tr affic regu lati ons : Tra ffic si gns and traffi c
regulations always have prior ity over driving
recommendations.
Ÿ Always listen at moderate volume to protect your
hearing and to be able to hear warning signals (e.g.
police sirens and other external alerts while driving).
During mute phases (e.g. when changing the audio
source), changing the volume is not advisable. Do
not increase the volume during this mute phase.
Road safety
Observe the following notes about road safety:
To avoid any injury or damage to yourself, your car and
others, please make sure to do as following. Observe
the following note to protect yourself against injuries:
Ÿ Before using this unit, please read all related
instructions carefully.
Ÿ Any damage to this unit caused by improper
operations will void warranty.
Ÿ In order to drive safely and not break traffic rules,
please do not watch videos or operate the unit while
driving.
Ÿ The below-listed applications while driving the
vehicle may divert your attention from the traffic
situation and may lead to serious accidents:
¡ Using the navigation feature like entering the
destination address
¡ Video playback or watching any kind of video
Ÿ You are advised to refrain from any activity which
could possibly divert your attention while driving.
The best way to use these applications is when your
vehicle is parked in a safe location.
Ÿ To avoid short circuit, please do not dispose the unit
into the water and please do not place or leave any
kind of metal object (such as a coin or metal tools) in
the unit.
Ÿ Please operate the unit as per this Manual, it is not
necessary to open the unit for maintenance; In case
if maintenance is required, please seek professional
help.
Ÿ After the car engine is off, please do not use the car
audio for a long time, otherwise, the battery could
be drained.
Instructions to read this User Manual
Illustrations are used in th is manual to expl ain
operations and precautions. The illustrations used in
04
Page 5

Safety notes
this manual are only for reference, please take the
actual unit as standard.
Marks
Mark for important preventive measures; please
read carefully to prevent any injury.
Ma rk for a speci al exp lan at ion , au xil iar y
interpretation, imitation and references.
Mark for additional information to operate this
unit. Warm notes: When there is any difference
between the Manual and the actual unit, please
take the actual units
as standard.
Cleaning notes
Ÿ Solvents, cleaning and scouring agents as well as
dashboard spray and plastics care products may
contain ingredients that will damage the surface &
screen of the audio system.
Ÿ Use only a dry or slightly moistened cloth for
cleaning the audio system.
Disposal notes
Ÿ Do not dispose of your old unit/batteries in the
household trash.
Ÿ Use the return and collection systems available to
dispose of the old device, the remote control and
exhausted batteries.
05
Page 6
Placing the device in operation
Placing the device in operation
Switching on/off
To turn on touch the soft key and to turn off the unit
touch the soft key for 2 seconds.
Turn on/off unit with the ignition switch
Turn on the unit:
When the ignition switch is at ACC ON position, press
the soft key on the panel to turn on the unit.
Turn off the unit:
When the unit is ON, long-press the soft key on the
panel for more than 2 seconds, the unit will turn off.
Main menu (Home)
In the main menu, please touch the soft keys on the
touchscreen to call up different sources and operating
modes.
In the current source, press the soft key. The main
menu (home page) is displayed. As long as you do not
select a new audio source, the last active audio source
continues to play. Note: The icons used in these
instructions are intended to facilitate the explanation
and actual details may vary in your device.
Volume
You can adjust the volume in steps from 0 (minimum)
to 100 (maximum).
Touch the soft key to increase volume & soft key
to reduce the volume.
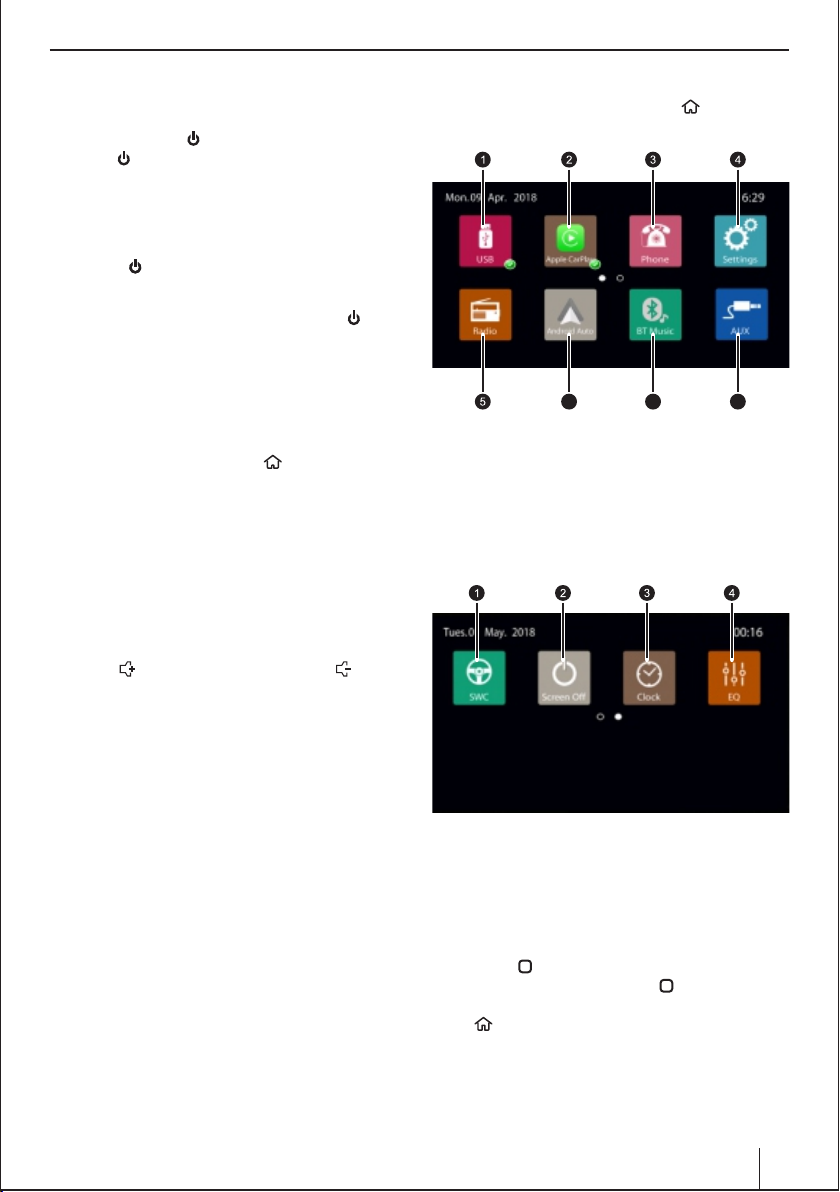
Main Interface
After the unit is turned on, touch the icon to enter
the main interface.
6 7 8
1. USB
2. Apple Car Play
3. Phone
4. Setting
5. Radio
6. Android Auto
7. BT Music
8. AUX
1. SWC Steering wheel control
2. Screen off
3. Clock settings
4. Equalizer
Ÿ Swipe the screen left with your nger to move to the
next page of the main interface.
Ÿ Touch the icon to return to the Home page.
Ÿ Under any interface, touch the icon to return to
the main interface directly. You can use the home
key on the remote to go to the Home menu.
06
Page 7

Radio Function
Radio Function
Radio Function Operation
Touch the icon [Radio} in the main interface to enter
the Radio interface. This will launch the radio and play
the last played radio station.
Radio Icon
Setting the reception area
This car audio system is designed for operation in
different regions with different frequency ranges and
station technologies. The factory default of the
reception area is 'INDIA'. If you operate the car audio
system in Asia, you may leave the setting to 'INDIA' or
set a suitable reception area on the menu:
Ÿ On the home page, press the (System Settings) icon.
The settings menu is displayed.
You can leave it at the current setting
Ÿ Select on the Radio region button to display the list
of available reception areas.
Ÿ Sel ect the desired recept ion area by double-
clicking.
Ÿ The list is hidden, the selected reception area is set.
Ÿ The main menu is displayed again.
Tuning into a station
Ÿ Briey press the button once or several times
to change the frequency in Increments.
Ÿ You can select broadcast frequency directly by
touch and drag on the frequency bar.
Ÿ The frequency selected is played back on the radio.
Ÿ Press the button for approx. 2 seconds to start
station seek tuning.
Ÿ The radio tunes into the next receivable station.
Note: In the FM waveband, only traffic information
stations are tuned into if the priority for t raffi c
information feature is switched on - Not Applicable.
Storing stations manually
Ÿ Select the desired memory bank with the soft
key.
Ÿ Set the desired station.
Ÿ Press & drag the frequency seek bar
to store the current station at the bottom.
Ÿ The station is stored & can be switched by selecting
the desired station.
With this device, you can automatically search for and
store 10 FM & 10 AM stations offering the strongest
reception in the region in the current memory bank.
Any previously stored stations in this memory bank are
deleted in the process.
Ÿ To browse the saved station touch the PRESET
soft key to see the saved stations
Ÿ Touch the FM AM button to switch from FM to AM
reception
Ÿ At the top left area of the Settings menu. Touch the
(General) soft key.
Ÿ Select the 'Radio' option
Ÿ The current setting is displayed as 'INDIA' region.
07
Scanning stations
You can use the scan function to play all the receivable
stations of the current wave band for a few seconds.
Long press the soft key. The seek tuning searches
for stations In the current waveband. Each receivable
station is played for a few seconds in the process.
Band Switch
Touch the FM AM band icon to switch the radio bands
among FM / AM radio reception.
Page 8

Radio Function | Audio Settings
Tune and Seek
Short-press the icon to tune point by point; Long
press the icon to seek manually; It will stop
seeking when a station sought.
Auto Seek and Store stations
Long-press the L icon to auto seek, & auto store the
sought stations. During seeking, tap the L icon again
to stop seeking.
20 stations will be stored in FM band (10 stations in FM
and 10 stations will be stored in AM band. The system
will stop seeking after one-circle seeking.
Ÿ Start radio mode
Ÿ Select memory bank
Ÿ Tune Into a station
Select Memory Bank
On the home screen, your will nd the 'Radio' icon.
Touch the 'Radio' icon to enjoy the radio on the go.
Open the Different memory bank s c lick on the
PRESETS tab. 10 stations will reect, choose one as
per your preference.
Sound Settings
Equalizer Settings
In the main menu or on the control bar of the current
audio source. To manage the Equalizer settings Select
'EQ ' form the main menu.
Equalizer (EQ) Icon
The equalizer menu is displayed. You can adjust the
equalizer for all sources. The equaliser allows the user
to ne-tune sound to suit individual taste by allowing
user to change the Bass, Mid and Treble
Press the FM AM soft key repeatedly until the desired
memory bank is displayed.
This option offers simplied preset sound turning and
displays 5 EQ options. The 'User' setting allows user to
ne -tune the mu sic just right to suit individual
listening taste. The options available to the user are
listed below.
Click on any of the preference options with a touch to
choose from appropriate genre.
Ÿ Classical
Ÿ Pop
Ÿ Fock
Ÿ Jazz
Ÿ User
Audio distribution (Fader/Balance)
Touch BALANCE/FADER to adjust the audio output to
suit user preferences.
Left Front
Left Rear
Right Front
Right Rear
08
Page 9

Audio Settings | Phone Feature
Ÿ Touch the blue dot to adjust your preference OR use
the arrow keys to adjust your preference.
Ÿ The Bal & Fad reading are displayed on the top right
of the screen.
Ÿ Once you have achieved your desired setting touch
the return tab to return to the previous menu.
Ÿ Use the option to come out of sound settings.
DSP
09
Page 10

Audio Settings | Phone Feature
Phone Feature
Please be aware that using a hand-held phone while
driving is an offence. You can use this device to make
and receive call hands-free. However, it is suggested to
make minimal use of this feature and talk only when
necessar y. Talking while driving may divert your
attention from traffic conditions ahead.
Phone Icon
Pairing Phone via Bluetooth
For the rst time to pair a mobile with the radio, it is
suggested to follow as below instructions:
Ÿ Turn ON BT on the mobile device;
Ÿ Search for the Radio on the phone and connect;
Ÿ Alternately you can search phone from unit by
pressing the search key on the bottom of the screen;
Note: You need to switch ON the BT on your mobile
phone. Make sure you select "Visible to all nearby
Bluetooth devices”
Ÿ After the unit is powered off and on, the Bluetooth of
the unit will connect the last connected mobile
device, if within range
Ÿ After pairing successfully, the icon [ Å ] showing the
connecting status on the upper-right corner of the
screen will turn White
lt is required to turn on the function "Visible to all
nearby Bluetooth devices" on the mobile, and then the
unit will to able to nd the mobile Bluetooth device.
Dialling
After the mobile is paired to the unit successfully, input
a phone number via touch pad and then touch the icon
[Å] to make a call. During dialling, if a wrong number is
input, you may touch the icon [ ] to delete one by one,
or long-press the icon [ ] to delete all, as is shown in
below interface:
9821000000
You can also make a call via your mobile directly.
You can also hang up a call via your phone directly.
Ÿ A prompt message will show on the mobile, if the
unit ask for password, input the password 0000 and
Conrm on the mobile;
Ÿ After pairing successfully, the system will enter the
interface below:
Make or Answer a call
When there is an incoming call the unit will switch to
Bluetooth interface automatically.
As shown in the interface below:
Click YES to accept an incoming call or NO to reject.
You can also answer or refuse a call via your mobile
directly.
10
Page 11

Phone Features
View Call History
Touch the 'History' in the Bluetooth interface to see the
last dialled history of your phone.
The history options allows you see the Outgoing
call/Missed call/Incoming call.
View Contact List/ Phone Book
Touch the Contact option in Bluetooth interface to see
your Contact list.
Note: After Bluetooth is paired successfully, the system
will send a request message to the mobile device
would like to access your contacts and call history. Give
access to device?" Press "Yes" on your mobile, the unit
wi ll begin to d ownload the phonebo ok; Af ter
downloading successfully, the call history and phone
book of the mobile will display on the unit.
The Bluetooth device name may be different, please
take the specic unit as standard.
11
Page 12

BT Music
BT Music
Open the Bluetooth music tab to from the main
interface to play music from the phone and you can
enjoy music on the go.
Bluetooth Icon
You can also enjoy Music through your USB drive. Once
you insert a USB drive the device will auto search for
music les and display options to play music and
browse playlist.
USB Music Function
You can play the audio les via USB device.
The music formats supported by this unit include MP3,
WMA etc
When playing a music le that is not supported, the
system will prompt "fail to play as the le format is not
supported".
9
Touch this icon to play the previous song.
Play or pause the current song
9
Move to next song in the playlist
Open and browse the available playlist of songs
Via Bluetooth music function, you can play the music
les in your mobile via the unit. To use the BT music, it is
requ ired y ou r mo bile sup po rts cor respond ing
Bluetooth protocol. After the mobile Bluetooth device
is paired to the unit, the audio system will autoconnect the paired mobile.
12
Page 13

Apple CarPlay
Apple CarPlay
Apple CarPlay Icon
**
About CarPlay
CarPlay puts key iPhone apps on the radio screen. With
CarPlay and your iPhone, you can get turn-by-turn
directions , make phone calls, exchange text messages,
listen to music, and more. CarPlay uses the contacts on
your iPhone to help you make calls, send texts, and nd
destinations.
Note: Siri must be enabled on your iPhone. Go to
Settings > General > Siri.
Use an Apple-approved Lightning to USB cable to
connect iPhone to your car's USB port. It may be
labelled with the CarPlay logo, the word CarPlay, or an
image of a smartphone.
Once connected, the CarPlay Home screen will appear
automatically.
*
Set up CarPlay with your iPhone
You can use CarPlay to get directions, make calls, send
and receive messages, and more.
You need an iPhone 5 or later to use CarPlay.
To turn on Siri, go to Settings > Siri & Search.
View current audio source
If the CarPlay Home screen doesn't appear, select the
CarPlay logo on the radio’s display.
Speak to Siri:
Press & hold the voice control soft key on the steering
wheel, or the Home soft key on the CarPlay Home
screen, until Siri beeps. Then make your request.
Open an App:
Touch the app on the touchscreen.
Return to the CarPlay Home screen:
Touch the Home soft key on the touchscreen or press
the back soft key until you get back to the Home
screen.
Return to your Radio's Home screen:
Touch the grey icon with your car's logo if it appears, or
press the physical Home soft key on your radio if your
car has one.
View additional Apps:
If you have more than 8 apps, some apps may appear
on next page of the Home screen. Swipe left on the
touchscreen.
Set up CarPlay
Ÿ Plug your iPhone into the CarPlay USB port. If the
CarPlay Home screen doesn't appear, select the
CarPlay logo on the radio display.
If CarPlay doesn't work like you expect, here's what you
can check. After each step, try using CarPlay again.
Ÿ Make sure that Siri is turned on.
Ÿ Restart your iPhone and your car. Depending on
your car, you might see the CarPlay Home screen
when you turn it on. If you don't, look for the CarPlay
logo on the radio's display.
Ÿ Try a different Lightning to USB cable. Make sure
that the cable is MFi certied.
Ÿ Update to the latest version of iOS.
*Currently Apple Maps is not functional in India.
**(compatible with iPhone5 or later with iOS7.1 or above)
13
View & control the current audio source:
Touch Now Playing to see the current audio app.
Phone
Use Siri to help you make calls or open Phone, then
select Show Contacts to bring up your favourites,
recent calls, voicemail, a list of contacts, or a keypad.
Page 14

Ask Siri: Say something like:
“Call Rahul”
“Return to my last call”
“Check voicemails”
Messages
Use Siri to help you send, hear & reply to text messages
or open Messages, then select Show Messages to see a
list of past conversations. Select a conversation to hear
unread messages or respond to a thread. Select to
start a new conversation.
Ask Siri: Say something like:
“Text my wife”
“Tell Reena I'm in traffic & I'll be 15 minutes late
to the meeting”
“Read my text messages”
Music
WARNING: To prevent possible hearing damage, do
not listen to high volume levels for long periods.
Use Siri or open Music to access your Apple Music
membership and the music on your iPhone - including
songs, artists, albums, and playlists. Or tune in to Radio.
Apple CarPlay
\
You can also use Siri with CarPlay to access many of the
apps on iPhone, including Calendar, Reminders, Clock,
and more.
Ask Siri: Say something like:
“When is my next meeting?”
“Remind me to pack a swimsuit when I get
home”
“Add sugar to my grocery list”
“Set my alarm for 7:00 AM tomorrow”
CarPlay display showing For You music selections.
Other music choices - New, Radio, Playlists, and My
Music - appear as soft keys across the top.
Other apps
CarPlay works with select third-party audio apps that
you download to your iPhone. Compatible apps show
up automatically on the CarPlay Home screen.
**(compatible with iPhone5 or later with iOS7.1 or above)
14
Page 15

Android Auto
Android Auto
*
Android Auto Icon
Warning: Drive safely! Make sure to stay fully aware of
the road & driving conditions & always obey applicable
laws.
Android Auto is a mobile app developed by Google to
mi rro r fe atu re s from an An dro id d evi ce ( e.g.,
smartphone) to a car's compatible in-dash information
and entertainment.
Once an Android device is paired with the head unit,
the system mirrors qualied apps from the device to
the radio's display, with a simple, driver-friendly user
interface. Supported apps include GPS mapping /
navigation, music playback, SMS, telephone. The
system supports touchscreen type headunit, although
hands-free operation through voice commands is
encouraged to minimize driving distraction.
If you have Android Auto on your phone you can
launch the functions from the main interface.
Set up your Android Auto app: If you're using
Android Auto for the rst time, here are some steps to
get started:
Ÿ Make sure your phone is running Android 5.0
(Lollipop) & above. For best per formance, we
recommend Android 6.0 (Marshmallow) & above.
Ÿ Download the Android Auto app from Google Play.
Ÿ Make sure your phone has a strong and fast network
connection. We recommend running Android Auto
for the rst time within Wi-Fi range for the fastest
installation.
Start Android Auto
Ÿ Open Android Auto.
Ÿ Your phone might ask you to download or update
certain apps, like Google Maps.
Ÿ Review the Safety Notice and Terms & Conditions on
your phone (only required the rst time you use the
app).
Ÿ Follow the steps on the screen to give Android Auto
permission to access your phone's features & apps.
Ÿ Turn on notications for Android Auto. For the best
experience, we recommend accepting all requests.
Ÿ If your phone is already paired with your car or
mount's Bluetooth, select the device to enable auto
launch for Android Auto.
Android Auto (with a USB cable)
Before you connect your phone for the rst time, turn
on your car. Make sure it's in park (P) and that you have
time to set up an Android Auto.
Ÿ Unlock your phone's screen.
Ÿ Connect your phone to your car using an original
USB data cable.
Ÿ Your phone might ask you to download or update
certain apps, like Google Maps.
Ÿ Review the Safety information and Android Auto
permissions to access your apps.
Ÿ Turn on notications for Android Auto.
Ÿ For the best experience, we recommend accepting
all requests.
Ÿ Your ph one 's B lue tooth wi ll be t urn ed on
automatically when Android Auto is connected to
the car via USB.
Ÿ On your radio display, select Android Auto . Follow
the instructions to get started.
Navigation with Google Maps
Warning: Maps depends on data services. These data
services are subject to change & may not be available in
al l are as, res ult ing in map s & lo cat ion- bas ed
information that may be unavailable, inaccurate, or
incomplete. Compare the information provided in
Maps to your surroundings. Use common sense when
navigating. Always observe current road conditions
and posted signs to resolve any discrepancies. Some
Maps features require Location Services.
You can use Android Auto to get voice-guided
naviga ti on, es ti mate d ar ri val ti me s, live t raffic
information, lane guidance, and more with Google
Maps. Get directions with voice commands
Say "OK Google" or select the microphone.
15
*(compatible with Android version 5.0 onwards)
Page 16

Tell Android Auto where you would like to go. Some
examples of things you can say are:
"Take me home."
"Navigate to Nariman Point, Mumbai."
"Directions to Café Coffee Day."
"Navigate to work."
"Drive to Metro Cinemas, Marine Lines."
If multiple locations come up, conrm the one you
want and follow the directions to your destination.
Android Auto | AUX in
and start the conversation.
Missed calls appear as notications on your Home
Screen. To res pond to a missed c all, sel ec t t he
notication.
Make a call by voice
Ÿ Say "OK Google" or select the microphone
Ÿ Say “call” and then a contact name or phone number.
For example:
¡ “Call Sunil Kumar.”
¡ “Call 555-555-5555.”
Get directions with the display
Ÿ Put your car in park (P). If you are using Android Auto
on your car screen, you won't be able to type in your
destination until you do so.
Ÿ Select Directions.
Ÿ To open the keyboard, select the search eld at the
top of the screen.
Ÿ Enter your destination.
Ÿ If multiple locations come up, conrm the one you
want and follow the directions to your destination.
Get traffic information
You will see colour-coded current traffic conditions on
highways and roads where information is available.
You can turn traffic information on and off:
If you are using Android Auto on your phone screen,
Select More. If you are using the radio display, select
Menu.
Select the traffic switch. If traffic information is on, the
switch will be blue and will show grey when turned off.
To stop navigation at any point, simply say "OK Google"
or selec t t he microphone and say "Stop/ca ncel
navigation. “To modify or mute voice guidance, get
alternate routes, or see information about your
destination at any time during your trip, select More
Make and receive phone calls
When you receive a call, a notication will appear at the
top of the Android Auto display with the caller's
information. Select the notication to accept the call
You can also dial the no. from the dial pad of the radio.
AUX in
AUX icon
Connect the audio output to the audio input & touch
the Aux-in icon to access this source.
*(compatible with Android version 5.0 onwards)
16
Page 17

Steering Wheel Control | Clock | Screen Off
SWC (Steering wheel control)
Steering wheel control allows you up to eight functions
that can be operated via existing steering wheel
mounted controls. This requires assigning the desired
function the buttons on the SWC.
Note: The SWC function operates with analog control
signals, depending on the vehicle type additional
interface may be required.
Steering Wheel Control icon
Ÿ Select the SWC icon form the main interface
Ÿ Assign the desired function to up to 11 placeholders
(Select any form 1 to 11)
Ÿ The assigned placeholder is identied by the check
mark and the selected function is identied by
placeholder number
Ÿ Repeat the steps to assign the additional function to
the SWC controls
Ÿ Thereafter assign the relevant placeholders to the
buttons of steering wheel-mounted controls
Screen off
There is a blackout feature in the radio. Touch on
'Blackout' tab to enable a dark screen. The music
continues to play in the background and the screen
appears to be off. This can help you concentrate while
driving at night.
Screen Off icon
Clock
Most drivers prefer having only the clock on the device
screen. This feature is made available to you on the
main interface itself. Click on the 'Clock' Icon to launch.
Clock icon
Ÿ First, select the function key on the device,
Ÿ Then press the corresponding physical key on car
steering control.
Ÿ Pres s an y button of the rem ote contr ol for
approximately 1 second
Ÿ The displayed function is assigned to the button
being pressed
Ÿ Once the placeholder is assigned select the next key
to assign
Ÿ Repeat the same steps to assign the rest of the keys
Note: The actual no. of keys may vary depending on
how many placeholders you have in the SWC device.
17
The clock will continue displaying until the users
touches the screen.
Page 18

General Settings
General Settings
Manage all your device settings of your device by a
touch on the 'settings' icon in the main interface. By
default, it will lead you to general settings.
Setting icon
In general settings, you nd the following options,
which you can edit as per your preference.
Ÿ Time Zone
Ÿ Date
Ÿ 12hrs or 24 hrs mode display
Ÿ Auto adjust Daylight Savings
Ÿ Android Auto launch settings
Ÿ Language settings
Ÿ Advanced settings
Ÿ Restore Factory settings
Date
Edit the date using this option. Set year>>Set date and
touch on 'OK' to set the right time.
Set Time
Edit the time using this option. Set hour>>Sett
Minutes>>Set seconds and touch on 'OK' to set the
right time.
12hrs or 24 hrs mode display / Daylight Savings
Time Zone
Touch on 'Time Zone' and select the applicable time
zone for your area.
Default Time Zone: (GMT+05:30) Chennai, Kolkata
You can set the 12 hours (AM/PM) time display or 24hour time display as per your preference by activating
or deactivating the blue soft key.
18
Page 19

General Settings
Android Auto launch settings
You can activate or deactivate the automatic launch of
'Android Auto’
Language settings
There are two languages available on your device.
English and Spanish, select the language of your
choice and touch on 'OK' to set your device language.
wheel control form this tab. SWC allows you up to
eight functions that can be operated via existing
steering wheel-mounted controls. This requires
assigning the desired function the buttons on the
SWC
Restore Factory settings
At any point in time, you can restore the factory
settings through the 'Restore Factory Settings' option.
By touching 'Yes', all your previous set data will be
erased and the unit will reset.
Audio settings
Advance settings
Under the 'Common settings', you can do the following,
touch to activate or deactivate.
Ÿ Parking settings: touch to activate and deactivate.
Ÿ Il lum inati on C ont ro l: t ouc h to act iva te and
deactivate.
Ÿ SWC Settings: Along with the 'SWC' icon available on
the main interface, you can manage the Steering
19
Manage all your audio settings with the 'Audio' option
available. You can manage the below listed audio
options.
Ÿ Beep sound
Ÿ Loudness - Use this to increase bass output at low
volumes
Ÿ Media volume increase or decrease
Ÿ Phone volume
Ÿ Speech and Navigation
Page 20

General Settings
Display settings
The intensity of the backlight can be set using the seek
bar towards the left or right. The settings available are:
Ÿ Day Brightness increase or decrease
Ÿ Night Brightness increase or decrease
Ÿ Led Settings
« Illumination colour
« Day brightness
« Night brightness
Bluetooth Settings
Radio settings
Along with the radio option available in the main
interface, you can manage the radio settings option
available in the general settings- Radio option
Ÿ The current setting is displayed as 'INDIA region'.
You may leave it at the current setting.
Ÿ Select on the Radio region button to display the list
of available reception areas.
Ÿ Select the desired reception area by double-
clicking.
Ÿ The list is hidden, the selected reception area is set.
Ÿ Manage FM / AM reception quality
RDS Settings
Manage all your Bluetooth settings with the 'Bluetooth
option available. You can manage the below listed
Bluetooth options.
Ÿ Turn On or Off Bluetooth
Ÿ Turn On or Off Bluetooth auto connect
Ÿ Search new Bluetooth device.
Ÿ Auto answer
Ÿ Automatic download of Phonebook
Ÿ Check Device Name
Ÿ View Software version.
You can enable disable RDS / AF &TF with this option.
"RDS" stands for "Radio Data System" and it allows
FM broadcasters to send far more than just an analog
audio signal out over the air waves.
Alternat e Frequenc y (AF): AF (perh aps better
id ent i ed as Al ter na te F re que ncy Swi tch ing ),
automatically returns your FM tuner to the strongest
signal carrying the information.
Traffic Announcement (TA): This is the active side of
TP capability. TA allows yo u to program some
automotive stations to constantly monitor TP stations
& t un e t h em in a ut om ati c al ly i f a sp eci a l
announcement is being made even if you're already
listening to another station.
20
Page 21

Useful Information | Service
Useful information
Warranty
We provide manufacturer's warranty for products
bought within the I ndia. For devices purchased
outside the India, the warranty terms issued by our
respective responsible domestic agency is valid.
Warranty terms can be viewed at
www.blaupunkt.com.
Register ONLINE within 15 days of PURCHASE to
activate WARRANTY.
The procedure to activate the warranty is given below;
Thank you for buying Blaupunkt
Model: Palm Beach 550
Serial No.:
BP76103550000001
Please activate the e-warranty within 15 days of purchase.
To activate your e-warranty, please follow the below steps:
SERIAL <space> <serial number> to 07760962759
Step 2. In response to the sent SMS, you should
E-user manual is available at www.blaupunkt.com
the link at the bottom on the page to download.
Step 1. Please send SMS
receive back a link via SMS, please Click on it
Step 3. Complete a simple form to register
your product & activate e-warranty.
or upon completion of registration, follow
Service
If your device should need service, please contact us
for the location of an authorized service center near
you.
www.blaupunkt.com
OR
Email: support@blaupunkt.in
OR
Call 1800 209 6820 for the location of an authorized
service center near you.
Should you require further assistance,
please call: Customer Support 1800 209 6820
Thank You!!
21
Page 22

File fromat
MPEG
AVI
RM
Mp4
MKV
Supported
Video Code
MPEG-1 Video
MPEG-2 Video
AVI(MPEG2, MPEG4)
RV8/9/10
MPEG-4 MPEG-1/2
MPEG-4, MPEG-1/2,
Rv8/9/10
Support
Video Prole
Simple, Main, High
MPEG2:simple, main, high
MPEG4: advanced
N/A
MPEG4: advanced simple, simple
MPEG2: simple, main
MPEG2: simple, main, high
MPEG4: advanced
simple, simple
Supported
Audio Code
MPEG,
PCM, MP3
MPEG, MP3,
PCM, FLAC
COOK
Mp2, MP3,
PCM, MPEG
Mp2, MP3,
PCM, MPEG, FLAC
Video Bitrate Limit
Supported
Bitrate: 30Mbps
Resolution: 1080
Frame rate: 30fps
Bitrate: 30Mbps
Resolution: 1080
Frame rate: 30fps
Bitrate: 30Mbps
Resolution: 1080
Frame rate: 30fps
Bitrate: 30Mbps
Resolution: 1080
Frame rate: 30fps
Bitrate: 30Mbps
Resolution: 1080
Frame rate: 30fps
File
Extension
.mpg, .mpeg,
.dat, .vob
.avi, .xvid
.rm, .rmvb
.mp4, .mov
.mkv
File fromat
MP3
FLAC
APE
File fromat
JPEG
Supported Audio Code
MP1/MP2/MP3/PCM
Flac
Ape
Supported Audio Code Supported File Extension
Baseline jpeg, Progressive jpeg
Decod source image size up to 8784X5856,
re-sample to 720X480 or 720X576
Video Bitrate Limit
8kbps to 320kbps.mp2
8 to 192KHz
8 to 96KHz
Limitation
Supported File Extension
.mp3
.ac
.ape
.jpg, .jpeg
22
Page 23

23
Page 24

Blaupunkt India Private Limited
47, Atlanta Society, Nariman Point
Mumbai‐ 400 021. Maharashtra. India.
www.blaupunkt.com
 Loading...