

Page 1
User's Guide
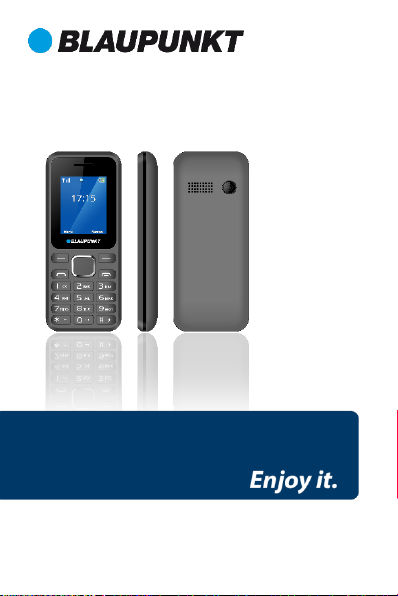
Mobile phone FS 04
Page 2

Table of contents
General Information ................................................................ 1
1. Safety .................................................................................... 1
2. Product specifications ......................................................... 7
3. About the keys ..................................................................... 8
4. Getting Started ..................................................................... 9
4.1. Insert a SIM card ........................................................ 9
4.2. Insert a memory card ................................................. 9
4.3. Insert battery ............................................................ 10
4.4. Remove the battery .................................................. 10
4.5. Charging the battery ................................................ 10
4.6. Maintaining the battery ........................................... 11
5. Power On/Off ..................................................................... 12
6. Call functions ..................................................................... 12
6.1. Make a call ................................................................ 13
6.2. Receive call................................................................ 13
6.3. Available functions during call ................................. 14
6.4. Emergency call .......................................................... 15
7. Messages ............................................................................ 15
7.1. Write a message ....................................................... 15
7.2. Incoming messages .................................................. 16
7.3. Drafts ........................................................................ 17
7.4. Outbox....................................................................... 17
7.5. Sent messages .......................................................... 17
7.6. SMS settings ............................................................. 17
8. Log ...................................................................................... 18
8.1. Call logs ..................................................................... 18
8.2. Call settings............................................................... 18
9. Phonebook ......................................................................... 19
9.1. Add new contact ....................................................... 20
9.2. Search and view a contact ....................................... 20
Page 3

10. Camera ............................................................................. 22
11. Multimedia ....................................................................... 22
11.1. Image viewer .......................................................... 22
11.2. Video recorder ........................................................ 23
11.3. Video player ............................................................ 23
11.4. Music player ........................................................... 24
11.5. Sound recorder ....................................................... 24
11.6. FM radio ................................................................. 25
12. Organizer .......................................................................... 25
12.1. Calendar .................................................................. 25
12.2. Alarm ...................................................................... 25
12.3. Worldclock .............................................................. 26
12.4. Electric torch ........................................................... 26
12.5. Calculator................................................................ 27
13. File manager .................................................................... 27
14. Settings ............................................................................. 28
14.1. Profiles .................................................................... 28
14.2. Phone settings ........................................................ 29
14.3. Security settings ..................................................... 30
14.4. Connectivity ............................................................ 31
14.5. Restore factory settings ......................................... 31
15. Shortcuts .......................................................................... 31
16. Declaration of Conformity ............................................... 32
Page 4

1
General Information
Thank you for choosing our device. This manual contains
general information, in addition to the information required
for operation.
Note:
• For your safety, use only accessories approved by the
manufacturer. Use of unapproved accessories may
result in a warranty revocation.
• If the device that appears in this manual does not
match your device, rely on the information displayed
on the device. The manufacturer reserves the right to
change the operation of the device without prior
notice.
The manufacturer reserves the right to change the operating
instructions as well.
1. Safety
Safety regulations
Please read the safety instructions carefully, as ignoring it may
be dangerous or illegal.
The owner of the device is responsible for the use of this
appliance. Do not switch on the device, where it is prohibited
to use a mobile phone or to interfere with radio waves.
Airplane
When traveling via airplane, your device must be switched off
whenever the crew or warning signals are instructed to do so.
Page 5

2
Using a mobile phone may be dangerous to the operation of
the aircraft and may interfere with network communication.
Use of the device despite the ban may have legal
consequences.
Explosion hazards and restricted areas
Turn off the device in explosion hazardous areas. Sparks in
such places may lead to an explosion or fire that may result
in serious injury or death. Turn off the devicce at gasoline or
gas filling stations, especially near the fuel pumps. Follow the
instructions strictly in locations such as fuel tanks, chemical
plants, and explosive substances.
Electronic devices
To avoid demagnetisation, do not leave your device for a long
time close to electronic devices.
Electrical medical devices
Your phone is a radio transmitter that can interfere with
electronic medical devices or implants such as hearing aids,
pacemakers, insulin pumps, and so on. operation. We
recommend that you keep a distance of at least 15 cm
between the implant and the device, never wear your phone
in the breast pocket. Follow the instructions of the
manufacturer of the medical device. If you have a medical
implant and have any other questions about using mobile or
wireless devices, ask your doctor.
Use in hospitals
Hospitals and other healthcare facilities can use devices that
are particularly sensitive to RF signals. Switch off your phone
if prohibited signals are instructed to do so, or hospital staff
Page 6

3
ask for it.
Road safety
Observe the local laws and regulations regarding smartphone
usage while driving. If you make a phone call while driving,
observe the following rules: Focus on driving to become
aware of traffic conditions; If the device has a hands-free
function, use handsfree. If the traffic situation requires, stop
the car before you pick up the phone.
Use environment
The device complies with the recommended emission values
for radio waves when kept at a minimum distance of 1.5 cm
from the ear. When carrying the phone in a case, belt clip or
holder, make sure that it does not contain metal and that the
phone is slightly distracted from the body. When using other
accessories, it is not possible to operate in accordance with
radio frequency guidelines. If you do not use a case and do
not hold the phone on your ear, keep it at least 2.5 cm away
from your body, especially during data transfer.
Note on using this unit
Do not place the device close to magnetic cards or other
magnetic devices. The phone's magnetism can erase the
data found on the disc on the card.
Wired telephone, television, radio may cause
interference and may affect the operation of the mobile
phone.
Keep the appliance dry, all moisture may damage the
electrical circuits.
Keep the unit away from extreme temperature
Page 7

4
conditions.
Keep the appliance away from places where the
temperature can reach 60 ° C, such as dashboard,
window sill, fire, burning cigarette.
Do not paint the appliance.
Do not shake the appliance, do not drop it or crush it.
Do not disassemble or modify the phone as this may
damage the phone, which may cause leakage, which
interrupts the internal circuits.
Clean only the phone with a damp or non-static cloth.
Do not use alcohol, thinner, benzine or other chemical,
scouring agent to clean the appliance.
The product may become warm during normal use or
during charging.Ne hagyja a készüléket hosszú időre
lemerült akkumulátorral, mert adatvesztést okozhat.
Metal parts of the device may cause skin irritation.
Do not put the device in the back pocket if it is damaged,
damaging the phone. Do not put the device in the
bottom of the bag as it may break.
If the phone is in vibrating mode, place it in a place
where it can not fall off during vibration.
Do not press the display with a needle or other sharp
object, as it may damage the LCD display, which will give
you a surplus.
Store the device in an appropriate location when not in
use. Keep away from children.
If you lose or steal your device, contact your network
Page 8

5
service provider immediately to prevent the SIM card
from being used by unauthorized persons. The service
provider may ask for the IMEI number of the device that
you can find on the battery sticker or by dialing the code
*#06#. Record this number if you need it in the future.
To prevent unauthorized use, lock the SIM card or the
device, change the passwords if necessary.
Always switch off the appliance before removing the
battery. Otherwise, it may cause data loss.
When leaving your vehicle, carry the appliance or put it
in the glove compartment to prevent theft.
Keep the device, battery, and charger away from
children.
Notes on using the battery
Do not disassemble or modify the battery as this may
cause leakage, overheating, or explosion.
Do not dispose of the battery in a fire as it may cause an
explosion. Dispose of the old battery according to local
regulations. Do not throw it into household rubbish.
Do not short circuit the battery circuits with a needle or
other metal object as it may cause leakage, overheating
or explosion.
If the battery is exposed to a liquid, it may cause
blindness. If this happens, do not rub your eyes, but
rinse with water and seek medical attention
immediately.
If the liquid spilled from the battery contacts skin, burns
the skin. Wash your skin with clean water and consult a
Page 9

6
physician immediately.
Do not take the battery in your mouth as it may be
poisonous.
Do not continue to use the battery if it finds too hot or
has changed its color or shape.
Keep the battery dry.
Do not store the battery near fire or other hot places.
Store the battery in a cool, well-ventilated area and do
not expose it to direct sunlight.
Do not charge the battery for more than 24 hours.
The battery can be charged for hundreds of times, but
each charge will shorten its life and wear out after a
while.
When replacing a battery, use only a battery approved
by the manufacturer. Using an incorrect battery may
result in a warranty.
Qualified service
The product can only be repaired by a qualified person.
Hearing protection
To avoid hearing loss, do not listen to music or radio for a long
time at high volume.
Water resistance
The appliance is not waterproof, so keep it dry.
Page 10

7
2. Product specifications
Power Supply Features:
• Input: (AC), 100-240 V - 50/60 Hz – 0.1 A
• Output: (DC), 5 V - 500 mA
Battery Type and Voltage:
• Li-ion battery, 3.7 V, 600 mAh
Network type:
• GSM 900/1800 MHz
SAR values:
• 1.133 W/Kg (Head)
• 0.789 W/Kg (Body)
Note: Actual operating conditions depend on local conditions,
network environment, and user habits.
The mains power socket used must be close to the
charger/holder and easily accessible, so that it can be used as
an 'on/off' facility.
Page 11

8
3. About the keys
1. Left soft key / Right Soft key: Opens the menu item in the
left / right corner of the screen.
2. Dial key: dial / answer the call and in standby mode, open
the call list.
3. End / Off Power Button: Press and hold to turn the power
on and off; briefly press it down, reject a call, or quit it from
the menu.
4. Ok key: press to execute the indicated function. In standby
mode, press to open the selected link.
5. Navigation keys: Press up / down / left / right directions to
scroll through the menu. In standby mode, press the up /
down / left / right arrows to access the quick menu at the top
of the screen and press OK to execute.
6. 0-9 alphanumeric keypad: Press the corresponding keys to
enter numbers when dialing or the characters of the numbers
when writing text.
In Idle mode: Press and hold "2" to "9" to use the Speed Dial
feature (if set in the menu [Phone Book / Speed Dial]).
Press * twice to display "+" the international developer signal.
7. * (Star) button: in standby mode press and hold * to display
the international prefix '+'. In Menu mode, briefly press to
lock the keypad.
8. # (Dual Cross) button: in standby mode, press and hold to
activate / deactivate Silent mode.
Page 12

9
4. Getting Started
4.1. Insert a SIM card
To use your phone, you need to insert a valid SIM card to
connect to the GSM network.
To avoid missing or damaged the contents of the SIM card,
please DO NOT hold the metal part of the SIM card with your
hands free and keep it away from electromagnetic devices. If
the SIM card is damaged, it can not be connected to the GSM
network. Before inserting or removing the SIM card, make
sure that the device is turned off and removed from the back
of the device.
Note: Locate the SIM card slot on the back of the device and
in the direction of the signal, with the collisions slide the card.
4.2. Insert a memory card
The memory card is not part of the basic package, but the
memory of the device can be expanded with an SD card.
Please make sure that the memory card is inserted correctly
before use.
Note that the device may shake, the memory card may slide
out of the slot, so please do not bend it, scratch the memory
card or expose it to static electricity or dust, do not immerse
it in water. Place the memory card in the slot on the back of
the machine, with a chip down, as shown on the device.
Please be careful when using a memory card, especially when
it is removed. Some memory cards must be formatted with a
computer before use.
Page 13

10
4.3. Insert battery
1. Insert the battery chip into the protruding metal point in
the battery slot, insert the battery, and push the top down
until the battery engages in the recess.
2. Put back the back cover.
4.4. Remove the battery
To remove the battery, turn off the device, remove the cover,
and then remove the battery at the top.
Note:
Please remove the battery when it is switched off, as it may
cause abnormal operation when the skin is switched on.
4.5. Charging the battery
Connect the charger to the appliance and plug the other end
into the socket. If the device is turned on while charging, the
battery icon will move in the right corner of the display.
Charging is completed when the charging indicator on the top
right is lit. If charging is switched off, a charging indicator
appears on the display. When charging is complete, unplug
the charger from the unit.
Note: When the battery voltage is low, a warning message is
displayed on the display. Charge the battery as soon as you
can, to avoid any inconvenience, the device can be switched
off during a telephone conversation. Your device can
automatically turn off when the power level is too low.
Page 14

11
1. If you use the battery at a persistently low charge, it may
adversely affect the battery life and quality.
2. Use only the charger approved by the manufacturer for
proper operation.
3. Do not remove the battery during charging.
4. Fill the unit for at least 4 hours before first use. This can
increase the efficiency of the multiple charge and discharge
cycles.
4.6. Maintaining the battery
The device has a rechargeable battery. When not using the
charger, disconnect it from the power source. For more than
a week, do not leave the phone charging. Temperature
influences battery capacity. Battery may need to be cooled or
warmed up before charging. If the battery temperature is
lower than 0 ° C or higher than 45 ° C, do not charge the
battery. Use the battery according to its intended purpose.
Do not short-circuit the battery terminals. Do not use a
damaged battery. If you are using an appliance under
extreme temperature conditions, the battery will not work
properly and its life span will be reduced. DO NOT throw the
battery into fire, follow local laws and regulations regarding
the disposal of the spent battery.
Page 15

12
5. Power On/Off
Press and hold the End / On-Off button to turn the unit on or
off.
1. If a SIM card is not inserted, it is defective or not fit correctly,
a warning message will be displayed after switching on the
display. Turn off your readiness and make sure the SIM card
is inserted correctly.
2. If you insert the SIM card into the device, the PIN request
and the phone password are active, the device prompts you
for the password and PIN code then switches to standby
mode.
After switching on, the phone automatically searches for the
network. If the device has found the allowed network, it will
display its name and signal strength.
If your device does not find a suitable network, you can only
make an emergency call or access non-network services on
your phone
6. Call functions
If you have completed the steps in the previous chapter, the
machine is ready to make and receive calls. For more
information about call origination and basic call functions,
see this chapter.
Note:
If you are using a headset, gently insert and unplug the jack
plug to avoid possible injury.
Page 16

13
6.1. Make a call
When the network service provider name appears on the
display, the phone is ready to make and receive calls.
Direct calling
In Standby mode, press the number keys to enter the number
you want to call, press the right soft key to clear the wrong
numbers, press the left soft key or the dial key to start the call
if the specified number is correct.
To enter an international phone number format, press and
hold the [*] key until "+" international call sign appears on the
display.
Dialing from Names
Use the right soft key to enter Names. Use the navigation keys
to scroll to the contact you want to dial, then press the call
key or Options (soft key left)> Call.
6.2. Receive call
When an incoming call is alerted to your device if your service
provider supports the number display, the display shows the
caller's number or the caller's name (depending on whether
you have saved it in the phone book).
1. Press the dial key or the left soft key and answer [Answer]
to the incoming call.
2. If Any key responds function is active, [Settings / Call
Settings / Answer Mode / Anykey], you can answer any call
using any key except the Right softkey and the End / Off
button.
3. When the headset is connected to the unit and [Headset]
Page 17

14
is activated [Settings / Call settings / Answering mode /
Automatic receiving in headset mode], incoming calls will be
automatically received by your phone after 5 seconds of
vibration or ringing.
4. If you do not want to answer the call, press the End / Off
button to reject the call.
The End / Off button can also be used to disconnect the call.
5. During a call, press the down / up navigation keys to reduce
or increase the loudspeaker volume.
6.3. Available functions during call
Press <Menu> (left) to select from the following options
during a call:
• Hold / No hold
• End call
• Phonebook - Open a phonebook during a call
• Call list - to open call logs during a call
• Messages - Open messages during a call
• Start recording - Record the ongoing call
• Mute
• Volume - to decrease or increase the volume in the call
You can navigate through the available menu items on the
screen with the navigation key.
To end the call, press the end call key, or select Options> End
call.
Page 18

15
6.4. Emergency call
You can immediately make an emergency call without a SIM
card. Different networks can use different emergency
numbers, so please contact your network operator.
7. Messages
Message service is a network-dependent service that allows
you to send and receive SMS. For more information, contact
your network provider.
7.1. Write a message
Features: Write new message, Inbox, Drafts, Outbox, Sent
items, SMS settings.
In Menu mode, select Messages> Write message.
Note: To send the SMS, you must have the correct message
center number from your network service provider. You can
check and change the message center in Menu> Messaging>
SMS settings> SIM> SMSC adress.
While writing a message, press # to switch between input
modes.
Press the left soft key [Options] during message editing to
access the following functions:
- Send to: You can specify the recipient of the message
manually or select it from Names.
- Input Mode: Displays the Available Input Modes list.
- Advanced: Insert phone number, Insert name, Insert
smiley
- Save: Save a message to drafts
Page 19

16
Sending
After Adding a Recipient (which you can do by entering a
direct phone number or from Contacts), you can send the
message by selecting <Options> Send.
7.2. Incoming messages
You can store received messages on your device or on the SIM
card and access it.
When you receive a message, a beep or vibration (as
previously configured in the menu) will alert you to this, or a
graphic will appear on the display. Press the left soft key [View]
or OK to view the message, and the right soft key to return to
the SMS menu to read other incoming messages.
If the SMS memory is full, you will see a "Memory full"
indicator on the display and the SMS icon flashes. Before you
can receive a message, delete some of the older ones. If the
size of the new message exceeds the capacity of incoming
messages, the information may be lost or incomplete.
In the message list, press the left soft key [View] to view the
message. Press the left soft key [Options] repeatedly to select:
· Answer: You can reply directly to the message.
· Sender's Call: Call the sender directly.
· Forward: Forward a message to another recipient.
· Delete: Deletes the message
· Special / Use Number: If the message contains a phone
number you can choose from the following options:
• Call: Call the phone number in the message
• Save to phonebook: You can create a new contact
with the phone number
Page 20

17
7.3. Drafts
You can view messages in the unfinished (While Writing
Message: Options / Save) messages in this folder.
7.4. Outbox
When [Save and send] is activated, unanswered messages are
saved in this folder.
In the messages list, press the View soft key (left soft key) to
read the selected message.
7.5. Sent messages
If the message is sent, the sent message is saved in the Sent
Items folder.
7.6. SMS settings
You can change and save the parameters of the SMS service
on the SIM card: In the SIM menu you can:
• Message Sender Center address (Message Number),
• Delivery report in case of sending a message (Handed / On)
To validate the changes, press the left soft key [Options] and
then (Save)
To save outgoing SMSs, you can activate the SMS settings /
SMS save / On option.
Page 21

18
8. Log
8.1. Call logs
In Menu mode, select Call Logs to access the Missed, Dialed,
Received, All Calls list.
Delete call logs: Use this option to clear the call details of a
given menu item or all the lists at a time.
Missed calls, Dialed numbers, Received calls list, the following
options are available:
• View - view the details of a call.
• Call - to call a specific number
• Send a text message - Send a text message to the
selected phone number.
• Save to phonebook - Add phone number to Contacts.
• Add to blacklist - block phone calls.
• Delete - Deletes a specific item from the list
In Call timers, you can view the duration of the call by type
and in total.
8.2. Call settings
You can choose the following options:
· Call Waiting (Depends on network support): Turn on or off
or check the Call Waiting status.
When the phone is switched on, an alert is heard during a call
if someone else calls and the caller's number or name is
displayed (depending on whether you have saved it in the
phone book).
· Call divert (depends on network support): Divert incoming
voice calls to voicemail or other phone numbers, depending
Page 22

19
on the setting. Divert may be unconditional [All voice divert
redirection] or conditional (Divert if not available; Divert if no
answer; Divert if busy). Use the up / down navigation keys to
select the appropriate divert type from the list, press Ok or
Left soft key [OK] to select one of the following options:
Activate: Forward to a new number or Voicemail (by type) for
an incoming call:
- New number: Use the up / down navigation key to select this
line, then press the left soft key or OK. Enter the full phone
number to which you want to divert incoming calls.
- Voice Mail: If you have a voicemail, pressing the OK or Left
soft key [OK] will cause the conditional or unconditional
redirection to the voicemail if you have previously set your
voicemail number in Menu> Messaging> SMS Settings> SIM>
Voice Mail Server.
Answer mode: In this menu option you can set the call to
answer by pressing any key or make a call with a 5 second
delay when a headset is connected.
9. Phonebook
In Standby mode, use the right soft key to enter Names or to
access Menu> Phonebook.
Press the left soft key [Options] to access the menu function.
You can save the numbers and names you frequently use to
the SIM card and the device in two places. The number of
contacts that can be stored on the SIM card depends on the
card's capacity. You can store up to 100 contacts in the phone
memory. When you enter the phonebook, you can view all
Page 23

20
the contacts (stored on the SIM card and on your device).
Various icons indicate which contact is saved for which
storage.
You can search for that contact by entering the first letter of
the contact.
After searching for a contact, you can dial the number by
pressing the Dial button and disconnecting the line by
pressing the end / Off button.
9.1. Add new contact
In Standby mode, enter the phone number and select (left)
Options> Save to Phonebook.
Select storage space (SIM1, SIM2, or Phone) to save the
phone number.
Enter contact details: name, phone number.
To save, press the Options (left) soft key and select Save.
9.2. Search and view a contact
• In standby mode, select the <Names> (right) soft key
and select the desired contact using the navigation
keys.
• In Menu mode, enter the Phonebook menu and enter
the first letter of the contact you are looking for in the
search box. Select a name from the hit list.
Page 24

21
If you find a contact you are looking for, you can choose from
the following options (only available after opening a contact):
• View: View contact information
• Send text message - Send a text message to the
selected phone number
• Call - to dial the selected number.
• Edit - to edit the selected contact.
• Delete - to delete the selected contact.
• Copy - to copy the contact to the SIM card or phone
memory.
• Select more: Tick the selected contacts and send
them to SMS or delete the marked ones.
• Settings
Fixed dialing: Set a fixed call (if the network service provider
supports the feature).
Memory status: view the number of contacts stored on the
device and the SIM card, and how many contacts can be
stored. The storage capacity of the SIM card may vary by card
type.
Page 25

22
10. Camera
Your device has a camera for taking photos. To store images,
you need a memory card.
In Photo Preview mode, you can choose from the following
options by pressing Options (left soft key) in the popup
window:
• Switch to camcorder: to enter video capture mode.
• Photos: Opens saved photos.
• Settings: Use the up / down navigation keys to scroll
through the Flip Guard, Scene Mode, White Balance,
Self-timer functions. To select, press Options (left soft
key) Select. To save the changes, press Save.
• Image Settings: In this menu, you can adjust the image
size and picture quality.
11. Multimedia
11.1. Image viewer
Attention! Insert the memory card to use the menu item.
In this menu, you can view the images saved on the memory
card, press OK in the selected image, then Options (left soft
key) to access the following functions.
• View: view the selected image.
• Send: You can send the image via Bluetooth.
• Use differently: set photos as wallpaper.
• Rename: You can change the name of the image.
• Delete: Deletes the current image.
• Mass Storage: Displays the list of images on the memory
Page 26

23
card.
• Image information: Here you can see the details of a
picture such as: resolution, size, creation time
11.2. Video recorder
Insert a memory card to make a video recording. In Video
Preview mode, press Options (left soft key) to access the
following actions:
• Switch to camera: switches to camera mode.
• Settings: Press the left / right navigation keys to set the
anti-flip settings.
• Video settings: In this menu, you can adjust the video
quality.
Press the center navigation key to capture the video, press
the same button to pause or resume recording; a Right
softkey [Stop] can stop recording. Your device will display a
warning message about saving the video and then return to
the video preview mode so that you can take another shot.
Reset default settings: reset parameters to default.
11.3. Video player
This menu item allows you to play video clips stored on a
memory card.
Press Options (left soft key) to access the following functions
on the selected video:
• Playback: Plays the video, press OK (Center Navigation)
again to start it.
• Send: You can send the video via Bluetooth.
• Rename: You can change the name of the video.
• Delete: Deletes the selected video.
Page 27

24
11.4. Music player
On the player interface, press OK to select / play / pause the
left / right navigation buttons to go to the previous / next /
audio file, the up / down navigation buttons to adjust the
volume.
Using the left soft key [List] you can enter the playlist by
pressing the left soft key [Options] again to access the player
program: play, details, update the list, settings.
In Settings, you can set repeating, mixing numbers, playing
backgrounds.
11.5. Sound recorder
You can use voice recorder to record telephone conversations
and make other voice recordings.
Select "New Entry" with the left soft key to start or pause the
recording and stop the right soft key. The unit saves the
recording to which a warning message appears on the display.
After recording, you can access the following options by
pressing the Left soft key [Options].
• New entry: Create a new recording.
• Playback: you can retrieve the current recording.
• List: To view the list of recordings, use the Options (left
soft key) to select from the following options:
o Playback: Play back the current recording
o Rename: You can change the recording name.
o Delete: Deletes the selected recording.
o Send: You can send the video via Bluetooth.
Page 28

25
11.6. FM radio
In Menu mode, go to Multimedia> FM radio. To connect to a
radio, connect the headset, which acts as an antenna. If you
do not connect a headset to your device, you may not be able
to receive radio reception or in very poor quality.
In the FM radio application, press the left / right navigation
keys to search the channels automatically forwards /
backwards. Use the up / down navigation keys to adjust the
volume.
Note: 1. If the Playback in background feature is active, you
can also listen to the radio in standby or menu mode. You can
also listen to the radio with handsfree, but do not remove the
headset.
2. The quality of radio broadcasting is influenced by the
environment. You can improve the quality by manual search
and by placing your device closer to the window.
12. Organizer
12.1. Calendar
To open Calendar - in menu mode - go to Organizer> Calendar.
The calendar indicates the current month, highlighting the
current date with color. Use the navigation keys to scroll
through the days. Select a date and press OK or the left soft
key [Options] to choose from: Go to date, Go to today, Start
of week.
12.2. Alarm
In Menu mode, go to the Organizer> Alarm menu, where you
can set 5 different alarms. The wake-up function also works
Page 29

26
when the device is switched off.
When the alarm clock sounds, press the Left soft key or the
Stop button to stop; press the Right soft key to the snooze.
To change the alarm details, select one from the list and press
the left soft key [Alarm]:
1. Enable / disable the alarm by ticking out and on. When an
alarm is active, you will see a green dot before "On". In the
alarm clock list, the active alarms are indicated by a check
mark.
2. To change the alarm time (Time), scroll with the navigation
keys (up and down) and use the numeric keypad to enter the
alarm / alarm time.
3. Use the down / up navigation buttons to edit the Repeat
Time to set the days of the week to activate the alarm. Press
the left soft key [Options] or OK to choose whether your
device will only ring once, daily or on the marked days
(Monday, Tuesday, Wednesday, Thursday, Friday, Saturday,
Sunday) at the given time.
4. Select the alarm tone line to change the alarm sound. Press
the left soft key [Options] or OK to display the list of ringtones,
press the Down / Up navigation keys to scroll through the list
and listen to the alarm sound, press the left soft key [OK] or
OK to activate the selected sound.
12.3. Worldclock
To open World clock - in menu mode - go to Organizer> World
clock, where you can select different time zones.
12.4. Electric torch
To turn on the flashlight - in menu mode - go to Organizer>
Electric torch. Use the up / down navigation keys to select [OK]
Page 30

27
with the OK button or press the left softkey.
12.5. Calculator
In Menu mode, go to Extras> Calculator to open the calculator.
The calculator in the machine can perform the 4 basic
operations.
13. File manager
In Menu mode, go to File manager. You can view all or the
free storage of the memory card (if it is connected to a
memory card). To view the files, select your device or
memory card using the navigation keys, then go to the
Options (left soft key) menu and select Open.
• New Folder: Create a new directory on the current drive.
• Rename: You can change the name of the file or
directory depending on which one is selected.
• Delete: Deletes the selected library or file, depending on
which one you chose.
• Copy: You can copy the selected file to the selected
folder with options / answers.
• Move: Moves the selected file (erased from the original
location) to the selected folder with options / answers.
• Details: See the file size and date information.
Page 31

28
14. Settings
14.1. Profiles
Silent mode
To activate the Silent mode, press and hold #. Press the #
button repeatedly to activate General Mode.
Customize profiles
In Menu mode, go to the Settings / User Profiles menu, and
then select the profile you want to change. There are 4
profiles in the device: General, Low, Meeting, Outdoor.
To change the profile, press [Options] and select Personalize.
In this menu, you can change the following settings: alert type,
ring type, ringing tone for calls and messages, ring volume,
keypad sound.
In the Restore menu, you can reset the factory defaults for
the profile.
Add a ringtone from a memory card
In Menu mode, go to User Profiles> Options> Personalization>
Incoming Call, and then select Select from File.
Then, the device enters the File Manager where you can
select from the music stored on the memory card (if there is
a memory card in the device) by pressing the OK soft key.
Page 32

29
14.2. Phone settings
You can change the following in the Date and Time submenu:
• Reset Location: You can select the capital of the
country where you live.
• Set date and time: Use the navigation keys to highlight
the line you want to set, and then use the numeric
keypad to enter the time and date. To save, press Save
(left soft key).
• Enter Format: You can set the time and date format.
• Update with time zone: Select this option and you can
enable and update the update with time zone.
Language: You can select the language you want to use
Preferred input methods: You can edit your keyboard input
method according to your custom.
Display settings: You can customize the display according to
your taste.
• Wallpaper: Choose a wallpaper for your phone from
pre-installed wallpapers (System) or from your own files
(Custom); this picture is displayed in standby mode.
• Auto. Keypad lock: this menu option allows you to set
how long the keypad will close: 15 sec; 1 minute; 5
minutes or in the same menu item to turn off the
function. To lock the keypad, press ¬ * in Menu mode.
To unlock, press the left soft key and then *.
• On On: You can set an animation that appears when
you turn on the power on the memory card.
• Display Off: You can animate an animation from the
memory card when it is turned off.
• Show date / time: You can set whether the date and
time should be displayed on the display in standby mode.
Page 33

30
Flying mode
In this menu item, you can turn the flying mode on and off.
The flying mode turns off all network functions
Various settings:
• LCD Backlight: You can set the display backlight time
and brightness.
14.3. Security settings
SIM security (PIN)
PIN code: Protects your SIM card against unauthorized use. In
Menu> Settings> Security Settings, you can turn the PIN lock
on or off and change the PIN code.
* Note: If you enter an invalid PIN three times in succession,
the SIM card will be locked, and you will need to have the SIM
card PUK code unlocked. The PIN and PUK codes are supplied
with your SIM card, provided by the network service provider.
PIN2 code: You can use the PIN2 code to access advanced
features (if supported by your service provider).
* Note: If you enter an invalid PIN2 code three times in a row,
the PIN2 code will be locked and you will need the PUK2 code
to unlock the PIN2 code. If not, contact your network
operator.
Phone lock
Menu> Settings> Security settings> Phone security> Phone
lock allows you to password protect your device against
unauthorized users.
To activate the phone lock, you must enter the phone
password. If this feature is active, the phone password must
be entered every time you turn it on. Note: The default phone
password is 1122. Please change this to a unique code as
Page 34

31
soon as possible: to change the code in Menu> Settings>
Security Settings> Phone Security> Change password. The
specified code may consist of 4 to 8 digits.
14.4. Connectivity
This menu option allows you to modify your Bluetooth
settings. To activate Bluetooth - in menu mode, go to Settings>
Connectivity> Bluetooth. You can make the following settings
in the menu item: Bluetooth On / Off, visibility, connect to
another device [My device], change device name.
14.5. Restore factory settings
To reset the factory settings (delete all user data from the
device) In Menu mode, go to Settings> Restore factory
settings. Factory password required for restoration: 1122.
Attention! All user data is deleted from the device, deletion
can not be undone.
15. Shortcuts
In the standby mode, press the navigation key up. A quick
menu appears and you can access the point by pressing the
numeric keypad.
To set up: Menu> Shortcut menu, press Options to select one
of the following options:
- Add (add new function)
- Edit (Edit the given point)
- Delete (delete a shortcut menu)
- Delete all
- Change order
Page 35

32
16. Declaration of Conformity
The Blaupunkt FS 04 is compliant with the essential
requirements and relevant provisions of RoHS Directive
2014/53 / EU and 2011/65 / EU. The Declaration of
Conformity is available on our website.
Designed and Engineered by
Blaupunkt Competence Center Mobile Europe
HTM Mobile Kft.
1118 Budapest, Dayka Gábor utca 3. Hungary
Assembled in P.R.C by
CSM Technology Co., Ltd.
5F, Bld. C, Hongshengyuan Industrial Park, Longgang District,
Shenzhen, China
For more information on this product, visit our website at
www.htmmobile.hu or www.blaupunkt.com.
 Loading...