

Blackmagic Design HyperDeck Studio HD Mini, Hyperdeck Studio Hd Pro Installation and Operation Manual
Page 1

July 2021
Installation and Operation Manual
HyperDeck
Dısk Recorders
HyperDeck Disk Recorders
Page 2

Languages
To go directly to your preferred language, simply click on the hyperlinks listed in the
contents below.
English 3
日本語 73
Français 144
Deutsch 215
Español 286
中文 357
한국어 428
Русский 499
Italiano 570
Português 641
Türkçe 712
Page 3

Welcome
Thank you for purchasing your Blackmagic HyperDeck disk recorder!
When we designed the original Blackmagic HyperDeck disk recorders back in 2011,
wewanted to make it easier and more affordable to record and play back professional
video on removable 2.5” Solid State Disks.
English
Now we are excited to present our new range of HyperDeck disk recorders that let you
record HD and Ultra HD video using SD cards, SSDs and now USB flash disks. Youcan
even connect a Blackmagic MultiDock 10G and record or play back files on external
hard drives!
HyperDeck Studio Plus and Pro models feature familiar broadcast deck controls with a
search dial for jog, shuttle and scroll playback. The search dial’s clutch mechanism lets you
feel the playback so you can search through your clips without taking your eyes off the
monitor. They even include a front headphone connection and speaker so you can quickly
check your audio directly from your HyperDeck, plus many more features!
We hope you get years of use from your HyperDeck disk recorder and that it will serve
youwell with your productions!
Please check the support page at www.blackmagicdesign.com for the latest version of
this manual and updates to the HyperDeck software. Keeping your software up to date will
always ensure you get all the latest features. When downloading software, please register
with your information so we can keep you updated when new software is released. We are
constantly working on new features and improvements, so we would love to hear from you!
Grant Petty
CEO Blackmagic Design
Page 4

Contents
Introducing HyperDeck Disk Recorders 5
Getting Started 6
Plugging in Power 6
Connecting Video and Audio 6
Checking Audio 7
Plugging in Media 7
Recording Video 9
Recording on multiple media 9
Playback 10
Playing Video with HyperDeck 10
Using the Search Dial 11
Using the Front Panel 13
Media Slot Indicators 13
Using the LCD Menu 14
Settings 15
Rear Panel 27
Using the Monitor Output 29
Storage Media 32
SD Card 32
Preparing Media on a Computer 37
Using your HyperDeck asa Webcam 38
Setting the Webcam Source 38
Setting up Open Broadcaster 39
Blackmagic HyperDeck Setup 41
Using HyperDeck Setup 41
LUTs Page 42
Updating the Internal Software 43
Teranex Mini Rack Shelf 44
RS-422 Control 45
Transferring Files over a Network 50
Connecting to an ATEM Switcher 52
Understanding Post
Production Workflows 53
Developer Information 54
Blackmagic HyperDeck Ethernet
Protocol 54
Protocol Commands 54
Protocol Details 58
Help 69
SSD 34
EXT Disk 35
Formatting Media 37
Regulatory Notices 70
Safety Information 71
Warranty 72
4Blackmagic HyperDeck Studio
Page 5

Introducing HyperDeck Disk Recorders
Your Blackmagic HyperDeck disk recorder is part of a family of HD and 4K disk recorders
designed to fit your own production workflow. HyperDeck Studio HD Pro and HyperDeck
Studio 4K Pro are built to fit inside a single rack unit and are large enough to record and
play back files on both SD cards and 9.5mm SSDs.
HyperDeck Studio HD Mini and HyperDeck Studio HD Plus are smaller disk recorders
that can be used comfortably on your desktop or fitted in a rack unit via an optional
Teranex Mini Rack Shelf.
HyperDeck Studio HD Pro and HyperDeck Studio 4K Pro
HyperDeck Studio HD Mini HyperDeck Studio HD Plus
All models can also record to USB flash disks and support HD video up to 1080p60.
HyperDeckStudio 4K Pro supports Ultra HD video up to 2160p60.
Recording and playback functions generally operate the same way on all models, with extra
features on larger models giving you greater playback control and broader connection options.
This instruction manual provides all the information you need to get started with your
HyperDeck disk recorder and master all the controls and features!
5Introducing HyperDeck Disk Recorders
Page 6

Getting Started
Getting started with your HyperDeck Studio disk recorder is as easy as connecting power,
plugging in your video sources and destination equipment and inserting your SSDs or SD cards.
Plugging in Power
To power your HyperDeck, plug a standard IEC cable to your HyperDeck’s power input on
therear panel.
If your HyperDeck model has an additional IEC power input, you can connect to another power
source for redundancy. For example, connecting the second input to an uninterrupted power
supply, or UPS, will instantly take over if the primary source fails.
All models also include a 12V DC input, which lets you connect power from an external
12V battery.
HyperDeck Studio HD Mini can also be powered via an AC plug pack. If your power supply has a
locking ring, secure the connection to HyperDeck Studio HD Mini by tightening the connector
to the unit. This locks the power cable in place to prevent accidental disconnection.
Once powered, the LCD display will prompt you to select your language. Using the search dial,
scroll to the language you wish to use and press the flashing ‘set’ button. This will take you to
the home screen. For more information about the home screen and LCD menus, refer to the
‘using the front panel’ section.
Connecting Video and Audio
Plug your source video to the SDI or HDMI inputs, and your destination equipment to the SDI or
HDMI outputs. For example, a source could be a digital cinema camera and a destination could
be an HDMI television or SDI monitor.
All HyperDeck models support HD video up to 1080p60. HyperDeck Studio 4K Pro has 12G-SDI
connectors so you can input or output Ultra HD up to 2160p60 using a single BNC cable.
6Getting Started
Page 7

You can confirm the SDI or HDMI video signal by monitoring the built in LCD on the front panel.
TIP If you don’t see the video source on the LCD, it might be because you have
connected to the other source input. Press the ‘input’ button on the front panel to cycle
through the SDI or HDMI sources.
Audio is embedded in the SDI or HDMI signal so you don’t have to worry about connecting
audio. You can check the audio levels by observing the meters next to the video image
on the LCD.
Checking Audio
If your HyperDeck features a speaker and headphone port on the front panel, you can quickly
check your audio using the built in speaker or by plugging in headphones. To listen, press and
hold the speaker button and rotate the search dial to adjust the volume. A volume indicator will
appear on the LCD home screen.
Double press the speaker button to keep the speaker enabled. Double press again to disable.
Plugging in Media
All HyperDeck Studio models ship ready to record immediately without having to configure any
settings. All you need is a formatted SSD or SD card.
You can easily format media via the LCD menu settings. You can also format using a computer.
Refer to the ‘Formatting Media’ section in this manual for more information on how to format
your media. You can also find information about the types of media that are best for recording
video and a list of recommended drives and cards.
To plug in an SSD:
1 Hold a 9.5mm SSD with the connection pins facing the bottom and aligned with your
HyperDeck’s drive bay. Gently push the SSD into the drive bay until you feel it slot
into place.
2 Your HyperDeck Studio will verify the SSD. This is shown by an illuminated green
indicator surrounding the drive bay. When the green indicator stops, your HyperDeck
isready to record!
The drive indicator will illuminate green when reading the media and then turn off when your
HyperDeck is ready to record
7Getting Started
Page 8

To remove the SSD, grip the outer edge and gently pull away from the unit. You will feel the
SSD disconnect from the slot.
Hold your SSD with the connection pins facing the bottom, alignedwith your HyperDeck
Studio’sdrive bay and gently pushtheSSD into the drive bay until you feel it slot into place
To plug in an SD card:
1 Hold the SD card with the gold connectors facing your HyperDeck Studio’s LCD and
align it with the media slot. Now gently push the card into the slot until you feel it lock
firmly into place.
2 Your HyperDeck Studio will verify the SD card. This is shown by an illuminated green
indicator above the SD card slot.
When the indicator turns off and the stop button is illuminated, your HyperDeck Studio is ready to record.
8Getting Started
Page 9

TIP To remove the card, gently push until you feel it click, then release. The card will
eject a short distance, allowing you to hold the edge of the card and remove it from
the slot.
Your HyperDeck Studio is now ready for recording and playback!
Recording Video
After confirming that your video source is displayed on the LCD, you can start recording
straight away!
To start recording, press the record button. When recording to an SD card, the slot indicator will
illuminate red along with the record button, the play button will illuminate and a record icon will
appear in the LCD home screen. When recording to an SSD, the dynamic media indicator will
illuminate red.
While HyperDeck Studio is recording, the storage indicator on the LCD will alternate between displaying
the active slot and record time remaining on the media.
To finish the recording, press the stop button. Press the ‘play’ button to start playback
immediately.
TIP If you want to change the codec being used, you can change the codec setting
using the Blackmagic HyperDeck Setup utility. For more information, refer to the
‘Blackmagic HyperDeck Setup’ section later in this manual.
Recording on multiple media
When there is less than 3 minutes of record time remaining on your SD card or SSD, the
timecode counter on your HyperDeck Studio’s LCD will turn red and the ‘stop’ button will
flash slowly.
This also means there is no second disk with space that recording can continue onto. In this
case, you simply need to insert a disk with space so recording can continue. Once you insert a
blank disk into an empty slot or the ext disk input, the slow flashing will stop and the timecode
9Recording Video
Page 10

will revert to white. This means HyperDeck can continue to record, because this second disk
has been checked ok and there is space to keep recording.
When more than one media is connected to HyperDeck Studio, the recording will spill from one
disk or drive to the next. This will be shown in the upper right corner of the home screen.
Swapping Disks During Recording
If you want to change the disk you are recording to at any time, and you have a second disk
thathas free space, then simply hold down the record button and the recording will move from
the current disk to the next disk. This is very useful when you want to get that disk out of the
HyperDeck without pausing recording. This can happen during live events when you need to
get an important recording out to another location, but you don’t want to miss anything or
stoprecording.
If the record button flashes during a recording, there may be problems with your media
resulting in dropped frames. This can occur when recording Ultra HD using slower media,
forexample, recording 2160p30 ProRes HQ uses a higher data rate compared to ProRes Proxy,
so your SD cards or SSDs need to be the fastest available. For a list of approved media, refer
the ‘storage media’ section in this manual.
Playback
The transport controls feature buttons commonly found on traditional broadcast decks including
‘record’, ‘rewind’, ‘play’, ‘fast fwd’ and ‘stop’. ‘Skip’ reverse and ‘skip’ forward buttons operate
like previous and next buttons so you can quickly navigate from clip to clip.
Playing Video with HyperDeck
1 Press the ‘play’ button once for instant playback and you’ll see your video on the LCD
and any displays connected to your HyperDeck’s video outputs.
2 To skip to the next clip, press the ‘next clip’ button on the control panel.
3 Press ‘previous clip’ once to go to the start of the current clip or press twice to skip
back to the start of the previous clip.
Press the play button on your HyperDeck’s control panel to play back a clip and press
theforward or reverse skip buttons to restart the current clip or skip to a different one
10Playback
Page 11

TIP To play back video files on your HyperDeck, you will need to set the codec
tomatch. You can do this using the LCD menu. Refer to the ‘using the LCD menu’
and‘settings’ sections for more information.
Loop Playback
If you want playback to continue indefinitely, you can set your HyperDeck to loop by pressing
the play button again during playback. When loop playback is enabled, you will see the loop
icon appear on the LCD. There are two loop modes available.
Loop clip Loops the currently playing clip.
Loop all clips Loops all recorded clips on your media.
Dynamic LEDs
During playback, the bezel surrounding the drive bay illuminates green in a circular motion to
indicate the playback speed and direction
TIP If the play button flashes on HyperDecks that record on SSDs, this means the disk
is not fast enough and playback cannot keep up. We recommend you change to a
more compressed recording format such as H.264 or use a faster recommended SSD
or external disk for Ultra HD recording.
Using the Search Dial
Using the search dial during playback is a fast way to move through your clips and select
specific moments to play, or review them frame by frame. This can be important if you need
tolocate a specific moment in a clip, either by visually monitoring the clip as you turn the dial,
orby searching for a specific timecode point. It is also helpful for parking the playhead at a
specific cue point, ready for the clip to be rolled to air during a live broadcast.
Press the ‘search’ button to cycle through search dial modes
11Playback
Page 12

Search dial modes include Jog, Shuttle and Scroll.
Jog Plays forwards or backwards through the clip frame by frame allowing
precise control.
Shuttle Plays forwards or backwards at a faster rate. The playback will vary based
on how far you turn the dial.
Scroll Even faster playback depending on how far you turn the dial. This mode
ishelpful to move quickly through a long clip when searching for a
specificmoment.
Larger models have dedicated search mode buttons and feature a search dial with a built in
clutch mechanism that provides tactile feedback during use. This allows you to feel your way
through the clip while watching it on a television or monitor.
Press the dedicated ‘JOG’, ‘STL’ and ‘SCR’ buttons
to select jog, shuttle and scroll search modes
TIP To resume normal playback, press the ‘play’ or ‘stop’ button.
12Playback
Page 13

Using the Front Panel
When recording or playing video with HyperDeck, any information you need to know is
displayed on the unit itself via LED indicators for each media slot and the built in LCD.
HyperDeck Studio Home Screen
Time Remaining and Media Indicator –
During recording, the icon will consistently
change between the time remaining on the disk
and the current drive in use. During playback,
the active media icon will be displayed.
Format Indicator – Shows the format of the
input or file for playback. It will also indicate
the input source when toggling the ‘input’
button on some HyperDeck Studio models
along with the current volume when adjusting
the speaker and headphone volumes via
the front panel button and search dial.
Status Indicator – Displays the
current status of the deck, including
the current playback mode.
Audio Meters – Displays
the audio levels of the source
or file during playback.
Media Slot Indicators
When you first power on HyperDeck, or any time you insert an SSD or SD card, the slot indicator
will illuminate green while checking the media and then switch off. If the disk has notbeen
formatted correctly, or fails to work, the slot will illuminate solid orange until the disk is removed.
In this case, check if the disk is formatted correctly and also that it works with a computer.
HyperDeck’s media slot indicators illuminate to let you know the status
ofthedisk,for example red when recording, and green during playback
13Using the Front Panel
Page 14

Using the LCD Menu
Press the ‘menu’ button on the front panel to open the menu settings.
Turn the search dial or press the skip buttons to navigate between the menu options and press
‘set’ to select a submenu.
Turn the search dial to move through the menu settings
With the menu item selected, press the ‘set’ button.
Adjust settings using the search dial or skip fwd and skip bwd buttons and confirm them by
pressing the ‘set’ button.
Press ‘menu’ to step back through the options and return to the home screen.
14Using the Front Panel
Page 15

Settings
Record Menu
Input
Select your SDI or HDMI source using the input setting. You can also change your input source
using the ‘input’ button on the front panel.
Codec
All HyperDeck Studio models can record compressed video using H.264, Apple ProRes and
DNxHD codecs. HyperDeck Studio 4K Pro models can also use H.265 and DNxHR codecs
when recording 4K media.
Trigger Record
There are two trigger record modes available, video start/stop and timecode run.
Some cameras, such as the URSA Mini, send a signal over SDI to start and stop recording on
external recorders. Tapping on ‘video start/stop’ will trigger the HyperDeck to start or stop
recording when the record button is pressed on the camera.
Use the time ‘timecode run’ option to trigger the unit to start recording when it receives a valid
timecode signal via the inputs. When the signal stops, recording will also stop. Disable trigger
recording by tapping the ‘none’ option.
NOTE When recording from an HDMI or SDI camera, make sure the output is clean
with overlays turned off as any overlays that are present in your camera’s video output
will be recorded with your image.
Input Re-Sync
This setting will enable a re-sync on the video input and ensure video is locked to the external
reference before recording. The video output will remain locked to reference even when
switched to recording, as the input itself is being resynchronized. This feature is used for ISO
recording where you need multiple decks timecode locked but some sources are non-sync.
This feature is normally turned off so video inputs are recorded without frames being added
orremoved from the input video.
All broadcast decks can normally use a reference input to lock the video output during
playback. This means the output of the HyperDeck playback will be locked to the reference
input so it won’t need to be resynchronized when connected to a large broadcast system.
However, when the deck goes into record, the output will switch over to the input because
younormally want the input video recorded untouched with the same untouched video sent
toother downstream equipment that’s connected to the HyperDeck video outputs.
15Settings
Page 16

However, HyperDeck Studio has a unique feature that helps with ISO recording. It will allow
youto completely reverse this process and resynchronize the video input to the reference
input. What this means is you can connect a non-sync source to the HyperDeck and it will
retime the video input to the video reference and then record it.
Non-sync sources could be computers, consumer cameras or any video equipment that is
unable to have a reference connected to it. It could even be an incoming video feed from
another studio or external broadcaster. Non-sync sources cause problems with ISO recording,
as you need the timecode on all recordings to match perfectly over time. A non-sync source
willrun faster or slower than your other sources and slip out of sync vs the timecode quite
quickly during the recording. This makes multi-cam editing a horrific process as the sources
won’t have matching timecode.
With input re-sync turned on, the HyperDeck video input will be analyzed and if it starts
fallingbehind a frame will be repeated, or if it starts running ahead of the reference, a frame
willbe removed. This is called resynchronization and the processing on the input is called a
frame re-sync. It means the timecode in the clips being recorded on all decks will have the
same events happening at the same timecode. It makes multi-cam editing possible.
Of course the downside is you are adding some frames to the input, or removing some
framesfrom the input before recording. This is why it’s best to leave this feature turned off
andto only use it when you absolutely cannot do anything to connect a reference to an ISO
source because it’s a computer or consumer device.
However, there is one situation where you can turn the input re-sync feature on and use it.
When input re-sync is turned on, the HyperDeck video output will remain reference locked
even when the deck is recording. What this means is you can connect the SDI output of the
HyperDeck to a camera to lock the camera to the reference via the program return feed.
Agood example is the Blackmagic Studio Camera 4K Pro and it can set its reference to the
external video. Then the camera feed will be reference locked from the HyperDeck and the
HyperDeck input re-sync won’t have to add or remove frames because the camera is not
running fast or slow.
The input re-sync only does something if the video input is not locked to the same reference
asthe HyperDeck. But in this case, the HyperDeck output is the reference source to the
camera and the HyperDeck is locked to its video reference input. If you have multiple
HyperDecks all locked together by looping the reference connections, then all cameras and
HyperDecks will be locked as a single group. Then if one of the HyperDecks in a group has
anon-sync source, such as a computer, then that one input will be resynchronized, but the
other sources won’t need anything.
The re-sync is automatic so you can just connect sources and it will work. The input re-sync
feature can be extremely powerful, however, it’s important to know when it’s going to do
something and what it will do. Try some experiments with multiple HyperDecks and multi-cam
editing software to see how it works! It’s a fantastic way to do program production that’s
very fast.
16Settings
Page 17

Monitor Menu
The monitor menu is included on HyperDeck Studio models with the monitor out connection
onthe rear panel.
Clean Feed
Turning clean feed to on will remove the status text from appearing on displays connected to
the monitor out on the rear of HyperDeck Studio. For more information on the monitor out
display, including what information is displayed, refer to the monitor out section later in
this manual.
3D LUT
Display LUTs can be especially helpful when using the HyperDeck Studio as a field recorder.
They work by telling the unit what color and luminance output to display. This can be useful
forwhen you are using the ‘film’ dynamic range on your camera which has an intentionally
undersaturated, ‘flat’ appearance. By applying a display LUT, you can get an idea of what your
video will look like after it has been graded.
Display LUTs are selected via Blackmagic HyperDeck Setup can be applied on the SDI
monitor out.
To turn a 3D LUT on or off:
1 Press the ‘menu’ button and using the search dial, scroll to the ‘monitor’ menu.
2 Press the ‘set’ button.
3 Using the search dial, scroll down until ‘3D LUT’ is highlighted blue.
4 Toggle the set button to turn the LUT on or off.
For more information on selecting a LUT, refer to the Blackmagic HyperDeck Setup section
laterin this manual.
TIP For more information on the monitor out view, see the ‘monitor out’ section later in
the manual.
17Settings
Page 18

Audio Menu
Recorded Audio Channels
HyperDeck Studio can record up to 16 channels of PCM audio at a time. To select the number
ofchannels to record, expand the recorded audio channels list and select 2, 4, 8 or 16 channels.
If the codec is set to H.264 or H.265, you can also select 2 channels of AAC audio so you can
upload recordings directly to YouTube. This setting also selects the number of channels to
appear via the monitor out connection.
Monitor Channels
When recording more than two channels, you can select which channels you want to see on
thefront panel LCD. This can be done via the monitor channels option. For HyperDeck Studio
models featuring a front panel speaker, this setting also sets which channels of audio will play
back through the speaker and headphones connection.
Audio Meters
The built in LCD displays audio meters for embedded audio channels. You can select to display
PPM or VU Meters. To change your meter type, expand the menu setting and select your
preferred audio meter display from the options.
Headphone Level
For models featuring a headphone port on the front panel you can adjust the headphone
volume via the headphone level setting.
Speaker Level
Adjust the speaker volume by turning the search dial. The default level is 50%.
TIP Headphone and speaker volume can also be adjusted directly via the front panel.
Press and hold the speaker button and turn the search dial to increase or decrease the
playback volume. The volume level will appear in the upper center of the front panel.
18Settings
Page 19

Storage Menu
Format Media
SD Cards, SSDs and media connected via the rear ext disk connection can be formatted
directly on the unit or via a Mac or Windows computer.
Preparing Media on HyperDeck Studio:
1 Using the search dial and set button, select format media.
2 Select the media to format from the list and press set.
3 Choose the format and press set.
4 A confirmation window will appear detailing which card is to be formatted and the
selected format option, select format.
5 A formatting window will appear once completed, select Ok.
HFS+, is also known as Mac OS X Extended, and is the recommended format as it supports
‘journaling’. Data on journaled media is more likely to be recovered in the rare event that your
storage media becomes corrupted. HFS+ is natively supported by Mac. exFAT is supported
natively by Mac and Windows without needing any additional software but does not support
journaling.
To format media on a Mac or Windows computer, refer to the formatting media section in
this manual.
Setup Menu
19Settings
Page 20

Name
When more than one HyperDeck Studio is on the network, you may wish to give them discrete
names. This can be done via Blackmagic HyperDeck Setup or Blackmagic HyperDeck Ethernet
Protocol using a terminal application.
Language
HyperDeck Studio supports 13 languages, including English, Chinese, Japanese, Korean,
Spanish, German, French, Russian, Italian, Portuguese, Turkish, Ukrainian and Polish.
To select the language:
1 Once the setup menu is highlighted, press set.
2 Scroll the search dial down to select language and press set.
3 Using the search dial to select the language and press set. Once selected you will
automatically return to the setup menu.
Date
To adjust the date, select the date field and press set. Using the search dial you can select the
day, month and year. This will populate the timestamp file suffix.
Time
To adjust the time, select time and press set. Use the search dial to adjust the hours and
minutes. HyperDeck Studio clock is a 24 hour clock.
Software
Displays the current software version.
Front Panel
Set your HyperDeck’s front panel to ‘light’ mode for a brightly illuminated LCD. Use ‘dark’
modefor dimly lit environments where a bright LCD may be distracting, for example multiple
HyperDeck units mounted in a rack in a production facility.
20Settings
Page 21

Camera
This setting is helpful when using HyperDeck to record ISO files from multiple cameras
andthen editing them on a multicamera timeline in DaVinci Resolve.
Each individual camera identification letter will appear in the files’ metadata, allowing
DaVinciResolve to identify each angle easily when using the sync bin feature.
Assign you camera using characters A-Z or 1-9
Default Standard
Sometimes the HyperDeck Studio does not know what video standard you want to use.
Thissetting will let the HyperDeck know the video standard you want to use most of the time.
A good example is if you have turn on a HyperDeck Studio, it has no video input connected
andyou insert a disk with files on it with 2 different video standards. Which video standard
should the HyperDeck play? The default video standard will give it an indication which video
standard you prefer and it will switch to that format and play those files.
The default video standard is also useful when you first turn on a HyperDeck, and it has no
video input and no media disk inserted. In this case, the HyperDeck Studio does not know
which video standard to use for the monitoring output. The default video standard will guide
iton what to do.
However, the default video standard is only a guide. It won’t override anything. So if you had
amedia disk with only 1 type of video file on it and you press play, the HyperDeck Studio will
switch to that video standard and play. It will ignore the default video standard because it’s
obvious you just want to play the files on the disk.
It’s a similar situation with recording. If you press record, the HyperDeck will just record whatever
video standard is connected to the video input. Plus, once you have done the recording, the
HyperDeck Studio will playback the same video standard files on the disk, even if there are
other files on the disk that match the default video standard. It’s assumed you want to playback
the same video standard as you just recorded. If you unplug the media disk and plug it back in
again, only then will the default video standard be used to choose which type of files to
play back.
The default video standard is only a guide to help the HyperDeck Studio make decisions about
what to do when it’s not sure. It’s not an override that forces the deck to behave in any
specific way.
21Settings
Page 22

Network Settings
Protocol
Blackmagic HyperDeck is shipped set to DHCP, so once connected, your network server will
automatically assign an IP address and no other network settings will need to be adjusted.
Ifyou need to set a manual address, you can connect via a static IP.
With ‘protocol’ selected press the flashing ‘set’ button to access the menu, scroll to ‘Static IP’
and press ‘set’.
IP Address, Subnet Mask and Gateway
Once Static IP is selected, you can enter your network details manually.
To change the IP address:
1 Use the search dial to highlight ‘IP address’ and press the flashing ‘set’ button on your
HyperDeck’s front panel.
2 Using the search dial, adjust the IP address, rotate the search dial to adjust your IP
address, pressing ‘set’ to confirm before adjusting the next set of values.
3 Press ‘set’ to confirm the change and move to the next value.
When you have finished entering your IP address, you can repeat these steps to adjust the
Subnet Mask and Gateway. Once finished, press the flashing ‘menu’ button to exit and return to
the home screen.
22Settings
Page 23

Timecode Settings
Input
There are five timecode input options available when recording.
Video Input Selecting video input will take the embedded timecode from SDI and HDMI sources
with SMPTE RP 188 metadata. This will maintain sync between your SDI orHDMI
source and the file recorded on the HyperDeck Studio.
External Click this option when using the timecode in connection on the rear panel.
Internal Use this option to record time of day timecode via the built in timecode generator.
Last Clip
Regen
Preset If you want to set a timecode manually, select the preset option. Recorded clips
By selecting ‘last clip regen’ for your timecode input, each file will start one frame
after the last frame of the previous clip. For example, if your first clip ends on
10:28:30:10, the next clip timecode will start at 10:28:30:11.
will start at the timecode set via the preset later in the manual.
Drop Frame
For NTSC sources at frame rates of 29.97 or 59.94, you can select ‘drop frame’ or ‘non-drop
frame’ timecode. If the source is unknown, select ‘default’. This will maintain the standard of the
input, or default to drop frame if there is no valid timecode.
Preset
You can set your time code manually by pressing the set button and entering the start time
code using the search dial and set button. Make sure the ‘preset’ option is selected under the
input menu.
Output
Select your timecode options for your outputs.
Timeline To output a continuous timecode for all clips recorded on a card or drive,
selecttimeline.
Clip Selecting the clip option will output the time code of each individual clip.
SDI Output
23Settings
Page 24

3G-SDI Output
Some broadcast equipment can only receive level A or level B 3G-SDI video.
To maintain compatibility with other broadcast equipment, select Level A for direct stream
3G-SDI or Level B for dual stream multiplexed 3G-SDI.
Genlock Settings
Reference Source
Select your reference source from the following three options.
Auto ‘Auto’ mode will default to external if there is a signal connected to the ‘ref in’
connection on the rear panel. If there is no reference connected, it will default to
theinput SDI or HDMI source.
Input Select ‘input’ if your SDI or HDMI source has embedded reference that you want to
syncto. Anexample of this would be where your analog deck may have a genlock
source directly connected.
External Select ‘external’ if you have an external reference device, for example the
Blackmagic Sync Generator, connected via the ‘ref in’ connector on the rear panel.
External Reference Indicator –
A ‘ref’ indicator will be
displayed on the built in LCD
when your HyperDeck Studio
is successfully locked to an
external reference source.
Reference Timing
Reference timing can be adjusted if you are archiving from analog tape decks and you need
frame synchronization. The reference adjustment is in samples so you can get an extremely
accurate timing adjustment down to the sample level.
To adjust the timing:
1 In the setup menu, use the search dial to highlight ‘reference timing lines’ and press
theflashing ‘set’ button.
2 Adjust the timeline lines value by turning the dial clockwise to increase or counter
clockwise to decrease.
3 To confirm your selection, press the flashing ‘set’ button.
4 To adjust the pixels, press the flashing ‘menu’ button to return to the setup menu and
repeat the steps for reference timing pixels.
24Settings
Page 25

File Settings
Timestamp File Suffix
The timestamp added to the filename is set to ‘off’ by default. If you would like the date and
time recorded in your filename, press the set button and use the search dial to turn the
‘timestamp file suffix’ option to on.
HyperDeck_2105061438_0001
HyperDeck_2105061438_0001 Filename
HyperDeck_2105061438_0001 Year
HyperDeck_2105061438_0001 Month
HyperDeck_2105061438_0001 Day
HyperDeck_2105061438_0001 Hour
HyperDeck_2105061438_0001 Minute
HyperDeck_2105061438_0001 Clip Number
HDR Format Override
HyperDeck Studio 4K Pro will automatically detect embedded HDR metadata in a 4K video
signal or file and display it via the HDMI output. If the signal or file is tagged incorrectly, or your
display is not HDR compatible, you can override the HDR format.
To do this, set the ‘HDR format override’ setting to an SDR option, such as Rec.2020 SDR.
The available HDR playback and record settings are:
Auto
Auto is the default setting that will let HyperDeck automatically select the output format that
conforms to the clip’s HDR metadata.
Rec.709
For high definition video using standard dynamic range.
Rec.2020 SDR
This setting is used for Ultra HD video using standard dynamic range.
HLG
HLG stands for ‘hybrid log gamma’. This format allows HDR video to be played back on HDR
capable TVs and monitors, including those that support up to Rec.2020 SDR.
25Settings
Page 26

The following settings support the Rec.2020 color gamut, plus PQ, or perceptual quantizer
published as SMPTE ST2084. PQ is the function of wide gamut HDR that allows for the display
of brighter images. Luminance values in candelas per meter squared, for example 1000 cd/m
2
indicate the maximum luminance per square meter supported by the corresponding format.
ST2084 (300)
2
300 cd/m
luminance.
ST2084 (500)
2
500 cd/m
luminance.
ST2084 (800)
2
800 cd/m
luminance.
ST2084 (1000)
2
1000 cd/m
luminance.
ST2084 (2000)
2
2000 cd/m
luminance.
ST2084 (4000)
2
4000 cd/m
luminance.
Remote
Remote
Select ‘remote’ to enable remote control via RS-422, this will let the HyperDeck be controlled
remotely by another device, for example, HyperDeck Extreme Control. When selected, the
dedicated remote button on some HyperDeck models will illuminate to indicate it is active.
Deselect remote to control the unit locally.
Deck Control
When remote is enabled, you can mirror the transport controls from one HyperDeck to multiple
additional HyperDeck units. Daisy chain your HyperDecks by connecting the remote out
connector from the master HyperDeck to the remote in connector on a second unit, then continue
the RS-422 chain for additional units. When all additional units have their remote setting enabled,
transport controls on the master unit will also control the additional units.
For example, when you press the ‘record’ button on the master HyperDeck, all the additional
HyperDecks connected will begin recording simultaneously.
It’s worth noting that while you cannot use HyperDeck Studio HD Mini as a controller, it can be
controlled by a HyperDeck Pro or Plus model.
Reset
Factory Reset
Highlight ‘Factory Reset’ in the setup menu to restore your HyperDeck to factory settings.
Onceyou press ‘set’, you will be prompted to confirm your selection.
26Settings
Page 27

Rear Panel
HyperDeck Studio HD Mini
includes a power connector
with a locking ring to prevent
accidental disconnection
3
2 5 6 8 941
HyperDeck Studio
HDMini and Plus models
featureBNC connectors
fortimecodeinand out
7
1 Power
All HyperDecks feature an IEC power input for AC mains power. HyperDeck Studio 4K
Pro features two for redundancy. The DC input allows for external 12V battery power,
which can also be used for redundancy. Ensure any DC power source is compatible
with the input voltage and current rating marked below the DC in connector.
2 Ethernet
The Ethernet port lets you connect to your network for fast ftp transfers or to remotely
control the unit using the HyperDeck Ethernet Protocol. File transfers speeds are
supported via 1GbE on HD models and 10GbE on HyperDeck Studio 4K Pro. For more
details on transferring files via an FTP client, see the ‘transferring files over a network’
section later in this manual.
When connected to the same network shared with an ATEM switcher, you can also
control your HyperDeck using the ATEM switcher or an ATEM hardware panel.
3 Remote
Some HyperDeck Studio models feature two RS-422 DE-9 connectors for remote in
and out. HyperDeck Studio HD Mini supports remote in only.
4 Ext Disk
Connect a flash disk to the USB-C connector so you can record to external disks at up
to 5Gb/s on HyperDeck Studio HD models. HyperDeck Studio 4K Pro models feature a
USB 3.1 gen 2 connection for transfer speeds up to 10Gb/s. You can also connect to
multi port USB-C hubs or Blackmagic MultiDock 10G to connect one or multiple SSDs.
When your HyperDeck is connected to your computer via USB, you can use the
HyperDeck as your webcam source in software including Open Broadcaster and
Skype. For more information, see ‘Setting up Open Broadcaster’ later in this manual.
5 Monitor Out
The 3G-SDI monitor out connection provides a downscaled output with overlays so that
you can monitor on an external display. The overlays include drive icons, audio meters
and a time counter display as well as a display LUT. For more information on the
Monitor SDI settings, including how to output a clean signal, see the ‘settings’ section
earlier in this manual.
27Rear Panel
Page 28

6 Ref
All HyperDeck models have their own built in sync generator that generates stabilized
black burst and tri-sync video reference signals. This means you can connect your
HyperDeck’s reference output to other video equipment’s reference input and lock
them to a master reference signal generated by your HyperDeck.
You can also connect a reference signal to the reference input and sync your
HyperDeck to an external master sync source.
For more information on selecting a reference source, including when looping multiple
HyperDeck disk recorders together, see ‘setup’ settings earlier in this manual.
7 Timecode
All HyperDecks also have their own time of day timecode generator. In a similar fashion
to reference, you can loop the timecode signal from a master HyperDeck to other
HyperDecks or video equipment so that each recording shares the same timecode.
Depending on the HyperDeck model you are using, the timecode connectors will be
either BNC or XLR. For more information on how to select your timecode options,
seethe ‘settings’ section earlier in this manual.
8 HDMI
Connect the HDMI output to HDMI televisions and monitors.
HyperDeck will auto detect SDR and HDR video standards when the signal is flagged
with the correct metadata. Youcan also override the HDR flag using the settings menu.
For more information, refer to the ‘settings’ section earlier in this manual.
9 SDI
HyperDeck Studio HD Mini models feature a single 3G SDI for signals up to 1080p60.
HyperDeck Studio HD Plus and HyperDeck Studio HD Pro models features 6G-SDI
allowing for signals from SD up to 2160p30. HyperDeck Studio 4K Pro features 12G-SDI
inputs and outputs allowing for resolutions up to 2160p60.
HyperDecks with two SDI outputs can be used to play back ProRes 4444 files for
simultaneous fill and key when connected to ATEM switchers.
28Rear Panel
Page 29

Using the Monitor Output
The monitor output is a fast way to visually check your recording or playback video, with
overlays displaying important status information such as the codec being used, the video and
signal format, frame rate, timecode, file name, transport control status, storage media status,
and audio levels.
Below is a description of the information displayed.
Codec
Displays the codec selected via the LCD menu.
Format
Displays the current clip’s resolution and frame rate when in playback mode. If you are in record
mode, it will display the resolution and frame rate of the video connected to the currently
selected source.
Timecode
Displays the timecode present in your video clip during playback, or currently being recorded
via the video or timecode inputs. You can also select between displaying clip timecode or the
time counter for the timeline.
Source
Displays the currently selected SDI or HDMI source. If ‘no signal’ appears, it means a valid
signal is not detected.
Name
Shows the name of your HyperDeck disk recorder. For information on how to change the name,
see ‘Blackmagic HyperDeck Setup’ later in this manual.
29Using the Monitor Output
Page 30

Status
As you play back or record a clip, this indicator will display the transport control status and
controls currently being used. These include:
HyperDeck is in standby mode. Indicates playback is set to ‘loop’
all recorded clips sharing the
currently selected video format.
Video is being played. Indicates playback is set to loop
asingle clip.
Video is being recorded.
Theindicator will illuminate
redduringrecording.
Displayed during fast forward
orrewind. The numbers indicate
the speed.
Indicates shuttle mode is
enabled,but in standby.
HyperDeck is in jog mode.
HyperDeck is in scroll mode.
Storage Media Status
These three indicators display the name and status of the SD card, SSDs and active USB drive
and vary slightly depending on the HyperDeck model.
HyperDeck
Studio HD Plus
SD Card slot 1 SD Card slot 2 Active external disk
HyperDeck
Studio Pro Models
Current SD or SSD
slot in use
Next SD or SSD
slot in order
Active external disk
On all HyperDeck models, the third indicator displays the USB drive. If you are using a USB hub,
or a dock such as Blackmagic MultiDock 10G, the active drive will be displayed.
Disk or Drive Indicator
The text above the progress bar indicates the SD card slot or SSD slot. If you are
recording, ‘current’ will appear to the left of the drive so you can easily identify which
disk is recording. ‘Next’ will appear above the progress bar to indicate the next disk or
drive to be recorded to.
30Using the Monitor Output
Page 31

Media Bar
The media bar icon will be either blue, white or red depending on its current status
andwill display the used space on the card.
The blue drive icon indicates the active drive. This is the drive
that will be used for playback and recording.
A white drive icon indicates there is media present, but not
active. A solid white icon indicates the media is full.
The bar will illuminate red during recording.
Text underneath the media bar will display either the record time remaining or the
status of the slot.
Time remaining
When your SD card or SSD drive has space remaining, the duration available will be
displayed in hours:minutes:seconds based on the current source format and your
chosen codec and quality settings. If there is less than an hour left, minutes:seconds
remaining will be displayed.
Slot status
‘No card’ and ‘no drive’ will display if there is no media connected to that media slot.
Once an SD card, SSD or USB drive is full, the icon will display ‘card full’ or ‘drive full’ so
you know it’s time to swap out the storage media. If you have another SD card or SSD
inserted, the recording will automatically spill over and start recording onto it. If you
have an external disk connected, the recording will spill over once all the SD cards and
SSDs are full.
A locked drive will be shown with ‘locked’ under the progress bar.
31Using the Monitor Output
Page 32

Audio Meters
On screen audio meters will display up to 16 channels of audio, depending on how
many channels you wish to record. These can be set to either PPM or VU meters via the
audio tab ofthe LCD menu.
To select your number of recorded audio channels, or to change to a different audio
meter, usethe audio tab of the LCD menu. For more information, refer to the ‘settings’
section earlier inthis manual.
Storage Media
SD Card
For high quality Ultra HD recording we recommend high speed UHS-II SD cards. These cards
need to be capable of write speeds above 220MB/s for recording up to Ultra HD 2160p60.
However, ifyou are recording at a lower bit rate with higher compression you might be able
touse slower cards. Generally, the faster the cards the better.
It’s worth regularly checking the latest version of this manual for more up to date information
and can always be downloaded from the Blackmagic Design website at
www.blackmagicdesign.com/support
What SD cards should I use with HyperDeck Studio 4K Pro?
The following SD Cards are recommended for recording 2160p up to 60 fps
Brand Model Capacity
Angelbird AV Pro MK2 V90 SDXC 128GB
Angelbird AV Pro MK2 V90 SDXC 256GB
ProGrade Digital SDXC UHS-II V90 300R 128GB
ProGrade Digital SDXC UHS-II V90 300R 256GB
Wise SD2-128U3 SDXC UHS-II 128GB
32Storage Media
Page 33

What SD cards should I use with HyperDeck Studio HD Pro?
The following SD Cards are recommended for recording 2160p up to 30 fps
Brand Model Capacity
Angelbird AV Pro MK2 V90 SDXC 64GB
Angelbird AV Pro MK2 V90 SDXC 128GB
Angelbird AV Pro MK2 V90 SDXC 256GB
ProGrade Digital SDXC UHS-II V90 300R 64GB
ProGrade Digital SDXC UHS-II V90 300R 128GB
ProGrade Digital SDXC UHS-II V90 300R 256GB
Wise SD2-64U3 SDXC UHS-II 64GB
Wise SD2-128U3 SDXC UHS-II 128GB
What SD cards should I use with HyperDeck Studio HD Plus?
The following SD Cards are recommended for recording 2160p up to 30 fps
Brand Model Capacity
Angelbird AV Pro MK2 V90 SDXC 64GB
Angelbird AV Pro MK2 V90 SDXC 128GB
Angelbird AV Pro MK2 V90 SDXC 256GB
ProGrade Digital SDXC UHS-II V90 300R 64GB
ProGrade Digital SDXC UHS-II V90 300R 128GB
ProGrade Digital SDXC UHS-II V90 300R 256GB
Wise SD2-64U3 SDXC UHS-II 64GB
Wise SD2-128U3 SDXC UHS-II 128GB
What SD cards should I use with HyperDeck Studio HD Mini?
The following SD Cards are recommended for recording 1080p ProRes 422 HQ up to 60 fps
Brand Model Capacity
Angelbird AV Pro MK2 V90 SDXC 64GB
Angelbird AV Pro MK2 V90 SDXC 128GB
Angelbird AV Pro MK2 V90 SDXC 256GB
ProGrade Digital SDXC UHS-II V90 300R 64GB
ProGrade Digital SDXC UHS-II V90 300R 128GB
ProGrade Digital SDXC UHS-II V90 300R 256GB
Wise SD2-64U3 SDXC UHS-II 64GB
Wise SD2-128U3 SDXC UHS-II 128GB
33Storage Media
Page 34

SSD
When working with high data rate video it’s important to carefully check the SSD you would
liketo use. This is because some SSDs can have up to 50% lower write speed than the
manufacturer’s claimed speed, so even though the disk specifications claim an SSD is fast
enough to handle video, in reality the disk is not fast enough for real time video recording.
Hidden data compression mostly affects recording and often these disks can still be used for
real time playback.
In our testing, we have found larger newer models of SSD and larger capacity SSDs are
generally faster. SSDs recommended for use include:
What SSDs should I use with HyperDeck Studio 4K Pro?
The following USB-C drives are recommended for recording 2160p up to 60 fps
Brand Model Capacity
Samsung 860 PRO 512GB
Samsung 860 PRO 1TB
Samsung 870 EVO (MZ-77E250BW) 250GB
Samsung 870 EVO (MZ-77E500BW) 500GB
Samsung 870 EVO (MZ-77E1T0BW) 1TB
Samsung 870 EVO (MZ-77E2T0BW) 2TB
What SSDs should I use with HyperDeck Studio HD Pro?
The following USB-C drives are recommended for recording 2160p up to 30 fps
Brand Model Capacity
Samsung 860 PRO 512GB
Samsung 860 PRO 1TB
Samsung 870 EVO (MZ-77E250BW) 250GB
Samsung 870 EVO (MZ-77E500BW) 500GB
Samsung 870 EVO (MZ-77E1T0BW) 1TB
Samsung 870 EVO (MZ-77E2T0BW) 2TB
34Storage Media
Page 35
EXT Disk
All HyperDeck models can record directly to USB-C flash disks. These fast, high capacity
drivesallow you to record video for long periods. You can then connect the flash disk to your
computer and edit directly from them!
For even higher storage capacities, you can connect a USB-C dock or external hard drive.
Toconnect your Blackmagic MultiDock 10G or USB-C flash disk, connect a cable from your
USB-C connected device to the ‘ext disk’ port on the rear panel of your HyperDeck.
What USB-C drives should I use with HyperDeck Studio 4K Pro?
The following USB-C drives are recommended for recording 2160p up to 60 fps
Brand Model Capacity
Angelbird SSD2GO PKT MK2 512GB
Angelbird SSD2GO PKT MK2 2TB
DelKinDevices Juggler 1TB
DelKinDevices Juggler 2TB
LaCie Rugged SSD STHR2000800 2TB
LaCie Rugged SSD Pro STHZ1000800 1TB
Wise PTS-512 Portable SSD 512GB
Wise PTS-1024 Portable SSD 1TB
What USB-C drives should I use with HyperDeck Studio HD Pro?
The following USB-C drives are recommended for recording 2160p up to 30 fps
Brand Model Capacity
Angelbird SSD2GO PKT MK2 512GB
Angelbird SSD2GO PKT MK2 2TB
DelKinDevices Juggler 1TB
DelKinDevices Juggler 2TB
LaCie Rugged SSD STHR2000800 2TB
LaCie Rugged SSD Pro STHZ1000800 1TB
Wise PTS-512 Portable SSD 512GB
Wise PTS-1024 Portable SSD 1TB
35Storage Media
Page 36

What USB-C drives should I use with HyperDeck Studio HD Plus?
The following USB-C drives are recommended for recording 2160p up to 30 fps
Brand Model Capacity
Angelbird SSD2GO PKT MK2 512GB
Angelbird SSD2GO PKT MK2 2TB
DelKinDevices Juggler 1TB
DelKinDevices Juggler 2TB
LaCie Rugged SSD STHR2000800 2TB
LaCie Rugged SSD Pro STHZ1000800 1TB
Wise PTS-512 Portable SSD 512GB
Wise PTS-1024 Portable SSD 1TB
What USB-C drives should I use with HyperDeck Studio HD Mini?
The following USB-C drives are recommended for recording 1080p ProRes 422 HQ
up to 60 fps
Brand Model Capacity
Angelbird SSD2GO PKT MK2 512GB
Angelbird SSD2GO PKT MK2 2TB
DelKinDevices Juggler 1TB
DelKinDevices Juggler 2TB
Wise PTS-512 Portable SSD 512GB
Wise PTS-1024 Portable SSD 1TB
36Storage Media
Page 37

Formatting Media
Preparing Media on a Computer
Formatting Media on a Mac Computer
The Disk Utility application included with Mac can format a drive in the HFS+ or exFAT formats.
Make sure you back up anything important from your disk as you will lose everything on it when
it is formatted.
1 Connect an SSD to your computer with an external dock or cable adapter and dismiss
any message offering to use your SSD for Time Machine backups. For CFast cards,
connect it to your computer via an external card reader.
2 Go to applications/utilities and launch Disk Utility.
3 Click on the disk icon of your SSD or CFast card and then click the erase tab.
4 Set the format to Mac OS Extended (Journaled) or exFAT.
5 Type a name for the new volume and then click erase. Your media will quickly be
formatted and made ready for use with HyperDeck.
Formatting Media on a Windows computer
The format dialog box can format a drive in the exFAT format on a Windows PC. Make sure you
back up anything important from your SSD or SD card as you will lose everything on it when it
isformatted.
1 Connect an SSD to your computer with an external dock or cable adapter. For CFast
cards, connect it to your computer via an external CFast card reader.
2 Open the start menu or start screen and choose computer. Right-click on your SSD
orCFast card.
3 From the contextual menu, choose format.
4 Set the file system to exFAT and the allocation unit size to 128 kilobytes.
5 Type a volume label, select quick format and click Start.
6 Your media will quickly be formatted and made ready for use with HyperDeck.
37Formatting Media
Page 38

Using your HyperDeck asa Webcam
When connected to a computer via USB, your HyperDeck disk recorder will be detected as
awebcam. This means you can broadcast the playback or recording from your HyperDeck
using streaming software such as Open Broadcaster.
Setting the Webcam Source
In most cases, your streaming software will automatically set HyperDeck as the webcam,
sowhen you launch your streaming software you will see the picture from your HyperDeck
Studio straight away. If your software doesn’t select it automatically, simply set the software
touse HyperDeck as the webcam and microphone.
Below is an example of how to set the webcam settings on Skype.
1 In Skype’s menu bar, open the ‘audio and video settings’.
2 Click on the ‘Camera’ menu and select your HyperDeck from the list. Youwill see the
video from HyperDeck appear in the preview window.
3 Now go to the ‘microphone’ menu and select your HyperDeck as the audio source.
With your Skype settings set correctly, perhaps try out a Skype call with a friend as a quick test
to check your webcam setup is working.
That’s all you need to do, your HyperDeck Studio is now ready to broadcast your video to the
world live!
38Using your HyperDeck asa Webcam
Page 39

Setting up Open Broadcaster
1
2
3
4
5
6
Open Broadcaster is an open source application that works as a streaming platform between
your HyperDeck Studio and your favorite streaming software like YouTube, Twitch, Facebook
Live and others. Broadcaster compresses your video to a bit rate that is easily managed by your
streaming app.
Below is a demonstration of how to set up Open Broadcaster to stream the webcam output
from your HyperDeck Studio using YouTube Live as the streaming service.
Launch Open Broadcaster and click on the
plussymbol in the ‘sources’ box.
Name the new source and click ‘OK’. In the device menu, select your HyperDeckStudio
Select ‘Video Capture Device’.
model and click ‘OK’.
Now go to your YouTube account. Click on the
‘golive’ button then click ‘stream’.
In the YouTube ‘stream’ options, enter your
broadcast details and click ‘create stream’.
39Using your HyperDeck asa Webcam
Page 40

YouTube will now generate a stream key that will
7
8
9
10
11
12
direct Open Broadcaster to your YouTube account.
Click the ‘copy’ button next to the stream key.
Copythe stream key that you will now paste
intoOpen Broadcaster.
Return to Open Broadcaster and open the
preferences by clicking on ‘OBS/preferences’
inthemenu bar. Select ‘stream’. Now paste in the
stream key you copied from YouTube and click ‘OK’.
You will now see the video from your HyperDeck
in the Open Broadcaster streaming previewwindow.
To connect Open Broadcaster’s broadcast
link to YouTube, click ‘start streaming’ in the bottom
right corner of the screen. This establishes the link
to YouTube from Open Broadcaster and from here
every thing will now be set using YouTube Live.
With Open Broadcaster now communicating
with YouTube Live, you are ready to begin your
broadcast. Now it’s time to perform your final
checks and make sure everything is good.
Go back to YouTube Live and you will see the
webcam program output from your HyperDeck
in the background. Click ‘done’.
If you are all set, you can now begin
yourbroadcastby clicking ‘go live’.
You are now broadcasting live on YouTube with Open Broadcaster.
NOTE Due to the nature of internet streaming there can often be a delay, so it’s
important to watch the stream on YouTube and confirm your program has finished
before clicking ‘end stream’ to make sure you don’t accidentally cut the end of your
broadcast short.
40Using your HyperDeck asa Webcam
Page 41

Blackmagic HyperDeck Setup
Using HyperDeck Setup
Blackmagic HyperDeck Setup is used to change settings and update the internal software in
your HyperDeck.
To use HyperDeck Setup:
1 Connect HyperDeck to your computer via USB or Ethernet.
2 Launch HyperDeck Setup. Your HyperDeck model will be named in the setup utility
home page.
3 Click on the circular ‘setup’ icon or the image of your HyperDeck to open the
setup page.
Setup Page
If you have more than one HyperDeck Studio, you may wish to give each unit a discrete name
to make them easy to identify. You can do this via the ‘name’ option.
41Blackmagic HyperDeck Setup
Page 42

Network
Protocol
To use your HyperDeck Studio with ATEM switchers, or to control it remotely via
HyperDeck Ethernet Protocol, the HyperDeck Studio needs be on the same network
asyour other equipment using DHCP or by manually adding a fixed IP address.
DHCP
Static IP
HyperDeck Studio disk recorders arrive set to DHCP by default. The
dynamic host configuration protocol, or DHCP, is a service on network
servers that automatically finds your HyperDeck Studio and assigns an
IP address. The DHCP is a great service that makes it easy to connect
equipment via Ethernet and ensure their IP addresses do not conflict with
each other. Most computers and network switchers support DHCP.
When ‘static ip’ is selected, you can enter your network details manually.
When setting IP addresses manually so all units can communicate, they
must share the same subnet mask and gateway settings. In addition, the
first three fields of numbers in the panel’s IP address also need to match.
If there are other devices on the network that have the same identifying
number in their IP address, there will be a conflict and the units won’t
connect. If you encounter a conflict, simply change the identifying number
in the unit’s IP address.
LUTs Page
HyperDeck models with monitor out connections on the rear panel can display the input video
with 3D LUTs applied. 17 point, 33 point and 65 point .cube LUT files are supported.
This can be useful for when you are using the ‘film’ dynamic range on your camera which has
an intentionally undersaturated, ‘flat’ appearance. By applying a display LUT, you can get a
representation of what your video will look like after it has been graded.
The 3D LUT is only used on the monitor out display and not actually recorded into the video
itself, so you don’t need to worry that your recorded image will have the look
permanently applied.
If you want to apply the same LUT to your image in DaVinci Resolve, you can simply import the
exact same LUT .cube file used on your HyperDeck Studio into DaVinci Resolve and apply it to
your grade.
42Blackmagic HyperDeck Setup
Page 43

To view a LUT
1 First you need to select your display LUT. Click on the ‘import’ button.
2 From the file window, navigate to the LUT you wish to import and press ‘open’.
3 Once your LUT is imported, toggle the ‘3D LUT’ option to ‘on’ and press the
‘save’ button.
The selected display LUT will appear on the monitor out display. You can now turn the LUT
onor off via the monitor settings in the LCD menu.
Updating the Internal Software
The setup utility lets you update your HyperDeck disk recorder’s internal software in addition
toconfiguring the streaming settings, network settings and streaming quality.
To update the internal software:
1 Download the newest Blackmagic HyperDeck Setup installer from
www.blackmagicdesign.com/support.
2 Run the Blackmagic HyperDeck Setup installer on your computer and follow the
onscreen instructions.
3 After installation is complete, connect your HyperDeck Studio to the computer via the
USB or Ethernet connector on the rear panel.
4 Launch Blackmagic HyperDeck Setup and follow any onscreen prompt to update the
internal software. If no prompt appears, the internal software is up to date and there is
nothing further you need to do.
43Updating the Internal Software
Page 44
Download the latest setup utility for your Blackmagic HyperDeck Studio from
theBlackmagic Design support center at www.blackmagicdesign.com/support
Teranex Mini Rack Shelf
Teranex Mini Rack Shelf is a 1 RU shelf that lets you install Blackmagic HyperDeck Studio HD
Mini and HyperDeck Studio HD Plus models into a broadcast rack or road case. Blackmagic
HyperDeck Studio HD Mini is so small, you can install it next to other Blackmagic Design
equipment that shares a similar form factor, such as Teranex Mini converters, Blackmagic
MultiView 4 and Blackmagic Web Presenter. For example, installing a Blackmagic HyperDeck
Studio HD Mini together with ATEM Television Studio HD gives you the ability to switch eight
video inputs and record the program output on your HyperDeck Studio HD Mini. This modular
design lets you build your own custom video solutions that are portable and easy to use!
Teranex Mini Rack Shelf lets you rack mount your Blackmagic HyperDeck Studio HD Mini and HyperDeck
Studio HD Plus with other Blackmagic Design equipment that shares the same form factor.
To install your Blackmagic HyperDeck into a Teranex Mini Rack Shelf, remove the unit’s rubber
feet, if installed, and fasten the unit to the base of the shelf using the supplied screws.
The Teranex Mini Rack Shelf ships with two original blank panels which you can use to cover
gaps if you don’t need to install additional Blackmagic Design equipment.
For more information check the Blackmagic Design website at www.blackmagicdesign.com
44Teranex Mini Rack Shelf
Page 45

RS-422 Control
What is RS-422 Control?
The RS-422 standard is a serial deck control broadcast standard and has been used by
broadcasters since the early 1980s and is found on many decks, linear editors, nonlinear editors
and broadcast automation products. All current HyperDeck models support this standard so
can be integrated into broadcast automation, remote control systems, editing systems and any
kind of custom control you might like to design yourself.
HyperDeck Studio also supports file based commands from the Advanced Media Protocol via
RS-422. This lets you control your HyperDeck with an external device using AMP commands
such as adding clips to a playlist, determining the filename of the next clip, looping a single clip
or timeline, or clearing a playlist.
Using an External RS-422 Controller
All current HyperDeck models feature an industry standard Sony™ compatible RS-422 deck
control port, which has the correct pin connections for a direct connection to any remote
controller with RS-422, for example HyperDeck Extreme Control.
You can use pre-manufactured 9 pin cables as long as each end of the cable is wired ‘pin for
pin’ where the same pin numbers on each end of the cable are connected together. If you
would like to make custom cables, please refer to the accompanying wiring diagram.
You can remotely control your HyperDeck from HyperDeck Extreme Control instead of locally
pushing buttons.
1 Connect a video signal to your HyperDeck’s video input.
2 Connect an RS-422 cable from your HyperDeck Extreme Control to your
HyperDeck Studio.
3 Enable remote control by pressing the remote button on the front control panel, or via
the LCD menu in HyperDeck Studio Mini, to allow remote deck control.
You can now remotely start and stop recording and playback of your HyperDeck as well as
performing other common jog and shuttle functions. The full list of supported RS-422
commands is in the following section named ‘supported RS-422 commands’.
5 4 3 2 1
9 8 7 6
Receive
(–)
2 7 8 3 1, 4, 6, 9
RS-422 remote pin connections
Receive
(+)
Transmit
(–)
Transmit
(+)
Ground
Pins
45RS-422 Control
Page 46

Make sure your HyperDeck has remote set to ‘on’ in the LCD menu,
or via the front panel remote button, to enable RS-422 deck control
All HyperDeck models support remote control via the RS-422 port on the rear panel
Supported RS-422 Commands
Command Reply No Remote Notes
0 - System Control
0x00 0x11 DeviceTypeRequest
1 - Slave Response
0x20 0x00 Stop Acknowledge Disabled
0x20 0x01 Play Acknowledge Disabled
0x20 0x02 Record Acknowledge Disabled
0x20 0x04 StandbyOff Acknowledge Disabled
0x20 0x05 StandbyOn Acknowledge Disabled
0x20 0x0F Eject Acknowledge Disabled
0x20 0x10 FastFwd Acknowledge Disabled
0x21 0x11 JogFwd1 Acknowledge Disabled
0x22 0x11 JogFwd2 Acknowledge Disabled
0x21 0x12 VarFwd1 Acknowledge Disabled Uses ShuttleFwd1
0x22 0x12 VarFwd2 Acknowledge Disabled
0x21 0x13 ShuttleFwd1 Acknowledge Disabled
0x22 0x13 ShuttleFwd2 Acknowledge Disabled
0x20 0x20 Rewind Acknowledge Disabled
0x21 0x21 JogRev1 Acknowledge Disabled
0x22 0x21 JogRev2 Acknowledge Disabled
0x21 0x22 VarRev1 Acknowledge Disabled Uses ShuttleRev1
NTSC: 0xF0E0
PAL: 0xF1E0
24P: 0xF2E0
Enabled
Treated as N=1;
Same as JogFwd1
Treated as N=1;
Same as VarFwd1
Treated as N=1;
Same as ShuttleFwd1
Treated as N=1;
Same as JogRev1
46RS-422 Control
Page 47

Command Reply No Remote Notes
0x22 0x22 VarRev2 Acknowledge Disabled
0x21 0x23 ShuttleRev1 Acknowledge Disabled
0x22 0x23 ShuttleRev2 Acknowledge Disabled
0x20 0x30 Preroll Acknowledge Disabled
0x24 0x31 CueData Acknowledge Disabled
0x20 0x34 SyncPlay Acknowledge Disabled
0x20 0x40 Preview Acknowledge Disabled Status bits are set
0x20 0x41 Review Acknowledge Disabled Status bits are set
0x20 0x43 OutpointPreview Acknowledge Disabled
0x22 0x5C DMCSetFwd Acknowledge Disabled
0x22 0x5D DMCSetRev Acknowledge Disabled
0x20 0x60 FullEEOff Acknowledge Disabled
0x20 0x61 FullEEOn Acknowledge Disabled
0x20 0x63 SelectEEOn Acknowledge Disabled
Treated as N=1;
Same as VarRev1
Treated as N=1;
Same as ShuttleRev1
4 - Preset/Select Control
0x40 0x10 InEntry Acknowledge Disabled
0x40 0x11 OutEntry Acknowledge Disabled
0x44 0x14 InDataPreset Acknowledge Disabled
0x44 0x15 OutDataPreset Acknowledge Disabled
0x40 0x18 InShift+ Acknowledge Disabled
0x40 0x19 InShift- Acknowledge Disabled
0x40 0x1A OutShift+ Acknowledge Disabled
0x40 0x1B OutShift- Acknowledge Disabled
0x40 0x20 InReset Acknowledge Disabled
0x40 0x21 OutReset Acknowledge Disabled
0x40 0x22 AInReset Acknowledge Disabled
0x40 0x23 AOutReset Acknowledge Disabled
0x44 0x31 PrerollPreset Acknowledge Disabled
0x40 0x40 AutoModeOff Acknowledge Disabled
0x40 0x41 AutoModeOn Acknowledge Disabled
0x41 0x37 InputCheck Acknowledge Disabled
ignored, Status bit
remembered
ignored, Status bit
remembered
47RS-422 Control
Page 48

Command Reply No Remote Notes
6 - Sense Request
0x61 0x0A TimeCodeGenSense — —
0x61 0x0C CurrentTimeSense — —
0x60 0x10 InDataSense InData Enabled
0x60 0x11 OutDataSense OutData Enabled
0x60 0x12 AInDataSense AInData Enabled
0x60 0x13 AOutDataSense AOutData Enabled
0x61 0x20 StatusSense StatusData Enabled
0x60 0x2B RemainTimeSense RemainTimeData Enabled
0x60 0x2E SpeedSense SpeedData Enabled
0x60 0x31 PrerollTimeSense PreRollTimeData Enabled
0x60 0x36 TimerModeSense TimerModeData Enabled
0x60 0x3E RecordInhibitSense RecordInhibitStatus Enabled
7 - Sense Reply
0x78 0x00 Timer1Data — —
0x78 0x04 LTCUserBitsTimeData — —
0x78 0x06 VITCUserBitsTimeData — —
0x74 0x06 VITCTimeData — — Current Time
0x74 0x07 UserBitsVITCTimeData — — 00:00:00:00
0x74 0x08 GenTCData — — Current Time
0x78 0x08 GenTCUBData — —
0x74 0x09 GenUBData — — 00:00:00:00
0x74 0x10 InData — —
0x74 0x11 OutData — —
0x74 0x12 AInData — —
0x74 0x13 AOutData — —
0x74 0x14 CorrectedLTCTimeData — — Current Time
0x70 0x20 StatusData — —
0x76 0x2B RemainTimeData — —
0x71 0x2E SpeedData — —
0x74 0x31 PrerollTimeData — —
0x71 0x36 TimerModeData — — Returns 0 (TimeCode)
0x72 0x3E RecordInhibitStatus — —
Current Time and
00:00:00:00
Current Time and
00:00:00:00
Current Time and
00:00:00:00
Current Time and
00:00:00:00
Please see “Status Bits”
sheet: Limited to 9 bytes
of status, silently
truncated
48RS-422 Control
Page 49

Command Reply No Remote Notes
A - Advanced Media Protocol
0xA1 0x01 AutoSkip Acknowledge Disabled
0xAX 0x15 ListNextID IDListing Enabled
0x20 0x29 ClearPlaylist Acknowledge Disabled
0x41 0x42 SetPlaybackLoop Acknowledge Disabled
0x41 0x44 SetStopMode Acknowledge Disabled
0x4f 0x16 AppendPreset Acknowledge Disabled
Blackmagic Extensions
0x82 0x02 BMDSeekToTimelinePosition Acknowledge Disabled
0x81 0x03 BMDSeekRelativeClip Acknowledge Disabled
8-bit signed number of
clips to skip from current
clip
when x = 0 single clip
request when x = 1, #
clips can be specified in
the send data
Bit 0 loop mode enable,
0=false 1=true
Bit 1 is single clip/timeline
0=single clip
1=timeline
0 = Off
1 = Freeze on last frame
2 = Freeze on next clip
3 = Show black
2 Bytes for the length N
of the clip name
N Bytes for each character
of the clip name
4 Byte in point timecode
(format is FFSSMMHH)
4 Byte out point timecode
(format is FFSSMMHH)
16-bit little endian
fractional position
[0..65535]
One-byte signed integer,
which is the number of
clips to skip (negative for
backwards).
RS-422 Developer Information
bit 7 bit 6 bit 5 bit 4 bit 3 bit 2 bit 1 bit 0
Byte 0
Byte 1
Byte 2
Byte 3
Byte 4
Byte 5
Byte 6
Byte 7
Byte 8
Byte 9
0 0 Cassette out 0 0 0 0 Local
Standby 0 Stop 0 Rewind Forward Record Play
Servo Lock 0 Shuttle Jog Var Direction Still 1
Auto Mode 0 0 0 Aout Set Ain Set Out Set In Set
Select EE Full EE Loop Playback 0 0 0 0 0
0 0 0 0 0 0 0 0
0 Lamp Still Lamp Fwd Lamp Rev 0 0 0 0
0 0 0 0 0 0 0 0
0 0 Near EOT EOT 0 0 0 0
0 0 0 0 0 0 0 0
49RS-422 Control
Page 50

Variables
Cassette Out
Local
Standby
Direction
Still
Auto Mode
Select EE, Full EE
Lamp Still/Fwd/Rev
Near EOT
EOT
Others
Cue Complete (byte 2, bit 0)
HyperDeck Serial RS-422 Protocol
Protocol
Set if no SSD is present
Set if Remote is disabled (local control)
Set if a disk is available
Clear if playback is forwarding, set if playback is reversing
Set if playback is paused, or if in input preview mode
Set if in Auto Mode
Set if in input preview mode
Set according to playback speed and direction
Set if total space left on available SSDs is less than 3 minutes
Set if total space left on available SSDs is less than 30 seconds
Always 1: Cue requests are always instantaneous
Based on Sony 9-pin protocol
Interface
Baud rate 38.4 Kbps
1 start bit
8 data bits
1 stop bit
1 parity bit
Odd parity
Transferring Files over a Network
Your HyperDeck disk recorder supports file transfer via file transfer protocol, or ftp. This
powerful feature lets you copy files directly from your computer to your HyperDeck via a
network with the fast speeds a local network can provide. For example, you could be copying
new files to a remote HyperDeck unit based at another location for digital signage.
Connecting to HyperDeck Studio
With your computer and HyperDeck Studio on the same network, all you’ll need is an ftpclient
and your HyperDeck Studio’s IP address.
1 Download and install an FTP client on the computer you want to connect
your HyperDeck to. Werecommend Cyberduck, FileZilla or Transmit but most
FTPapplications will work. Cyberduck and FileZilla are free downloads.
50Transferring Files over a Network
Page 51

2 Connect your HyperDeck Studio to your network using an Ethernet cable and noteits
IP address. To access the IP address, press the ‘menu’ button and rotate the search dial
to access the ‘network’ screen. You’ll see your HyperDeck Studio’s IP address at the
bottom of this screen.
You can find your HyperDeck Studio’s IP
address in the smart panel’s ‘network’ screen
3 Enter your HyperDeck’s IP address into your TCP application’s connection dialog.
Thenaming and position of this box can vary between applications, but it is usually
labeled ‘server’ or ‘host.’ If your FTP program includes an ‘anonymous login’ checkbox,
make sure this is checked.
When connecting to HyperDeck Studio, you don’t need to enter a username or
password. Simply enter your disk recorder’s IP address in your FTP application’s
‘server’ or ‘host’ field and check an ‘anonymous login’ checkbox if one is available.
Transferring Files
Once connected to your HyperDeck you can transfer files as you normally would with your
ftpprogram. Most ftp applications have a drag and drop interface but check your particular
application for the appropriate method.
You can transfer any file to and from your HyperDeck, but it’s worth noting that any files you
intend to play back from HyperDeck Studio will need to conform to your HyperDeck’s
supported codecs and resolutions. You can find a list of supported codecs in the ‘Blackmagic
HyperDeck Setup’ section of this manual.
TIP You can transfer files over a network while your HyperDeck is recording.
HyperDeck will automatically adjust transfer speeds to make sure recording is
notaffected.
51Transferring Files over a Network
Page 52

Connecting to an ATEM Switcher
If you’re using an ATEM switcher, you can plug in up to 4 Blackmagic HyperDeck disk recorders
and control them using the ATEM software or hardware panel. This is a very powerful feature
that effectively gives you an entire videotape department at your fingertips. You can also
trigger recording on your HyperDeck from an ATEM switcher, which is a great way of making an
archive copy of a live broadcast, or capturing B roll when live switching a production that will be
fine tuned later.
ATEM switchers, such as the ATEM 4 M/E Broadcast Studio 4K, canconnect with up to four
HyperDeck disk recorders
To connect HyperDecks to an ATEM switcher:
1 Connect your HyperDeck to the same network as your ATEM Switcher and note its
IP address.
Your HyperDeck’s IP address can be found via its front panel and LCD menu by
entering the ‘setup’, then ‘Ethernet’ menus from the main menu.
Alternatively, you can access your HyperDeck’s IP address on your Mac or PC via the
‘configure’ tab in Blackmagic HyperDeck Setup utility.
2 Connect one of your HyperDeck’s SDI or HDMI outputs to an SDI or HDMI source input
on your ATEM Switcher.
3 If you want to use your ATEM Switcher to trigger recording on your HyperDeck,
you’llalso need to connect a video source to your HyperDeck.
Simply connect an SDI or HDMI source to your HyperDeck as usual. To record your
ATEM switcher’s program output, connect one of your switcher’s auxiliary SDI outputs
to your HyperDeck’s SDI input.
4 Enable remote by pressing the remote button on HyperDeck’s front panel, or via the
LCD menu on HyperDeck Studio Mini, to allow remote control from the switcher.
5 Complete the connection process by entering your HyperDeck’s source and
IPaddress information into your ATEM software or ATEM broadcast panel. This is very
straightforward and laid out in your ATEM switcher manual.
52Connecting to an ATEM Switcher
Page 53

Make sure your HyperDeck has remote set to ‘on’ in the LCD menu, or via the
controlpanel remote button, to enable Ethernet control with an ATEM switcher
Understanding Post Production Workflows
Accessing Your Clips
To access your clips, simply plug the SD card or SSD into your computer via an SD card slot,
external reader, or SSD dock. You can either drag the files from the SSD or SD card directly to a
local hard drive, or you can work directly from the SSD or SD card. You can also connect SSDs
to your computer with a 2.5” eSATA to USB cable adapter, however this won’t be fast enough to
handle working directly from the SSD and is really only recommended as a portable solution for
getting your video files off the SSD and onto a laptop.
Mac OS
QuickTime is built into Mac OS. Apple ProRes, Avid DNxHD and DNxHR QuickTime movies
recorded by HyperDeck can be opened in almost any video software on Mac OS.
DNxHD and DNxHR MXF files recorded by HyperDeck can be opened with Avid Media
Composer and DaVinci Resolve for Mac. DNxHD codecs can be downloaded free from
http://www.avid.com/products/avid-dnxhr-and-dnxhd
MCC closed caption data files recorded by HyperDeck can be opened with MacCaption
software for Mac OS from http://www.telestream.net/captioning/overview.htm
Windows
Apple ProRes QuickTime movies recorded by HyperDeck require QuickTime to be installed on
your PC. Almost any video software on Windows that supports QuickTime can open movies
recorded by HyperDeck. QuickTime for Windows can be downloaded free from
http://www.apple.com/quicktime/download/.
DNxHD and DNxHR MXF files recorded by HyperDeck can be opened with Avid Media
Composer and DaVinci Resolve for Windows. DNxHD codecs can be downloaded free from
http://www.avid.com/products/avid-dnxhr-and-dnxhd
MCC closed caption data files recorded by HyperDeck can be opened with CaptionMaker
software for Windows from http://www.telestream.net/captioning/overview.htm
53Understanding Post Production Workflows
Page 54

Developer Information
Blackmagic HyperDeck Ethernet Protocol
The Blackmagic HyperDeck Ethernet Protocol is a text based protocol accessed by connecting
to TCP port 9993 on HyperDeck Studio models that have a built in Ethernet connection. If you
are a software developer, you can use the protocol to construct devices that integrate with our
products. Here at Blackmagic Design our approach is to open up our protocols and we eagerly
look forward to seeing what you come up with!
Protocol Commands
Command Command Description
help or ? Provides help text on all commands and parameters
commands return commands in XML format
device info return device information
disk list query clip list on active disk
disk list: slot id: {n} query clip list on disk in slot {n}
quit disconnect ethernet control
ping check device is responding
preview: enable: {true/false} switch to preview or output
play play from current timecode
play: speed: {-5000 to 5000} play at specific speed
play: loop: {true/false} play in loops or stop-at-end
play: single clip: {true/false} play current clip or all clips
playrange query playrange setting
playrange set: clip id: {n} set play range to play clip {n} only
playrange set: clip id: {n} count: {m} set play range to {m} clips starting from clip {n}
playrange set: in: {inT} out: {outT}
playrange set: timeline in: {in} timeline out:
{out}
playrange clear clear/reset play range setting
play on startup query unit play on startup state
play on startup: enable: {true/false} enable or disable play on startup
play on startup: single clip: {true/false} play single clip or all clips on startup
play option query play options
play option: stop mode:
{lastframe/nextframe/black}
record record from current input
record: name: {name} record named clip
record spill spill current recording to next slot
set play range to play between:
- timecode {inT} andtimecode {outT}
set play range in units of frames between:
- timeline position {in} and position {out} clear/reset play
rangesetting
set output frame when playback stops
54Developer Information
Page 55

Command Command Description
record: spill: slot id: {n}
stop stop playback or recording
clips count query number of clips on timeline
clips get query all timeline clips
clips get: clip id: {n} query a timeline clip info
clips get: clip id: {n} count: {m} query m clips starting from n
clips get: version: {1/2}
clips add: name: {name} append a clip to timeline
clips add: clip id: {n} name: {name} insert clip before existing clip {n}
clips add: in: {inT} out: {outT} name: {name} append the {inT} to {outT} portion of clip
clips remove: clip id: {n}
clips clear empty timeline clip list
transport info query current activity
slot info query active slot
slot info: slot id: {n} query slot {n}
slot select: slot id: {n} switch to specified slot
slot select: video format: {format} load clips of specified format
slot unblock unblock active slot
slot unblock: slot id: {n} unblock slot {n}
cache info query cache status
dynamic range query dynamic range settings
dynamic range: playback override:
{off/Rec709/Rec2020_SDR/HLG/
ST2084_300/ST2084_500/
ST2084_800/ST2084_1000/
ST2084_2000/ST2084_4000/ST2084
dynamic range: record override:
{off/Rec709/Rec2020_SDR/HLG/
ST2084_300/ST2084_500/
ST2084_800/ST2084_1000/
ST2084_2000/ST2084_4000/ST2048}
notify query notification status
notify: remote: {true/false} set remote notifications
notify: transport: {true/false} set transport notifications
notify: slot: {true/false} set slot notifications
notify: configuration: {true/false} set configuration notifications
notify: dropped frames: {true/false} set dropped frames notifications
notify: display timecode: {true/false} set display timecode notifications
spill current recording to specified slot
use current id to spill to same slot
query clip info using specified output version:
version 1: is: name startT duration
version 2: id: startT duration inT outT name
remove clip {n} from the timeline
(invalidates clip ids following clip {n})
set playback dynamic range override
set record dynamic range override
55Developer Information
Page 56

Command Command Description
notify: timeline position: {true/false} set playback timeline position notifications
notify: playrange: {true/false} set playrange notifications
notify: cache: {true/false} set cache notifications
notify: dynamic range: {true/false} set dynamic range settings notifications
notify: slate: {true/false} set digital slate notifications
goto: clip id: {start/end} goto first clip or last clip
goto: clip id: {n} goto clip id {n}
goto: clip id: +{n} go forward {n} clips
goto: clip id: -{n} go backward {n} clips
goto: clip: {n} goto frame position {n} within current clip
goto: clip: +{n} go forward {n} frames within current clip
goto: clip: -{n} go backward {n} frames within current clip
goto: clip: {start/end} goto start or end of clip
goto: timeline: {n} goto frame position {n} within timeline
goto: timeline: +{n} o forward {n} frames within timeline
goto: timeline: -{n} go backward {n} frames within timeline
goto: timeline: {start/end} goto start or end of timeline
goto: timecode: {timecode} goto specified timecode
goto: timecode: +{timecode} go forward {timecode} duration
goto: timecode: -{timecode} go backward {timecode} duration
goto: slot id: {n} goto slot id {n}
jog: timecode: {timecode} jog to timecode
jog: timecode: +{timecode} jog forward {timecode} duration
jog: timecode: -{timecode} jog backward {timecode} duration
shuttle: speed: {-5000 to 5000} shuttle with speed
remote query unit remote control state
remote: enable: {true/false} enable or disable remote control
remote: override: {true/false} session override remote control
configuration query configuration settings
configuration: video input: SDI switch to SDI input
configuration: video input: HDMI switch to HDMI input
configuration: video input: component switch to component input
configuration: audio input: embedded capture embedded audio
configuration: audio input: XLR capture XLR audio
configuration: audio input: RCA capture RCA audio
configuration: file format: {format} switch to specific file format
configuration: audio codec: PCM switch to PCM audio
configuration: audio codec: AAC switch to AAC audio
56Developer Information
Page 57

Command Command Description
configuration: timecode input:
{external/embedded/preset/clip}
configuration: timecode output:
{clip/timeline/internal}
configuration: timecode preference:
{default/dropframe/nondropframe}
configuration: timecode preset:
{timecode}
configuration: audio input channels: {n} set the number of audio channels recorded to {n}
configuration: record trigger:
{none/recordbit/timecoderun}
configuration: record prefix: {name} set the record prefix name (supports UTF-8 name)
configuration: append timestamp:
{true/false}
configuration: xlr input id: {n} xlr type:
{line/mic}
configuration: genlock input resync:
{true/false}
uptime return time since last boot
format: prepare: {format} prepare a disk formatting operation to filesystem {format}
format: confirm: {token} perform a pre-prepared formatting operation using token
identify: enable: {true/false} identify the device
watchdog: period: {period in seconds} client connection timeout
reboot reboot device
slate clips slate clips information
slate project slate project information
slate project:↵
camera: {index}↵
change the timecode input
change the timecode output
whether or not to use drop frame timecodes when not
otherwise specified
set the timecode preset
change the record trigger
append timestamp to recorded filename
configure xlr input type
multiple xlr inputs can be configured in a single command
enable or disable genlock input resync
set camera index e.g. A
Command Combinations
You can combine the parameters into a single command, for example:
play: speed: 200 loop: true single clip: true
Or for configuration:
configuration: video input: SDI audio input: XLR
Or to switch to the second disk, but only play NTSC clips:
slot select: slot id: 2 video format: NTSC
Using XML
While you can use the Terminal to talk to HyperDeck, if you are writing software, you can use
XML to confirm the existence of a specific command based on the firmware of the HyperDeck
you are communicating with. This helps your software user interface adjust to the capabilities of
the specific HyperDeck model and software version.
57Developer Information
Page 58

Protocol Details
Connection
The HyperDeck Ethernet server listens on TCP port 9993.
Basic syntax
The HyperDeck protocol is a line oriented text protocol. Lines from the server will be separated by an ascii
CR LF sequence. Messages from the client may be separated by LF or CR LF.
New lines are represented in this document as a "↵" symbol.
Single line command syntax
Command parameters are usually optional. A command with no parameters is terminated with a new line:
{Command name}↵
If parameters are specified, the command name is followed by a colon, then pairs of parameter names and
values. Each parameter name is terminated with a colon character:
{Com mand name}: {Parameter}: {Value} {Parameter}: {Value} ...↵
Multiline command syntax
The HyperDeck protocol also supports an equivalent multiline syntax where each parameter-value pair is
entered on a new line. E.g.
{Command name}:↵
{Pa r a m ete r}: { Va l ue}↵
{Pa r a m ete r}: { Va l ue}↵
↵
Response syntax
Simple responses from the server consist of a three digit response code and descriptive text terminated by
a new line:
{Response code} {Response text}↵
If a response carries parameters, the response text is terminated with a colon, and parameter name and
value pairs follow on subsequent lines until a blank line is returned:
{Response code} {Response text}:↵
{Pa r a m ete r}: { Va l ue}↵
{Pa r a m ete r}: { Va l ue}↵
...
↵
Successful response codes
A simple acknowledgement of a command is indicated with a response code of 200:
200 ok↵
Other successful responses carry parameters and are indicated with response codes in the range of 201
to299.
58Developer Information
Page 59

Failure response codes
Failure responses to commands are indicated with response codes in the range of 100 to 199:
100 syntax error
101 unsupported parameter
102 invalid value
103 unsupported
104 disk full
105 no disk
106 disk error
107 timeline empty
108 internal error
109 out of range
110 no input
111 remote control disabled
112 clip not found
120 connection rejected
150 invalid state
151 invalid codec
160 invalid format
161 invalid token
162 format not prepared
163 parameterized single line command not supported
Asynchronous response codes
The server may return asynchronous messages at any time. These responses are indicated with response
codes in the range of 500 to 599:
5xx {Response Text}:↵
{Pa r a m ete r}: { Va l ue}↵
{Pa r a m ete r}: { Va l ue}↵
↵
Connection response
On connection, an asynchronous message will be delivered:
500 connection info:↵
protocol version: {Version}↵
model: {Model Name}↵
↵
Connection rejection
Only one client may connect to the server at a time. If other clients attempt to connect concurrently,
they will receive an error and be disconnected:
120 connection rejected↵
59Developer Information
Page 60

Timecode syntax
Timecodes are expressed as non-drop-frame timecode in the format:
HH:M M:SS:FF
Handling of deck "remote" state
The “remote” command may be used to enable or disable the remote control of the deck. Any attempt to
change the deck state over ethernet while remote access is disabled will generate an error:
111 remote control disabled↵
To enable or disable remote control:
remote: enable: {“true”, “false”} ↵
The current remote control state may be overridden allowing remote access over ethernet irrespective of
the current remote control state:
remote: override: {“true”, “false”} ↵
The override state is only valid for the currently connected ethernet client and only while the connection
remains open.
The “remote” command may be used to query the remote control state of the deck by specif ying no
parameters:
remote↵
The deck will return the current remote control state:
210 remote info:↵
ena bled: {“true”, “false”}↵
override: {“true”, “false”}↵
↵
Asynchronous remote control information change notification is disabled by default and may be
configured with the “notify” command. When enabled, changes in remote state will generate a “510 remote
info:”asynchronous message with the same parameters as the “210 remote info:” message.
Closing connection
The "quit" command instructs the server to cleanly shut down the connection:
quit↵
Checking connection status
The "ping" command has no function other than to determine if the server is responding:
ping↵
Getting help
The "help" or "?" commands return human readable help text describing all available commands and
parameters:
help↵
Or:
?↵
The server will respond with a list of all supported commands:
201 hel p:↵
{H elp Text}↵
{H elp Text}↵
↵
60Developer Information
Page 61

Switching to preview mode
The "preview" command instructs the deck to switch between preview mode and output mode:
preview: enable: {"true", "false"}↵
Playback will be stopped when the deck is switched to preview mode. Capturing will be stopped when the
deck is switched to output mode.
Controlling device playback
The “play” command instructs the deck to start playing:
play↵
The play command accepts a number of parameters which may be used together in most combinations.
By default, the deck will play all remaining clips on the timeline then stop.
The “single clip” parameter may be used to override this behavior:
play: single clip: {“true”, “false”}↵
By default, the deck will play at normal (100%) speed. An alternate speed may be specified in percentage
between -1600 and 1600:
play: speed: {% normal speed}↵
By default, the deck will stop playing when it reaches to the end of the timeline. The “loop” parameter may
be used to override this behavior:
play: loop: {“true”, “false”}↵
The “playrange” command instructs the deck to play all the clips. To override this behavior: and select a
particular clip:
playrange set: clip id: {Clip ID}↵
To only play a certain timecode range:
playrange set: in: {in timecode} out: {out timecode}↵
To clear a set playrange and return to the default value:
playrange clear↵
The “play on startup command” instructs the deck on what action to take on startup. By default, the deck
will not play. Use the “enable” command to start playback after each power up.
play on startup: enable {“true”, “false”}↵
By default, the unit will play back all clips on startup. Use the “single clip” command to override.
play on startup: single clip: {“true”, “false”}↵
Stopping deck operation
The "stop" command instructs the deck to stop the current playback or capture:
stop↵
61Developer Information
Page 62

Changing timeline position
The "goto" command instructs the deck to switch to playback mode and change its position within the
timeline.
To go to the start of a specific clip:
goto: clip id: {Clip ID}↵
To move forward/back {count} clips from the current clip on the current timeline:
goto: clip id: +/-{count}↵
Note that if the resultant clip id goes beyond the first or last clip on timeline, it will be clamp at the first or
last clip.
To go to the start or end of the current clip:
goto: clip: {“start”, “end”}↵
To go to the start of the first clip or the end of the last clip:
goto: timeline: {“start”, “end”}↵
To go to a specified timecode:
goto: timecode: {timecode}↵
To move forward or back a specified duration in timecode:
goto: timecode: {“+”, “-”}{duration in timecode}↵
To specify between slot 1 and slot 2:
goto: slot id: {Slot ID}↵
Note that only one parameter/value pair is allowed for each goto command.
Enumerating supported commands and parameters
The "commands" command returns the supported commands:
commands↵
The command list is returned in a computer readable XML format:
212 commands:
<commands>↵
<command name="…"><parameter name="…"/>…</command>↵
<command name="…"><parameter name="…"/>…</command>↵
…
</commands>↵
↵
More XML tokens and parameters may be added in later releases.
62Developer Information
Page 63

Controlling asynchronous notifications
The “notify” command may be used to enable or disable asynchronous notifications from the server.
To enable or disable transport notifications:
notify: transport: {“true”, “false”}↵
To enable or disable slot notifications:
notify: slot: {“true”, “false”}↵
To enable or disable remote notifications:
notify: remote: {“true”, “false”}↵
To enable or disable configuration notifications:
notify: configuration: {“true”, “false”}↵
Multiple parameters may be specified. If no parameters are specified, the server returns the current state of
all notifications:
209 notify:↵
transport: {“true”, “false”}↵
slot: {“true”, “false”}↵
remote: {“true”, “false”}↵
configuration: {“true”, “false”}↵
dropped frames: {“true”, “false”}↵
display timecode: {“true”, “false”}↵
timeline position: {“true”, “false”}↵
playrange: {“true”, “false”}↵
cache: {“true”, “false”}↵
dynamic range: {“true”, “false”}↵
slate: {“true”, “false”}↵
↵
Retrieving device information
The "device info" command returns information about the connected deck device:
device info↵
The server will respond with:
204 device info:↵
protocol version: {Version}↵
model: {Model Name}↵
unique id: {unique alphanumeric identifier}↵
slot count: {number of storage slots}↵
software version: {software version}↵
↵
63Developer Information
Page 64

Retrieving slot information
The "slot info" command returns information about a slot. Without parameters, the command returns
information for the currently selected slot:
slot info↵
If a slot id is specified, that slot will be queried:
slot info: slot id: {Slot ID}↵
The server will respond with slot specific information:
202 slot info:↵
slot id: {Slot ID}↵
status: {"empty", "mounting", "error", "mounted"}↵
volume na me: {Volume name}↵
recording time: {recording time available in seconds}↵
video format: {disk's default video format}↵
blocked: {“true”, “false”}↵
↵
Asynchronous slot information change notification is disabled by default and may be configured with
the "notify" command. When enabled, changes in slot state will generate a "502 slot info:" asynchronous
message with the same parameters as the "202 slot info:" message.
Retrieving clip information
The “disk list” command returns the information for each playable clip on a given disk. Without parameters,
the command returns information for the current active disk:
disk list↵
If a slot id is specified, the disk in that slot will be queried:
disk list: slot id: {Slot ID}↵
The server responds with the list of all playable clips on the disk in the format of: Index, name, formats, and
duration in timecode:
206 disk list:↵
slot id: {Slot ID}↵
{clip index}: {name} {file format} {video format} {Duration
timecode}↵
{clip index}: {name} {file format} {video format} {Duration
timecode}↵
…
↵
Note that the clip index starts from 1.
Retrieving clip count
The "clips count" command returns the number of clips on the current timeline:
clips count ↵
The server responds with the number of clips:
214 clips count: ↵
clip count: {Count}↵
64Developer Information
Page 65

Retrieving timeline information
The "clips get" command returns information for each available clip on the current timeline. Without
parameters, the command returns information for all clips on timeline:
clips get↵
The server responds with a list of clip IDs, names and timecodes:
205 clips info:↵
clip count: {Count}↵
{Clip ID}: {Name} {Start timecode} {Duration timecode}↵
{Clip ID}: {Name} {Start timecode} {Duration timecode}↵
…
↵
Retrieving transport information
The “transport info” command returns the state of the transport:
transport info ↵
The server responds with transport specific information:
208 transport info:
status: {“preview”, “stopped”, “play”, “forward”, “rewind”,
“j o g ”, “s hu t t l e”,” r e c o r d” }↵
speed: {Play speed between -5000 and 5000 %}↵
slot id: {Slot ID or “none”}↵
clip id: {Clip ID or “none”}↵
single clip: {“true”, “false”}↵
display timecode: {timecode}↵
timecode: {timecode}↵
video format: {Video format}↵
loop: {“true”, “false”}↵
timeline: {n}↵
input video format: {Video format”}↵
dynamic range: {“off”, “Rec709”, “Rec2020_SDR”, “HLG”,
“ST2084_300”, “ST2084_500”, “ST2084_800”, “ST2084_1000”,
“ST2084_2000”, “ST2084_4000”, “ST2048” or “none”}↵
↵
The "timecode" value is the timecode within the current timeline for playback or the clip for record. The
"display timecode" is the timecode displayed on the front of the deck. The two timecodes will differ in some
deck modes.
Asynchronous transport information change notification is disabled by default and may be configured
with the "notify" command. When enabled, changes in transport state will generate a "508 transport info:"
asynchronous message with the same parameters as the "208 transport info:" message.
65Developer Information
Page 66

Video Formats
The following video formats are currently supported on HyperDeck Studio:
NTSC, PAL, NTSCp, PALp
720p50, 720p5994, 720p60
1080p23976, 1080p24, 1080p25, 1080p2997, 1080p30
1080i50, 1080i5994, 1080i60
HyperDeck Studio Pro and Plus models support these 4k formats:
4Kp23976, 4Kp24, 4Kp25, 4Kp2997, 4Kp30
HyperDeck Studio 4K Pro adds support for the following 4k formats:
4Kp50, 4Kp5994, 4Kp60
Video format support may vary between models and software releases.
File Formats
All HyperDeck models currently support the following file formats:
H.264High_SDI
H.264High
H.264Medium
H.264Low
QuickTimeProResHQ
QuickTimeProRes
QuickTimeProResLT
QuickTimeProResProxy
QuickTimeDNxHD220x
DNxHD220x
QuickTimeDNxHD145
DNxHD145
QuickTimeDNxHD45
DNxHD45
HyperDeck Studio 4K Pro also supports the following file formats:
H.265High_SDI
H.265High
H.265Medium
H.265Low
QuickTimeDNxHR_HQX
DNxHR_HQX 4Kp60
QuickTimeDNxHR_SQ
DNxHR_SQ
QuickTimeDNxHR_LB
DNxHR_LB
Supported file formats may vary between models and software releases.
66Developer Information
Page 67

Querying and updating configuration information
The "configuration" command may be used to query the current configuration of the deck:
configuration↵
The server returns the conf iguration of the deck:
211 configuration:↵
audio input: {“embedded”, “XLR”, “RCA”}↵
audio mapping: {n}↵
video input: {“SDI”, “HDMI”, “component”, “composite”}↵
file form at: {format}↵
audio codec: {“PCM”, “AAC”}↵
timecode input: {“external”, “embedded”, “preset”, “clip”}↵
timecode output: {“clip”, “timeline”}↵
timecode preference: {“default”, “dropframe”, “nondropframe”}↵
timecode preset: {timecode}↵
audio input channels: {n}↵
record trigger: {“none”, “recordbit”, “timecoderun”}↵
record prefix: {name}↵
append ti mestamp: {“true”, “false”}↵
↵
One or more configuration parameters may be specified to change the configuration of the deck.
To change the current video input:
configuration: video input: {“SDI”, “HDMI”, “component”}↵
Valid video inputs may vary between models. To configure the current audio input:
configuration: audio input: {“embedded”, “XLR”, “RCA”}↵
Valid audio inputs may vary between models.
To configure the current file format:
configuration: file format: {File format}↵
Note that changes to the file format may require the deck to reset, which will cause the client connection to
be closed. In such case, response code 213 will be returned (instead of 200) before the client connection is
closed:
“213 deck rebooting”
Asynchronous configuration information change notification is disabled by default and may be configured
with the “notify” command. When enabled, changes in configuration will generate a “511 configuration:”
asynchronous message with the same parameters as the “211 configuration:” message.
Selecting active slot and video format
The "slot select" command instructs the deck to switch to a specified slot, or/and to select a specified
output video format.
To switch to a specified slot:
slot select: slot id: {slot ID}↵
To select the output video format:
slot select: video format: {video format}↵
Either or all slot select parameters may be specified. Note that selecting video format will result in a rescan
of the disk to reconstruct the timeline with all clips of the specified video format.
67Developer Information
Page 68

Clearing the current timeline
The "clips clear" command instructs the deck to empty the current timeline:
clips clear↵
The server responds with
200 ok↵
Adding a clip to the current timeline
The "clips add:" command instructs the deck to add a clip to the current timeline:
clips add: name: {"clip name"}↵
The server responds with
200 ok↵
or in case of error
1xx {error description}↵
Configuring the watchdog
The “watchdog” command instructs the deck to monitor the connected client and terminate the connection
if the client is inactive for at least a specified period of time.
To configure the watchdog:
watchdog: period: {period in seconds}↵
To avoid disconnection, the client must send a command to the server at least every {period} seconds. Note
that if the period is set to 0 or less than 0, connection monitoring will be disabled.
68Developer Information
Page 69

Help
Getting Help
The fastest way to obtain help is to go to the Blackmagic Design online support pages and
check the latest support material available for your Blackmagic HyperDeck disk recorder.
Blackmagic Design Online Support Pages
The latest manual, software and support notes can be found at the Blackmagic Design support
center at www.blackmagicdesign.com/support.
Blackmagic Design Forum
The Blackmagic Design forum on our website is a helpful resource you can visit for more
information and creative ideas. This can also be a faster way of getting help as there may
already be answers you can find from other experienced users and Blackmagic Design staff
which will keep you moving forward. You can visit the forum at
https://forum.blackmagicdesign.com
Contacting Blackmagic Design Support
If you can’t find the help you need in our support material or on the forum, please use the
“Sendus an email” button on the support page to email a support request. Alternatively,
click on the “Find your local support team” button on the support page and call your nearest
Blackmagic Design support office.
Checking the Software Version Currently Installed
To check which version of Blackmagic HyperDeck software is installed on your computer,
open the About Blackmagic HyperDeck Setup window.
On Mac OS, open Blackmagic HyperDeck Setup from the Applications folder.
Select About Blackmagic HyperDeck Setup from the application menu to reveal the
version number.
On Windows, open Blackmagic HyperDeck Setup utility from your Start menu or Start
Screen. Clickon the Help menu and select About Blackmagic HyperDeck Setup to
reveal the version number.
How to Get the Latest Software Updates
After checking the version of Blackmagic HyperDeck Setup software installed on your computer,
please visit the Blackmagic Design support center at www.blackmagicdesign.com/support to
check for the latest updates. While it is usually a good idea to run the latest updates, it is wise to
avoid updating any software if you are in the middle of an important project.
69Help
Page 70

Regulatory Notices
Disposal of Waste of Electrical and Electronic Equipment Within the European Union.
The symbol on the product indicates that this equipment must not be disposed of with
other waste materials. In order to dispose of your waste equipment, it must be handed
over to a designated collection point for recycling. The separate collection and
recycling of your waste equipment at the time of disposal will help conserve natural
resources and ensure that it is recycled in a manner that protects human health and
theenvironment. For more information about where you can drop off your waste
equipment for recycling, please contact your local city recycling office or the dealer
from whom you purchased the product.
This equipment has been tested and found to comply with the limits for a Class A
digitaldevice, pursuant to Part 15 of the FCC rules. These limits are designed to provide
reasonable protection against harmful interference when the equipment is operated
inacommercial environment. This equipment generates, uses, and can radiate radio
frequency energy and, if not installed and used in accordance with the instructions,
maycause harmful interference to radio communications. Operation of this product in
aresidential area is likely to cause harmful interference, in which case the user will be
required to correct the interference at personal expense.
Operation is subject to the following two conditions:
1 This device may not cause harmful interference.
2 This device must accept any interference received, including interference that
may cause undesired operation.
R-R-BMD-20210202002
R-R-BMD-20210202003
R-R-BMD-20201201003
R-R-BMD-20210301001
ISED Canada Statement
This device complies with Canadianstandards for Class A digital apparatus.
Any modifications or use of this product outside its intended use could void
compliance to these standards.
Connection to HDMI interfaces must be made with high quality shielded
HDMI cables.
This equipment has been tested for compliance with the intended use in a
commercial environment. If the equipment is used in a domestic environment,
it may cause radio interference.
70Regulatory Notices
Page 71

Safety Information
For protection against electric shock, the equipment must be connected to a mains socket
outlet with a protective earth connection. In case of doubt contact a qualifiedelectrician.
To reduce the risk of electric shock, do not expose this equipment to dripping orsplashing.
o
Product is suitable for use in tropical locations with an ambient temperature of up to 40
Ensure that adequate ventilation is provided around the product and that it is not restricted.
When rack mounting, ensure that the ventilation is not restricted by adjacent equipment.
No operator serviceable parts inside product. Refer servicing to your local Blackmagic Design
service center.
Use only at altitudes not more than 2000m above sea level.
State of California statement
This product can expose you to chemicals such as trace amounts of polybrominated biphenyls
within plastic parts, which is known to the state of California to cause cancer and birth defects
or other reproductive harm.
For more information go to www.P65Warnings.ca.gov.
C.
Warning for Authorized Service Personnel
Disconnect power from both power inlets before servicing!
71Safety Information
Page 72

Warranty
12 Month Limited Warranty
Blackmagic Design warrants that this product will be free from defects in materials and workmanship
for a period of 12 months from the date of purchase. If a product proves to be defective during this
warranty period, Blackmagic Design, at its option, either will repair the defective product without
charge for parts and labor, or will provide a replacement in exchange for the defective product.
In order to obtain service under this warranty, you the Customer, must notify Blackmagic Design
of the defect before the expiration of the warranty period and make suitable arrangements for the
performance of service. The Customer shall be responsible for packaging and shipping the
defective product to a designated service center nominated by Blackmagic Design, withshipping
charges pre paid. Customer shall be responsible for paying all shipping charges, insurance, duties,
taxes, and any other charges for products returned to us for any reason.
This warranty shall not apply to any defect, failure or damage caused by improper use or improper
or inadequate maintenance and care. Blackmagic Design shall not be obligated to furnish service
under this warranty: a) to repair damage resulting from attempts by personnel other than
Blackmagic Design representatives to install, repair or service the product,
b) to repair damage resulting from improper use or connection to incompatible equipment,
c) to repair any damage or malfunction caused by the use of non Blackmagic Design parts or
supplies, or d) to service a product that has been modified or integrated with other products when
the effect of such a modification or integration increases the time or difficulty of servicing the
product. THIS WARRANTY IS GIVEN BY BLACKMAGIC DESIGN IN LIEU OF ANY OTHER
WARRANTIES, EXPRESS OR IMPLIED. BLACKMAGIC DESIGN AND ITS VENDORS DISCLAIM ANY
IMPLIED WARRANTIES OF MERCHANTABILITY OR FITNESS FOR A PARTICULAR PURPOSE.
BLACKMAGIC DESIGN’S RESPONSIBILITY TO REPAIR OR REPLACE DEFECTIVE PRODUCTS IS
THE WHOLE AND EXCLUSIVE REMEDY PROVIDED TO THE CUSTOMER FOR ANY INDIRECT,
SPECIAL, INCIDENTAL OR CONSEQUENTIAL DAMAGES IRRESPECTIVE OF WHETHER BLACKMAGIC
DESIGN OR THE VENDOR HAS ADVANCE NOTICE OF THE POSSIBILITY OF SUCH DAMAGES.
BLACKMAGIC DESIGN IS NOT LIABLE FOR ANY ILLEGAL USE OF EQUIPMENT BY CUSTOMER.
BLACKMAGIC IS NOT LIABLE FOR ANY DAMAGES RESULTING FROM USE OF THIS PRODUCT.
USER OPERATES THIS PRODUCT AT OWN RISK.
© Copyright 2021 Blackmagic Design. All rights reserved. ‘Blackmagic Design’, ‘DeckLink’, ‘HDLink’, ‘Workgroup Videohub’,
‘Multibridge Pro’, ‘Multibridge Ex treme’, ‘Intensity’ and ‘Leading the creative video revolution’ are registered trademarks in the
US and other countries. All other company and product names may be trade marks of their respective companies with which
they are associated.
72Warranty
Page 73

2021年7
インストール/オペレーションマニュアル
月
HyperDeck
ディスクレコーダー
HyperDeckディスクレコーダー
Page 74

ようこそ
Blackmagic HyperDeckディスクレコーダーをお買い上げいただき誠にありがとうございます。
2011
年に、
Blackmagic HyperDeck
ンチのリムーバ ブル
したいと考えました。
SSD
でプロ仕様のビデオの収録・再生を簡単かつ低価格に行える製品を開発
ディスクレコーダーのオリジナルモ デルを設 計した 際 、2.5イ
このたび、
思 って い ま す。新 機 種 は SDカードとSSDに加え、新たにUSBフラッシュディスクにHDおよびUltra HD
を収 録できます。Blackmagic MultiDock 10Gを接 続して、ファイルの収録・再 生を外付けハードド
ライブで実行することも可能です!
HyperDeck Studio Plus
り、サーチダイヤルで ジョグ、シャトル、スクロール 再生を操作できます。サーチ ダイヤルのクラッチ
機構では、手元でフィードバックが得られるため、モニターから目を離すことなくクリップを検 索で
きます。フロントパネルにヘッドフォン接続とスピーカーも搭載しているため、
接オーディオを確認できるだけでなく、他にも多数の機能に対応しています。
HyperDeck
ディスクレコーダーの 新しいラインナップをご 紹 介できることを 大 変喜ばしく
および
Pro
シリーズは、使い 慣 れた放 送デッキコントロール を搭載してお
HyperDeck
から直
HyperDeckディスクレコーダーを末長くご使 用いただき、制作の一翼を担えればと思っています。
弊 社のウェブ サイト www.blackmagicdesign.com/jpのサポートページで、最新バージョンのマニュ
アルおよび
ることで、常に 最 新の機 能 をお使いいただけます。ソフトウェアをダ ウンロードする際 にユーザー 登録
していただければ、新しいソフトウェアのリリース時にお知らせいたします。私 たちは、常に新機能の
開発および製品の改善に努めていますので、ユーザーの皆様からご意見をいただければ幸いです。
HyperDeck
ソ フト ウ ェアの アップ デ ート を ご 確 認くだ さい 。ソ フト ウ ェア をア ップ デ ートす
Blackmagic Design CEO
グ ラ ン ト・ペ ティ
Page 75

目次
HyperDeckディスクレコー ダーについて 76
はじめに 77
電源の接 続 77
ビデ オとオー ディオ を 接 続 77
オー ディオのチェック 78
メディアの 接 続 78
ビデオの収録 80
複 数のメディアへ の 収 録 80
再生 81
HyperDeck
サー チ ダイヤル の 使用 82
フロントパネル の使 用 84
メディア ス ロット の イン ジケー ター 84
LCD
設定 86
リアパネル 98
モニター出力の 使 用 100
ストレー ジメディア 103
SD
カード 103
でビデオを再生 81
メニューの使 用 85
コンピュー ターでメディア を 準 備 108
HyperDeck
ウェブカムソースの設定 109
Open
Blackmagic
HyperDeck
「LUTs」ペ ー ジ 113
内部ソフトウェアのアップデート 114
Teranex
RS
-422コントロール 116
ネットワークでファイルを転送 121
ATE M
ポストプロダクションワークフローについて 124
Developer
Blackmagic
をウェブカメラとして使 用する 109
Broadcasterの セ ットアップ 110
HyperDeckSetup 112
Setupを使 用する 112
MiniRackShelf 115
スイッ チ ャー に接 続 123
Information 125
HyperDeck
EthernetProtocol 125
Protocol
Protocol
ヘルプ 140
Commands 125
Details 129
SSD
105
外 付 け ディスク 106
メディアをフォ ーマット 108
規制に関する警告 141
安全情報 142
保証 143
Blackmagic HyperDeck Studi
o
75
Page 76

HyperDeck
ディスクレコーダーについて
Blackmagic HyperDeck
ディスクレコーダーシリーズの一部です。HyperDeck Studio HD Proおよび HyperDeck Studio 4K Pro
は、1Uラック内に収まるように 設 計されており、SDカードおよび9.
ています。
HyperDeck Studio HD Miniおよび HyperDeck Studio HD Plusはコンパ クトな ディスクレコ ー ダーで、
デスクトップでも邪魔にならずに使用でき、オプションの
に設 置することも可 能 です。
デ ィス ク レ コ ー ダ ー は 、制 作 ワ ー ク フ ロ ー に お い てHDおよび4K収録に対応した
5mm SSD
Teranex Mini Rack Shelf
で の収 録・再生 に 対応し
を用 いて、1Uラック
HyperDeck
HyperDeckStudioHDMini HyperDeckStudioHDPlus
全モデルは、USBフラ ッ シュディスク に 収 録で き 、1080p60までのHDビ デオ に 対 応して い ま す。HyperDeck
Studio 4K Proは、2160p60までのUltra HDビデオをサポートしています。
収録・再生機能の操作方法は、全モデルでほぼ共通していますが、大型モデルには追加の再生コントロ
ールとインターフェースが搭載されています。
こ の イン ス ト ラ クシ ョン・マ ニュ アル は 、
べてを記 載しているので、あらゆるコントロールや機能を使いこなせるようになります。
StudioHDProおよびHyperDeckStudio4KPro
HyperDeck
ディスクレコーダーを使い始める上で必要な情報す
HyperDeckディスクレコーダーについて
76
Page 77

はじめに
HyperDeck Studi
SSDまたはSDカードを挿入するだけで簡単に使 用できます。
ディスクレコーダーは、電源を接続し、ビデオソースおよび送信先機器を接続し、
電源の接続
HyperDeck
追加の
2
つ目の入力を連続電力供給が可能な
り替わります。
全モデルで
HyperDeck Studio HD Miniは、AC
る 場 合 は 、コ ネ ク タ ー を 締 め て 、HyperDeck Studio HD Miniの接続を固定します。これにより、電源ケ
ーブルが所定の位置にロックされるため、誤って接続が外れることを防ぎます。
へ 給 電 す る に は 、標 準 の
IEC
電源入力を搭載している機種では、冗長性を得るために他の電源を接続できます。例えば、
12V DC入力も搭載しているため、外付け12Vバッテリーからも給 電できます。
IEC
ケーブル を 背面 に ある
UPS
に接 続 すると、メインの電源に問題が生じた場合、瞬 時に切
プラグパックからも給 電できます。電 源 にロックリングが付いてい
HyperDeck
の電源入力に差し込みます。
電源を入れると、
択し、点滅している「
びLCDメニューの詳細 は「フロントパネル の使 用」セクションを参照してください 。
LCD
ディスプレイに言語選択の画面が表示されます。サーチダイヤルで表示言語を選
SET
」ボタンを押します。ホームスクリーンが表示されます。ホームスクリーンおよ
ビデオとオーディオを接続
SDI/HDMI
デ ジ タル シ ネ マ カ メラ 、送 信 先 は HDMIテレビやSDIモニターなど を 使用で きます。
HyperDeckの全モデルは1080p60までのHDビデオをサポートしています。HyperDeck Studio 4K Proは、
12G-SDIコネクターを搭 載してい る の で、1本のBNCケ ーブ ルで 2160p60までのUltra HDの入力または 出
力が 可能 です。
入力にソースビデオを接続し、送信先機 器を
SDI/HDMI
出 力 に 接 続 し ま す 。例 え ば 、ソ ー ス は
はじめに
77
Page 78

フロントパネル に内 蔵 されている
クできます。
LCD
でモニタリングすることで、
SDI
または
HDMI
ビデオ信 号 を チェッ
作業のこつ
あ り ま す 。フ ロ ン ト パ ネ ル の「
オー ディオは SDIまたはHDMI信号にエンベッドされているため、オーディオを接続する必要はありませ
ん 。オー ディ オレ ベ ル は 、LCDのビデオの横に表示されるメーターで確認できます。
LCD
にビデオソースが確認できない場合、他のソース入力に接続している可能性が
INPUT
」ボ タ ン を 押 し て、
SDI
または
HDMI
ソースを 切り替えます。
オー ディオのチェック
フロントパネルにスピーカーとヘッドフォンポートを搭載した
用して、またはヘッドフォンを接続してオーディオをチェックできます。オーディオを聞くには、スピーカ
ーボタンを長押しします。ボタンを押しながらサーチダイヤルを回すと、音量を調整できます。音量イン
ジケー ターがLCDのホーム スクリ ーン に 表示 さ れま す。
スピーカー ボタンを2回押すと、スピーカーがオンの 状 態になります。再びボタンを2回 押 すと オフに な
りま す。
HyperDeck
で は 、内 蔵 の ス ピー カ ー を 使
メディアの 接続
HyperDeck Studio
せん。必要な作業は、SSDまたはSDカード のフォーマ ットだけ で す。
メデ ィア の フォ ー マ ットは 、
で もフォ ー マットで きま す。メディアの フォーマット方 法 の 詳 細 は「メディア をフォーマット」セクシ ョン
を参照してください。ビ デオの 収 録に適した メディアの種 類、および 推 奨ドライブとカードのリストも同
セクションに記 載さ れています。
SSD
を 挿入 する:
1
9.5mm SSD
SSDをドライブベイに差し込 み 、スロットにしっかりと収まるまで ゆっくりと押します。
2
HyperDeck StudioがSSD
灯します。緑のインジケーターが消えると、HyperDeckで の収 録 準 備が 完了したことを意 味 します。
ドライブインジケーター は 、メディア を読 み込んでいる際は 緑に点 灯し、HyperDeckで 収 録の 準備 が完了す ると消 え ま す。
シリーズは、すぐに収録できる 状 態 で 発 送されており、設定を変 更する必要は ありま
LCD
メニュー設 定 を 使 用して簡単に実行できま す。また は 、コンピューター
の接続ピンを下に向け、
を検証します。検証中は、ドライブベイの周囲の緑のインジケーターが点
HyperDeck
のドライブベイと一 直 線に なるように持 ちま す。
はじめに
78
Page 79

SSD
を取り外すには 、
ると、その感触が得られるはずです。
SSD
の 端を 持って ユ ニットか らゆ っくりと 引き 離しま す。
SSD
が ス ロットか ら外 れ
接続ピンを下に 向け、HyperDeckStudioのドラ イブベ イと 一 直 線に な る よう に SSDを持ち、
スロットにしっかりと収 まる までゆっくりと押します。
SD
カ ード を 挿 入する:
1
金のコネクターが
と一 直線に なるようにします。カード を ス ロットに 差 し 込 み、固 定 さ れ る ま で ゆっくりと押 します。
HyperDeck StudioのLCD
の方を向くようにSDカードを持ち、メディアスロット
2 HyperDeck StudioがSDカードを検証します。検証中は、SDカードスロットの上 部 の緑 のイン ジ
ケーター が 点 灯します。
インジケーターが消え、停止ボタンが点灯すると、HyperDeckStudioで収 録 する 準 備 が 完了したことを 意味します。
はじめに
79
Page 80

作業のこつ カードを取り出すには、カチッと音がするまでスロットに押し込 んで、リリースします。
カードがイジェクトされるので、カードの端を持ってスロットから取り出します。
HyperDeck Studioで 収録 および 再生の準備 が 完 了しました。
ビデオの収録
LCDにビデオソースが表示されたことを確認したら、収録を開始できます。
収録ボタンを押すと、収録が開始されます。SDカードに収録する場合、スロットインジケーターと収録
ボタンが 赤に点 灯します。また、再生ボタンが点灯して、
れます。SSDに 収 録 す る 場 合 は 、ダ イ ナ ミ ッ ク・メ デ ィア イ ン ジ ケ ー タ ー が 赤 に 点 灯 し ま す 。
LCD
ホーム スクリーン に 収 録 アイコン が表 示さ
HyperDeckStudioの収録中、LCD上のストレー ジインジ ケ ーター は 、
アクティブなスロットとメディアの収録可能時間を交互に表示します。
収録を停止するには、停止ボタンを押します。再生ボタンを押すと、再生を開始します。
作業のこつ 使 用しているコーデックを変更したい場合、
クを変 更できます。詳細は 、このマニュアルの「
を 参 照してくだ さ い 。
Blackmagic HyperDeck Setup
HyperDeck Setup Utilityでコーデッ
」セ ク シ ョン
複 数のメディアへ の収録
SD
カードや
ウンターは赤くなり、停止ボタンがゆっくりと点滅します。
こ れ は 、収 録 を 継 続 で き る 空 き ス ペ ー ス の あ る2つ目のディスクが無いことも意味しています。この場 合、
収録を継続するには、空きスペースがあるディスクを挿入してください。空いているスロットまたは外付
けディスク入 力に、空きディスクを挿入すると、ゆっくりとした点滅が止まり、タイムコードの色が白に戻
り ま す 。こ れ は 、2つ目のディスクがチェックされた結果、収録を続けるために必要なスペースがあり、
HyperDeckで 収 録 が 継 続 できることを意 味 します。
SSD
の収録可能時間が残り3分を 切った場 合、
HyperDeck StudioのLCD
の タイムコ ードカ
ビデオの収録
80
Page 81

HyperDeck Studio
引き 継 がれま す。これ は 、ホーム スクリーンの右上で 確 認で きます。
に複数のメディアが接続されたら、収録が現在のディスクまたはドライブから次へと
収 録 中 にメディア を交 換 する
収録するディスクを変更したい 場 合で2つ目のディスクに空きスペースがあれば、収録ボタンを長押し
することにより、現在収 録しているディスクから次のディスクに収録先が 変わります。この機 能 は 、収 録
を停止せずに
の最中に重要なコンテンツを別のロケーション用に取り出す必要がある時に、イベントすべてを収録し
たい場 合 や、収 録を停止したくない場 合などに役 立ちます。
収録中に 収 録ボタンが点滅する場 合、メディアに問題 があり、コマ落ちが 生じている可能性があります。
こ れ は 、低 速 の メ デ ィア で
HQ
で収録する場 合、
速 の もの を使 用 す る 必 要が ありま す。推 奨 メディアのリス ト は 、こ の マ ニュアル の「ストレ ージメデ ィア」
を 参 照してくだ さ い 。
HyperDeck
ProRes Proxy
からディスクを取り出したい 場 合に非常に便 利 です。例えば、ライブイベント
Ultra HD
を 収 録 す る 際 に 起 こ る こ と が あ りま す。例 え ば 、
より高いデータレートを使用するので、SDカードや
2160p30のProRes
SSD
は最も高
再生
トランスポートコントロールに 関しては 、従 来 型の放 送デッキに搭 載 されている ボタンを サ ポートしてい
ます。これには、収録、巻き戻し、再生、早送り、停止ボタンが含まれます。「
順 方 向と 逆 方 向 そ れ ぞ れ のボタ ン が あ り 、前 の クリップ/ 次 の クリ ップ の 頭 出し ボタンと 同 様に 機 能 す る
た め 、クリップ からクリップ にす ばや く 移 動 でき ま す。
HyperDeck
1
再生ボタンを押すとビデオが再生され、
プレイでビデオを確認できます。
でビデオを再生
LCD
、ま た は
HyperDeck
2 次 の クリップ にスキ ップ する に は 、コン ト ロ ール パネ ル の 次 クリップ 頭 出 しボタ ン を 押 しま す。
3
前 ク リ ップ 頭 出しボ タ ンを1回 押 す と 、現 在 の ク リ ップ の 頭 に 戻 り 、2回 押 す と 前の クリップ の頭 に
戻ります。
HyperDeckのコントロールパネルの再生ボタンを押すとクリップが再生され、次クリップ頭出しボタンを押すと次の
クリップ にス キップし 、前 クリップ 頭出しボ タ ン を 押 すと現 在 の クリップ を 再 ス タート しま す。
SKIP
( ス キ ップ )」ボ タ ン は 、
のビ デ オ出 力 に接 続した ディス
再生
81
Page 82

作業のこつ
要 が あ り ま す 。こ れ は 、
「設 定」セクションを参照してください。
HyperDeck
でビデオファイルを再生するには 、マッチするコーデックに設 定する必
LCD
メ ニ ュ ー で 実 行 で き ま す 。 詳 細 は 、「
LCD
メ ニュ ー の 使 用 」お よ び
ル ープ 再 生
半永久的に再生を継続したい場合は、再生中に再生ボタンをもう一度押すことで、
に設 定できます。ル ープ再 生 が 有 効になっていると、
2つのモ ードが ありま す。
LCD
に ル ープ アイ コ ン が 表 示さ れま す。ル ープ に は
HyperDeck
を ル ープ
クリップル ープ
すべてをル ープ
現 在 再生 し て い る クリップ を ル ープ しま す。
メディア に 収 録さ れて い る 全 ク リ ップ を
ル ープ し ま す。
ダイナミック LED
再生中、ドライブベイを囲む枠が緑に点灯し、ドライブベイの周囲を回るので、再生 速 度と方向を確 認
できます。
作業のこつ
ディスクの速度が十分でなく、再生が追いつかないことを意味します。H.
い収録フォーマットに変更するか、
ディス ク を 使 用することを お 勧 め しま す。
SSD
への収録機能を搭載した
HyperDeck
Ultra HD
の再生ボタンが点滅している場合は、
264
収録に対応できる高速の推奨
など圧縮率の高
SSD
または外付け
サーチダイヤルの使用
サーチダイヤルを再生中に使用することで、クリップ間をすばやく移動して、特定の箇所を再生するため
に 選 択 した り、フ レ ームごと に ク リ ップ を チェッ ク で き ます。クリップ で 特 定の 箇 所を 見 つけ る 必 要 が あ
る場合に、この機能は重要です。ダイヤルを回転させて視覚的にクリップをモニタリングしたり、特定の
タイムコードを検索できます。特定の位置に再生ヘッドを配置し、生放送で該当のクリップを再生でき
るように 準 備 しておくと 便 利 で す。
「SEARCH」ボタンを押して、サーチダイヤル のモード を切り替えます。
再生
82
Page 83

サーチダイヤルのモードには、ジョグ(JOG)、シ ャ ト ル( STL)、ス ク ロ ー ル( SCR)が あり ま す。
ジョグ
クリップをフレームごとに前方/ 後方 に再生できるため、精度の高いコントロ
ール が 可能 で す。
シャトル
より高速にクリップを前 方/ 後 方に再生します。ダイヤルを回した程 度によっ
て 、再 生 速 度 が 変 わ り ま す 。
スクロール
ダイヤル を回転させた程度に基づき、さらに高 速に再 生します。このモ ード
は 、長 尺の クリップ で 特 定 の 瞬 間 を 探 して いる 際 に 、クリップ 内 を すば やく移
動 で きるので 便 利 で す。
大型のモデルはサーチモードボタンを搭載しており、クラッチ機構を内蔵したサーチダイヤルでは使用
中に触 覚 的なフィードバックが得られます。これにより、テレビやモニターを見 ながら、手の 感 触でクリ
ップ内を移動することができます。
「JOG( ジ ョ グ ) 」 、「 STL( シ ャ ト ル ) 」 、「 SCR( ス ク ロ ー ル )」
ボ タ ン を 押 す と 、サ ー チ モ ー ド を 選 択 で き ま す 。
作業のこつ 通常の再生に戻るには、「PLAY」ま た は「 STOP」ボ タ ン を 押 し ま す。
再生
83
Page 84

フロントパネルの 使 用
HyperDeckでビデオを収録・再生する際、必要な情報は本体のメディアスロットのLEDインジケーター
と内蔵 LCDに 表 示さ れ ます。
HyperDeck Studio
ホームスクリーン
録画可能 時 間 およびメディアインジケーター–
収 録 中 、ア イ コ ン は デ ィ ス ク へ の 録 画 可 能 時 間
と現在使用中のドライブを一定間隔で表示しま
す 。 再 生 中 は 、使 用 中 の メ デ ィア の アイ コ ン が 表
示され ま す。
フォ ーマット インジケー ター –入力または再
生に使 用 するファイル のフォーマットを表示し
ます。
HyperDeckStudioの一部の機種では
「
INPUT」ボタンで 切り替えた入 力ソースも表示
しま す。フロ ントパネル のボタ ンとサー チ ダイヤル
を用 いて、ス ピー カ ー とヘッドフ ォン の 音 量を 調 整
する際は、現在の音量が表示されます。
ステータスインジケーター –現在の再
生モードなど、デッキの現在のステータ
スを 表 示 しま す。
オー ディオメーター–ソースま
たは 再生に使 用するファイル の
オーディオレベルを 表示します。
メディアスロットのイン ジケ ー ター
HyperDeck
が緑に点灯し、終わると消えます。挿入したディスクが適切にフォーマットされていない場合、または正し
く動作しない場合は、ディスクを取り出すまでスロットがオレンジに点 灯します。この場 合、ディスクのフ
ォーマットが 正しく行 わ れ たか、またコンピューターで 機能 するか 確 認してください 。
HyperDeckのメディアスロットの インジ ケ ー ター はディスクの 状 態を ライトで 表 示 しま す。
例えば、収録中は赤、再生中は緑に点灯します。
の 電 源 を 入 れ る か 、ま た は
SSD/SD
カードを挿入すると、メディアの 確 認中はインジケーター
フロントパネルの使 用
84
Page 85

LCD
メニュー の使 用
フ ロ ント パ ネ ル の「 MENU」ボ タ ン を 押 して メ ニュ ー 設 定 を 開 き ま す。
サーチダイヤルを回すか、「
サブメ ニュー を 選 択します。
サー チダイヤルを 回して、メニュー設 定 を移動
メ ニ ュ ー ア イ テ ム を 選 択 し た ら 、「 SET」ボ タ ン を 押 し ま す。
SKIP
」ボタンを押して、メニューのオプション間を移動し、「
SET
」を 押 し て
サーチダイヤルか、順方向/逆方向の「SKIP」 ボ タ ン を 使 用 し て 設 定 を 調 整 し 、「 SET」ボ タ ン で 確 定 しま す。
オプションを遡ってホームスクリーンに戻るには「MENU」ボ タ ン を 使 用 しま す。
フロントパネルの使 用
85
Page 86
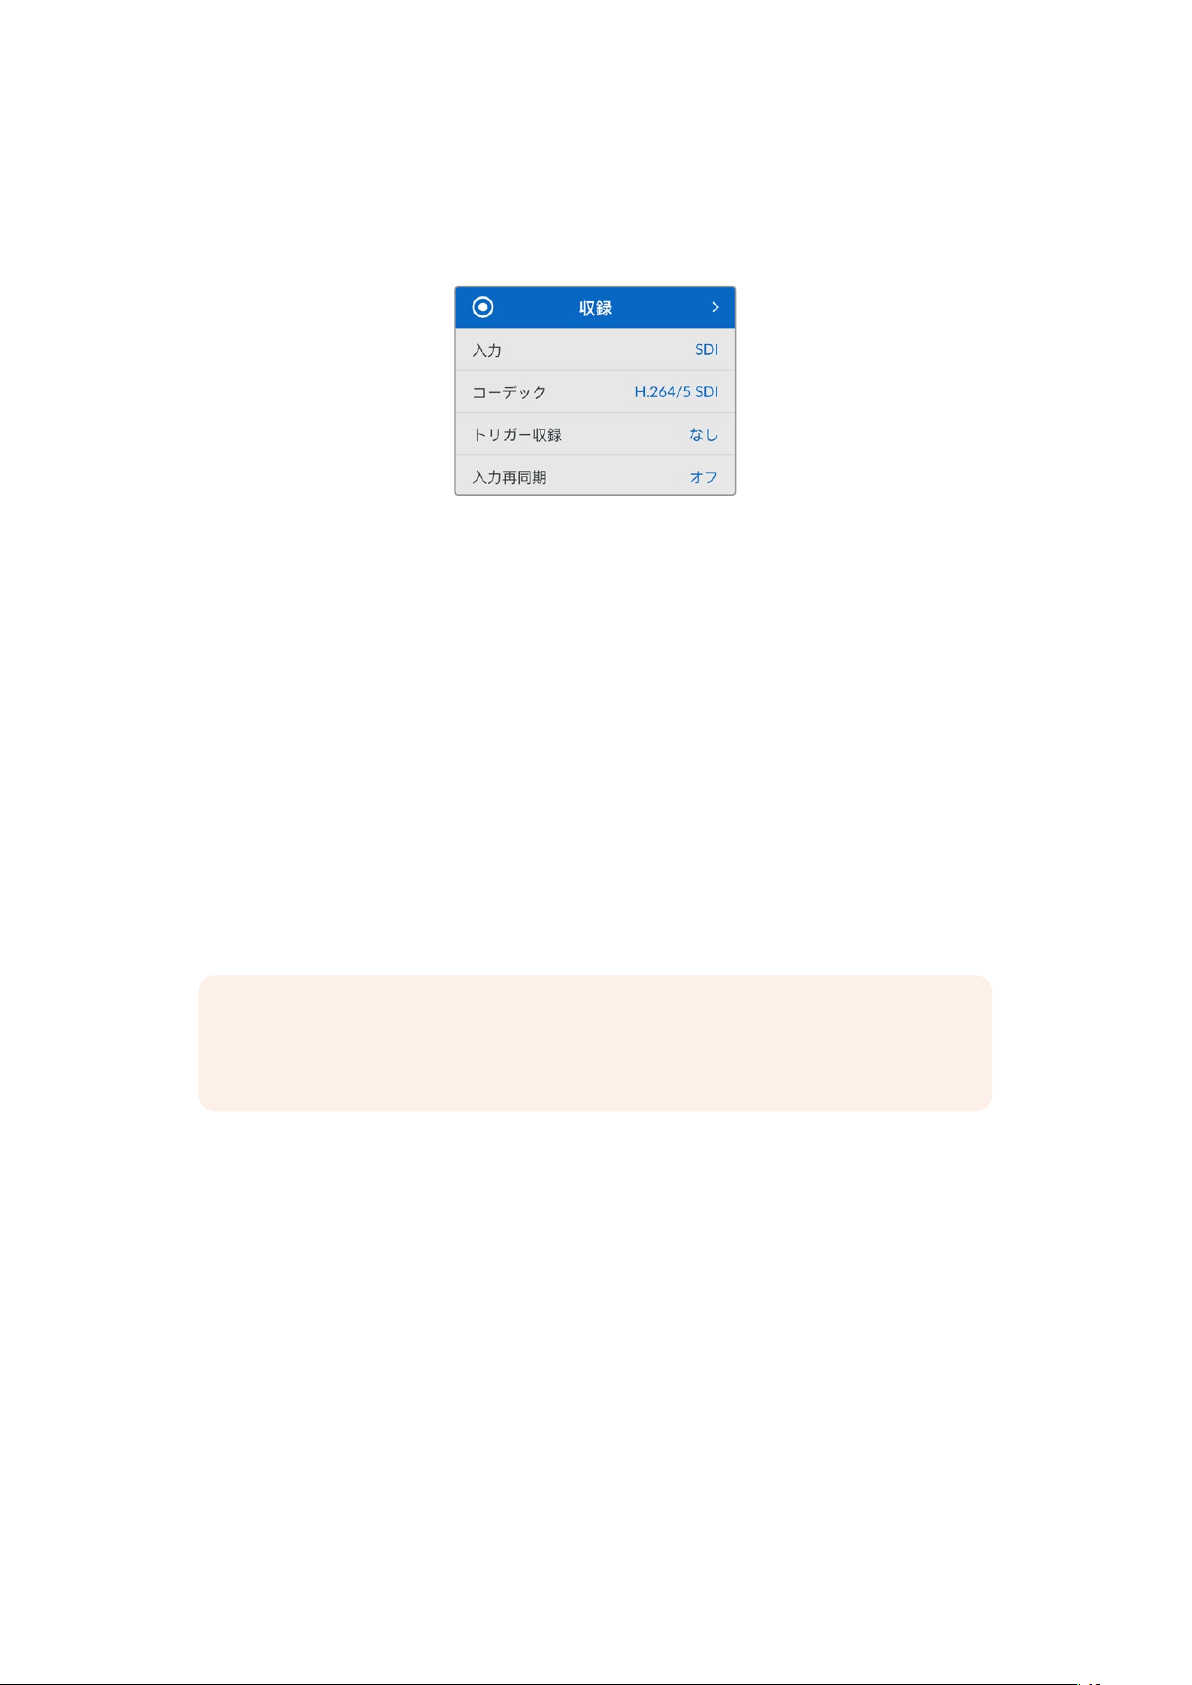
設定
収録メニュー
入力
「入 力 」設 定 で SDIまたはHDMIソースを選択します。また、フロントパネルの「INPUT」ボタンで も入 力
ソースを変 更で きます。
コーデック
HyperDeck Studio
す。HyperDeck Studio 4K Proでは、4Kメディア を収 録 す る 際 に H.265およびDNxHRを使 用 できます。
トリガー 収 録
「 ビ デ オ 開 始 / 停 止 」と「 タ イム コ ー ド ト リ ガ ー 」の 2種 類のトリガー 収 録か ら選 択できま す。
の全モデルは、H.
264、Apple ProRes、DNxHD
コー デックで 圧 縮ビデオを収 録しま
URSA Miniなどの一 部のカメラは 、外 部レコーダーの収録開始/停止をコントロールする信号をSDI経由
で送信します。「ビデオ開始 /停止 」をタップすると、カメラの録 画ボタンが押された際に、
で 収 録を開 始 /停 止しま す。
「タイム コードトリガ ー 」で は 、入 力を 介 して有 効なタイムコード信 号 を受 信すると、
開始します。信号が止まると、収 録も停止しま す。トリガー収 録を無 効 にするには「なし」を 選 択します。
メモ HDMIまたはSDIカメラから収録する場合、オーバーレイ機能がオフになっており、出力が
クリーンなことを確認してください。カメラのビデオ出力にオーバーレイが付いていると、イメー
ジと共にオーバーレイが収録されます。
HyperDeck
HyperDeck
で収録を
入力再同期
ビデ オ入 力の再同期を有 効 にし、収録を始 める前 にビデオが外部リファレンスにロックされるようにし
ます。収録に切り替えても、入力自体が再同期されるため、ビデオ出力はリファレンスにロックされたま
まになります。この機 能 は 、複 数のデッキのタイムコードをロックする必 要があるにも関わらず、一 部の
ソースが同期していない個別収録に使用します。デフォルトではオフになっており、ビデオ入力にフレー
ムが追加や除去されることなく収録されます。
通常、放 送 デッキはリファレンス入 力を使用して、再生中にビ デオ出力をロックします。つまり、HyperDeck
の再生出力はリファレンス入力にロックされるため、大型の放送システムに接 続された際に再同期する
必要はありません。
しかし、デッキで収録する際は、出力モードから入力モードに切り替わり、使用するリファレンスソースが
変 わ り ま す 。こ れ は 、多 く の 場 合 、
に送信されるビデオと同様に、手を加えずに入力ビデオを収録したいからです。
HyperDeck
のビデオ出力に接続した、その他のダウンストリーム機器
設定
86
Page 87

HyperDeck Studio
の過程を逆転させ、ビデオ入力をリファレンス入力に再同期します。つまり、非同期のソースを
に接 続すると、ビデオ入 力をビデオリファレンスにリタイムして収録します。
非同期ソースとは、コンピューターや民生用カメラなど、リファレンスを接続できないビデオ機器のこと
を意味します。別のスタジオや外部からの入力ビデオフィードも使用できます。個別収録において、非同
期ソースは、すべての収録ビデオで完璧にタイムコードを一致させる必要があるので問題となり得ます。
非同期ソースは他のソースと速度が異なり、収録を始めてからすぐに、タイムコードにずれが生じ始める
ことになります。つまり、ソースのタイムコードが一 致しないため、マルチカム編 集で 困 難が 生じます。
は、個別収録が簡単に実行できる独自の機能を搭載しています。この機能では、上記
HyperDeck
「入力再同期」をオンにすると、
す 。リ フ ァ レ ン ス よ り 早 過 ぎ る 場 合 は 、1フレームが除去されます。これは再同期と呼ばれ、入力に対する
処 理 はフレ ーム 再同 期と呼 ば れ ま す。これにより、すべ てのデッキで 収 録さ れ るクリップは 、各ソースから
一 致 したタイムコード で 収録 さ れ ま す。これ をマル チ カ ム 編集 の 作業 に 使 用できます。
しか し 、入 力にフレーム を 追 加ま た は 除去して収 録してい ること がマイナス面とな ります。そ ういった 理
由により、通常はこの機能をオフにしておき、コンピューターや民生用機 器 など、リファレンスを接 続で
きない 個 別 収 録ソースを使 用する場合にのみ有効にすることを推奨します。
「入力再同期」には別の使用方法もあります。同機能がオンになっている場合、
力は、収録中もリファレンスへのロックが維持されるので、
プログラムリターンフィードを 介してカメラをリファレンスにロックで きます。例えば 、
Camera 4K Pro
ファレンスにロックされ、カメラの速度がマッチするため、
ップへ のフレ ーム の 追 加 や 除 去 を 行 い ま せ ん 。
ビデオ入 力が
プに対する処理を実行します。この ケースでは、HyperDeckの出 力 はカ メラ のリファレン スソースであ
り、
HyperDeck
ープさせてロックしている場合、すべてのカメラと
ル ープ 内 の
れますが、他のソースは影響を受けません。
ソースを接続するだけで再同期は自動で実行されます。「入力再同期」は非常にパワフルな機能です
が、機能の内容と実行されるタイミングを理 解しておくことが重 要です。複数の
ム 編 集ソフトウェア を 使用して、色々と試してみ ることをお勧 めしま す。高 速にプ ロ グ ラム を 制 作 で きる
優 れ た 方法で す。
では、リファレンスを外 部ビデオに設 定 で きま す。カメラフィードは
HyperDeck
はビデオリファレンス入力にロックされます。複数の
HyperDeck
がコンピューターなどの非同期ソースを使用している場合、その入力は再同期さ
HyperDeck
のビデオ入 力が 遅 れている場合、1フレーム が繰り返されま
HyperDeckのSDI
HyperDeck
出 力 を カメラに接 続して、
のビデオ出
Blackmagic Studio
HyperDeck
HyperDeck
と同じリファレンスにロックされていない場合のみ、「入力再同期」はクリッ
HyperDeck
は一つのグループとしてロックされます。グ
の「入力再同期」機能は収録クリ
HyperDeck
のリファレンス接 続を ル
HyperDeck
からのリ
とマルチカ
設定
87
Page 88

モニタリングメニュー
モニタリングメニューは 、リアパネル にモニター 出 力 を搭 載した機種のみで 使用できま す。
クリーンフィード
クリーンフィードをオンにすると、
イのステータステキストが 非表示になります。表示される情報などのモニター出力に関する情 報は、
このマニュアル の「モニター出力の 使用」セクションに後 述されています。
3D LUT
ディス プ レイ
ディス プ レイ
低いフラットな 見 た目 にしてある” フィル ム”ダイナミックレンジ を 使用している 際 に役 立ちま す。ディスプ
レイLUTを適用することで、グレーディング後のビデオのルックを想定できます。
LUTは、HyperDeck Studio
LUT
は、ディスプレイに出力するカラーおよび輝度を指定します。これは、意図的に彩度の
HyperDeck Studio
をフィールドレコー ダーとして使 用 して い る 際に特に便 利で す。
の背面のモニター出力に接続しているディスプレ
ディス プ レイ
3D LUT
1
LUTはBlackmagic HyperDeck Setupで 選 択でき、SDIモニター出 力 に 適用 で きま す。
のオン/オフを切り替える:
「MENU」ボタンを 押し、サー チ ダイヤルを 使 用して、「モニタリング」メニューに進みます。
2 「SET」ボ タ ン を 押 し ま す。
3 サ ー チ ダ イ ヤ ル を 使 用 し て 、「 3D LUT」が青でハイライトされるようにナビゲートします。
4 「SET」ボ タ ン を 押 し て、LUTのオン/オフを切り替えます。
LUT
の選択方法に関しては、後述の「
作業のこつ モニター出力に関する情 報 は 、このマニュアル の「モニター 出 力の 使 用」セクショ
ンに後 述さ れていま す。
Blackmagic HyperDeck Setup
」セクションを参照してください。
設定
88
Page 89

オーディオメニュー
収 録 オー ディオチャンネ ル
HyperDeck Studio
チャンネル 数を 設定 するには「 収 録オー ディオ チ ャンネル」に 進 み 、
す 。コ ー デ ッ ク がH.
き る た め 、直 接
も選 択しま す。
モニタリングチャンネル
2
チャンネルを超える数のチャンネル数を収 録している場合、フロントパネルに表 示するチャンネルを
選択できます。これは「モニタリングチャンネル」のオプションで設定できます。フロントパネルを搭載
したHyperDeck Studioでは、この設定でスピーカーおよびヘッドフォン接続で再生するオーディオチャ
ンネルも設定できます。
は同時に最大16チャンネル の
264
YouTub e
またはH.
に ア ッ プ ロ ー ド で き ま す 。 こ の 設 定 は 、モ ニ タ ー 出 力 に 表 示 さ れ る チ ャ ン ネ ル 数
265
に設 定されている場 合、2チャンネル の
PCM
オー ディオを収 録できま す。収 録 するオーディオ
2ch、4ch、8ch、16ch
AAC
から選 択しま
オーディオを選択で
オー ディオメーター
内蔵LCDは、エンベッドされた オーディオチャンネルのオーディオメーターを表 示します。メーター は 、PPM
またはVUから選択で きます。メーターの種類を変 更するには「オーディオメーター」のオプションからオ
ーディオメーターの表示方法を選択します。
ヘッドフォンレ ベル
フロントパ ネ ル にヘッドフォン を 搭載 した モ デルで は「 ヘッドフォンレ ベ ル」設 定 でヘッド フォン の 音 量
を調 整 できま す。
スピーカーレ ベ ル
サーチダイヤルを回して、スピーカーの音量を調整します。デフォルトは50%です。
作業のこつ ヘッドフォンとスピーカーの音 量は 、フロントパネルから直接調 整 することもできます。
スピーカーボタンを押しながら、サーチダイヤルを回して、再生 ボリュームを調整します。音 量レ
ベルは、フロントパネルの中央上部に表示されます。
設定
89
Page 90

ストレージメニュー
メディア をフォ ー マット
リアパネル の
直 接 ユ ニ ッ ト で 、あ る い は MacまたはWindowsコンピュー ターで フォーマ ット を 実行 で きま す。
EXT DISK
( 外 付 け デ ィス ク )コ ネ ク タ ー にSDカード、
SSD
、メディアを接続している場合、
HyperDeck Studio
1
サ ー チ ダ イ ヤ ル と「 SET」ボタンを使 用して「メディアをフォーマット」を選 択します。
でメデ ィ ア を 準 備 す る:
2 リストから 初期化するメディアを選択して「SET」ボ タ ン を 押 し ま す 。
3 フォーマットを選 択して「SET」ボ タ ン を 押 しま す。
4
初期 化されるカードと、選 択したフォーマットを確認 するメッセージが 表 示 されます。「フォーマ
ッ ト 」を 選 択 して 確 定 し ま す 。
5
フォ ー マット 中 であ ることを 示すメッ セ ージ が 表 示され 、完 了のメッ セ ー ジが 表示 さ れ たら「OK」
を選 択しま す。
HFS+ は「 Mac OS Extended」としても知られており、ジャーナリングをサポートしているため、使用が
推 奨 されるフォーマットです。万 が 一、ストレージメディアが 破損した場 合 、ジャーナリングされたメデ
ィアのデータは回復できる可能性があります。
は
Mac
および
Windows
ませんが、ジャーナリングには対応していません。
Mac
または
Windows
てくだ さ い 。
によりネイティブサ ポートされており、ソフトウェアを別途 購 入する必要はあり
で のメディア の フ ォ ーマ ット方 法は 、「メディア を フォ ー マ ット」セク シ ョン を 参 照し
HFS+はMac
でネイティブサ ポ ートされて い ま す。
ex FAT
セットアップメニ ュー
設定
90
Page 91

名前
ネットワ ー クで 複 数の
あ り ま す 。こ れ は 、
HyperDeck Studio
を使用している場合、個別の名前を付けると便利な場合が
Blackmagic HyperDeck Setup
、ま た は タ ー ミ ナ ル ア プ リ を 使 用 し て
Blackmagic
HyperDeck Ethernet Protocolで 実 行で きます。
言語
HyperDeck Studioは13
ペイン語、ドイツ語、フランス語、ロシア語、イタリア語、ポルトガル語、トルコ語、ウクライナ語、ポーラ
ンド 語 で す。
ヶ国語をサポートしています。対応言語は、日本語、英語、中国語、韓国語、ス
言 語 を 選 択す る:
「セットアップ」メ ニューが ハ イライトされ たら「SET」を 押 しま す。
1
2 サー チ ダイヤルを回して、「言語」を 選 択したら「SET」を 押 し ま す 。
3
サー チ ダイヤルを使 用して、使 用 する言語を選択したら「SET」を 押 し ま す 。言 語 が 選 択 さ れ る と 、
自 動 的に「セットアップ」メ ニュー に 戻ります。
日付
日付を設定するには、「日付」設定を選択して「
月、年 を 選択します。ここで 設 定した日 付がファイル の タイムスタンプ・サフィックスとして 使 用さ れ ます。
SET
」ボ タ ン を 押 し ま す 。サ ー チ ダ イ ヤ ル を 使 用 し て 、日 、
時刻
時刻を設定するには、「時刻」設定を選択して「
時 間と分を調 整します。HyperDeck Studioの時計は24時 制です。
SET
」ボタンを押します。サー チ ダイヤルを使 用して、
ソフトウェア
現在のソフトウェアバージョンを表示します。
フロントパネル
HyperDeck
表 示 さ れ ます。薄 暗い 環 境で は「ダー ク カラー」モードの 使 用 を推 奨しま す。こういった 場 所で は、明 る
い
LCD
マウントしている場合などです。
のフロントパネルの 表 示モードを設定できます。「ライトカラー」は 、
は気が散る原因となり得ます。例としては、プロダクション施設のラックに複 数の
LCD
が明るい背景で
HyperDeck
を
設定
91
Page 92
カメラ
この設 定は、
ムタイムラ イン で 編集 する 際 に便 利で す。
HyperDeck
で複数のカメラから個別収録ファイルを収録し、
DaVinci Resolve
のマルチカ
各カメラの識別文字がファイルのメタデータに記録されるため、同期ビン機能を使用する際に
Resolveが各アングルを簡単に識別できます。
カメラ の 識 別 文 字 に は A〜Zまたは1〜9が 使 用で きます。
デフォルトフォーマット
HyperDeck Studio
で 使 用 するビ デ オフォーマットを設 定しま す。
例えば、ビデオ入力を接続していない状態で
マットのファイルが存 在 するディスクを挿入した場 合、再生に使 用するビデオフォーマットを
で指定する 必 要 が あります。「デフォルトフォーマット」で は 、
を設 定でき、フォーマットを切り替えて、これらのファイルを再生します。
が、使 用するビ デオフォーマットを検 出できない場 合 に 、この設定を用 いて、メイン
HyperDeck Studioをオンにし、2つの異 なるビデ オフォー
HyperDeck
HyperDeck
で 使 用 するビ デ オフォーマット
DaVinci
この機能は 、HyperDeckにビ デ オ入 力やメディアディスクが接 続 されてい ない 状 態で、HyperDeckを初
めてオンにする際にも便 利です。この 場 合、
ォーマット を 検出で きな い ので、「デ フォルトフォ ーマット」の 情 報 を使 用しま す。
しかし、この機能はガイドとして使用されるだけで、オーバーライドする訳ではありません。例えば、
一種 類 のビデオファイルが 収録 さ れたメディアディスクを再生する場 合 、
オフォーマットに切り替えて再生 を実 行します。「デフォルトフォーマット」の 情報 は 使 用され ません。
これは収録でも同様です。収録ボタンを押すと、
ット を 使 用 しま す。収 録 の 終 了 後 、HyperDeck Studioは 収 録に 使 用 したのと同 一のビ デ オフォーマット
で、そのファイルを再生しま す。これは、「デフォルトフォーマット」と一致 するビデオフォーマットのファ
イルがディスクに存在する場合でも同様です。デッキは、収録に使用したのと同じビデオフォーマットを
再生します。メディアディスクの 接 続を外し、接 続し直した場 合の み 、「デフォルトフォーマット」の 設 定に
基 づ き 、再 生 に 使 用 す る フ ァ イ ル の 種 類 が 選 択 さ れ ま す 。
この機能は 、
ドとして使用されるだけであり、デッキを特定の方法で動作させるようにオーバーライドする機能では
ありません。
HyperDeck Studio
が使用するフォーマットを自動的に決めることができない場合にガイ
HyperDeck Studio
HyperDeck
はビデオ入力に接続されたビデオフォーマ
はモニタリング出力に使用するビデオフ
HyperDeck Studio
はそのビデ
設定
92
Page 93

ネットワー ク 設 定
プロトコル
Blackmagic HyperDeck
るとネットワー ク サー バー は自 動的 に IPアドレスを割り当てるので、その他のネットワーク設定を調整する必
要はありません。マニュアルでアドレスを設定する必要がある場合、静的IPアドレス経 由で 接続 で きます。
は デ フォルトで
DHCP
に設定されて出荷されます。そのため、ネットワークに接続す
「 プ ロ ト コ ル 」を 選 択 し た 状 態 で 、点 滅 し て い る「
ス 」を 選 択 し「 SET」ボ タ ン を 押 しま す。
IP
ア ド レ ス 、サ ブ ネ ッ ト マ ス ク 、ゲ ー ト ウ ェ イ
「静的IPアドレス」を選択すると、ネットワークの詳細をマニュアルで入力できます。
IP
アドレスを変 更する:
1
サーチダイヤルを使用して「IPアドレス」を ハイラ イトし 、
し て い る「 SET」ボ タ ン を 押 し ま す。
2
サー チダイヤル を回 転させてIPア ド レ ス を 調 整 し 、「 SET」ボタンを押して確 定し、次の数値に進みます。
SET
」 ボ タ ン を 押 し て メ ニ ュ ー に 進 み 、「 静 的IPアドレ
HyperDeck
のフロントパネルで、点滅
3 「SET」ボタンを押して変更を確 定し、次の数値に進みます。
IP
アドレスの入 力 が 終わったら、上 記の 手 順 を 繰り返し、「サ ブネットマスク」と「ゲートウェイ」も調 整 で き
ます。終了したら、点滅している「
MENU
」ボタンを押してメニューを出て、ホームスクリーンに戻ります。
設定
93
Page 94

タイムコード 設 定
入力
収録中、5つの タイムコ ード入 力オ プシ ョンを 使用 できま す。
ビデ オ入 力
外部
内部
前のクリップ
から生成
プリセ ット
「 ビ デ オ入 力 」を 選 択 す る と 、SMPTE RP 188メタデ ー タの 付 いた SDIおよびHDMIソース
のエンベデッドタイムコードを使用します。これにより、SDIまたはHDMIソースと、
HyperDeck Studioで収録されるファイルの同期が維持されます。
リアパネルのコネクターに接続したタイムコードを使 用する場合に、このオプションを選
択します。
内 蔵 のタイムコードジェネレー ター を 介して、時 刻 タイムコ ード を 収 録する 場 合 に 、
このオプションを選択します。
タイムコード入 力に「前 の クリップか ら生 成 」を選 択 すると、各ファイル は 、前の クリ
ップ の 最 終 フレ ーム の 1つ後のフレームから開始されます。例えば、最初のクリップが
10:28:30:10で 終 わ る 場 合 、次 の ク リッ プ は 10:28:30:11か ら 開 始します。
タイムコードをマニュアルで設 定したい 場 合 は「プリセット」オプションを選択しま
す 。プ リ セ ッ ト で 設 定 し た タ イム コ ー ド で 、収 録 し た ク リ ッ プ が 開 始 し ま す 。プ リ セ ッ ト
に関しては、このマニュアルに後述されています。
ドロップ フレ ーム
29.97
および59.
きま す。ソース が不 明な 場 合 は「デフォルト」を 選 択します。これ により、入 力の 規格が 維持されま す。
有効なタイムコードが ない 場 合 はデフォルトのドロップフレームになります。
94fpsのNTSC
ソ ース で は「ド ロ ッ プ フ レ ー ム 」ま た は「ノ ン ド ロップ フ レ ー ム 」を 選 択 で
プリセット
タ イ ム コ ー ド を マ ニ ュ ア ル で 設 定 で き ま す 。「
タ イム コ ード を 入 力 しま す。入 力 メ ニュ ー の「 プ リ セ ット 」が 選 択 さ れ て い る 必 要 が あり ま す。
SET
」 ボ タ ン を 押 し 、サ ー チ ダ イ ヤ ル と 「
SET
」ボ タ ン で 開 始
出力
出力に使用するタイムコードのオプションを選 択します。
タイムラ イン
クリップ
カードまた はドライブに収録され た 全 クリップ を 通して、継 続したタイムコードを出力す
る に は「 タ イム ラ イ ン」を 選 択 し ま す 。
「 ク リップ」を 選 択 する と、個 別の クリップ ごと にタ イム コ ード を 出 力し ま す。
SDI出力
設定
94
Page 95

3G-SDI
放 送 機 器 によって は 、Level AまたはLevel Bの3G-SDIビデオしか受信できない場合があります。
出力
他の放 送 機 器との互換性を維 持 するには、
Level A(3G専 用 の マ ッ ピ ン グ )ま た は Level B(多重化した
3G-SDIのデュアルストリーム)を選択します。
ゲンロック設 定
リファレンスソース
リファレンスソースを 以下 の3つのオプションから選択できます。
自動
入力
こ の モ ー ド で は 、リ ア パ ネ ル の 「 REF IN(リファレンス入力)」に信号が接続されている場
合、外部ソースをデフォルトで使用します。リファレンスが接続されていない場合、入力SDI
またはHDMIソース が デ フォルトとして使 用さ れ ま す。
SDIまたはHDMIソース にリファレン ス がエ ンベッドされており、このリファレンスに 同 期させ
たい場 合は「入力」を選 択します。例えば 、アナログデッキに直接 ゲンロックソースが接 続
されている場合などです。
外部
Blackmagicのシンクジェネレーターなどの 外部リファレンス機 器が、リアパネル の「REF
IN(リファレンス入力)」に接続されている場合に選択します。
外部リファレンスインジケ ー ター–
HyperDeckStudioが外 部リファレ
ンスソースにロックされ ると「
インジケー ターが内蔵
されます。
REF」
LCDに表示
リファレンスタイミング
リファレンスタイミング は 、アナログデッキからアーカイブしており、フレ ーム同 期 が 必 要 な 場 合に調 整
できます。リファレンスはサンプル単位で調 整できるので、サンプルレベルで正確にタイミングを調整可
能 で す。
タイミ ン グ を 調 整 す る:
「セットアップ」メ ニューで サー チ ダイヤル を 使 用して「リフ ァレンス タイミン グ・ラ イン」を ハイラ
1
イトし、点滅している「SET」ボ タ ン を 押 し ま す。
2
タイムラインのラインの 値 を 調 整します。ダイヤルを時計回りに回 すと増え、反 時 計 回りでは減
りま す。
3 点滅している「SET」ボ タ ン を 押 して 、選 択 を 確 定 し ま す。
4
ピクセルを調整するには、点滅している「
「リファレンスタイミング・ピクセル」で上 記 の 手 順 を 繰り返しま す。
MENU
」ボタンを 押 して「セットアップ」メ ニュー に 戻り、
設定
95
Page 96

ファイル 設 定
タ イム ス タン プ・サ フィッ クス
ファイル 名 に 追 加され るタイムスタンプ は 、デフォルトでは オ フに設 定 さ れてい ま す。ファイル 名 に日付
と時刻を記録したい場合は、「
ックス」のオプションをオンにします。
HyperDeck_2105061438_0001
SET
」ボタンを押し、サー チ ダイヤルを使 用して「タイムスタンプ・サフィ
HyperDeck_2105061438_0001
HyperDeck_2105061438_0001
HyperDeck_2105061438_0001
HyperDeck_2105061438_0001
HyperDeck_2105061438_0001
HyperDeck_2105061438_0001
HyperDeck_2105061438_0001
ファイル 名
年
月
日
時
分
クリップ 番 号
HDRフォーマットオ ーバー ライド
HyperDeck Studio 4K Proは、4Kビデオ 信 号ま たは ファイル に エン ベッドされ た HDRメタデータを自動
的に検出し、
プレ イが HDRに 対応して い ない 場 合 、HDRフォ ー マットをオーバーラ イド できます。
HDMI
出力を 介して表 示します。信 号またはファイルの タグが 適 切 で はない場 合 や、ディス
オ ー バ ー ラ イ ド す る に は 、「
ョンに 設 定しま す。
HDR
フ ォ ー マ ット オ ー バ ー ラ イ ド」設 定 を
Rec.2020 SDR
などの
SDR
オプシ
HDR再生および収録設定は以下から選択できます:
自動
デフォルトの設 定です。
に選 択しま す。
HyperDeck
が クリップ の
HDR
メタデ ー タと一 致 する 出 力フォーマットを自動 的
Rec.709
標 準ダイナ ミックレンジの HDビデオに使 用しま す。
Rec.2020 SDR
標 準ダイナ ミックレンジの Ultra HDビデ オに使 用しま す。
HLG
HLGは 、「 Hybrid Log Gamma(ハイブリッドログガンマ)」の省略で す。このフォーマットは、
HDR(Rec.2020 SDRまで)対応のテレビやモニターでHDRビデ オ を再生 で きます。
設定
96
Page 97

以下の設定は、
知 覚 量 子 化 )を サ ポ ー トし て い ま す。PQは 、よ り 明 る い イメ ー ジ を 表 示 可 能 に す る 、広 色 域
で す 。輝 度 値 は 、カ ン デ ラ 毎 平 方 メ ー トル(cd/
ォーマットが平 方メートルごとにサポートする輝 度 の 最 大値 で す。
Rec.2020
色 域 、お よ び
SMPTE ST2084
2
m
)で示されます。例えば、
として 規 格化さ れ たPQ(
1000 cd/m
Perceptual Quantizer
2
は 、対 応 す る フ
HDR
/
の機能
ST2084 (300
輝度 300 cd/m
ST2084 (500
輝度 500 cd/m
ST2084 (800
輝度 800 cd/m
ST2084 (1000
輝度 1000 cd/m
ST2084 (2000
輝度 2000 cd/m
ST2084 (4000
輝度 4000 cd/m
)
2
)
2
)
2
)
2
)
2
)
2
リモート
リモート
RS-422を介したリモートコントロールを有効にするには「リモート」を選 択します。これにより、HyperDeck
Extreme Control
の一部のモデルに搭載されている「
る と 、ロ ー カ ル で ユ ニ ッ ト を 操 作 で き ま す 。
などの 他の 機 器 から
HyperDeck
REM
」ボタンが点灯してオンになっていることを示します。オフにす
を 操 作 で き ま す 。リ モ ー ト が 選 択 さ れ る と 、
HyperDeck
デッキコントロール
リモ ートが オ ンに なってい る場 合、1台の
の複数の
ニットのリモ ート入 力に接 続してデイジ ーチェーンを構 築しま す。RS追加接続していきます。追加したユニットすべてのリモート設定がオンになると、マスターとなるユニット
で行ったトランスポートコントロールは、追加ユニットでも実行されます。
例 え ば 、マ ス タ ー と な る
が 同 時に収 録を 開 始します。
HyperDeck
で同じ操作を実行できます。マスターとなる
HyperDeck
HyperDeck
で収録ボタンを押すと、デイジーチェーンされた
のトランスポートコントロールを操作することで、別
HyperDeck
のリモート出力を2番目のユ
422
を 使 用 し て 、同 様 に ユ ニ ッ ト を
HyperDeck
すべて
HyperDeck Studio HD Miniはコントローラーとして使用することはで きませんが、ProまたはPlusシリ
ーズか らは 操 作が 可能 です。
リセット
出 荷 時 設 定 にリセット
「セットアップ」メ ニューで「出 荷 時 設 定にリセット」を ハ イラ イトする と 、
戻 せ ま す 。「 SET」ボタンを押すと、操作を実行するか確認する画面が表示されます。
HyperDeck
を出荷時の設定に
設定
97
Page 98

リアパネル
HyperDeck Studio HD Mini
の電源コネクターは、ロックリン
グ を 搭 載 し て い る た め 、誤 っ て コ
ネクタ ー が 外れ ることを防 止
3
2 5 6 8 941
HyperDeck Studio HD Mini
およびPlusモデルは、タイムコ
ード入出力用のBNCコネクタ
ーを搭載
7
1 電源
HyperDeck
Studio 4K Proには2
付けバッテリー電 源を接 続できるので、冗長 性を確 保できます。接 続 するDC電源は、DC入力コ
ネクターの下に記載されている入力ボルテージと定格電流に必ず互換している必要があります。
ETHERNET
2
イーサネットポ ートで は 、ネットワ ー クに 接続 し 、高 速 の
HyperDeck Ethernet Protocol
の転送速度は、HDモデルで 1GbE、HyperDeck Studio 4K Proでは10GbEで す。FTPクライア
ントを使 用したファイルの転送に関しては 、後 述の「ネットワー クでファイルを転 送 」セクショ
ンを 参 照してくだ さ い 。
の全 モデルはAC主電源に接 続できる
つ搭載されているため、電源の冗長性が得られます。DC入力には
(イーサネット)
を使 用してユニットをリモートコントロールで きます。ファイル
IEC
電源 入力を搭載しています。
FTP
を使 用してファイルの 転 送や、
HyperDeck
12V
の外
ATE M
スイッ チャー を 同じ ネットワ ークに 接 続 してい る場 合、
ードウェアパネルからHyperDeckを操 作 できま す。
REMOTE
3
HyperDeck Studio
リモ ートの入 出 力を接 続できま す。
しています。
EXT DISK
4
フラッシ ュディスクを
スクに収録で きます。HyperDeck Studio 4K Proは、USB-C 3.1 Gen 2に対 応してい る の で、
最大
を接 続すると、1枚または複数のSSDを 使 用で きます。
USBでHyperDeck
ソフトウェアで、HyperDeckを ウ ェ ブ カ ム ソ ー ス と し て 使 用 で き ま す。詳 細 は 、後 述 の「 Open
(リモ ート)
の一 部のモデルは 、DE-9を搭 載した2つのRS-
(外付け ディスク)
USB-C
コネクターに接 続 すると、HDモデルでは最 大
10Gb/s
で転 送できます。また、マルチポートの
をコンピューターに接続している 場 合、
HyperDeck Studio HD Mini
USB-C
ATE M
スイッ チャー ま たは
422
をサ ポートしており、
は 、リ モ ー ト 入 力 の み に 対 応
5Gb/s
で外付けディ
ハブや
Blackmagic MultiDock 10G
Open BroadcasterやSkype
Broadcasterのセットアップ」セクションを参 照してください。
MONITOR OUT
5
3G-SDI
モニター出 力コネクターでは 、オーバーレイ付きのダウンスケールした出力を送信するた
め、外 部ディスプレ イでモニタリング できま す。オーバーレイには、ドライブアイコン、オーディ
オ メ ー タ ー 、タ イム カ ウ ン タ ー 、デ ィス プ レ イ LUTが含まれます。クリーンフィードの出力方法な
ど、SDIのモニタリング設 定に関しては、このマニュアルの「設定 」セクションに前述されています。
(モニター 出力)
ATE M
などの
ハ
リアパネル
98
Page 99

REF
6
(リファレンス )
HyperDeck
よび3値シンク・ビデオリファレンスを 生 成します。つまり、HyperDeckのリファレンス 出力を 他
のビデオ機器のレファレンス入力に接続し、
にロックすること が 可能 で す。
の全モデルはシンクジェネレーターを内蔵しており、安定したブラックバーストお
HyperDeck
が 生 成するマスターリファレンス信 号
リファレンス 信 号をリファレンス 入 力 に接 続し 、
させることもで きます。
複数の
HyperDeck
に関しては、前 述 の「設定 」セクションの「セットアップメニュー」を参 照してください 。
TIMECODE
7
HyperDeck
ンスと似ており、タイムコード信号 をマスター
ループできるため、それぞれに収録された映像には同じタイムコードが 記録されます。
HyperDeck
ています。タイムコードのオプションの 選 択 方 法に関しては、前述の「設 定 」セクションを参照
してください 。
HDMI
8
ディスクレコーダーをループさせている場合のリファレンスソースの選択方法
(タイム コー ド )
の全モデルは時刻タイムコードのジェネレーターも搭載しています。これはリファレ
のモデルによって、タイムコードコネクターは
HyperDeck
HyperDeck
を外部マスター同期ソースに同期
から他の
BNC
HyperDeck
または
やビデオ機 器に
XLR
のいずれかを搭載し
HDMI出力を 使 用すると、HDMIテレビや モニターに接 続できます。
HyperDeck
マ ッ ト を自 動 的 に 検 出 しま す。設 定 メ ニュ ーで HDRフラグ をオーバ ーライド することも可 能 です。
詳細は、後 述の「 設 定」セクションを参 照してください。
SDI
9
HyperDeck Studio HD Miniは、1080p60
は、適 切なメタデータが信号にフラグ付けされている場合、
までの単一の3G-
SDI
信号をサポートしています。
SDRとHDR
ビデオフォー
HyperDeck Studio HD PlusおよびHyperDeck Studio HD Proは、SDから2160p30までの
6G-SDI
信号 に 対応 して い ま す。
入出力をサポートしています。
HyperDeck Studio 4K Proは、2160p60
までの解 像度の
12G-SDI
2つのSDI
キー用にProRes 4444ファイル を再生 で きます。
出力を搭載した
HyperDeck
では、
ATE M
スイッチャーに接続されている際に、フィル&
リアパネル
99
Page 100

モニター出力の 使 用
モニター出力を使用すると、収録のチェックやビデオの再生をすばやく実行できます。オーバーレイに
は、使用されているコーデック、ビデオおよび信号のフォーマット、フレームレート、タイムコード、ファ
イル名、トランス ポートコントロールステ ー タス 、ストレージメディアステータス、オーディオレ ベ ルなど
の重要な情報が表示されます。
以 下 は 、そ れ ぞ れ に 表 示 さ れ る 情 報 で す 。
コーデック
LCDメニューで選択されたコーデックを表示します。
フォ ー マット
再生モードで、現在の クリップの解像 度とフレ ームレ ートを表 示します。収 録 モ ード で は 、現在 選 択され
ているソースのビデオの解像度とフレームレートが表示されます。
タイムコ ード
再生しているビデオクリップのタイムコードを表示します。あるいは、ビデオまたはタイムコード入力を介
して収 録されているタイムコードを表示します。表 示 は 、クリップタイムコードまたはタイムラインのタイ
ムカウン ターから選 択 できま す。
ソース
現在選択されている
号 が 検出され な かったことを意 味しま す。
SDI
または
HDMI
入力ソースを表示します。「信号なし」と表示された場合、有効な信
名前
HyperDeck
ディスクレコーダーの名前を表示します。名前の変更方法は、後 述の「
Blackmagic HyperDeck
Setup」を 参 照 して く だ さ い 。
モニター出力の 使 用
100
 Loading...