

B&G WR10 + BT-1 Quick Reference Manual
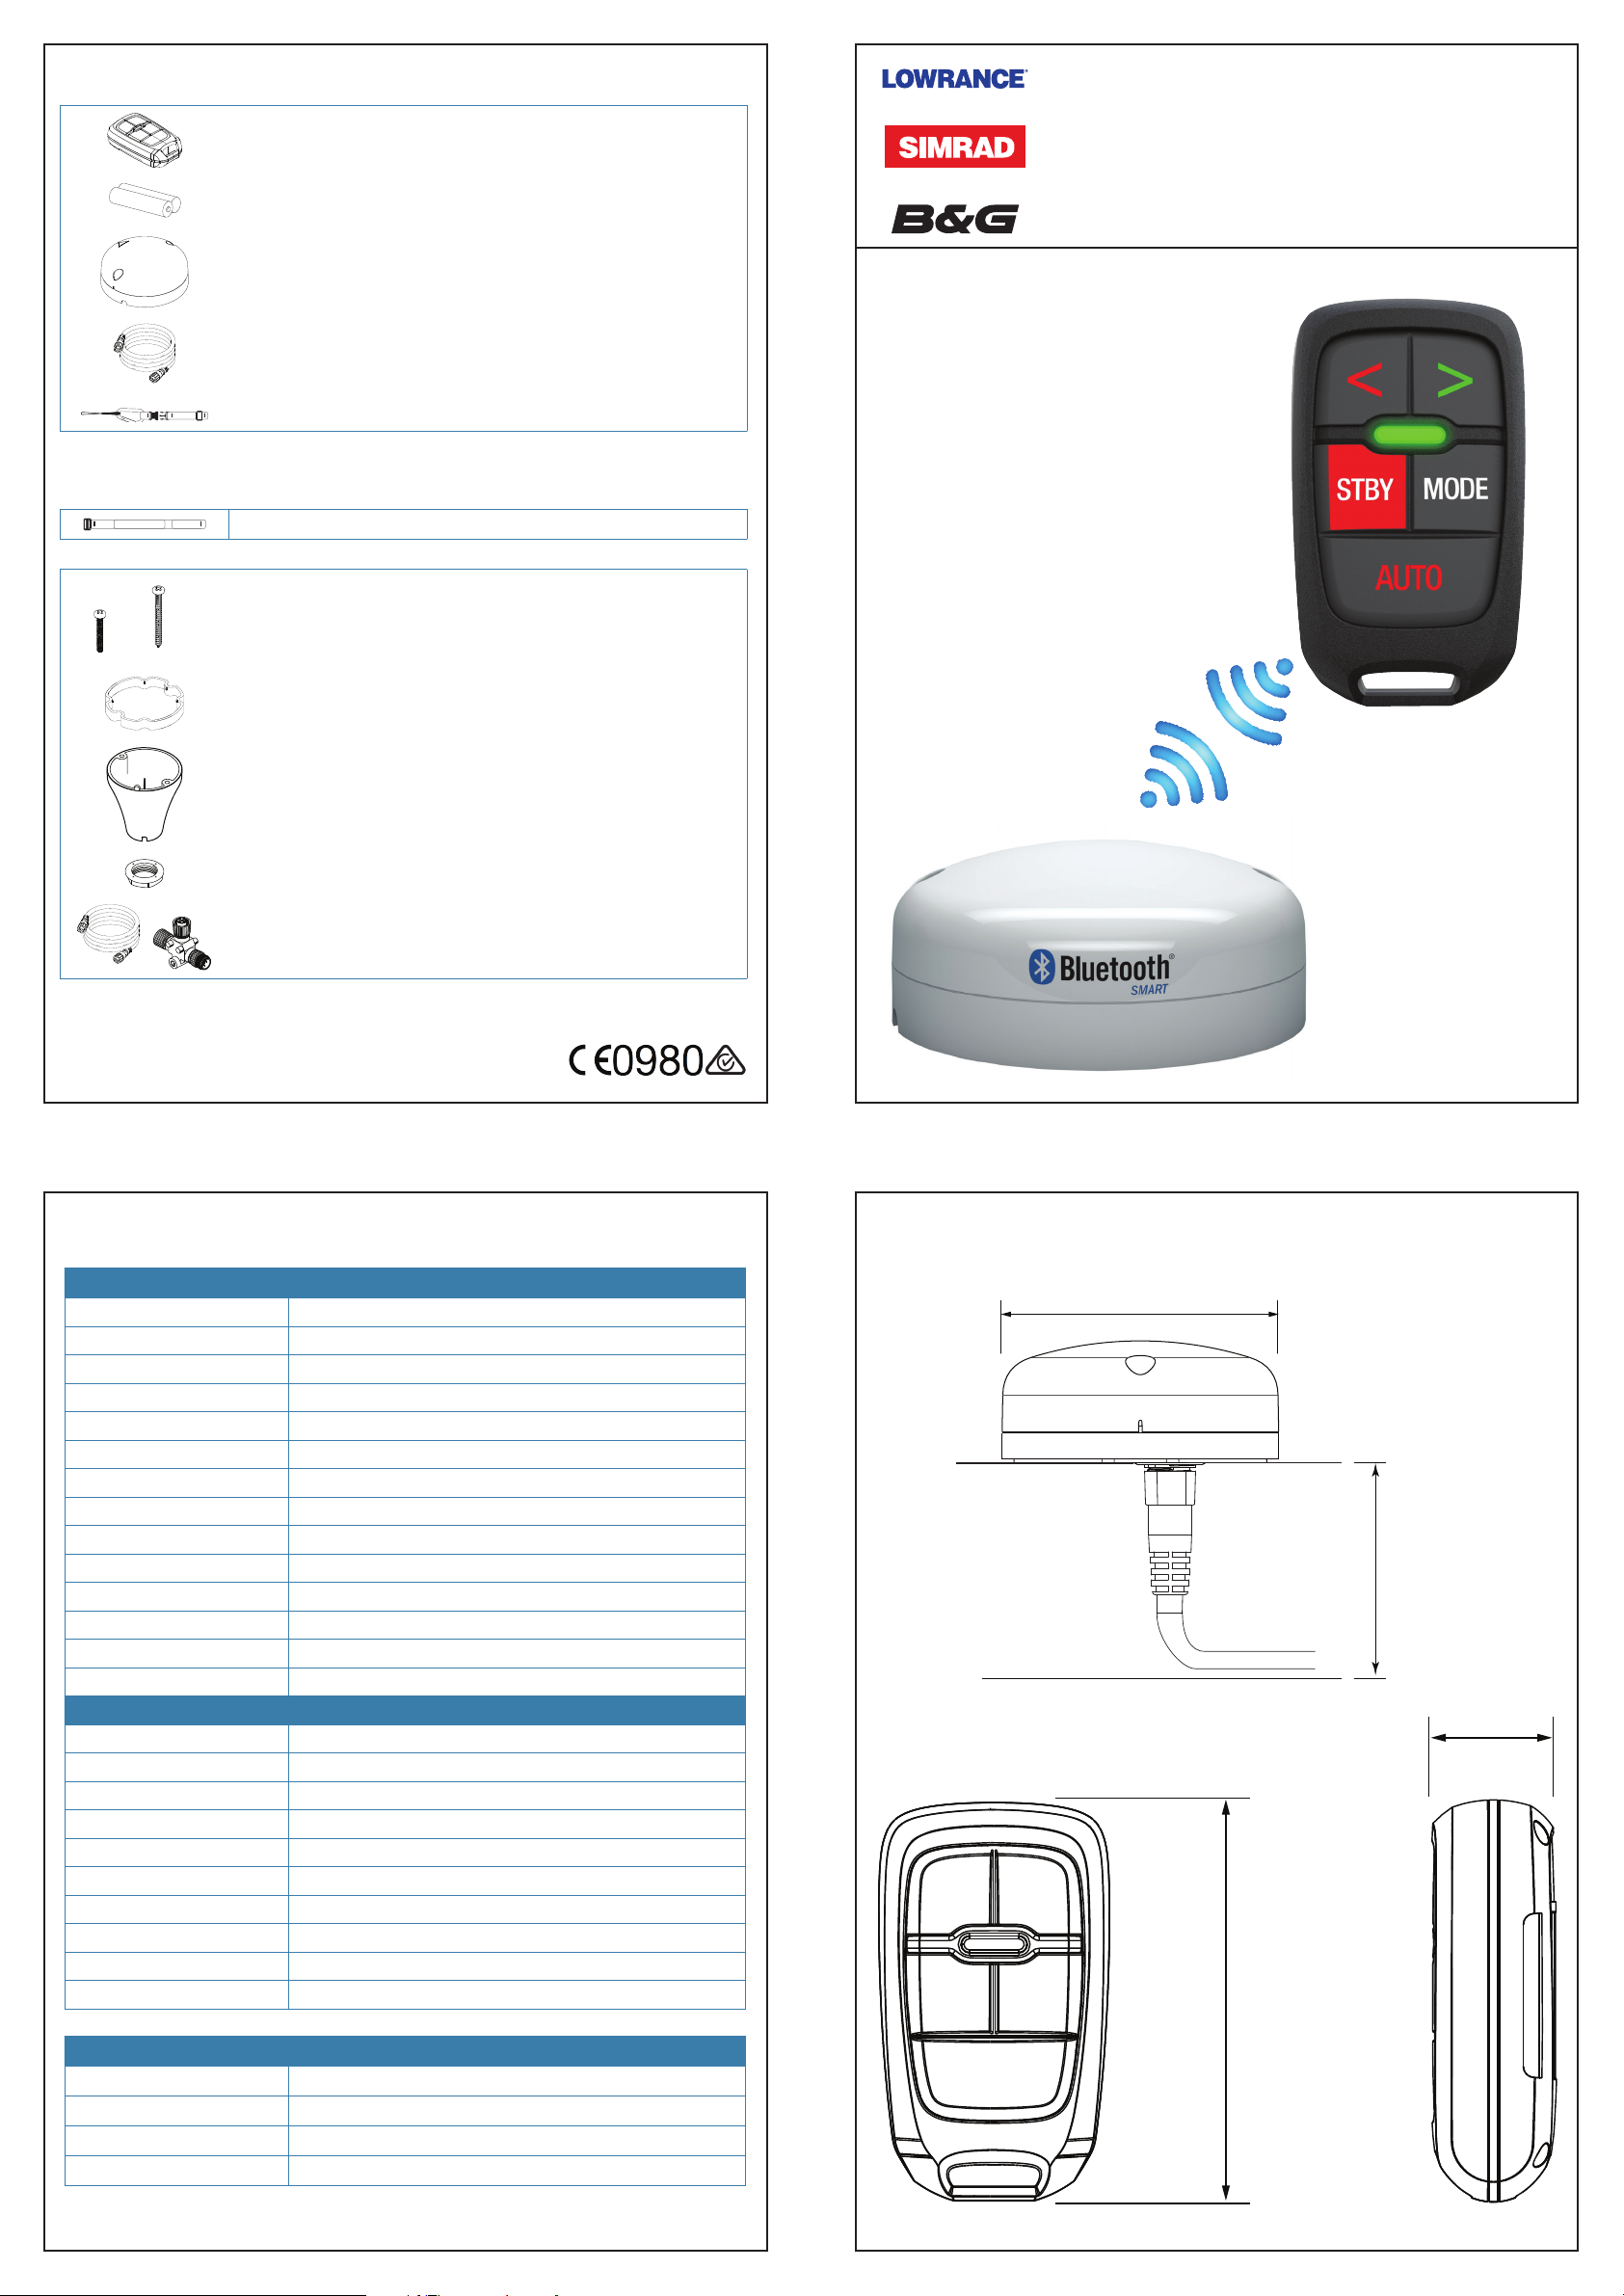
Content of standard package
WR10 Wireless Autopilot Controller
x 2 x 2
1 WR10 Wireless Autopilot Controller
2 AAA batteries
1 BT-1 Bluetooth Base Station
1 Micro-C drop cable 1.8 m (6 ft)
3 Lanyard straps (1 for each brand) + 1 carabiner clip
Accessories
Wrist strap (000-12360-001)
Kit for pole mounting:
2 pcs. M4 30 mm stainless steel Phillips head mounting screws
(081-0008-11)
2 pcs. No. 6x 1.5 Phillips head bolts (083-0011-15)
and BT-1 Bluetooth Base Station
Quick Reference Guide
Dash mount gasket (074-1253-000)
Mount Pole Cone (072-2970-000)
Pole mount locking nut (037-0105-00)
Micro-C drop cable 1,8 m (6 ft) (003-7872-00)
*988-10831-001*
Micro-C T-Joiner (037-0491-01)
Specications
Dimensional drawings
Base station
Dimensions Ø 90 mm, H 38 mm (Ø 3.54” H 1.50”)
Power supply and interface 9-16 V DC via Micro-C network
Power consumption <100 mA at 12 V DC
Temperature Operating: -25°C to +60°C, Storage: -40°C to +85°C
Humidity 66°C, 95% RH, 18 hrs
Environmental protection IPx7
In-rush current 2 A for 20 ms (@ internal 5 V)
Connection cable: Micro-C drop cable 1.8 m (6 ft)
Signal wire gauge 24 AWG
Power wire gauge 22 AWG
Power wire resistance 5.7 ohms per 100 meters
Maximum current 3 A
Connector Micro-C T-Joiner
Remote controller
Dimensions H 72.64 mm, W 41.58 mm, D 22 mm, Weight:
Power supply 2 AAA batteries
Temperature Operating: -20°C to +55°C, Storage: -30°C to +70°C
Humidity 66°C, 95% RH, 18 hrs
Environmental protection IPx6, IPx7
Operation 5 buttons
Communication Bluetooth via Base station, range >30 m
Mounting Lanyard strap or wrist mounted
41.58 mm (1.63”)
60 mm
2.36 “
22.0 mm
(0.86”)
Brand Supported autopilot systems
Simrad NAC-1, AC12, AC42, SG05
Simrad Pro AC70
Lowrance Outboard Pilot
B&G H5000, Triton
72.64 mm
(2.85”)
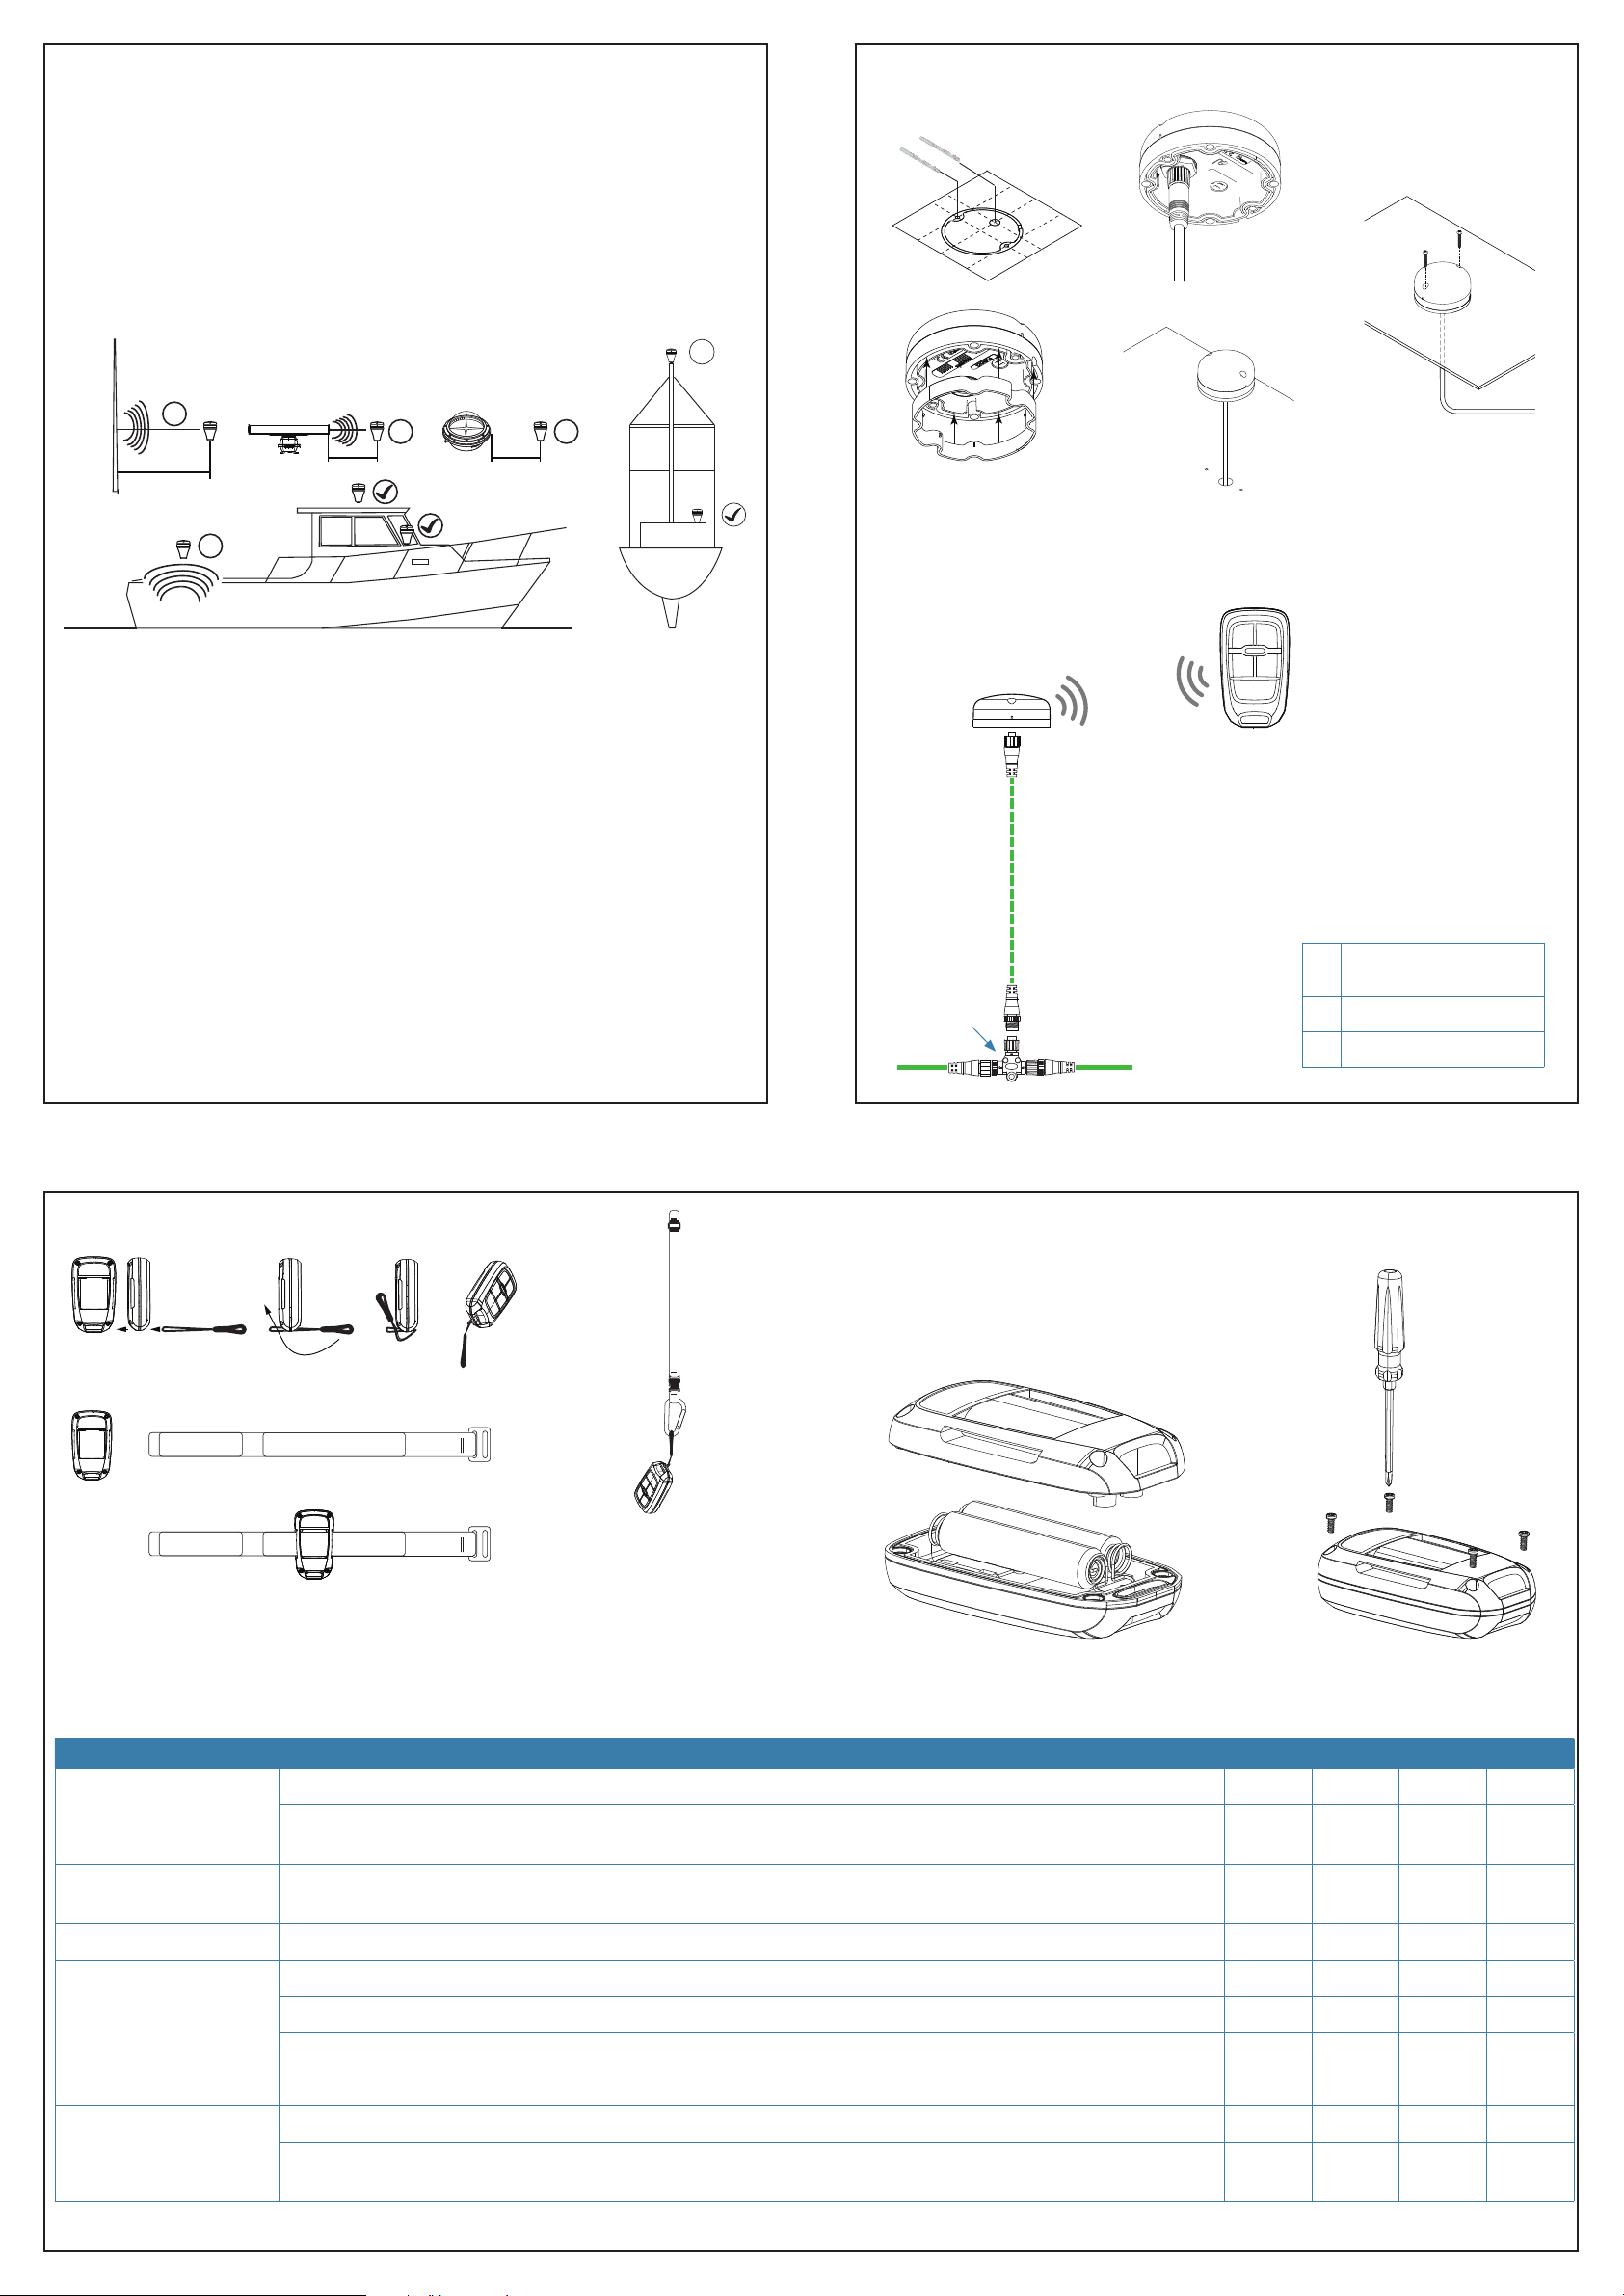
Mounting location of base station
Surface mount the base station
• Avoid installing the base station behind other electrical and electronic devices, as
they may interfere with the signal and consistency of wireless communication.
• The base station should be at least 2 meters away from any other Bluetooth or wireless LAN (WiFi) transceiver.
• It is advisable to check Bluetooth connection throughout the boat by pairing the
unit before permanently mounting the base station.
X
Magnetic Field
X X
2 m (6 ft) Min
Radio Transmitter
X
Electromagnetic
Interference
RADAR
0.5 m (20”) Min 0.5 m (20”) Min
X
1
19 mm
3 mm
3
5
2
4
Wiring the base station
Pairing a remote to the base station
To pair a remote with the base station:
A
• Remove power from the base station.
• Restore power, and within 10 seconds press and hold the MODE and STBY buttons
on the remote until the green LED starts to flash.
• Release the keys and within 5 seconds press AUTO. Green LED lights up solid for 2
seconds when the remote is paired and red if an error occurred.
• The remote unit has a unique serial number. Up to four serial numbers (remotes) can
be stored by your receiver, and the same process is followed for each remote.
B
Use of Lanyard strap or wristband Add/replace batteries
WR10 Wireless Autopilot Controller operates on 2 AAA
batteries. Remove the cover to add or replace the
batteries.
C
1.8 m (6 ft) Micro-C drop
A
cable (male to female)
Micro-C T-Joiner
B
Micro-C backbone
C
Operation
Keys and LED Action Mode: Auto Standby Wind NoDrift
< Left arrow Port or
> Right arrow Starboard
< Left arrow +
> Right arrow
STBY Place the autopilot into Standby mode. √
MODE Changes the autopilot mode:
AUTO Engages the autopilot into AUTO mode.
LED* Green for 1s indicates message acknowledged. Red for 1s indicates message is either rejected or not acknowledged. √ √ √
* Note: In addition to the LED behaviour specified: Red will flash for 1s every 10s when battery level is low.
Short press: Adjust 1° to Port/Starboard i.e. heading in Auto mode, course in NoDrift mode and wind angle in Wind mode.
Long press (2s): Adjust 10° to Port/Starboard i.e. heading in Auto mode, course in NoDrift mode and wind angle in Wind
mode.
Autotack (in Wind mode), press and hold until LED is flashing green rapidly, then press AUTO to confirm.
1. Boats set to SAIL: Toggles AUTO and WIND modes. √ √
2. Other boat types: Toggles AUTO and NoDrift modes. √ √
Green rapid flashes for up to 10s, followed by solid green for 1s. Red for 1s indicates message is either rejected or not
acknowledged.
√ √
√ √
√
√ √
 Loading...