

Page 1
Adding or Reloading Mitto’s on 2 Button Devices
Alp
The Control Panel May Contain Live 230v Contacts That Could Cause
Severe Harm or Fatal Injury If Touched
! Because of the presence of live contacts, programming should be restricted to
electrically trained and competent personnel
! Do not attempt this process in wet weather
! Only touch the 2 control buttons.
! If you are in any doubt seek professional help.
The following sequence will add new, or reload existing Mitto transmitters to control
panels and receivers equipped with 2 button programming systems.
• Read the entire sequence through before attempting
• The process steps must be completed in rapid succession without pause
• If you lose your way or become confused, simply leave the device to time out
(About 15 seconds) and start again.
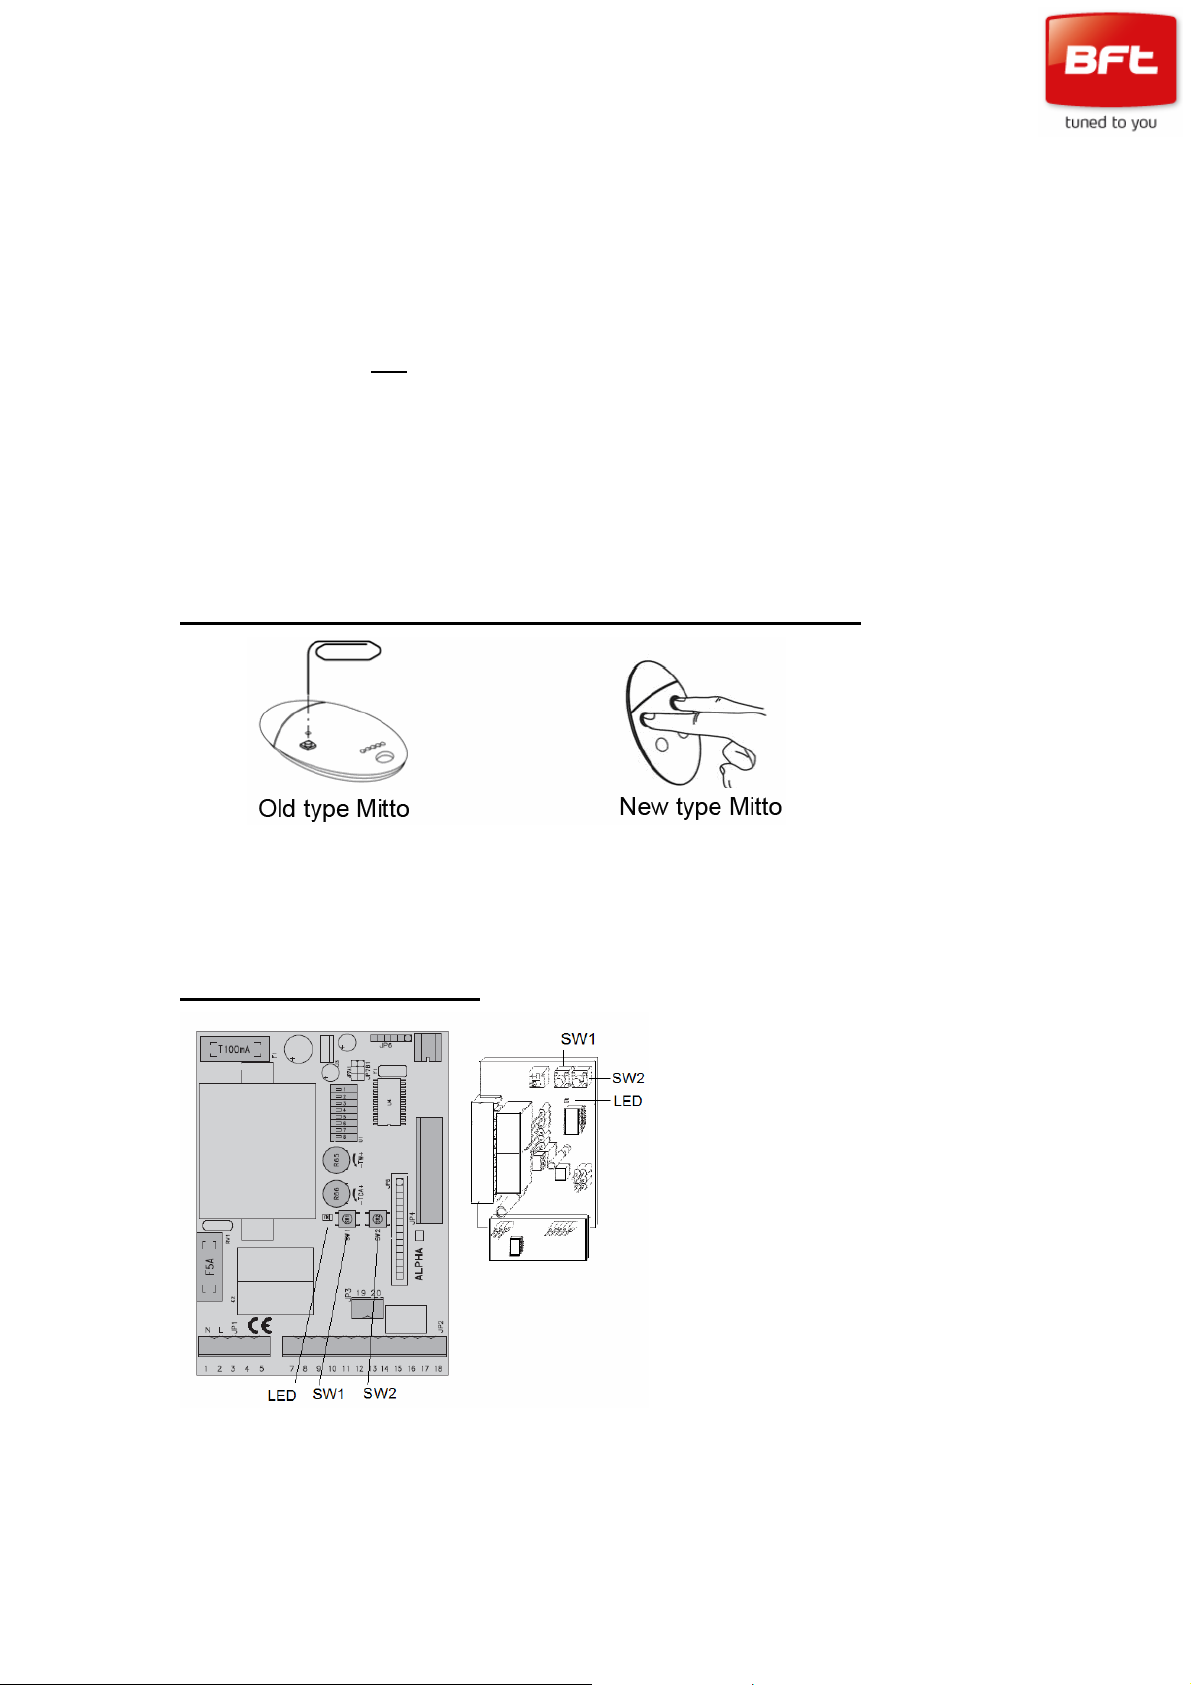
Mitto 2 & 4 Button Transmitters – “Hidden Button Function”
• Older Mitto’s have a hidden button on the rear
• Current Mitto’s have no hidden button on the rear
On current Mitto’s this function is achieved by pressing the top 2 buttons together
• Check and confirm which model of Mitto you are using before starting
Example 2 Button Devices
Clonix 2 Receiver
ha Control Panel
Either type of device is equipped with 2 buttons and an indicator LED
• SW1 for Channel1 and SW2 for Channel 2
Page 1 of 2
Page 2

Adding or Reloading Mitto’s on 2 Button Devices
1. Press SW1 once = Flashing LED
2. Press the transmitter hidden button(s) until the LED goes constant
3. Press the transmitter button you wish to operate the door/gate with
until the LED goes back to flashing
4. If you have more transmitters to program go back to step 2 and repeat with
the next transmitter
5. When you have finished, wait until the device times out (About 15 seconds)
Your added transmitter(s) will not work until the receiver times out
Common problems;
• The receiver is full – only a limited number of slots are available
Fit an expansion card – seek technical advice
• Process not followed quickly enough – panel has timed out
Repeat the process
• Inadvertent use of SW2 Instead of SW1
Repeat the process using SW1
• Inadvertent multiple pressing of SW1 or SW2 button
The receiver has been set with unwanted latching or timed response, reprogram the
transmitter with a single
• The function you require has been wired into Channel 2
Repeat the process using SW2 instead of SW1
• The function you require has been wired to a remote receiver
Locate and identify the receiver – seek technical advice
• Faulty/damaged transmitter –
Diagnose by substitution
This guide only covers simple loading of transmitters, many more functions and
options exist, for more details seek professional help from your local BFT installer.
SW1 button press
Page 2 of 2
 Loading...