

Beurer SL60 User manual

DE
Schnarchmaske
Gebrauchsanweisung ........ 2
EN
Snore mask
Instructions for use ...........
FR
Masque anti-ronflements
Mode d’emploi .................
ES
Máscara antirronquidos
Instrucciones de uso ........
SL 60
IT
Maschera antirussamento
Istruzioni per l’uso ............
TR
12
22
32
Horlama maskesi
Kullanım kılavuzu ..............
RU
Маска против храпа
Инструкция
поприменению ...............
PL
Maska przeciw chrapaniu
Instrukcja obsługi .............
42
52
62
72

DEUTSCH
Lesen Sie diese Gebrauchsanweisung sorgfältig durch,
bewahren Sie sie für den späteren Gebrauch auf, machen
Sie sie anderen Benutzern zugänglich und beachten Sie
die Hinweise.
Inhaltsverzeichnis
1. Zum Kennenlernen ...................3
2. Zeichenerklärung......................4
3. Hinweise ....................................4
4. Gerätebeschreibung ................5
5. Inbetriebnahme .........................6
5.1 Schnarchmaske mit „beurer
SleepQuiet“ App verbinden ......... 6
5.2 Schnarchmaske anlegen ............. 6
5.3 Anwendung ................................. 7
Sehr geehrte Kundin, sehr geehrter Kunde,
wir freuen uns, dass Sie sich für ein Produkt unseres Sortimentes entschieden
haben. Unser Name steht für hochwertige und eingehend geprüfte Qualitätsprodukte aus den Bereichen Wärme, Gewicht, Blutdruck, Körpertemperatur,
Puls, Sanfte Therapie, Massage, Luft und Beauty.
Mit freundlicher Empfehlung
Ihr beurer-Team
Lieferumfang
Überprüfen Sie den Lieferumfang auf äußere Unversehrtheit der Kartonverpackung und auf die Vollständigkeit des Inhalts. Vor dem Gebrauch ist sicherzustellen, dass das Gerät und Zubehör keine sichtbaren Schäden aufweisen
und jegliches Verpackungsmaterial entfernt wird. Benutzen Sie es im Zweifelsfall nicht und wenden Sie sich an Ihren Händler oder an die angegebene
Kundendienstadresse.
6. Akku aufladen .........................7
7. Datenübertragung auf
Smartphone ............................8
8. Reinigung und Pflege .............8
9. Entsorgung ...........................10
10. Technische Daten .................10
11. Garantie / Service .................11
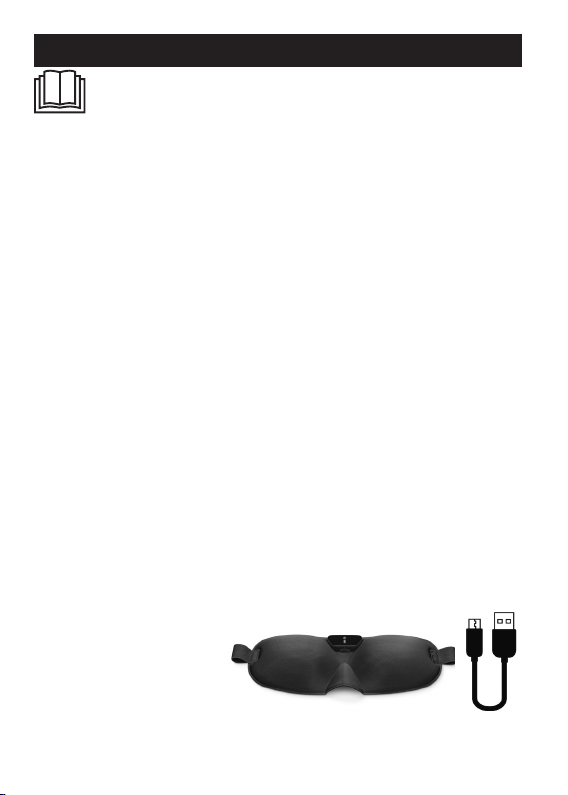
1x Schnarchmaske
1x Micro-USB Ladekabel
2
1. Zum Kennenlernen
Eine erholsame Nacht mit ausreichend Schlaf ist für unser körperliches und
psychisches Wohlbefinden von enormer Bedeutung; denn im Schlaf verarbeiten wir unter anderem neu gewonnene Erfahrungen und stärken unsere
geistige und körperliche Fitness. Wenn Sie jedoch im Schlaf schnarchen, ist
Ihre Schlafqualität stark beeinträchtigt.
Die beurer Schnarchmaske SL 60 wurde speziell dafür entwickelt, Schnarchen
zu reduzieren und Schlafqualität sowie Wohlbefinden zu steigern.
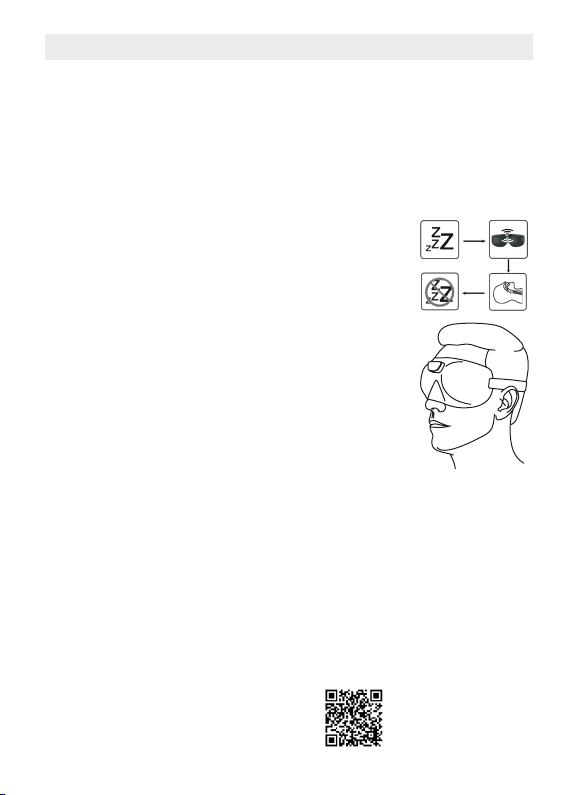
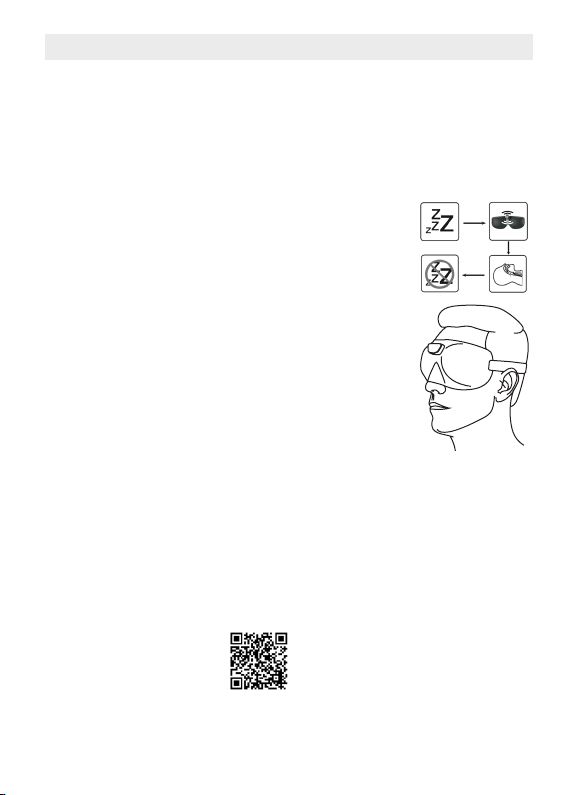
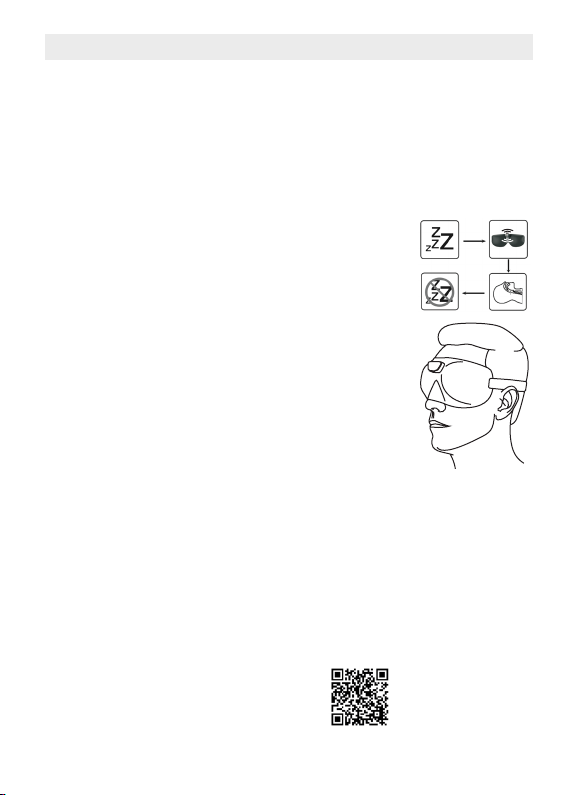
Wie funktioniert die Schnarchmaske?
Die Schnarchmaske wird wie eine normale Schlafmaske
getragen. Während der Nutzung wird akustisch überprüft,
ob es Schnarchgeräusche gibt. Neben dem hörbaren Geräusch löst das Schnarchen Schwingungen aus. Diese
werden durch den Schädelknochen übertragen und ebenfalls von der Schnarchmaske erfasst und ausgewertet. Sobald Geräusch und Schwingung erkannt werden, beginnt
die Bedieneinheit zu vibrieren. Die Intensität des Vibrationsimpulses steigert sich von einem niedrigen Niveau bis
der gewünschte Erfolg eintritt. Als Reaktion auf die Vibration festigt sich die Halsmuskulatur und die Atemwege önen sich. Die Atmung beruhigt sich und die Schnarchlaute
nehmen ab. Zusätzlich kann es zu einer Veränderung der
Liegeposition kommen. Ein weiterer Eekt ist das Training
der Rachenmuskulatur. Dieses kann langfristig zu einer
nachhaltigen Schnarchreduktion führen.
Die „beurer SleepQuiet“ App bietet folgende Funktionen:
•
Detaillierte Schnarch-Analyse inklusive Schnarchern pro Stunde, Aufzeichnungsdauer und Ermittlung der maximalen Schnarchlautstärke
•
Kalender mit Schnarchtagebuch
•
Auswertungsansicht (in Tages-/Wochen-/Jahresansicht)
•
Einstellbare Impulsintensität und Empfindlichkeit
Systemvoraussetzungen:
iOS ≥ 9.0, Android™ ≥ 4.4, Blue tooth® ≥ 4.0
Liste der unterstützten Geräte:
3

2. Zeichenerklärung
PAP
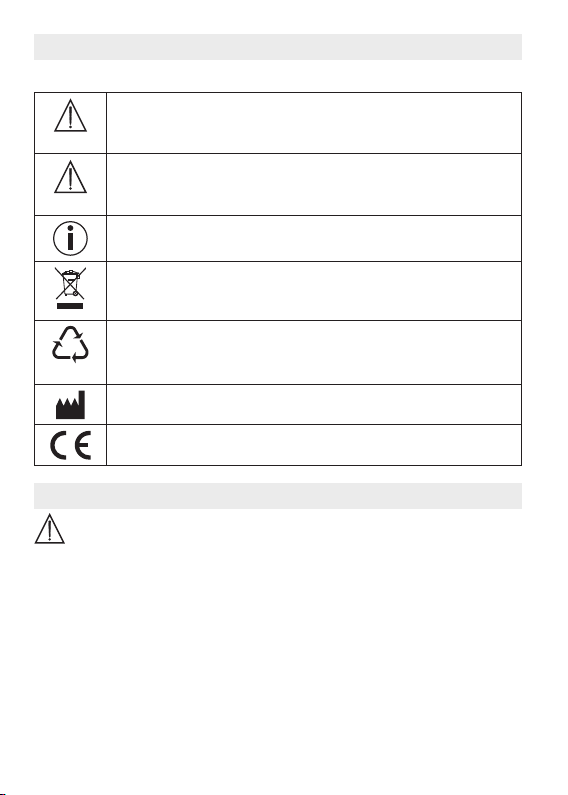
Folgende Symbole werden in dieser Gebrauchsanweisung verwendet:
WARNUNG
Warnhinweis auf Verletzungsgefahren oder Gefahren für Ihre
Gesundheit
ACHTUNG
Sicherheitshinweis auf mögliche Schäden am Gerät/Zubehör
Hinweis
Hinweis auf wichtige Informationen
Entsorgung gemäß Elektro- und Elektronik-Altgeräte EG-Richtlinie –WEEE (Waste Electrical and Electronic Equipment)
21
Verpackung umweltgerecht entsorgen
Hersteller
Dieses Produkt erfüllt die Anforderungen der geltenden europäischen und nationalen Richtlinien.
3. Hinweise
WARNUNG
•
Die abnehmbare Bedieneinheit der Schnarchmaske ist nur spritzwassergeschützt.
•
Halten Sie die abnehmbare Bedieneinheit der Schnarchmaske von Wasser fern!
•
Schützen Sie die Schnarchmaske vor Stößen, Feuchtigkeit, Schmutz, starken
Temperaturschwankungen und direkter Sonneneinstrahlung.
•
Halten Sie Kinder von Schnarchmaske und Verpackungsmaterial fern. Es besteht Erstickungsgefahr!
•
Halten Sie die abnehmbare Bedieneinheit der Schnarchmaske von Wärmequellen fern und verwenden Sie ihn nicht in der Nähe (~1 m) von Kurz- oder
Mikrowellengeräten.
•
Verwenden und lagern Sie die Schnarchmaske in einer Umgebungstemperatur zwischen 0°C bis 60°C. Höhere oder niedrigere Temperaturen können
die Schnarchmaske beschädigen.
4
•
Verwenden Sie zum Reinigen der abnehmbaren Bedieneinheit der Schnarchmaske keine chemischen Reiniger oder Scheuermittel. Reinigen Sie die
abnehmbare Bedieneinheit von Zeit zu Zeit mit einem 70%-Isopropyl-Alkohol-Pad. Die Schnarchmaske selbst ist maschinenwaschbar bei 30°C
(Extra-Schonwaschgang).
•
Wenn Flüssigkeit aus einer Akkuzelle mit Haut oder Augen in Kontakt kommt,
die betroene Stelle mit Wasser auswaschen und ärztliche Hilfe aufsuchen.
•
Schützen Sie Akkus vor übermäßiger Wärme.
•
Explosionsgefahr! Keine Akkus ins Feuer werfen.
•
Keine Akkus zerlegen, önen oder zerkleinern.
•
Laden Sie den Akku vor der ersten Inbetriebnahme vollständig auf.
•
Laden Sie den Akku mindestens einmal alle 3 Monate vollständig auf.
•
Akkus müssen vor dem Gebrauch korrekt geladen werden. Die Hinweise
des Herstellers bzw. die Angaben in dieser Gebrauchsanweisung für das
korrekte Laden sind stets einzuhalten.
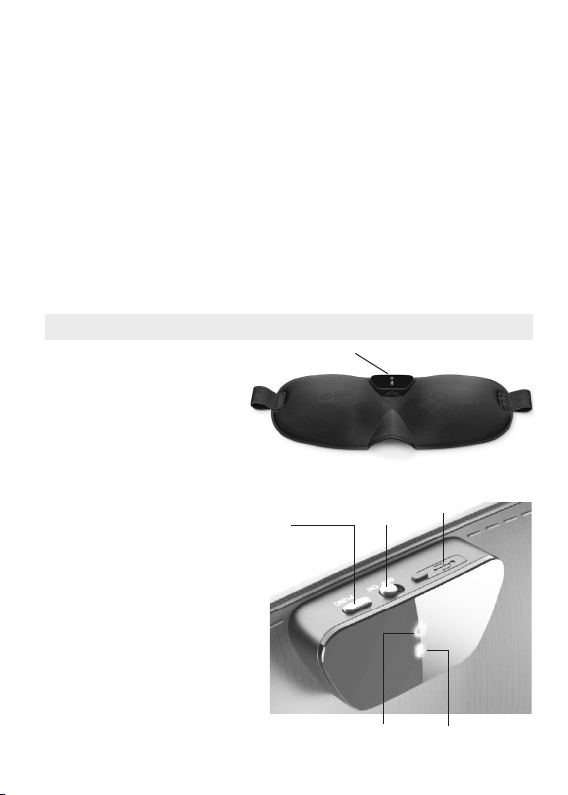
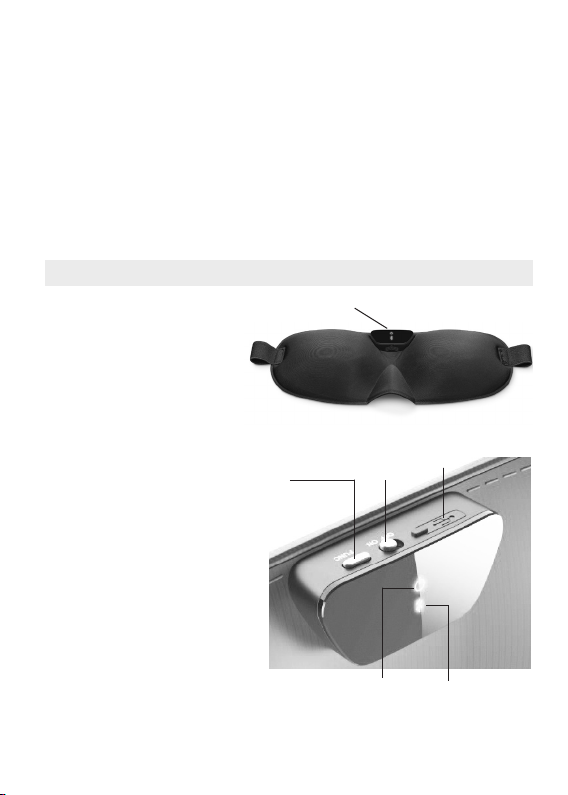
4. Gerätebeschreibung
1
1 Bedieneinheit
2 Micro-USB-Anschluss
3 EIN-/AUS-Schalter
4 Blue tooth®-Verbindungstaste
5 Betriebsleuchte
grün = betriebsbereit
rot = Akku aufladen
6 Anzeige für Blue tooth
®
4
2
3
5
5
6

5. Inbetriebnahme
5.1 Schnarchmaske mit „beurer SleepQuiet“ App verbinden
Sie können die Basisfunktionen der Schnarchmaske auch ohne „beurer
SleepQuiet“ App verwenden. Die Zusatzfunktionen wie Aufzeichnung, Statistik, Kalender und Einstellungen stehen Ihnen nur in Verbindung mit der
„beurer SleepQuiet“ App zur Verfügung.
Um Ihre Schnarchmaske mit der „beurer SleepQuiet“ App zu verbinden, gehen Sie wie folgt vor:
1.
Vergewissern Sie sich, dass Ihr Smartphone mit dem Internet verbunden ist.
2. Aktivieren Sie Blue tooth® auf Ihrem Smartphone.
3.
Laden Sie die kostenlose „beurer SleepQuiet“ App im Apple App Store (iOS)
oder bei Google Play (AndroidTM) herunter.
Je nach Einstellungen des Smartphones können für
die Internetverbindung oder Datenübertragung zusätzliche Kosten anfallen.
4. Starten Sie die „beurer SleepQuiet“ App und folgen Sie den Anweisungen.
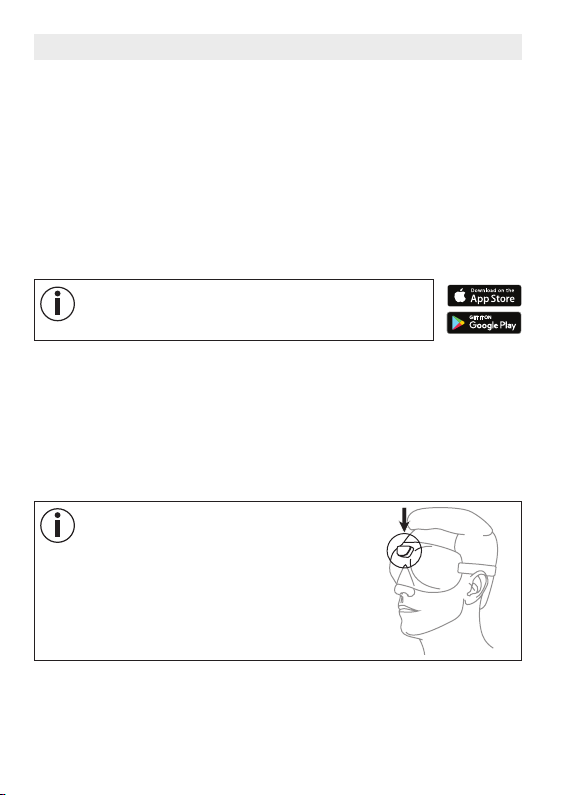
5.2 Schnarchmaske anlegen
1.
Um einen optimalen Tragekomfort zu gewährleisten, verstellen Sie den
Klettverschluss auf der Rückseite der Schnarchmaske auf Ihre gewünschte Größe. Achten Sie darauf, dass die Schnarchmaske nicht zu eng oder
zu locker anliegt.
2. Setzen Sie die Schnarchmaske wie eine normale Schlafmaske auf.
Vergewissern Sie sich, dass die Kunststoffplatte auf der Rückseite der Schnarchmaske mit
leichtem Druck die Stirn berührt. Nur so kann
eine optimale Schnarcherkennung gewährleistet werden.
6

5.3 Anwendung
1. Um die Schnarchmaske einzuschalten, schieben Sie den EIN-/AUS-Schalter auf „ON“. Nun leuchtet die Betriebsleuchte 15 Sekunden lang grün. Die
Schnarchmaske ist betriebsbereit. Des Weiteren beginnt direkt nach dem
Anschalten die Anzeige für Blue tooth® für maximal 15 Sekunden blau zu
blinken. Blaues blinken bedeutet, dass die Schnarchmaske versucht eine
Verbindung zu Ihrem Smartphone aufzubauen. Während Daten übertragen
werden, leuchtet die Anzeige für Blue tooth® dauerhaft blau.
Falls sich die Schnarchmaske nicht einschalten lässt oder die Betriebsleuchte rot aufleuchtet, müssen Sie den Akku der Schnarchmaske aufladen. Laden Sie den Akku wie in Kapitel „6. Akku aufladen“ beschrieben auf.
2.
Setzen Sie die Schnarchmaske auf und legen Sie sich schlafen. Damit andere Personen nicht im Schlaf durch die Leuchten gestört werden, erlöschen
diese automatisch nach 15 Sekunden.
3.
Sobald Sie aufstehen, nehmen Sie die Schnarchmaske ab und schalten Sie
diese aus. Um die Schnarchmaske auszuschalten, schieben Sie den EIN-/
AUS-Schalter auf „OFF“.
6. Akku aufladen
Um die aktuelle Akkukapazität zu überprüfen, drücken Sie die Bluetooth®-Verbindungstaste. Leuchtet die Betriebsleuchte grün auf,
verfügt der Akku über ausreichend Kapazität für die Nutzung einer
weiteren Nacht (über 41%). Leuchtet die Betriebsleuchte rot auf,
müssen Sie vor der Anwendung zuerst den Akku aufladen. Wenn
die Schnarchmaske mit der „beurer SleepQuiet“ App verbunden
ist, können Sie die aktuelle Akkukapazität (%) in der App ablesen.
Wenn Sie starker Schnarcher sind, empfehlen wir Ihnen den Akku
täglich aufzuladen.
Um den Akku aufzuladen, gehen Sie wie folgt vor:
1.
Önen Sie an der Schnarchmaske die Abdeckung des Micro-USB-Anschlusses.
2.
Verbinden Sie das im Lieferumfang enthaltene Ladekabel mit der Schnarchmaske und einem eingeschalteten Computer. Alternativ verbinden Sie das
Ladekabel mit der Schnarchmaske und einem USB-Netzadapter (nicht im
Lieferumfang enthalten). Stecken Sie den USB-Netzadapter in eine geeignete Steckdose.
7

3.
Während des Ladevorgangs blinkt die Betriebsleuchte grün. Sobald der
Akku vollständig geladen ist, leuchtet die Betriebsleuchte dauerhaft grün.
4.
Im Normalfall dauert eine vollständige Aufladung des Akkus ca. 2 Stunden.
Sobald der Akku vollständig geladen ist, stecken Sie das Ladekabel aus
dem Computer bzw. der Steckdose und dem USB-Netzadapter und der
Schnarchmaske.
5.
Bei vollem Akku beträgt die Akkulaufzeit ca. 2 bis 3 Tage. Die Betriebsleuchte
leuchtet rot, sobald die Akkukapazität bei unter 41% liegt.
7. Datenübertragung auf Smartphone
Um die aufgezeichneten Daten von Ihrer Schnarchmaske in die „beurer
SleepQuiet“ App zu übertragen, befolgen Sie die folgenden Handlungsschritte:
1. Aktivieren Sie Blue tooth® auf Ihrem Smartphone.
2. Önen Sie die „beurer SleepQuiet“ App.
3. Schieben Sie den EIN/AUS-Schalter an der Schnarchmaske auf „ON“. Die
Anzeige für Blue tooth® blinkt blau. Sobald die Schnarchmaske mit Ihrem
Smartphone verbunden ist, leuchtet die Anzeige für Blue tooth® dauerhaft
blau. Die aufgezeichneten Daten werden nun auf das Smartphone übertragen. Dies kann bei großer Datenmenge einige Zeit in Anspruch nehmen.
Nachdem die Daten übertragen wurden erlischt die Anzeige für Blue tooth®.
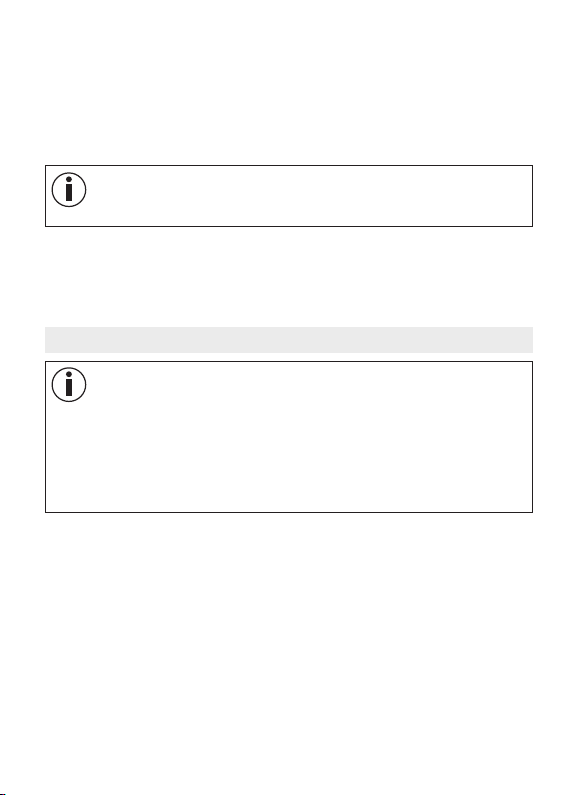
8. Reinigung und Pflege
Die Bedieneinheit der Schnarchmaske ist
abnehmbar. Ziehen Sie hierzu die Bedieneinheit in Richtung Pfeil auf der Unterseite und die Schnarchmaske mit beiden
Händen auseinander.
Beachten Sie, dass die Bedieneinheit
durch allzu häufiges Abtrennen beansprucht wird. Die Bedieneinheit sollte nur zum Zweck des Waschens der
Schnarchmaske gelöst werden.
ACHTUNG
•
Trennen Sie vor der Reinigung immer zuerst die Bedieneinheit von der
Schnarchmaske. Andernfalls besteht die Gefahr der Beschädigung.
8
ACHTUNG
•
Die Bedieneinheit der Schnarchmaske darf niemals mit Wasser oder mit anderen Flüssigkeiten in Kontakt kommen. Sie kann sonst beschädigt werden.
Verwenden Sie zur Reinigung der Bedieneinheit ein in 70%-Isopropyl-Alkohol getränktes Wattepad. Verwenden Sie keine chemischen Reiniger oder
Scheuermittel.
ACHTUNG
•
Beachten Sie, dass die Schnarchmaske nicht chemisch gereinigt, ausgewrungen, maschinell getrocknet, gemangelt oder gebügelt werden darf.
Andernfalls kann die Schnarchmakse beschädigt werden.
Die Schnarchmaske ist maschinenwaschbar. Schließen Sie hierzu den Klettverschluss auf der Rückseite der Schnarchmaske und legen Sie sie in einen
Kissenbezug oder Waschbeutel. Stellen Sie die Waschmaschine auf einen
besonders schonenden Waschgang bei 30°C ein (Extra-Schonwaschgang).
Waschen Sie die Schnarchmaske aus ökologischen Gründen nur zusammen
mit anderen Textilien. Benutzen Sie ein Feinwaschmittel und dosieren Sie es
nach Angaben des Herstellers.
ACHTUNG
•
Beachten Sie, dass die Schnarchmaske durch das Waschen beansprucht
wird.
Die Schnarchmaske sollte deshalb während der gesamten Lebensdauer max.
10 Mal in einer Waschmaschine gewaschen werden. Lassen Sie die Schnarchmaske flach ausgebreitet auf einem Wäscheständer trocknen.
ACHTUNG
•
Verbinden Sie die Schnarchmaske mit der Bedieneinheit erst wieder, wenn
die Schnarchmaske vollständig trocken ist. Andernfalls kann die Bedienein-
heit beschädigt werden.
9

9. Entsorgung
Im Interesse des Umweltschutzes darf das Gerät am Ende seiner Lebensdauer
nicht mit dem Hausmüll entsorgt werden.
Die Entsorgung kann über entsprechende Sammelstellen in Ihrem
Land erfolgen. Entsorgen Sie das Gerät gemäß der Elektro- und
Elektronik Altgeräte EG-Richtlinie – WEEE (Waste Electrical and
Electronic Equipment).
Bei Rückfragen wenden Sie sich an die für die Entsorgung zuständige kommunale Behörde.
10. Technische Daten
Maße (L x B x H)
Gewicht 48 g
Anschluss Micro-USB-Anschluss
Spannungsversorgung
Akku
Akkulaufzeit ca. 2-3 Tage (je nach Verwendung)
Speicher 1 Nacht bei starkem Schnarcher
Material
Datenübertragung Blue tooth® low energy technology
Zulässige
Betriebsbedingungen
Zulässige Transport-/
Aufbewahrungsbedingungen
Frequenzband 2402 - 2480 MHz
Sendeleistung 3,7 dBm
Bedieneinheit: 4,3 x 1,9 x 1,2 cm
Maske: 23,5 x 9,0 x 3,4 cm
Eingang: 100-240 V~; 50/60 Hz; 0,3 A
Ausgang: 5 V 1000 mA
Kapazität: 80 mAh
Nennspannung: 3,7 V
Typbezeichnung: Li-Ion
Bedieneinheit:
Polycarbonat (PC), Polymethylmethacrylat (PMMA)
Maske: Textil
0°C bis 60°C, 30 bis 75 % RH
860 bis 1060 hPa Umgebungsdruck
-20°C bis 60°C, < 75 % RH
860 bis 1060 hPa Umgebungsdruck
Acrylnitril-Butadien-Styrol (ABS)
10
,

Wir garantieren hiermit, dass dieses Produkt der europäischen RED Richtlinie
2014/53/EU entspricht.
Kontaktieren Sie bitte die genannte Serviceadresse, um detailliertere Angaben
– wie zum Beispiel die CE – Konformitätserklärung – zu erhalten.
11. Garantie / Service
Wir leisten 3 Jahre Garantie ab Kaufdatum für Material- und Fabrikationsfehler
des Produktes. Die Garantie gilt nicht:
•
Im Falle von Schäden, die auf unsachgemäßer Bedienung beruhen.
•
Für Verschleißteile.
•
Bei Eigenverschulden des Kunden.
•
Sobald das Gerät durch eine nicht autorisierte Werkstatt geönet wurde.
Die gesetzlichen Gewährleistungen des Kunden bleiben durch die Garantie un-
berührt. Für Geltendmachung eines Garantiefalles innerhalb der Garantiezeit ist
durch den Kunden der Nachweis des Kaufes zu führen. Die Garantie ist innerhalb eines Zeitraumes von 3 Jahren ab Kaufdatum gegenüber der Beurer GmbH,
Söflinger Str. 218, 89077 Ulm (Germany) geltend zu machen.
Bitte wenden Sie sich im Falle von Reklamationen an unseren Service unter
folgendem Kontakt:
Service Hotline:
Tel.: +49 (0) 731 / 39 89-144
E-Mail: kd@beurer.de
Fordern wir Sie zur Übersendung des defekten Produktes auf, ist das Produkt
an folgende Adresse zu senden:
Beurer GmbH
Servicecenter
Lessingstraße 10b
89231 Neu-Ulm
Germany
Irrtum und Änderungen vorbehalten
11
ENGLISH
Read these instructions for use carefully and keep them
for later use, be sure to make them accessible to other
users and observe the information they contain.
Table of contents
1. Getting to know your device..13
2. Signs and symbols .................14
3. Notes .......................................14
4. Device description .................15
5. Initial use .................................16
5.1 Connecting the snore mask to
the “beurer SleepQuiet” app ..... 16
5.2 Putting on the snore mask......... 16
5.3 Use ............................................ 17
Dear customer,
Thank you for choosing a product from our range. Our name stands for
high-quality, thoroughly tested products for applications related to heating,
weight, blood pressure, body temperature, pulse, gentle therapy, massage,
air and beauty.
With kind regards,
Your beurer team
Included in delivery
Check that the exterior of the delivery cardboard packaging is intact and make
sure that all components are present. Before use, ensure that there is no visible damage to the device or accessories and that all packaging material has
been removed. If you have any doubts, do not use the device and contact
your retailer or the specified Customer Service address.
6. Charging the battery ............17
7. Transferring data to your
smartphone ...........................18
8. Cleaning and maintenance ..18
9. Disposal ................................19
10. Technical data .......................20
11. Warranty/service ..................21
1x snore mask
1x micro USB charging cable
12
1. Getting to know your device
A restorative night's sleep is of huge importance for our physical and psychological well-being; after all, it is during sleep that we process things such as
new experiences and improve our mental and physical fitness. If you snore during your sleep, however, then the quality of your sleep is impaired considerably.
The beurer SL 60 snore mask was especially developed to reduce snoring
and to improve sleep quality and well-being.
How does the snore mask work?
The snore mask is worn like a regular sleep mask. While
it is being used, acoustic checks for snoring noises are
carried out. In addition to audible sounds, snoring causes
vibrations. These travel through the cranial bones and are
likewise picked up and evaluated by the snore mask. Once
sounds and vibrations are recognised, the control unit begins to vibrate. The intensity of this vibrating pulse increases from a low level until the desired result is achieved.
The throat muscles become firm and the airways open
as a reaction to the vibration. Breathing is calmed and
the snoring sound decreases. You may also change your
lying position. An additional eect is the training of the
throat muscles. In the long term this can result in a lasting
reduction in snoring.
The “beurer SleepQuiet” app provides the following
functions:
•
Detailed snoring analysis including snores per hour, recording duration and
determination of the maximum snoring volume
•
Calendar with snoring diary
•
Evaluation view (in days/weeks/year)
•
Adjustable impulse intensity and sensitivity
System requirements:
iOS ≥ 9.0, Android™ ≥ 4.4, Blue tooth® ≥ 4.0
List of supported devices:
13

2. Signs and symbols
PAP
The following symbols appear in these instructions for use:
WARNING
Warning notice indicating a risk of injury or damage to health
IMPORTANT
Safety note indicating possible damage to the device/accessory
Note
Note on important information
Disposal in accordance with the Waste Electrical and Electronic
Equipment EC Directive – WEEE
21
Dispose of packaging in an environmentally friendly manner
Manufacturer
This product satisfies the requirements of the applicable European and national directives.
3. Notes
WARNING
•
The removable control unit of the snore mask is only splash-proof.
•
Keep the removable control unit of the snore mask away from water!
•
Protect the snore mask from impacts, humidity, dirt, marked temperature
fluctuations and direct sunlight.
•
Keep the snore mask and packaging material away from children. Choking
hazard!
•
Keep the removable control unit of the snore mask away from heat sources
and do not use it near (~1 m) shortwave or microwave devices.
•
Use and store the snore mask at an ambient temperature between 0°C and
60°C. Higher or lower temperatures may damage the snore mask.
•
Do not use chemical cleaners or abrasive cleaning agents when cleaning
the removable control unit of the snore mask. Clean the removable control
14
unit occasionally with a 70% isopropyl alcohol pad. The snore mask itself
is machine washable at 30°C (extra-delicate cycle).
•
If your skin or eyes come into contact with fluid from a rechargeable battery
cell, flush out the aected areas with water and seek medical assistance.
•
Protect batteries from excessive heat.
•
Risk of explosion! Never throw batteries into a fire.
•
Do not disassemble, split or crush the batteries.
•
Fully charge the battery prior to initial use.
•
Fully charge the battery at least every 3 months.
•
Batteries must be charged correctly prior to use. The instructions from the
manufacturer and the specifications in these instructions for use regarding
correct charging must be observed at all times.
4. Device description
1
1 Control unit
2 Micro USB connection
3 ON/OFF switch
4 Blue tooth® connection button
5 Operating light
Green = ready for use
Red = charge the battery
6 Display for Blue tooth
®
4
2
3
5
15
6
5. Initial use
5.1 Connecting the snore mask to the “beurer SleepQuiet” app
You can use the basic functions of the snore mask also without the “beurer
SleepQuiet” app. The additional features such as recording, statistics, calendar
and settings are only available in conjunction with the “beurer SleepQuiet” app.
To connect your snore mask with the “beurer SleepQuiet” app, please proceed as follows:
1. Ensure that your smartphone is connected to the Internet.
2. Activate Blue tooth® on your smartphone.
3.
Download the free “beurer SleepQuiet” app from the Apple App Store (iOS)
or at Google Play (AndroidTM).
Depending on the smartphone settings, additional
charges may be incurred for connecting to the Internet
or transferring data.
4. Start the “beurer SleepQuiet” app and follow the instructions.
5.2 Putting on the snore mask
1.
To ensure optimum wearing comfort, adjust the hook-and-loop fastener on
the back of the snore mask to your desired size. Ensure that the snore mask
is not too tight or too loose.
2. Put the snore mask on like a regular sleeping mask.
Ensure that the plastic panel on the back of
the snore mask is touching the forehead with
light pressure. This is the only way to ensure
optimum snoring detection.
16
5.3 Use
1.
Move the ON/OFF switch to “ON” to switch on the snore mask. The operating light will now illuminate green for 15 seconds. The snore mask is ready
for use. Additionally, the Blue tooth® display will flash blue for a maximum of
15 seconds. The blue flashing indicates that the snore mask is attempting
to establish a connection with your smartphone. The Blue tooth® display will
continuously illuminate blue while data is being transferred.
If the snore mask does not switch on or the operating light illuminates
red, you must charge the batteries of the snore mask. Recharge the
battery as described in Chapter “6. Charging the battery”.
2.
Put the snore mask on and go to bed. So as not to disturb the sleep of
others, the lights on the device switch o automatically after 15 seconds.
3. As soon as you get up, remove the snore mask and switch it o. Move the
ON/OFF switch to “OFF” to switch o the snore mask.
6. Charging the battery
To check the current battery capacity, press the Blue tooth® connection button. If the operating light is green, the battery has sucient capacity for use for another night (more than 41%). If the
operating light is red, you must first charge the battery prior to use.
If the snore mask is connected to the “beurer SleepQuiet” app, you
will be able to see the current battery capacity (%) in the app. If you
are a heavy snorer, we recommend that you charge the battery
daily.
To charge the battery, proceed as follows:
1. Open the cover of the micro USB connection on the snore mask.
2. Connect the charging cable included in delivery to the snore mask and a
computer that is switched on. Alternatively, connect the charging cable to
the snore mask and a USB mains adapter (not included in delivery). Insert
the USB mains adapter into a suitable socket.
3. Whilst charging, the operating light flashes green. As soon as the battery is
fully charged, the operating light will remain green.
4. It usually takes approx. 2 hours to fully charge the battery. As soon as the
battery is completely charged, remove the charging cable from the computer
or the socket and the USB mains adapter and the snore mask.
17

5.
When the battery is fully charged, the battery life is approx. 2 to 3 days.
The operating light turns red as soon as the battery capacity is below 41%.
7. Transferring data to your smartphone
To transfer the recorded data from your snore mask to the “beurer Sleep Quiet”
app, proceed as follows:
1. Activate Blue tooth® on your smartphone.
2. Open the “beurer SleepQuiet” app.
3. Slide the ON/OFF switch on the snore mask to “ON”. The display for Blue-
tooth® flashes blue. As soon as the snore mask is connected to your smart-
phone, the Blue tooth® display will continuously illuminate blue. The recorded data is now transferred to the smartphone. For a large volume of data,
this may take some time. After data has been transferred, the Blue tooth®
display will go out.
8. Cleaning and maintenance
The control unit of the snore mask is removable. To do this, use both hands to
pull the control unit from the snore mask,
following the direction of the arrow on
the underside.
Please note that removing the control
unit too frequently has a negative eect
on the product. The control unit should
only be removed in order to wash the
snore mask.
IMPORTANT
•
Before cleaning, always remove the control unit from the snore mask.
Otherwise there is a risk of damage.
IMPORTANT
•
The control unit of the snore mask must never come into contact with water
or other liquids. This may cause damage.
When cleaning the control unit use a cotton pad soaked in 70% isopropyl alcohol. Do not use any chemical or abrasive cleaning agents.
18

IMPORTANT
•
Please note that the snore mask must not be chemically cleaned, wrung
out, tumble dried, put through a mangle or ironed. Otherwise the snore
mask may be damaged.
The snore mask is machine washable. To do this, close the hook-and-loop
fastener on the back of the snore mask and place it in a pillow case or wash
bag. Set the washing machine to a particularly gentle wash cycle at 30°C
(extra-delicate cycle).
For ecological reasons, always wash the snore mask together with other textiles. Use a delicate laundry detergent and measure it out according to the
manufacturer's instructions.
IMPORTANT
•
Please note that washing has a negative eect on the snore mask.
The snore mask should therefore be washed in a washing machine a maximum of 10 times during its life. Let the snore mask dry flat on a clothes horse.
IMPORTANT
•
Only reattach the control unit to the snore mask when the snore mask is fully
dry. Otherwise the control unit may be damaged.
9. Disposal
For environmental reasons, do not dispose of the device in the household
waste at the end of its useful life.
Dispose of the device at a suitable local collection or recycling point
in your country. Dispose of the device in accordance with EC Directive – WEEE (Waste Electrical and Electronic Equipment).
If you have any questions, please contact the local authorities responsible for waste disposal.
19

10. Technical data
Dimensions (L x W x H)
Weight 48 g
Connection Micro USB connection
Voltage supply
Battery
Battery life Approx. 2–3 days (depending on use)
Memory 1 night for heavy snoring
Material
Data transfer Blue tooth® low energy technology
Permissible operating
conditions
Permissible transport/
storage conditions
Frequency band 2402 to 2480 MHz
Transmission power 3.7 dBm
We hereby guarantee that this product complies with the European RED
Directive 2014/53/EU.
Please contact the specified service address to obtain further information,
such as the CE Declaration of Conformity.
Control unit: 4.3 x 1.9 x 1.2 cm
Mask: 23.5 x 9.0 x 3.4 cm
Input: 100-240 V~; 50/60 Hz; 0.3 A
Output: 5 V 1000 mA
Capacity: 80 mAh
Nominal voltage: 3.7 V
Type designation: Lithium-ion
Control unit:
Polycarbonate (PC), Polymethacrylate (PMMA)
Mask: Textile
0°C to 60°C, 30 to 75% RH
860 to 1060 hPa ambient pressure
-20°C to 60°C, < 75% RH
860 to 1060 hPa ambient pressure
Acrylonitrile butadiene styrene (ABS)
,
20

11. Warranty/service
In case of a claim under the warranty please contact your local dealer or the
local representation which is mentioned in the list “service international”.
In case of returning the unit please add a copy of your receipt and a short
report of the defect.
The following warranty terms shall apply:
1. The warranty period for BEURER products is either 3 years or – if
longer– the country specific warranty period from date of Purchase.
In case of a warranty claim, the date of purchase has to be proven by
means of the sales receipt or invoice.
2. Repairs (complete unit or parts of the unit) do not extend the warranty
period.
3. The warranty shall not be valid for damages because of
a. improper treatment, e.g. nonobservance of the user instructions.
b. repairs or tampering by the customer or unauthorised third parties.
c. transport from the manufacturer to the consumer or during transport
to the service centre.
d. The warranty shall not be valid for accessories which are subject to
normal wear and tear (cu, batteries etc.).
4. Liability for direct or indirect consequential losses caused by the unit are
excluded even if the damage to the unit is accepted as a warranty claim.
Subject to errors and changes
21

FRANÇAIS
Lisez attentivement ce mode d’emploi, conservez-le pour
un usage ultérieur, mettez-le à disposition des autres utilisateurs et suivez les consignes qui y figurent.
Table des matières
1. Familiarisation avec
l’appareil ..................................23
2. Symboles utilisés ....................24
3. Remarques ..............................24
4. Description de l’appareil .......25
5. Mise en service .......................26
5.1 Connecter le masque antironflements à l’application
«beurerSleepQuiet» ................ 26
5.2 Placer le masque anti-
ronflements ................................ 26
Chère cliente, cher client,
Nous vous remercions d’avoir choisi l’un de nos produits. Notre société est
réputée pour l’excellence de ses produits et les contrôles de qualité auxquels
ils sont soumis. Nos produits couvrent les domaines de la chaleur, du poids,
de la pression sanguine, de la température corporelle, de la thérapie douce,
des massages, de l’amélioration de l’air et de la beauté.
Sincères salutations,
Votre équipe Beurer
Contenu
Vérifiez si l’emballage carton extérieur du kit est intact et si tous les éléments
sont inclus. Avant l’utilisation, assurez-vous que l’appareil et les accessoires
ne présentent aucun dommage visible et que la totalité de l’emballage a bien
été retirée. En cas de doute, ne l’utilisez pas et adressez-vous à votre revendeur ou au service client indiqué.
5.3 Utilisation ................................... 27
6. Charger la batterie................27
7. Transfert des données sur
smartphone ...........................28
8. Nettoyage et entretien .........28
9. Élimination ............................30
10. Données techniques.............30
11. Garantie/Maintenance .........31
1masque anti-ronflements
1câble de charge micro-USB
22
1. Familiarisation avec l’appareil
Une nuit reposante avec un sommeil susant est primordiale pour notre bienêtre physique et psychologique, car pendant le sommeil, nous assimilons
entre autres les nouvelles expériences et nous renforçons notre forme physique et mentale. Lorsque vous ronflez pendant votre sommeil, sa qualité est
fortement diminuée.
Le masque anti-ronflements SL60 a été conçu pour réduire les ronflements
et améliorer la qualité du sommeil et le bien-être général.
Comment fonctionne le masque anti-ronflements?
Le masque anti-ronflements doit être porté comme un
masque de sommeil classique. Lorsqu’il est allumé, il vérifie s’il entend des bruits de ronflements. En plus d’un
son audible, le masque anti-ronflements déclenche des
vibrations. Elles sont transmises à travers l’os crânien et
également perçues et évaluées par le masque anti-ronflements. Dès que l’unité de commande détecte du bruit
et des vibrations, elle se met à vibrer. L’intensité de ces
impulsions vibratoires augmente progressivement en par
tant du niveau le plus bas, jusqu’à ce que l’eet escompté
se produise. En réponse à ces vibrations, la musculature
du cou se renforce et les voies respiratoires s’ouvrent.
La respiration se calme et les bruits de ronflements diminuent. Cela peut également entraîner un changement
de position de sommeil. À long terme, cela entraîne les
muscles de la gorge et peut conduire à une réduction durable du ronflement.
L’application «beurer SleepQuiet» propose les fonctions suivantes:
•
Analyse détaillée des ronflements avec calcul des ronflements par heure,
durée d’enregistrement et détermination du volume maximal du ronflement
•
Calendrier avec journal des ronflements
•
Achage de l’évaluation (achage par jour/semaine/année)
•
Intensité des impulsions et sensibilité réglables
Configuration requise:
iOS ≥ 9.0, Android™ ≥ 4.4, Blue tooth® ≥ 4.0
Liste des appareils pris en charge:
-
23
2. Symboles utilisés
PAP
Voici les symboles utilisés dans ce mode d’emploi:
AVERTISSEMENT
Ce symbole vous avertit des risques de blessures ou des dangers pour votre santé
ATTENTION
Ce symbole vous avertit des éventuels dommages au niveau de
l’appareil ou d’un accessoire
Remarque
Indication d’informations importantes
Élimination conformément à la directive européenne WEEE
(Waste Electrical and Electronic Equipment) relative aux déchets
d’équipements électriques et électroniques
21
Éliminer l’emballage dans le respect de l’environnement
Fabricant
Ce produit répond aux exigences des directives européennes et
nationales en vigueur.
3. Remarques
AVERTISSEMENT
•
L’unité de commande amovible du masque anti-ronflements est uniquement
protégée contre les éclaboussures.
•
Conservez l’unité de commande du masque anti-ronflements éloignée de l’eau!
•
Protégez le masque anti-ronflements contre les chocs, l’humidité, les saletés,
les fortes variations de température et l’ensoleillement direct.
•
Éloignez les enfants du masque anti-ronflements et de l’emballage. Ils pourraient s’étouer!
•
Conservez l’unité de commande amovible du masque anti-ronflements éloigné des sources de chaleur et ne l’utilisez pas à proximité (~1m) d’appareils
à ondes courtes ou micro-ondes.
•
Utilisez et conservez le masque anti-ronflements à une température comprise
24

entre 0°C et 60°C. Des températures plus basses ou plus élevées pourraient
endommager le masque anti-ronflements.
•
N’utilisez pas de détergent chimique ou abrasif pour nettoyer l’unité de commande amovible du masque anti-ronflements. Nettoyez de temps en temps
l’unité de commande avec un coton imbibé d’alcool isopropylique à 70%. Le
masque anti-ronflements peut être lavé en machine à 30°C (cycle extra-délicat).
•
Si du liquide de la cellule de batterie entre en contact avec la peau ou les
yeux, rincez la zone touchée avec de l’eau et consultez un médecin.
•
Protégez les batteries d’une chaleur excessive.
•
Risque d’explosion! Ne jetez pas les batteries dans le feu.
•
Ne démontez, n’ouvrez ou ne cassez pas les batteries.
•
Avant la première utilisation, chargez complètement la batterie.
•
Chargez complètement la batterie au moins une fois tous les 3mois.
•
Les batteries doivent être chargées correctement avant utilisation. Pour
charger l’appareil, respectez toujours les instructions du fabricant ou les
informations contenues dans ce mode d’emploi.
4. Description de l’appareil
1
1 Unité de commande
2 Connexion micro USB
3 Touche MARCHE/ARRÊT
4 Touche de connexion
Blue tooth
5 Voyant de fonctionnement
vert = prêt à l’emploi
rouge = batterie à charger
6 Témoin Blue tooth
®
4
®
3
2
25
5
6

5. Mise en service
5.1 Connecter le masque anti-ronflements à l’application
«beurerSleepQuiet»
Vous pouvez également utiliser les fonctions de base du masque anti-ronflements sans l’application «beurer SleepQuiet». Les fonctions supplémentaires,
comme l’enregistrement, les statistiques, le calendrier et les réglages sont
accessibles uniquement depuis l’application «beurer SleepQuiet».
Pour connecter le masque anti-ronflements à l’application « beurer
SleepQuiet», procédez comme suit:
1. Assurez-vous que votre smartphone est connecté à Internet.
2. Activez la fonction Blue tooth® sur votre smartphone.
3.
Téléchargez l’application gratuite «beurer SleepQuiet» sur l’Apple App Store
(iOS) ou sur Google Play (AndroidTM).
Selon les paramètres du smartphone, la connexion à
Internet ou le transfert des données peut entraîner des
coûts supplémentaires.
4. Lancez l’application «beurer SleepQuiet» et suivez les instructions.
5.2 Placer le masque anti-ronflements
1.
Pour garantir un confort maximal, réglez la fermeture auto-agrippante à
l’arrière du masque anti-ronflements à la taille désirée. Assurez-vous que
le masque anti-ronflements ne soit ni trop lâche, ni trop serré.
2.
Placez le masque anti-ronflements comme un masque de sommeil
classique.
Assurez-vous que la plaque en plastique à l’arrière du masque anti-ronflements exerce une
légère pression sur le front. Ceci est nécessaire pour assurer une détection des ronflements optimale.
26
 Loading...