

Page 1

heart rate monitor
herzfrequenz pulsuhr
german|engineering
PM 58
Operating Instructions
Gebrauchsanleitung
Page 2

Page 3

TABLE OF CONTENTS
Scope of delivery.............................................................................2
Important Notes ............................................................................... 3
General Information for Training....................................................5
Overview of the functions............................................................... 6
Transmission of signal and methods of Devices Measurement.6
Getting started ................................................................................. 7
General operation of the HR monitor.............................................8
Basic settings ................................................................................10
Training recording.........................................................................13
Technical specifications and batteries........................................16
G
B
1
Page 4
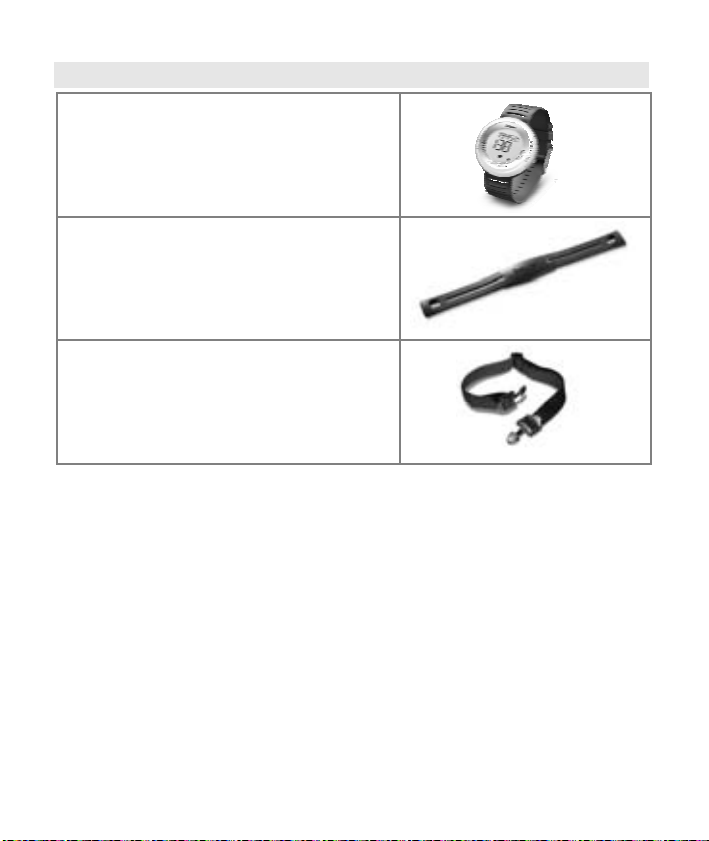
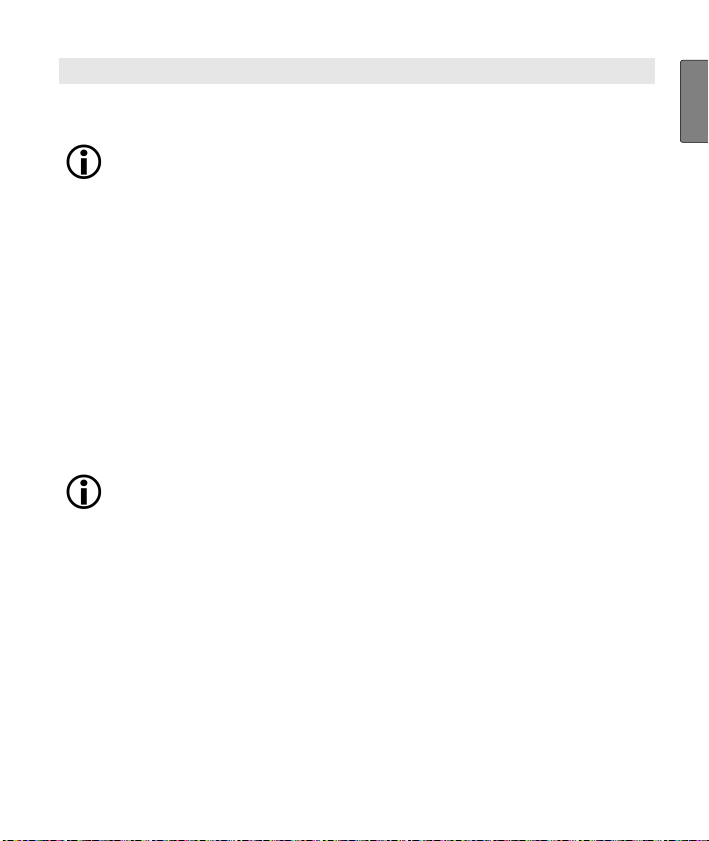
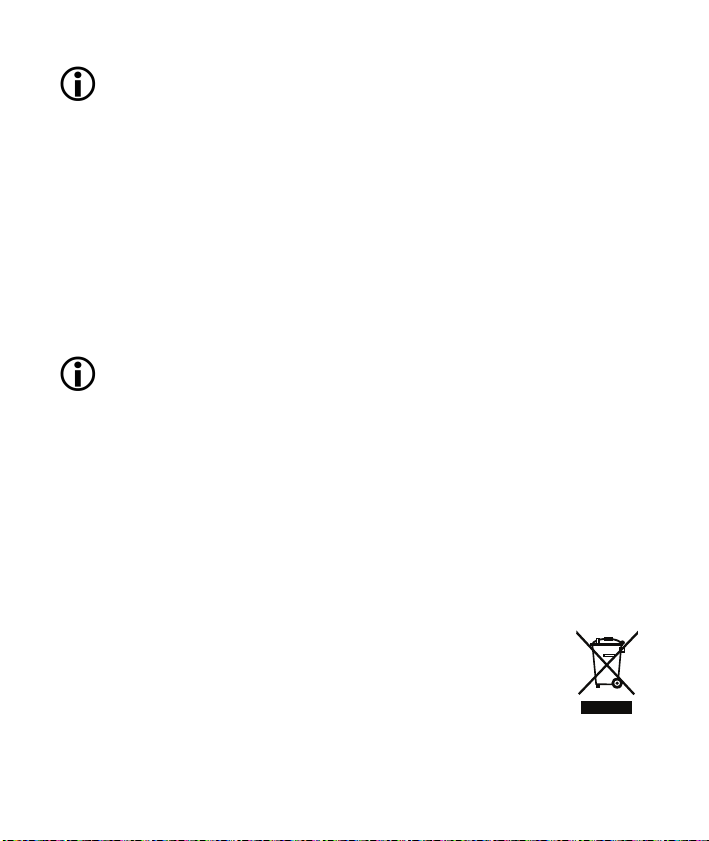
SCOPE OF DELIVERY
Heart rate monitor with wrist band
Chest strap
Elastic tension strap (adjustable)
In addition:
Operating instructions
2
Page 5
IMPORTANT NOTES
Please carefully read through these operating instructions, keep it
for future reference and also make it available to others.
Training
This product is not a therapeutic device. It is a training instrument,
which was developed for the measurement and representation of
the human heart rate.
With high-risk sports, please note that the use of the heart rate
monitor can represent an additional source of injury.
If in doubt or for illnesses, please consult your doctor concerning
the values of your upper and lower target heart rate as well as the
duration and frequency of training. In such a way, you can
achieve optimal results when training.
WARNING: People suffering from heart and circulatory illnesses
or those with pacemakers should only use this heart rate monitor
after having consulted their doctor.
Application
The device is only intended for private use.
This device may only be used for the purpose it was designed for
and in the manner outlined in this operating instructions. Any form
of improper use can be dangerous. The manufacturer is not liable
for damages that are caused by improper or incorrect use.
The heart rate monitor is waterproof. (see chapter „Technical
specifications and batteries“)
Electromagnetic disturbances may occur. (see chapter „Technical
specifications and batteries“)
G
B
3
Page 6
Cleaning and care
From time to time, carefully clean your chest strap, elastic chest
strap and heart rate monitor with a soap and water solution. Then
rinse off all components with clean water. Carefully dry them with
a soft towel. You can wash the elastic chest strap in the washing
machine at 30° without fabric softener. The chest strap is not made for the dryer!
Store the chest strap in a clean and dry place. Dirt impairs the
elasticity and functioning of the transmitter. Sweat and moisture
can keep the electrodes wet and consequently activate the transmitter, which shortens battery life.
Repair, Accessories and Disposal
Prior to use, it should be ensured that the device and accessories
are free of damage. If in doubt, do not use the device and consult
your sales representative or the customer service address provided.
Repairs may only be conducted by customer service or authorized
dealers. Please do not in any case attempt to repair the device!
Use the device only in combination with the accessories provided
with it.
Avoid contact with sunscreen or the like since these can cause
damage to the imprint or plastic components.
Please dispose of the device in accordance with Waste
Electric and Electronic Equipment 2002/96/EC - WEEE.
For inquiries, please contact the municipal authority responsible for disposal in your area.
4
Page 7

GENERAL INFORMATION FOR TRAINING
This heart rate monitor serves to measure the human pulse. By
means of various settings, you can support your individual training
program and monitor your pulse. You should monitor your pulse
during exercise because you should prevent your heart from excessive strain on the one hand and on the other in order to achieve the
optimal training results. The table provides you with some information on the selection of your training zone. The maximum heart rate
reduces with advancing age. Information on the training heart rate
must therefore always be in relation to the maximum heart rate. The
following rule of thumb helps to identify the maximum heart rate:
220 - age = maximum heart rate
The following example applies to a 40-year-old person: 220-40 = 180
Max. heart rate
range
Effect
Suitable for
Training
Heart/health
programme
50 - 60%
Strengthens the
heart and the
circulatory system
Ideal for beginners
Regenerative
training
Fat burning zone Fitness
60 - 70%
The body burns
the highest percentage of calories from fat.
Strengthens the
heart and the
circulatory system,
enhances fitness
Weight control
and loss
programme
70 - 80% 80 - 90% 90 - 100%
Improves the
respiratory and
circulatory system.
Ideal to promote
the basic
endurance
Athletes at
amateur level
Fitness training Endurance
See the chapter "Basic settings" on how to individually set your training zone.
Endurance training programme
Improves speed
maintenance and
increases basic
speed
Ambitious athletes
at amateur level,
professional
athletes
training
Anaerobic
training
Overloads specific
muscles. High
injury risk for
athletes at amateur level, risk related to the heart
in case of disease
Only professional
athletes
Fitness training
addressing
specific zones
G
B
5
Page 8

OVERVIEW OF THE FUNCTIONS
HR functions
Exact ECG heart rate measurement
Transmission: analogue
Individual training zone adjustable
Acoustic alarm for exit from the train-
ing zone
Maximum training heart rate
Average training heart rate (AVG)
Calorie consumption in [Kcal] (basis:
jogging)
Fat burning in [g]
Time functions
Time of day
Stop watch
Settings
Age
Gender
Weight in [kg]
Features
Display illumination
TRANSMISSION OF SIGNAL AND METHODS OF DEVICES MEAS-
UREMENT
Receiving range of the heart rate monitor
Your heart rate monitor picks up the heart rate signals sent by the
chest strap transmitter within a range of 70 centimeters.
Sensors on the chest strap
The entire chest strap consists of two components: the actual chest
strap and an elastic tension belt. On the inside of the chest strap
contacting the body, there are two rectangular, corrugated sensors.
Both sensors determine your heart rate ECG exactly and transmit
this to the heart rate monitor.
6
Page 9
GETTING STARTED
Putting on the heart rate monitor
You can wear your heart rate monitor like a wrist watch.
Activating the HR watch from transport mode
Press the buttons
SET/MENU
the HR monitor from the transport mode.
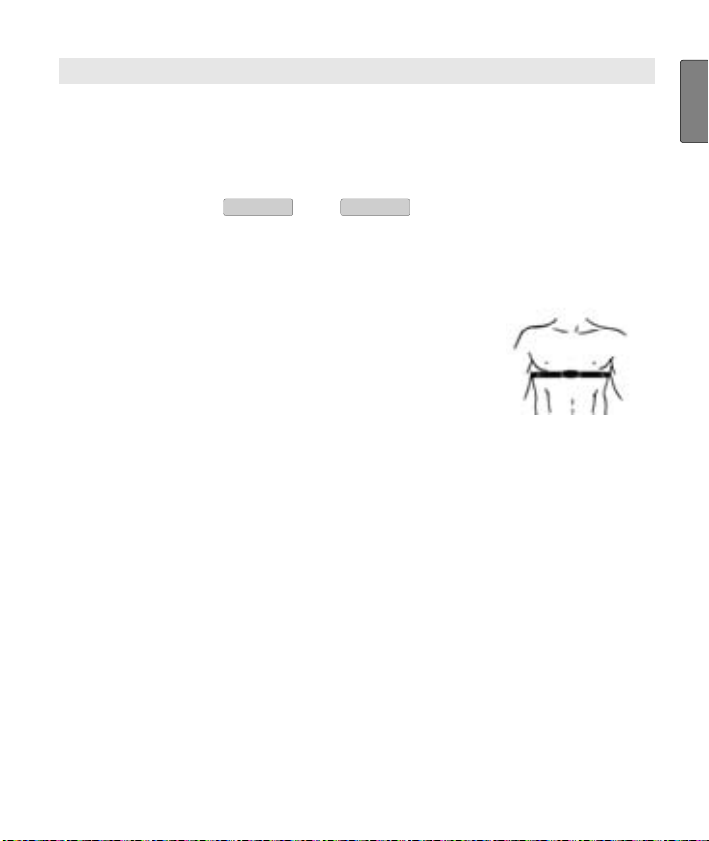
Putting on the chest strap
Tighten the chest strap with the elastic tension
belt. Adjust the length of the belt such that the
belt is snug, but neither too loose nor too tight.
Position the belt around the chest such that the
logo is facing outwards and in the correct position directly over the breast bone. For men, the
chest belt should be located directly below the
pectoral muscles, for women, directly below the
breast.
Since optimal contact between the skin and the heart rate sensors
can not be created immediately, it may take some time until the
heart rate is measured and displayed. If necessary, alter the position of the transmitter in order to achieve optimal contact. Most of
the time, sufficient contact is achieved through the accumulation
of sweat beneath the chest strap. You can, however, also wet the
contact points on the inside of the chest strap. For this, lift the
chest strap up from the skin slightly and wet the two sensors with
saliva, water or ECG gel (available at the chemistry). The contact
between the skin and chest strap may not be interrupted also with
greater movements of the thorax such as during deep breathing.
and
START/STOP
simultaneously to activate
G
B
7
Page 10
Significant chest chair can interfere with and even prevent contact.
Put on the chest strap a few minutes before starting in order to
warm it up to body temperature and establish optimal contact.
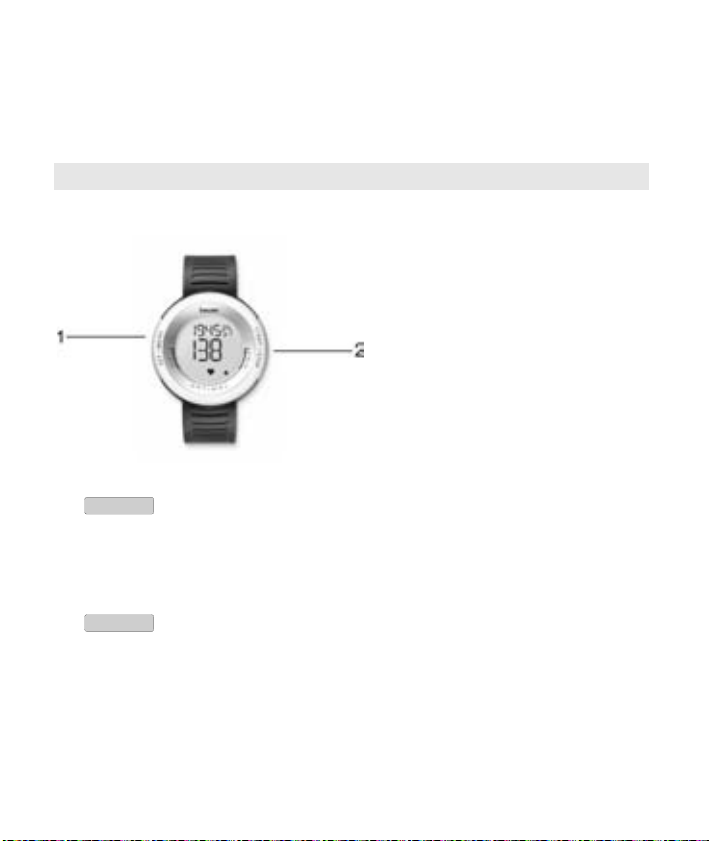
GENERAL OPERATION OF THE HR MONITOR
Buttons on the HR watch
1
SET/MENU
Switches into the basic settings and between the
different setting displays.
Switches between training time and time of day in
the training menu.
2
START/STOP
The display is illuminated for 5 seconds by pressing both buttons
Adjusts values. Press and holding accelerates the
entry.
Starts and stops functions.
simultaneously.
8
Page 11
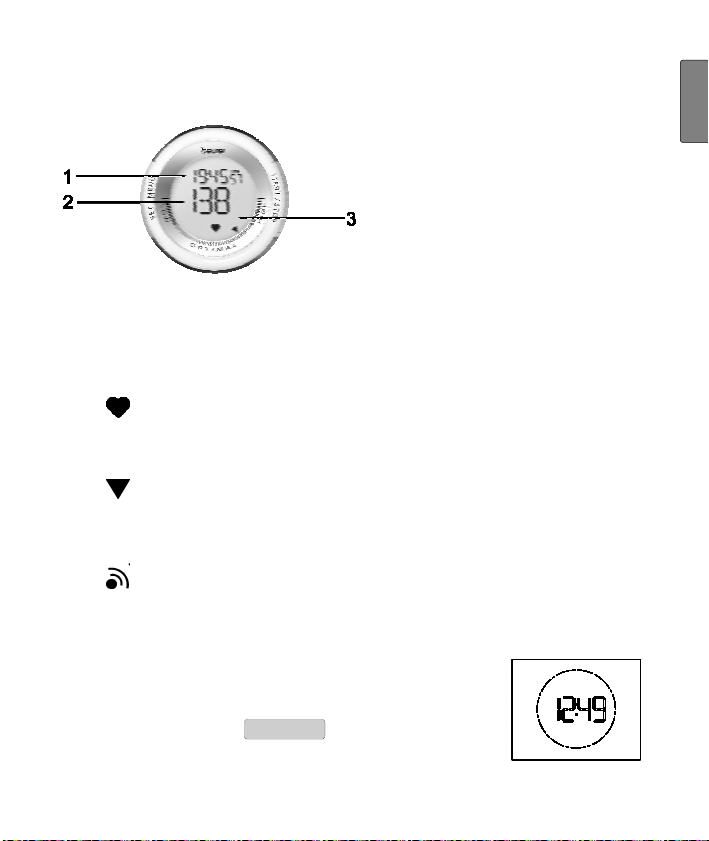
Display
G
B
1
Top line
2
Bottom line
3
Symbols
Heart rate is being received (flashing).
The pulse indicator shows you in the semicircle at the
bottom in which area of the training zone you are currently training (LOW, OPTIMAL, HIGH).
LOW indicates the lower training limit, HIGH the upper
training limit.
Acoustic alarm for leaving the training zone and for
pressing a button is activated.
Power saving mode
If your heart rate monitor has not received any
signal for approx. 2 minutes, it switches to the power saving mode. Only the current time will then be
displayed. Press the
the HR monitor.
START/STOP
button to reactivate
9
Page 12
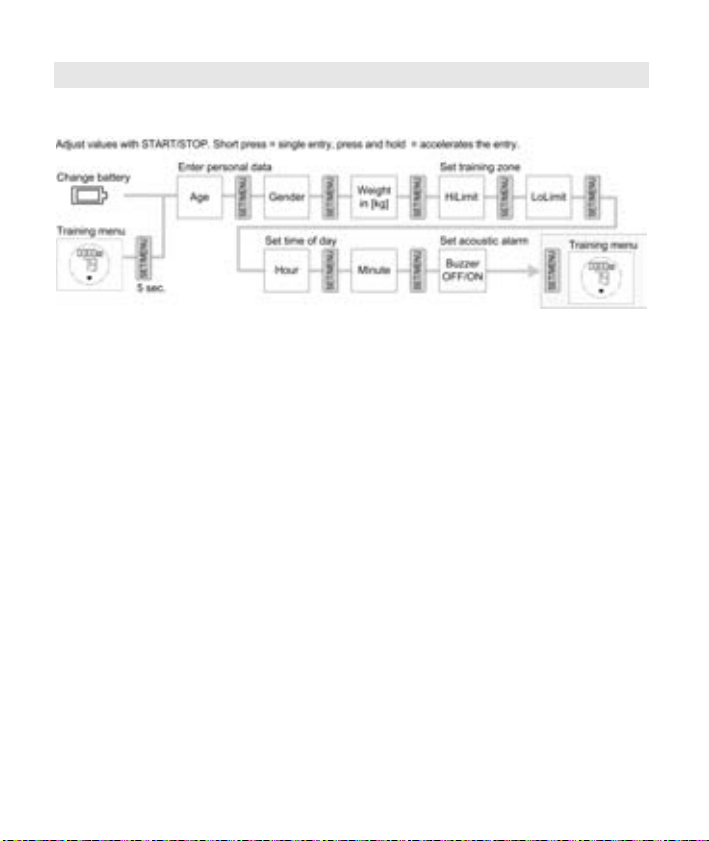
BASIC SETTINGS
Overview
In the setting menu you can:
Enter your personal data. Based on this data, your HR monitor
determines your calorie consumption and your fat burning during
training!
Set your training zone. Your HR monitor calculates your ideal
training zone automatically. If required, you can change it manually in the setting menu. During training, your HR monitor will emit
a acoustic signal when it leaves the training zone if the acoustic
alarm is activated.
Set the time of day.
Switch the acoustic alarm on or off when leaving the training zone
and when pressing a button.
10
Page 13

To change the settings in the setting menu proceed as follows: You
are in the training menu. Your training time displays 00:00:00. Press
the
SET/MENU
button for 5 seconds. Your HR monitor switches into
the setting menu.
When you change the battery you will automatically get into
the setting menu. Your previously stored settings will be lost
during this process. Enter your data once more.
G
B
SET/MENU
SET/MENU
SET/MENU
Enter personal data
AGE is displayed.
START/STOP
Gender is displayed.
START/STOP
male. Select
Weight is displayed.
START/STOP
Set your age (10-99).
Select M, if you are
F, if you are female.
Please select your
weight (20-227 kg).
Set training zone
Hi Lim (High Limit) is displayed.
You can change the upper pulse
limit (41-239) of the automatically
calculated training zone with
START/STOP
.
11
Page 14

SET/MENU
SET/MENU
SET/MENU
SET/MENU
SET/MENU
Lo Lim (Low Limit) is displayed.
You can change the lower pulse
lime (40-238) of the automatically
calculated training zone with
START/STOP
Set time of day
.
The hour setting blinks.
START/STOP
The minute setting blinks.
START/STOP
Set acoustic alarm
Set the hour (0-24).
Set the minute (0-59).
Buzzer OFF is displayed.
START/STOP
Turns the acoustic
alarm on (ON) and off (OFF)
when leaving the training zone
and when pressing a button.
Back to the training menu.
Information on the functions in
the training menu can be found in
chapter "Training recording".
12
Page 15

TRAINING RECORDING
Overview
In the training menu you can:
Stop your run times.
Display your training data.
Delete all recordings.
As soon as you are in the training menu, the
training time already recorded will be displayed in
the top line (after deletion: 00:00:00) and your
current pulse in the bottom line.
In the top line you can switch between training
time and time of day with
SET/MENU
.
G
B
13
Page 16

START/STOP
START/STOP
Start and stop run times
If you have already stopped a run
time, the recorded training time is
displayed in the top line.
Start the recording.
Your current pulse is displayed in
the bottom line.
Stop the recording.
Display results
Your different training values will
automatically be displayed alternately every 2 seconds. This display repeats itself three times.
Display 1:
Top line = Recorded training time;
Bottom line = Current heart rate
Your heart rate is being
received.
The pulse indicator shows
you in the semicircle at the
bottom in which area of the
training zone you are currently training (LOW, OPTIMAL, HIGH).
14
Page 17

Display 2:
Top line = Maximum training heart
HRmax;
rate
Bottom line = Average training
heart rate
AVG
Display 3:
Top line =
Fat burning [g];
Bottom line = Total calorie consumption
[kcal]
The calculation of the total
calorie consumption is conducted based on moderately
fast jogging. The basis for
the display of the calorie
consumption and fat burning
are personal data (basic
settings) and the time and
heart rate measured during
the training session.
Afterwards the display returns
automatically to the running time
which can be started and stopped
once again.
Please note: By pressing
START/STOP
you can return to the
display to start and stop the running time once again even during
the alternating display.
G
B
15
Page 18

Delete recording
You are now in the training re-
cording. Your last recorded training
time is displayed in the top line.
START/STOP
3 sec.
START/STOP
2 sec.
Delete the recording.
Reset Hold is displayed.
Press the
START/STOP
button until the
monitor switches to the power
saving mode. The current time is
displayed.
TECHNICAL SPECIFICATIONS AND BATTERIES
HR monitor Waterproof to 30 m (suitable for swimming)
Chest strap Waterproof (suitable for swimming)
Transmission fre-
5,3 KHz
quency
Battery HR monitor 3V lithium battery, type CR2032 (Recom-
mendation: SONY batteries)
Service life: approx. 1 year (approx. 1 hour
usage daily)
Battery chest strap 3V Lithium-Batterie, Typ CR2032 (Recom-
mendation: SONY batteries).
Service life: approx. 28 months (approx. 1
hour usage daily)
16
Page 19

Replacing the batteries
The battery of the HR monitor may only be replaced by a specialized
dealer (any lock-maker's shop) and at the service address provided.
You can replace the battery in the chest strap on your own. The
battery compartment is located on the inner side. Use a coin or the
battery to be used to open the compartment. The positive pole of the
battery inserted must face upwards. Carefully close the battery compartment again.
Used batteries do not belong in the household garbage. Dispose of these through your electronics
dealer or your local collecting point for recoverables.
You are legally required to do this. We will find this
symbol on batteries containing toxic chemicals: Pb =
battery contains lead, Cd = battery contains cadmium, Hg = battery contains mercury
Distortion and interference
In the HR monitor, a receivor for signals from the chest strap transmitter is integrated. During use, it may arise that the HR monitor
receives signals other than those transmitted by the chest strap.
How can I recognize interference?
Interference can be recognized in that the values displayed are unrealistic. If your normal heart rate amounts to 130 bpm and it is suddenly shown to be 200, then a short-term disturbance is present.
Once you have removed yourself from the vicinity of the source
causing the disturbance, the values will automatically resume being
accurate. Please note that distorted values can mildly influence the
training result displays and overall values.
G
B
17
Page 20

What kind of causes for interference are there?
In some situations, short-range electromagnetic interference can
occur. In order to avoid these, keep well away from these sources.
Nearby power lines
Walking through security gates in airports.
Nearby overhead lines (tram)
Nearby traffic lights, television sets, car motors, bike computers
Nearby exercise equipment
Nearby mobile phones
Interference from other devices for measuring heart rates
The HR monitor as a receiver can react to interfering stray signals
such as other heart rate monitors within a vicinity of one metre. This
can result in incorrect measurements particularly when training in
groups. If you e.g. jog next to one another, it can be beneficial to
wear the HR monitor on the other wrist or to increase the distance to
one's training partner.
18
Page 21

INHALTSVERZEICHNIS
Lieferumfang..................................................................................19
Wichtige Hinweise ......................................................................... 20
Allgemeines zum Training ............................................................ 22
Übersicht der Funktionen ............................................................. 23
Signalübertragung und Messprinzipien der Geräte...................23
Inbetriebnahme..............................................................................24
Allgemeine Bedienung der Pulsuhr.............................................25
Grundeinstellungen....................................................................... 27
Trainingsaufzeichnung .................................................................30
Technische Daten, Batterien und Garantie ................................. 33
LIEFERUMFANG
Herzfrequenz-Pulsuhr mit Armband
Brustgurt
D
Elastischer Spanngurt (verstellbar)
Zusätzlich:
Diese Gebrauchsanleitung
19
Page 22

WICHTIGE HINWEISE
Lesen Sie diese Gebrauchsanleitung sorgfältig durch, bewahren Sie
sie auf und machen sie diese auch anderen Personen zugänglich.
Training
Dieses Produkt ist kein medizinisches Gerät. Es ist ein Trainings-
instrument, welches für die Messung und Darstellung der menschlichen Herzfrequenz entwickelt wurde.
Beachten Sie bei Risiko-Sportarten, dass die Verwendung der
Pulsuhr eine zusätzliche Verletzungsquelle darstellen kann.
Bitte erkundigen Sie sich im Zweifelsfall oder bei Krankheiten bei
Ihrem behandelnden Arzt über Ihre eigenen Werte bezüglich oberer und unterer Trainings-Herzfrequenz, sowie Dauer und Häufigkeit des Trainings. Somit können Sie optimale Ergebnisse beim
Training erzielen.
ACHTUNG: Personen mit Herz- und Kreislaufkrankheiten oder
Träger von Herzschrittmachern sollten diese Herzfrequenzmessuhr nur nach Rücksprache mit ihrem Arzt verwenden.
Verwendungszweck
Das Gerät ist nur für den privaten Gebrauch bestimmt.
Dieses Gerät darf nur für den Zweck verwendet werden, für den
es entwickelt wurde, und auf die in der Gebrauchsanleitung angegebene Art und Weise. Jeder unsachgemäße Gebrauch kann gefährlich sein. Der Hersteller haftet nicht für Schäden, die durch
unsachgemäßen oder falschen Gebrauch verursacht wurden.
Diese Pulsuhr ist wasserdicht. (siehe Kapitel „Technische Daten,
Batterien und Garantie“)
Es können elektromagnetische Interferenzen auftreten. (siehe
Kapitel „Technische Daten, Batterien und Garantie“)
20
Page 23

Reinigung und Pflege
Reinigen Sie Brustgurt, elastisches Brustband und Pulsuhr von
Zeit zu Zeit sorgfältig mit einer Seifenwasserlösung. Spülen Sie alle Teile dann mit klarem Wasser ab. Trocknen Sie sie sorgfältig
mit einem weichen Tuch ab. Das elastische Brustband können Sie
in der Waschmaschine bei 30° ohne Weichspüler waschen. Das
Brustband ist nicht für den Wäschetrockner geeignet!
Bewahren Sie den Brustgurt an einem sauberen und trockenen
Ort auf. Schmutz beeinträchtigt die Elastizität und die Funktion
des Senders. Schweiß und Feuchtigkeit können bewirken, dass
durch Feuchtigkeit der Elektroden der Sender aktiviert bleibt, wodurch sich die Lebensdauer der Batterie verkürzt.
Reparatur, Zubehör und Entsorgung
Vor dem Gebrauch ist sicherzustellen, dass das Gerät und Zube-
hör keine sichtbaren Schäden aufweisen. Benutzen Sie es im
Zweifelsfall nicht und wenden Sie sich an Ihren Händler oder an
die angegebene Kundendienstadresse.
Reparaturen dürfen nur vom Kundendienst oder autorisierten
Händlern durchgeführt werden. Versuchen Sie in keinem Fall, das
Gerät selbständig zu reparieren!
Benutzen Sie das Gerät nur mit Beurer Original-Zubehörteilen.
Vermeiden Sie Kontakt mit Sonnencremes oder ähnlichem, da
diese den Aufdruck oder die Kunststoffteile beschädigen könnten.
Bitte entsorgen Sie das Gerät gemäß der Elektro- und
Elektronik Altgeräte Verordnung 2002/96/EC – WEEE
(Waste Electrical and Electronic Equipment). Bei Rückfragen wenden Sie sich bitte an die für die Entsorgung
zuständige kommunale Behörde.
21
D
Page 24

ALLGEMEINES ZUM TRAINING
Diese Pulsuhr dient zur Erfassung des Pulses beim Menschen.
Durch die verschiedenen Einstellmöglichkeiten können Sie Ihr individuelles Trainingsprogramm unterstützen und den Puls überwachen. Sie sollten Ihren Puls beim Training überwachen, weil Sie zum
einen Ihr Herz vor Überlastung schützen sollten und zum anderen,
um einen optimalen Trainingseffekt zu erzielen. Die Tabelle gibt
Ihnen einige Hinweise zur Auswahl Ihrer Trainingszone. Die maximale Herzfrequenz verringert sich mit zunehmendem Alter. Angaben
zum Trainingspuls müssen deshalb immer in Abhängigkeit zur maximalen Herzfrequenz stehen. Zur Bestimmung der maximalen
Herzfrequenz gilt die Faustformel:
220 - Lebensalter = maximale Herzfrequenz
Folgendes Beispiel gilt für eine 40-jährige Person: 220 - 40 = 180
Anteil der max.
Herzfrequenz
Auswirkung
Für wen
geeignet?
Training
Herz-Gesundheitszone
50 - 60%
Stärkung HerzKreislaufsystem
Ideal für Anfänger
Regeneratives
Training
Fettverbrennungszone
60 - 70%
Körper verbrennt
prozentual die
meisten Kalorien
aus Fett.
Trainiert HerzKreislaufsystem,
verbessert Fitness
Gewichtskontrolle,
-reduktion
Fitnesszone Kraftausdauer-
70 - 80% 80 - 90% 90 - 100%
Verbessert
Atmung und
Kreislauf.
Optimal zur
Steigerung der
GrundlagenAusdauer.
Freizeitsportler Ambitionierte
Fitness-Training Kraftausdauer-
bereich
Verbessert
Tempohärte und
steigert die Grundgeschwindigkeit.
Freizeitsportler,
Leistungssportler
Training
Wie Sie Ihre individuelle Trainingszone einstellen, lesen Sie im Kapitel „Grundeinstellungen“.
Anerobes
Training
Überlastet gezielt
Muskulatur.
Hohes Verletzungsrisiko für
Freizeitsportler,
bei Erkrankung:
Gefahr fürs Herz
Nur
Leistungssportler
Entwicklungsbereichstraining
22
Page 25

ÜBERSICHT DER FUNKTIONEN
Puls-Funktionen
EKG-genaue Herzfrequenz-Messung
Übertragung: analog
Individuelle Trainingszone einstellbar
Akustischer Alarm bei Verlassen der
Trainingszone
Maximale Trainings-Herzfrequenz
Durchschnittliche Trainings-
Herzfrequenz (Average, kurz: AVG)
Kalorienverbrauch in [Kcal] (Basis:
Joggen)
Fettverbrennung in [g]
Zeit-Funktionen
Uhrzeit
Stoppuhr
Einstellungen
Alter
Geschlecht
Gewicht in [kg]
AusstattungsMerkmale
Display-Beleuchtung
SIGNALÜBERTRAGUNG UND MESSPRINZIPIEN DER GERÄTE
Empfangsbereich der Pulsuhr
Ihre Pulsuhr empfängt die Pulssignale des Brustgurt-Senders innerhalb von 70 Zentimetern.
Sensoren des Brustgurtes
Der gesamte Brustgurt besteht aus zwei Teilen: dem eigentlichen
Brustgurt und einem elastischen Spanngurt. Auf der am Körper anliegenden Innenseite des Brustgurtes befinden sich in der Mitte zwei
rechteckige, gerippte Sensoren. Beide Sensoren erfassen Ihre Herzfrequenz EKG-genau und senden diese an die Pulsuhr weiter.
D
23
Page 26

INBETRIEBNAHME
Anlegen der Pulsuhr
Ihre Pulsuhr können Sie wie eine Armbanduhr tragen.
Aktivieren der Pulsuhr aus dem Transportmodus
Um die Uhr aus dem Transportmodus zu aktivieren, drücken Sie die
Knöpfe
Anlegen des Brustgurtes
Befestigen Sie den Brustgurt am elastischen
Da nicht sofort ein optimaler Kontakt zwischen Haut und Pulssen-
SET/MENU
und
START/STOP
gleichzeitig.
Spanngurt. Stellen Sie die Gurtlänge so ein,
dass der Gurt gut, jedoch nicht zu locker oder zu
eng anliegt. Legen Sie den Gurt so um die
Brust, dass das Logo nach außen zeigt und in
der richtigen Position direkt auf dem Brustbein
anliegt. Bei Männern sollte sich der Brustgurt direkt unter dem Brustmuskel, bei Frauen direkt
unter dem Brustansatz befinden.
soren hergestellt werden kann, kann es einige Zeit dauern, bis der
Puls gemessen und angezeigt wird. Verändern Sie gegebenenfalls die Position des Senders, um einen optimalen Kontakt zu erhalten. Durch Schweißbildung unterhalb des Brustgurtes wird
meist ein ausreichend guter Kontakt erreicht. Sie können jedoch
auch die Kontaktstellen der Innenseite des Brustgurtes befeuchten. Heben Sie dazu den Brustgurt leicht von der Haut ab und befeuchten Sie die beiden Sensoren leicht mit Speichel, Wasser
oder EKG-Gel (erhältlich in der Apotheke). Der Kontakt zwischen
Haut und Brustgurt darf auch bei größeren Bewegungen des
Brustkorbs, wie zum Beispiel bei tiefen Atemzügen, nicht unter-
24
Page 27

brochen werden. Starke Brustbehaarung kann den Kontakt stören
oder sogar verhindern.
Legen Sie den Brustgurt bereits einige Minuten vor dem Start an,
um ihn auf die Körpertemperatur zu erwärmen und einen optimalen Kontakt herzustellen.
ALLGEMEINE BEDIENUNG DER PULSUHR
Knöpfe der Pulsuhr
D
1
SET/MENU
Wechselt in die Grundeinstellungen und zwischen
den verschiedenen Einstell-Anzeigen.
Wechselt im Trainings-Menü zwischen Trainings-
zeit und Uhrzeit.
2
START/STOP
Gleichzeitiges Drücken beider Knöpfe beleuchtet das Display für
Stellt Werte ein. Gedrückt Halten beschleunigt die
Eingabe von Werten.
Startet und stoppt Funktionen.
5 Sekunden.
25
Page 28

Display
1
Obere Zeile
2
Untere Zeile
3
Symbole
Herzfrequenz wird empfangen (blinkend).
Der Pulsindikator zeigt Ihnen im unteren Halbkreis an, in
welchem Bereich der Trainingszone Sie gerade trainieren (LOW, OPTIMAL, HIGH).
LOW kennzeichnet dabei die untere Trainingsgrenze,
HIGH die obere Trainingsgrenze.
Akustischer Alarm bei Verlassen der Trainingszone und
bei Betätigen der Tasten ist aktiviert.
Stromsparmodus
Wenn Ihre Pulsuhr ca. 2 Minuten lang kein Signal
empfängt, schaltet die Uhr in den Stromsparmodus.
Es wird dann nur die aktuelle Uhrzeit angezeigt.
Drücken Sie den Knopf
wieder zu aktivieren.
START/STOP
, um die Pulsuhr
26
Page 29

GRUNDEINSTELLUNGEN
Übersicht
D
Im Einstell-Menü können Sie:
Ihre persönlichen Daten eingeben. Ihre Pulsuhr errechnet aus
diesen Daten Ihren Kalorienverbrauch und Ihre Fettverbrennung
während des Trainings!
Ihre Trainingszone einstellen. Ihre Pulsuhr berechnet automatisch
Ihre optimale Trainingszone. Sie können diese bei Bedarf manuell
im Einstell-Menü ändern. Bei aktiviertem Alarm ertönt während
des Trainings ein Signalton beim Verlassen der Trainingszone.
Die Uhrzeit einstellen.
Den Alarm ein- oder ausschalten. Ein Signalton ertönt beim Ver-
lassen der Trainingszone und beim Betätigen der Tasten.
Um Ihre Einstellungen im Einstell-Menü zu ändern, gehen Sie wie
folgt vor: Sie befinden sich im Trainings-Menü. Ihre Trainingszeit
zeigt 00:00:00 an. Drücken Sie den Knopf
SET/MENU
für 5 Sekun-
den. Ihre Pulsuhr wechselt in das Einstell-Menü.
Beim Wechsel der Batterie gelangen Sie automatisch in das
Einstell-Menü. Ihre bereits gespeicherten Einstellungen gehen bei diesem Vorgang verloren. Geben Sie Ihre Daten erneut ein.
27
Page 30

SET/MENU
SET/MENU
SET/MENU
SET/MENU
Persönliche Daten eingeben
AGE wird angezeigt.
START/STOP
Stellen Sie Ihr Lebens-
alter ein (10-99).
Gender wird angezeigt.
START/STOP
Wählen Sie M, wenn
Sie ein Mann sind. Wählen Sie
wenn Sie eine Frau sind.
Weight wird angezeigt.
START/STOP
Stellen Sie Ihr Gewicht
ein (20-227 kg).
Trainingszone einstellen
Hi Lim (High Limit) wird ange-
zeigt.
Mit
START/STOP
können Sie die
obere Pulsgrenze (41-239) der
automatisch berechneten Trainingszone ändern.
Lo Lim (Low Limit) wird ange-
zeigt.
Mit
START/STOP
können Sie die
untere Pulsgrenze (40-238) der
automatisch berechneten Trainingszone ändern.
F,
28
Page 31

SET/MENU
SET/MENU
SET/MENU
SET/MENU
Uhrzeit einstellen
Die Stunden-Einstellung blinkt.
START/STOP
(0-24) ein.
Die Minuten-Einstellung blinkt.
START/STOP
Stellen Sie die Stunde
Stellen Sie die Minute
(0-59) ein.
Akustischen Alarm einstellen
Buzzer OFF wird angezeigt.
START/STOP
Schaltet den akustischen Alarm beim Verlassen der
Trainingszone oder beim Drücken eines Knopfes abwechselnd
ein (ON) und aus (OFF).
Zurück in das Trainings-Menü.
Zu den Funktionen im TrainingsMenü lesen Sie weiter im Kapitel
„Trainingsaufzeichnung“.
D
29
Page 32

TRAININGSAUFZEICHNUNG
Übersicht
Im Trainings-Menü können Sie:
Ihre Laufzeiten stoppen.
Ihre Trainingsdaten anzeigen.
Alle Aufzeichnungen löschen.
Sobald Sie im Trainings-Menü sind, wird in der
oberen Zeile die bereits aufgezeichnete Trainingszeit (nach dem Löschen: 00:00:00) und in
der unteren Zeile Ihr aktueller Puls angezeigt.
SET/MENU
Mit
zwischen Trainingszeit und Uhrzeit wechseln.
können Sie in der oberen Zeile
30
Page 33

START/STOP
START/STOP
Laufzeit starten und stoppen
Wenn Sie bereits eine Laufzeit
gestoppt haben, steht in der oberen Zeile die aufgezeichnete Trainingszeit.
Starten Sie die Aufzeichnung.
Ihr aktueller Puls wird in der unte-
ren Zeile angezeigt.
Stoppen Sie die Aufzeichnung.
Ergebnisse anzeigen
Ihre verschiedenen Trainingsdaten
werden nun automatisch im Wechsel von 2 sec. angezeigt. Diese
Anzeige wiederholt sich drei Mal.
Anzeige 1:
Obere Zeile = aufgezeichnete
Trainingszeit;
Untere Zeile = aktueller Puls
Ihre Herzfrequenz wird
empfangen.
Der Pulsindikator zeigt
Ihnen im unteren Halbkreis
an, in welchem Bereich der
Trainingszone Sie gerade
trainieren (LOW, OPTIMAL, HIGH).
D
31
Page 34

Anzeige 2:
Obere Zeile = maximale Trainings-
Herzfrequenz
HRmax;
Untere Zeile = durchschnittliche
Trainings-Herzfrequenz
AVG
Anzeige 3:
Obere Zeile
= Fettverbrennung [g];
Untere Zeile = gesamter Kalorienverbrauch
[kcal]
Die Berechnung des gesamten Kalorienverbrauches
erfolgt auf Basis mittelschnellen Joggens. Grundlage für die Anzeige von
Kalorienverbrauch und Fettverbrennung sind die persönliche Daten (Grundeinstellungen) und die während des Trainings gemessene Zeit und Herzfrequenz.
Nach den Anzeigen gelangen Sie
automatisch zurück zum erneuten
Starten und Stoppen der Laufzeit.
Hinweis: Mit
START/STOP
können Sie
den automatischen Durchlauf der
Anzeigen 1-3 jederzeit beenden.
32
Page 35

Aufzeichnung löschen
Sie befinden sich in der Trai-
ningsaufzeichnung. In der oberen
Zeile wird Ihre zuletzt aufgezeichnete Trainingszeit angezeigt.
START/STOP
3 sec.
START/STOP
2 sec.
Löschen Sie die Aufzeichnungen.
Reset Hold wird angezeigt.
Drücken Sie so lange
bis die Uhr in den Stromsparmo-
START/STOP
,
dus schaltet. Es wird die aktuelle
Uhrzeit angezeigt.
TECHNISCHE DATEN, BATTERIEN UND GARANTIE
Pulsuhr Wasserdicht bis 30 m (zum Schwimmen
geeignet)
Brustgurt Wasserdicht (zum Schwimmen geeignet)
Übertragungsfrequenz 5,3 KHz
Batterie Pulsuhr 3V Lithium-Batterie, Typ CR2032 (Emp-
fehlung: SONY-Batterien).
Lebensdauer: ca. 1 Jahr (Benutzung täg-
lich ca. 1 Stunde)
D
Batterie Brustgurt 3V Lithium-Batterie, Typ CR2032 (Emp-
fehlung: SONY-Batterien)
Lebensdauer: ca. 28 Monate (Benutzung
täglich ca. 1 Stunde)
33
Page 36

Austausch der Batterien
Die Batterie der Pulsuhr darf nur ein Fachgeschäft (jede Uhrmacherwerkstätte) oder die angegebene Serviceadresse austauschen.
Ansonsten erlöschen Garantieansprüche.
Die Batterie des Brustgurtes können Sie selbständig wechseln. Das
Batteriefach befindet sich auf der Innenseite. Verwenden Sie zum
Öffnen des Faches eine Münze oder die einzusetzende Lithiumbatterie. Der Pluspol der eingelegten Batterie muss nach oben zeigen.
Verschließen Sie das Batteriefach wieder sorgfältig.
Verbrauchte Batterien gehören nicht in den Hausmüll. Entsorgen Sie diese über Ihren Elektrofachhändler oder Ihre örtliche Wertstoff-Sammelstelle.
Dazu sind Sie gesetzlich verpflichtet. Hinweis: Diese
Zeichen finden Sie auf schadstoffhaltigen Batterien:
Pb = Batterie enthält Blei, Cd = Batterie enthält
Cadmium, Hg = Batterie enthält Quecksilber.
34
Page 37

Störungen und Überlagerungen
In der Pulsuhr ist ein Empfänger für die Signale des Senders des
Brustgurtes eingebaut. Bei der Benutzung kann es vorkommen,
dass die Pulsuhr zusätzlich andere Signale empfängt als die des
Brustgurtes.
Wie können Sie Störungen erkennen?
Störungen erkennen Sie daran, dass unrealistische Werte angezeigt
werden. Wenn Ihr normaler Puls 130 bpm beträgt und es wird plötzlich 200 angezeigt, so liegt eine kurzfristige Störung vor. Sobald Sie
sich aus dem Umkreis der Störungsquelle entfernen, stimmen die
Werte automatisch wieder. Beachten Sie, dass gestörte Werte in die
Trainings-Ergebnisanzeigen einfließen und Gesamtwerte geringfügig beeinflussen können.
Welche typischen Störungsursachen gibt es?
In einigen Situationen können durch die Nahfeldübertragung elektromagnetische Überlagerungen (Interferenzen) auftreten. Um diese
zu vermeiden, halten Sie größeren Abstand von diesen Quellen.
Nahe Hochspannungsmasten
Beim Passieren von Sicherheitsschleusen in Flughäfen
Nahe Oberleitungen (Straßenbahn)
Nahe Ampeln, Fernsehgeräte, Automotoren, Fahrradcomputer
Nahe Fitnessgeräte
Nahe Mobiltelefone
D
Störungen durch andere Herzfrequenzmessgeräte
Die Pulsuhr als Empfänger kann auf Sendersignale, wie beispielsweise andere Pulsuhren, innerhalb einer Reichweite von einem
Meter reagieren. Insbesondere beim Training in Gruppen kann dies
zu fehlerhaften Messungen führen. Wenn Sie z.B. nebeneinander
joggen, kann es schon helfen, eine Pulsuhr am anderen Handgelenk
zu tragen oder den Abstand zum Trainingspartner zu vergrößern.
35
Page 38

Garantie
Wir leisten drei Jahre Garantie ab Kaufdatum für Material- und Fabrikationsfehler des Produktes. Die Garantie gilt nicht:
im Falle von Schäden auf Grund unsachgemäßer Bedienung
für Verschleißteile, wie zum Beispiel Batterien oder das Armband
für Mängel, die dem Kunden bereits bei Kauf bekannt waren
bei Eigenverschulden des Kunden
Die gesetzlichen Gewährleistungen des Kunden bleiben durch die
Garantie unberührt. Für Geltendmachung eines Garantiefalles innerhalb der Garantiezeit ist durch den Kunden der Nachweis des
Kaufes zu führen. Die Garantie ist innerhalb eines Zeitraumes von
drei Jahren ab Kaufdatum gegenüber der Beurer GmbH, 89077 Ulm,
Germany, geltend zu machen. Der Kunde hat im Garantiefall das
Recht zur Reparatur der Ware bei unseren eigenen oder bei von uns
autorisierten Werkstätten.
36
Page 39

Page 40

heart rate monitor
herzfrequenz pulsuhr
753.514-0809 Irrtum und Änderungen vorbehalten
Beurer GmbH, Söflinger Str. 218, 89077 Ulm, Germany
www.beurer.de, Tel: (0049) 0731-3989144, Fax: (0049) 0731-3989255, kd@beurer.de
 Loading...